This step-by-step guide will teach you how to manually install mods in Baldur’s Gate 3 on a Mac PC.
Step 1: Download a Mod
- Begin by downloading the mod you desire from the Nexus site.
- Click on the Files tab choose “Manual Download” and then select “Slow Download” to obtain the mod files.
- Once the download is complete, go to the downloads folder and unzip the files.
Inside the zip file, you’ll typically find two files.
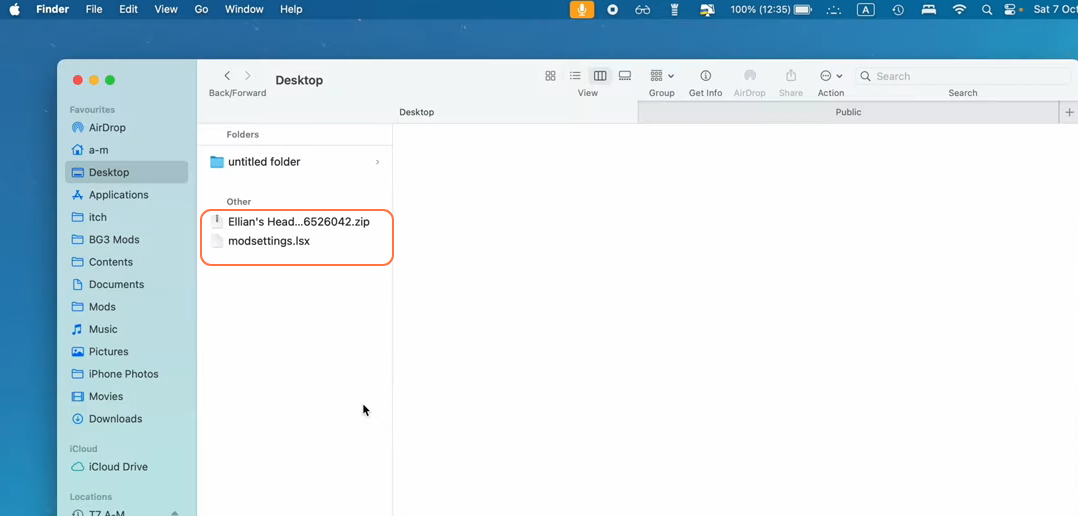
Step 2: The .pak File and Where to Place It
- One of the files you’ll find is a .pak file, which is the actual mod itself. You need to put this .pak file inside the mods folder of the BG3 game folder.
- If you don’t have a mods folder, create a new folder and name it.
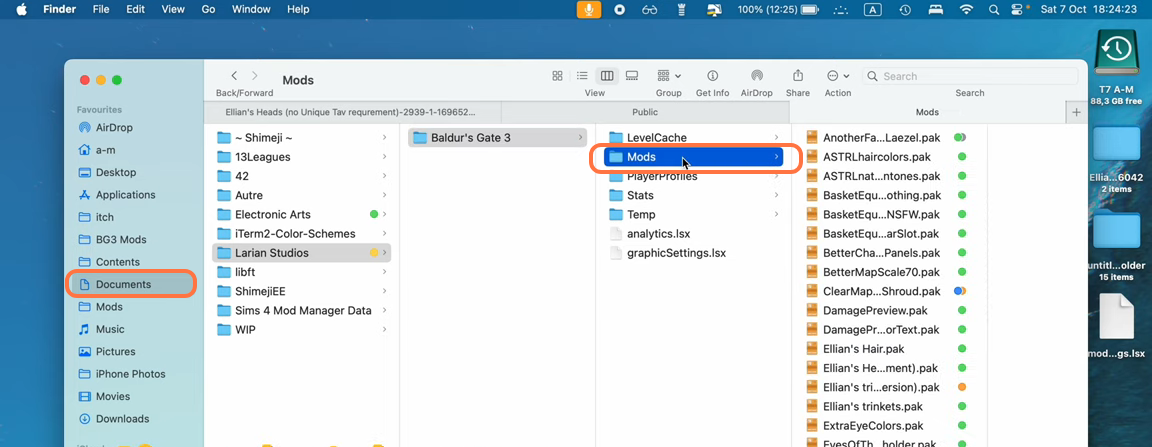
BG3 Directory:
Users\Username\Documents\Larian Studios\Baldur’s Gate 3
Step 3: The .json File and Its Purpose
- Another file is .json which contains all the information you’ll need to install your mods.
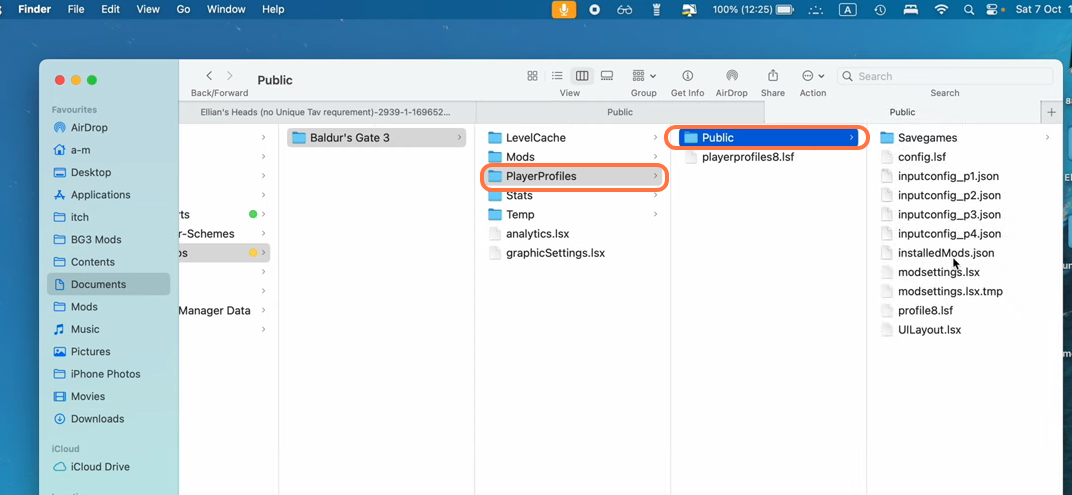
- Now, navigate to your “Baldur’s Gate 3” game folder and access “PlayerProfiles” and then “Public”.
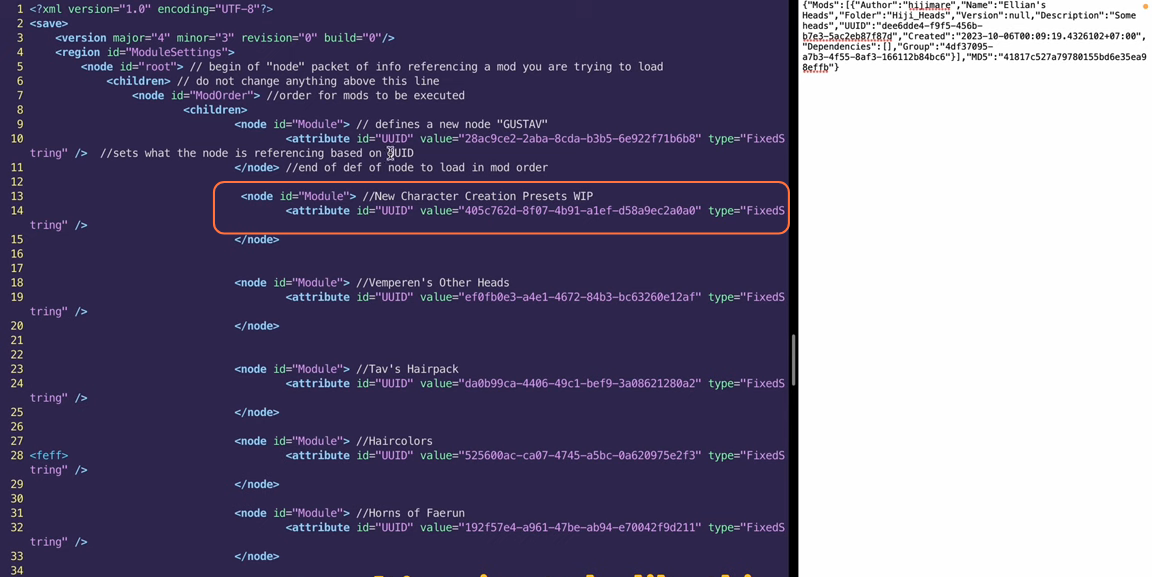
Step 4: The modsettings.xls File
- Find the modsettings.xls file and open it using a text editor like TextEdit.
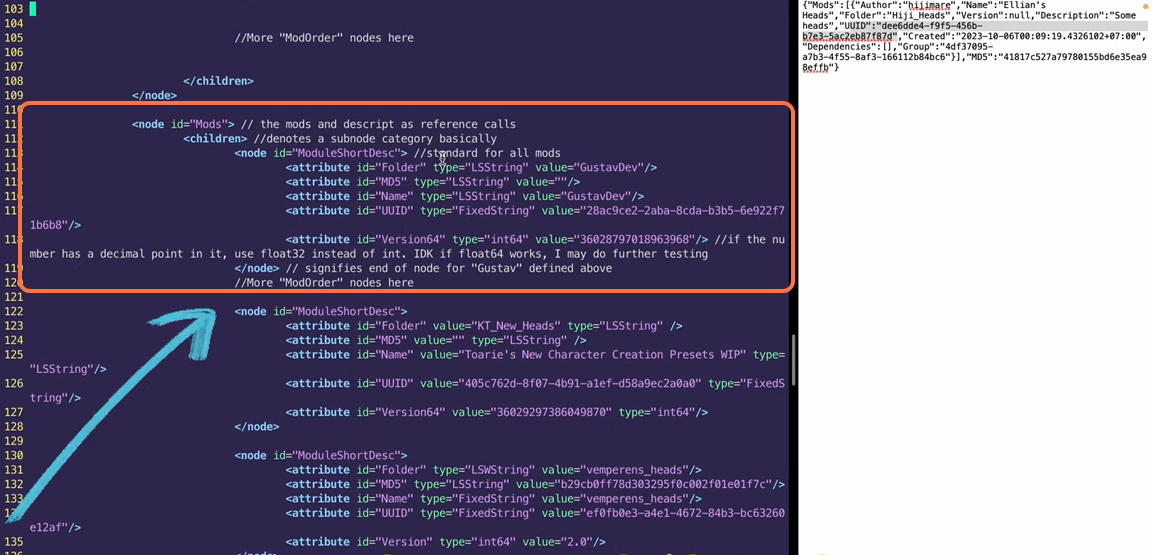
- The modsettings.xls file might look something like the following image (if you don’t have a modsettings.xls file configured at all, you can download this empty one ready for use).
Here’s what you need to do:
- Below the section <node id =”Module”> that determines the order in which the game loads mods, use the following prompt:
<node id ="Module">
<attribute id="UUID" value="" type="FixedString" />
</node>- You’ll need the UUID that can be found in the downloaded .json file.
- Add the value of the UUID inside the double quotation mark against the Value attribute.
Step 5: Fill the Json’s File Data
- Now scroll down to the section indicating which mods will be called or loaded by the game.
<node id="Mods">- Use the following prompt here:
<node id="ModuleShortDesc">
<attribute id="Folder" type="" />
<attribute id="MD5" type="LSString" value=""/>
<attribute id="Name" type="FixedString" value=""/>
<attribute id="UUID" type="FixedString" value=""/>
<attribute id="Version" type="int64" value=""/>
</node>- Here’s what you need to fill in:
“Folder”: As indicated in the .json file. For example, it could be “Hiji_Heads”.
“MD5”: Found in the .json file (e.g., “41817c527a79780155bd6e35ea98effb”.
“Name”: The mod’s name (e.g., “Ellian’s Heads”).
“UUID”: The UUID from the .json file (e.g., “dee6dde4-f9f5-456b-b7e3-5ac2eb87f87d”).
“Version”: If it’s “null” in the .json file, leave this field empty.
Once you’ve completed these steps for every mod you want to add, don’t forget to lock the modsettings.xls file to prevent the game from overwriting it, and keep a backup copy in case you encounter any issues.