This guide will show you how to put a price on a stand in Roblox. First, you have to create a game pass and then you will be able to put a price.
Create a Gamepass
In this section, we will take you through the steps to create a game pass. By following the steps below, you will be able to navigate to the Creation dashboard to create a game pass and then give it a name and description.
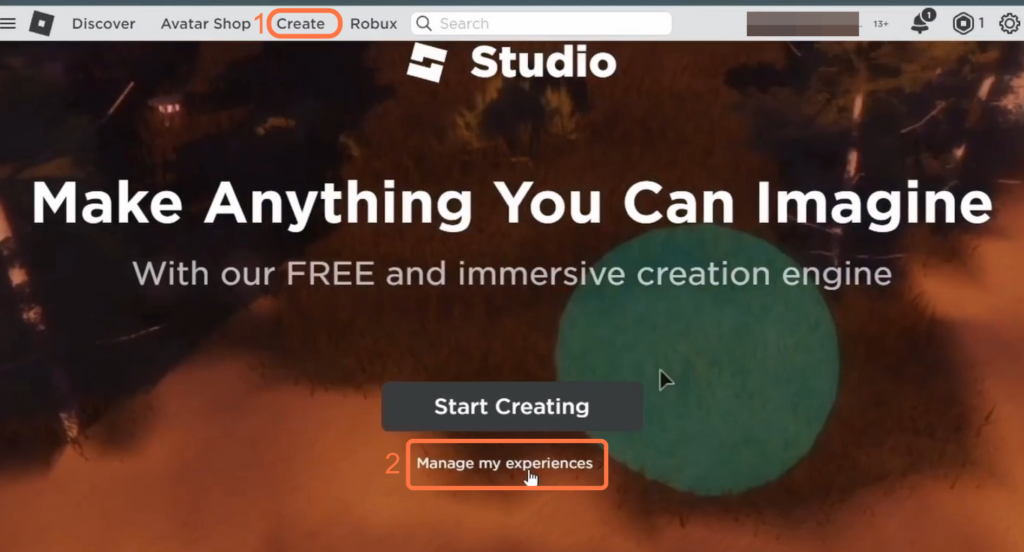
- First, open your web browser and go to the Roblox homepage. Look for the “Create” option at the top of the page and click on it.
Once you click on “Create,” a new page or section will open up. - On this new page, locate and click on the option that says “Manage My Experiences.”
It will take you to the Creation dashboard.
- Find and click on “Your Place“. Once you are on the place’s page, look for the “Associated Items” option on the left side of the screen and click on it.
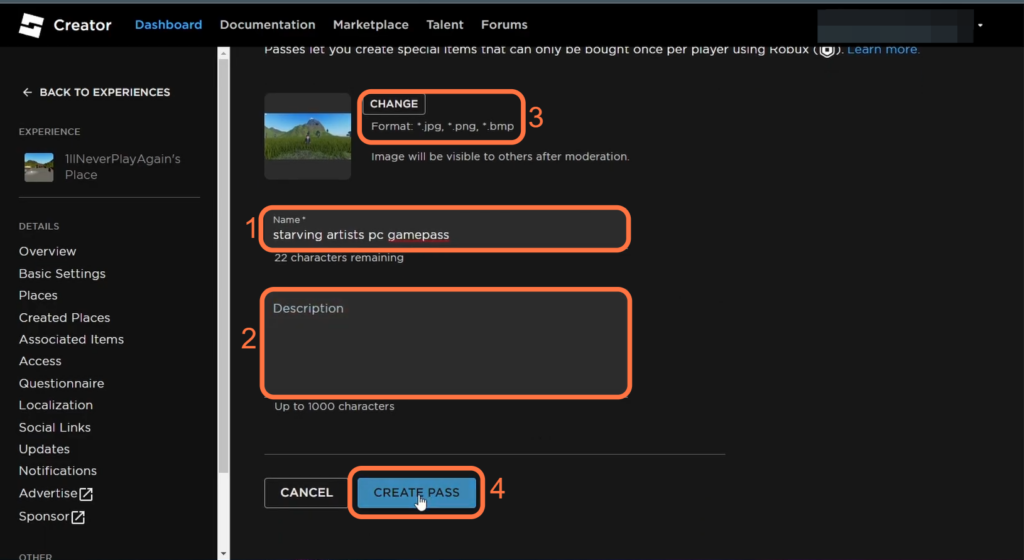
It will open up a new window. - Inside the new window, click the “Passes” tab and click on “Create A Pass.”
Set a price
This section describes how to set a price for your stand.
- To set a price for your pass, go to the Passes section of your Roblox account, where your created passes are listed.
- Locate your newly created pass and click on it to select it.
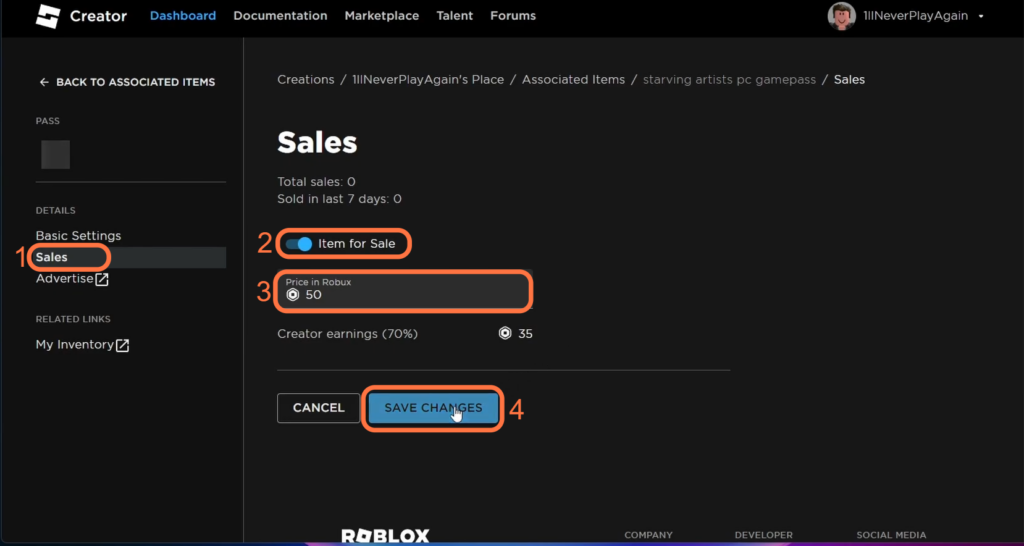
- Once you have selected the pass, click on “Sales” on the left side of the screen.
- Inside the sales settings, find the “Item for Sale” option and toggle it on.
This option allows you to set a price for your pass.
- You need to set a price for your pass and hit the Save Changes button.
Remember that you will only get 70% of pass the pass’s price.
- Now you have to launch the Please Donate game and go to an unclaimed stand.
- Hold E to get the new green donation button.