This guide will let you know how to reset your DNS settings on your PlayStation 4. Go through the guide and follow the step-by-step instructions to reset it.
- You have to start at the home screen of your device. Look for the “Settings” option and tap on it.
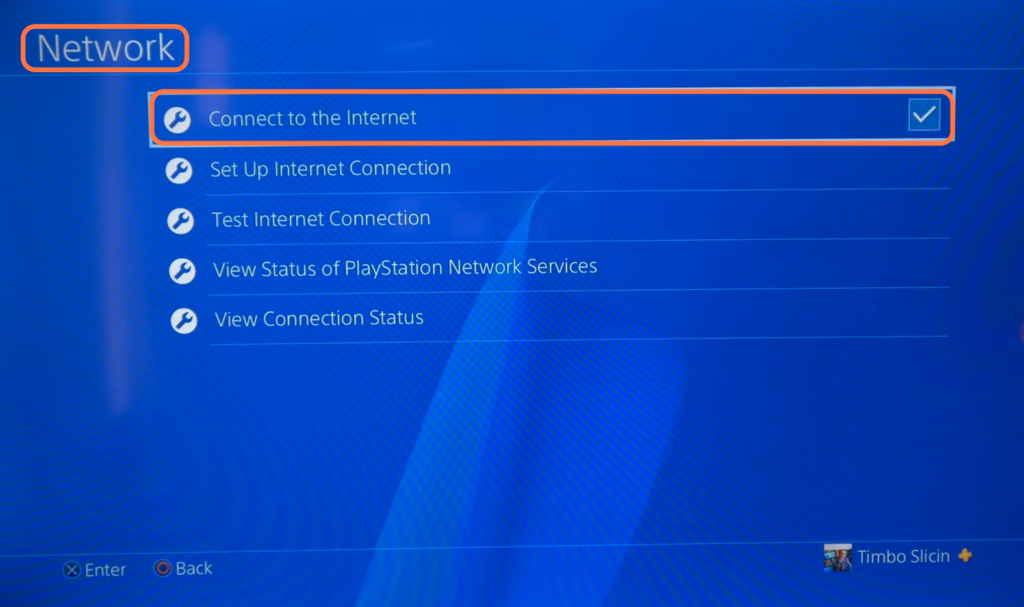
- Within the Settings menu, select the “Network” option.
- Once you are in the Network settings, tap on the “Set Up Internet Connection” option.
- Select the network you are currently connected to from the available options.
- To reset your settings for your DNS, go to Custom and choose a connection, and enter a password for that.
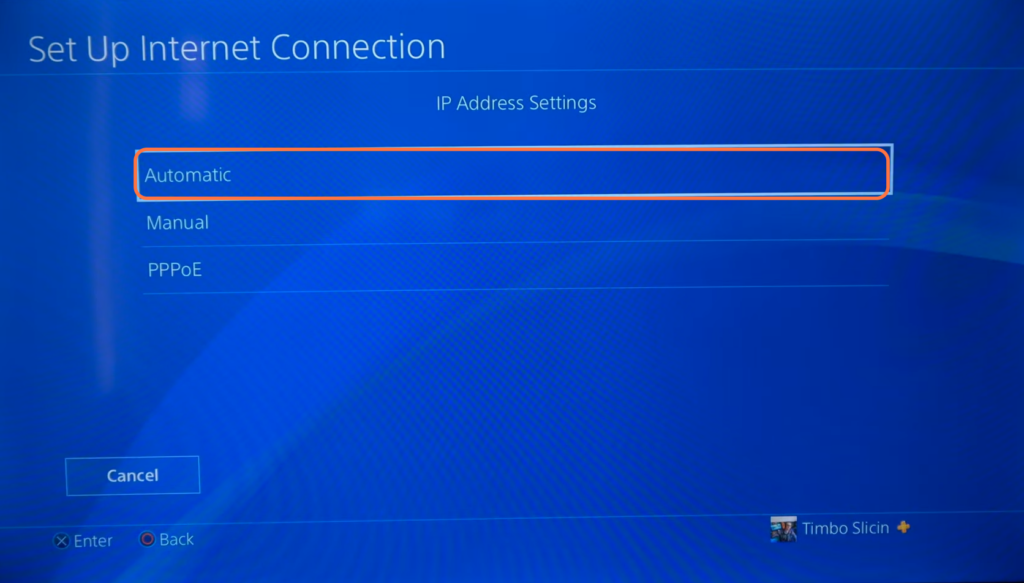
- After that, select Automatic under the IP Address Settings.
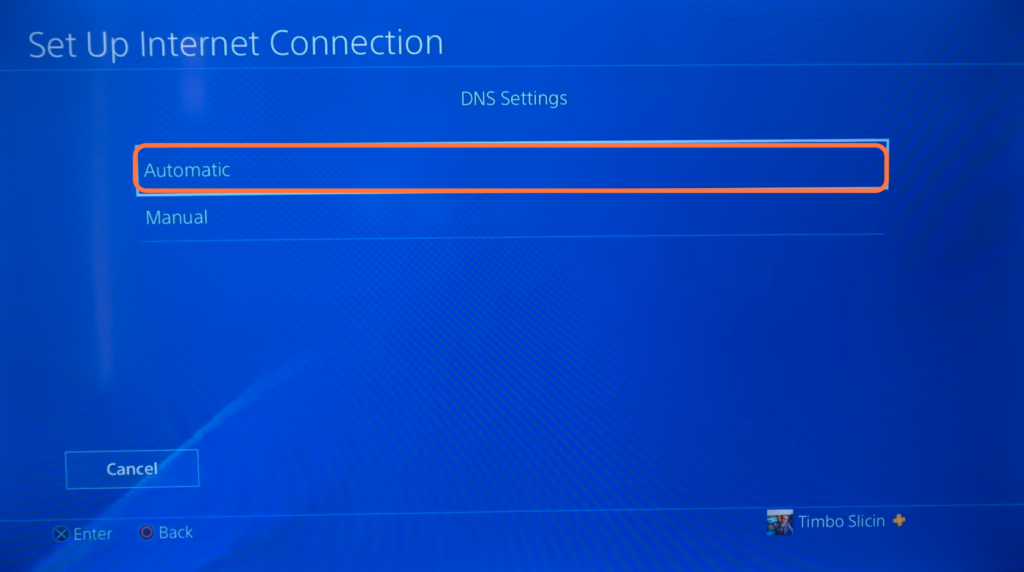
- Select Do Not Specify under DHCP Host Name and then tap on Automatic.
It will reset the DNS back to the default.
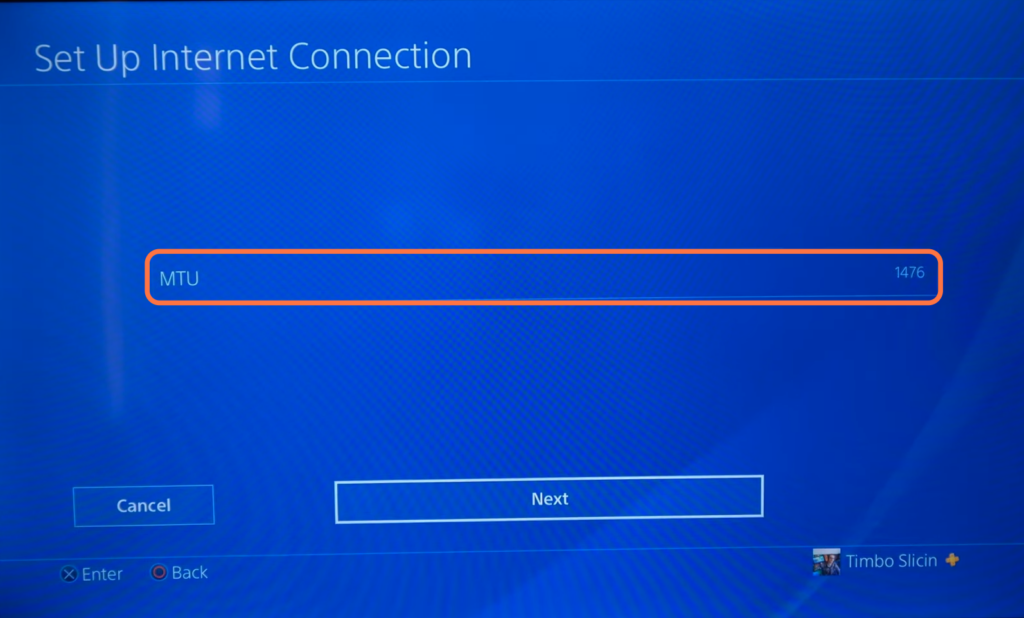
- Look for the “MTU settings” option. Select the “Manual” option for MTU settings.
- Enter the value “1476” in the MTU textbox and then tap the “Next” button to save the MTU settings.
- Select the “Do Not Use” option under the Proxy Server.
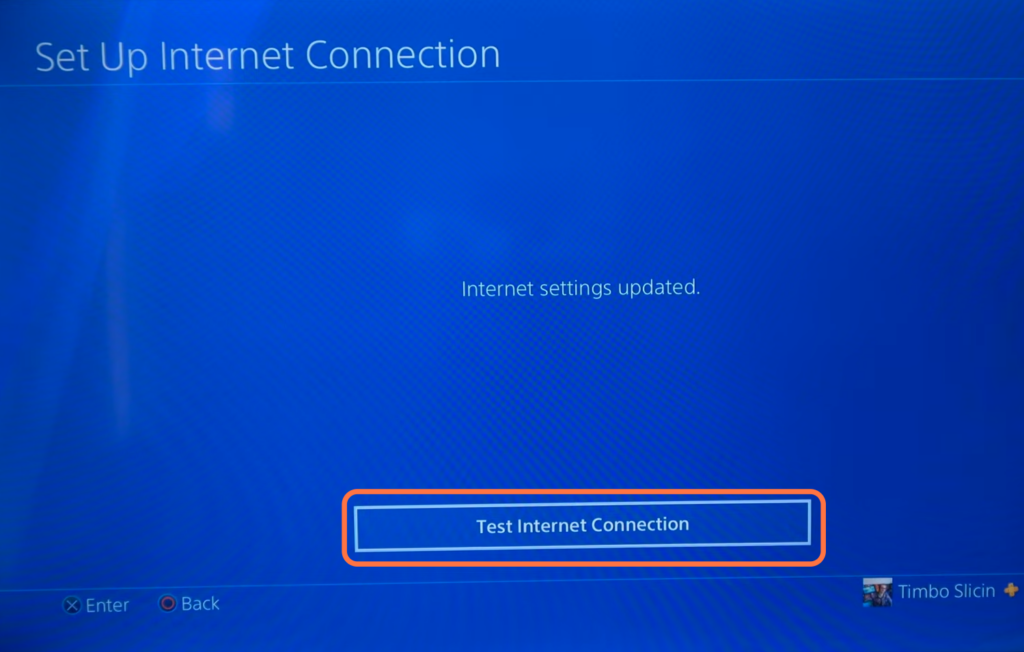
- After that, tap on the “Test Internet Connection” button to initiate the test.
Now you can see your download speed and the upload speed at the bottom.