This guide will provide you with the fastest method to reset the DNS Settings on PS5 and fix the Internet.
- Turn on your PlayStation 5 and ensure you are on the home screen. You have to go to settings.
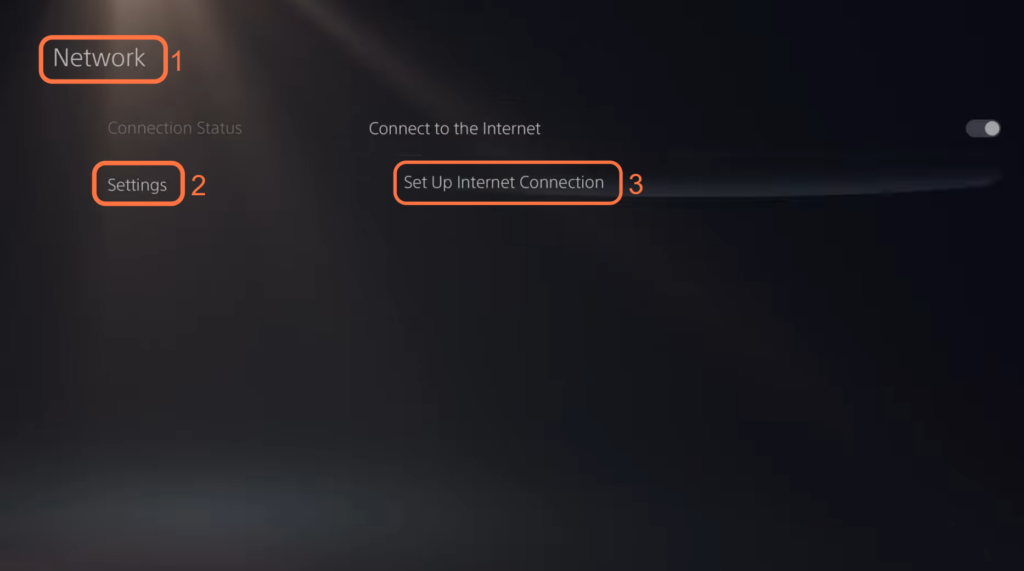
- Within the Settings menu, navigate to and select the “Network” option.
- After that, select the “Set Up Internet Connection” option.
- Select the internet connection that you are currently connected to and press “Options” on it.
A drop-down menu should appear on the screen. - Select the “Advanced Settings” option from the drop-down menu.
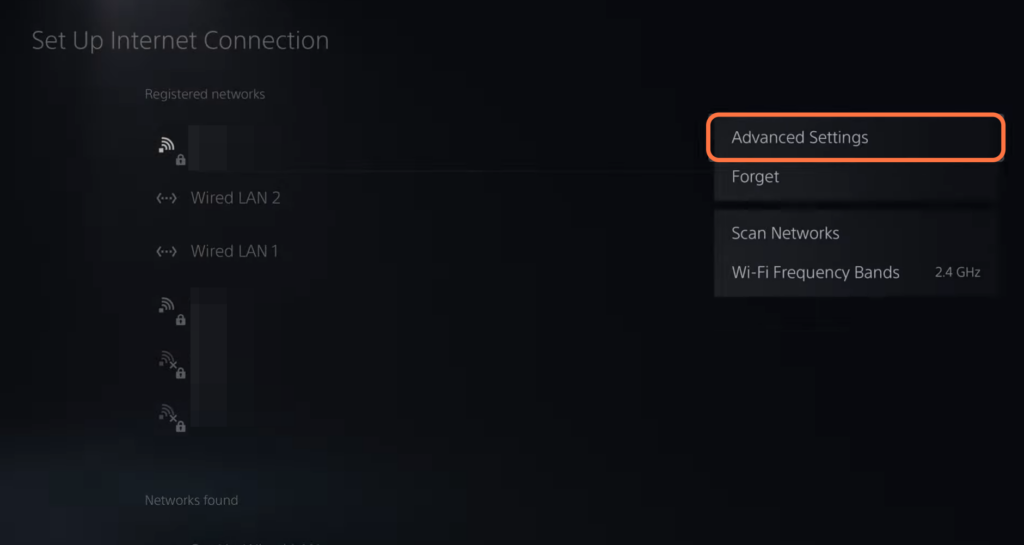
- You have to change the DNS settings from Manual to Automatic and hit the OK button.
It will restore the DNS settings back to default.

- If the issue still exists, then you have to press Options on your internet and select the Forget option.
- After that, press the OK button.
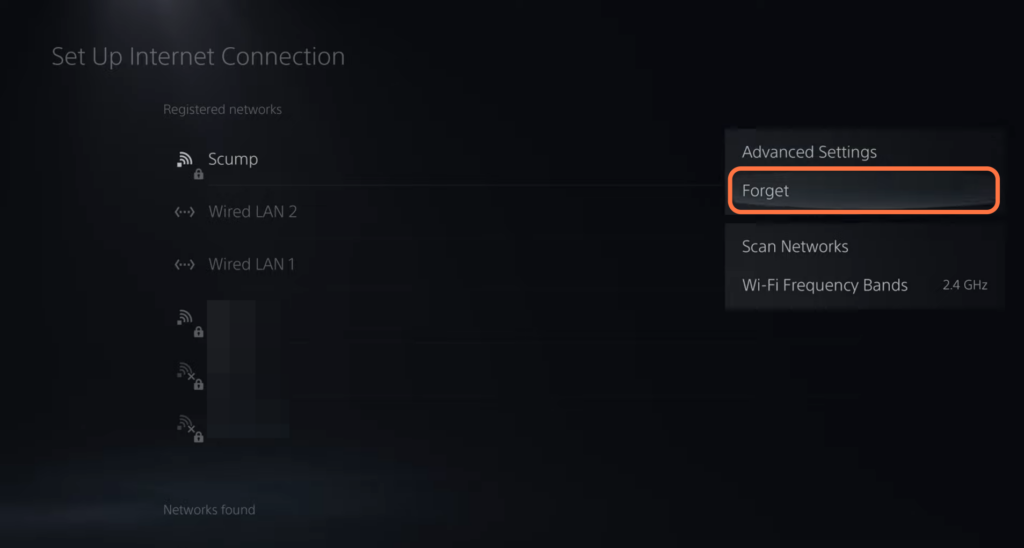
- After that, scroll down within the menu until you reach the “Networks Found” section.
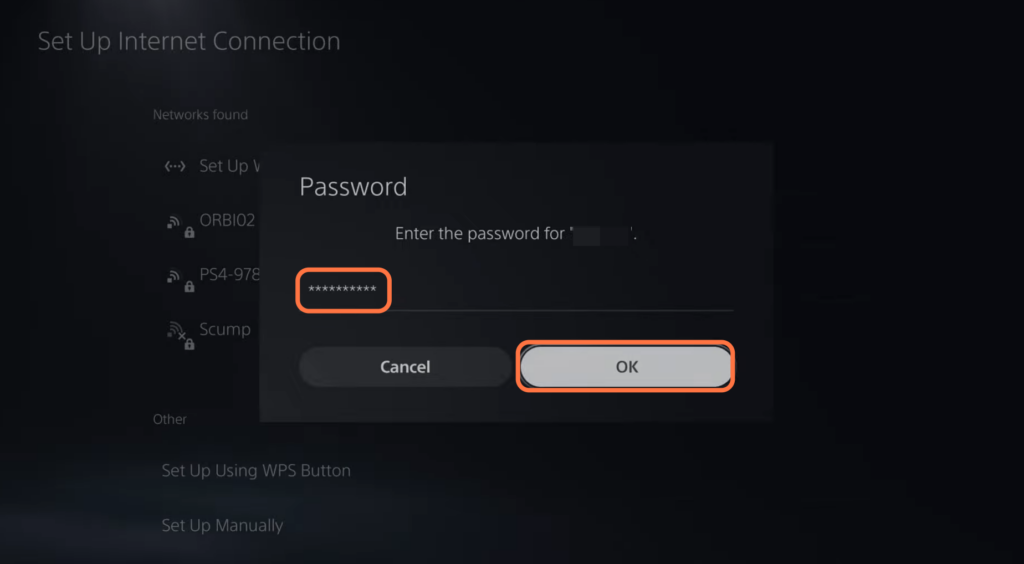
- Look for your Wi-Fi network within the list of available networks and reconnect it.
- Press the “R2” button on your device’s controller and hit the OK button.
- If you are still experiencing issues with your network settings, go to the settings and select the “System” option.
- Within the System settings menu, navigate to the “System Software” option.
- After that, select the Reset Options on the right side.

- Select Restore Default Settings, and input the default code “0000“.
- After that, hit the Restore button.
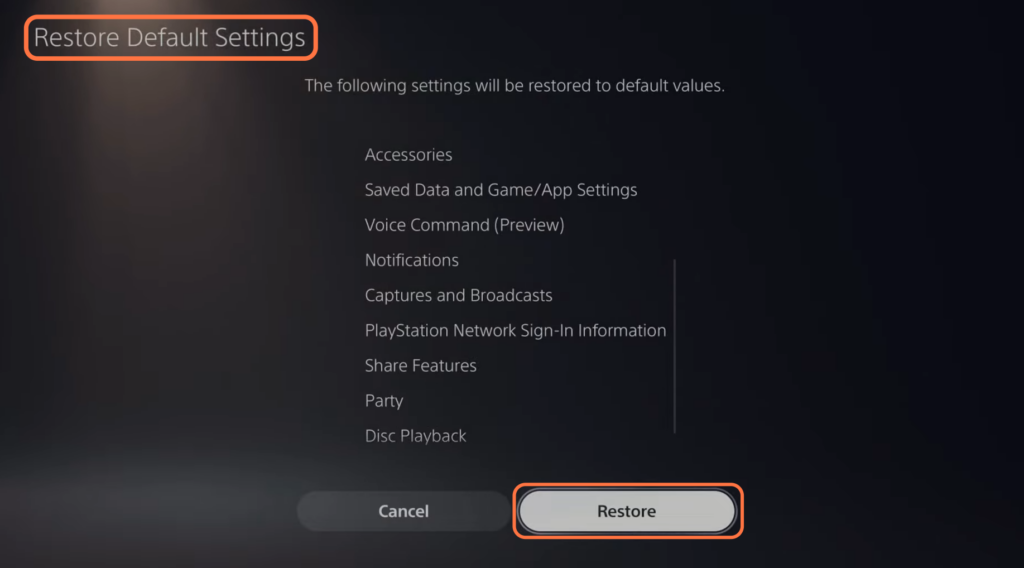
It will restore the settings and the network settings to the default values.
- After that, you need to sign back in with your email address and password to log into your PlayStation 5.