This guide will let you know how to set up your USB directory for the Dolphin emulator on Xbox. Gi through the guide and follow the step-by-step instructions to do so.
- First, you have to connect your USB device to your computer and make sure it is formatted.
- After that, launch the game.
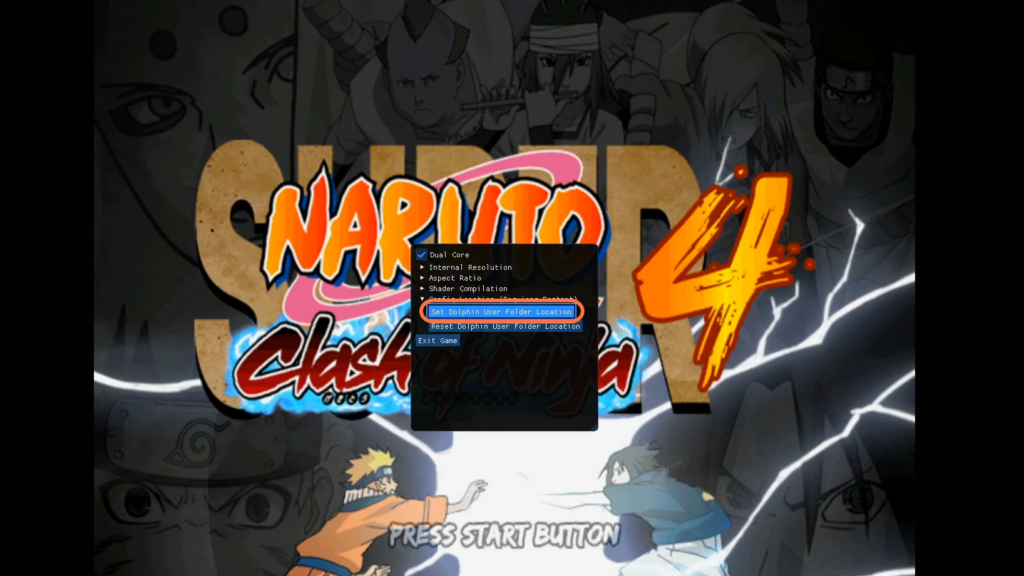
- Press the left stick and the Select button simultaneously to open up the quick menu.
- Once the quick menu is open, navigate through the options until you find the “Set Dolphin User Folder Location” option and then click on it.
- Scroll down on the left side until you find your USB device and then select it.
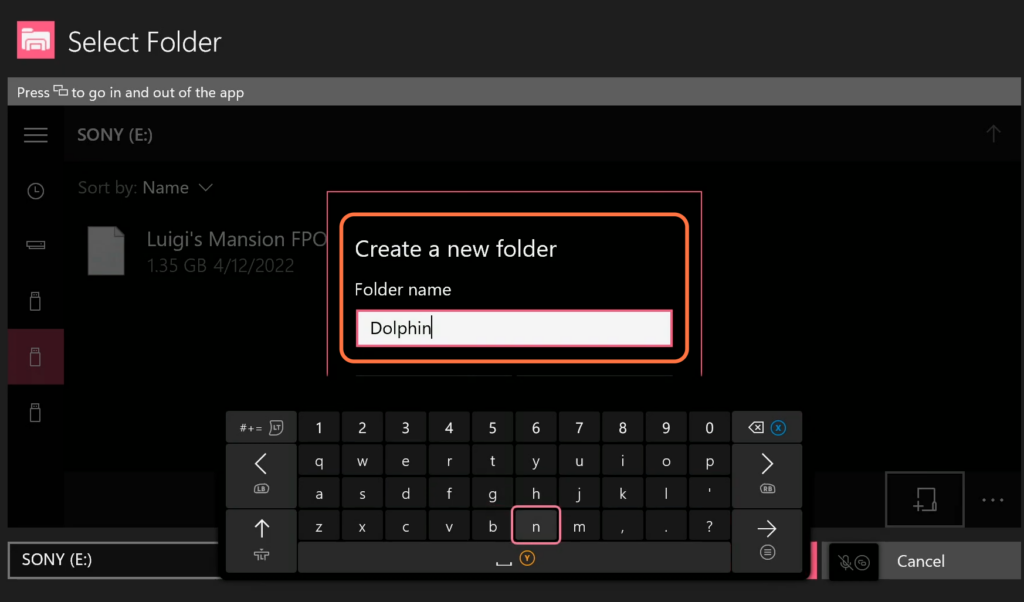
- Click on the button labelled “+” at the bottom right side of the window.
It will open a window to create a new folder on your USB device. - Type “Dolphin” as the name for the new folder and press the enter key on your keyboard.
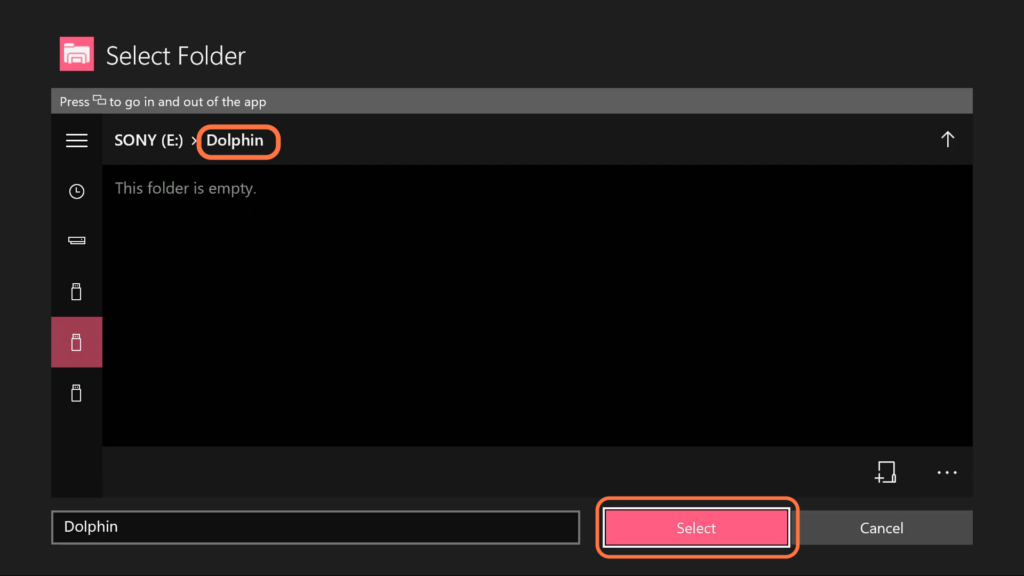
- Locate the folder named “Dolphin” that you have created.
- Open the folder by double-clicking on it and then click on the Select button at the bottom.
- The next thing you need to do is quit the app and then restart it.
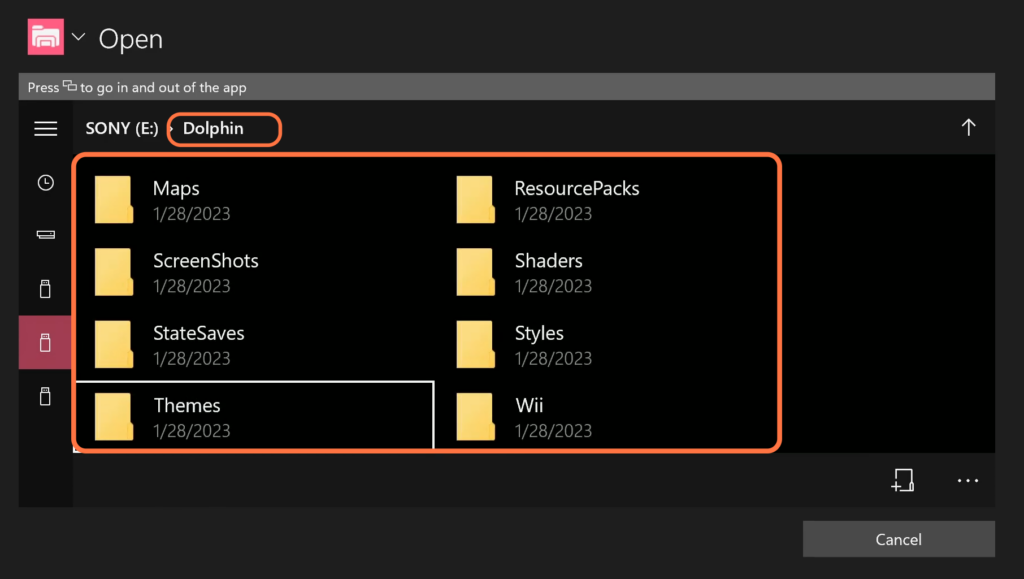
- After that, open up a game one more time so that it creates all the dolphin folders that you need.
- Quit the game, re-open Dolphin and navigate to your USB folder. Go to the new dolphin folder you just created and make sure that the files are there.
You have set up the USB directory for Dolphin to USB.
Now you can download the controller files and drag them into your USB.