In this guide, you will find how to set up a PS5 on an LG C2 OLED television. Go through the guide and follow the step-by-step instructions to set it up.
- Turn on your TV and ensure that it’s displaying the content from your gaming console.
- Locate and press the Gear icon on your TV remote control.
This will usually open up the settings menu. - Once you’re in the settings menu, use the navigation buttons on your remote to move through the available options.
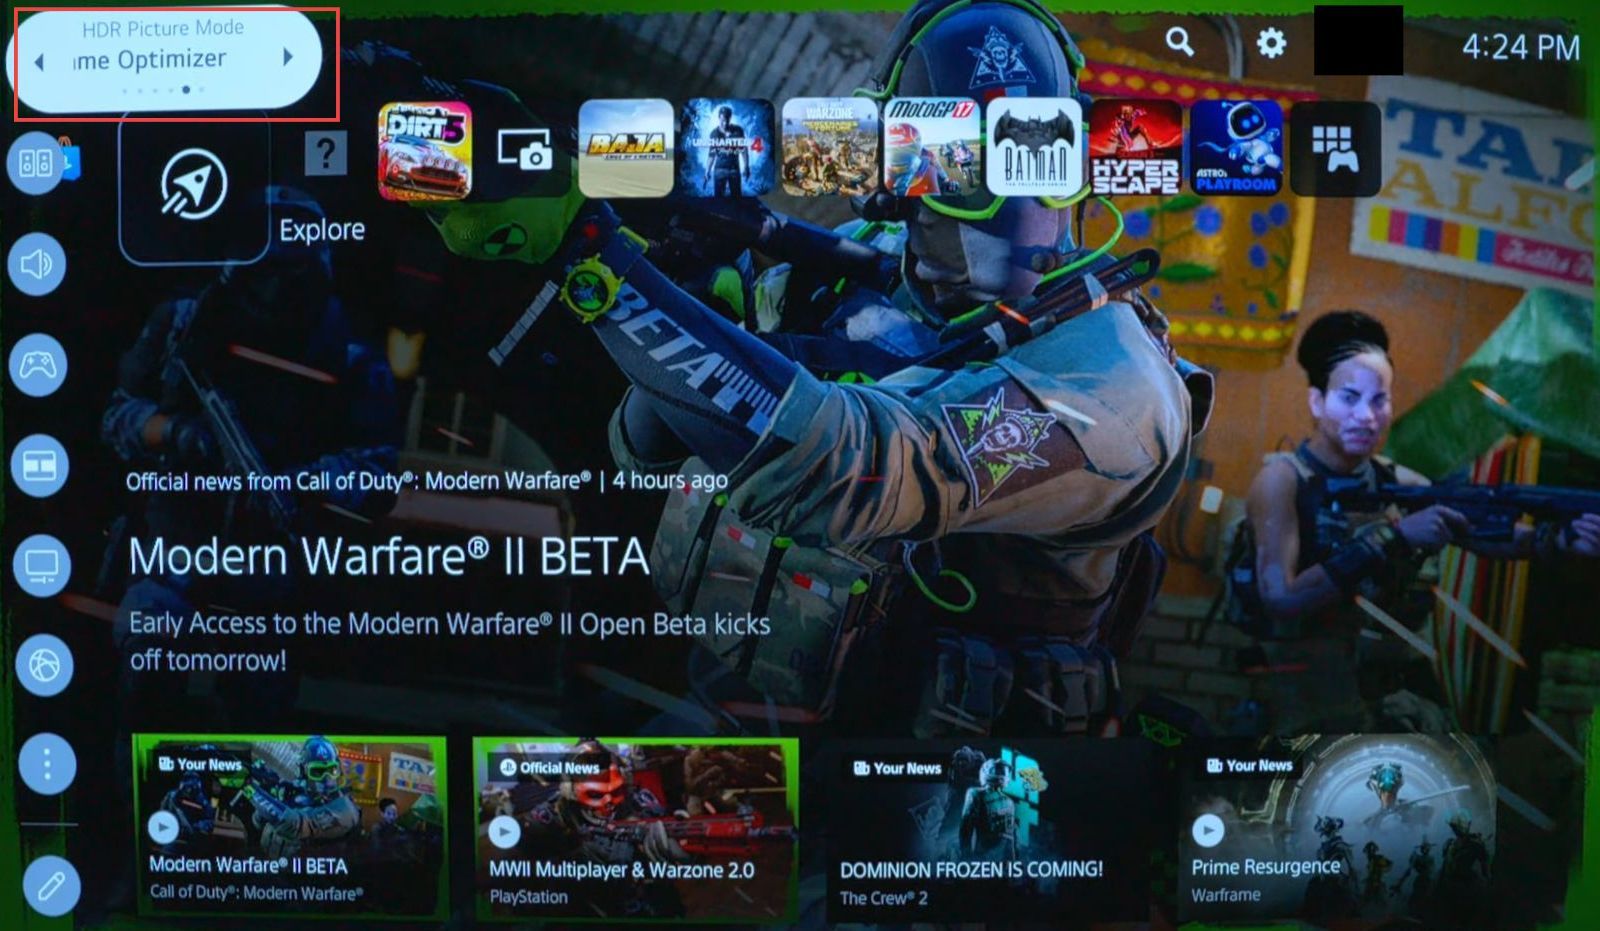
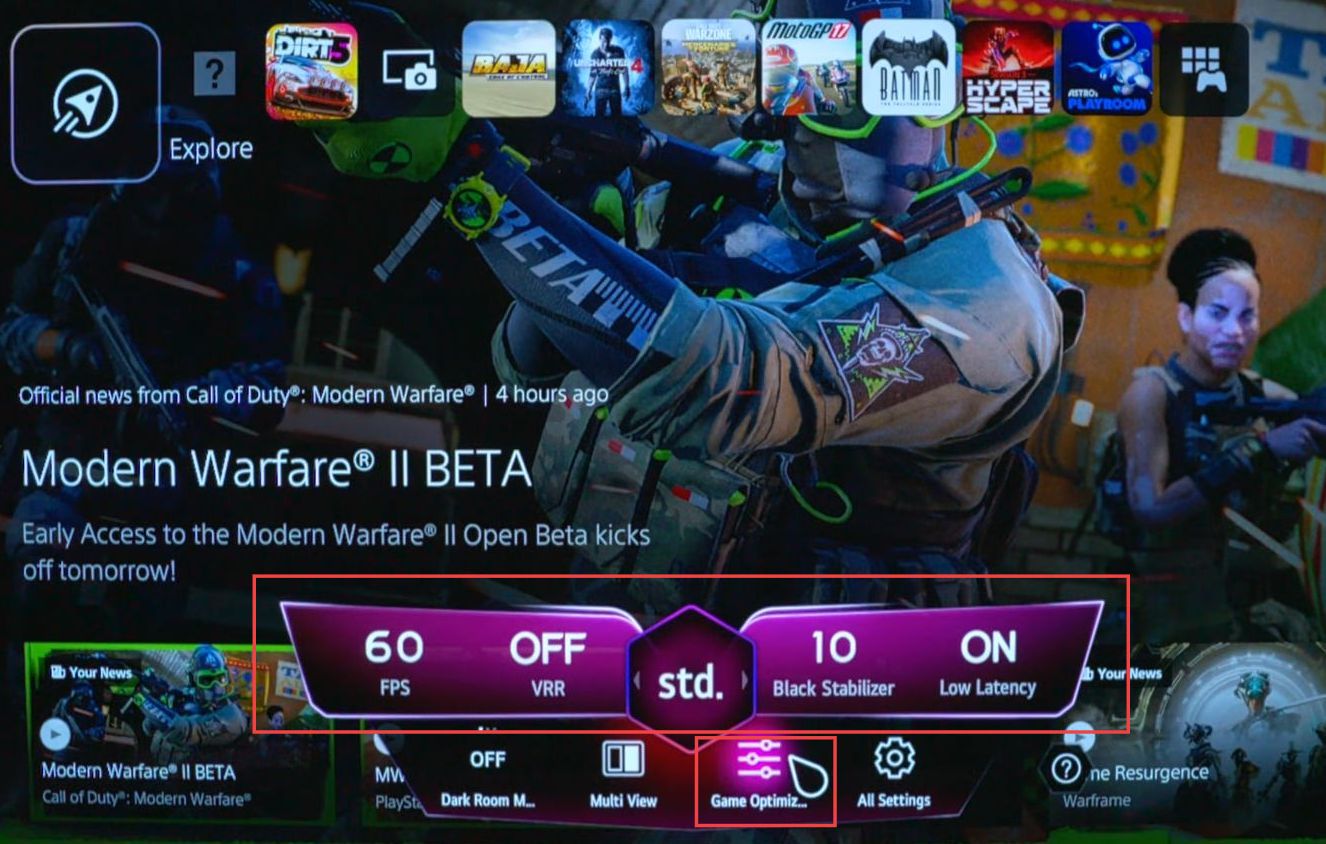
- Navigate to the top section of the settings menu and look for an option called Gaming Optimizer.
- Select the Gaming Optimizer option by pressing the OK button on your remote.
This option is designed to provide the fastest latency for gaming, optimizing the TV settings for better gaming performance. - After selecting Gaming Optimizer, you might be presented with additional settings related to gaming performance.
Review the settings and make any adjustments if necessary. - Once you’re satisfied with the settings, navigate to the Confirm option and select it to apply the changes.
- Within the settings menu, navigate to the Gaming Mode option.
This option is designed to enhance the gaming experience by optimizing various settings. - Select Gaming Mode by pressing the appropriate button on your remote.
Once you’ve entered Gaming Mode, you’ll notice a small gaming icon on the screen.
This badge provides you with important information about your gaming experience. - Look for details displayed by the gaming badge, such as frames per second (FPS), Variable Refresh Rate (VRR) settings, and low latency settings.
- Once you’ve adjusted the settings within the Gaming Optimizer menu, navigate to the Save button.
- If you want to further customize your gaming experience, navigate down to the Gaming Optimizer option, and select it using your remote’s navigation controls.
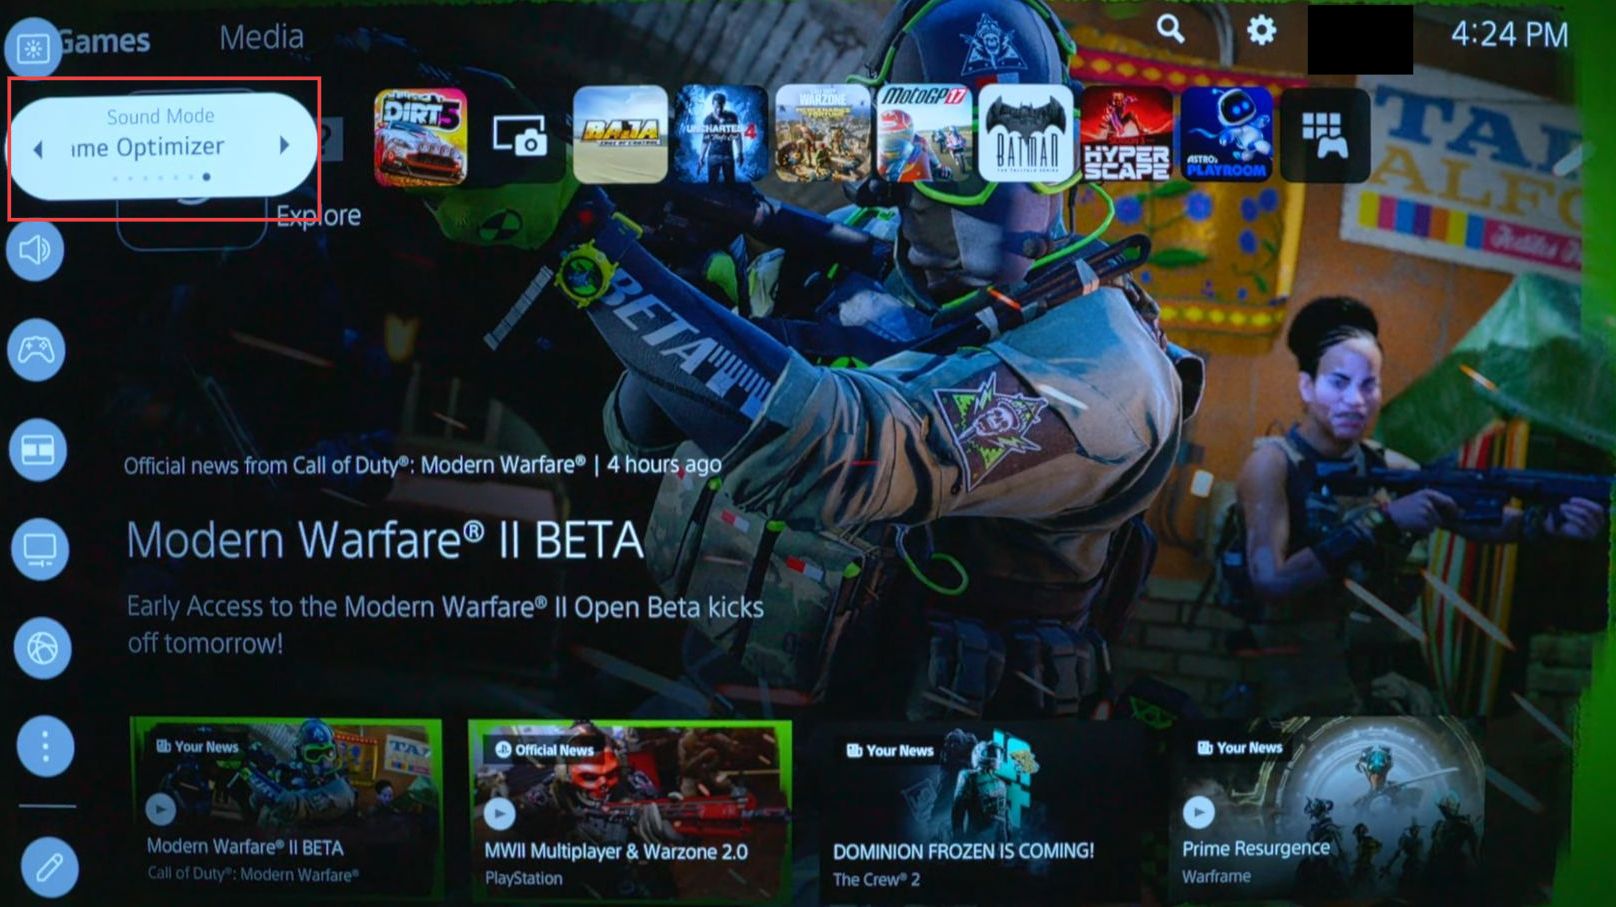
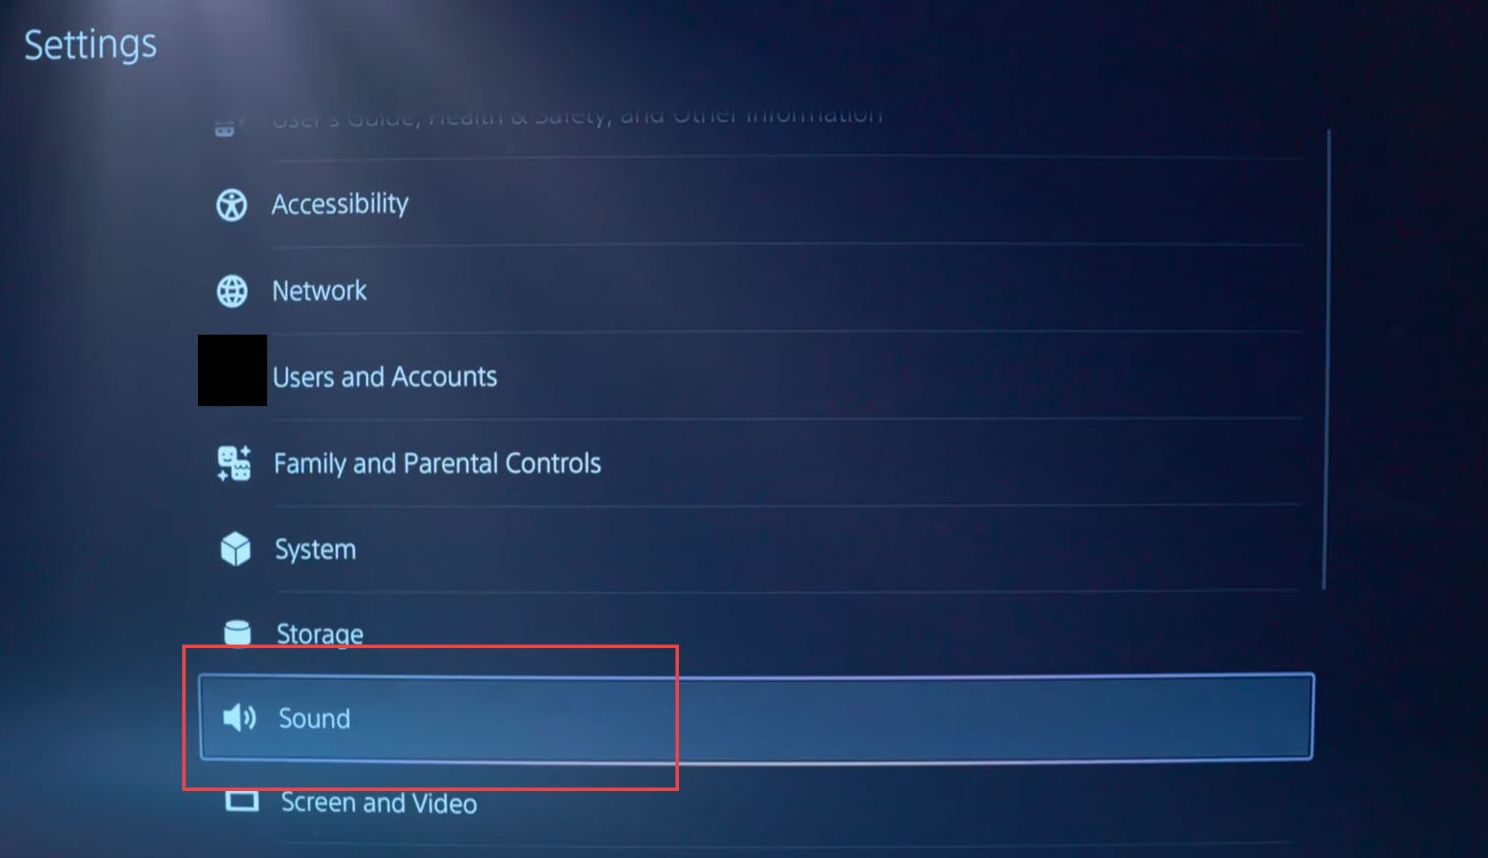
- Within the Settings menu, use the controller to scroll down and find the Sound option.
- Highlight and select the Sound option by pressing the X button on your controller.
Inside the Sound settings, you’ll find various options to customize your audio experience, such as audio output, audio format, volume settings, and more.
- If you’re using the TV’s built-in speakers and want to enhance the audio experience, then explore the available audio settings and configurations.
- Look for options that enhance TV speaker output, such as 3D Audio for Headphones.
Make adjustments to optimize the audio quality based on your preference. - Apply and save the changes before exiting the settings.
- If you have a soundbar connected to your TV, then understand that the need for TV speaker optimization may not be necessary, as soundbars often provide better audio quality.
- Ensure your soundbar is properly connected and set up. Adjust the soundbar’s settings and configurations using its remote to optimize audio output.
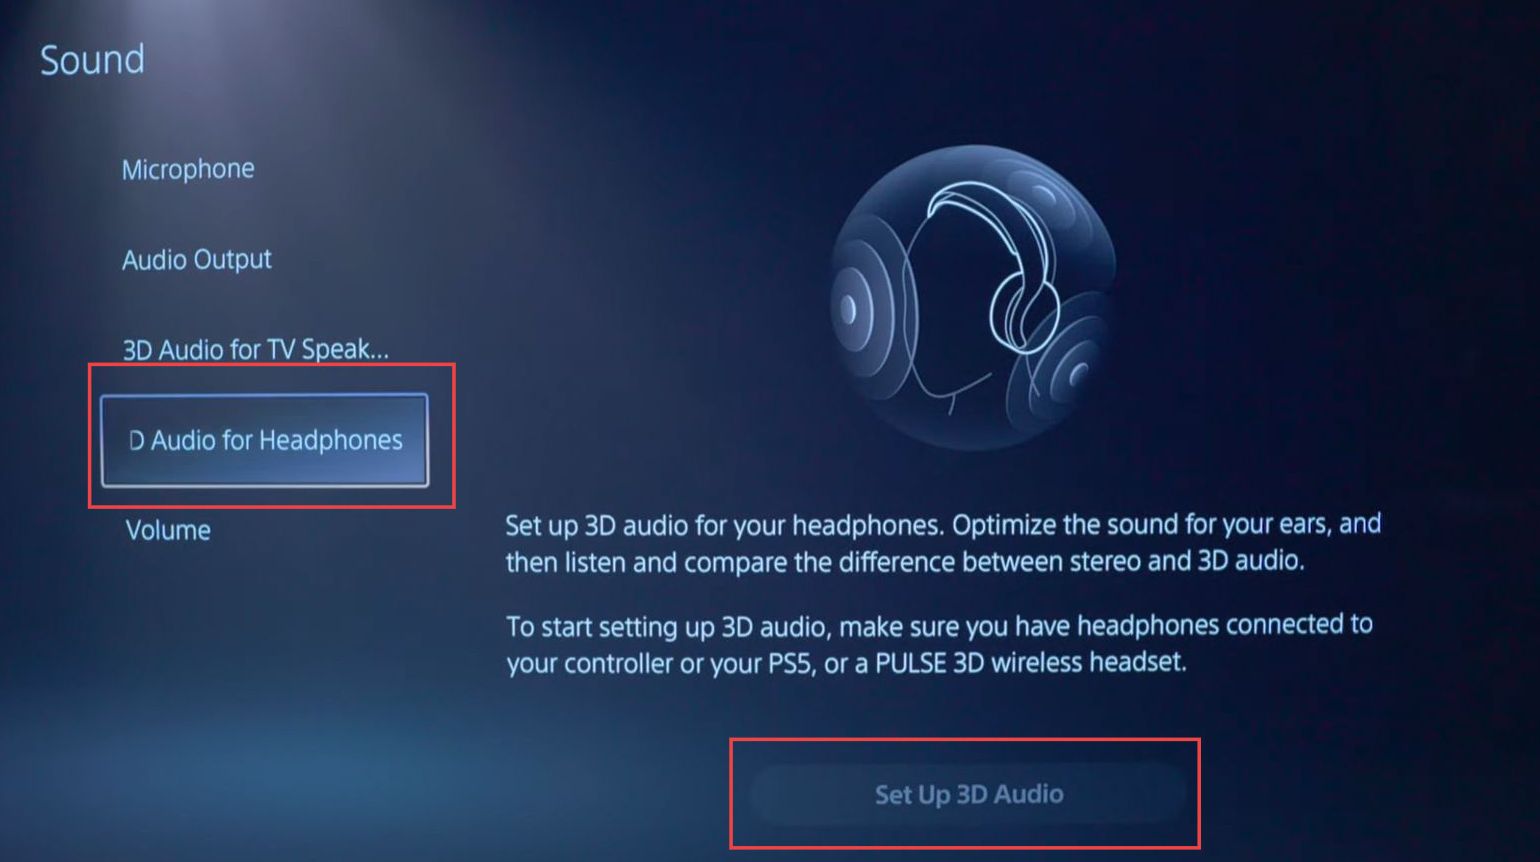
- If you’re using compatible headphones and want to experience 3D audio, then navigate to the 3D Audio for Headphones option on the left side panel within the Sound settings.
- Select the 3D Audio for Headphones option to enter the configuration menu and follow on-screen instructions to set up. After that, calibrate your compatible headphones for 3D audio.
Make sure the headphones are properly positioned and calibrated for an immersive audio experience. - Once configured, exit the menu to save the changes.
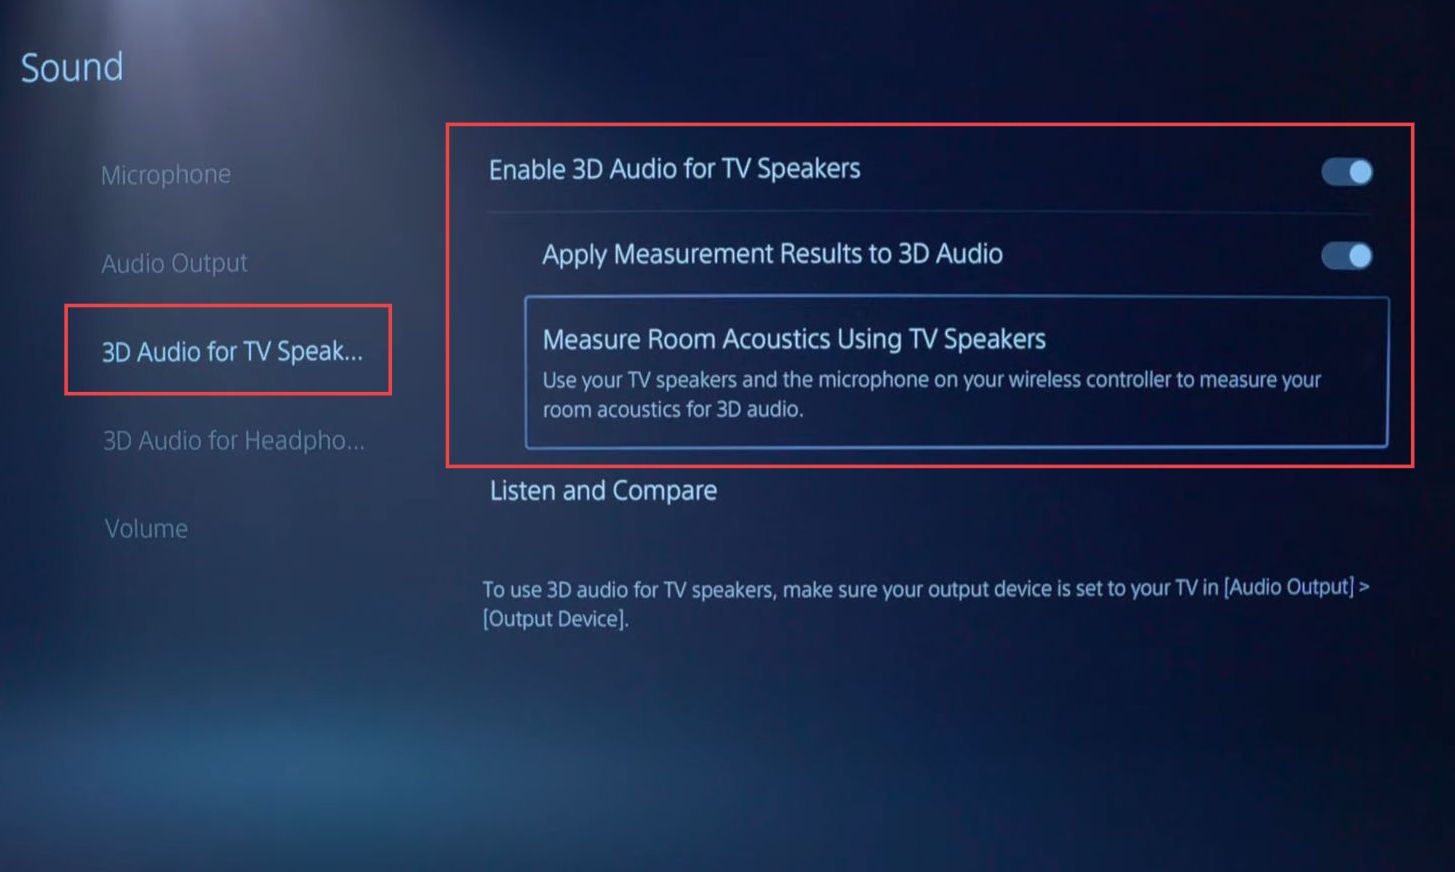
- With the 3D TV Audio Speakers option turned on, proceed to the next step of measuring your room’s acoustics.
- Adjust the volume of your TV to a suitable level. Ensure it’s loud enough for the microphone on the PlayStation controller to detect the audio signal.
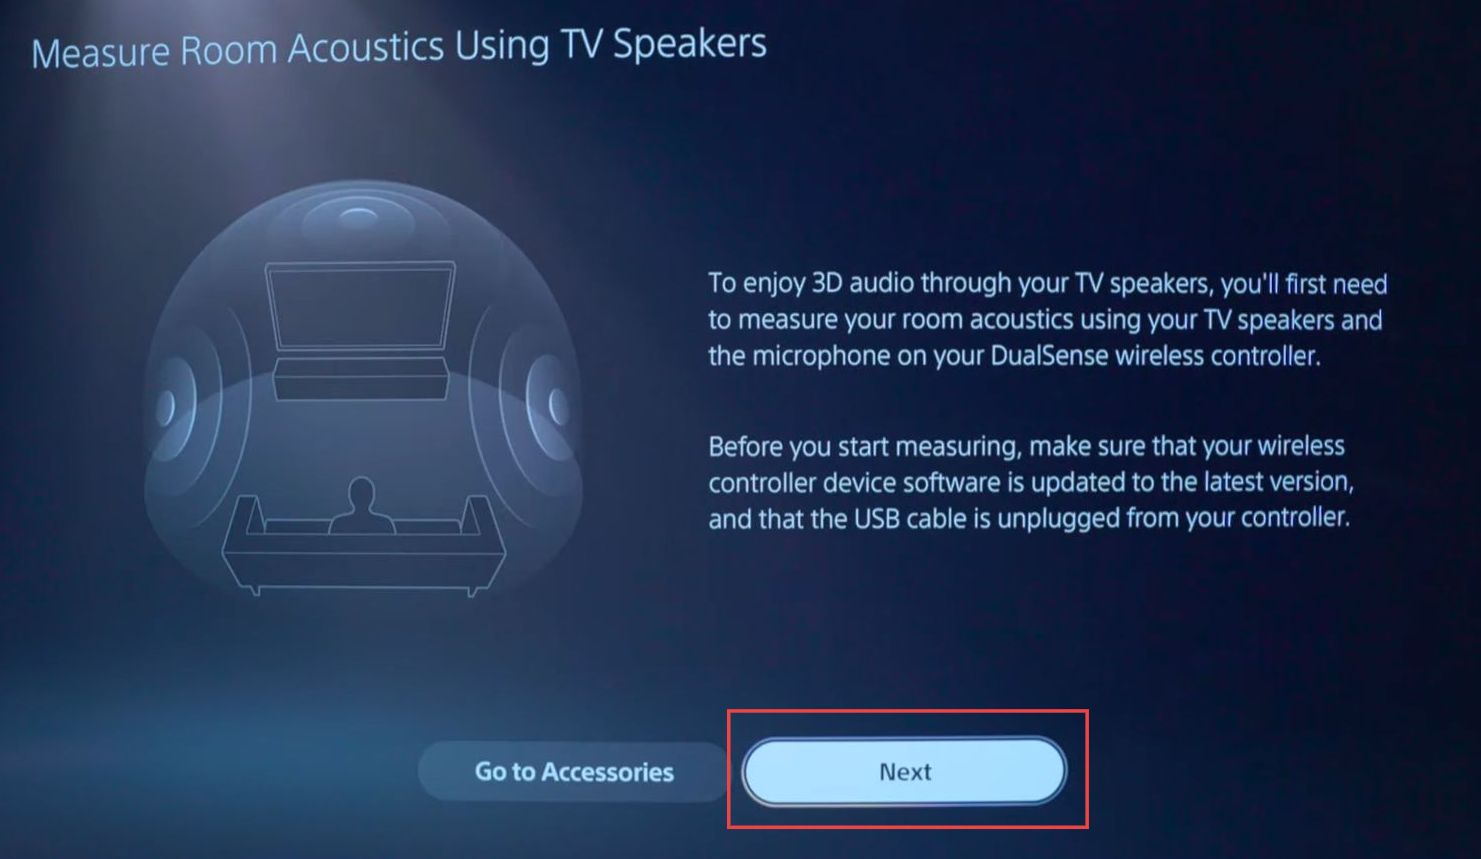
- Position yourself in a central spot within the room where you typically enjoy gaming consumption. Press the Measure Room Acoustics using the TV Speakers option.
This will initiate a process where the console’s microphone captures the audio signal as it interacts with your room’s acoustics.
- After enabling the 3D TV Audio Speakers option and adjusting the volume, proceed by selecting the Next button.
This should take you to the next stage of the process. - Allow the measurement process to run. During this time, the console’s microphone will be capturing and analyzing the audio signal as it interacts with your room’s acoustics.
Stay in your chosen sweet spot within the room while the measurement is in progress. - Once the measurement process is complete, you’ll likely receive a notification on the screen.
- At this point, the measurement is done, and your console has gathered the necessary data about your room’s acoustics.
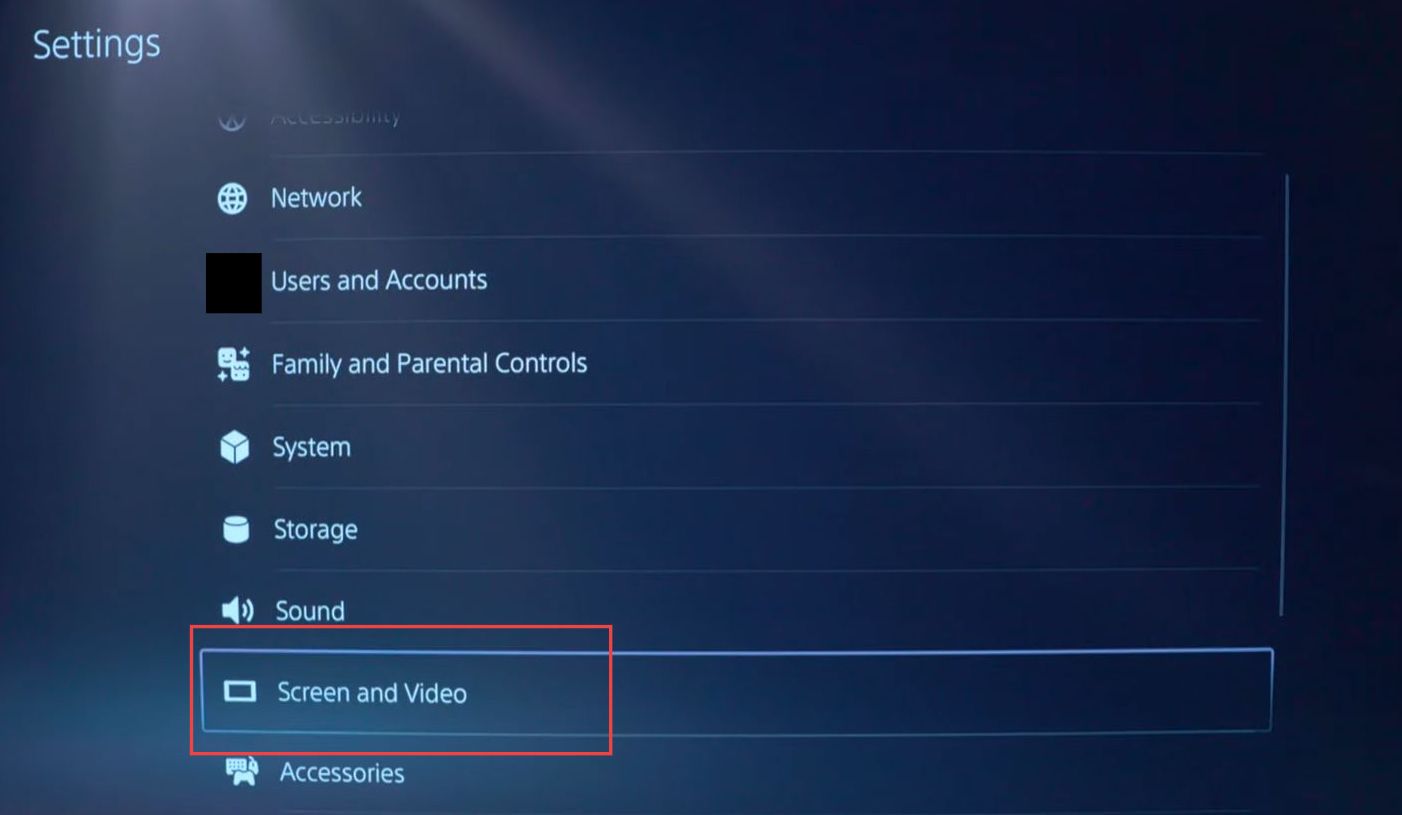
- From the PlayStation home screen, use your controller to navigate to the settings icon, and within the settings menu, look for the Screen and Video option.
This option might be located in the main settings menu. - Use your controller’s directional buttons to navigate to Screen and Video and select it.
- Use your controller to navigate to the Screen option located on the left side panel of the settings menu. Press the appropriate button to select it.
- Within the Screen settings, look for an option labelled Adjust Display Area.
This option is likely designed to fine-tune your screen’s display. - Select the Adjust Display Area option to access the screen alignment settings.
Here, you’ll be able to modify the positioning and alignment of your screen. - Use the on-screen controls to adjust the screen.
Your goal is to ensure that the screen is stretched out to meet all the corners of your display.
Pay attention to the edges and corners of the screen as you make adjustments. - Keep in mind that most TVs come with a factory default screen setting that is usually suitable for most users. If you find that the default setting meets your needs, you can leave it as is.
- Once you’re satisfied with the screen alignment and stretching, follow any on-screen prompts to save your changes.

- Using your controller, navigate to the Video Outputs option located on the left side panel of the settings menu.
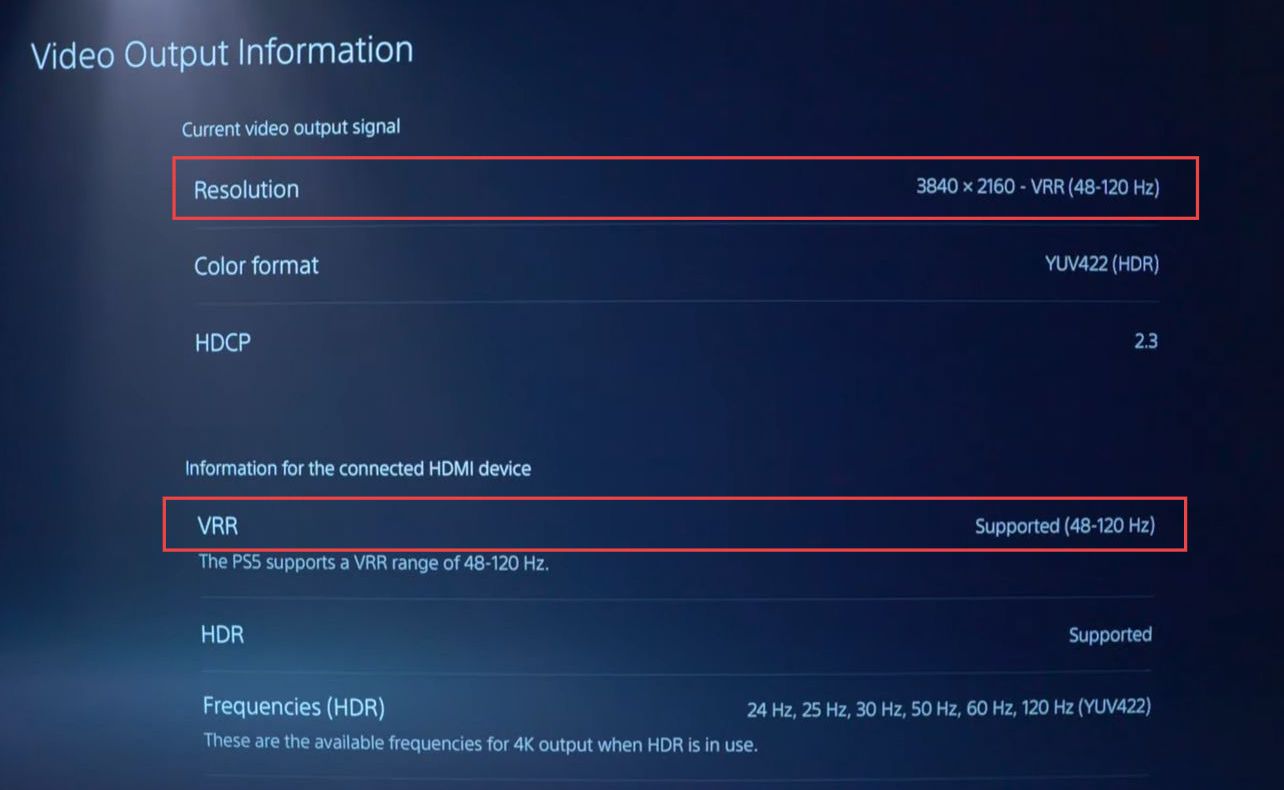
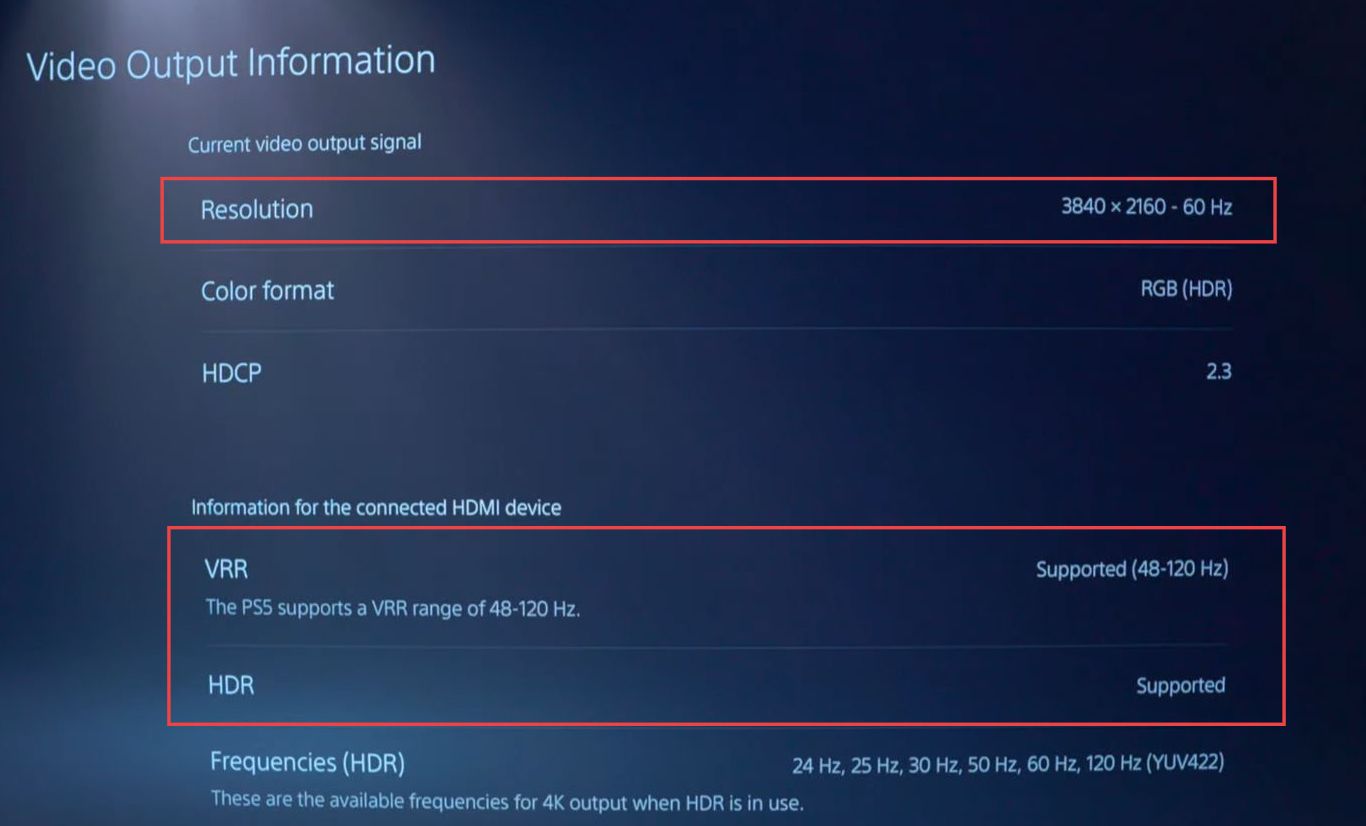
- Once in the Video Outputs settings, you’ll want to check the refresh rate of your TV.
Look for information about the refresh rate, such as whether it’s displaying at 60 Hz. - If your TV supports a higher refresh rate (e.g., 120 Hz) but is only displaying at 60 Hz, you’ll need to adjust this setting. Look for an option to change the refresh rate and increase it to the maximum supported by your TV.
- While in the Video Outputs settings, make sure to enable any additional features that your TV supports, such as Variable Refresh Rate (VRR) and High Dynamic Range (HDR).
These features can enhance your gaming experience. - After making any necessary adjustments, follow any on-screen prompts to save your changes.
- Once you’ve adjusted the refresh rate and enabled VRR and HDR, exit the settings menu and proceed to test your gameplay to ensure that the changes have taken effect.
- Navigate back to the main settings menu by pressing the appropriate button to go back.
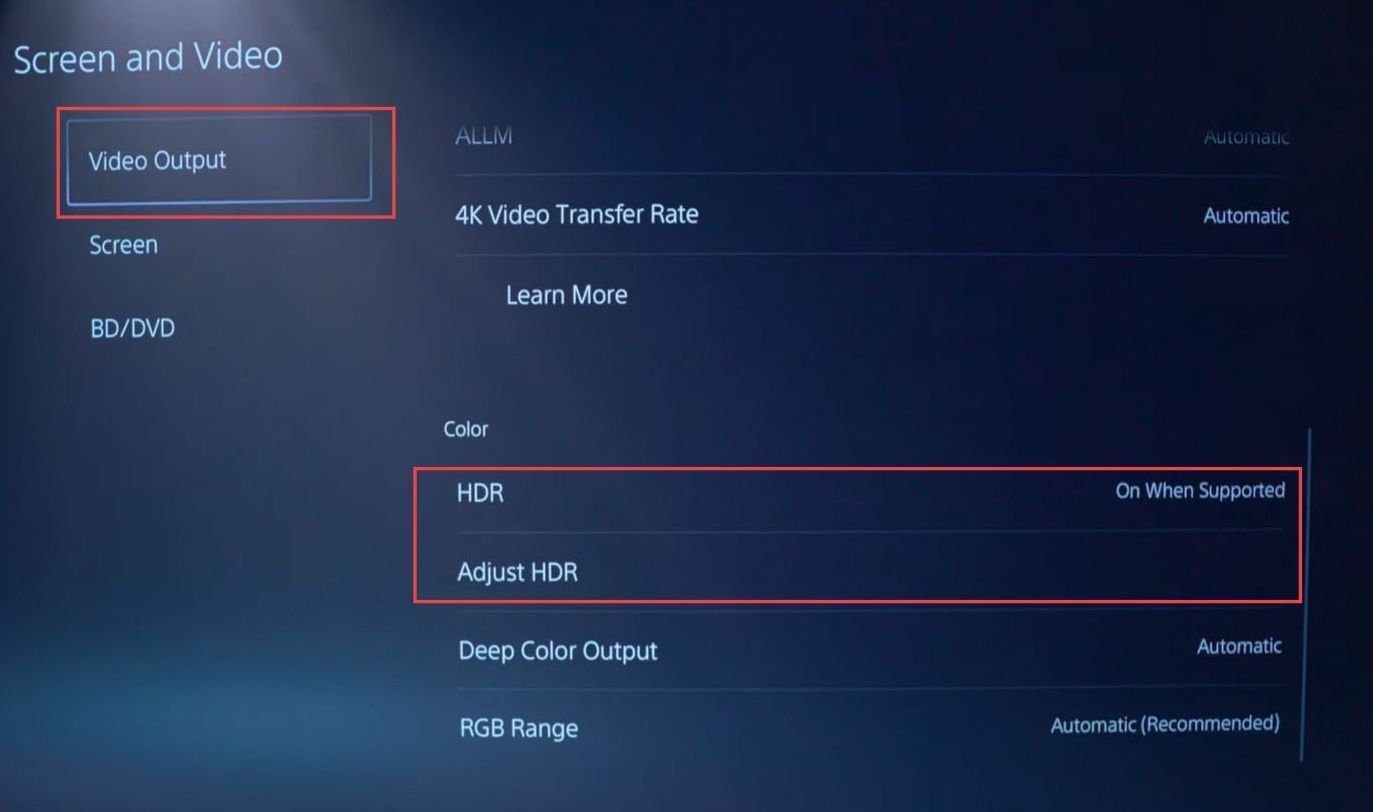
- Look for the HDR settings option which might be located under the Video Output settings. Select it.
- Within the HDR settings, check if there’s an option to enable HDR and make sure it’s set to On when supported.
It’s important to enable HDR only when it’s supported by the content you’re viewing, as enabling it always might not provide the best experience. - Look for an option like Adjust HDR and select it to fine-tune the HDR settings which will be presented with a series of screens to adjust the HDR brightness.
The goal is to adjust it until you can barely see a specific round circle on the screen. - On each screen, follow the instructions to adjust the HDR settings as instructed.
- Typically, you’ll need to adjust the settings to reach a point where the round circle is barely visible against the background.
- After going through the calibration screens, you’ll likely reach a confirmation screen and confirm your changes and save the adjusted HDR settings.
- Start by launching the game Dirt 5 on your PlayStation console and once you’re in the game, access the in-game settings menu.
This might be found in the main menu, and pause menu within the game. - Look for a section within the settings menu that relates to display options. This is where you’ll find the settings to adjust the resolution and refresh rate.
- Within the display settings, you should find options related to resolution and refresh rate.
Look for an option to set the resolution to 1440p and the refresh rate to 120 Hz. If these options are available, select them. - Once you’ve adjusted the resolution and refresh rate settings, save your changes for the new settings.
- Exit the settings menu and return to the main menu of the game. Exit the game Dirt 5 and return to the PlayStation home screen.
- Now, go to the PlayStation system settings from the home screen and navigate to the video settings section.
- Look for an option to set the refresh rate to 120 Hz. It’s possible that after adjusting the game settings, the system might recognize the 120 Hz option for your TV.
- If the option is available, select it to enable 120 Hz display mode.
- Confirm the changes, and then proceed to test your display to ensure that it’s running at 120 Hz.
- Keep note that not all games or TVs support 120 Hz, and the availability of these options can vary.
This process involves attempting to trigger the 120 Hz option through a game that supports it, but the success of this method is not guaranteed for all setups.