This guide will help you to set up A PS5 on a Samsung TU7000 Television. Go through the guide and follow the step-by-step instructions below to do so.
- First, you have to use the TV’s remote control to navigate through the menu options.
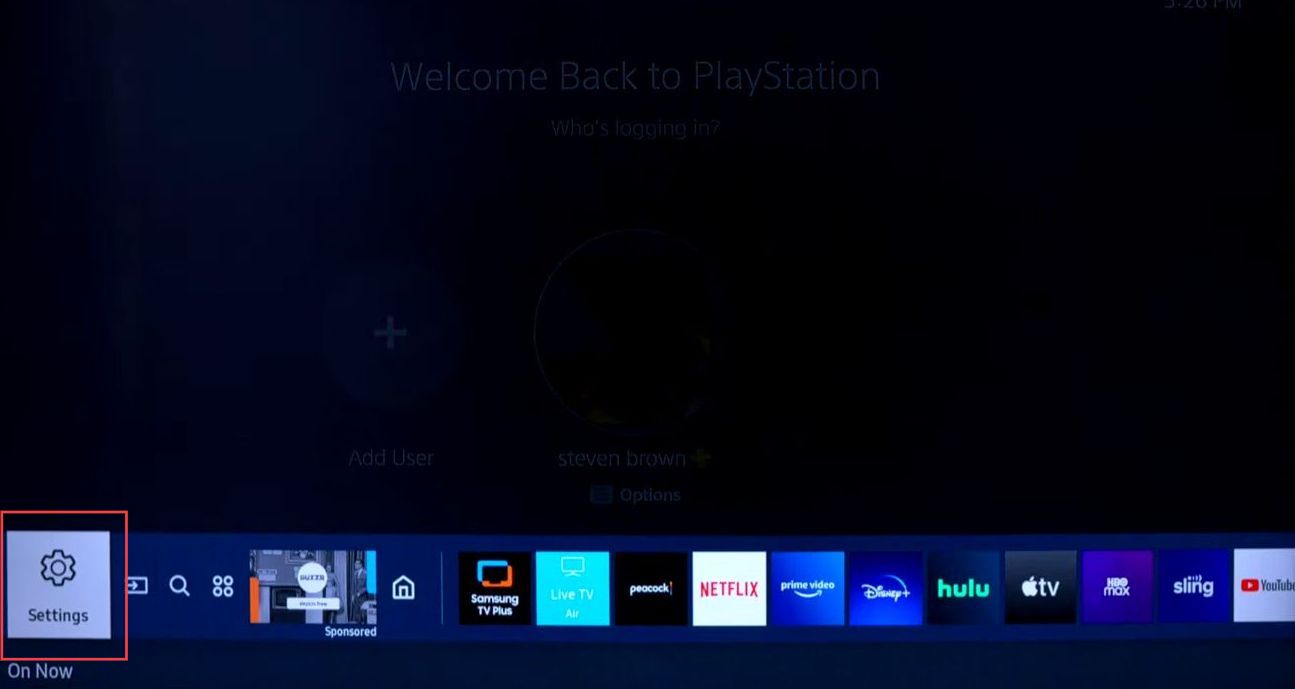
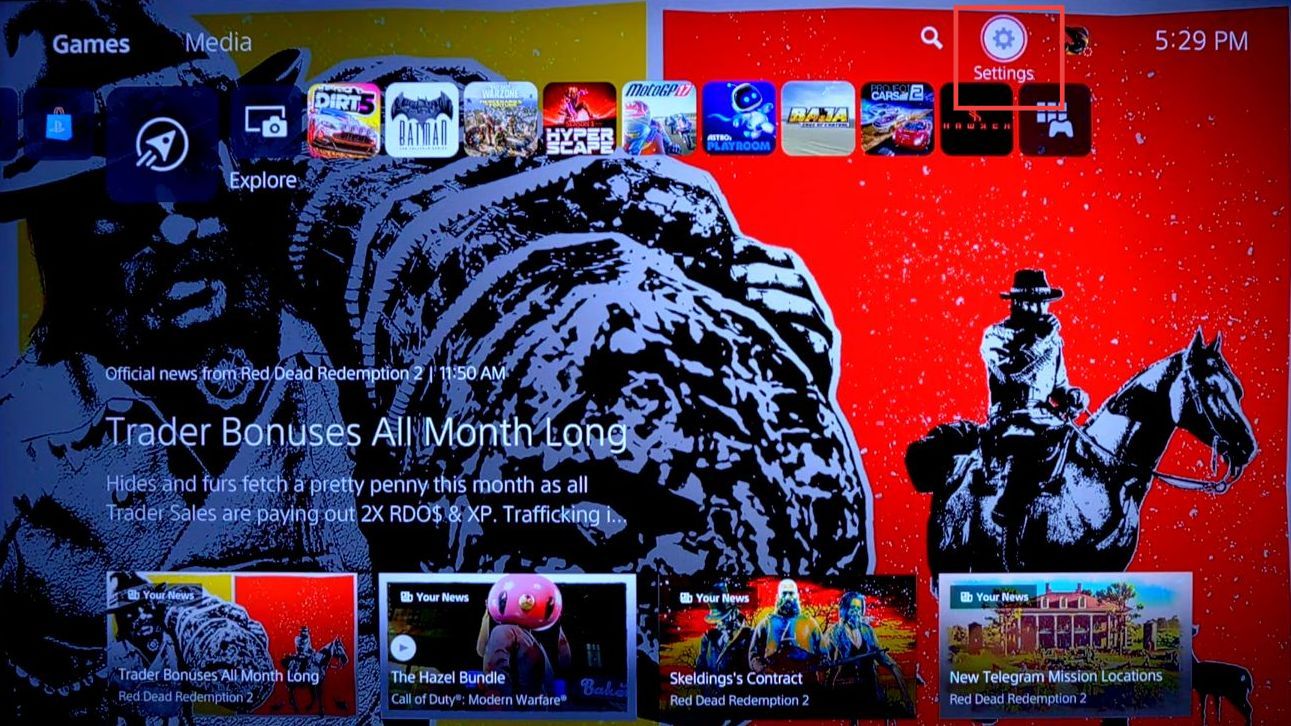
- Look for the Settings icon and press the Enter button to select it.
- Use the arrow keys to scroll through the options within the Settings menu.
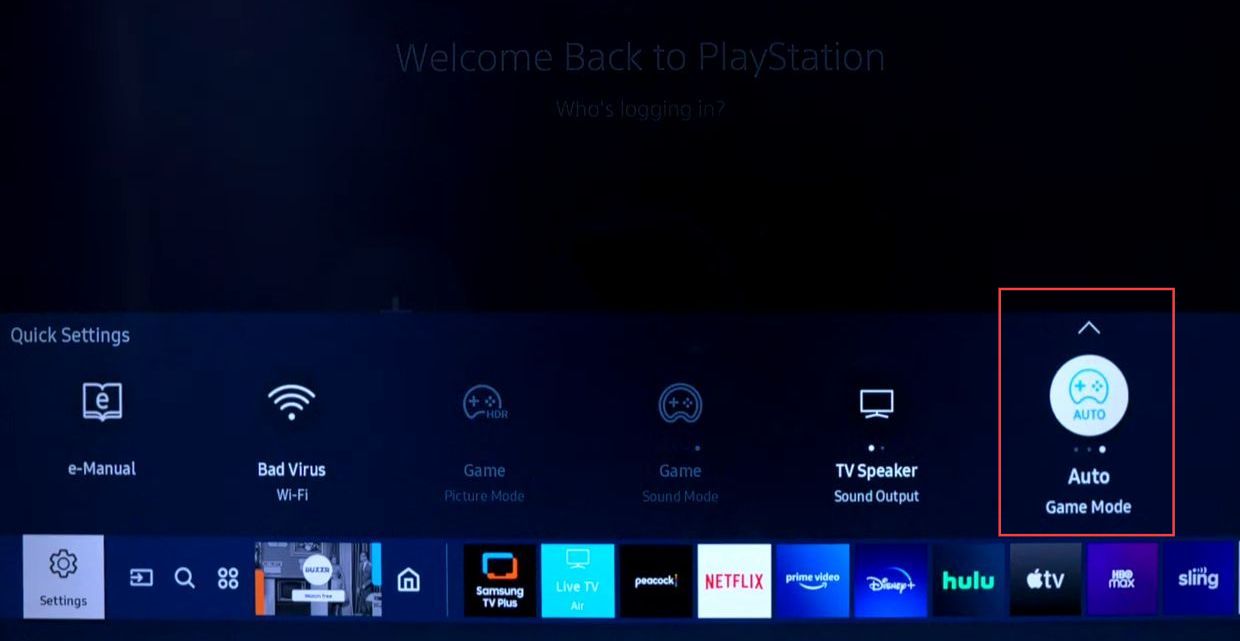
- Look for a section related to Display settings and locate the option for Gaming Mode that enhances gaming performance.
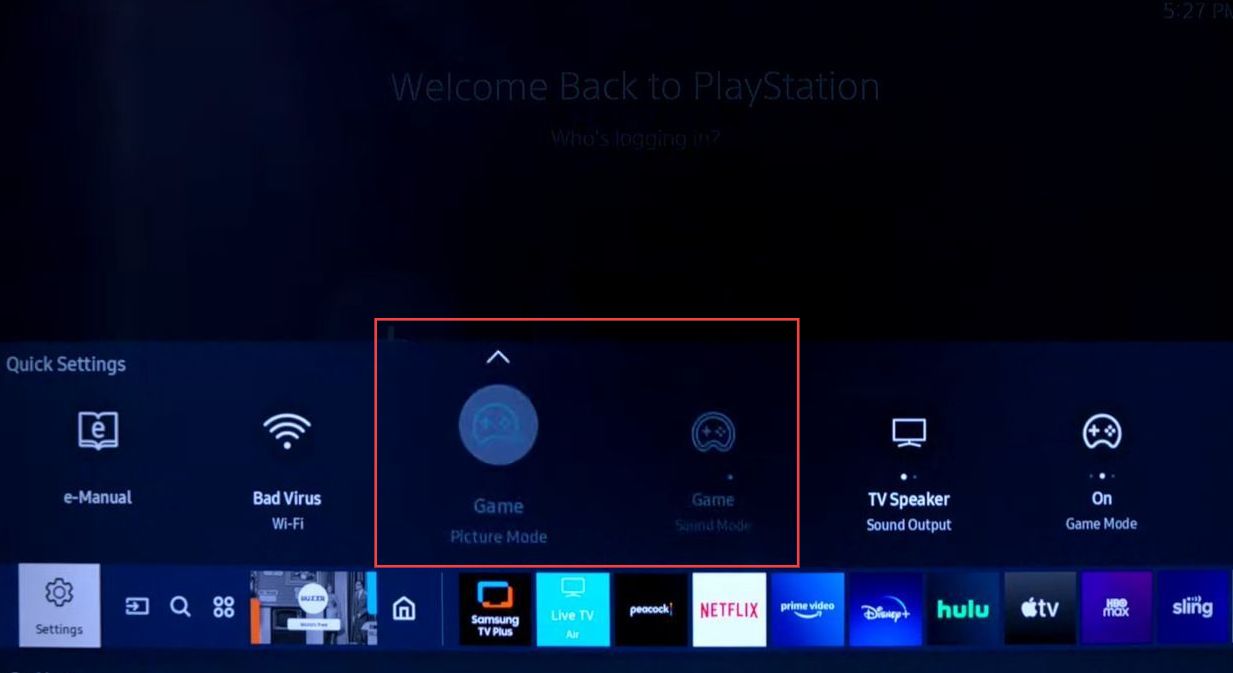
- Once you have accessed the Picture Mode settings, check which preset mode is currently selected.
This preset is designed to enhance the picture quality and response time for gaming. - Now, navigate back to the main settings menu and look for options related to Sound settings. In the Sound settings section, look for the option called Sound Mode and check which preset mode is currently selected.
- Within the Settings menu, use the arrow keys to scroll through the options and look for a section labeled General.
- Once you have highlighted the External Device Management option, press the OK button to select it.
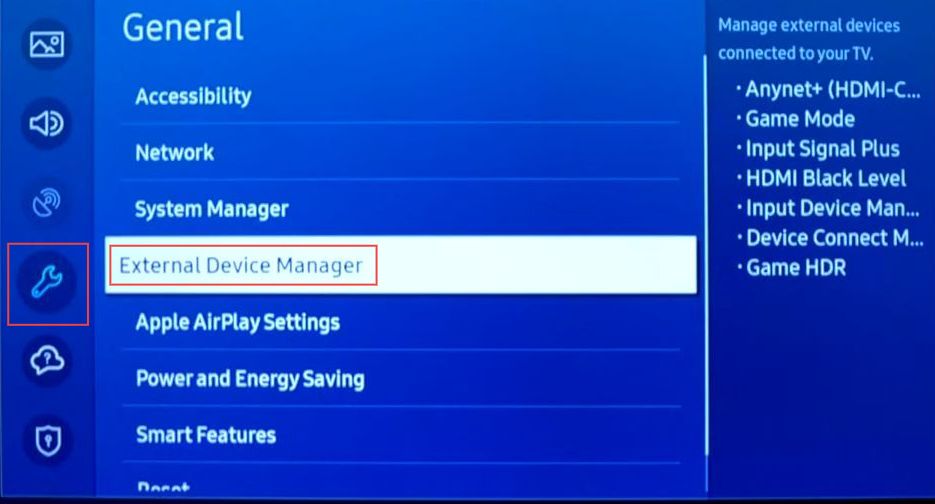
- Within the External Device Management settings, look for an option related to Gaming Mode.
After selecting it, you will likely find a toggle switch to enable or disable it. - Make sure that the toggle switch is set to On and enabled.
This will activate Gaming Mode on your Samsung TU7000 Television.
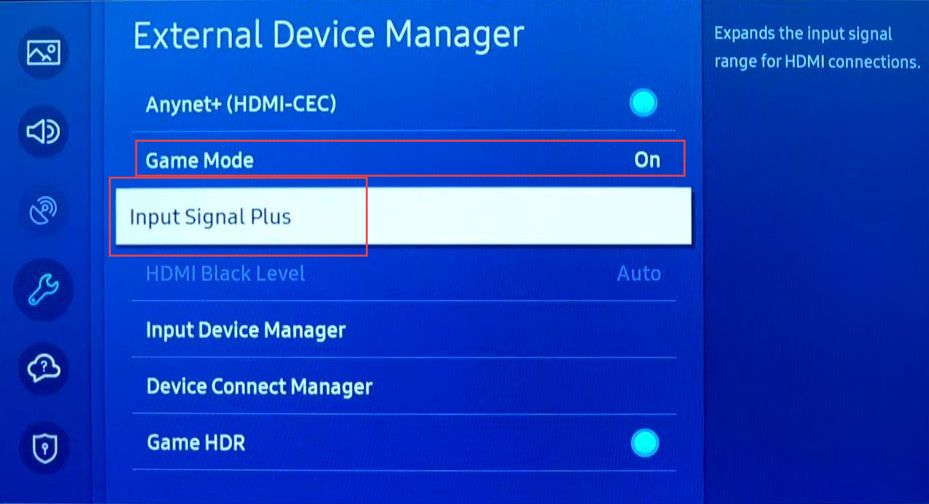
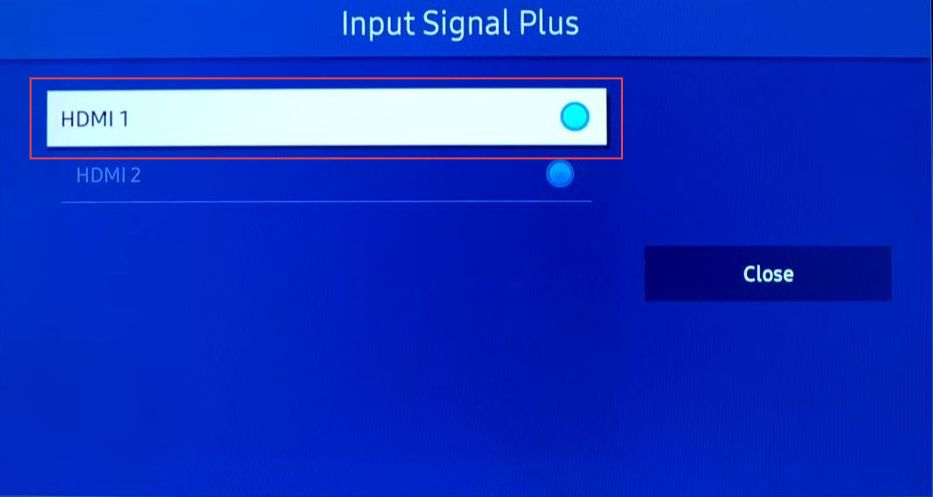
- Within the External Device Management settings, look for an option called Input Signal Plus and select it.
This feature is designed to enhance the output of the connected external device, such as a gaming console. After selecting the Input Signal Plus option, you will likely find a checkbox switch associated with this feature. - Make sure that the checkbox is checked.
Enabling Input Signal Plus will ensure that the connected external device, such as a gaming console, receives the best possible output from the TV. - After enabling Input Signal Plus, check for any visual indicators on the TV screen that confirm the activation of the feature.
You might notice improved picture quality and performance when using your gaming console.
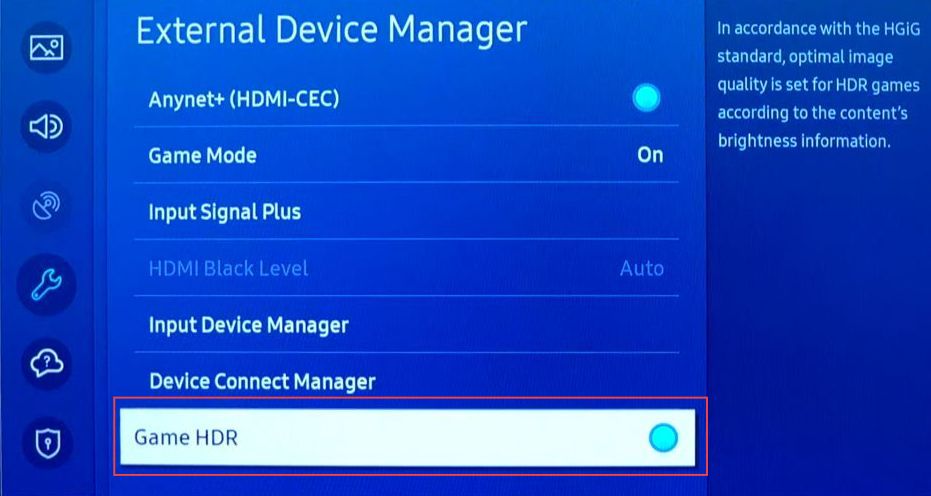
- Within the External Device Management settings, look for an option called Game HDR.
This feature is related to High Dynamic Range settings specifically optimized for gaming.
After selecting the Game HDR option, you will likely see a checkbox switch associated with this feature. - Make sure that the checkbox is checked.
Enabling Game HDR will activate High Dynamic Range settings specifically tailored for gaming.
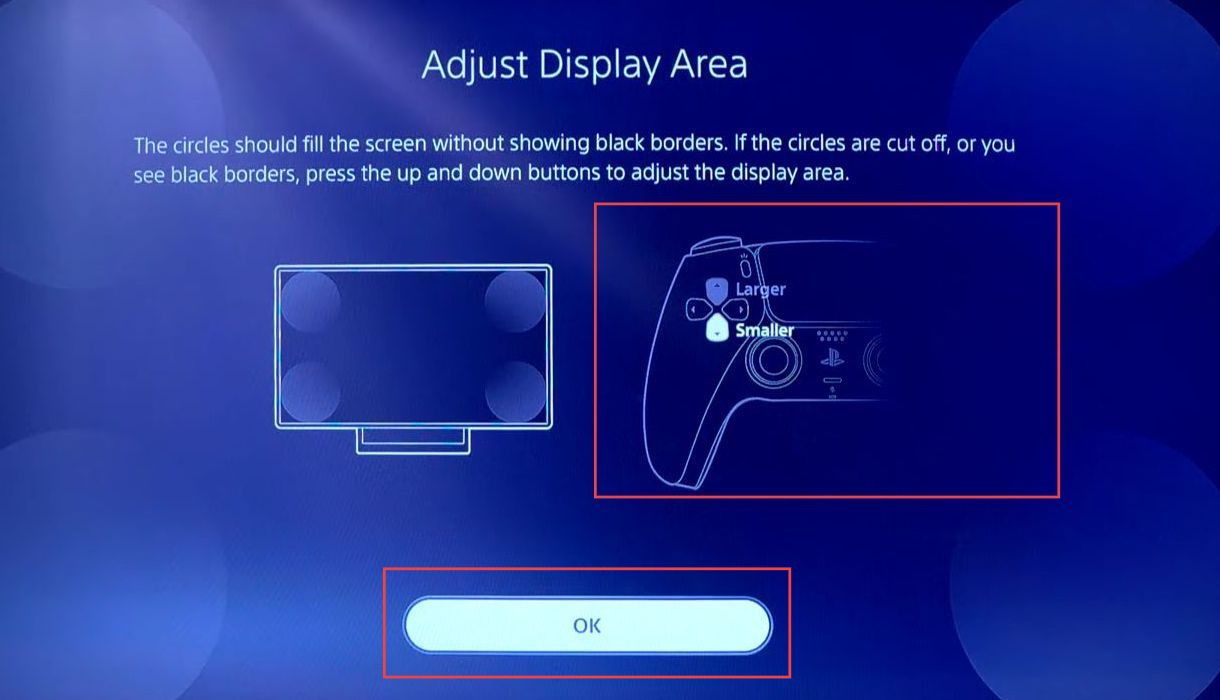
- On the screen, you will find an image that needs adjustment using the arrow keys and press the Up and Down buttons to move the highlighted frame up and down, respectively.
This action will allow you to adjust the screen area. - Once you have adjusted the screen area to your satisfaction, press the OK button to confirm your selection.
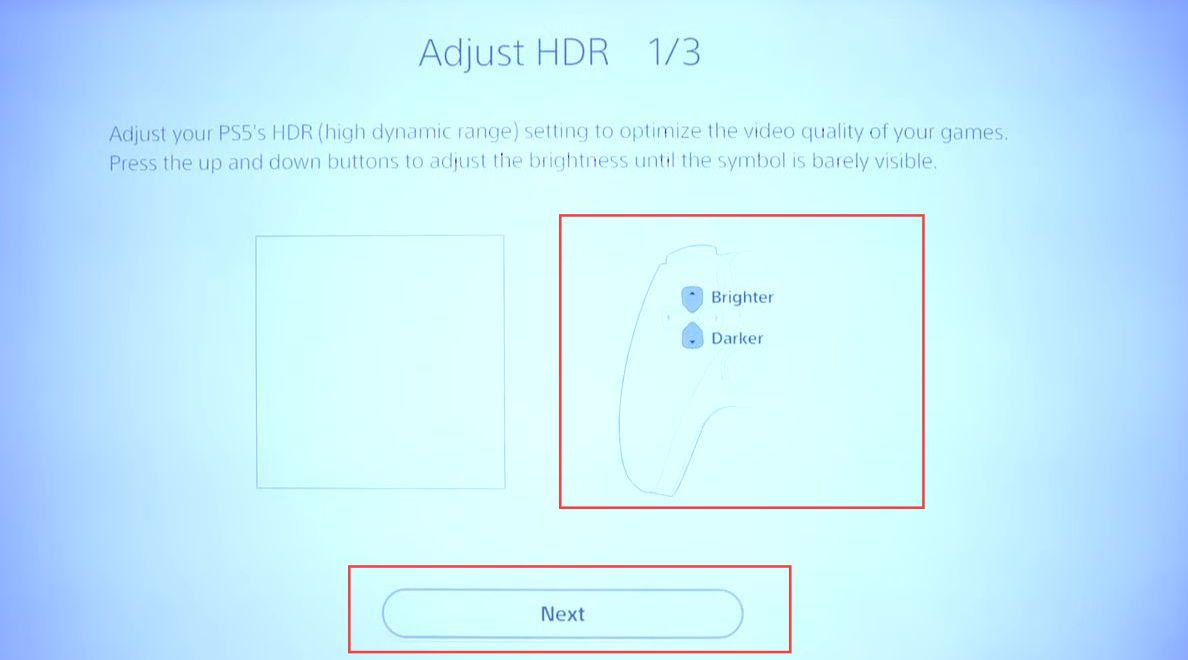
On the screen, you will find a slider representing the HDR settings.
- To adjust the HDR settings, use your controller to move up and down on the slider.
- The objective is to decrease the HDR brightness until the little light on the screen disappears.
This adjustment ensures that the HDR effect is optimized, providing the best visual experience for your specific gaming content. - Move the slider gradually, and as you make adjustments, observe the visual changes on the screen.
Keep adjusting the HDR brightness until the highlight is just barely noticeable.
- Once you have located the Settings option, press the Enter button to select it.
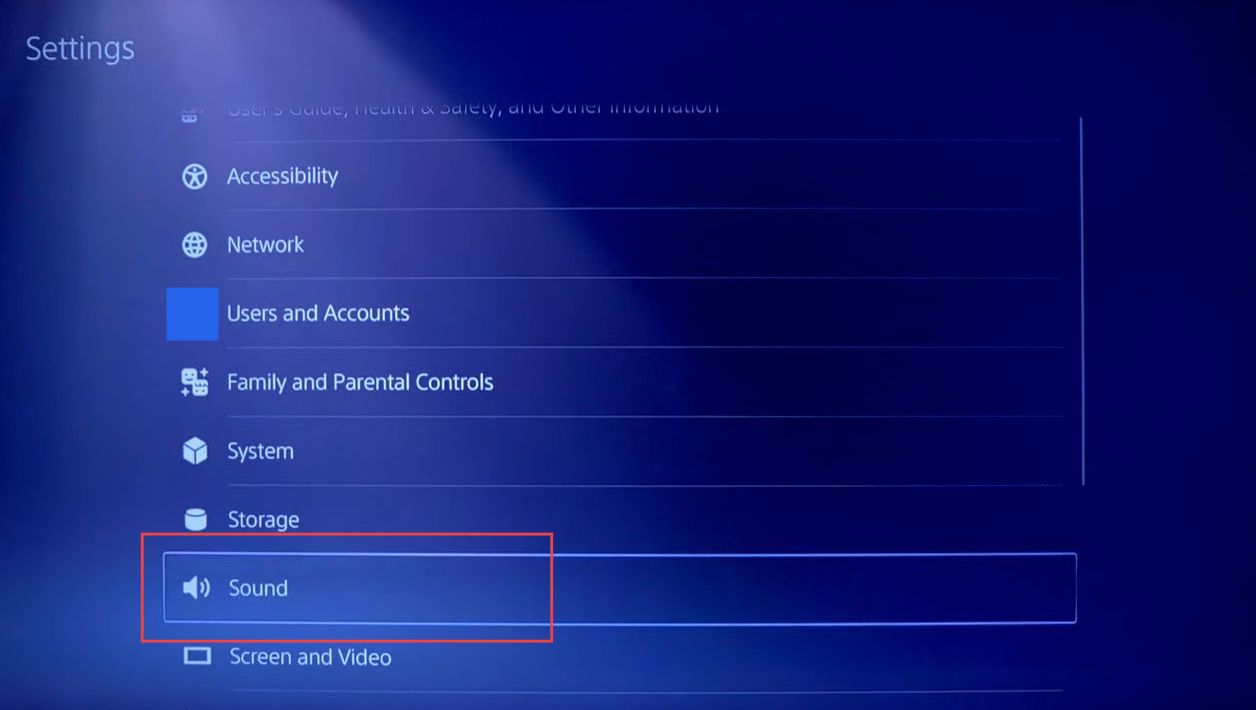
- Within the settings menu, use the arrow keys to scroll down and look for an option labeled Sound.
- Once you have located the Sound option, press the Enter button to select it.
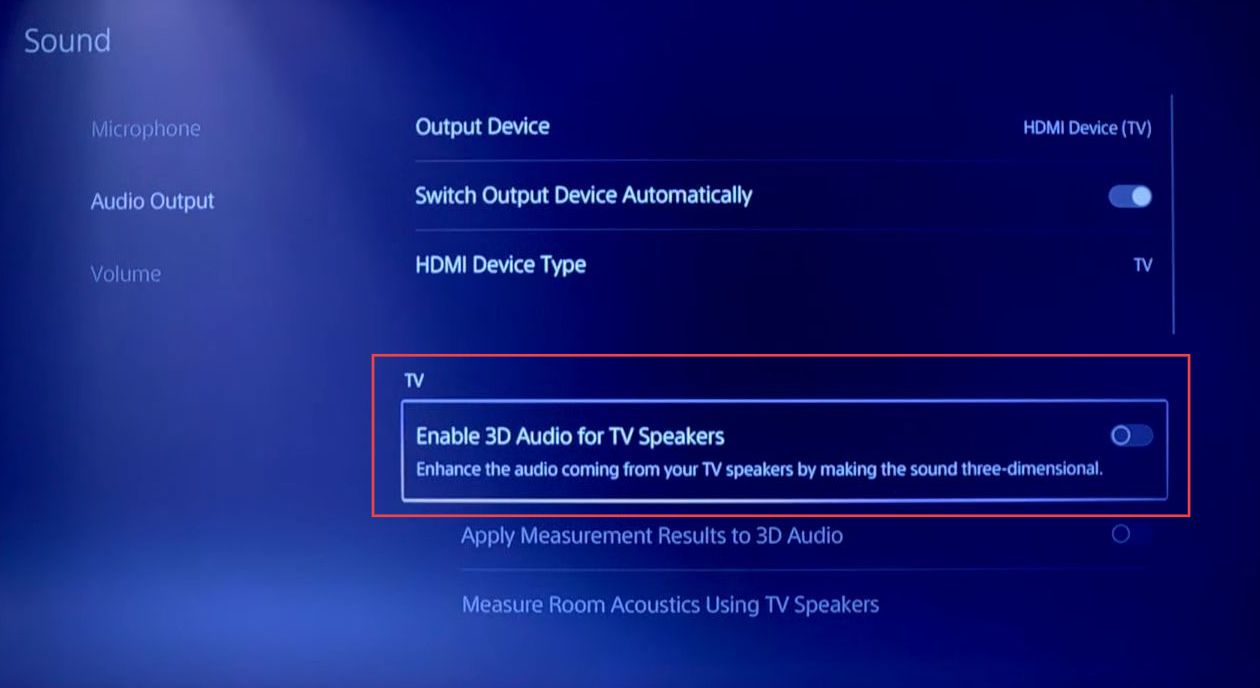
- Within the Sound settings, use the arrow keys to scroll down and look for an option labeled Audio Output. After that, press the Enter button to select it.
- Within the Audio Output settings, look for an option called Enable 3D Audio for Speakers.
This feature is designed to provide a better audio experience, especially when using the TV’s built-in speakers.
- Use the arrow keys to select the Enable 3D Audio for Speakers option. If there is a checkbox associated with this feature, make sure that it is checked to enable it.
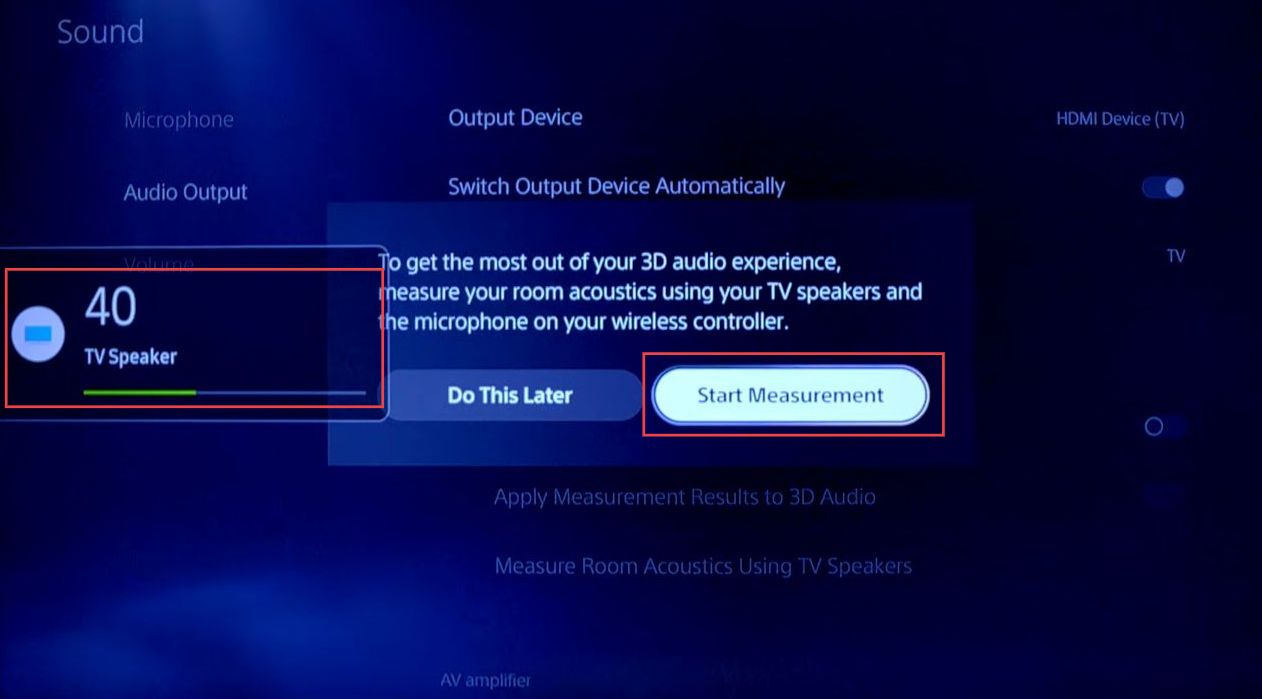
- Before starting the sound optimization process, ensure the TV volume is set to at least 30 or 40 percent.
This will provide an adequate audio level for the optimization process.
- Within the Sound settings, look for a feature labeled Sound Optimization and select Start Measurement to begin the sound optimization process.
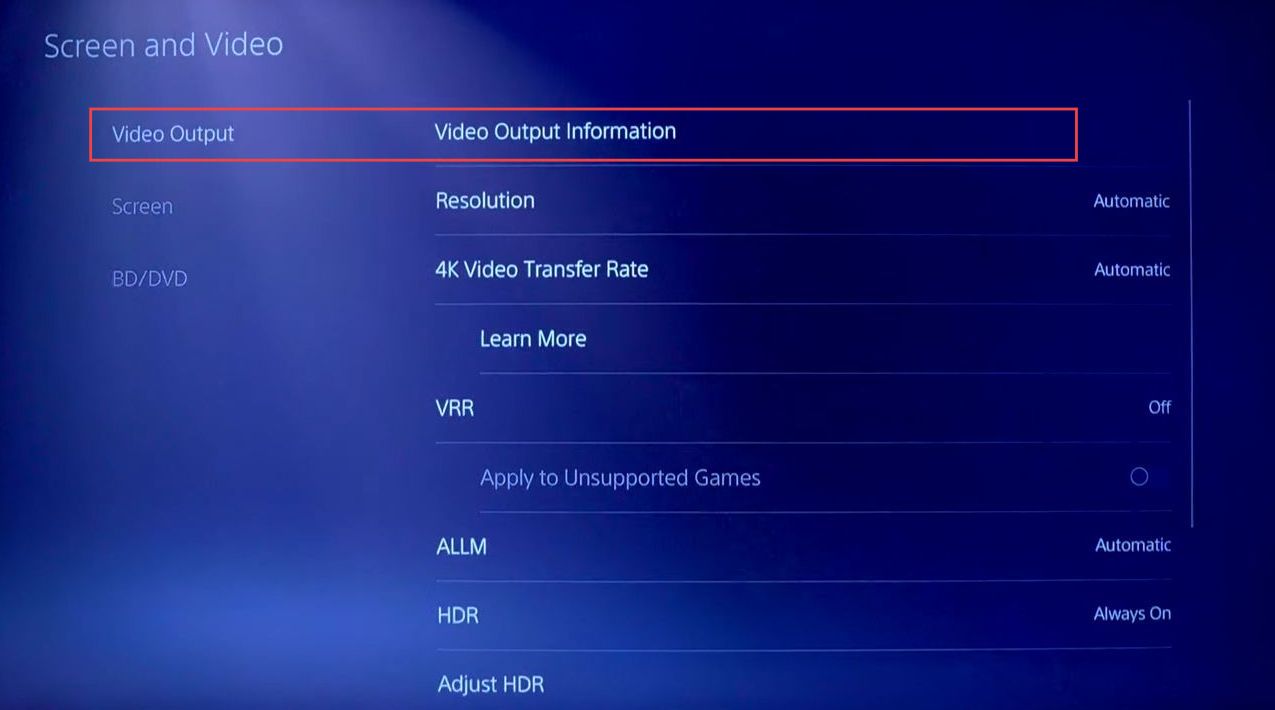
- Once you have located the Screen and Video option, press the Enter button to select it.

- Within the Screen and Video settings menu, look for an option labeled Video Output Information. Once you have located it, press Enter to select it.
This will take you to the Video Output Information section, where you can view details about the video output settings of your TV.
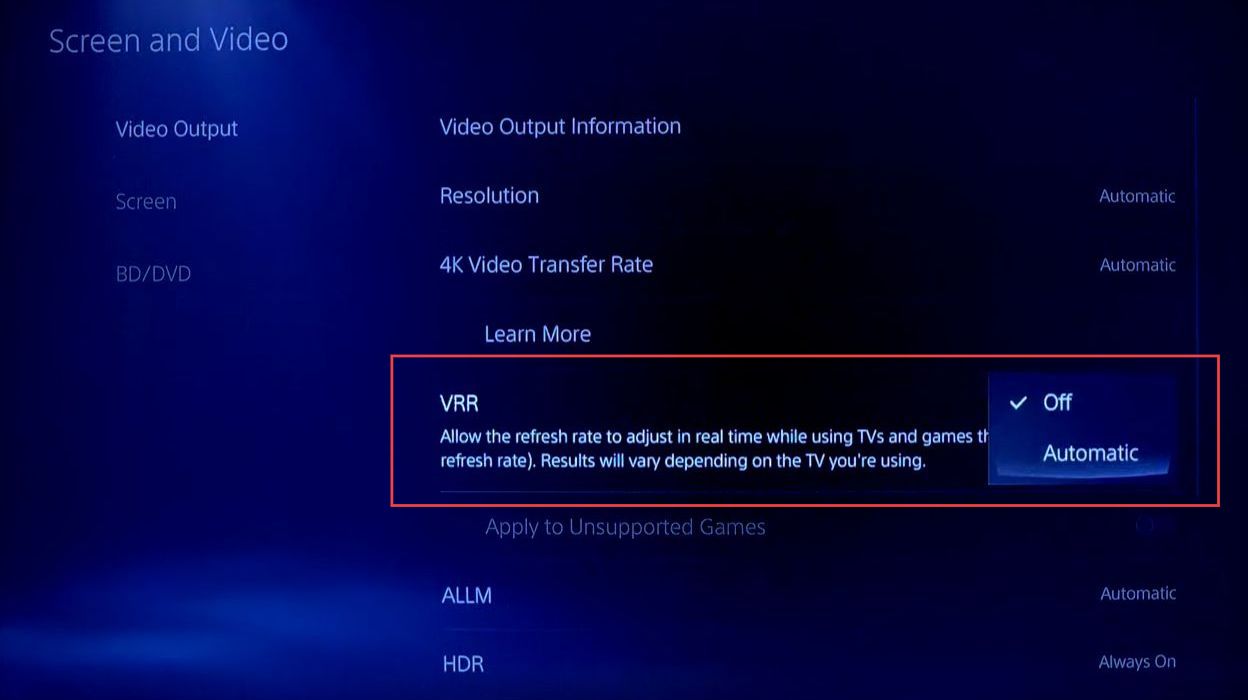
In this specific case, the TV can output 4K resolution (3840×2160 pixels) at 60 frames per second (fps). It’s mentioned that the cable being used supports HDCP 2.3, which is a form of copy protection for digital content. The information also states that a variable refresh rate (VRR) is not supported on this TV.
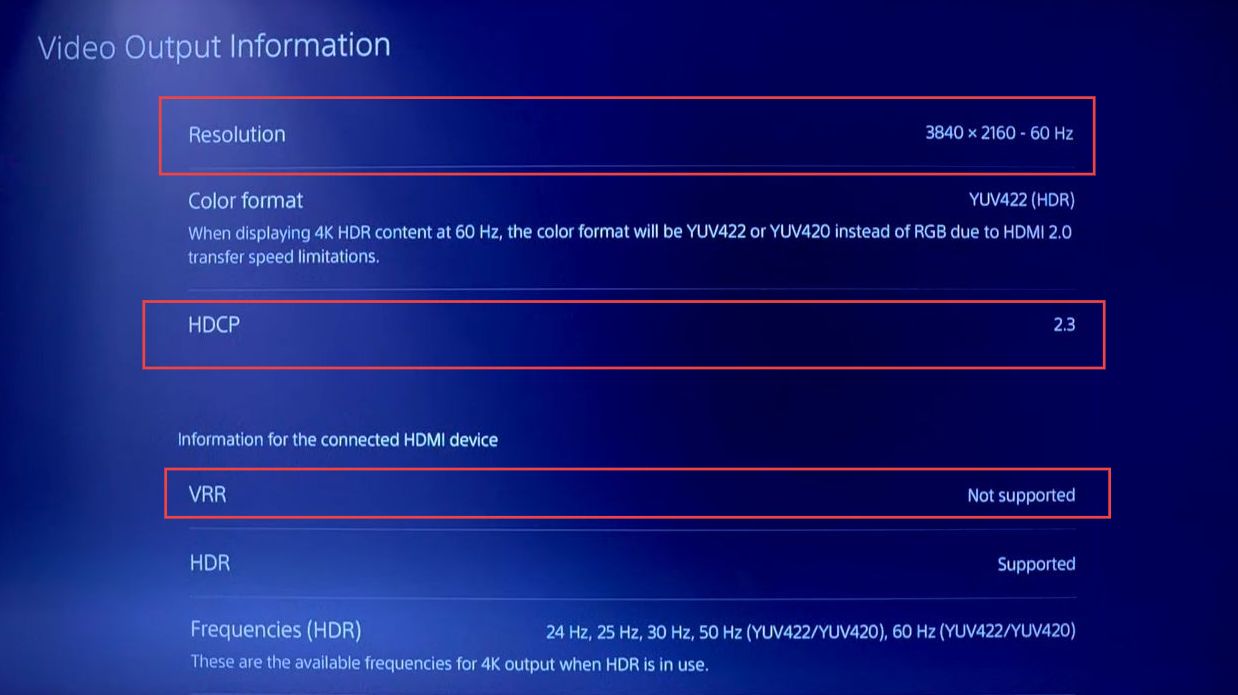
While viewing the Video Output Information section, you will notice information about HDR.
When you attempt to turn on VRR, you will receive a pop-up notification on the screen. The pop-up notification confirms that your TV does not support Variable Refresh Rate, which means you won’t be able to use this specific feature on your TV.
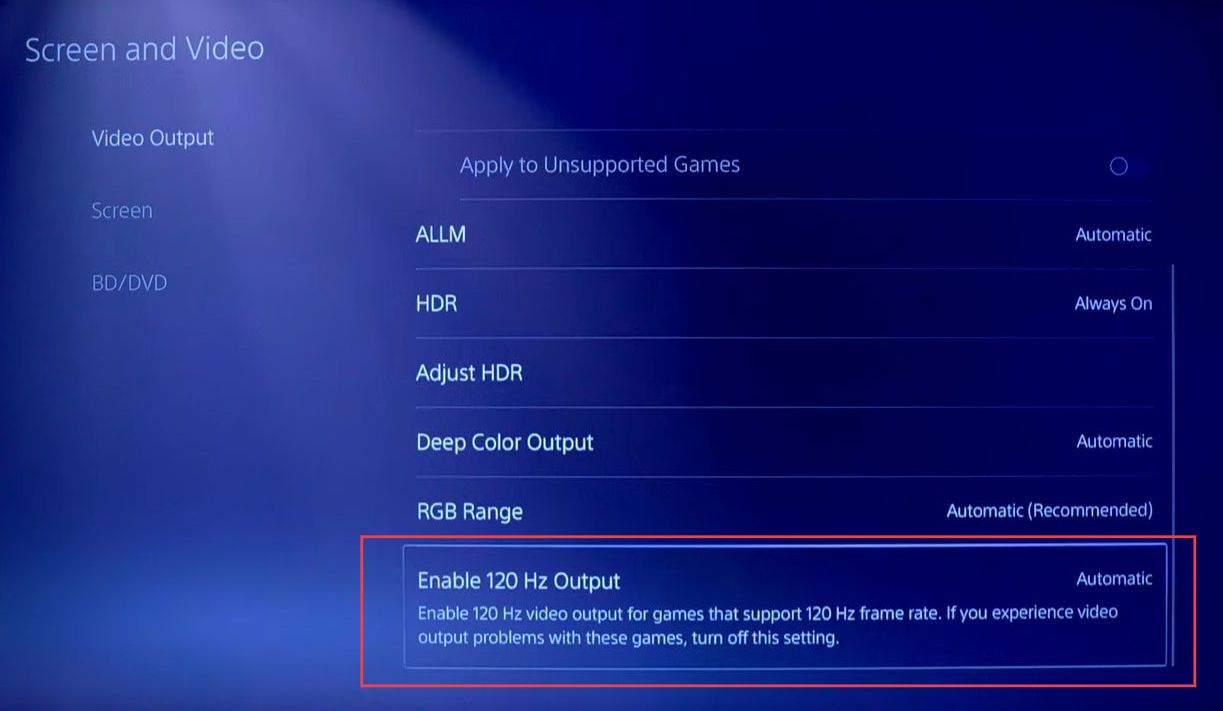
- Since your TV does not support a 120 Hz refresh rate, you won’t be able to take advantage of the benefits that come with higher refresh rates for gaming that supports it.
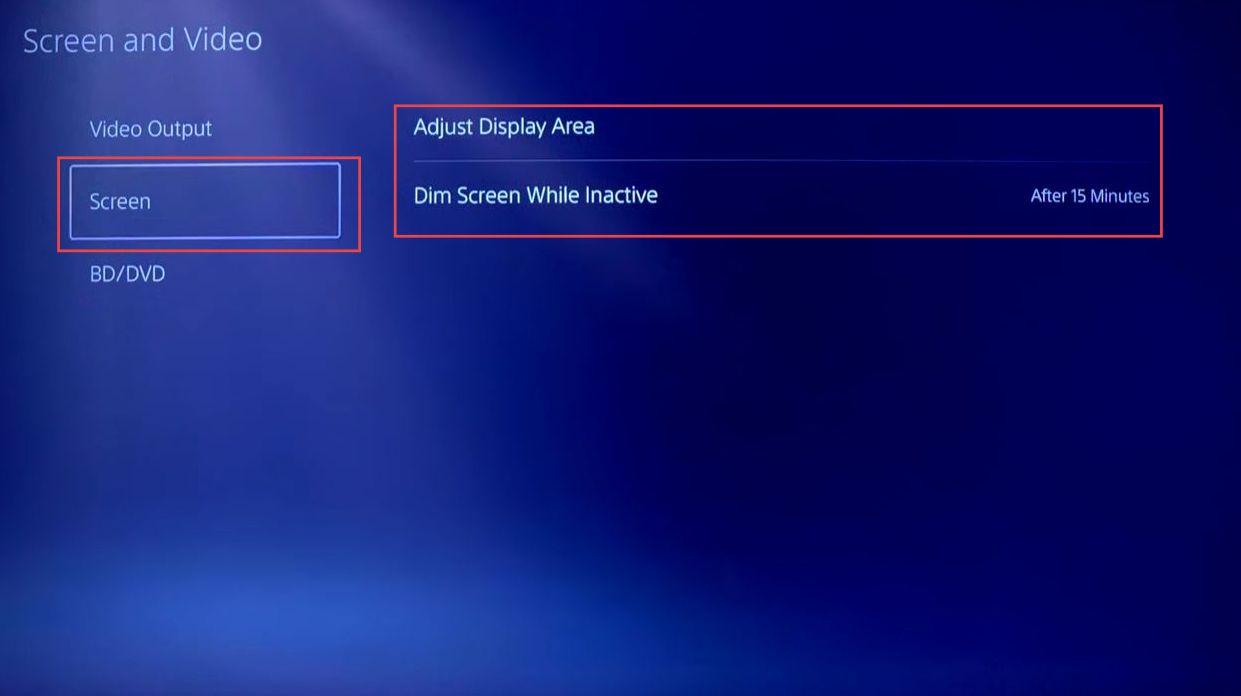
- Within the Screen and Video settings menu, look for an option labeled Screen Adjustment. Once you have located it, press the Enter button to select it.
In the Screen Adjustment section, you can fine-tune various display settings to suit your preferences and optimize the visual experience.
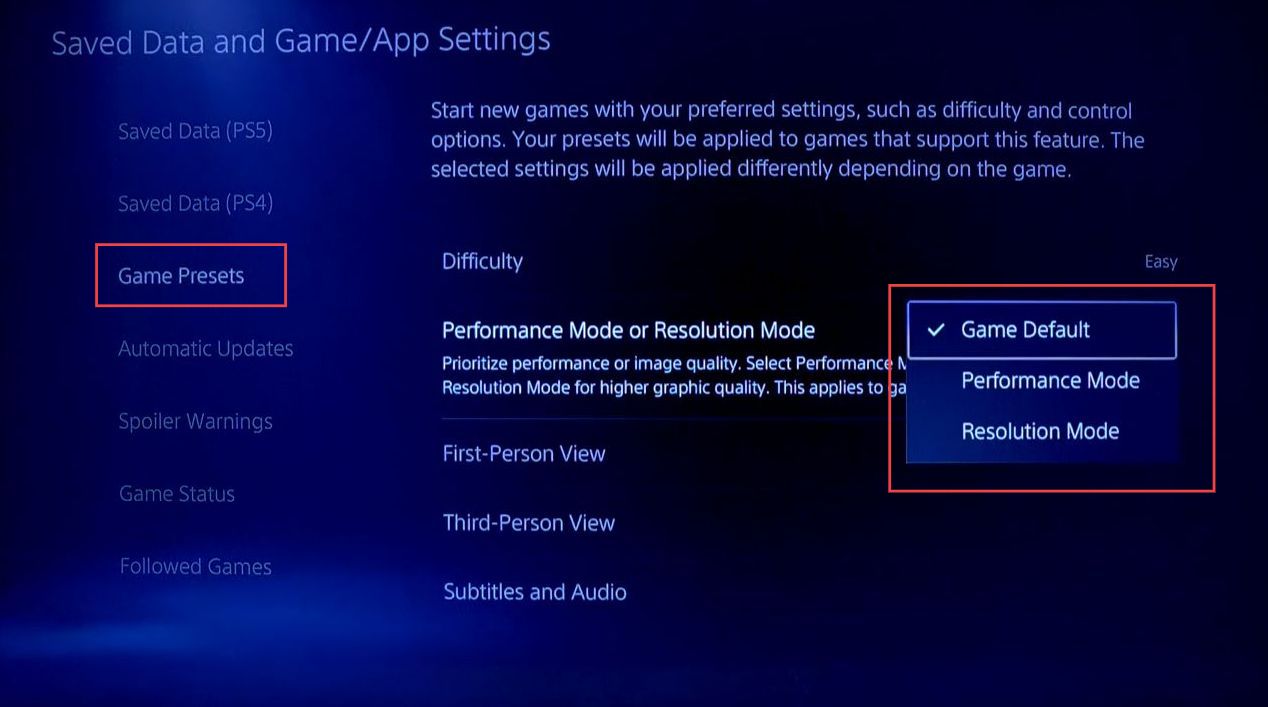
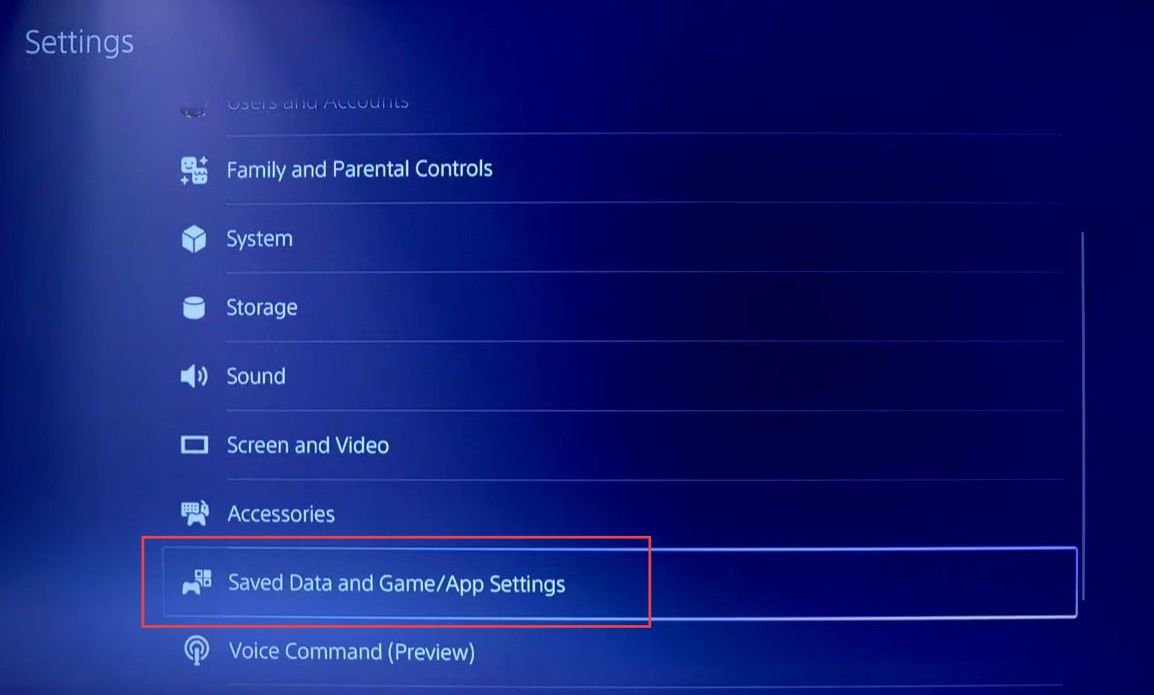
- Within the main settings menu, look for an option labeled Save Data and Game App Settings and then select it.
- Look for an option labeled Game Presets and press Enter to select it.
Within the Game Presets section, you will find different options for gaming modes, such as Default, Performance, and Resolution. - If you want your gaming console to provide better performance with smoother gameplay and faster frame rates, select Performance Mode. If you prioritize a higher resolution for more detailed and visually appealing graphics, select Resolution Mode.
- After selecting your preferred gaming mode, ensure to save your choice before exiting the Game Presets section.