If you’re looking to transfer your Sims 4 game saves to another computer, Dropbox is an excellent tool to accomplish this task. With a Dropbox account, you can enjoy free storage for your files. Follow this step-by-step guide to successfully transfer your Sims 4 game saves to another computer.
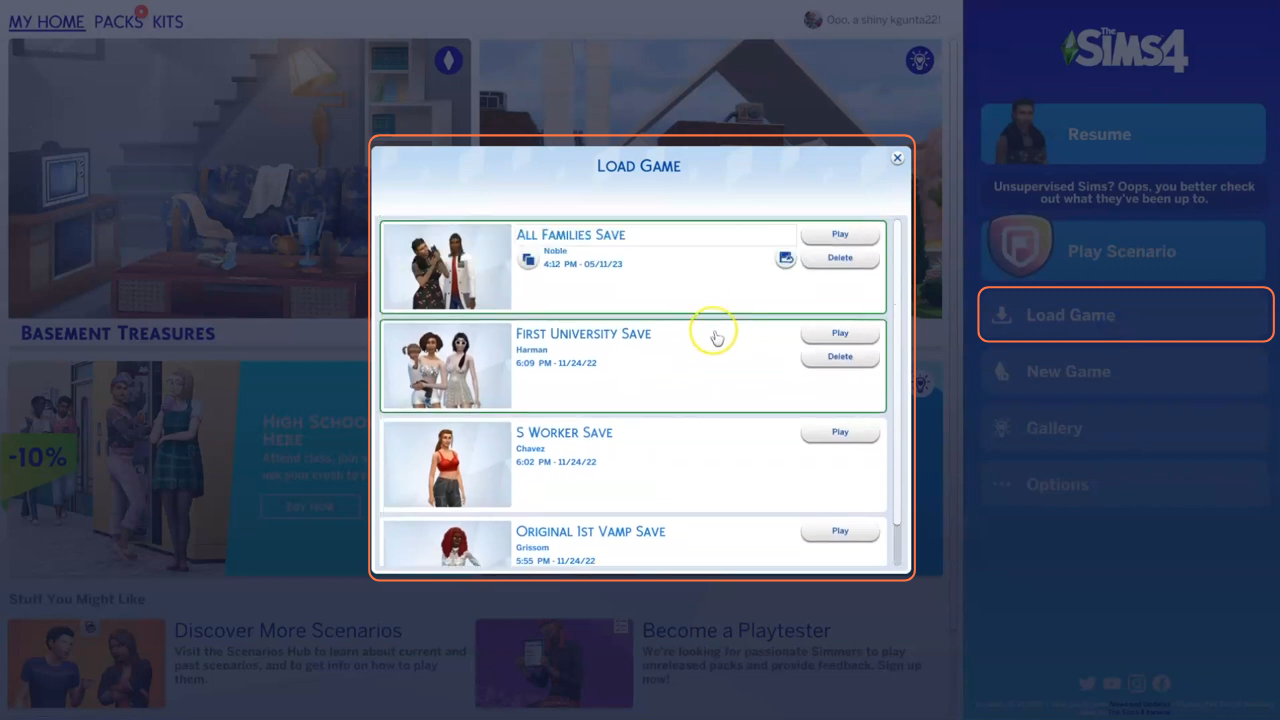
Step 1: Open your Sims 4 game on your current computer. Once the main menu appears, click on the “Load Game” tab to access all your saved games. Take note of the dates mentioned, which indicate when you last saved each game.
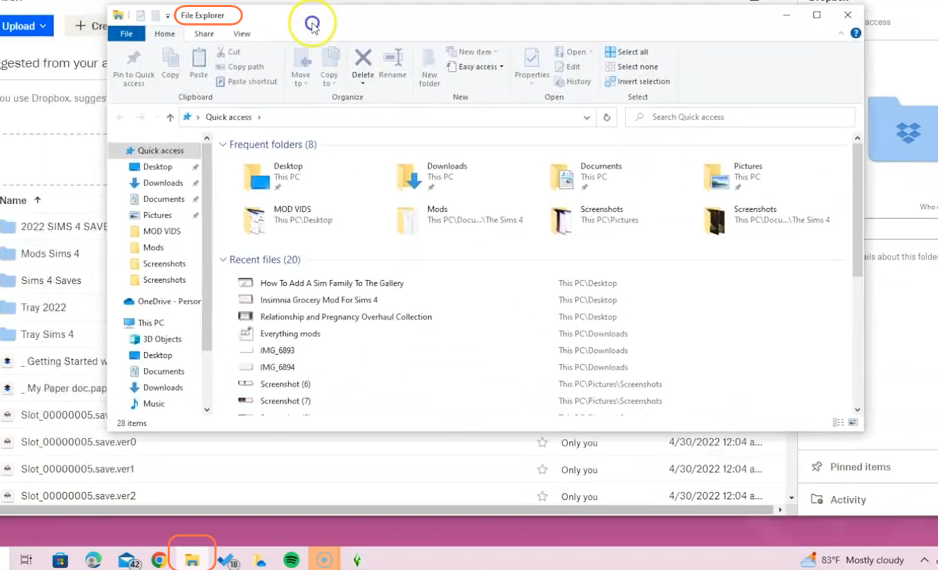
Step 2: On a Windows machine, open the File Explorer from the taskbar. If you’re using a MacBook, launch the Finder application to access the game directory. You must have opened the Origin app to play your Sims 4 game if you are on Mac.
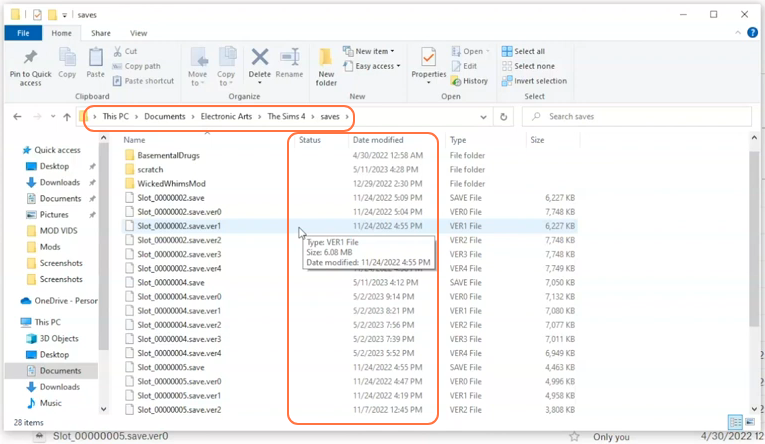
Step 3: Now it’s time to locate the Sims 4 game directory. By default, you can find the game directory at Documents > Electronic Arts > The Sims 4. Within this directory, you’ll
find important folders such as “Tray” and “Saves”. Both the folders contain essential files for your game. The Tray folder contain all tray saves which is equally important as the files in the Saves folder. It’s crucial to transfer both folders to the new computer.
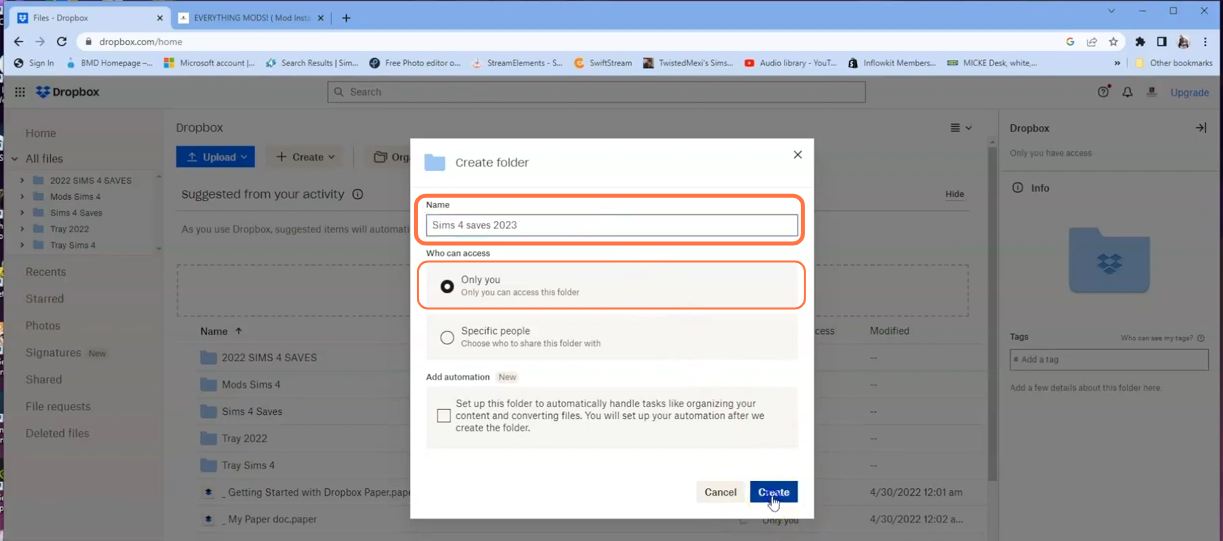
Step 4: Now, go to your Dropbox menu and click the “Create” button. From the dropdown menu, select the “Folder” option.

Step 5: Next, In the window that appears, enter a name for the folder, set the access privacy according to your preference, and click the “Create” button at the bottom right corner. Now you have several options at this point: you can request files from others, import files from Google Drive, or access the folder directly from your desktop, depending on your needs.
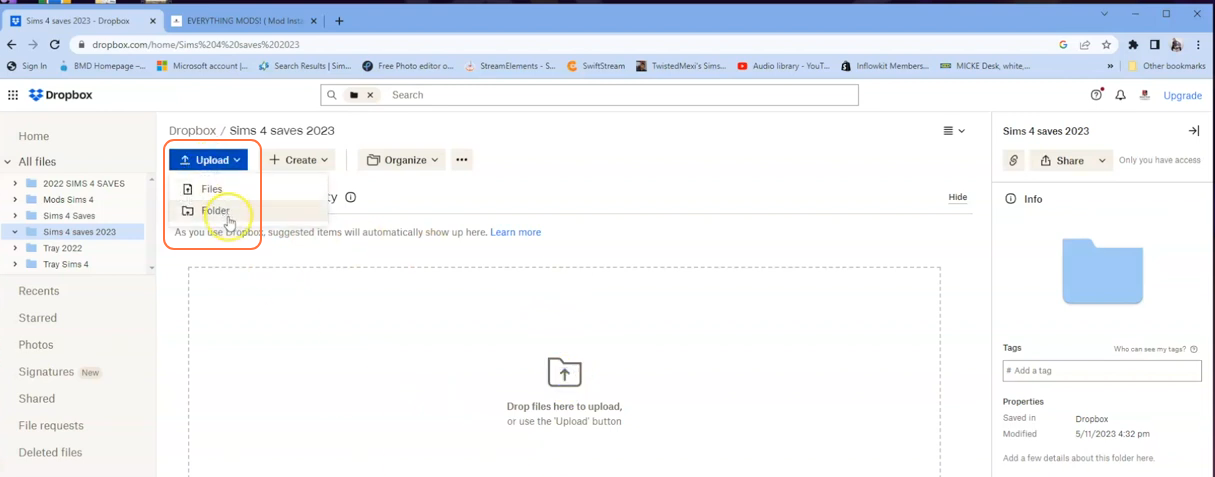
Step 6: If you choose to access the folder from your desktop, click the “Upload” button in Dropbox. Select the folder option and navigate to the Sims 4 folder on your PC. Choose the “Saves” folder and click the “Upload” button. The time required for the upload will depend on the number of saves in the folder and your internet speed.
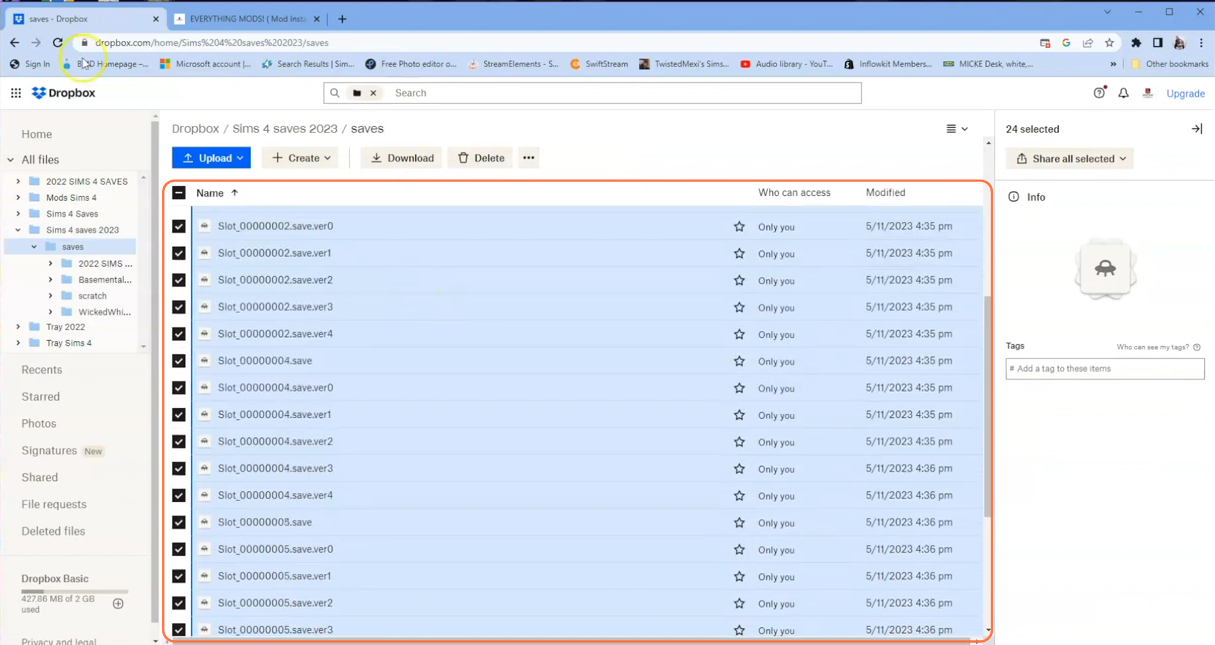
Step 7: Once the “Saves” folder is uploaded, click on it in Dropbox to open and confirm that all the save files are present.
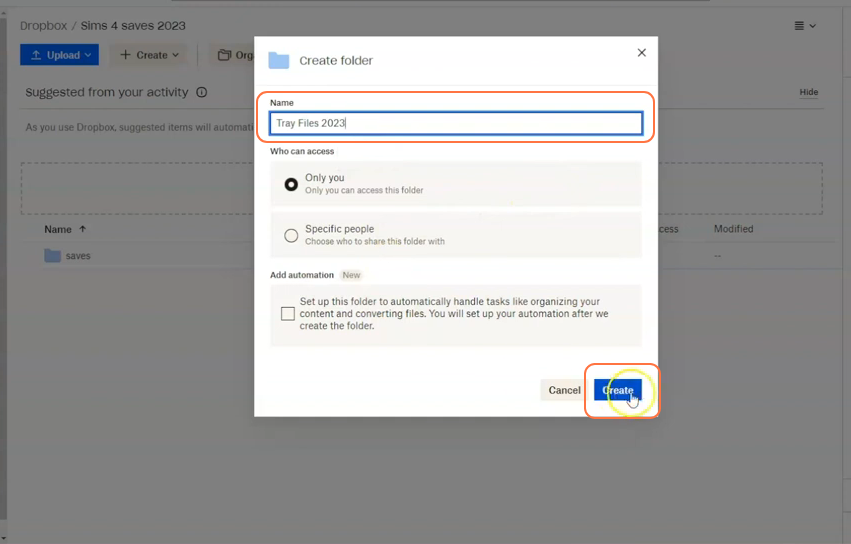
Step 8: Create another folder by clicking the “Create” button again, and this time name it “Tray Files”. Repeat the process of uploading files from the Sims 4 directory, but this time select the “Tray” folder.
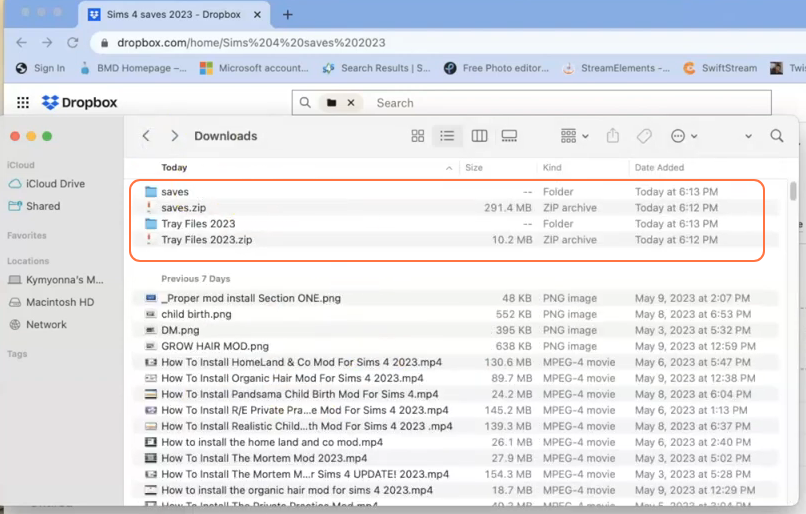
Step 9: Once you’ve finished uploading both folders, switch to the new computer. Log in to Dropbox to access the saved files on the second PC. To import the save files and tray files into your game, click the three dots in front of the respective folders and choose the “Download” option.

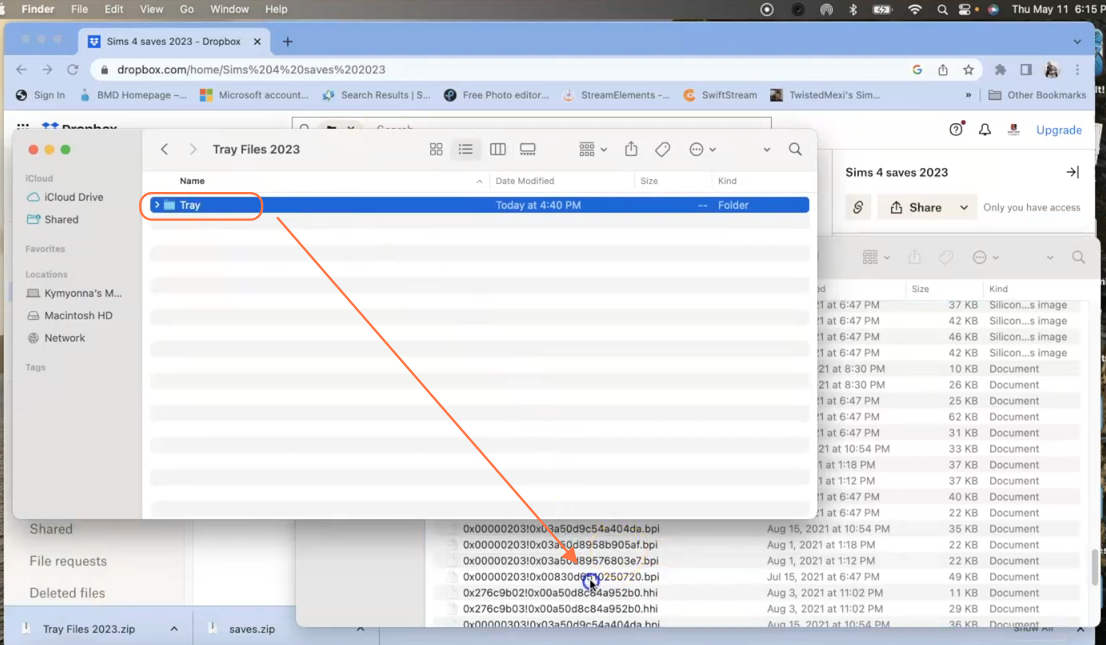
Step 10: The downloaded folders will be in zip format. If you’re using a Windows PC, decompress them using a tool like WinRAR. On a Mac, simply double-click the archives to extract the contents.
Step 11: Navigate to the Sims 4 directory on your new computer. You should see the “Saves” and “Tray” folders. Drag and drop the contents from the extracted folders into their corresponding folders in the Sims 4 directory. This ensures that the save files are correctly placed and ready to be used in the game.