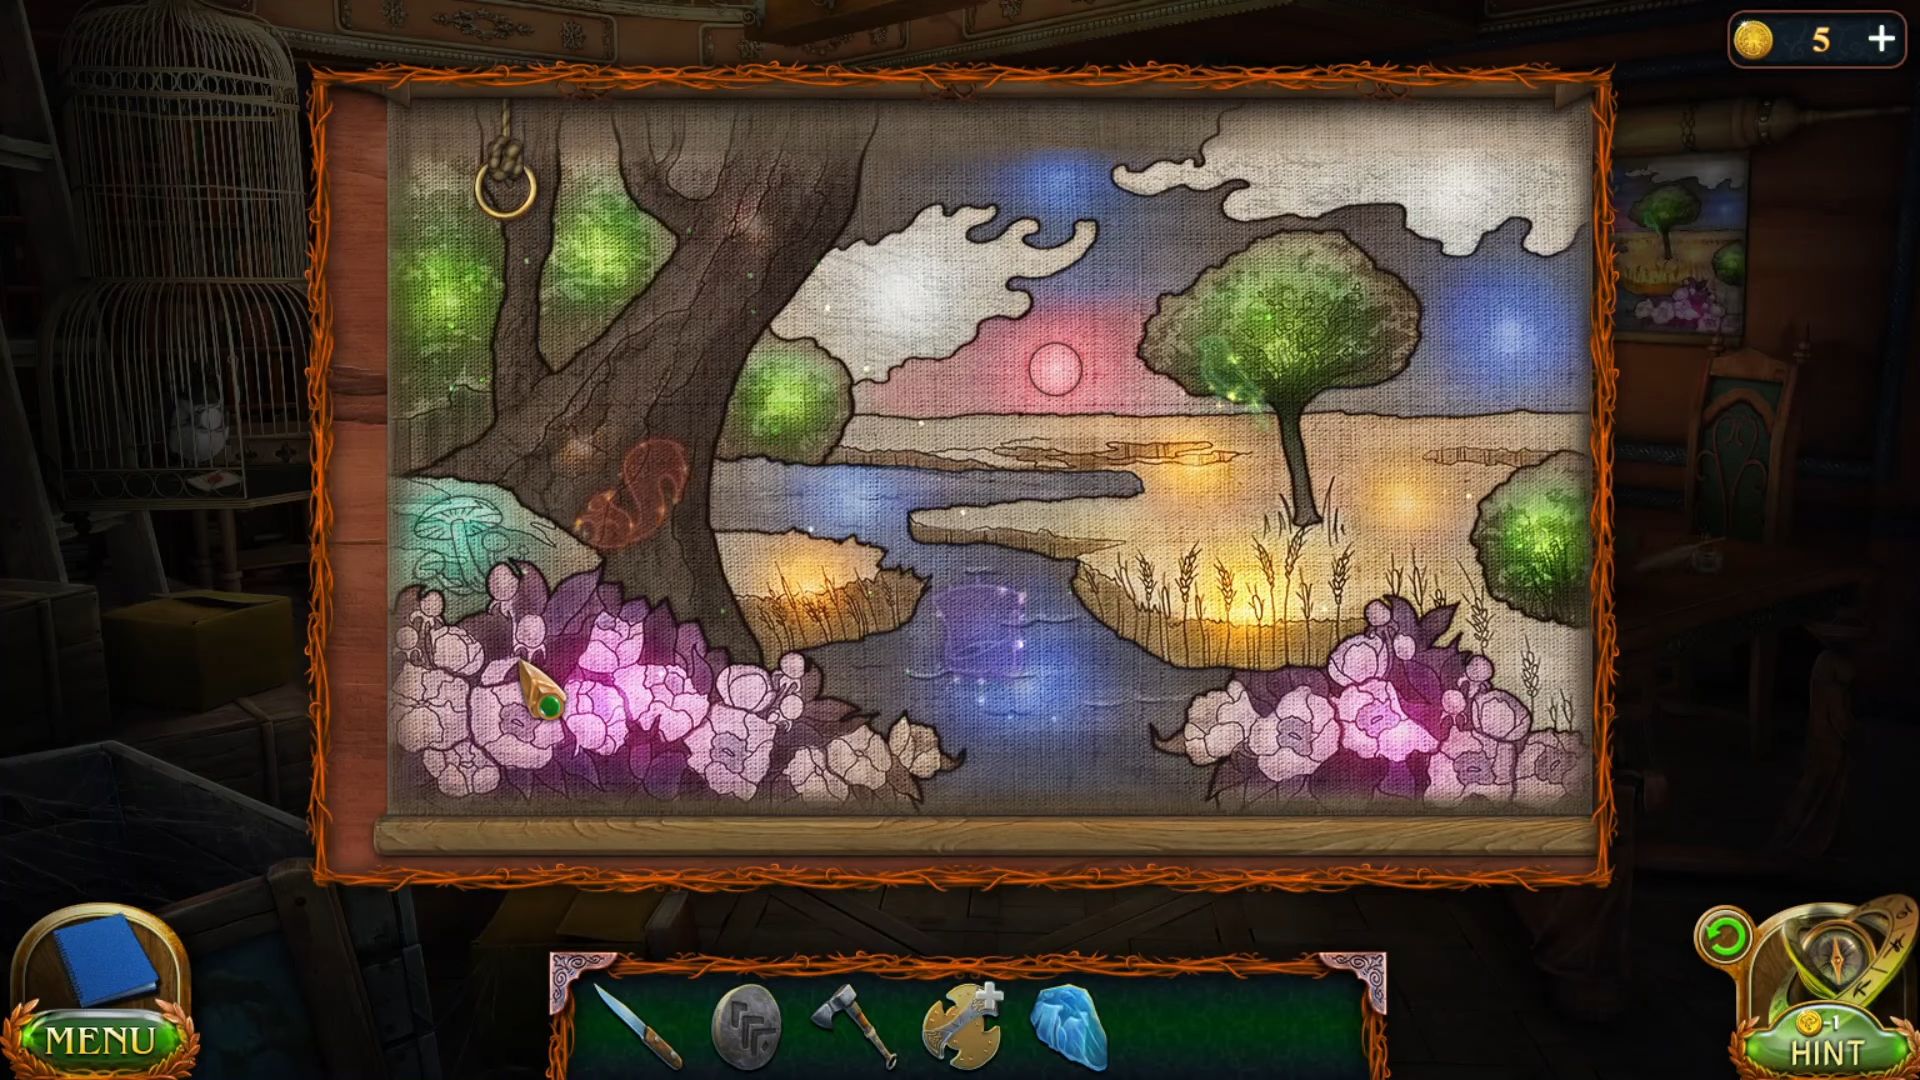
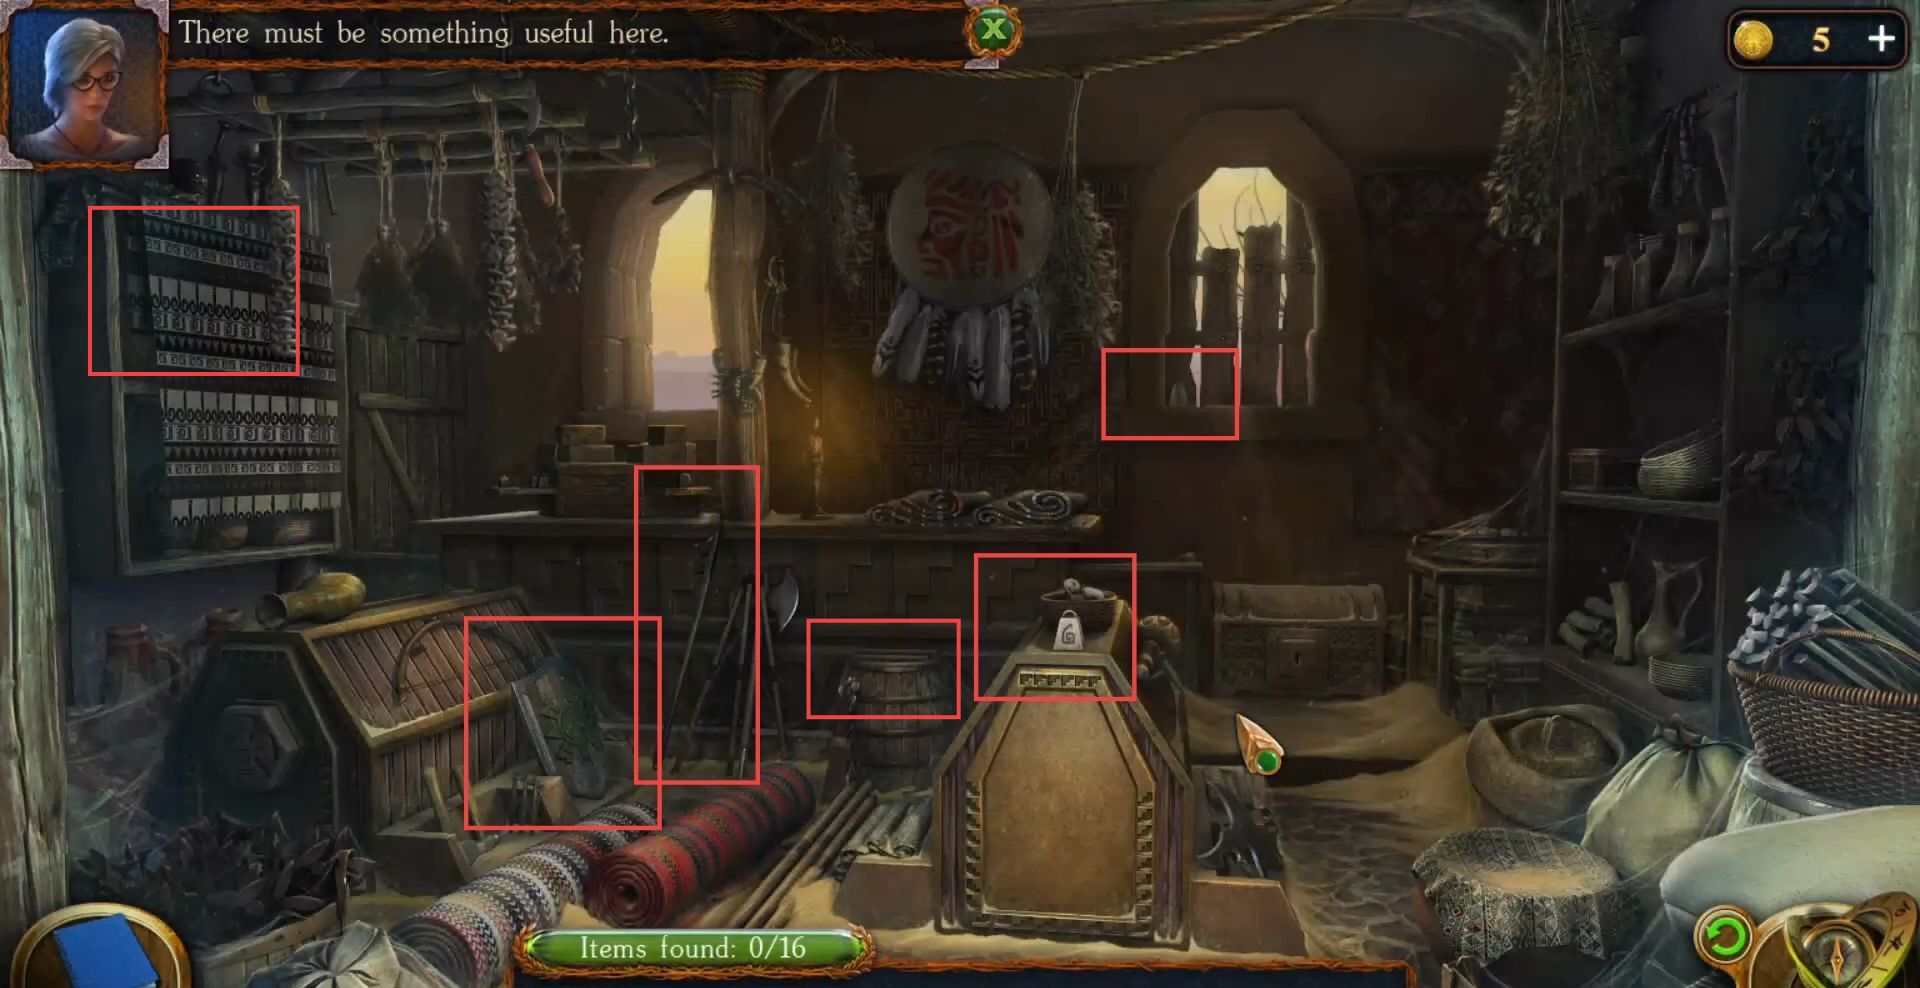
This game is the latest in Five-BN Adventures’ well-liked lineup of mystery escape rooms and puzzle games. Featuring exquisitely created surroundings, cleverly concealed items, riddles, and an engaging narrative that’s easy to follow. Assist Susan in rescuing her son from the stone-turning enchantment of an ancient artifact. To locate the correct spell and take on a formidable foe, return to the Lost Lands and meet with old pals. The destructive forces must be sealed forever and prevented from invading our world by using the required tools and formulating a strategy. In this guide, a description of the entire set of game dynamics’ details, hints, strategies, and characteristics is provided from start to end.
- First, grab a gardening scissor from the left side near the tree into your inventory.

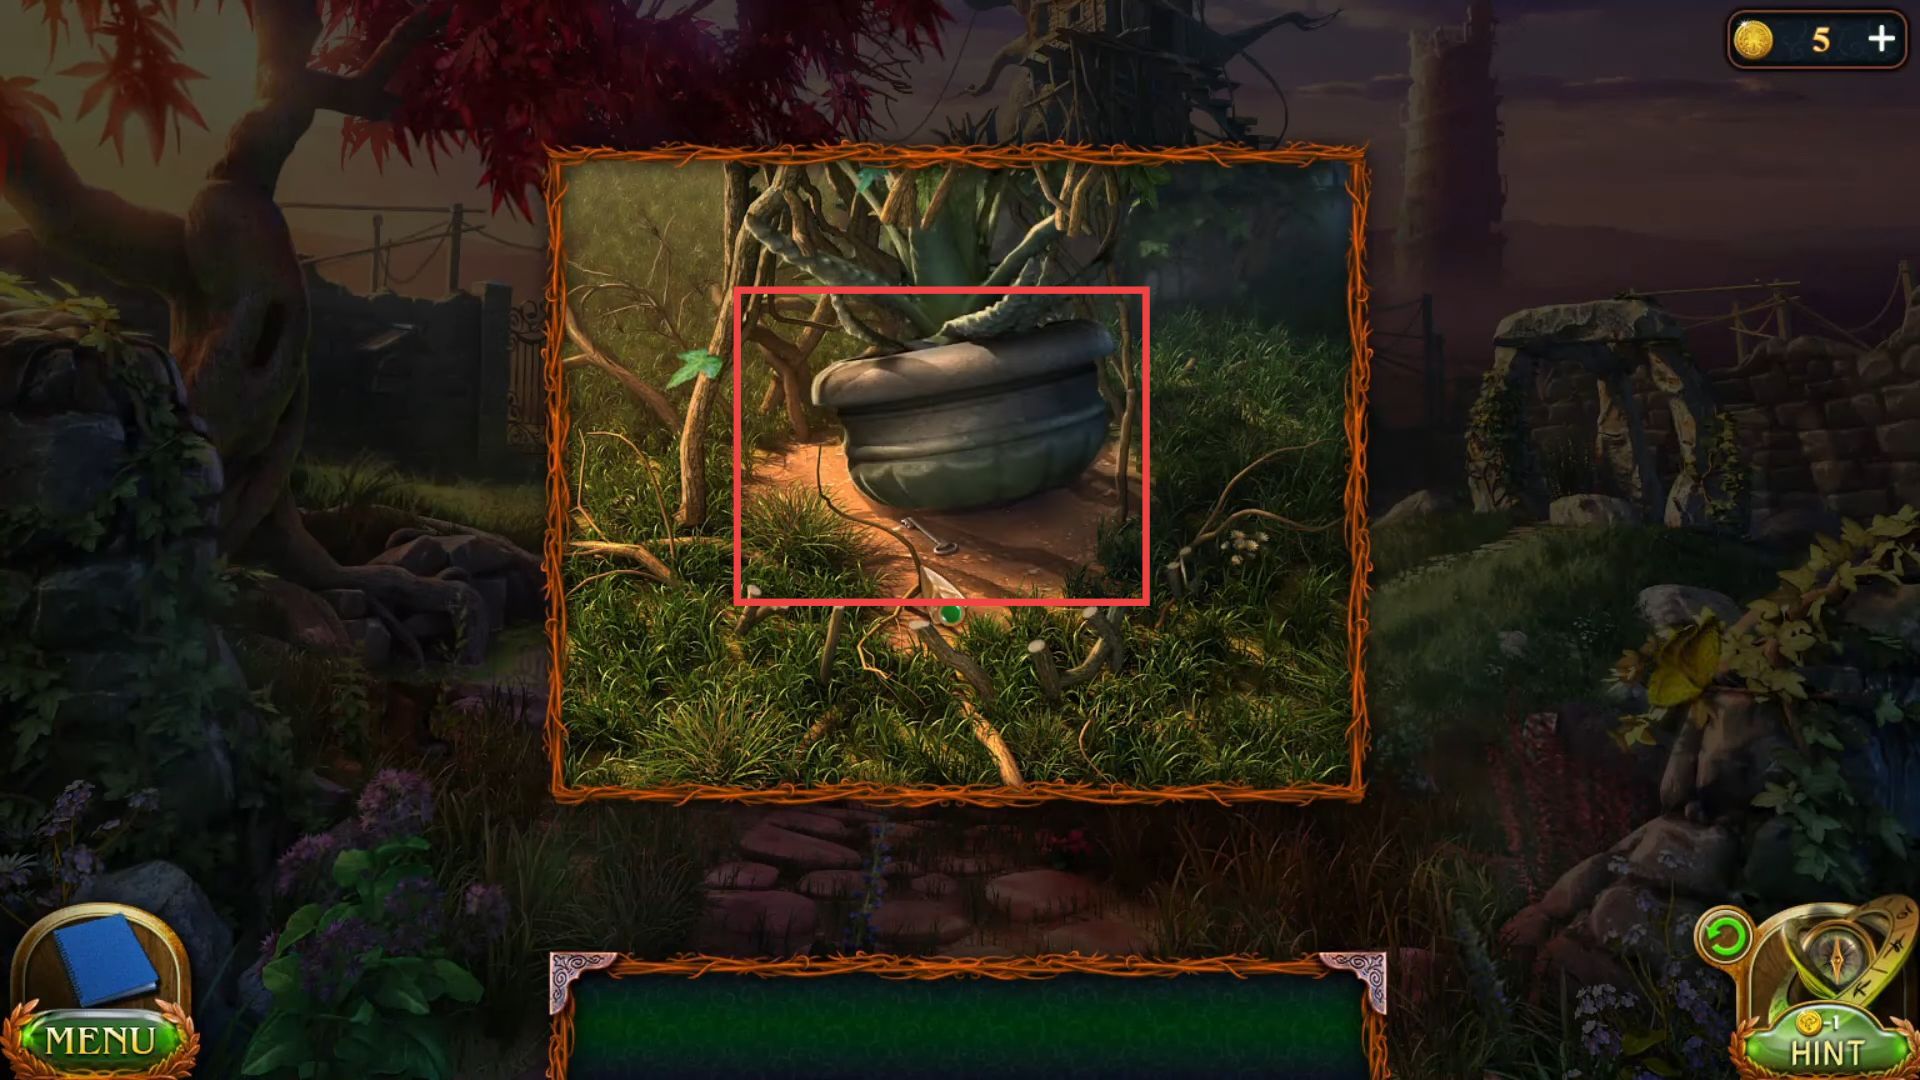
- Cut the branches from the tree using the gardening scissor to grab a key from the flower pot.
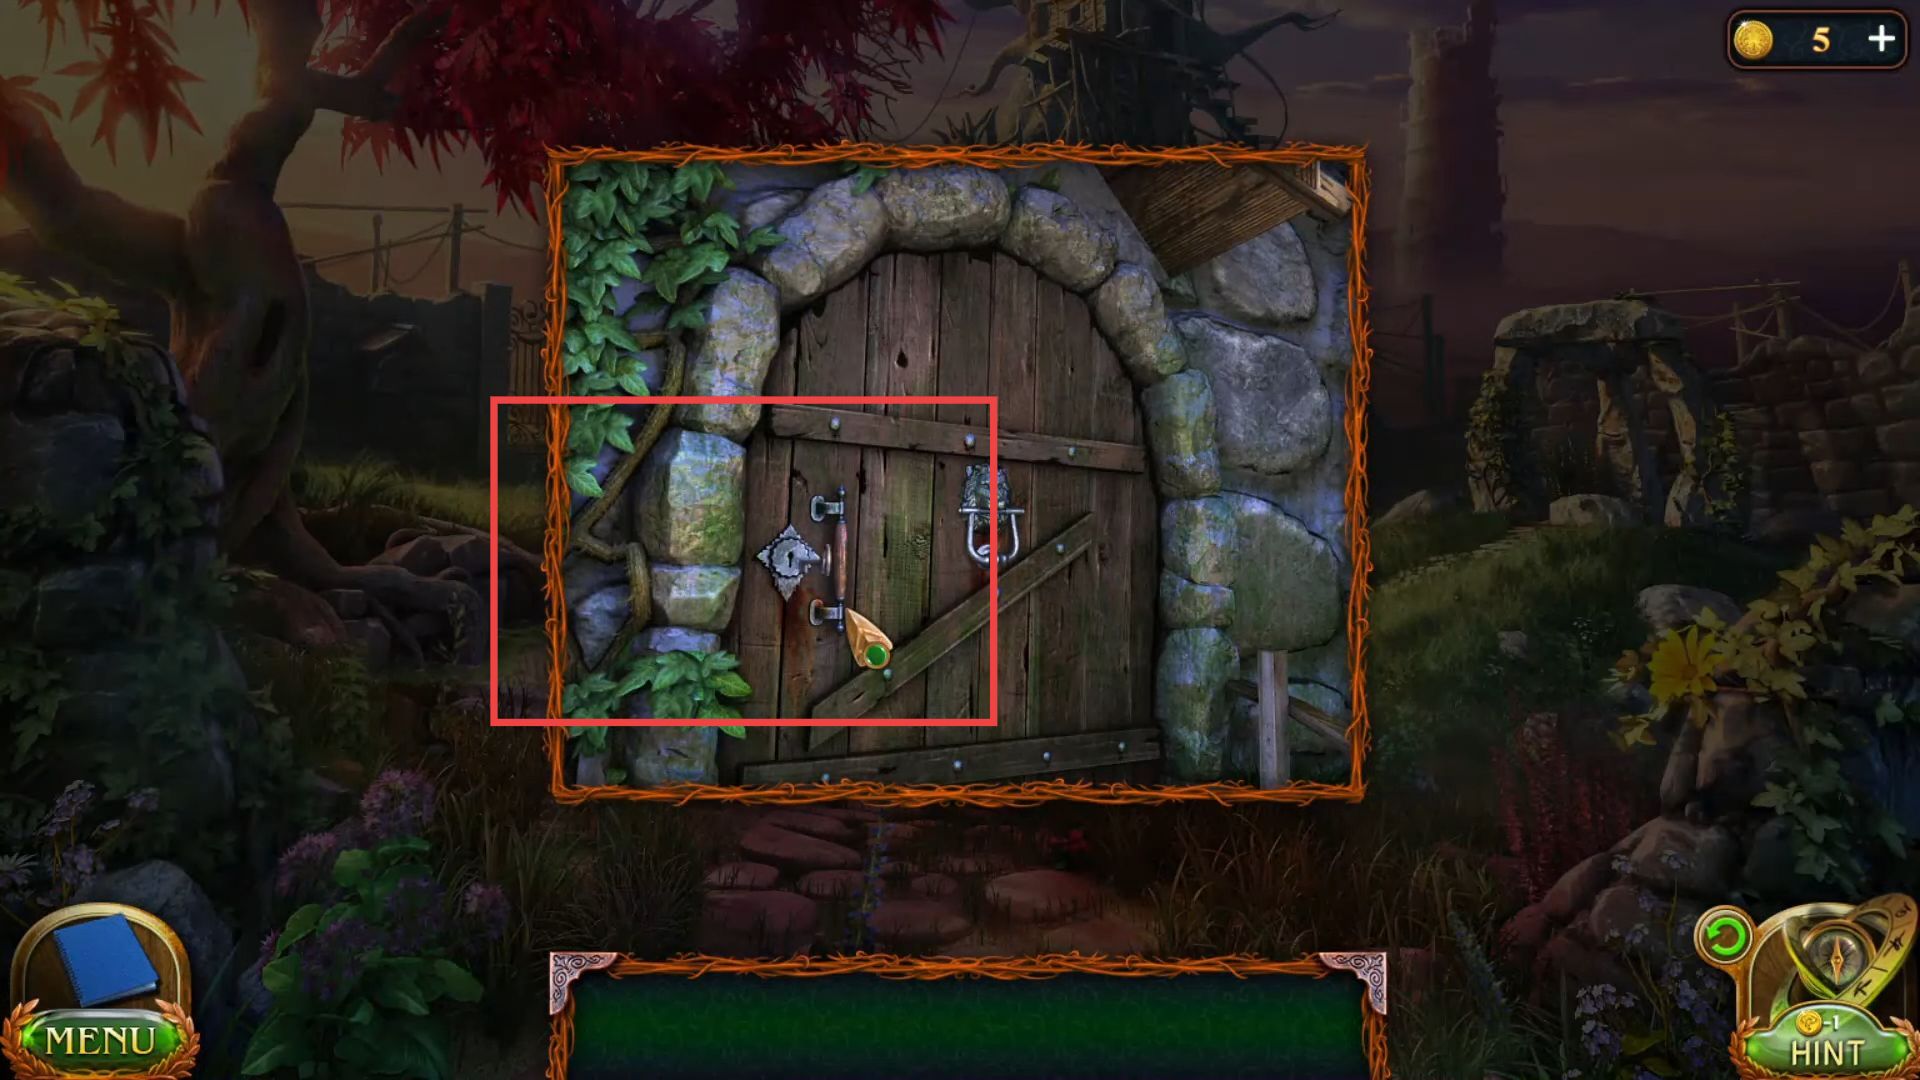
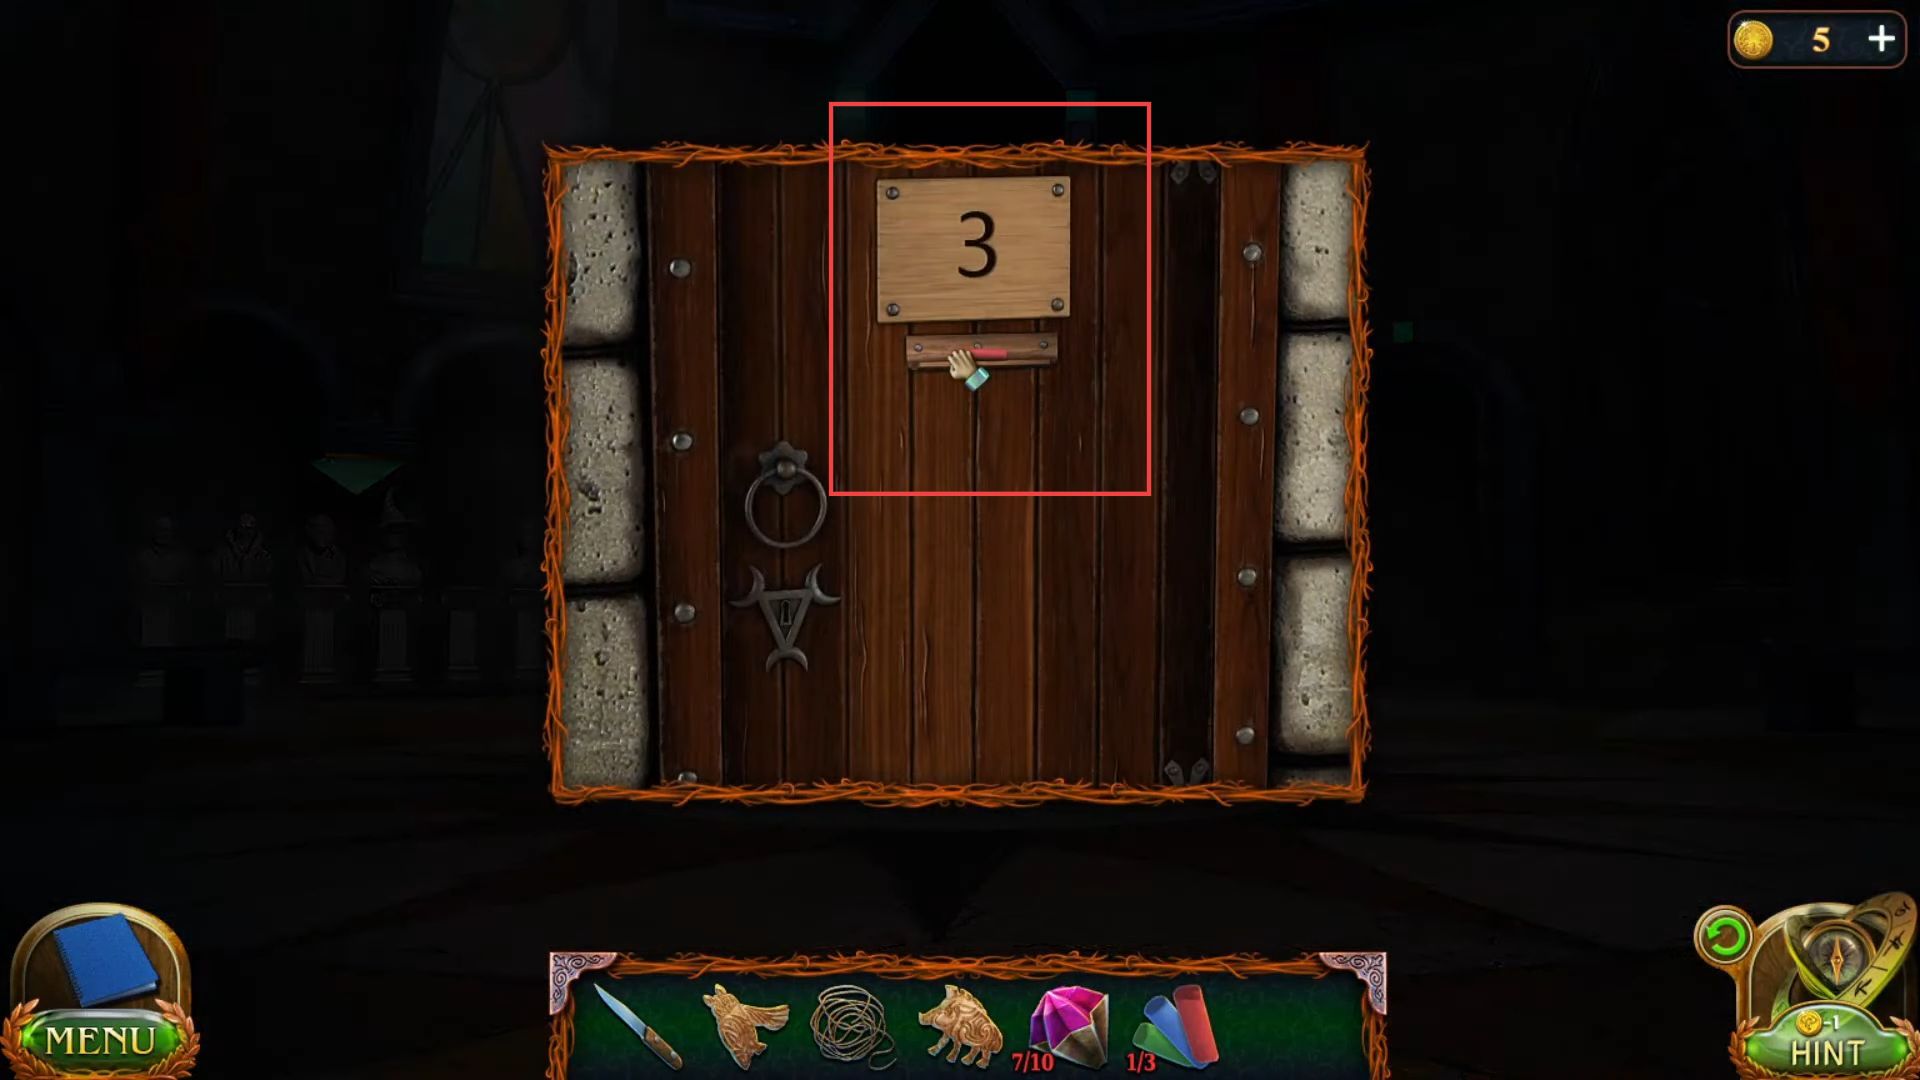
- Use the key to unlock the front door in the garden.
- Go inside the door, and slide the pot from the window to get a coin.
- Grab a few coloured glasses from the window.
- Go to the side table opposite the window to grab a knife.

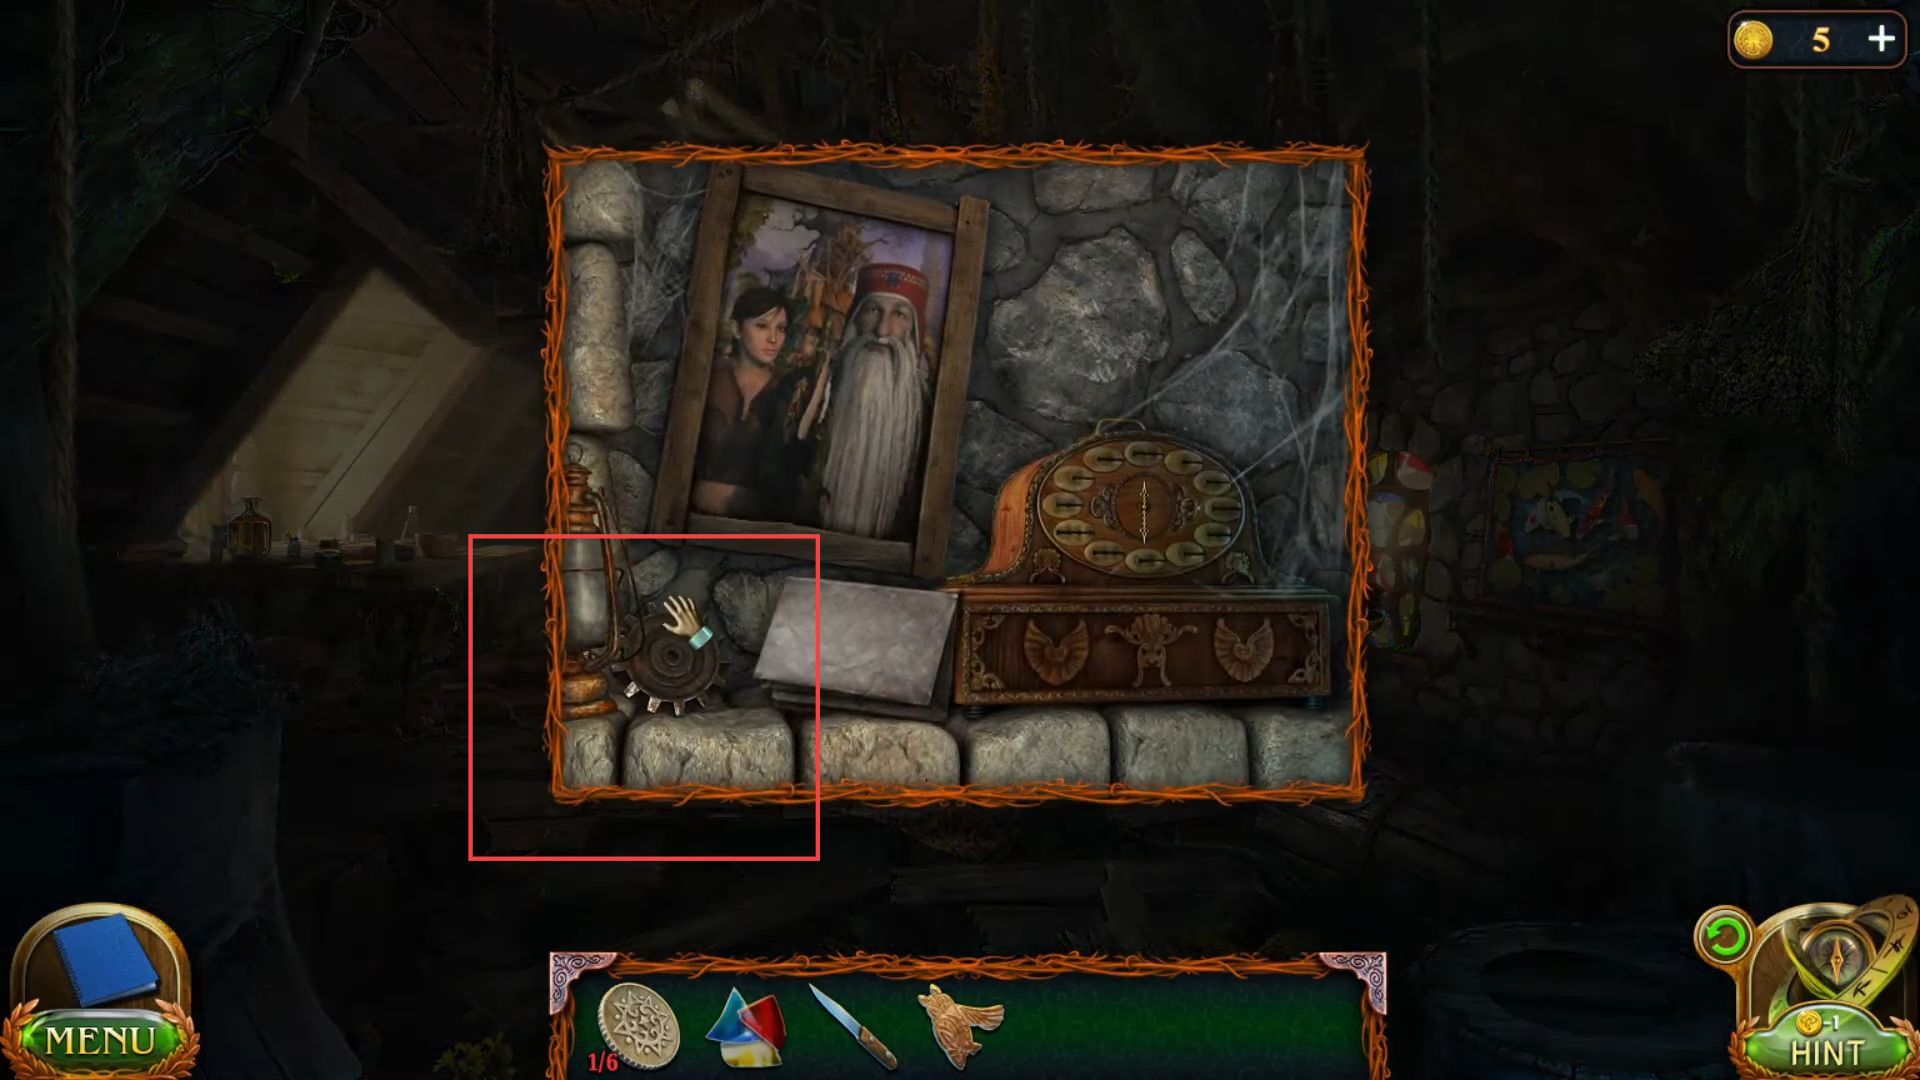
- Knock the cushion from the broken chair near the table to get an owl emblem.

- Grab the gear from the shelf into your inventory.
- Use the iron rod to clean the ash and grab another coin from the fire pit.

- Separate the wire from the coin and put it into your inventory.

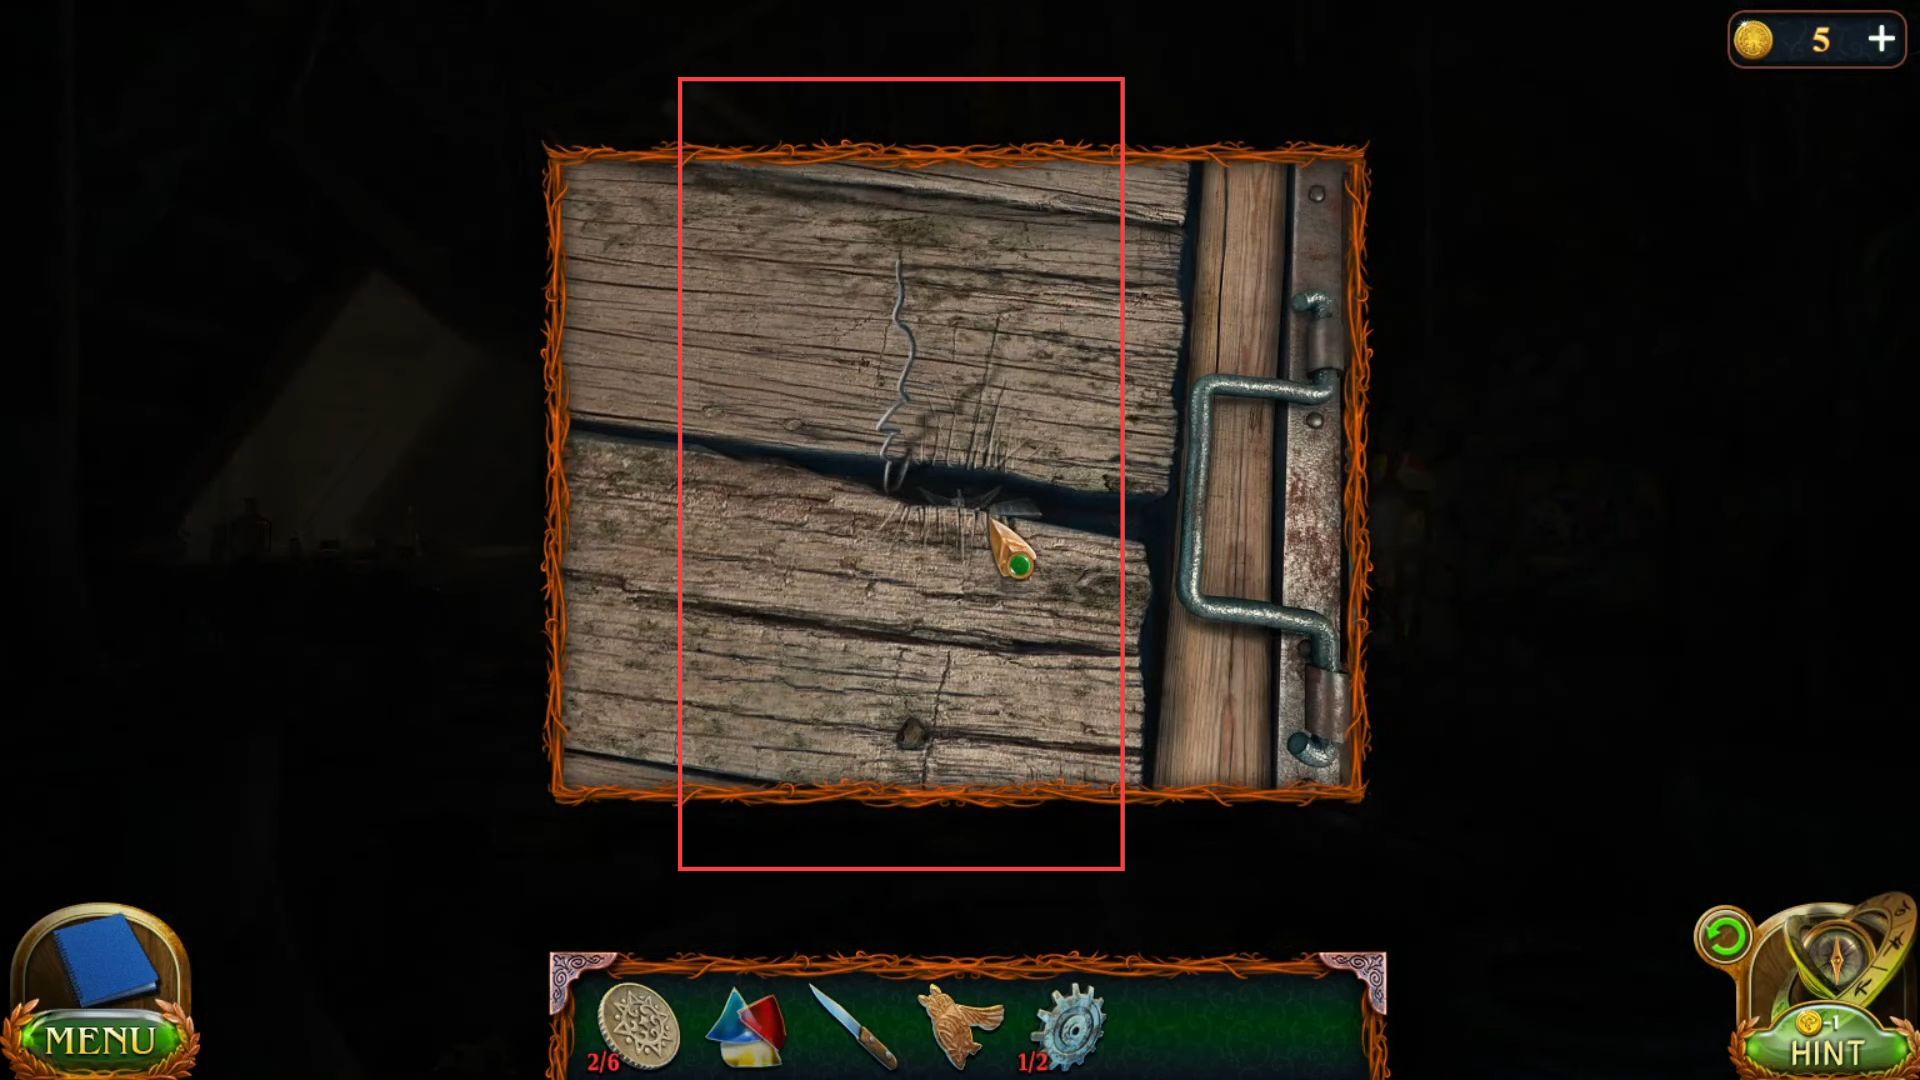
- Slide the carpet from the floor and use the pin to get a detail from the wooden log.
- Go outside the house, put the detail on the door to unlock it, and grab a star emblem and gear from the inside.

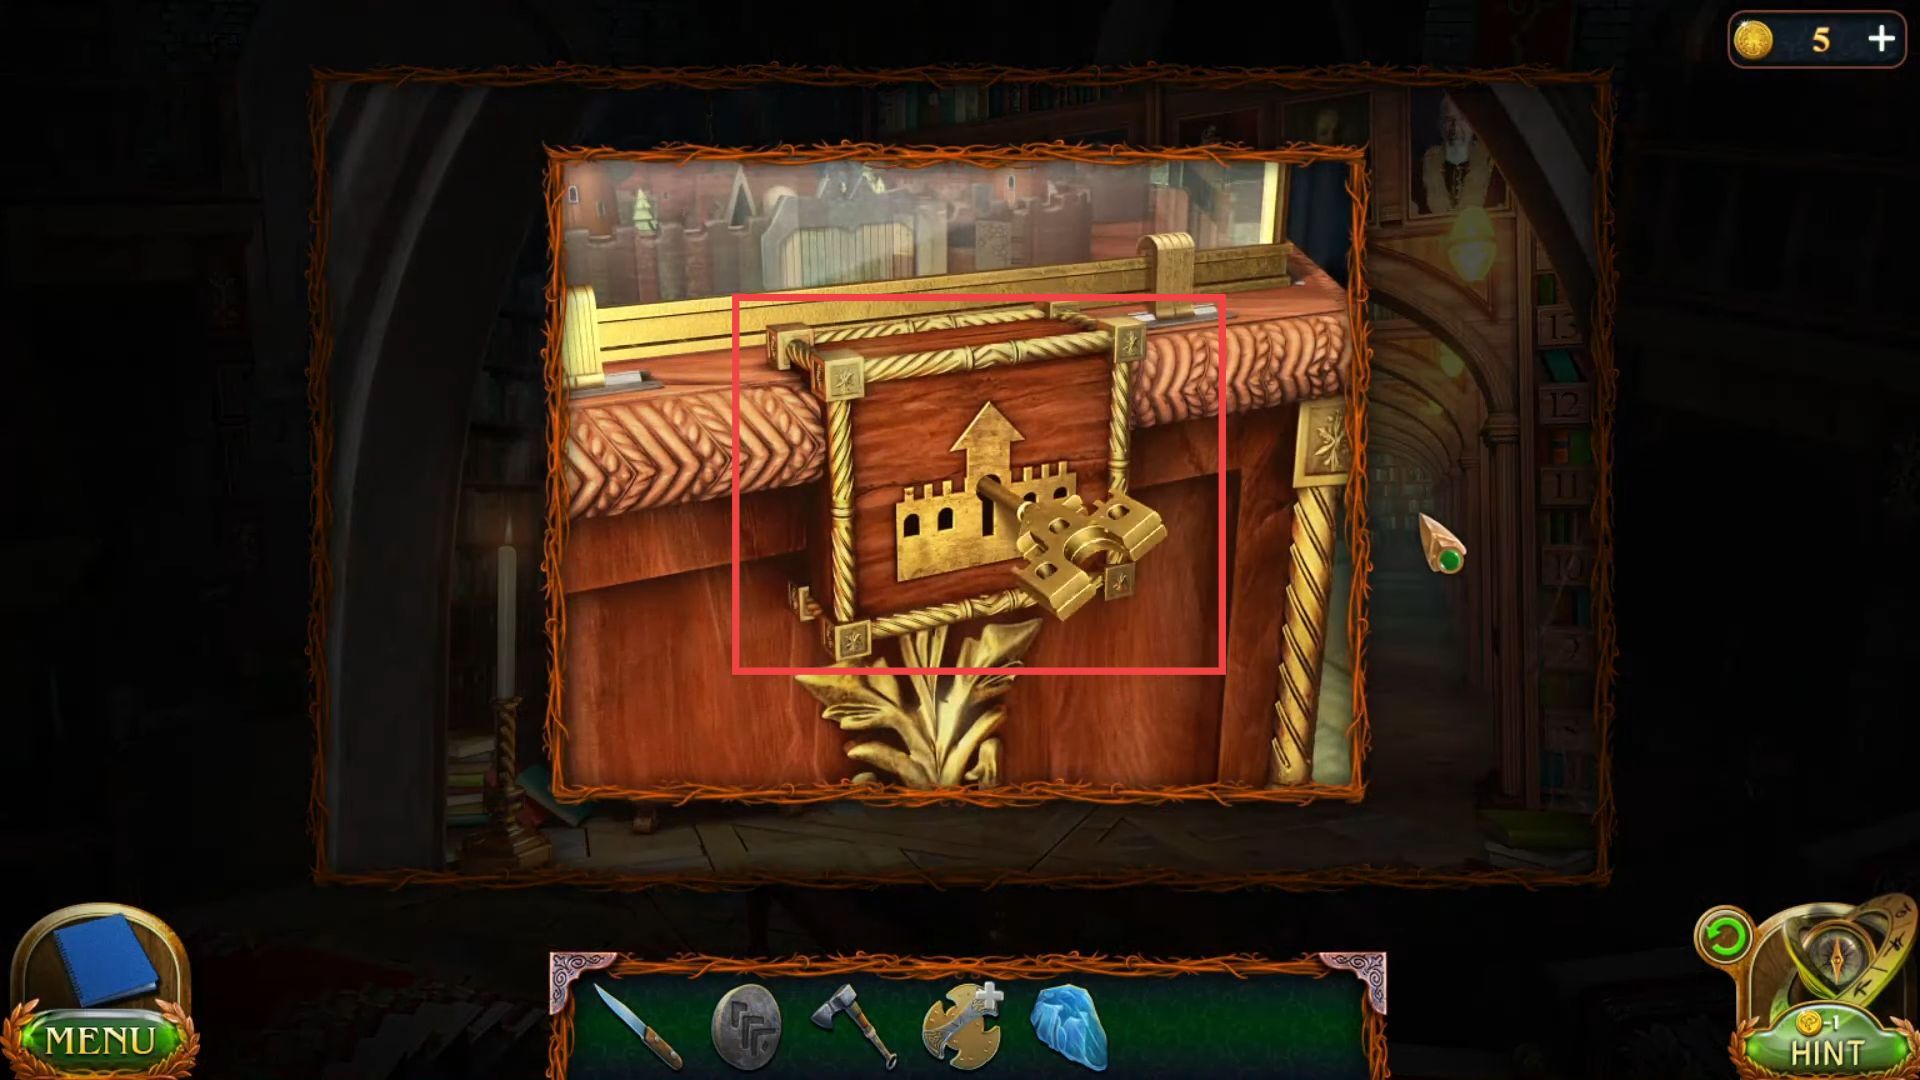
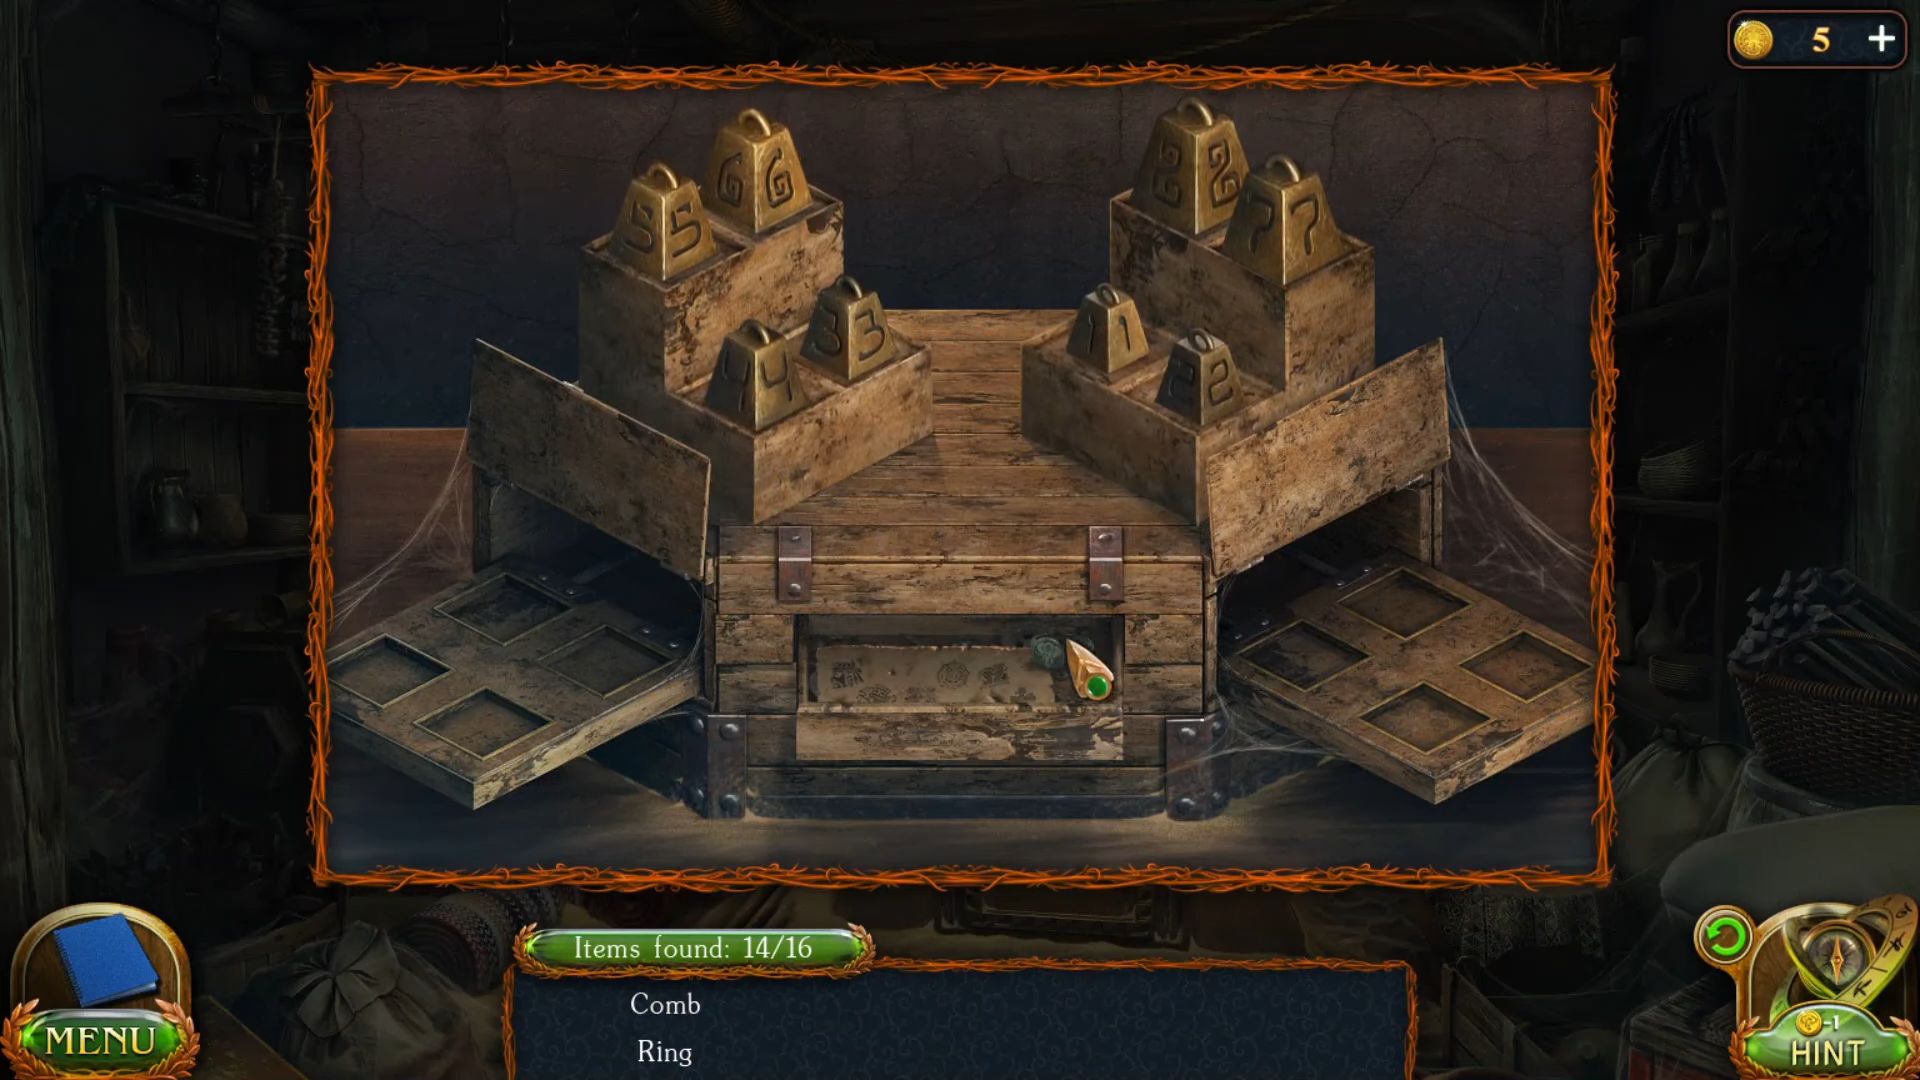
- Use the knife to remove the locker cover from the front gate.

- Place the gears into the locker, and adjust the latches in this sequence to unlock it.

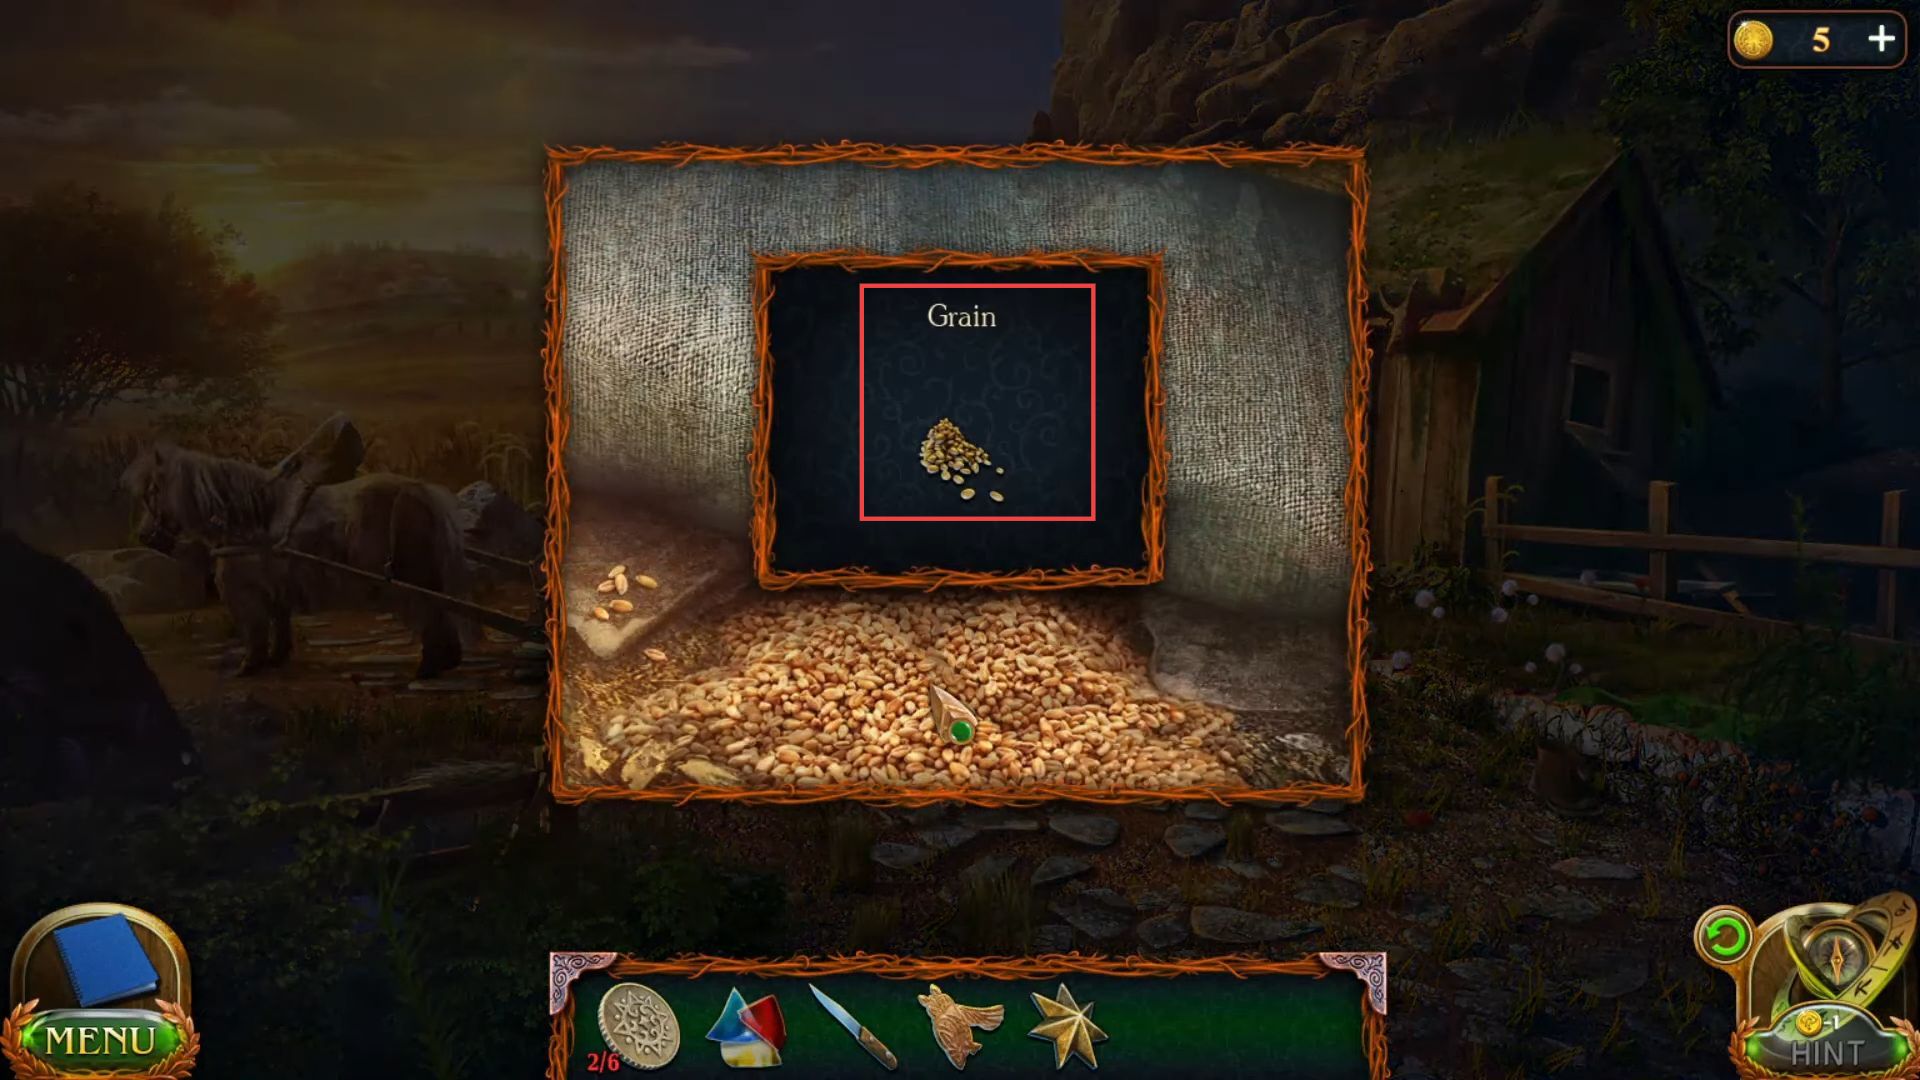
- Once the lock is opened, go inside it, and grab a few grains from the floor.
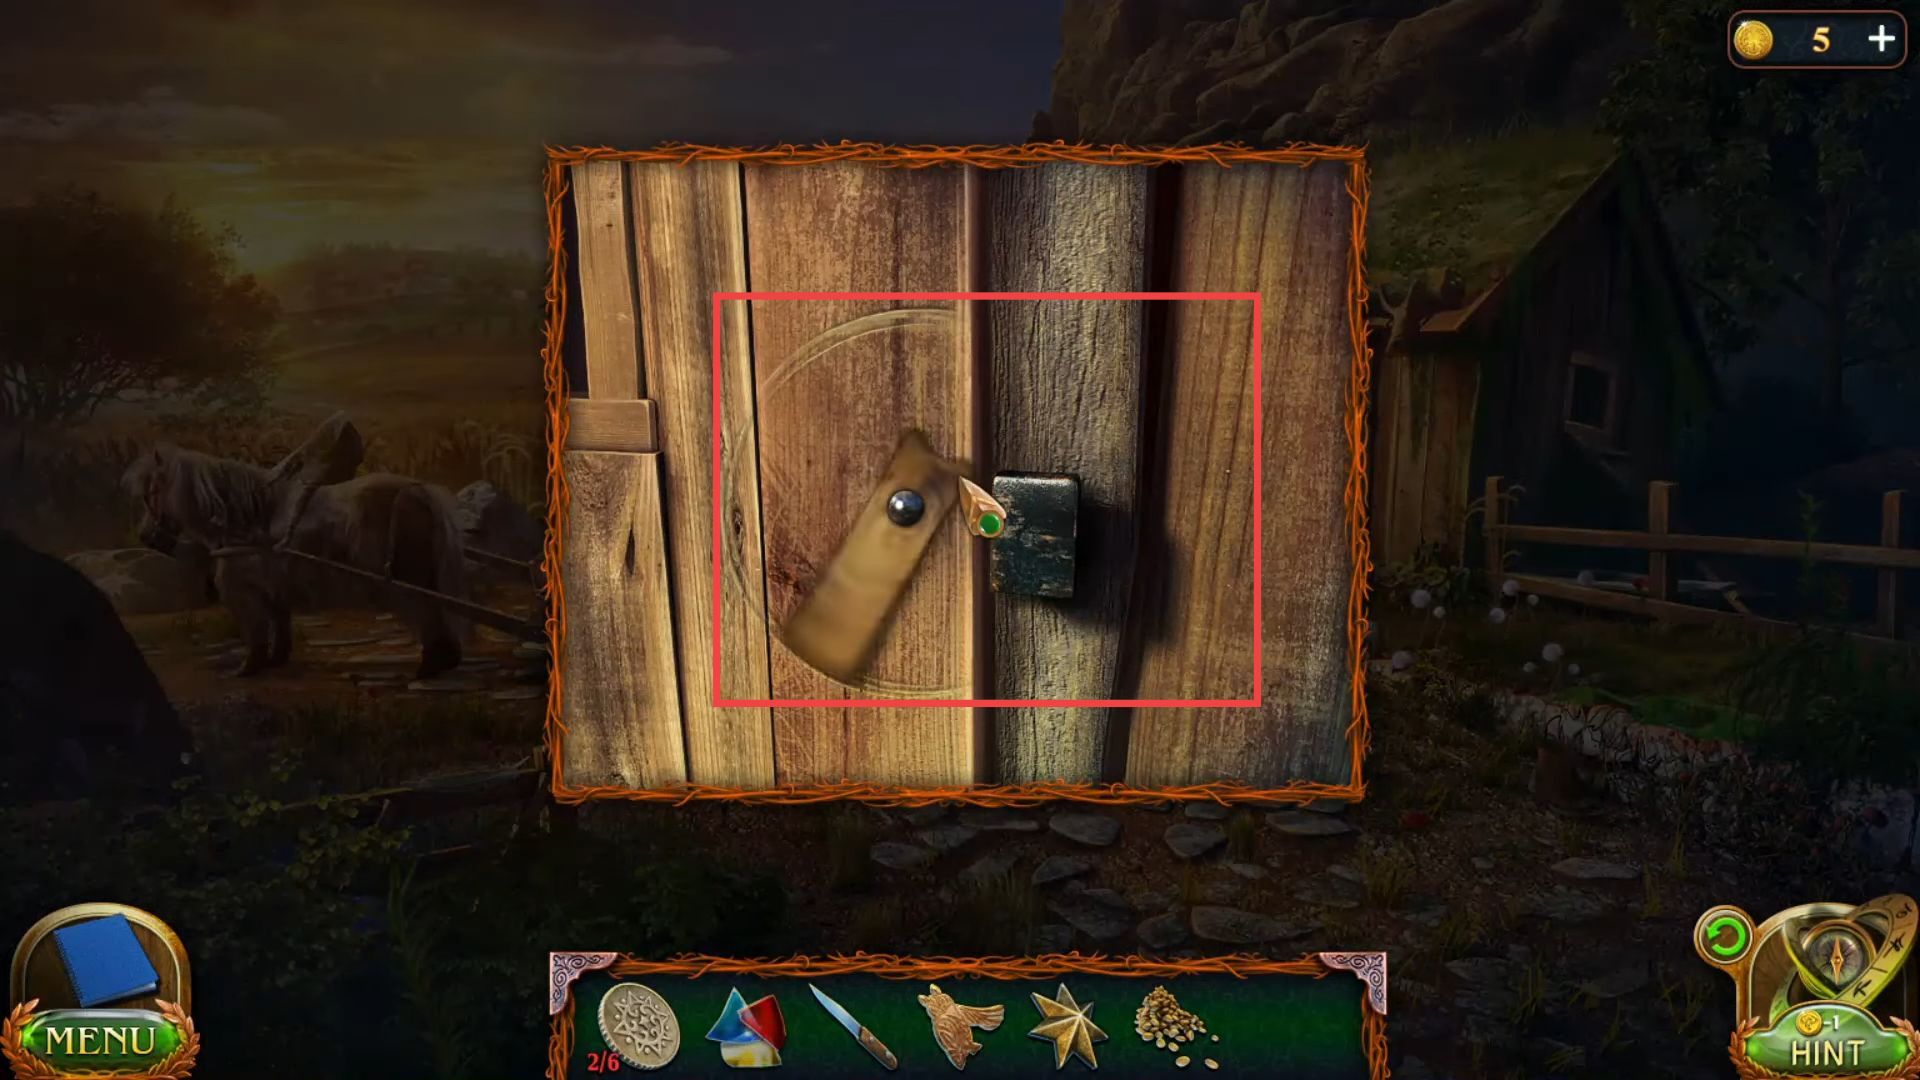
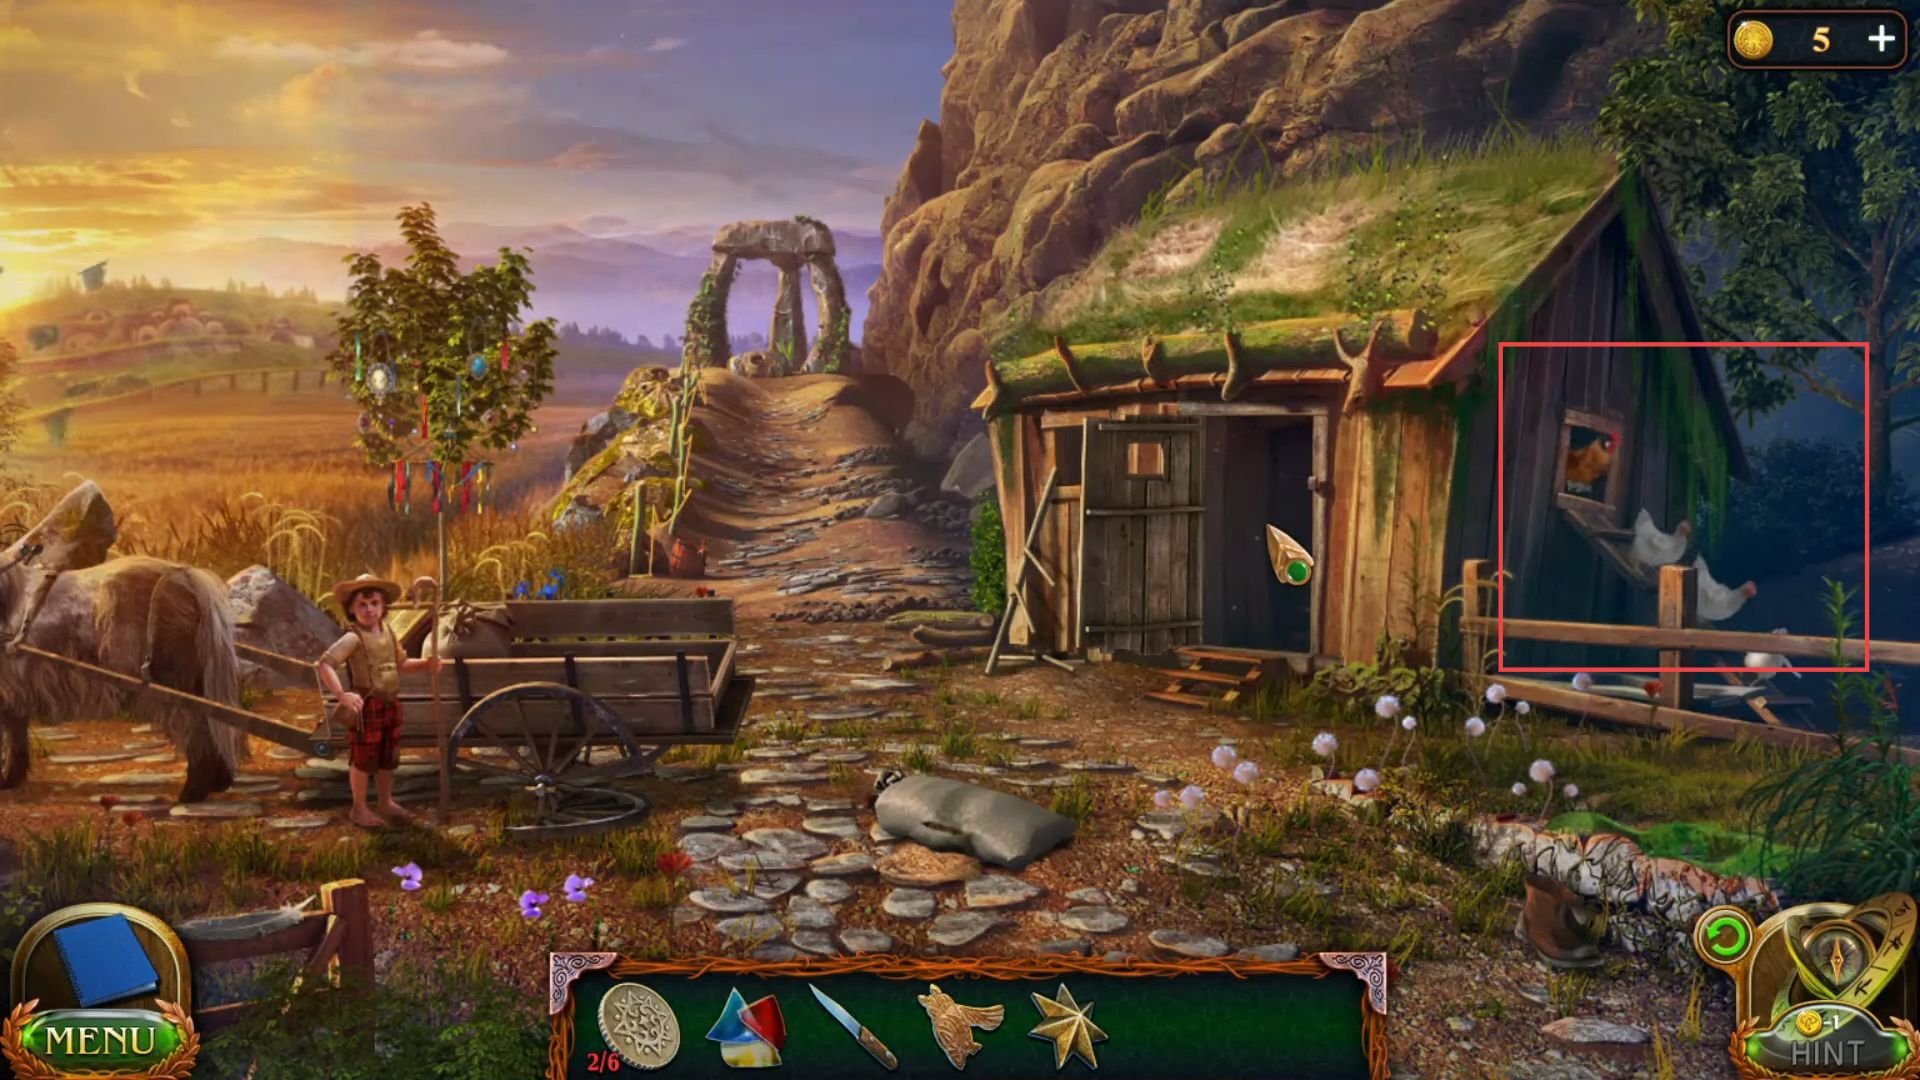
- Unlock the suitable side hut by knocking on the handle of the door.
- Go inside the hut and give some grains to the hen.
- Grab the wheel from the shelf.

- Remove the broken wheel of the cart, place the new wheel, and fix it.

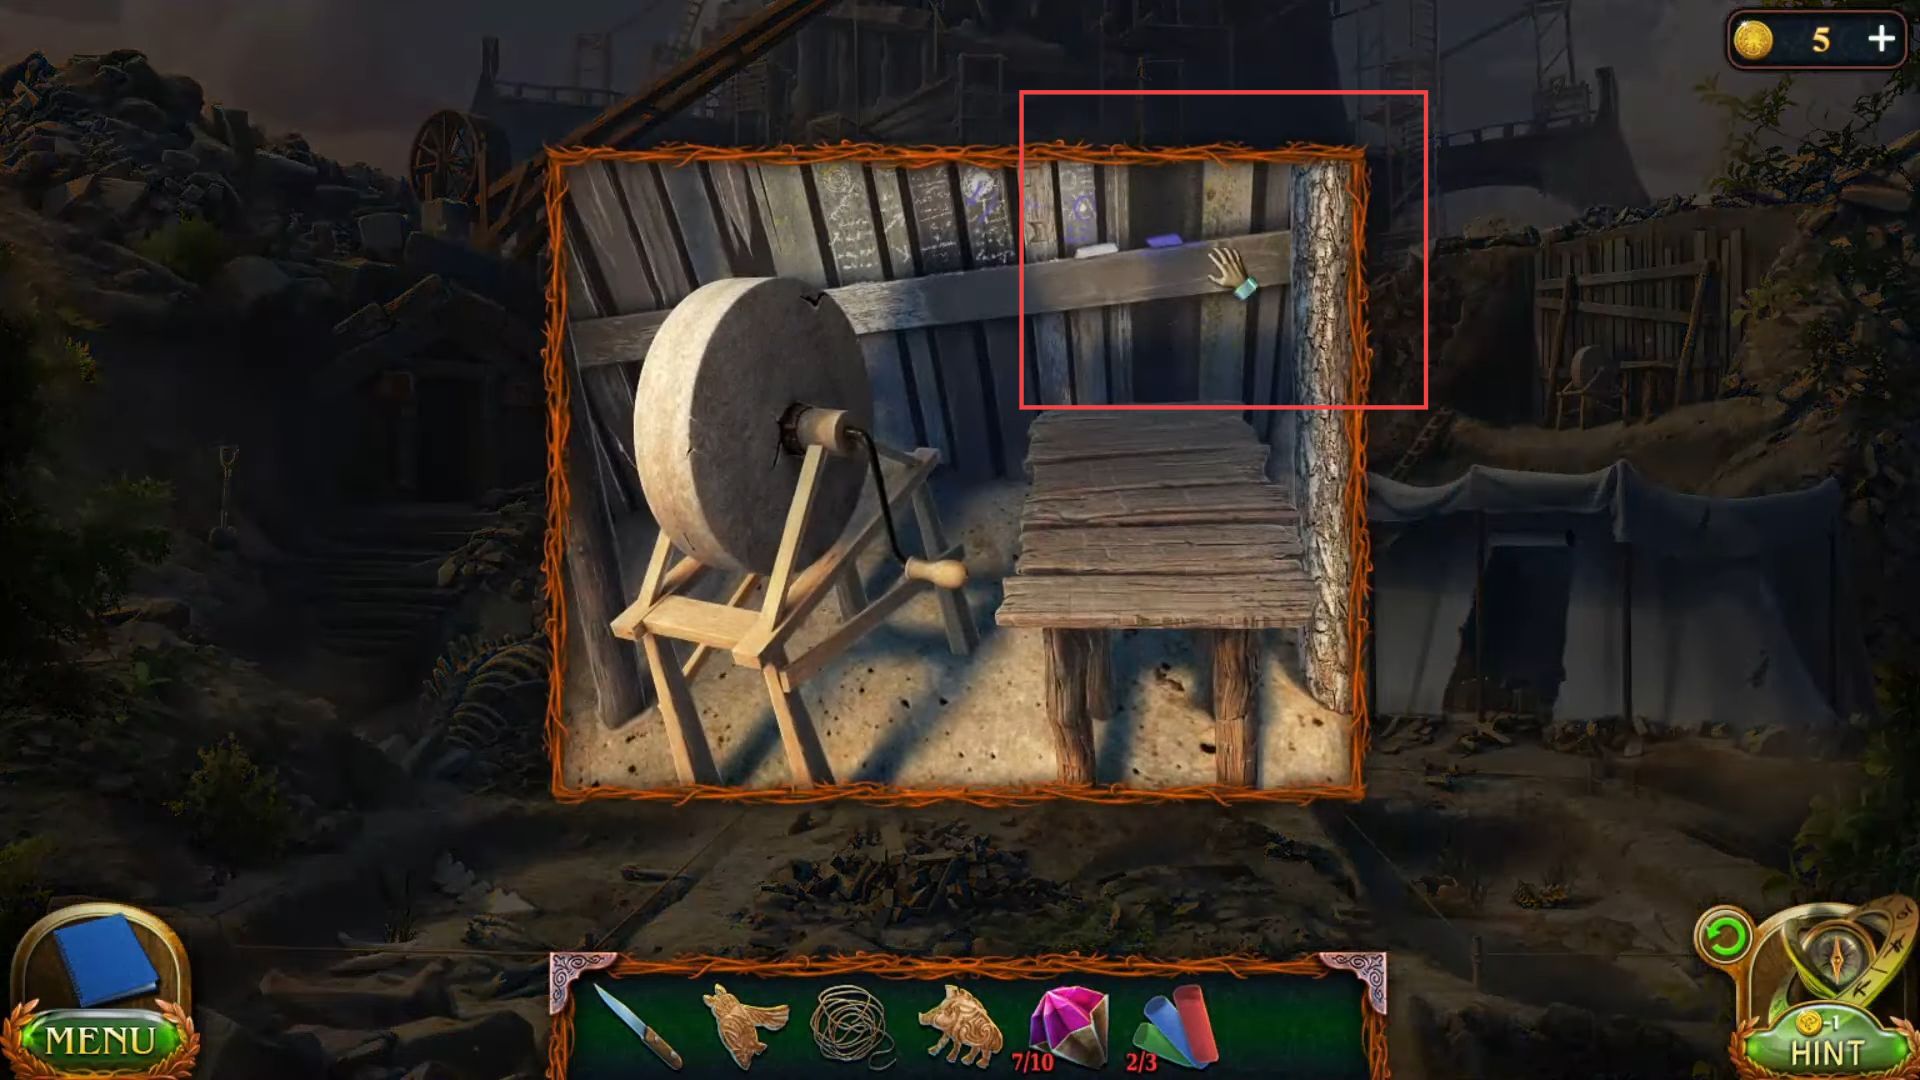
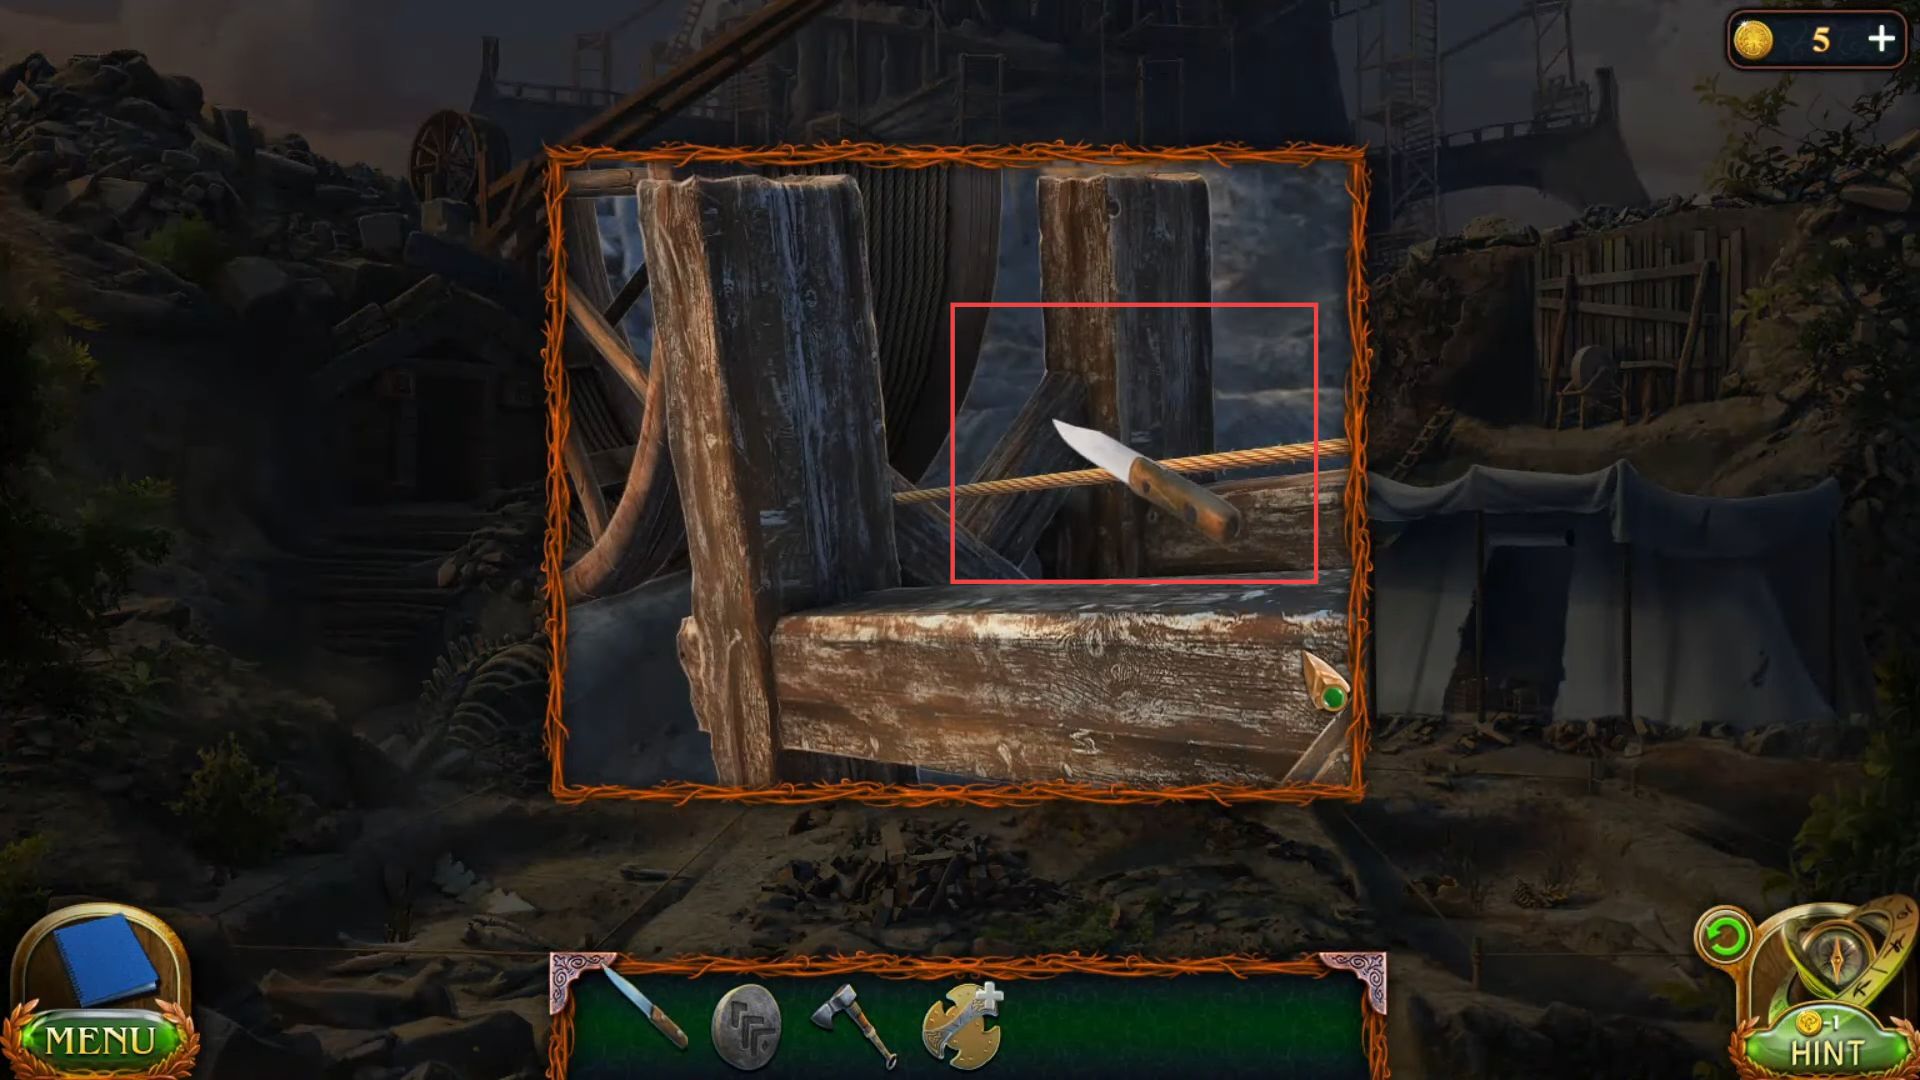
- Grab the rope from the next side of the hut.

- Get steps from the side wall of the hut.
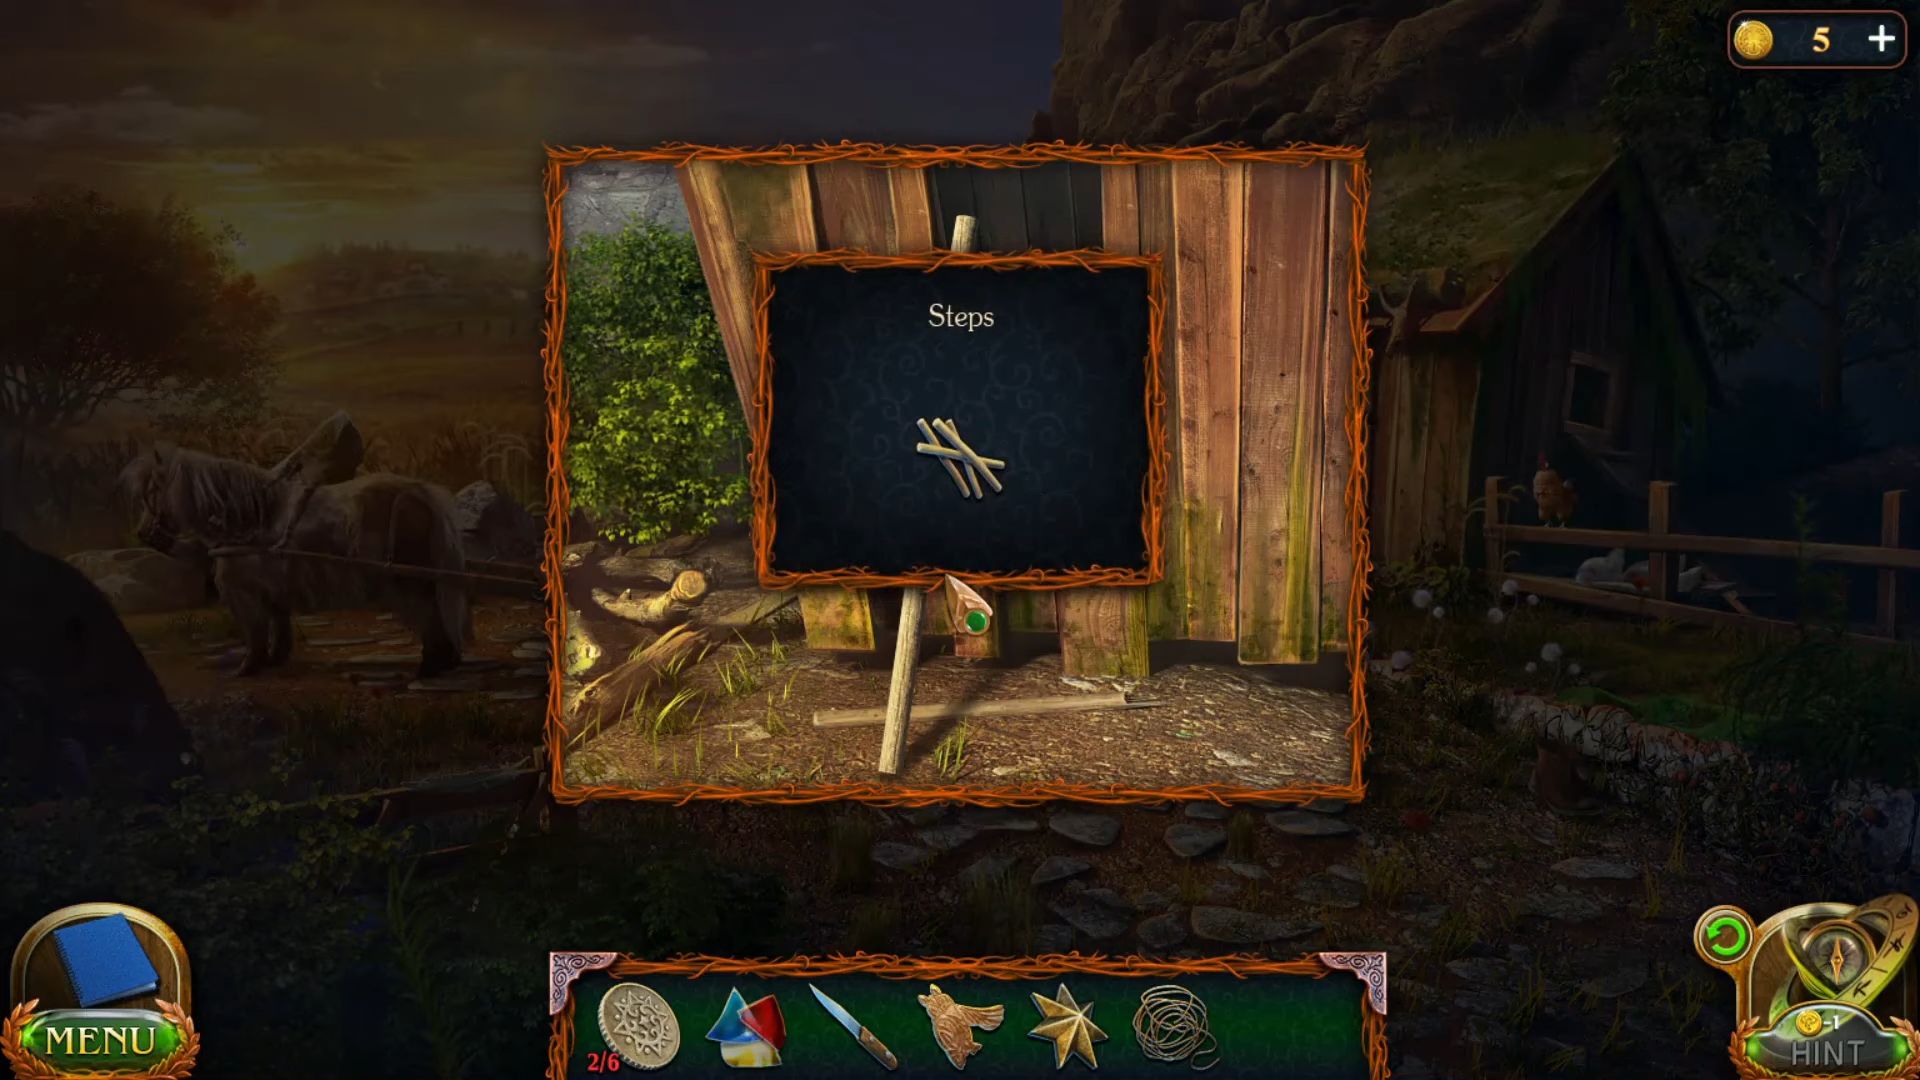
- Put the steps into the broken stairs from the hut house and fix them using the rope.

- Go inside the hut house, and grab a needle from the side shelf.
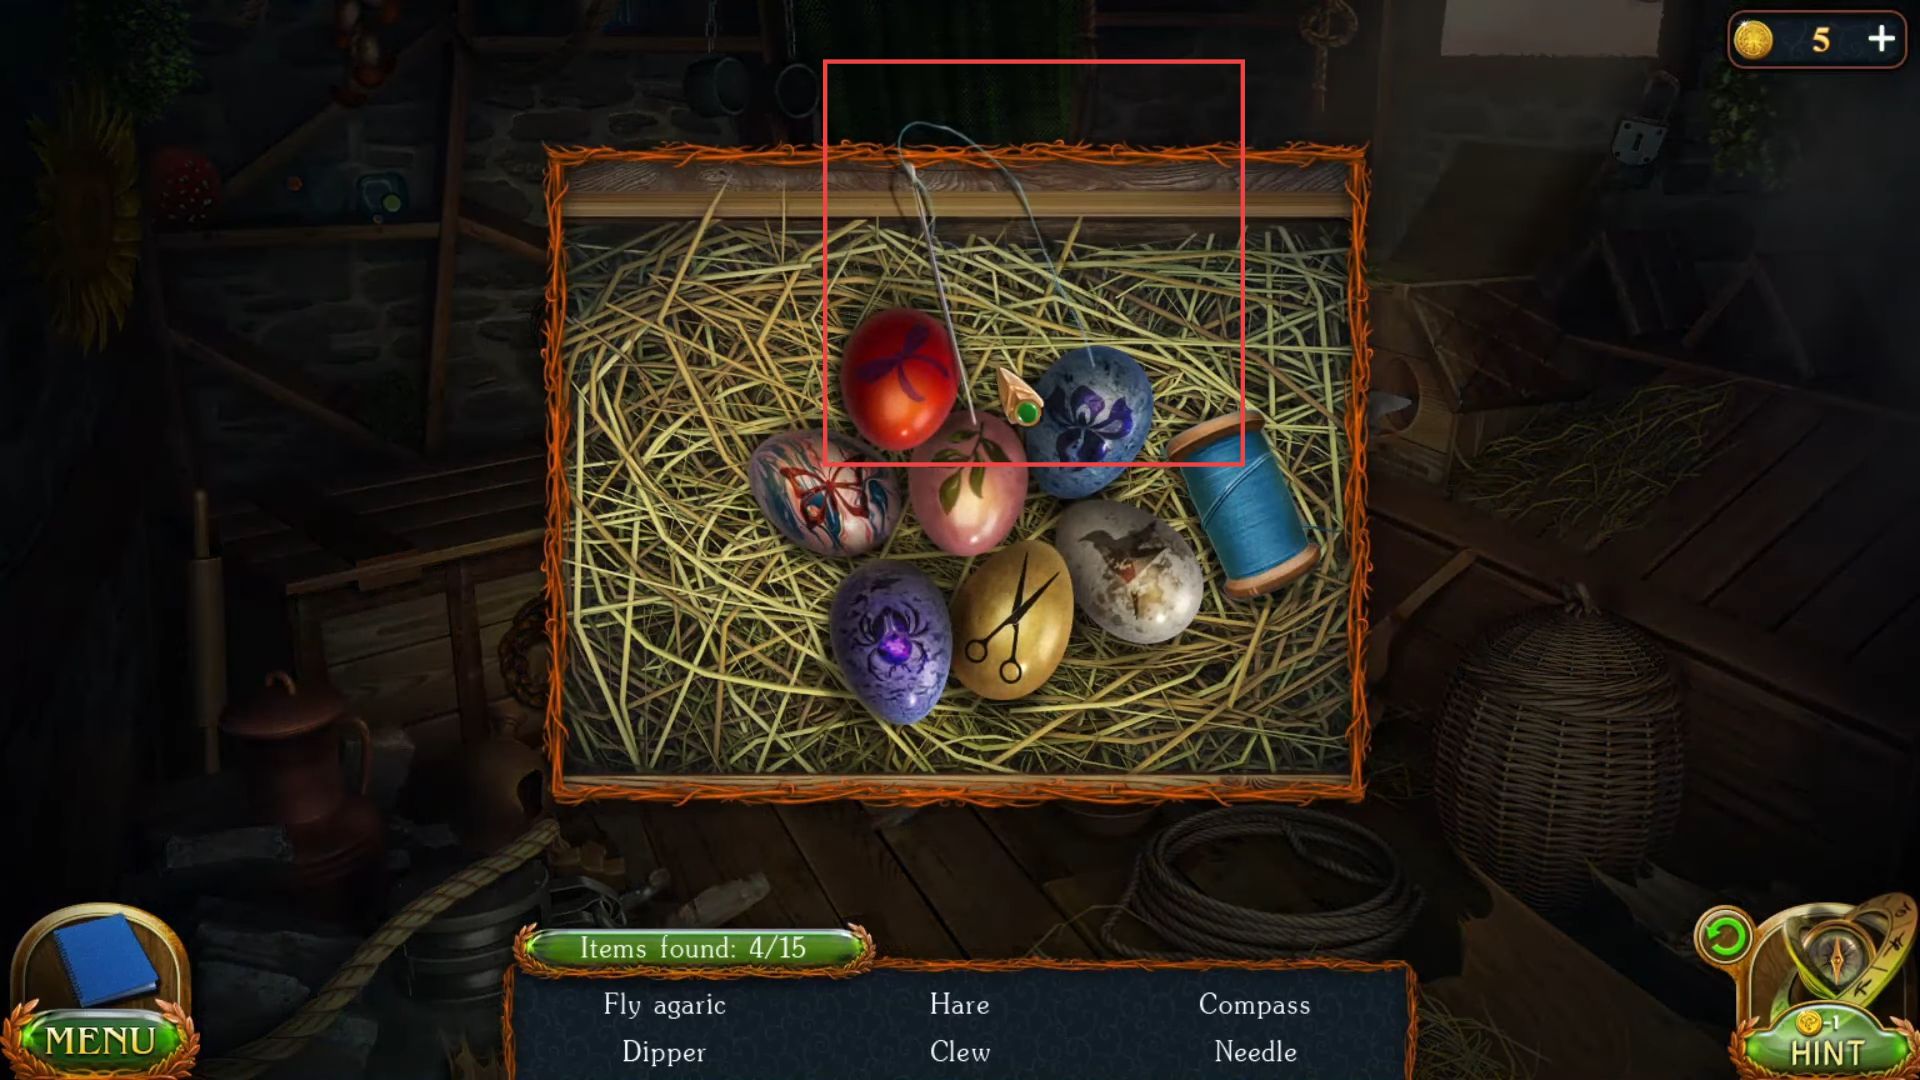
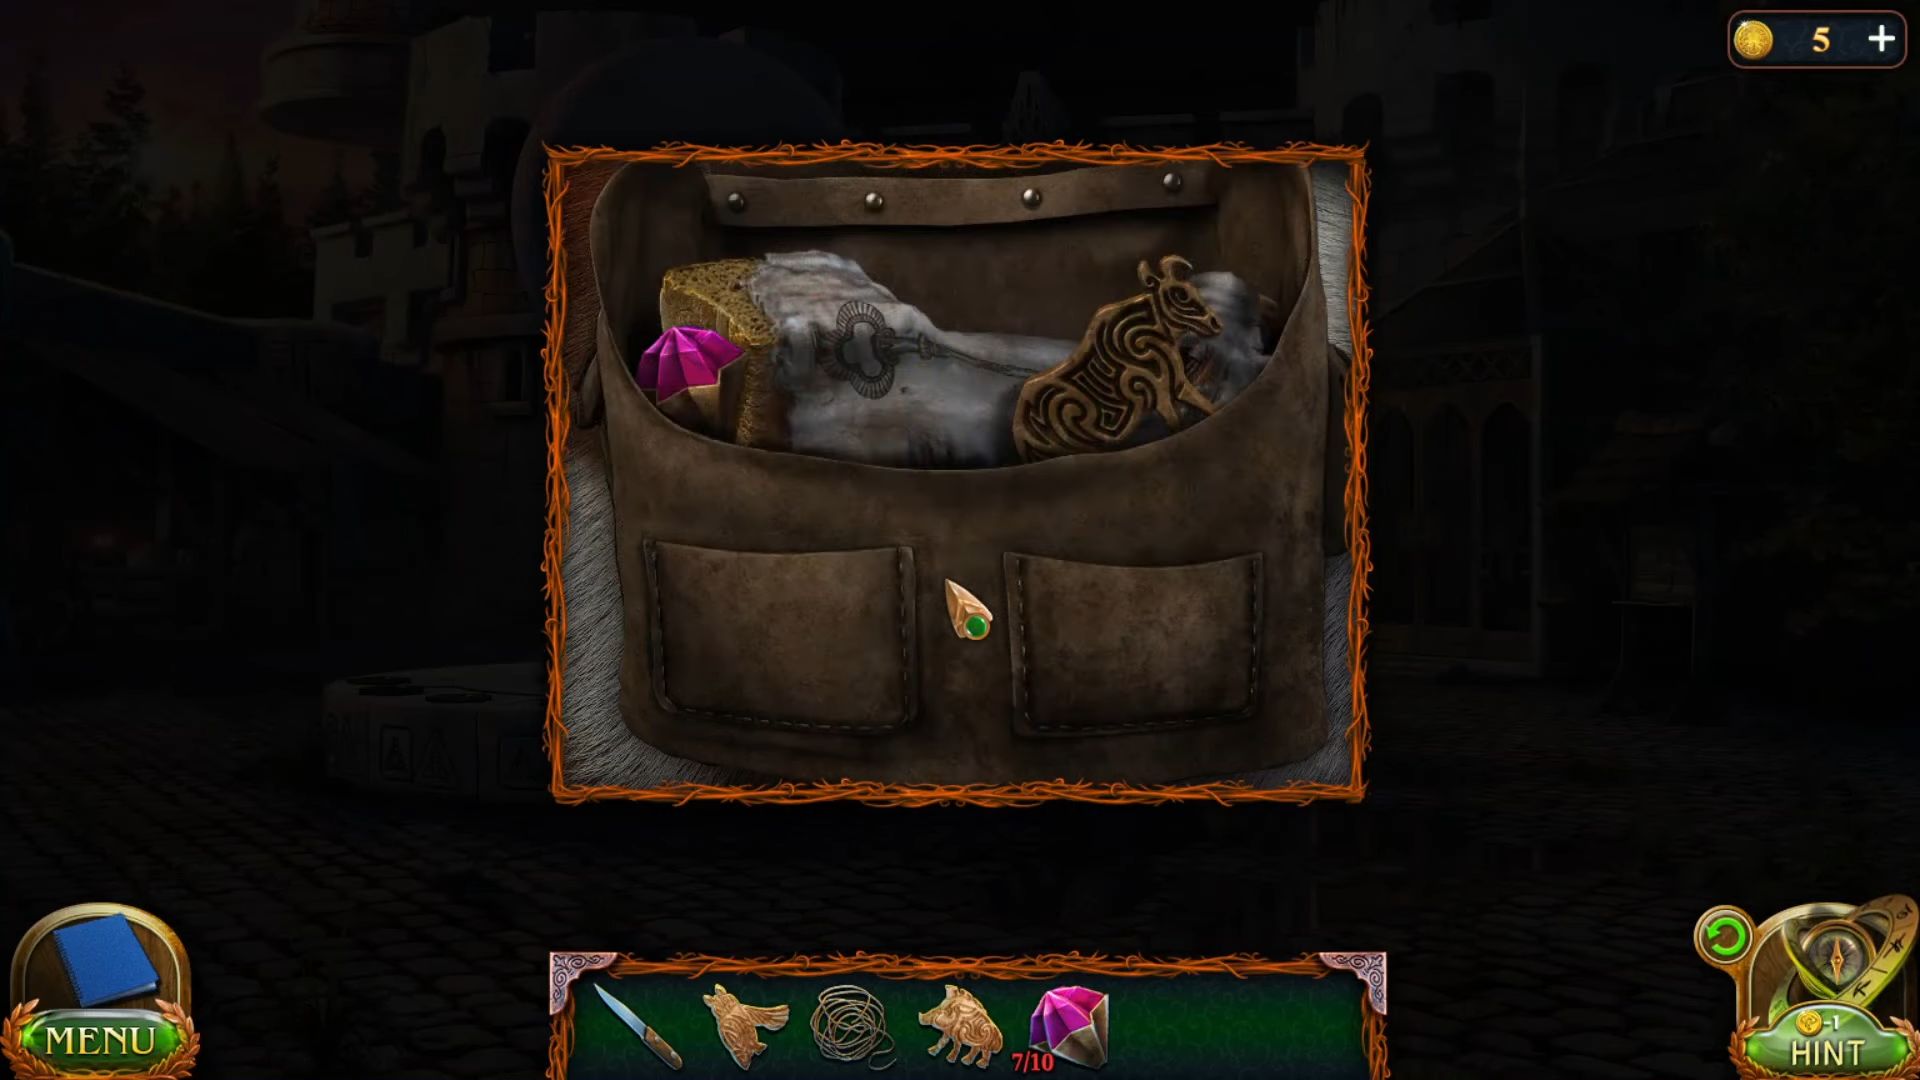
- Find the items such as fly agaric, scissors, lock, dipper, plate, rolling pin, spice scoop, clew, tree, and a compass from the box.

- Sew the grain bag using the needle and thread from the floor.

- Put the grain bag into the cart.
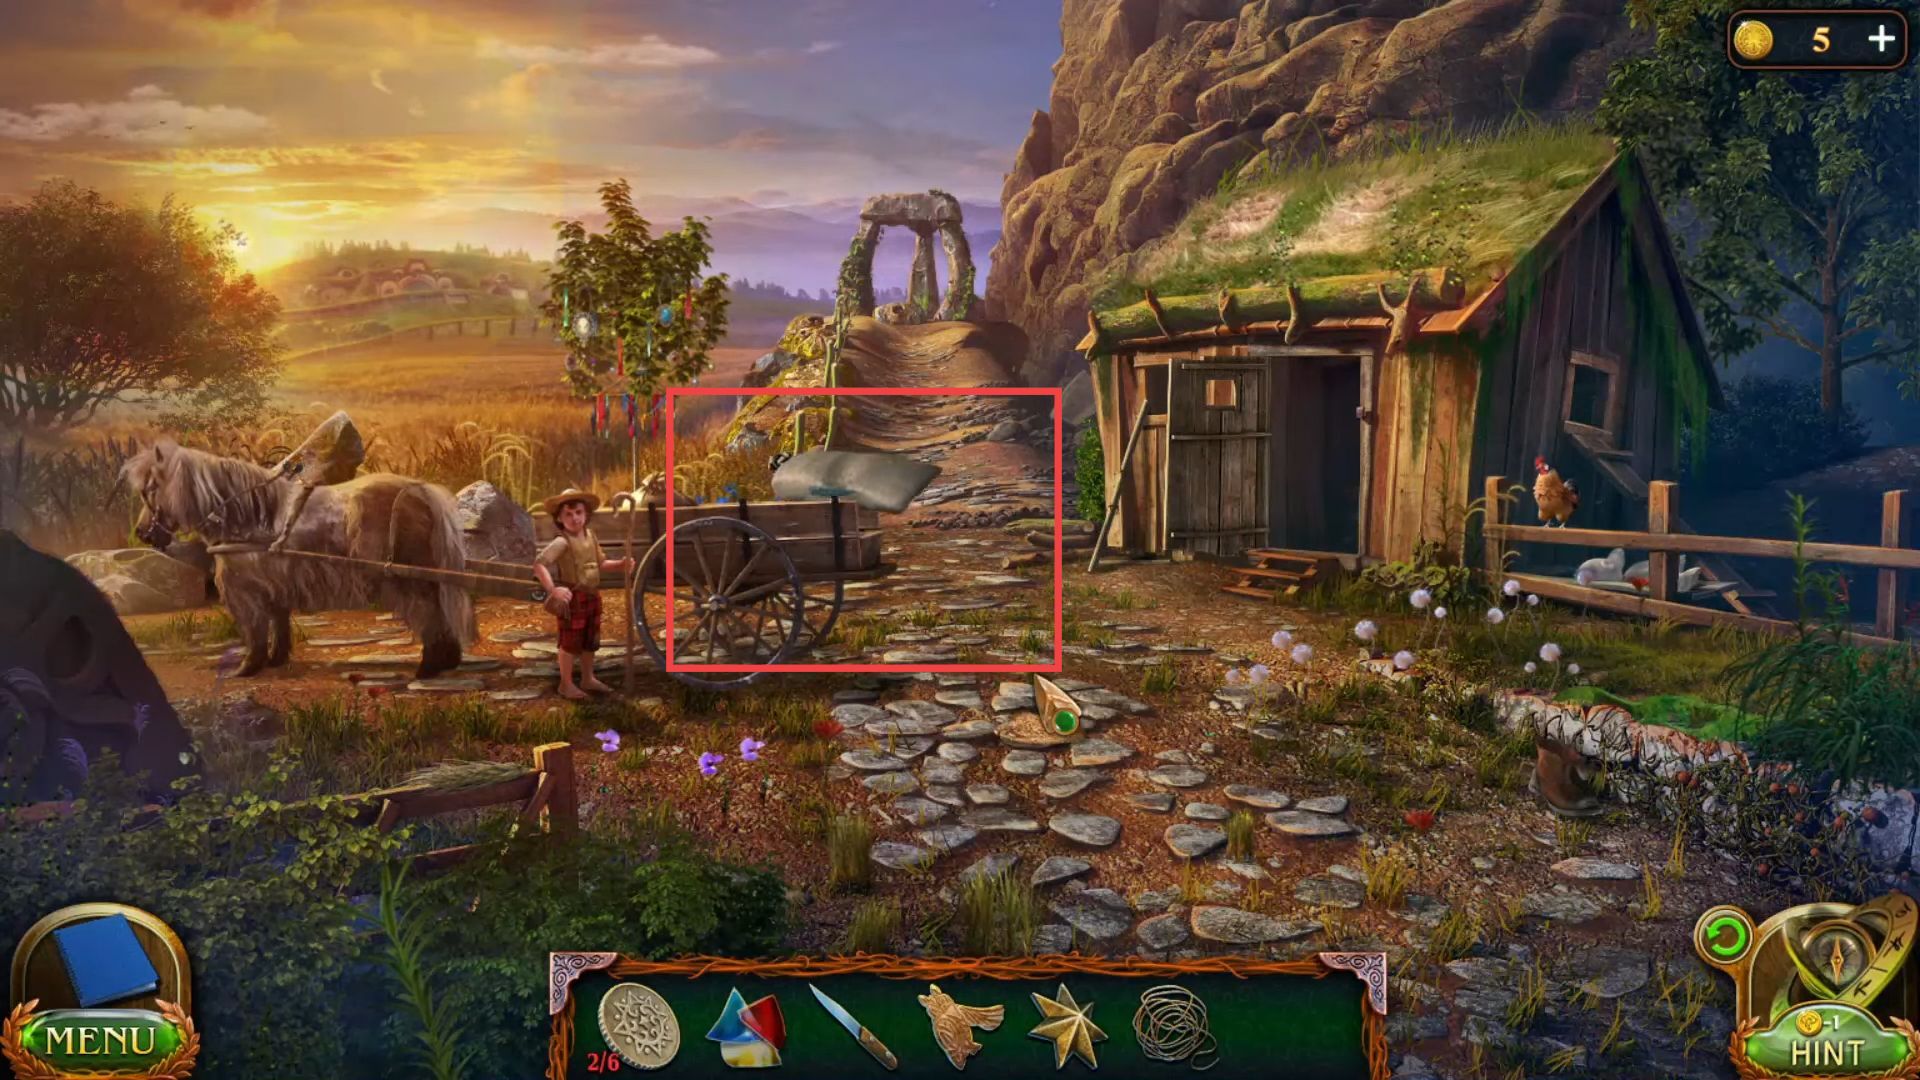
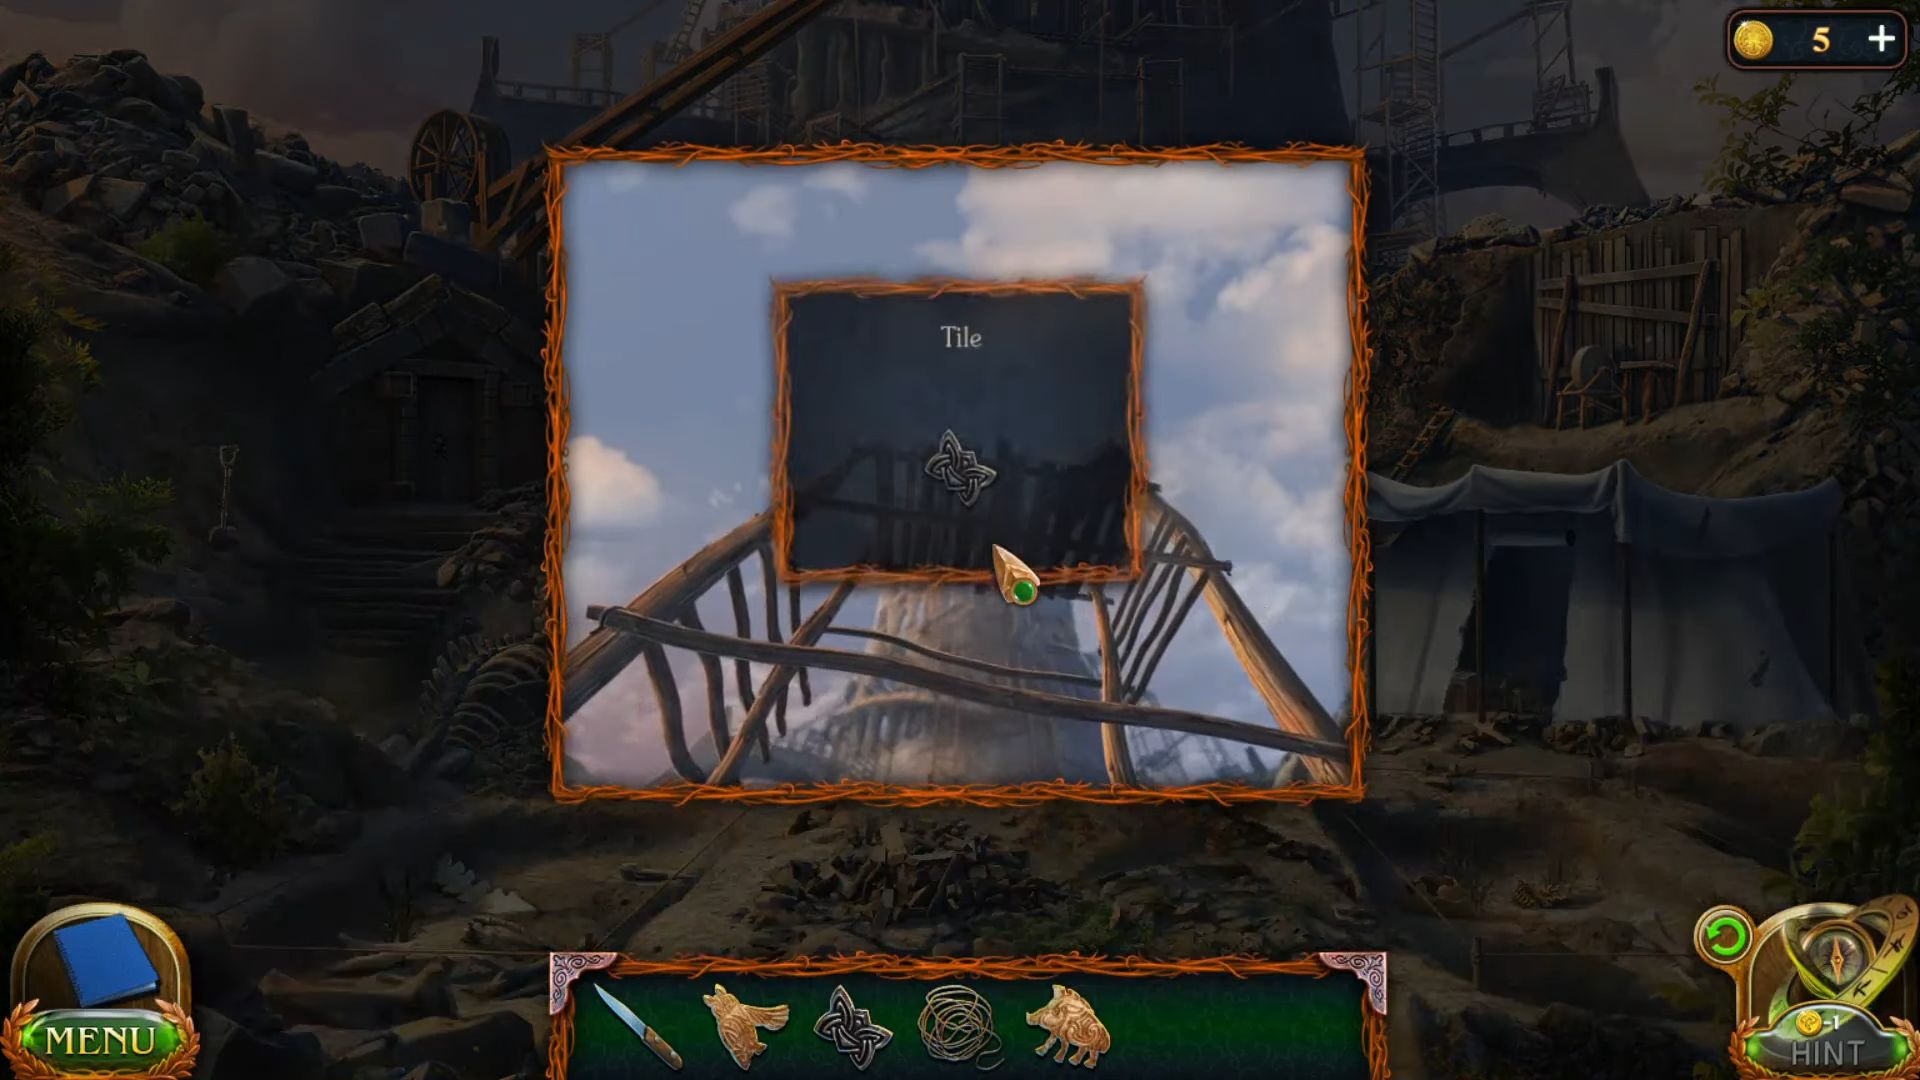
- Grab a tile from the small boy with a cart.
- Get a stick from the outer side wall of the hut house.

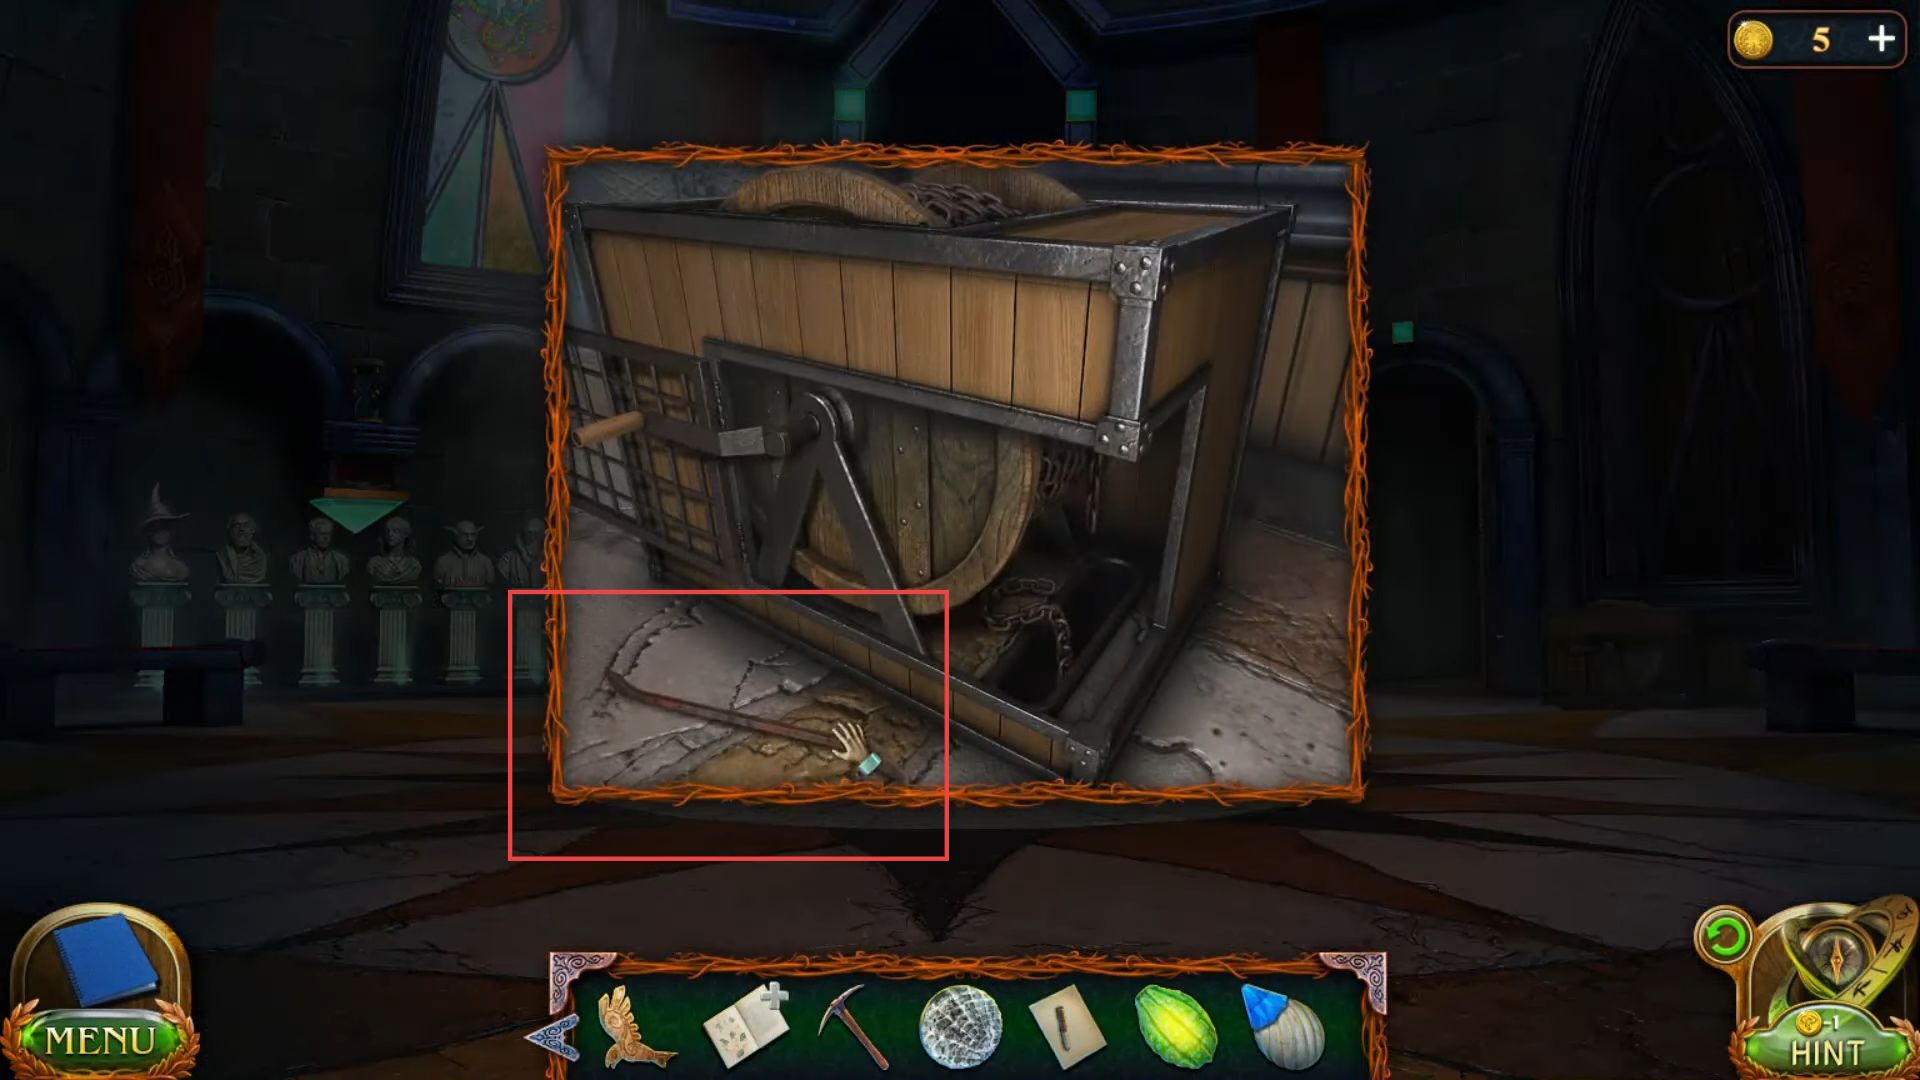
- Use this stick to slide the stone, grab a bottle with coins, break it, and get coins from the inside.
- Grab a bottle shard from the same place into your inventory.

- Go to the Maaron’s hut using the map from the bottom right side.

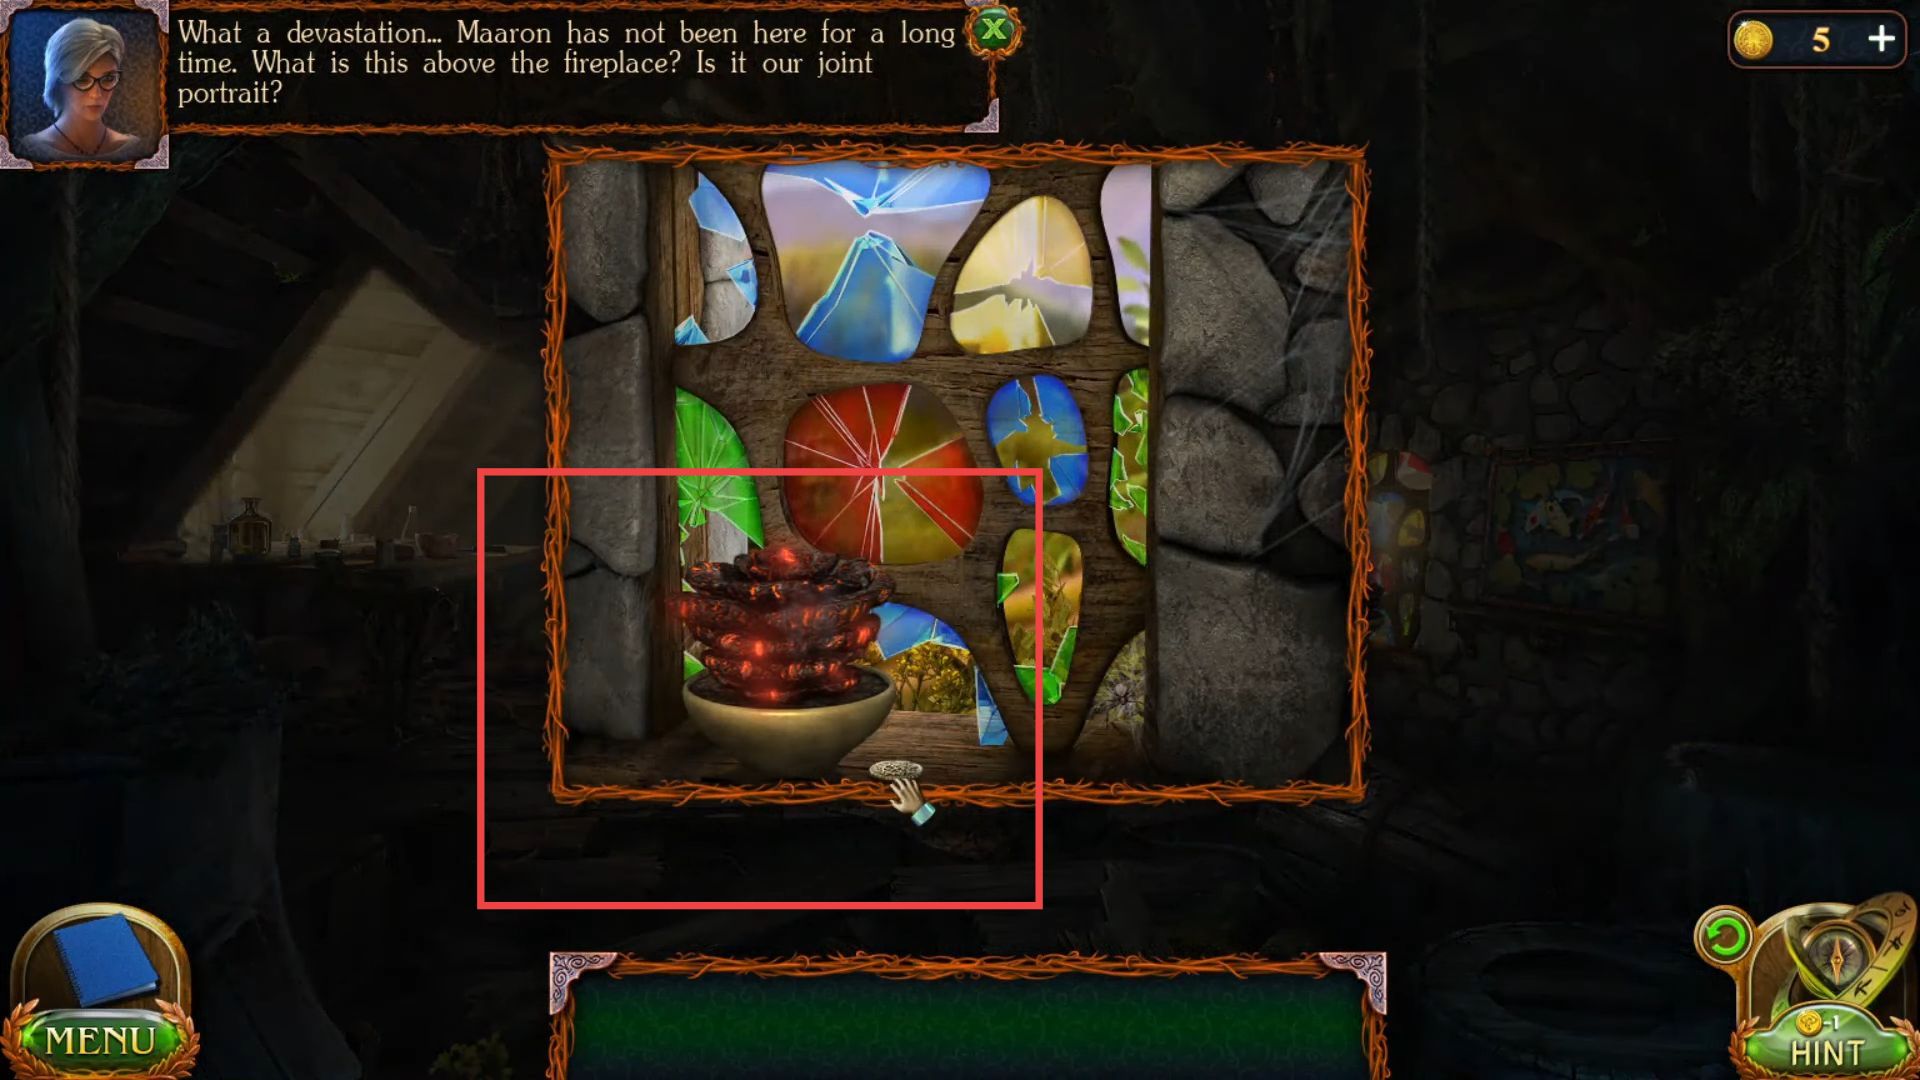
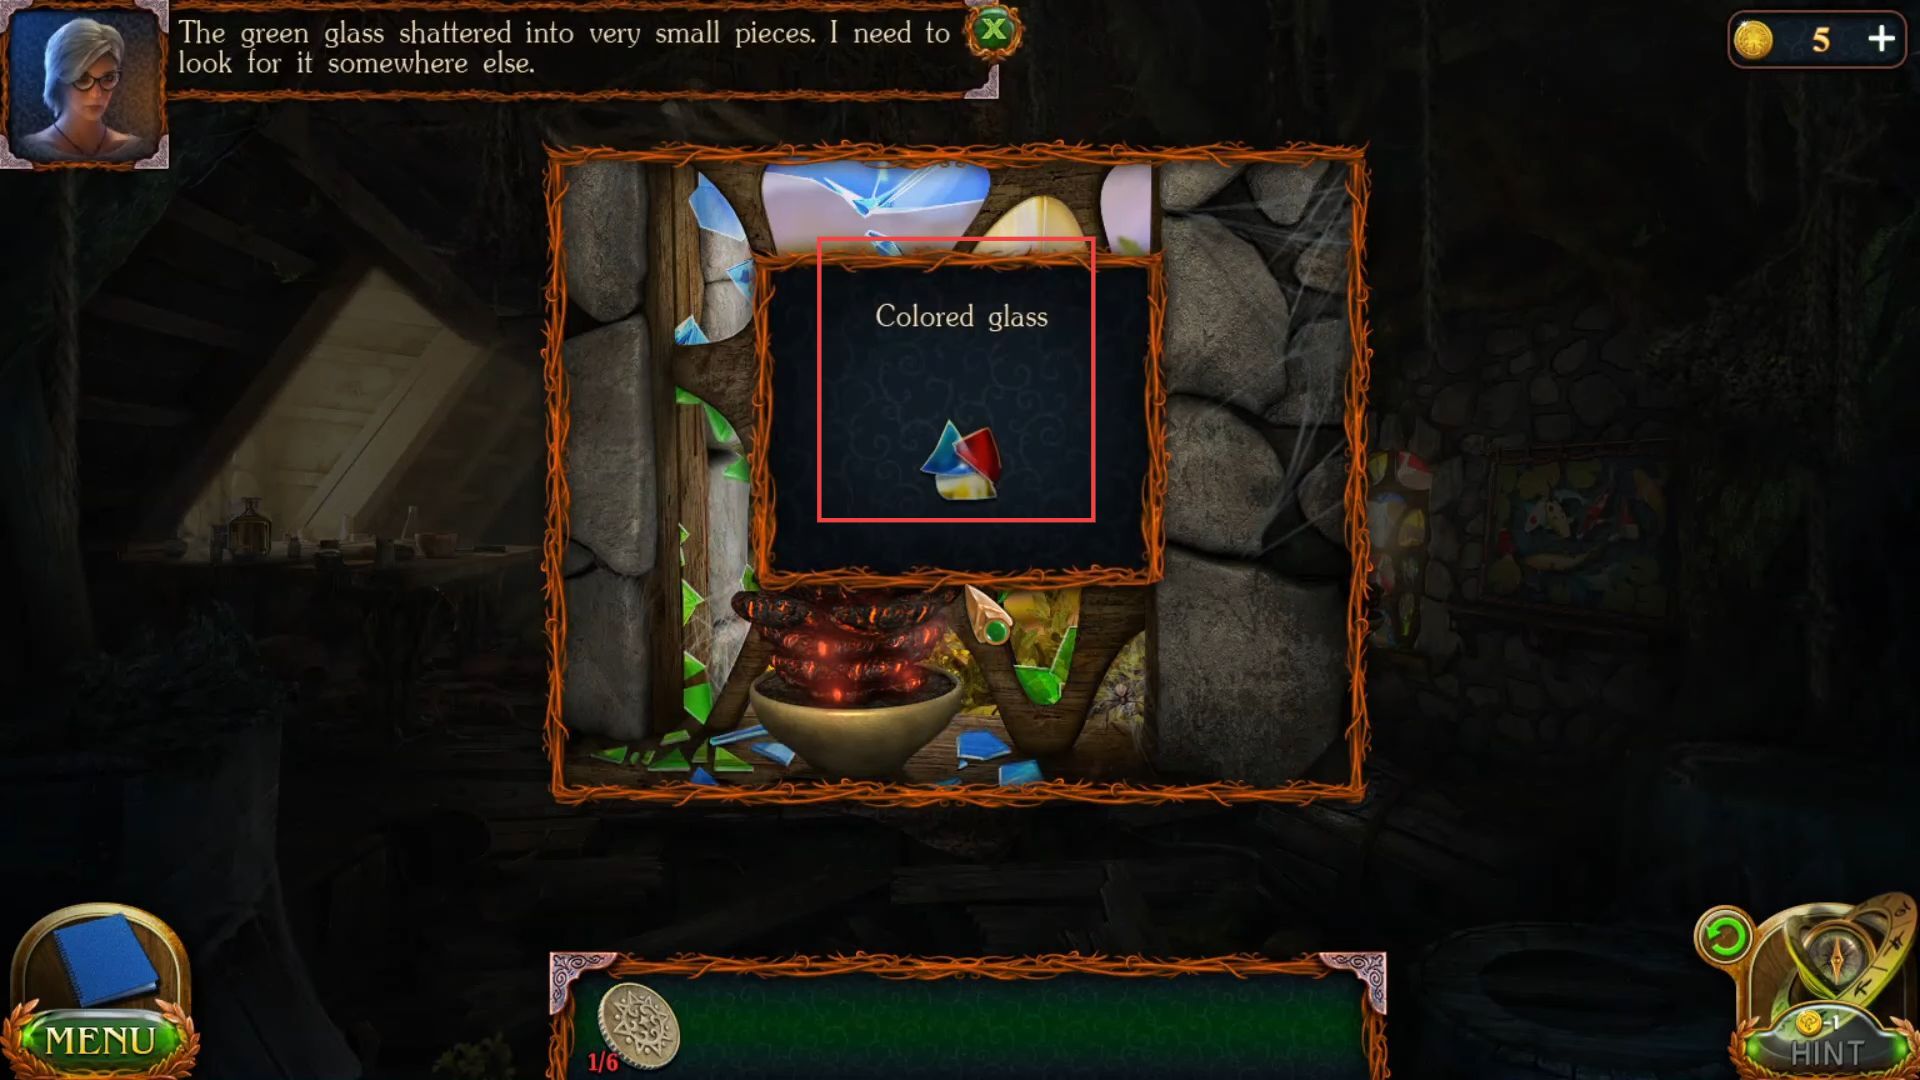
- Put the broken glass pieces and bottle shard on the shelf. Place the pieces on the board to get different clues.
- Go outside the garden and grab poppy seeds from the bunch of flowers.

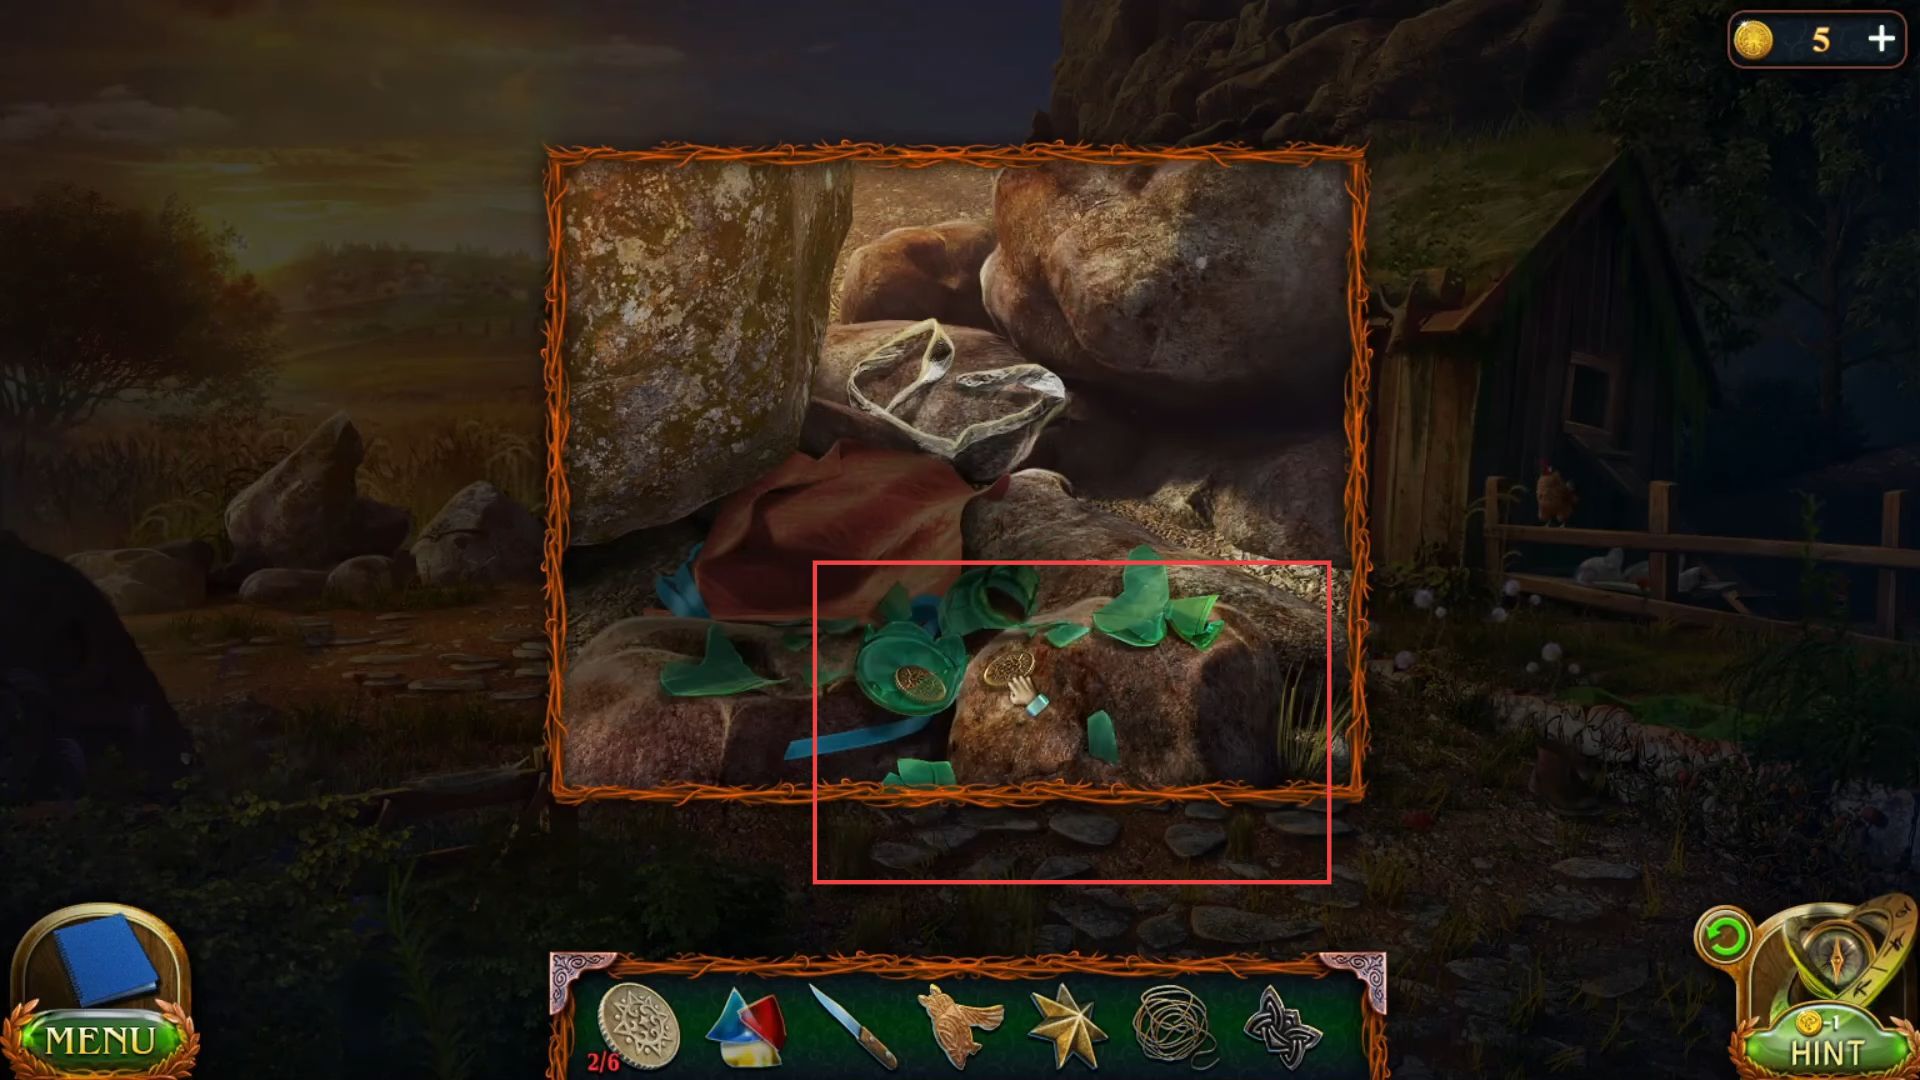
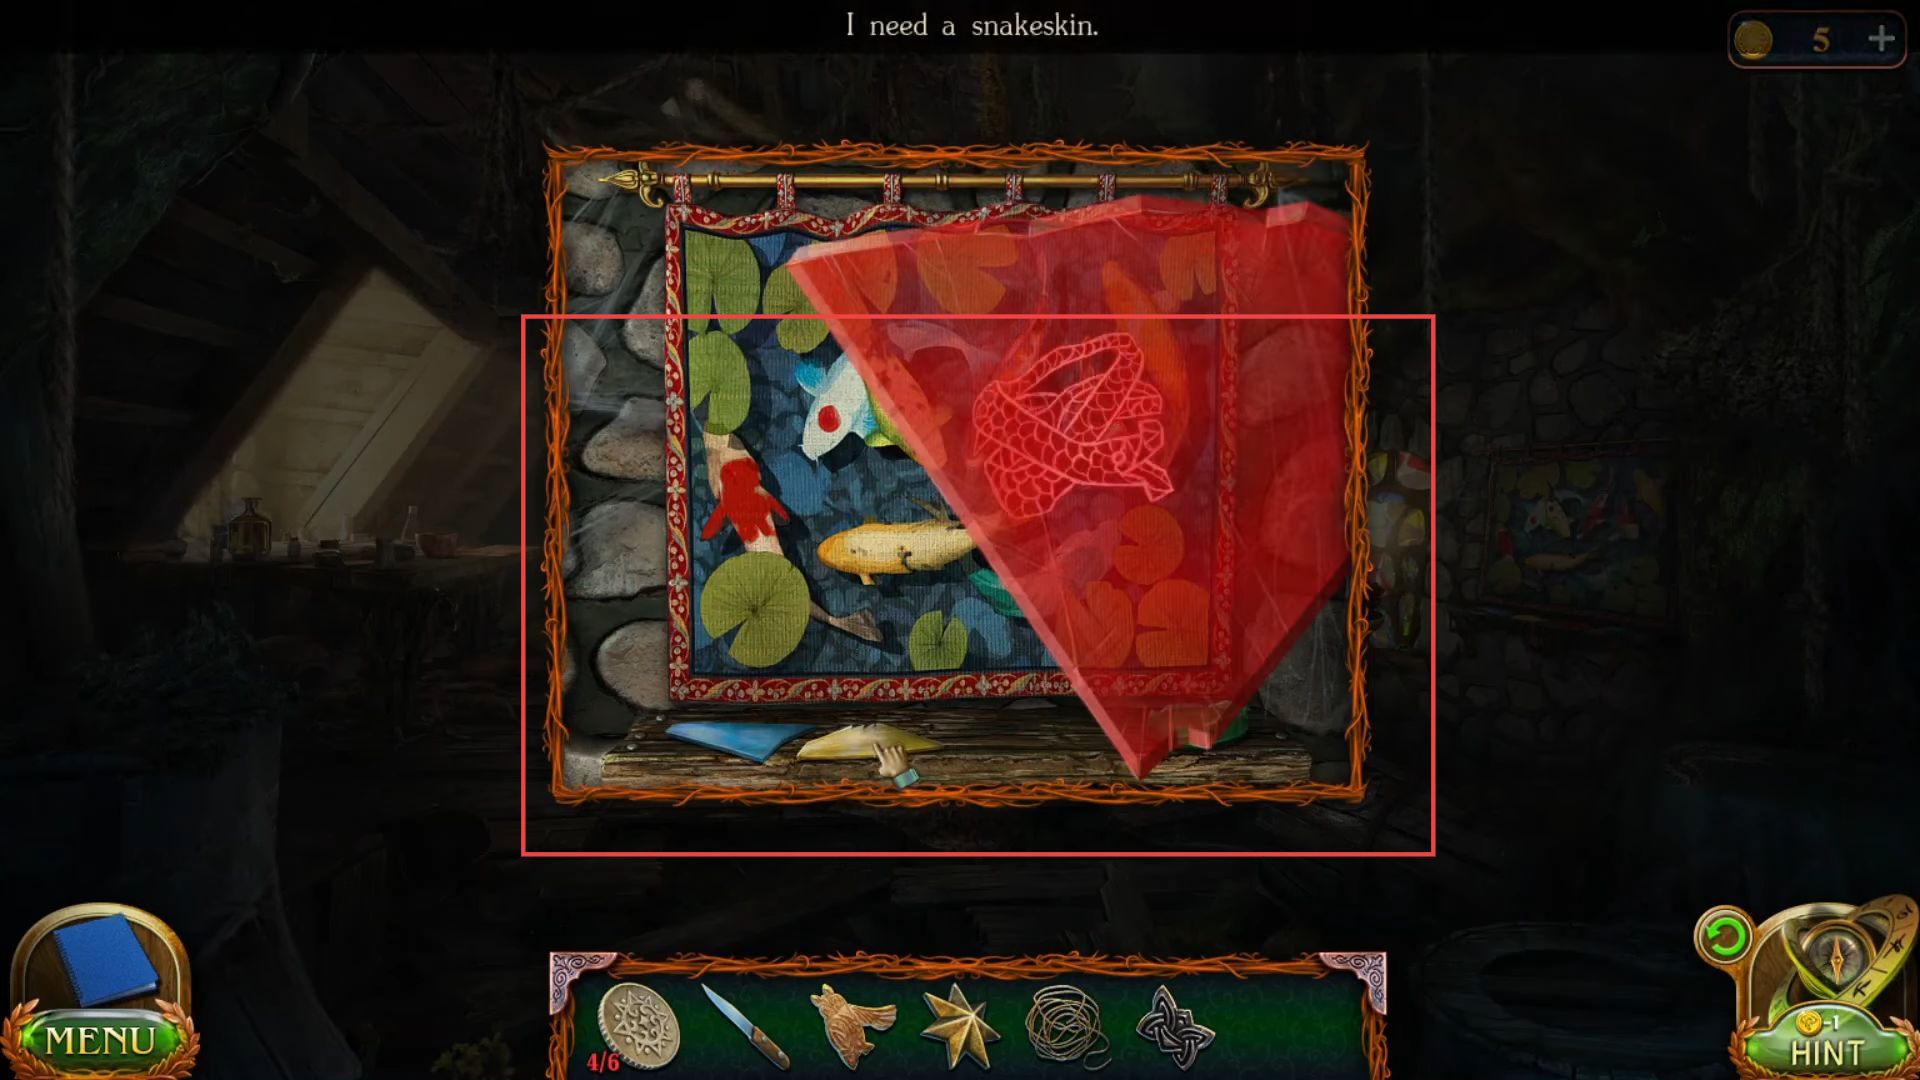
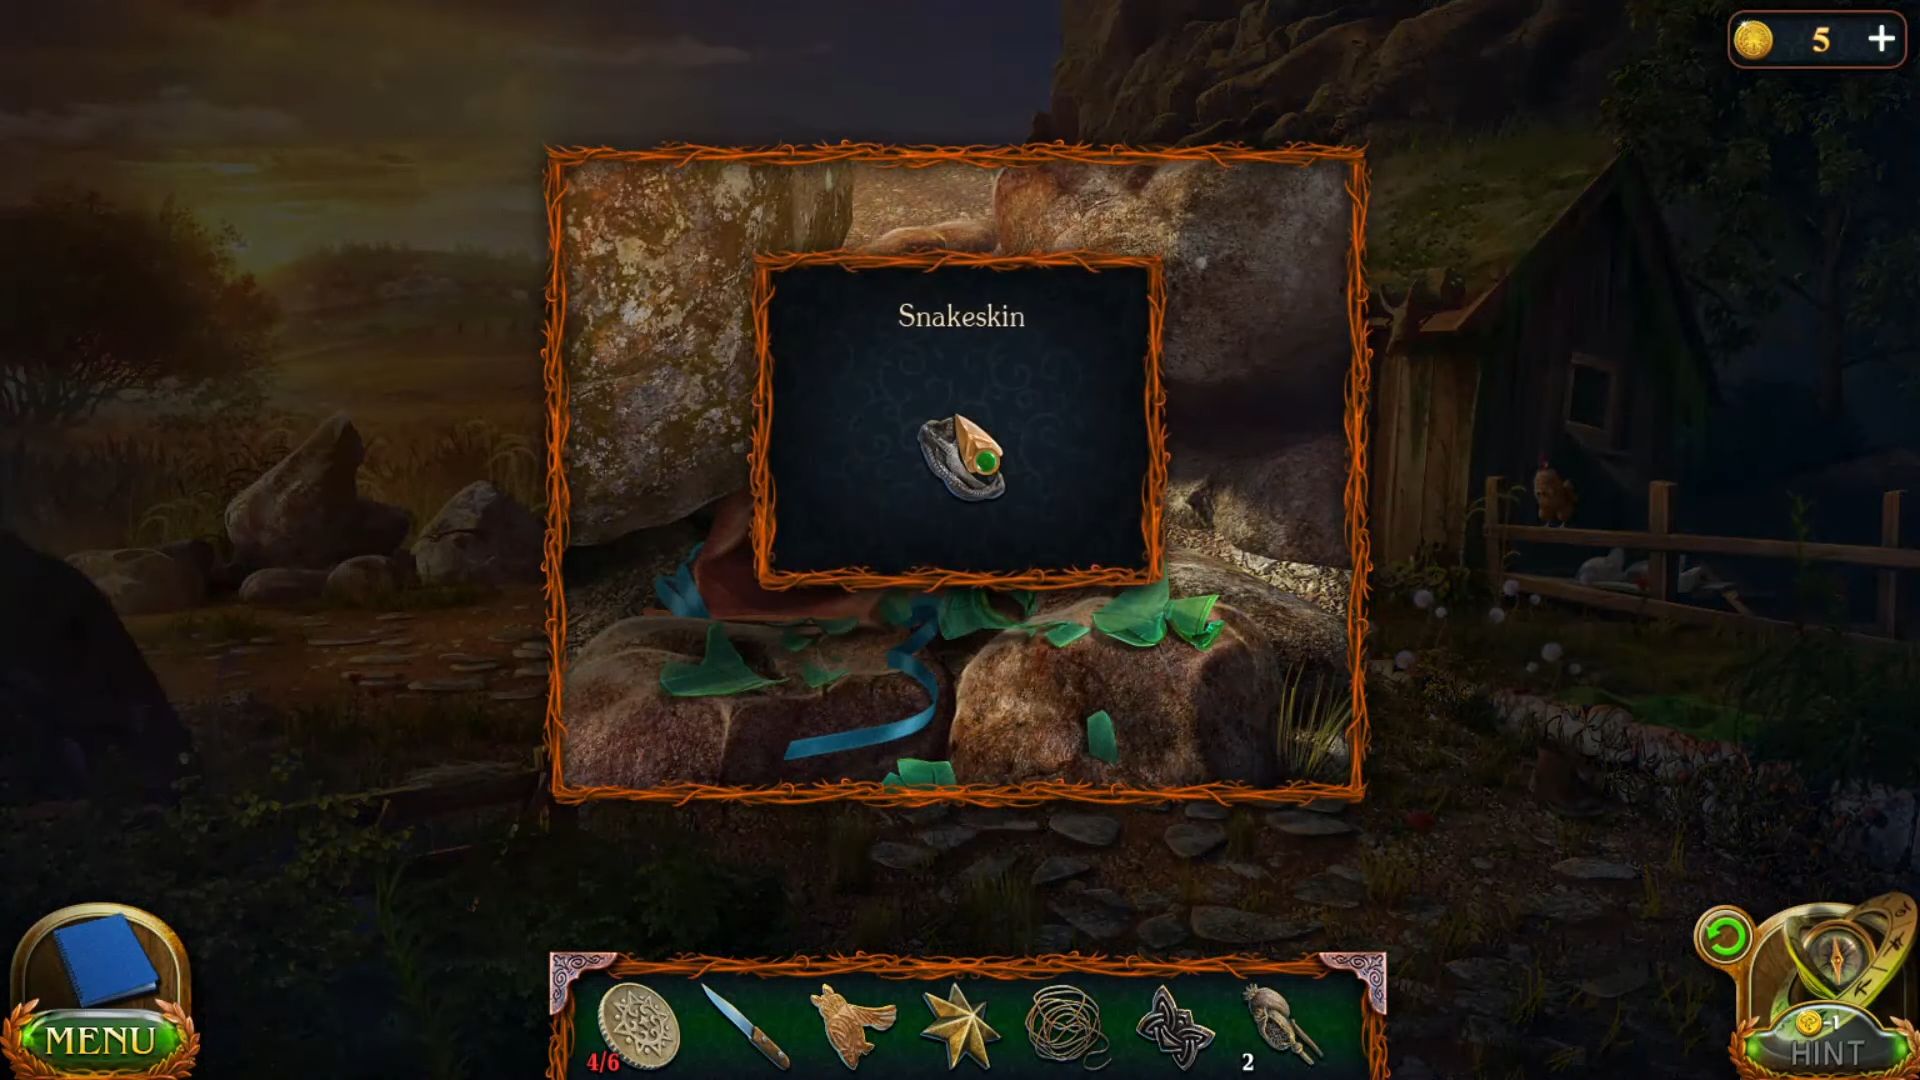
- Get a snakeskin from the stones with the broken bottle.
- Go inside the hut and grab eggshells from the hen’s shelf.

- Go next to the hut and grab another coin from the tree.

- Cut the ribbon using the knife to get another coin.
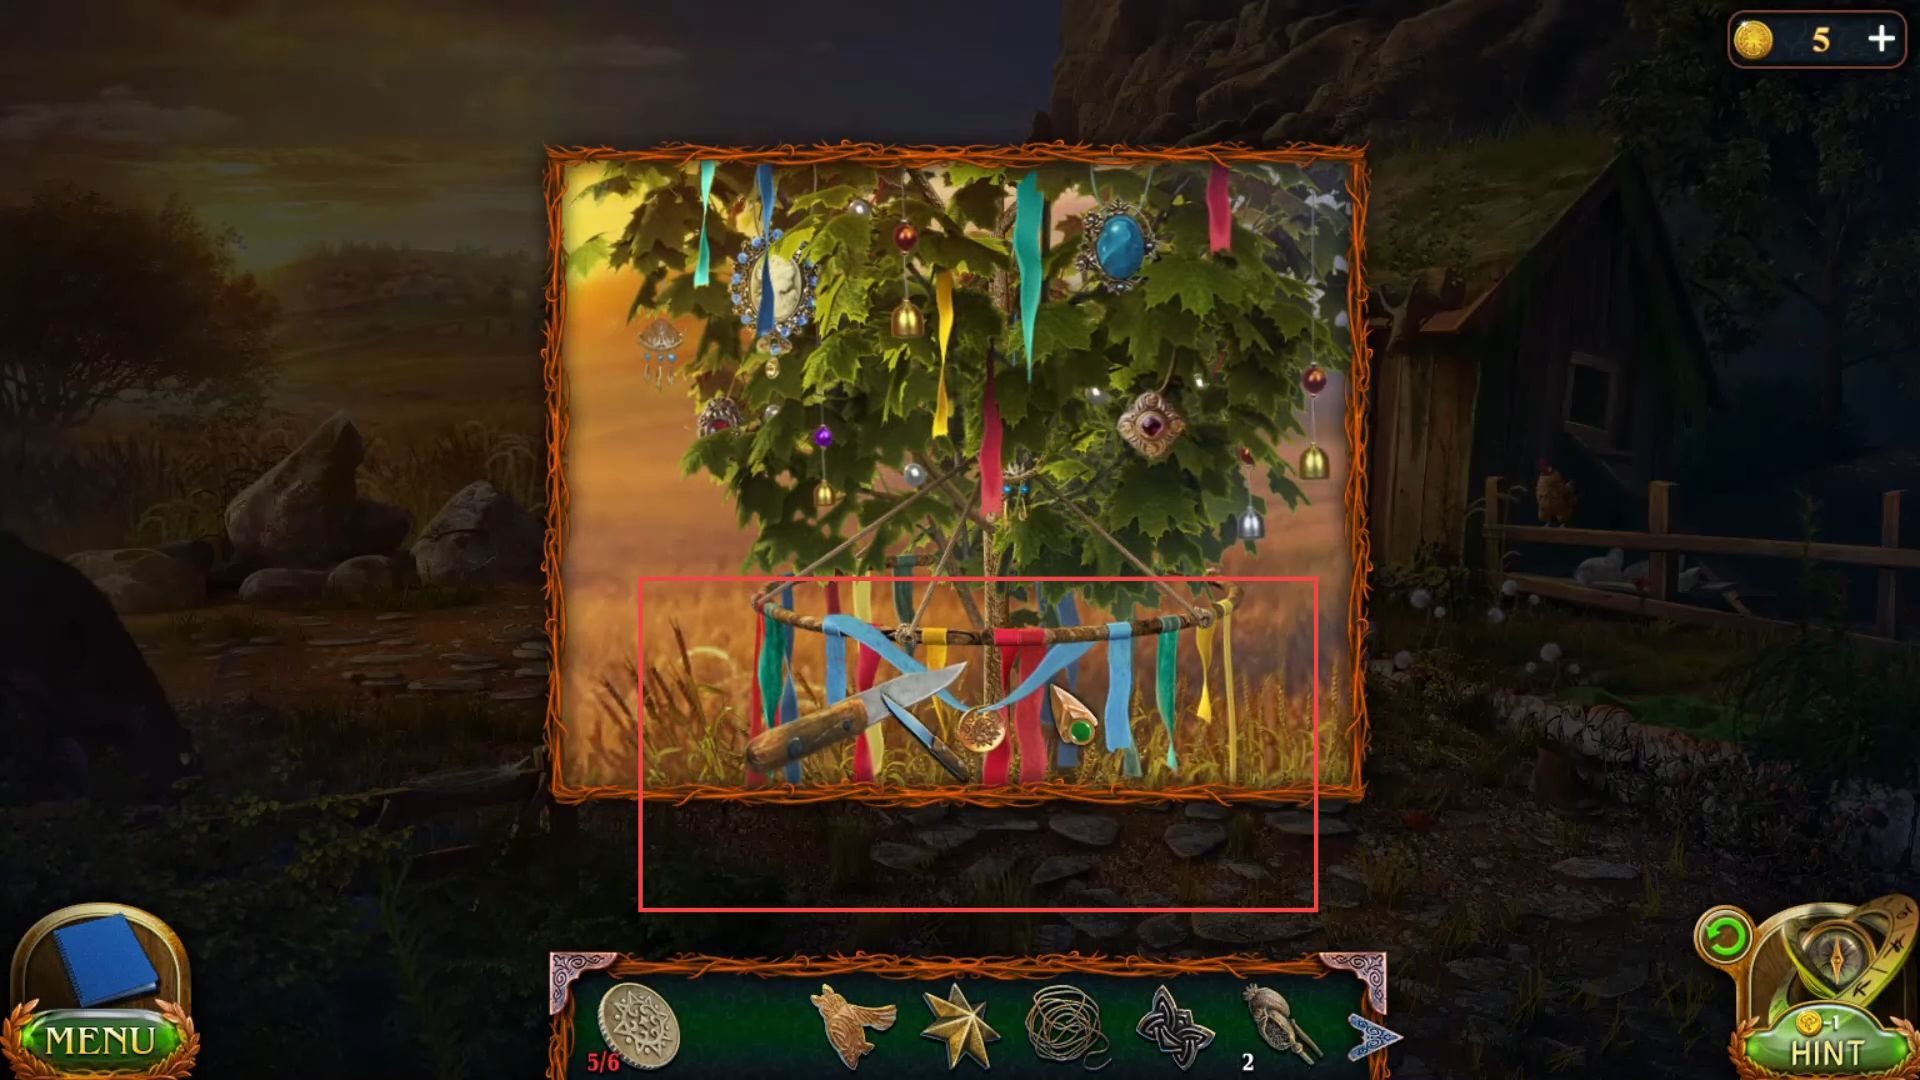
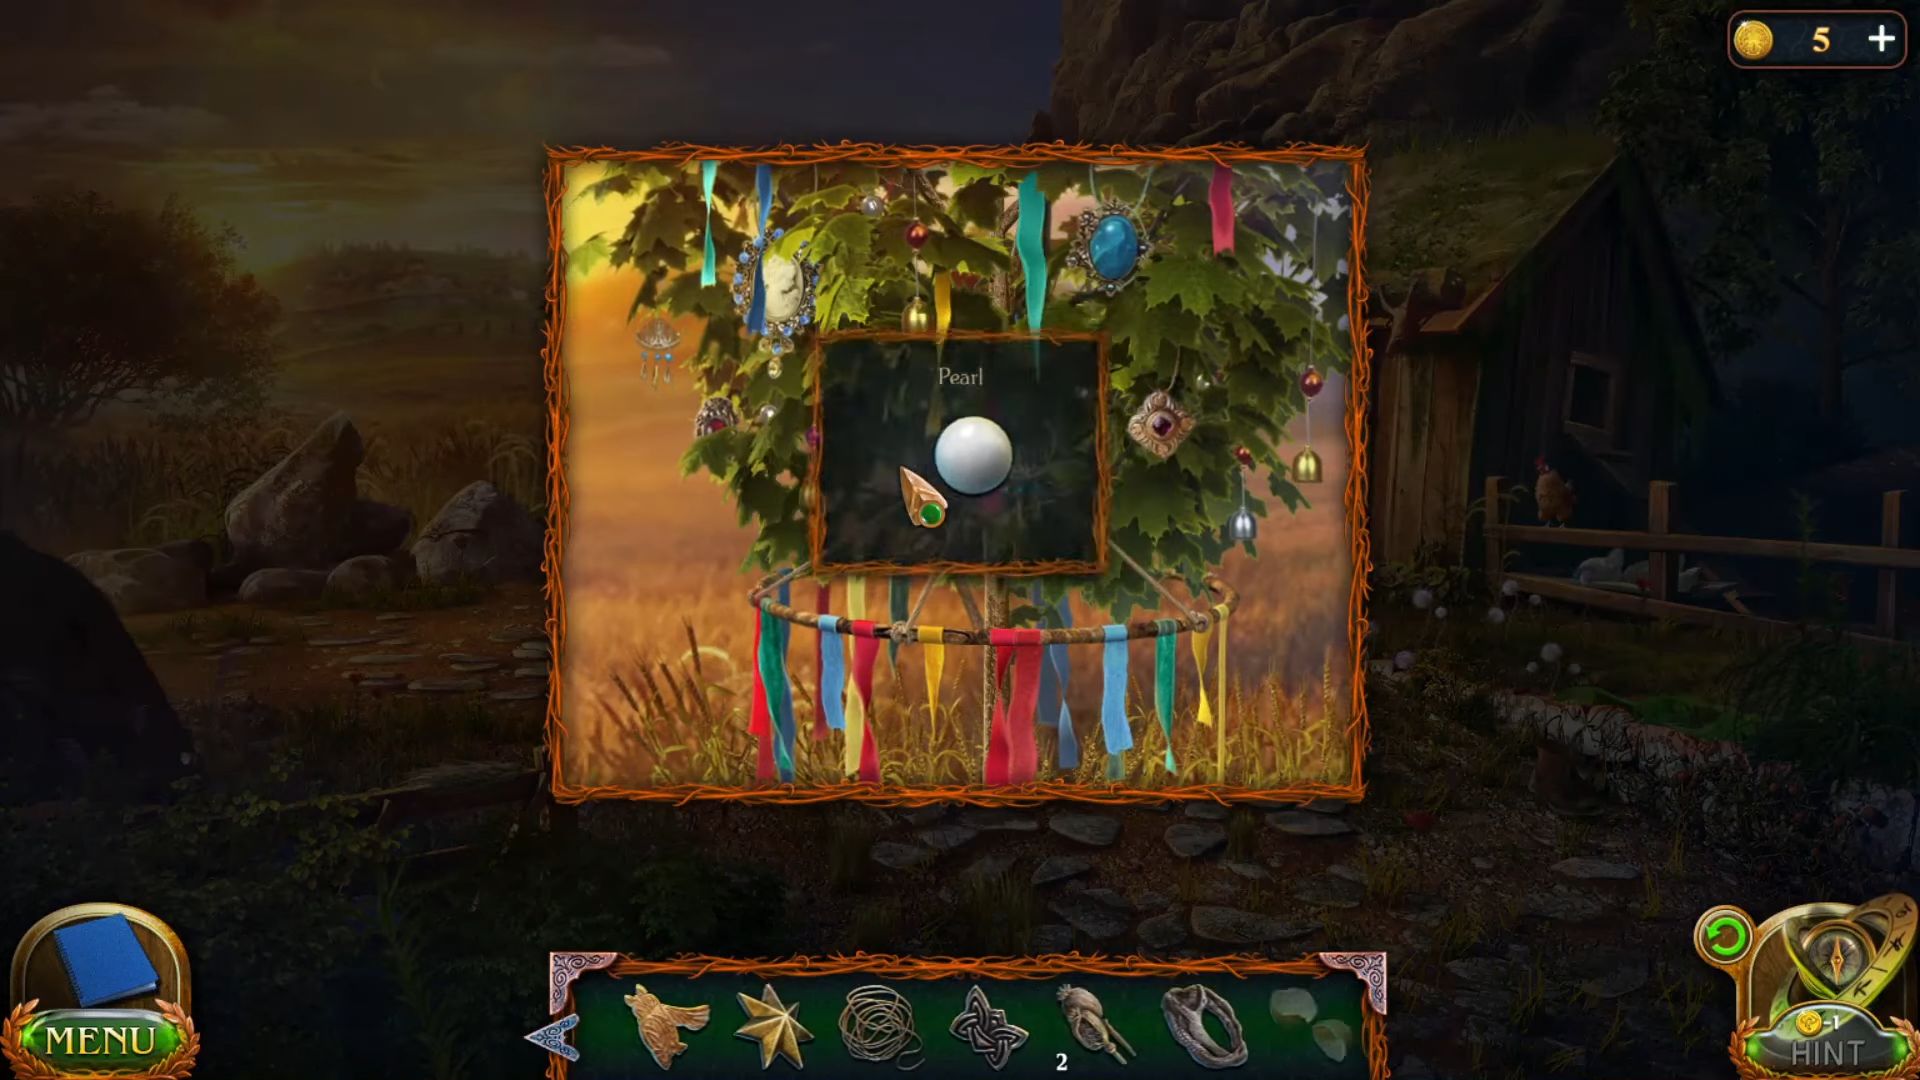
- Grab a pearl from the same place.
- Put the snakeskin, poppy seed, pearl, and eggshell on the table from the Maaron’s hut.

- Add all these items into the bowl and grind them using the pin.

- Put this mixture of invisible light into your inventory.

- Pour this mixture into the pool near the tree.

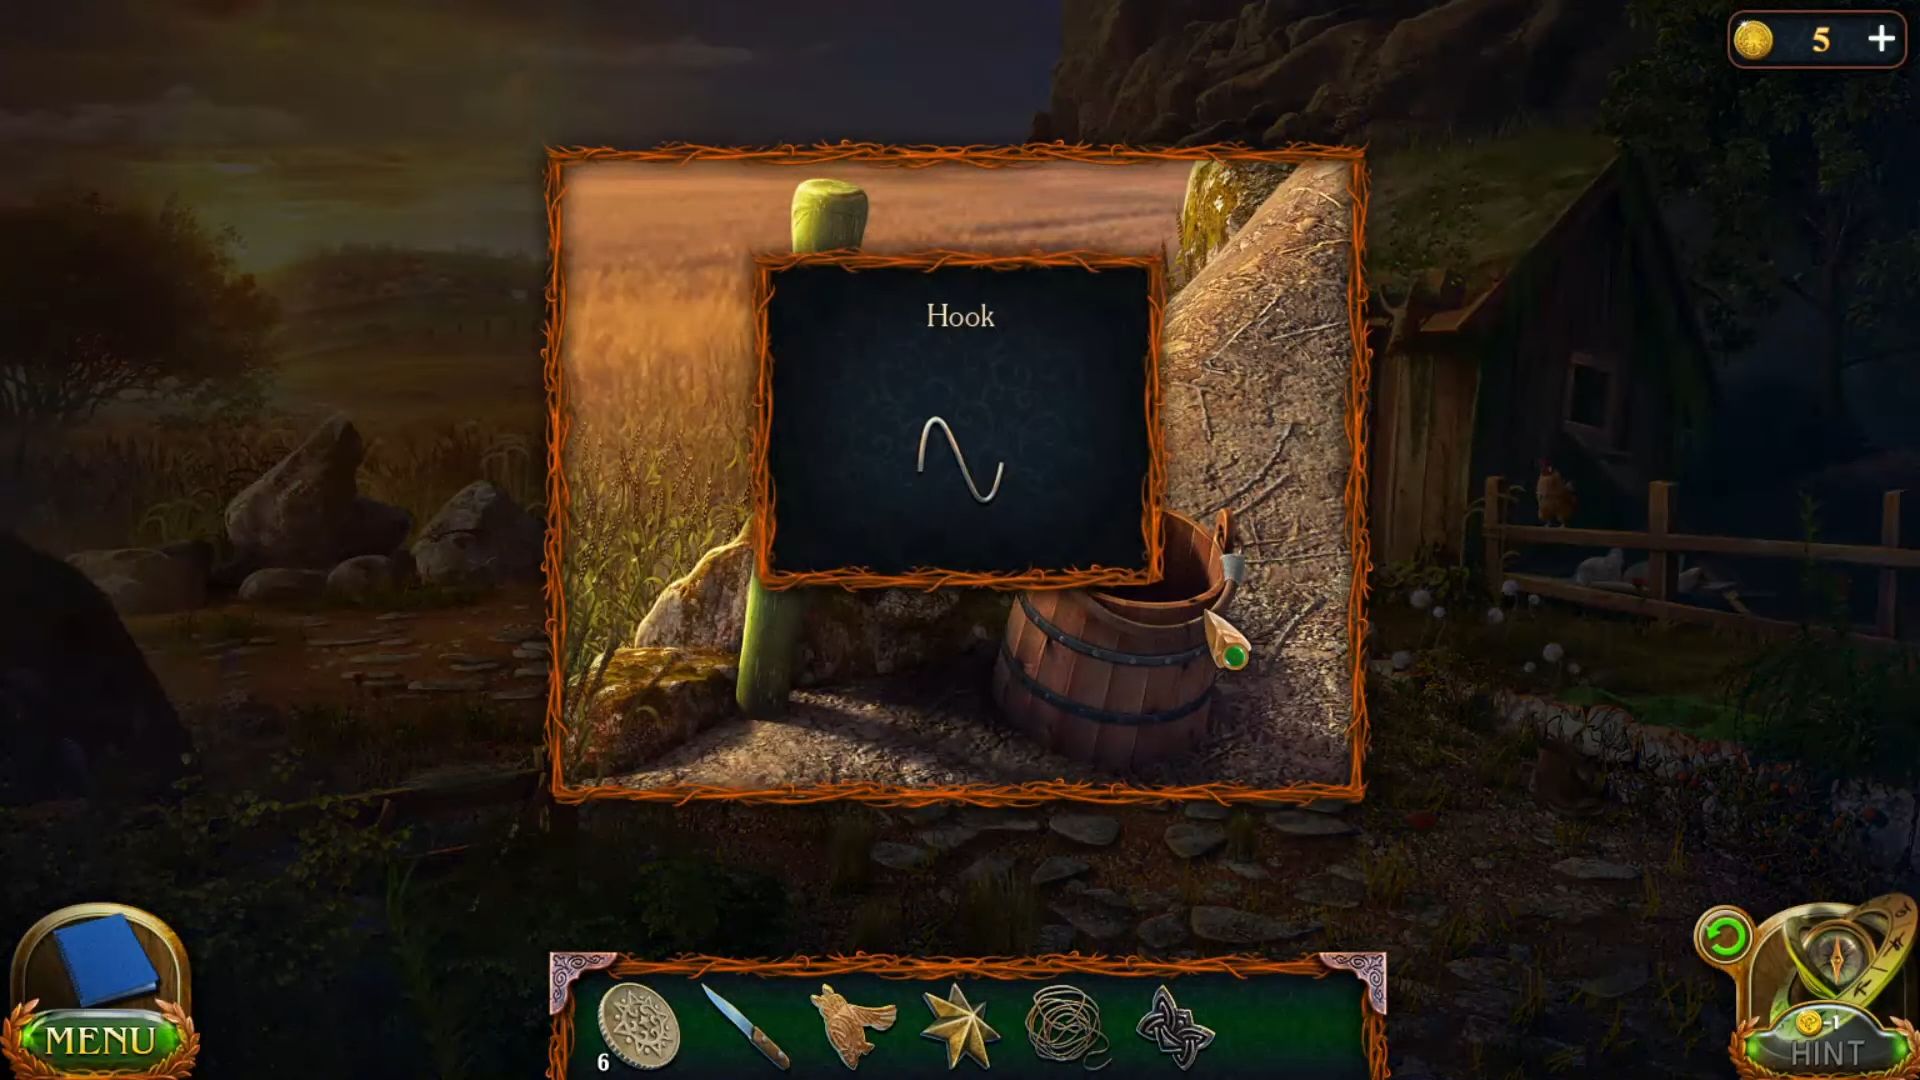
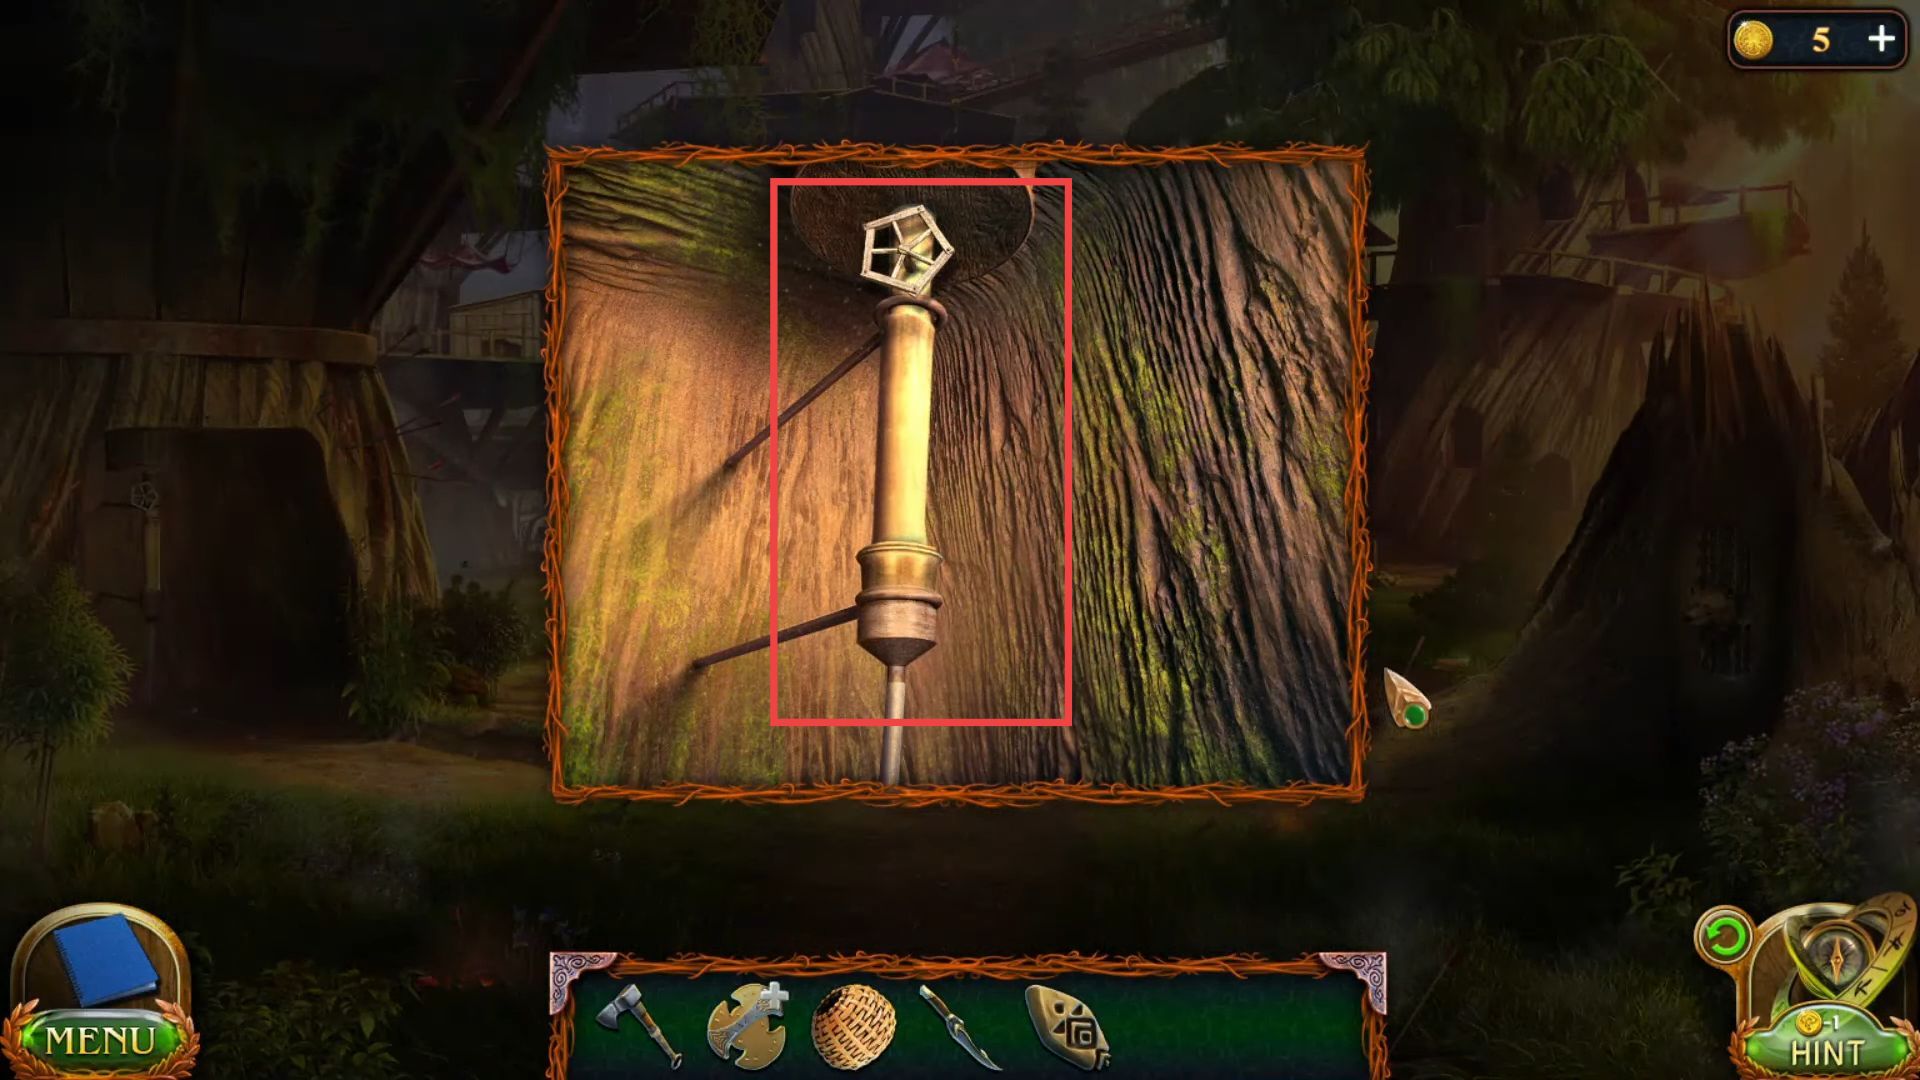
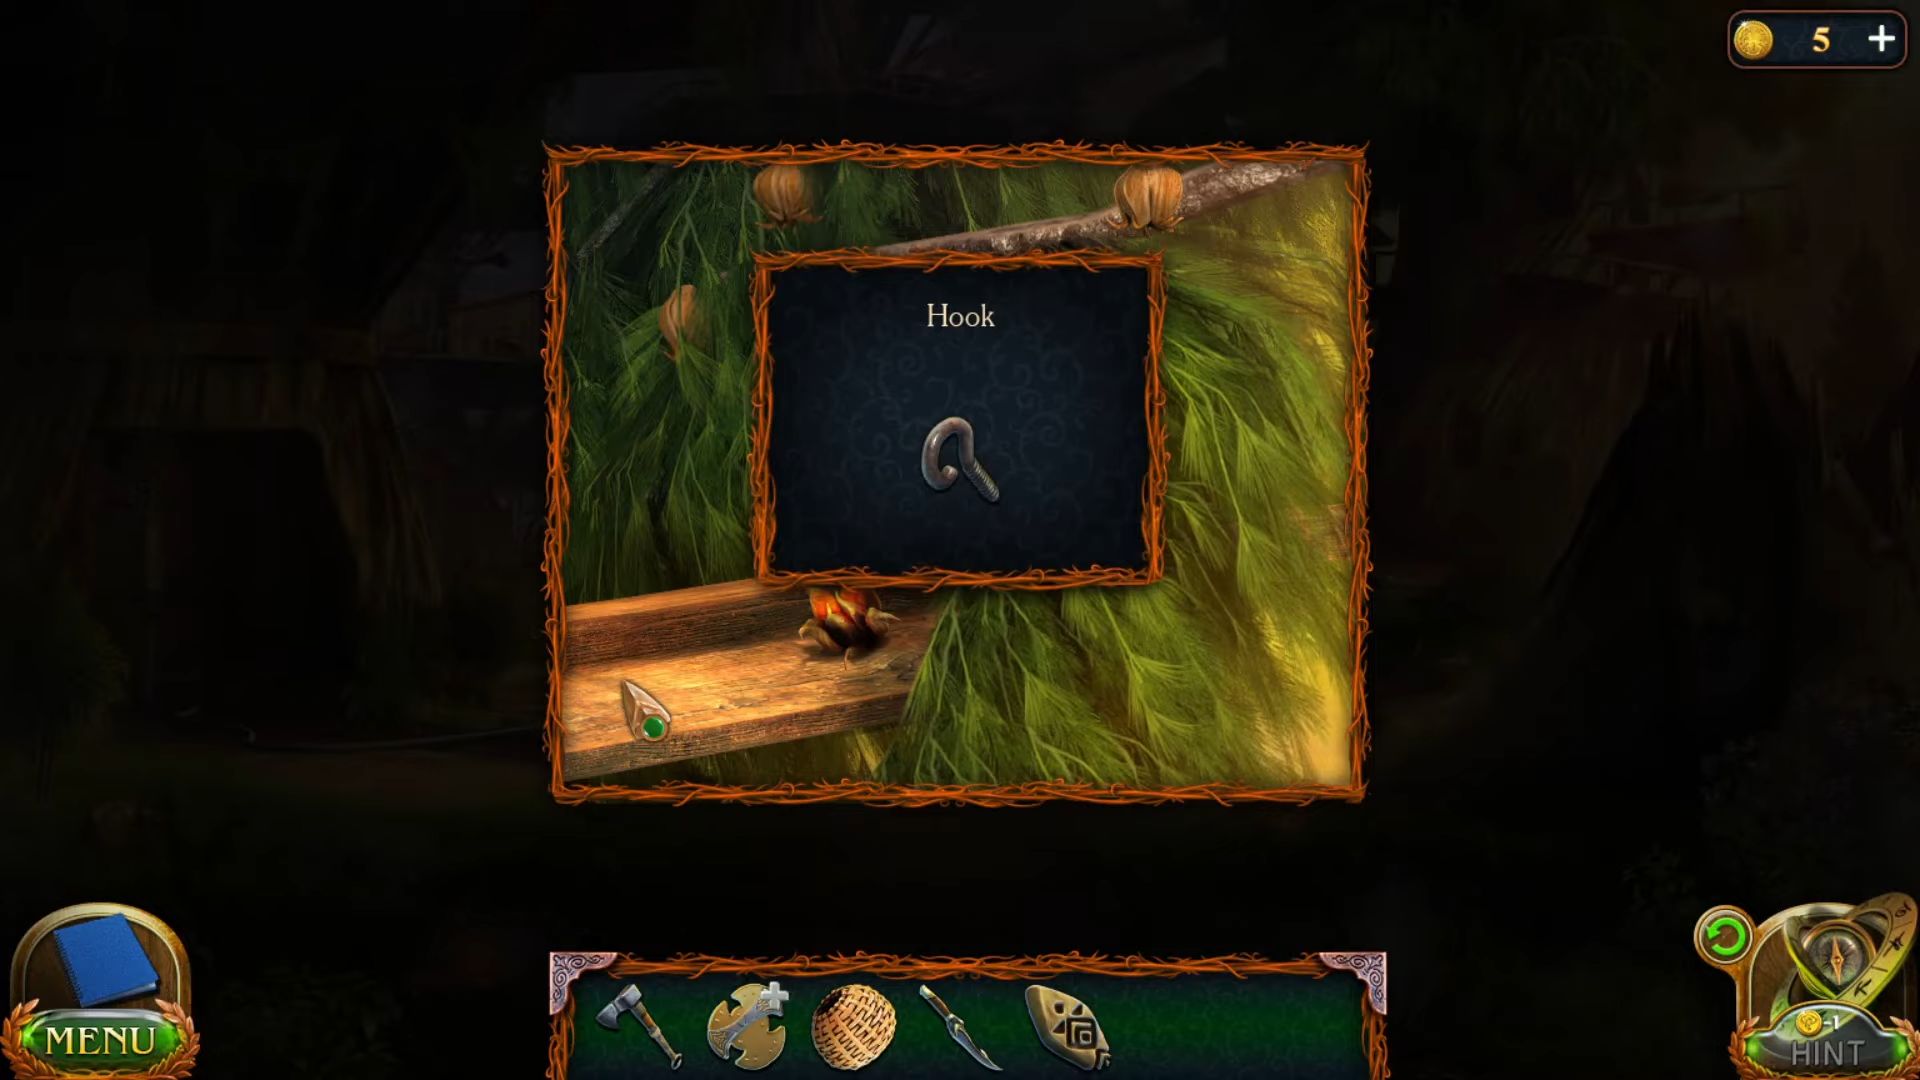
- Grab the hook from the side of the hut.
- Tie the rope with the hook from your inventory.

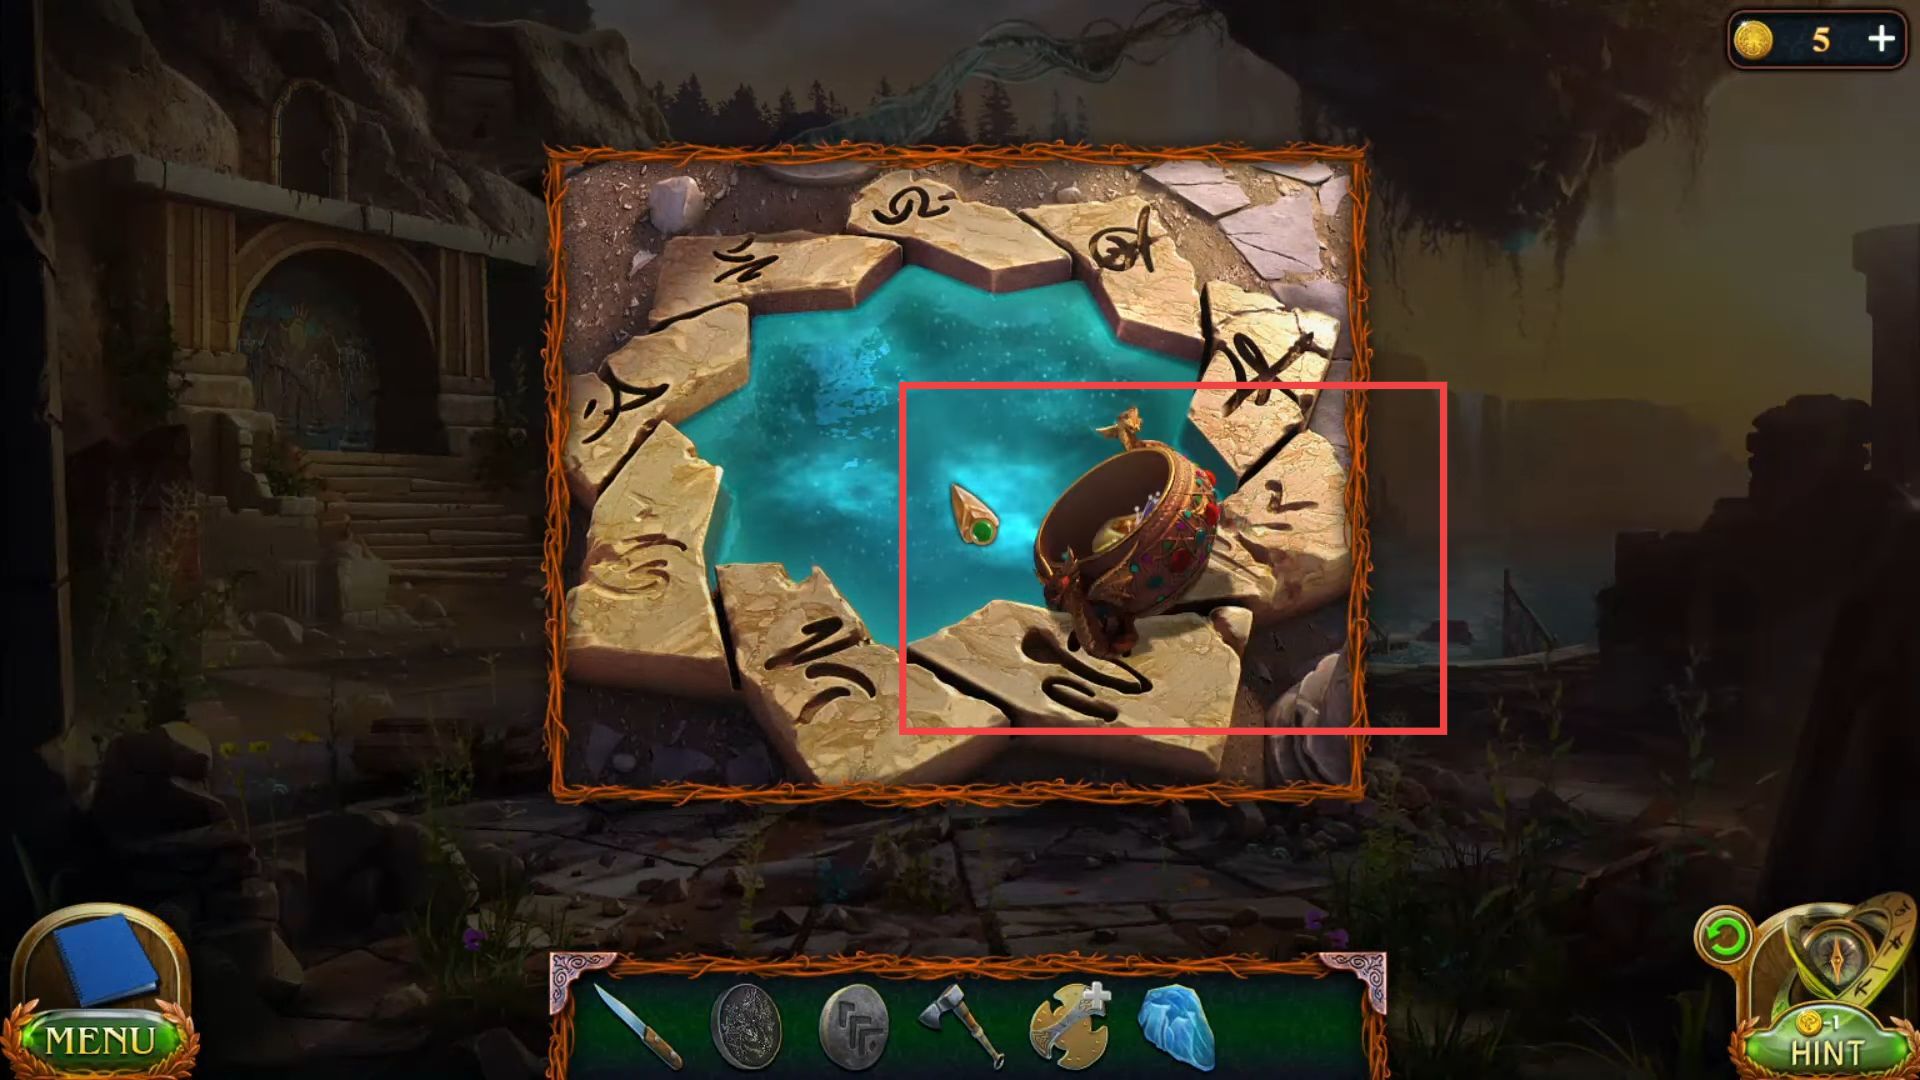
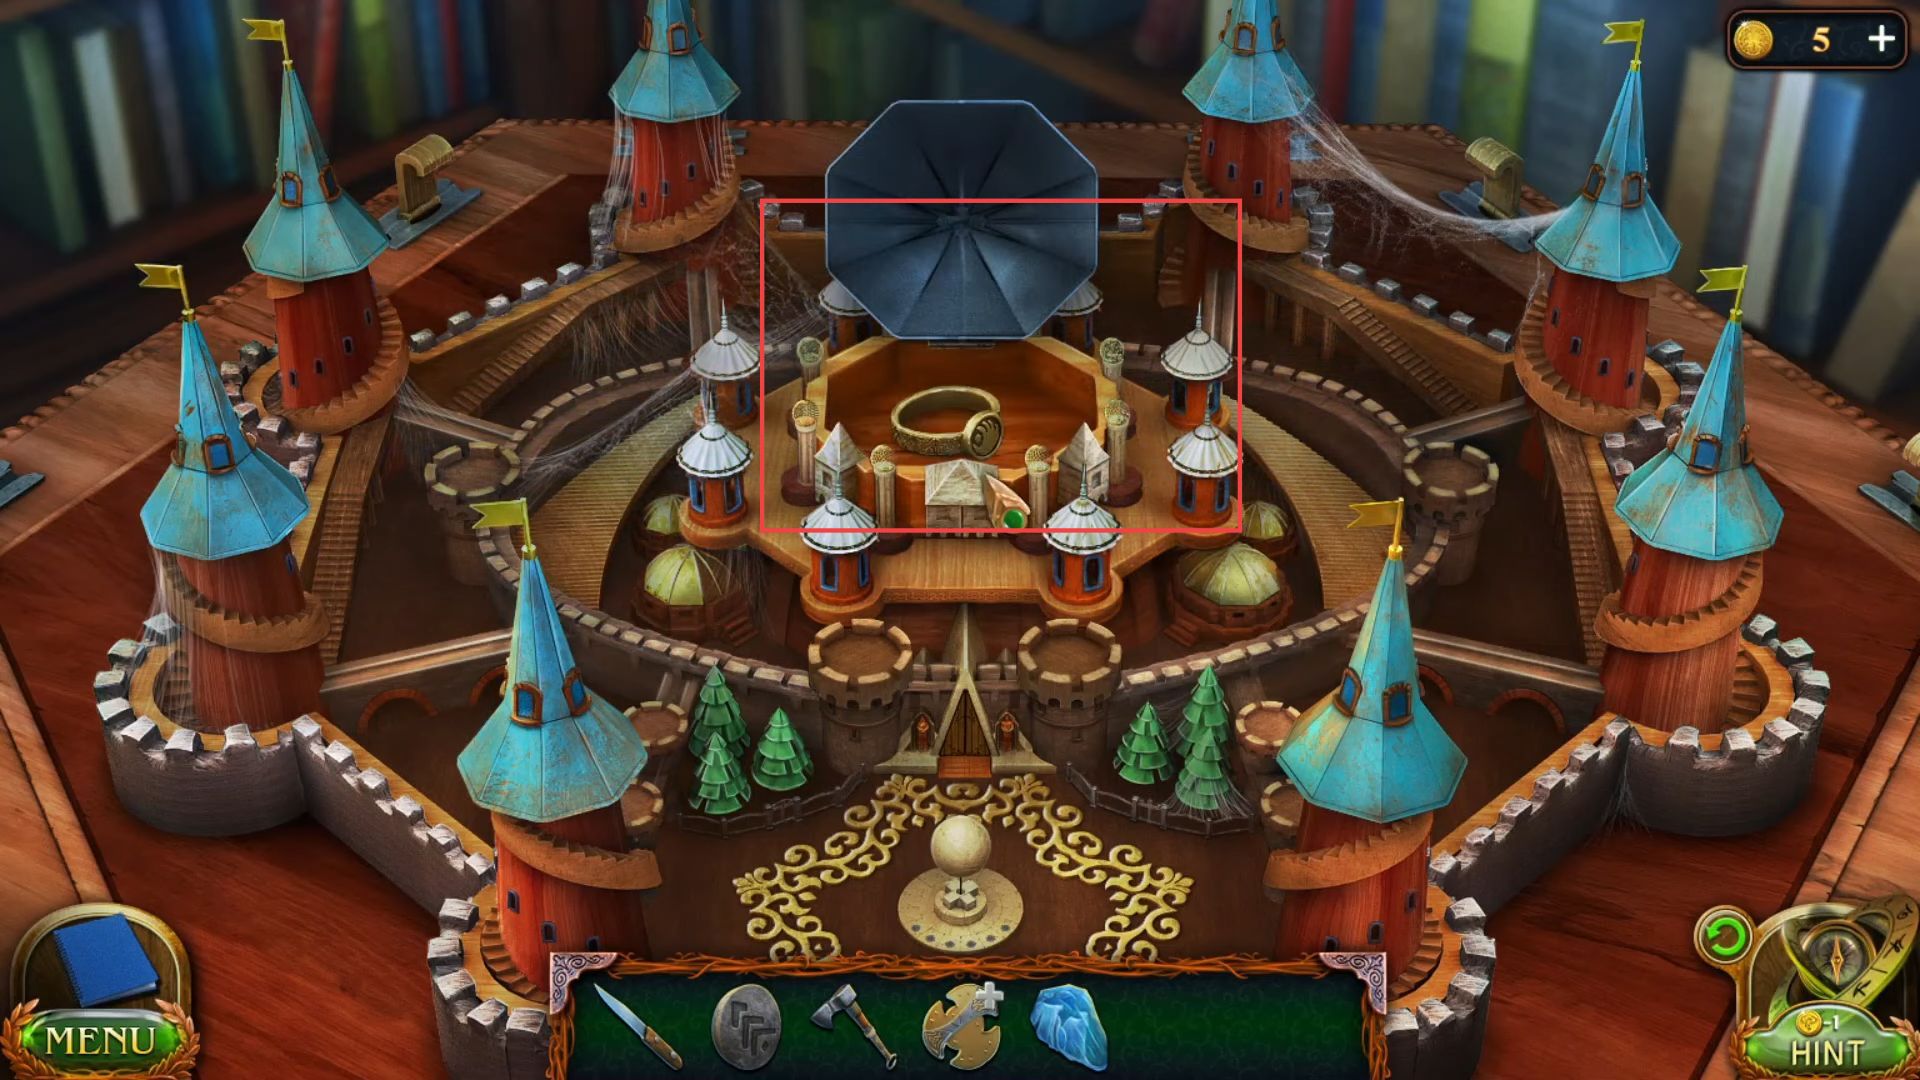
- Throw the hook into the pool to get the box from the inside.

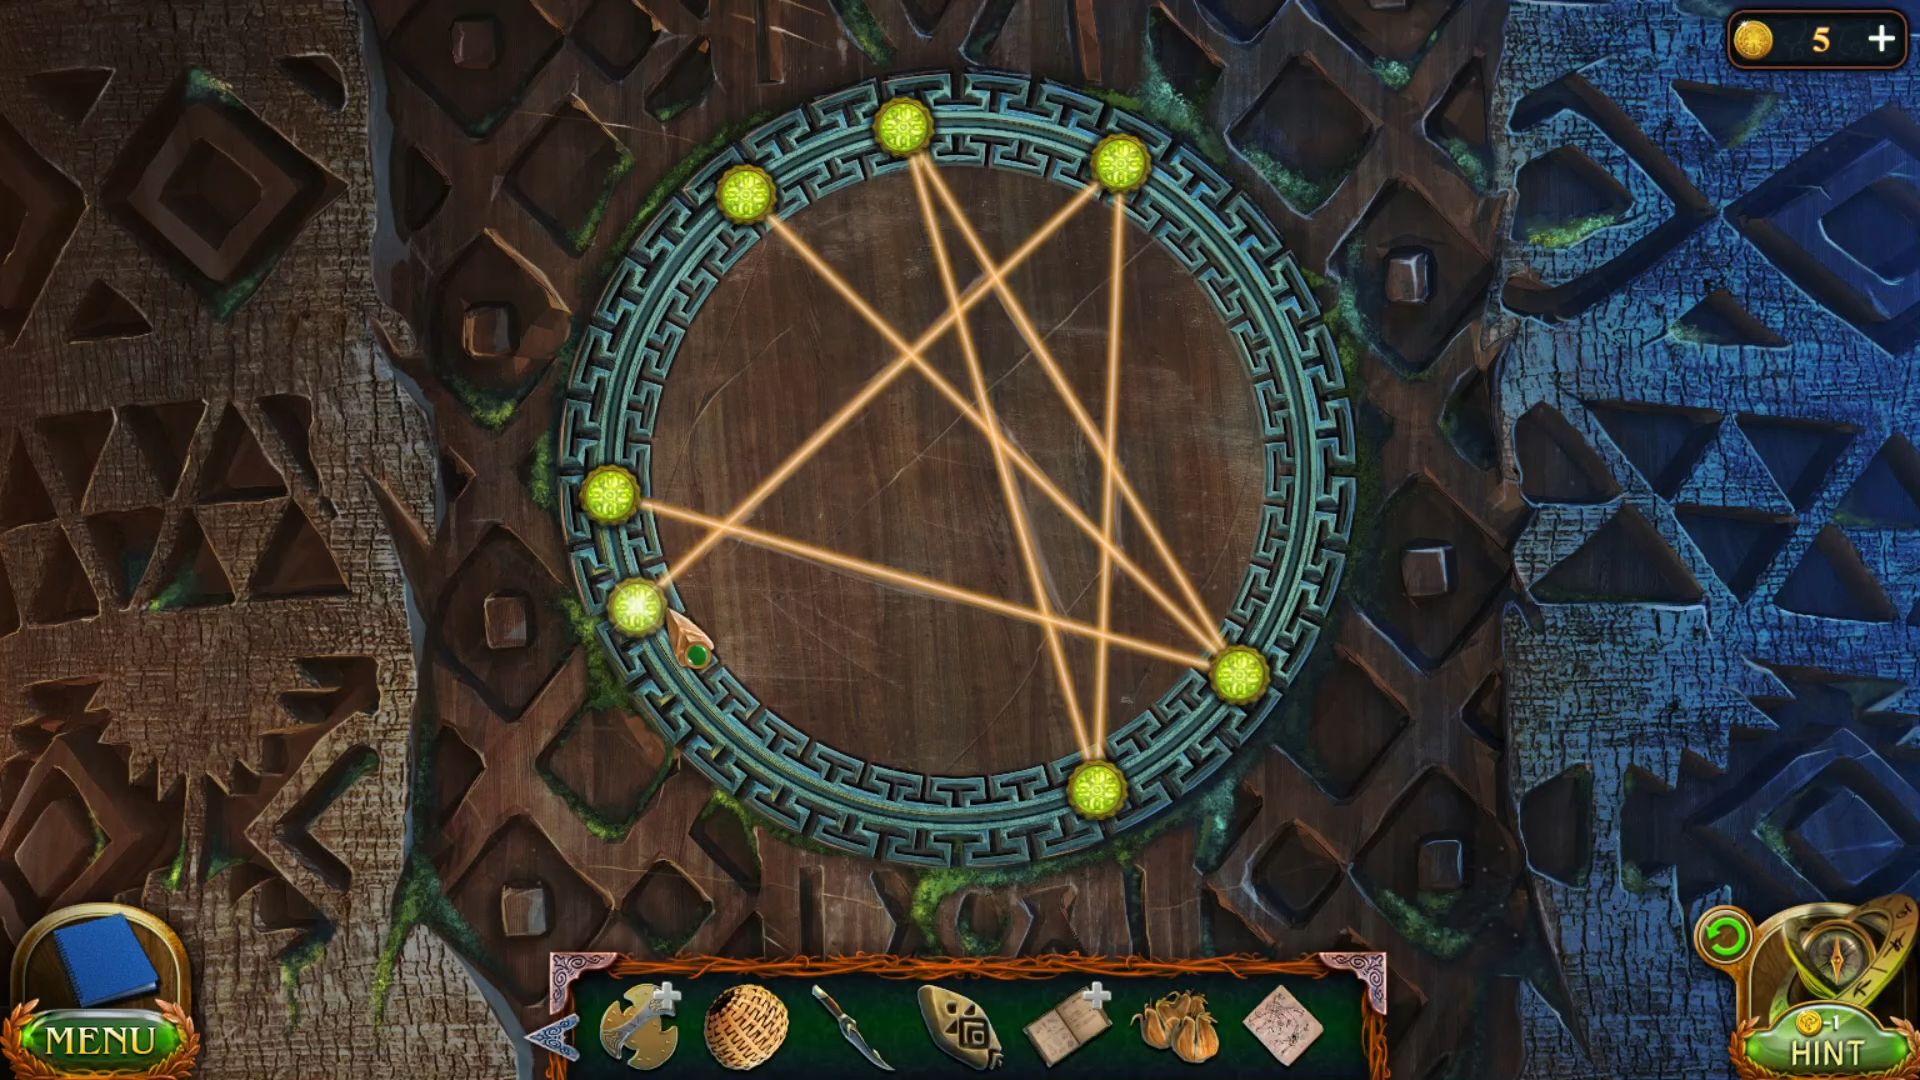
- Place the star emblem into the box.

- Put the coins in the locker of the box.

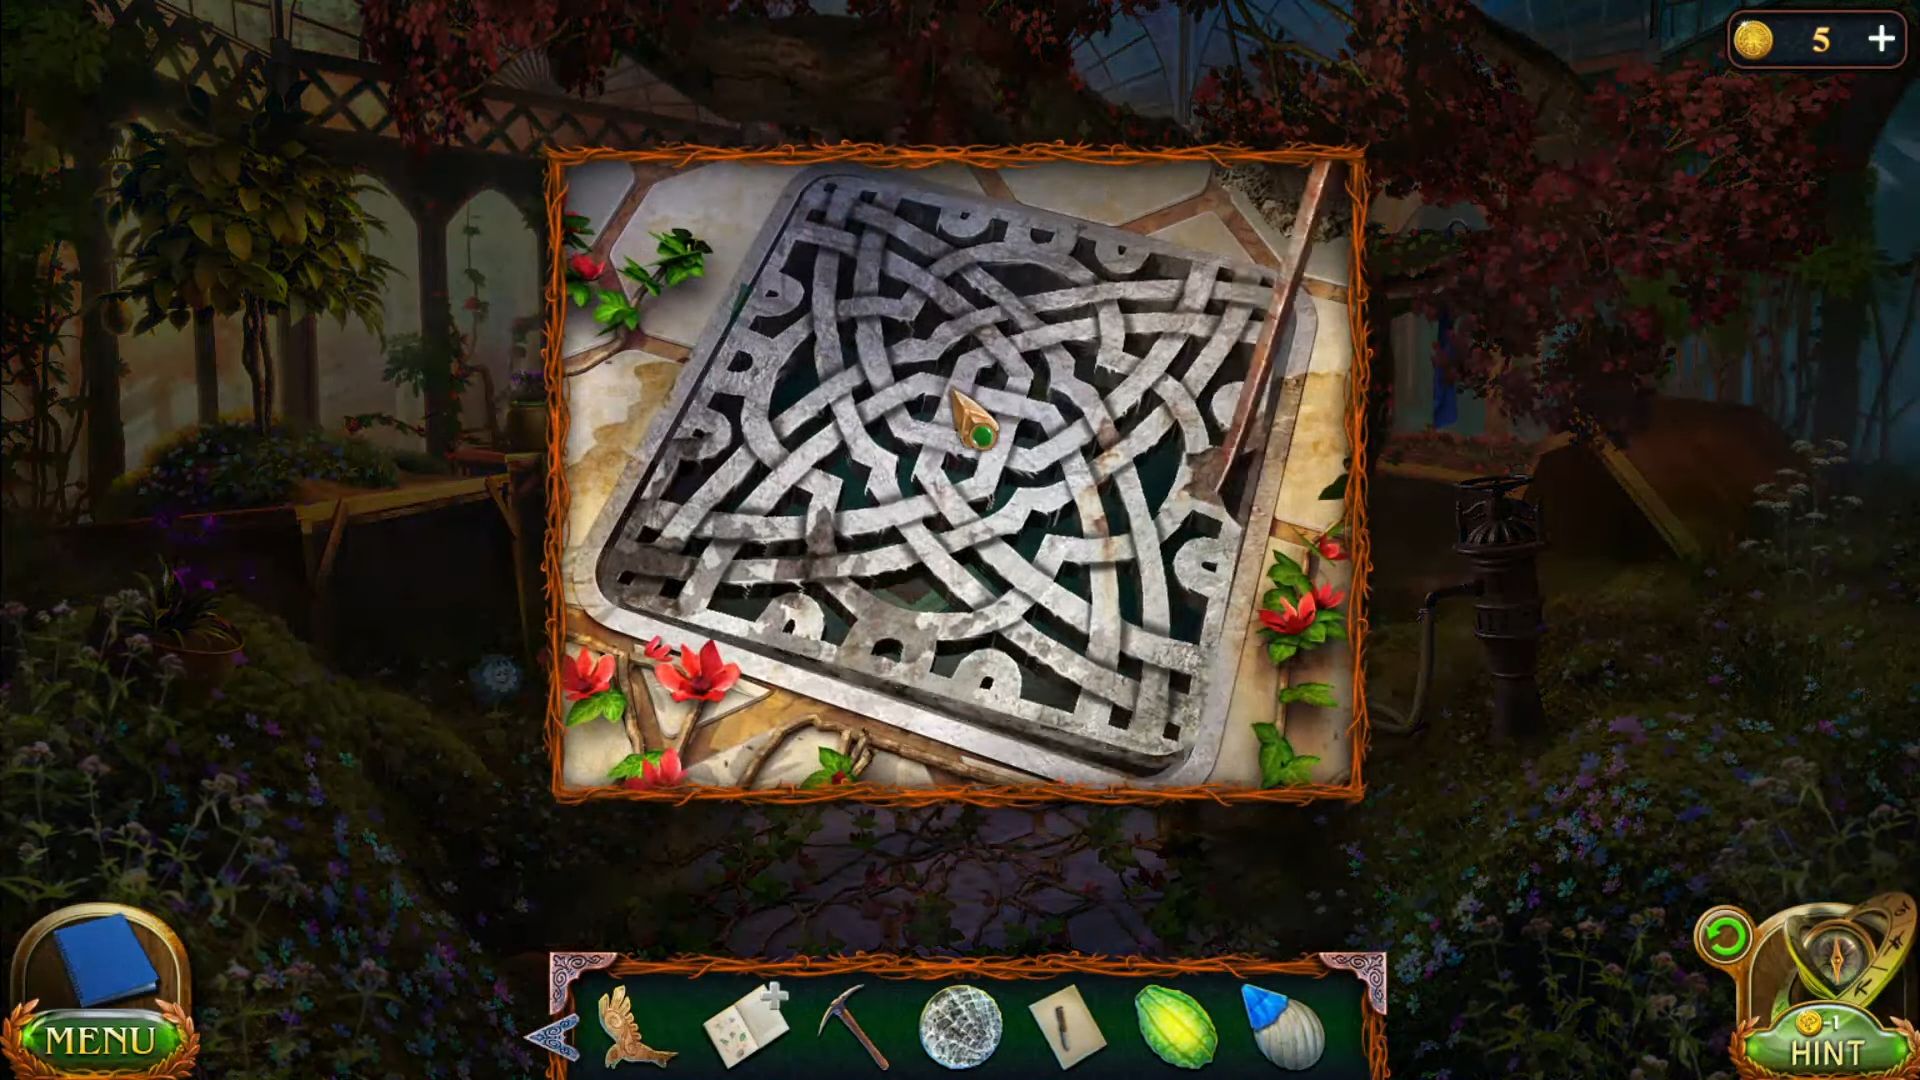
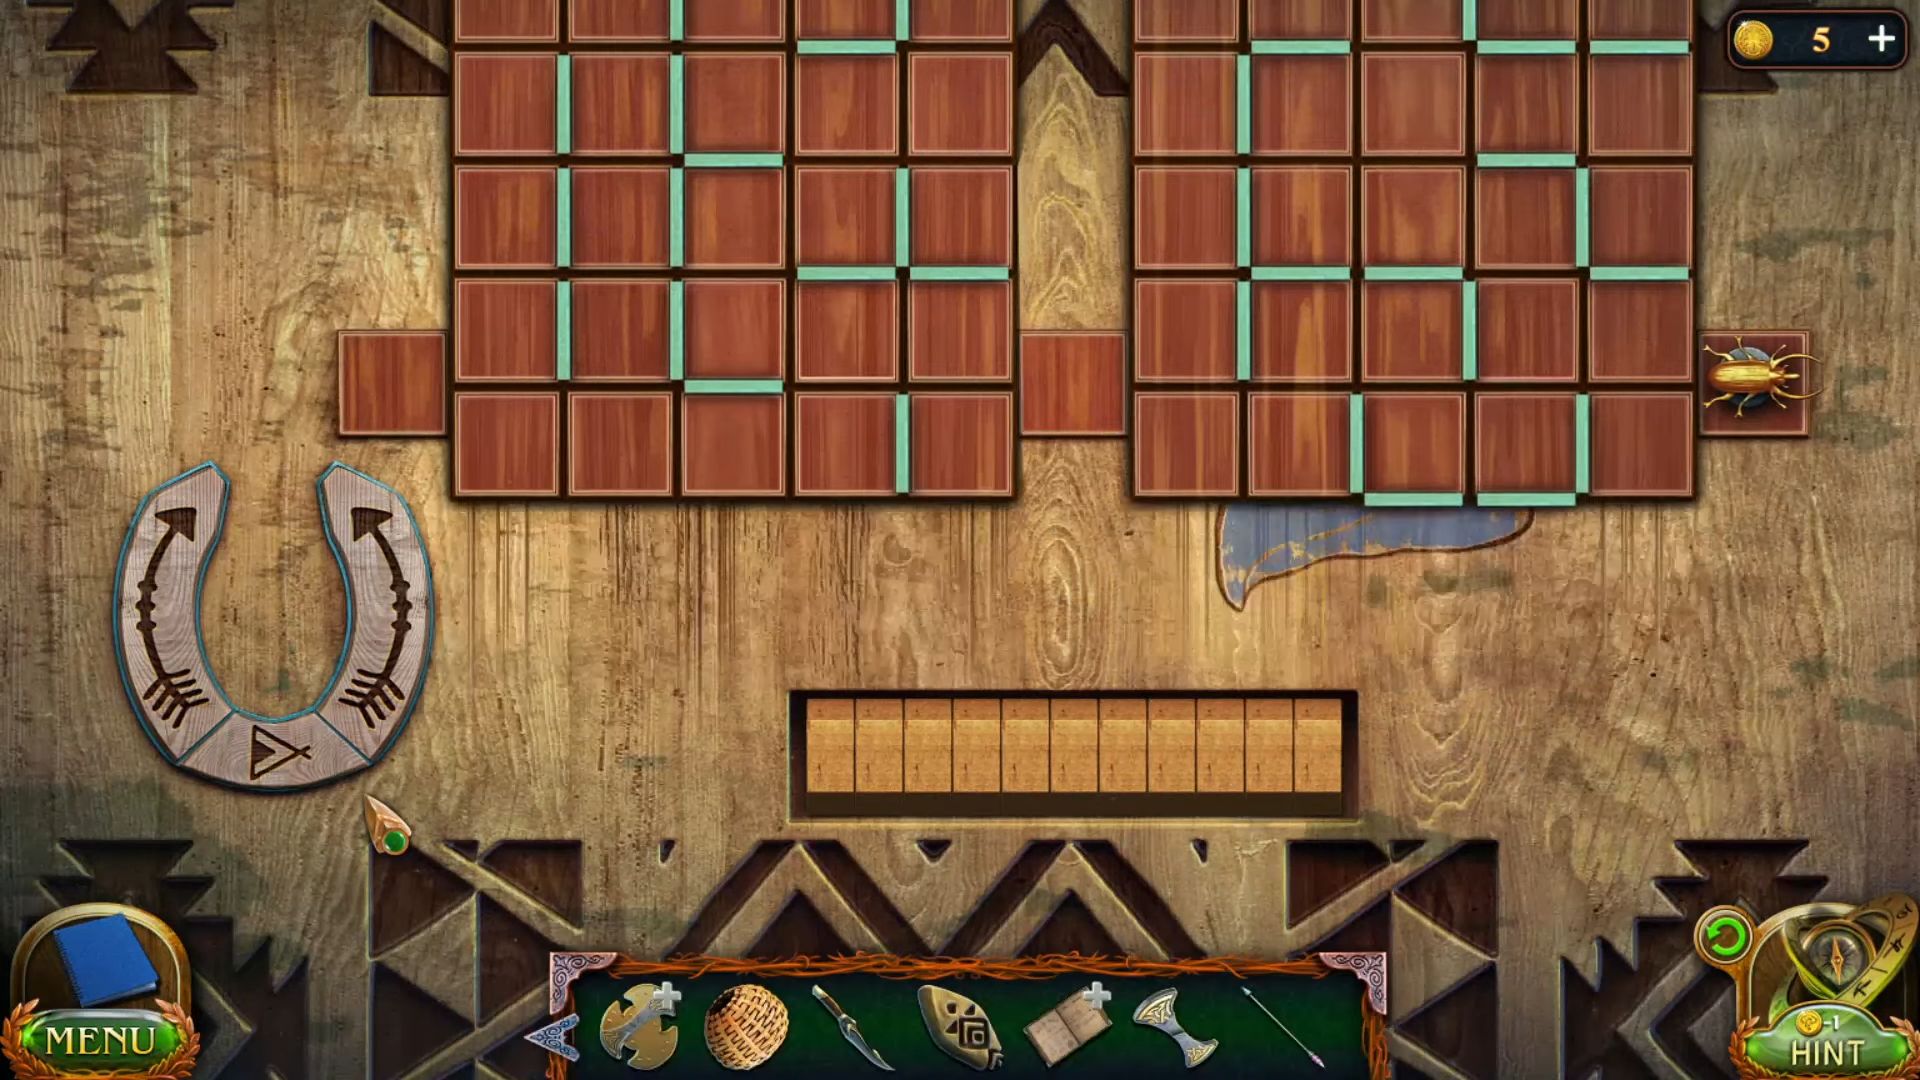
- Arrange the chips so that the chips in each column and row would not have the same colours and numbers in this sequence.

- Once the lock is opened, grab another note, rune, and a bar from the inside.

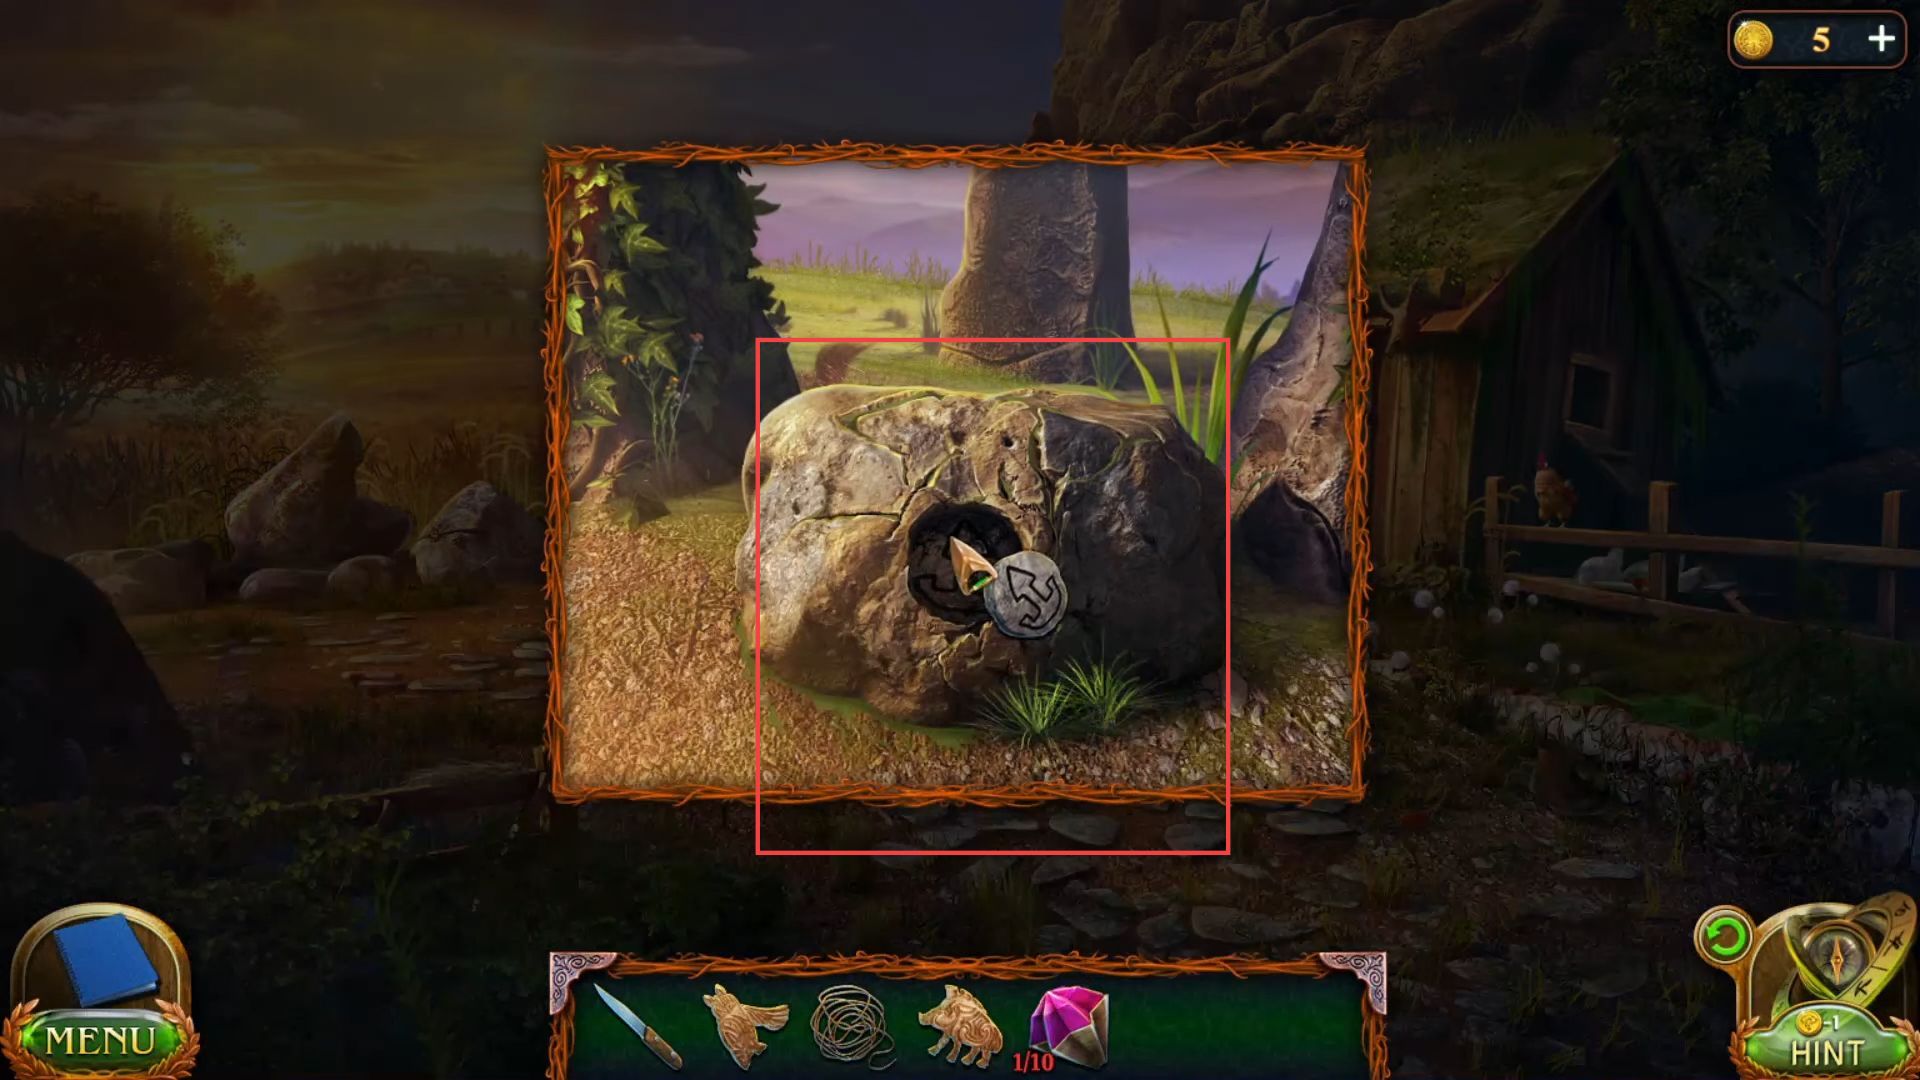
- Put the rune into the stone from the right side and go inside it.

- Knock the stairs to get a tile.
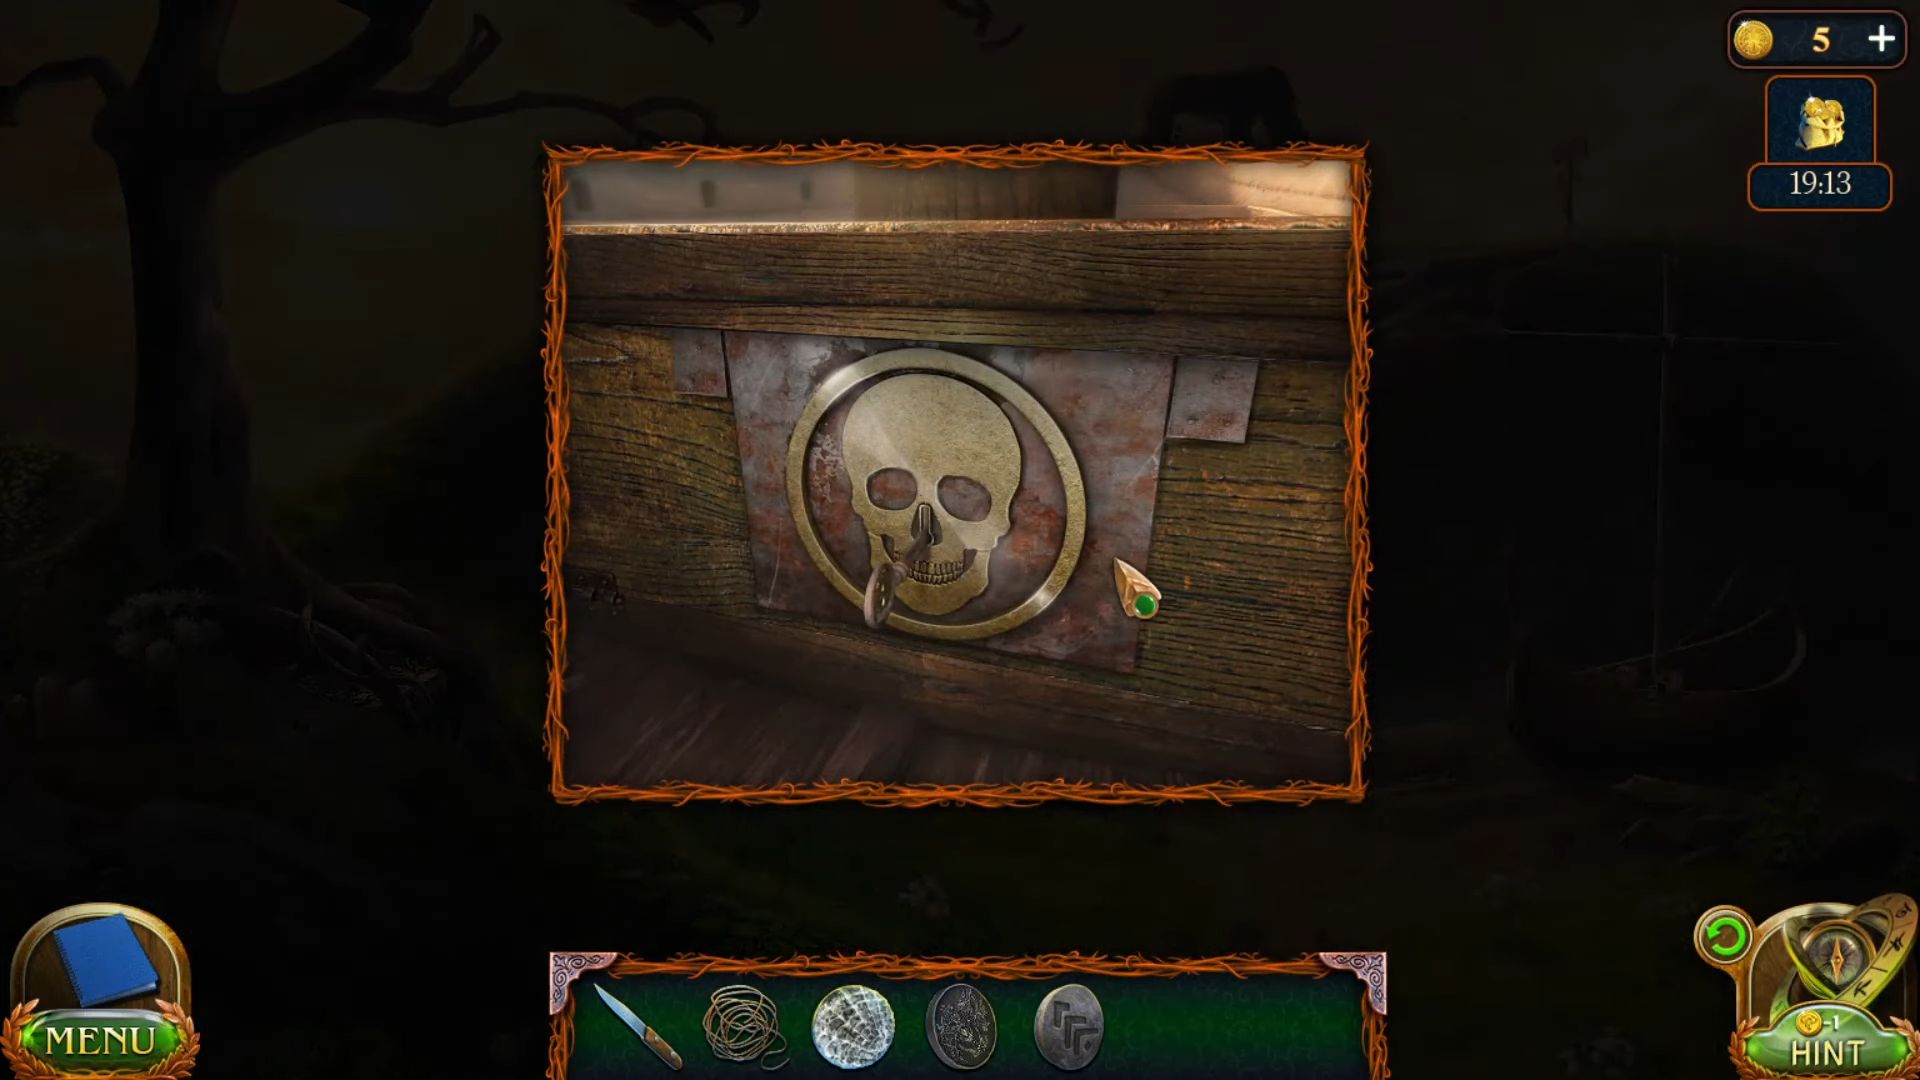
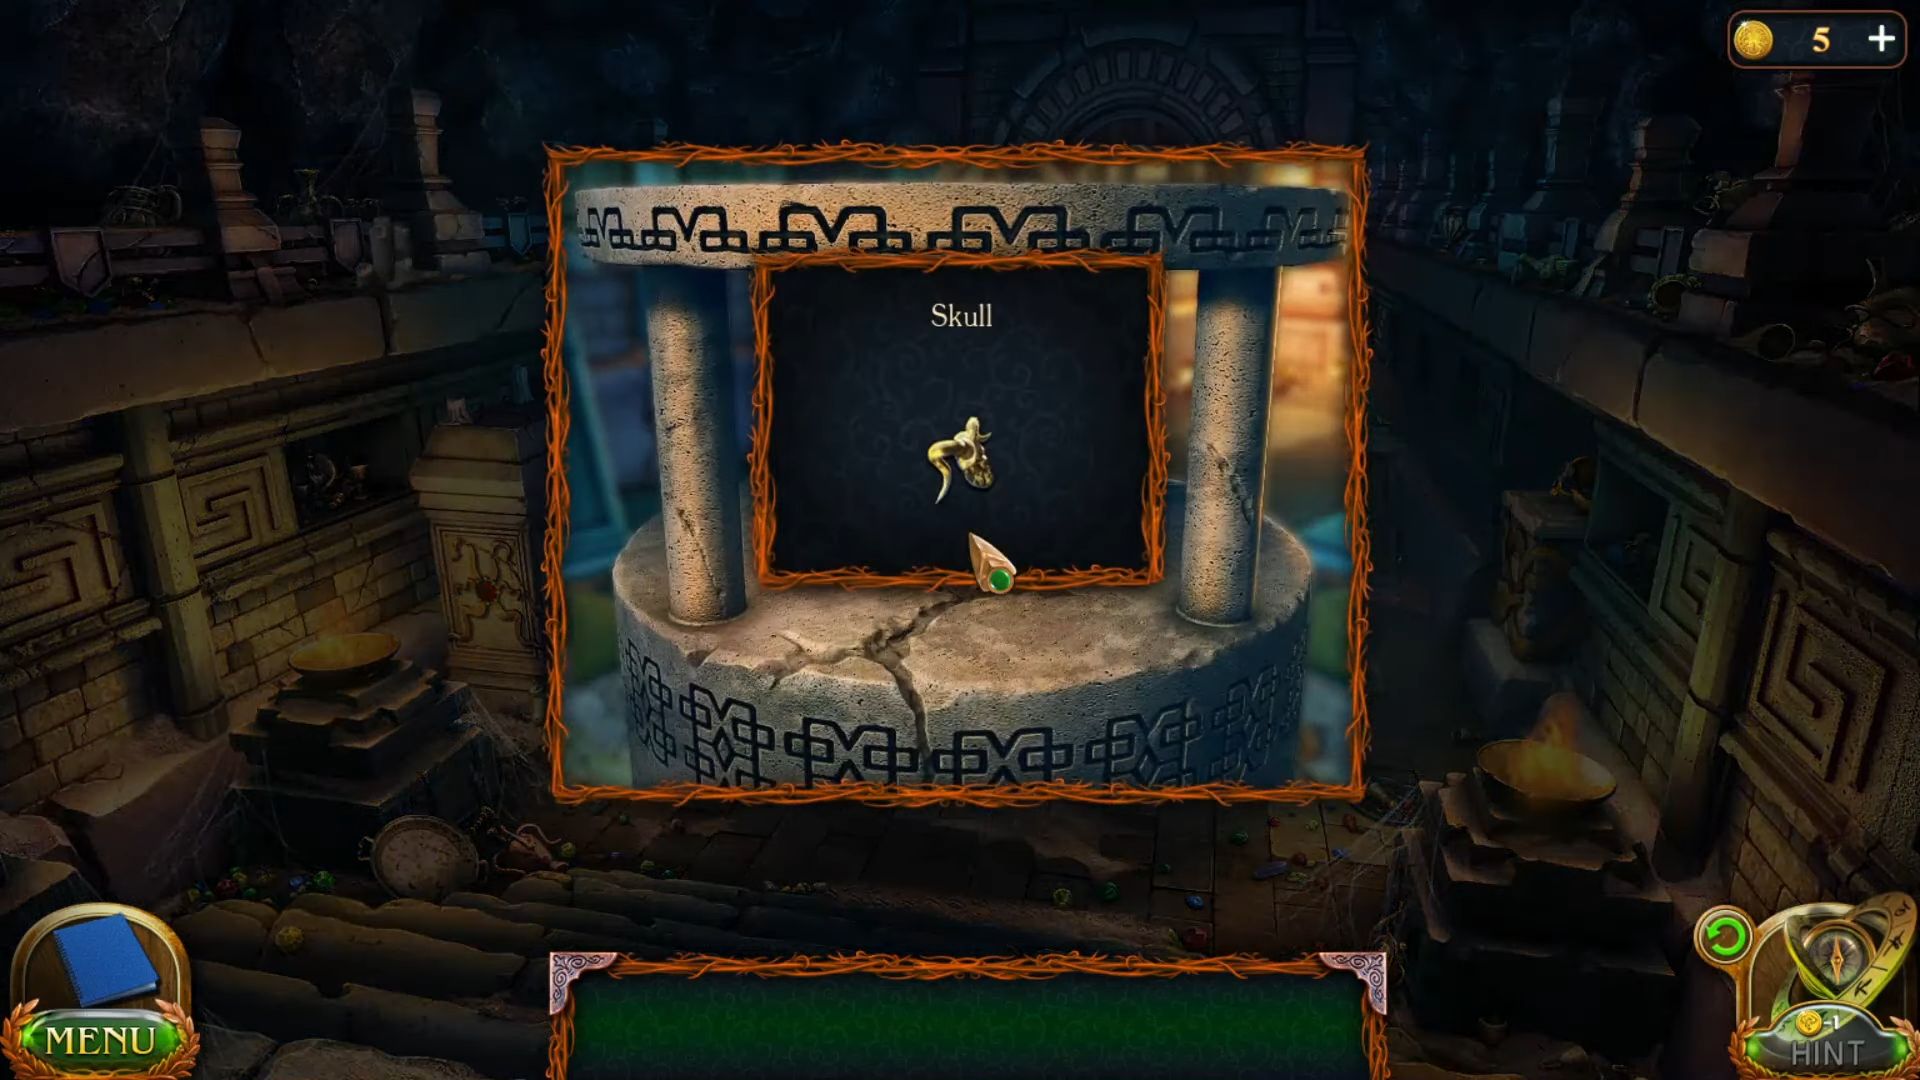
- Grab a skull from the left side of the skeleton.

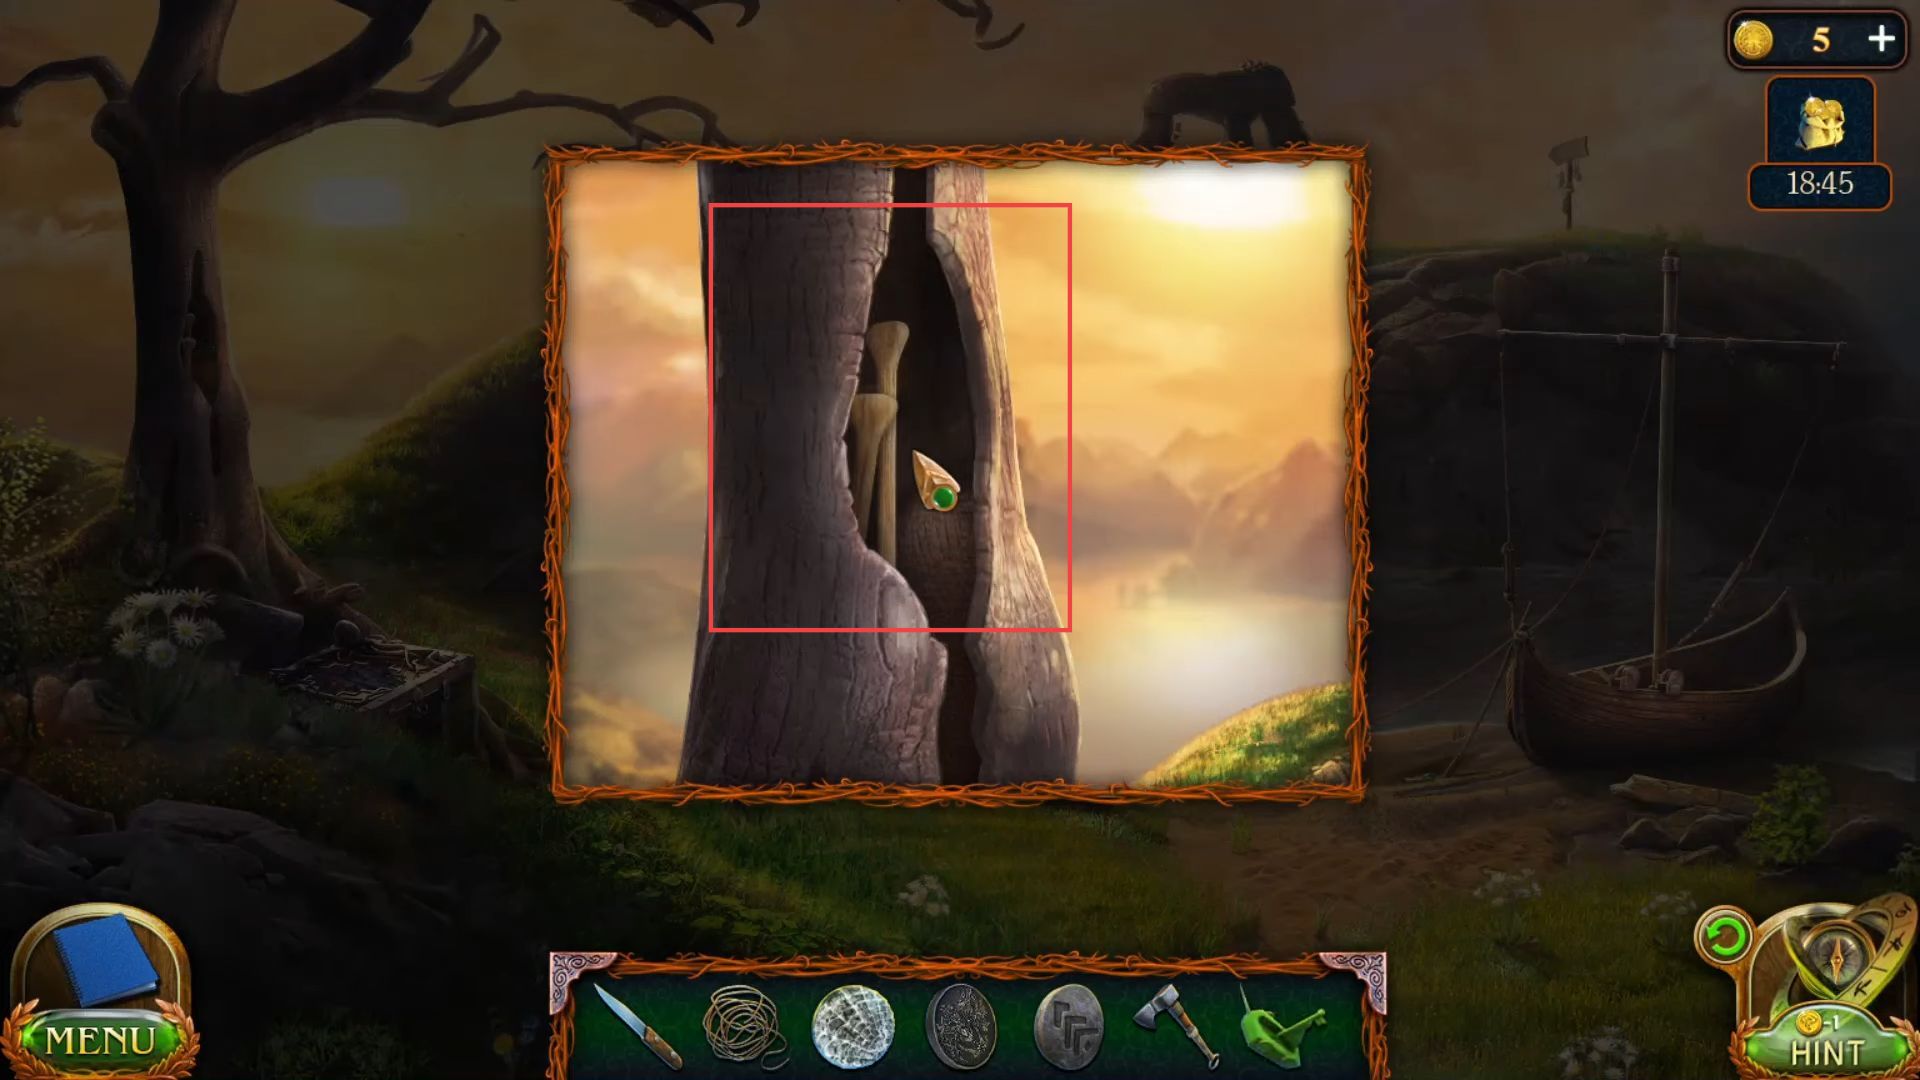
- Get a note and a tile piece from the tent.

- Put the tile into these places and a skull on the front door to unlock it.

- Once unlocked, go inside the door.

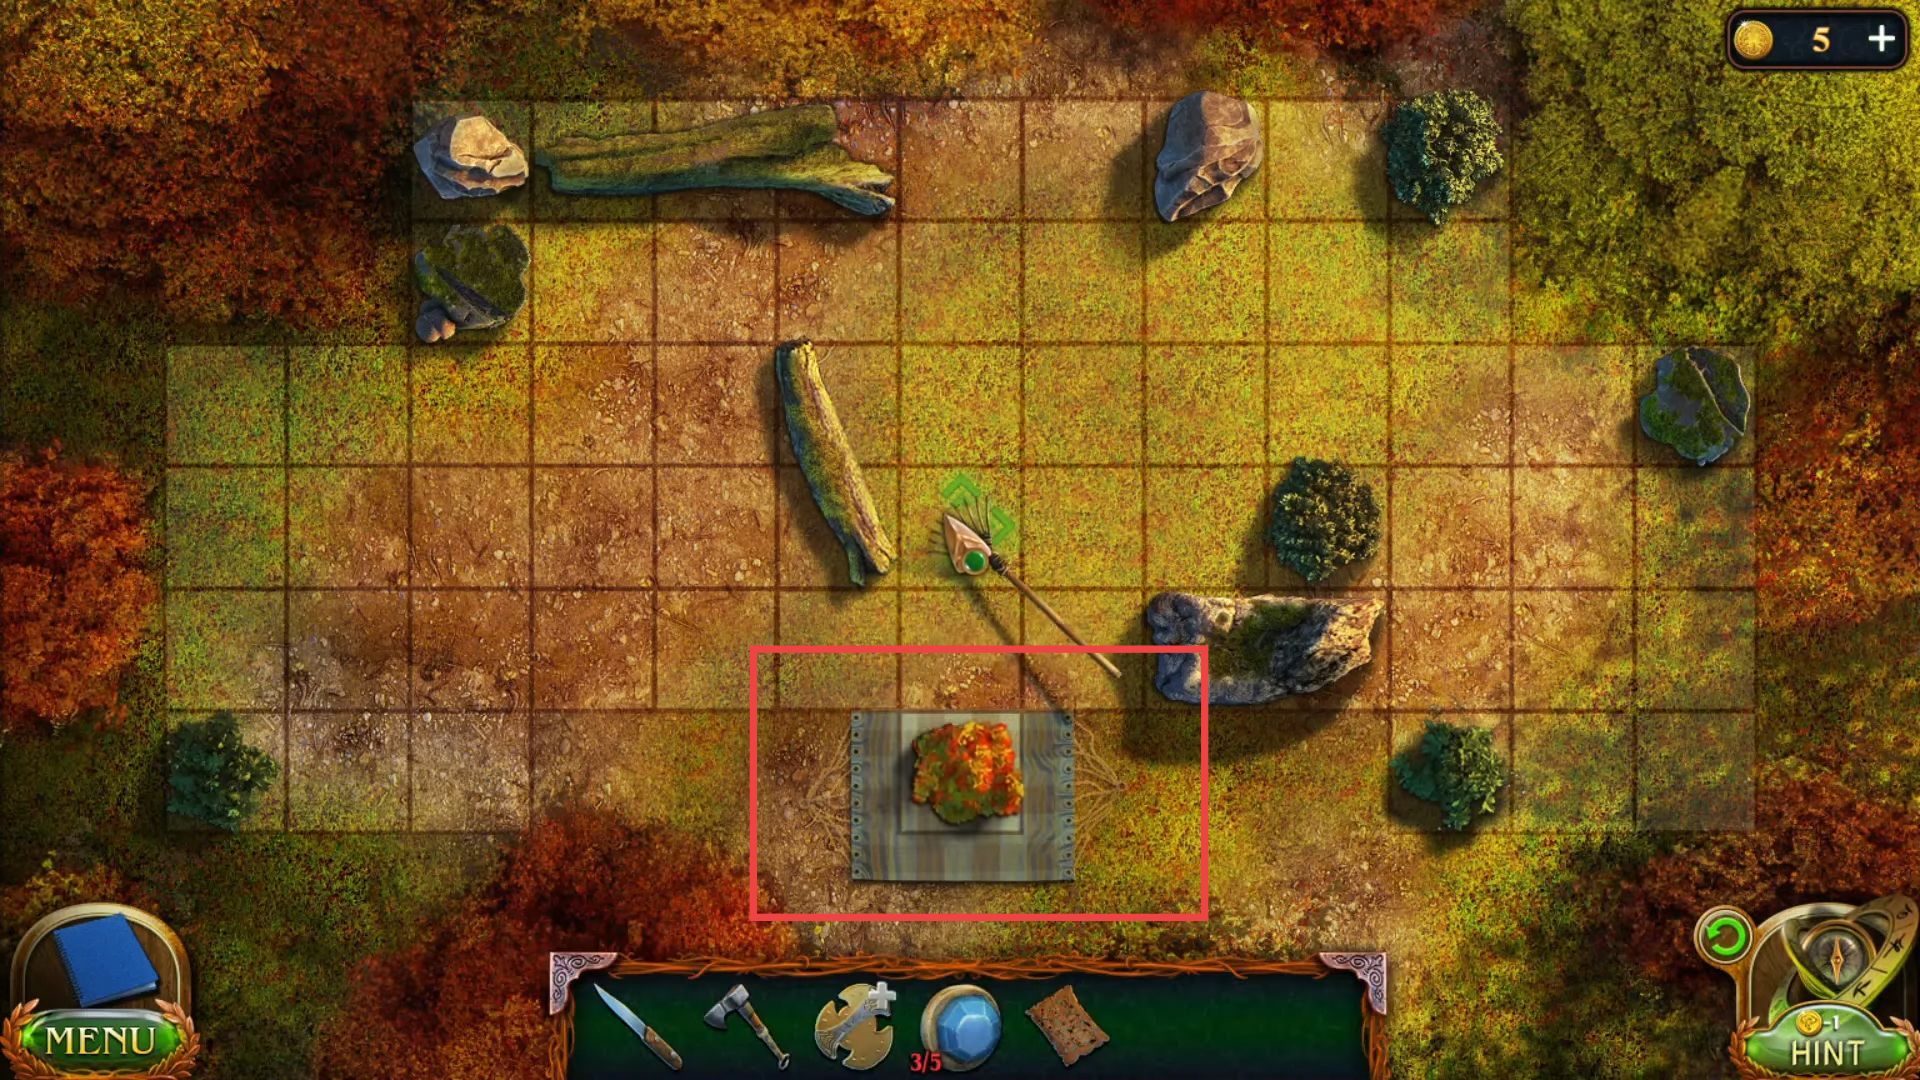
- Go to the suitable side hall and get a spear from the left corner.
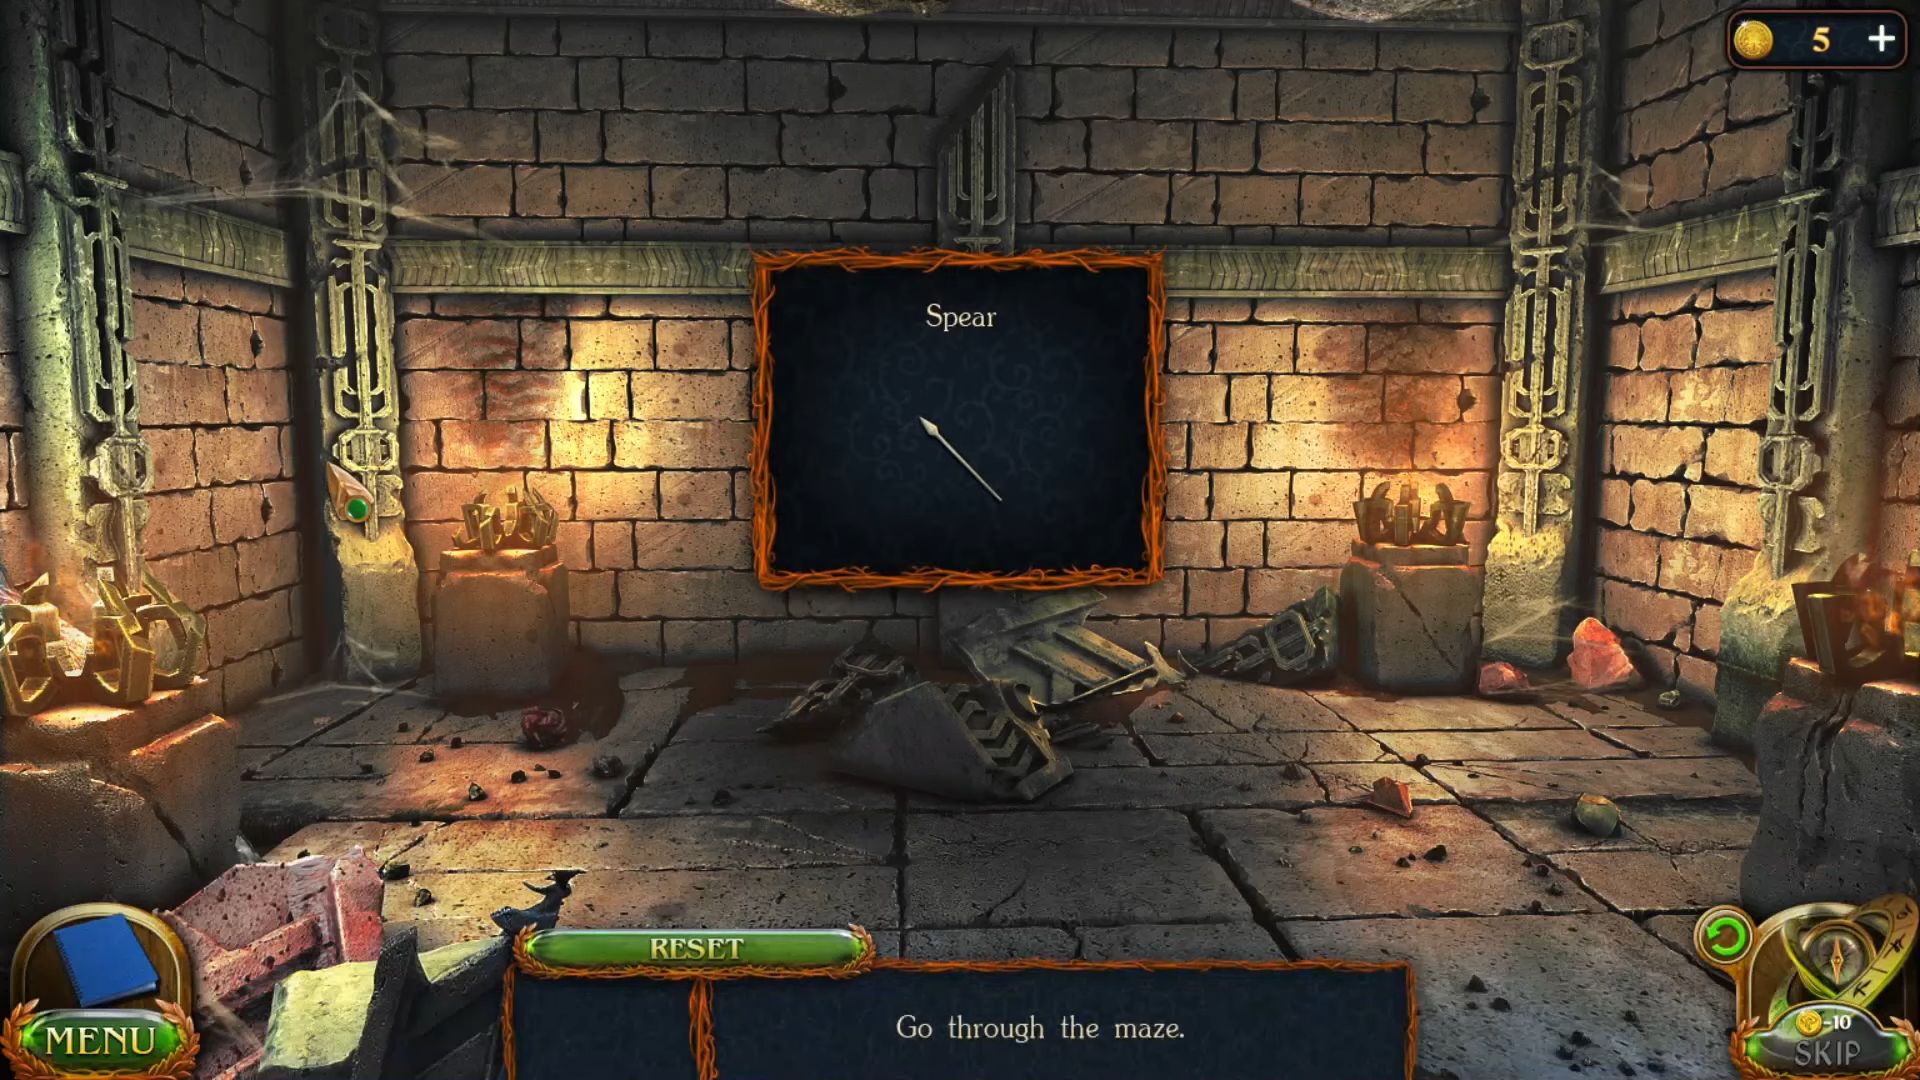
- Use the spear to get a face mask from the wall.

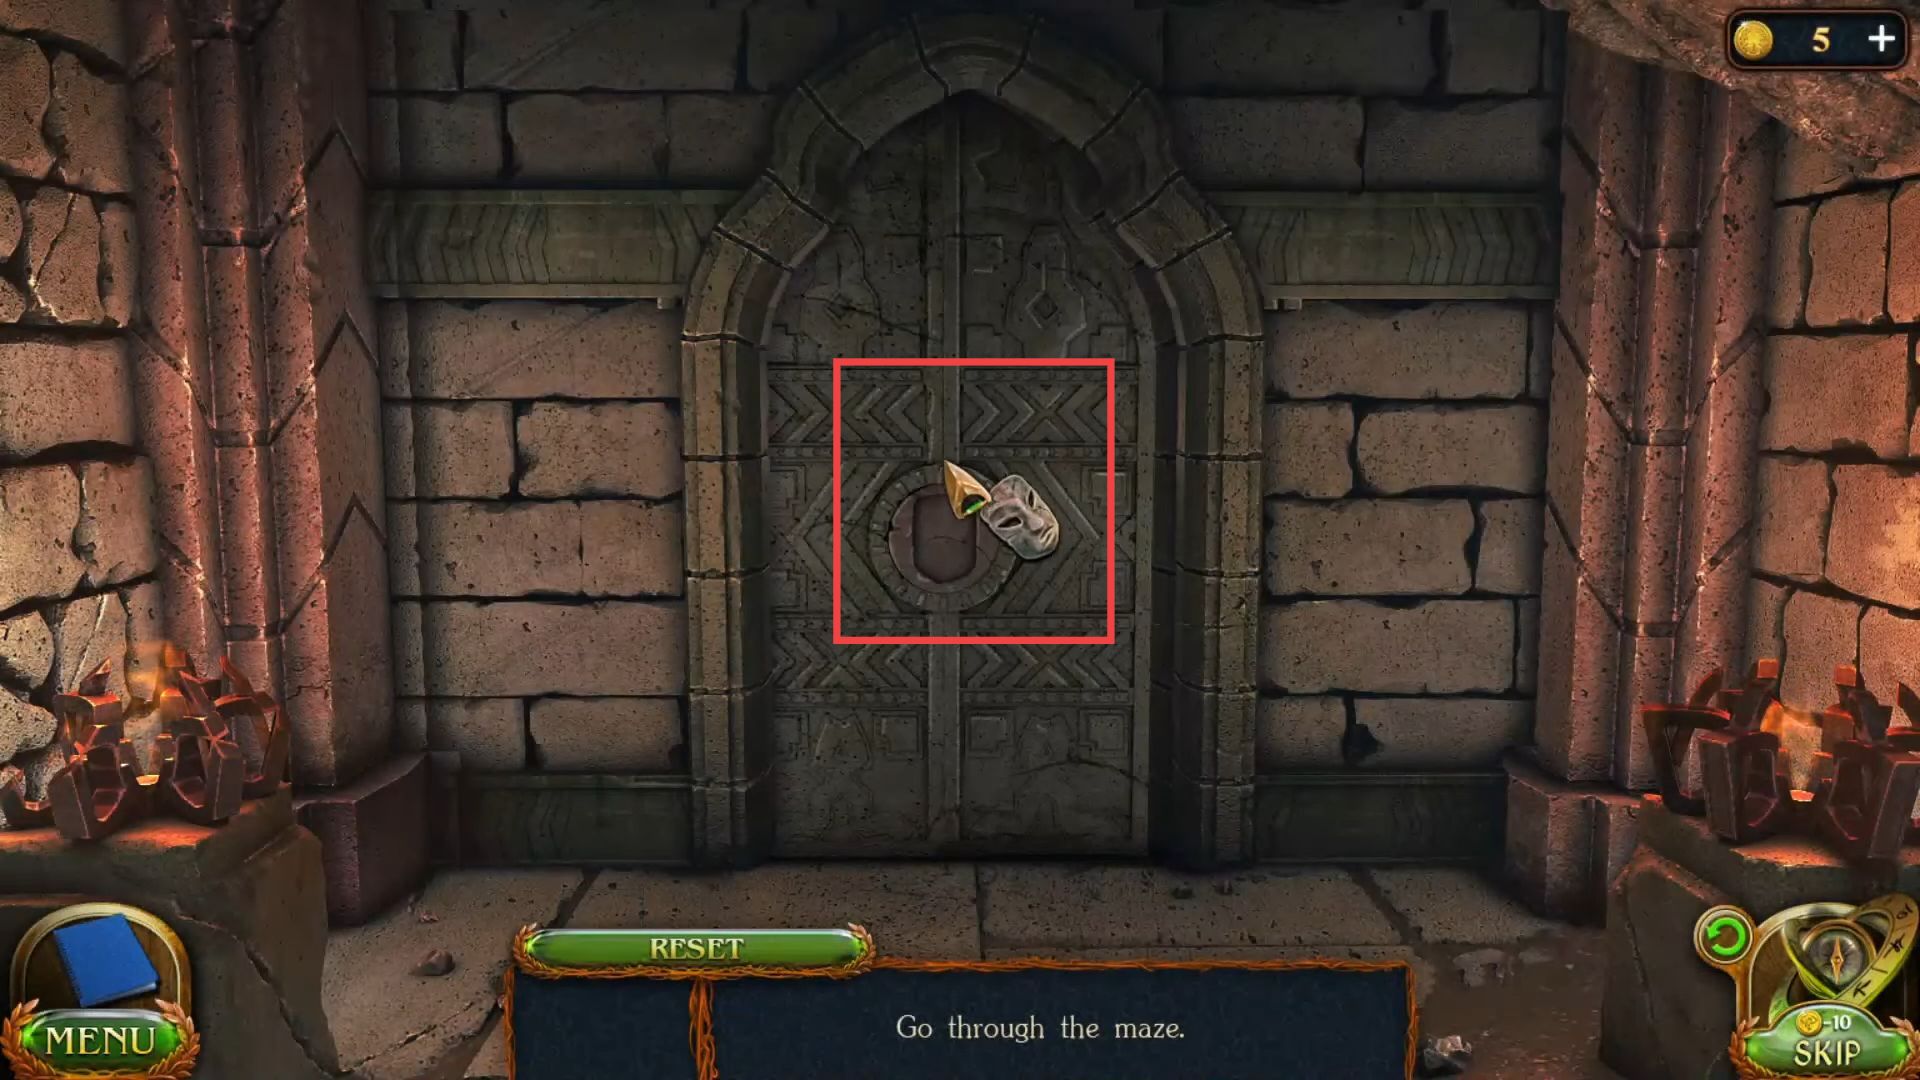
- Go to the proper side hall and put the mask in the door’s centre to unlock it.
- Once the door is opened, go to the left side hallway, and slide the handle to unlock the wall.

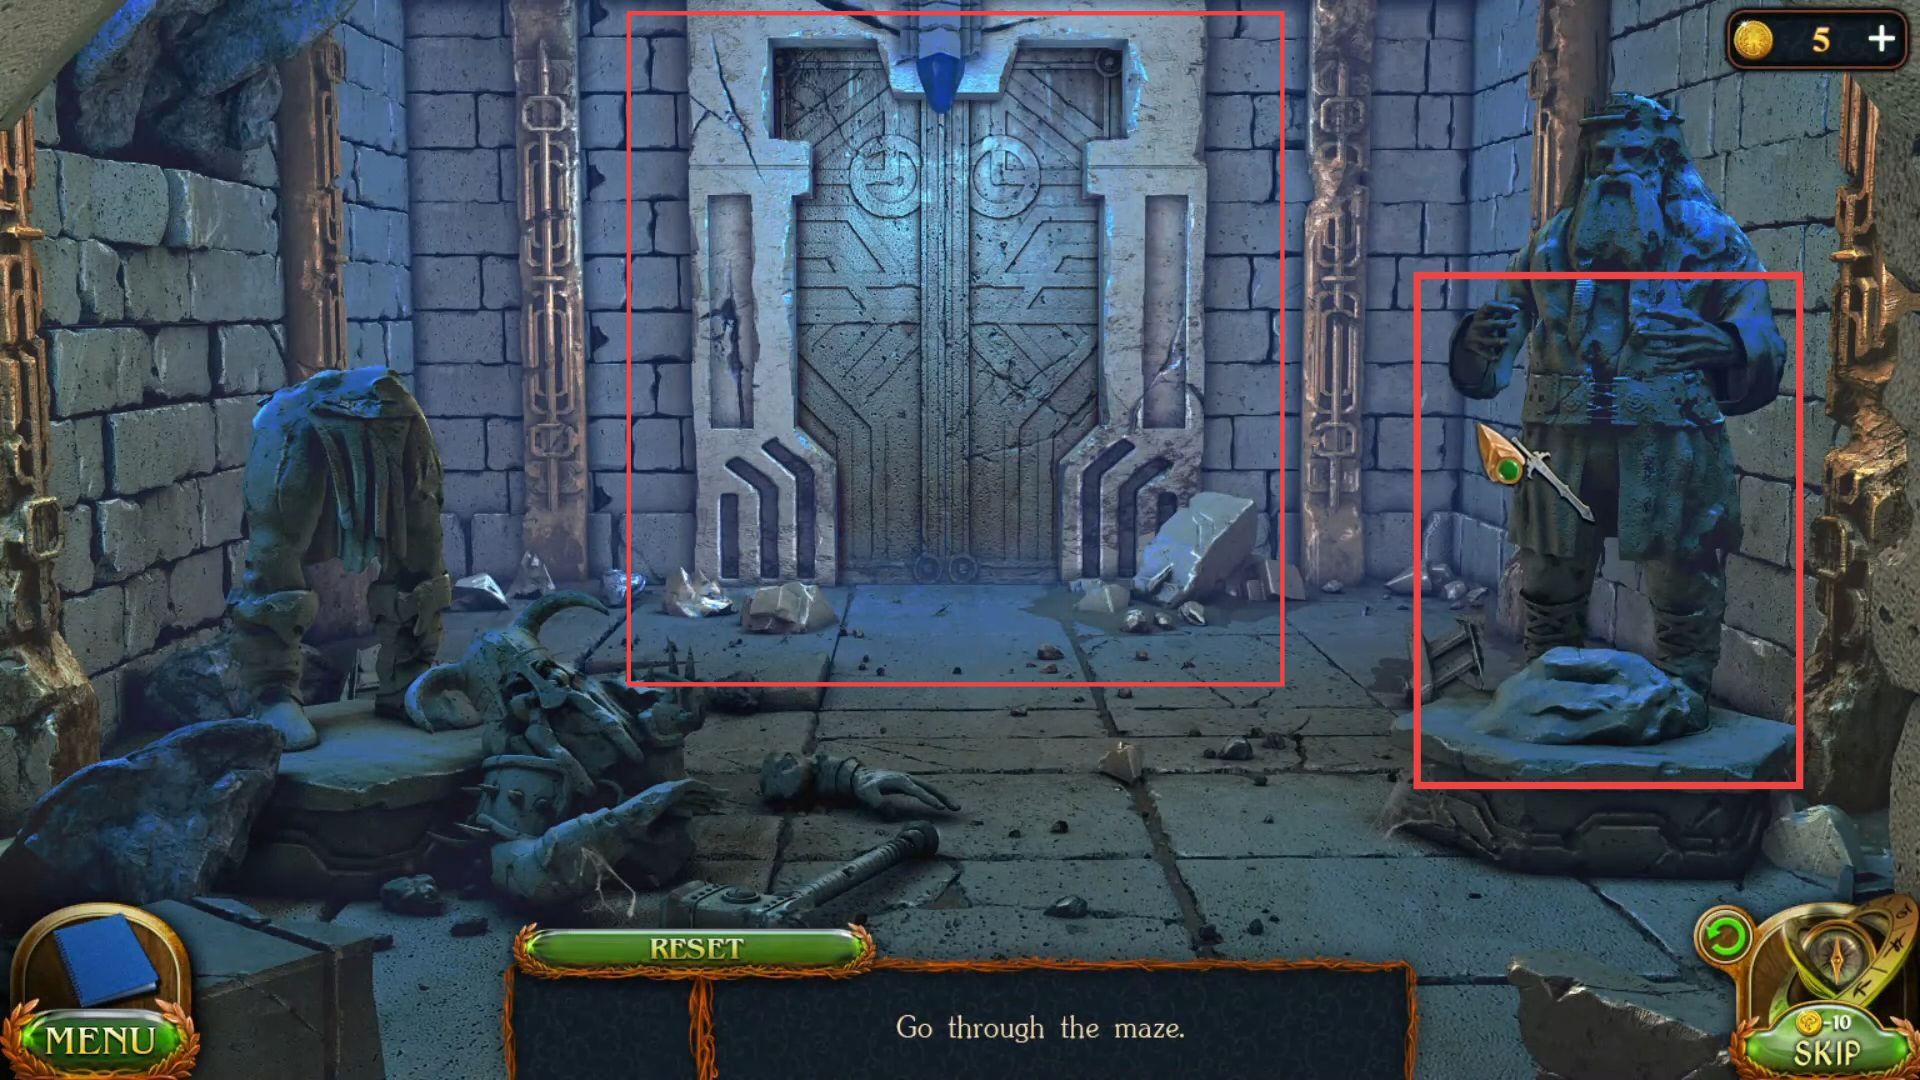
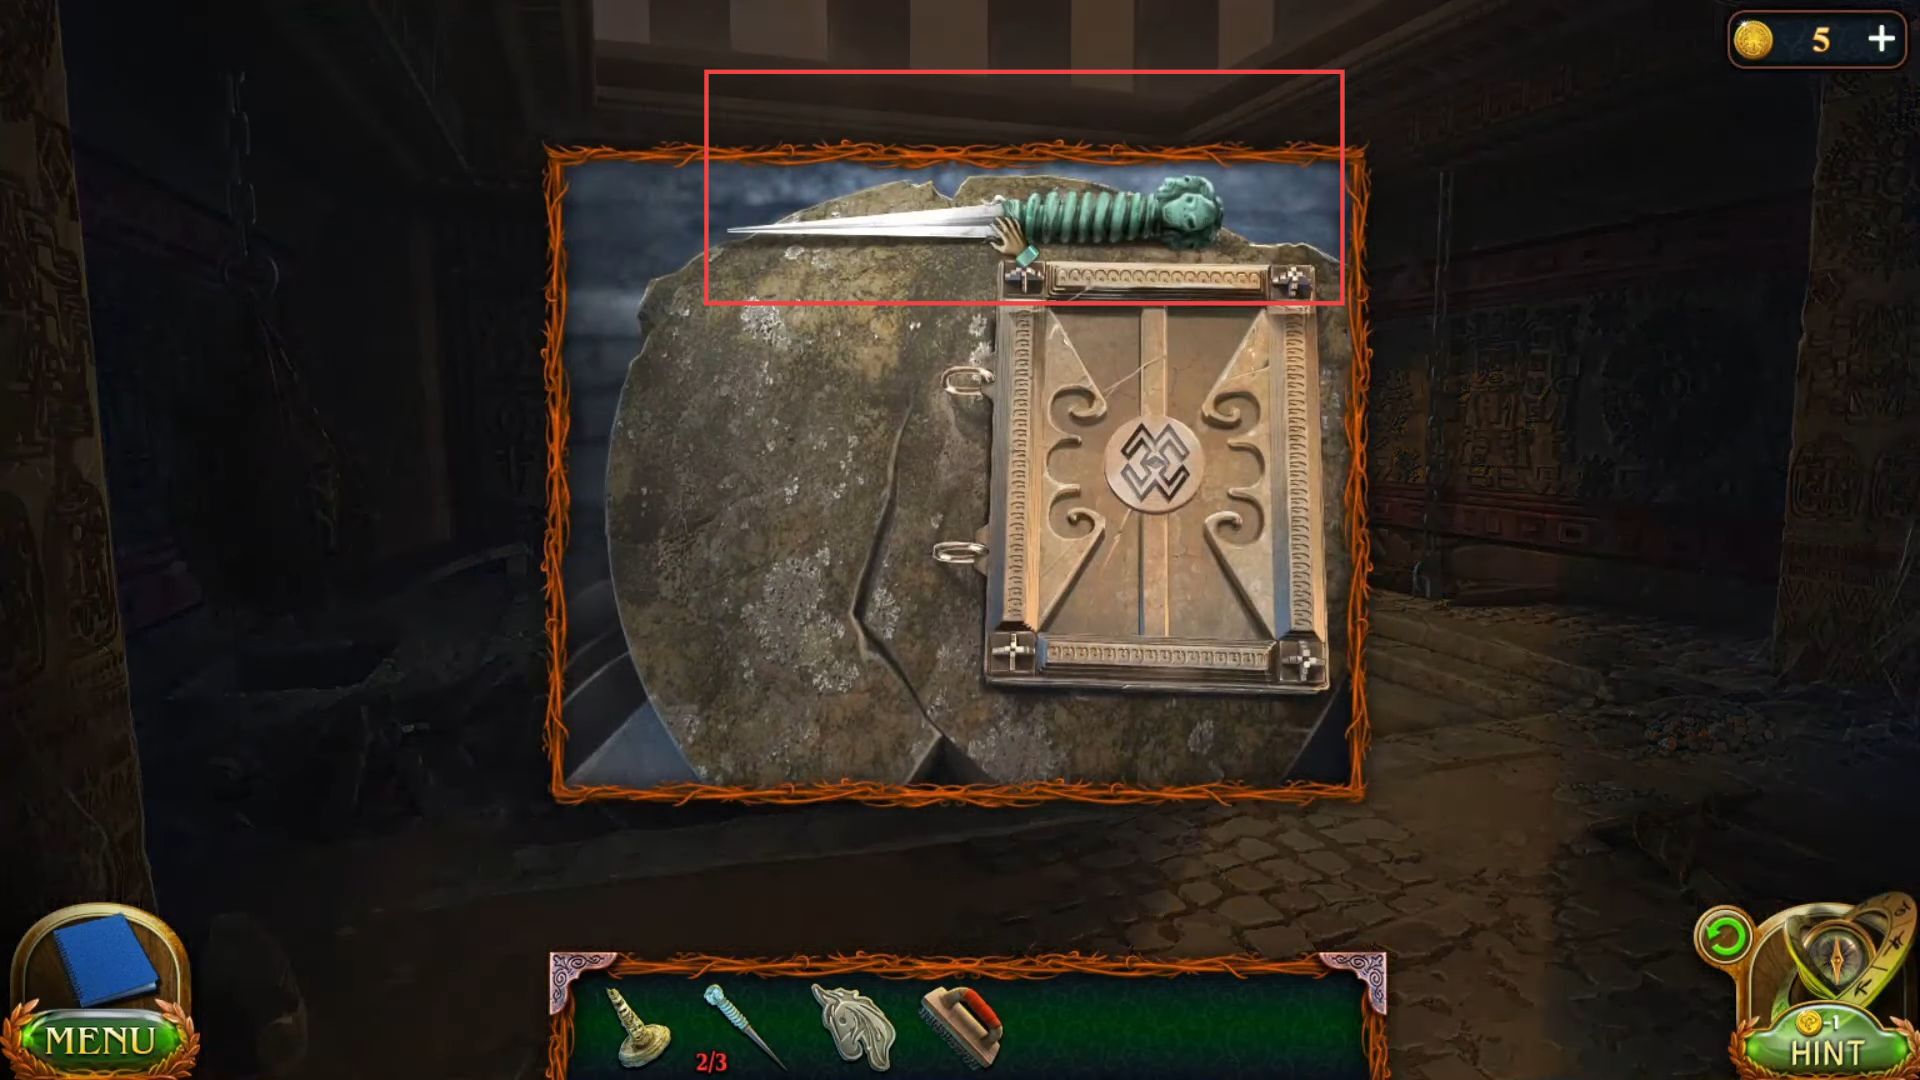
- Go inside the wall and grab a sword from the broken statue’s arm.

- Go into the right-side hallway and put the sword into the right-side statue’s hand to unlock the front door.
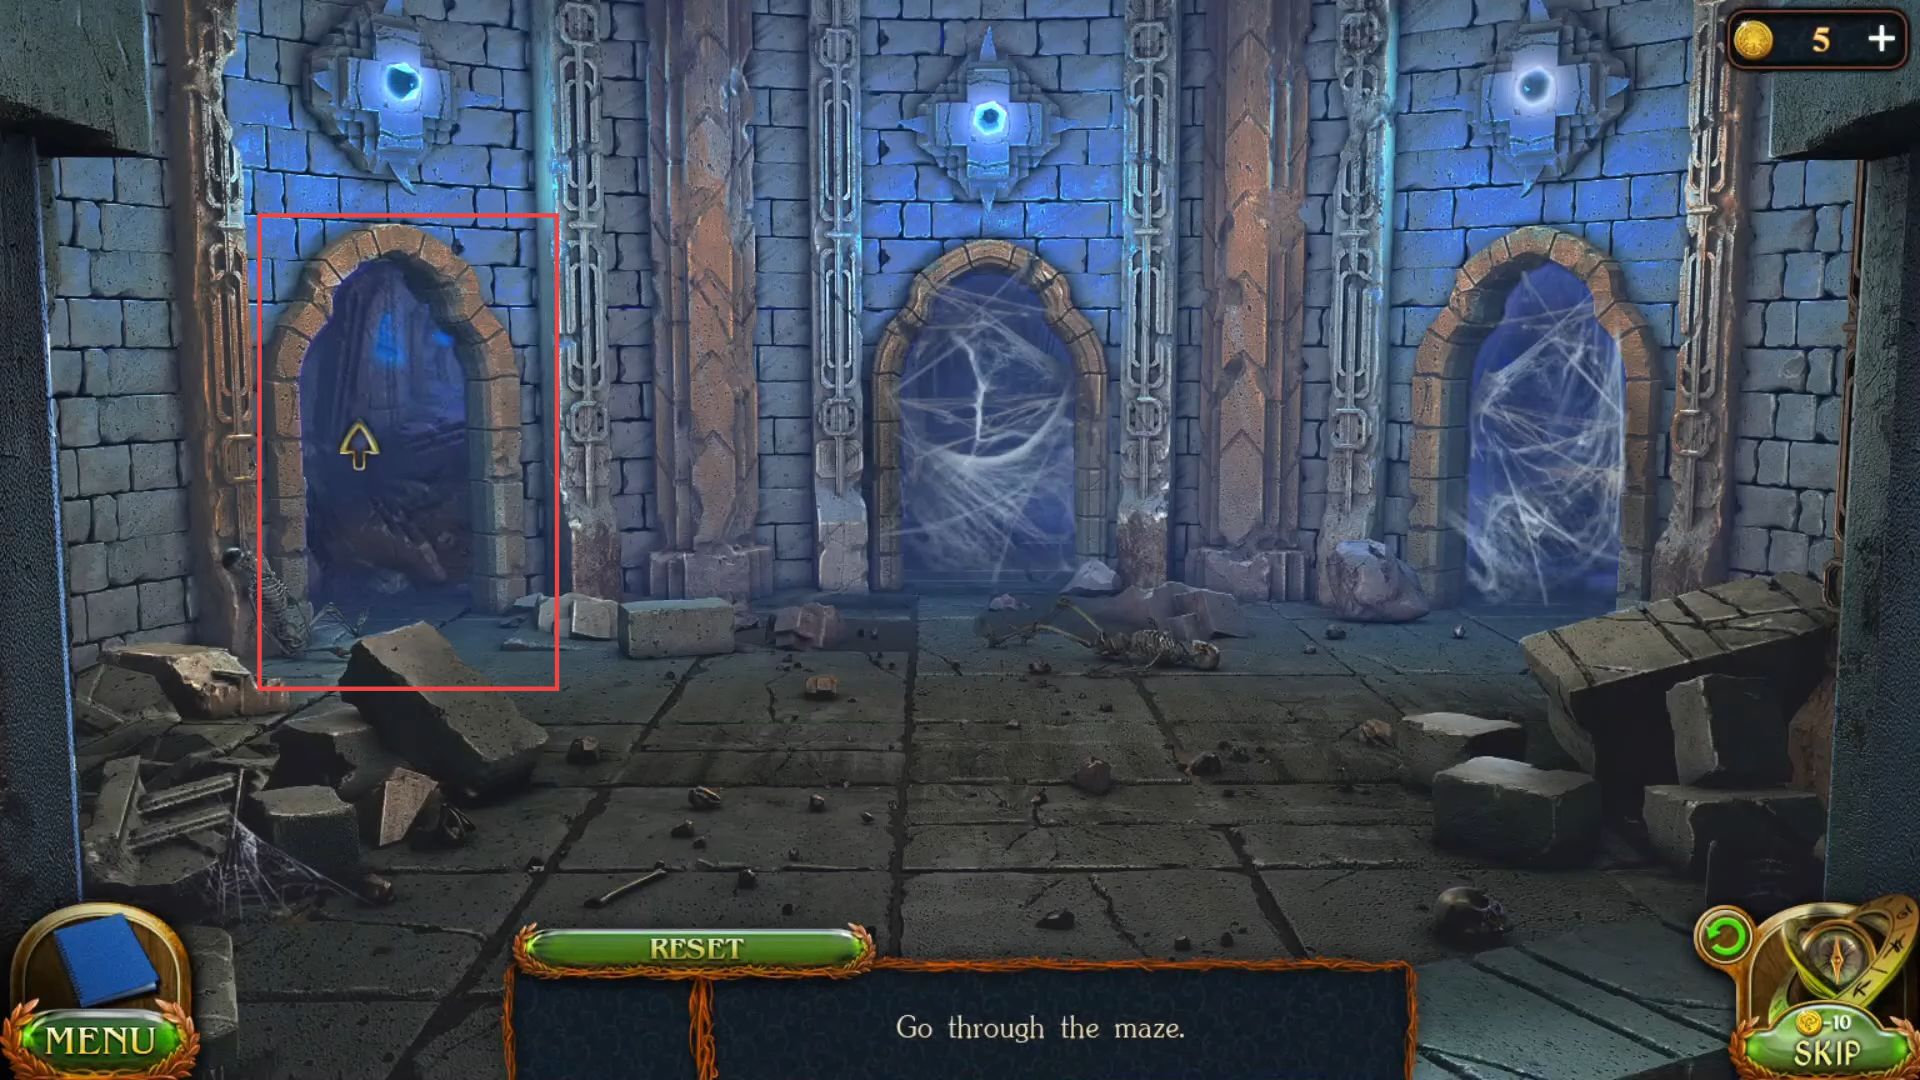
- Enter through the door and knock on the left side spider web to remove it.
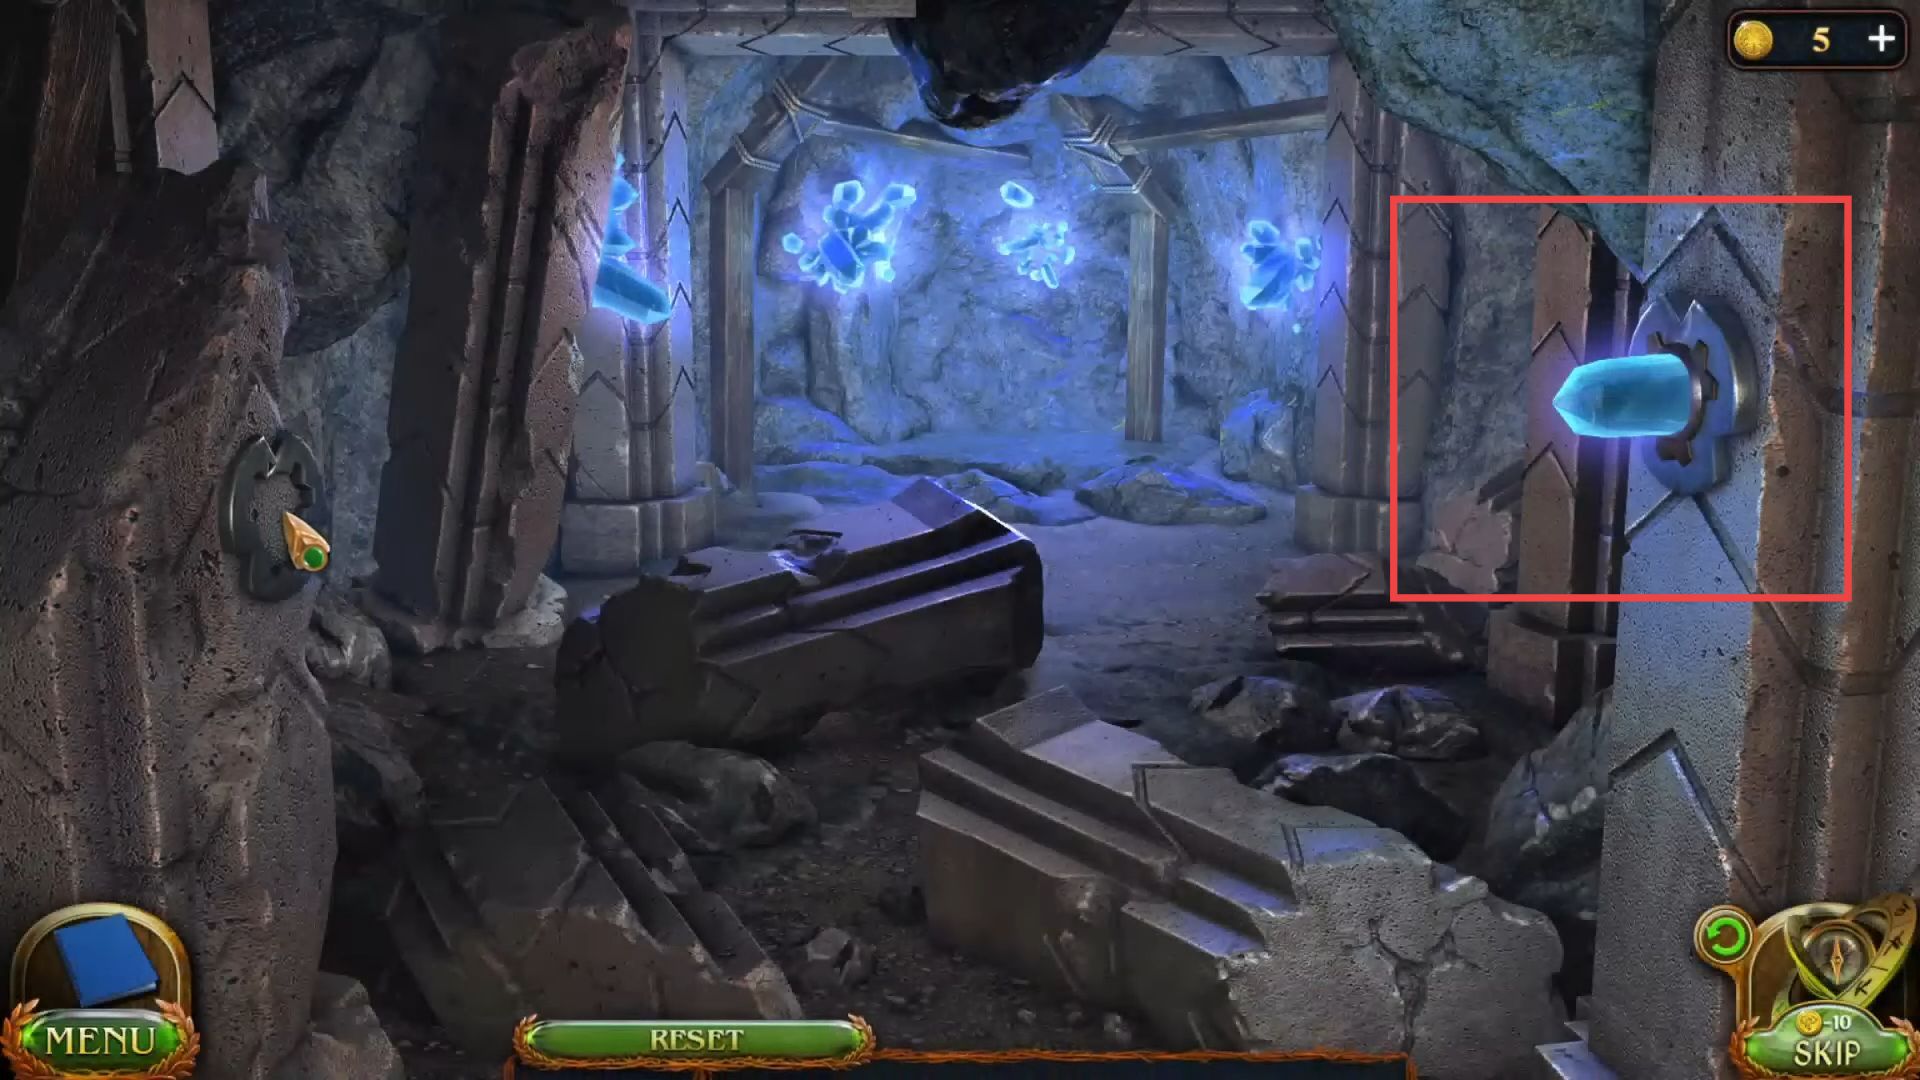
- Once in the room, grab the crystal from the wall.
- Now knock on the right side door with spider web.
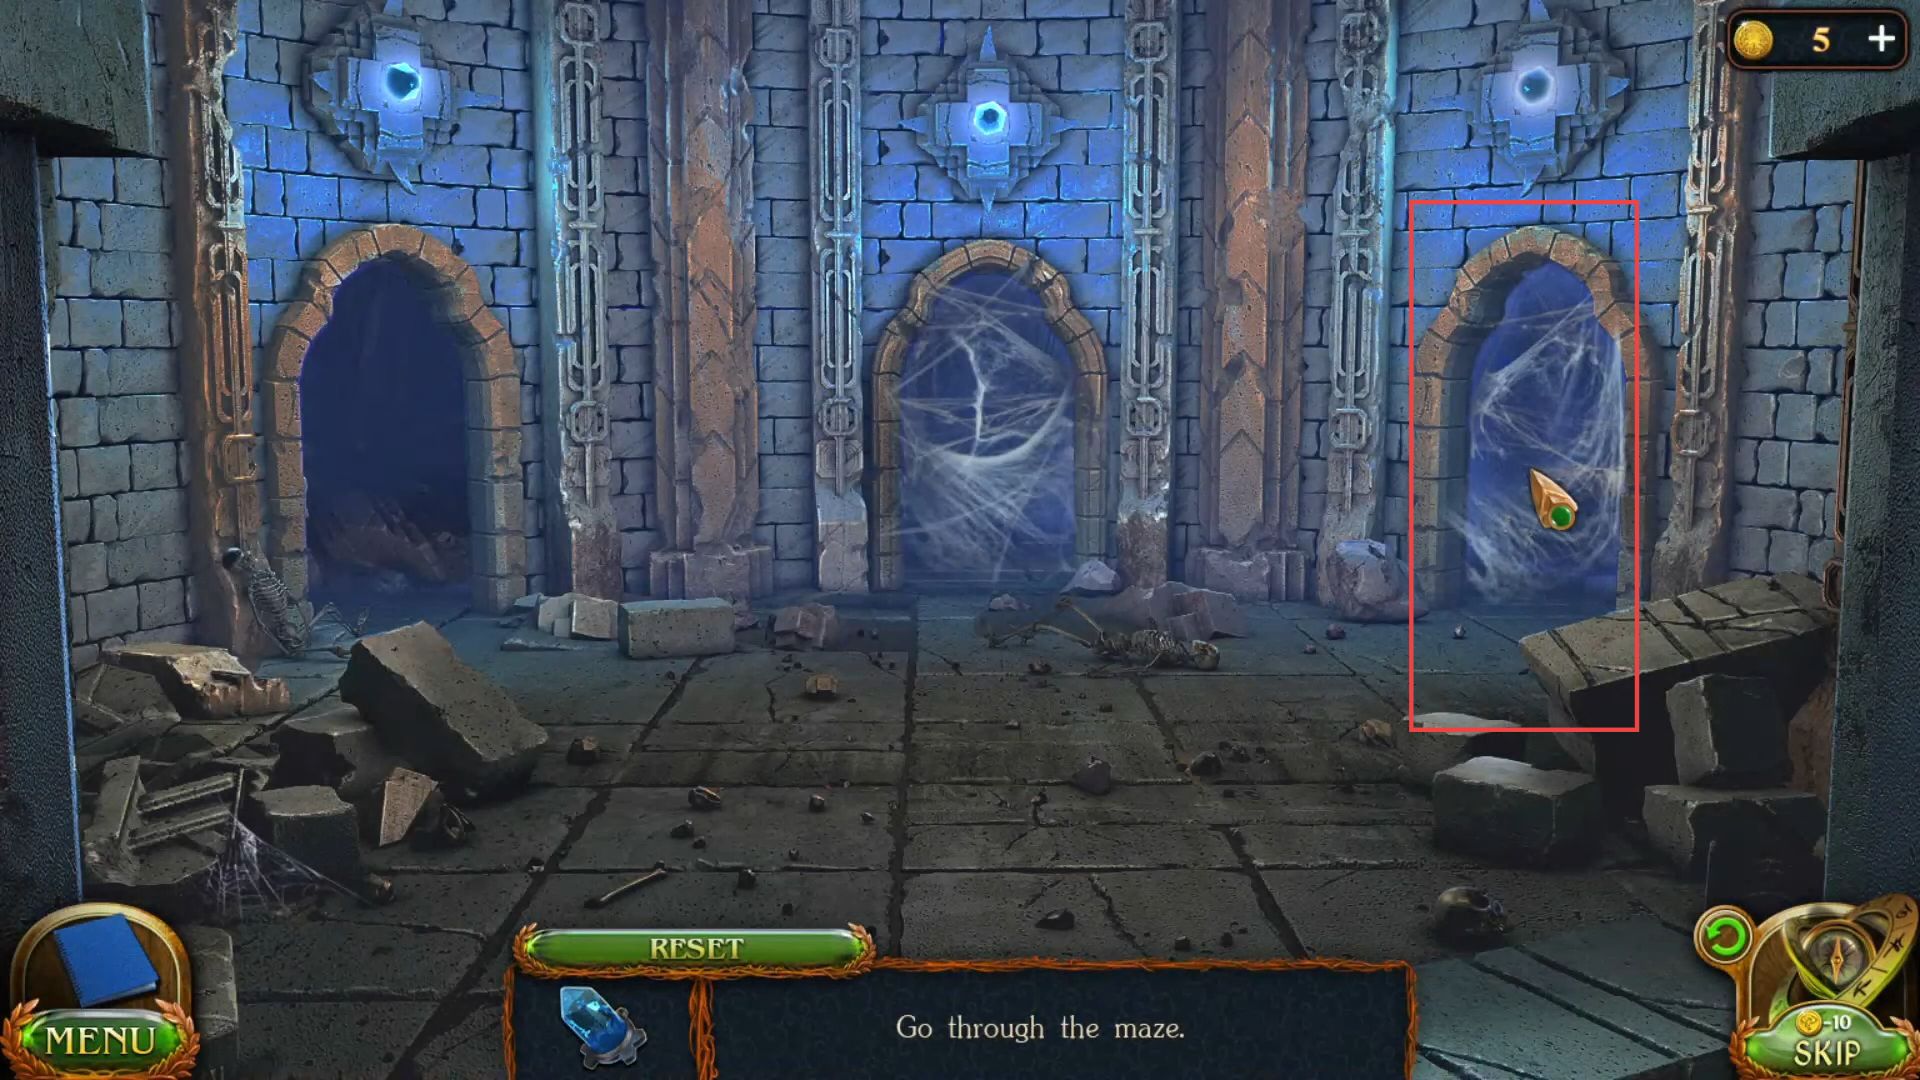
- Go inside the door once the web is removed and put the crystal on the left side of the wall.

- Enter the left side hallway and grab the lever arm from the broken statue.

- Now put the lever arm in the left side locker by entering the right side hallway and knock the lever arm to make a stair in the front wall.

- Go inside the door using the stairs and grab a plank near the tree.

- Knock on the tree’s branches and grab another plank from the floor.

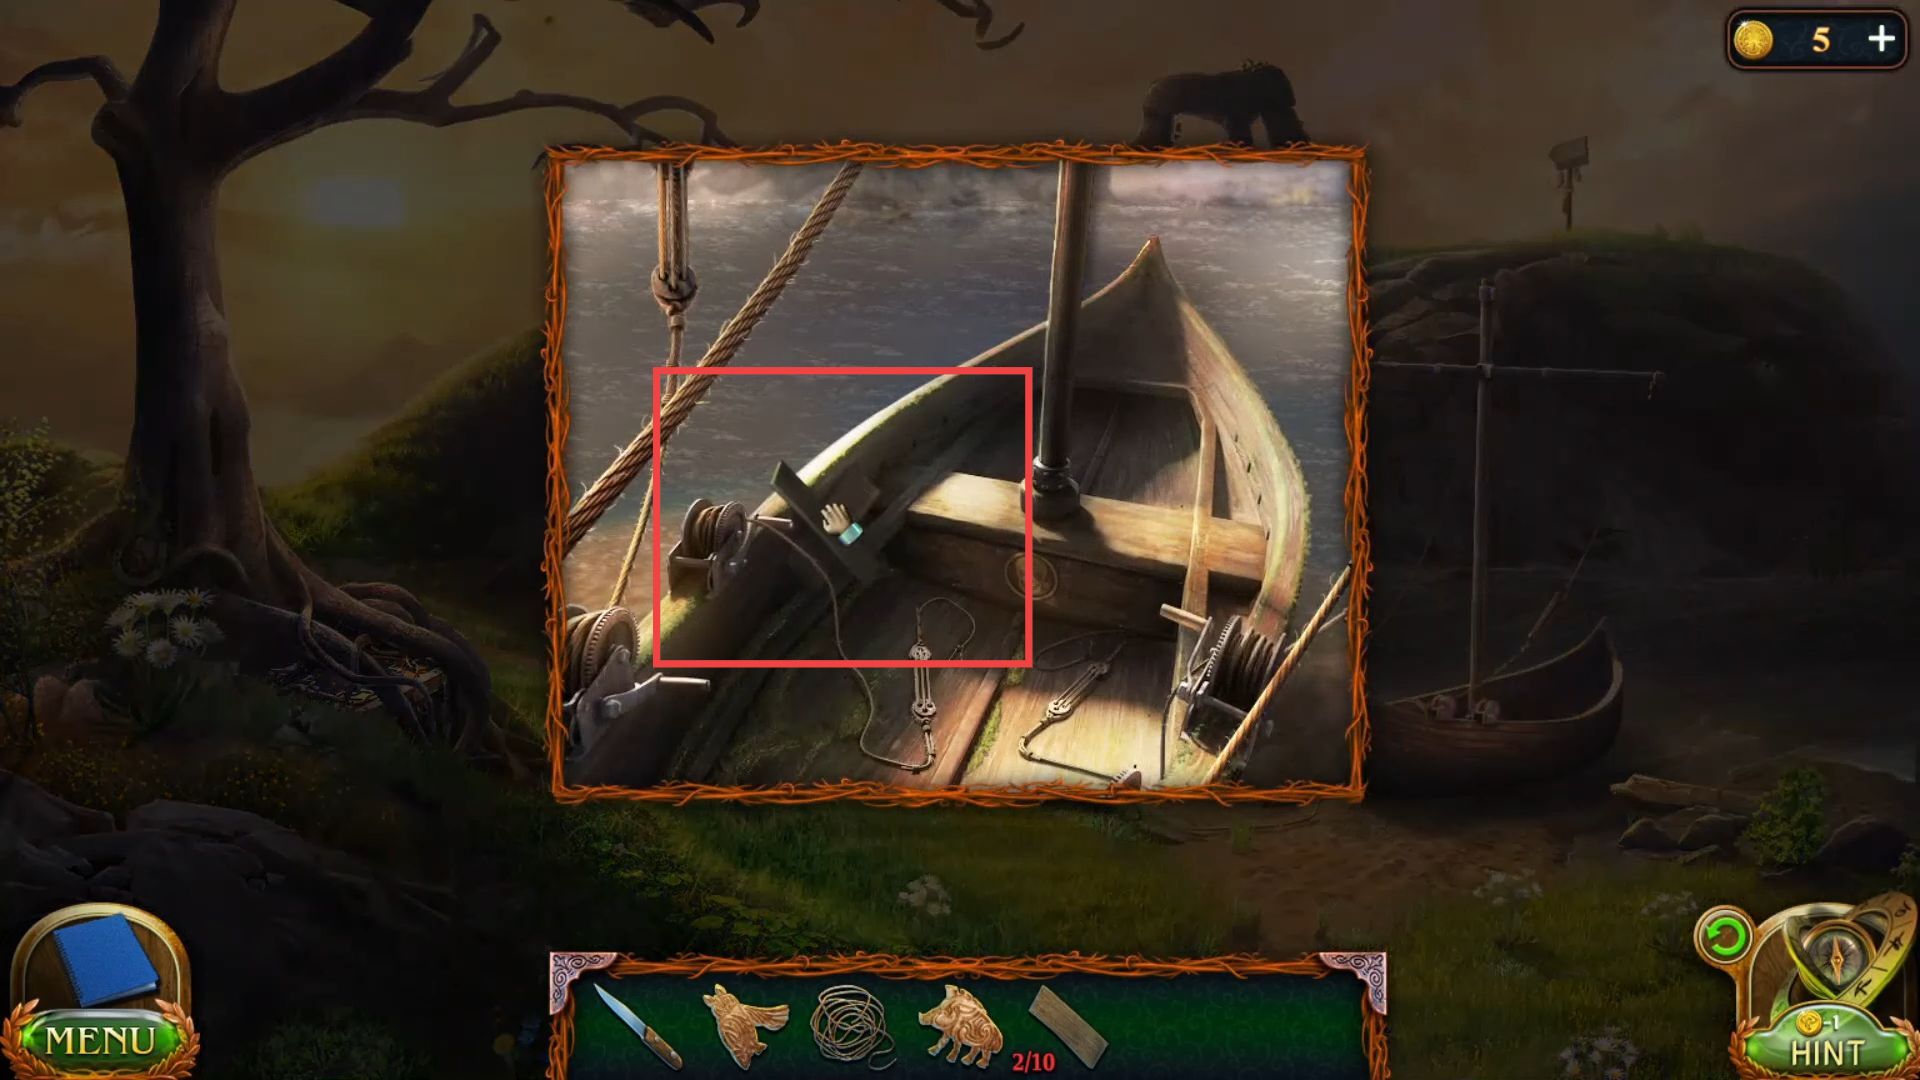
- Go to the boat from the river bank and grab two planks from the inside.
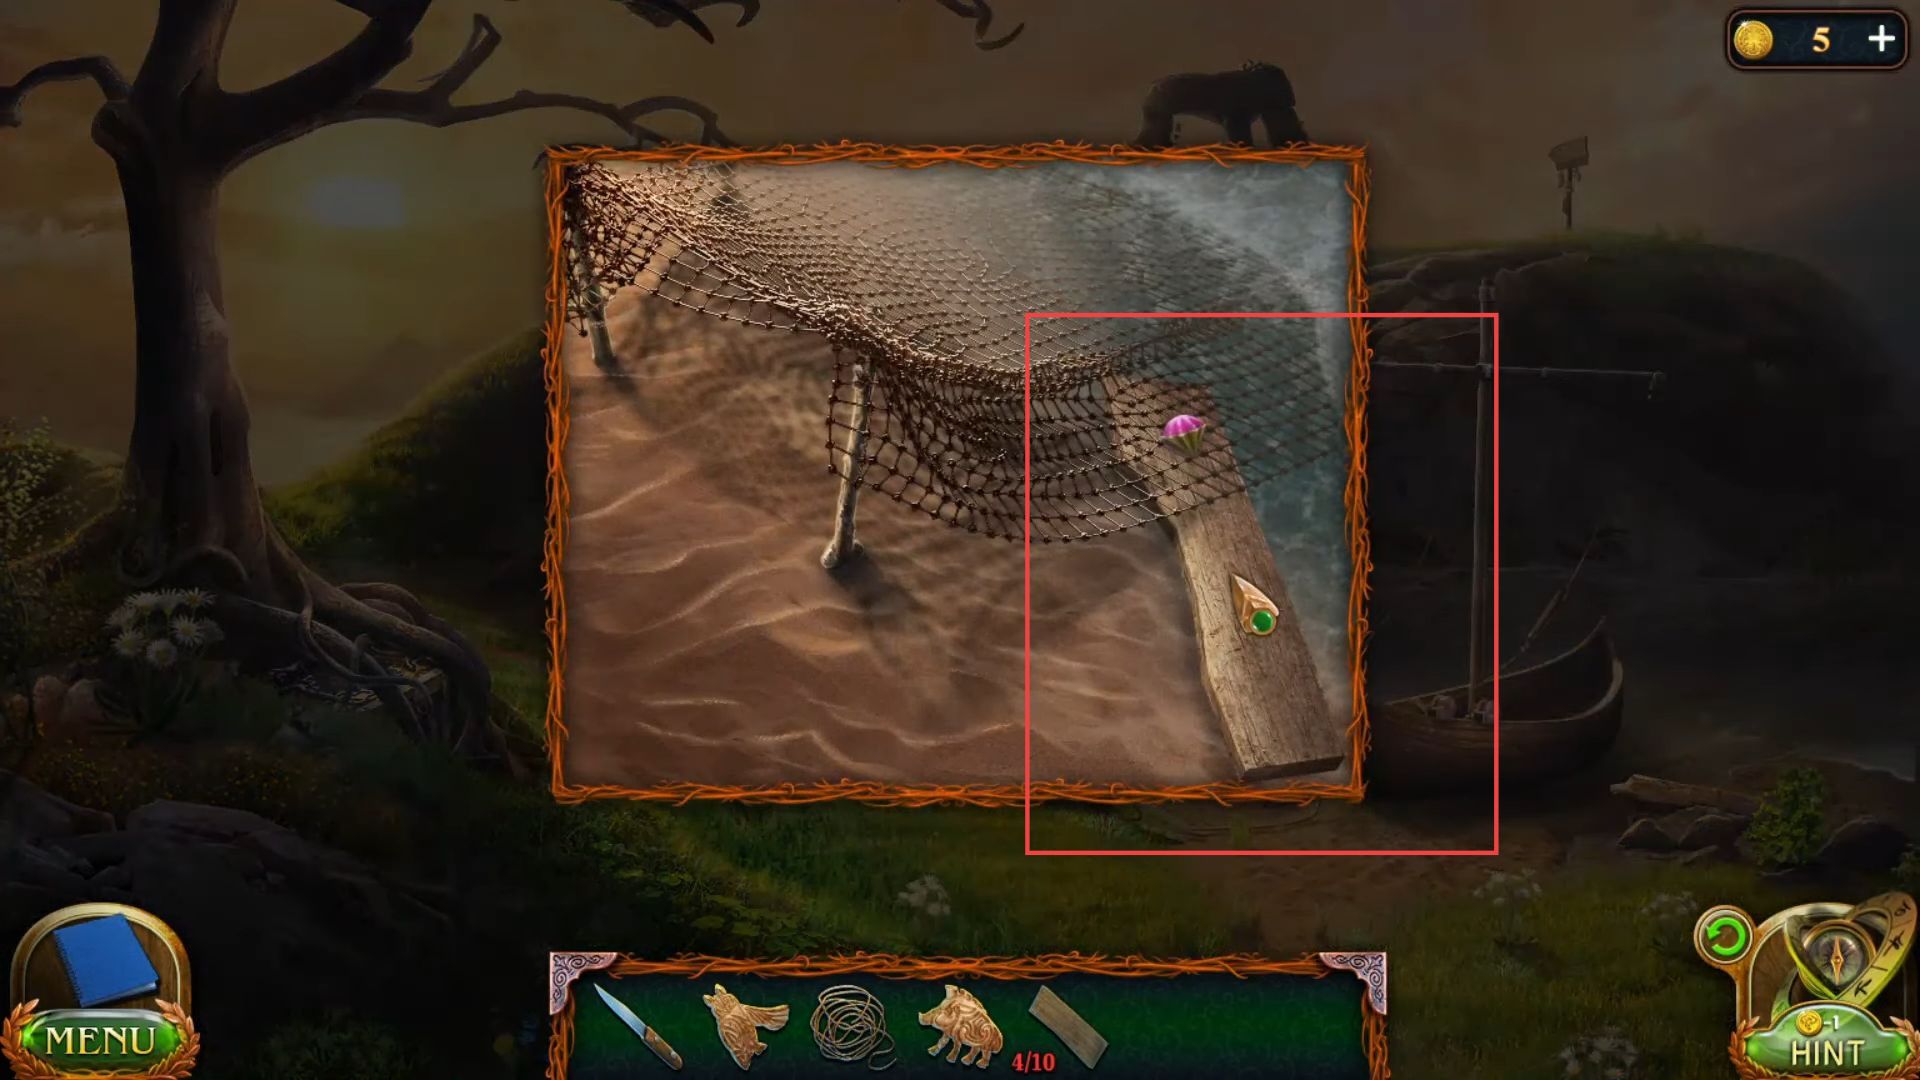
- Grab a gem and a plank from the net near the bridge.
- Get another plank from the floor near the stone.
- Grab two planks from the shelf across the river under the bridge.
- Go to the mini-mountain opposite the river and grab another plank.

- Grab another plank from the right side of the mini mountain.
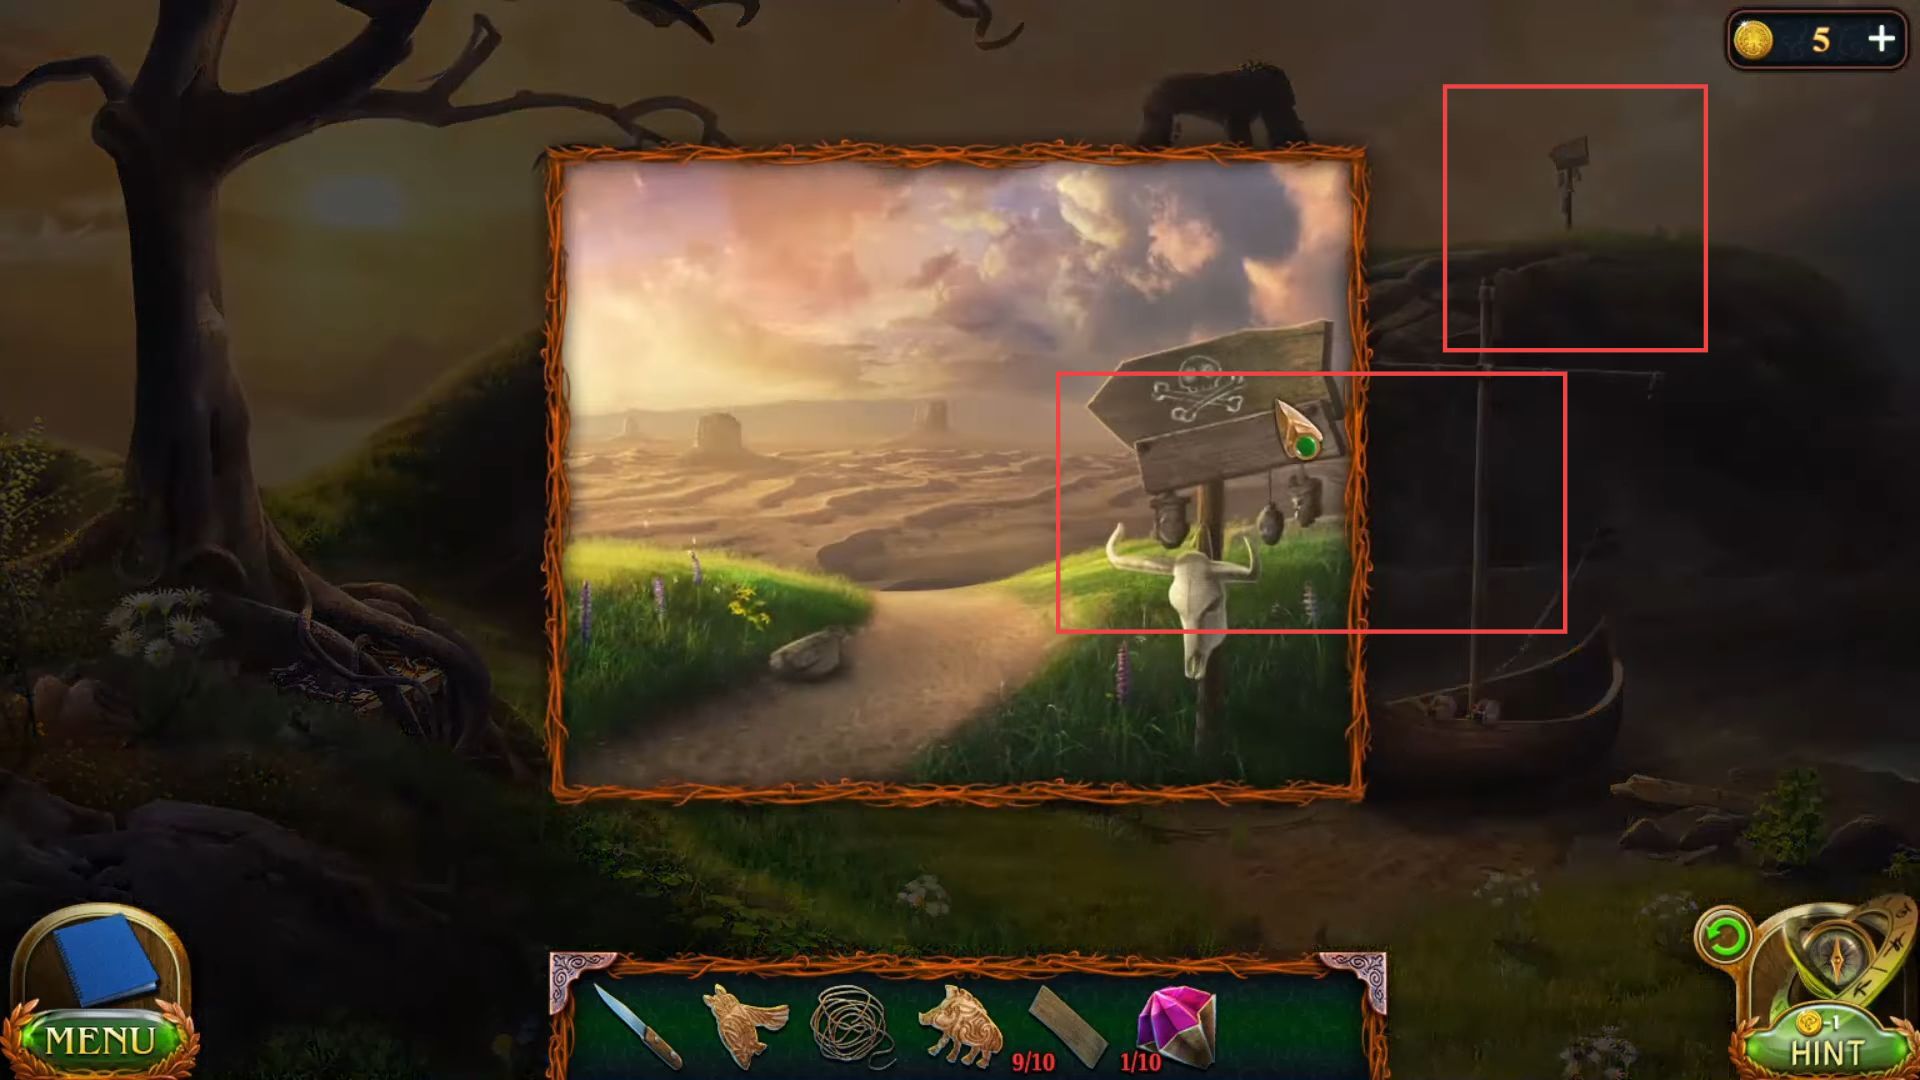
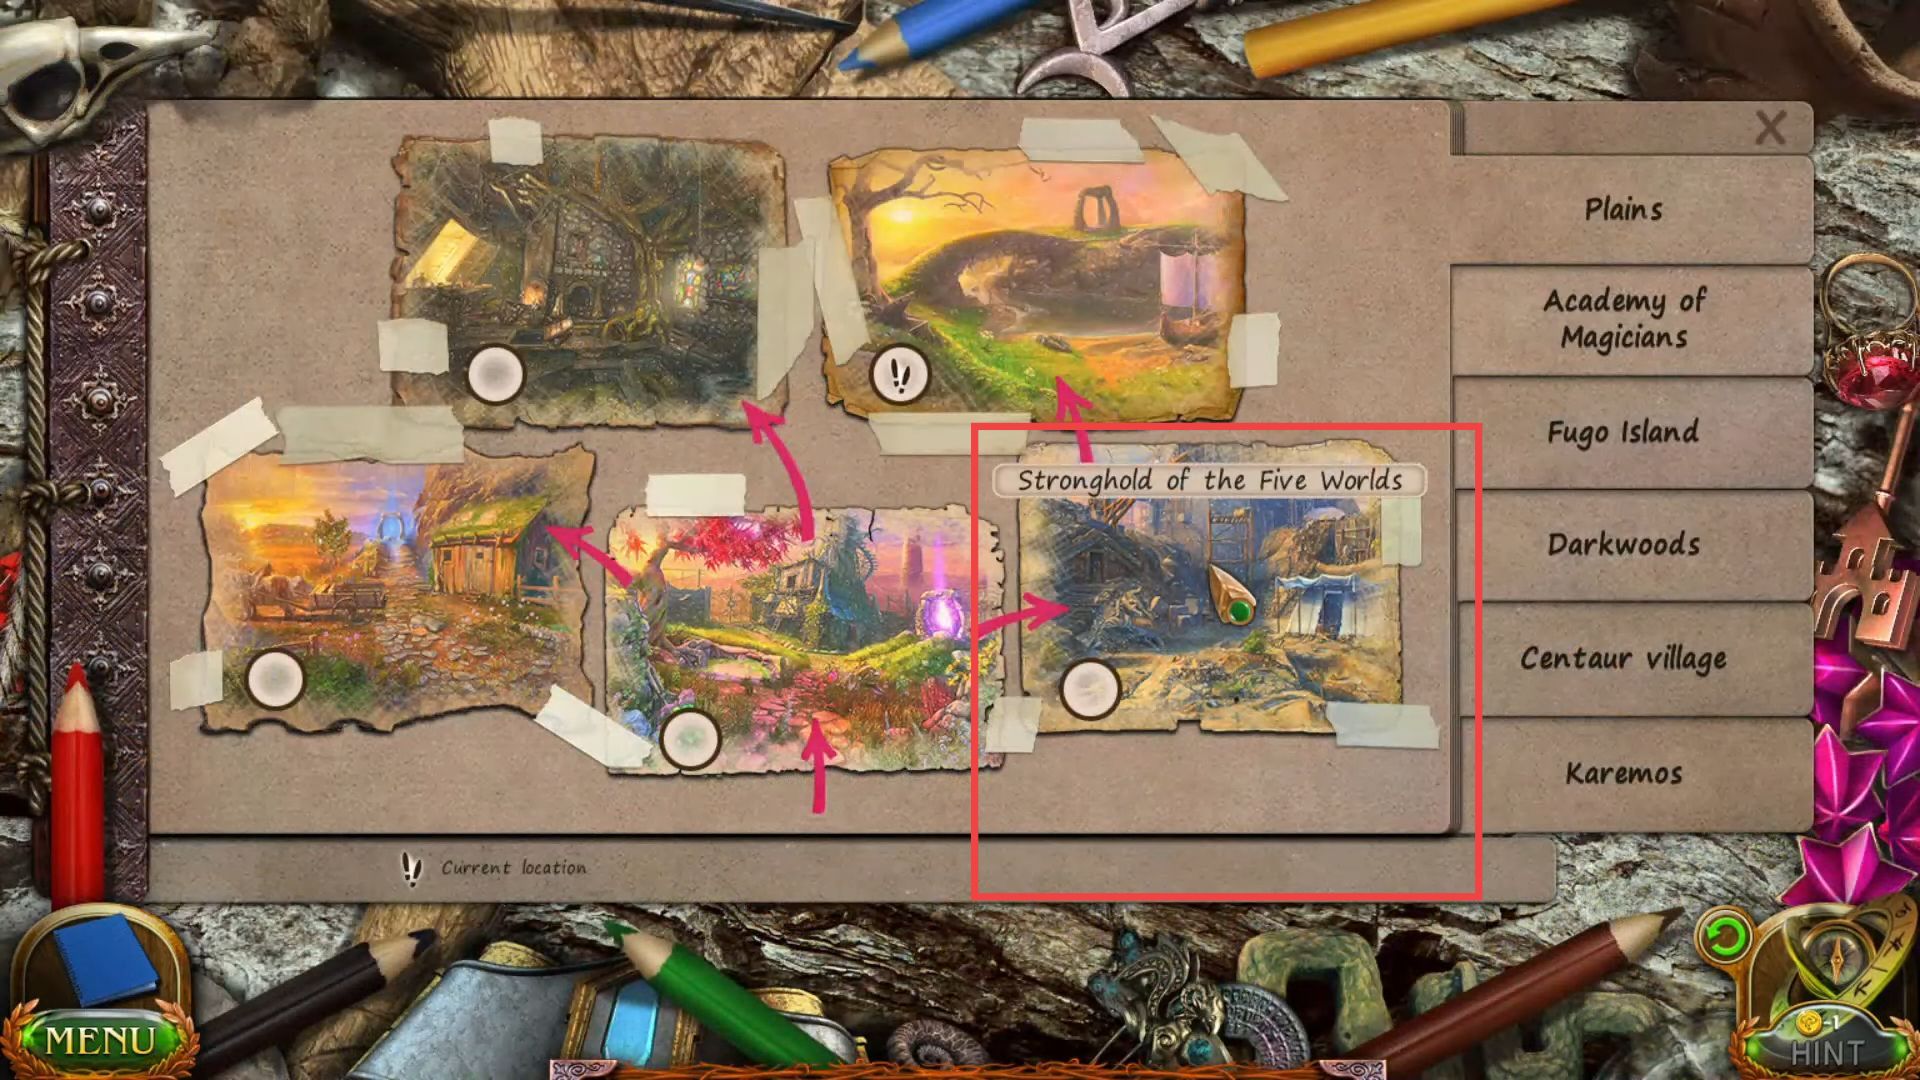
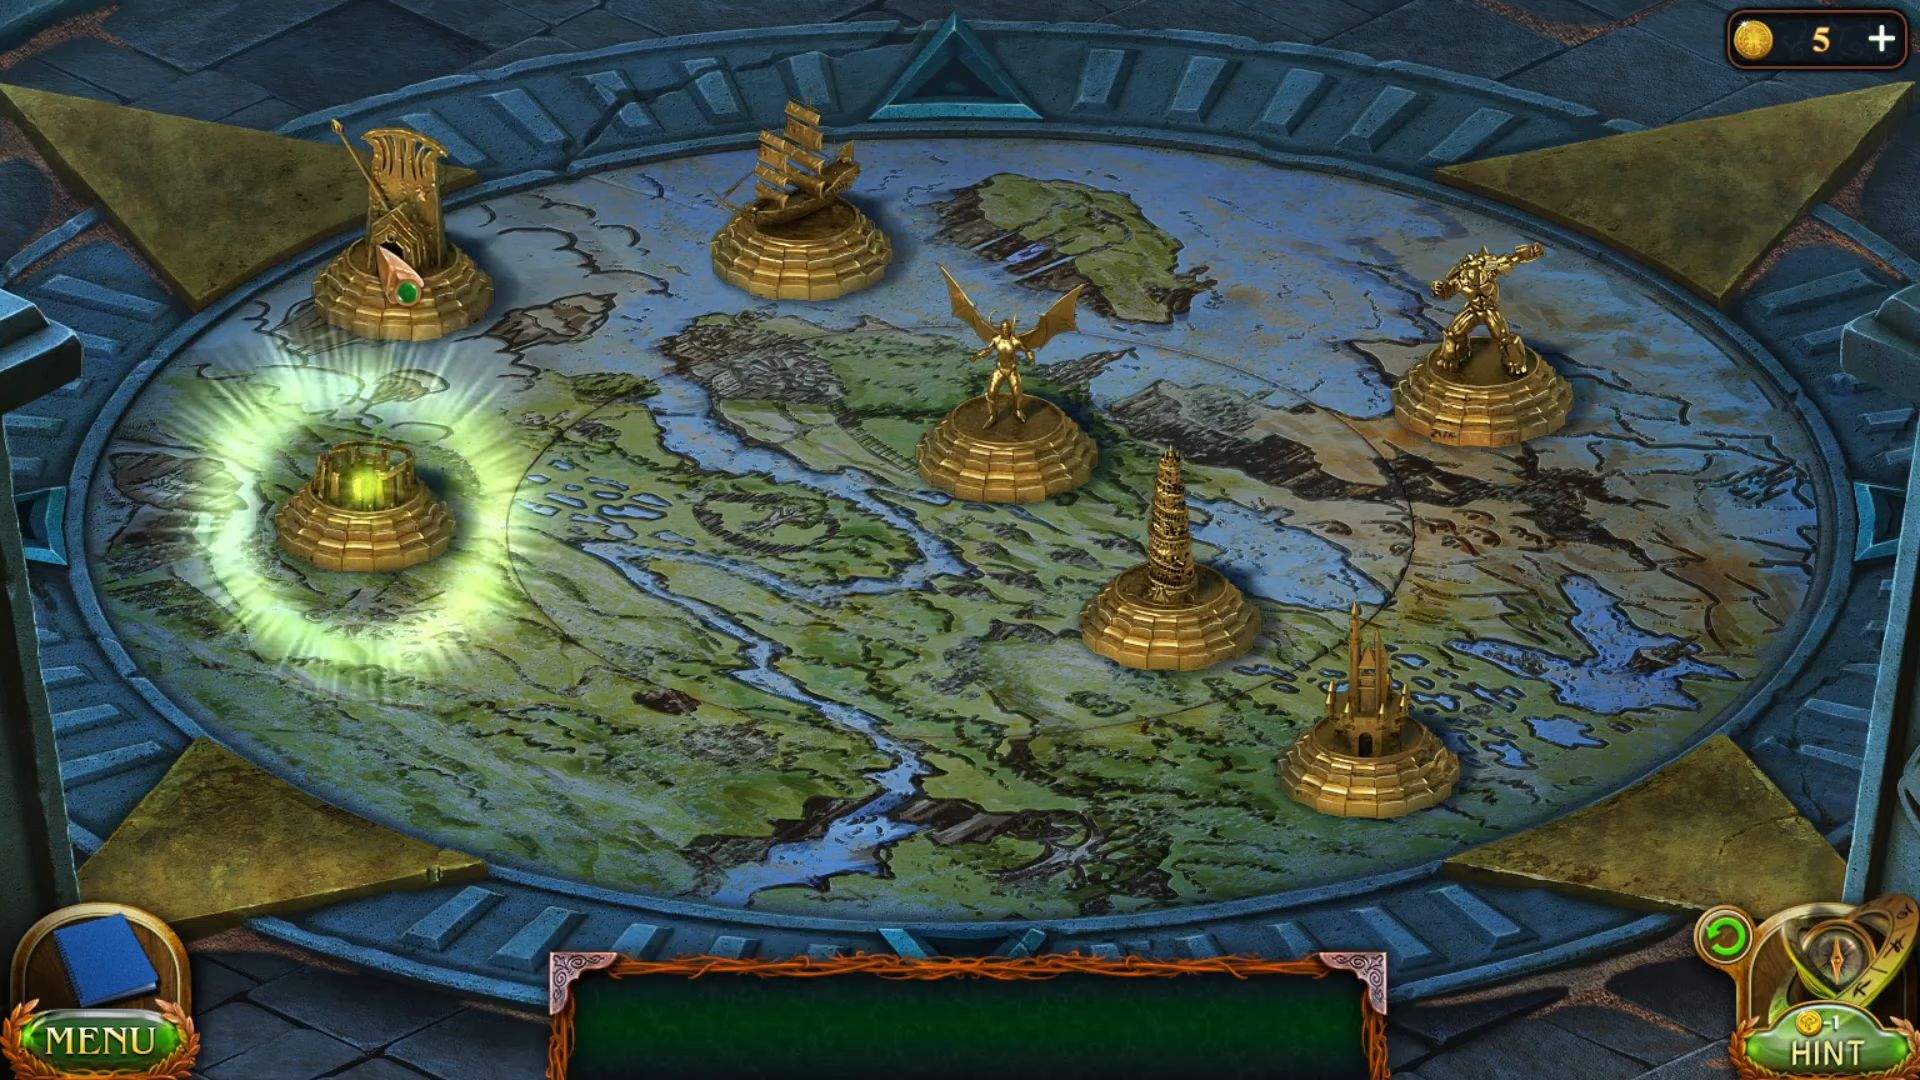
- Use the map to go to Stronghold of the Five Worlds.
- Distribute planks evenly in this sequence to repair each level of the scaffolding.
- Again, distribute planks evenly in this sequence to repair each level of the scaffolding from the upper portion.

- Distribute planks evenly in this sequence to repair each level of the scaffolding for another time from the top portion to unlock a new achievement.

- Knock the box from the upper portion of the planks to grab a hacksaw.

- Cut the locker from the tent using the hacksaw to unlock it.

- Once the box’s lock is opened, grab a rune from the inside.

- Go to the Halfling village using the map.

- Put the rune into the stone at this place near the tree.
- Go inside the light coming from the stone.

- Grab a manuscript from the right side shelf.

- Go to the front side door adjacent to the fountain.

- Grab a gem from the right side by knocking on the door’s lock.

- Go inside the front door and grab another gem from the right side cage by knocking it.

- Grab another gem from the front side hallway statue’s armour using the knife.
- Open the mouth of the statue to grab another gem. Then grab a halberd from the right hand of the statue.

- Remove the curtain of the green board using the halberd to get a gem and a clue from the green board.

- Knock on the right side door from the hallway.
- Go inside the door and grab another gem from the table by removing the objects.

- Grab crayons from the right side small box.

- Go inside the front side hallway and grab other crayons from door number 3.
- Open the map, select the plains tab, and go to Stronghold of the Five Worlds.

- Grab other crayons from the top of the tent’s wall.
- Go to the Academy of Magicians tab from the map and click the Courtyard of the Academy.

- Colour the horse’s side bag with these characters using crayons to get a clue to open the bag.

- Once the bag is opened, grab a bull, torn drawing, and a gem from the inside.
- Pick the party of the key in this sequence on the combination lock, as shown in the torn drawing clue to unlock the door.

- Once the door is opened, go inside it.

- Once inside the room, grab a hook from the right side box at this place.

- Get a broken floor cleaner part from the floor’s right corner.

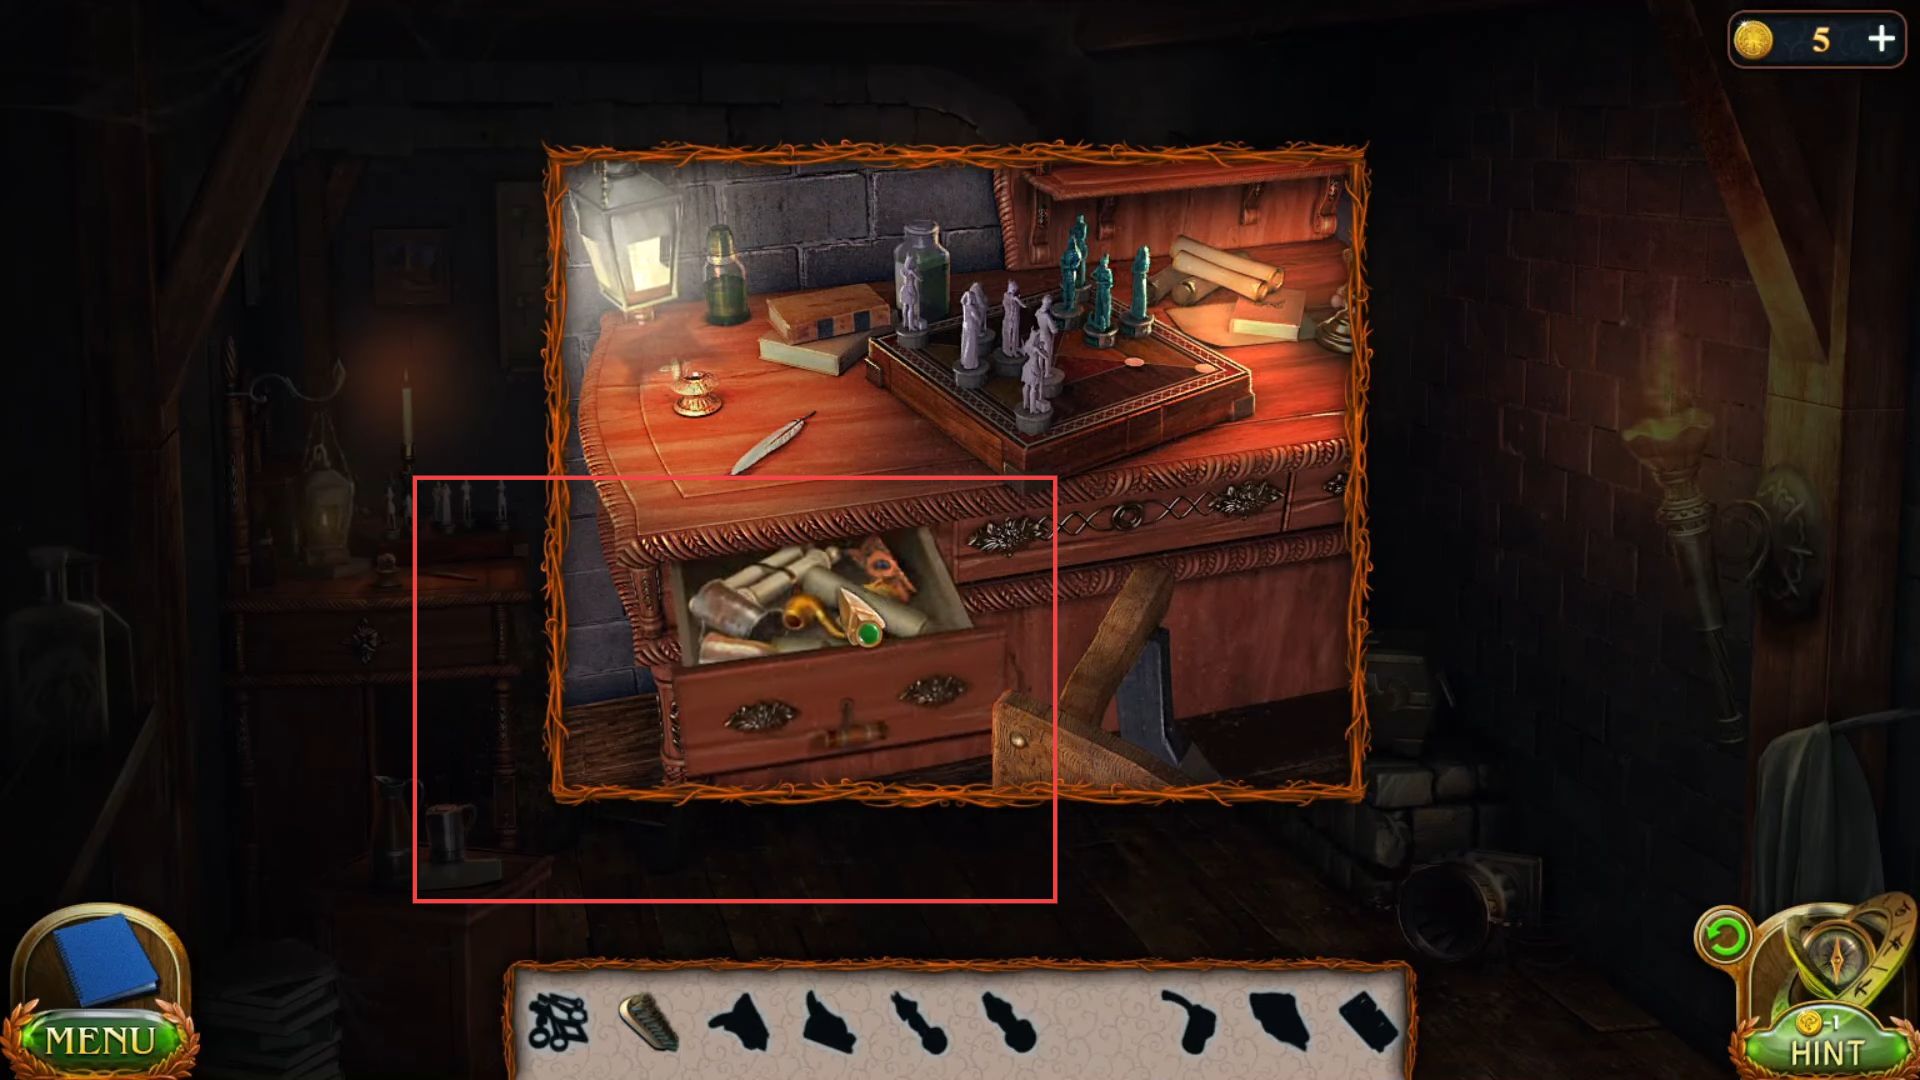
- Open the drawer by putting the hook and grab two items from the inside.
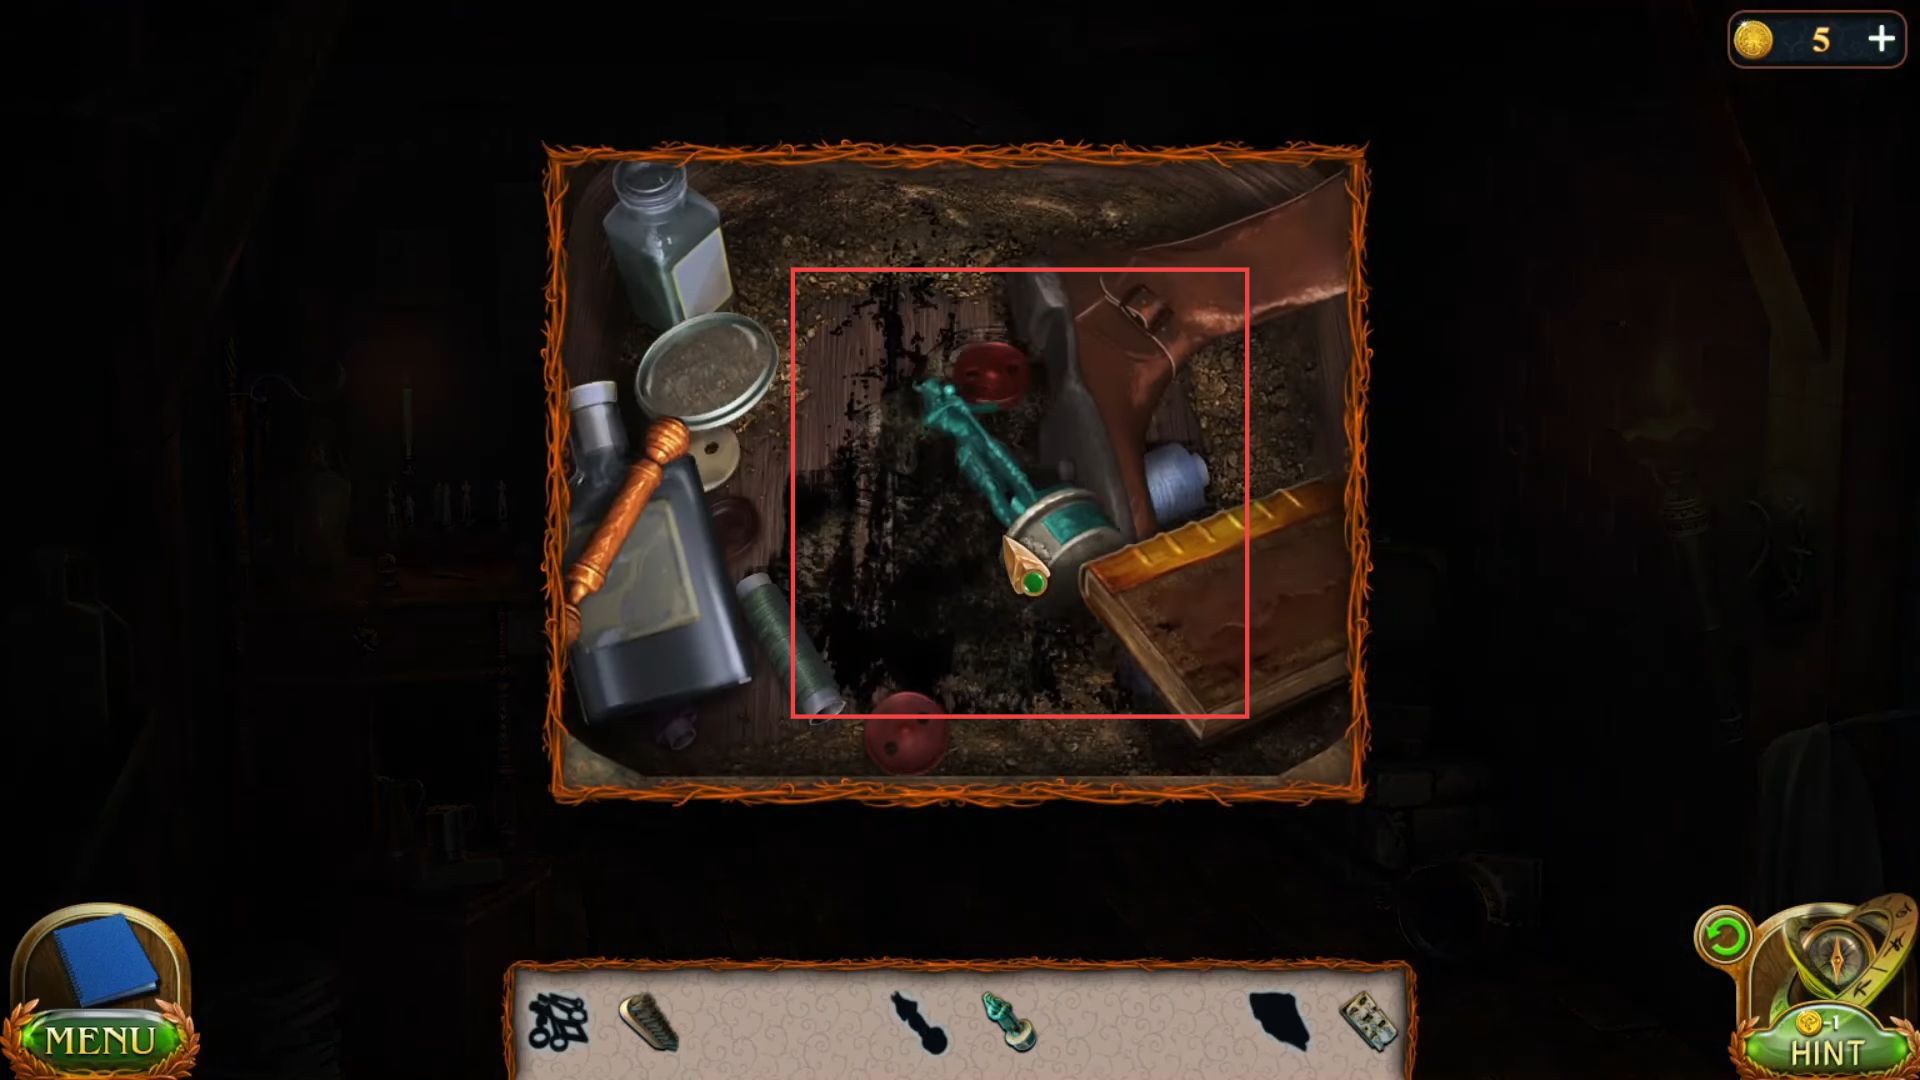
- Get another small item from the shelf on the front wall.

- Put the oil on the right side vent to unlock it and grab a few items from inside.

- Place the parts of the owl from your inventory into the box to open it.
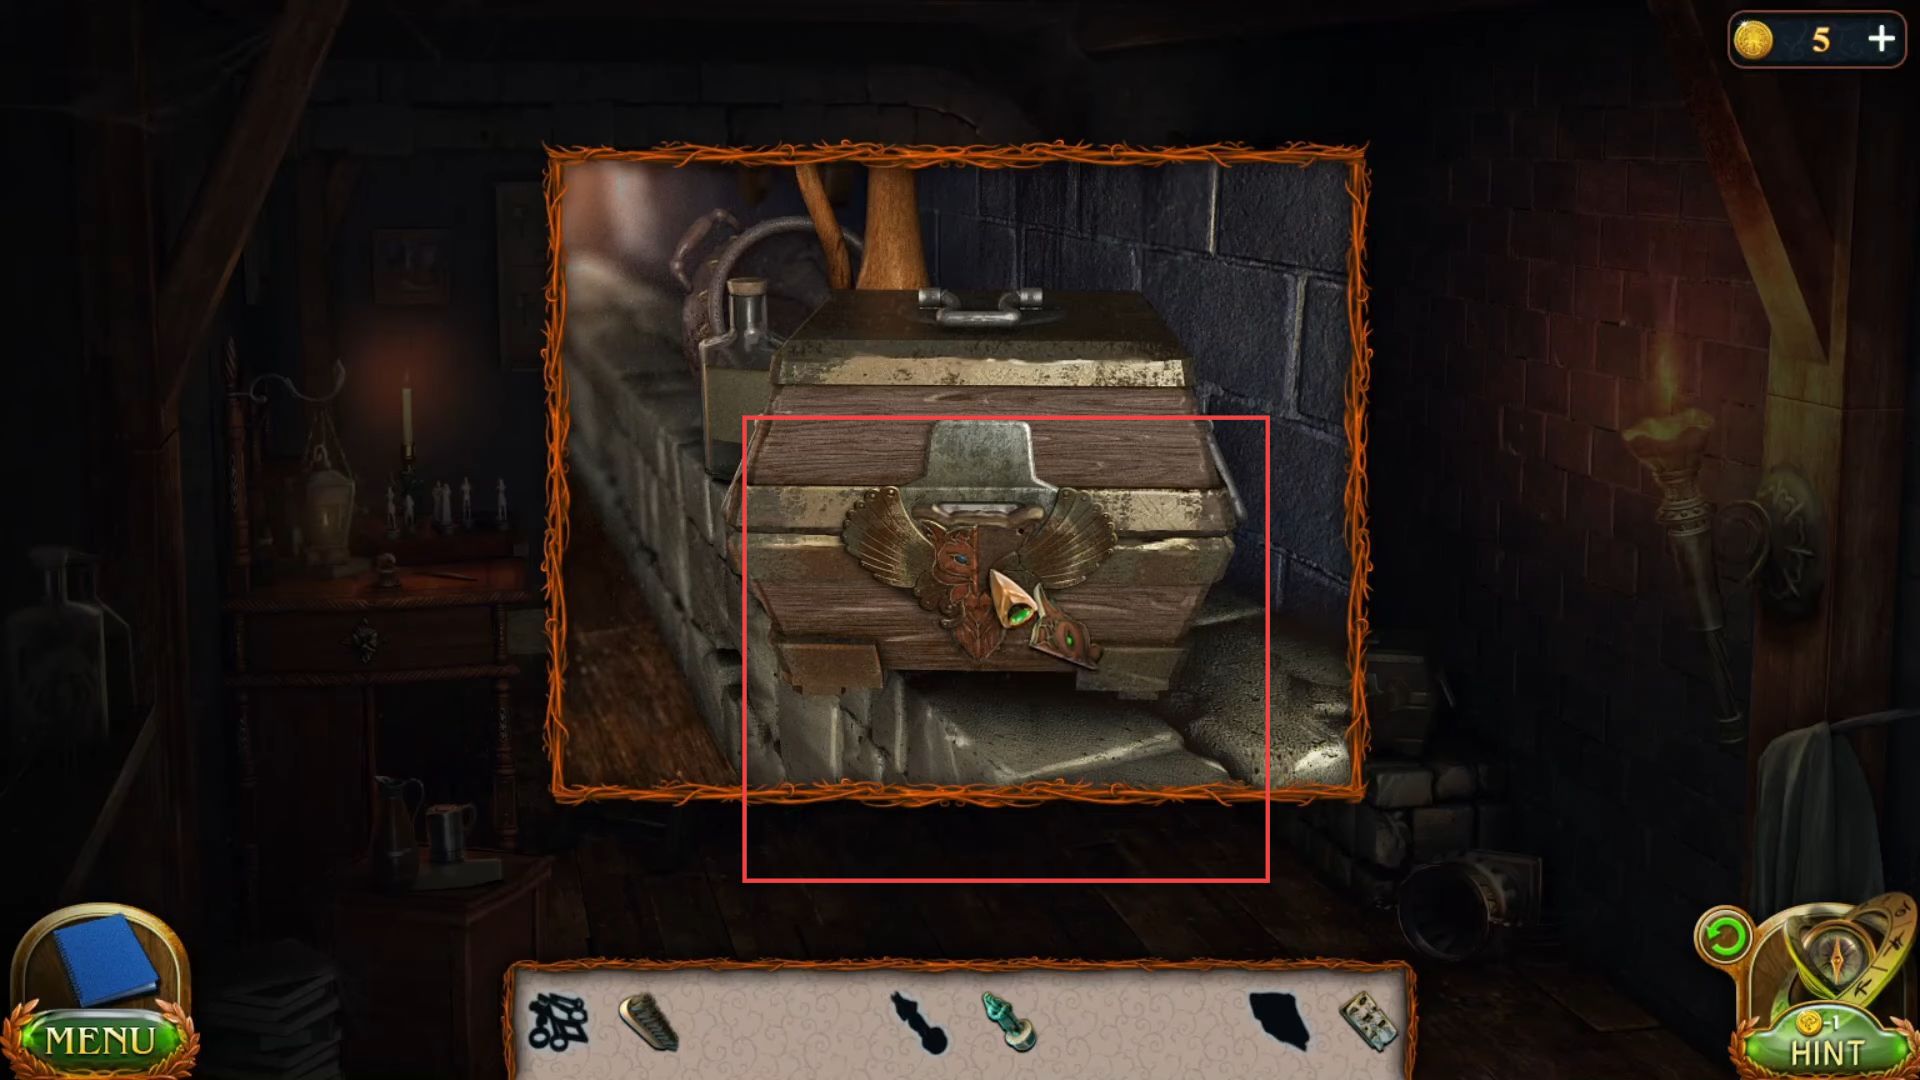
- Once the box is opened, knock on the items and grab another emblem from the inside.
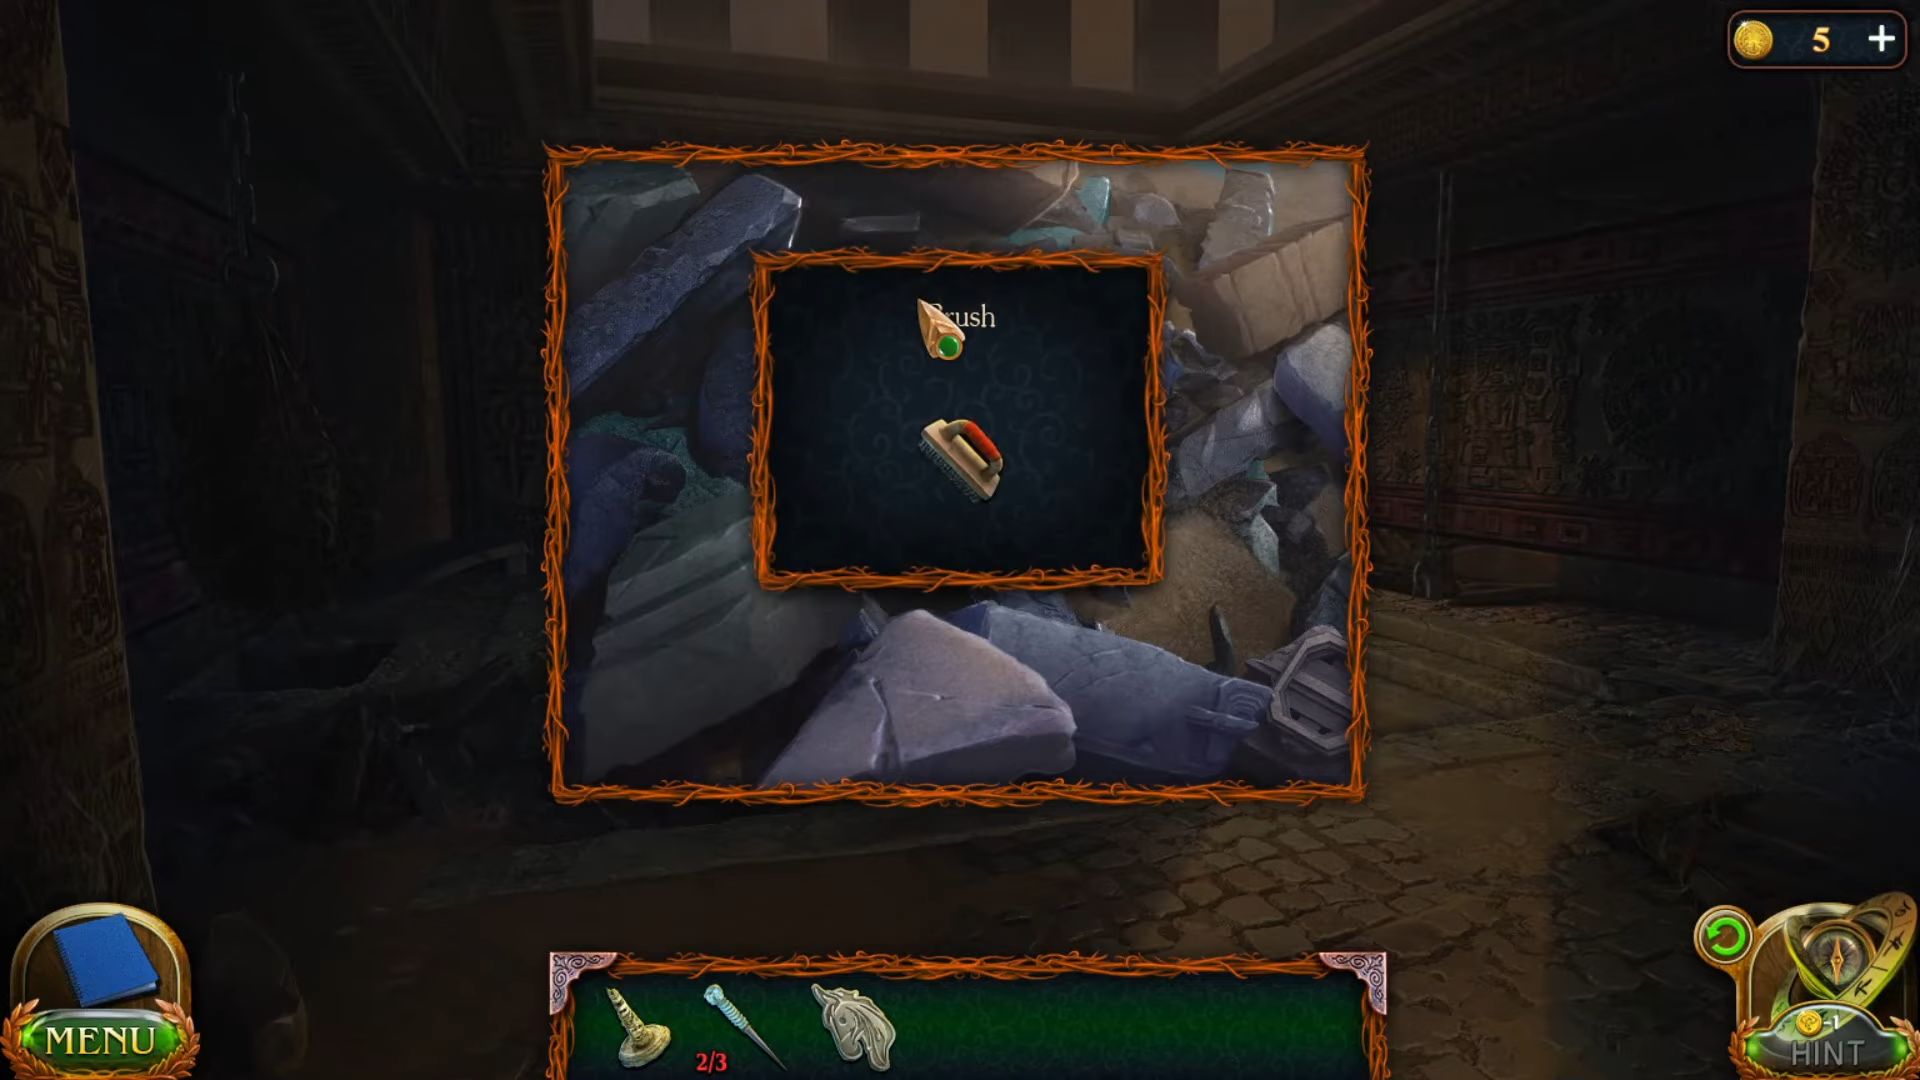
- Use the brush cleaner to get a clue inside the box.

- Place the chess board pieces from the table to grab a cloth in this sequence.

- Select the correct items in the picture using the previous hint to unlock the drawer.
- Once the drawer is opened, grab these utensils from the inside.
- Put the cloth in the window and hang the keys in their places in this way.

- Grab this key from the keys board.

- Put the key in door number 3 from the hallway to unlock it and go inside.

- Now grab a deer emblem from the right side table.

- Slide the bottle from the table to grab another gem.
- Grab another raven emblem and a gem from the bird’s cage.
- Spin the discs in this sequence and move the swords so that the blue crystals should be in the right place to unlock the drawer.
- Once the drawer is opened, put the gems in the crown and grab a stone.
- Go to the Maaron’s office on the map from the Academy of Magicians.

- Grab the magic sword from the table in Maaron’s office.

- Go to the library from the map and use a continuous line in this sequence to repeat on the wall with the drawing that you saw in Maaron’s memory to open the wall.
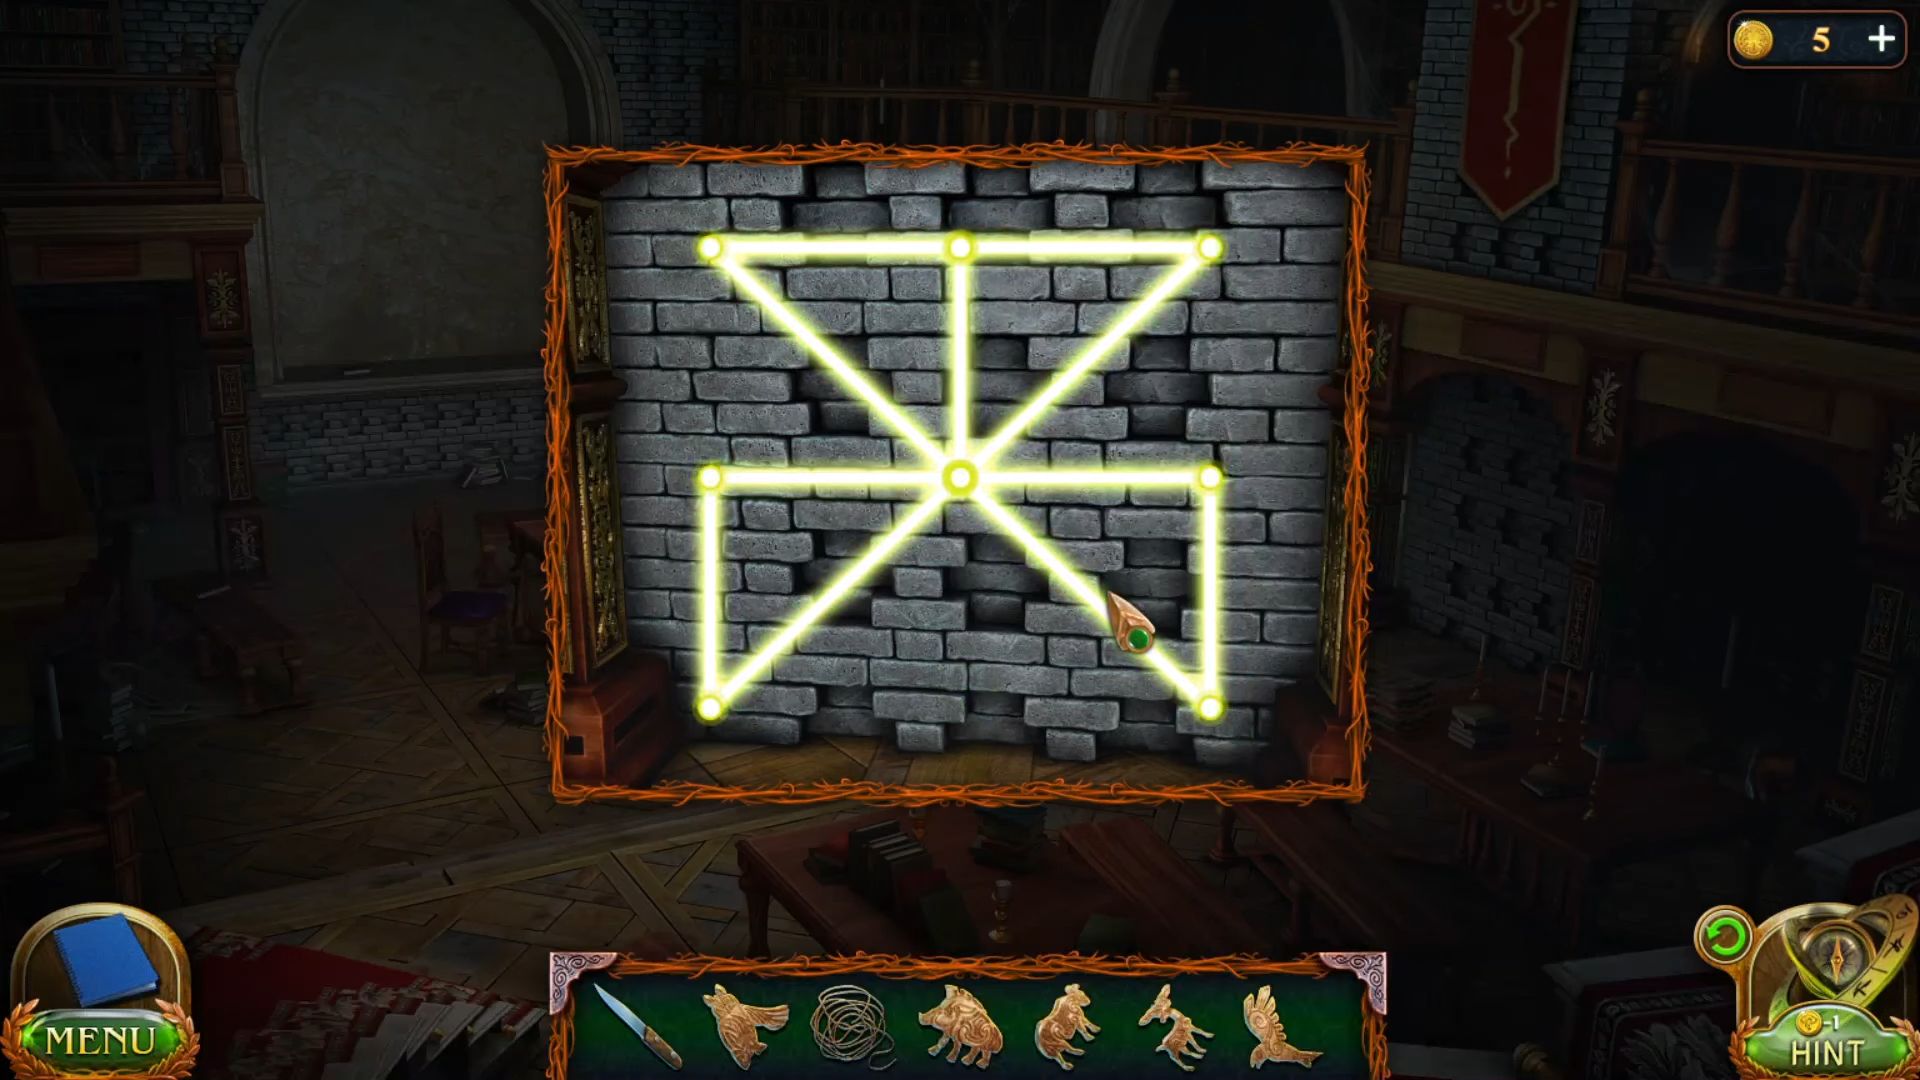
- Now go to the room from the magical wall.

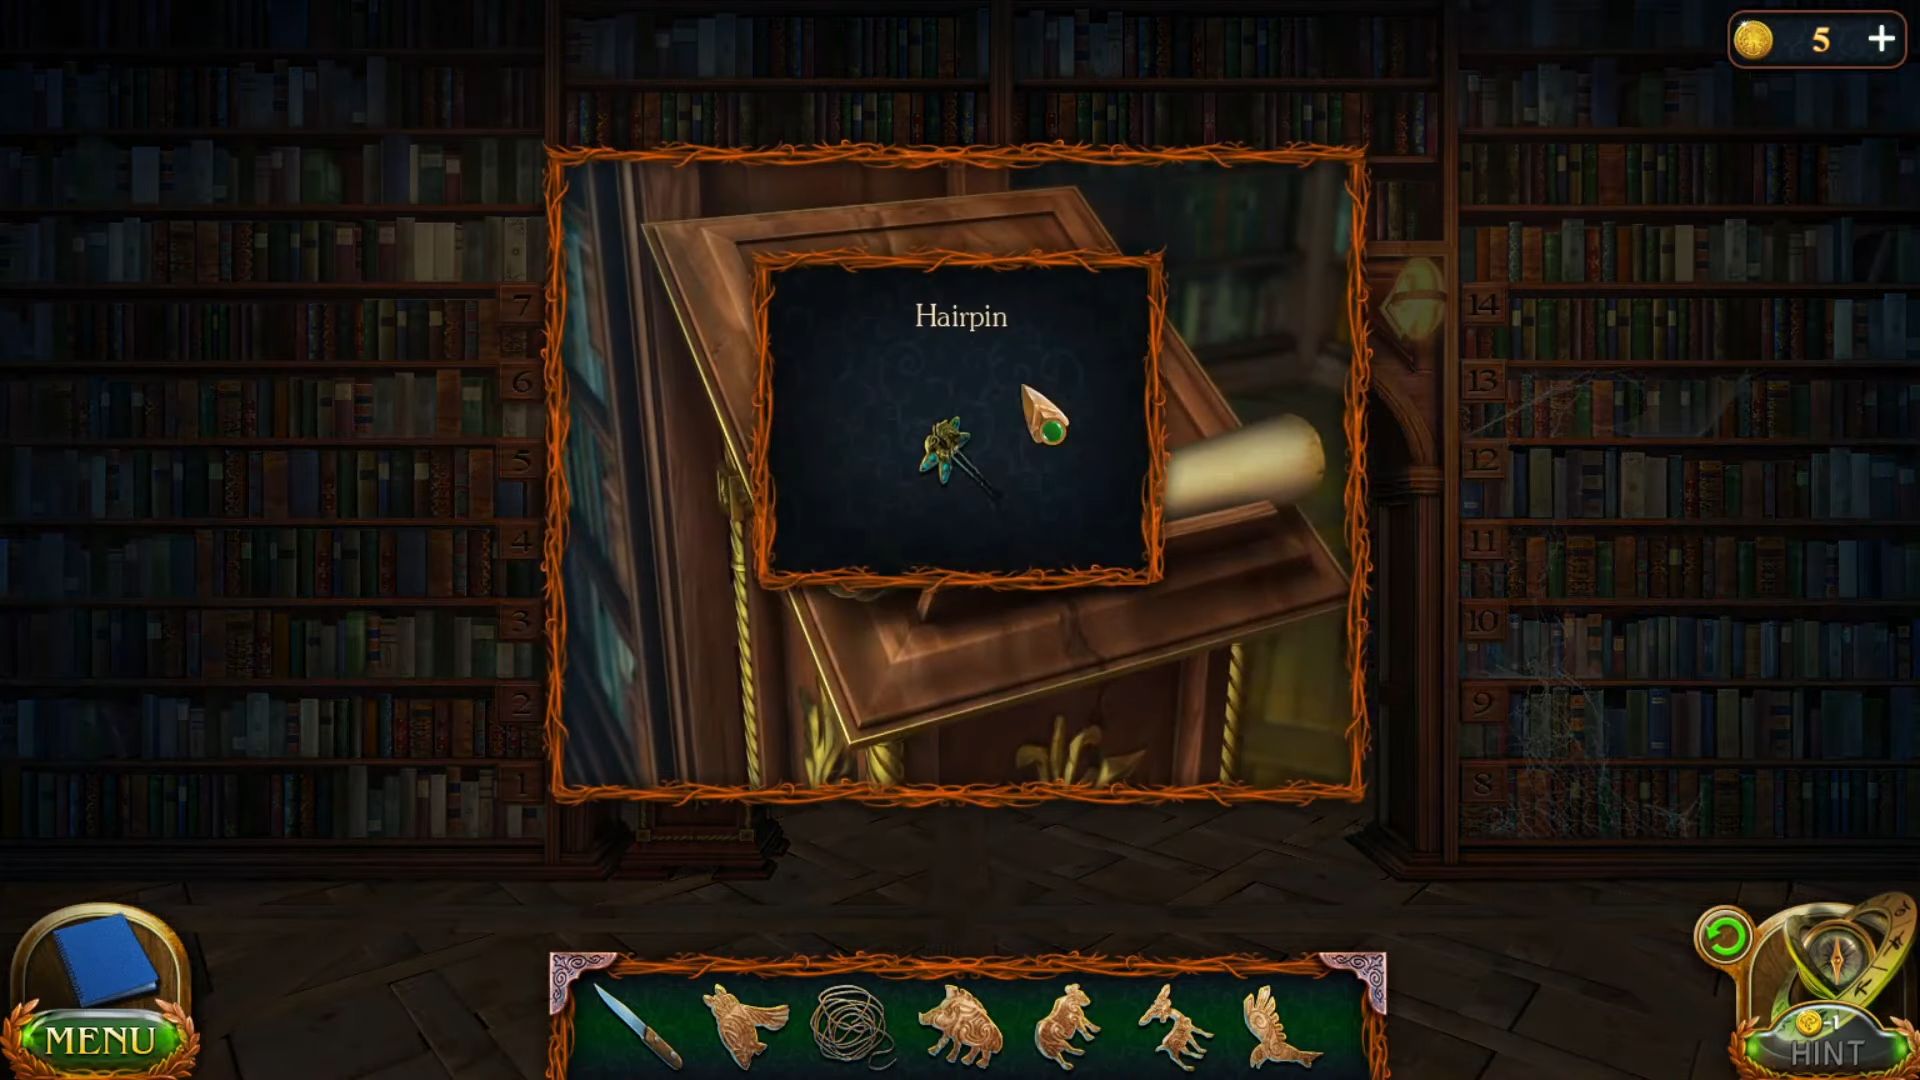
- Go to the bookshelf from the library and grab a hairpin on the book stand.
- Go to the 12-number bookshelf and grab a runes of dark woods.

- Go to the academy courtyard and use the hairpin to unlock the lock from the horse den.

- Once the lock is opened, grab a pickaxe and a bust from the shelf.
- Put the bust in the hall and arrange them in the correct order.

- Knock the hidden box from the busts and grab scales and a drop from the inside.

- Put the drop in the box from the outside ground near the fountain and slide the drop downward.

- Click the chips to place them on the circles of the corresponding colour. To change the direction of a chip, move it to a circle with an arrow to unlock the door.

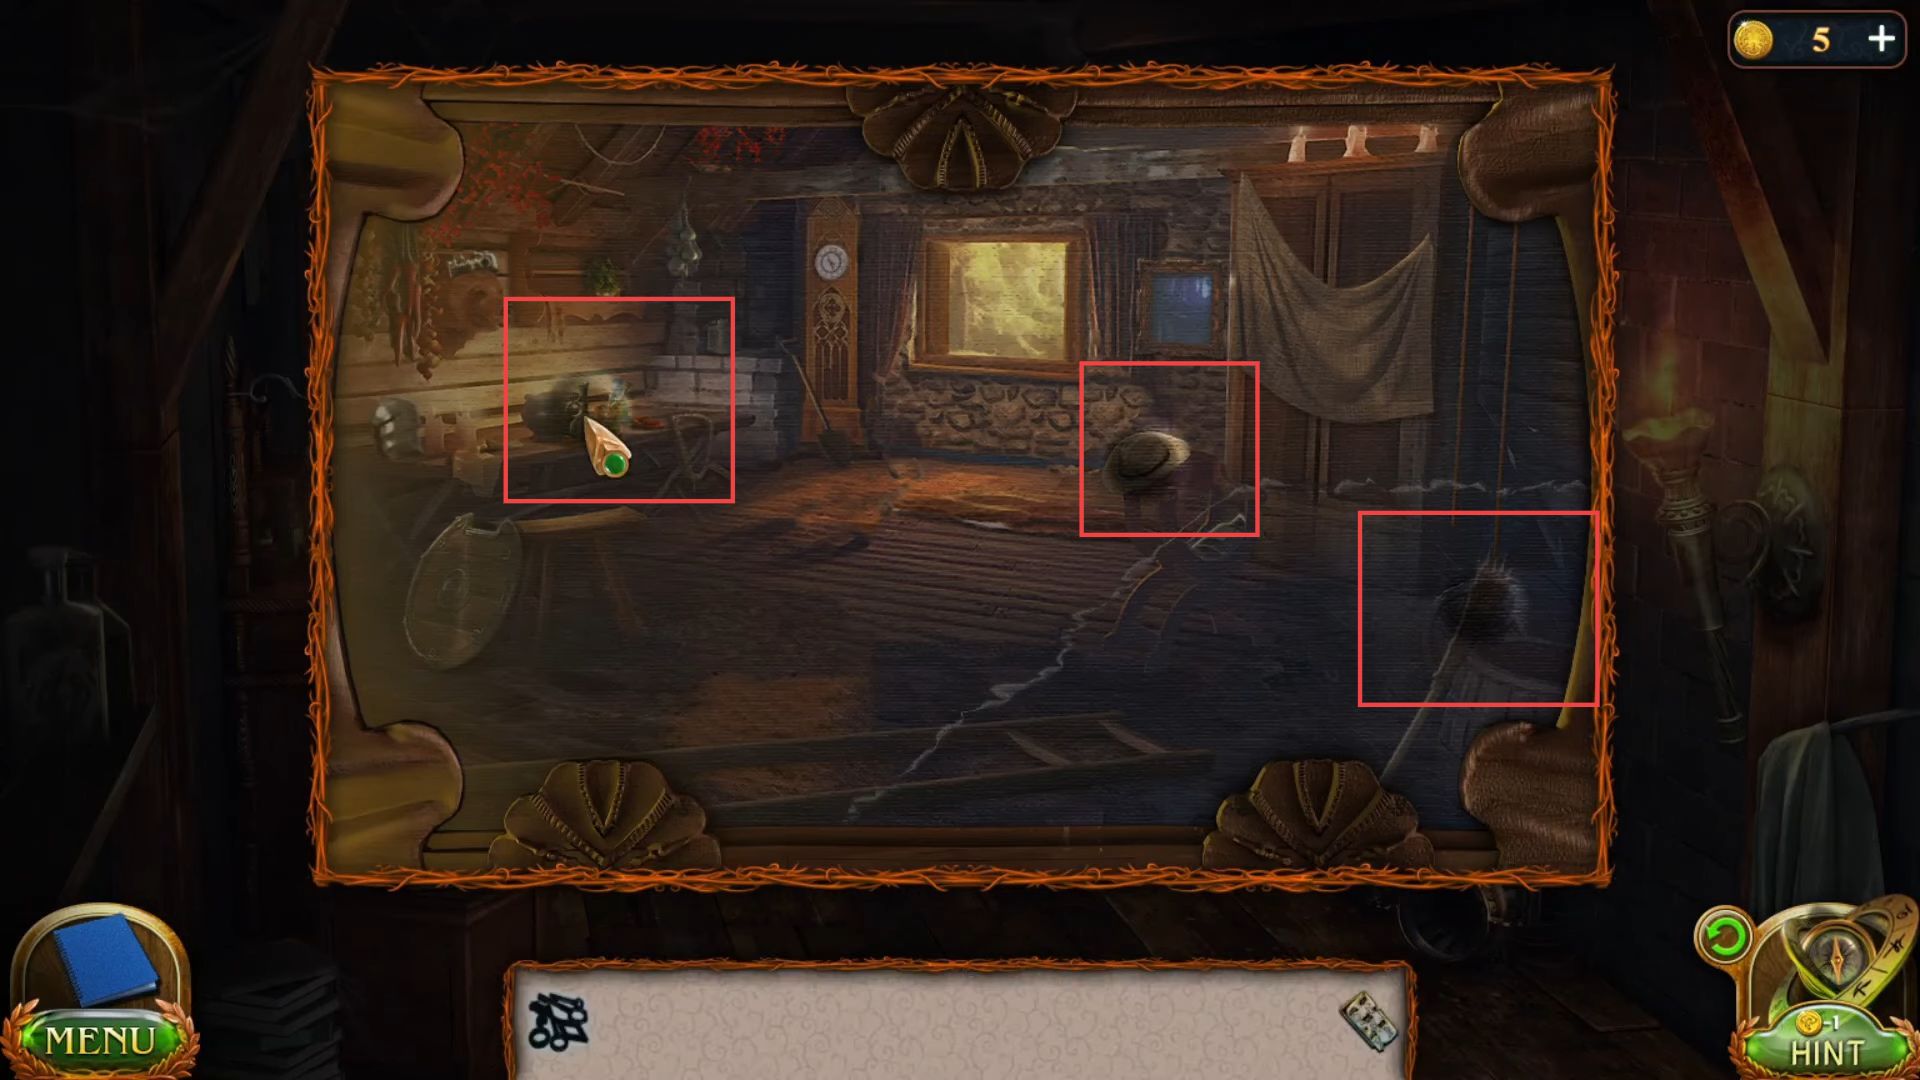
- Grab the gloves and paper pen from the bench.

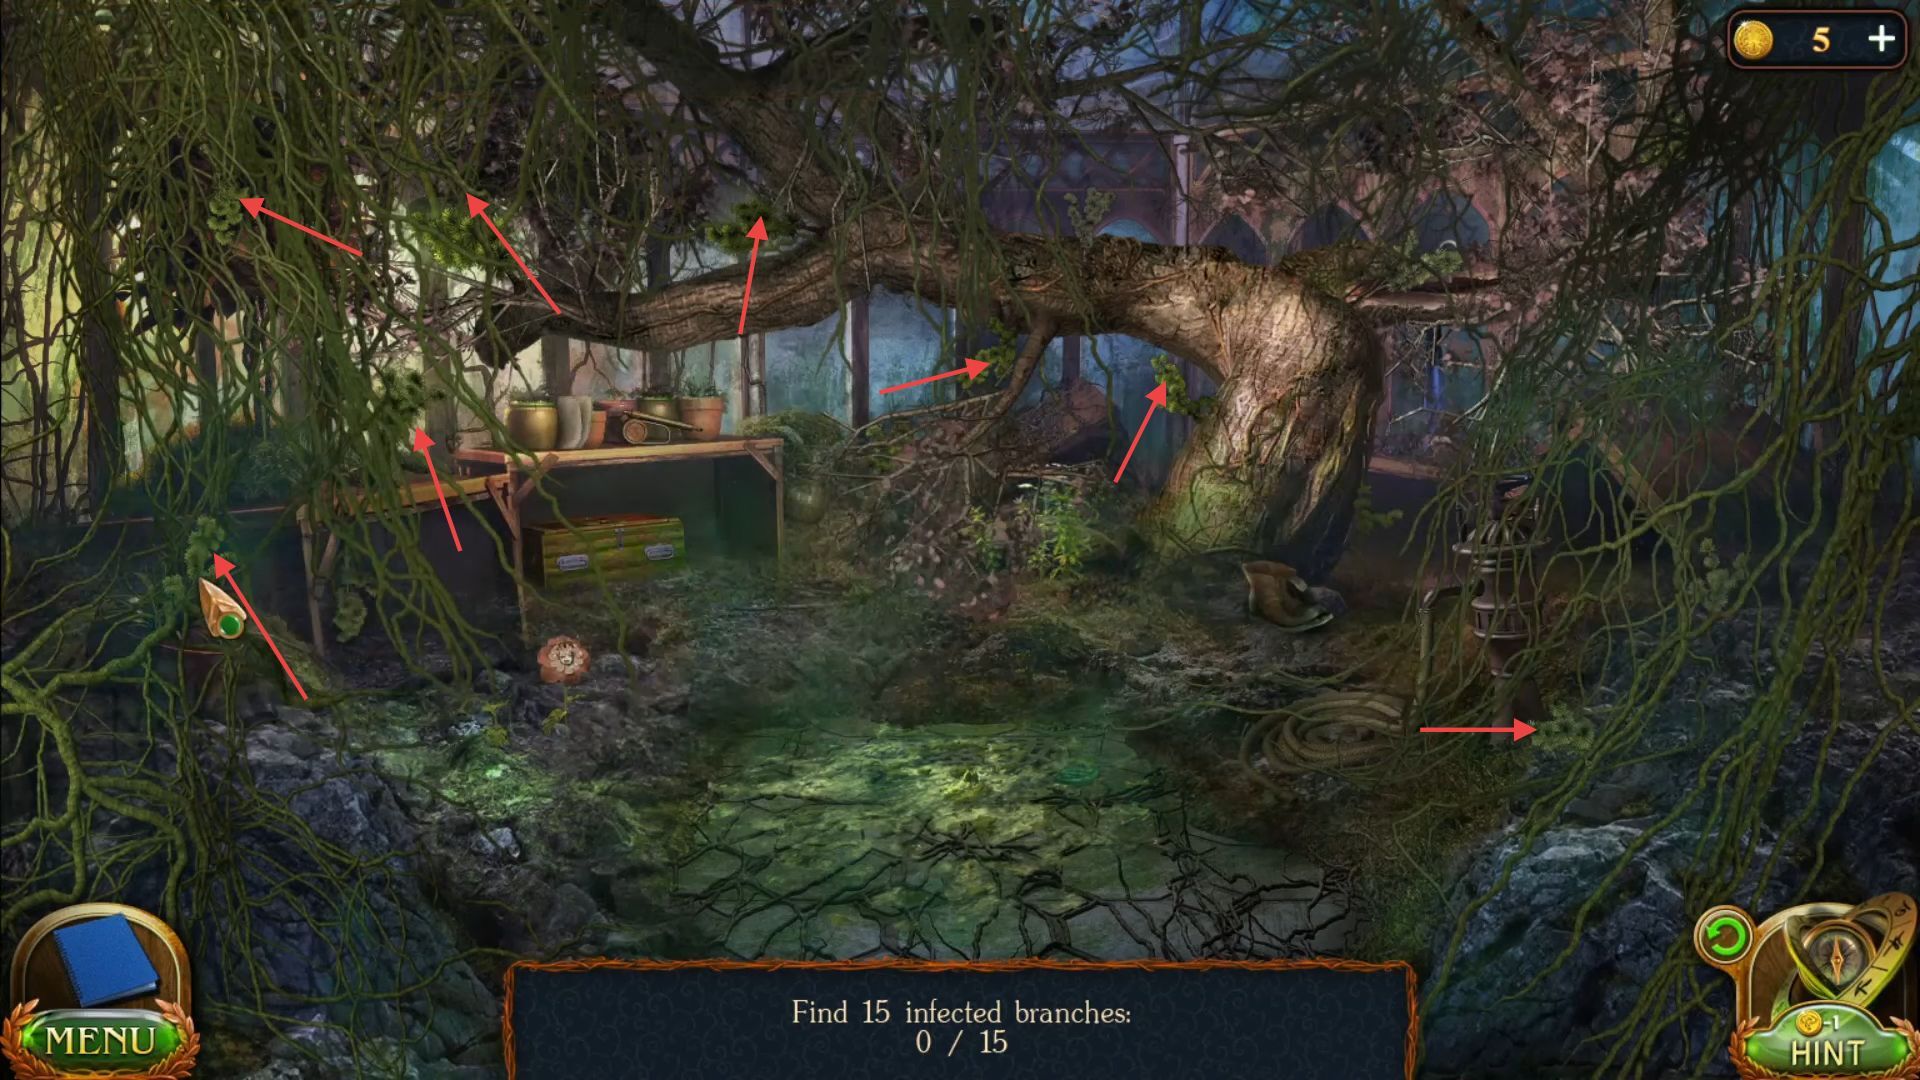
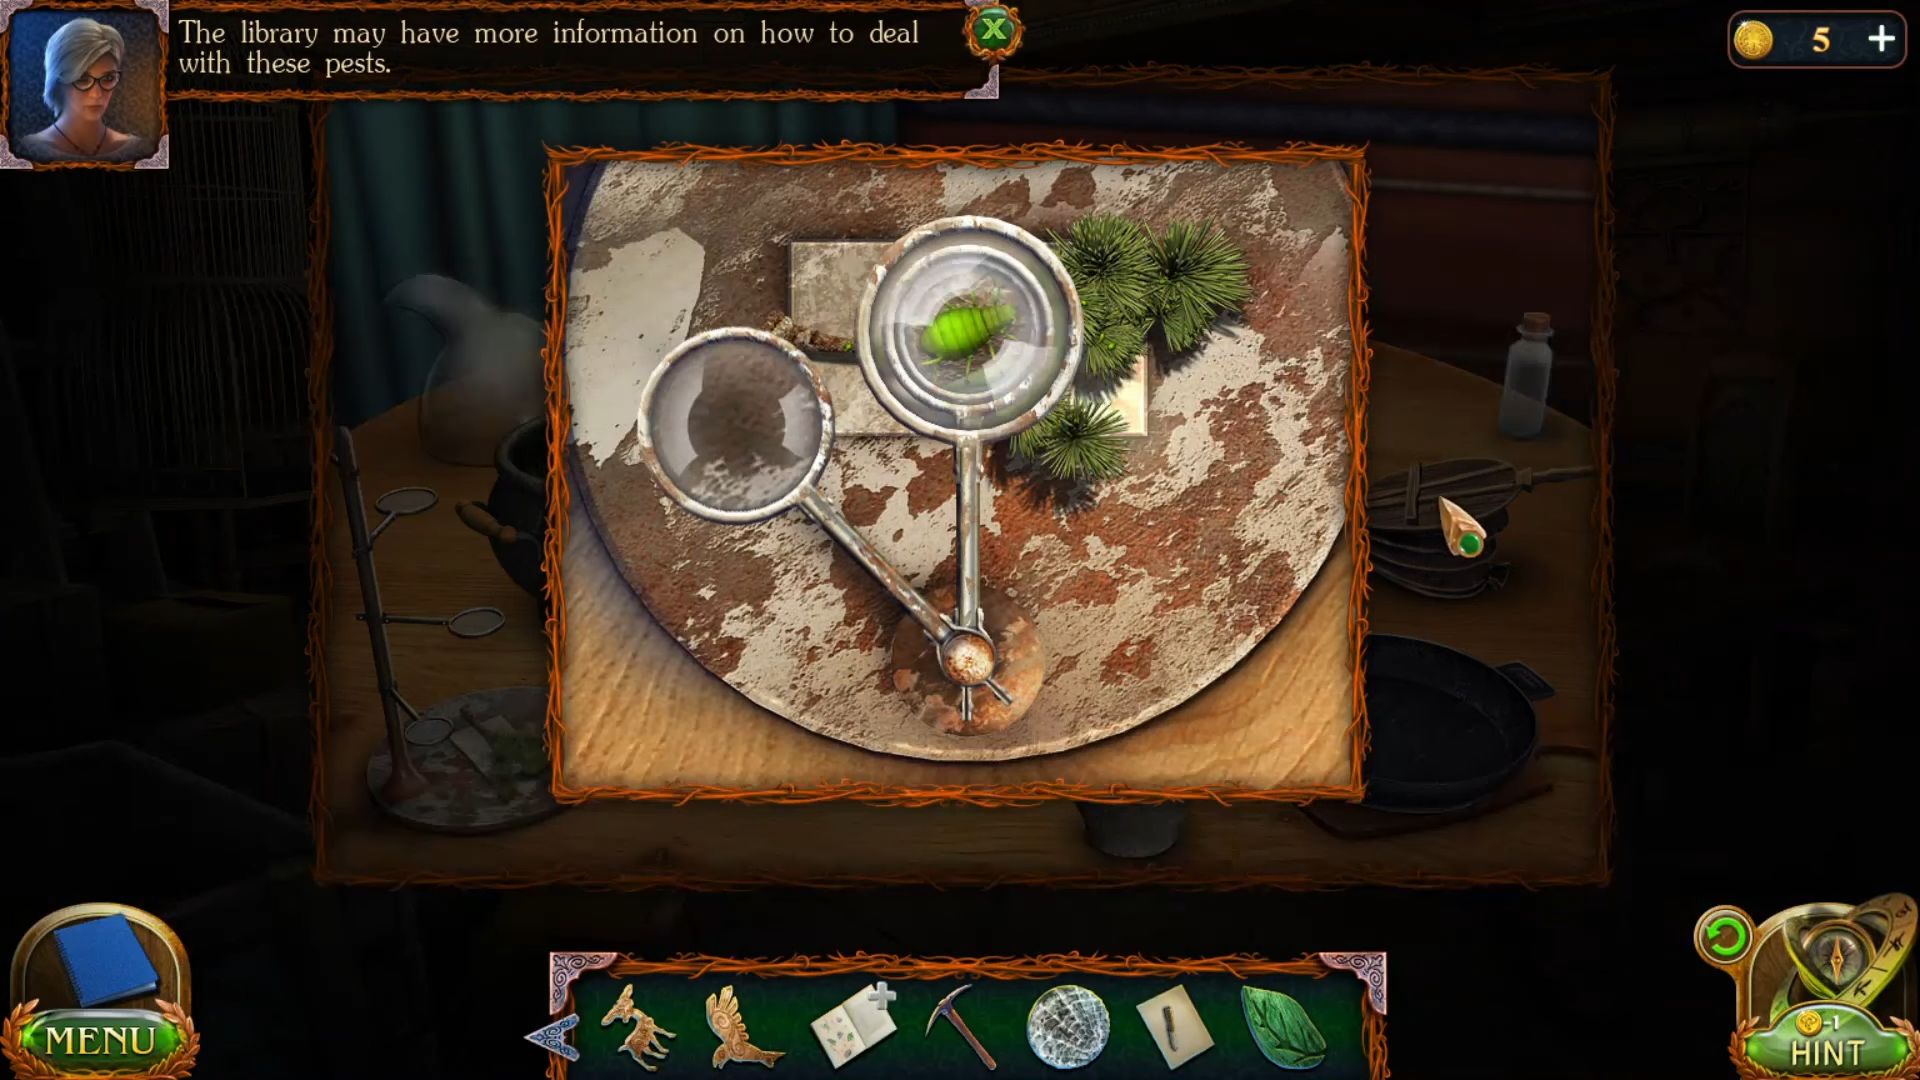
- Now find the fifteen infected branches from the tree.
- Grab a small leaf from the ground.

- Go to Maaron’s office, put the infected branch on the table, and set the magnification to 40x using microscope lenses. They have a magnification of 2,3,4, and 5 times. The degree of the lens magnification depends on its size.
- Head to the library in the plant section at the end and grab a pest book from shelf number 4 to get a clue.

- Move to the Maaron’s yard, grab a mystical mushroom and a leaf from the ground.
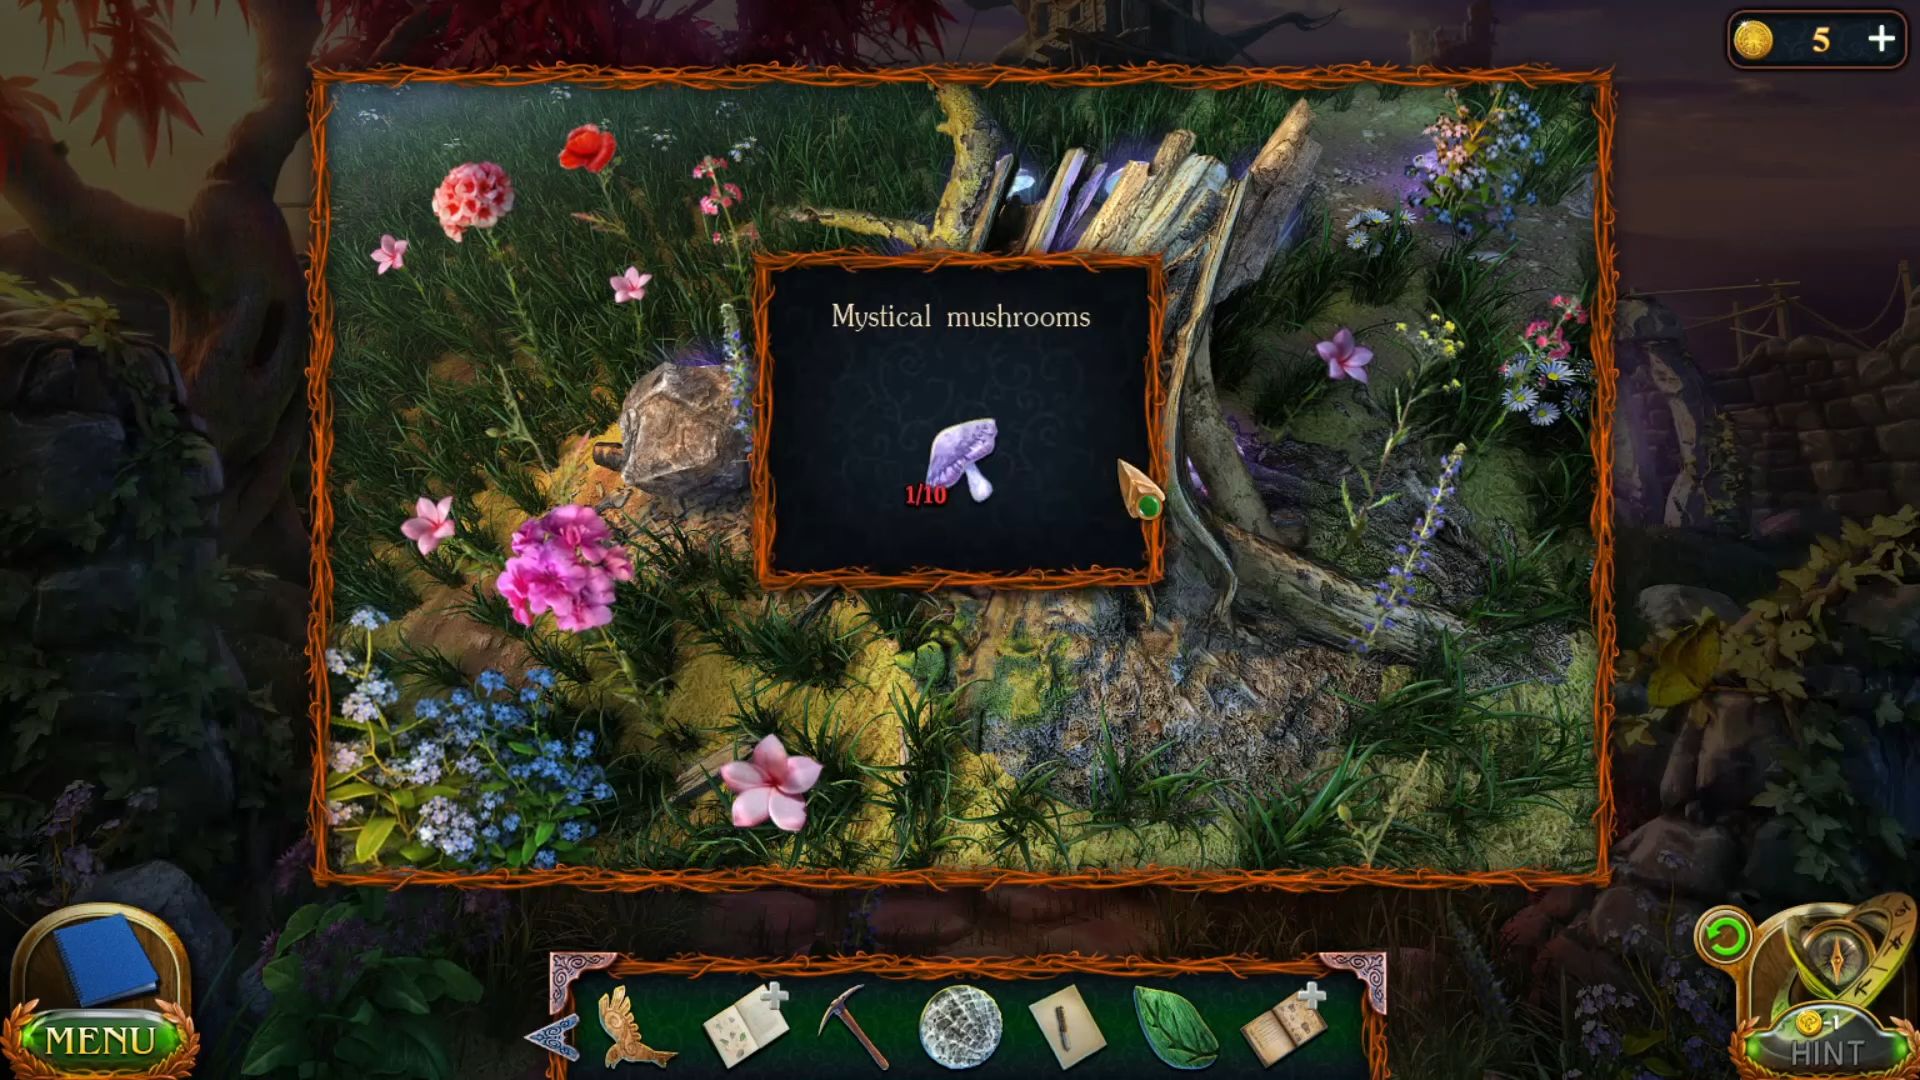
- Grab more mushrooms from the surrounding place.

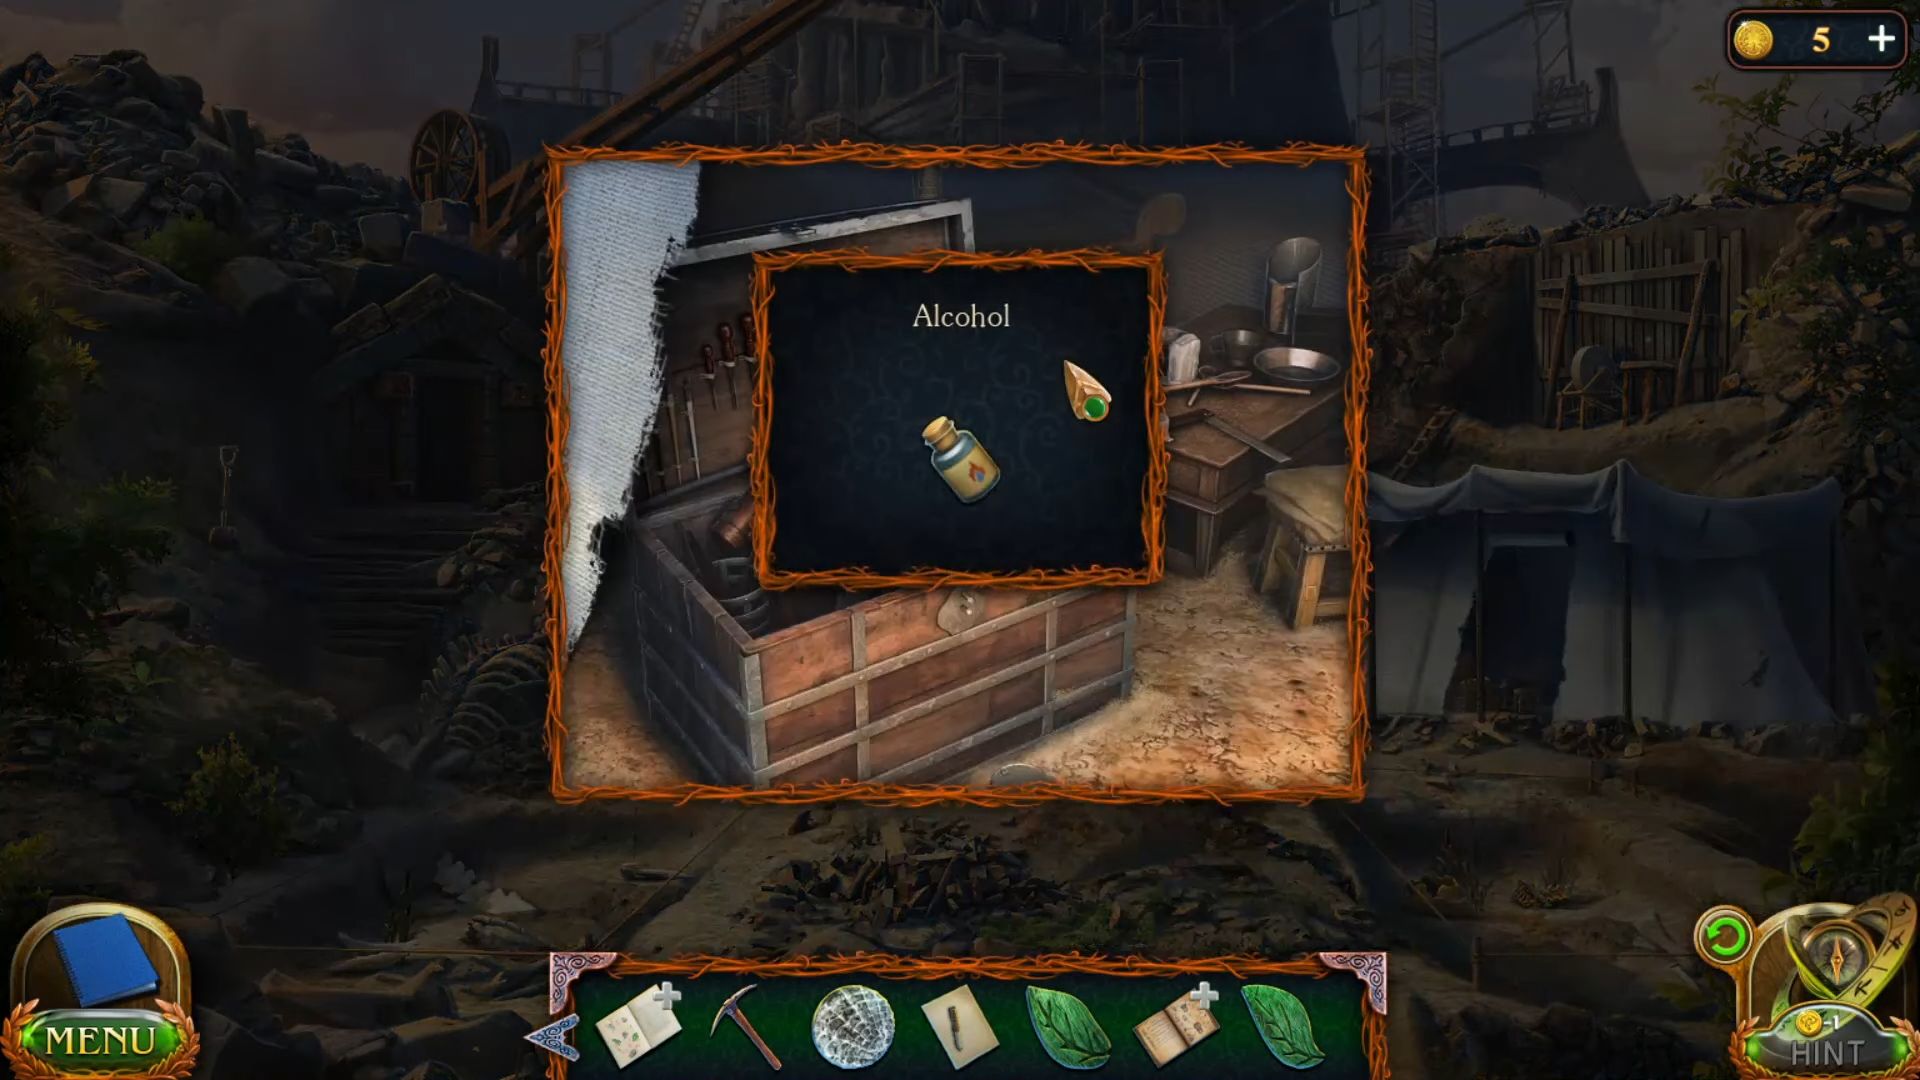
- Move to the stronghold of the five worlds using the map and get alcohol from the tent.
- Grab the tongs from the box in the upper portion.

- Use the tongs to get volcanic flower petals.

- Go to the greenhouse and put the small leaf on the box under the bench to open the door.

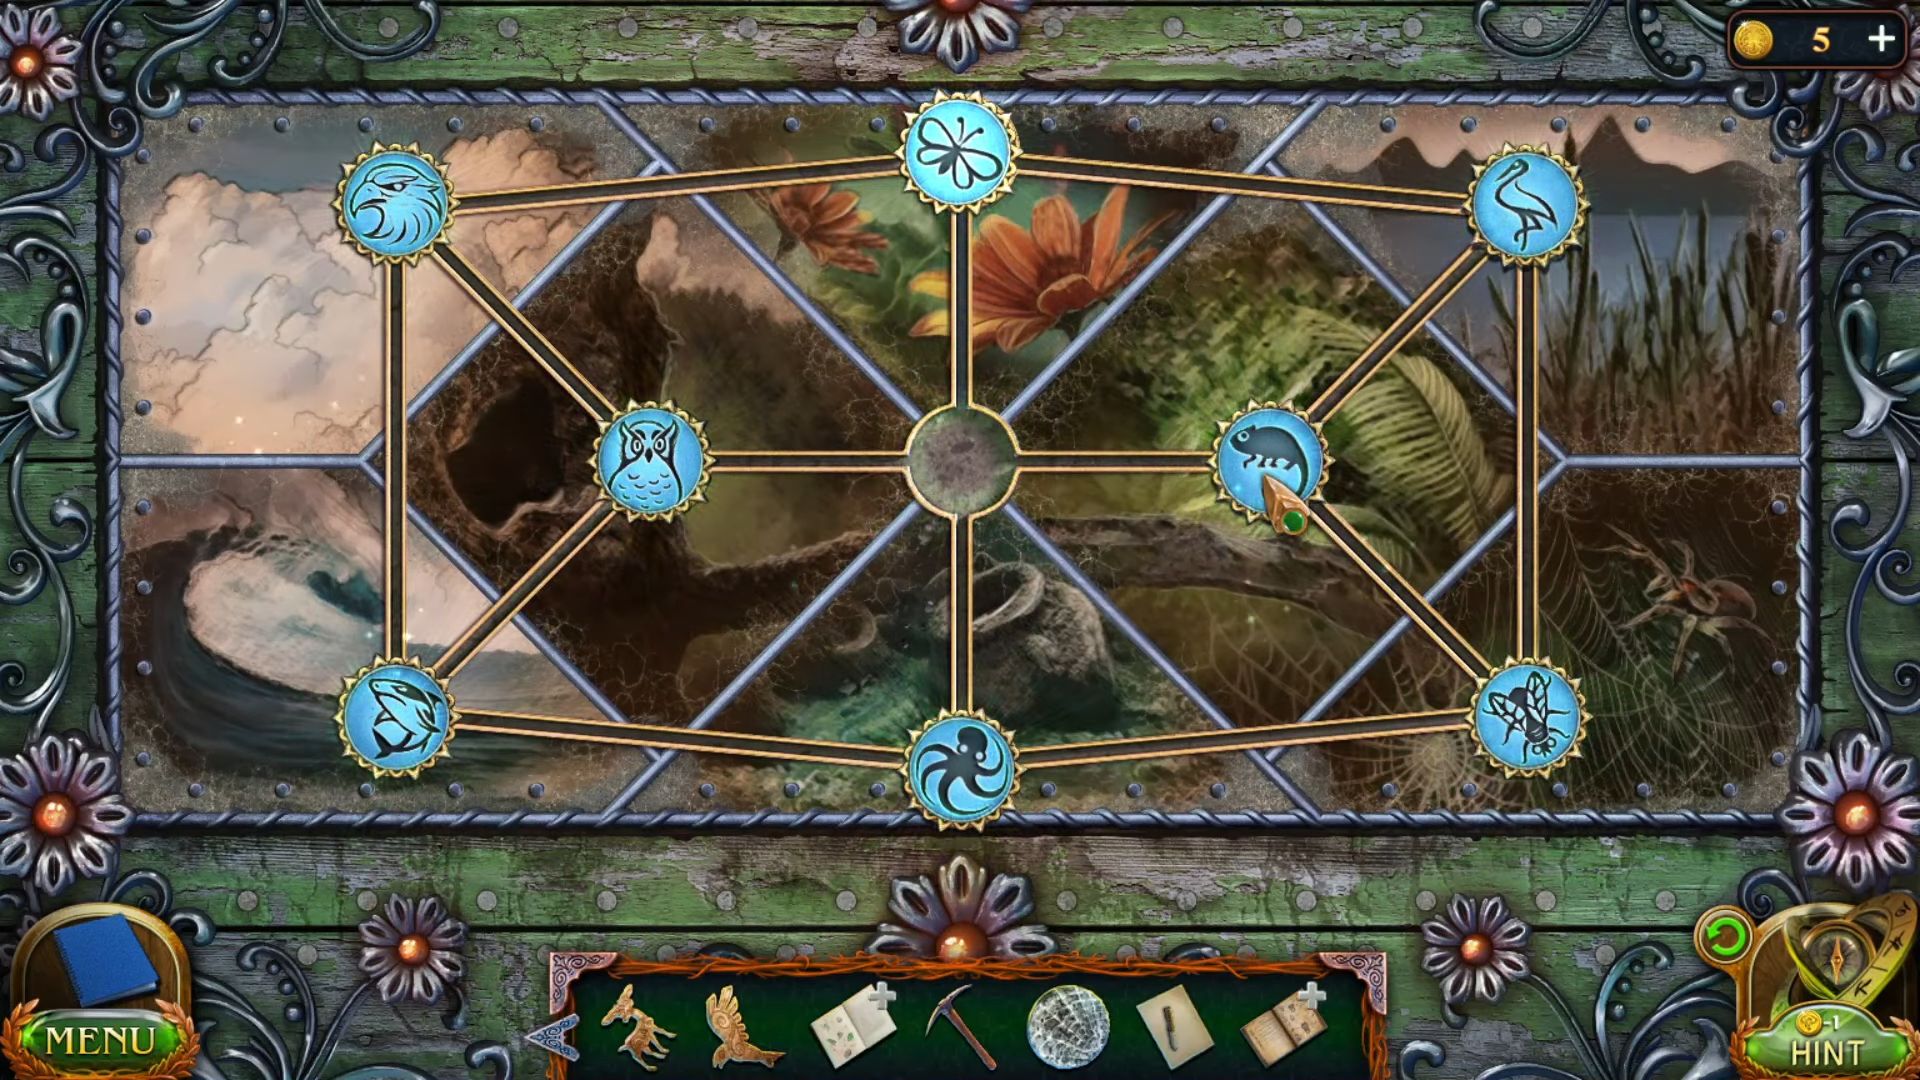
- Click the blue chip, swap it, and move the images of living creatures on the backgrounds of suitable landscapes.
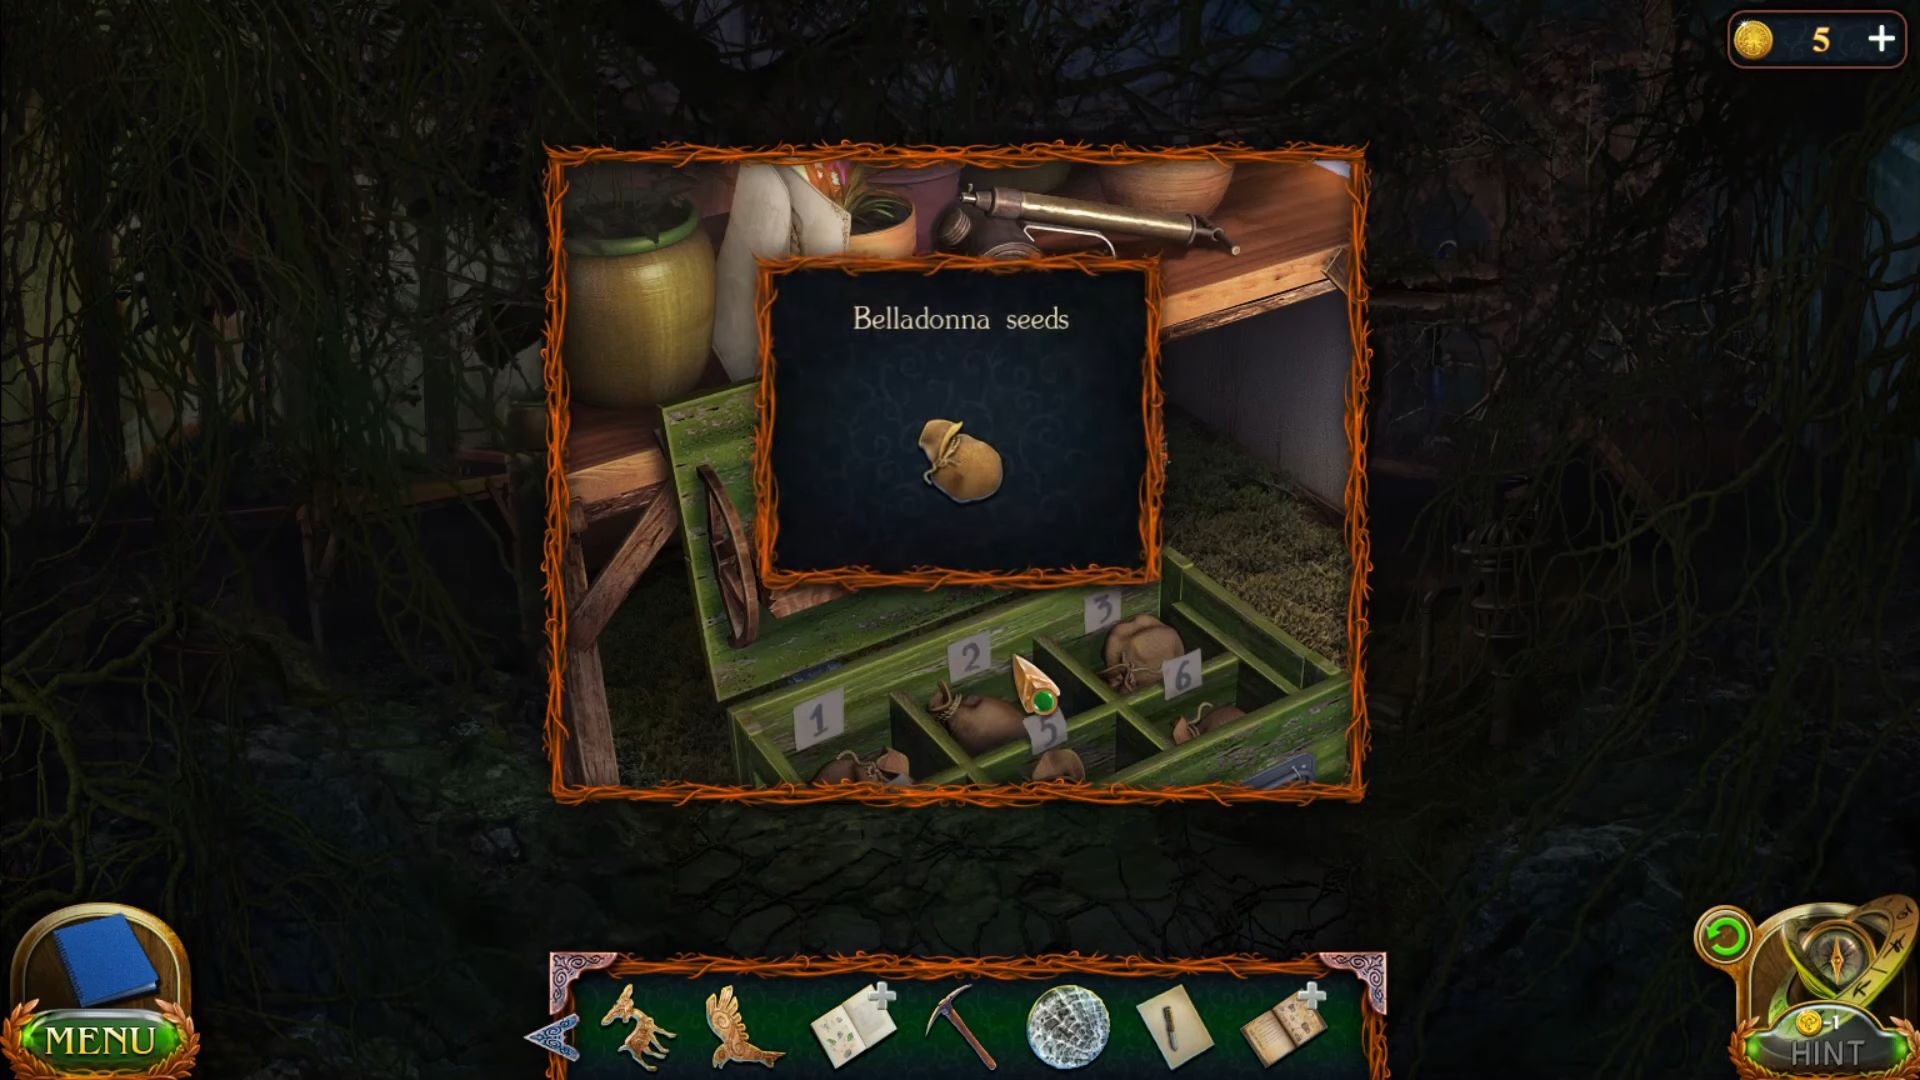
- Once the look is opened, grab belladonna seeds and a manuscript from the backside.
- Go to the Maroon’s office using the map, put the items and book on the table.

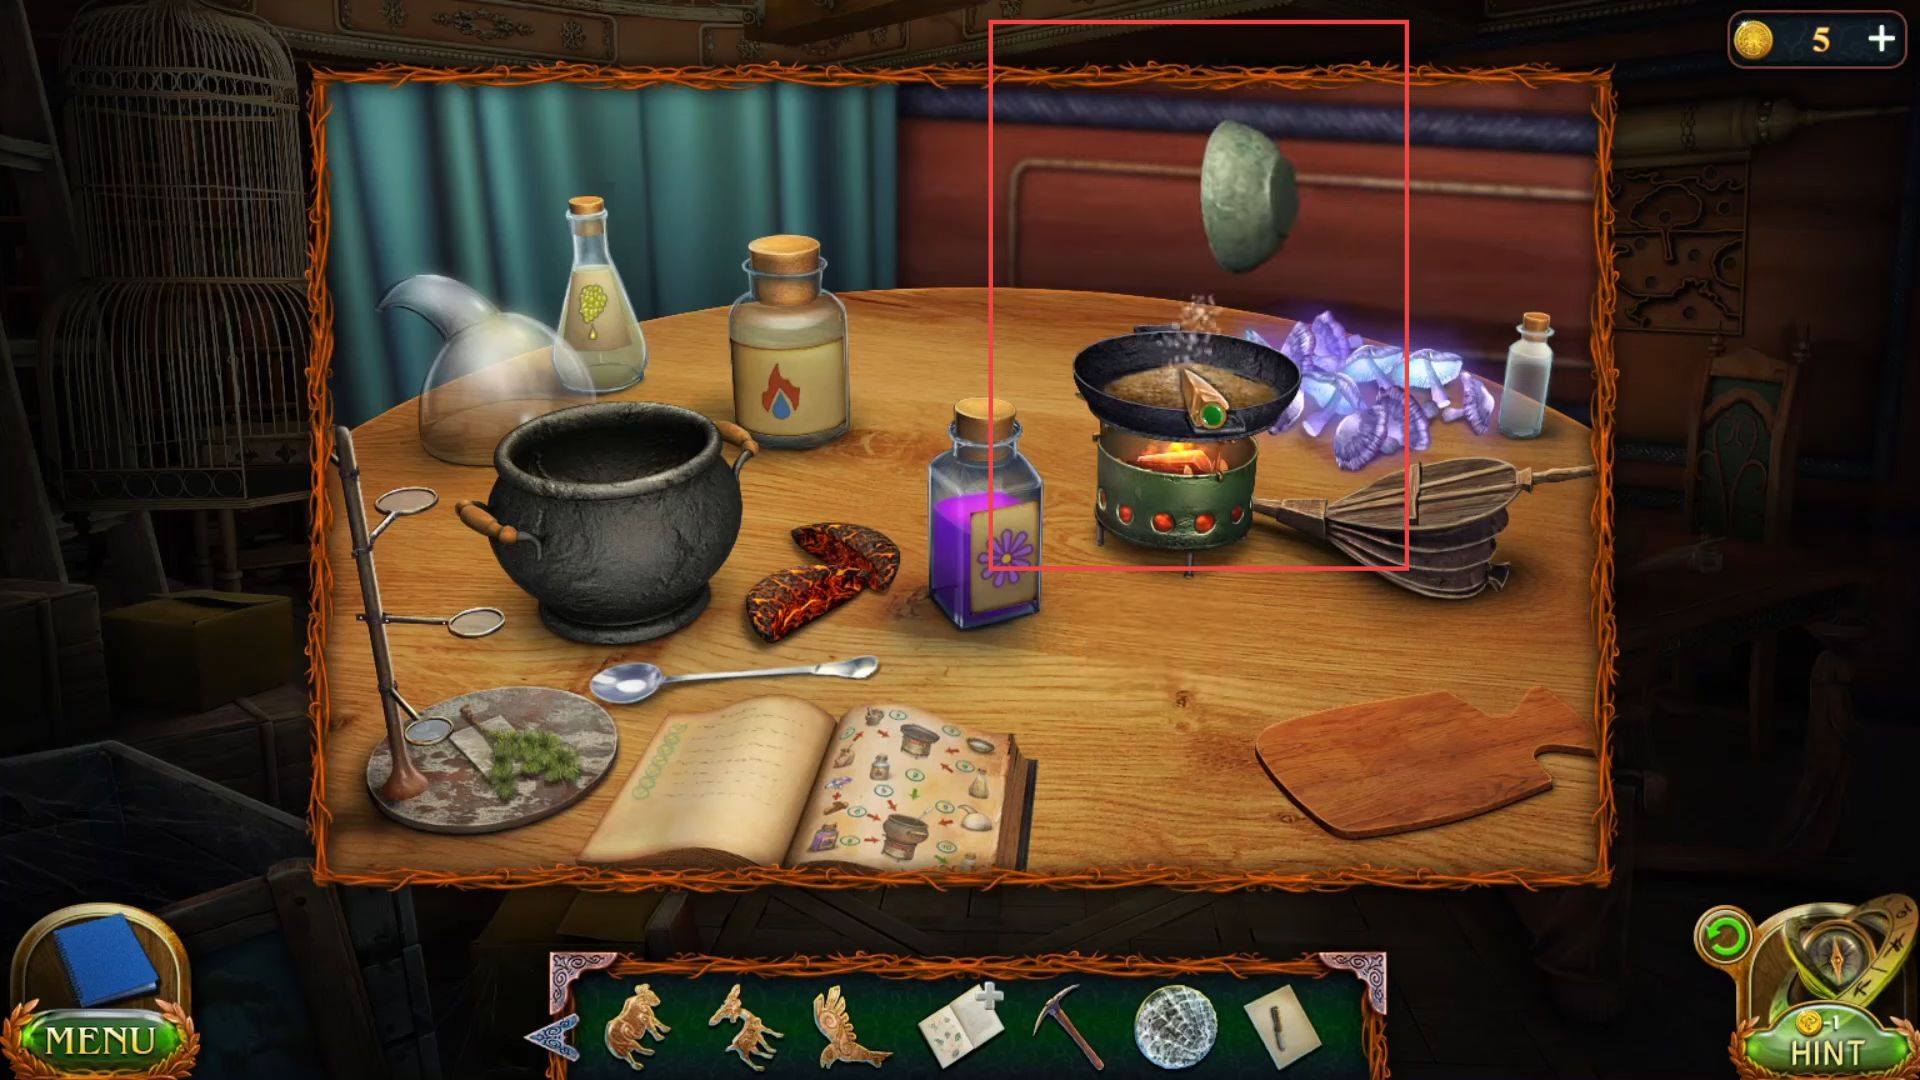
- Add the seeds to the pastel and crush them using the pin.

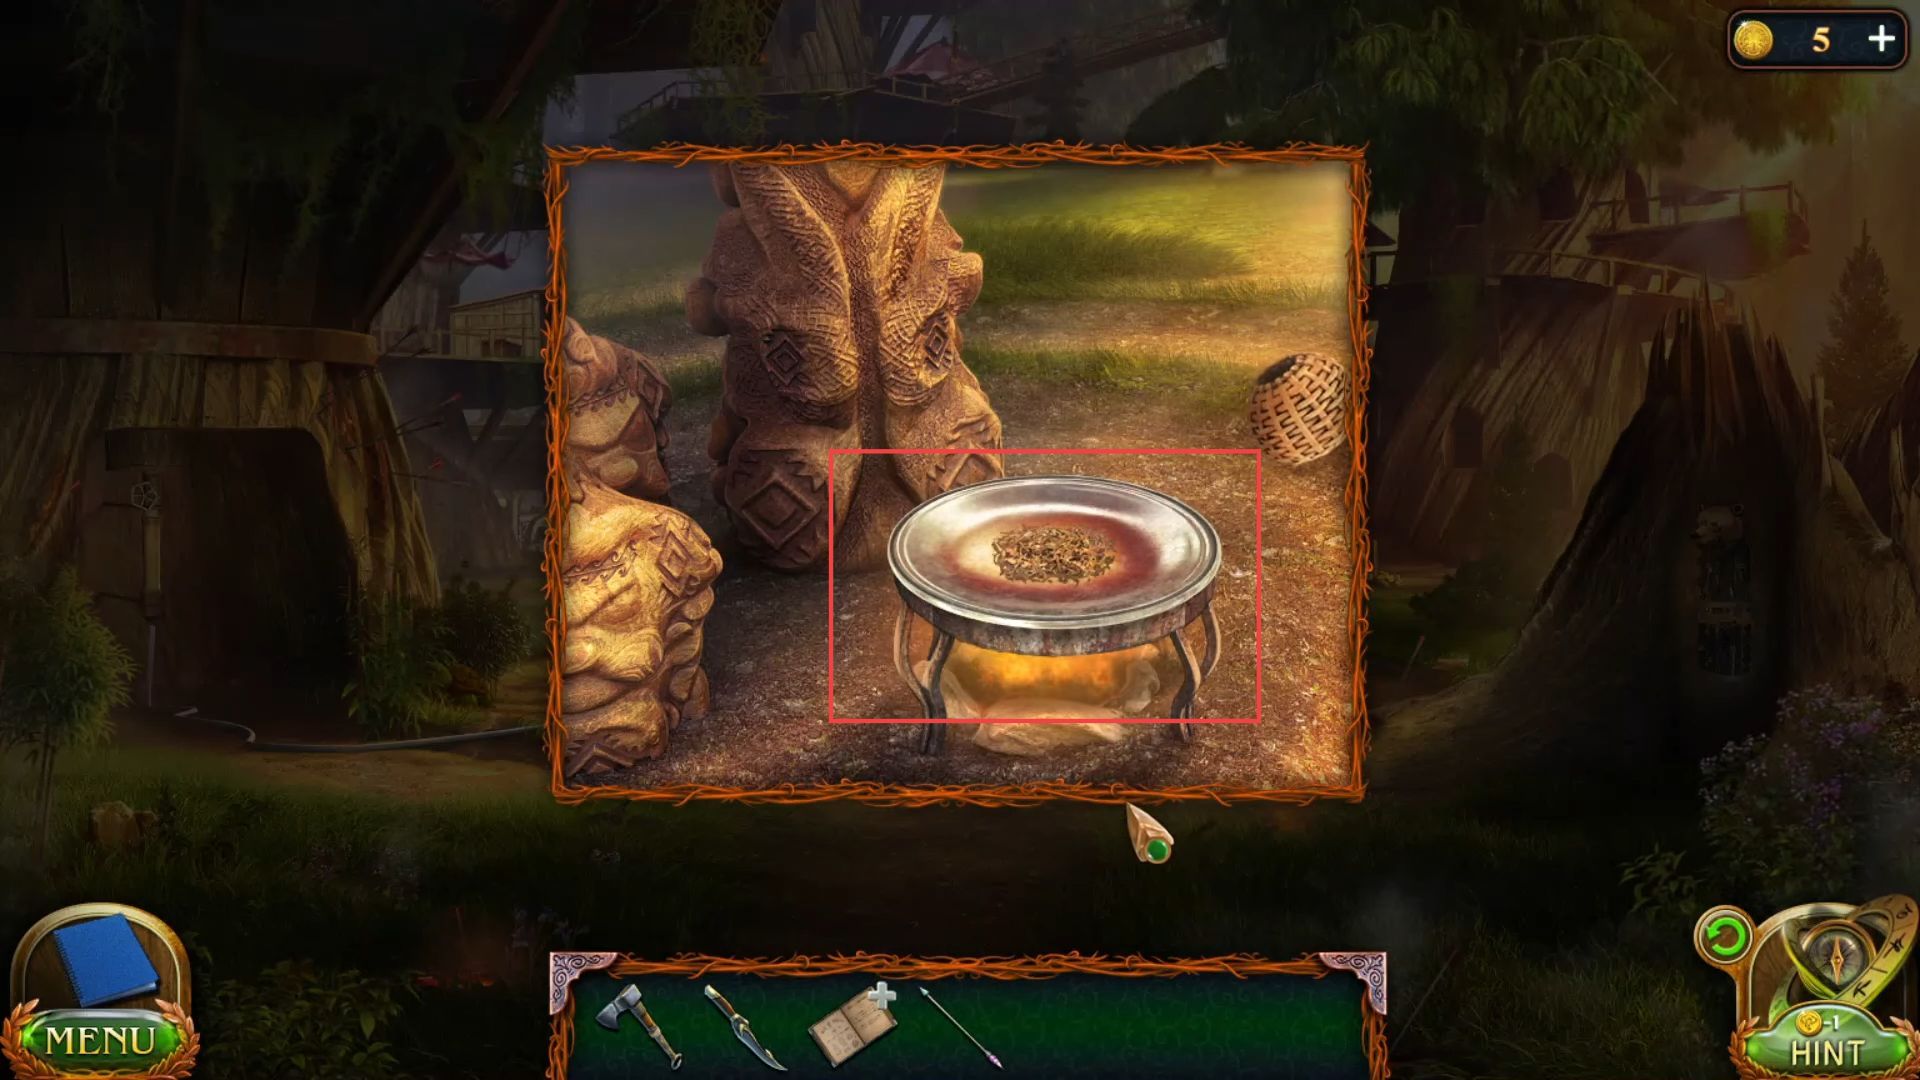
- Place the wood on the stove and ignite it using the blower.

- Put the pan on the stove and add the mixture from the pastel.

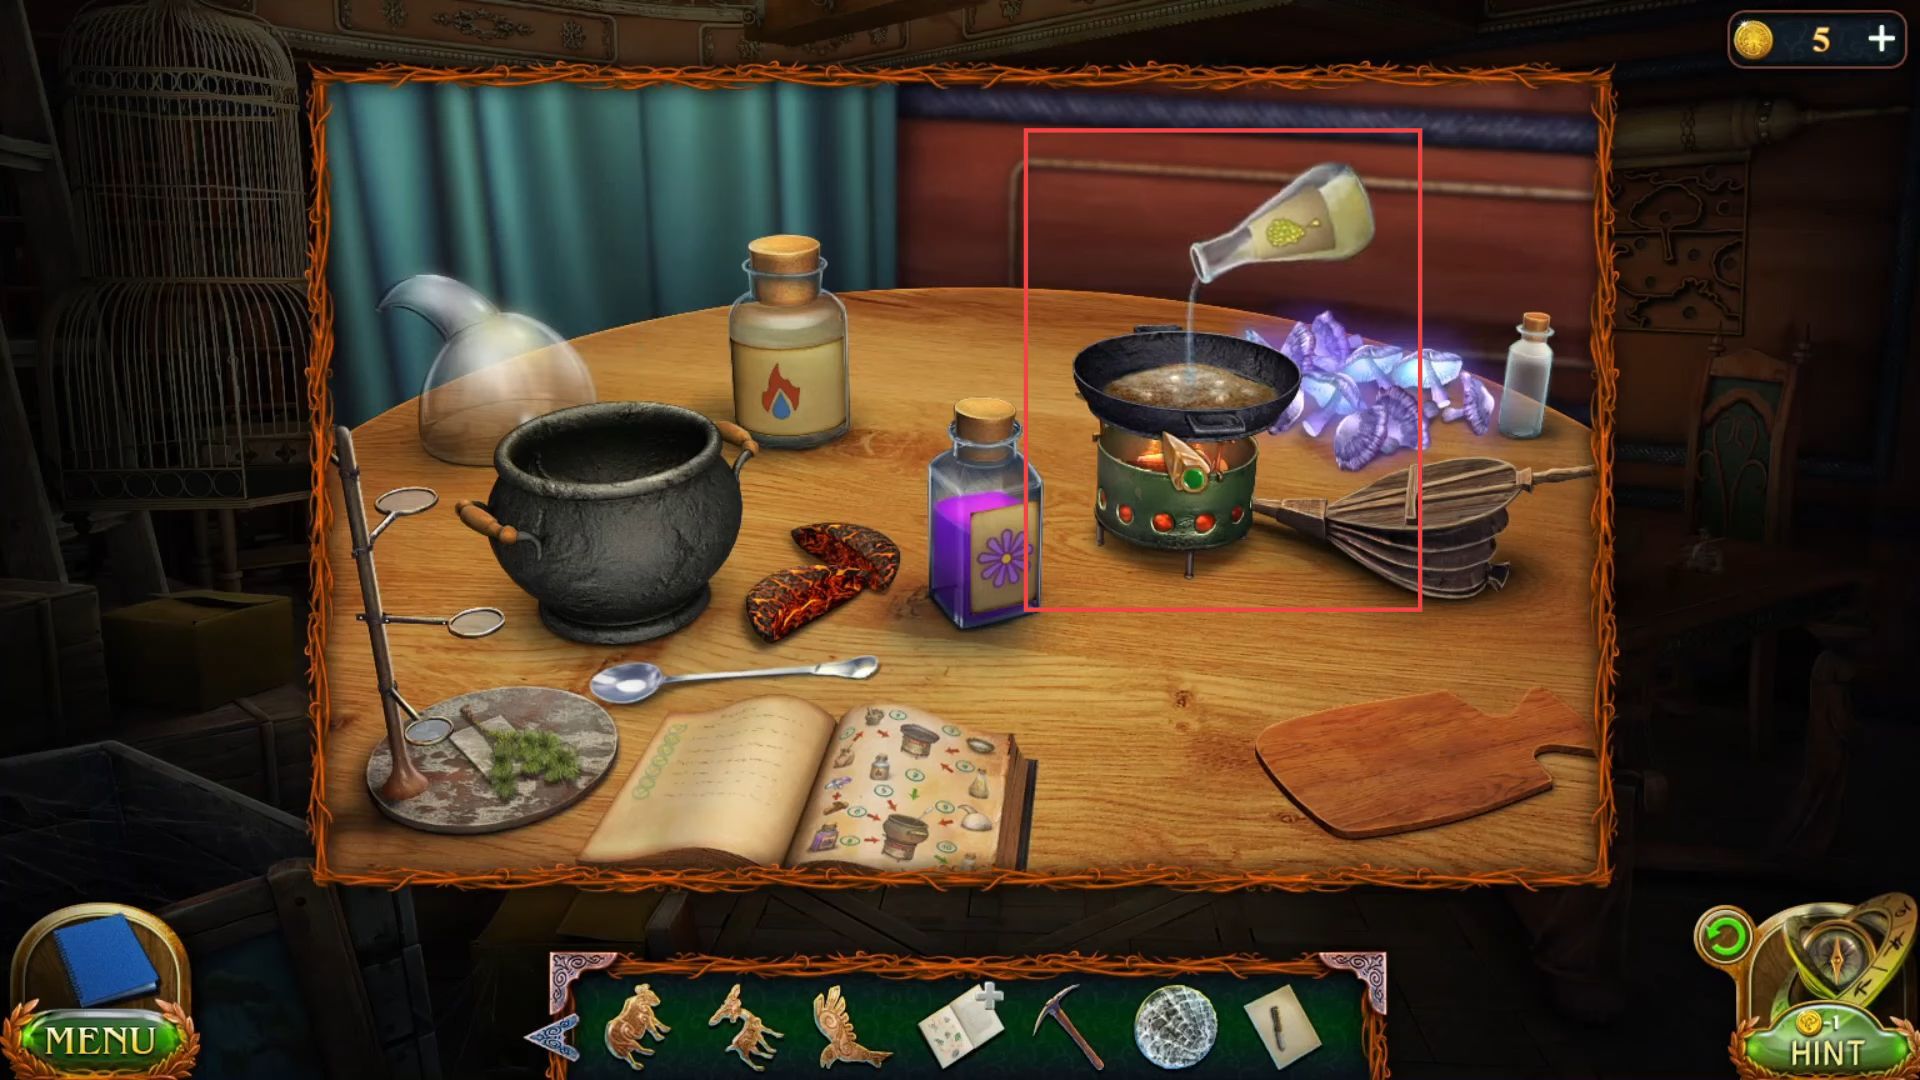
- Add the mixture from the cup into the pan from the table.
- Put the liquid from the flask into the pan.
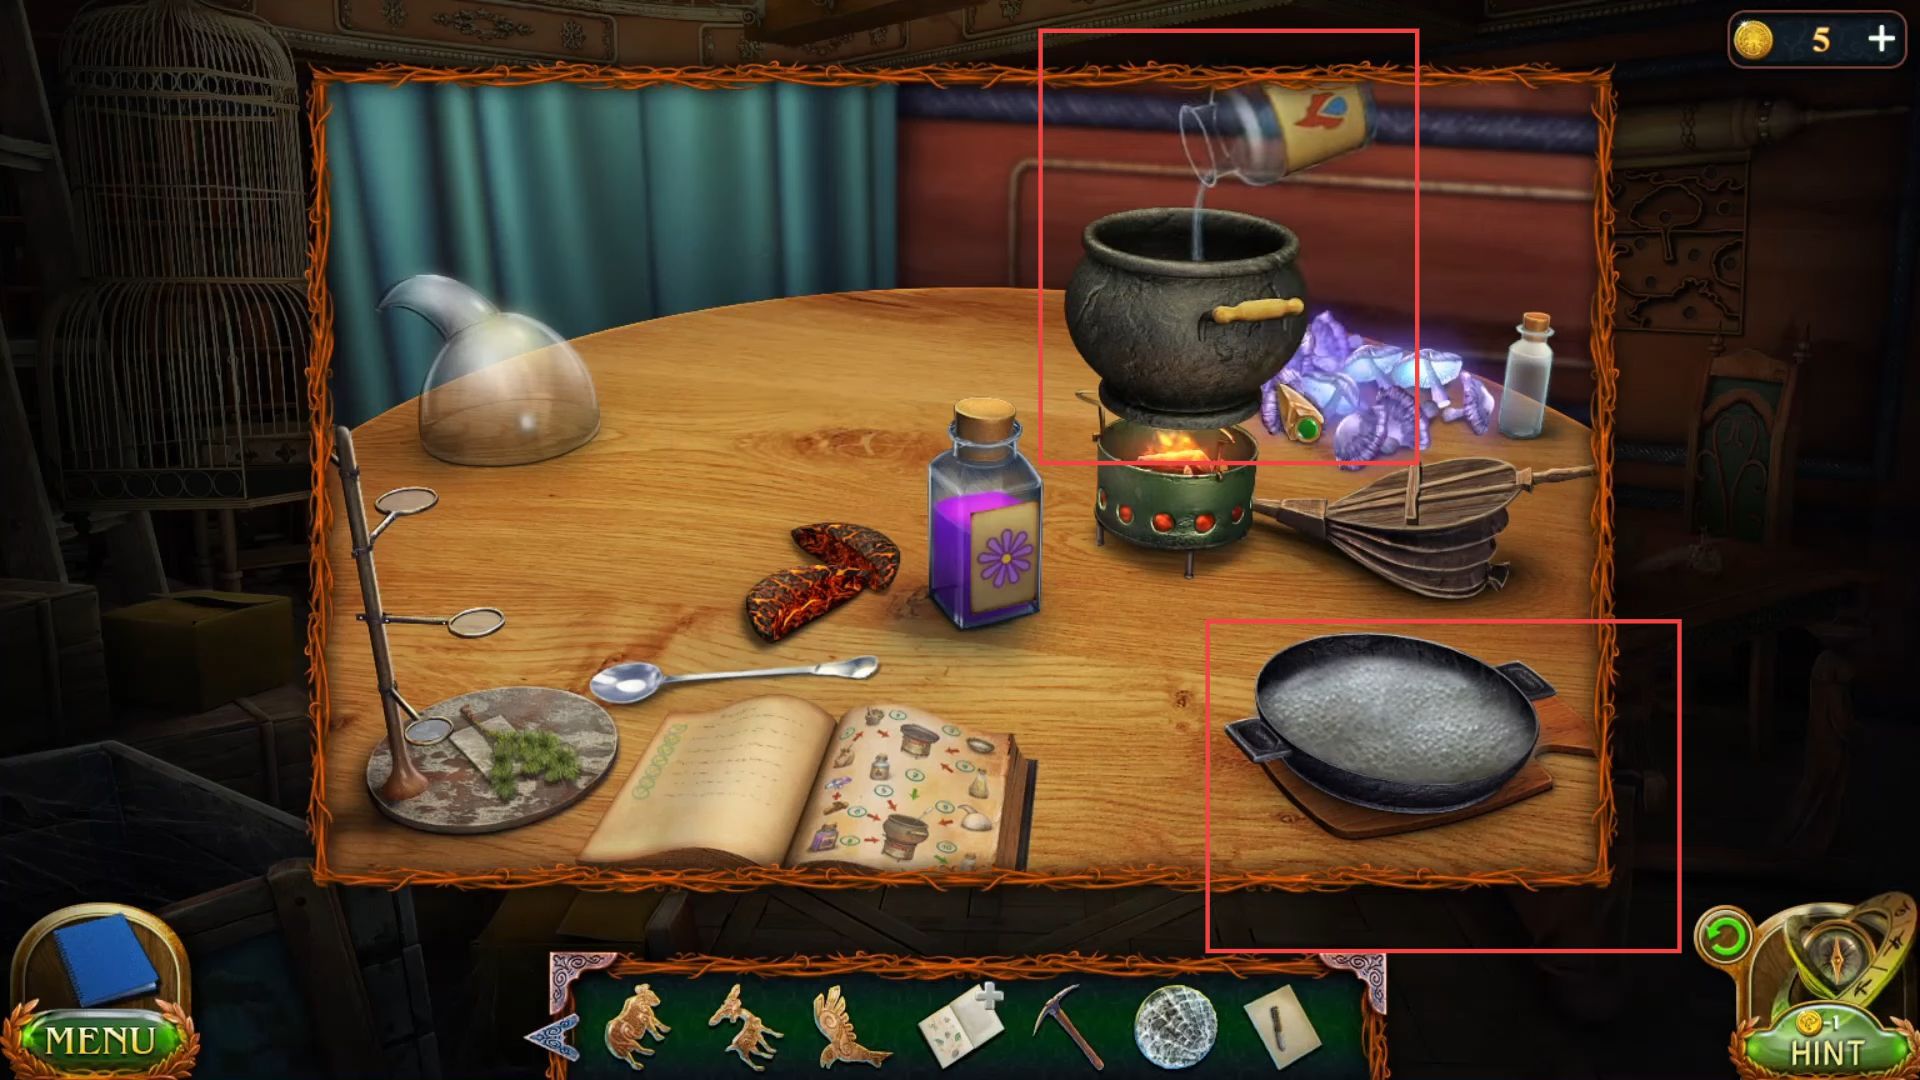
- Remove the pan from the stove, place the cooking pot, and add the liquid from the tube.
- Pour the mushrooms into the cooking pot.
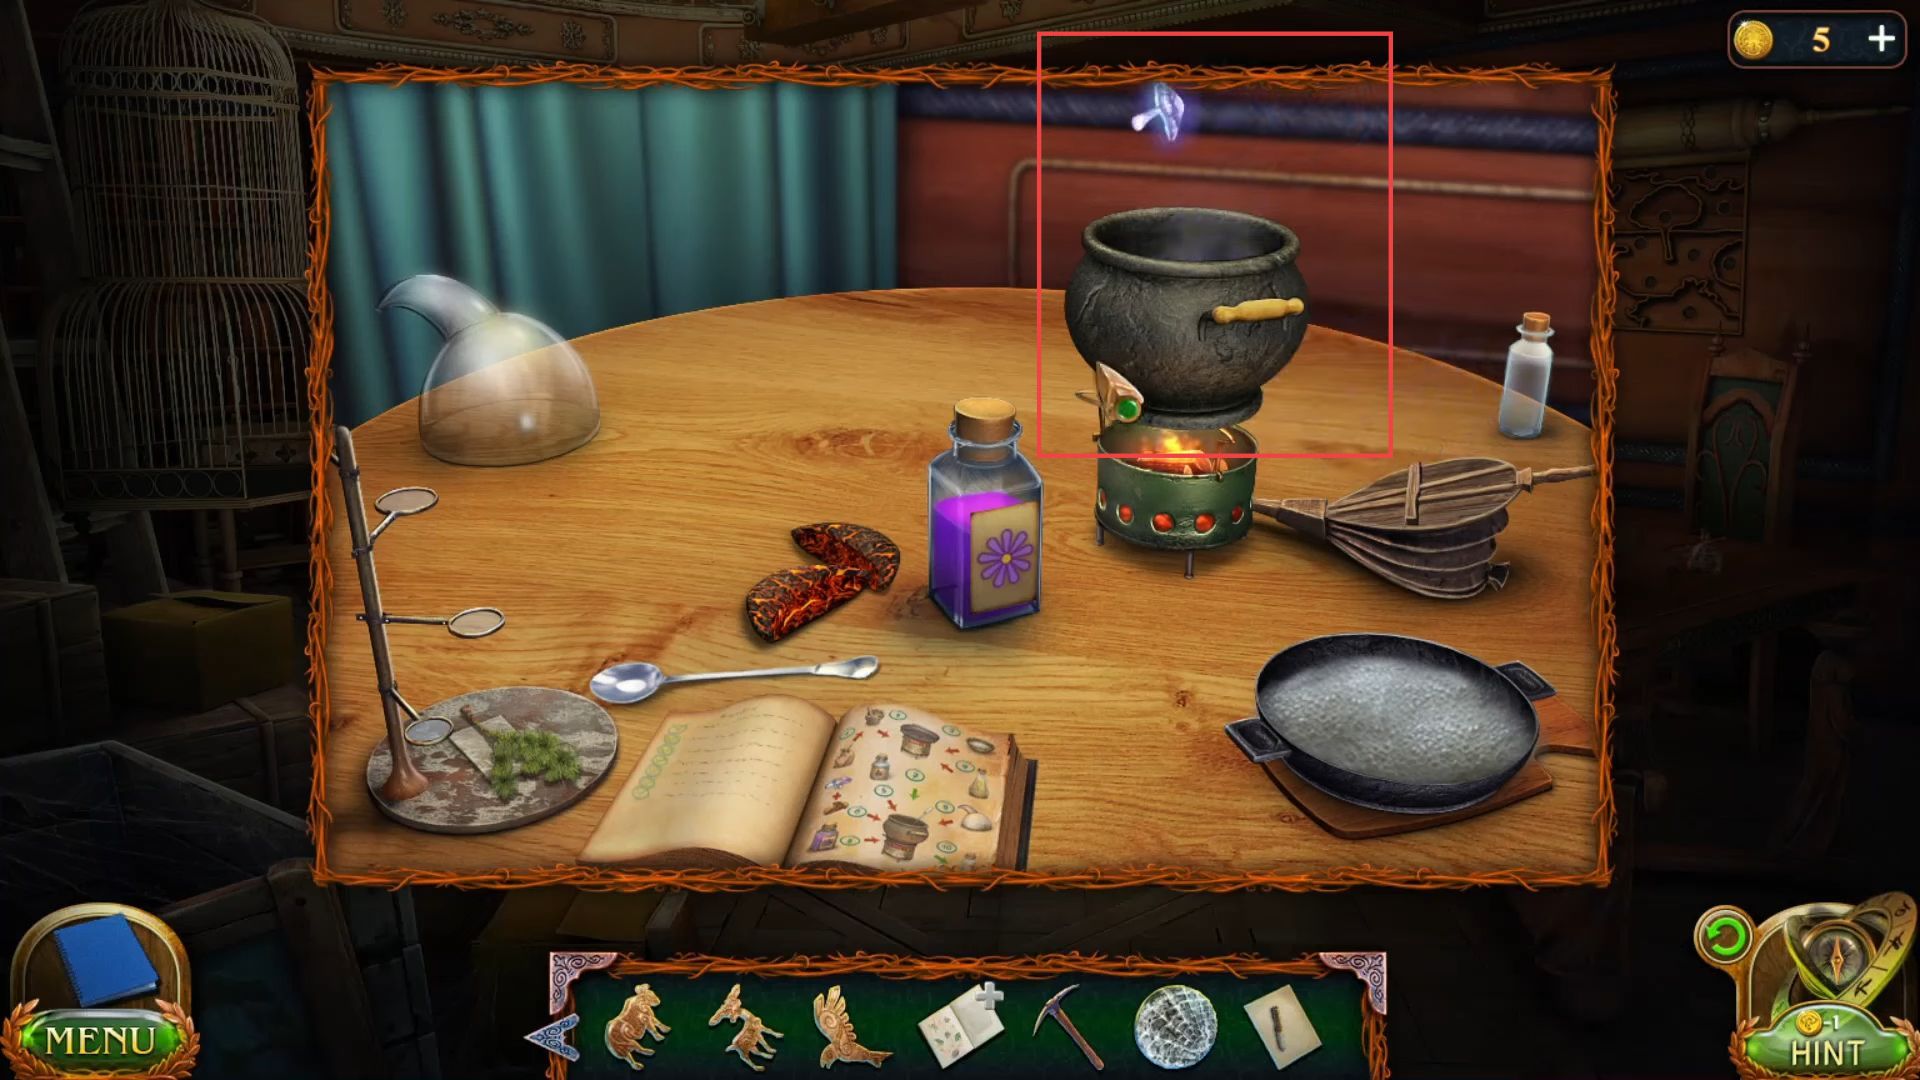
- Add the lava biscuits to the stove, put the mixture from the pan, and pour liquid from the table.
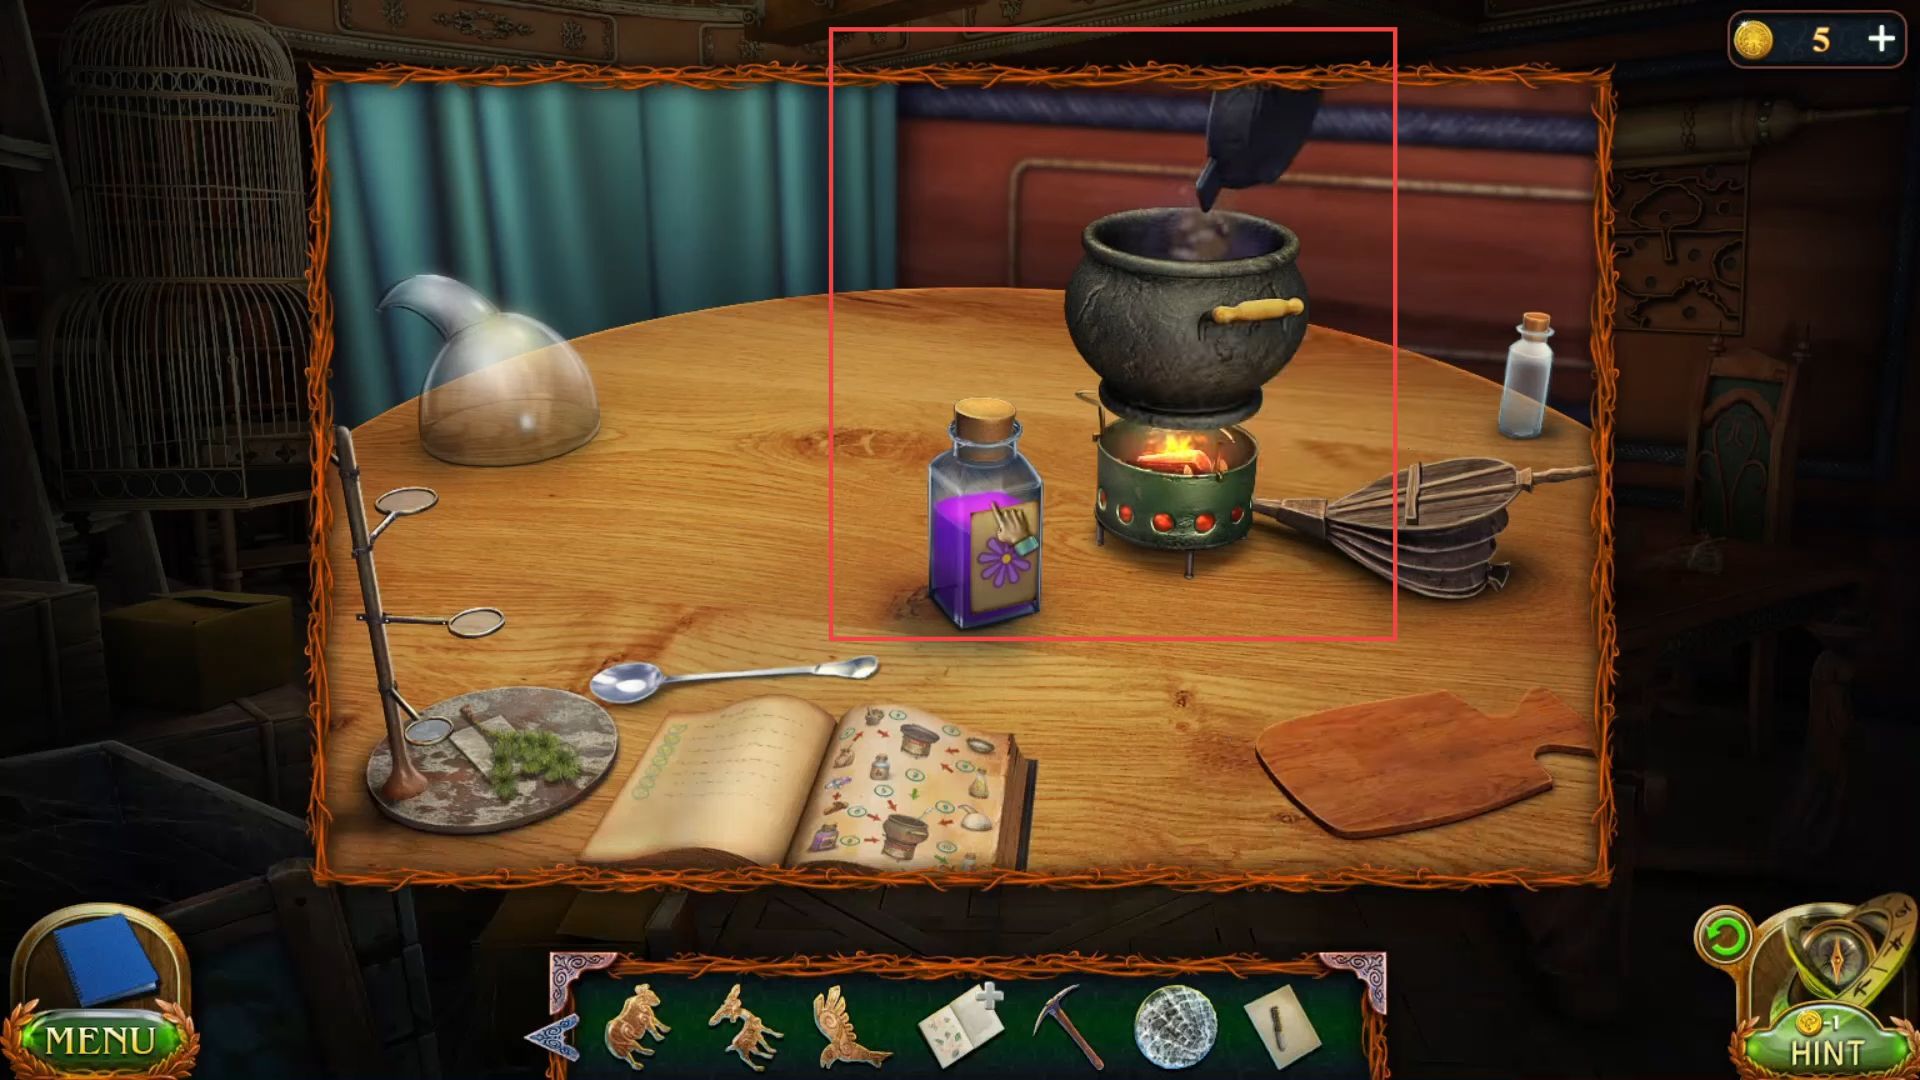
- Stir the mixture from the cooking pot using a spoon.

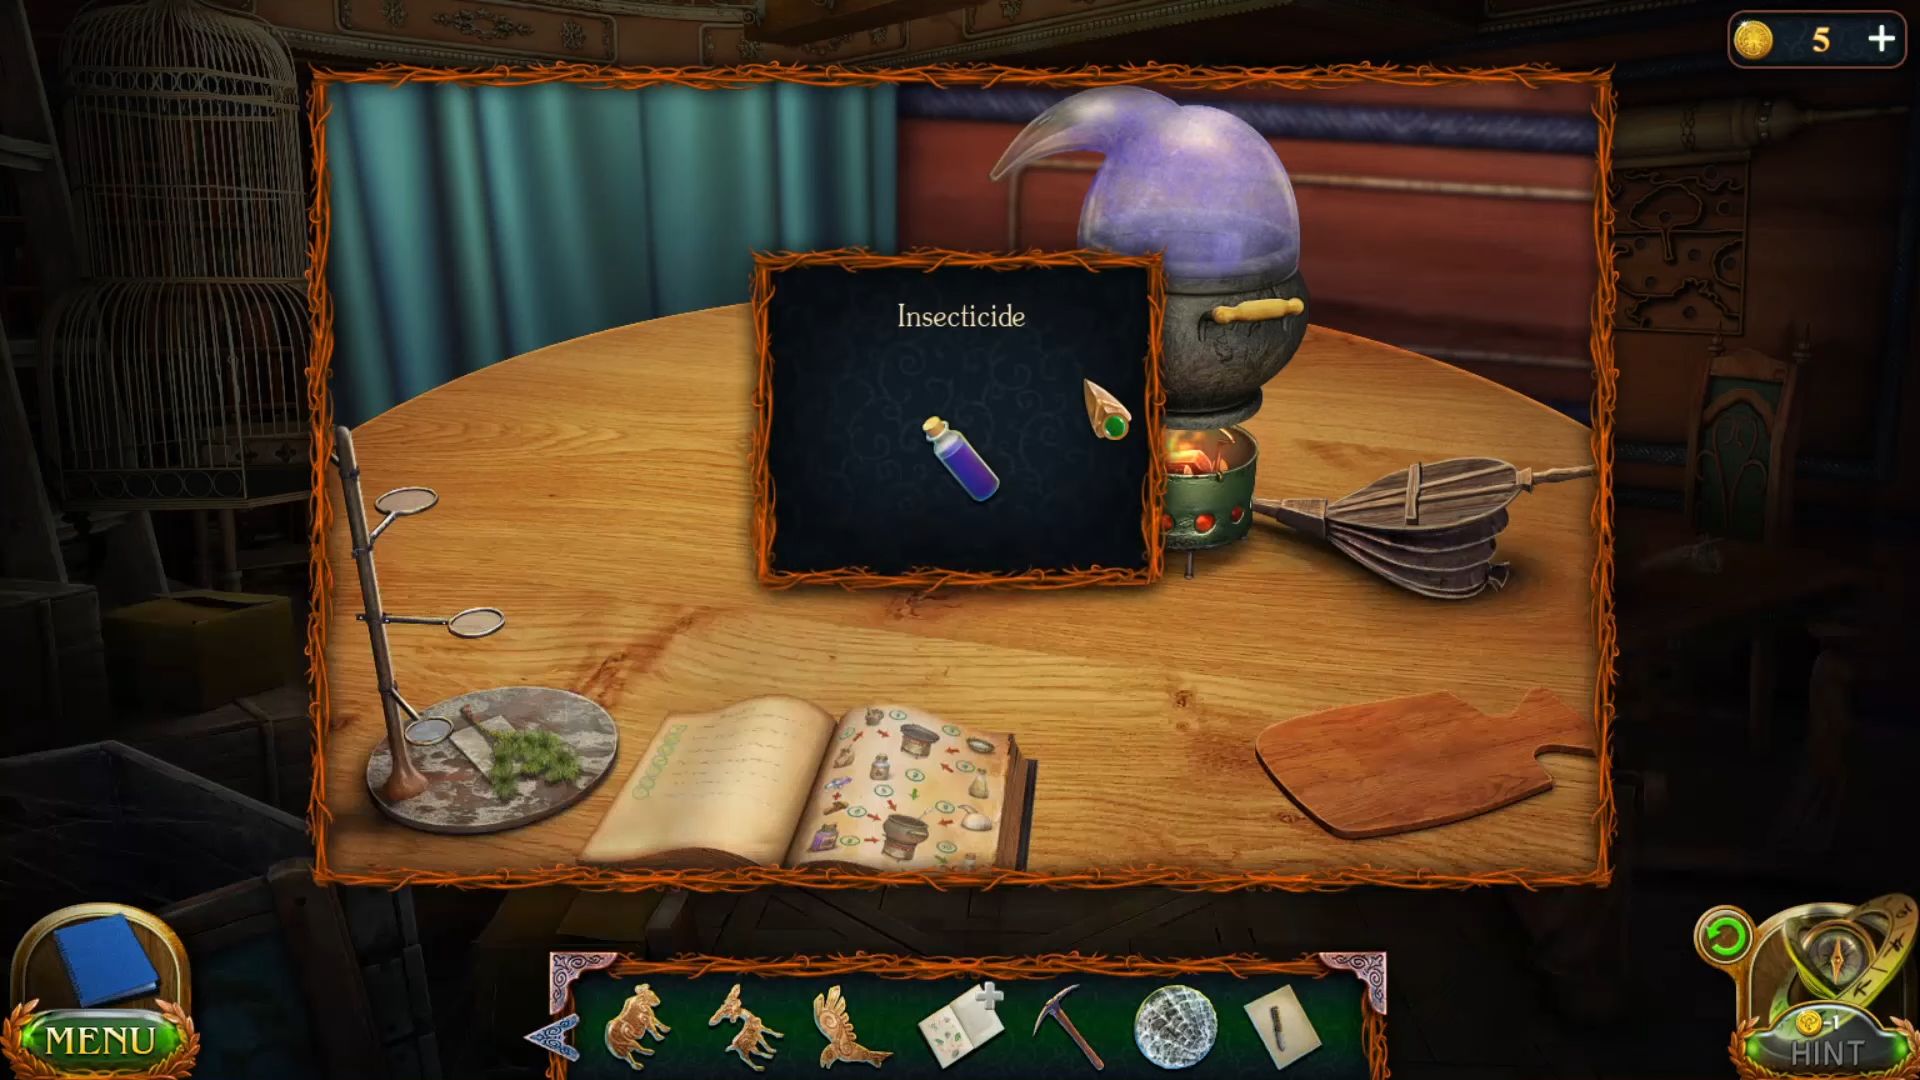
- Cover the cooking pot using the cap and place the bottle under the nozzle to get an insecticide liquid.
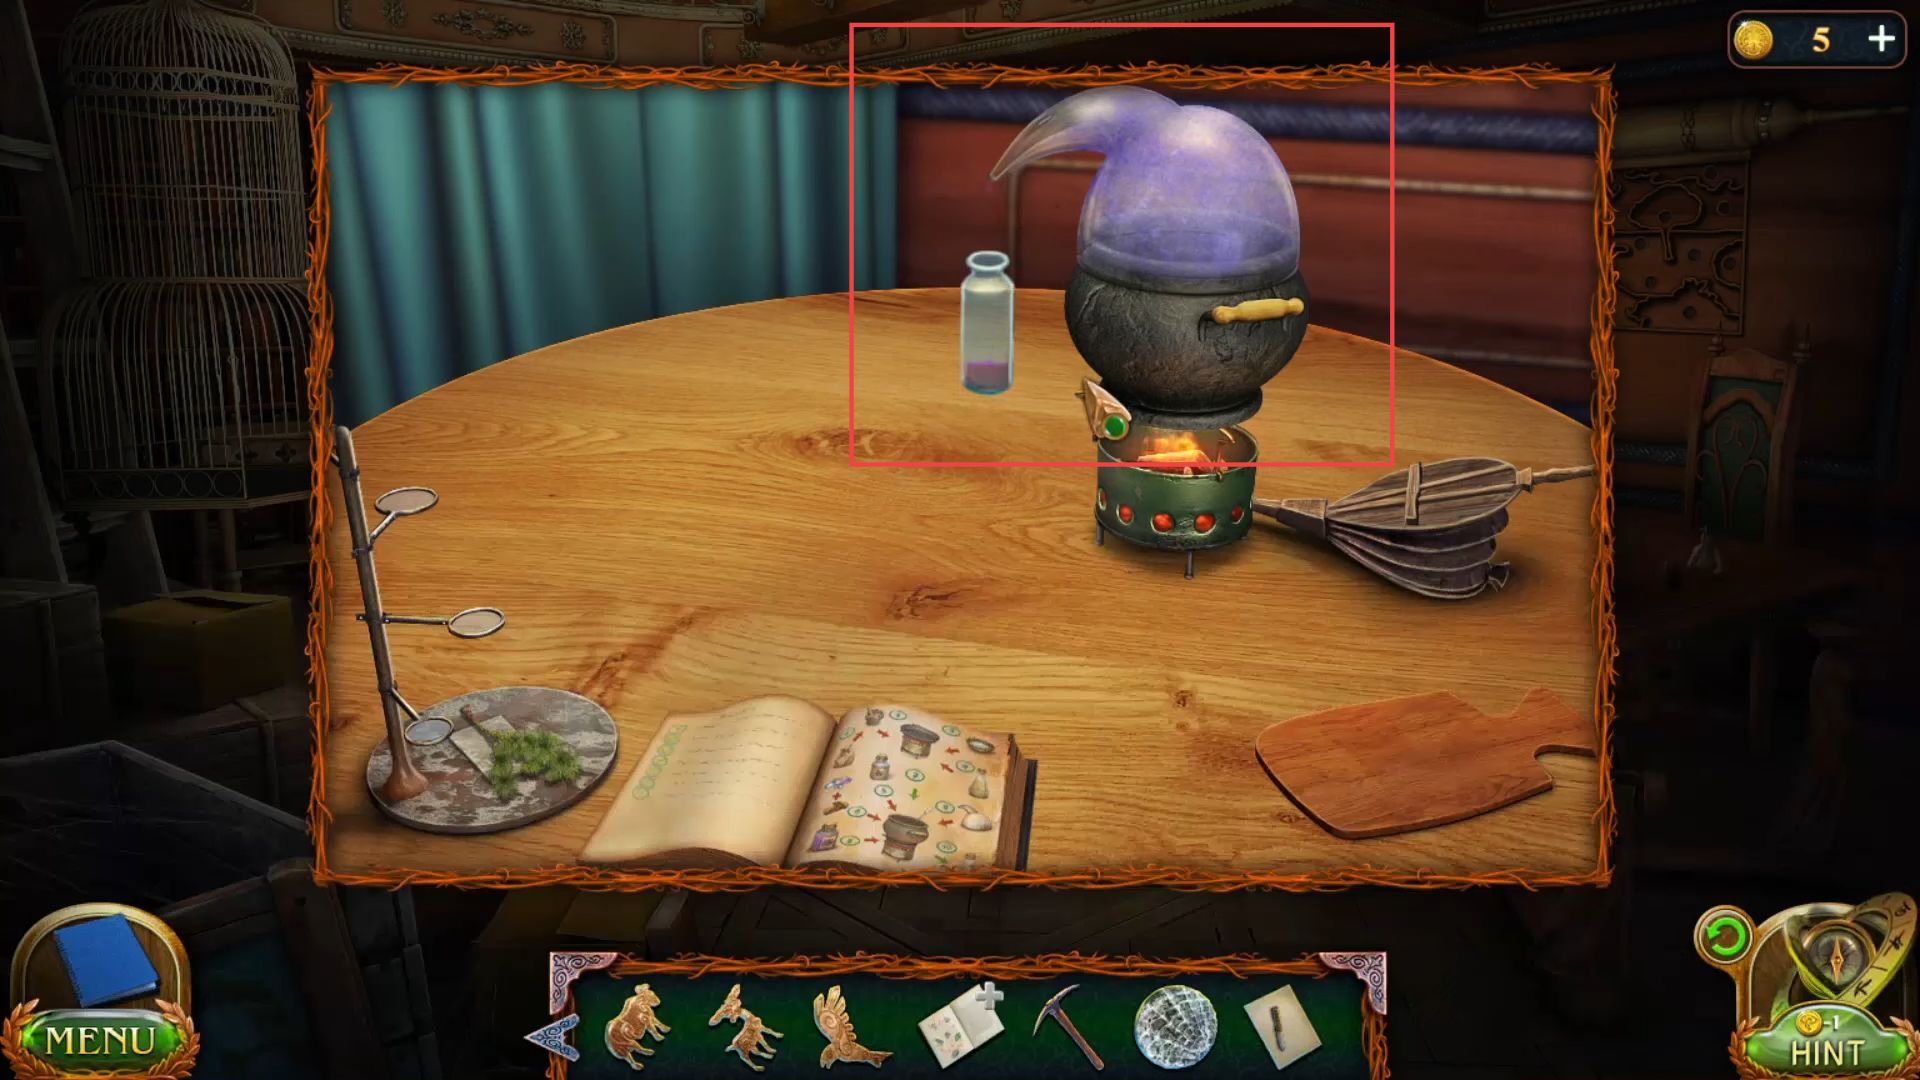
- Grab the insecticide bottle into your inventory.
- Go to the greenhouse and pour the insecticide into the sprayer.

- Spray the insecticide into the branches to remove them and recover the greenhouse.

- Now grab the portal fruit from the tree.

- Knock the leaves and grab a pommel from the ground near the tree.

- Go to the academy of the hall and grab the crowbar from the right side of the generator.
- Use the crowbar to remove the lid and grab another pommel.
- Put the pommel on the sword at the statue from the main hall.
- Place the pommel from the right side statue near the front door to remove the stairs.

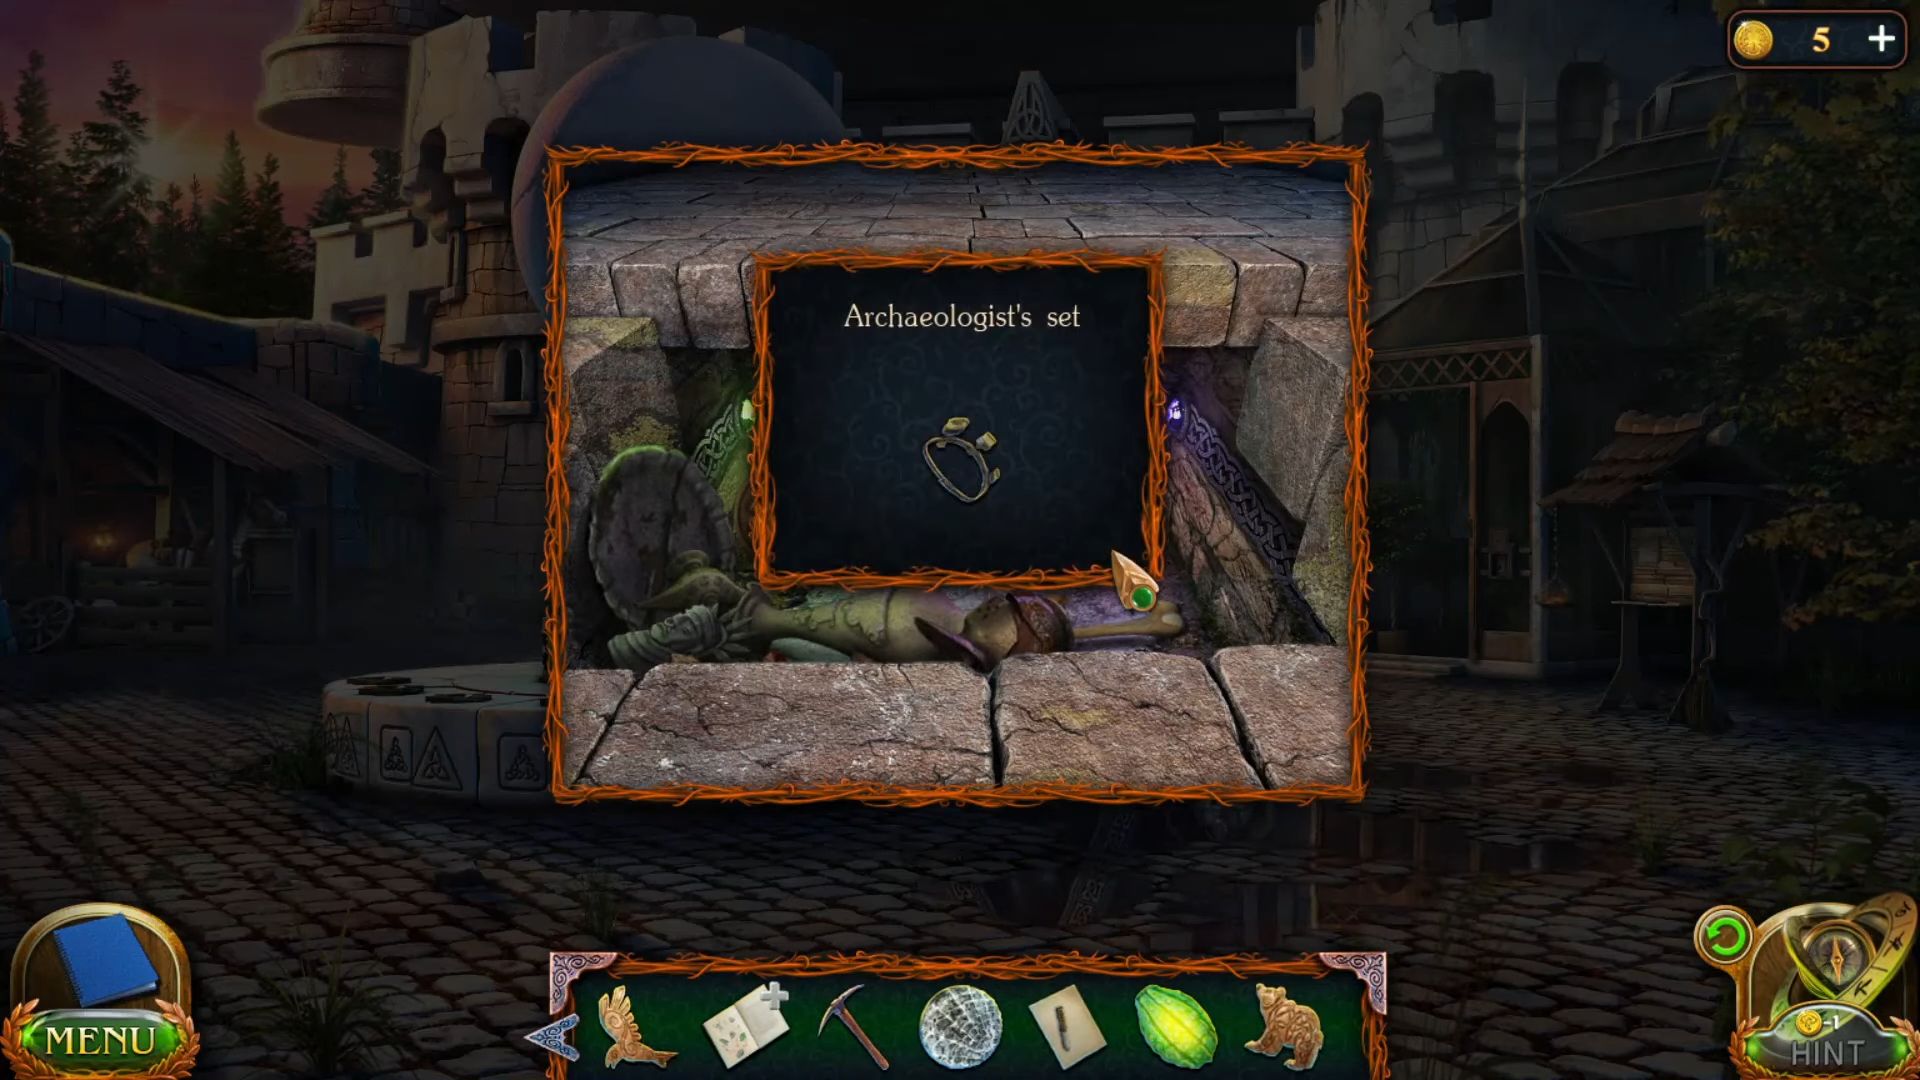
- Knock the items, grab a bear emblem and an archaeologist’s set.
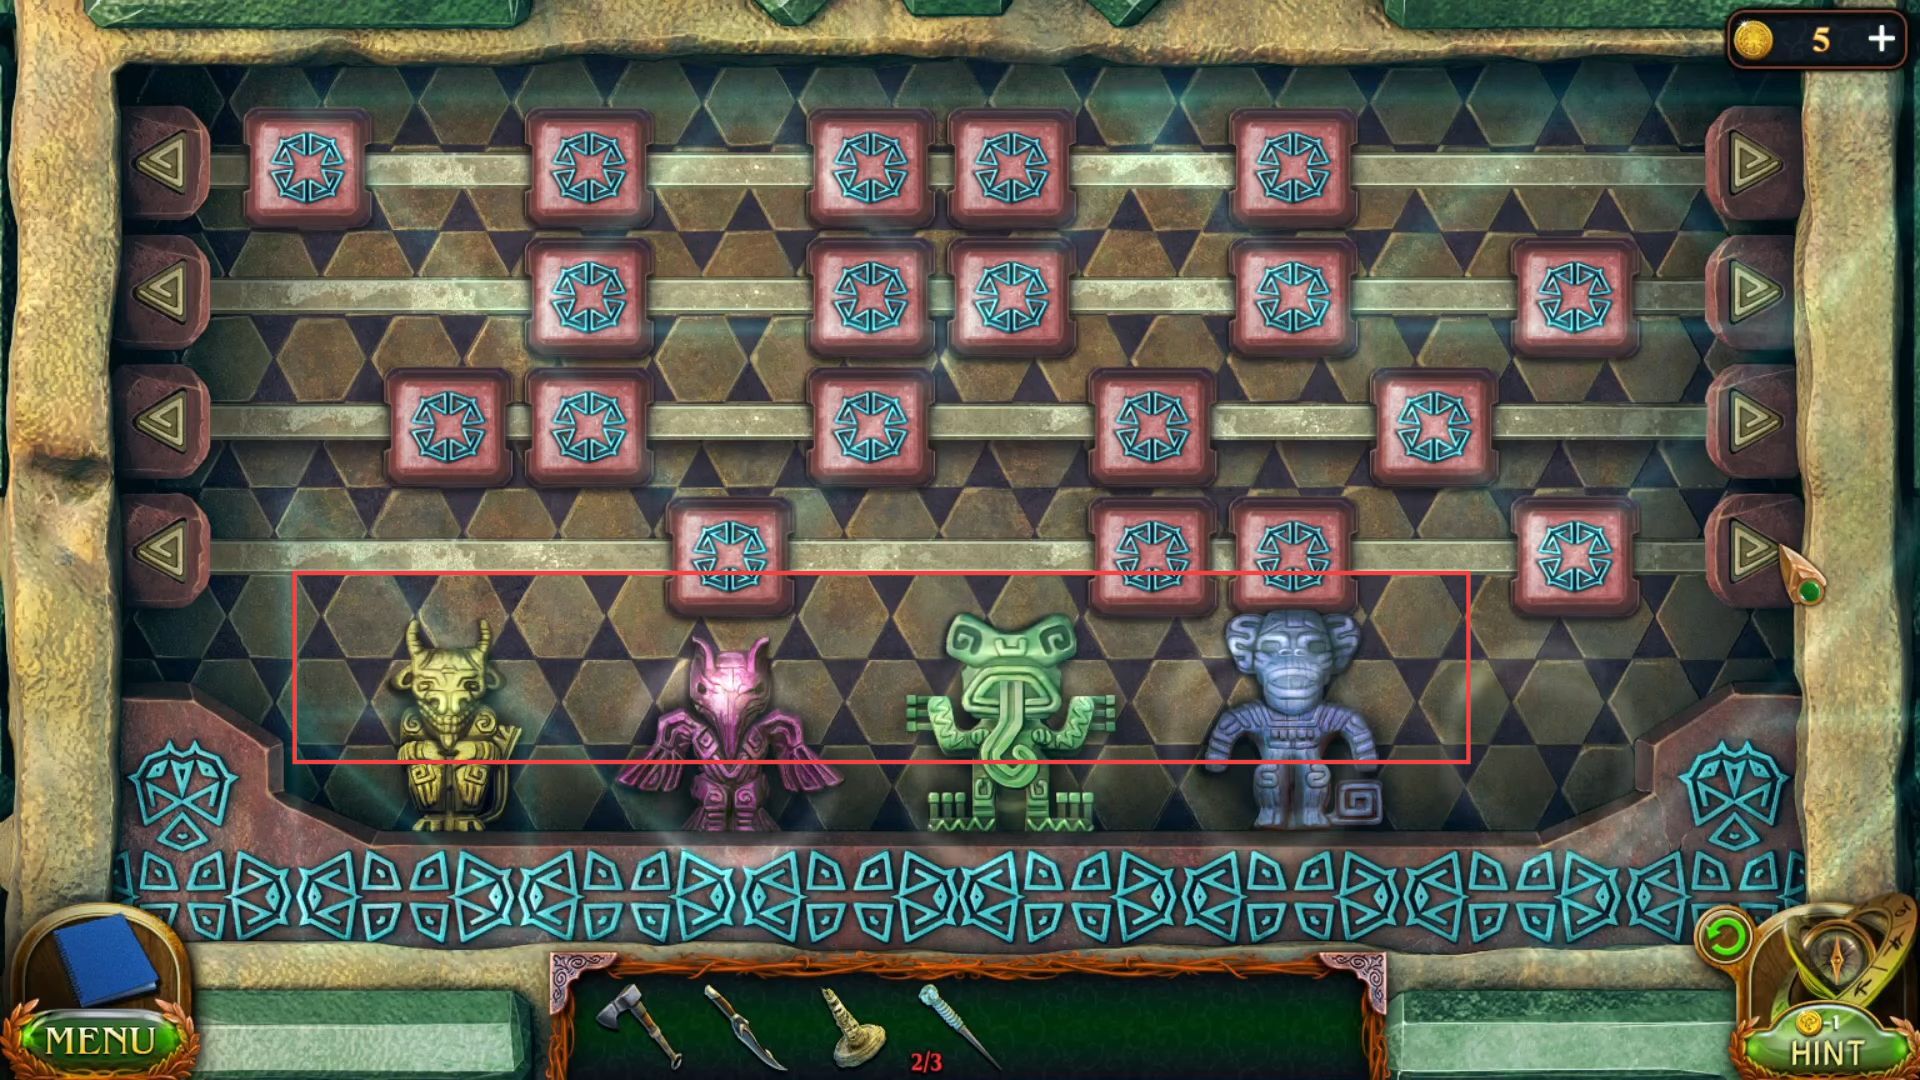
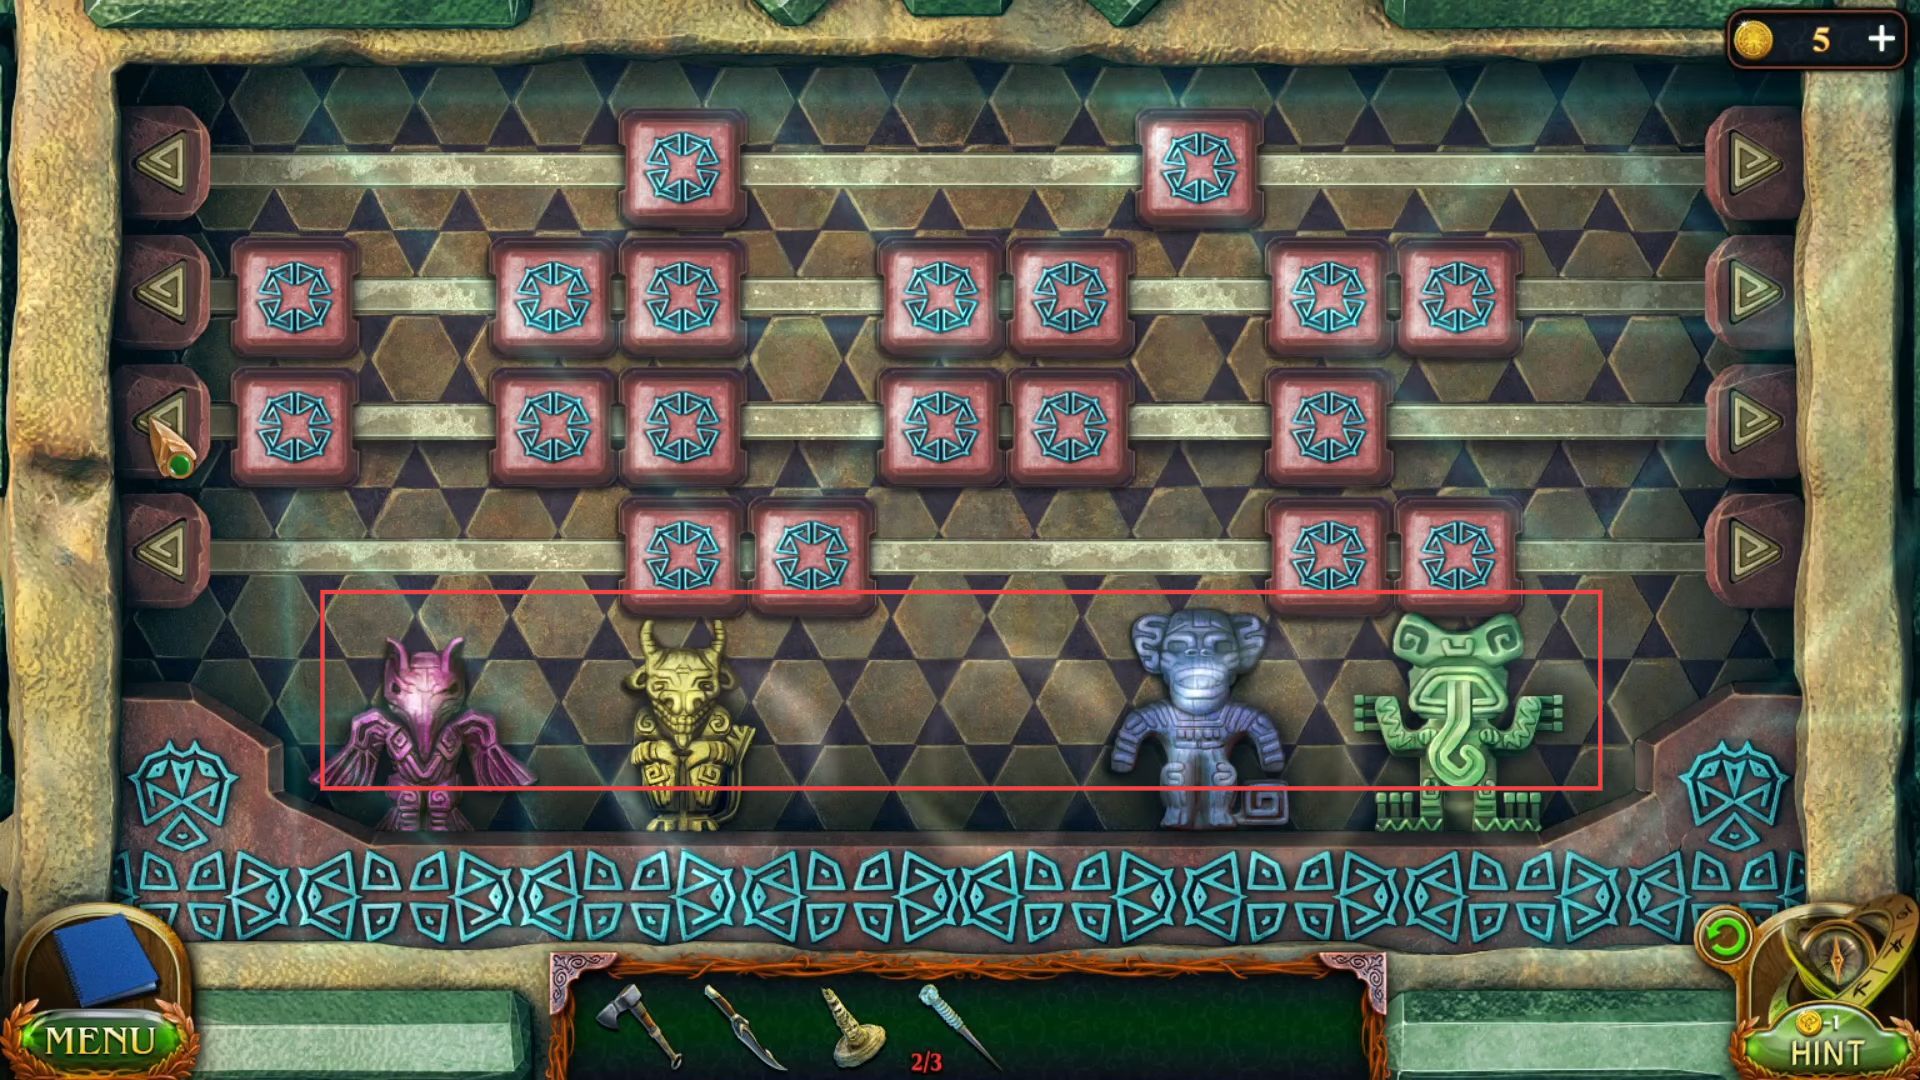
- Go to the Maaron’s hut, and place the bear, eagle, deer, cow, and owl emblems on the ground.

- Knock the handle to open the door and grab an emblem.

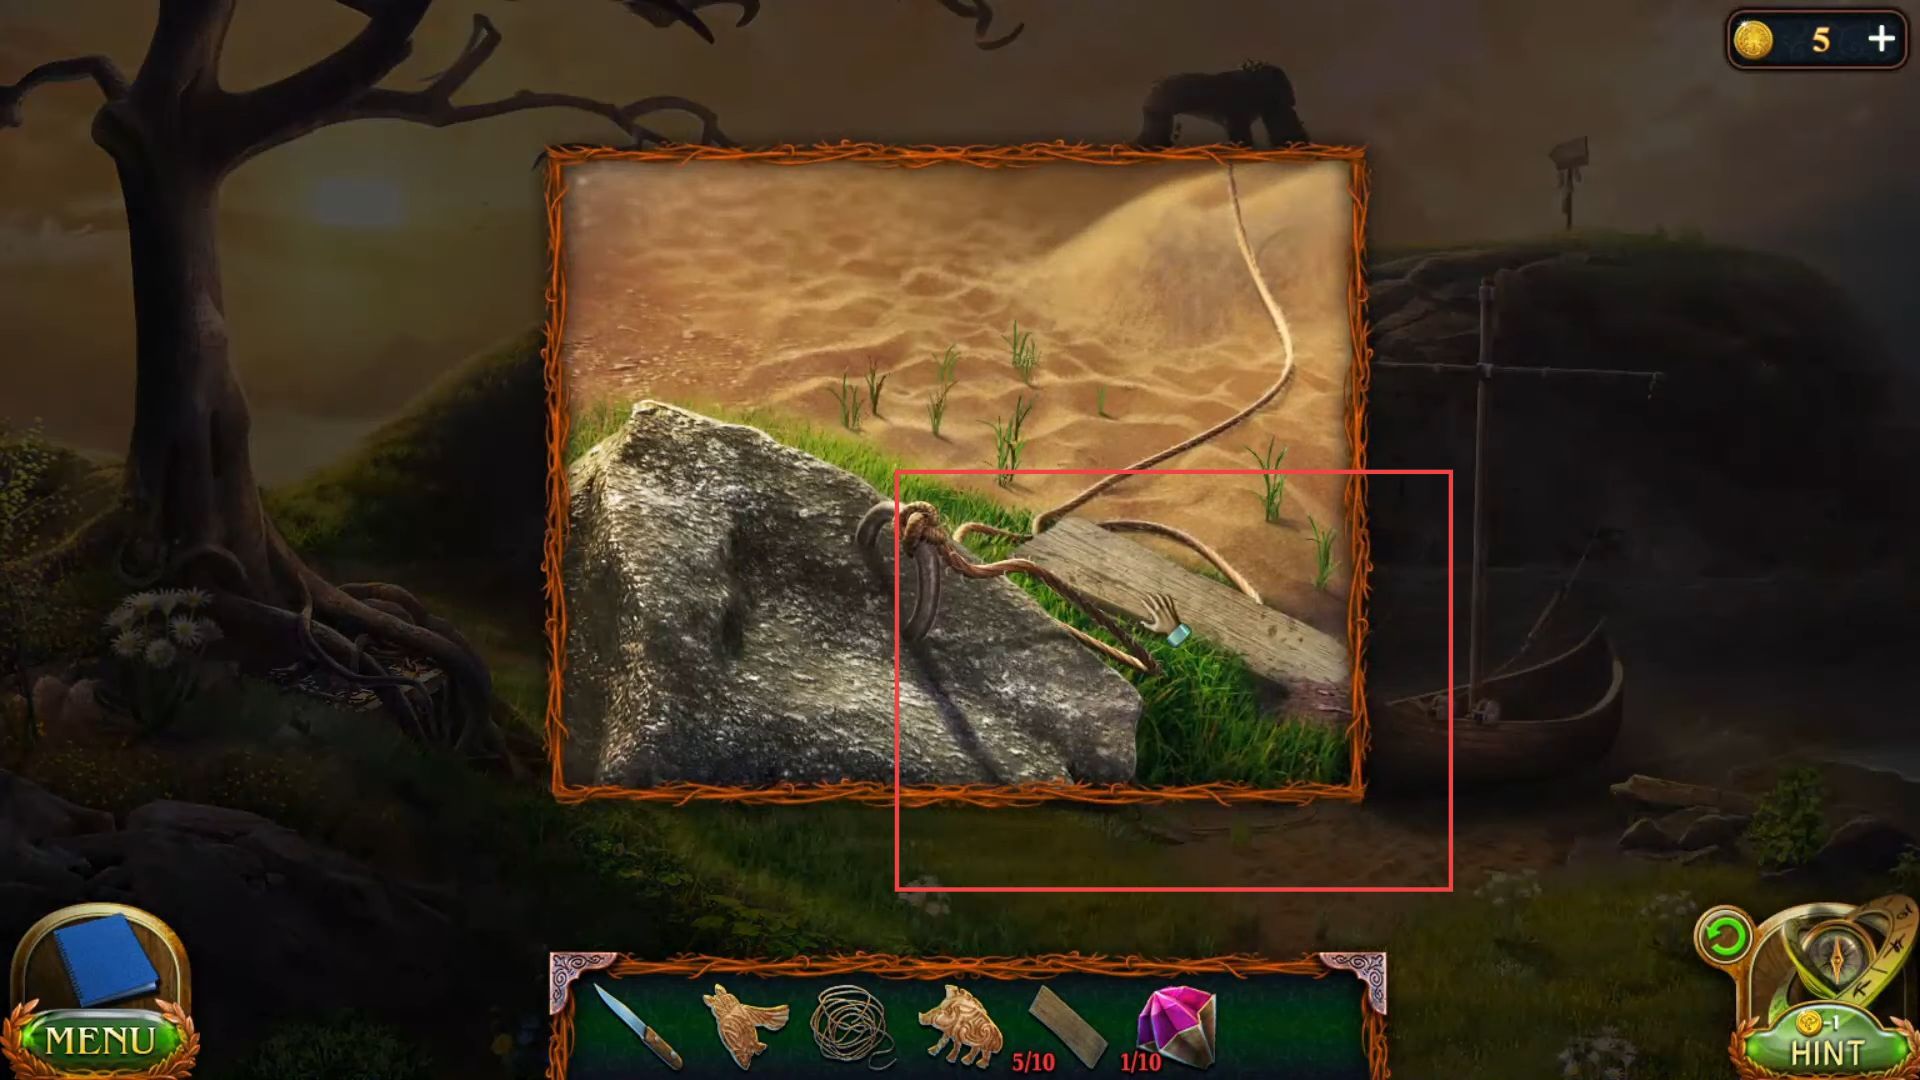
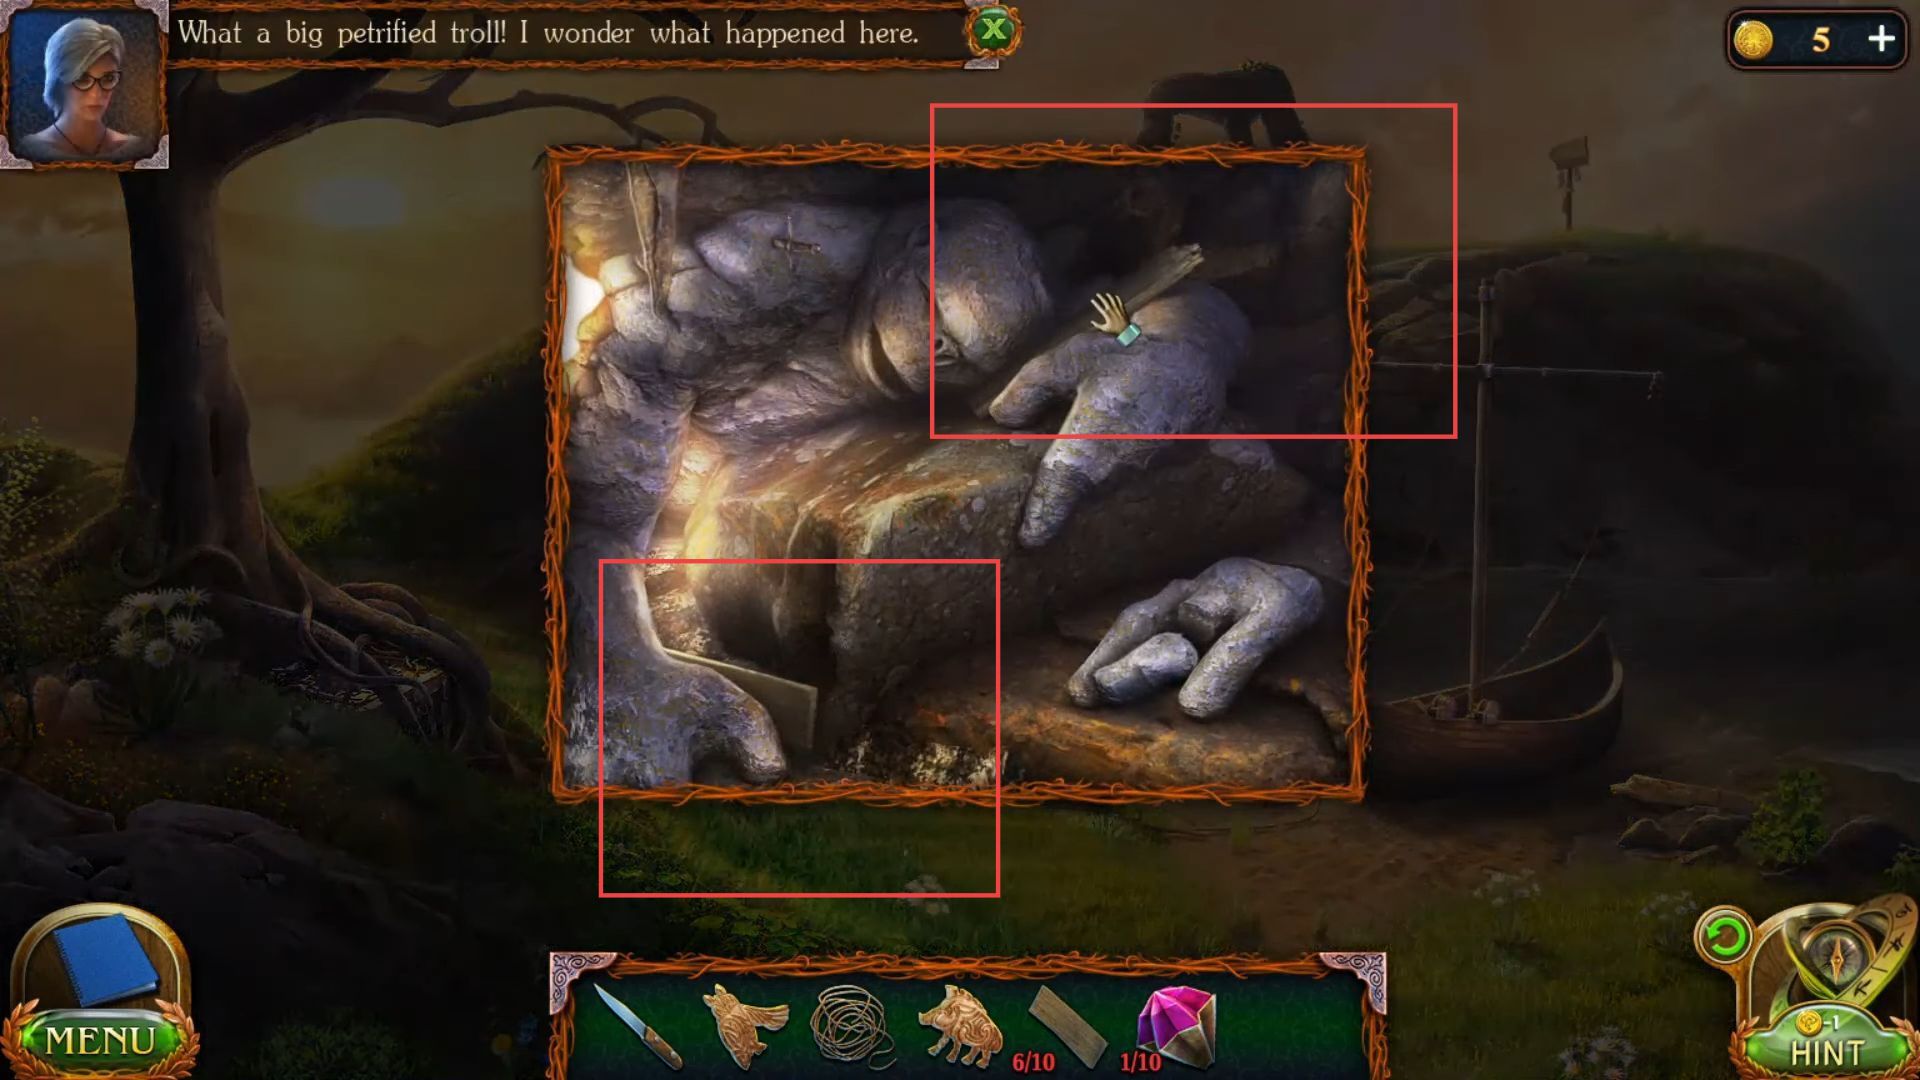
- Go to the riverside and use the axe to grab a troll stone.

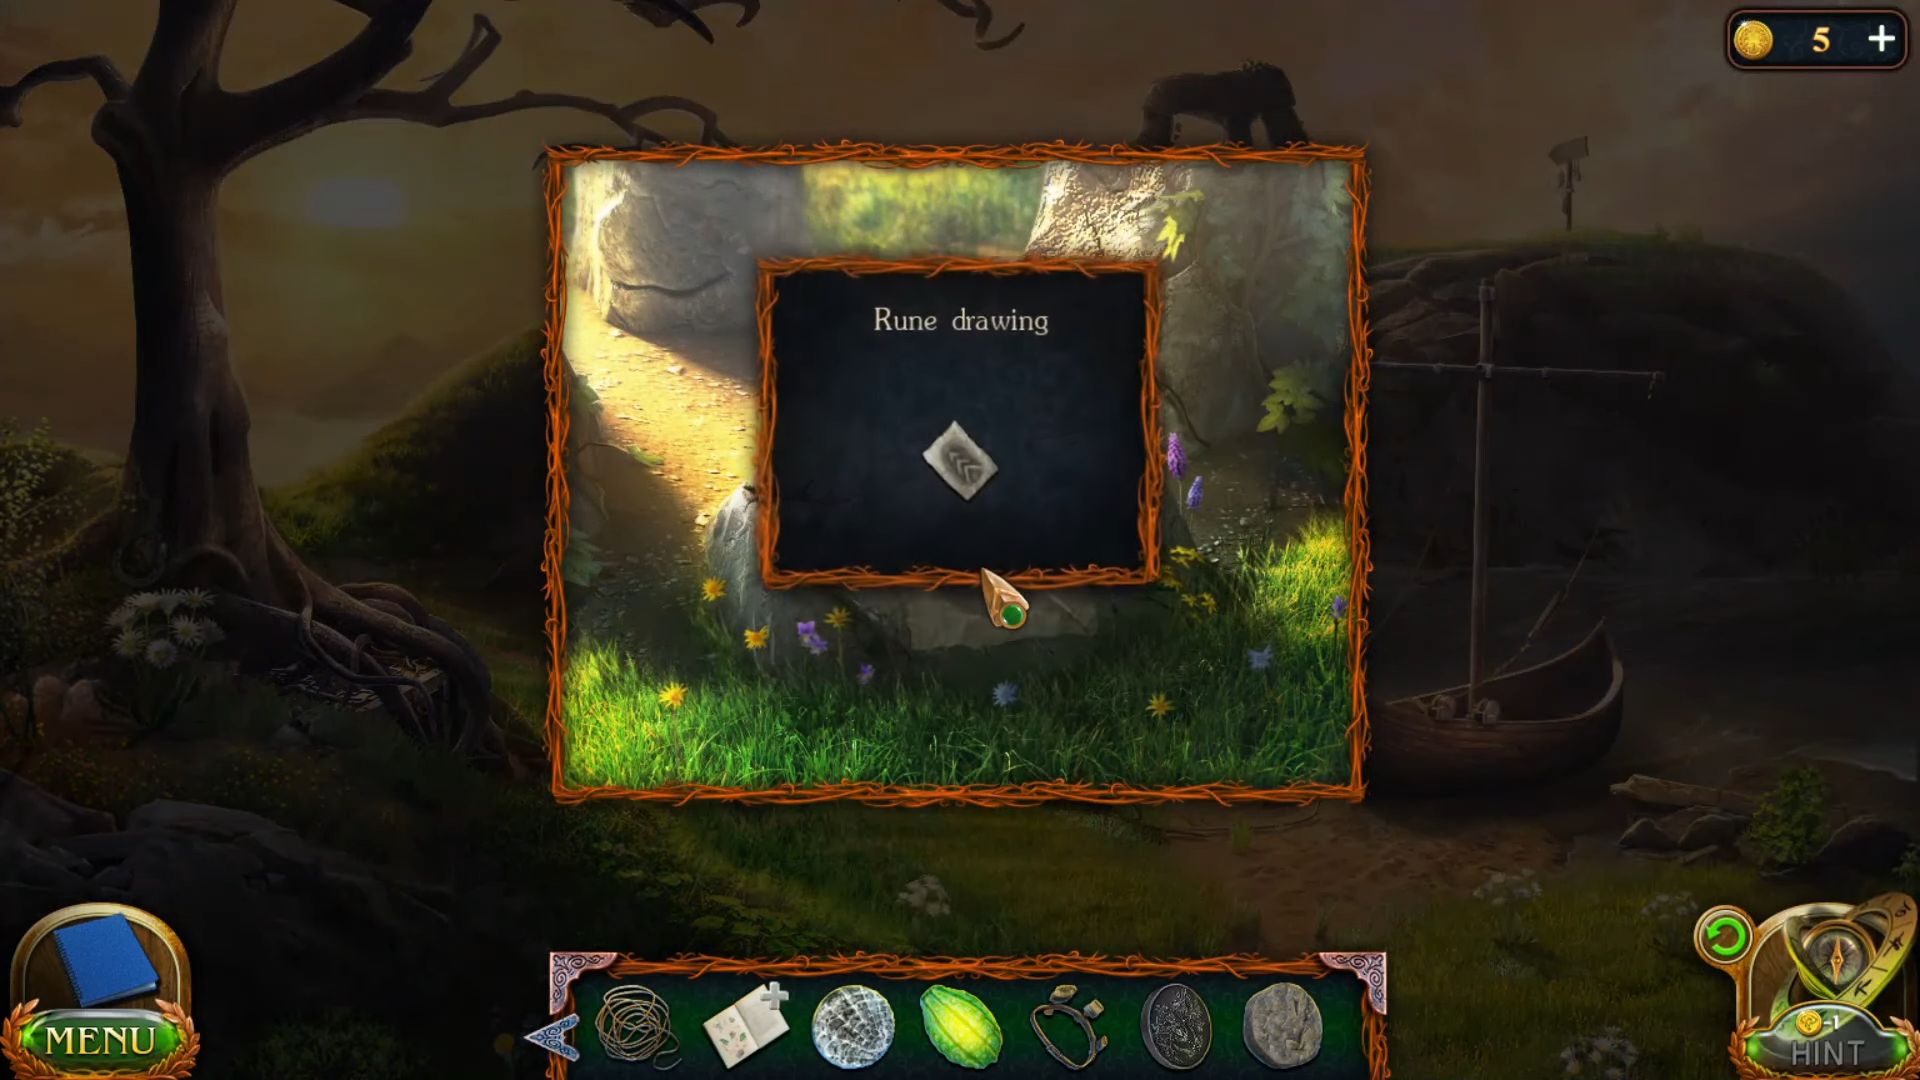
- Go to the mountain by crossing the river, place the paper pen, and get a rune drawing.
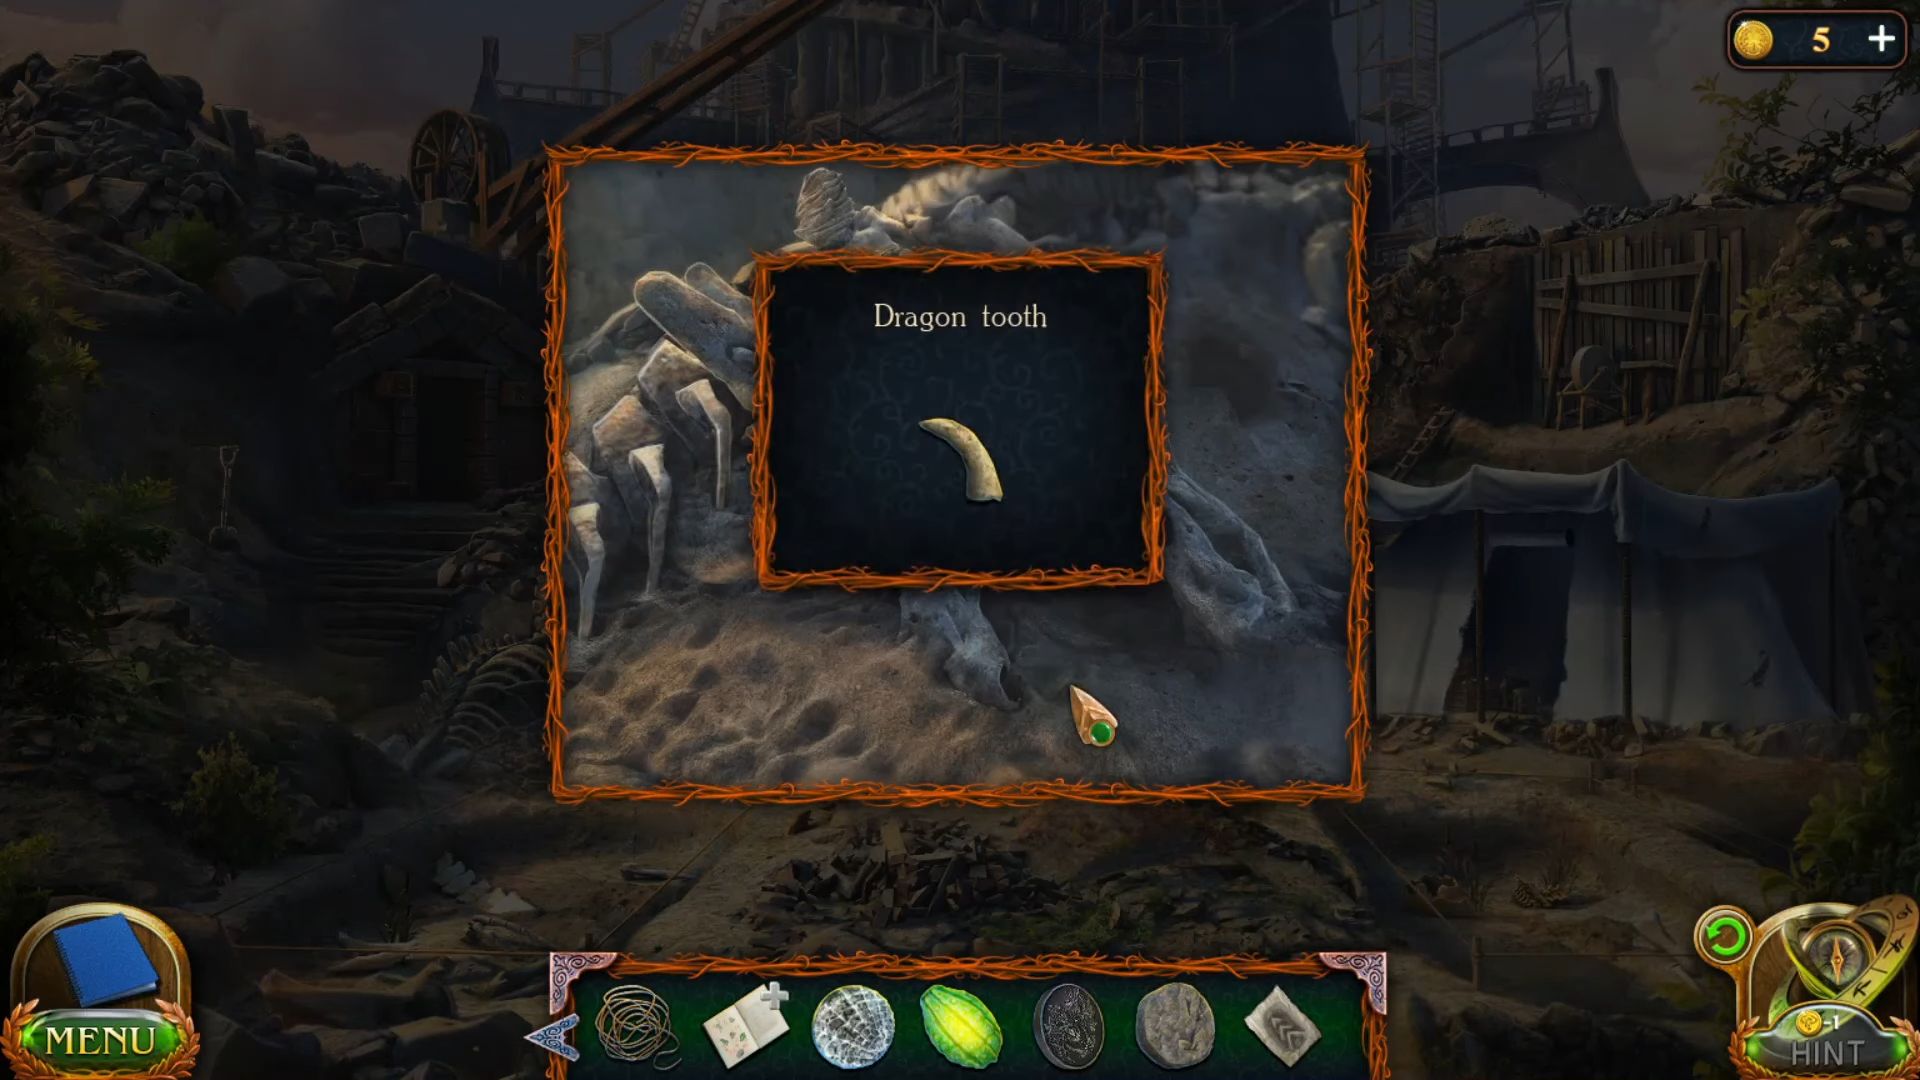
- Grab the dragon tooth by cutting it using the archaeologist cutter.
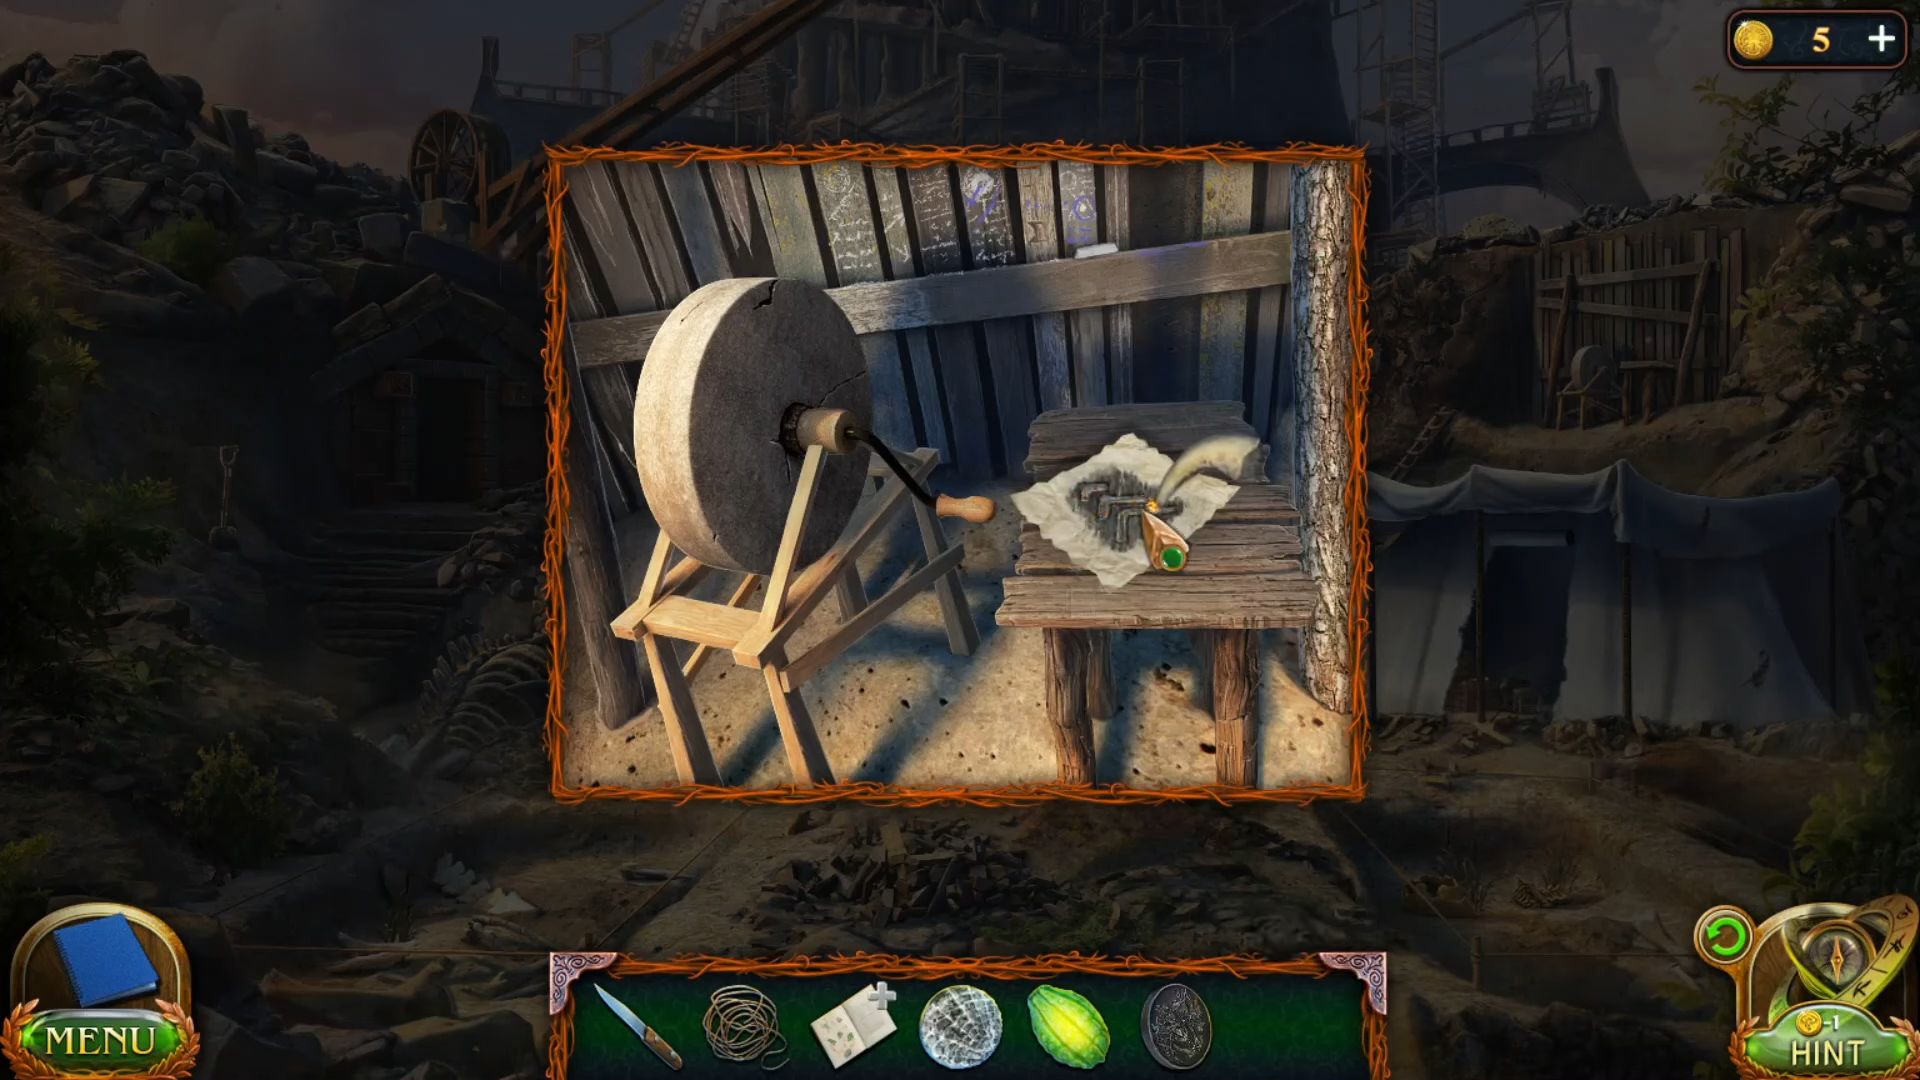
- Put the stone on the buffer to reshape it, place the drawing paper on the stone, and cut it using the dragon’s tooth.
- Add the portal fruit on the stone to make a rune.

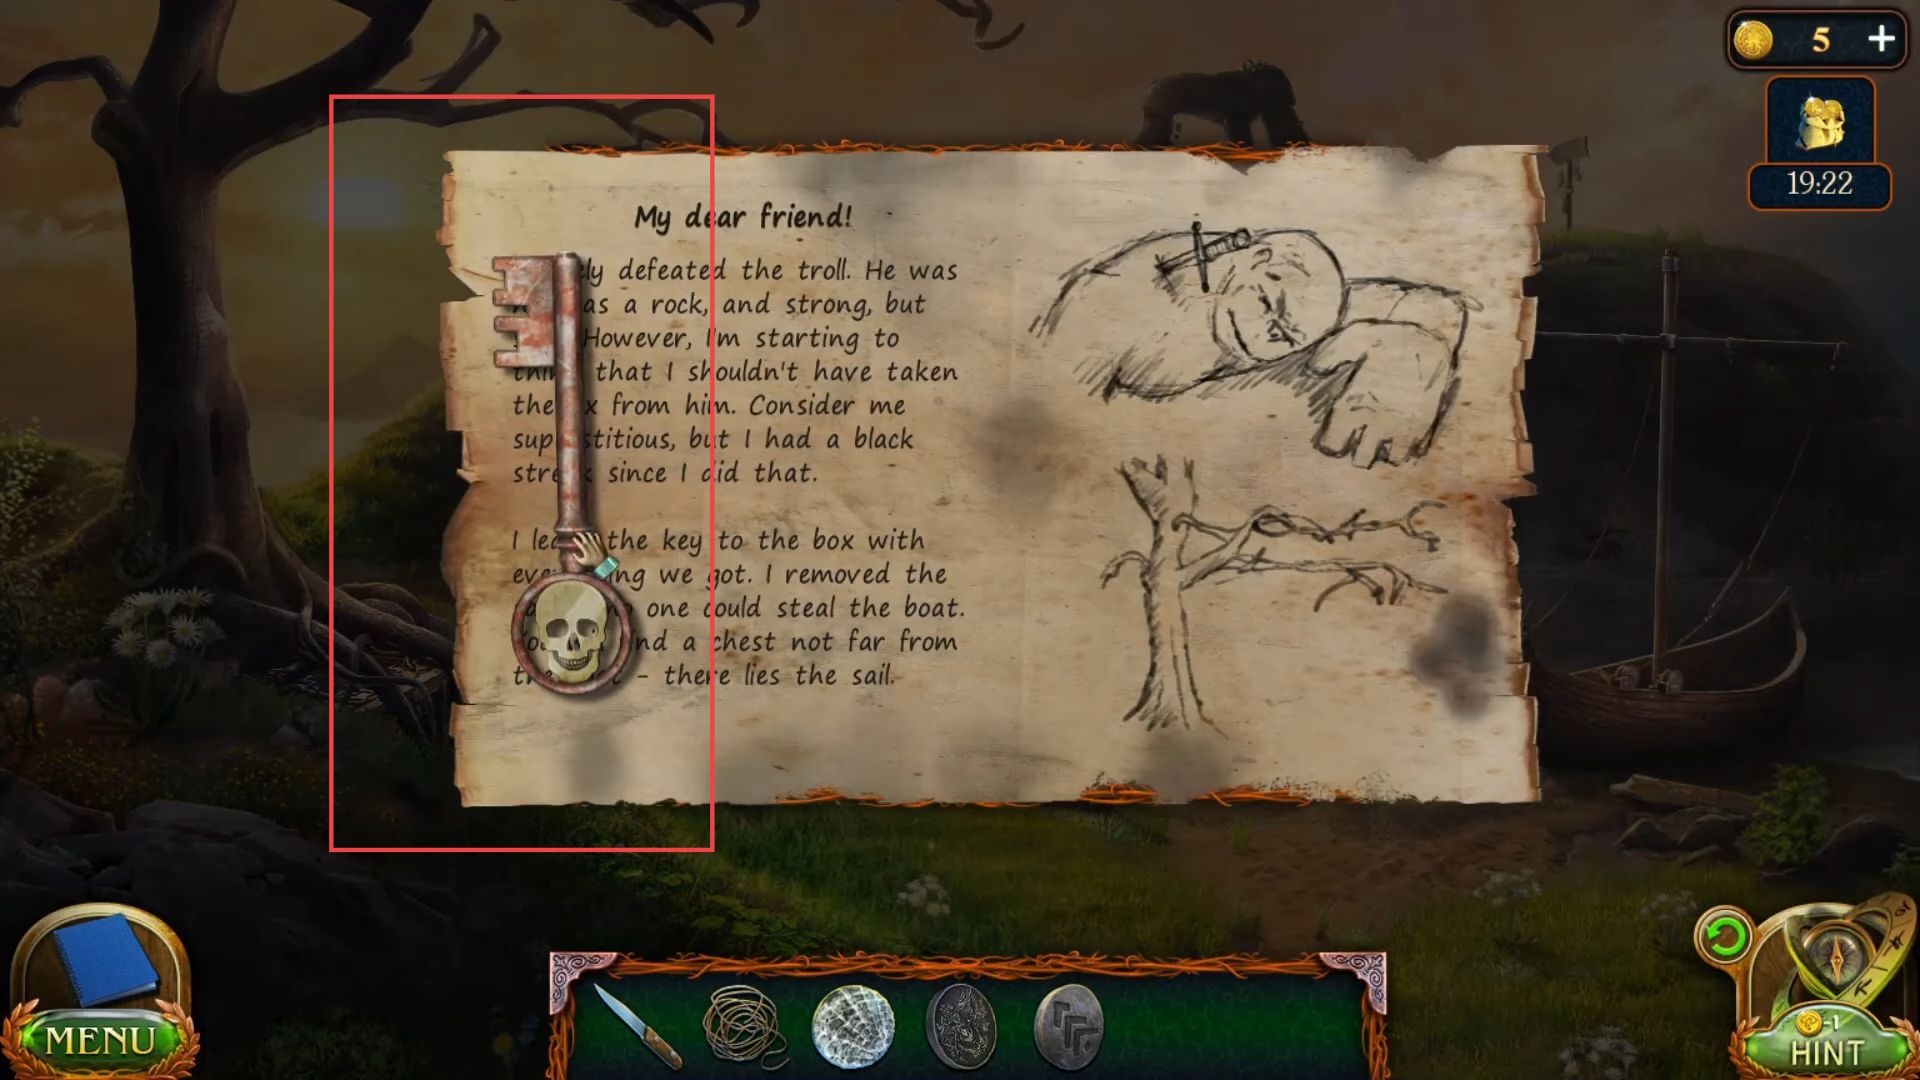
- Slide the boat, grab a bottle from the downside, break it, and get a key from the note.
- Go inside the boat, use this key to unlock the box, and grab a battle axe.
- Use the axe to cut the branches of the opposite tree.

- Get the boat and oars from the tree.
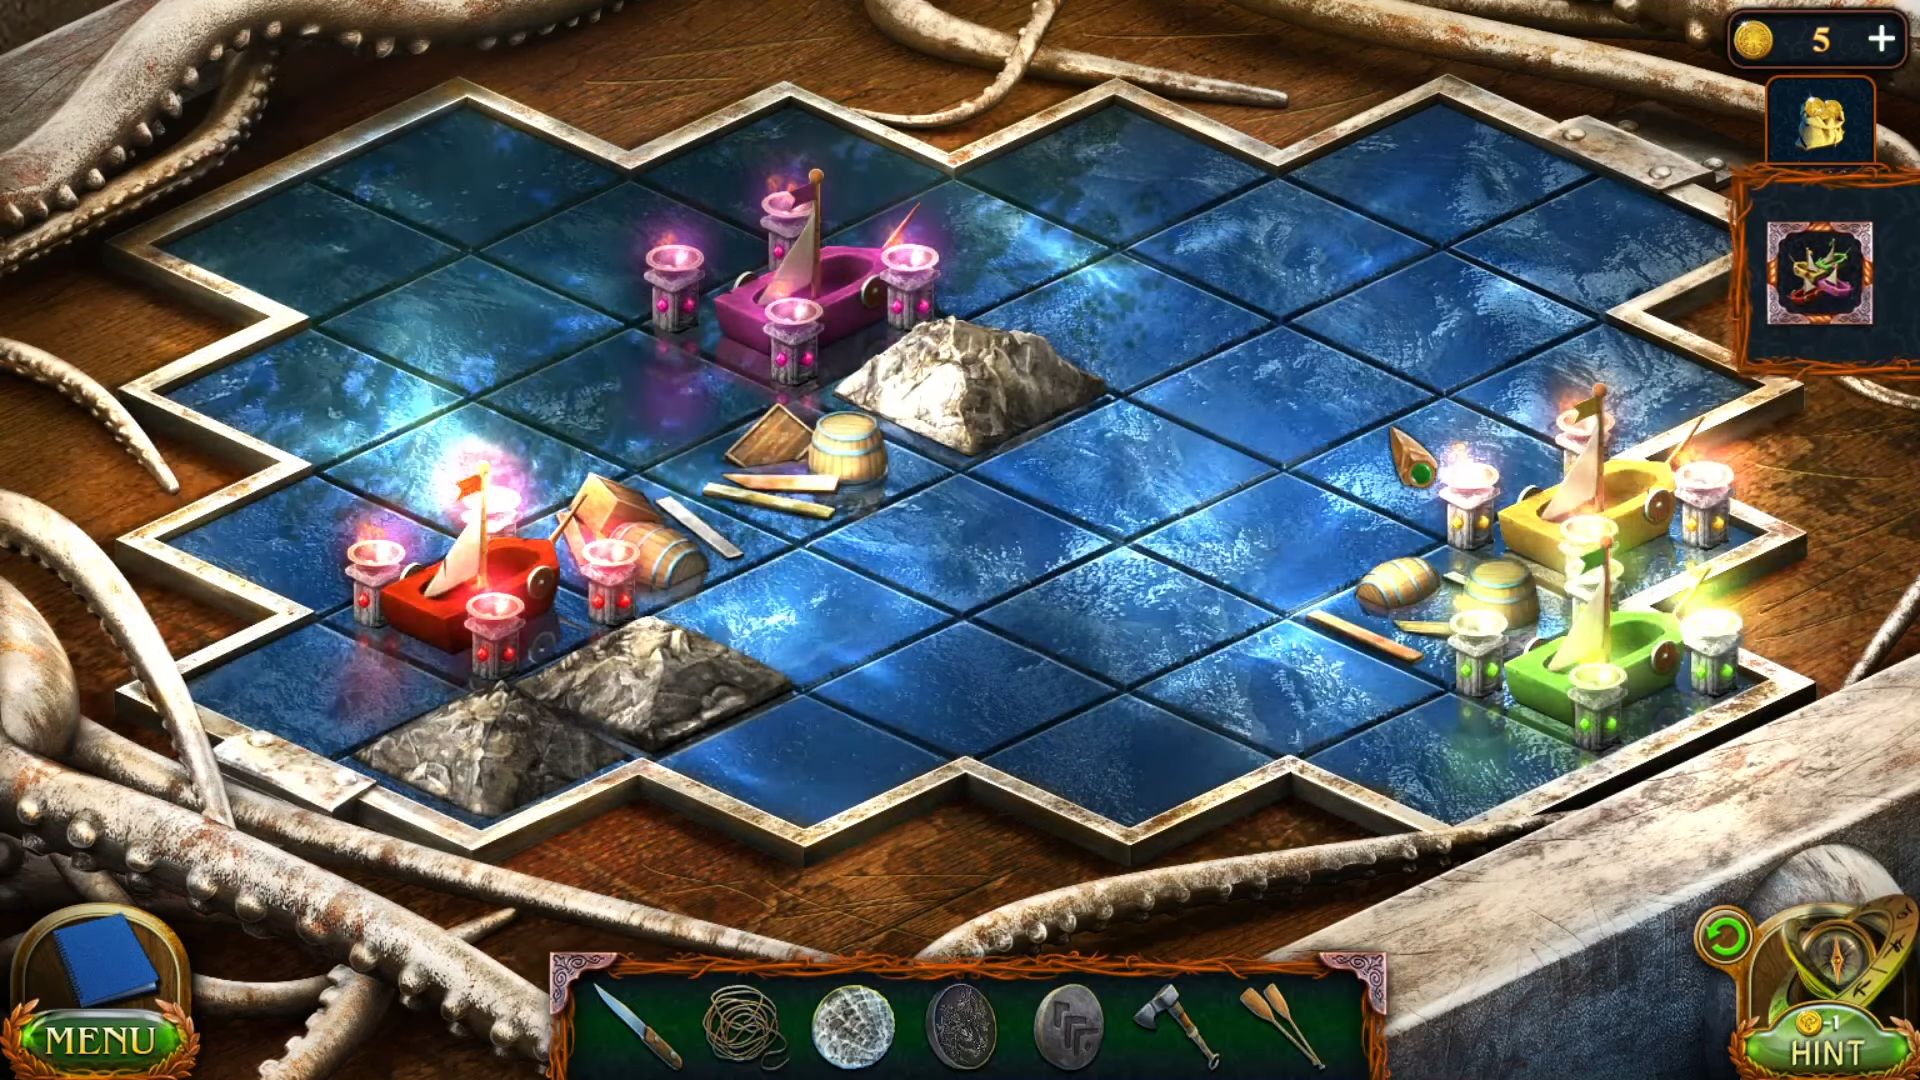
- Put the boat on the box under the tree, use stones and wooden fragments to move the boats, and lead them into the bay with columns of the corresponding colour.
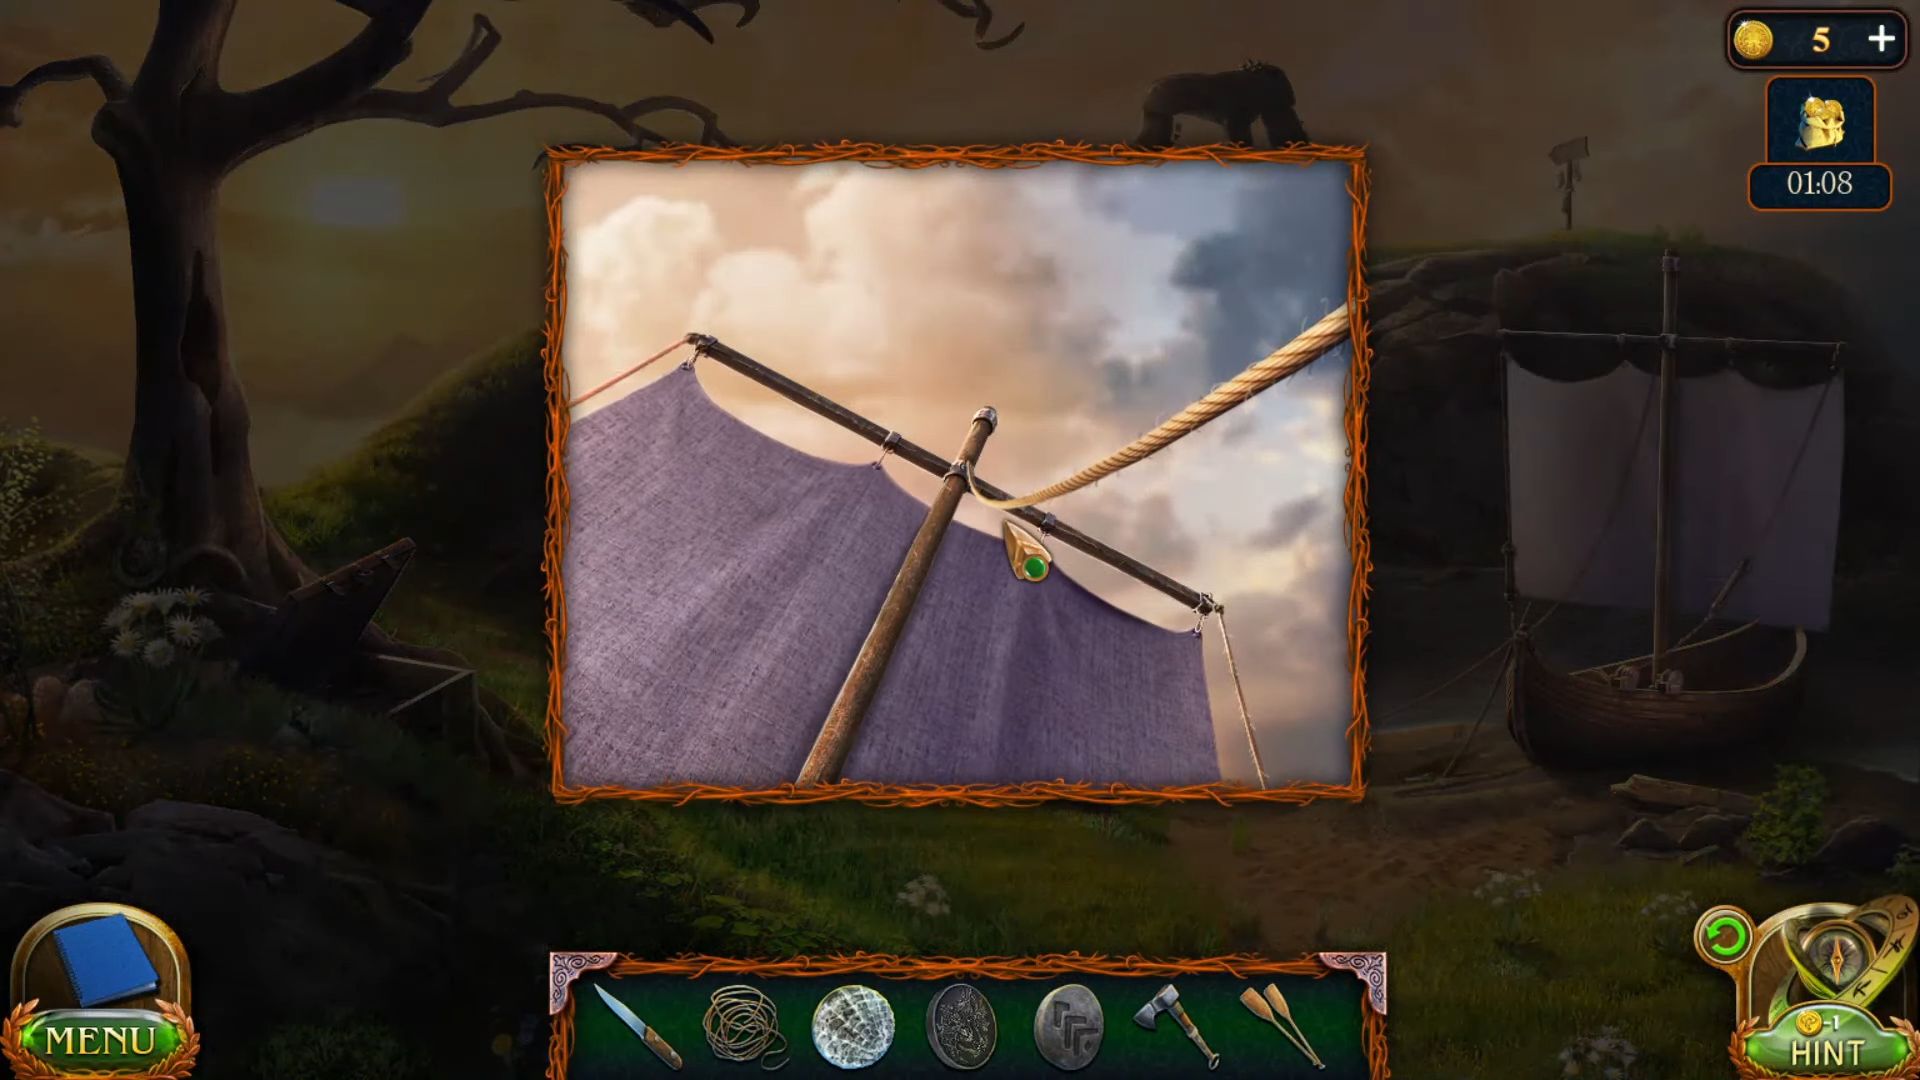
- Once the box is opened, grab a sail from the inside.

- Put the sail on the boat’s frame.
- Cut the rope using the knife from the stone near the tree.

- Place the oars in the boat on the front side.
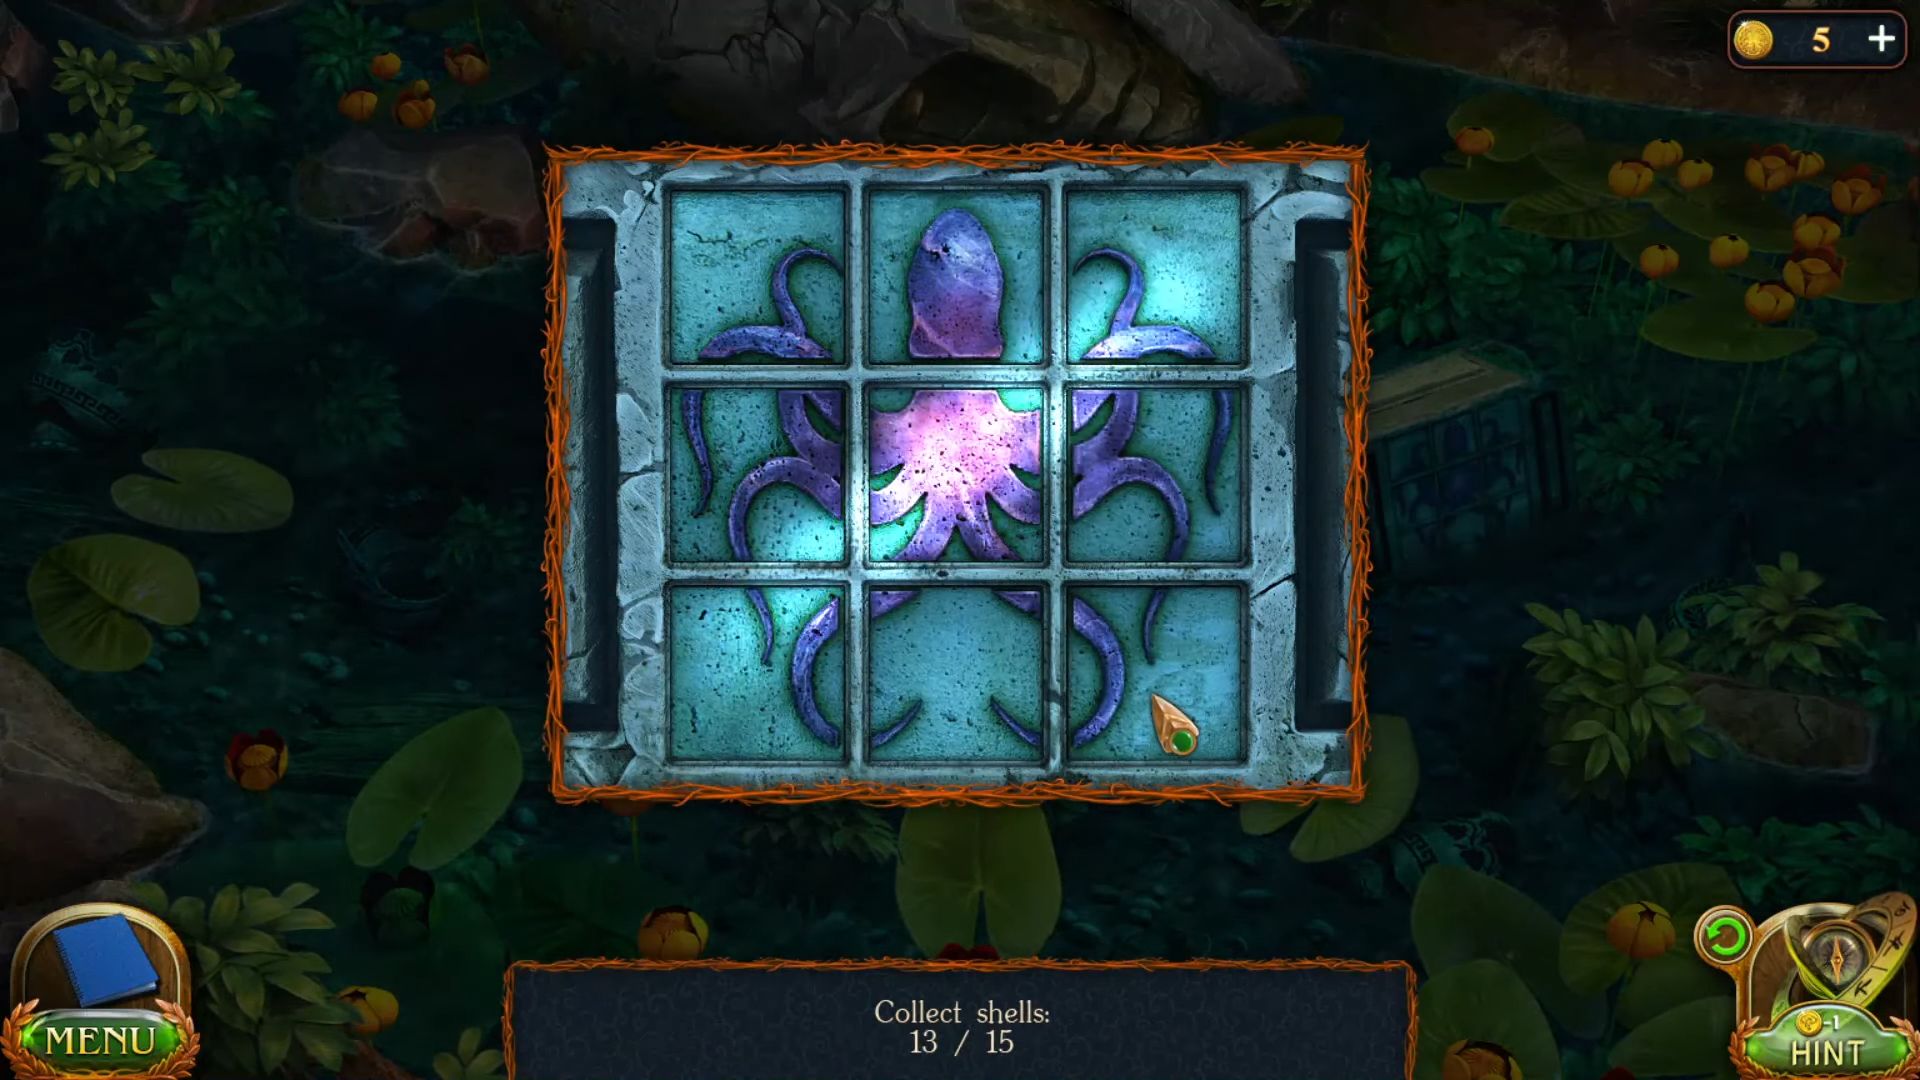
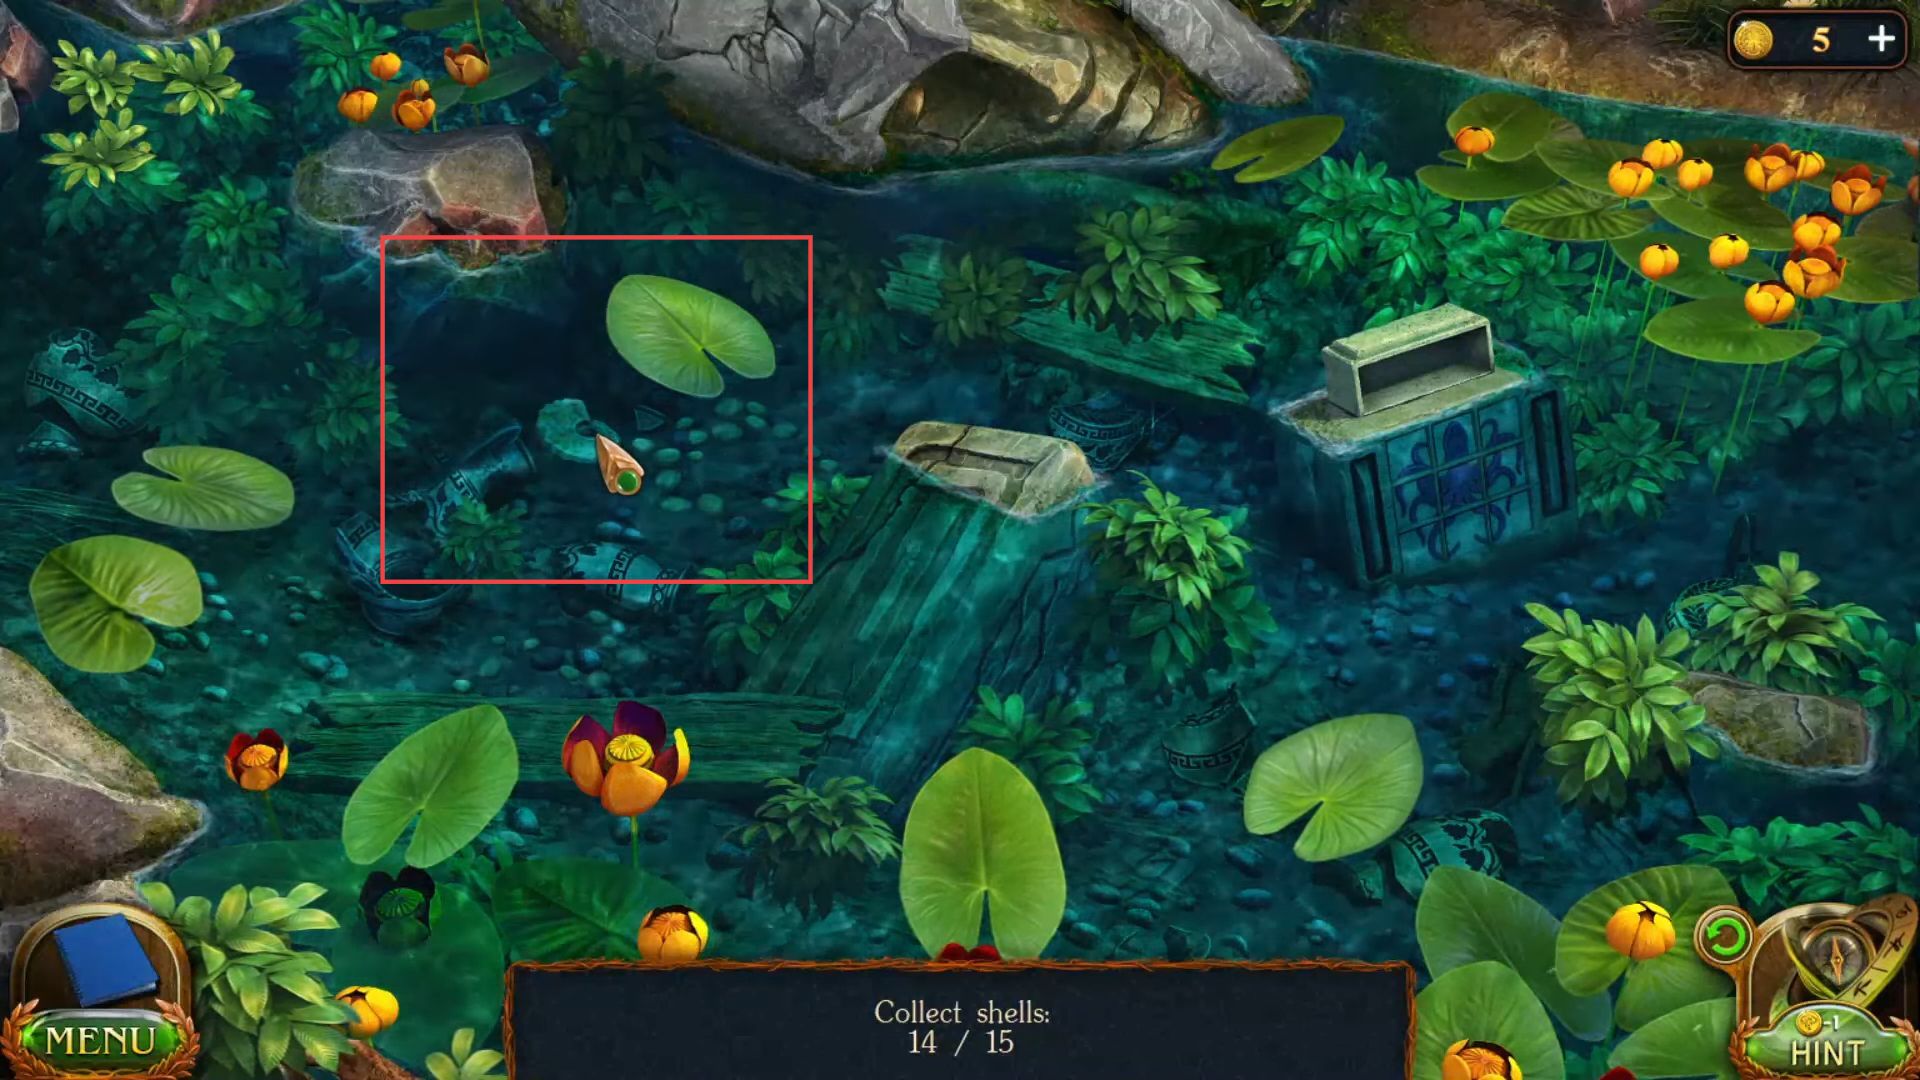
- Use the boat to go to the other side of the river and collect shells from the river.

- Now flip the tiles over to complete the octopus pattern in this sequence.
- Slide the pot from the water and collect another shell.
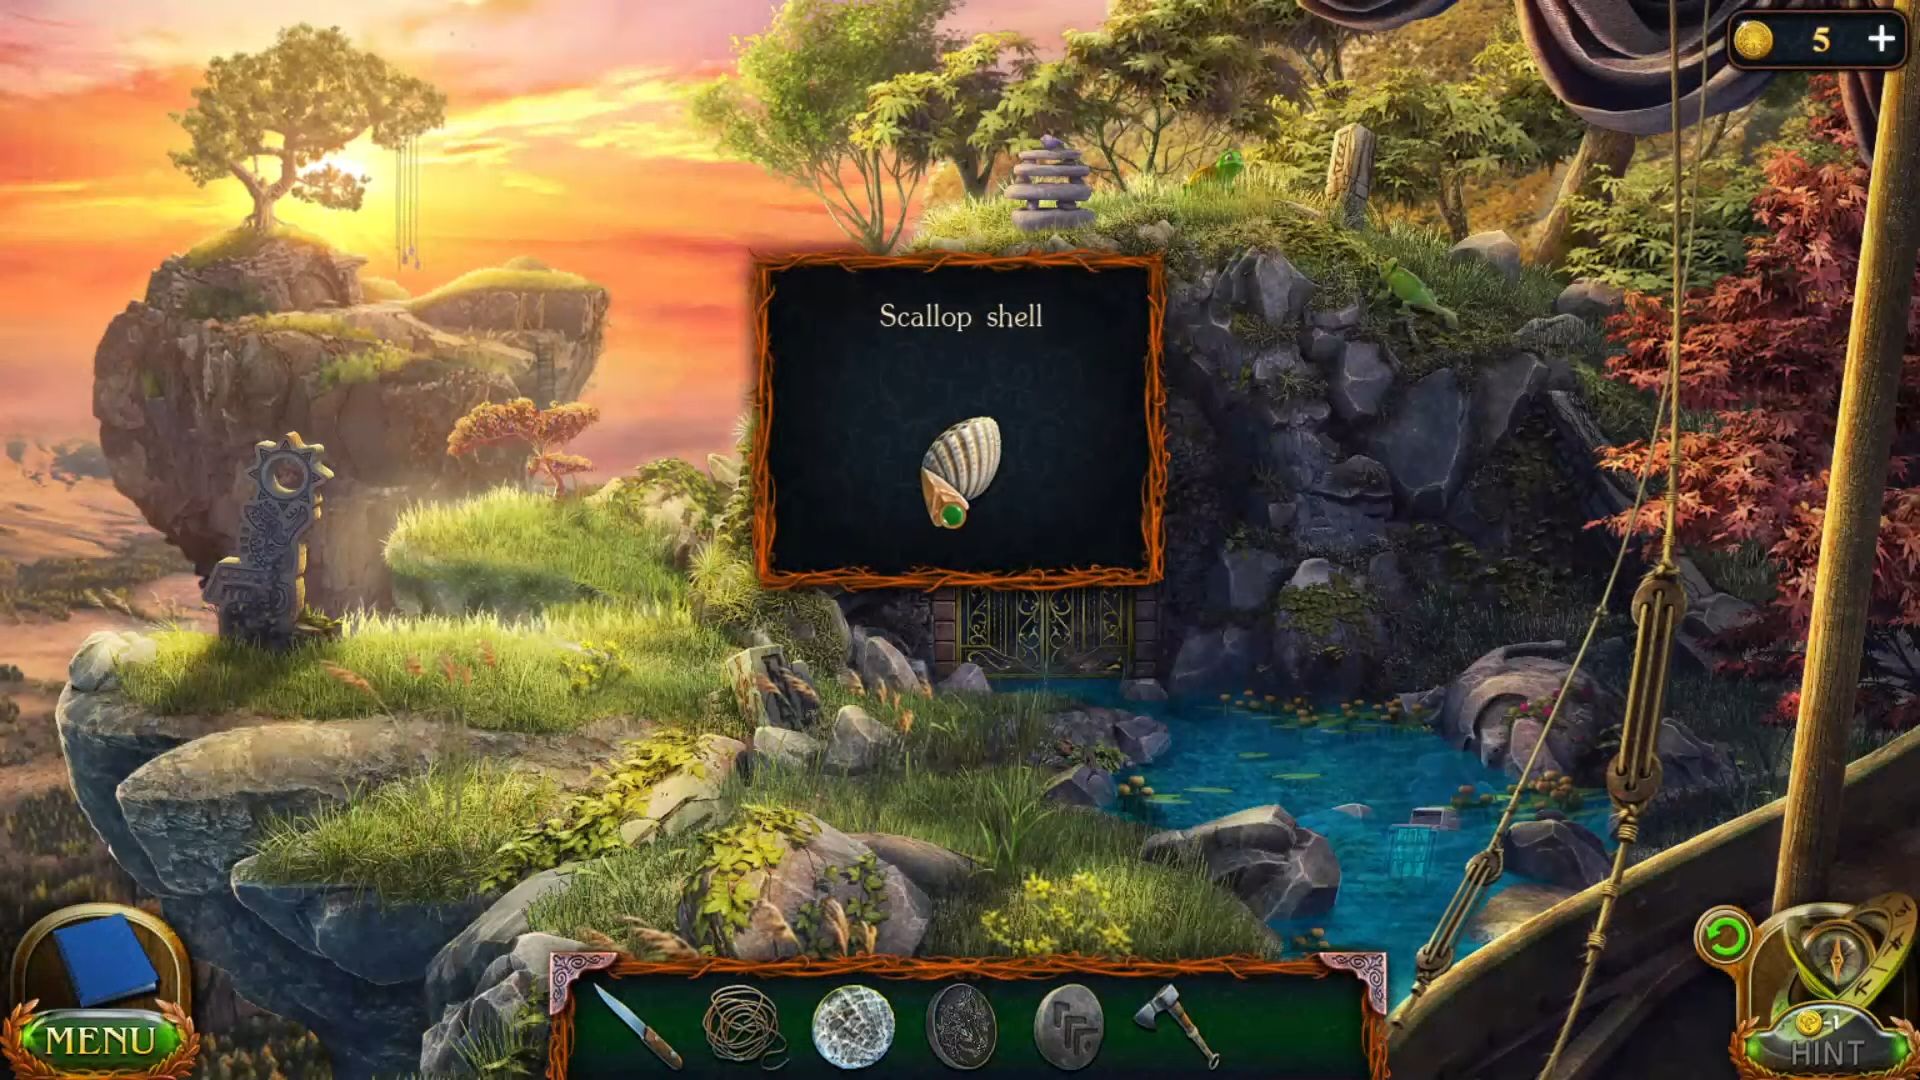
- Now get a scallop shell from the riverside.
- Put the scales in the statue near the left side of the river.

- Throw the rope with a hook on the other side of the valley.
- Use the axe to cut and put the tree branch into the inventory.

- Collect the bird figurine and calm shell using the tree branch from the river’s top.

- Put the bird figurine in the backpack from the other side of the river and grab a snail shell.

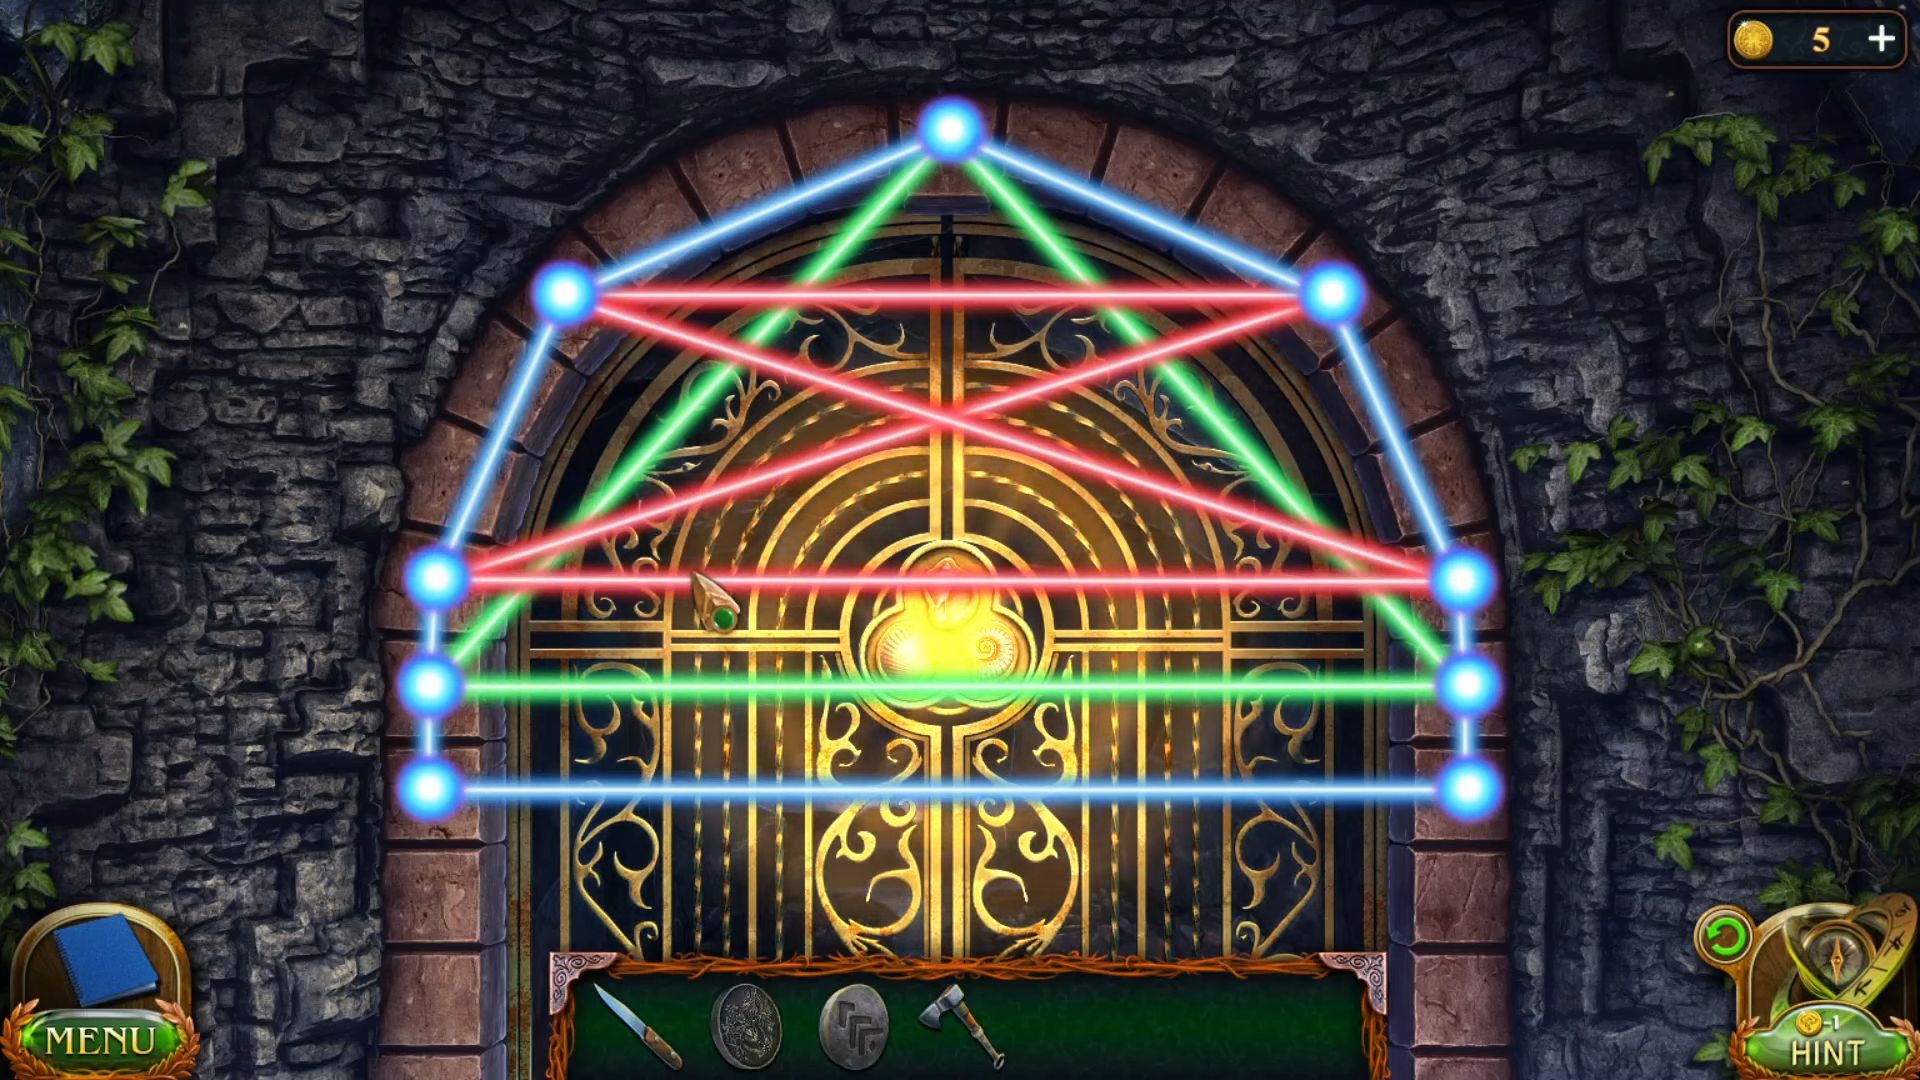
- Place the sea shells on the front door, swap the points by clicking on them to arrange the rays shown in the hint to unlock the door.
- Go inside the door to reach the temple and use the axe to get a tile from the well.

- Grab the shovel from the left side of the stairs.

- Return to the Fugo island, use the shovel to dig some soil, and grab tile with a pattern and an amulet.

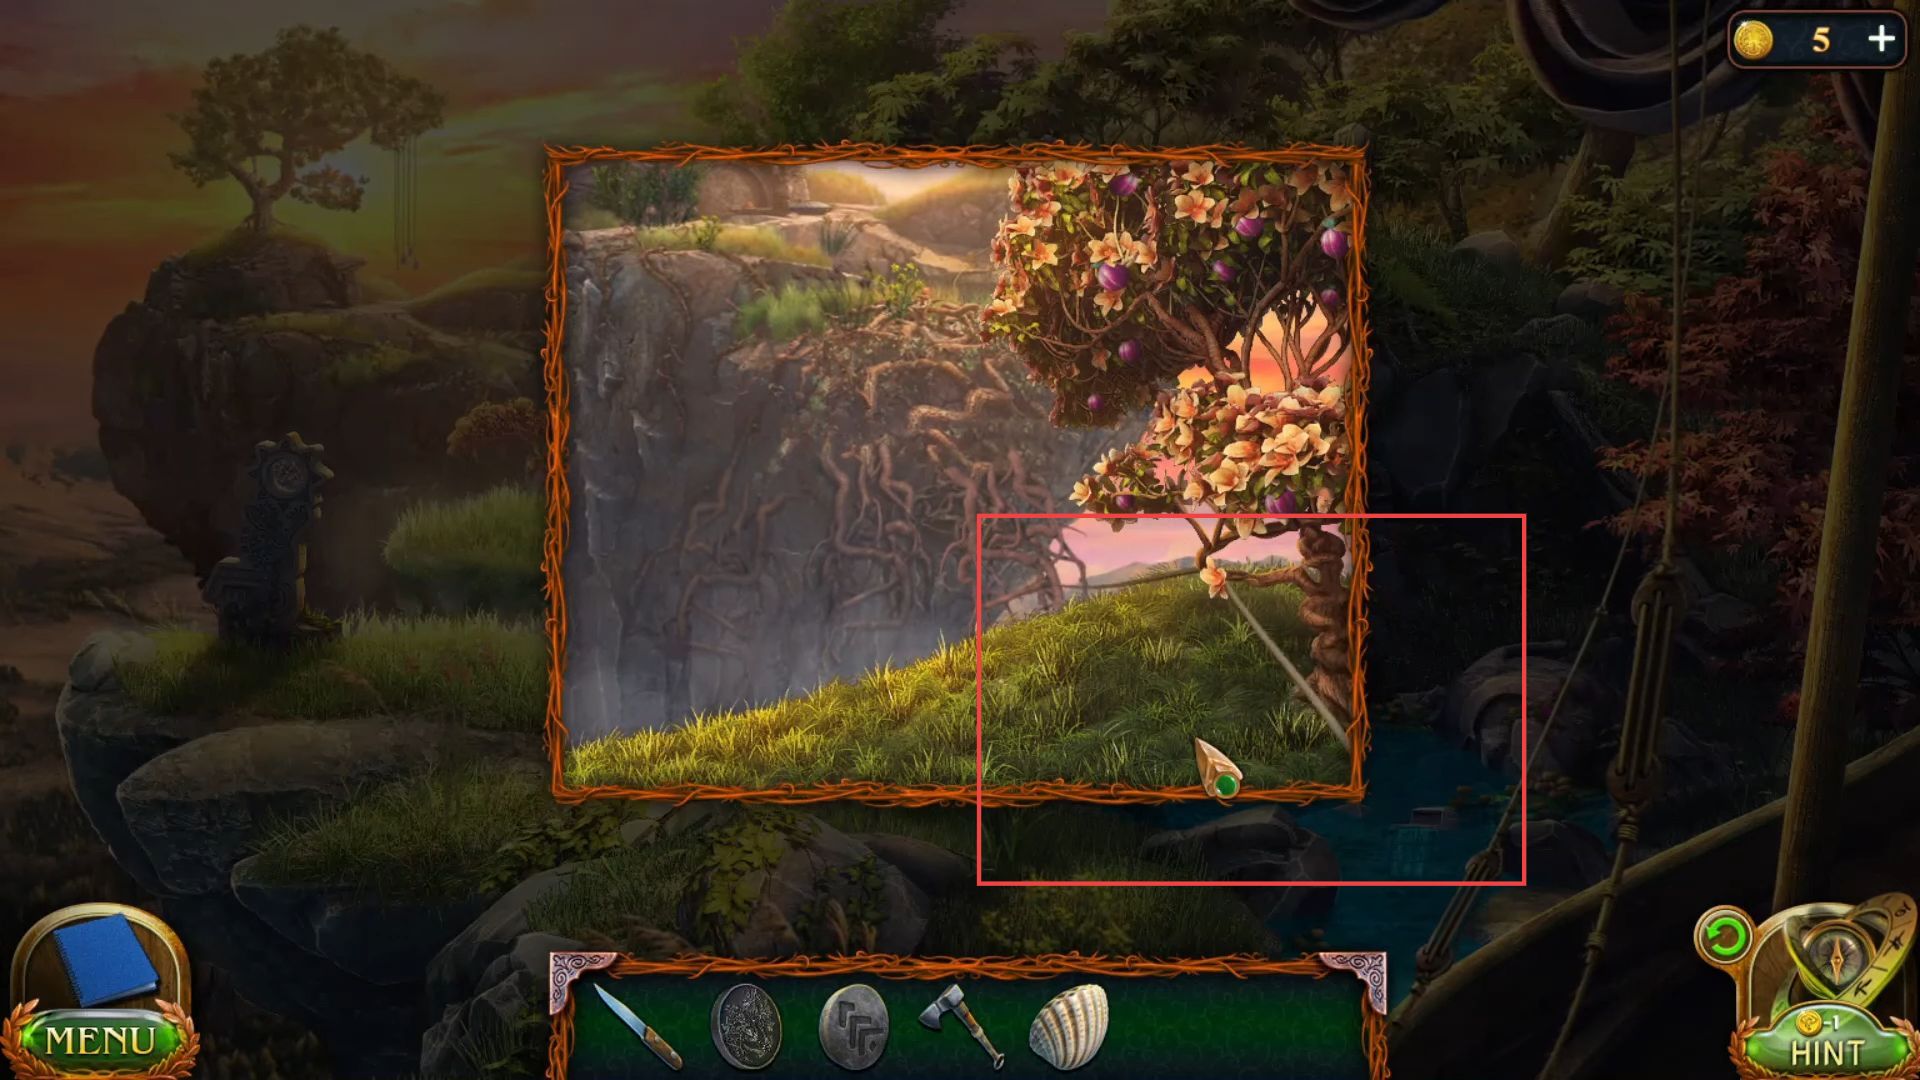
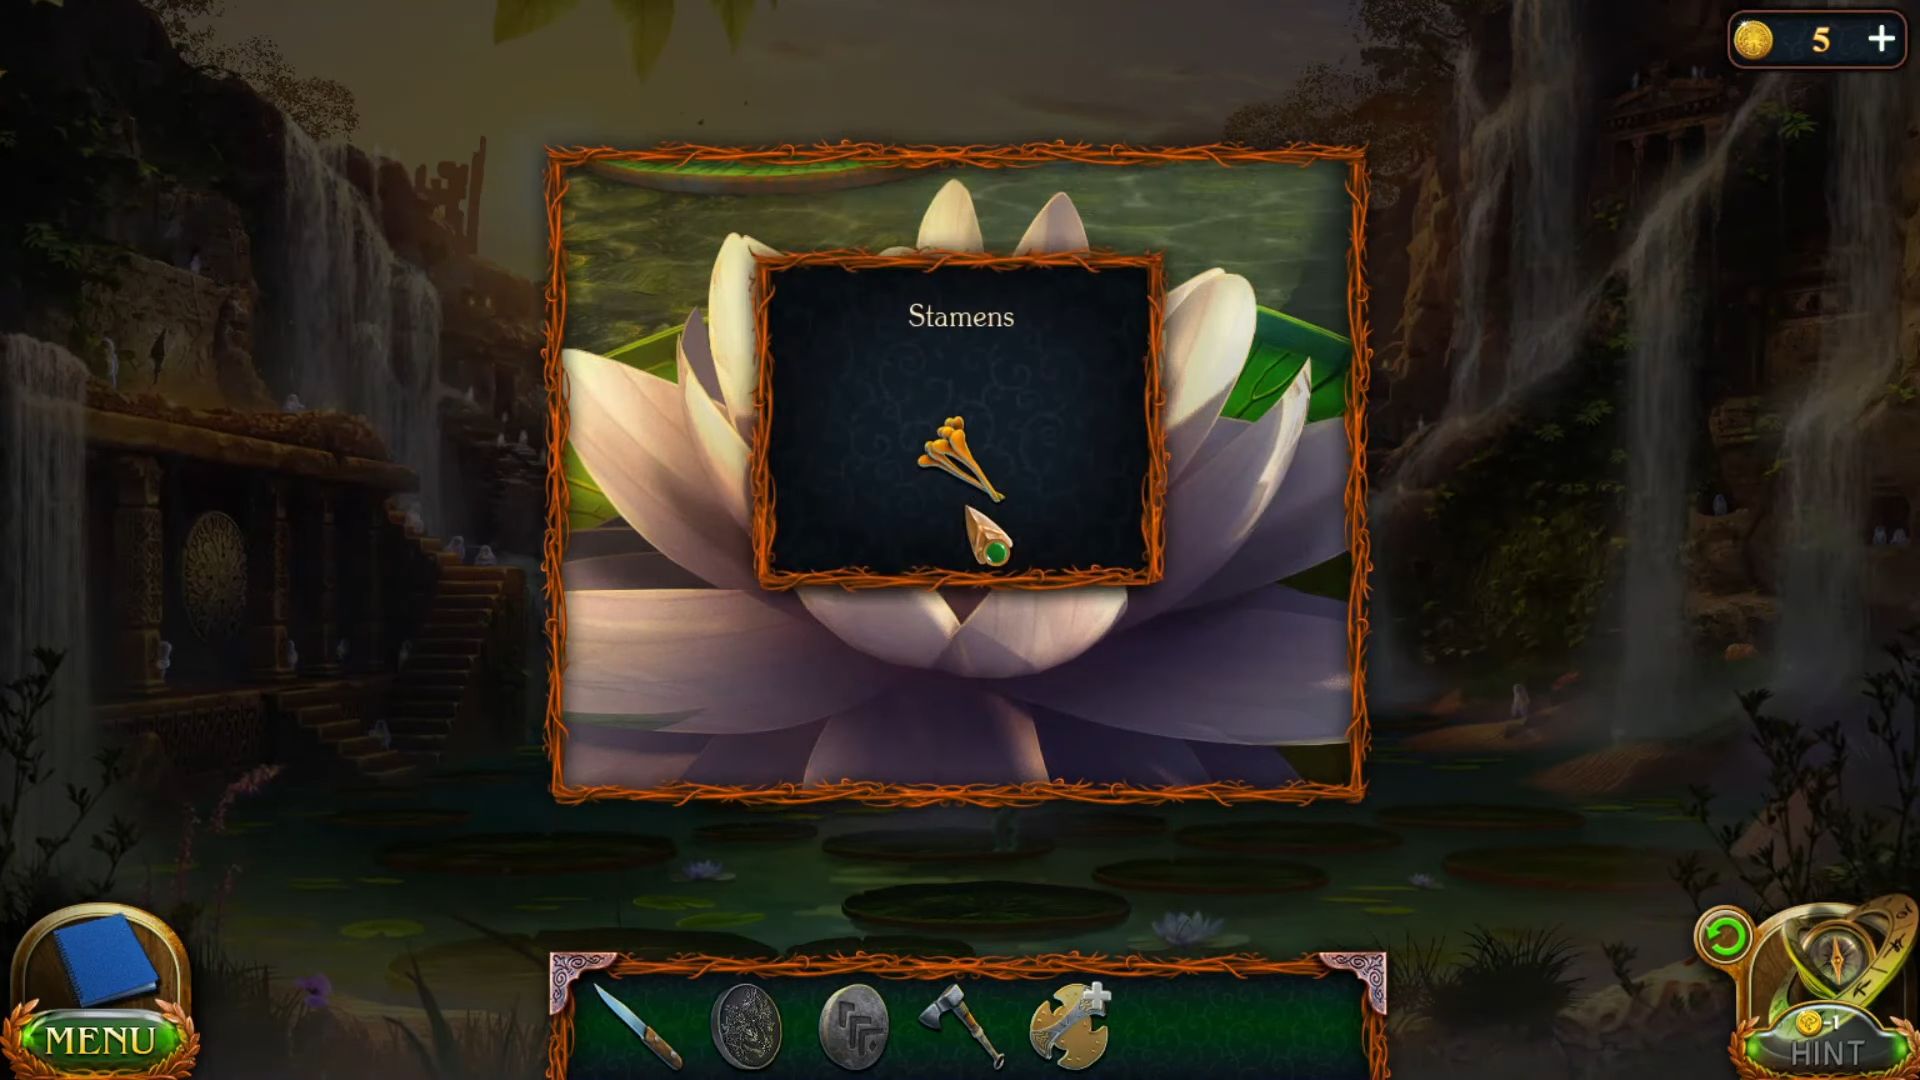
- Use the knife to get stamens from the white lily in the lake.
- Grab the snake skull from the mini pond.

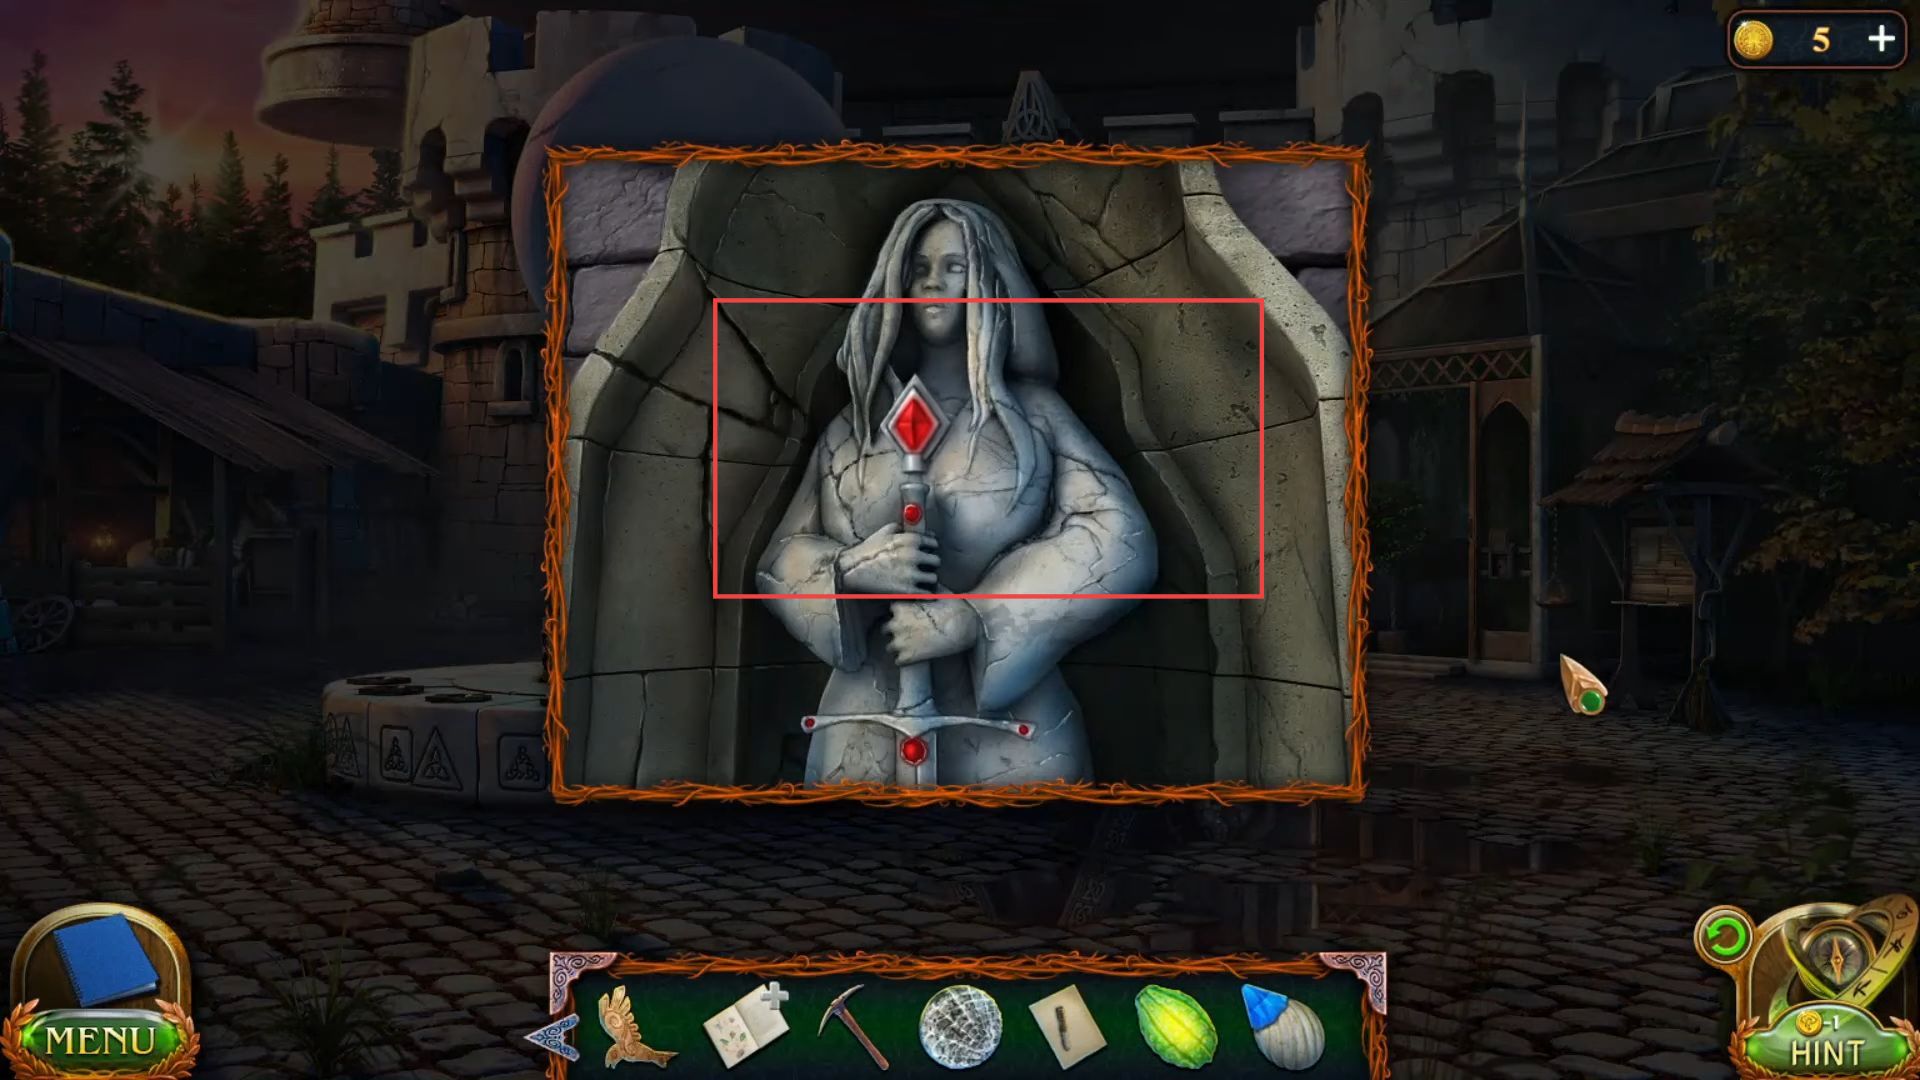
- Collect a tiara from the front side window near the stairs.

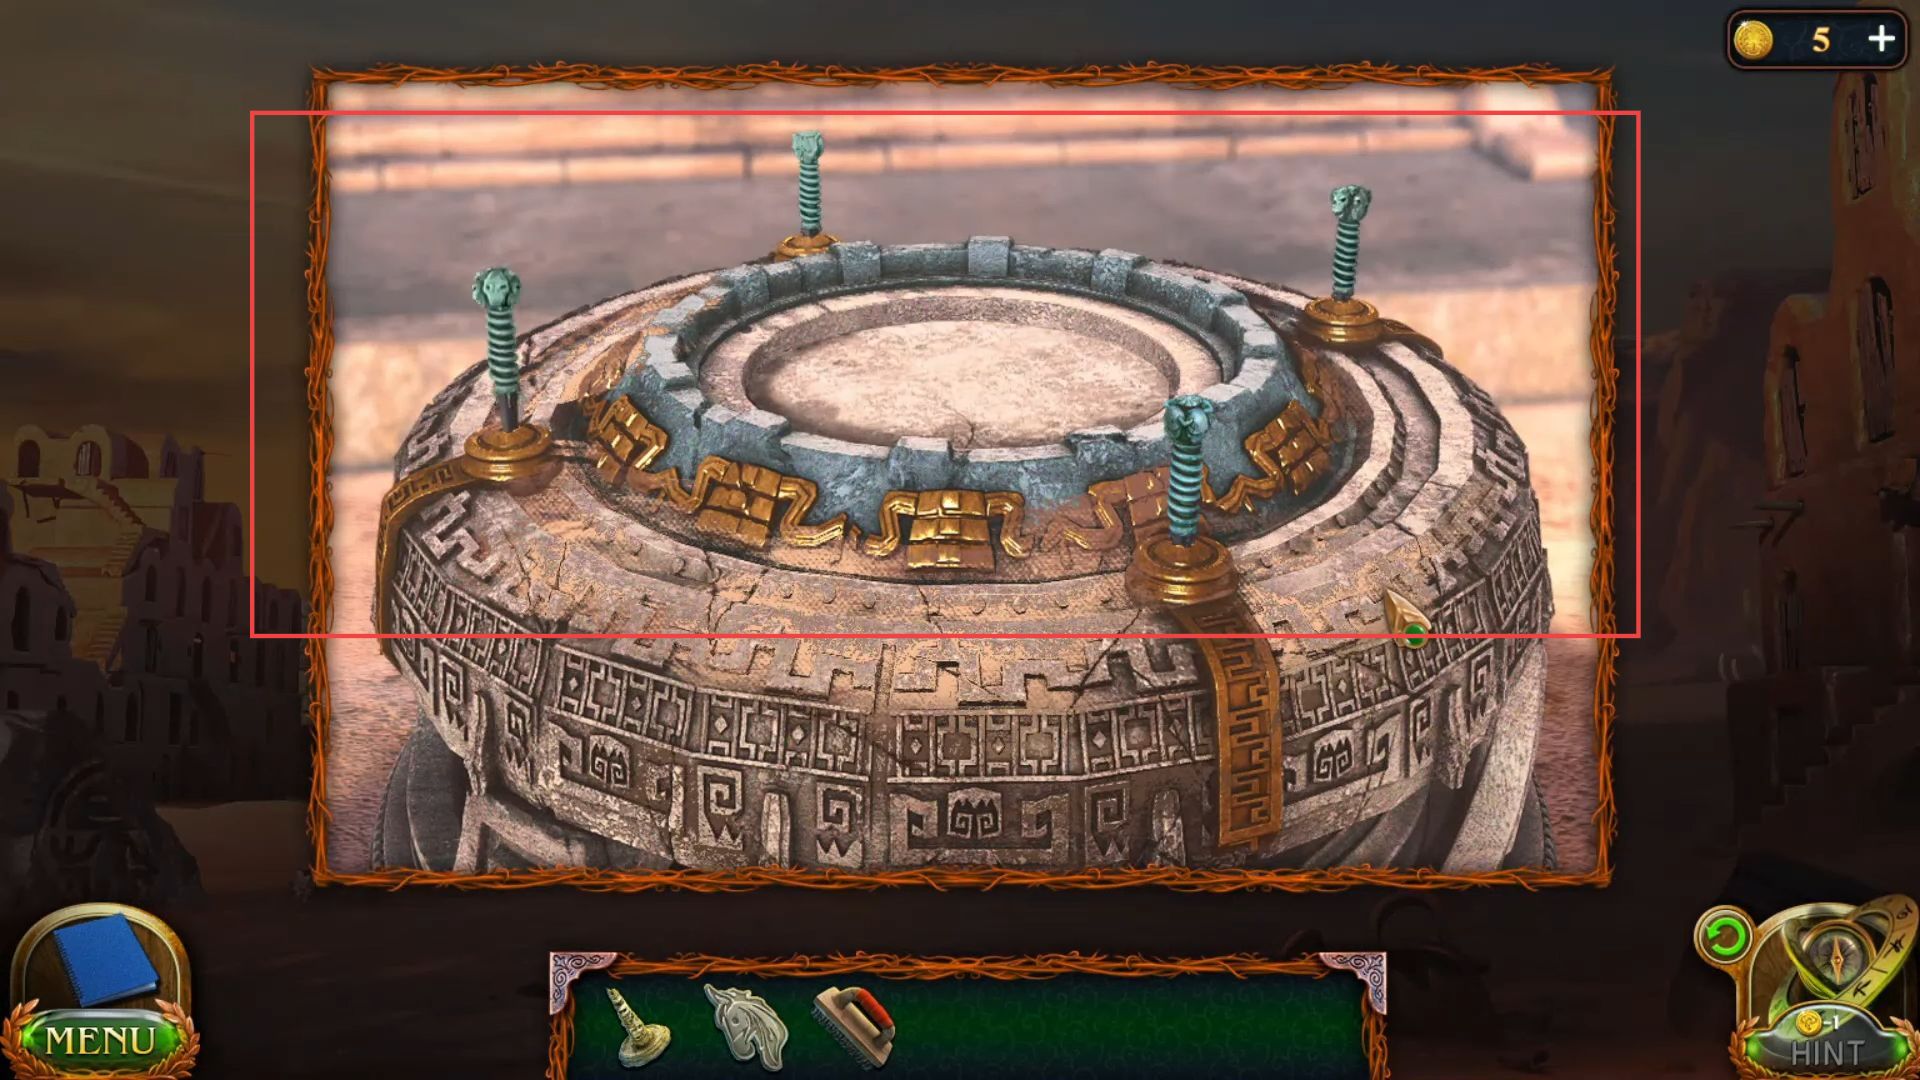
- Put the tiara on the head of the statue to get a Staff from the right hand.

- Connect the staff to the front door atop the window to unlock it.

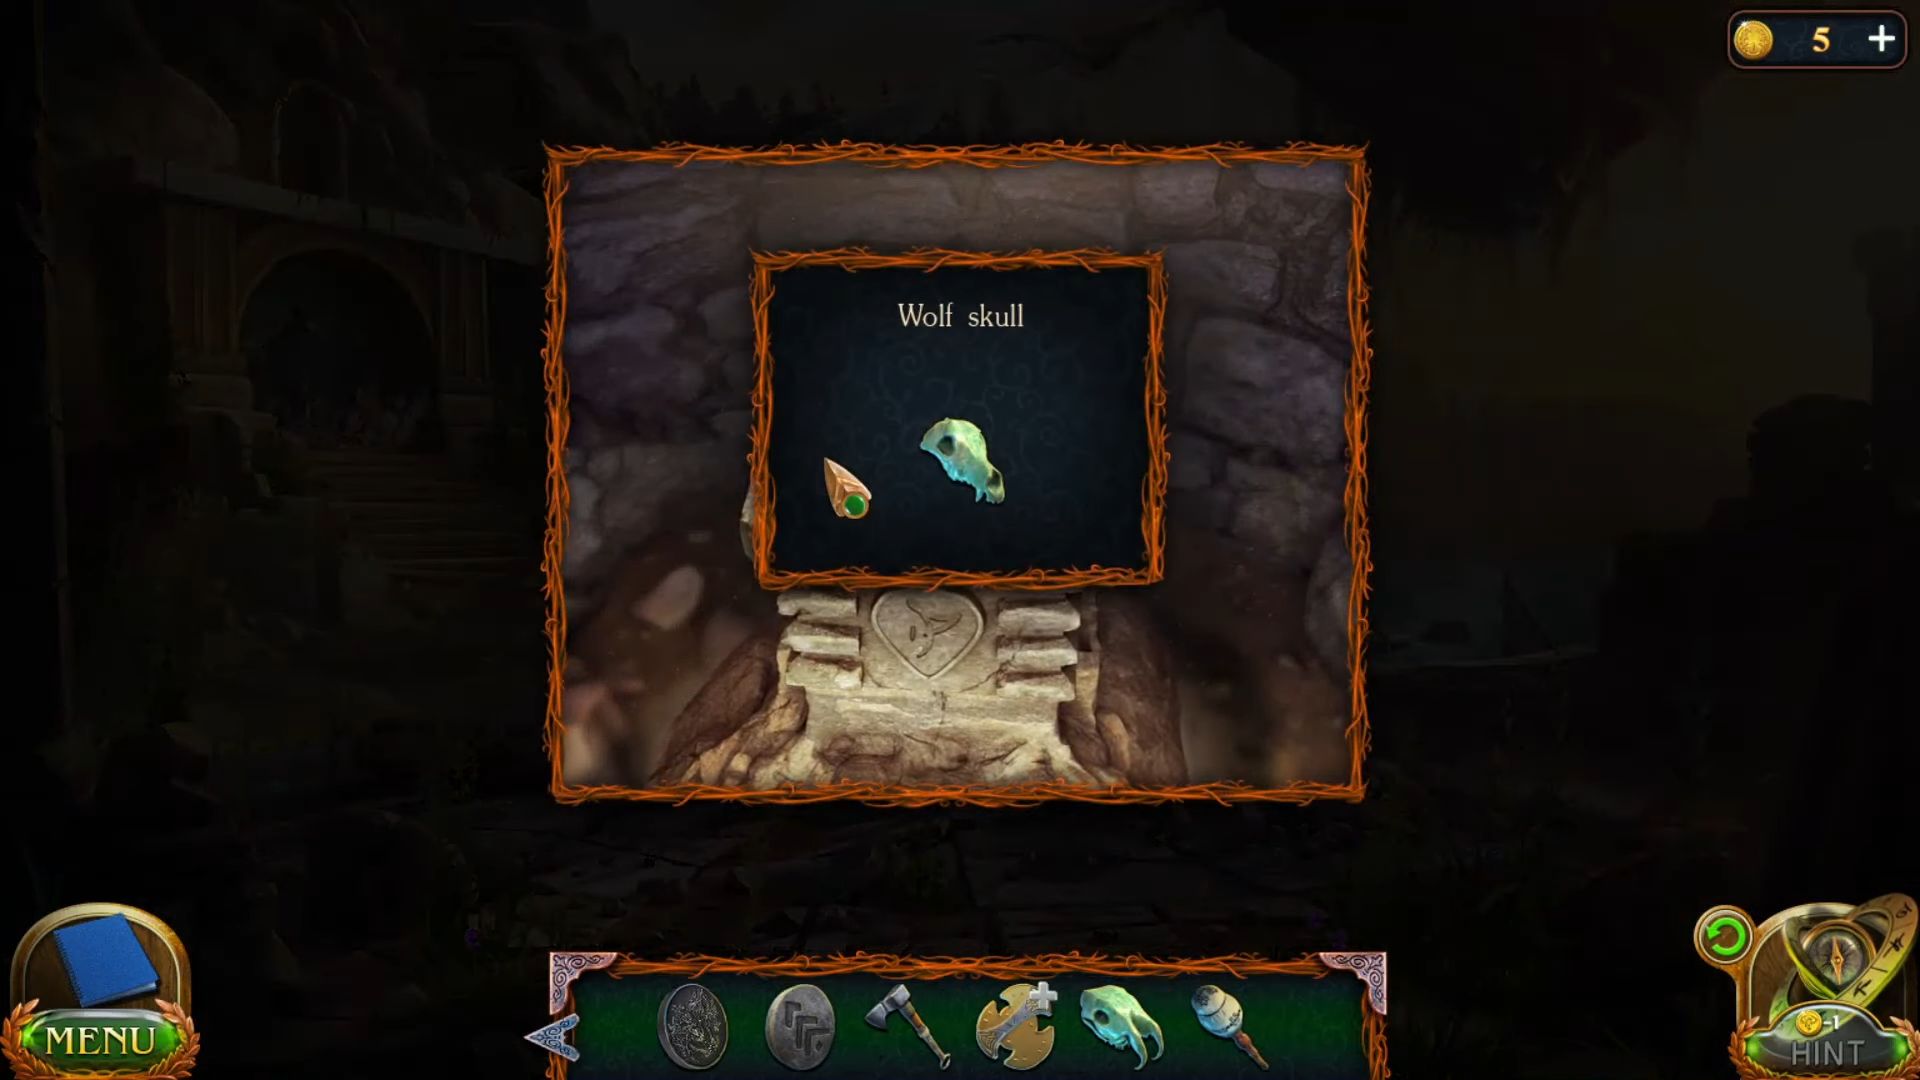
- Go inside the door, get a beater, a manuscript, and a wolf skull.
- Beat the bell with the beater from the sacred lake’s left side to discover the statues from the lake.
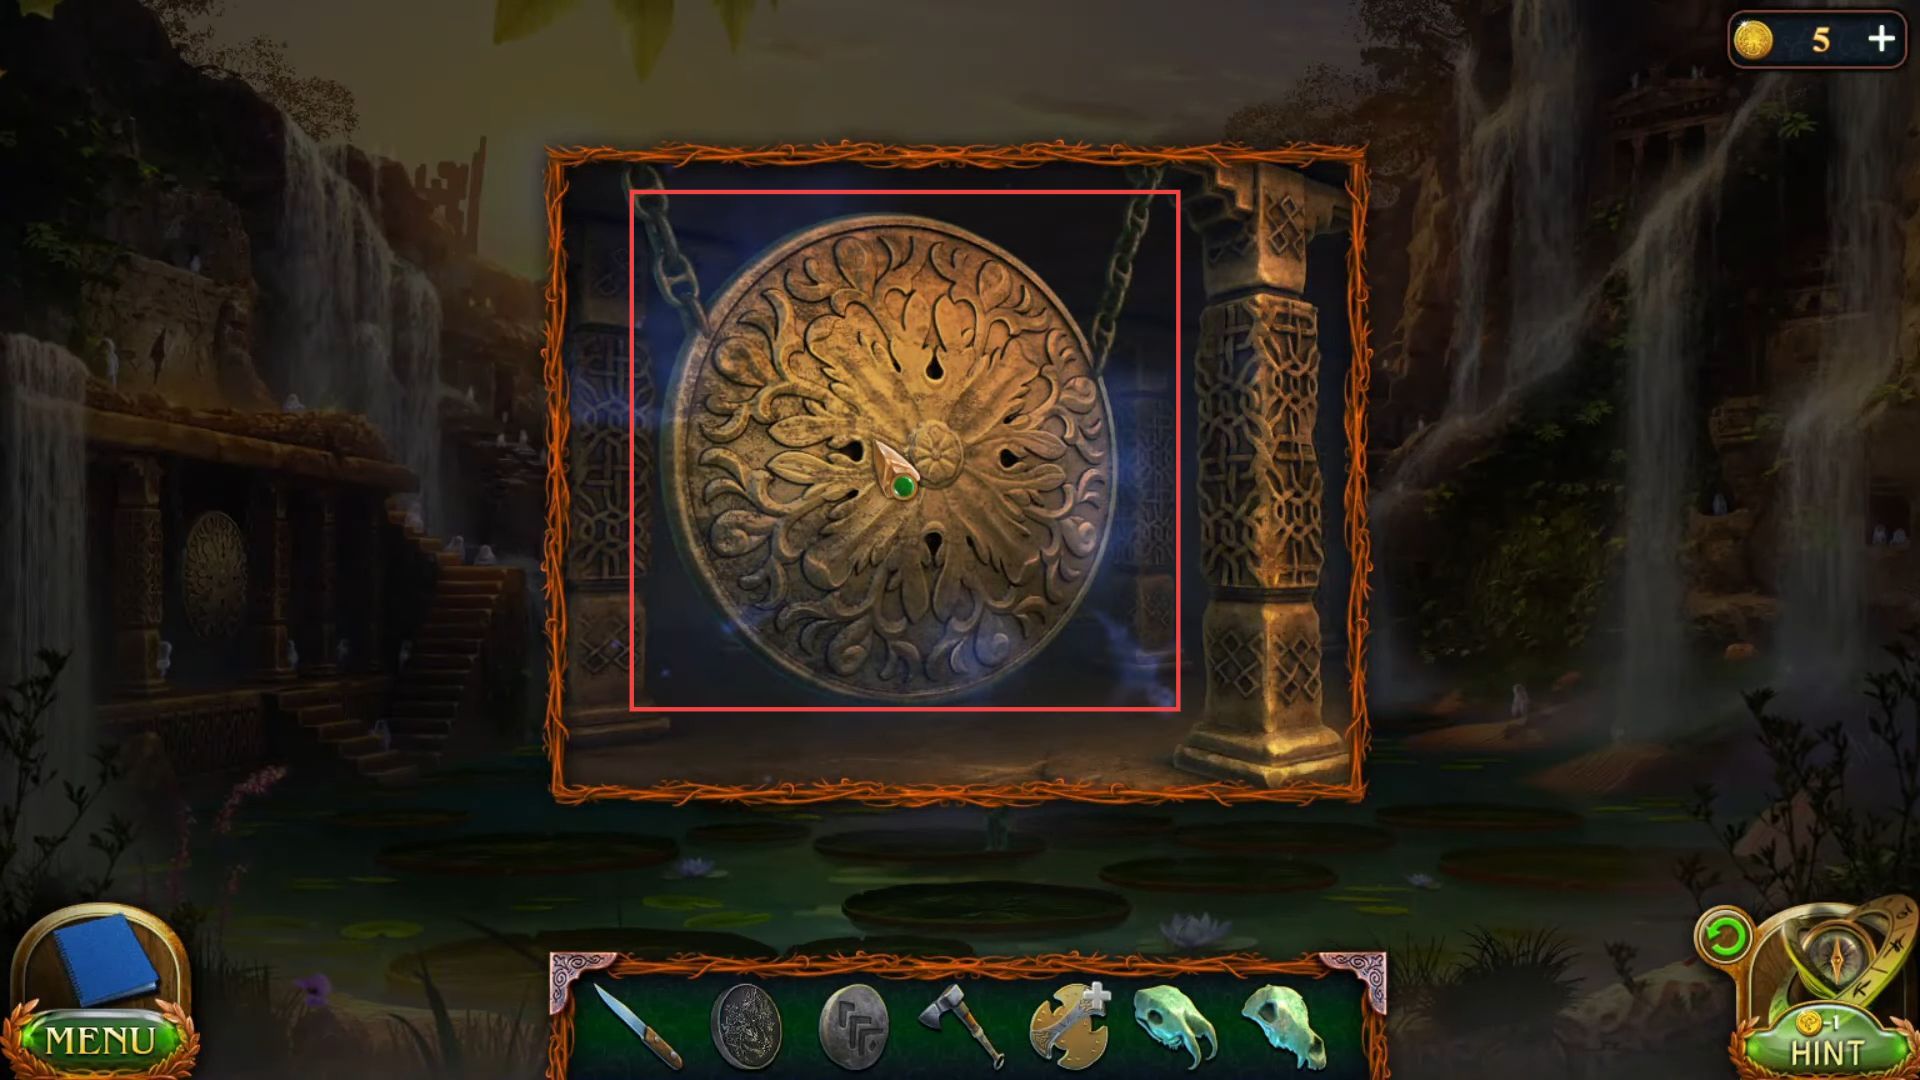
- Grab a book from the right side statue’s hand.

- Collect a pair of bells from the left side statue’s hand.

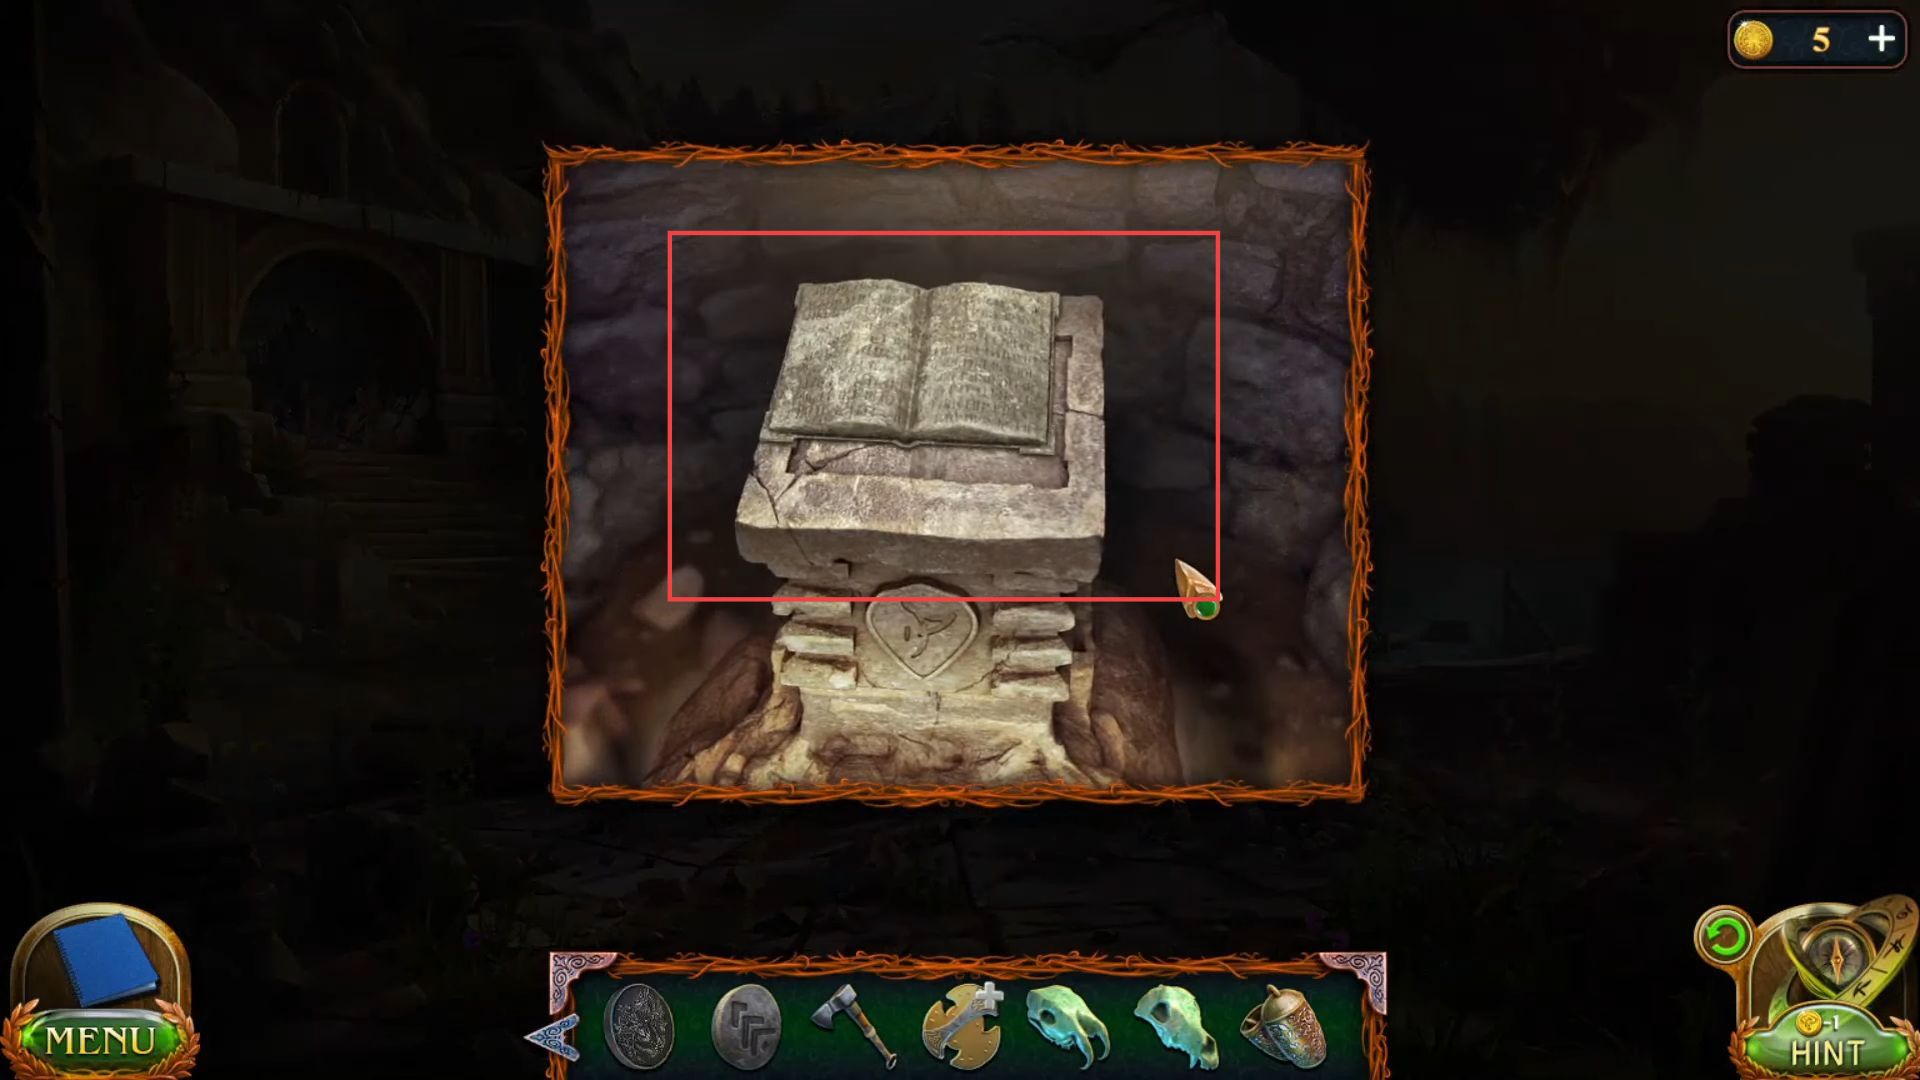
- Place the book in the centre of the cemented structure.
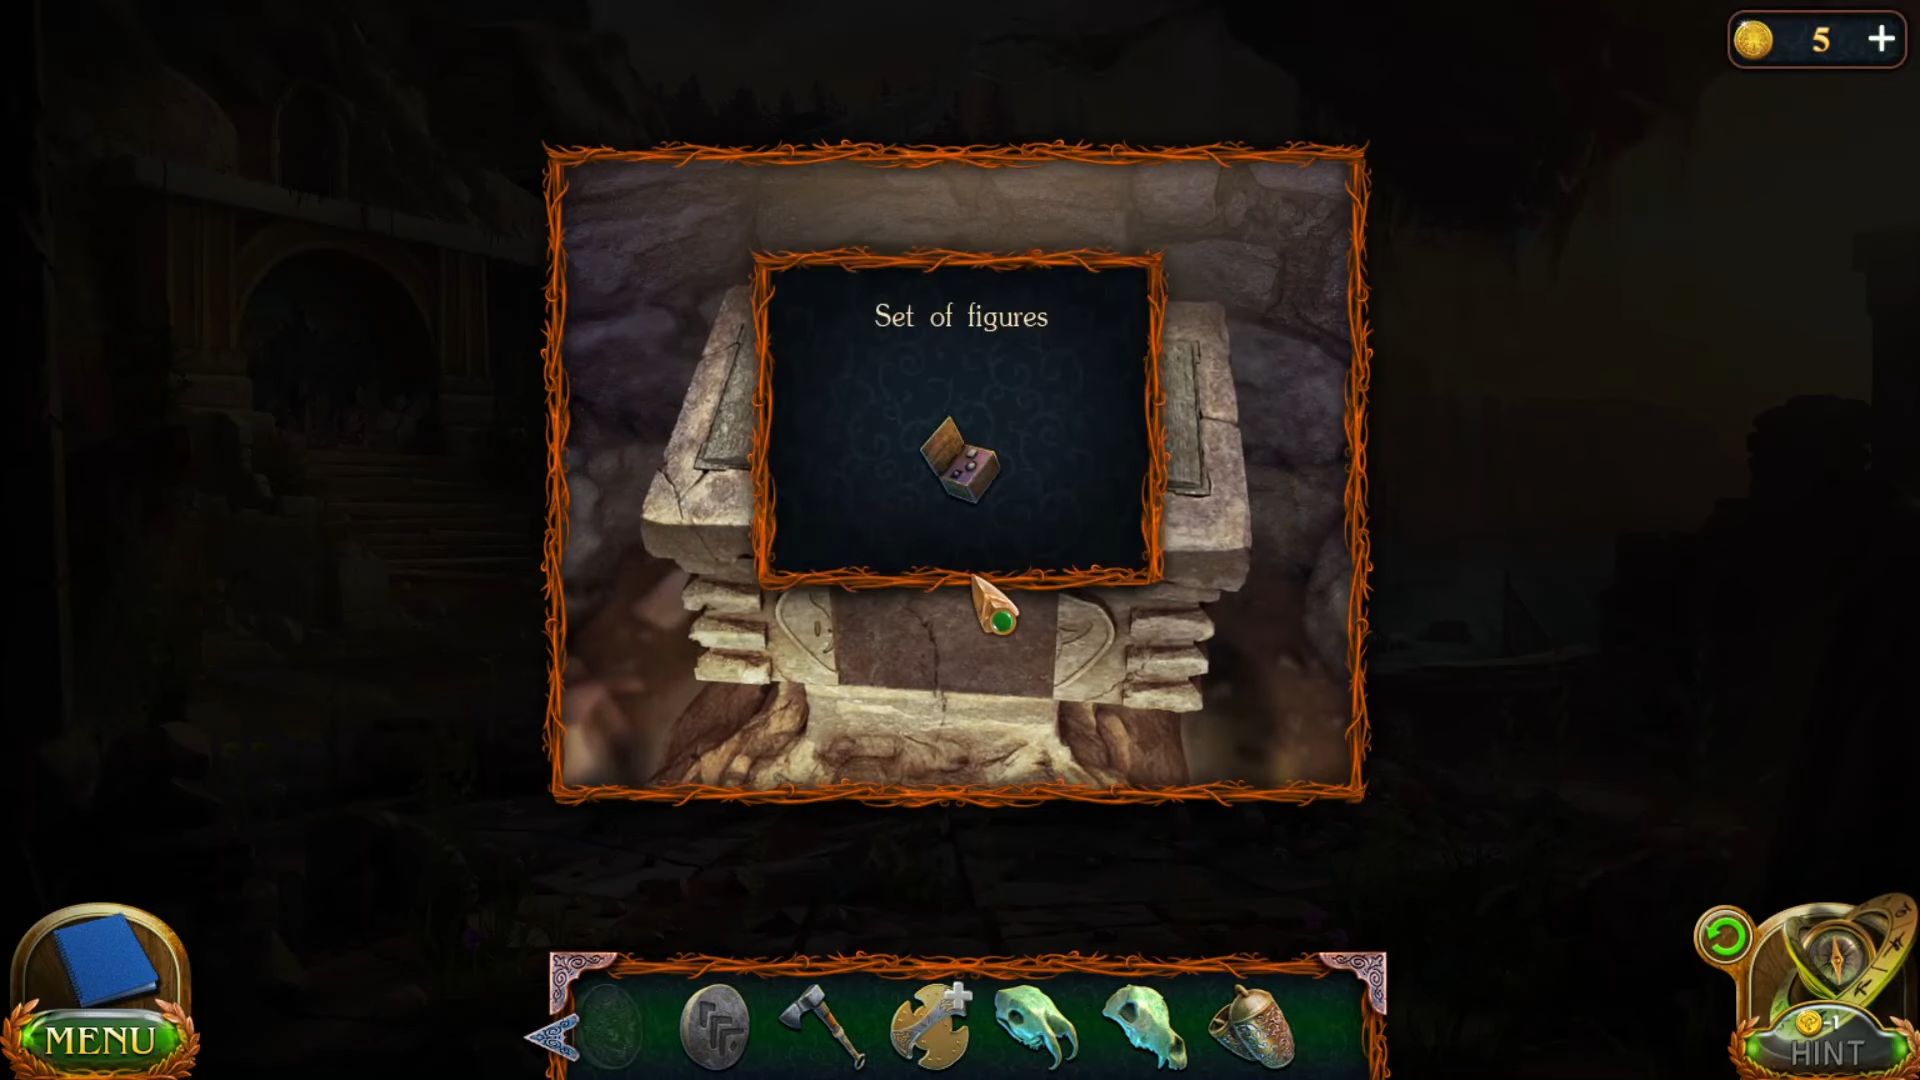
- Then grab a set of figures from the inside of the structure.
- Hang the bells in the rope of the hanging tree from the mountain.

- Grab an eagle skull inside the shell from the window.

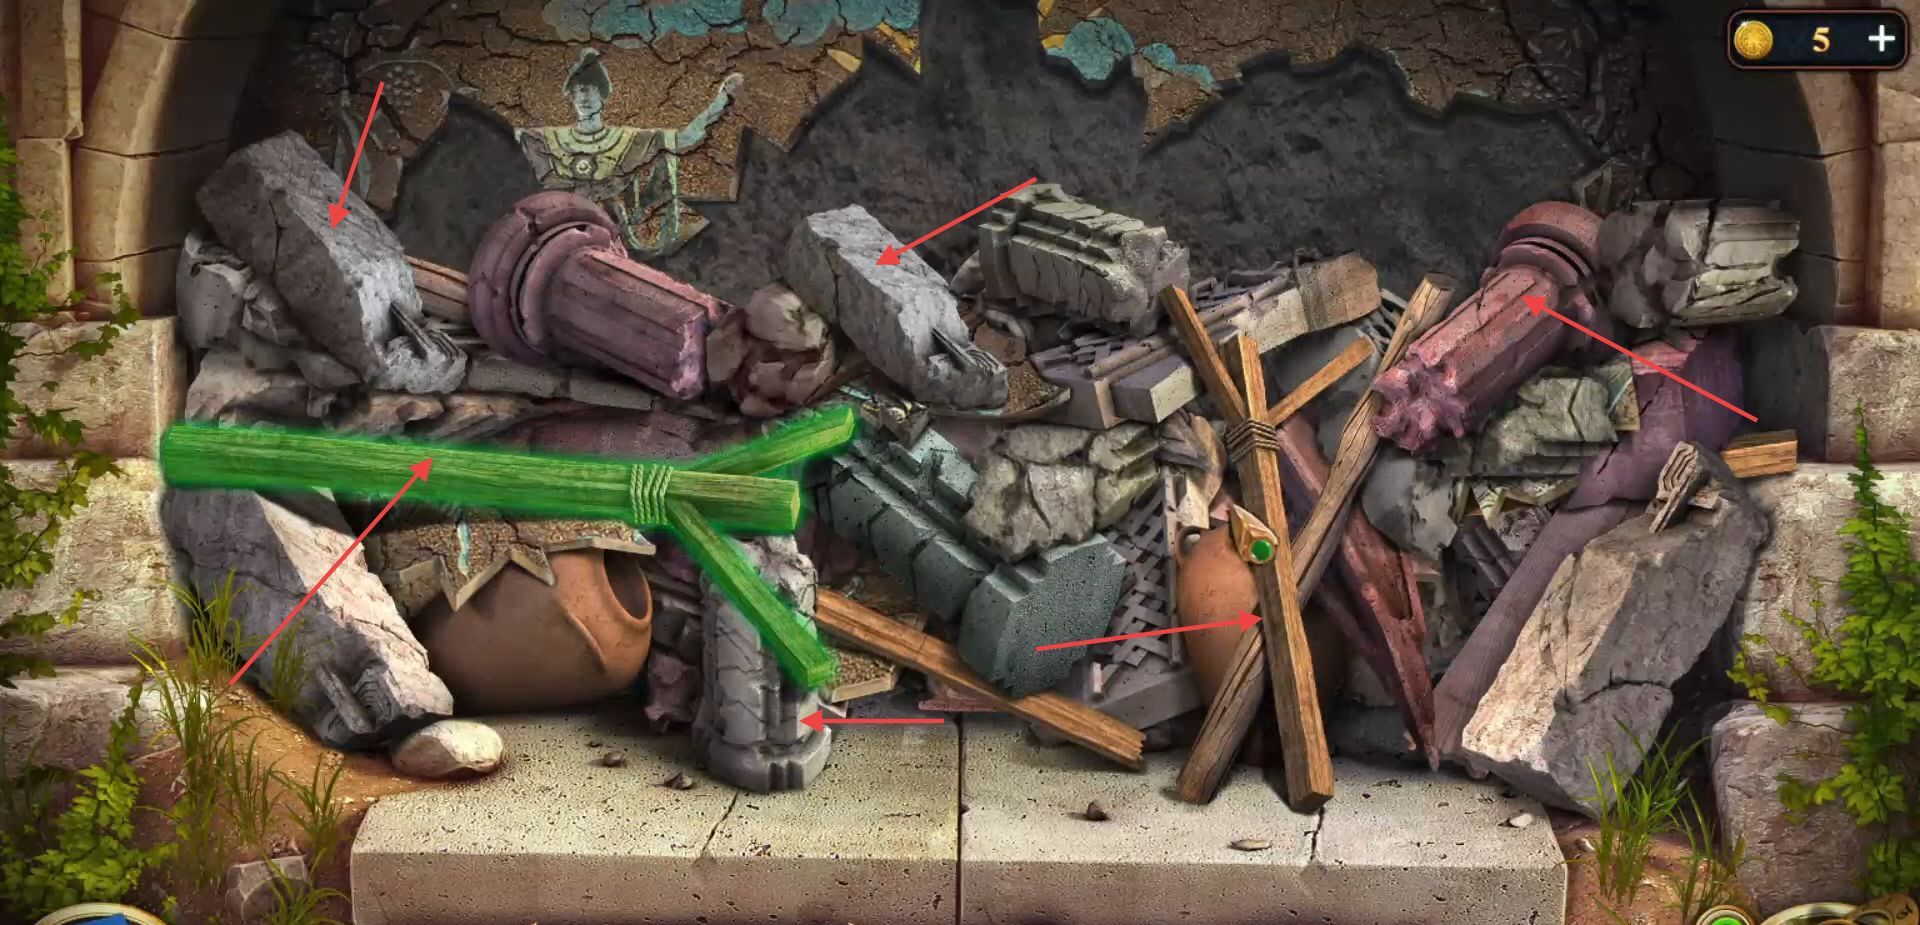
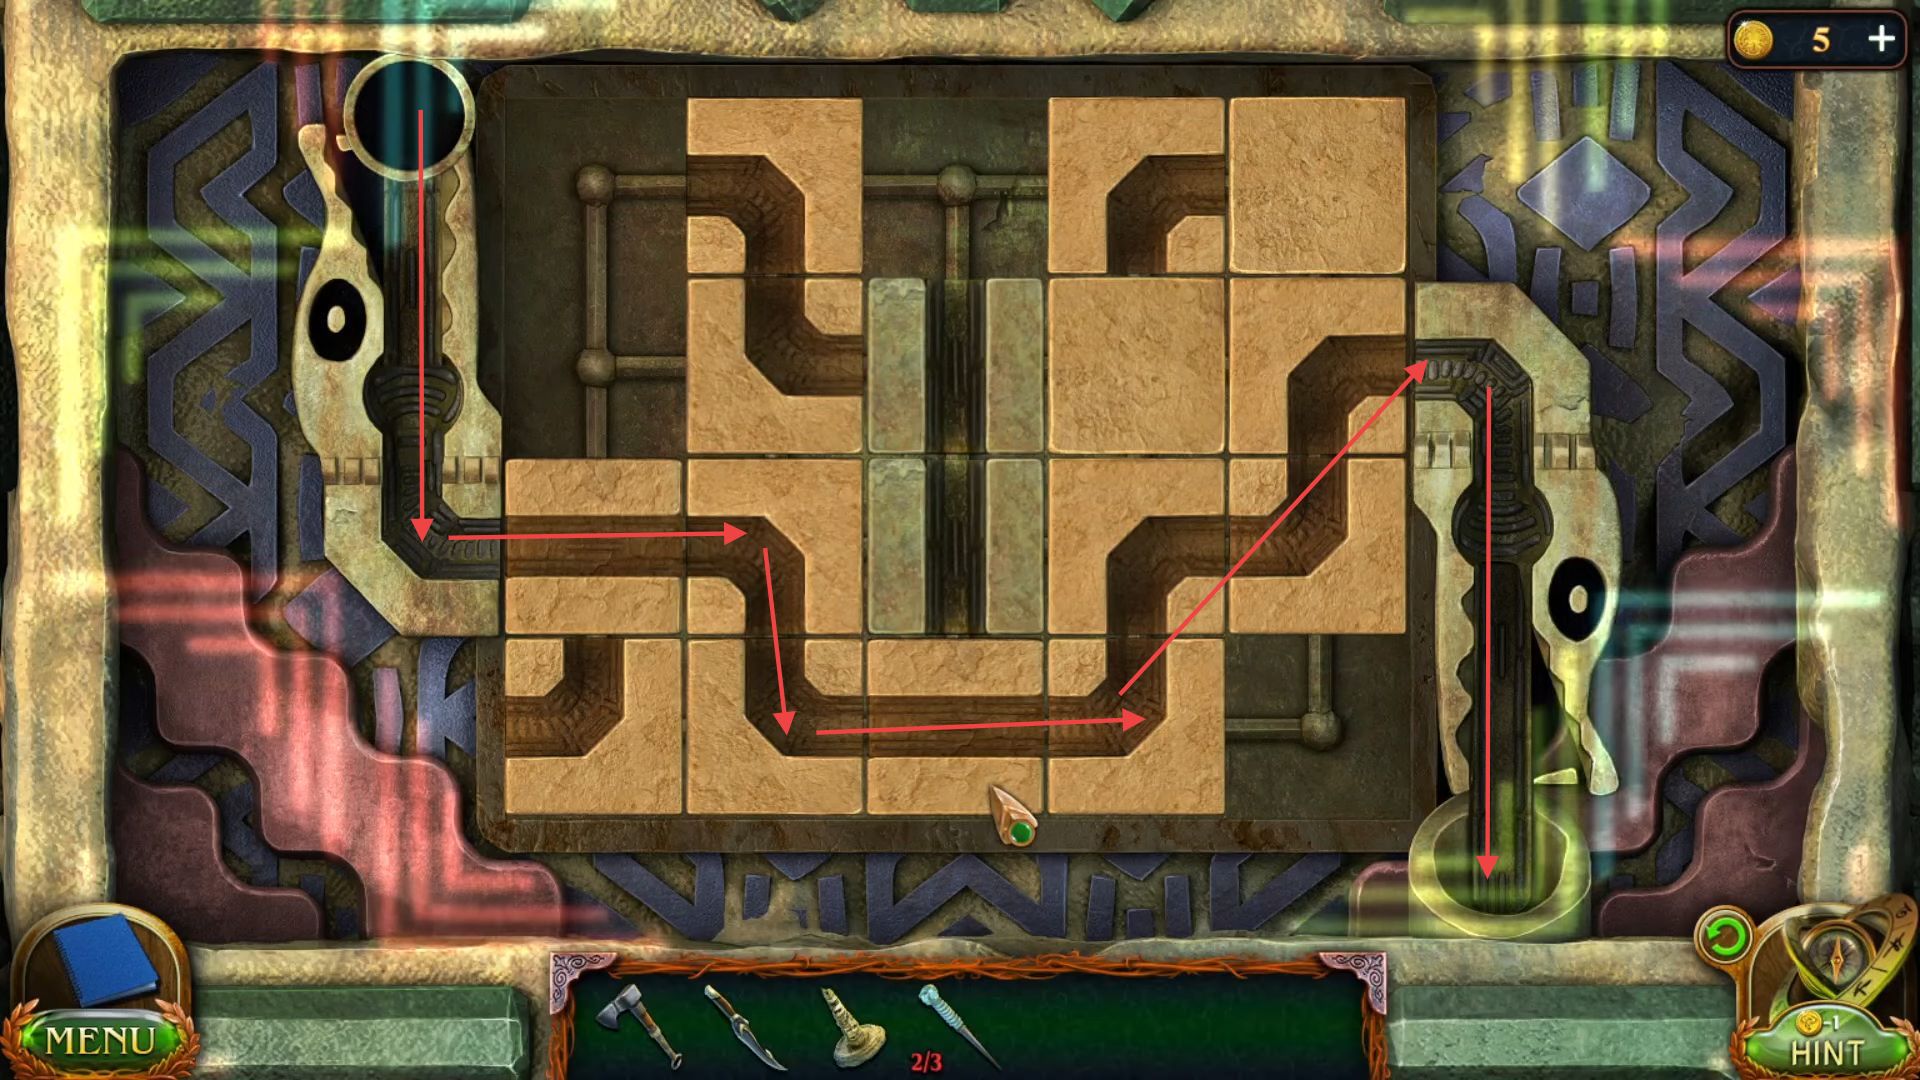
- Now choose an item and find its pair. If the items are the same and are not blocked by anything, they will be removed after clicking. Disassemble the obstruction in this way.
- Place the broken items in this sequence on the wall for a complete drawing.
- Put all the hands of the statue from the lake in this sequence.
- Use the knife to cut the leaves and make a tunnel.
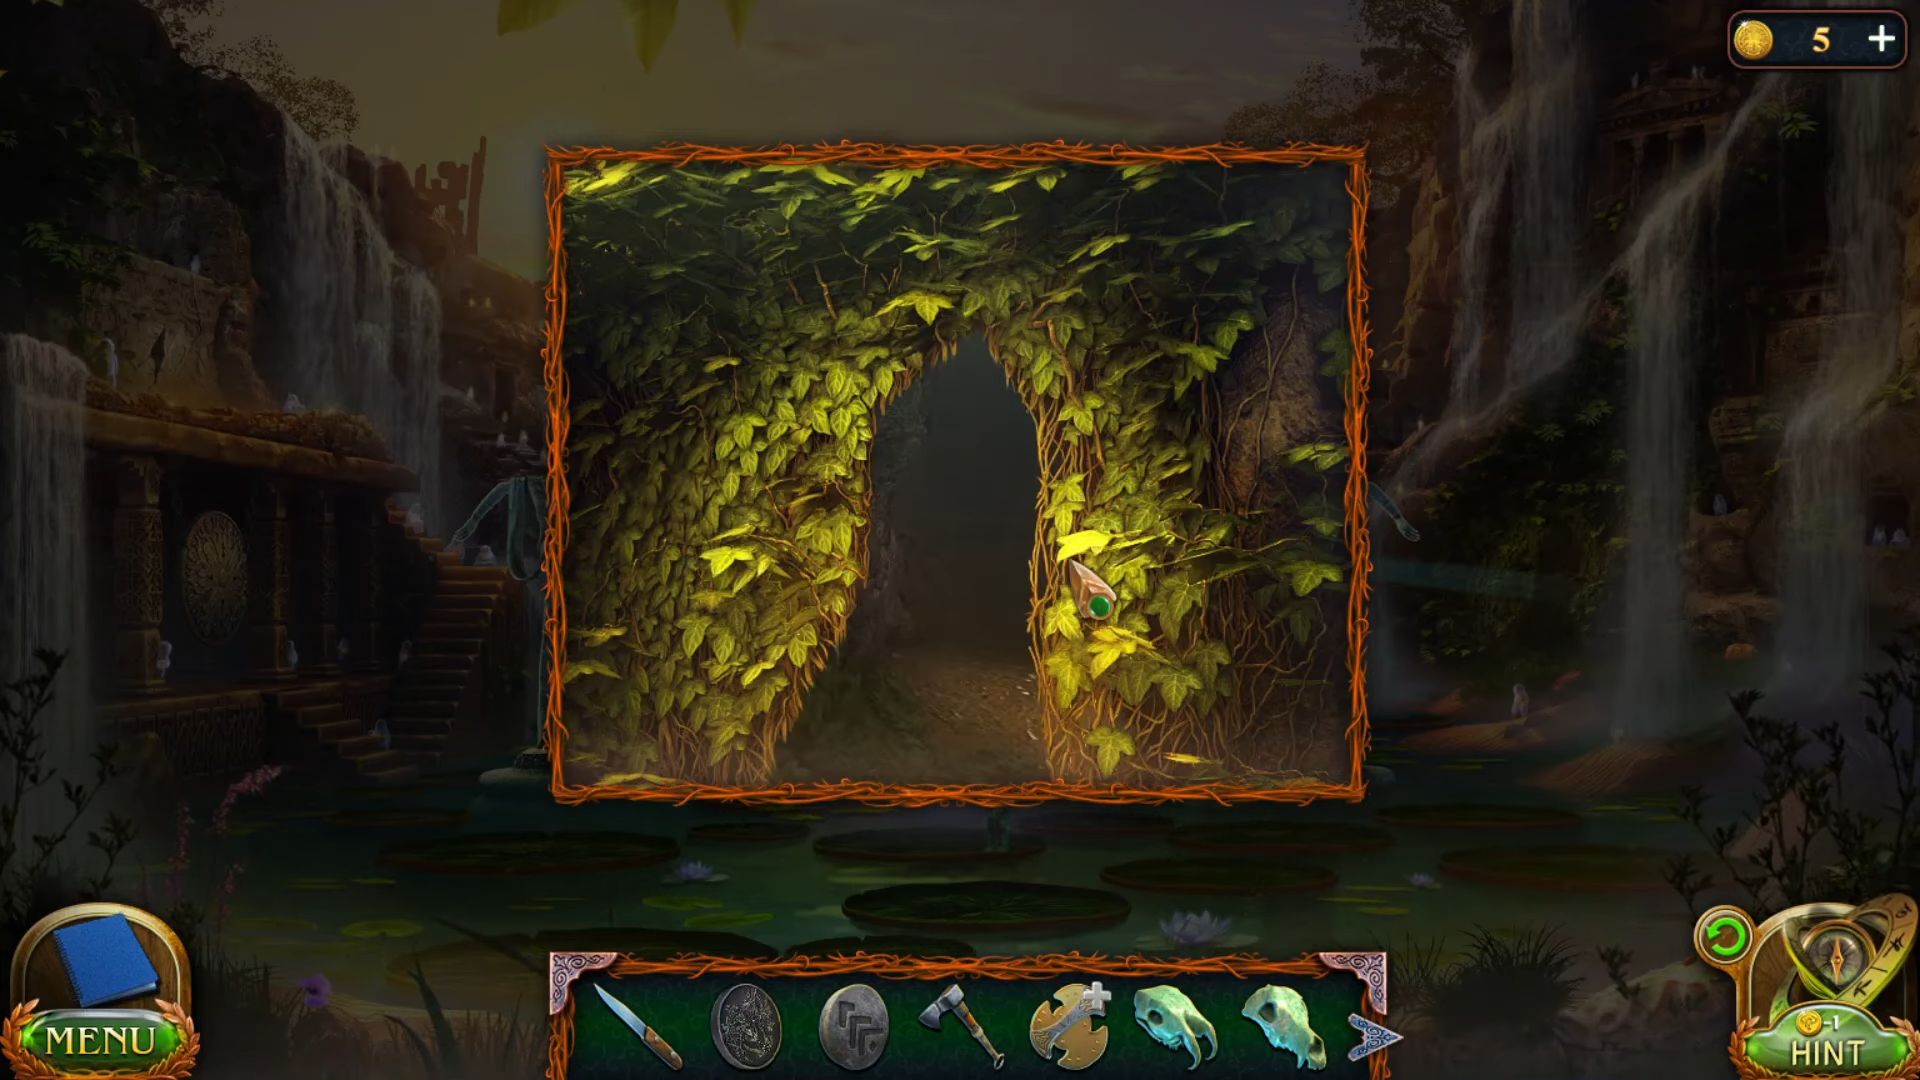
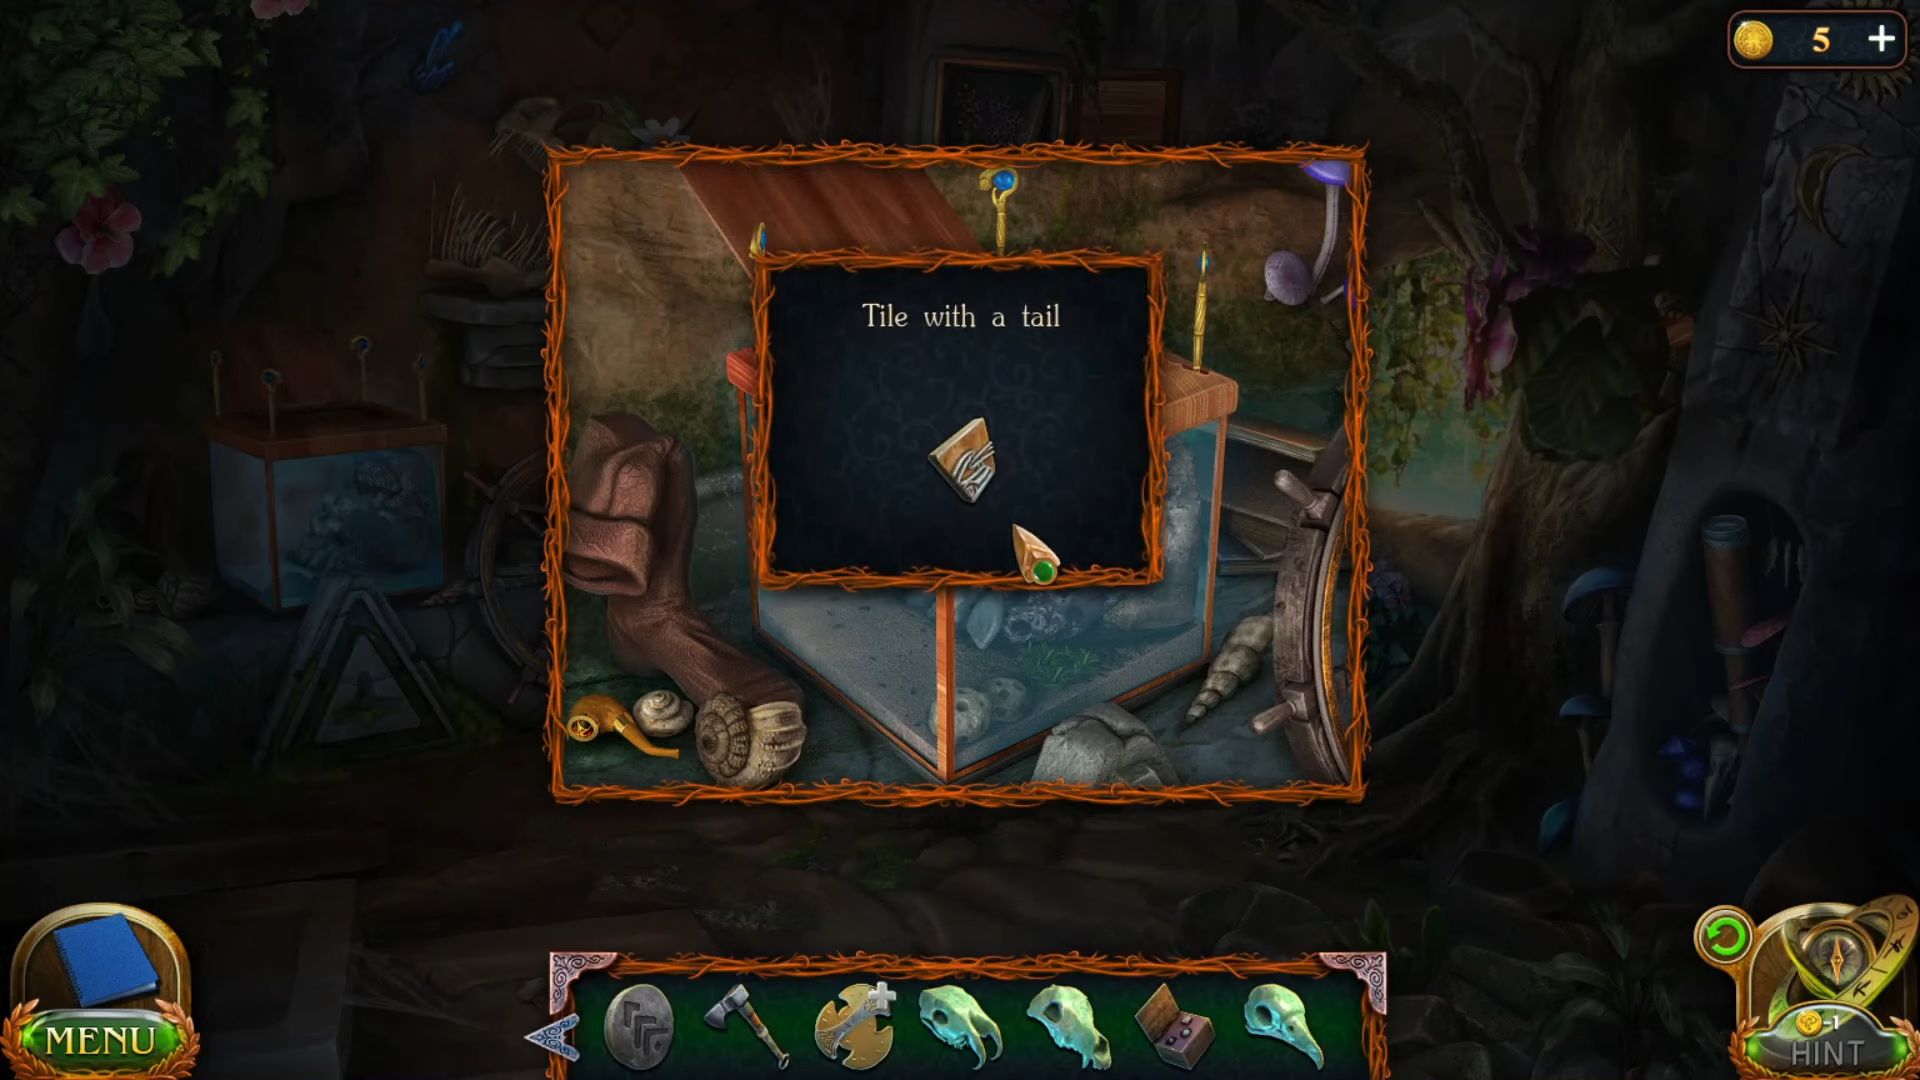
- Go to the tunnel and get a tile with a tail from the box.
- Put the tile pieces on this well in this pattern.

- Return to the small floating island, cut the bridge rope using the knife, and get the bridge into your inventory.
- Cut the ropes from the plank of the bridge using the knife in this sequence to make a ladder.

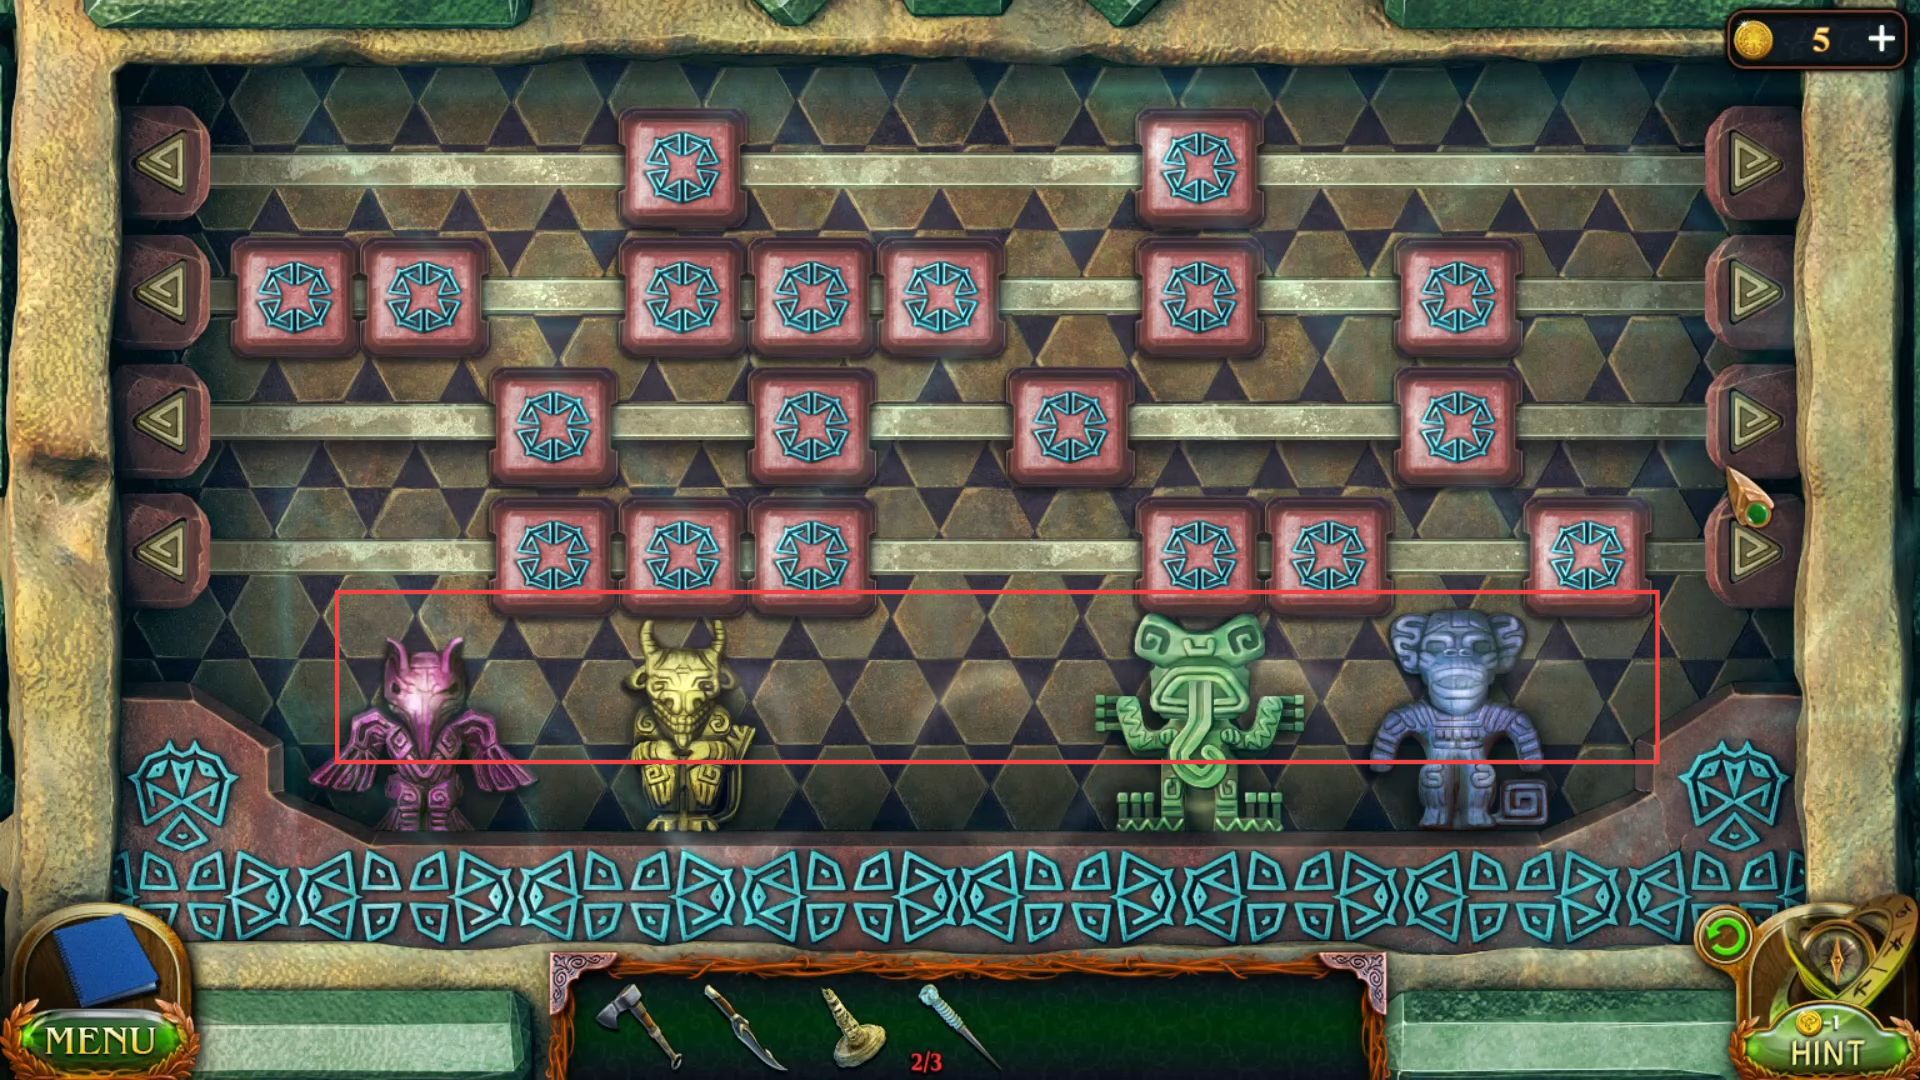
- Return to the academy courtyard using the map, and put the figures in the fountain area. Arrange the figures on the plates so that the shape and symbol of the figure do not repeat those drawn on the plate.

- Find different items such as a hare, rose, crab, the hand with fire, seahorse, clover tincture, Leo, rose, and a telescope from the fountain’s ball.
- Once the items are found, grab a horse skull from the inside.
- Go to the temple from Fugo temple and place the horse skull at this place.

- Place the wolf skull at the head of the statue.

- Put the eagle’s skull at the head of this statue.
- Connect the ladder to the lightning globe and place the horse’s skull in the pattern.

- Grab a part of the crystal from the stone.

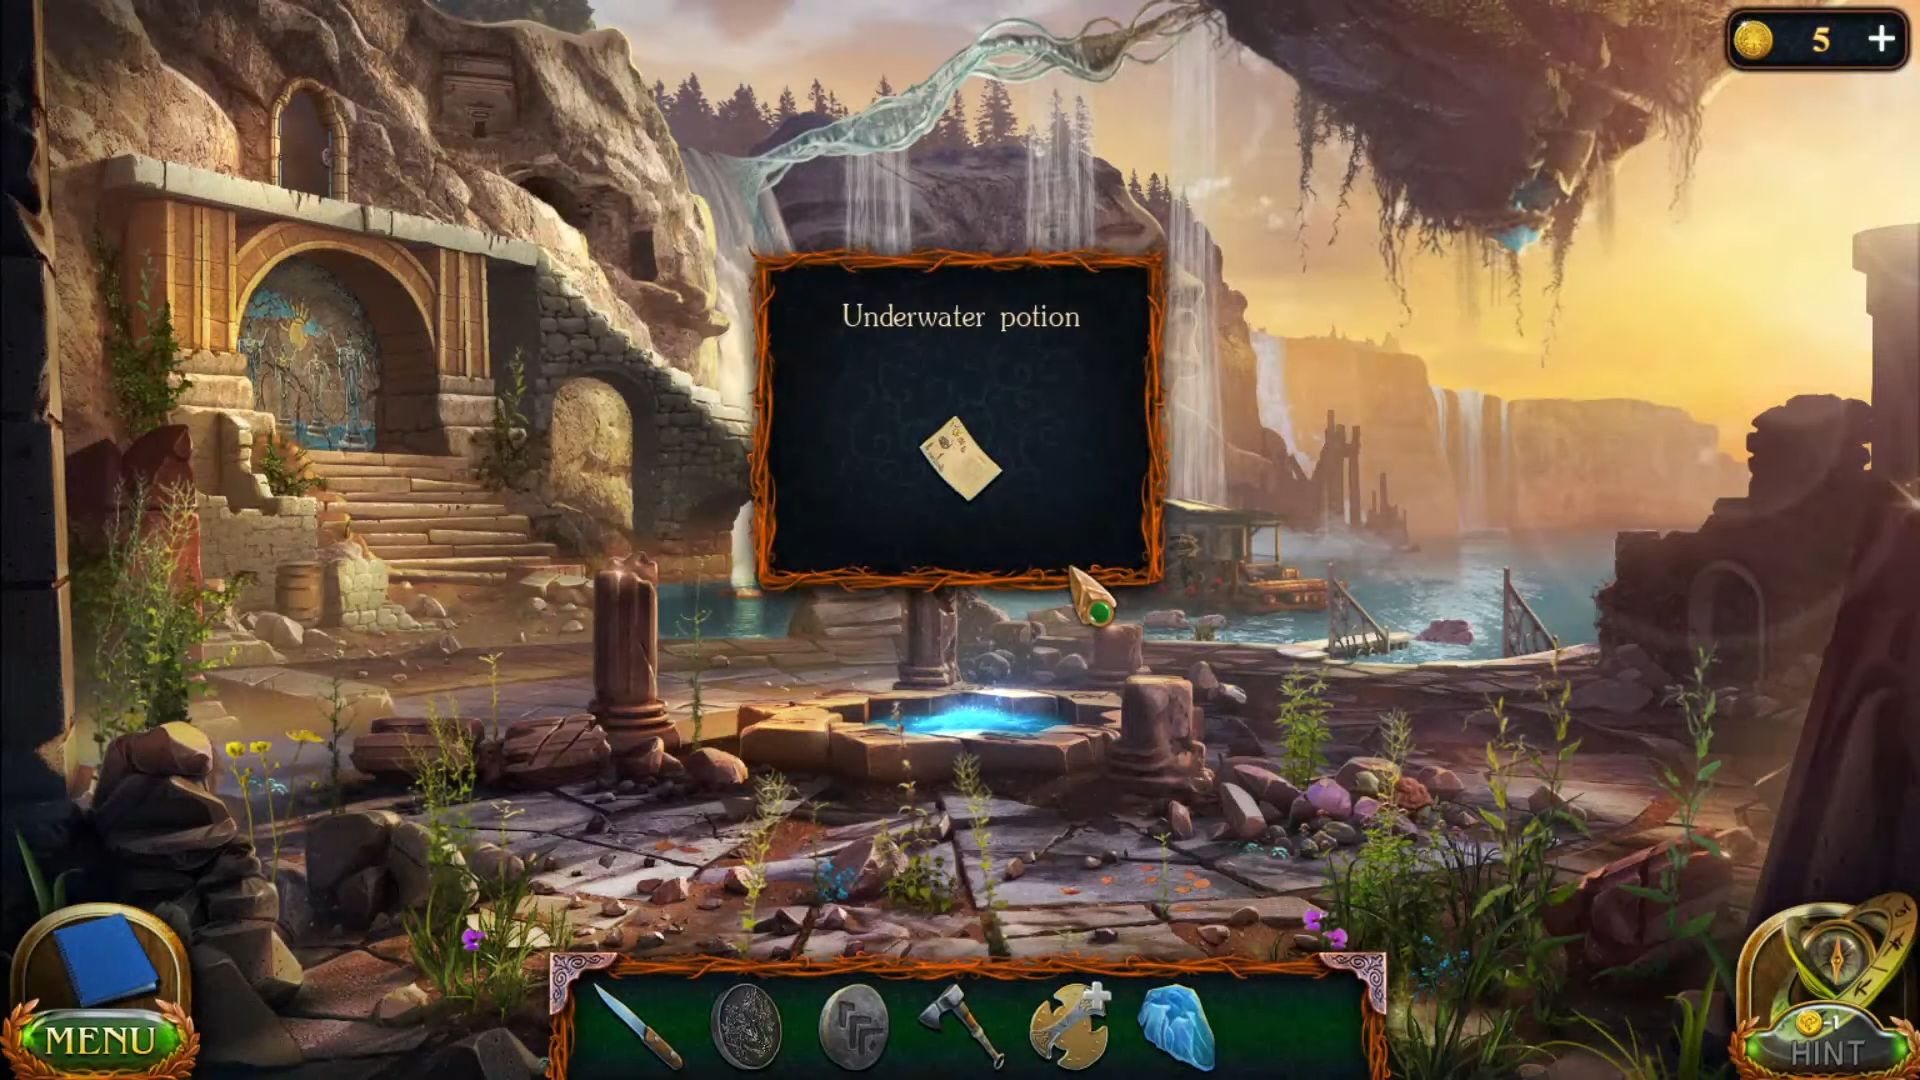
- Go to the city ruins and grab an underwater potion.
- Collect the purple seaweed from the stairs in the water.

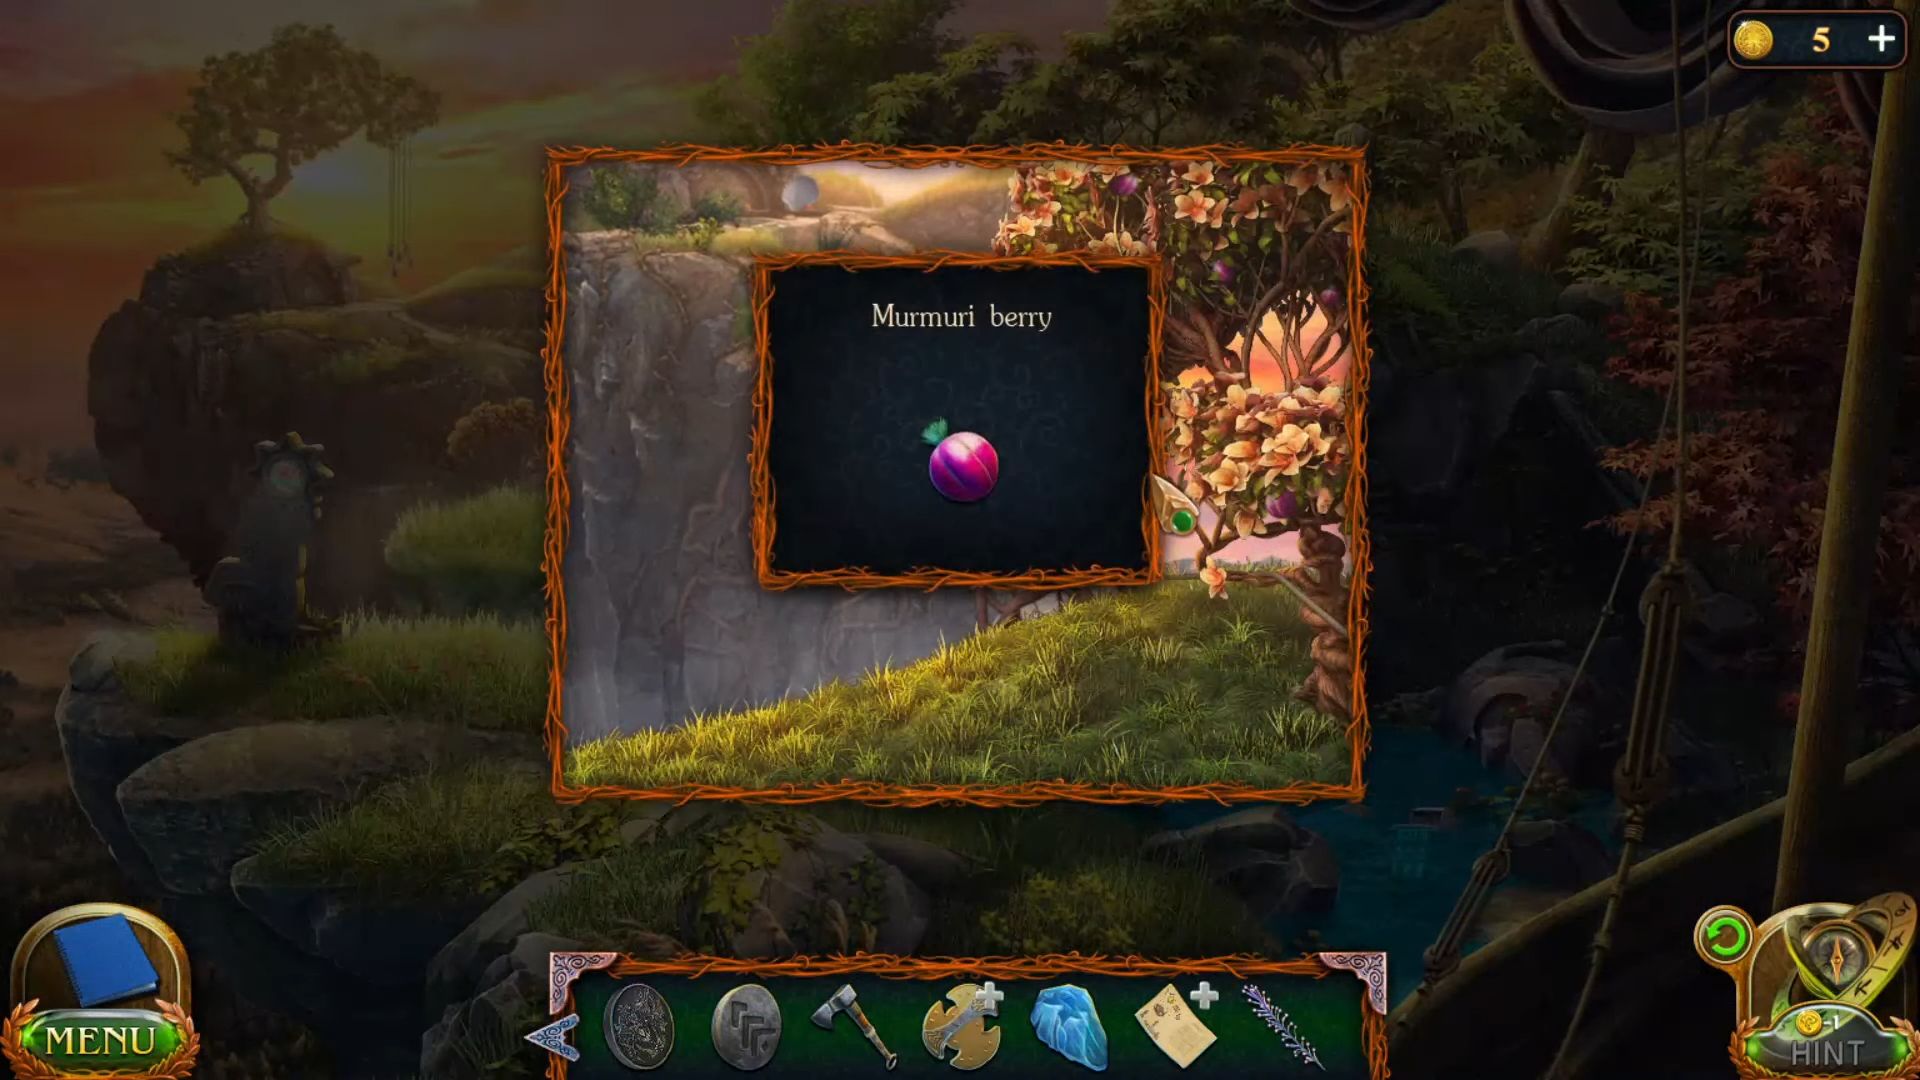
- Return to the island gate using the map and grab a Murmuri berry from the tree.
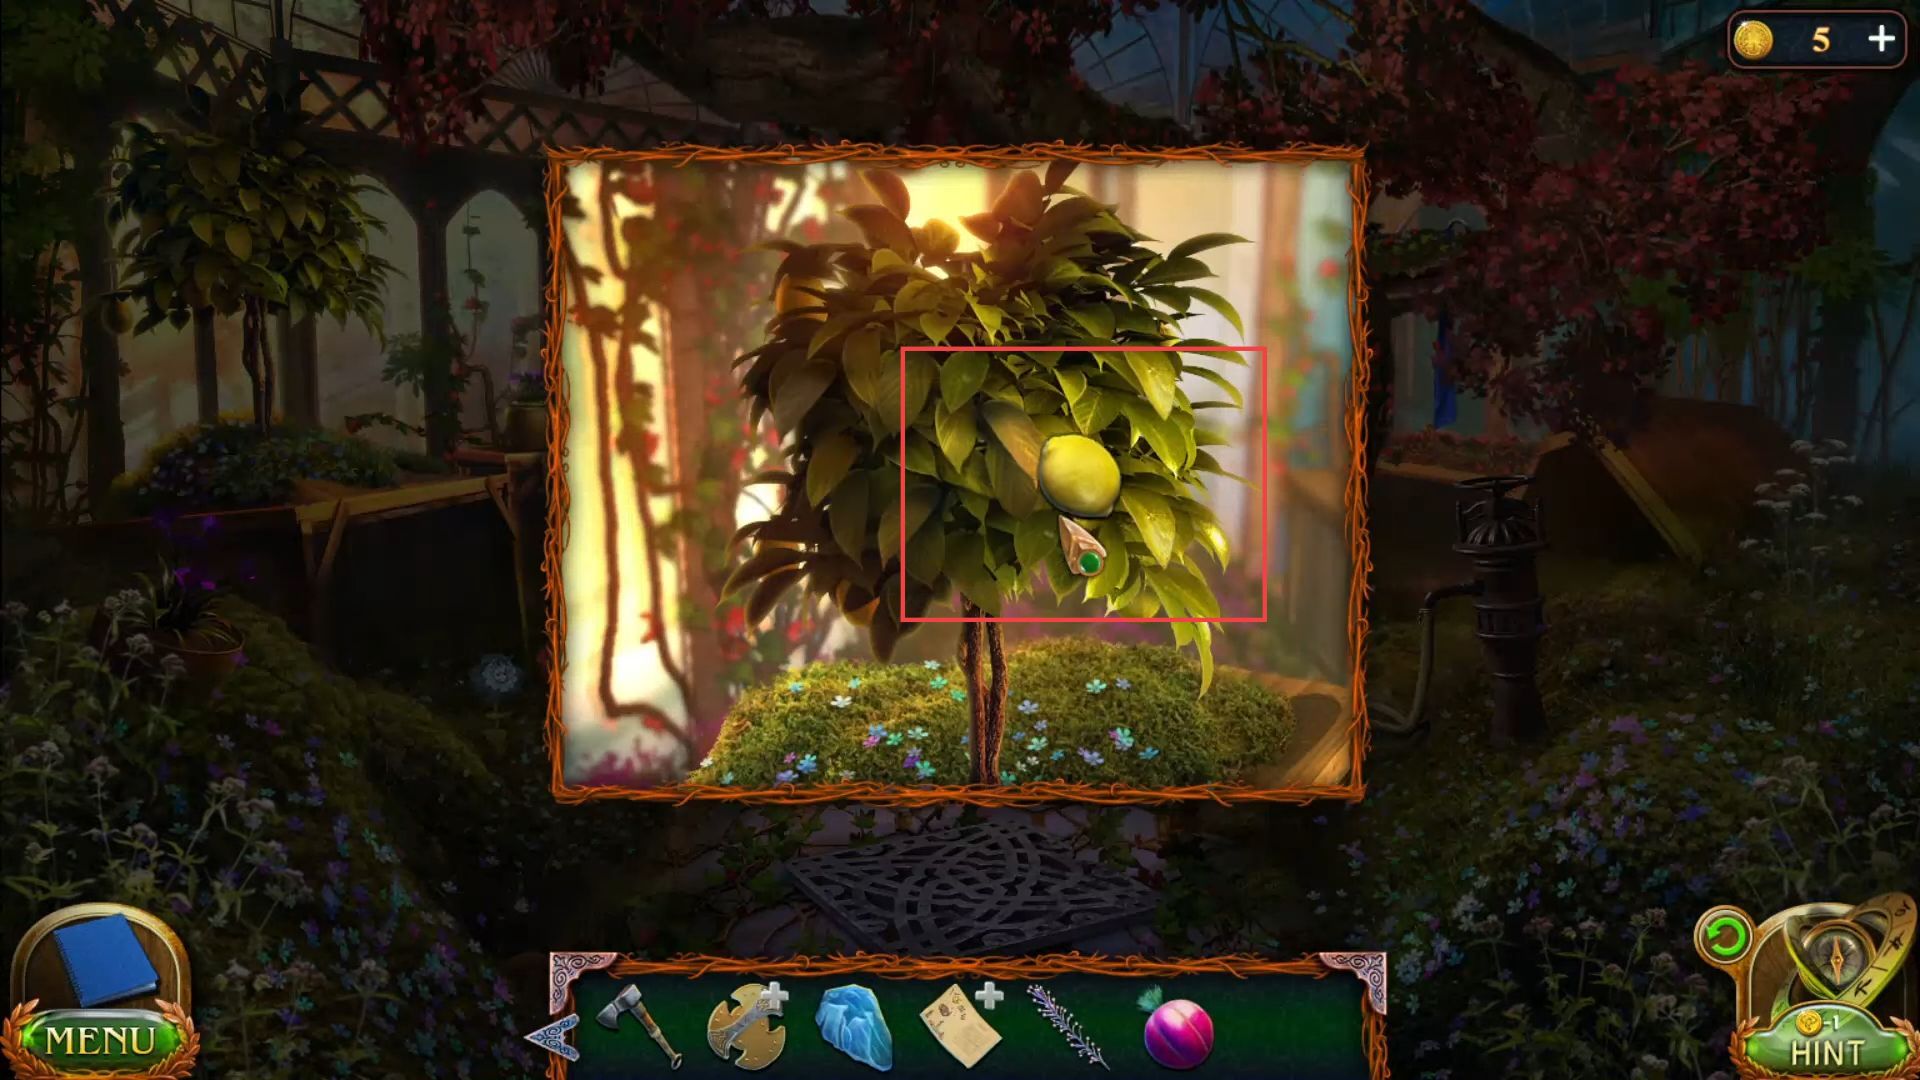
- Go to the greenhouse and get a lemon from the tree.
- Grab the lava flower juice from this window’s shelf.

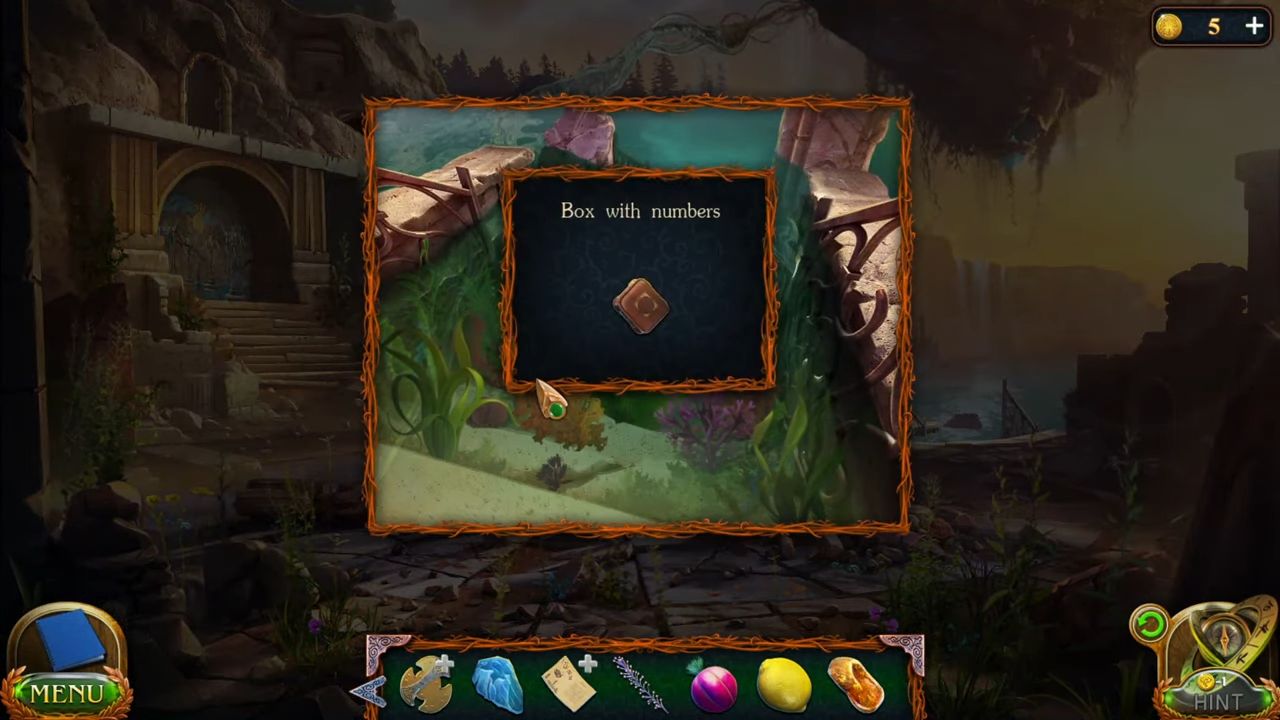
- Go back to the city ruins and get a box with numbers.
- Return to the hut and assemble the clock face using Roman numerals in this sequence.

- Get a dragon vessel from the shelf next to the clock.

- Add the seaweed to the vessel, cut the lemon, and pour it into it.

- Add lava juice and squeeze the berry into the vessel.

- Put the underwater potion ingredients into your inventory.

- Go to the city ruins and add the vessel ingredients to the pool.
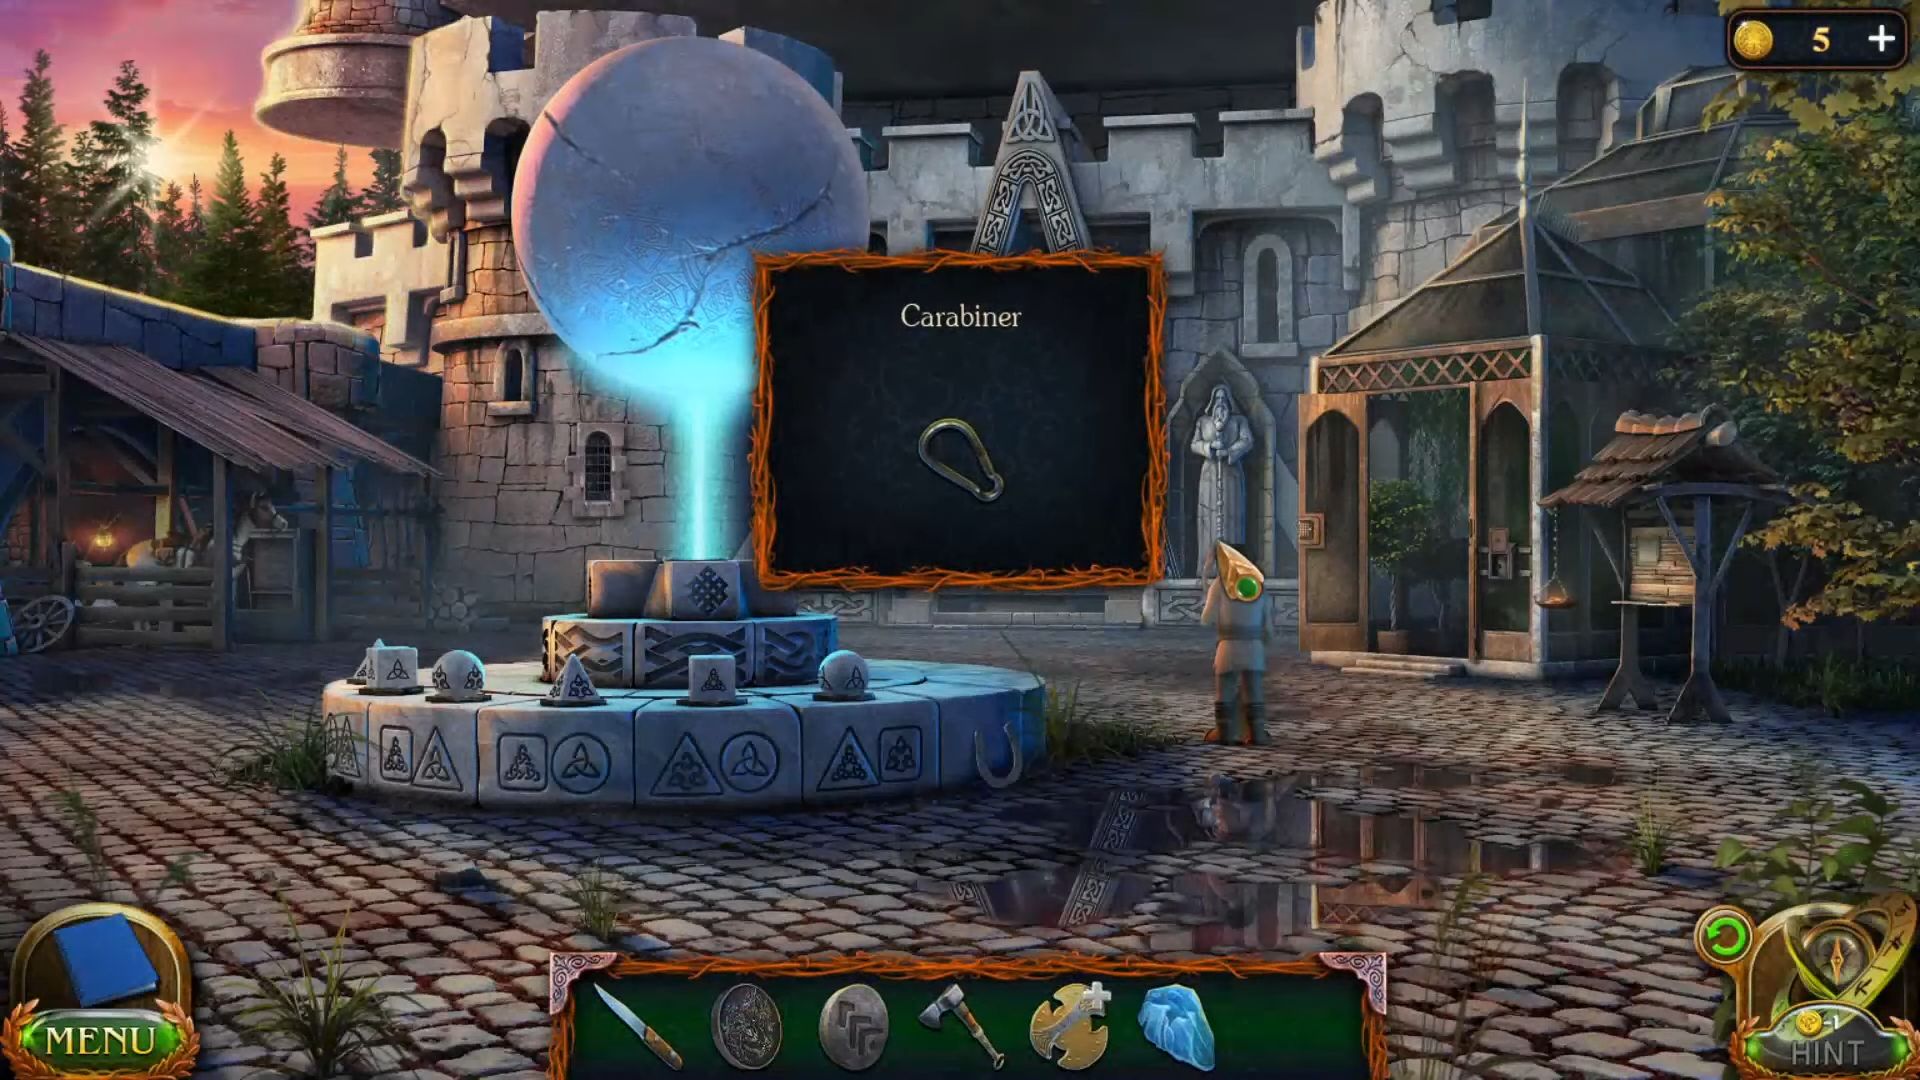
- Get a carabiner from the courtyard.
- Connect the chain from the library with a hook and slide the handle to open the door.

- Put the emblem in the centre of the floor and select all the places in the pattern on the floor that differ from the pattern on the hint emblem.
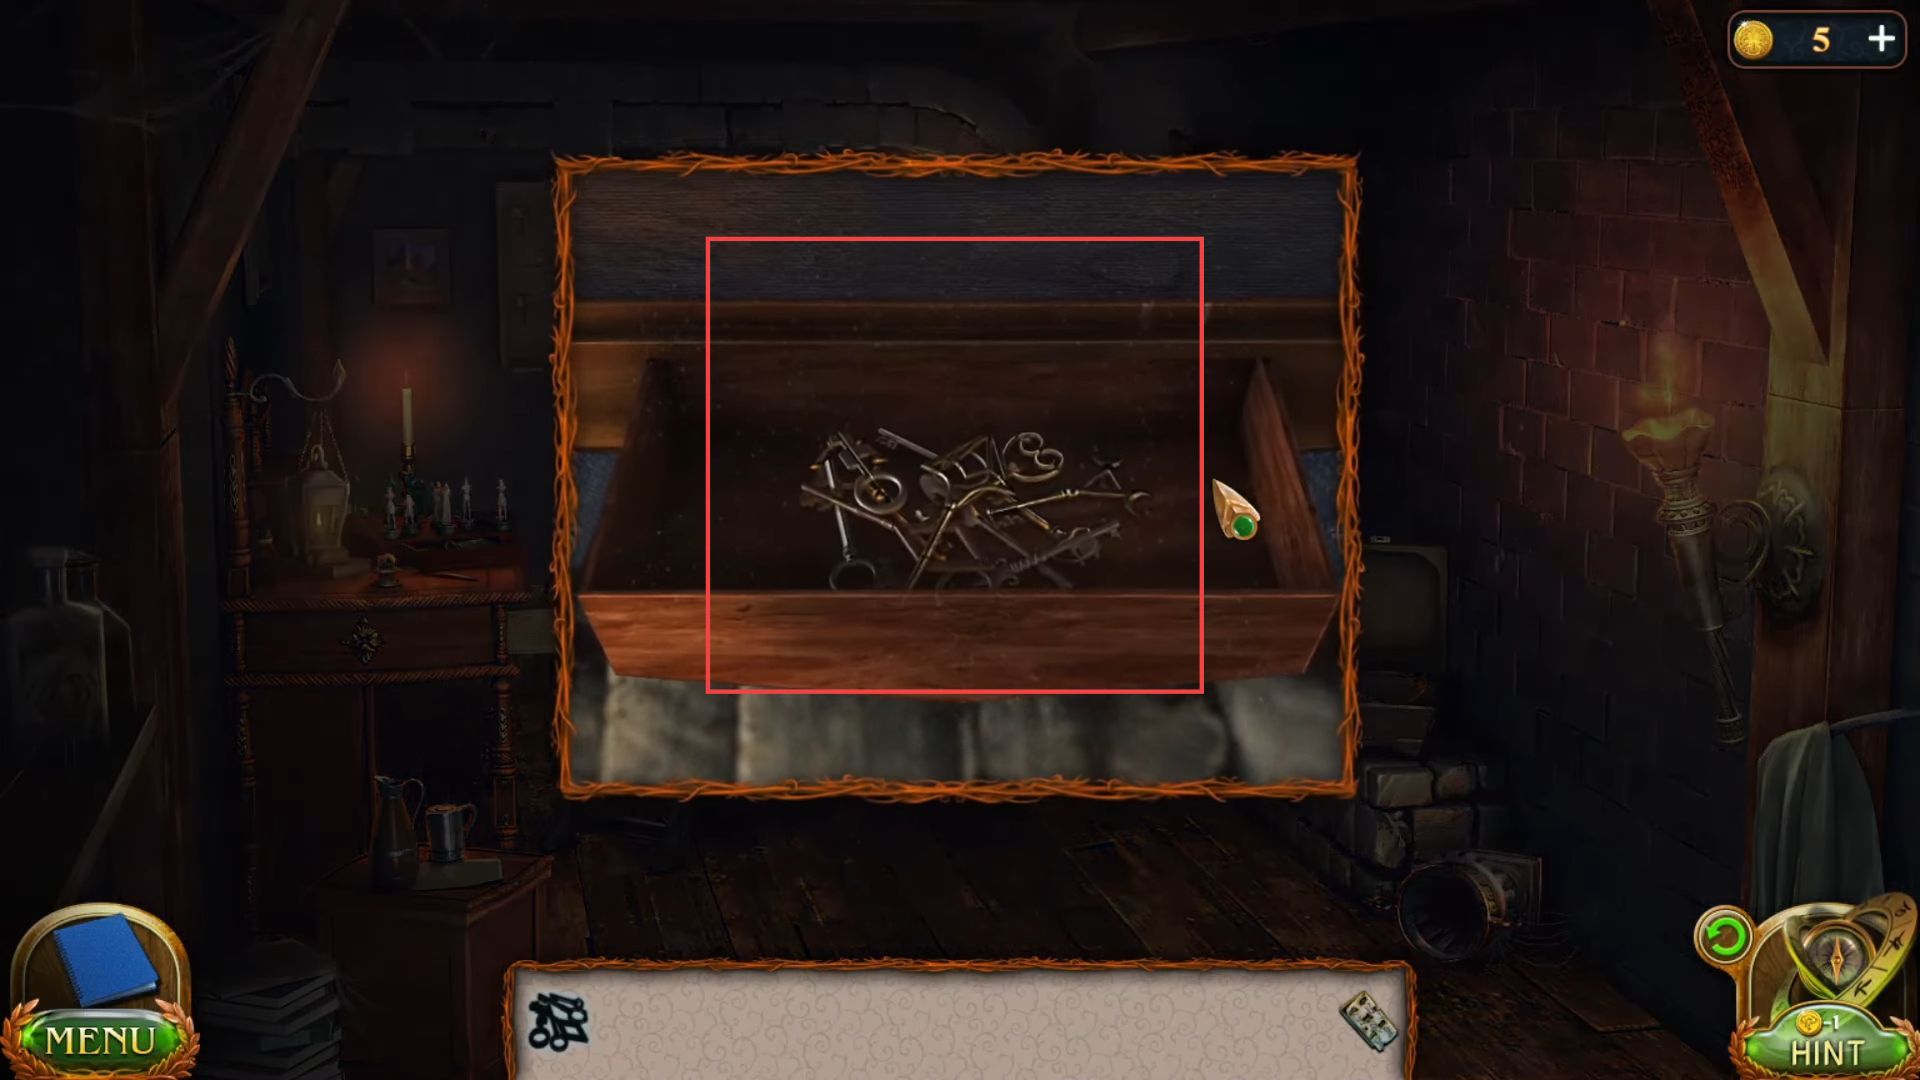
- Go inside the basement and grab a key.
- Use this key to unlock the showcase from the left side of the library entrance.
- Arrange the parts of the model that appeared not in their places correctly.

- Once arranged correctly, grab a signet from the central canopy.
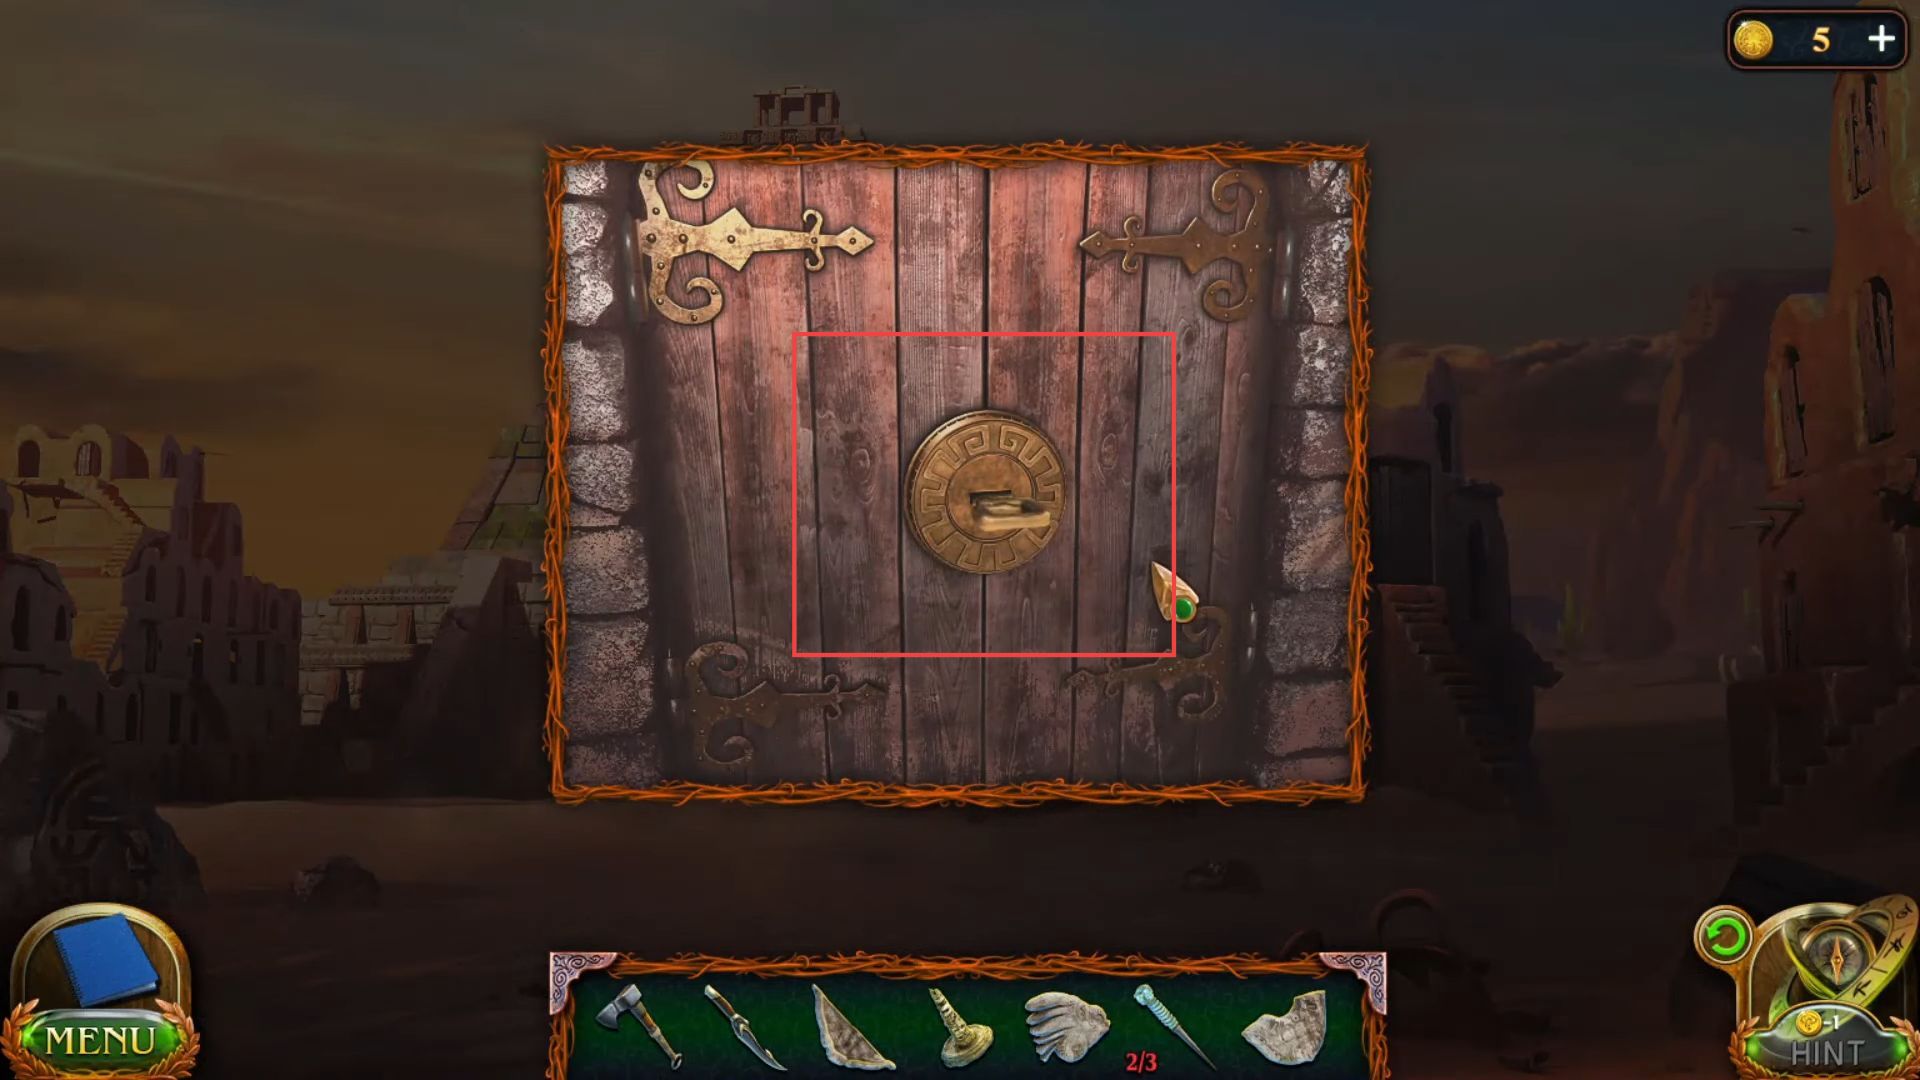
- Attach the signet in the centre of the door to unlock it.

- Click the red crosses and arrows, and change the tiles with animal places so that each one would be in a place with a suitable landscape.

- Once the door is opened, grab a box with balls from the shelf.
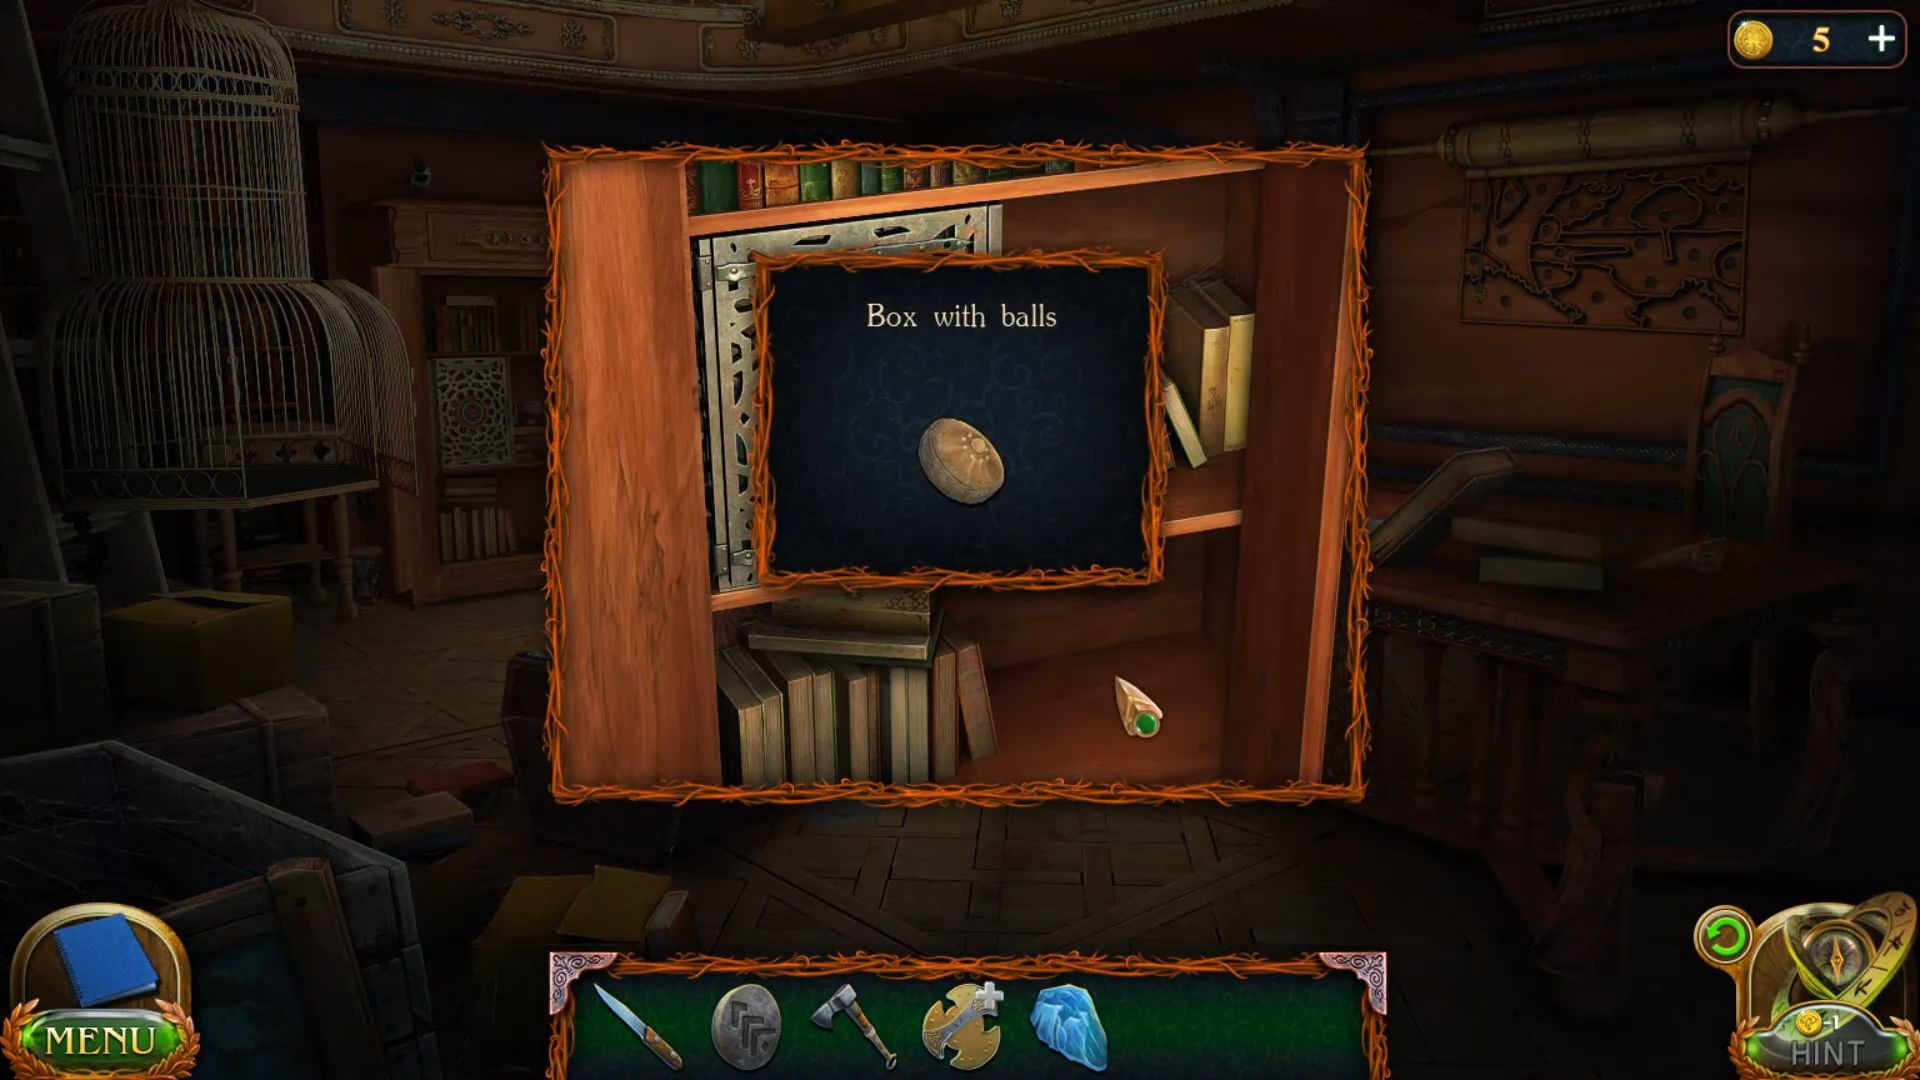
- Get a lollipop from the same place.

- Put the balls from the box on this board.

- Go to the greenhouse and place the lollipop to grab ants.

- Put the lollipop in the cage from Marron’s office and grab a red ball from the bird’s neck.

- Put the red ball on the left side of the board.
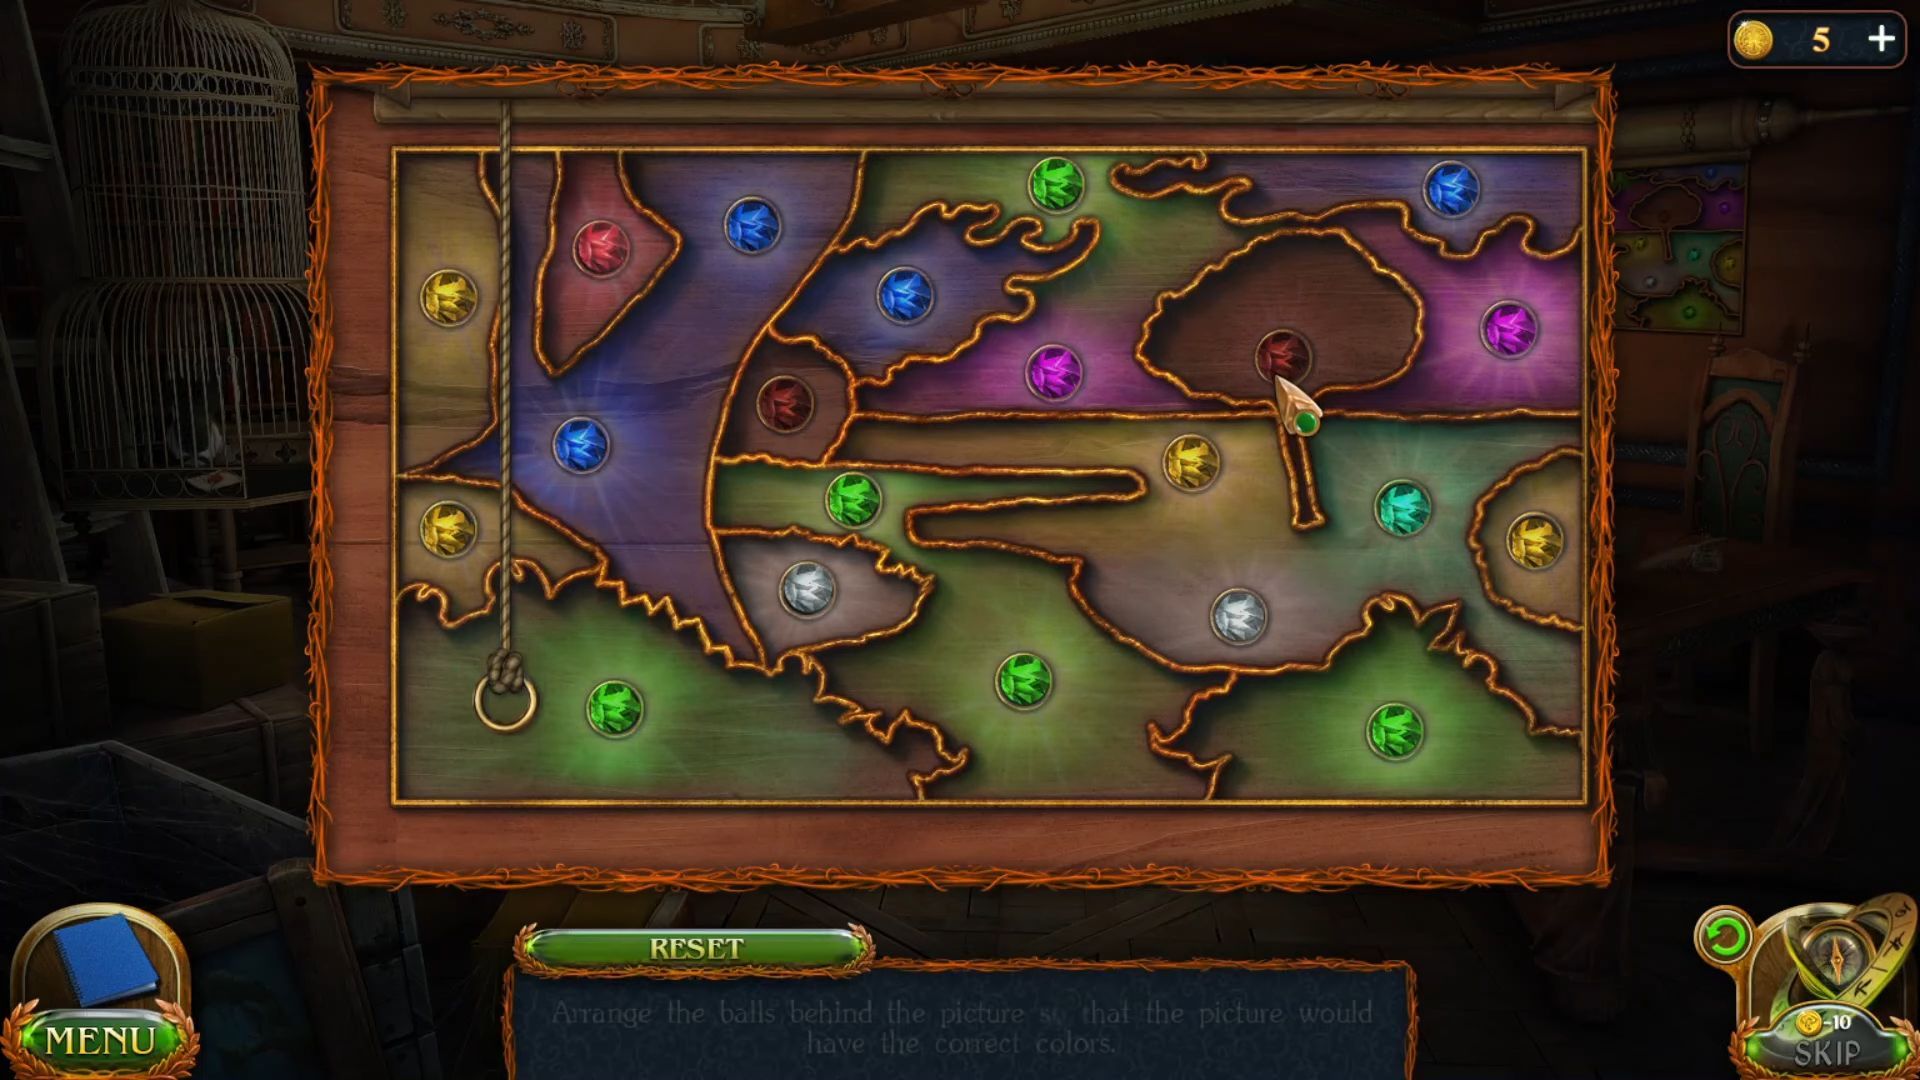
- Arrange the balls behind the picture so that the picture has the correct colours.
- Use the wheels of the right colour to select the correct symbols seen recently.

- Once the door is opened, grab a plate from the inside.

- Put the plate in this place from the secret room.

- Place the crystal on the stone in the courtyard.

- Cut the rope with the knife to drop the big stone.
- Grab the crystal powder from the stone.

- Add the powder into the mini pool.

- Put the emblem on the stone from the mountain.

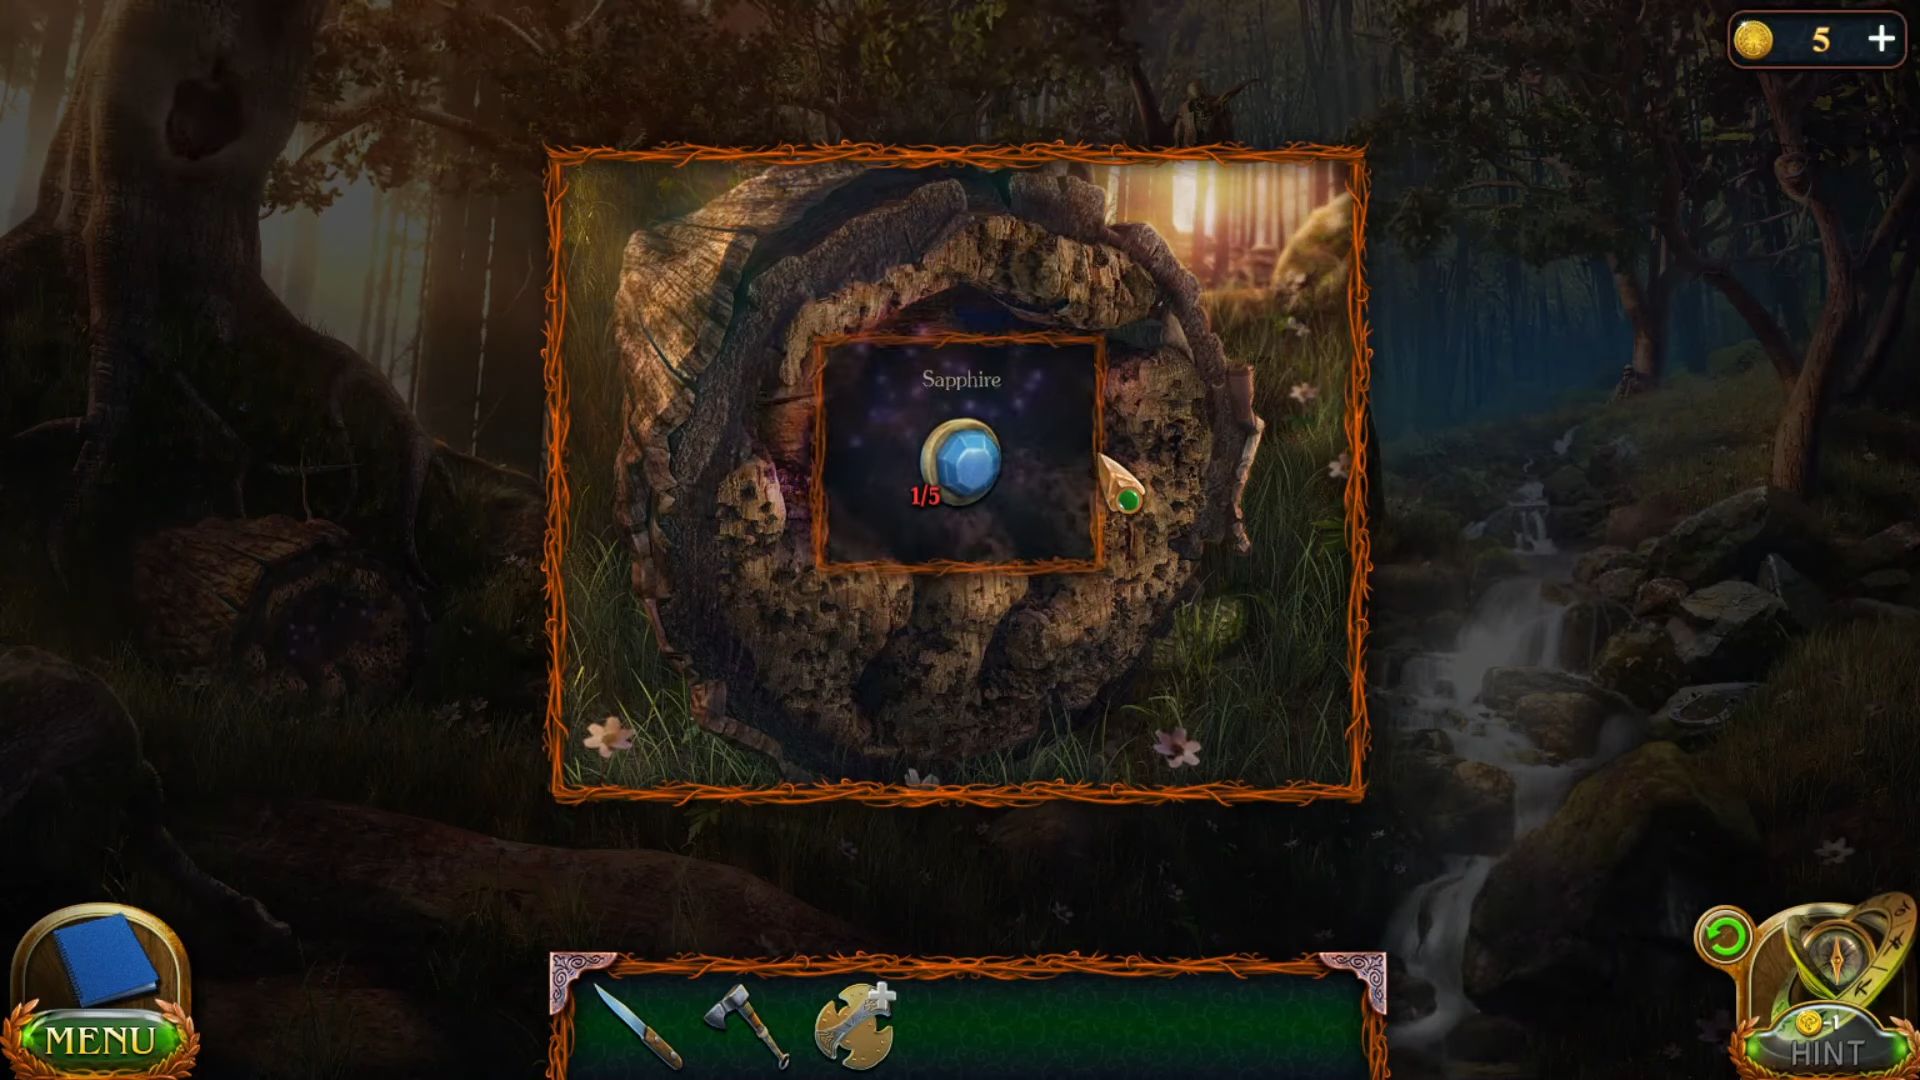
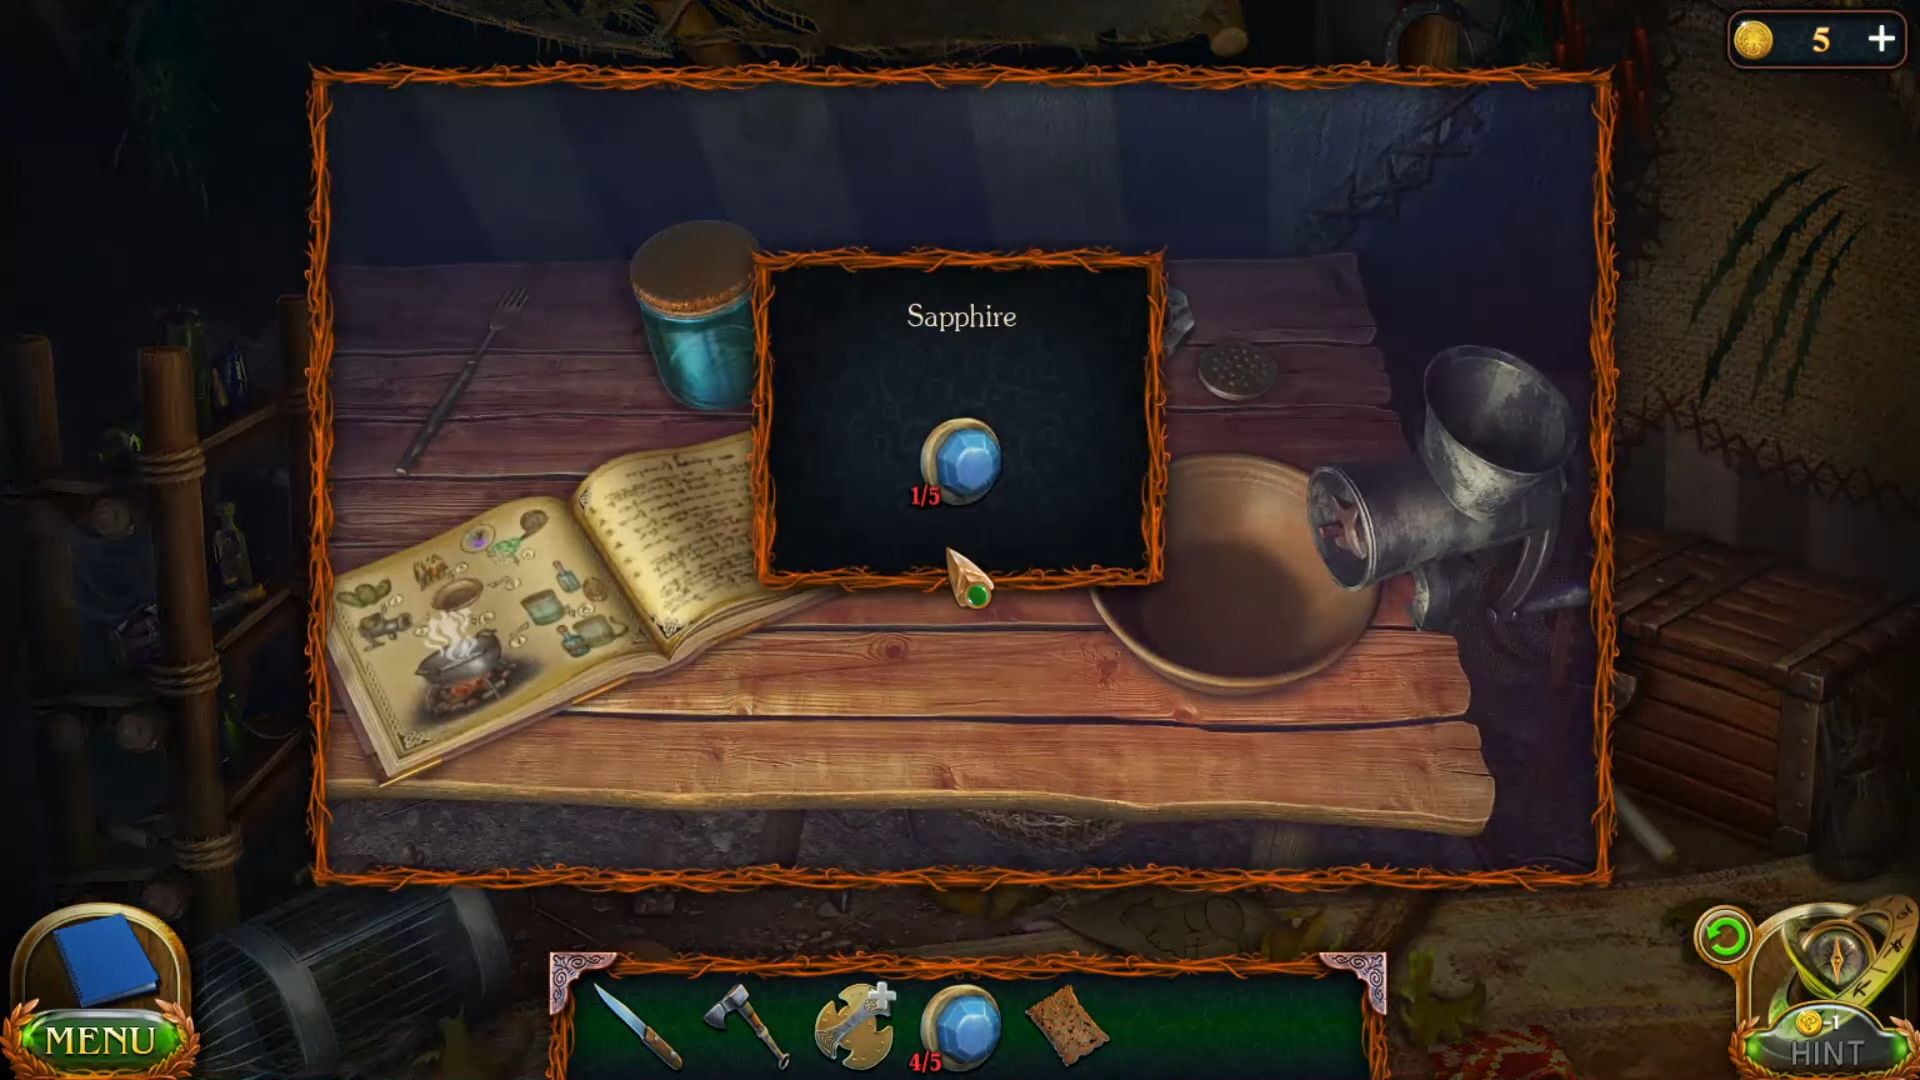
- Go inside the lightning demon from the mountain and grab a sapphire from the left side.
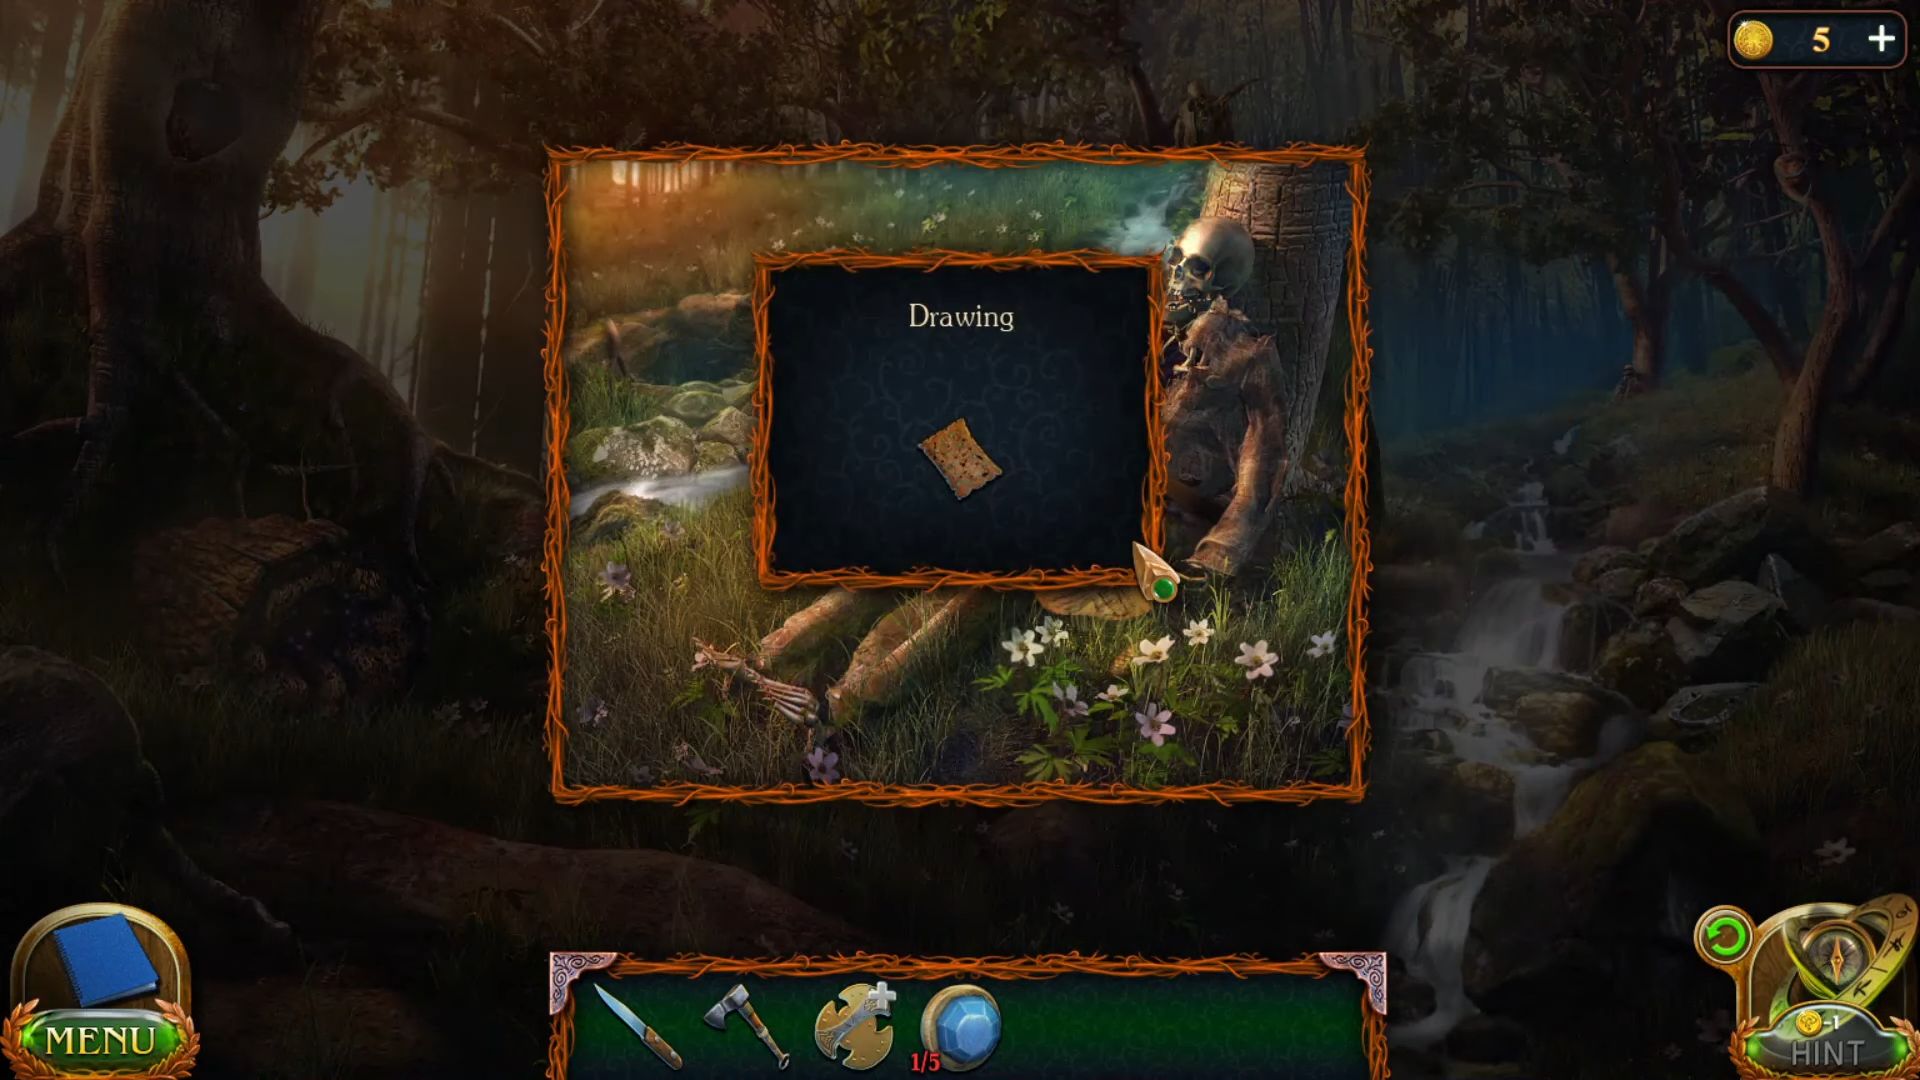
- Collect a drawing from the right-hand side skeleton near the tree.
- Grab another sapphire from the ground next to the skeleton.

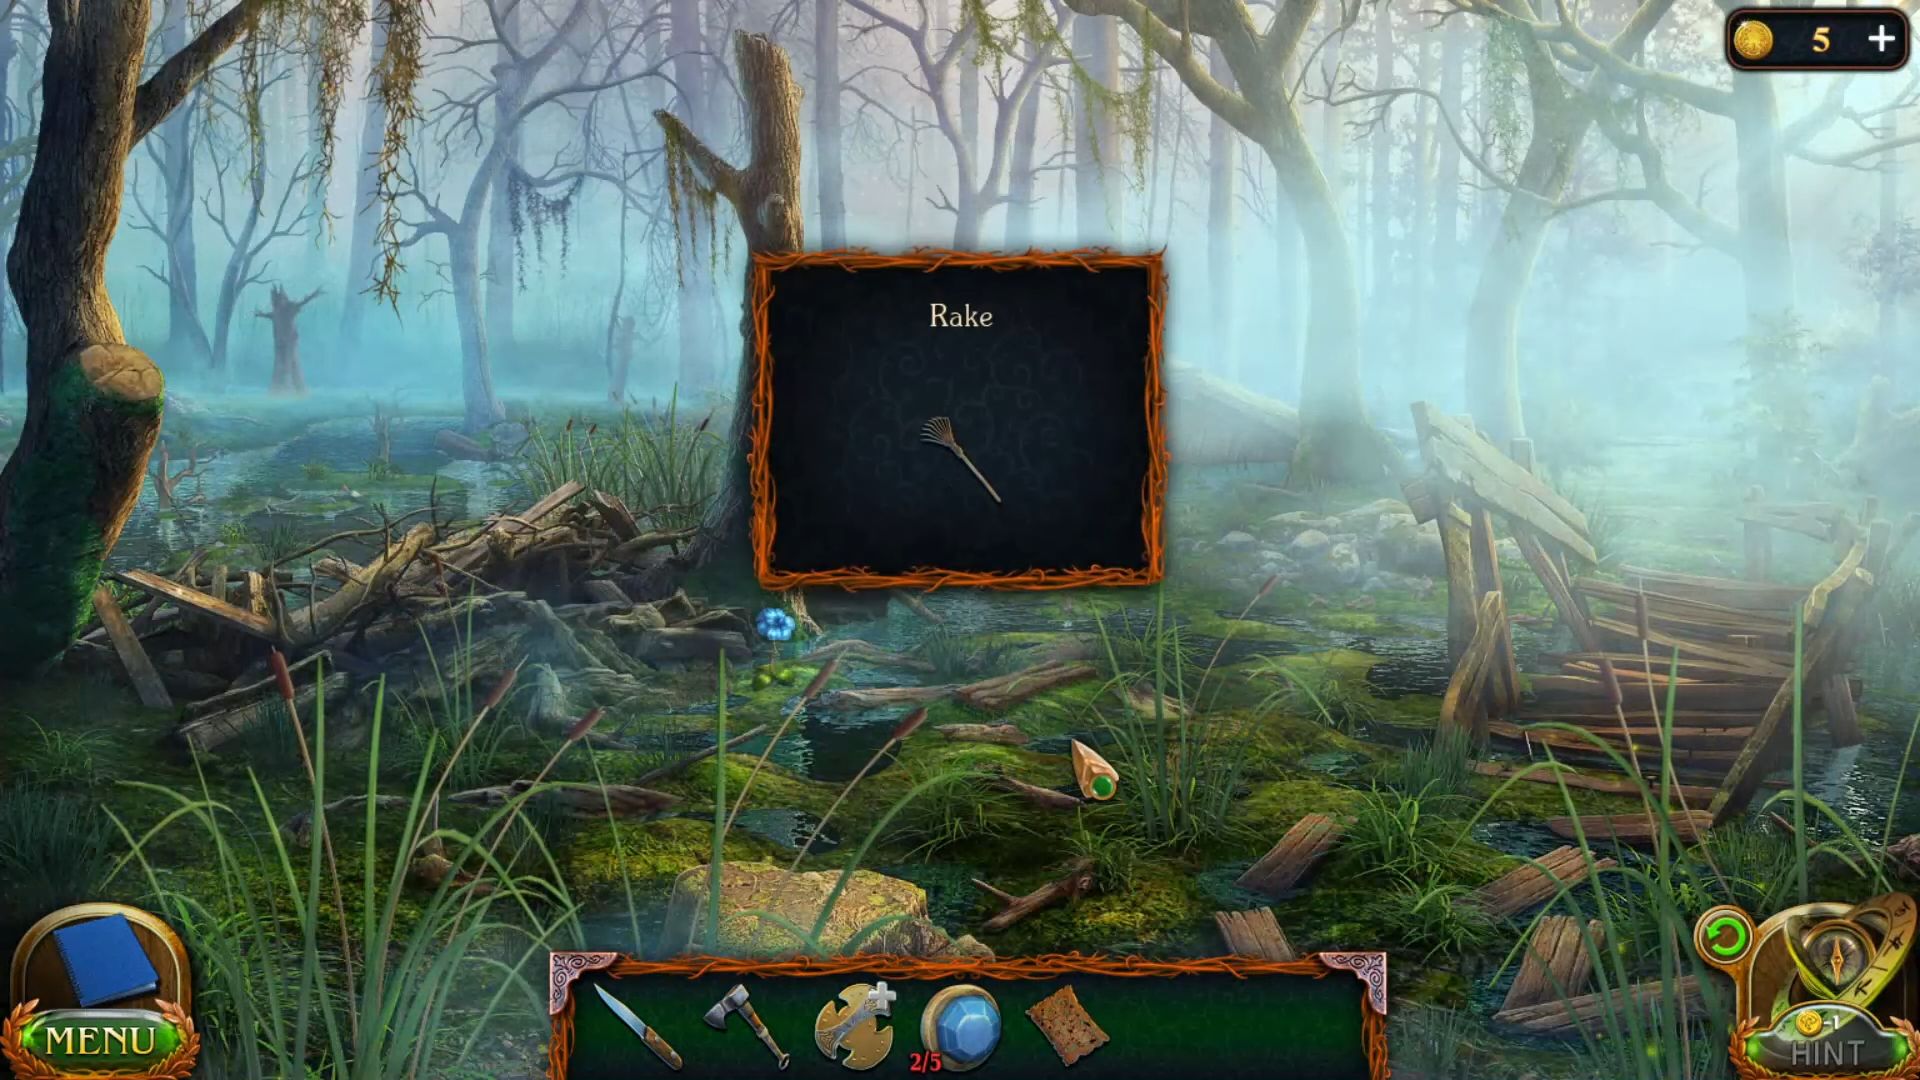
- Get a rake from the floor near the tree.
- Grab a plank from the right-hand side bridge.

- Place the logs like a bridge in the centre to reach the abandoned hut.
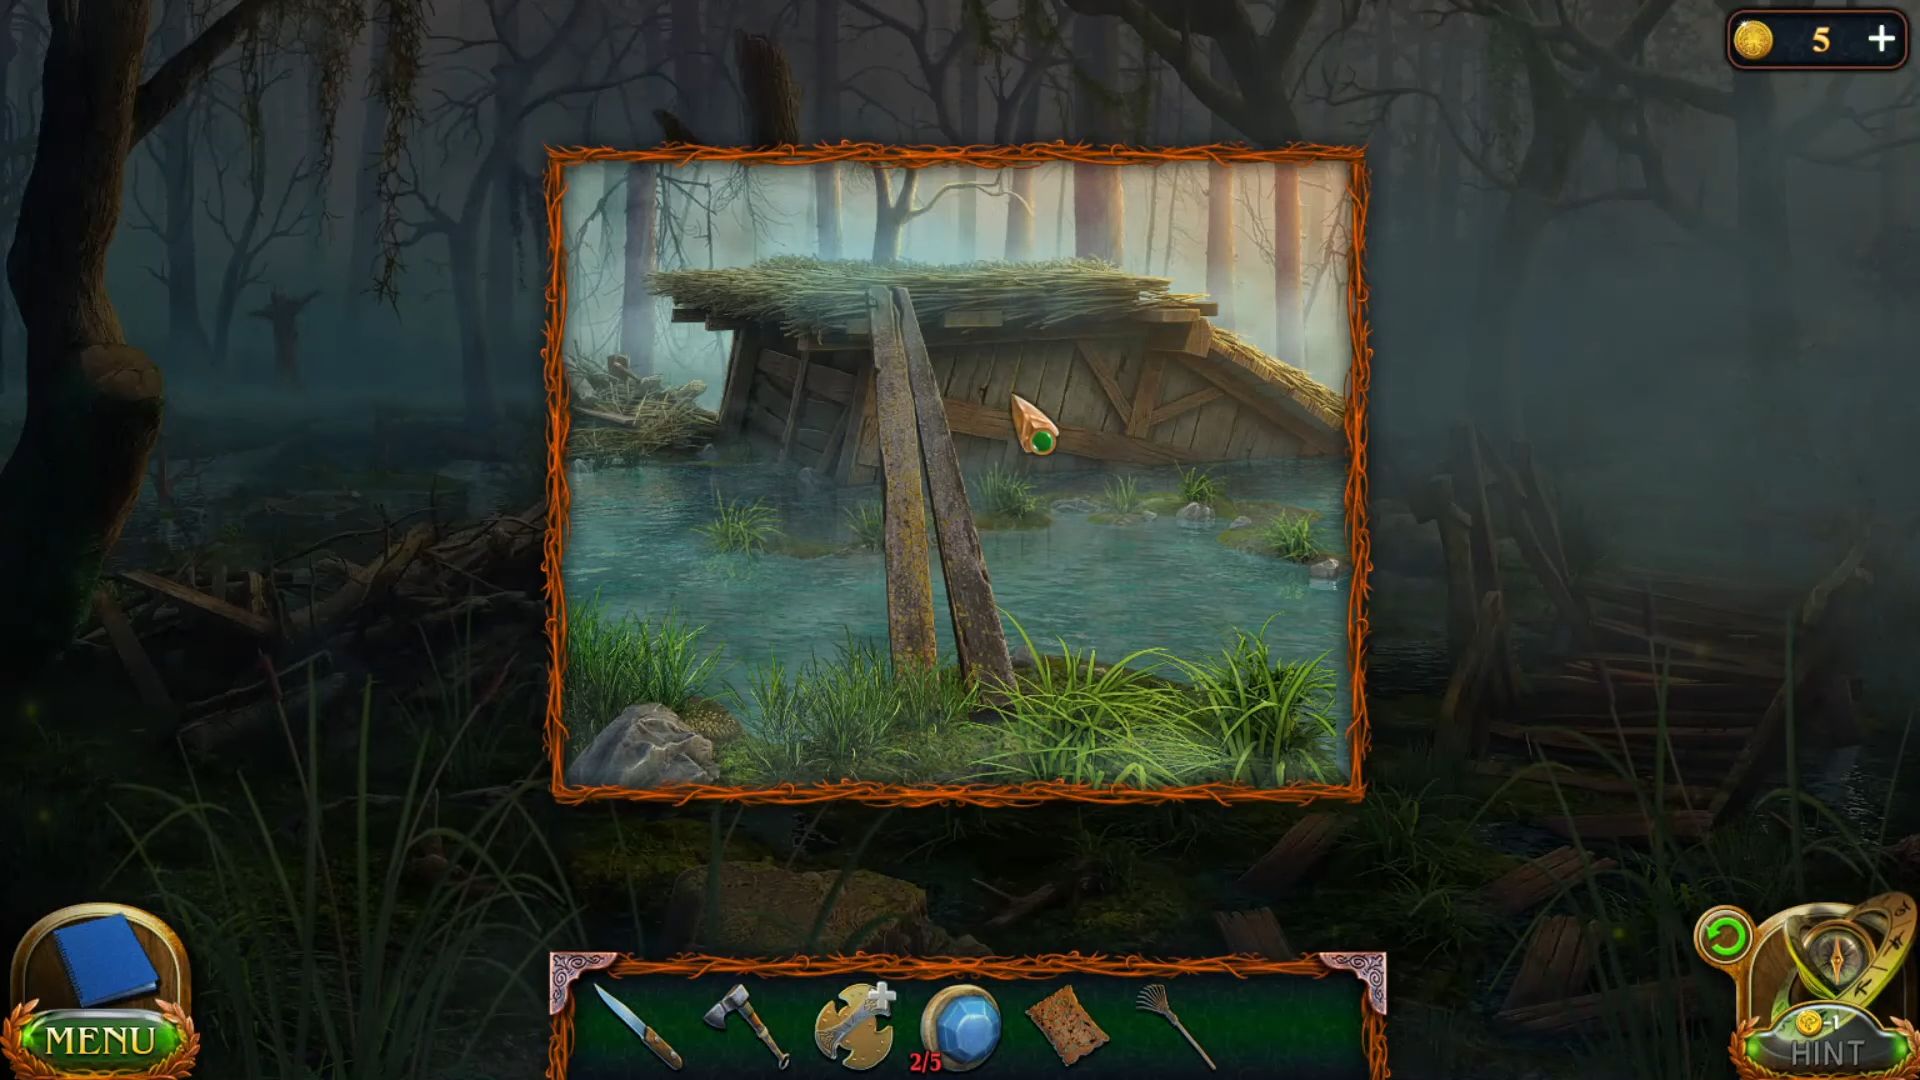
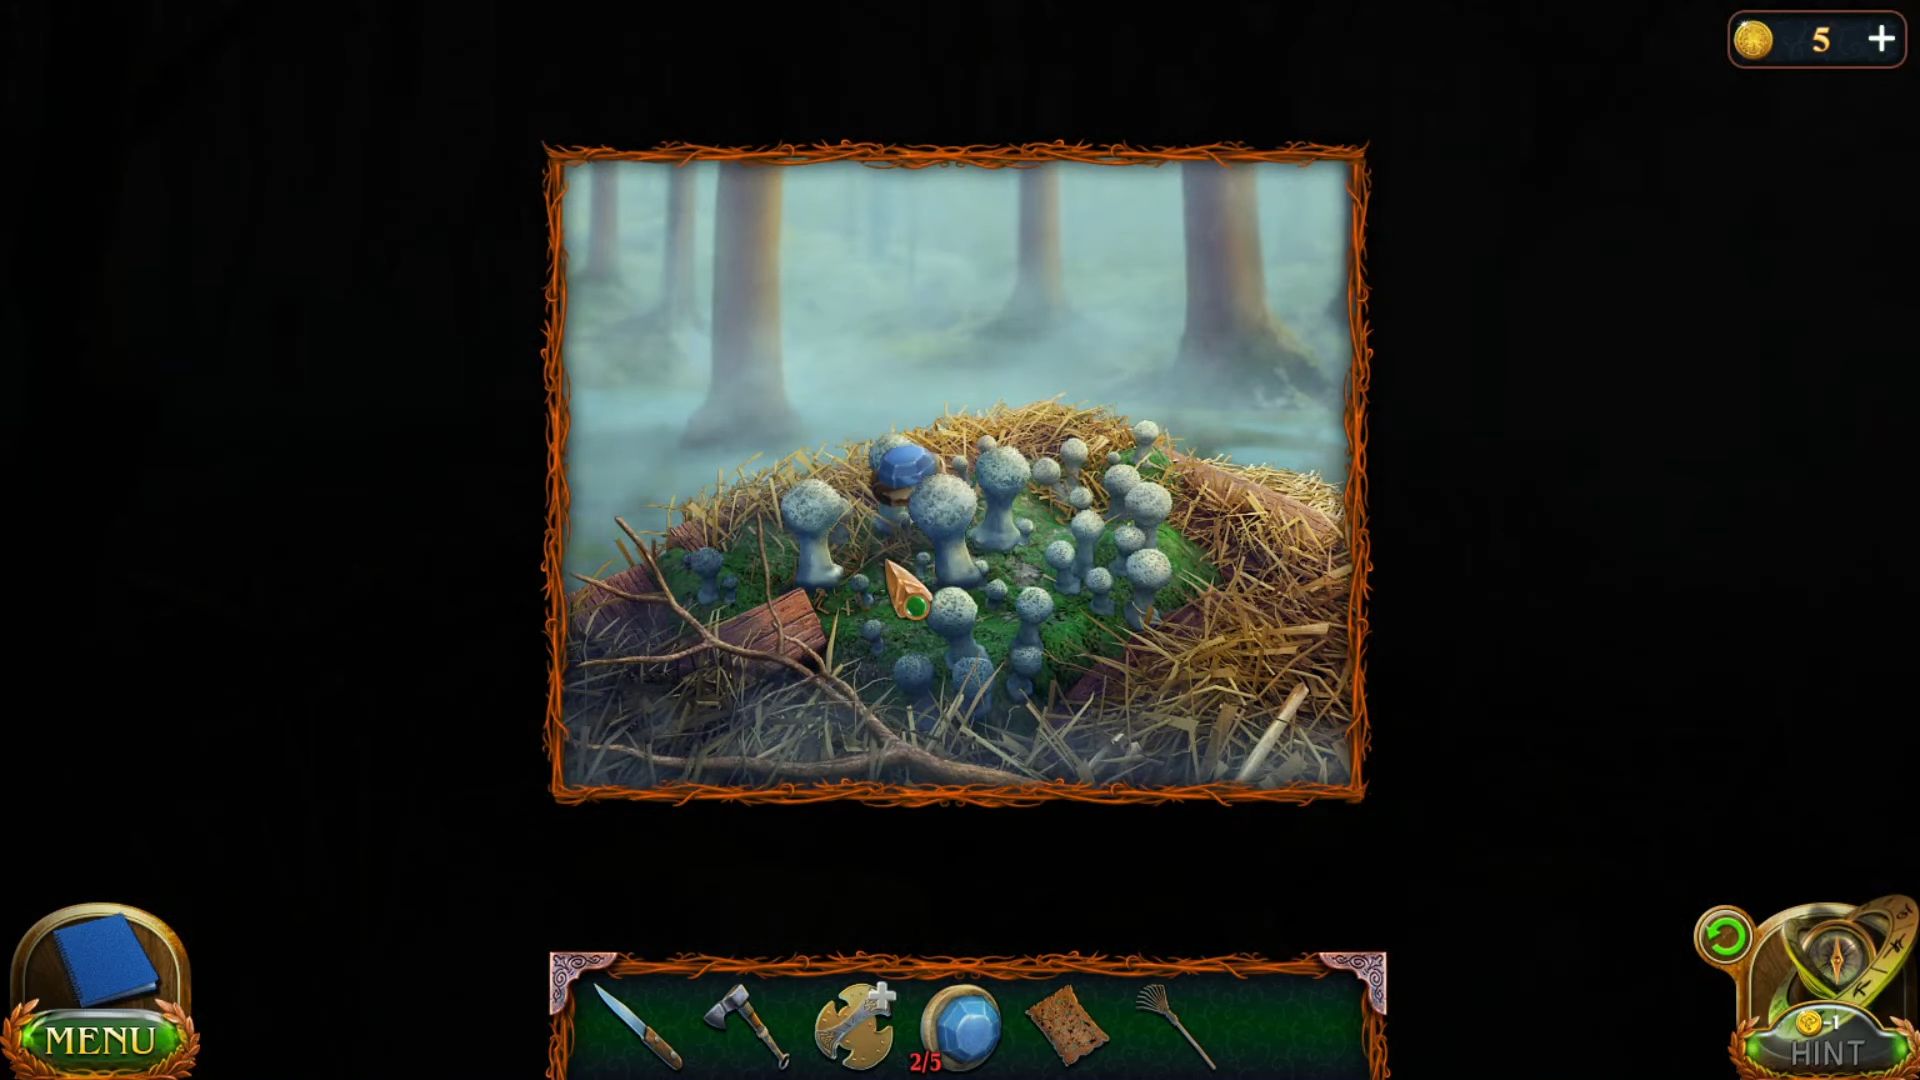
- Grab another sapphire from the top of the hut.
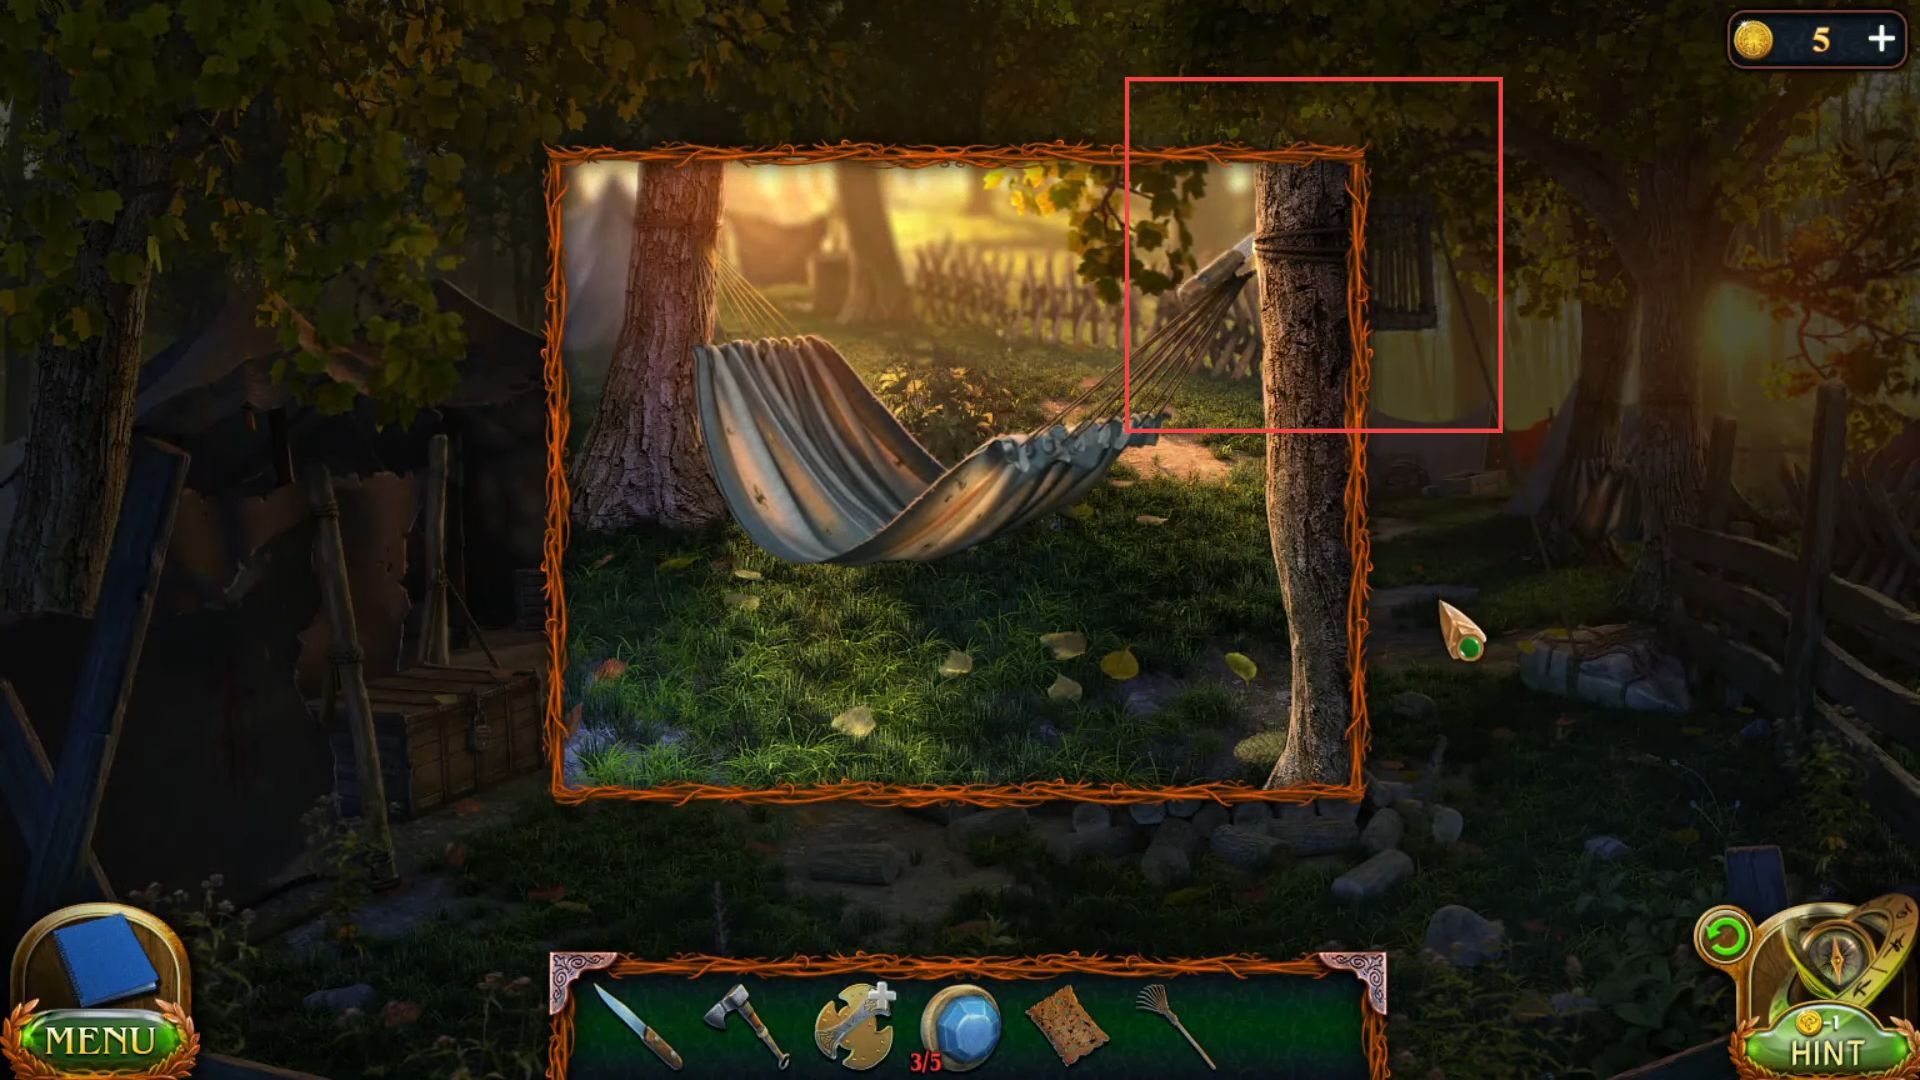
- Cut the rope using the knife to grab a hammock.
- Put the hammock on the ground, and gather all the piles of leaves onto the cloth. You need to click an empty square with arrows; all neighbouring piles of leaves will move 1 square away from it if there are no obstacles. If you move a pile of leaves to the field’s borders, you can no longer move it and have to restart.
- Grab a pile of leaves from this place.

- Put the pile of leaves under the cage near the tree.

- Cut the rope of the cage using the knife.
- Get another sapphire from the cage.

- Grab another sapphire from the table in the tent.
- Go to the cave and get tobacco of spirits.

- Place the sapphire on the board.

- Click the sapphires, and light the stones highlighted in the picture.
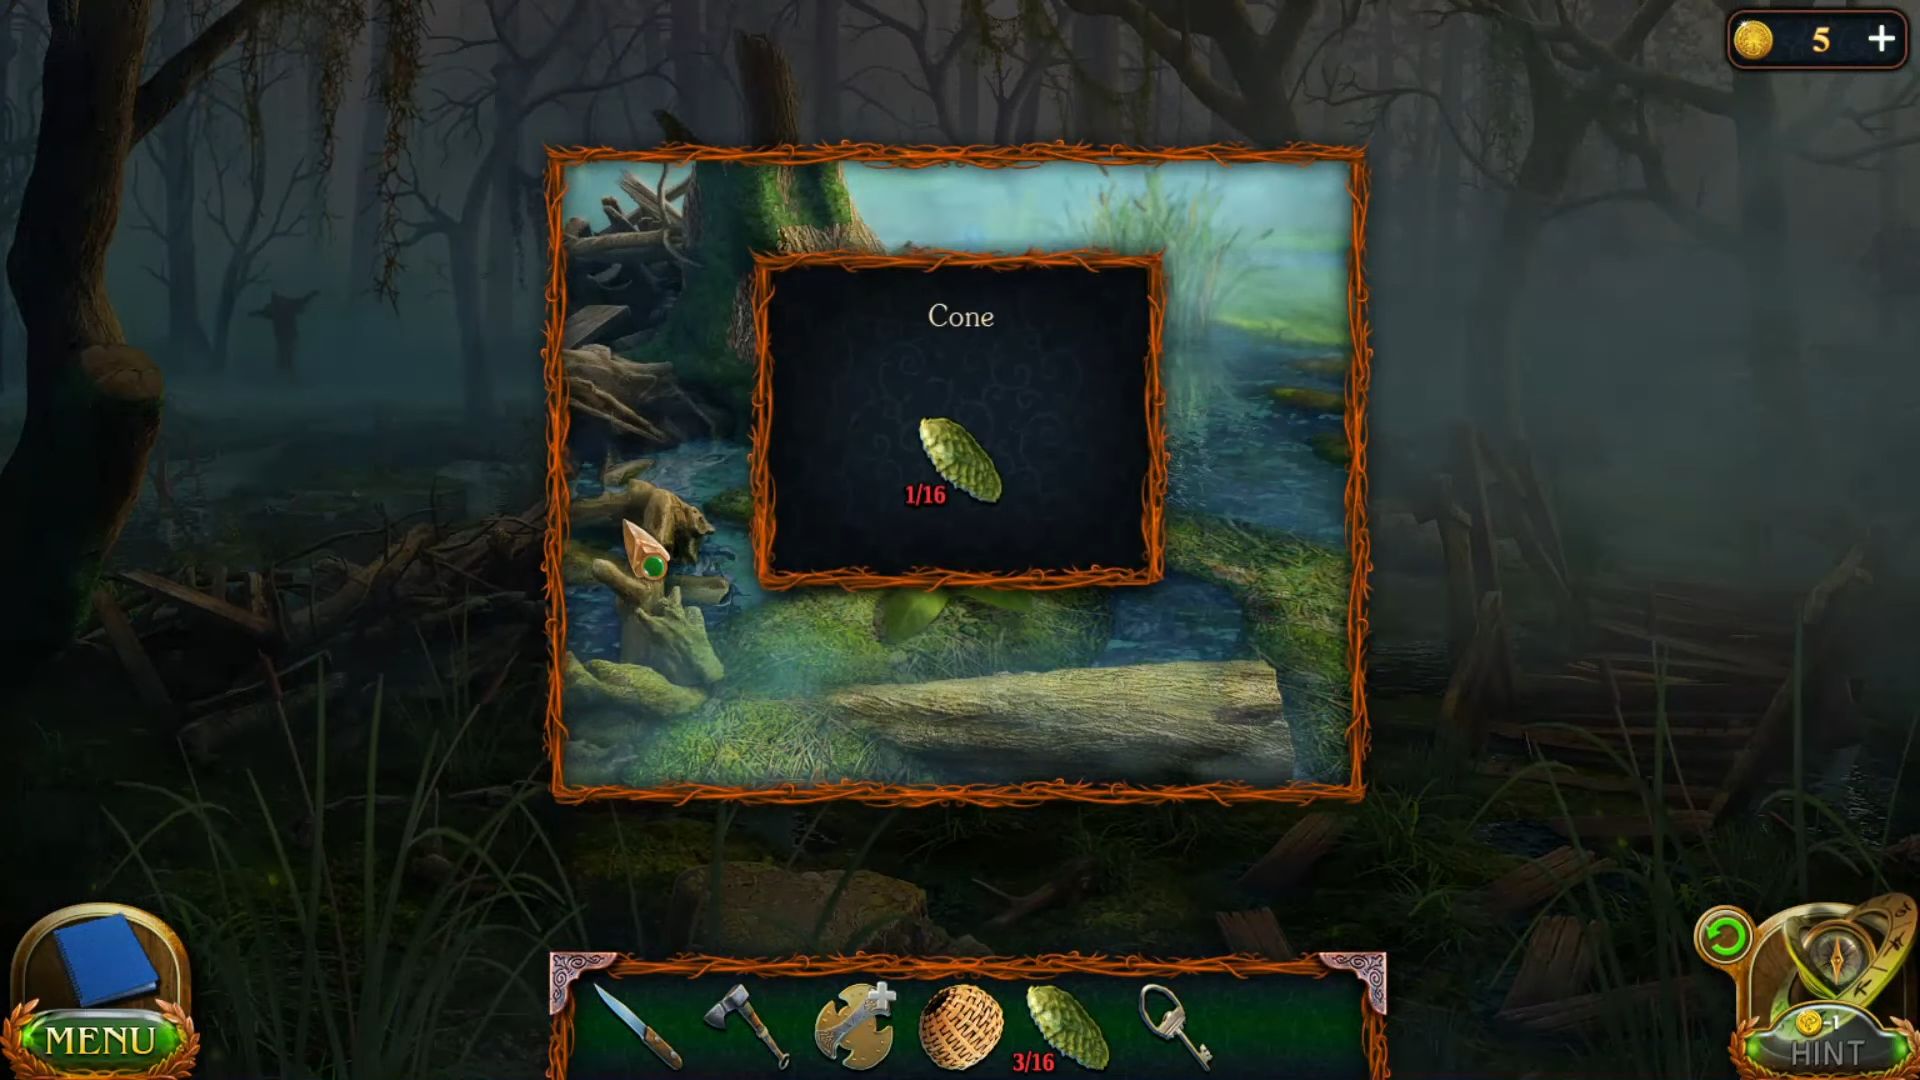
- Grab a cone from the ground near the tree.

- Get a key from the pocket of the skeleton’s pocket.

- Grab another cone from the ground near the skeleton from the tree.

- Get a cone from the ground near the treasure’s hole.

- Get another cone from the ground near the tree.
- Collect a cone from the ground near the stone.

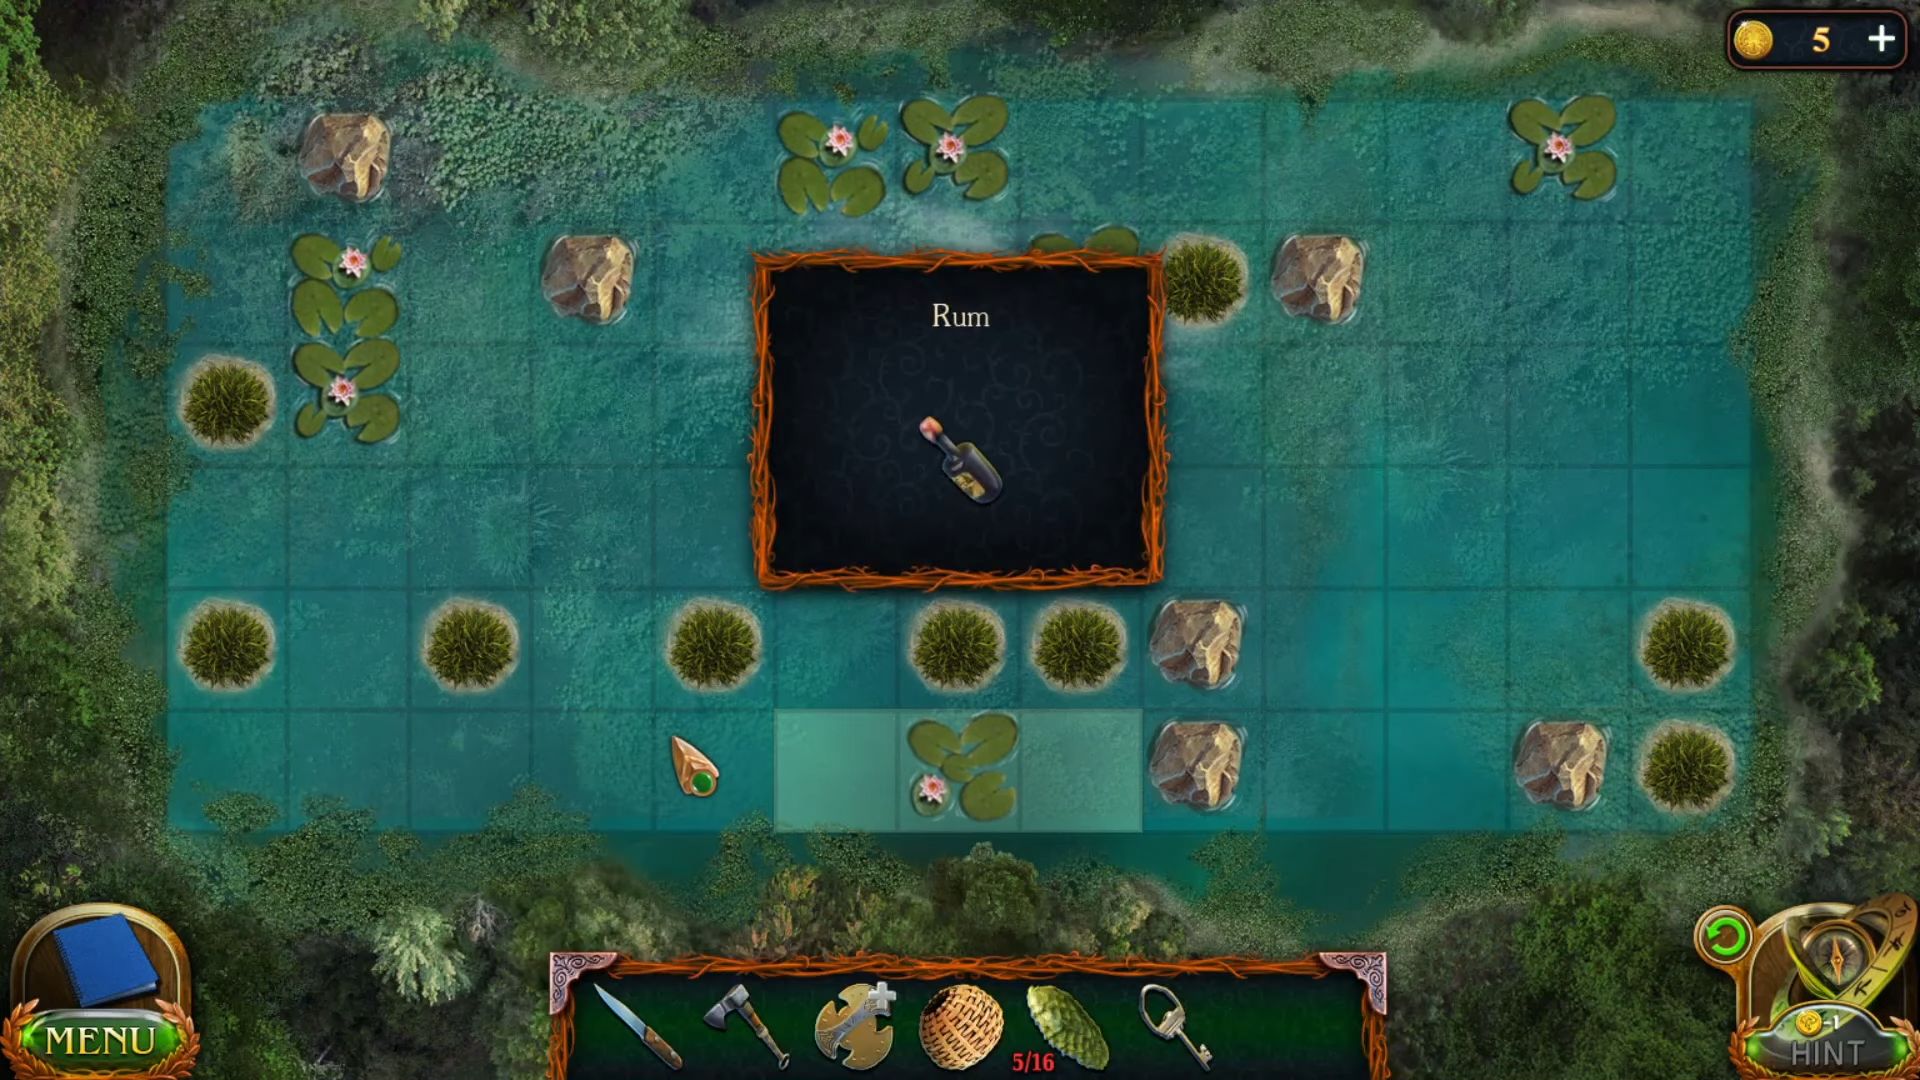
- A whole bottle of rum floats in the water. Click the water square to throw a stone there. Splash will throw objects around it to the sides. Move the bottle to the highlighted blue squares and get a bottle of rum from this place.
- Use the key to unlock the box near the tent from the forest to grab a cone, waterskin, and a hand net.

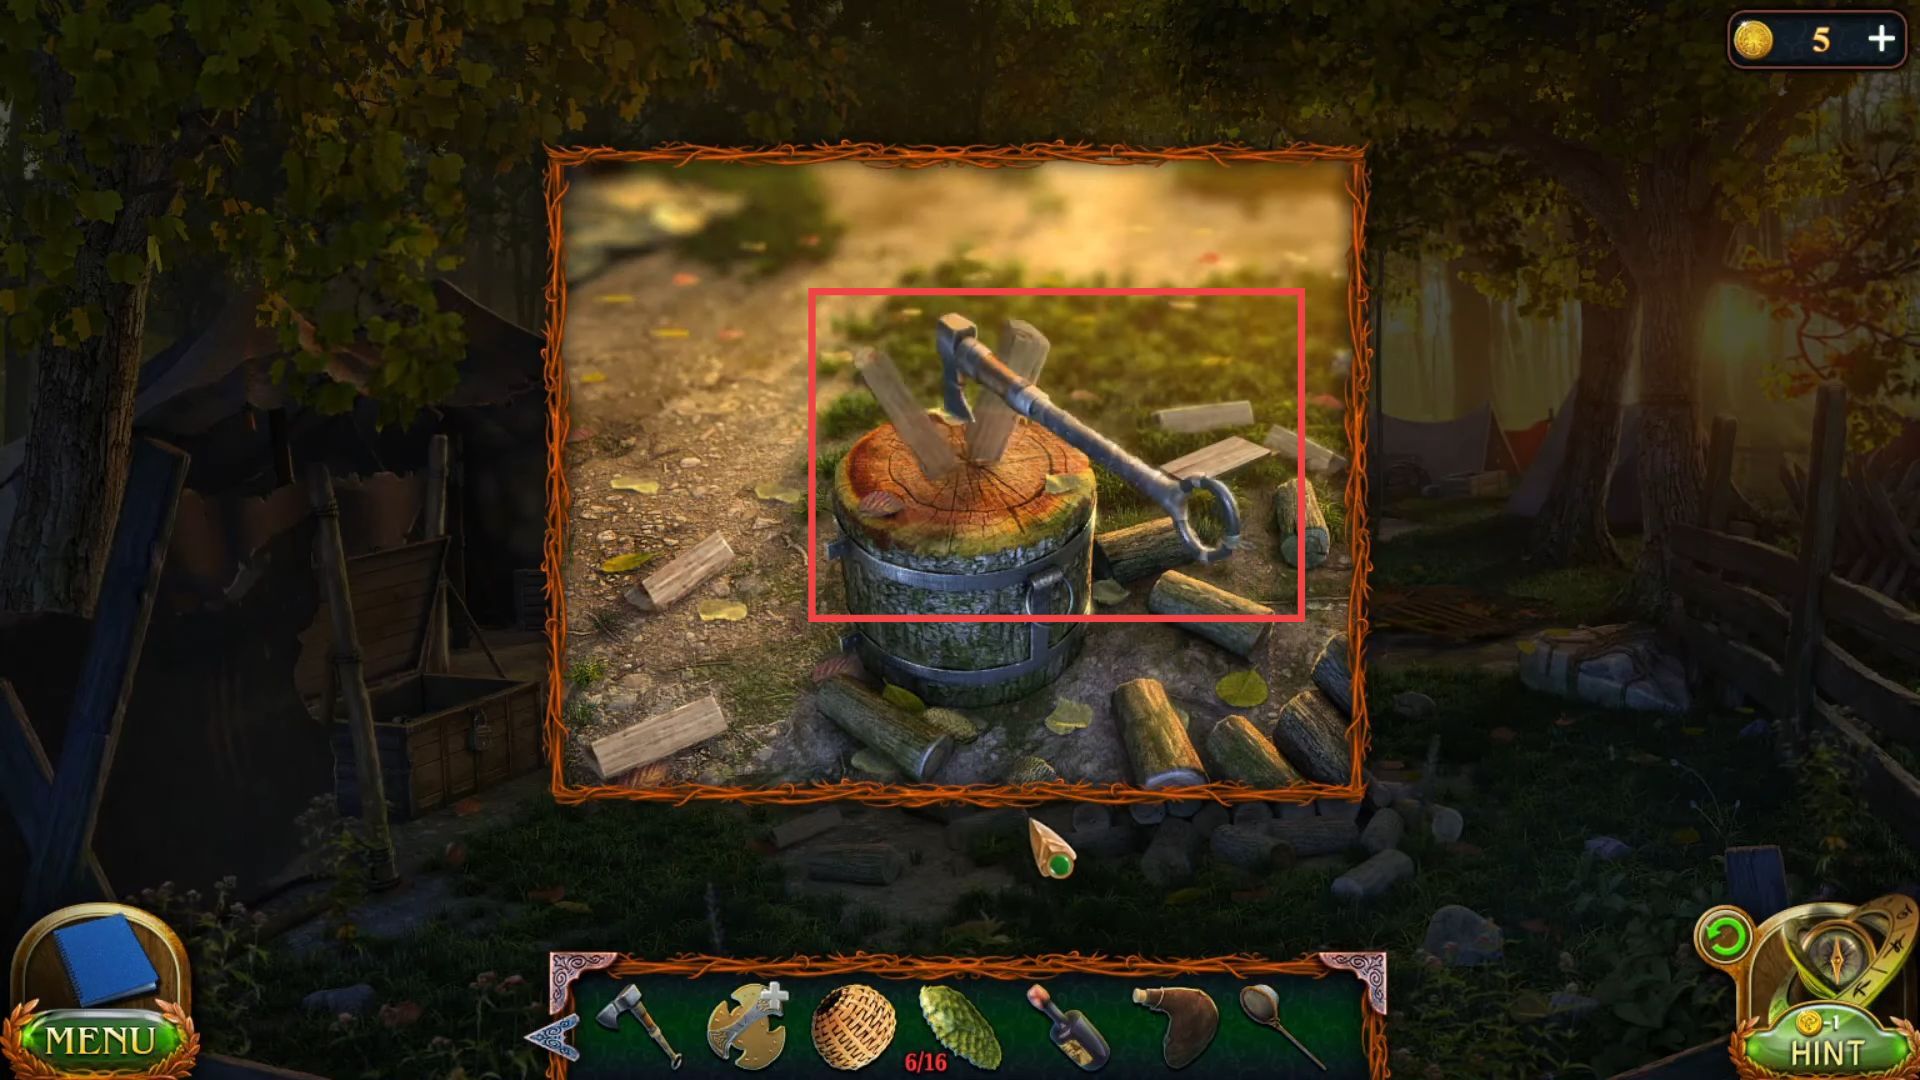
- Grab another cone from the ground, put the wooden logs on the box, and cut them using the axe to make them firewood.
- Grab two cones from the side stone at the ground.

- Grab two more cones from the ground near the open box.
- Get two more cones from the ground near the tree.

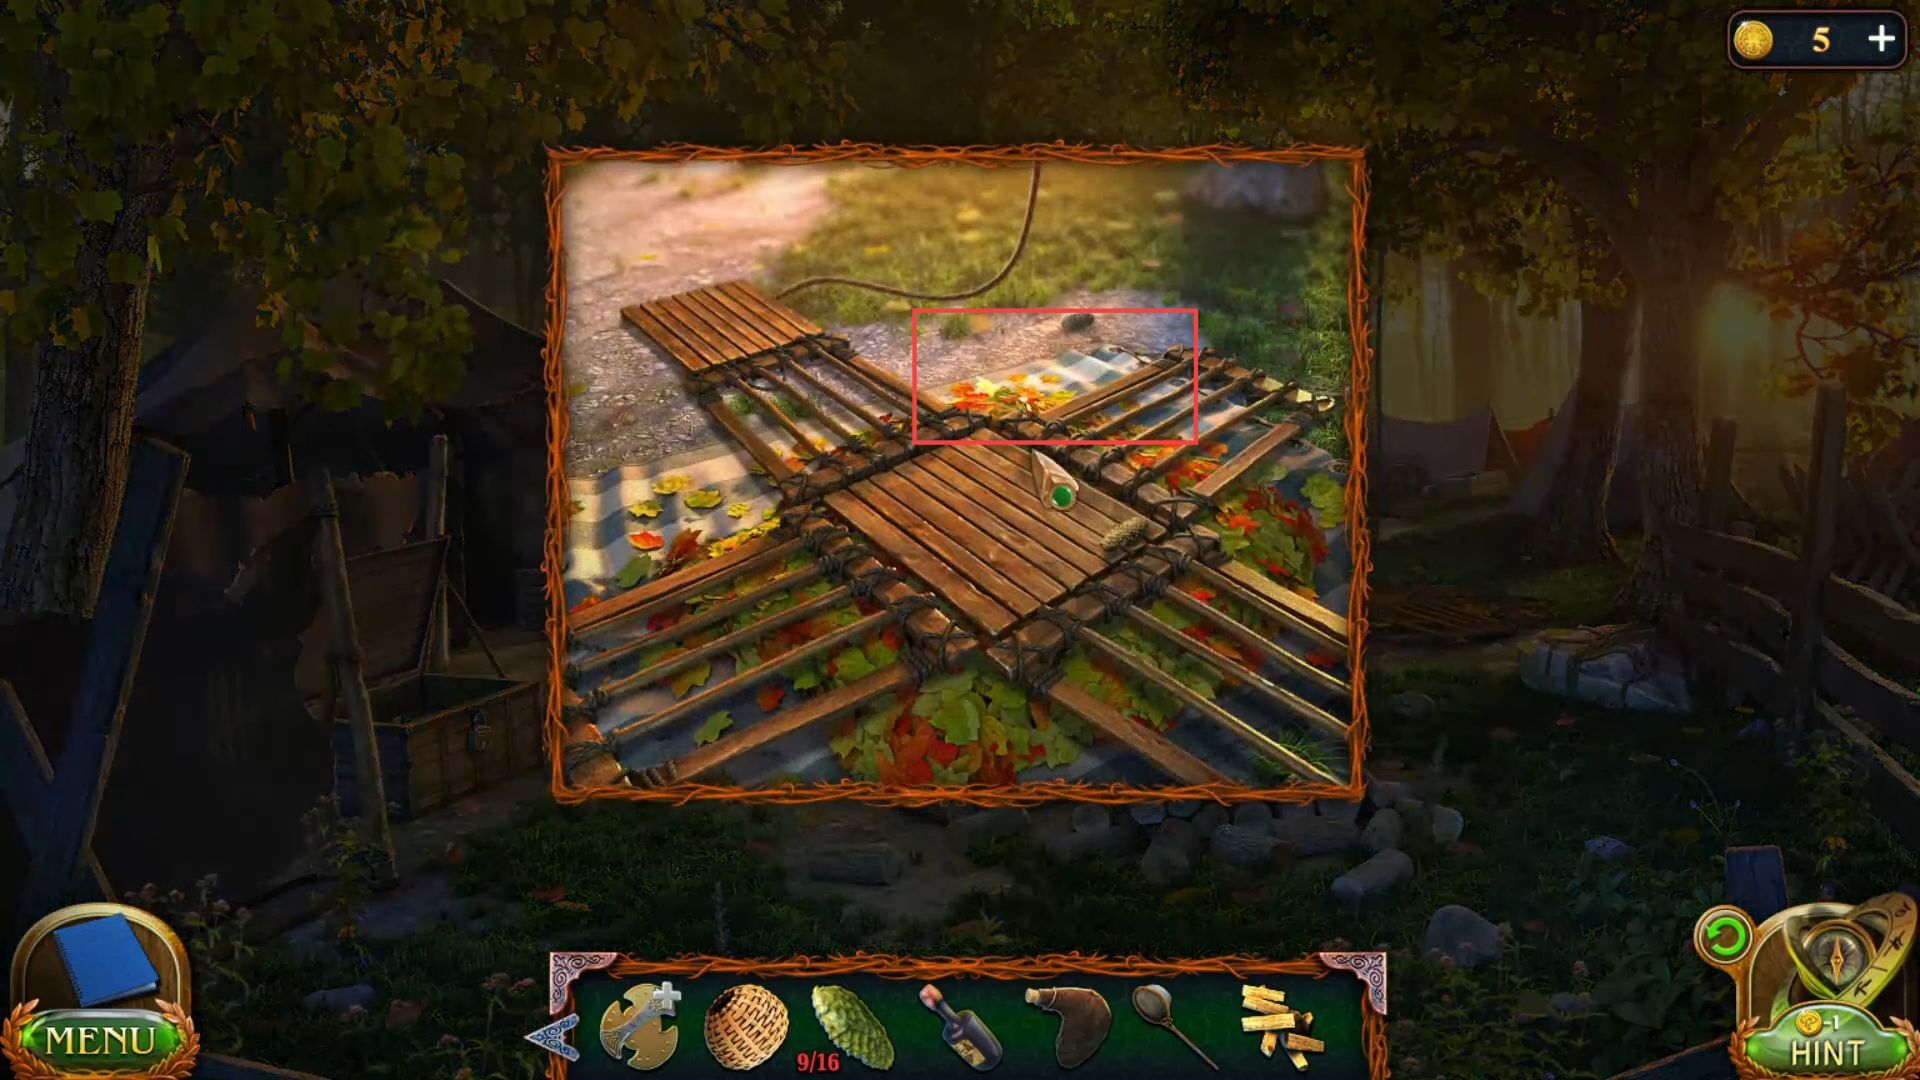
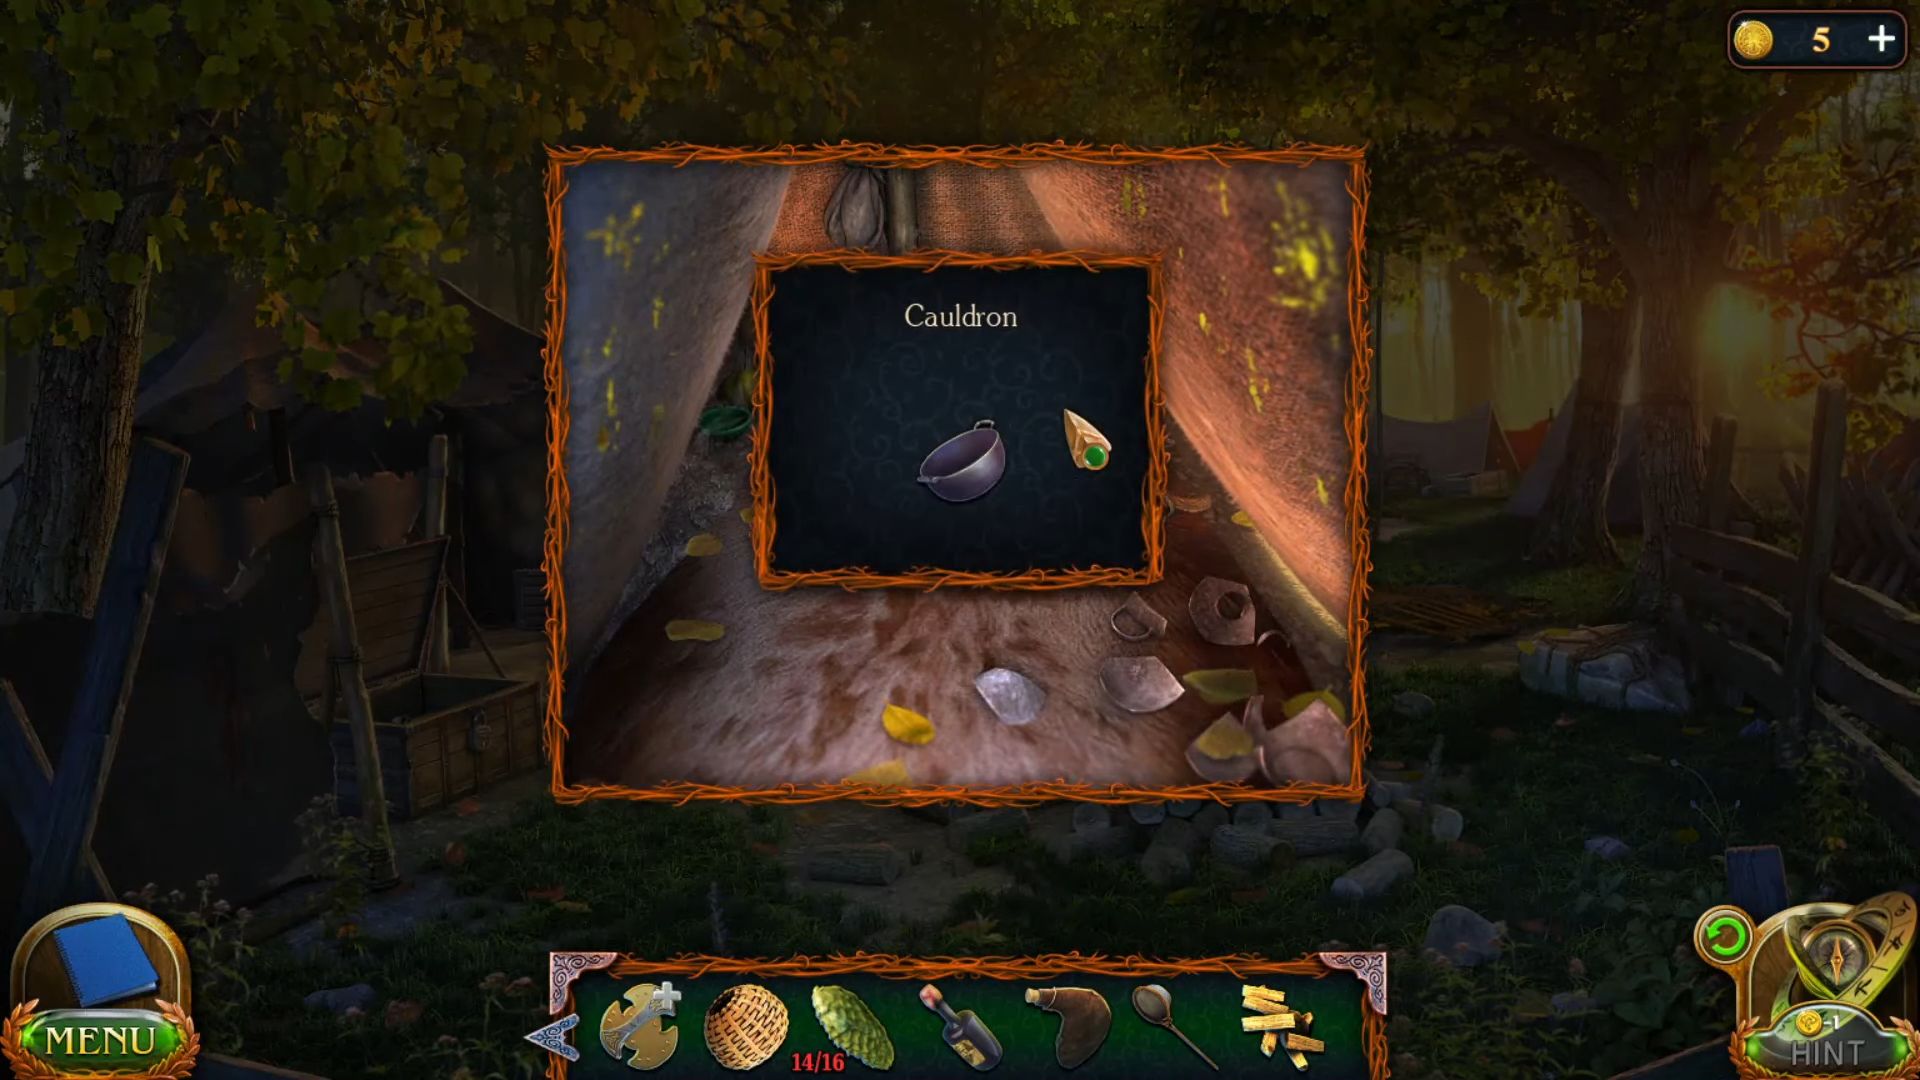
- Grab a cone, a cauldron, a coil of rope, and a manuscript from the tent.
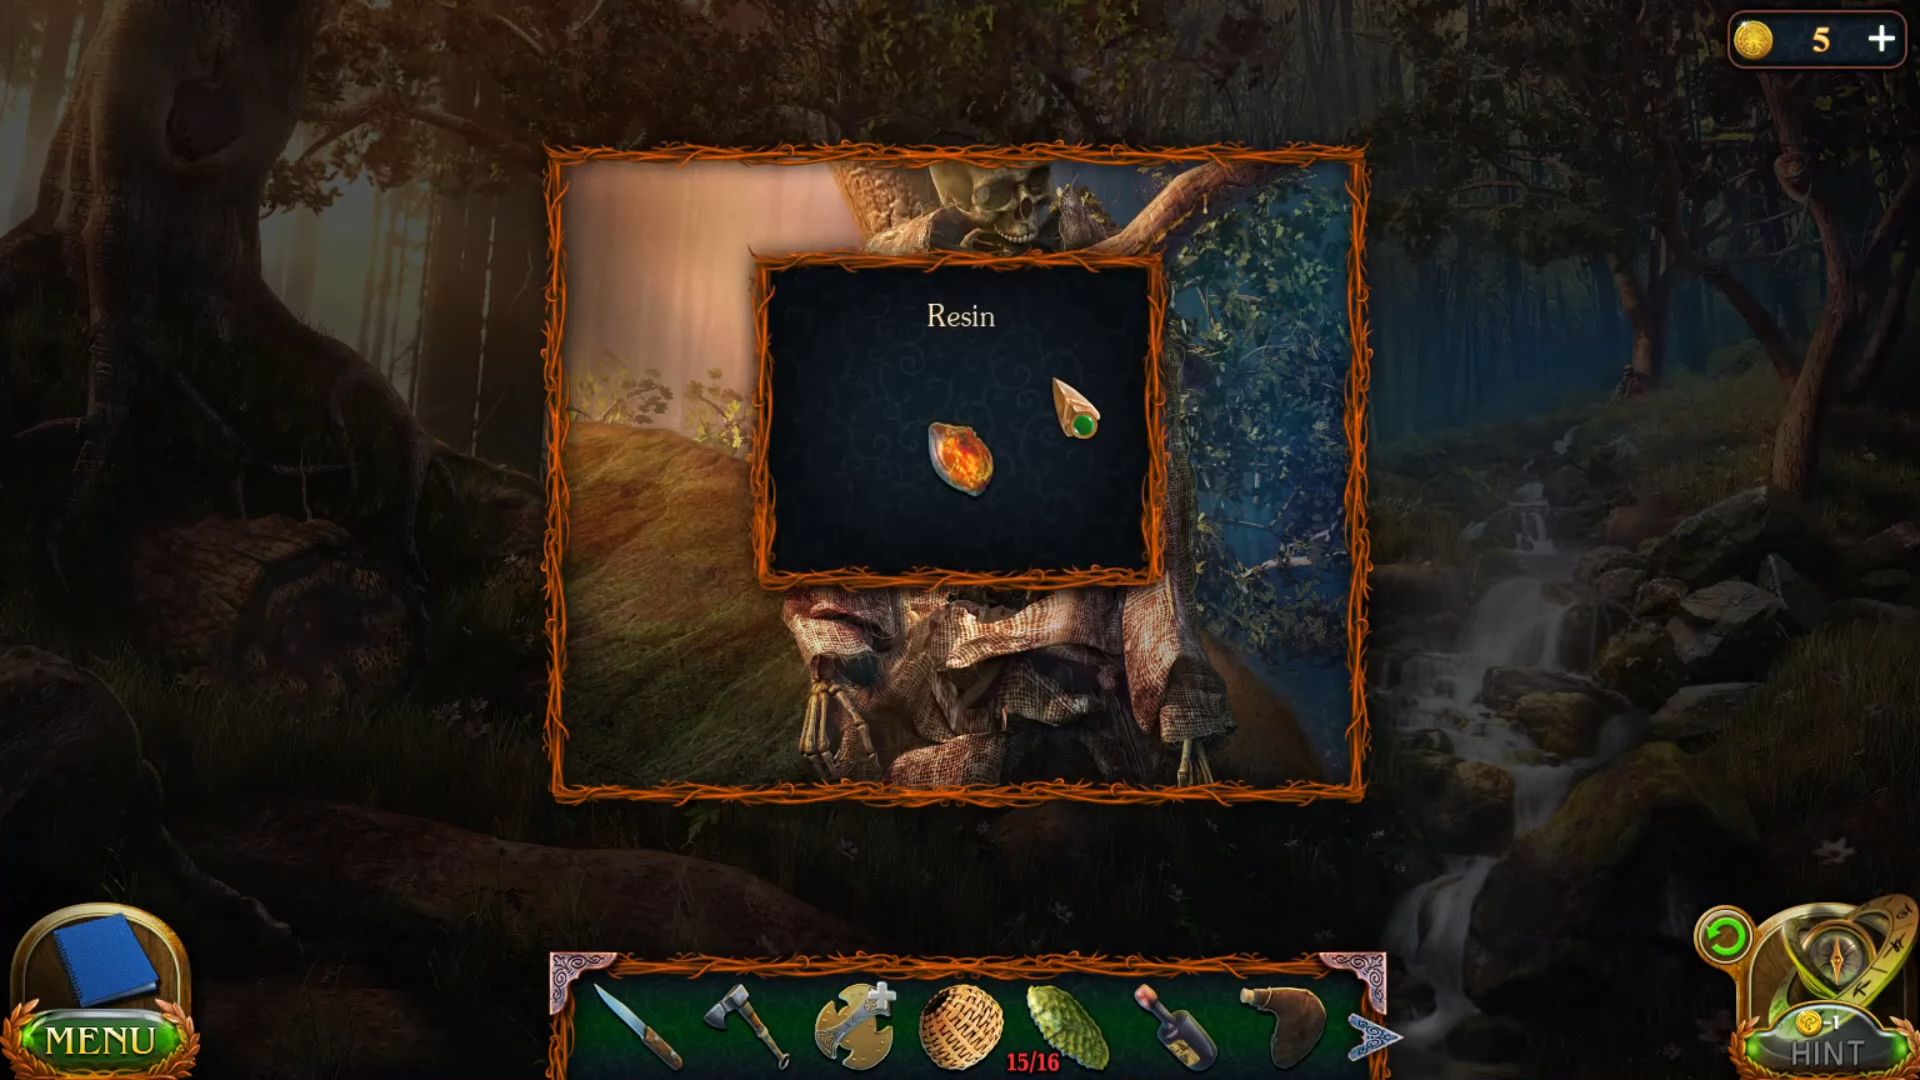
- Cut the resin from the tree branch using the knife near the skeleton.
- Grab the magnetic fireflies using the catcher near the tree.

- Get another cone from the broken frame of wood near the river.

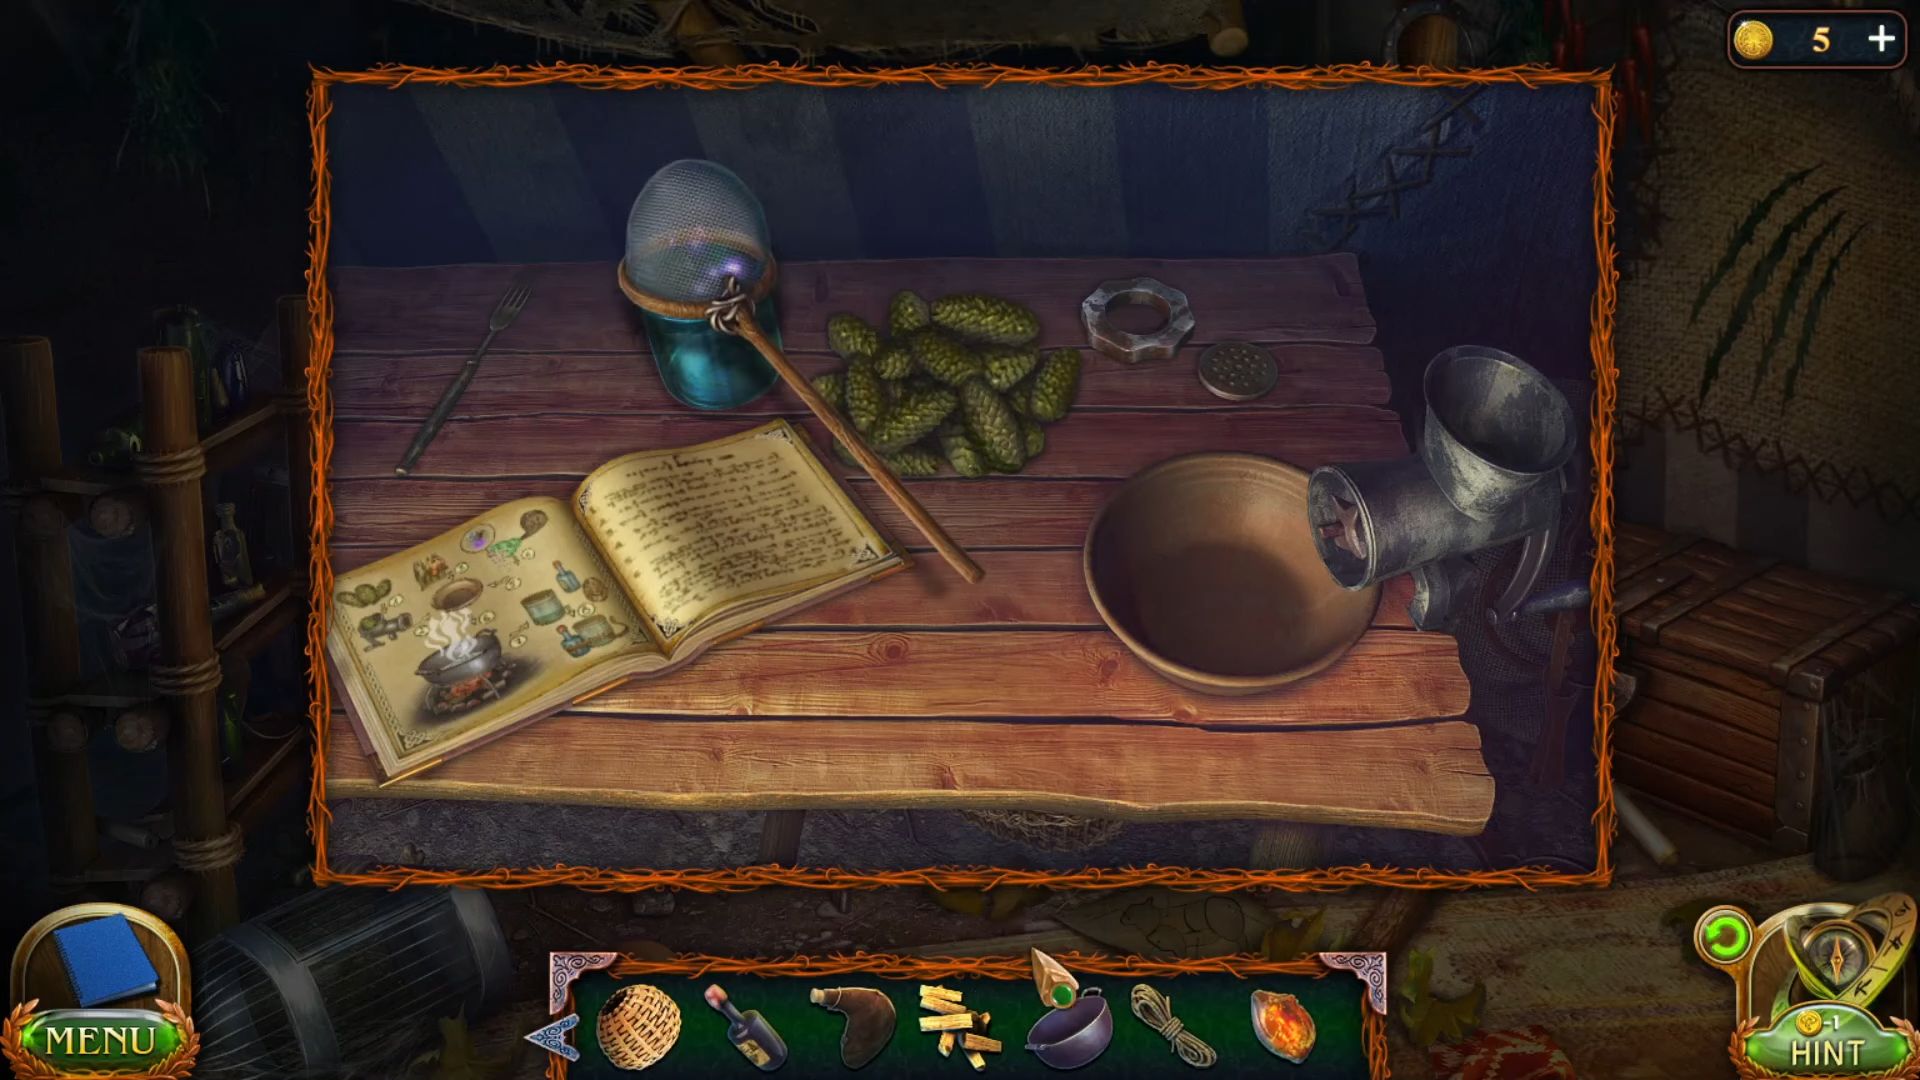
- Put the cones and fireflies on the table from the tent.
- Go to the swamps to get a bag of mushroom gas from the top of the hut.

- Return to the hunter camp, and put the cooking pot and firewood on the ground.

- Grab the bucket from the ground and fill it with water in the tent.

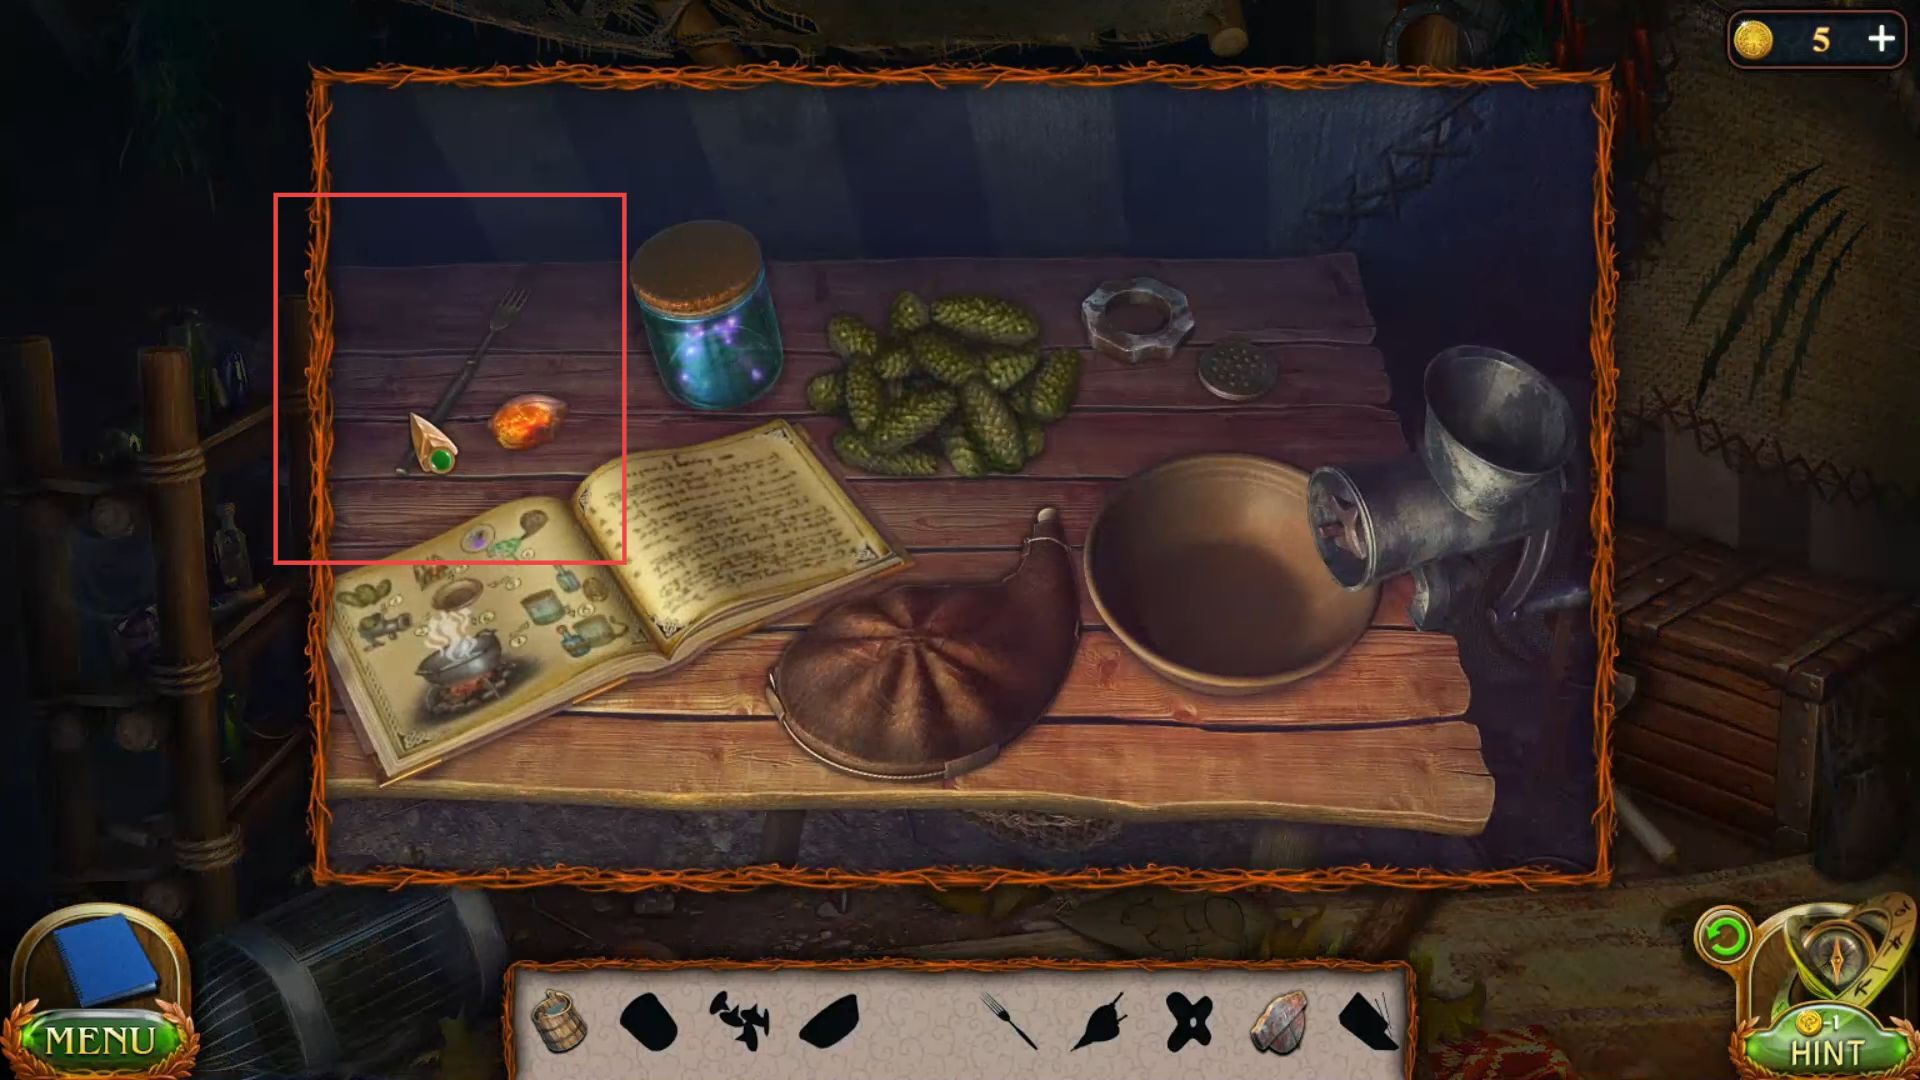
- Get a fork from the table in the tent.
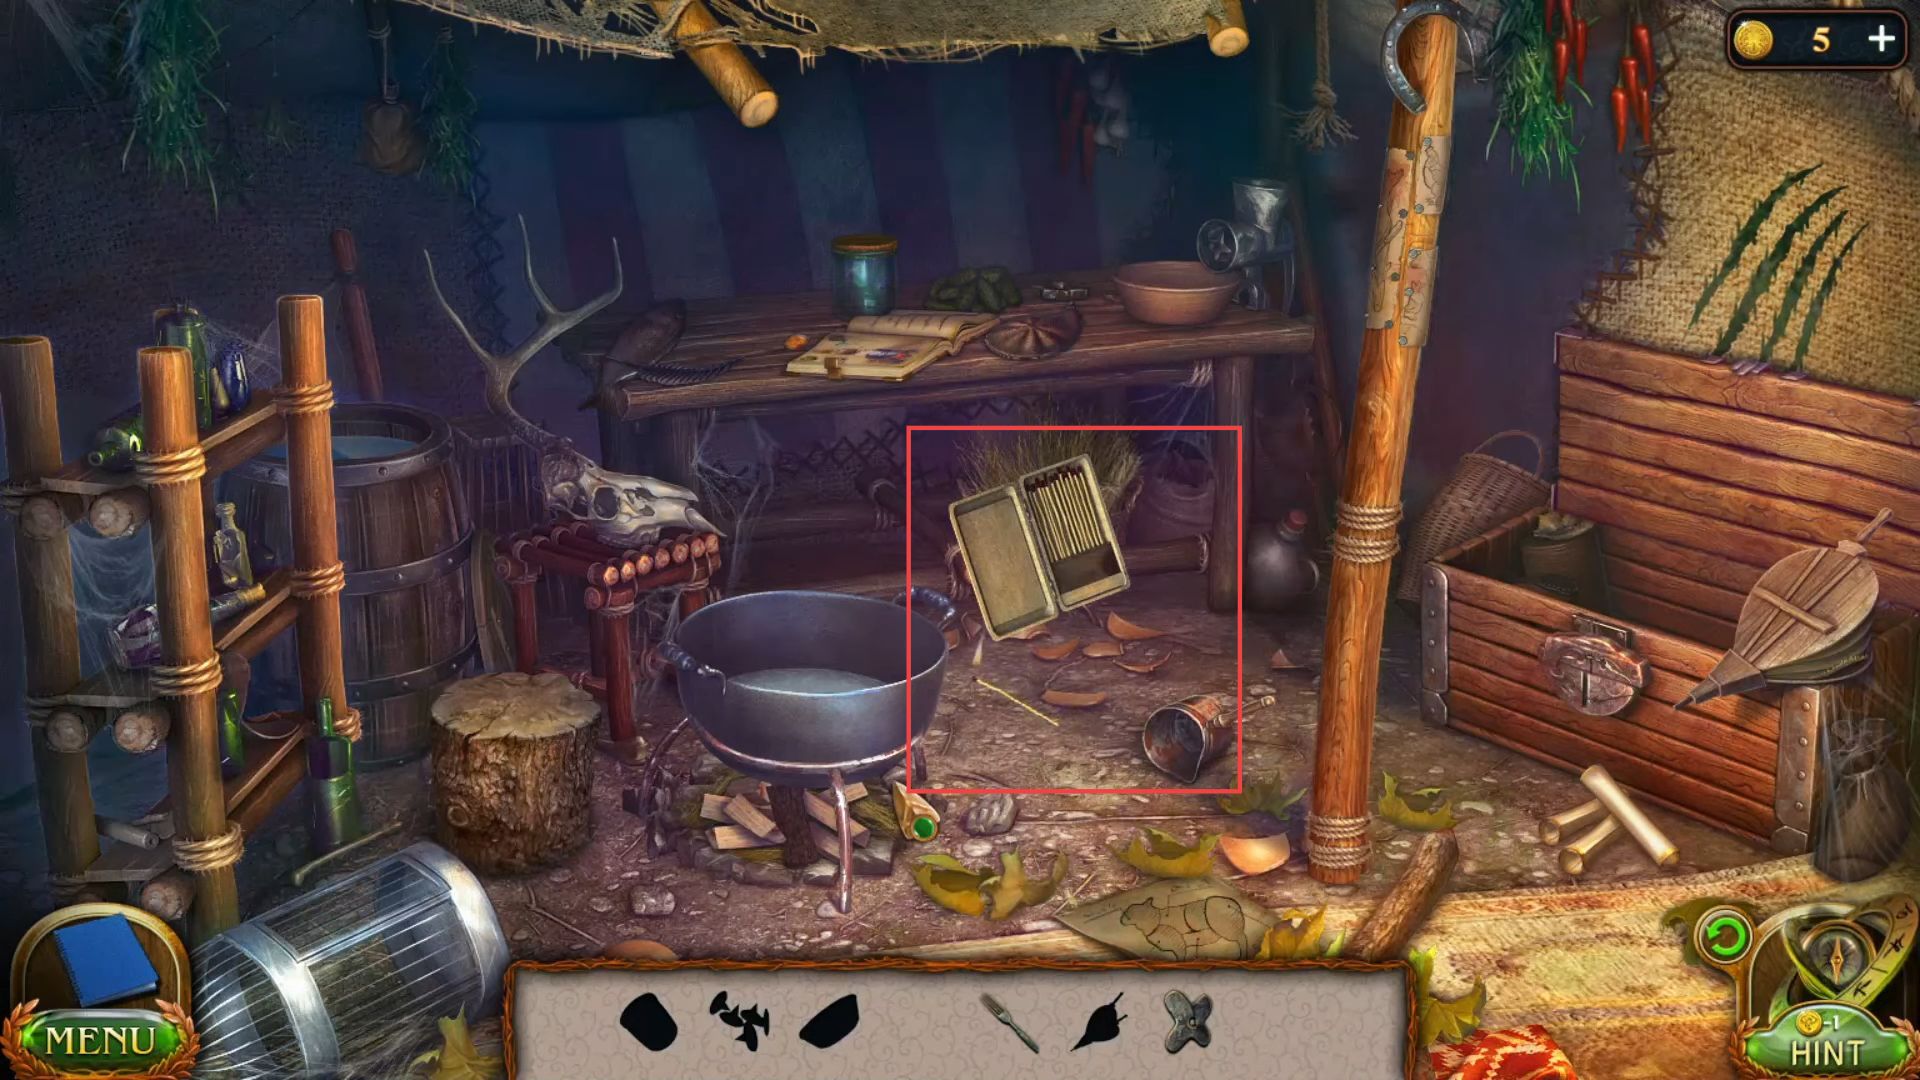
- Put the lock part on the box, open it, and grab a matchbox and an item from the inside.

- Add water into the cooking pot using the water bucket.
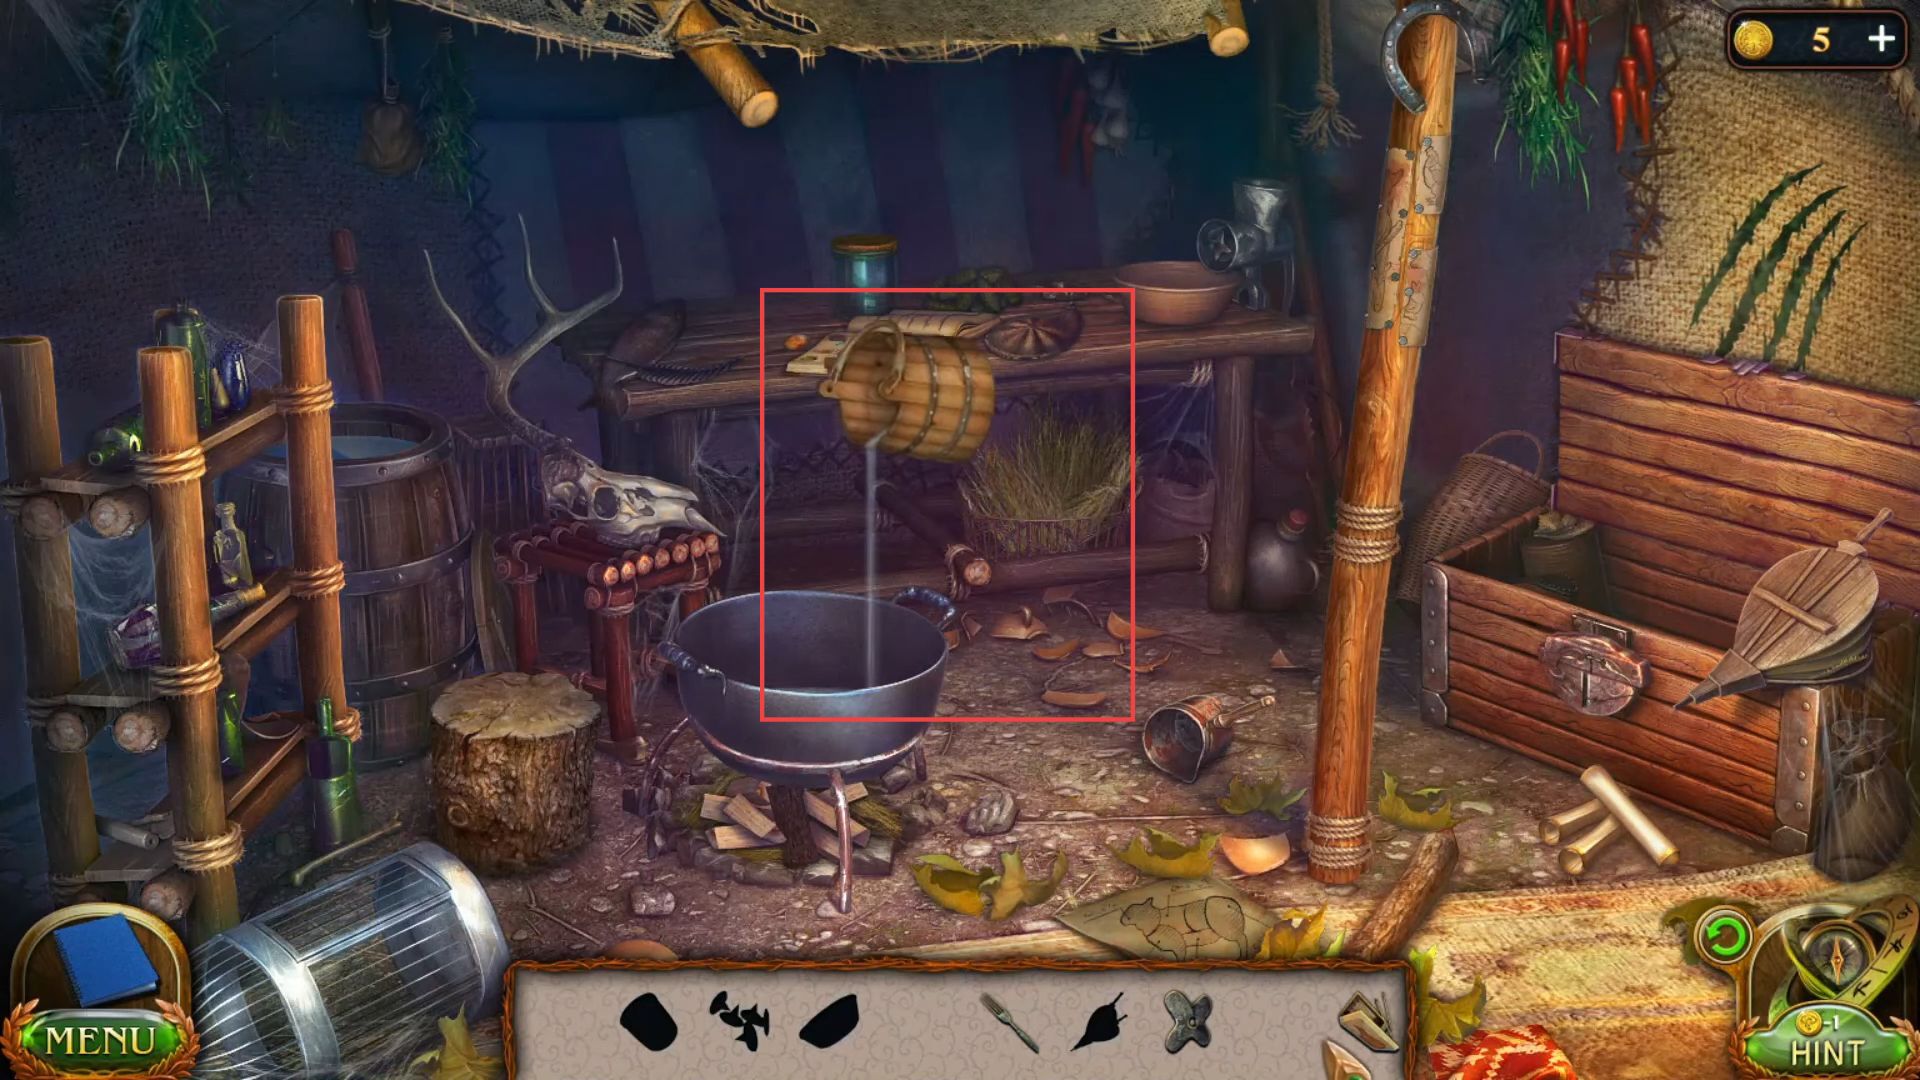
- Turn on the fire in the cooking pot using the matchstick.
- Use the fork to remove the nails from the bamboo and grab an item.

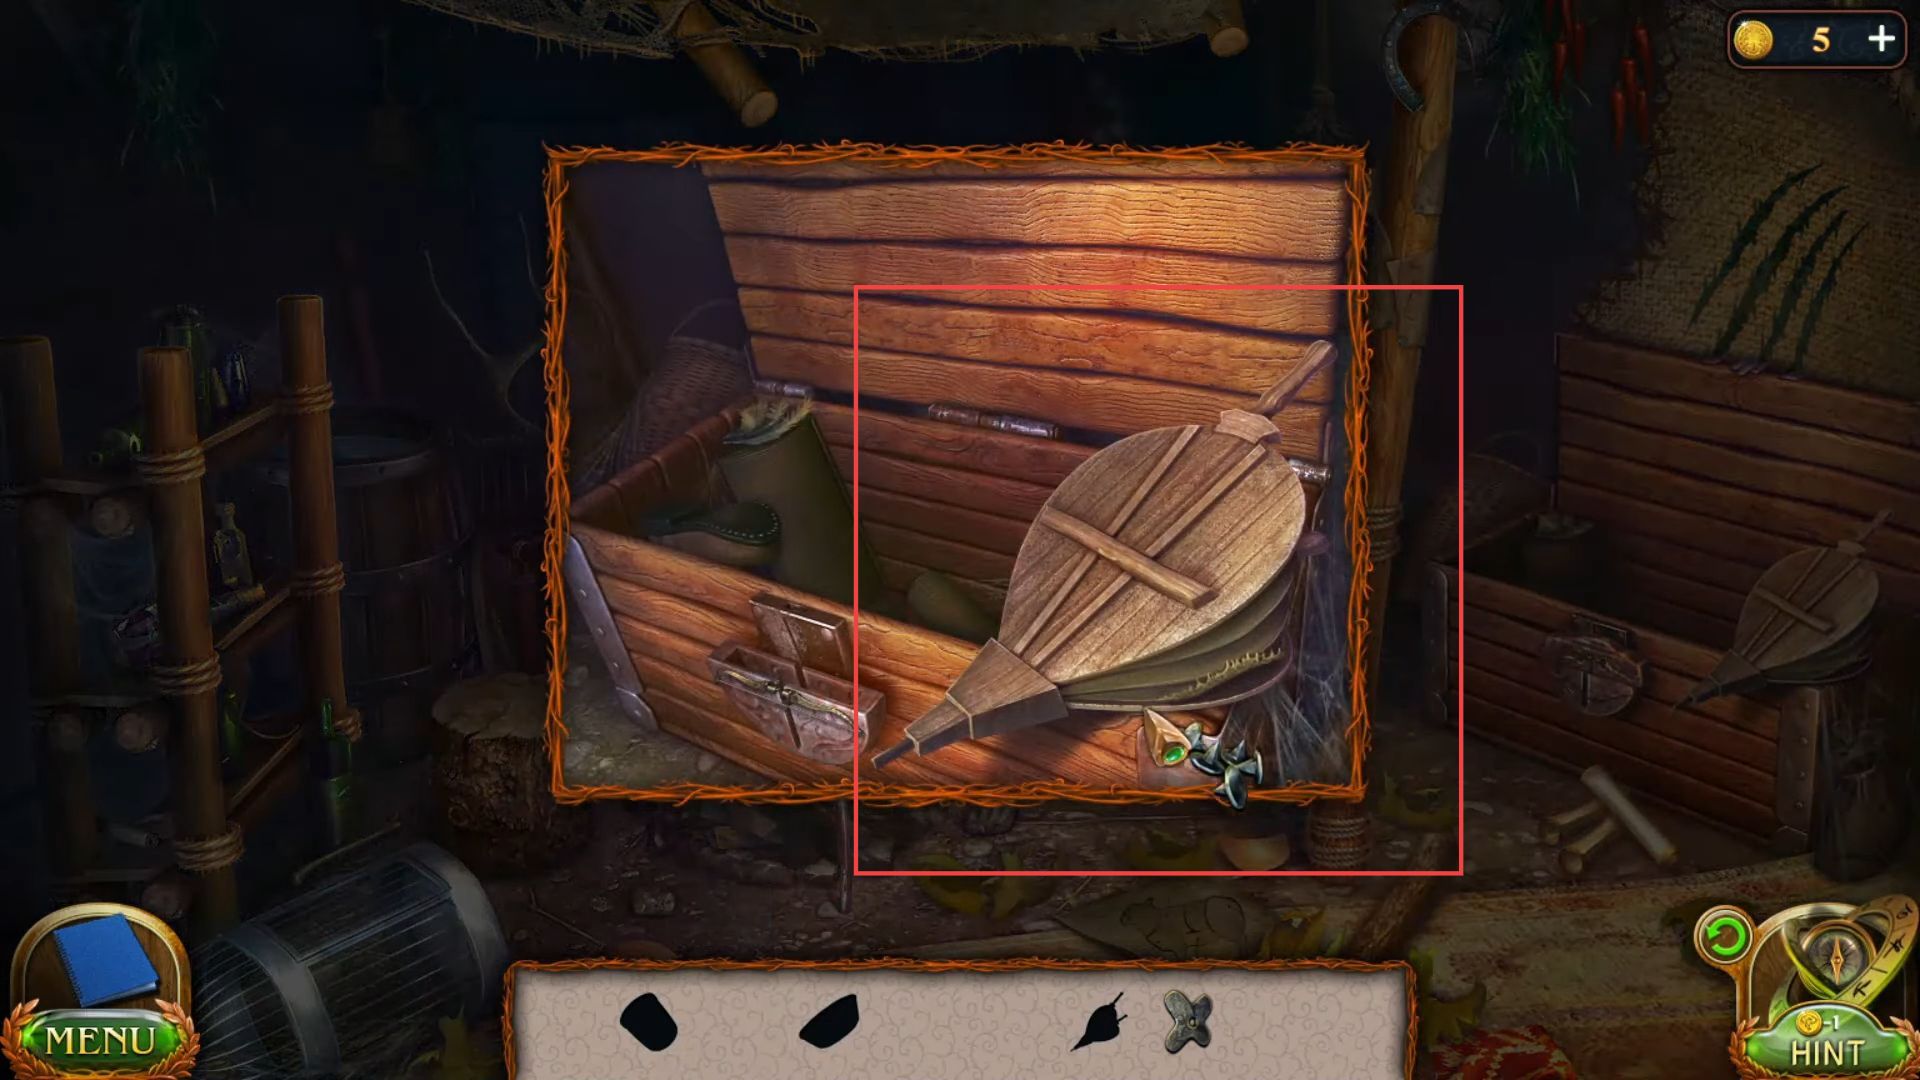
- Connect the pins from your inventory to the ballows and grab them.
- Blow the fire using the ballows under the cooking pot.

- Connect the knife in front of the machine and fix the opener on the front side.

- Put the cones and resins in the machine and rotate the handle to make the small pieces.

- Add fireflies to the plate and pour the gas into it from the table.

- Add the ingredients into the cooking pot from the tent.

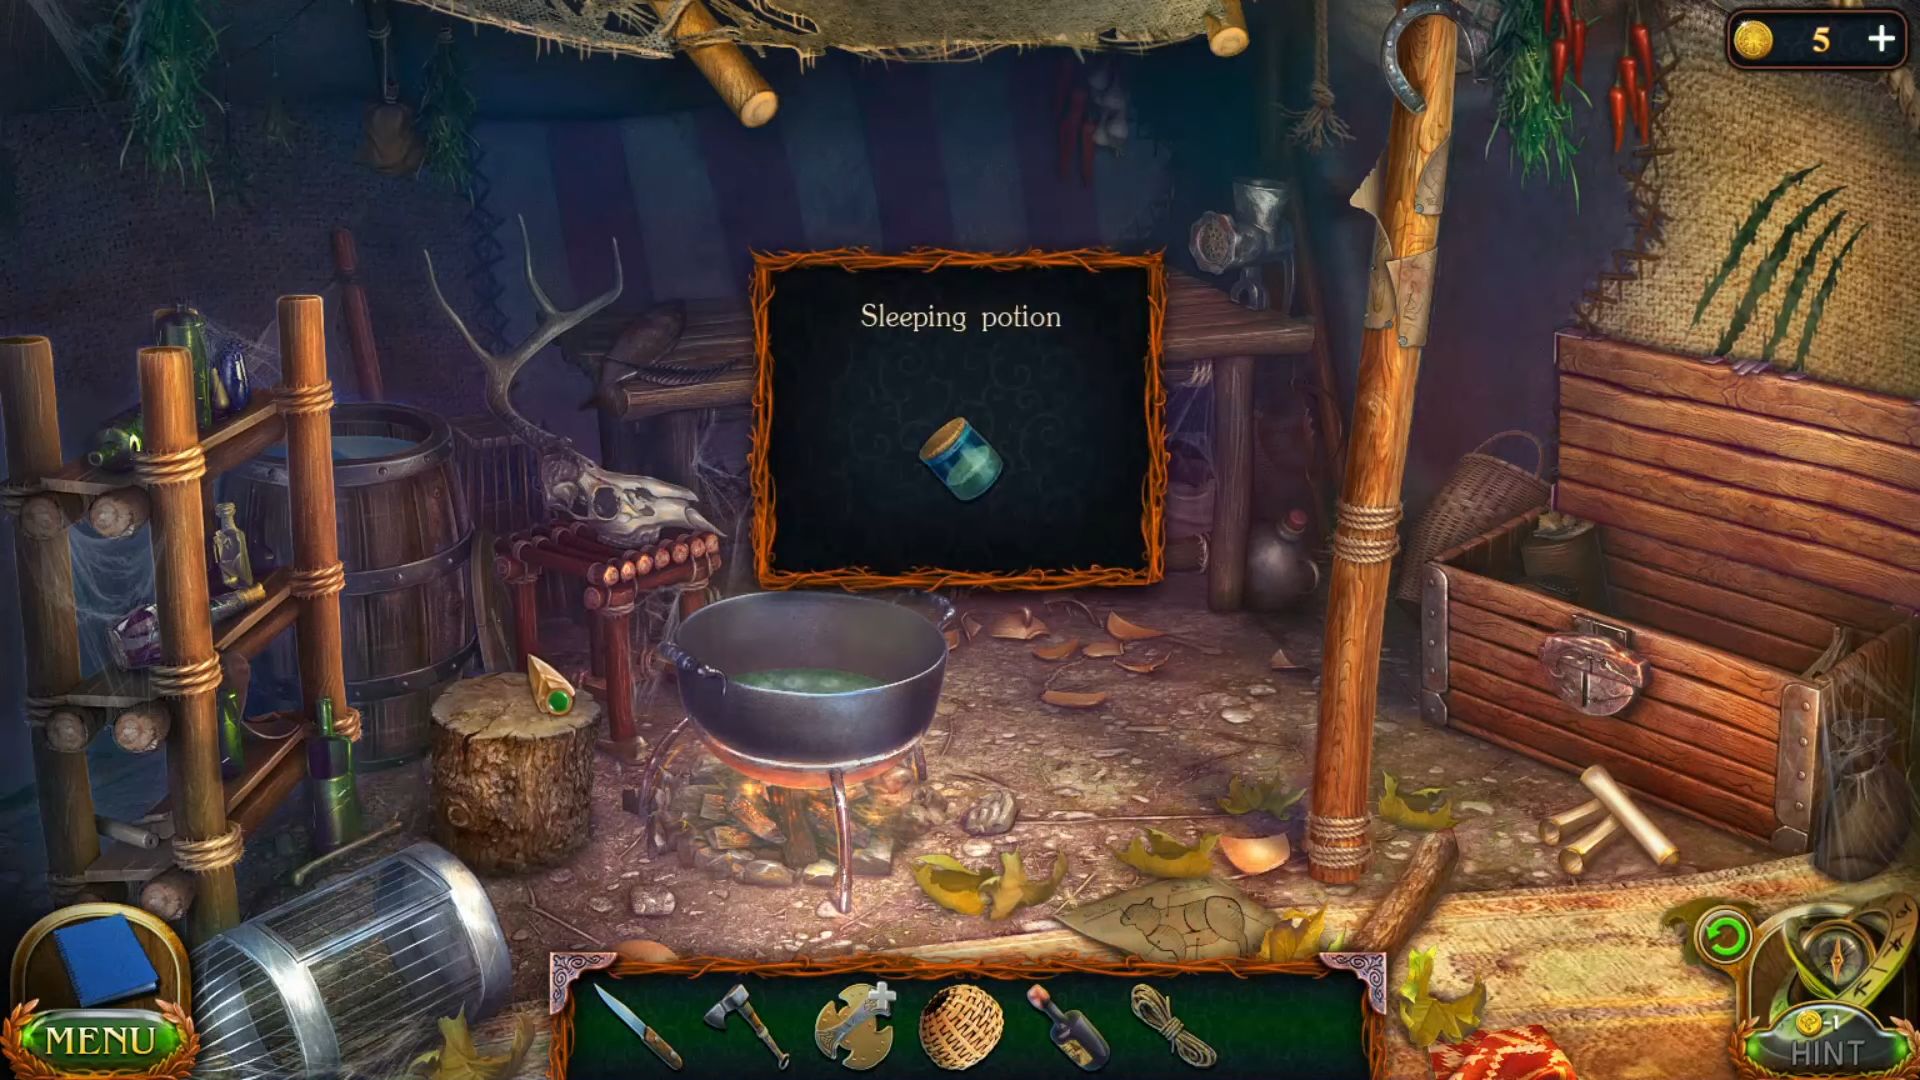
- Grab a mixture from the cooking pot and put it into the jar.

- Fit the cover on the jar and grab a sleeping potion into your inventory.
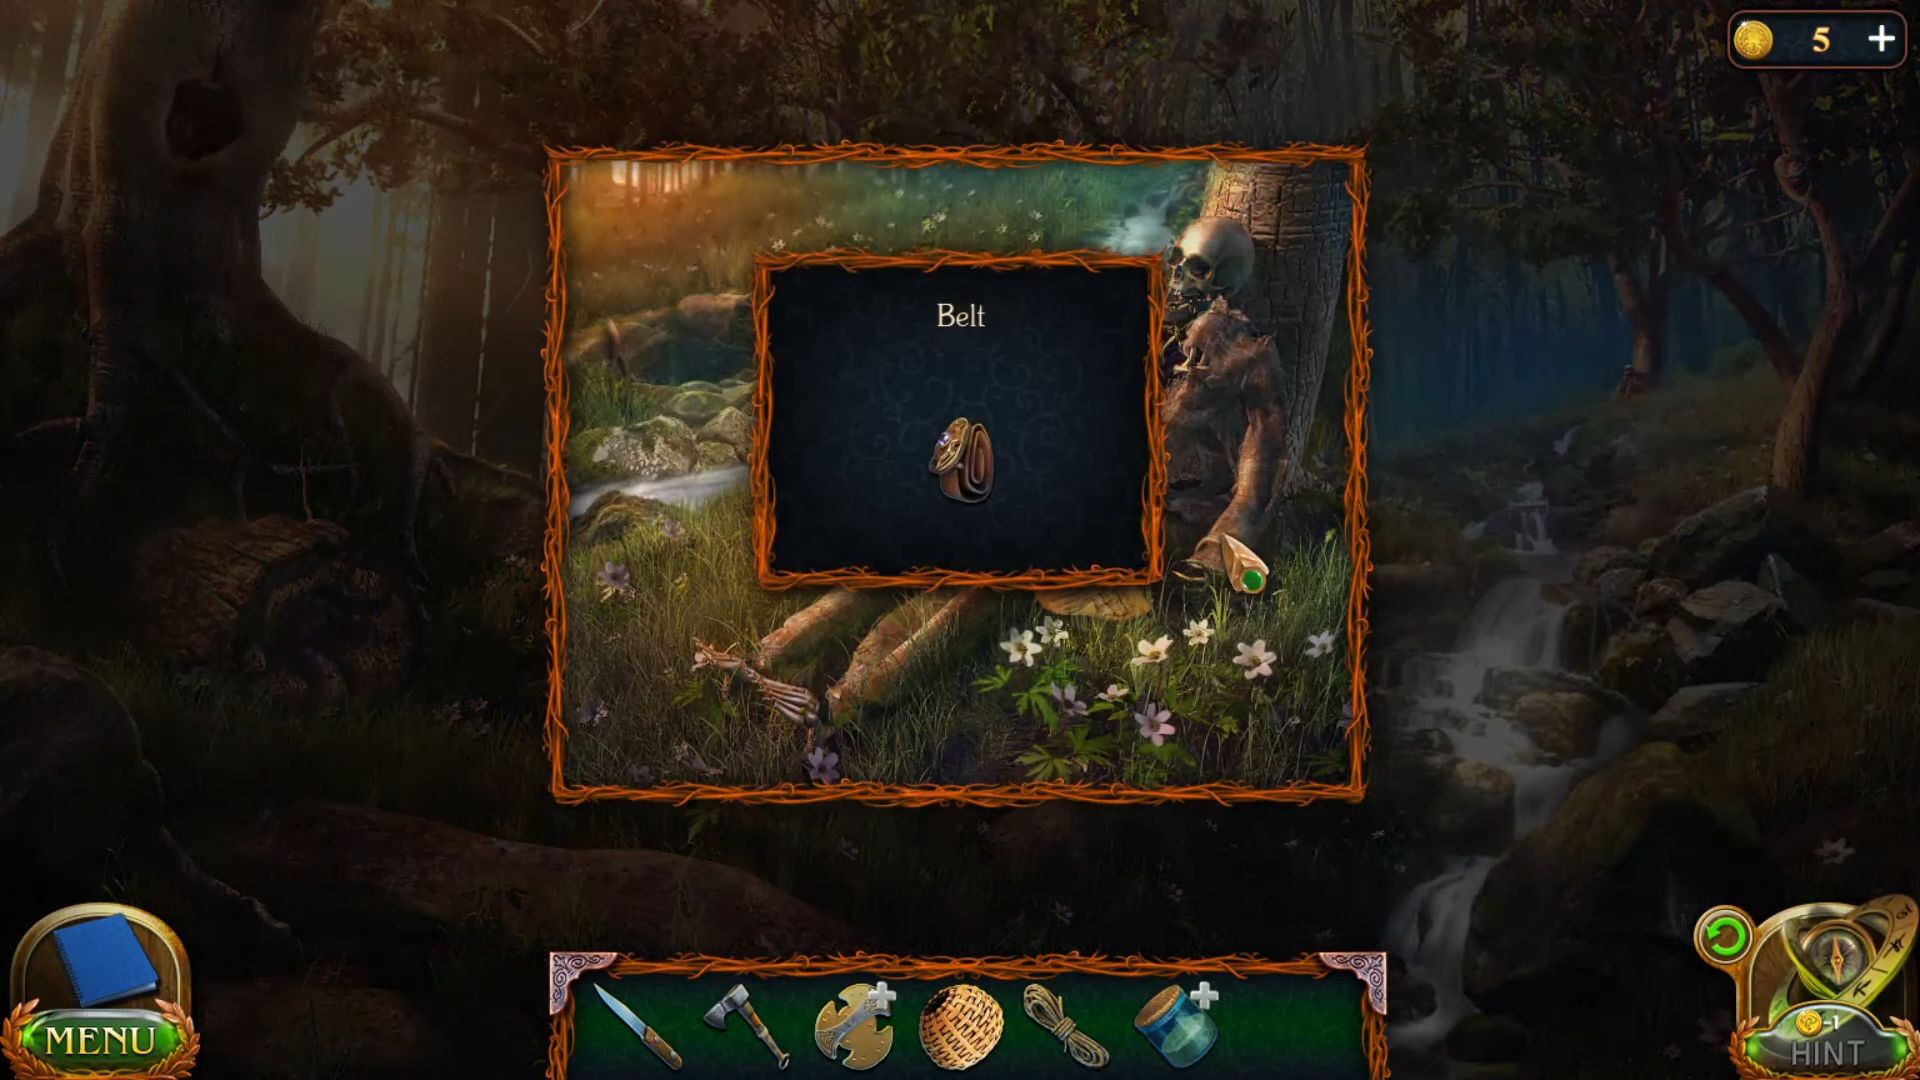
- Go to the forest and get a belt from the skeleton near the tree.
- Tie the belt with the bottle of rum and sleeping potion jar.

- Put the sleeping bomb into the hole and fit the rope.

- Go down the hole and grab a hair of centaur.

- Open the box from the right side. Put the hair of the centaur in the box and grab the search lantern.

- Put the search lantern in the air and get a clue from the pathway.

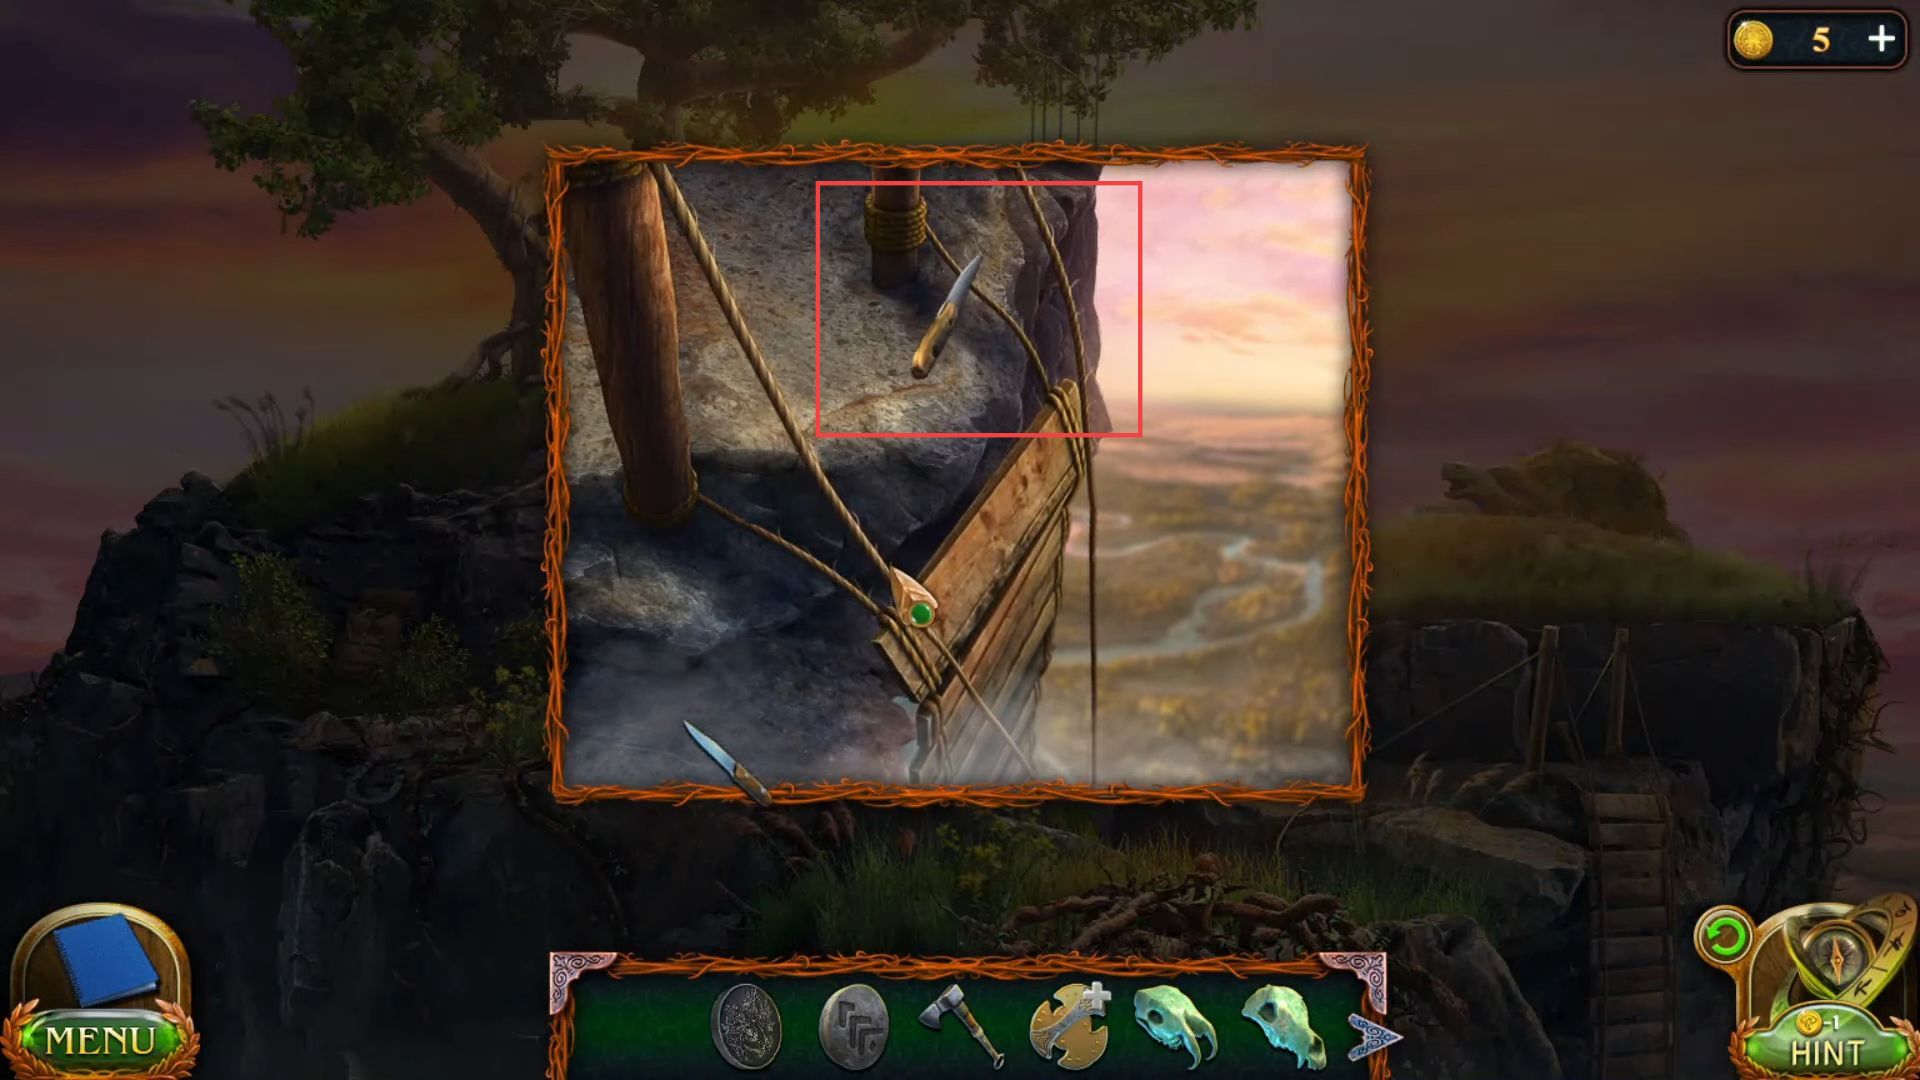
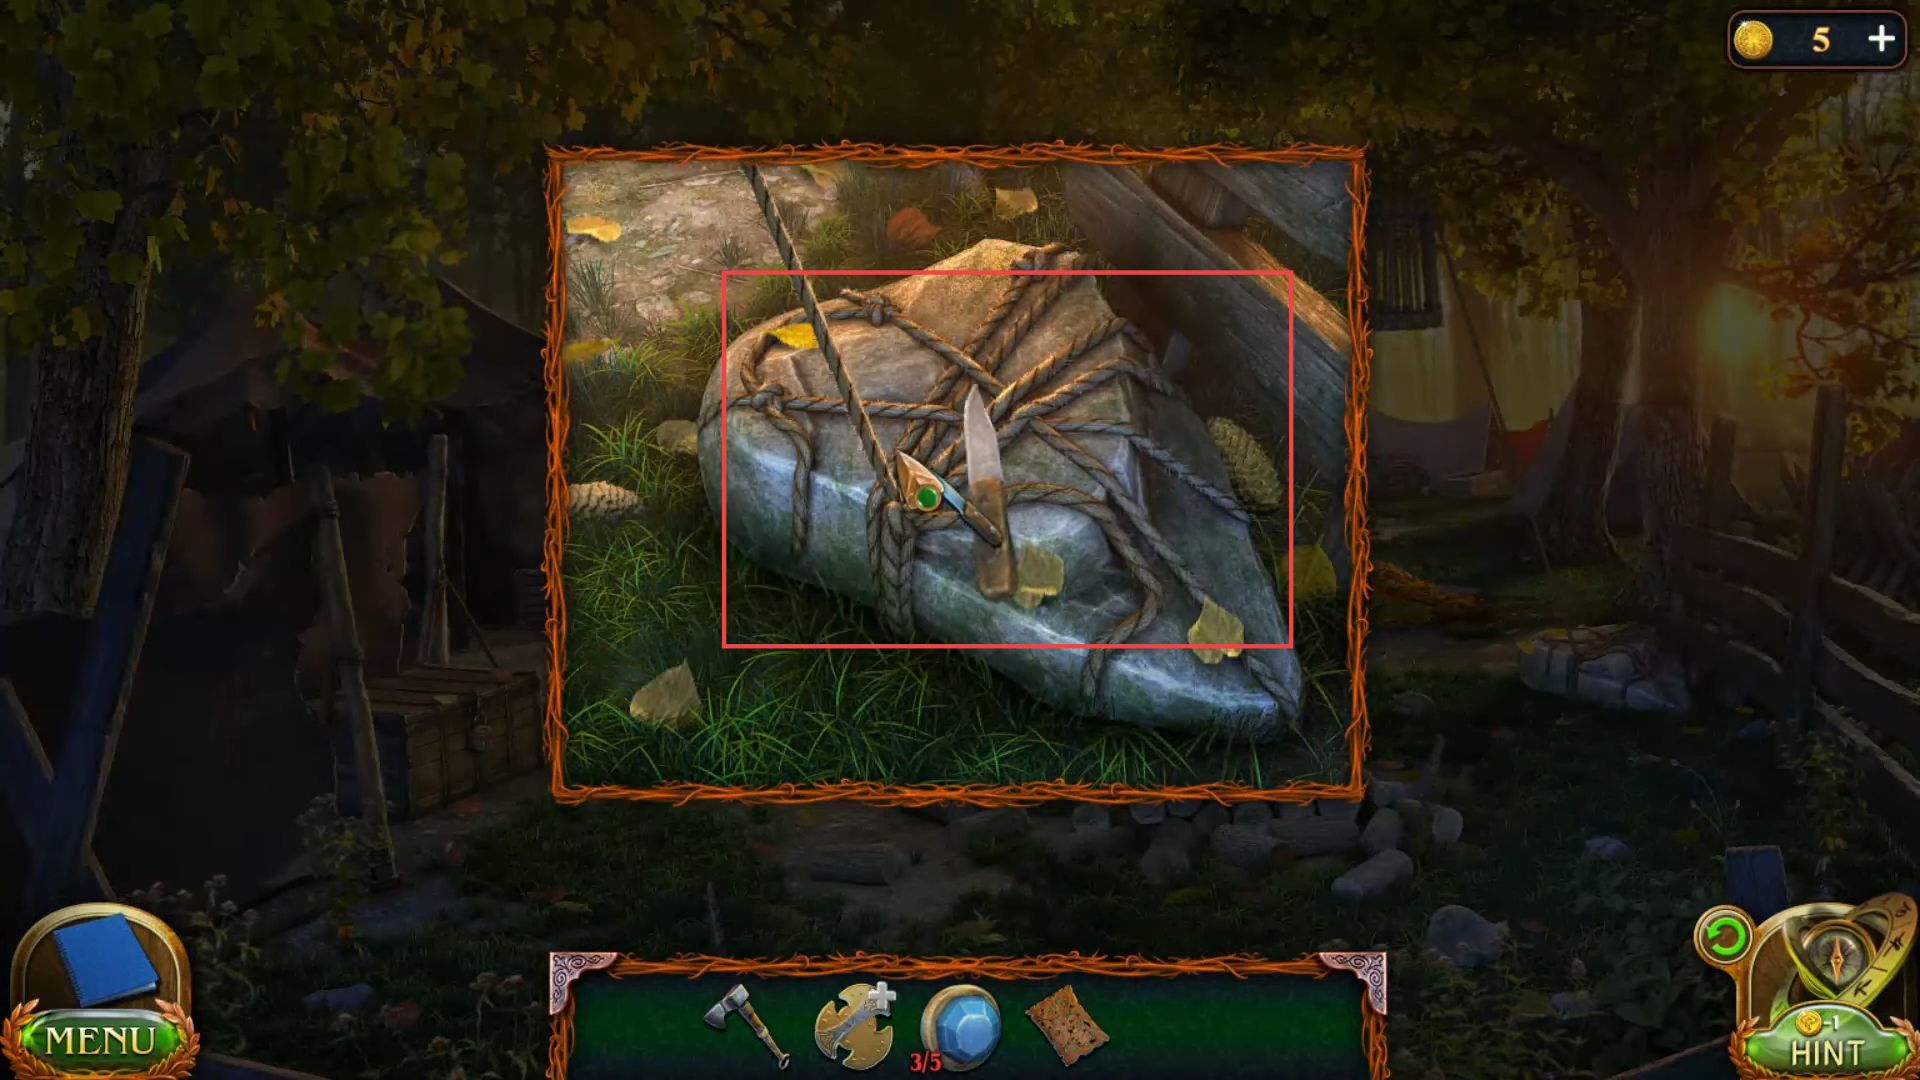
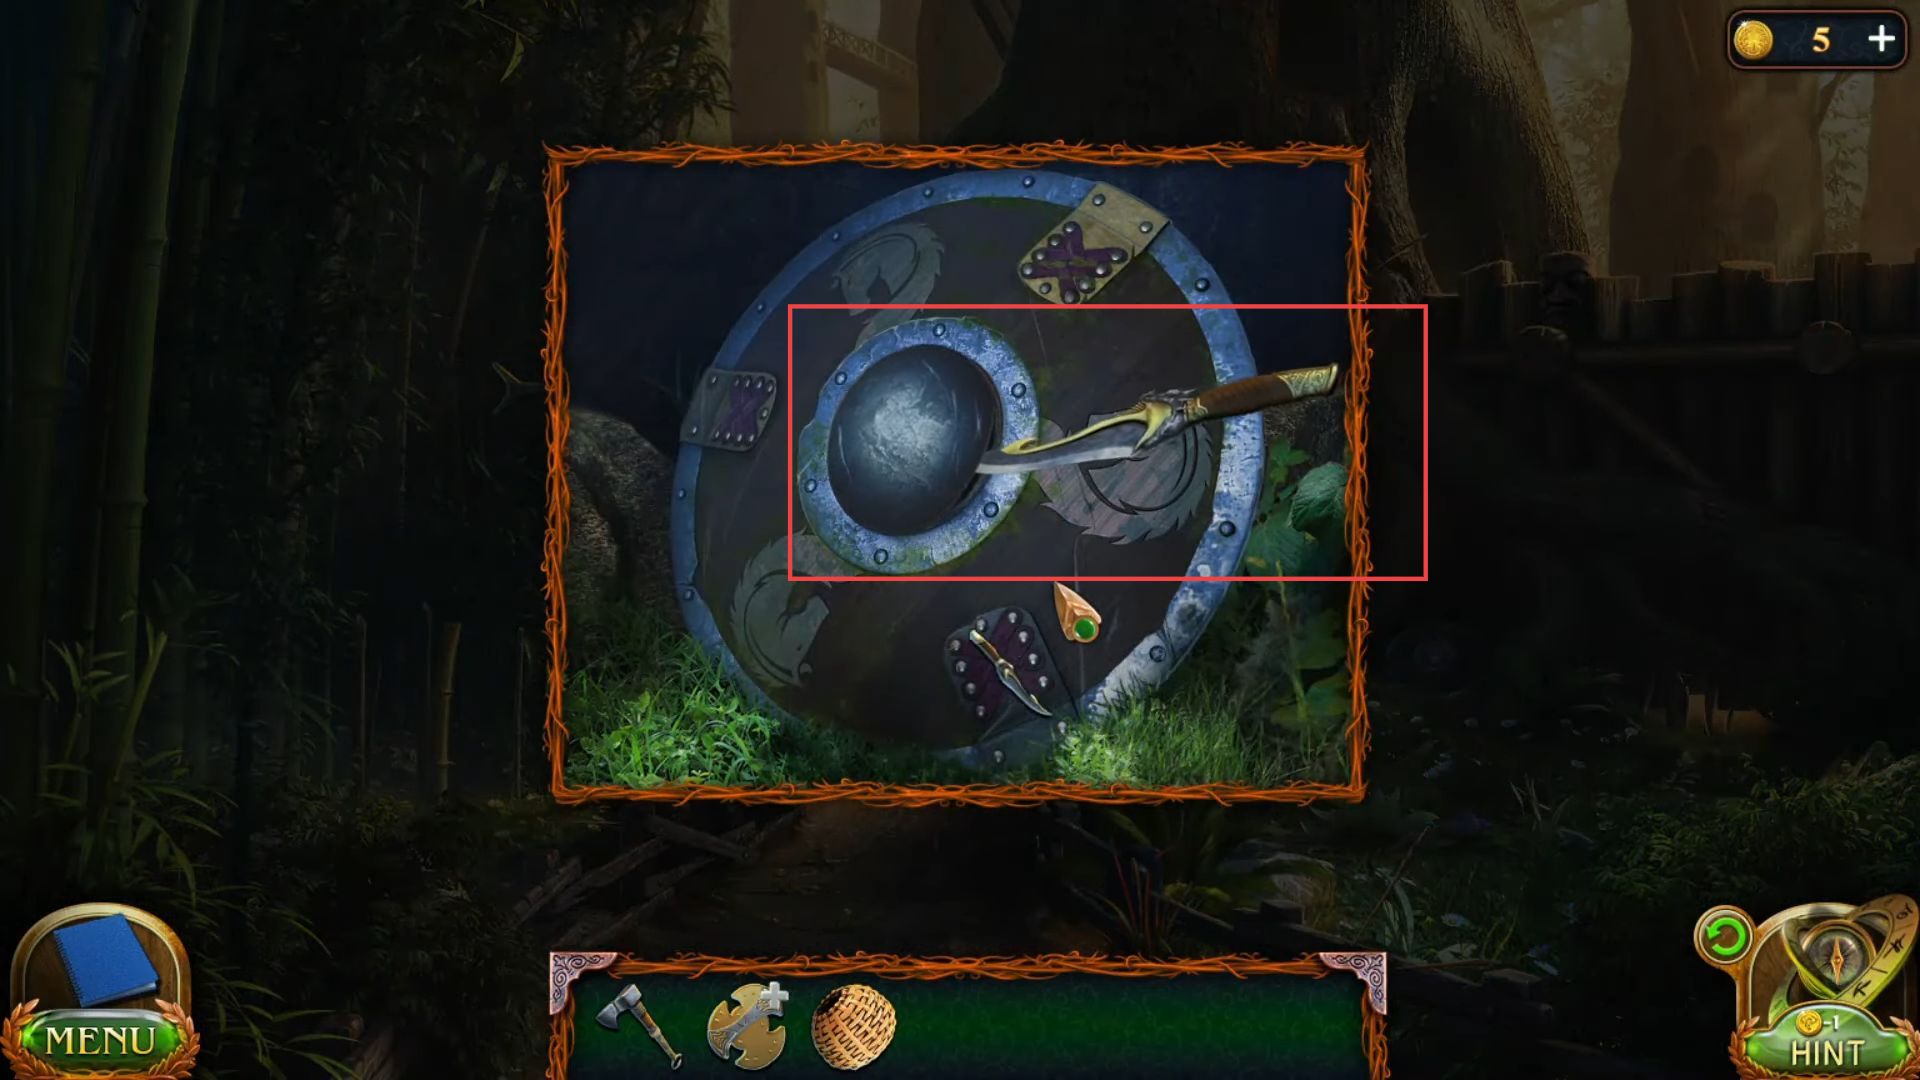
- Grab a dagger from the wall near the gate.

- Remove the cover using the dagger to get a clue.
- Cut the tree branches using the axe.

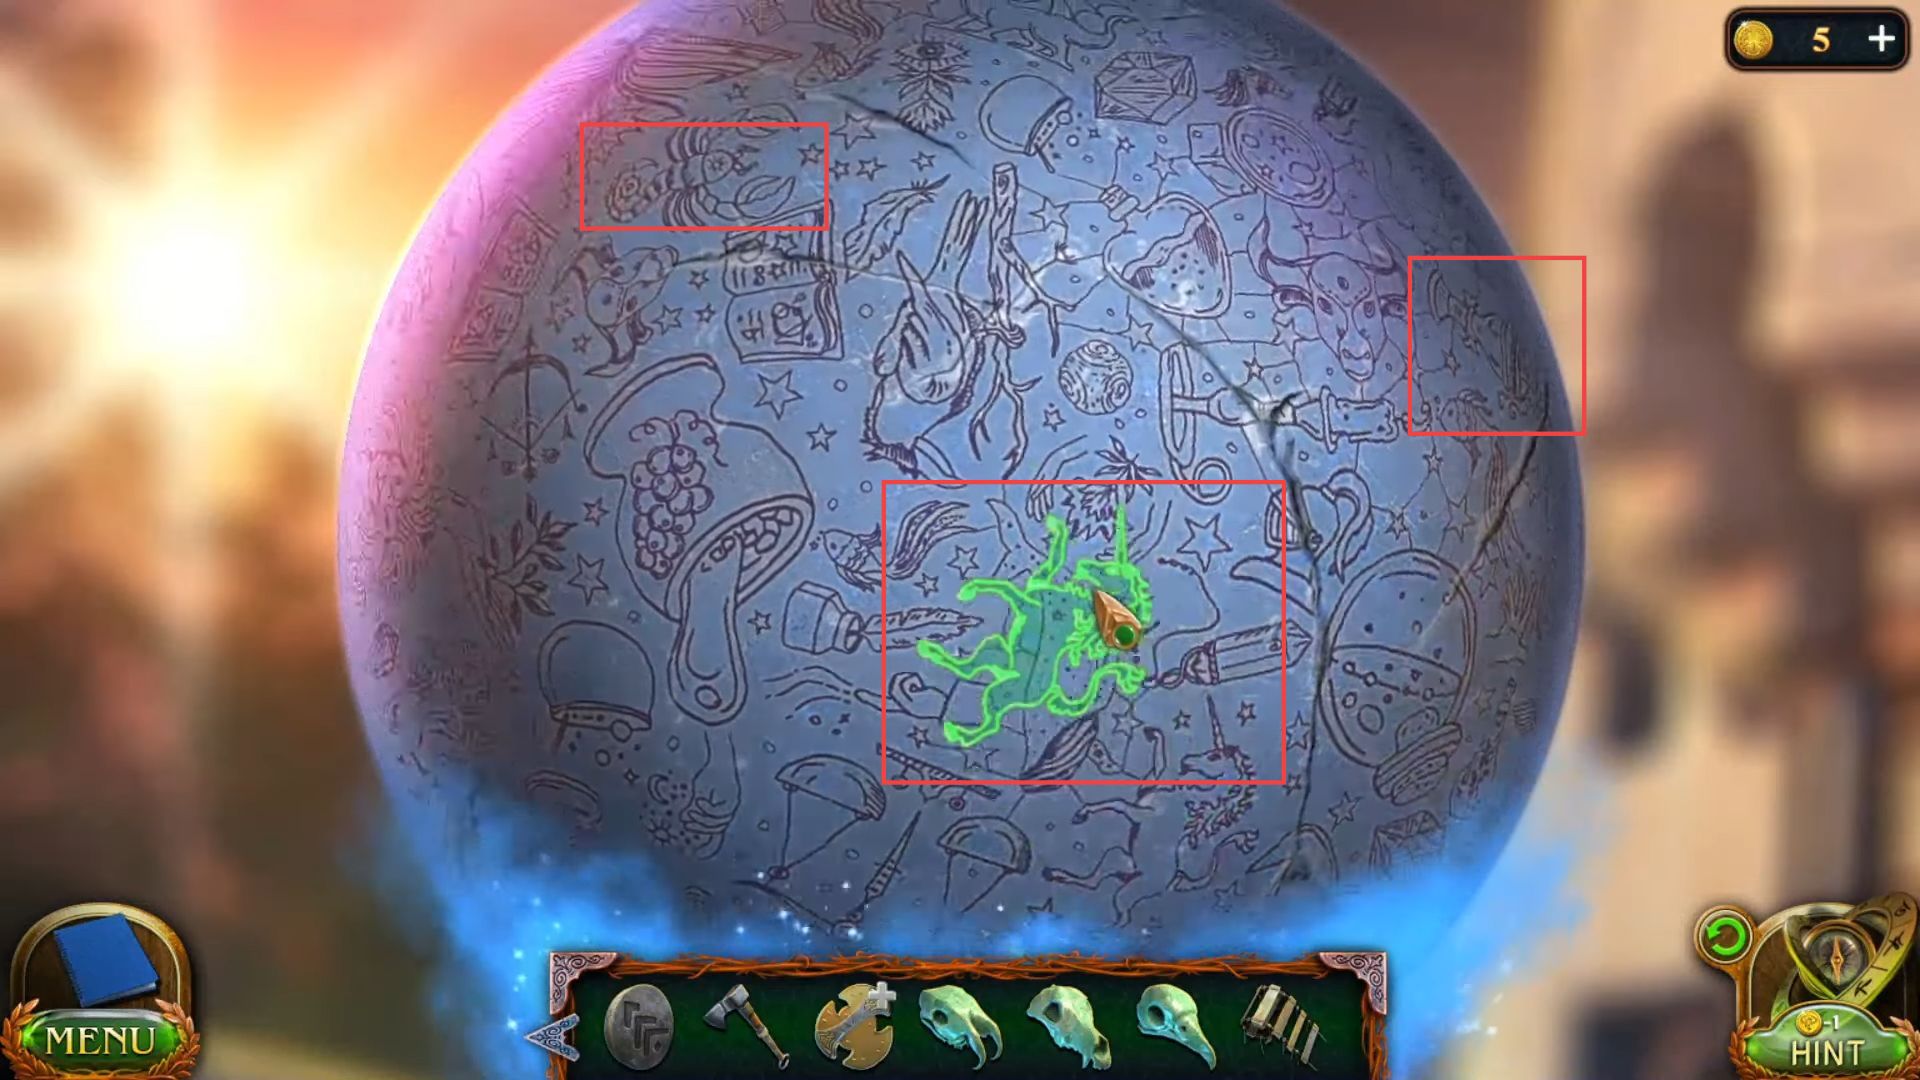
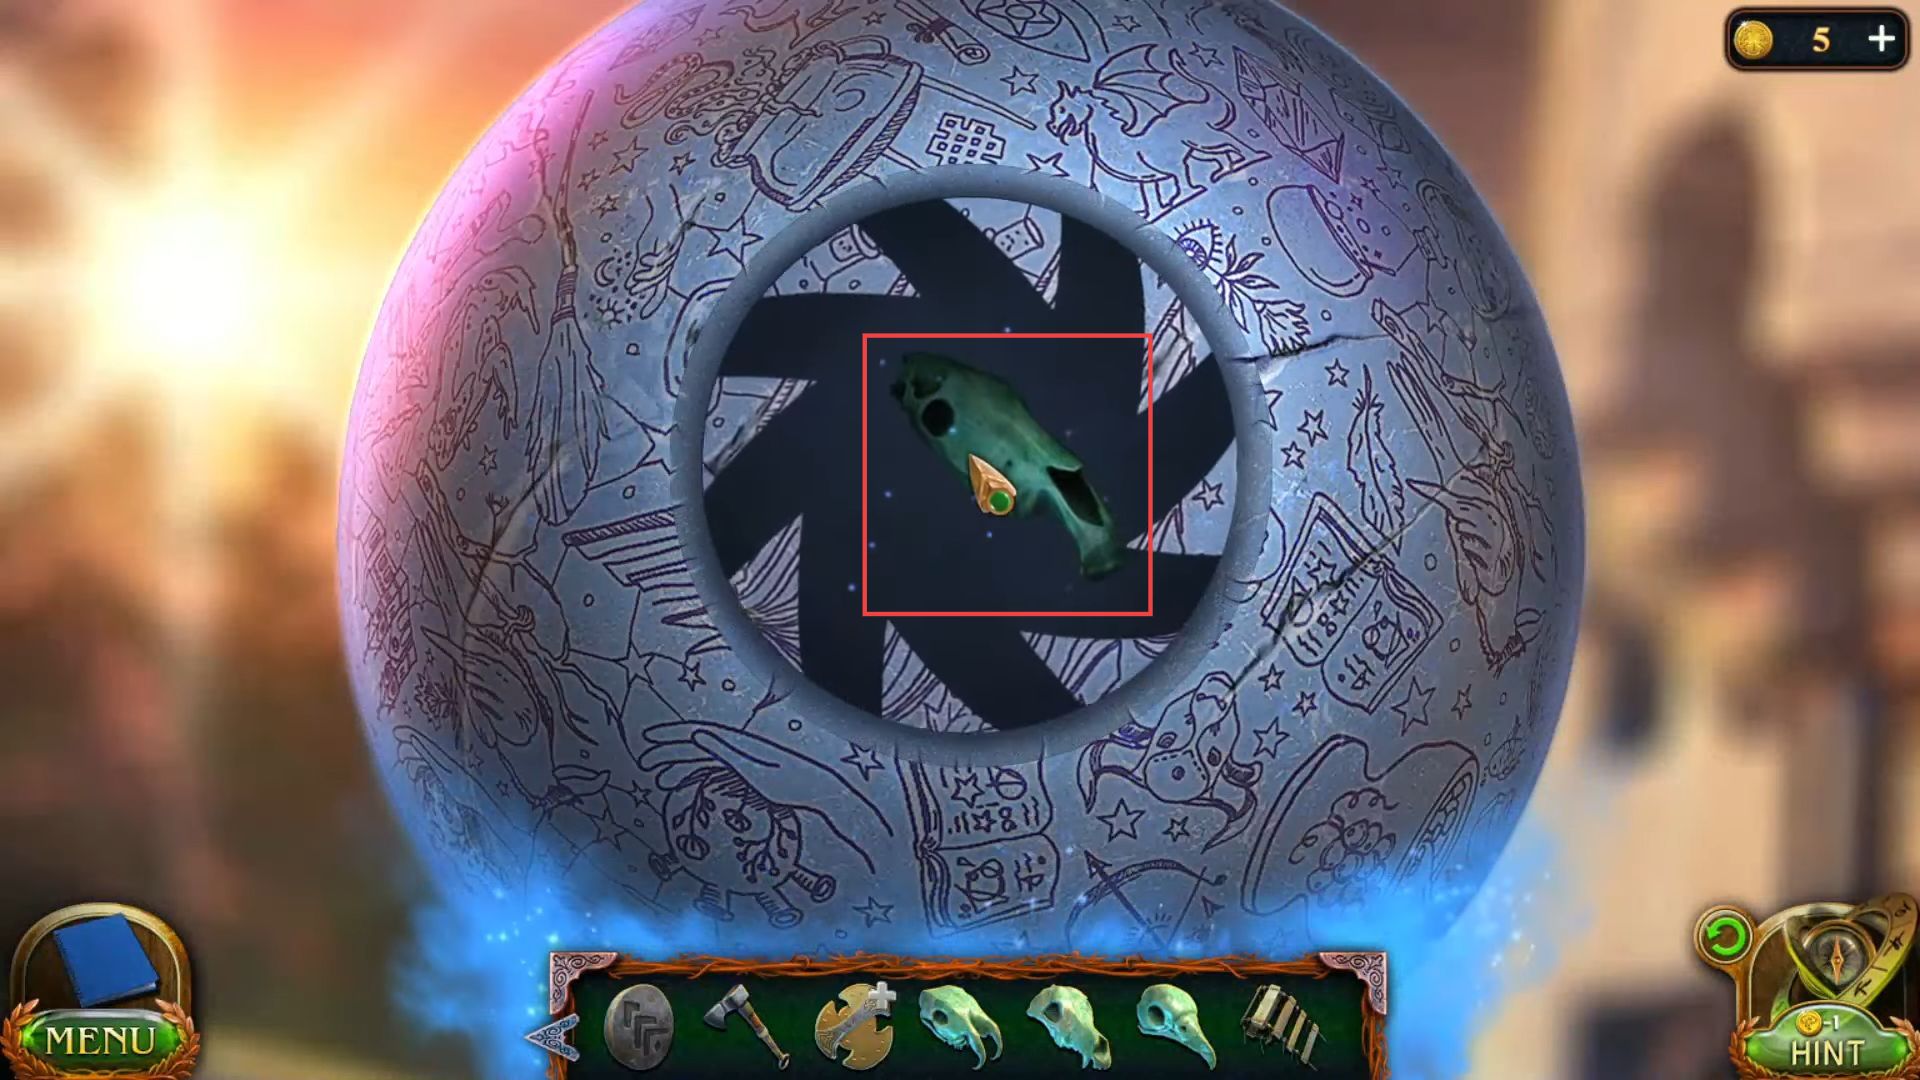
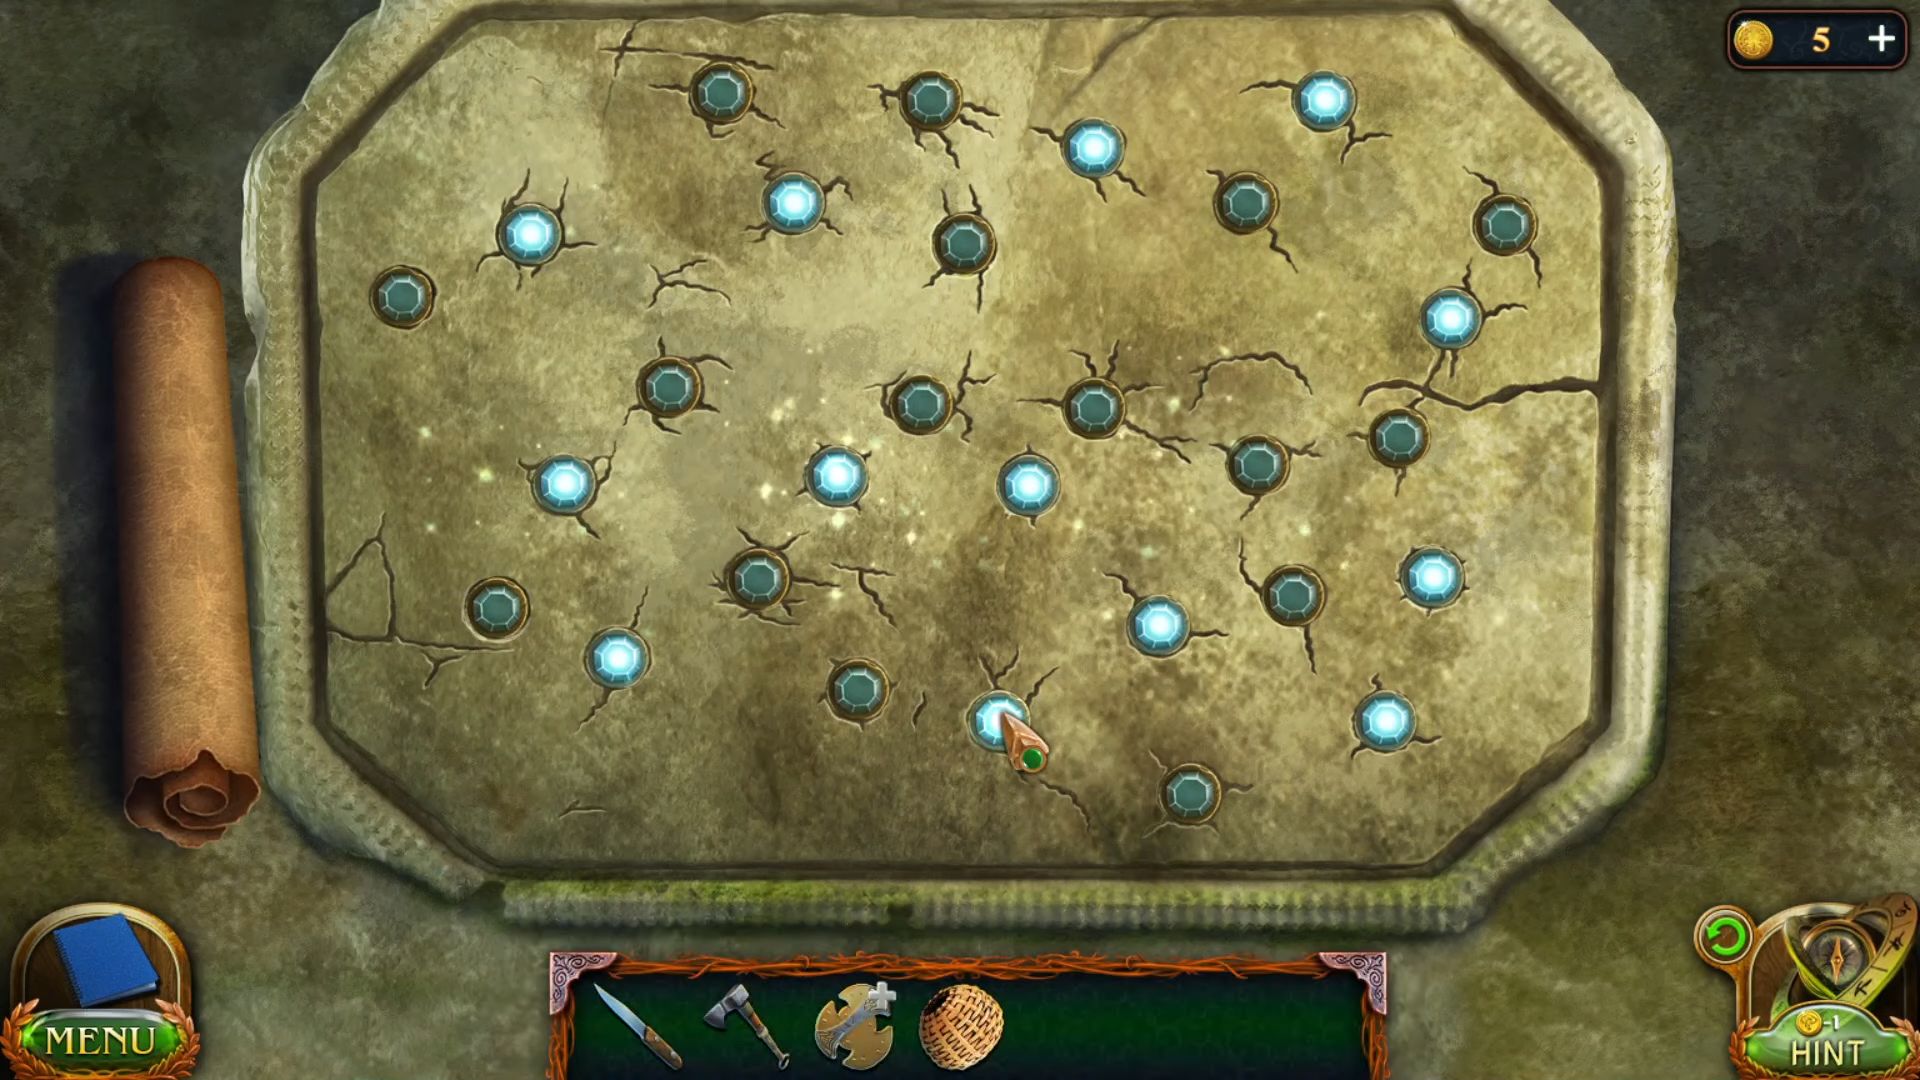
- Use the hint as a guide and light the same number of stars of different colours on the constellation in this sequence.

- Go inside the door once it is opened and grab a stick from the left side of the door.

- Get a pincer from the table by removing the grass using the stick.

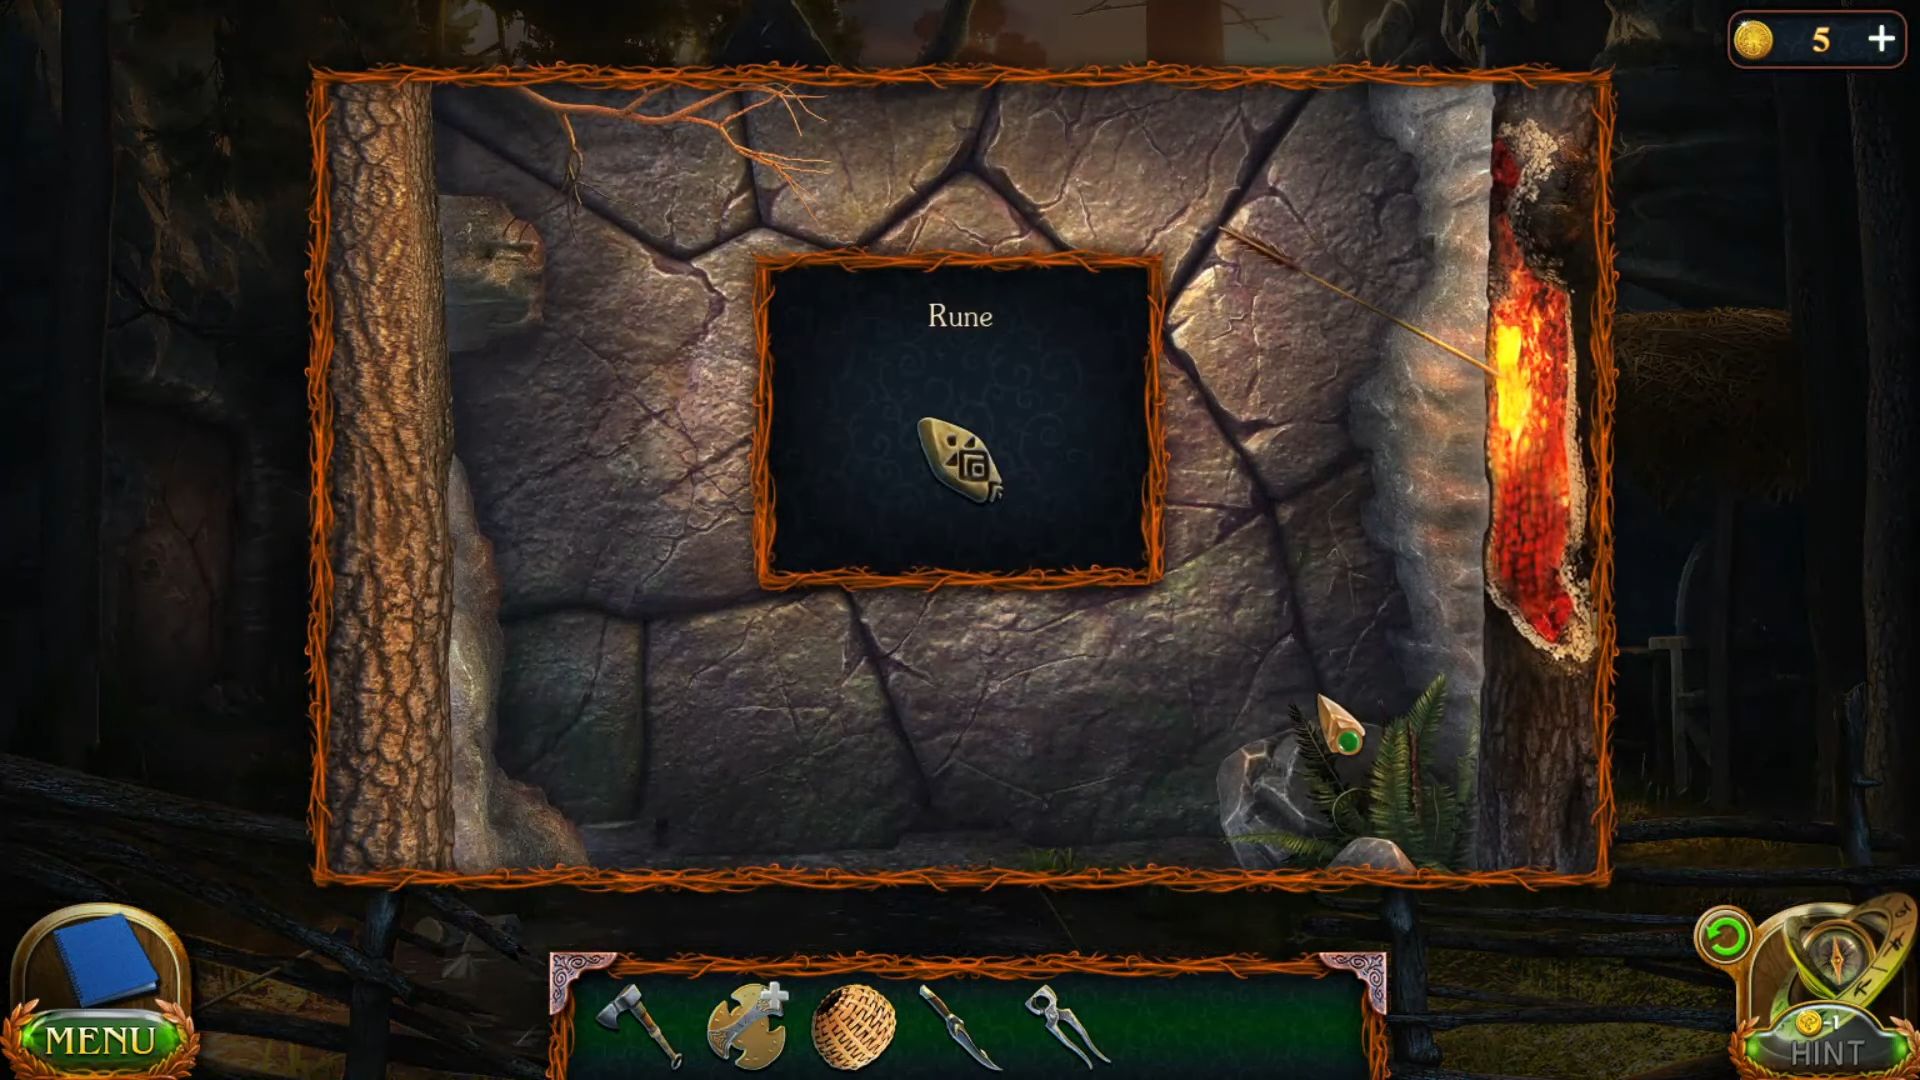
- Grab a rune from the front side wall.
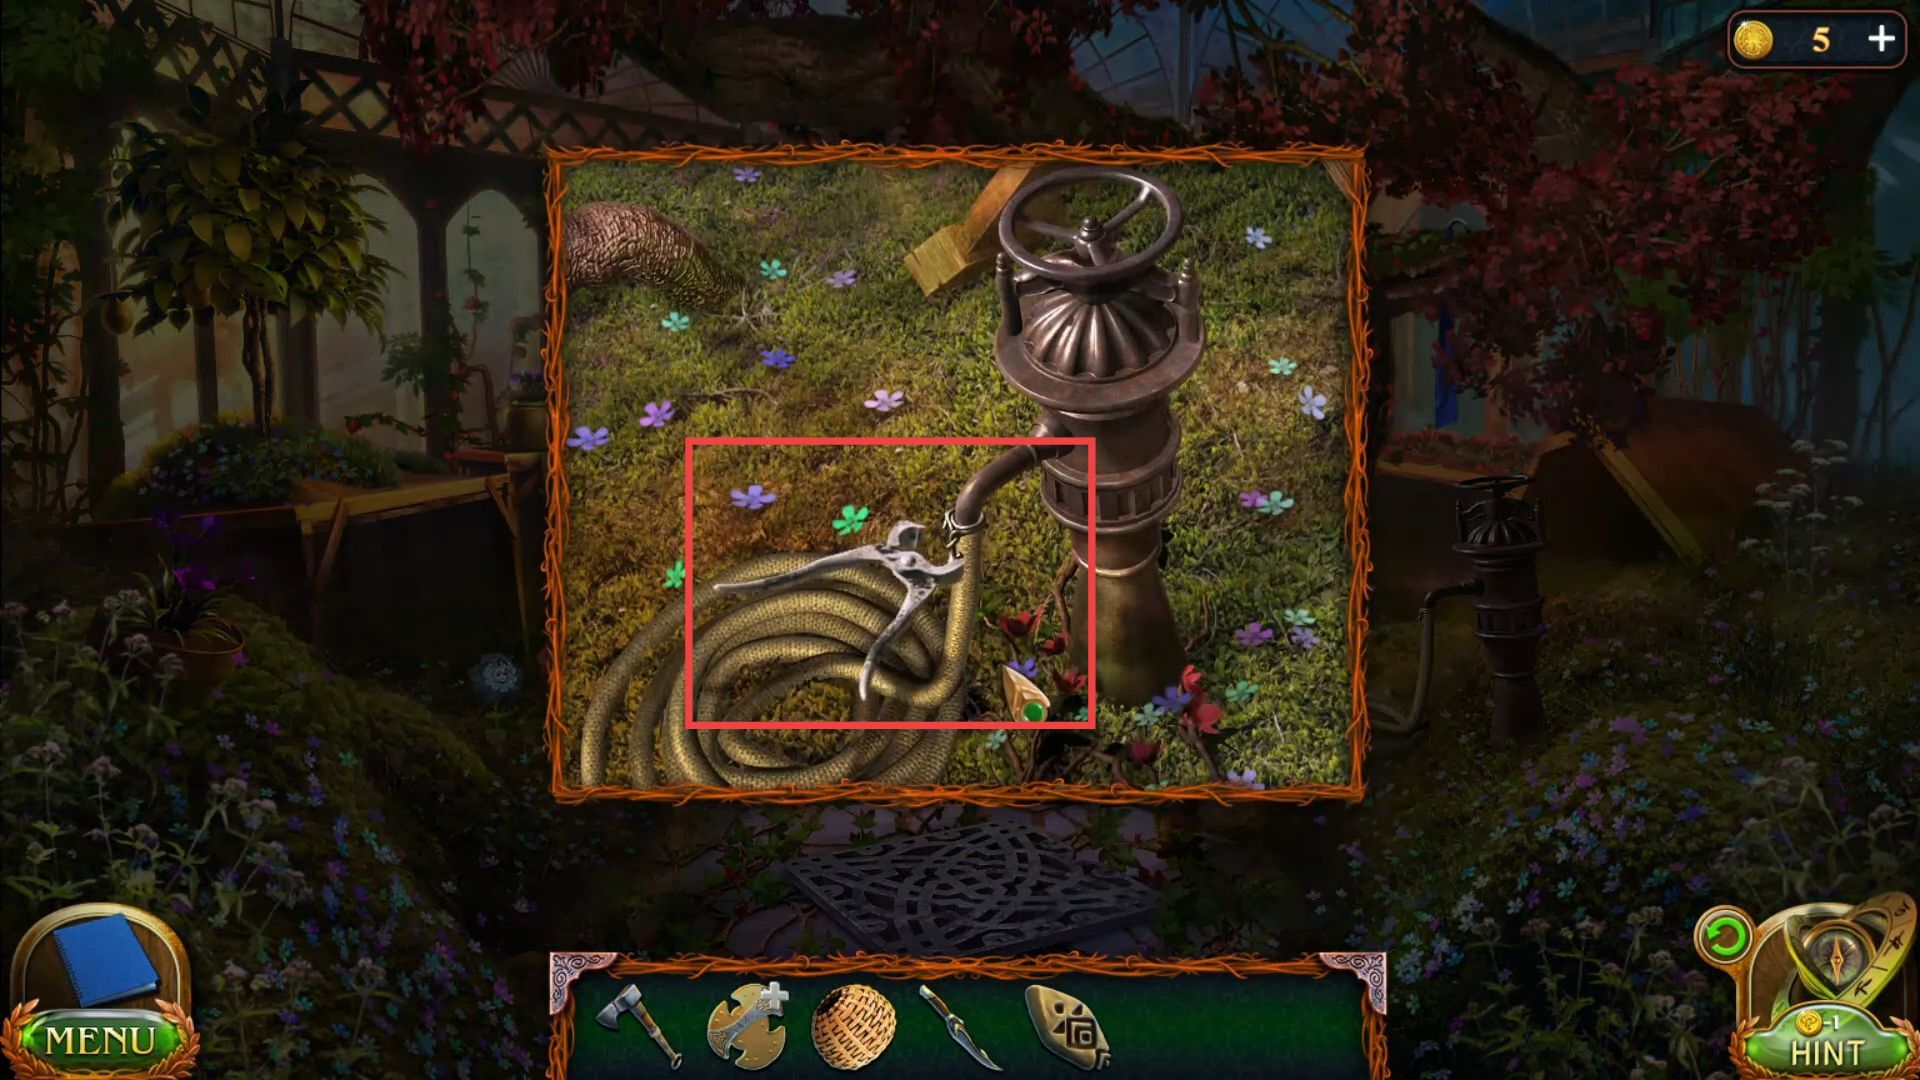
- Go to the greenhouse, use the pincer to remove the wire, and get the hose into your inventory.
- Return to the centaur village and cut the bamboo trunk using the axe.

- Put the bamboo trunk on the left side, connect the hose, and turn on the water valve.
- Return to the swamp and get an ammonia flower from the ground.

- Go to the house of Ziruk and present this ammonia flower to the older man.

- Go to the garden and get a hook from the tree.
- Place the hook on the board in the house of Ziruk and connect the rope with it.

- Now slide the handle to slide the board.
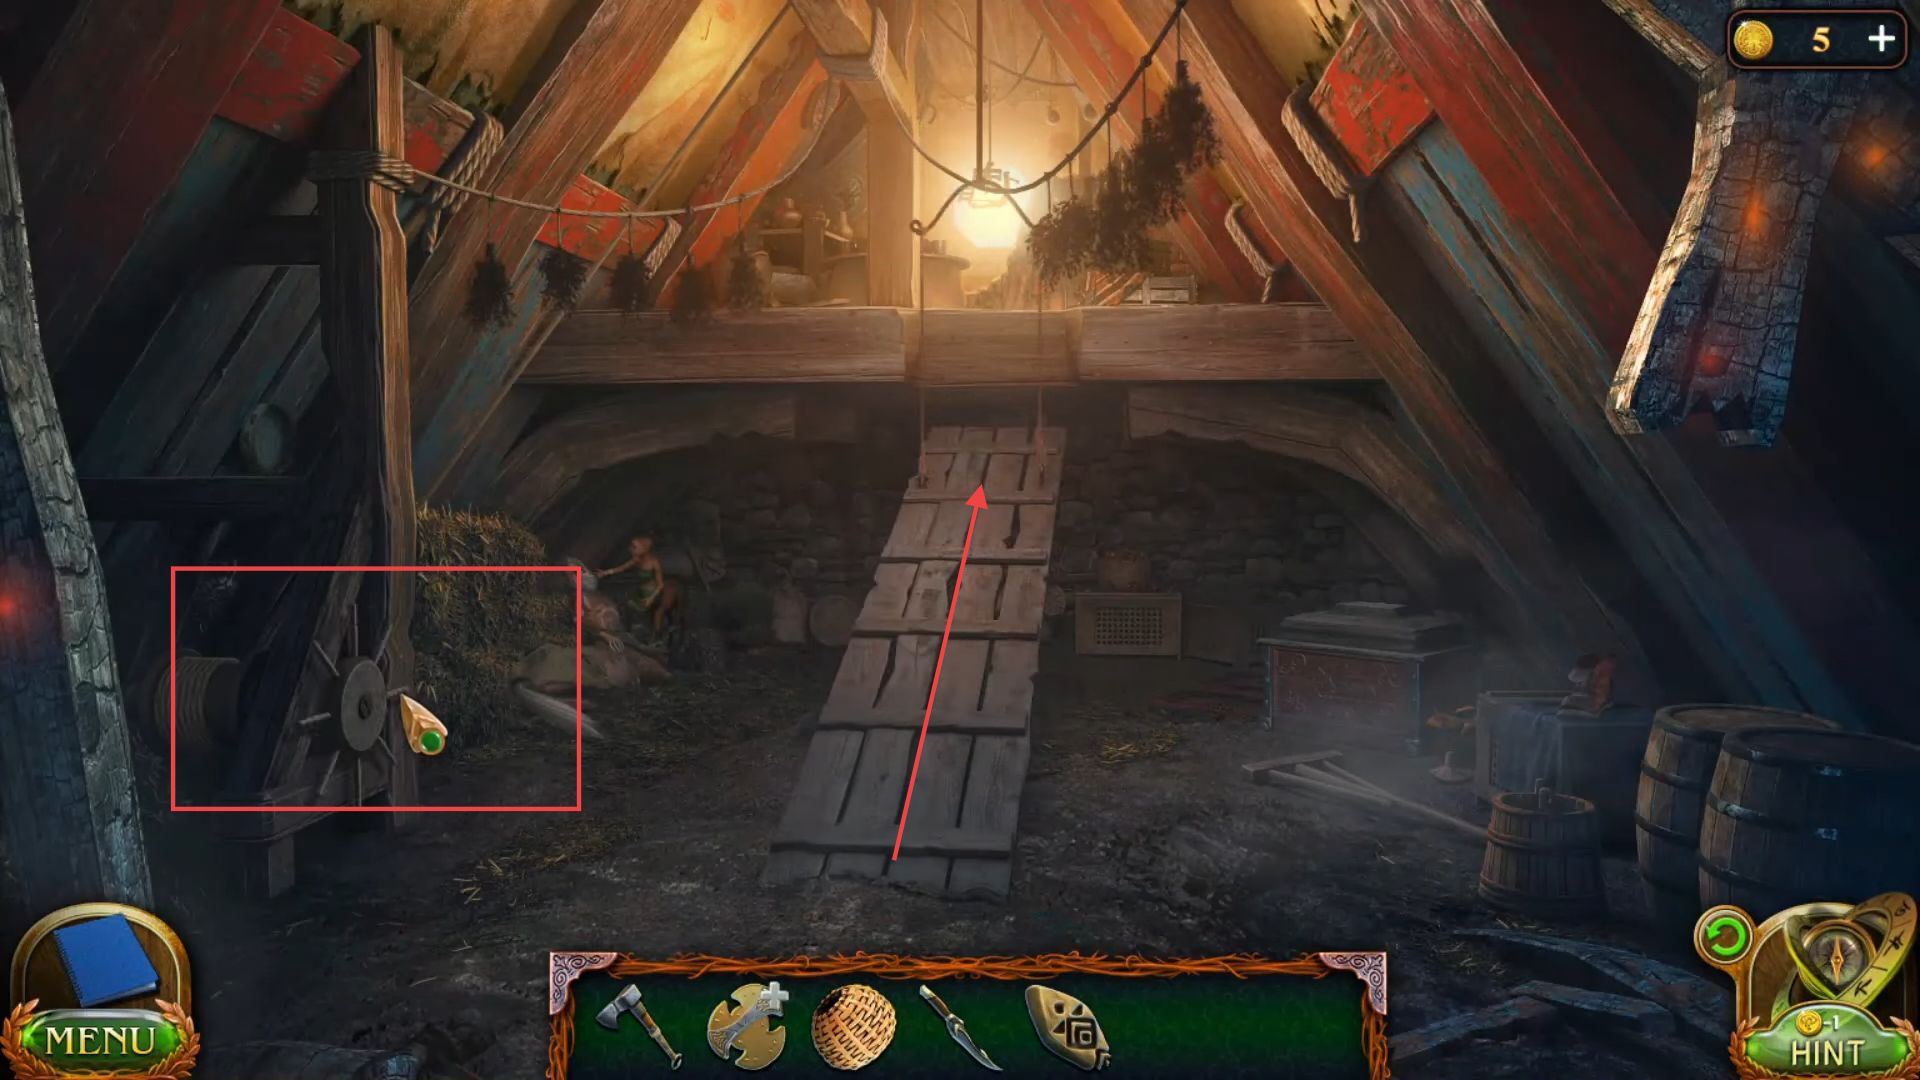
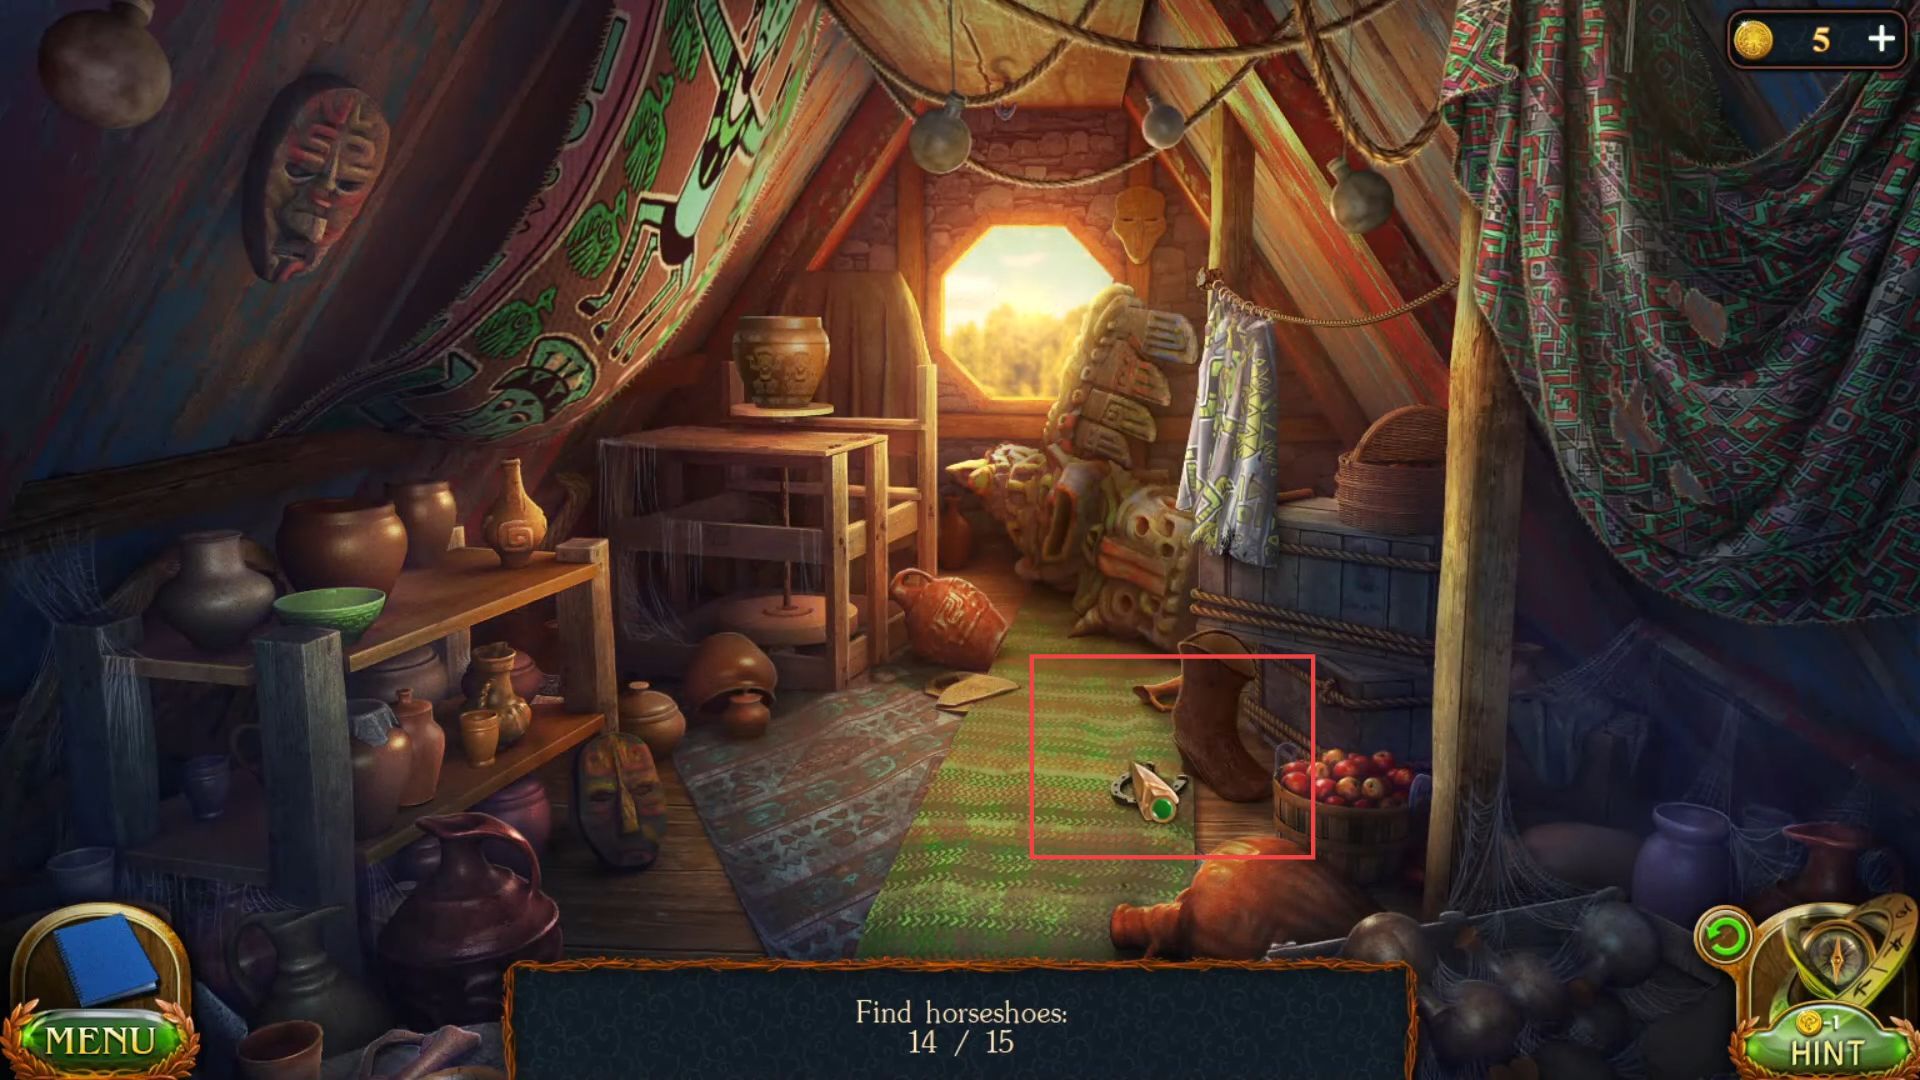
- Go to the upper portion using the board and find horseshoes.

- Find more horseshoes from the left side of the cloth.

- Get another horseshoe from the vase.

- Get another horseshoe from the vase.

- Get another horseshoe from the floor by removing the boot.
- Put the horseshoe on the box in this sequence, and it unlocks the box.

- Once the box is opened, grab a book of rituals and a mold from the inside.

- Get a key from the house of Zirak.

- Grab a flash cone from the tree in the garden.

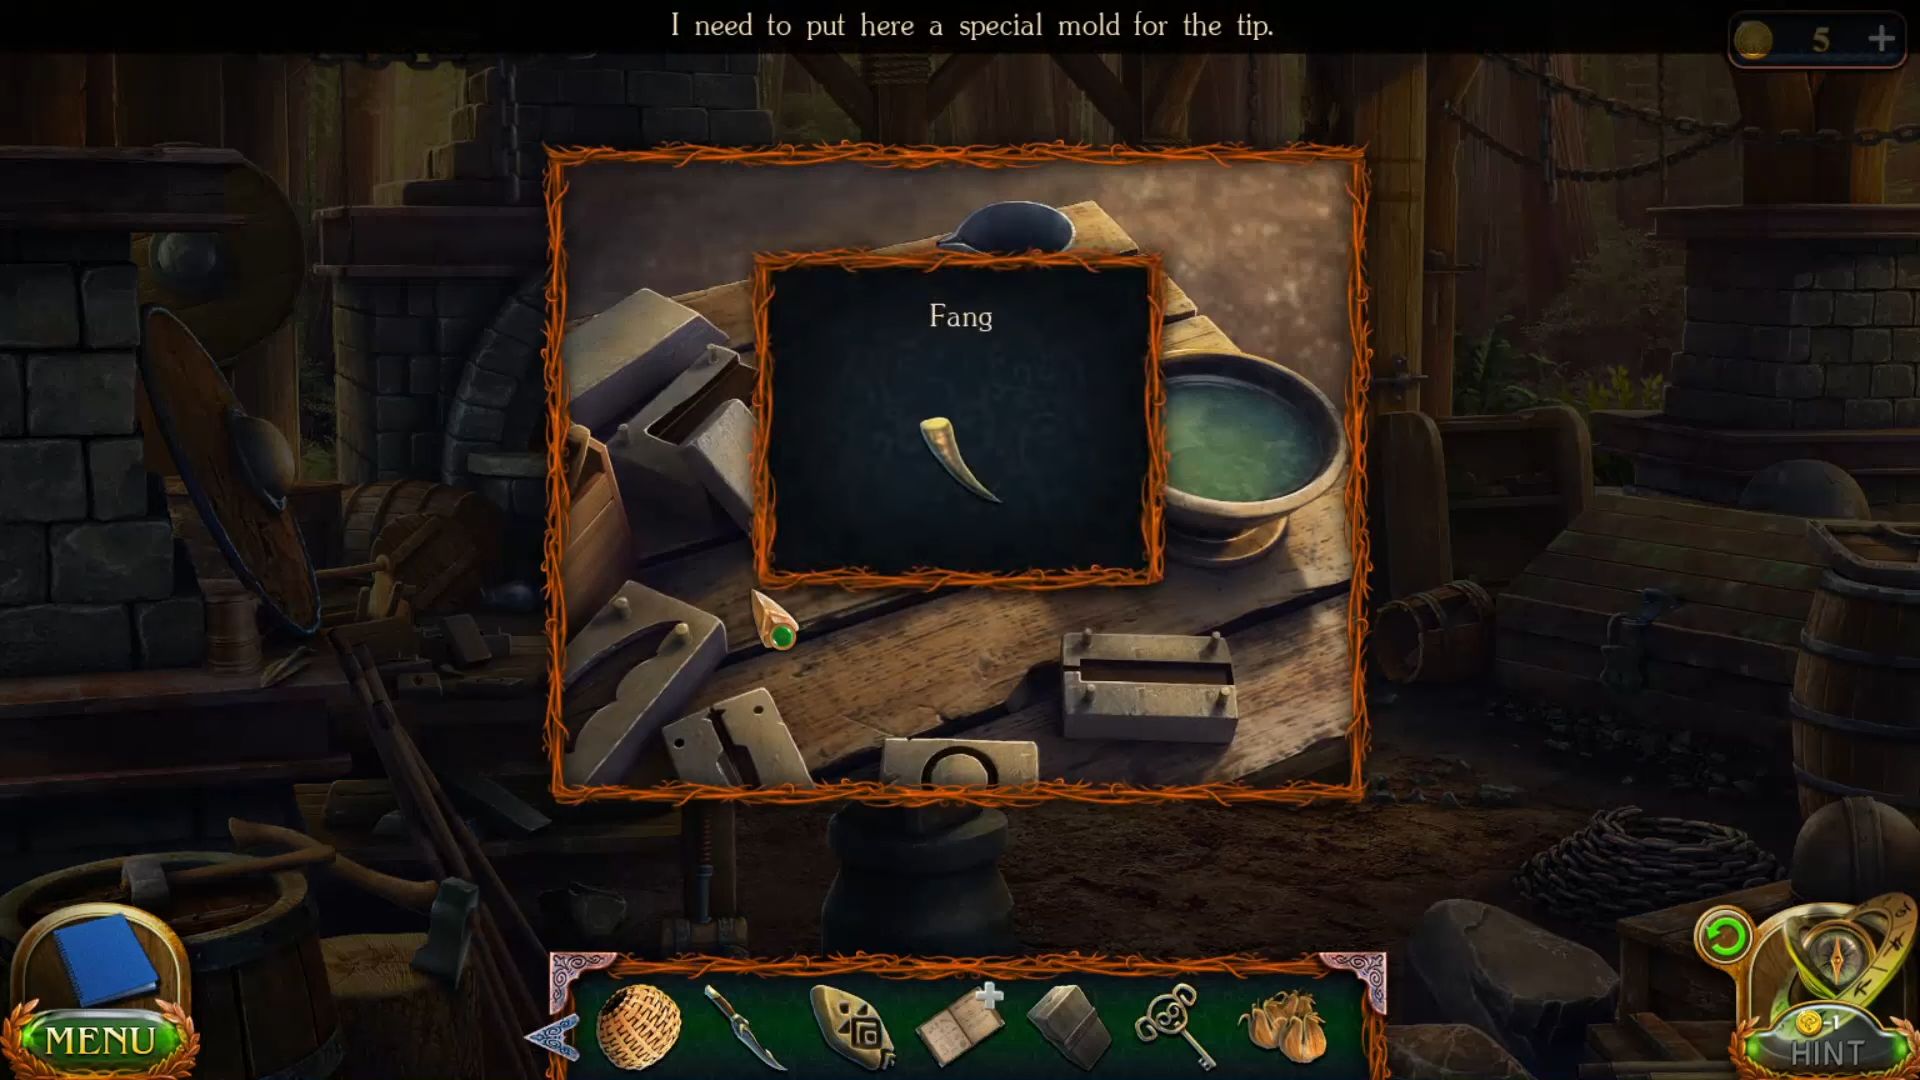
- Grab a fang and crucible from the table in the store.
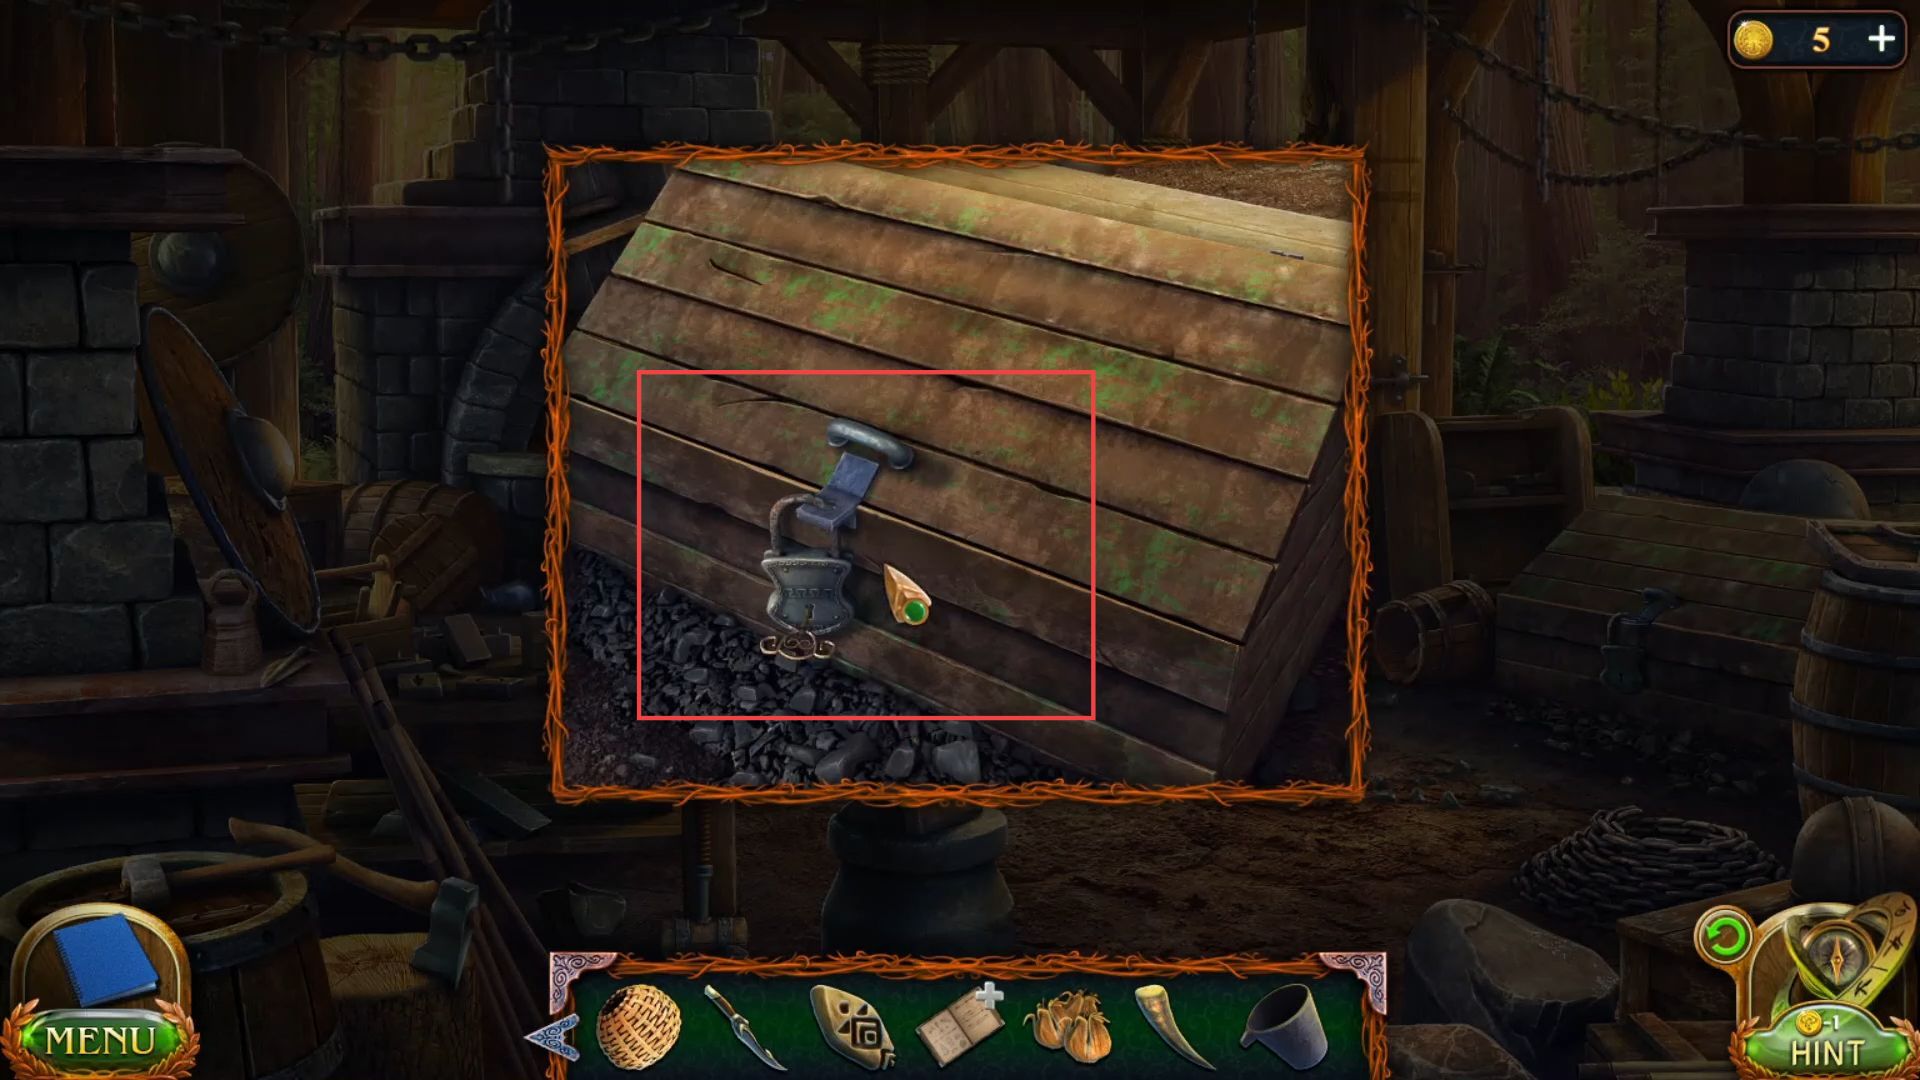
- Use the key to unlock the box and grab a scheme and a shovel with coal.
- Put the coal using the shovel into the grill from the front side wall.
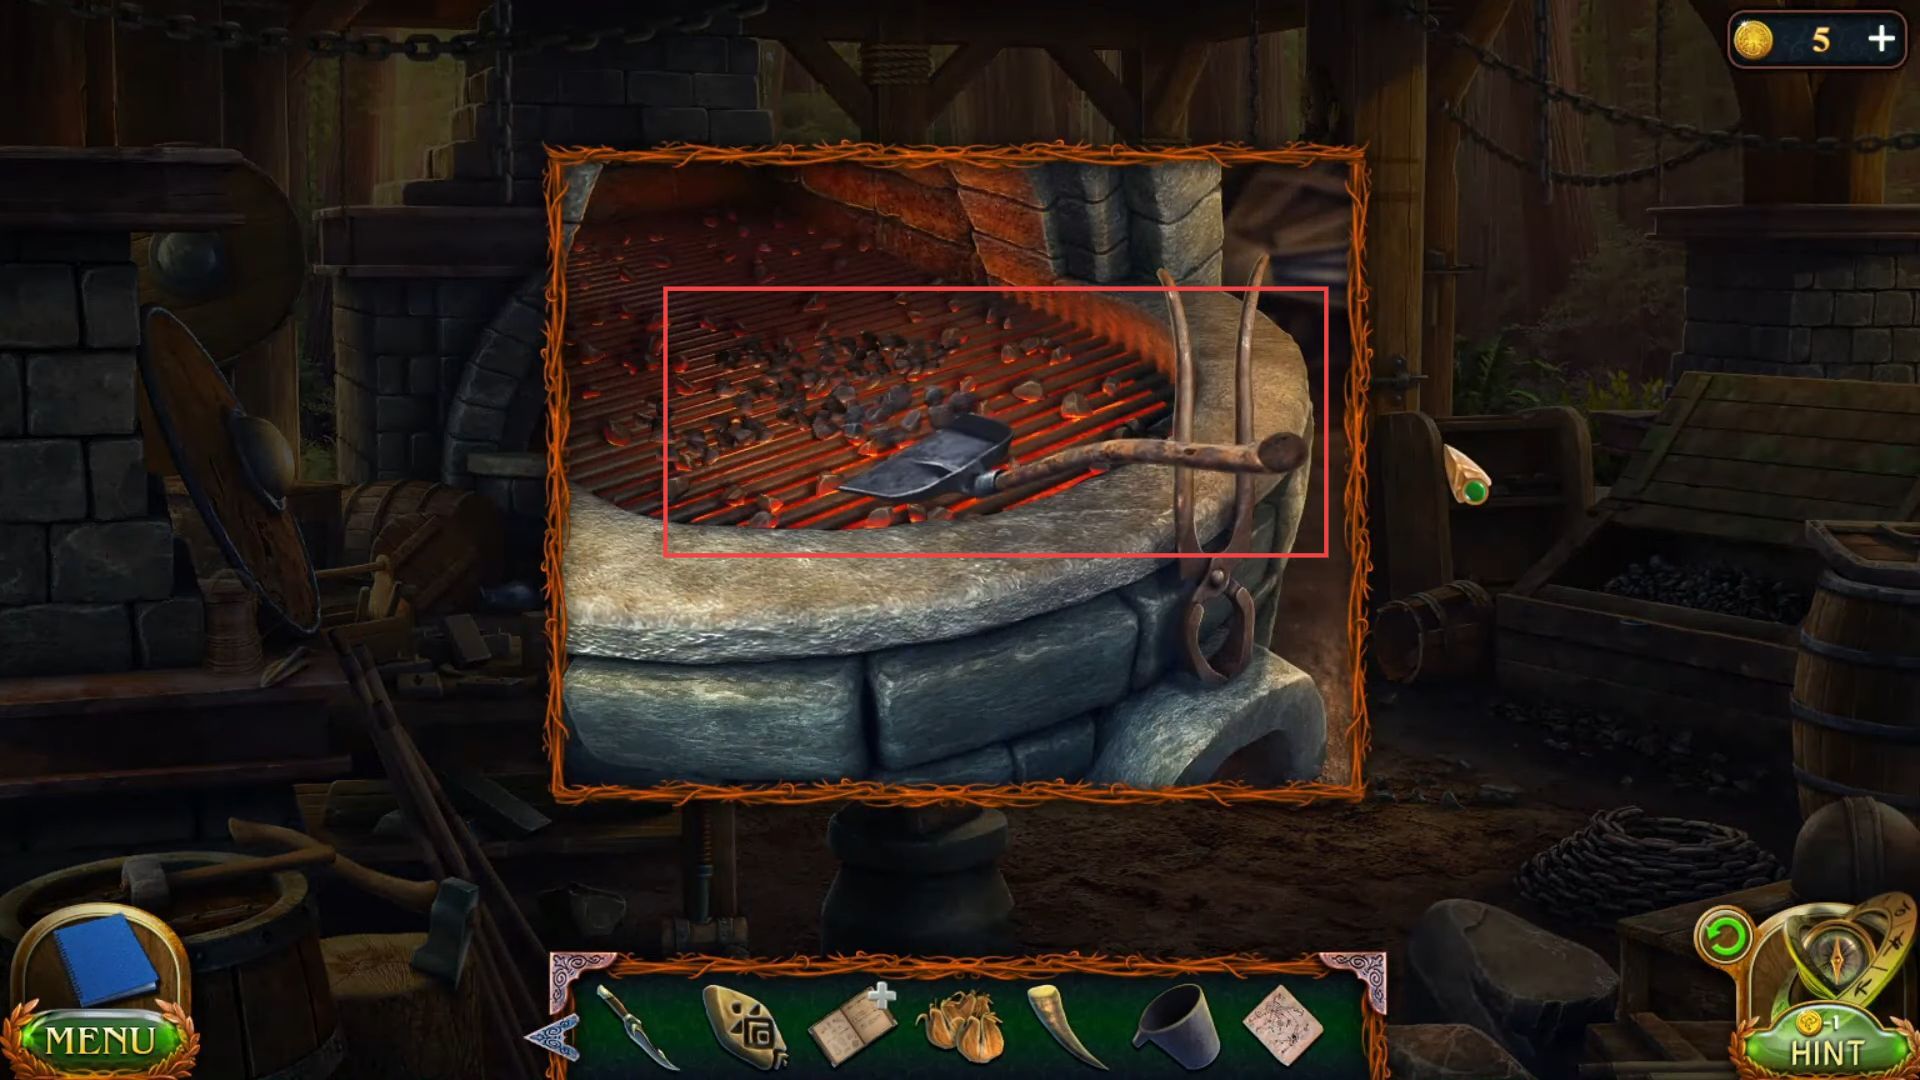
- Knock the blows to increase the fire.

- Put the crucible into the grill.

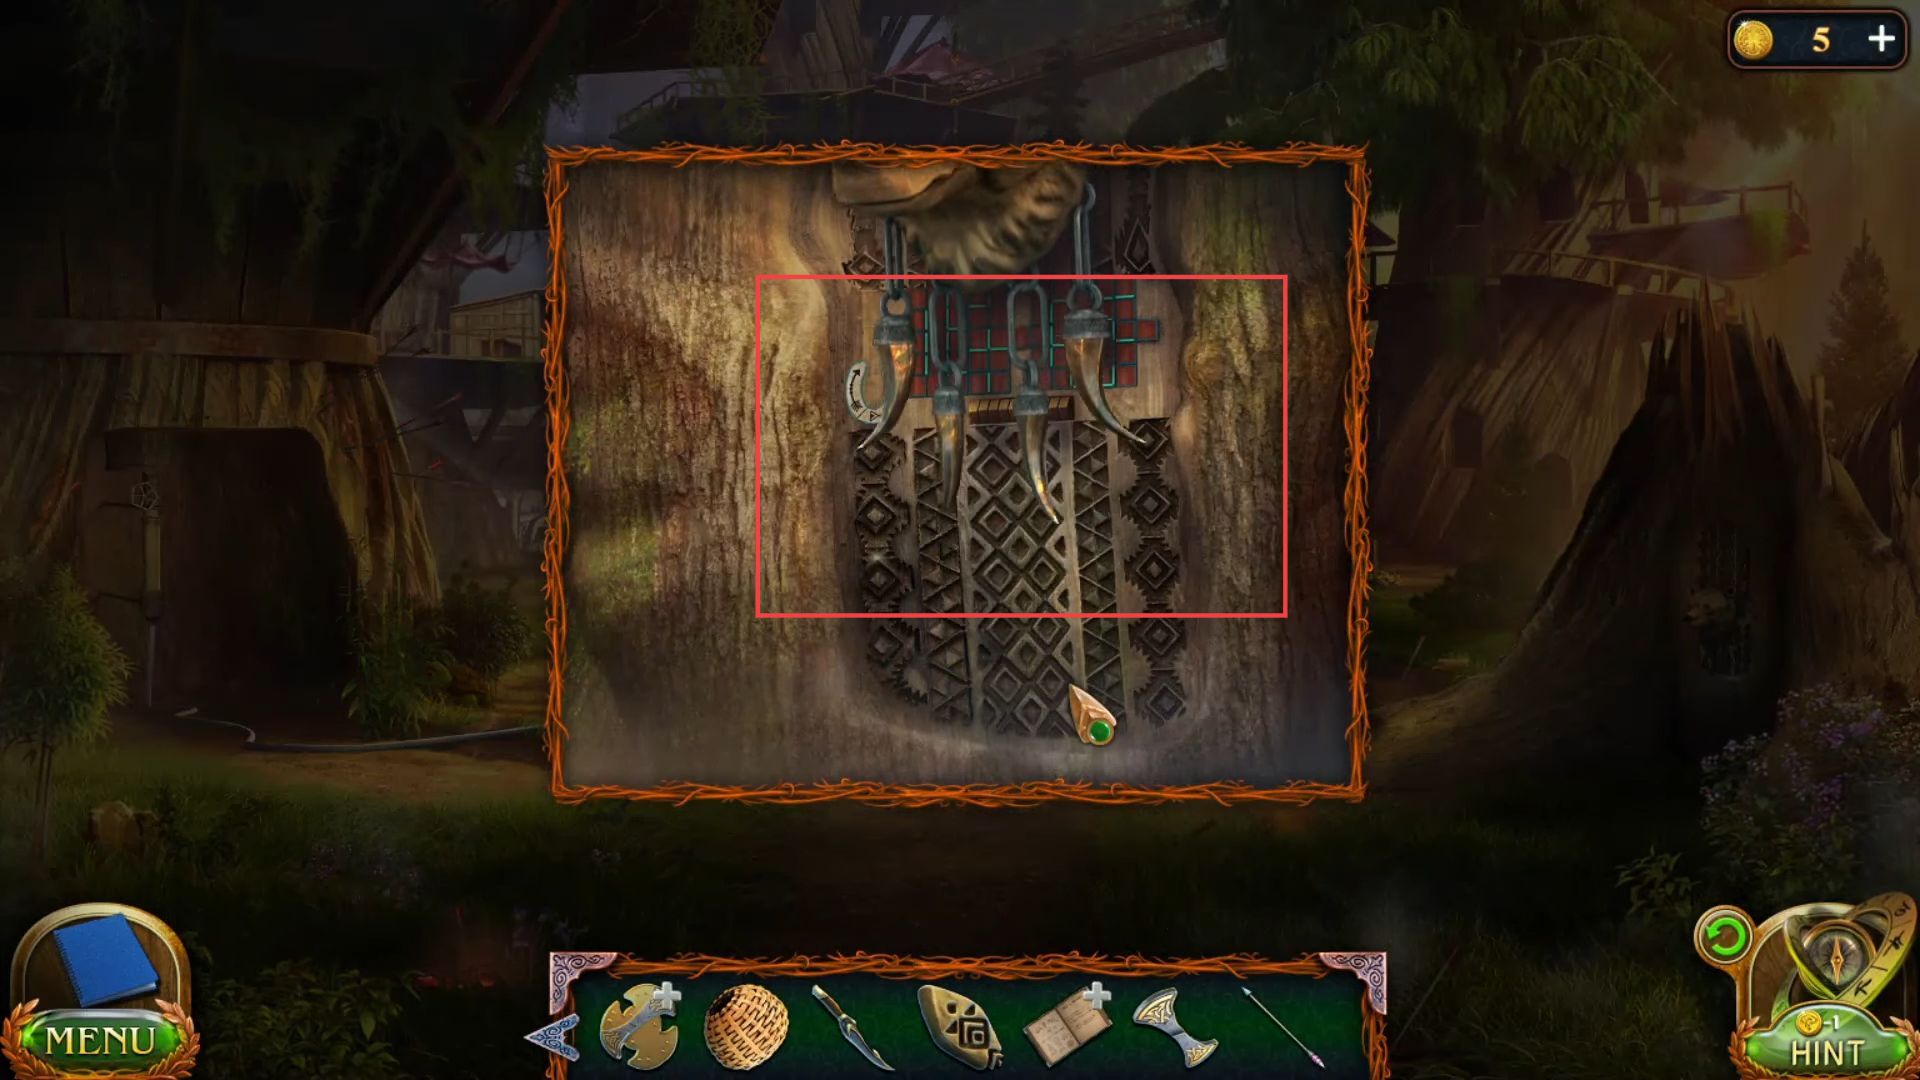
- Go to the Zirak courtyard and place the tong on the right side wall under the mummified head.
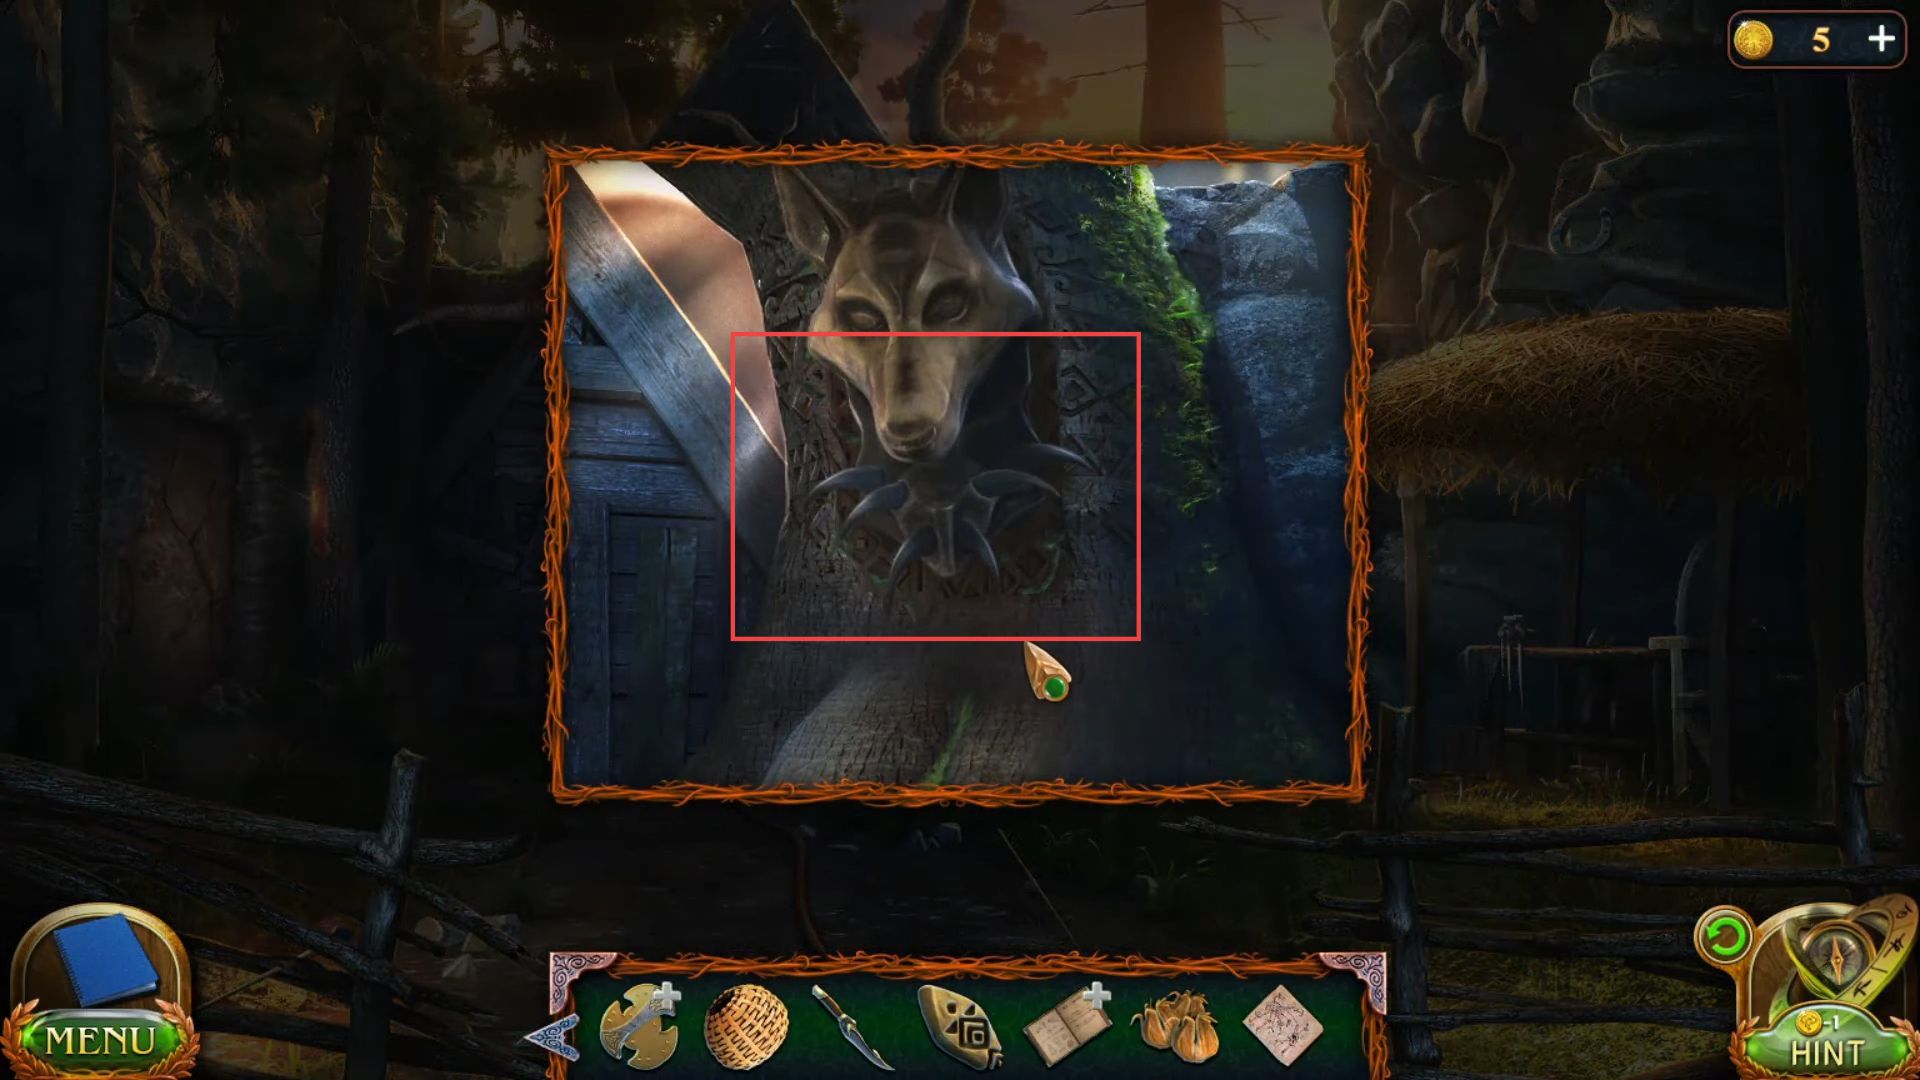
- Slide the statue head, move the chips on the frame, and arrange them so that the rays completely cover the pattern on the hint in this sequence.
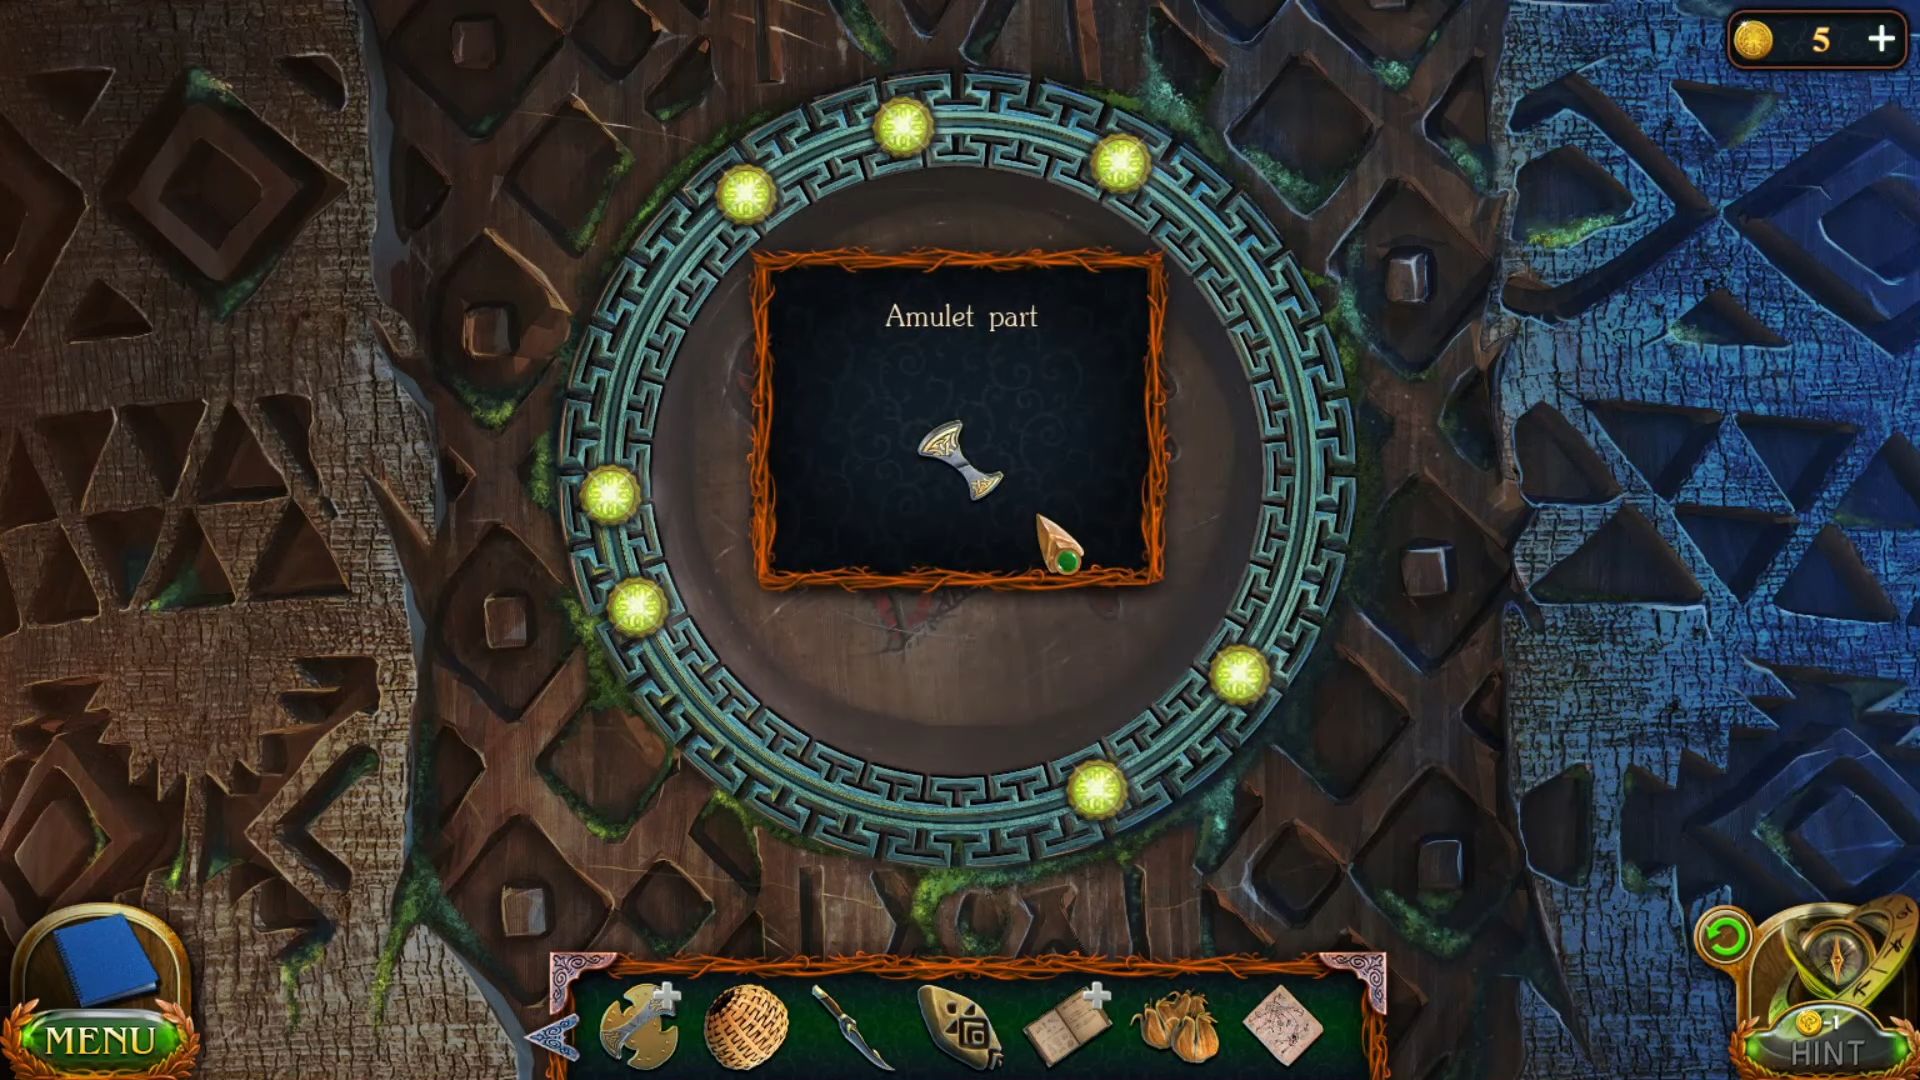
- Grab an amulet part from the box once it is opened.
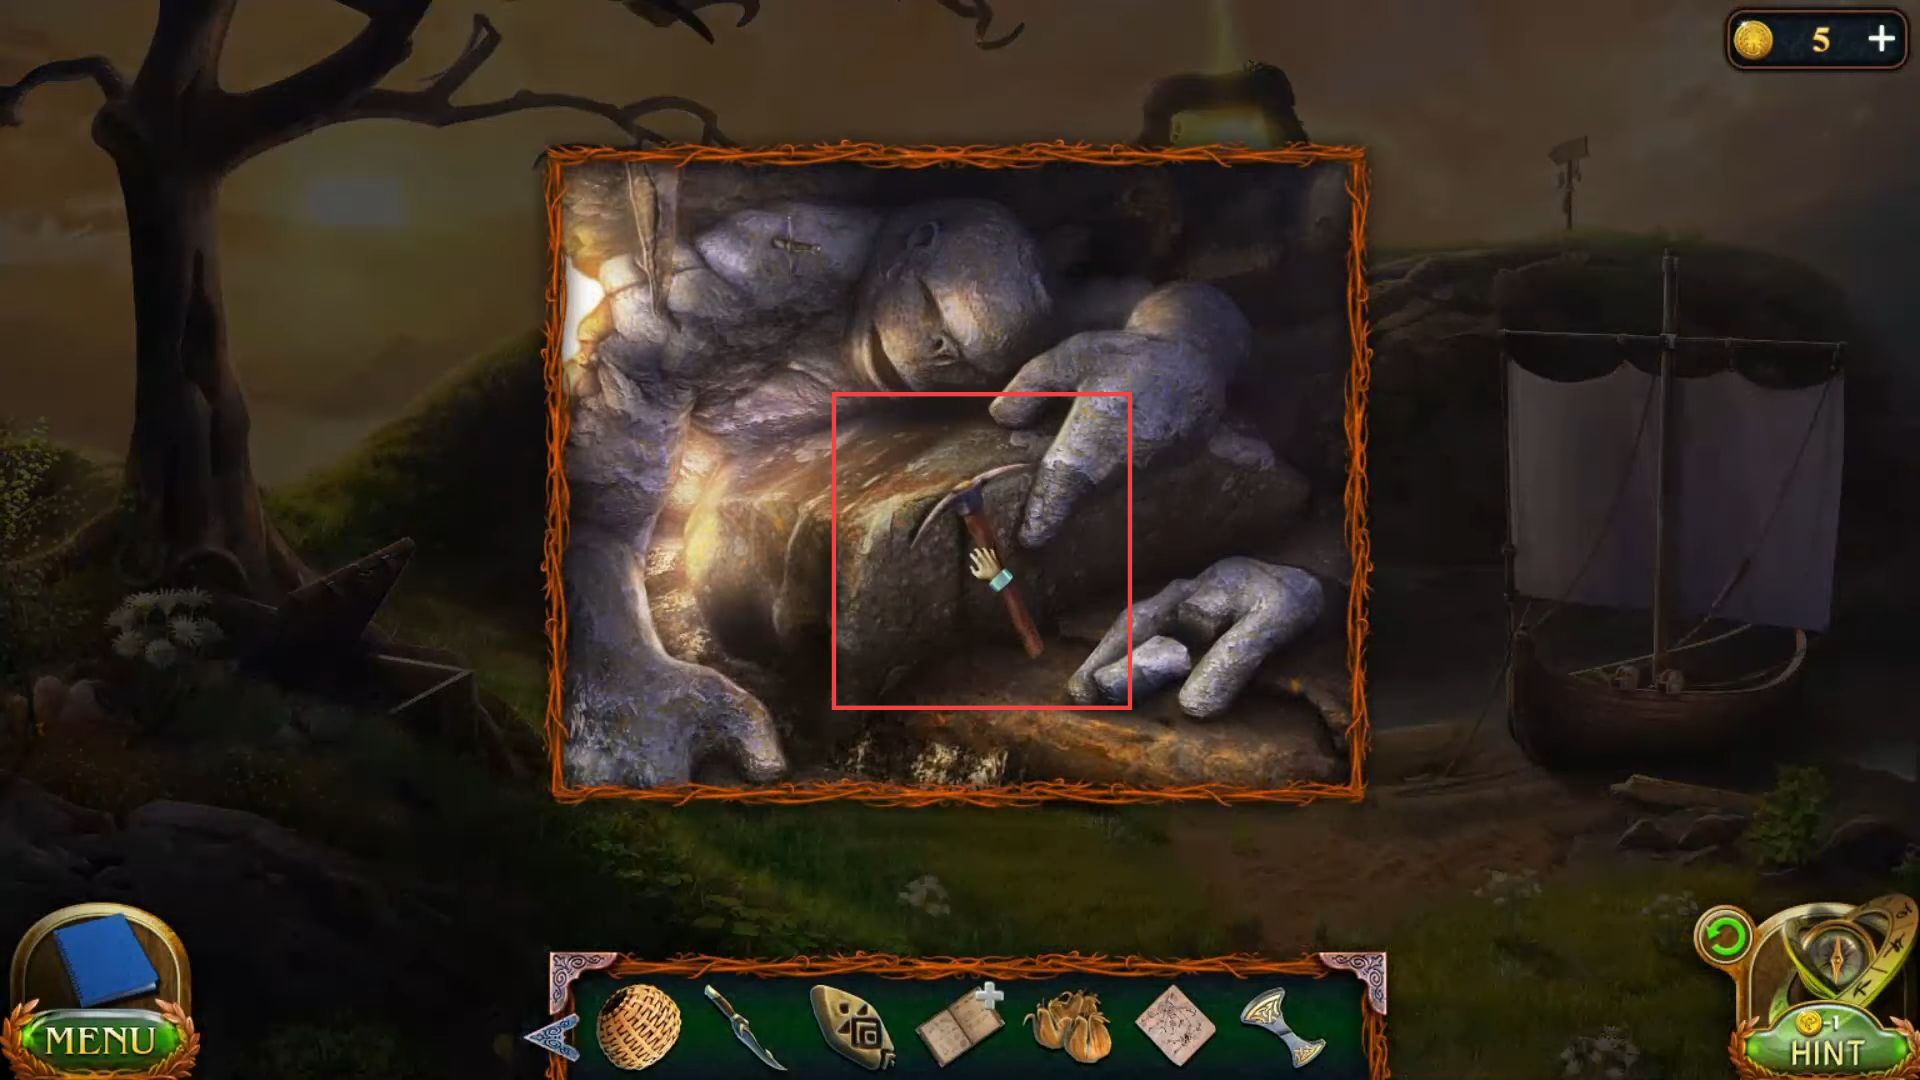
- Go to the river and grab a pickaxe from the stones under the bridge.
- Return to the ritual hall, use the axe to break indigo metal, and grab it.

- Go to the hunter camp and assemble the grappling cannon from the available parts according to the scheme. Add gunpowder from the right side box into the cannon, fix it in this sequence, and grab the grappling cannon into your inventory.

- Return to the courtyard and put the indigo metal into the crucible.

- Get the crucible using the catcher and grab the molten metal into your inventory.

- Put the molten metal into the mold from the table.

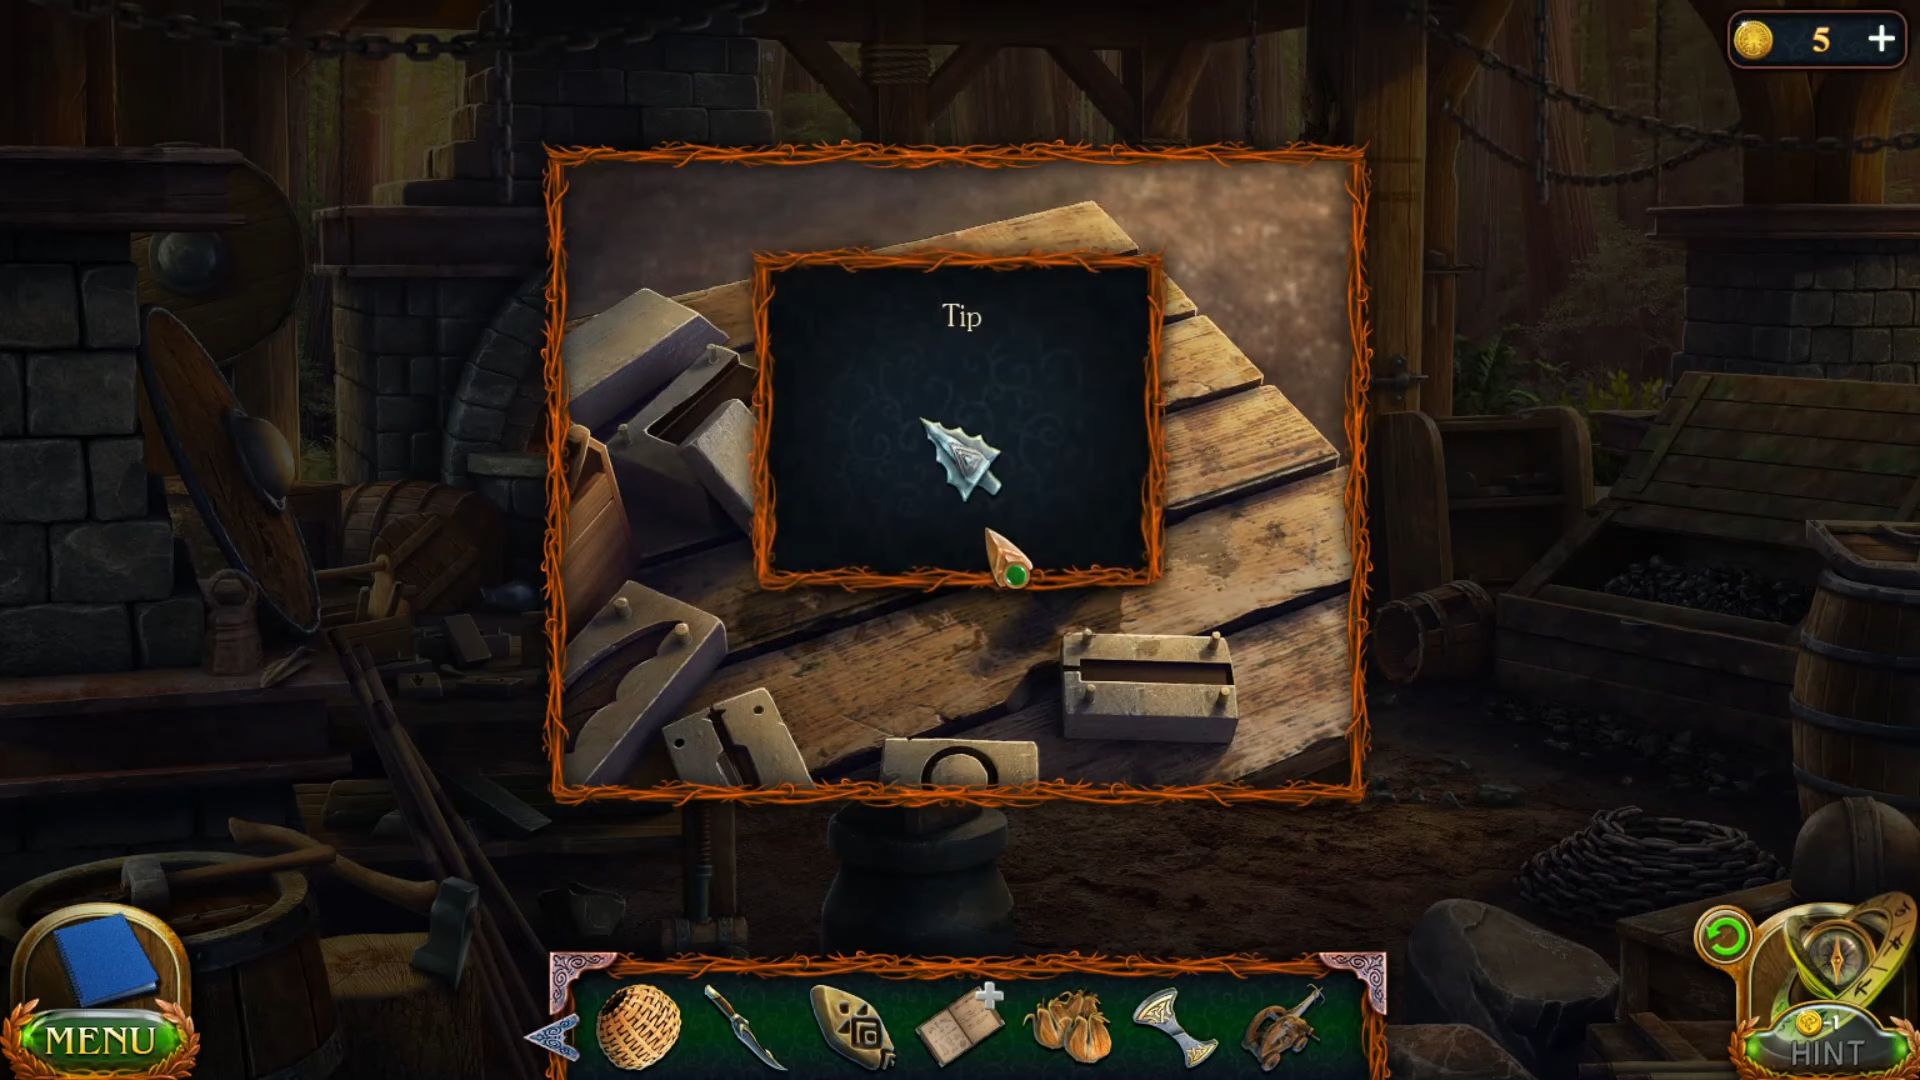
- Grab the tip from the mold.
- Go to the Zirak courtyard, put the hook on the mountain using the cannon, and grab a claw from the stone.

- Use the axe to cut the tree branch to get a Sequoia branch.
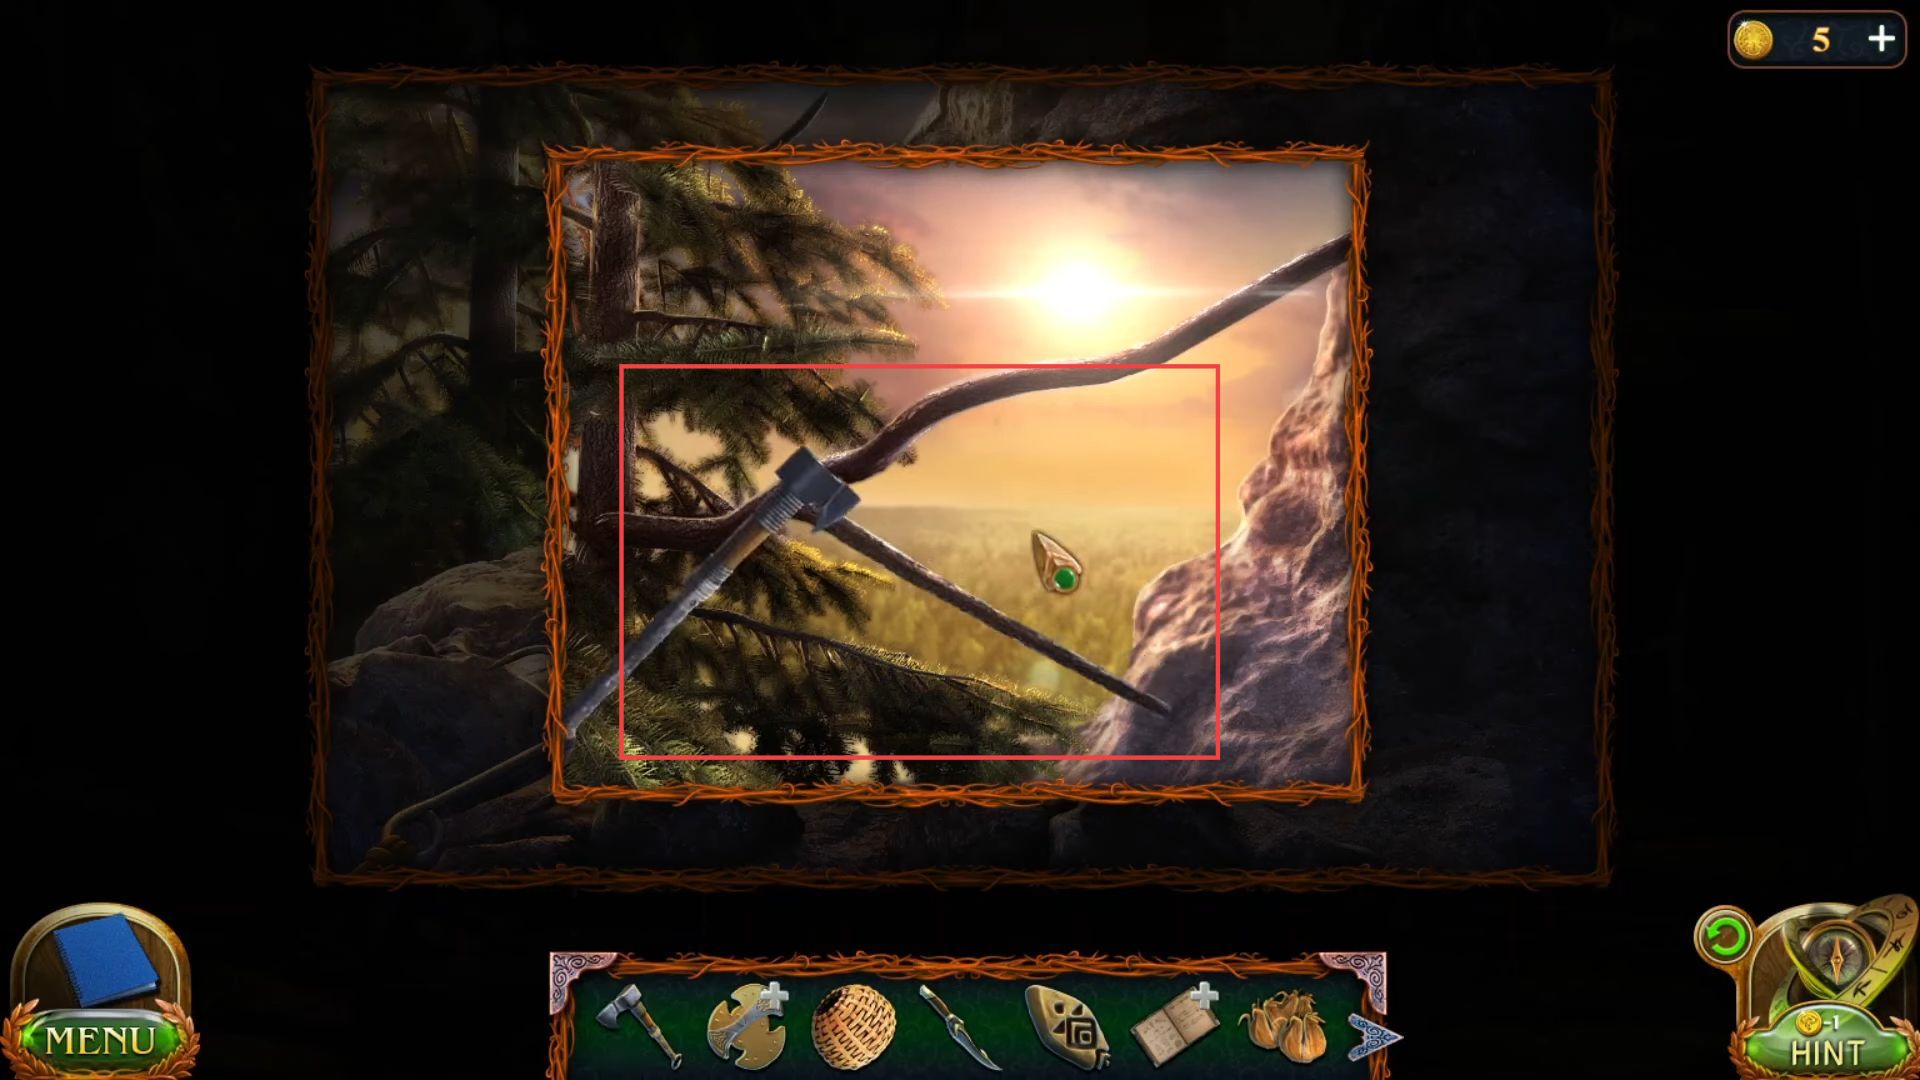
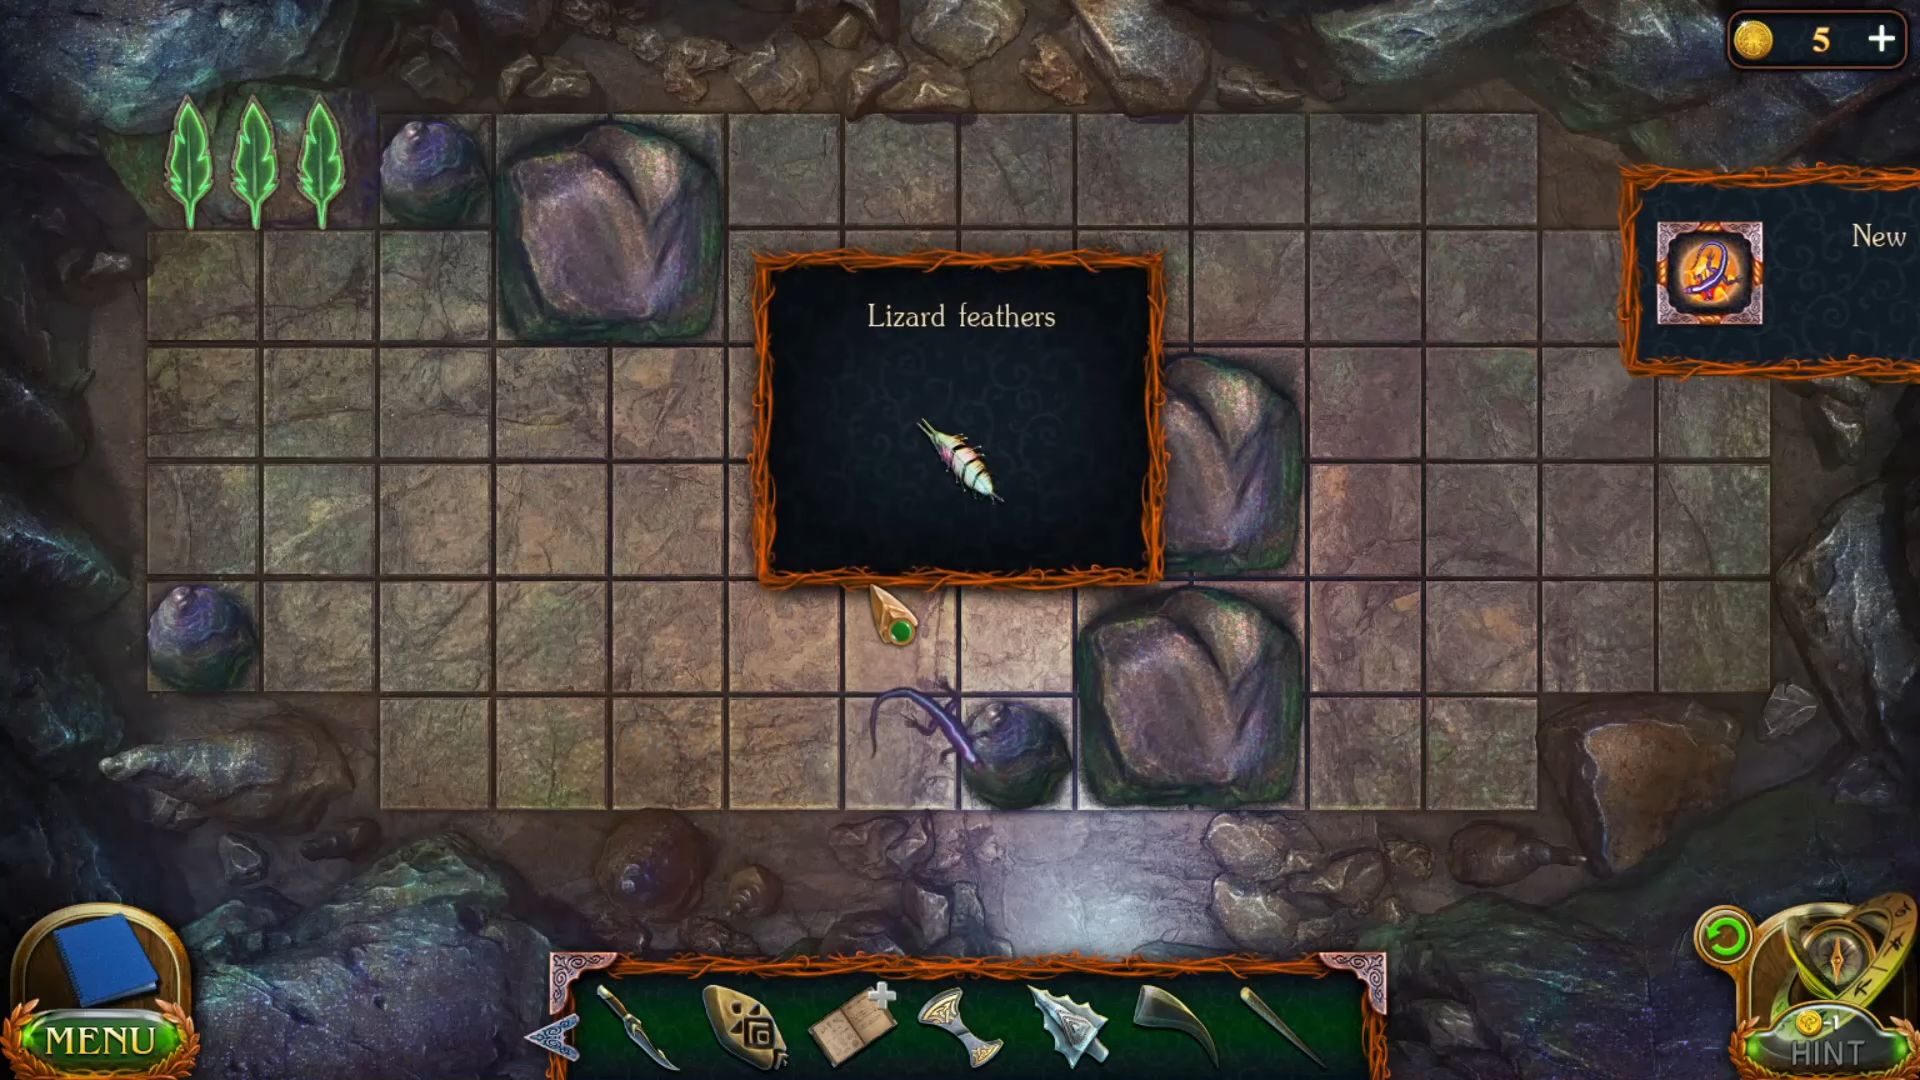
- Go to the front side cave, and here you have three cones. Click the square to place the cone there; simultaneously, the lizard will run away from the cone for one square. Then place cones so the lizard can run to the square with a cone. After that, grab lizard feathers from the board.
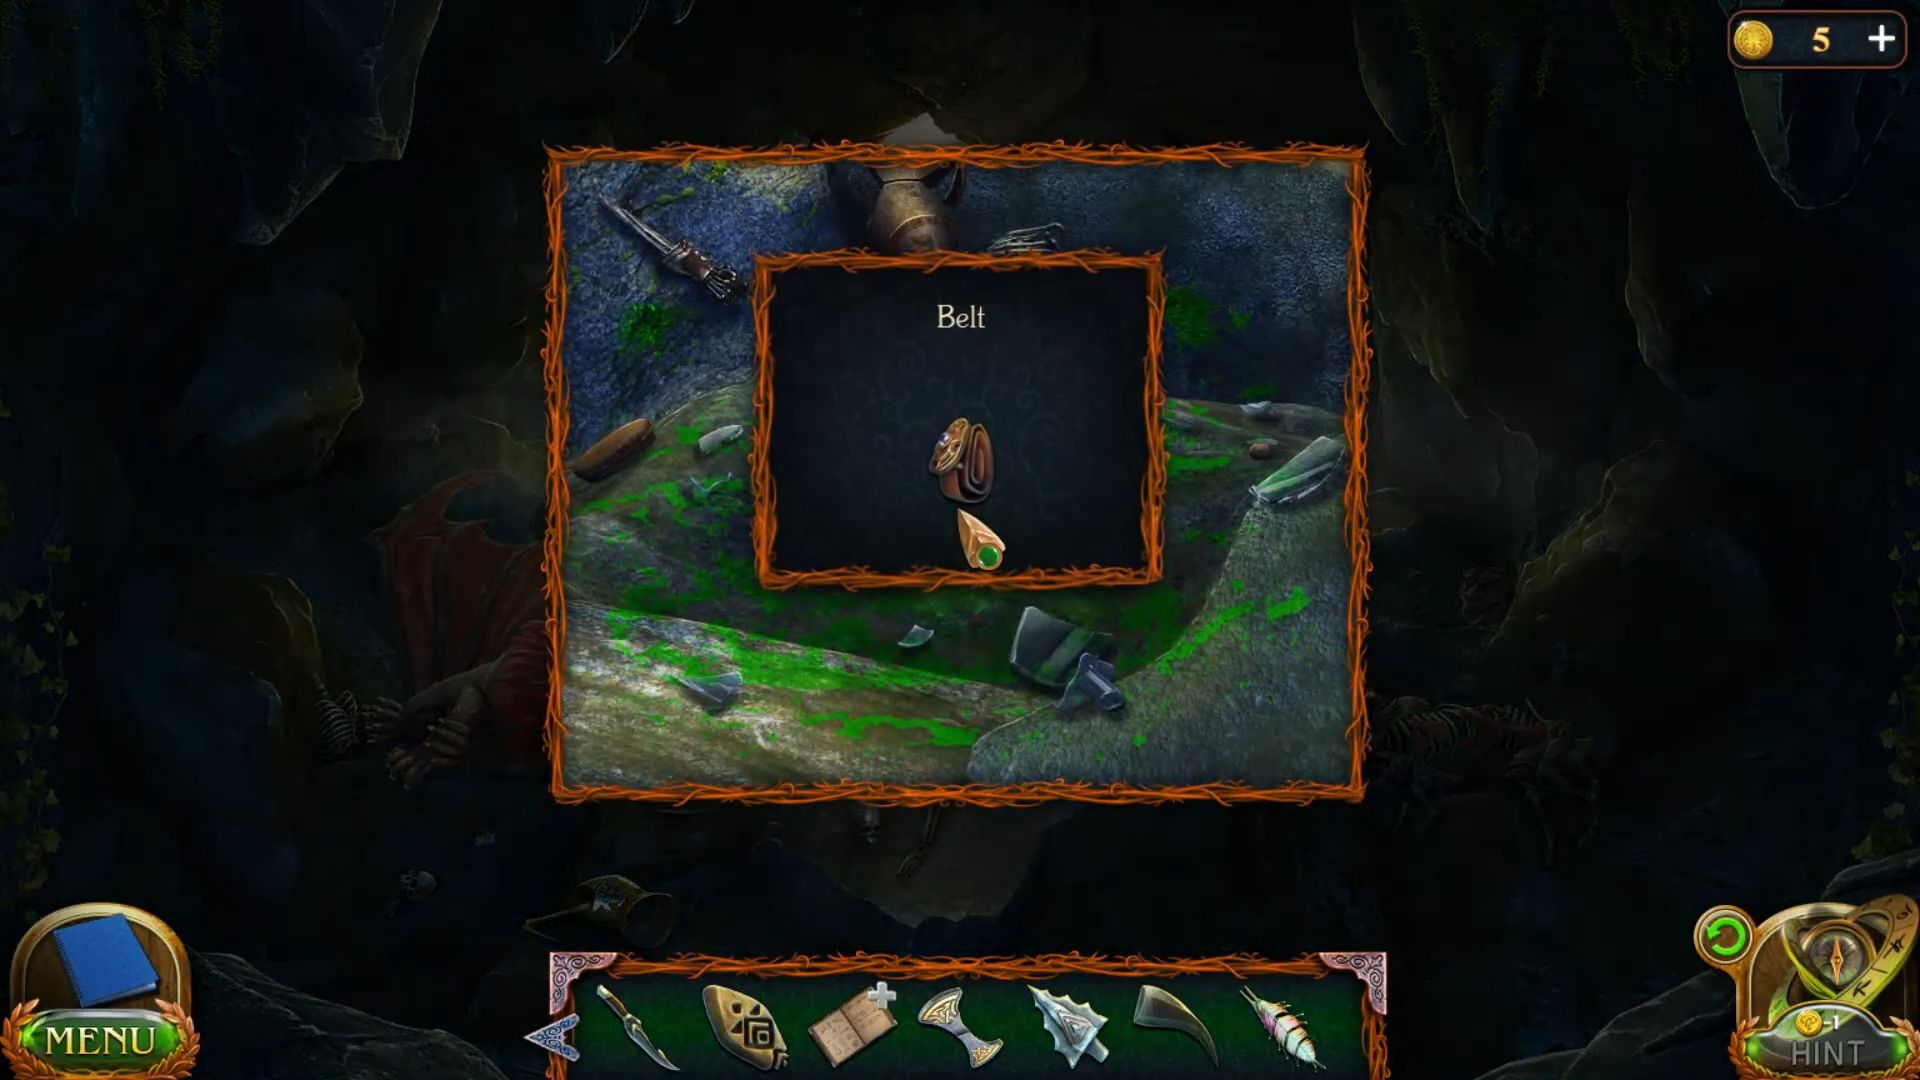
- Go to Monticore’s cave and grab a belt from the ground.
- Fix the belt with the pulley of the cutter from the courtyard and place the stick on the table.

- Cut the stick into the arrow shaft using the cutter from the table.

- Connect the lizard feathers on one side of the shaft and the tip on the other side in this sequence to make a ritual arrow.

- Hang the claw on the statue from the garden and slide it upward.
- Now rotate the field to move the beetle to the same square at the opposite end. Use the buttons on the horseshoe to create a spin plan and put it into action.
- Once the boards move upward, grab an amulet part from the box.

- Combine the amulet’s parts from your inventory in this sequence.

- Go to the fire pit side, place the rune on the pillar at this place, and slide it upward.

- Move the gold chip to the opposite end of the field by moving the chips.

- Grab the amulet centre from the box once it is opened.

- Fit the amulet centre to make a complete amulet.

- Place the amulet on the left side wall of the courtyard to open it.

- Now you need to click the right parts of frescoes that have been found the correct number of times recently to get the shield of valour.

- Put the shield on the fire from the garden and add ingredients from the bucket into it.
- Place the arrow in the shield in this sequence to make a family arrow.

- Give this family arrow to the older man from the house.
- Grab a key from the front wall of the pyramid building.

- Go to the right side of the pyramid building and grab a bow from the ground.

- Grab a manuscript headdress and stronghold of the five worlds from the table.

- Use the axe to cut the tree branches and grab a bundle from the sand.

- Cut the rope using the dagger to open it and grab a ritual knife and a breastplate from the inside.

- Grab another ritual knife from the dune.

- Use the key to unlock the door from the right side of the pyramid building.
- Go inside the room, and grab a few items, such as the weight of Seales, a lamp, a scorpion, a ring, a shield, a horsetail, and a harpoon from the inside.
- Grab a sickle, boomerang, flask, scorpion, and a scorpion from the box.

- Now arrange all the weights so that the weights of four weights on the right and four weights on the left would be the same.
- Click the button with pictures in the sequence indicated on the hint to unlock the box and grab a horse tail from the inside.

- Put the pieces of the horse on the wall in this sequence to unlock the left side door.

- Now move the parts across the field to the right and left by clicking the arrows in each row so that each head hits the figurine of the corresponding colour.
- Move the chips to build a path for the ball from the mouth of one snake to the mouth of another.
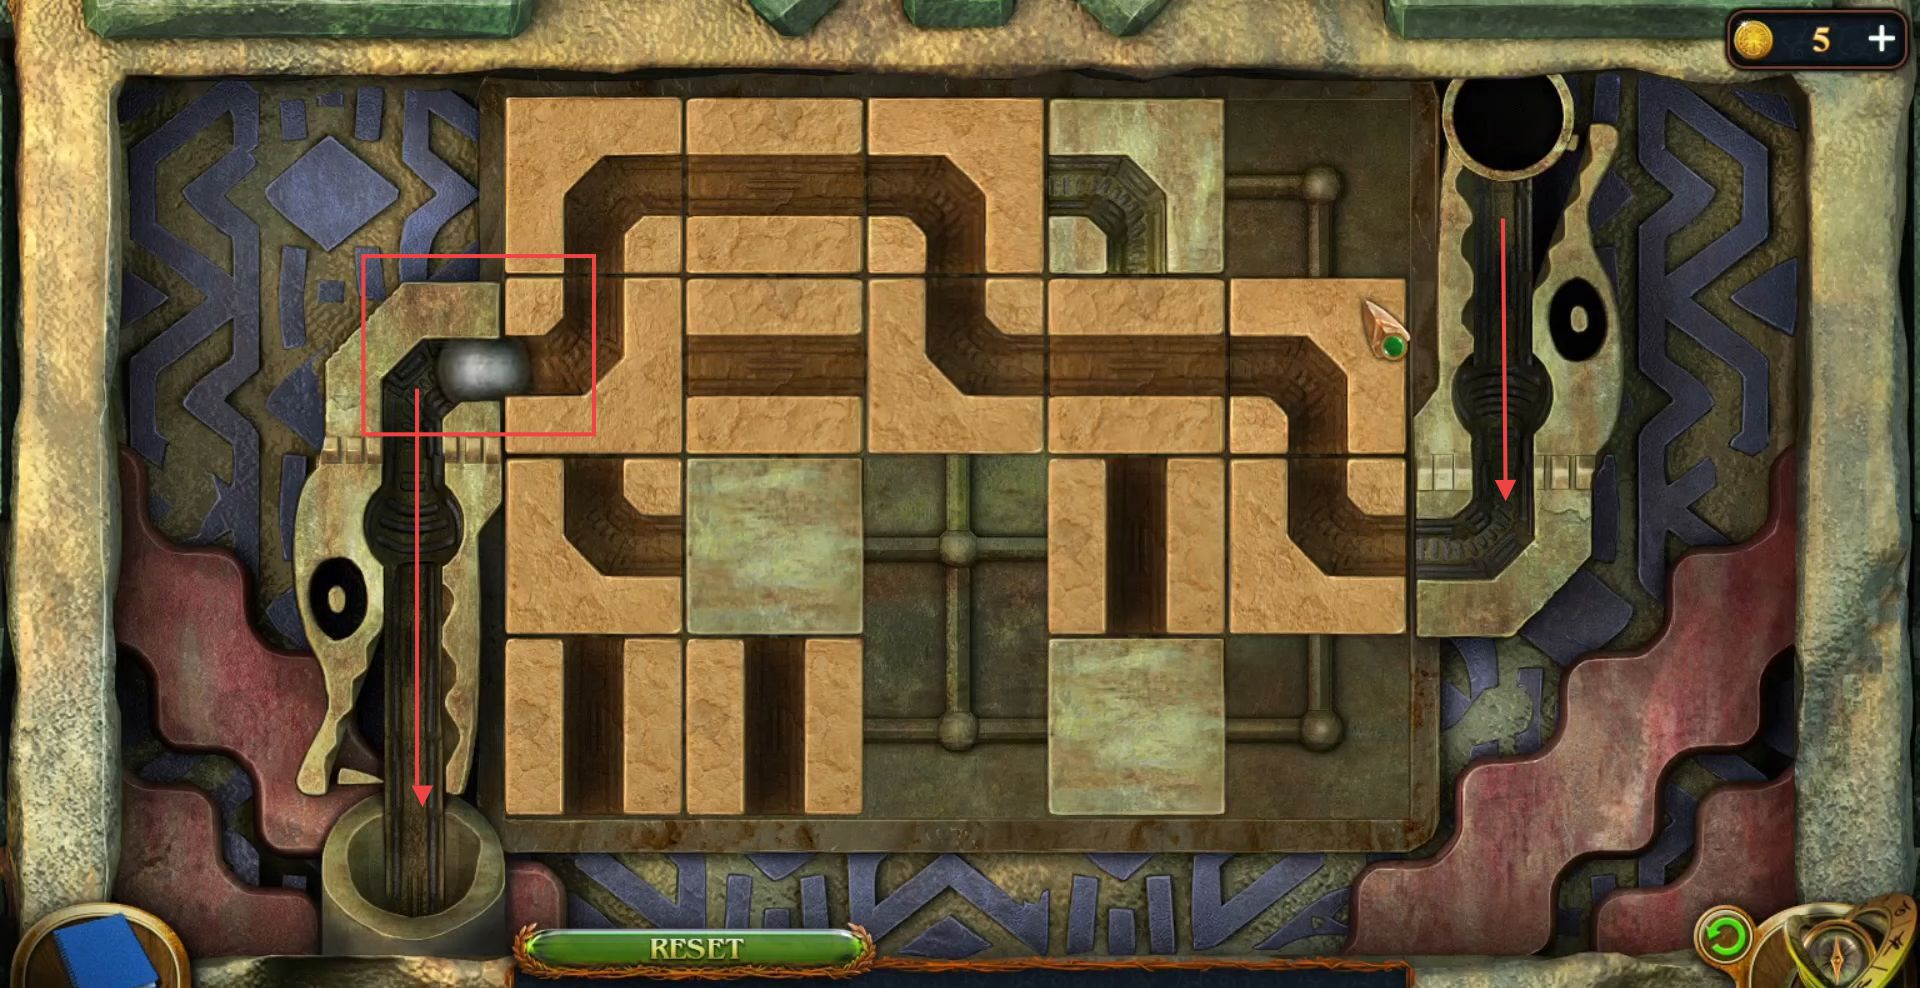
- Move the parts across the field to the right and left by clicking the arrows in each row so that each head hits the figurine of the corresponding colour.
- Move the chips to build a path for the ball from the mouth of one snake to the mouth of another.
- Move the parts across the field to the right and left by clicking the arrows in each row so that each head hits the figurine of the corresponding colour.
- Move the chips to build a path for the ball from the mouth of one snake to the mouth of another to make the stairs for going to the upper portion.

- Go to the top portion of the pyramid and cut the planks using the axe to drop the stone downward.

- Cut the net of the bag using the dagger and grab a horse’s head from the inside.

- Knock the stones from the floor to get a brush.
- Grab a ritual knife from the centre of the floor.
- Go outside, place the ritual knives in this sequence, and grab a flute from the centre.
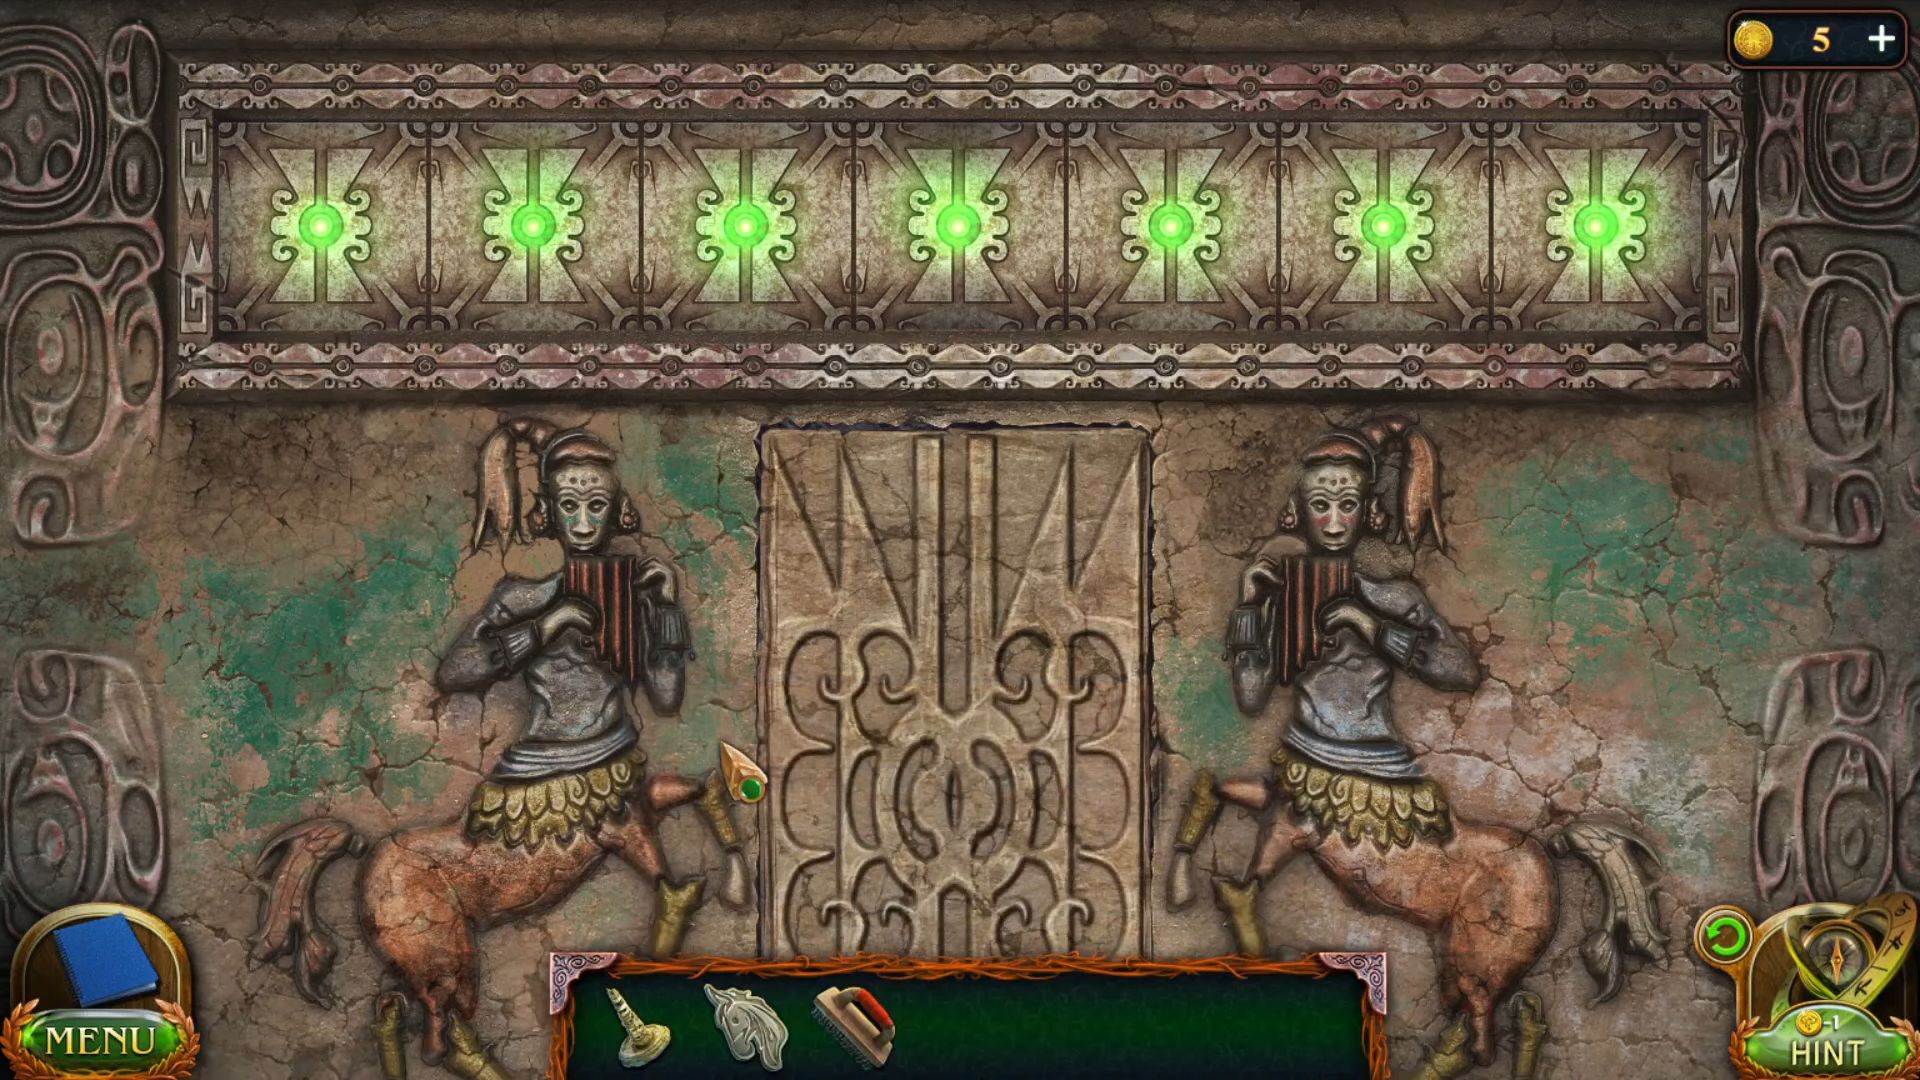
- Return to the upper portion, and click all the flute tubes so that their melody will light up all the green lights on the top panel, in turn from left to right.
- Grab a seal and a taras once the door is opened.

- Put the seal on the book to get a clue from the page.

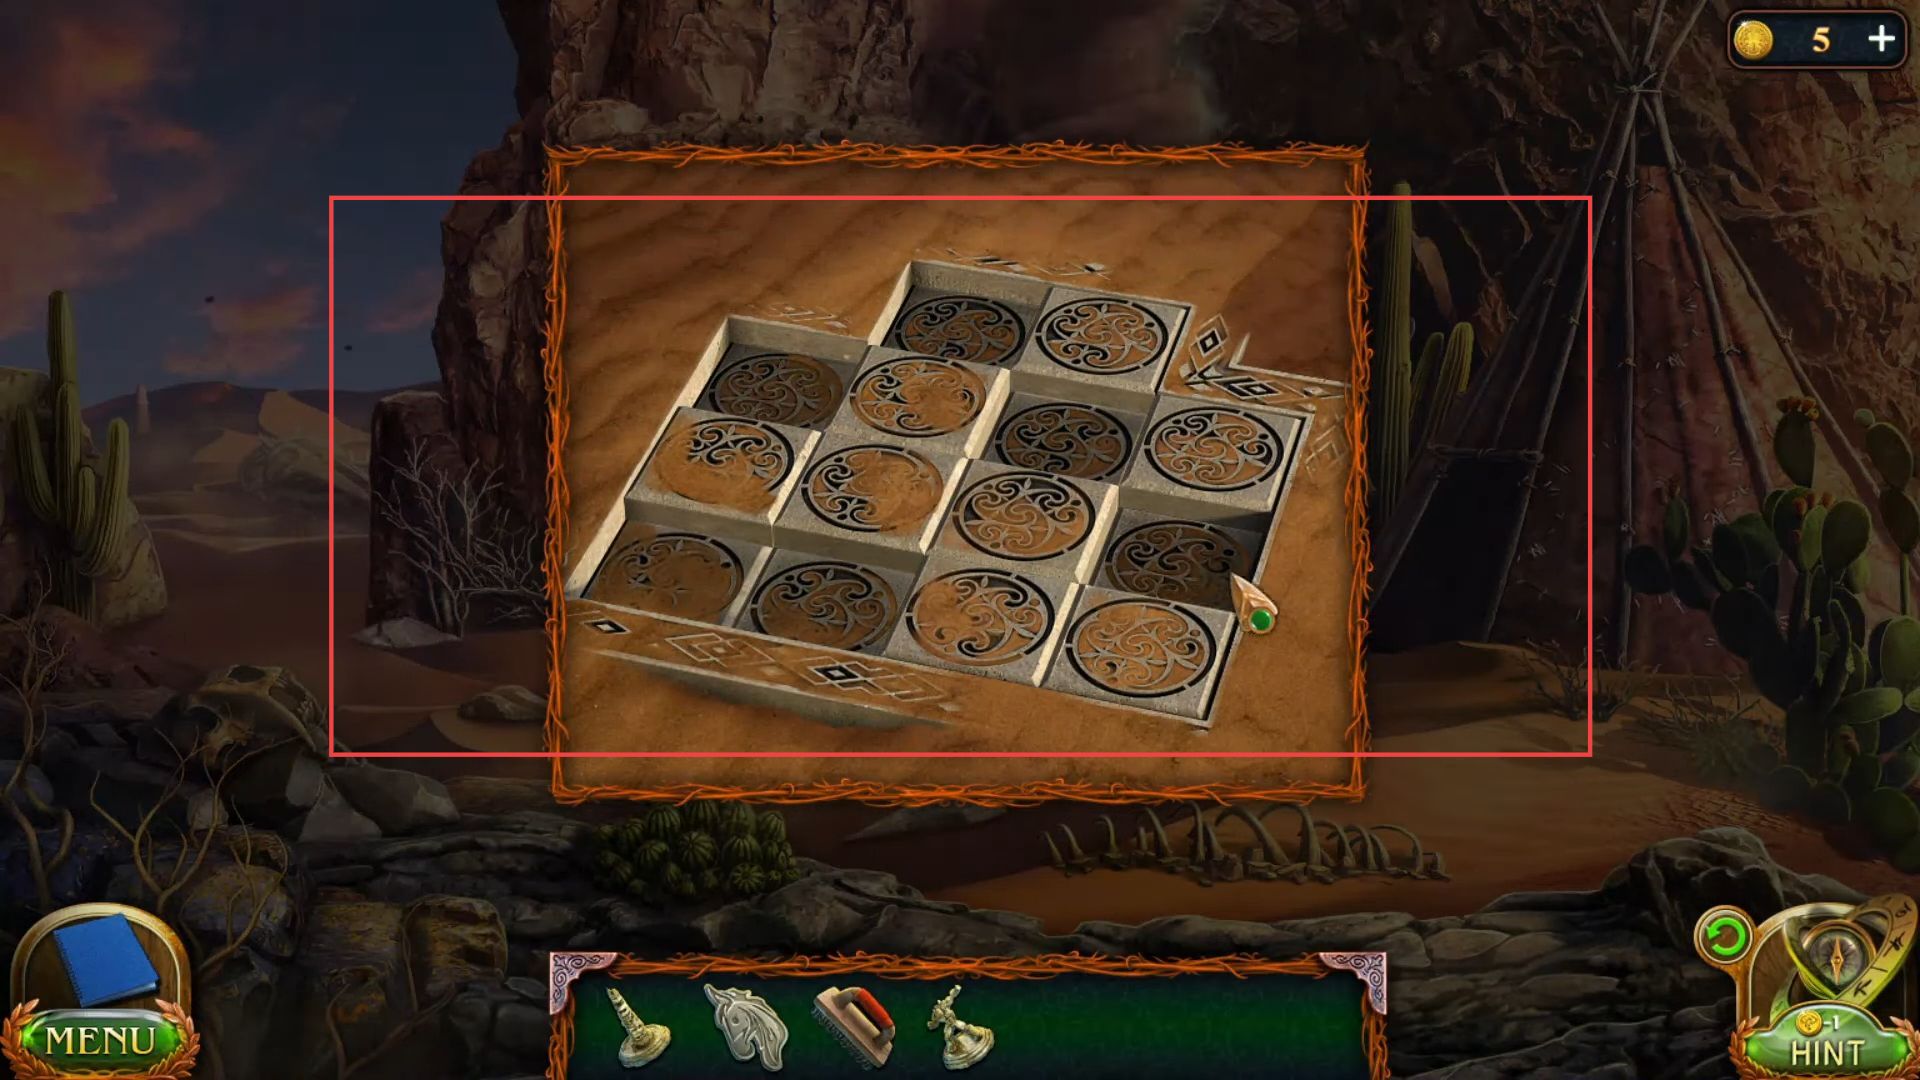
- Go to the cave using the map and click the tiles that have been seen on the hint in this sequence.
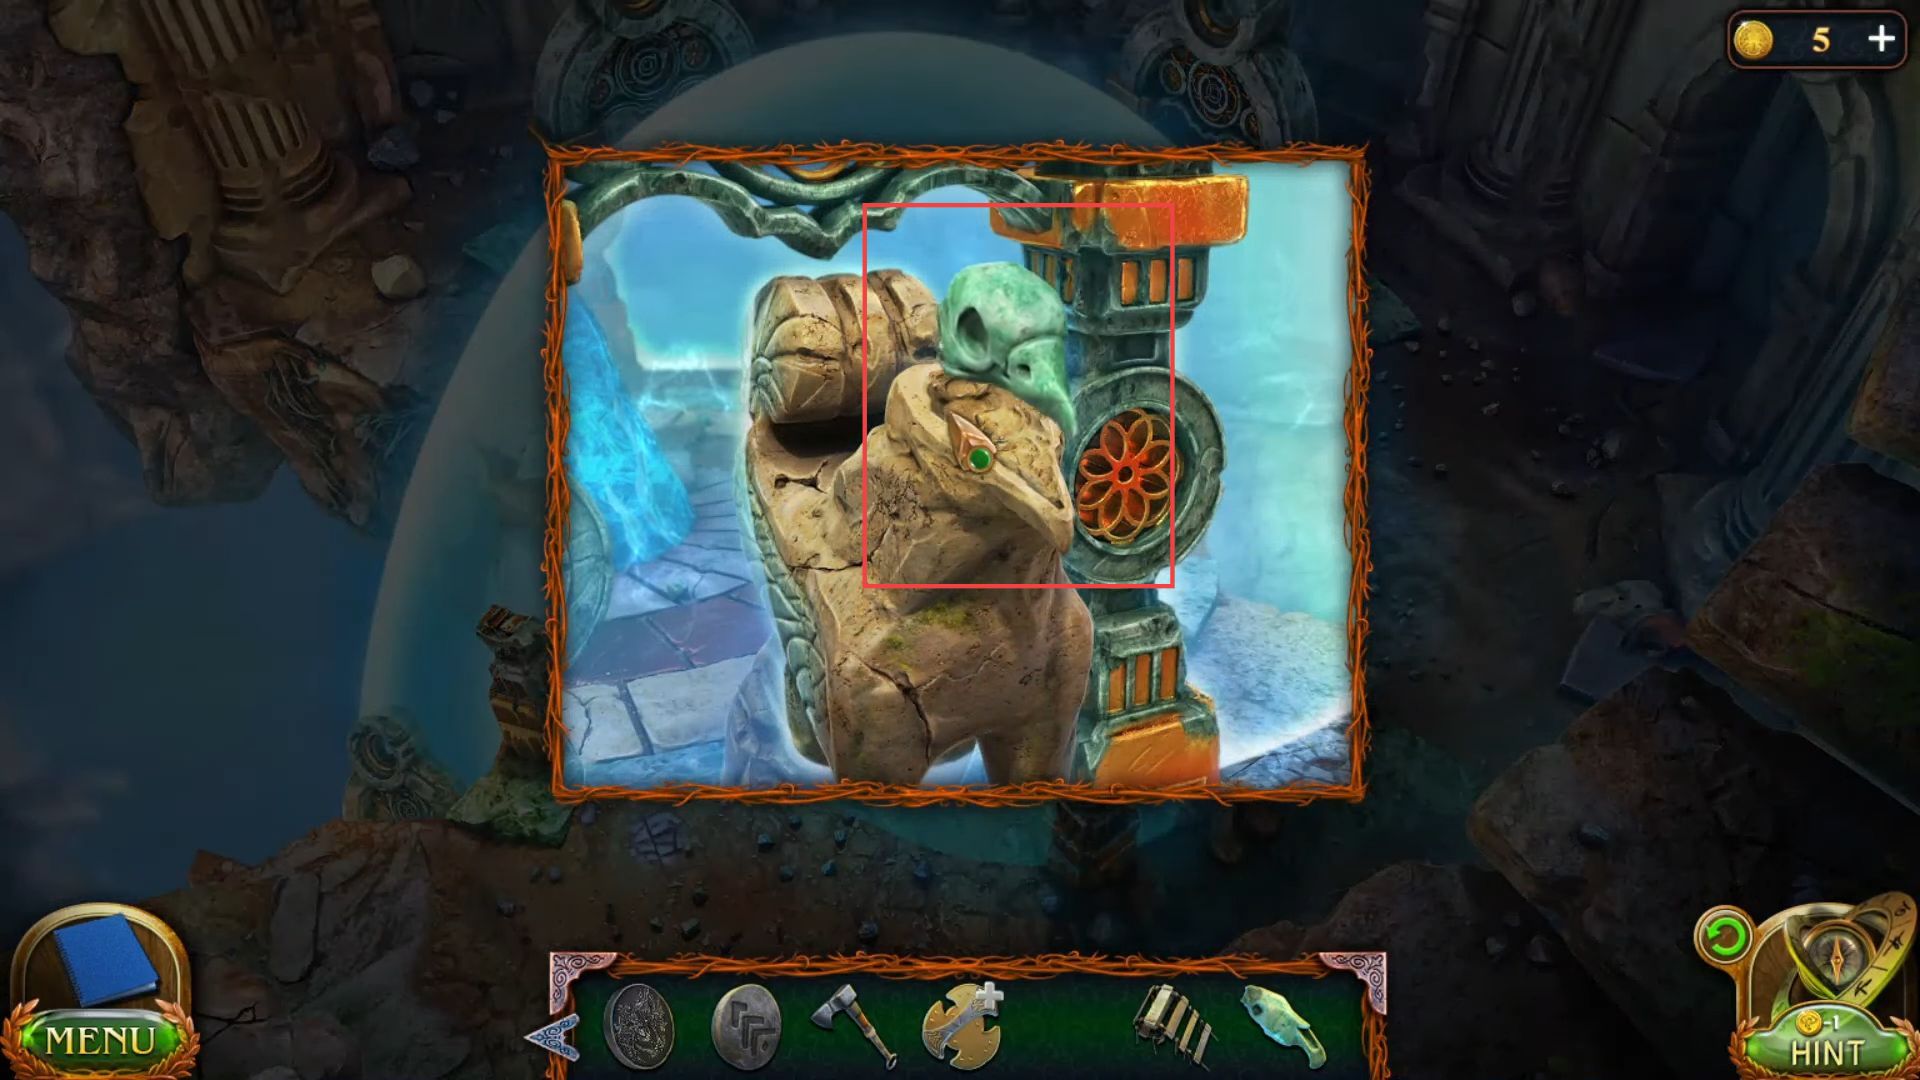
- Go inside the cave and place the horse’s head on the pillar.

- Use the brush to clean the dirt from the next pillar.

- Rotate the obelisks according to the prophecy that found in the treasury.

- Rotate the obelisks according to the prophecy that found in the treasury.

- Rotate the obelisks according to the prophecy that found in the treasury.
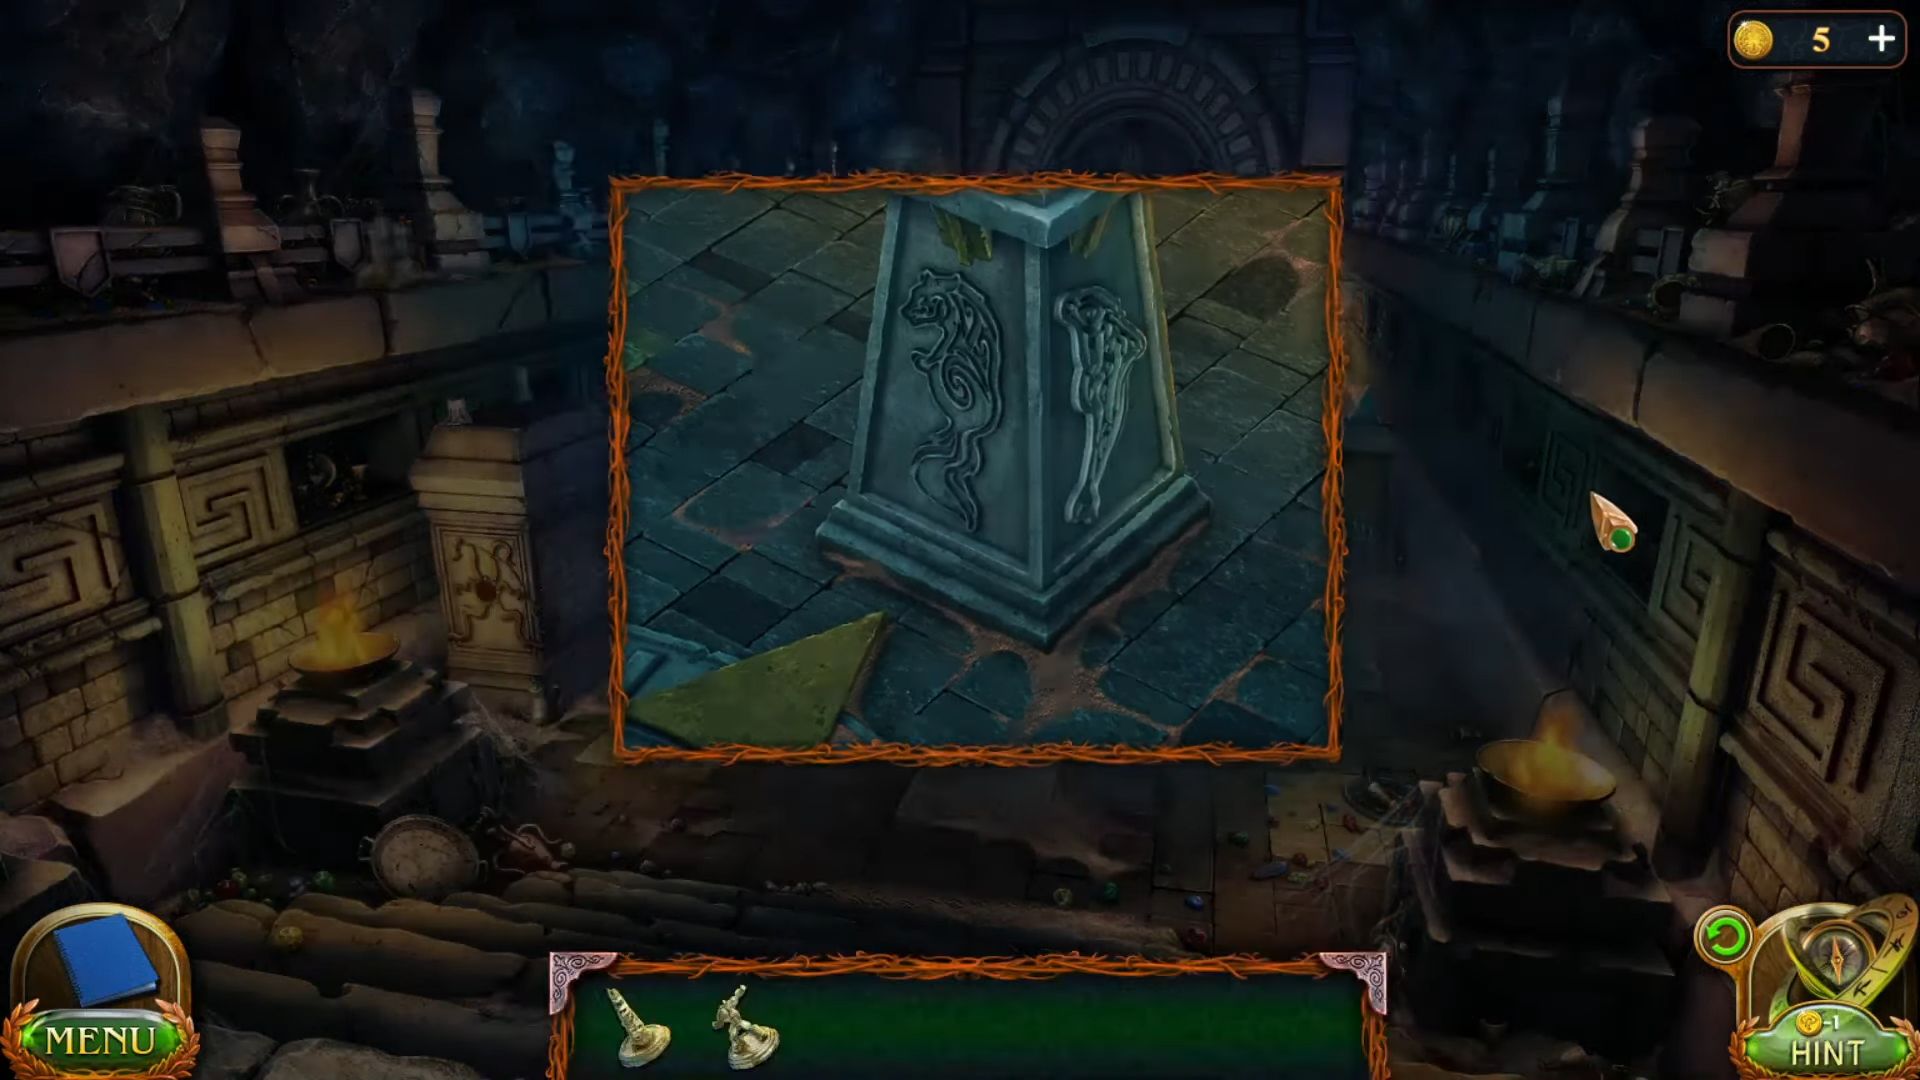
- Rotate the obelisks according to the prophecy that found on the treasury.

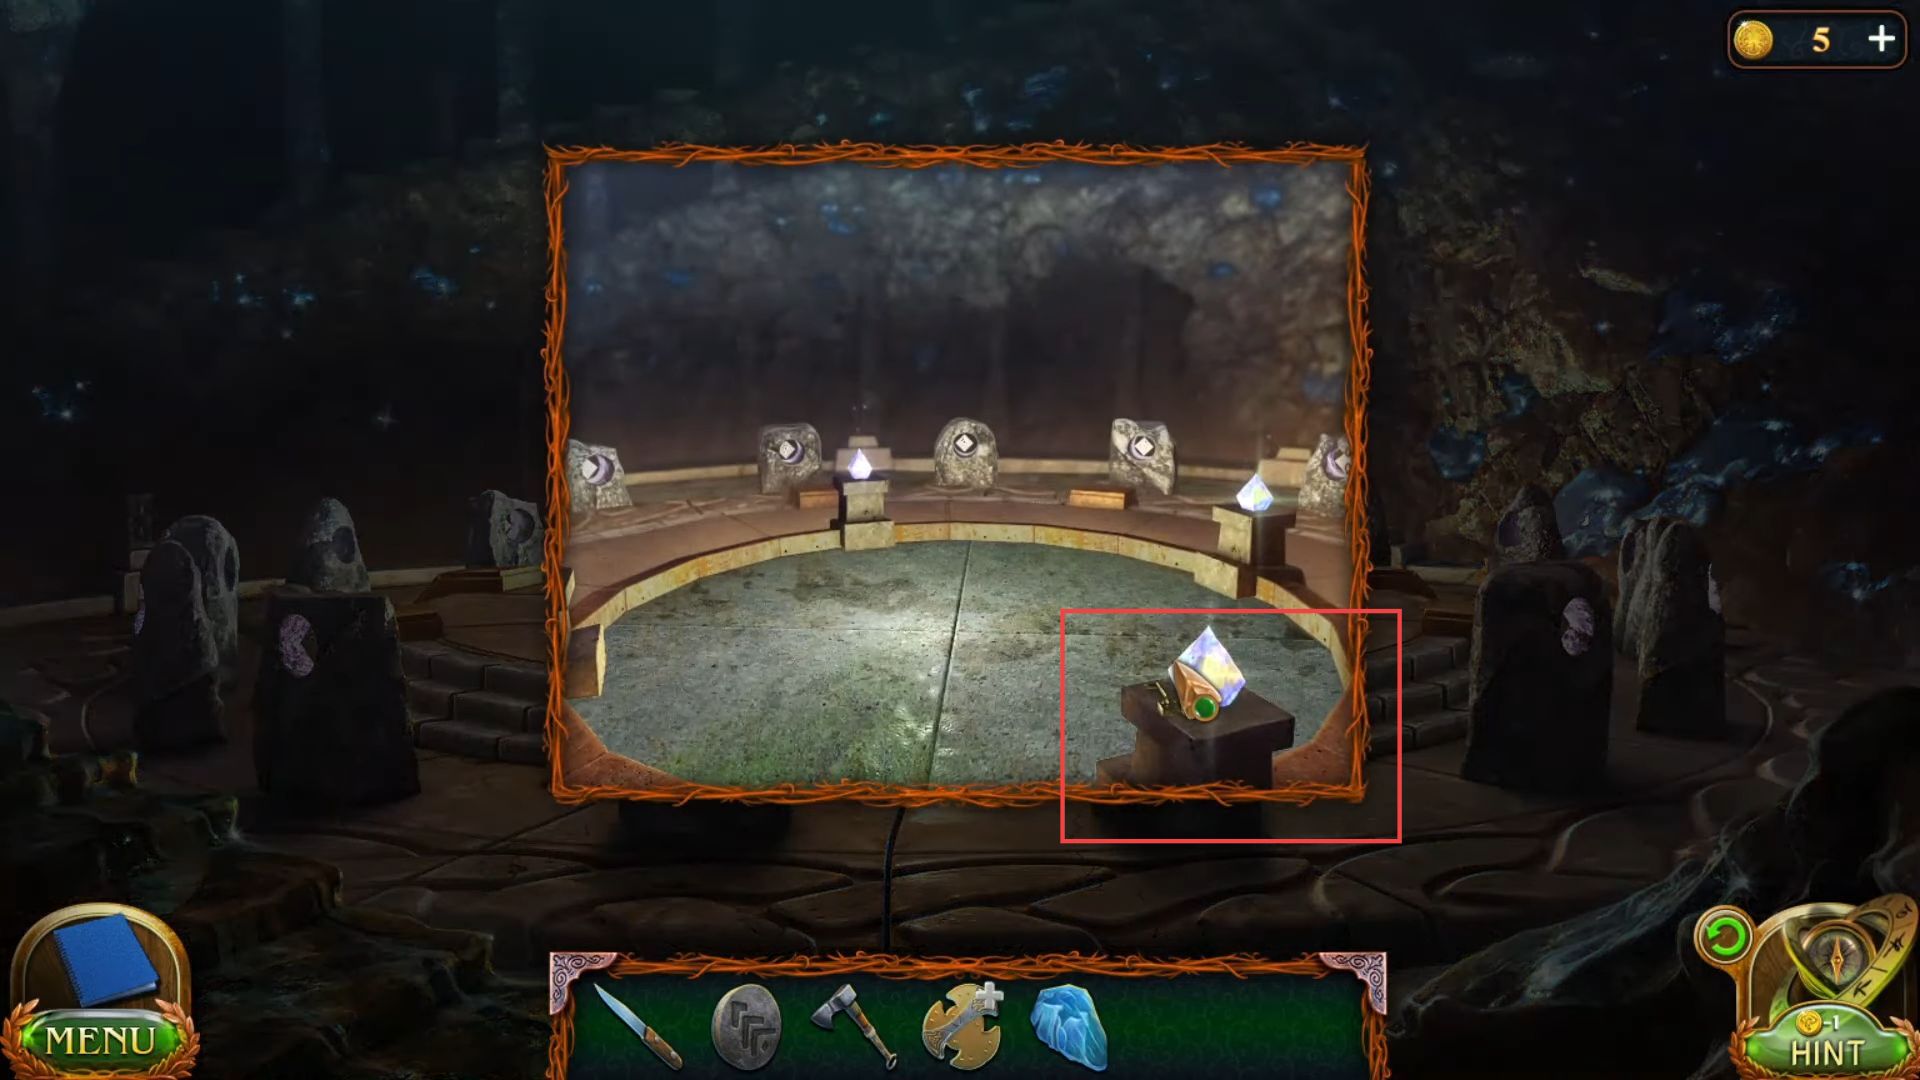
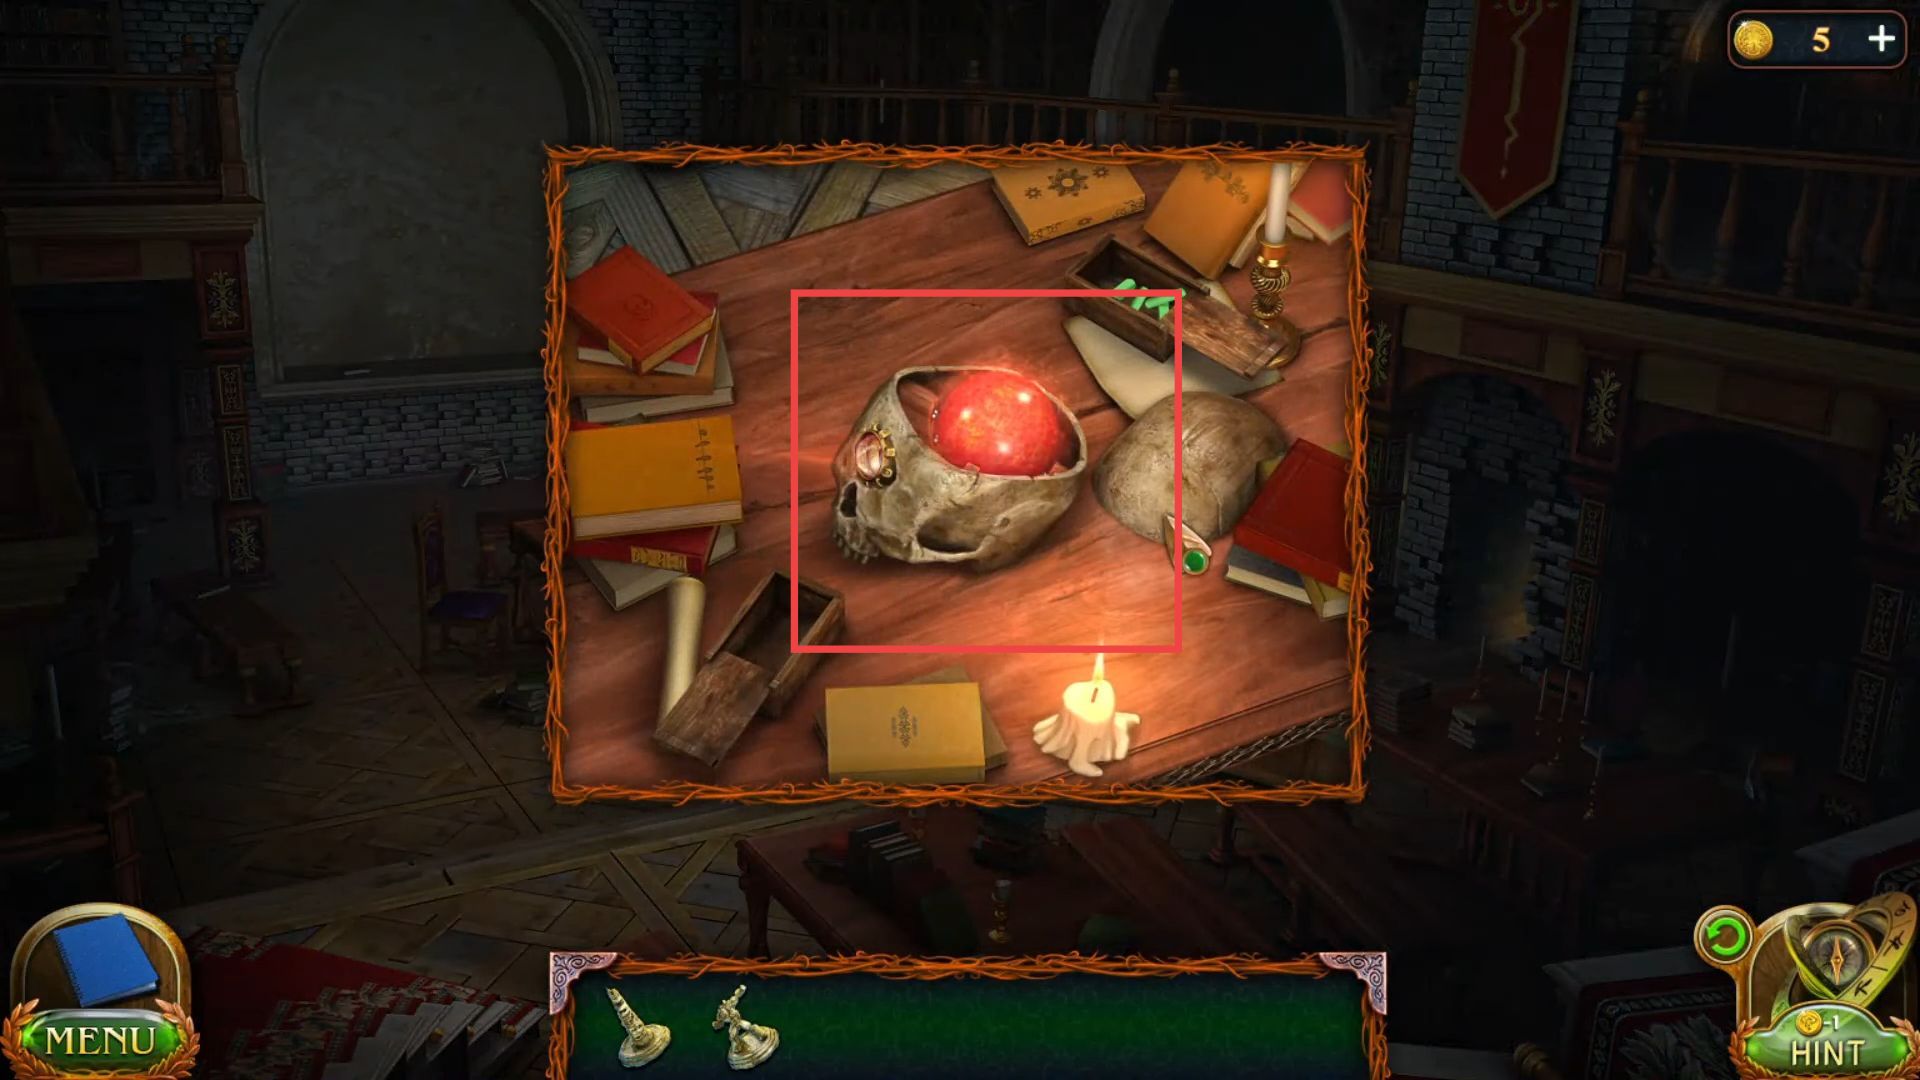
- Once the wall is opened, grab an orb of memories from the skull.
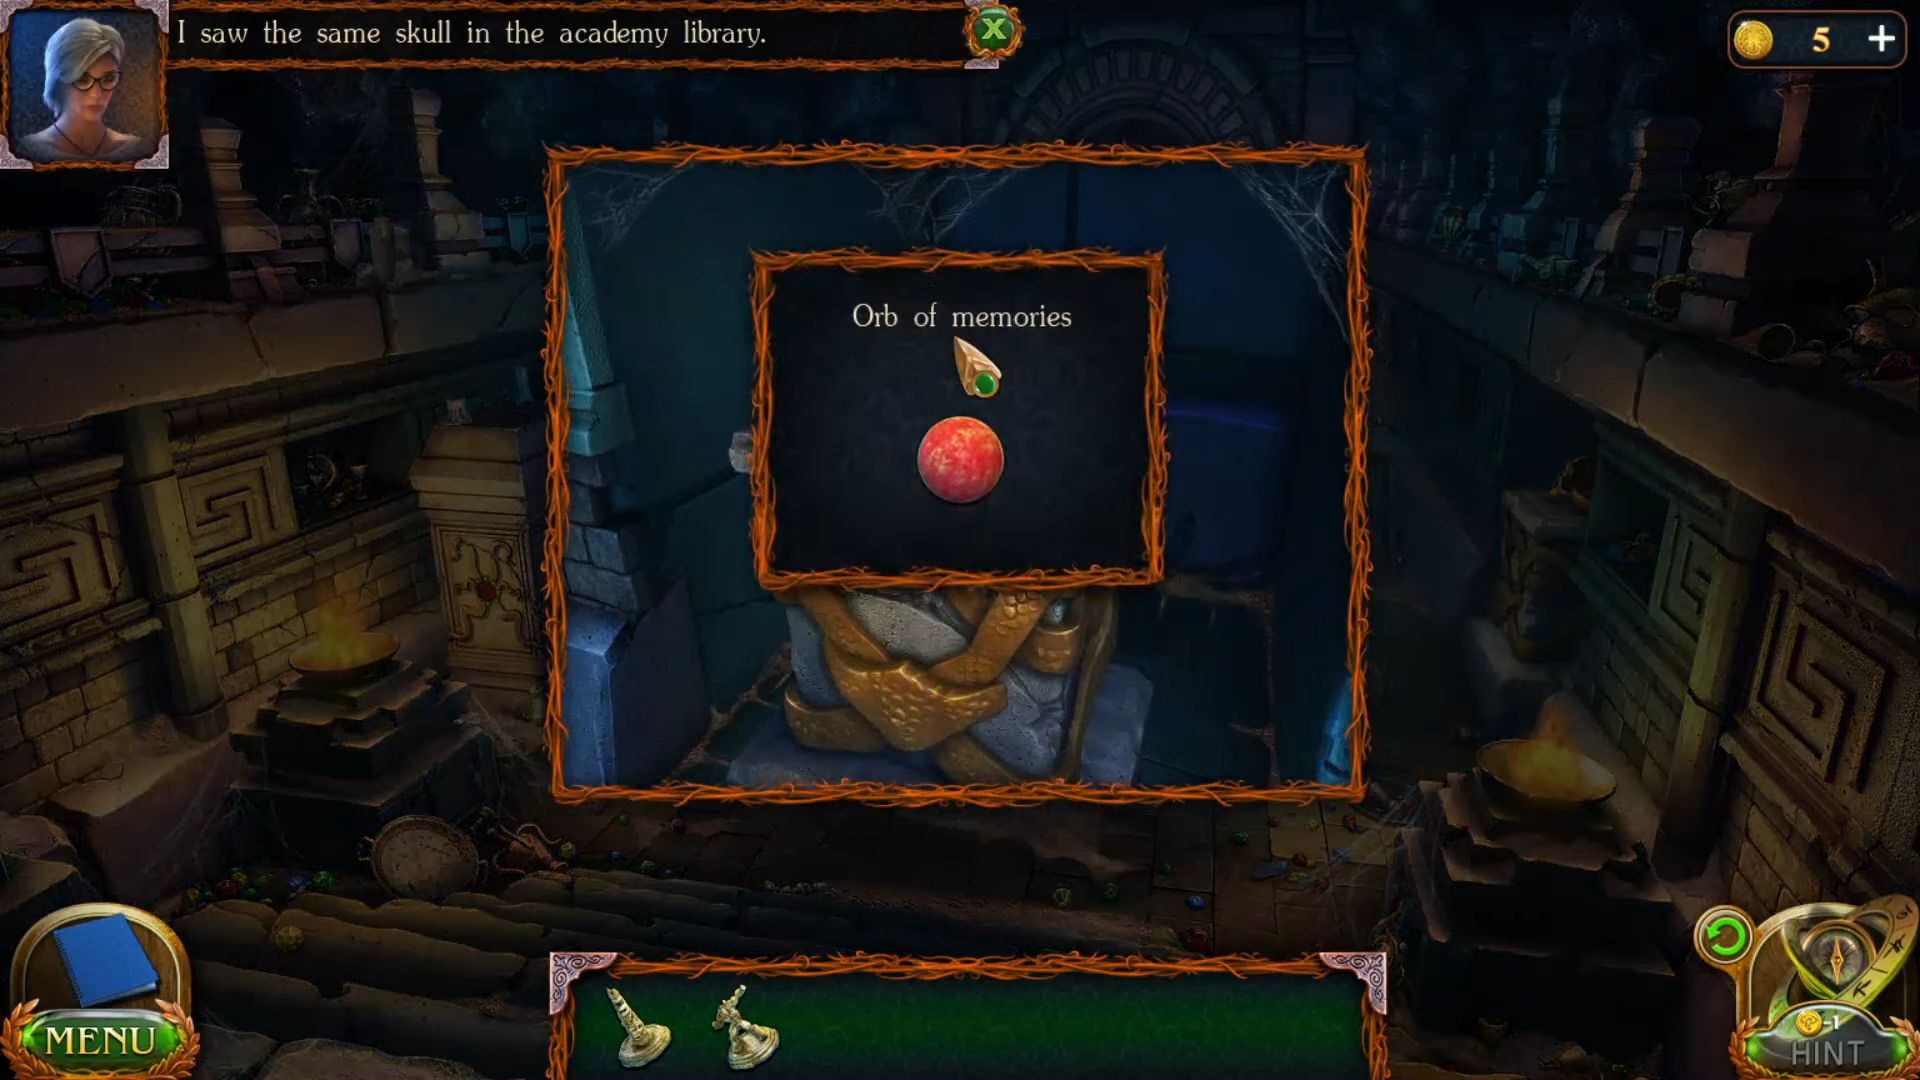
- Go to the library and place the orb of memories on the head of the half skull from the table.
- Head to the number 10 shield from the library and get this clue page.
- Return to the cave, clicks the dots in the sand, and help Susan draw this picture according to the hint from the library.

- Grab a key from the drawing place.

- Go inside the cave and place the key on the front door to unlock it.

- Go inside the door and grab a great Metronome from the left side.

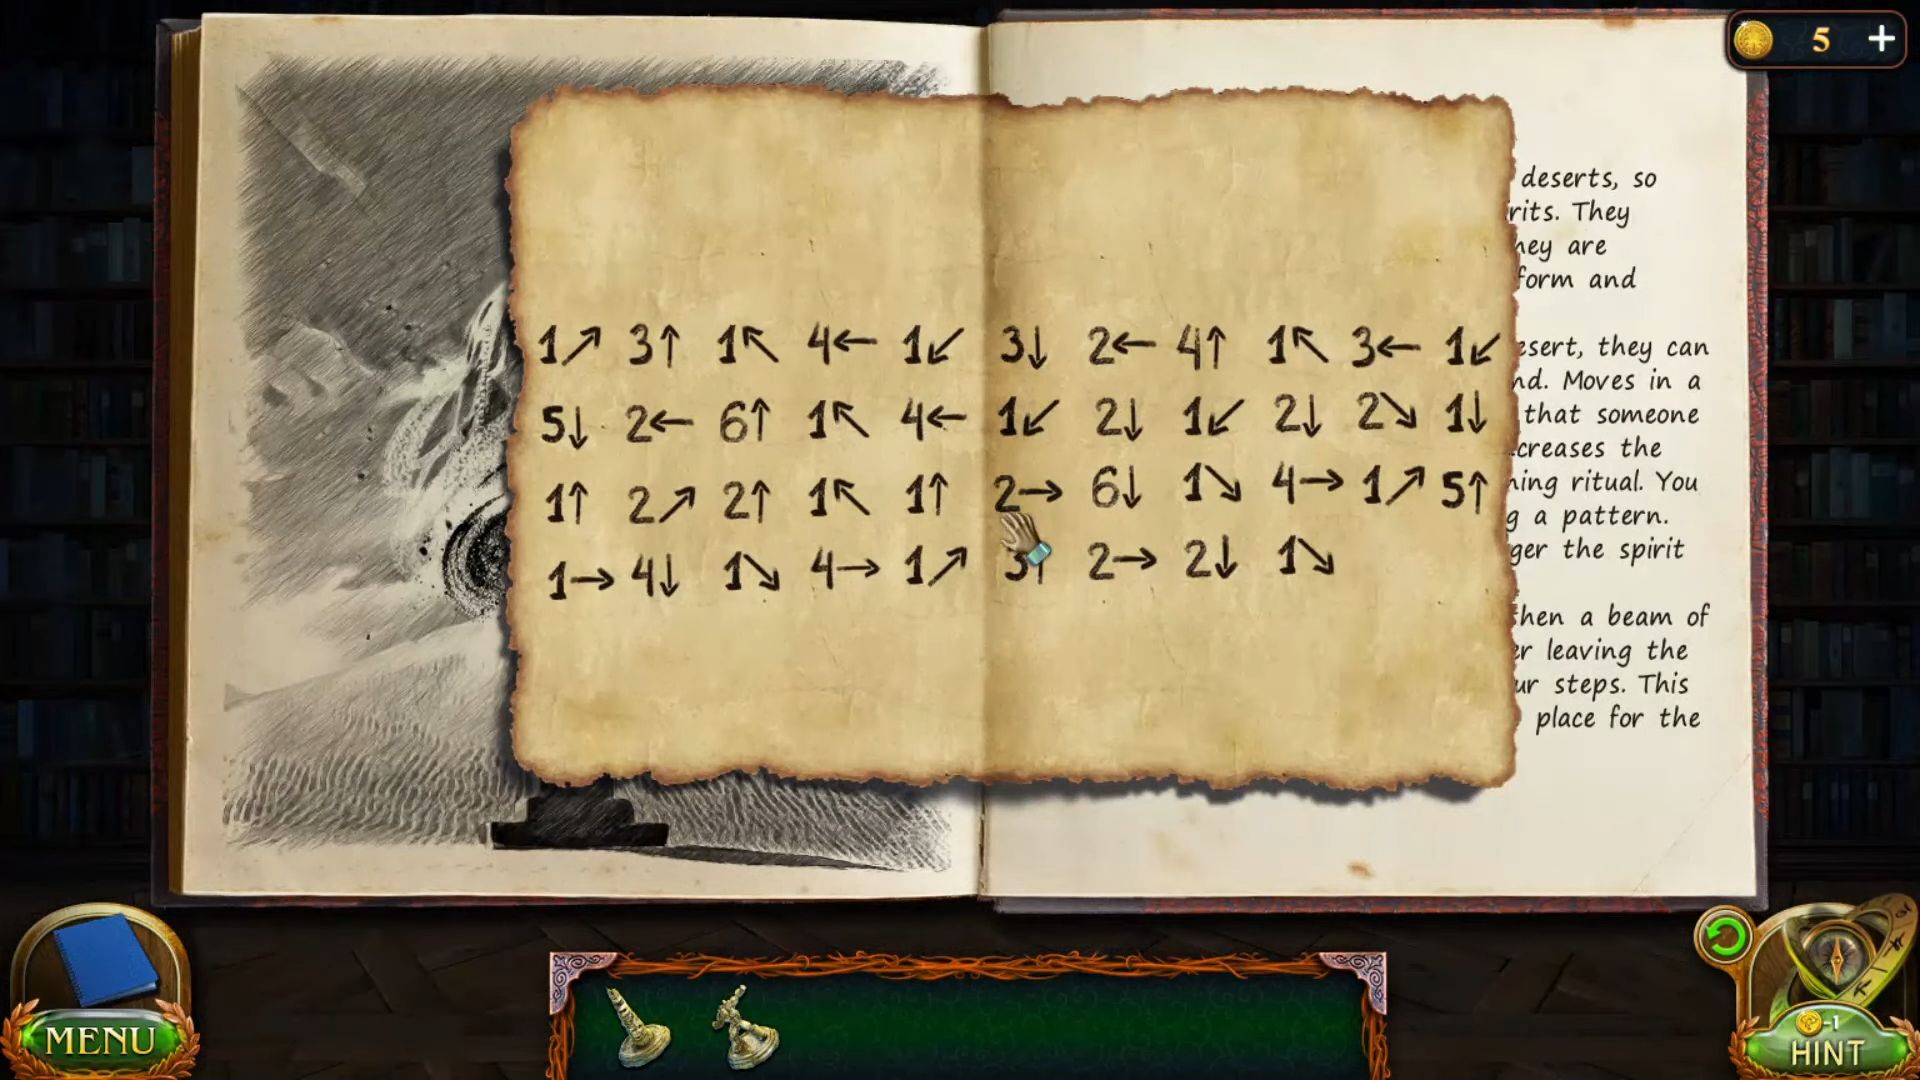
- Put the metronome on the board, then arrange the events and structures of the lost lands in this sequence.
- Grab a skull from the pillar.
- Go inside the cave room and put the skull on the left side board to slide it.

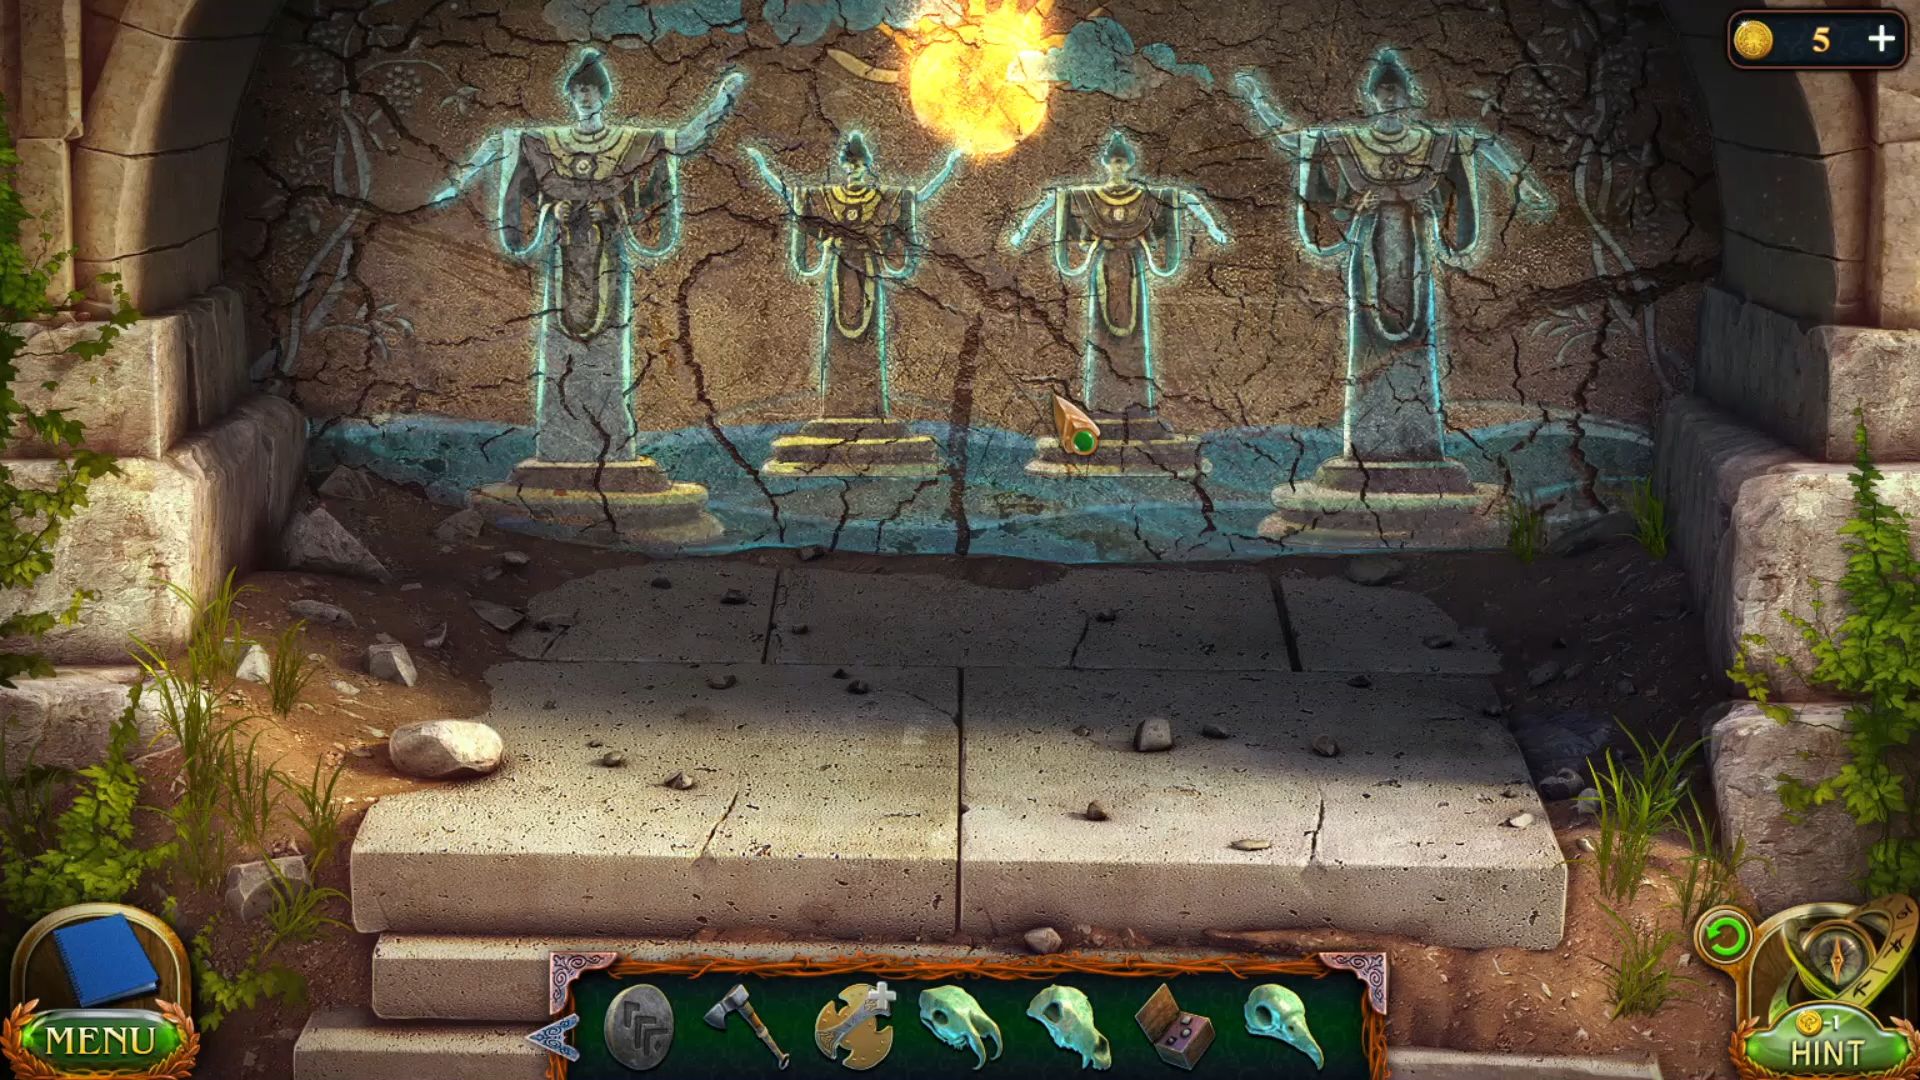
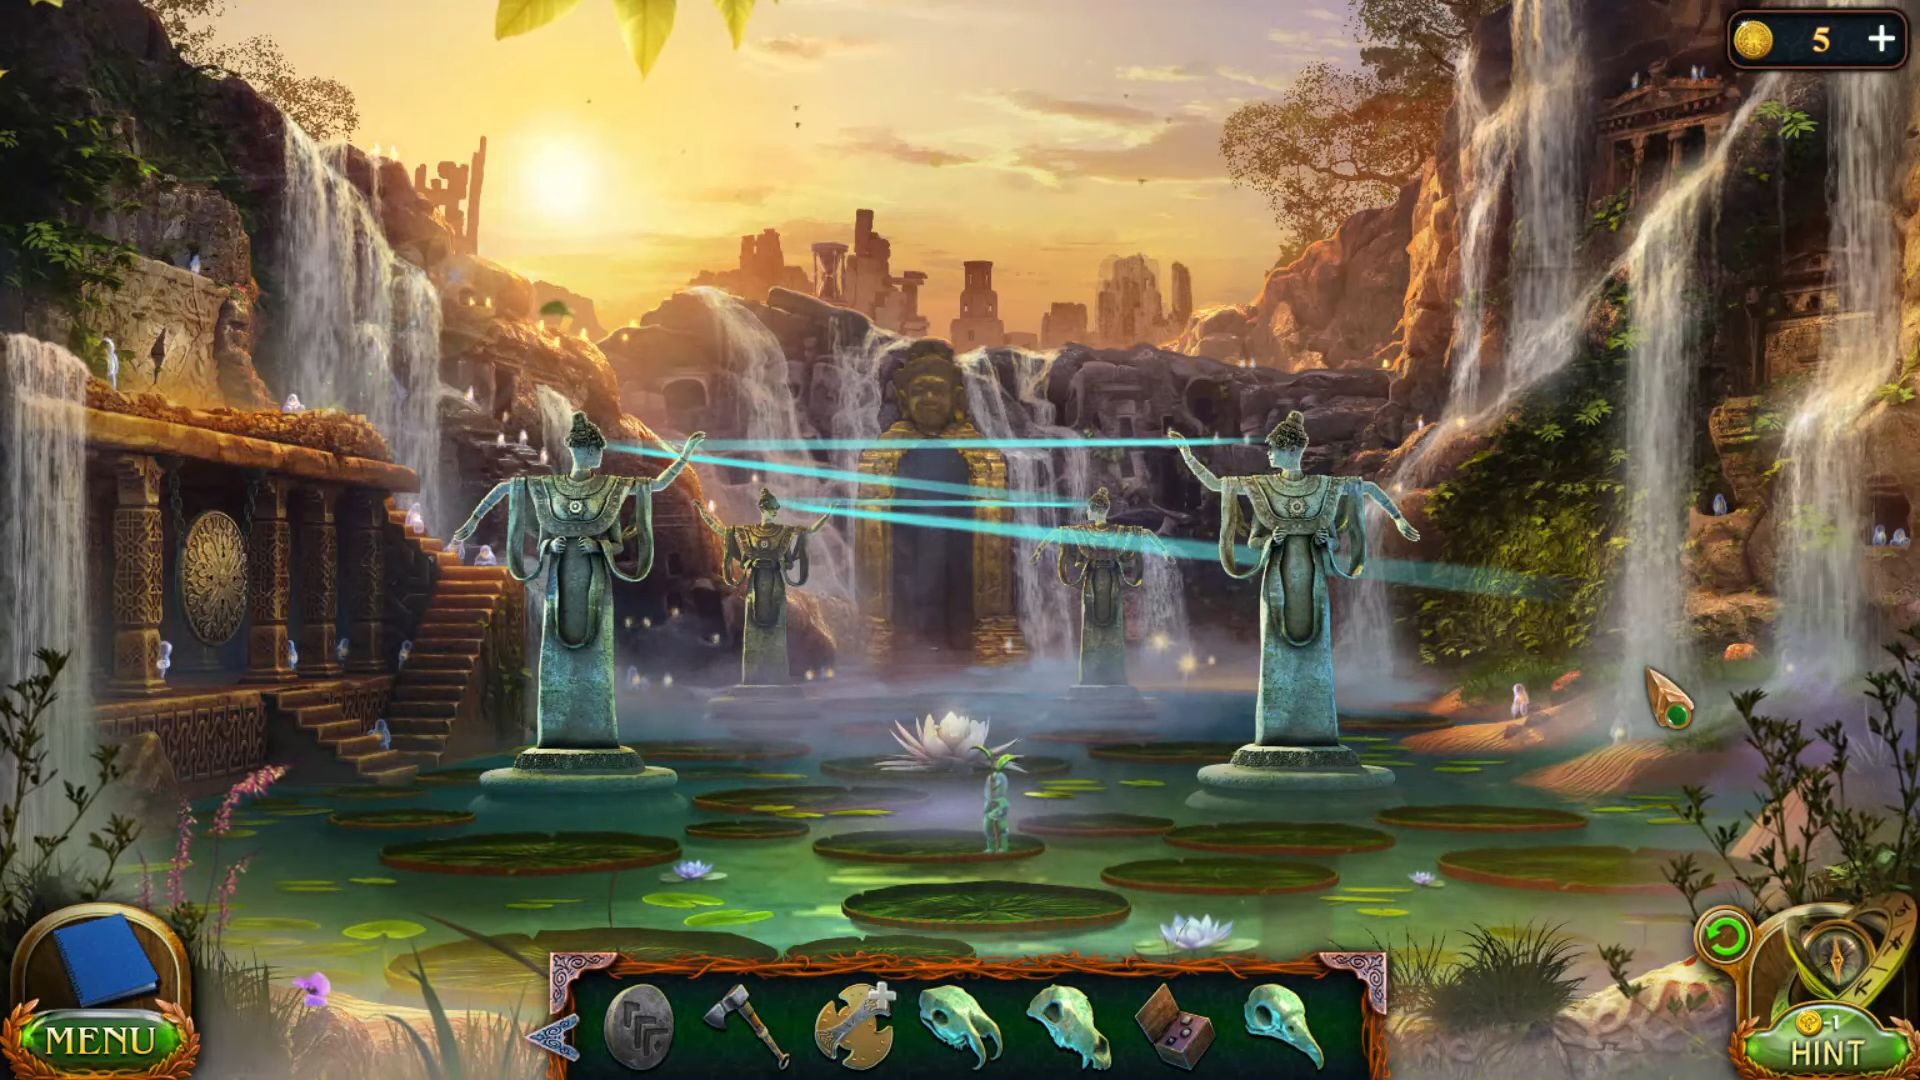
- Now move with beams to light up all the blue stones in this sequence.

- Click the chips to light them all up in this way.

- Move all the chips to their places like this.

- Move the chains by the edges across the field to fill in all yellow squares with chains in this sequence.

- Grab an amulet from the body at the centre of the floor.

- Put the amulet on the handcuff of the sleeping man.

- Finally, throw the handcuff with the amulet into the light ball.
