This guide will let you know how to fix the “Razer Synapse won’t open or fails to start” in Windows 10/11. Reinstalling Razer Synapse and Razer device drivers, Installing the latest Microsoft .NET Framework, disabling Windows Firewall, Closing any Razer Tasks, and Checking for Windows Updates are a few methods that can be followed to resolve the error.
Reinstalling Razer Synapse and Razer device drivers
In this section, we will take you through the steps to reinstall Razer Synapse and Razer device drivers. First, you have to open your device manager, then check for the Razer device drivers and uninstall them.
- First, you need to right-click the Windows button from the taskbar and select Device Manager from the listings.
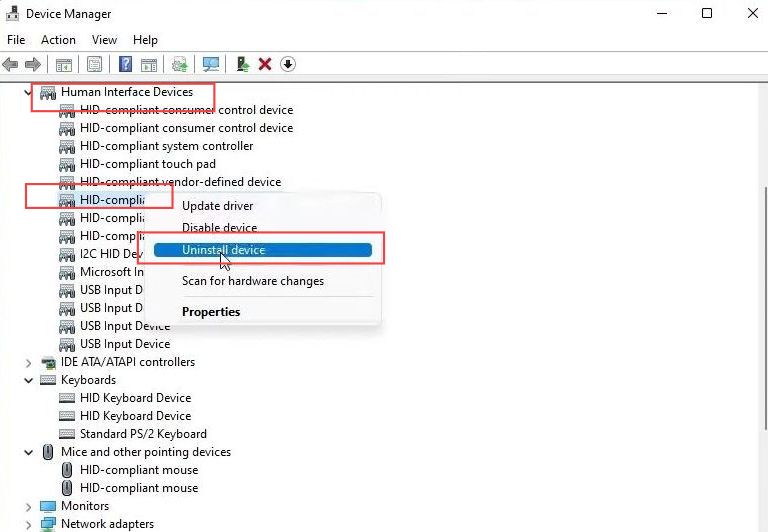
- Upon reaching the new window, click the Human Interface Devices tab to expand it.
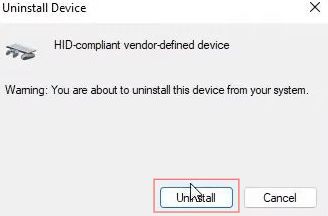
- Right-click your HID-compliant vendor-defined device and select the Uninstall device option from the listings.
- You have to click the Uninstall button from this window. After that, restart your computer and unplug all the Razer devices a few times.
- Once the computer is restarted then connect all the Razer devices again.
This will install the Razer devices related drivers automatically.
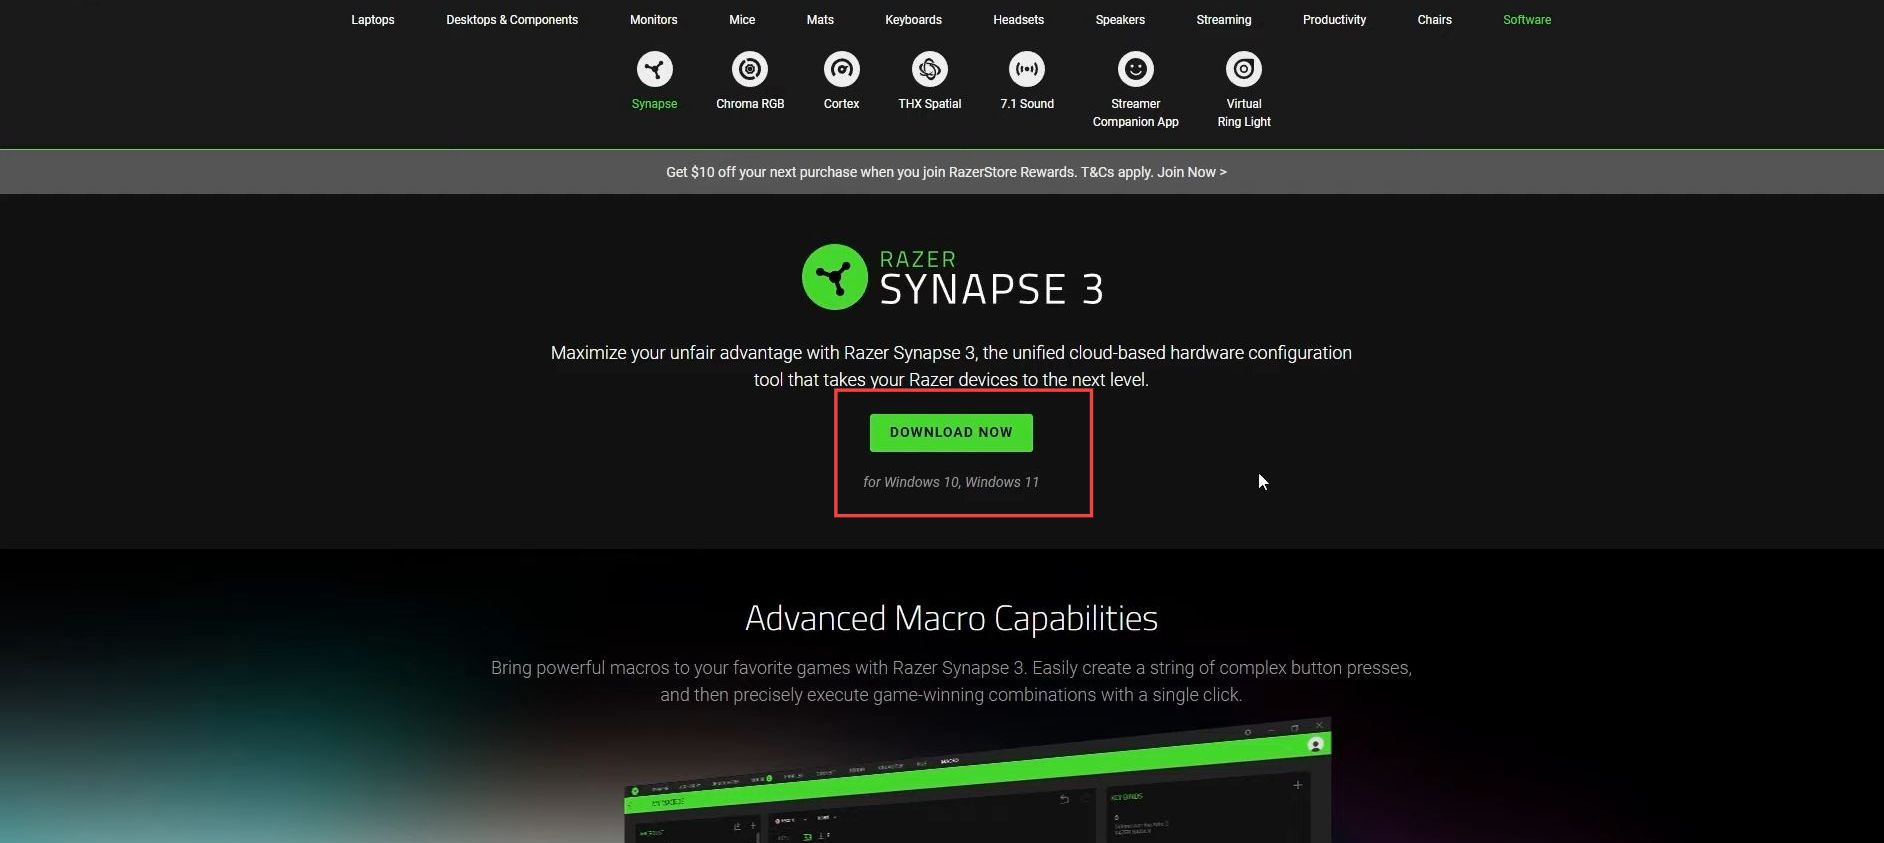
- Now open your browser from your computer and download Razer Synapse 3.
- Once you reach the web page, click the Download button to install the latest driver.
Installing the latest Microsoft .NET Framework
This section describes how to install the latest Microsoft .NET Framework to resolve the issue. You have to install the latest version of the .NET Framework and check whether the error is fixed.
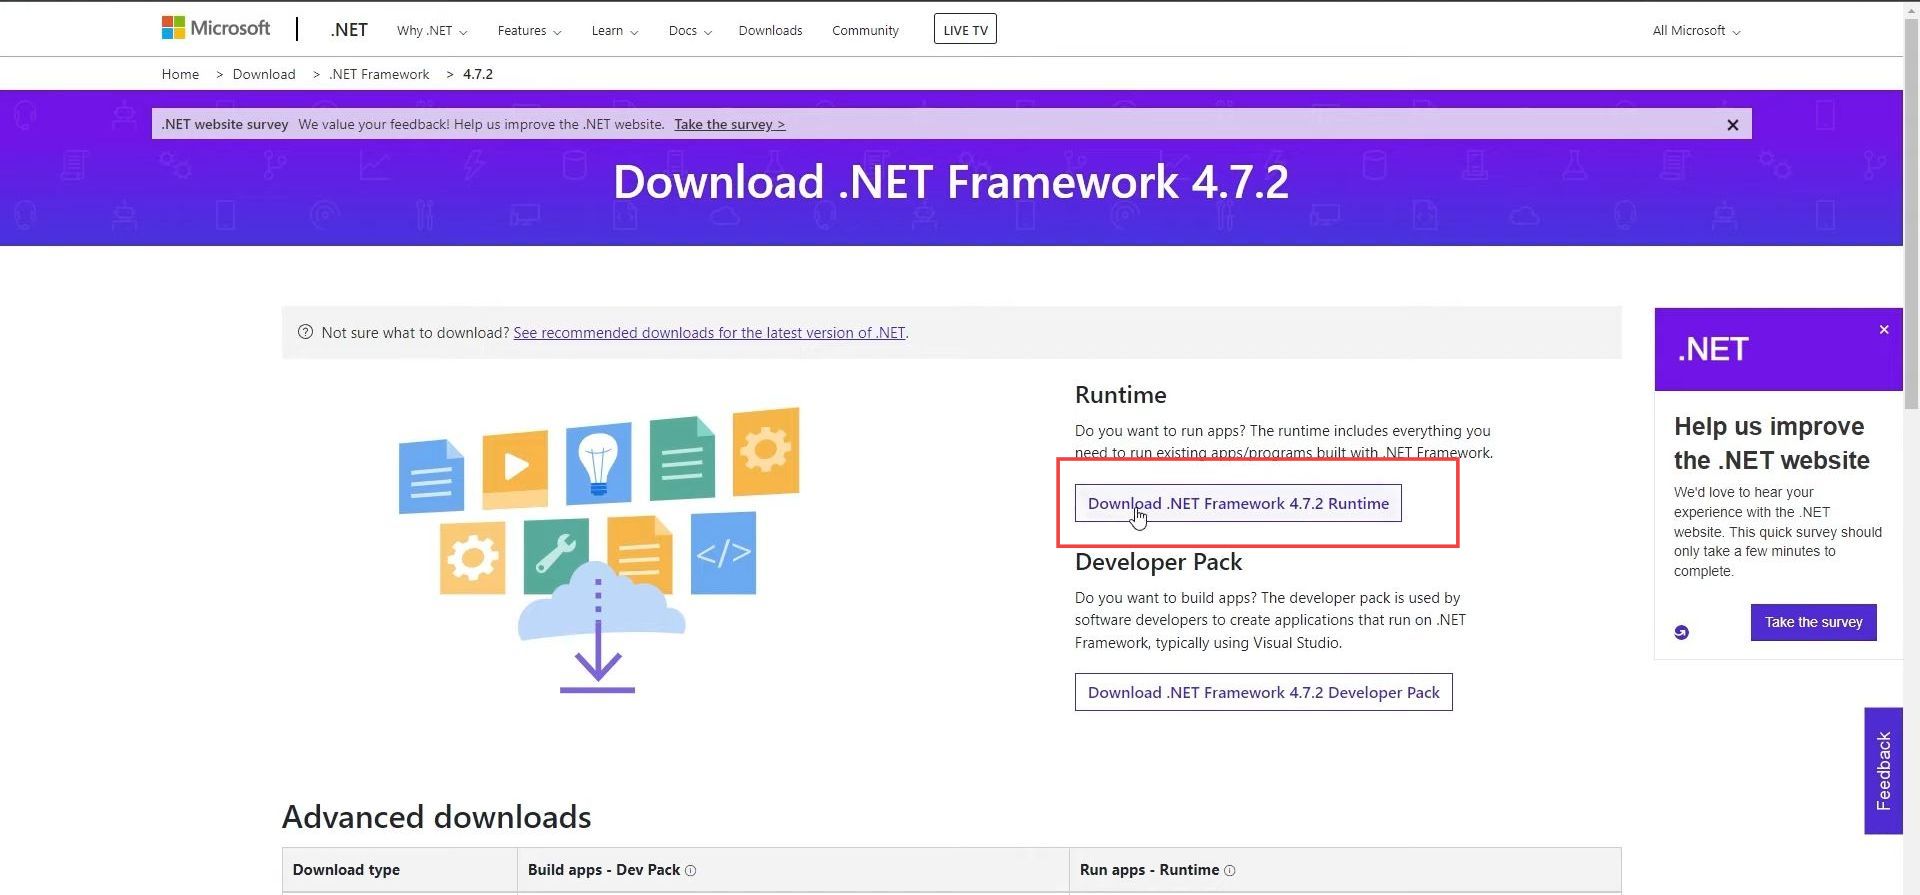
- Open the browser from your computer to download .NET Framework 4.7.2 for Windows 10 or 11.
- Once you reach the web page, click the Download .NET framework 4.7.2 Runtime button from the menu in the Runtime section.
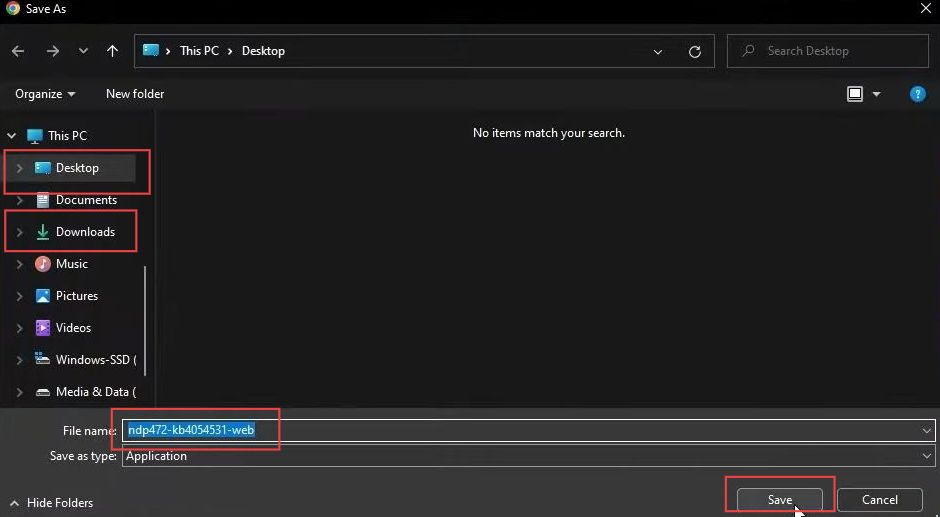
- After that, choose a suitable location such as a downloads folder or desktop to download the .NET framework 4.7.2 Runtime.
- Click the Save button from this window.
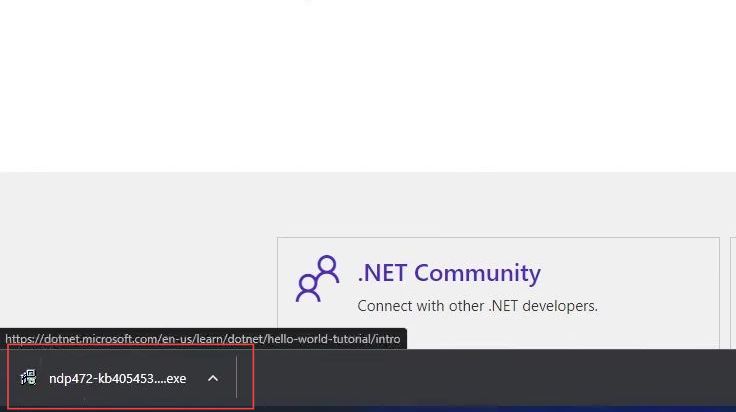
- Now click the downloaded file from the bottom left side to run the installer file.
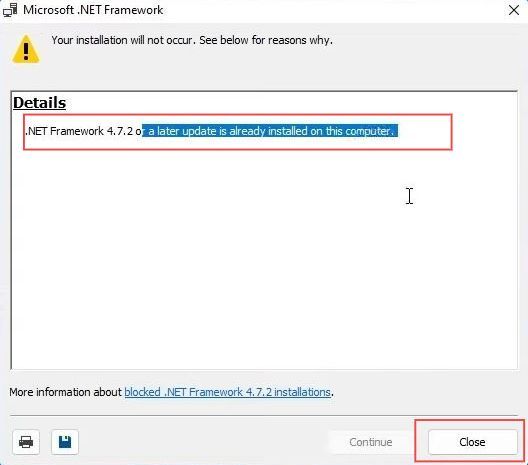
- If you get this notification in the details section, then it means you already have the recent version of .NET Framework 4.7.2 Runtime installed on your computer.
- Now you need to close the window by clicking the Close button.
However, if this notification does not appear, follow the instructions and check whether the issue is resolved.
Disable Windows Firewall
This section explains to disable the windows defender firewall to resolve the issue. You have to open the Defender firewall from the start menu and turn off the private and public network settings to check if the problem is solved.
- First, you need to click the Windows button from the taskbar.
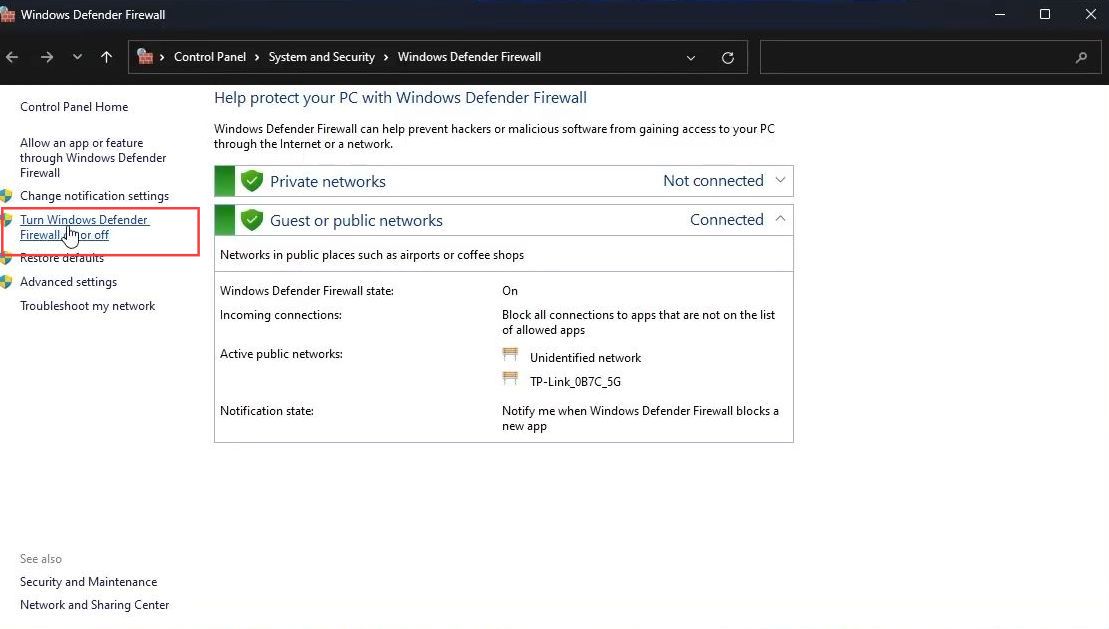
- Search firewall and click the Windows Defender firewall from the listings to open it.
- Once it opens up, select the Turn Windows Defender Firewall on or off option from the left side panel.
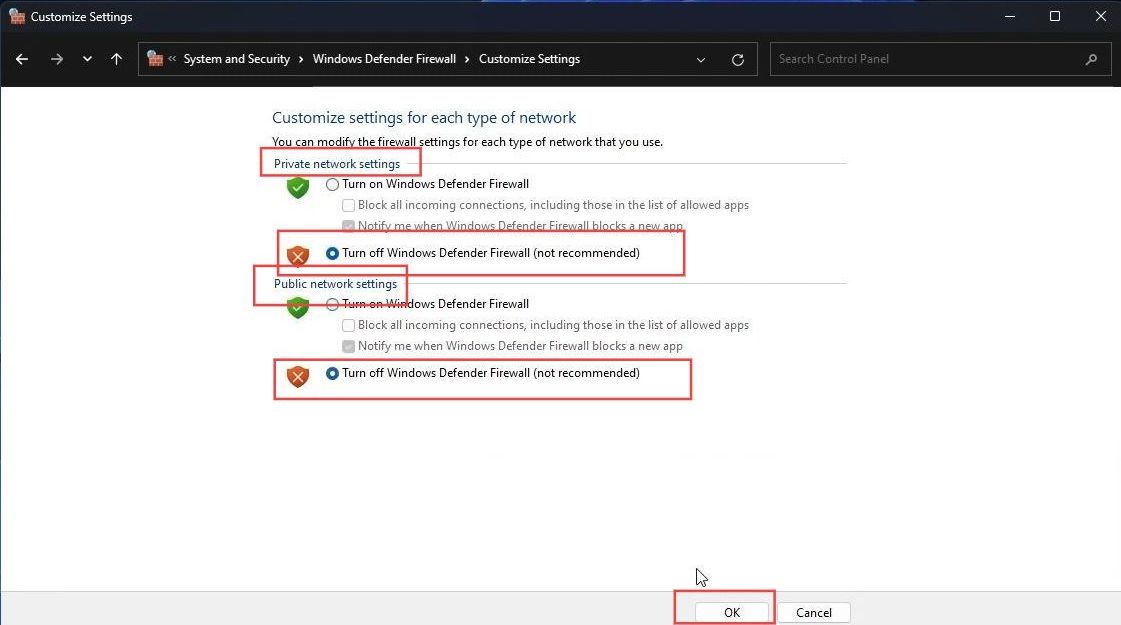
- Once the customize settings window is opened, select the turn-off windows defender firewall (not recommended) option from the private and public network settings section.
- After that, click the OK button to save the changes and restart your computer to check whether the issue is resolved.
- If the problem is not caused by the windows defender firewall, then reset the settings for both private and public users as previously.
Close any Razer Tasks
This section describes how to close any Razer Tasks to resolve the issue.
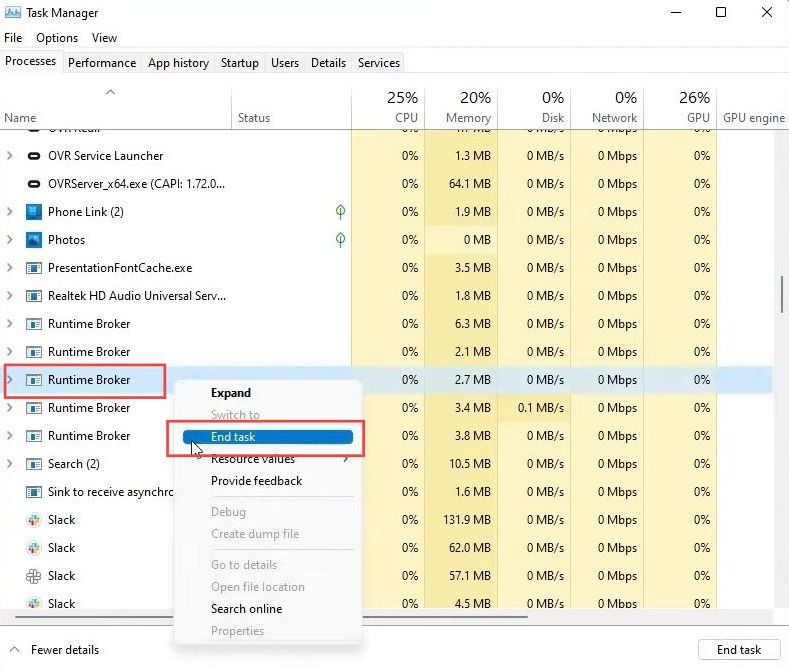
- First, you need to right-click the Windows button from your taskbar and select Task Manager from the listings.
- Upon reaching this window, scroll down to check the Razer process which is running.
- Right-click the ongoing Razer process and select the End Task option from the listings.
- After that, restart the Razer software and check whether the issue is resolved.
Check for Windows Updates
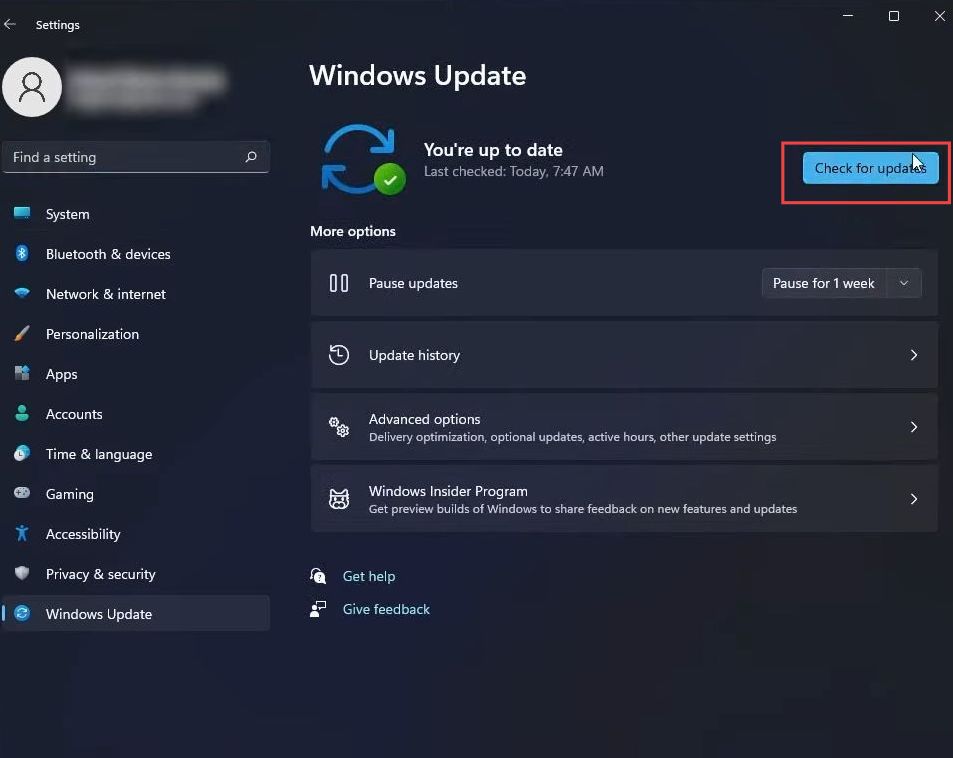
This section describes how to Check for Windows Updates to resolve the issue. You have to open settings, and then check for updates from the Windows update section.
- Press the Windows button located at the bottom left corner of your screen to open the Start menu.
- From the Start menu, click on the “Settings” option.
It will open up the settings window. - In the settings window, click on the “Windows Update” option at the bottom left side.
On the Windows Update settings page, you will see an option labelled “Check for updates.” - Click this button to initiate checking for available updates for your PC.
Windows will now connect to the Microsoft servers and search for any available updates for your computer. If there are any updates available, Windows will start downloading and installing them automatically. - Once the updates are complete, restart your computer and check if the issue is resolved.