In this comprehensive guide for Tiny Room Stories, you will explore a fantastic puzzle game that’s like an escape room. In this game, you’ll wander through a deserted city to find your father and other folks. The scenes are in 3D, and you can spin and move around to solve puzzles and uncover clues for your adventure. It’s a captivating twist on puzzle and escape room games.
The game is divided into 15 chapters coupled with various parts, and this fantastic guide has everything you need to navigate through it successfully.
Tiny Room Stories Walkthrough
Here’s the step-by-step guide for the starting part of Tiny Room Stories: Town Mystery, called the prologue scene. Each move and clue has been explained with pictures and codes that you can see if you want help.
Prologue
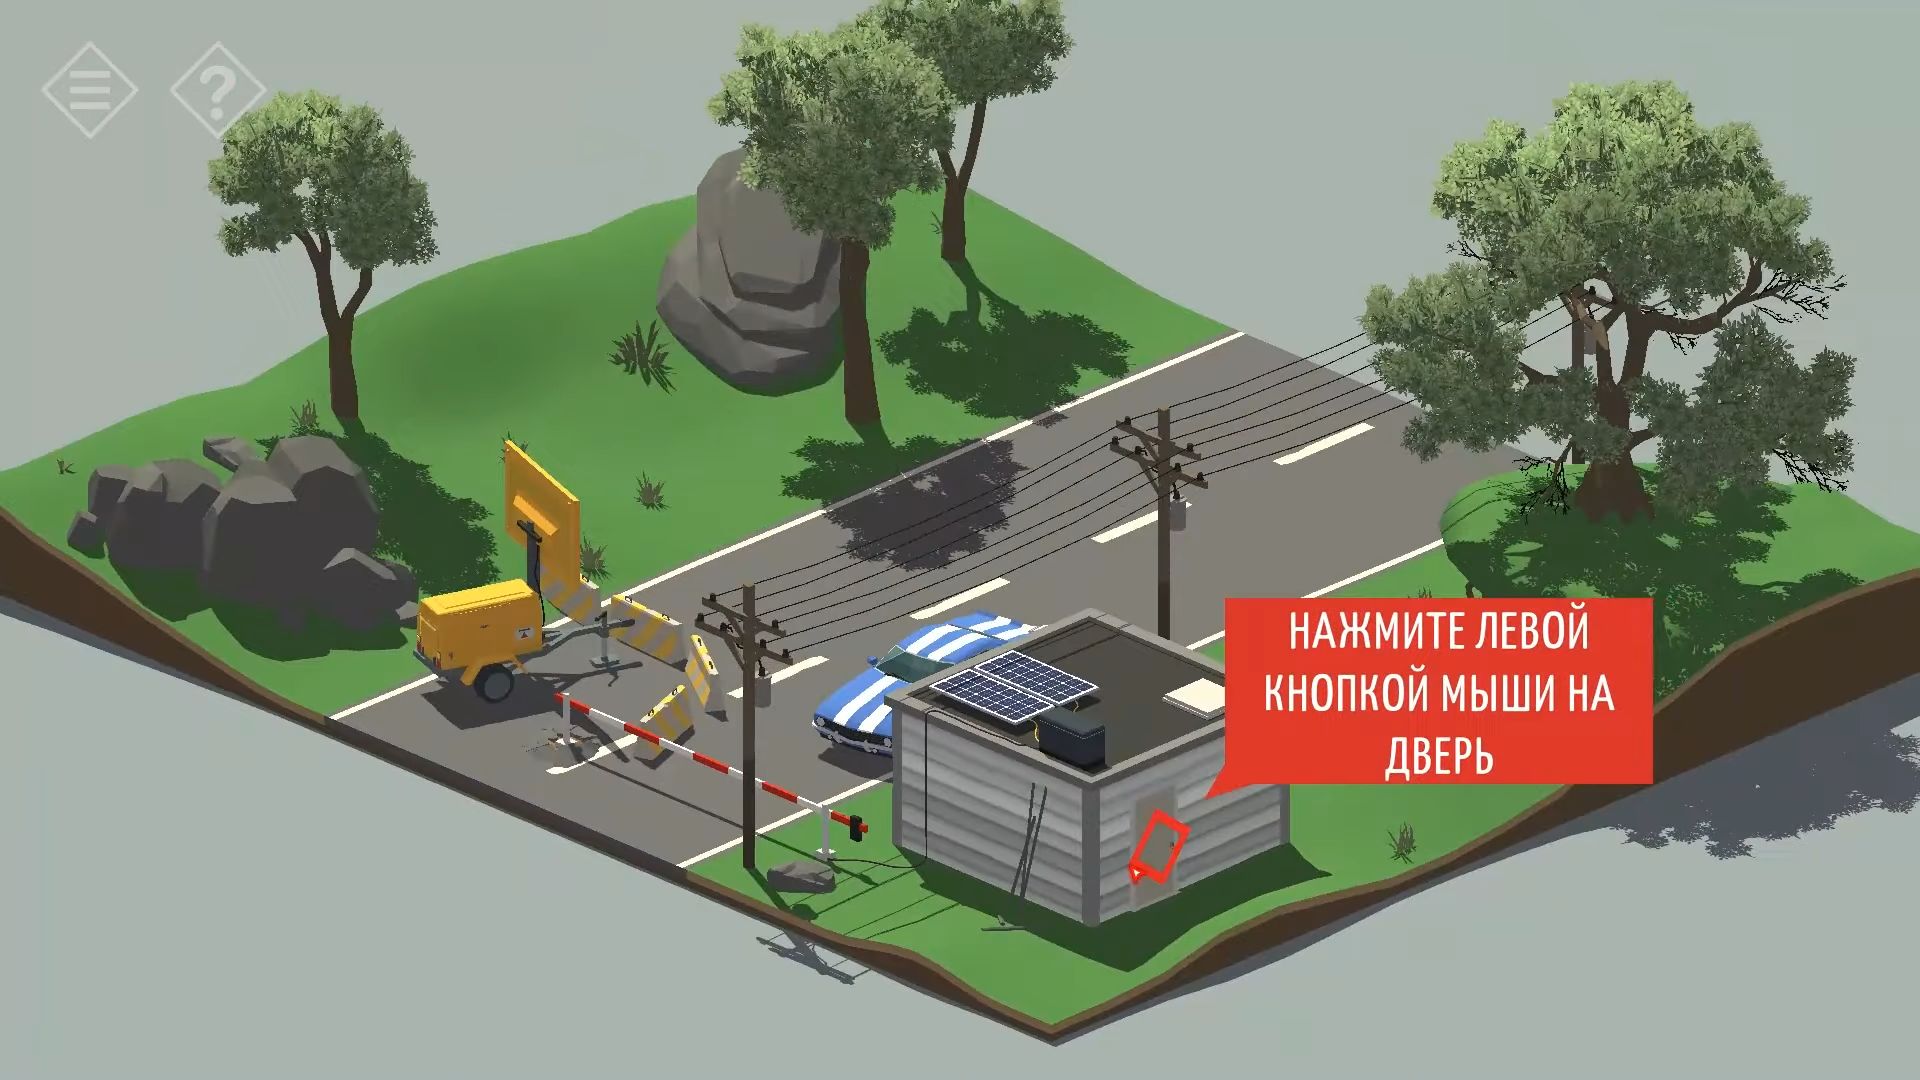
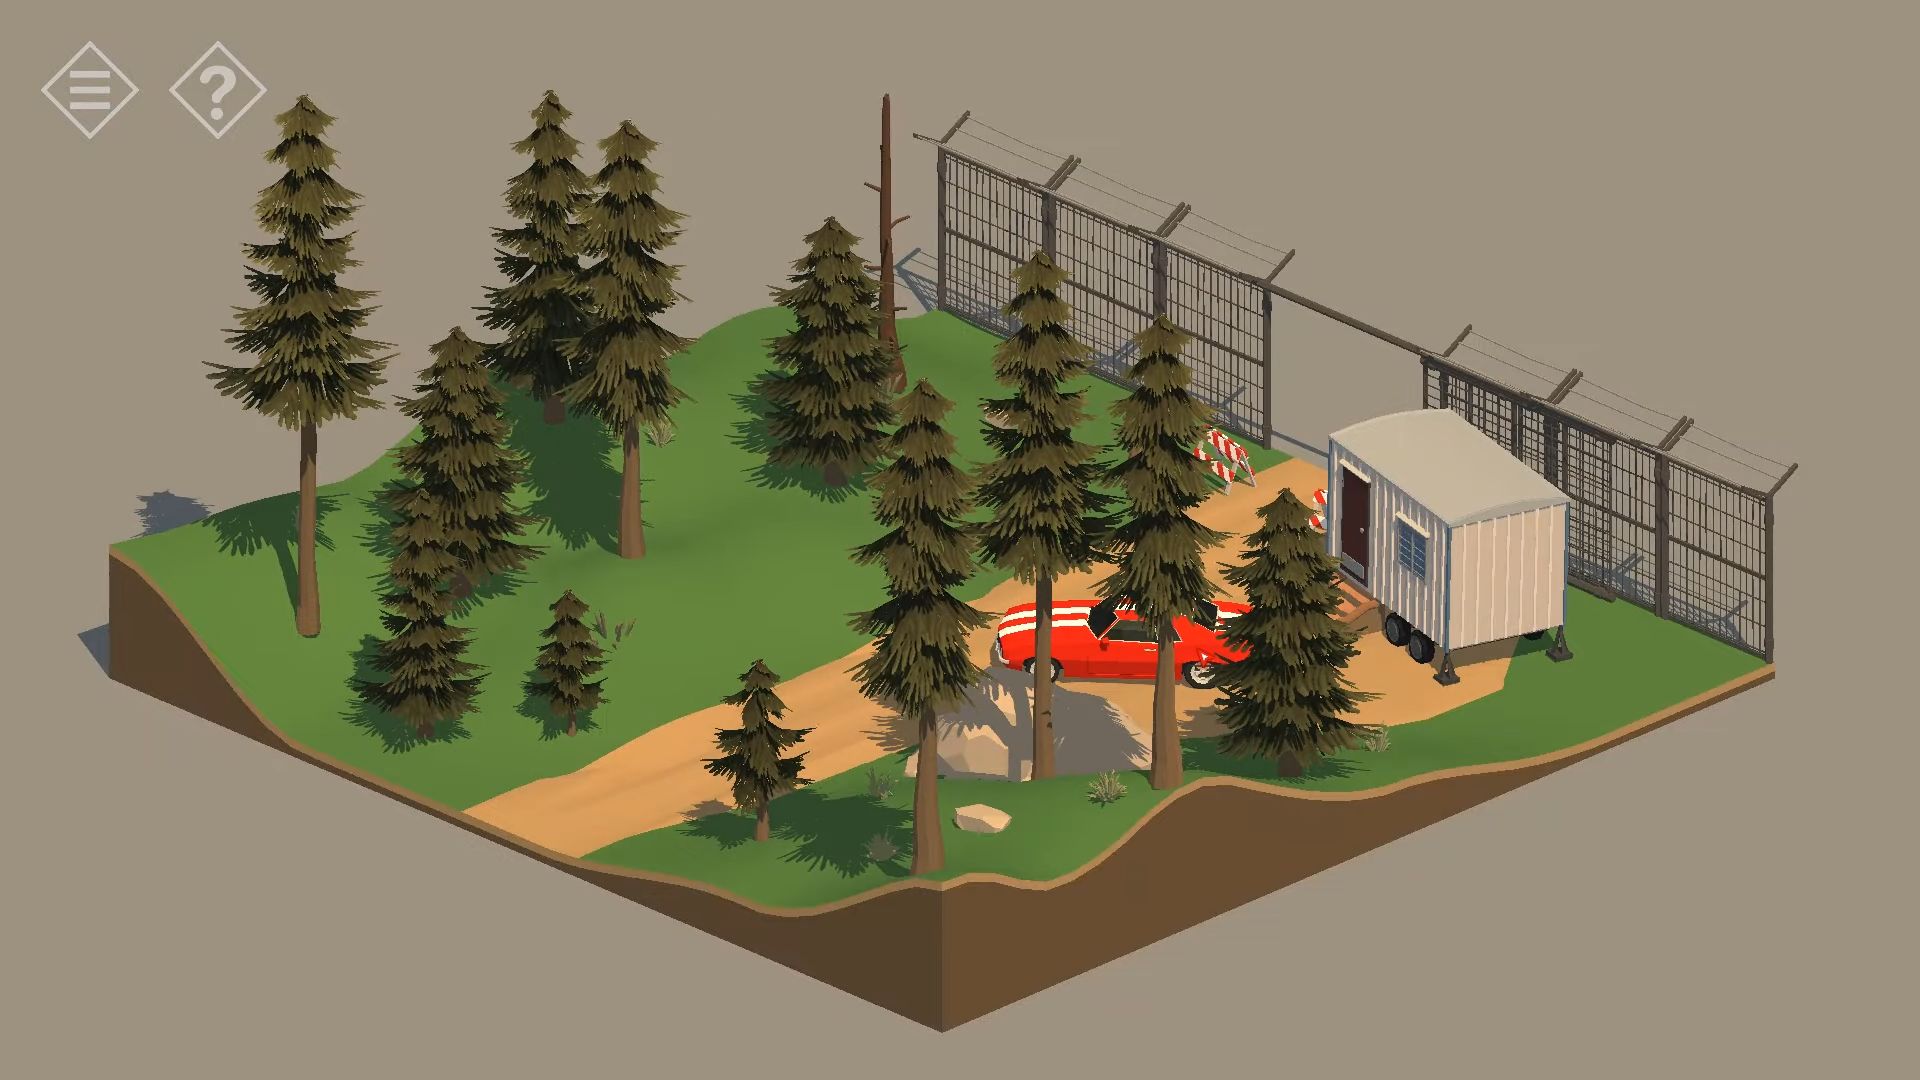
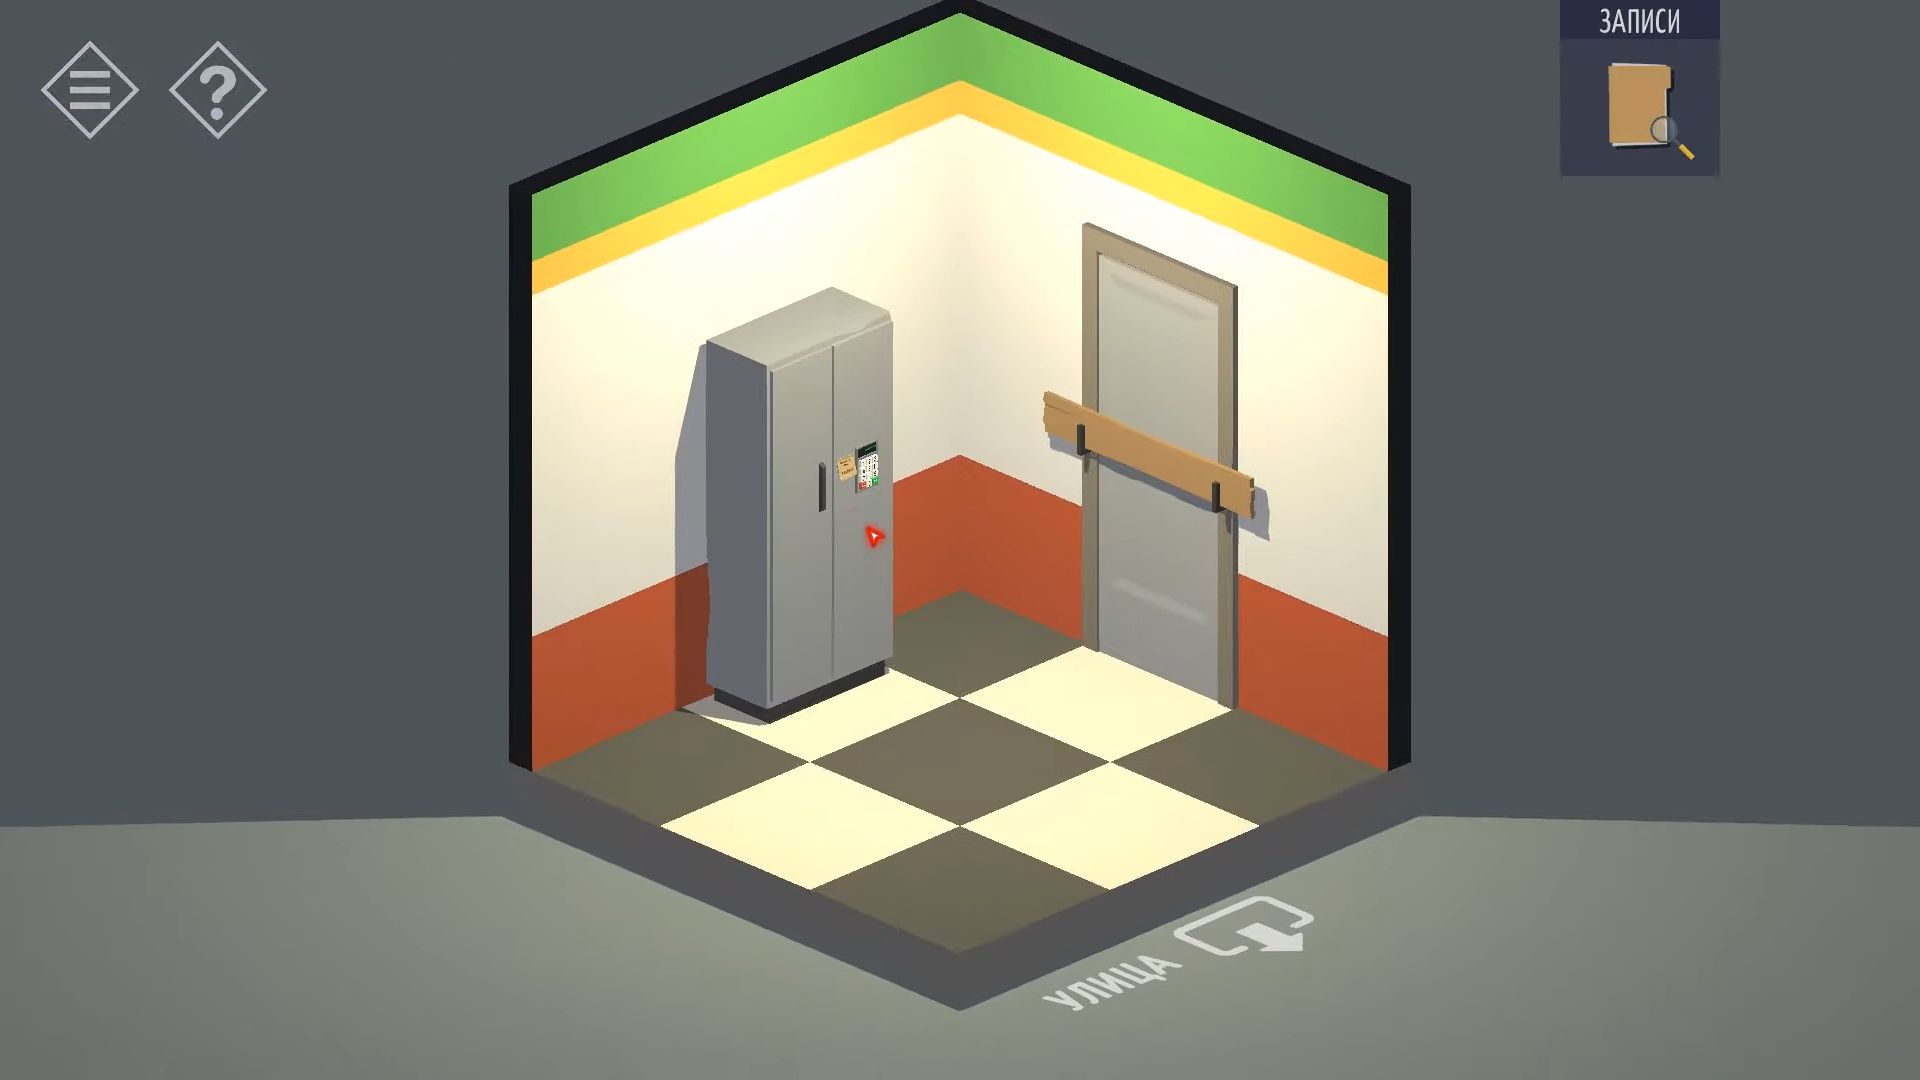
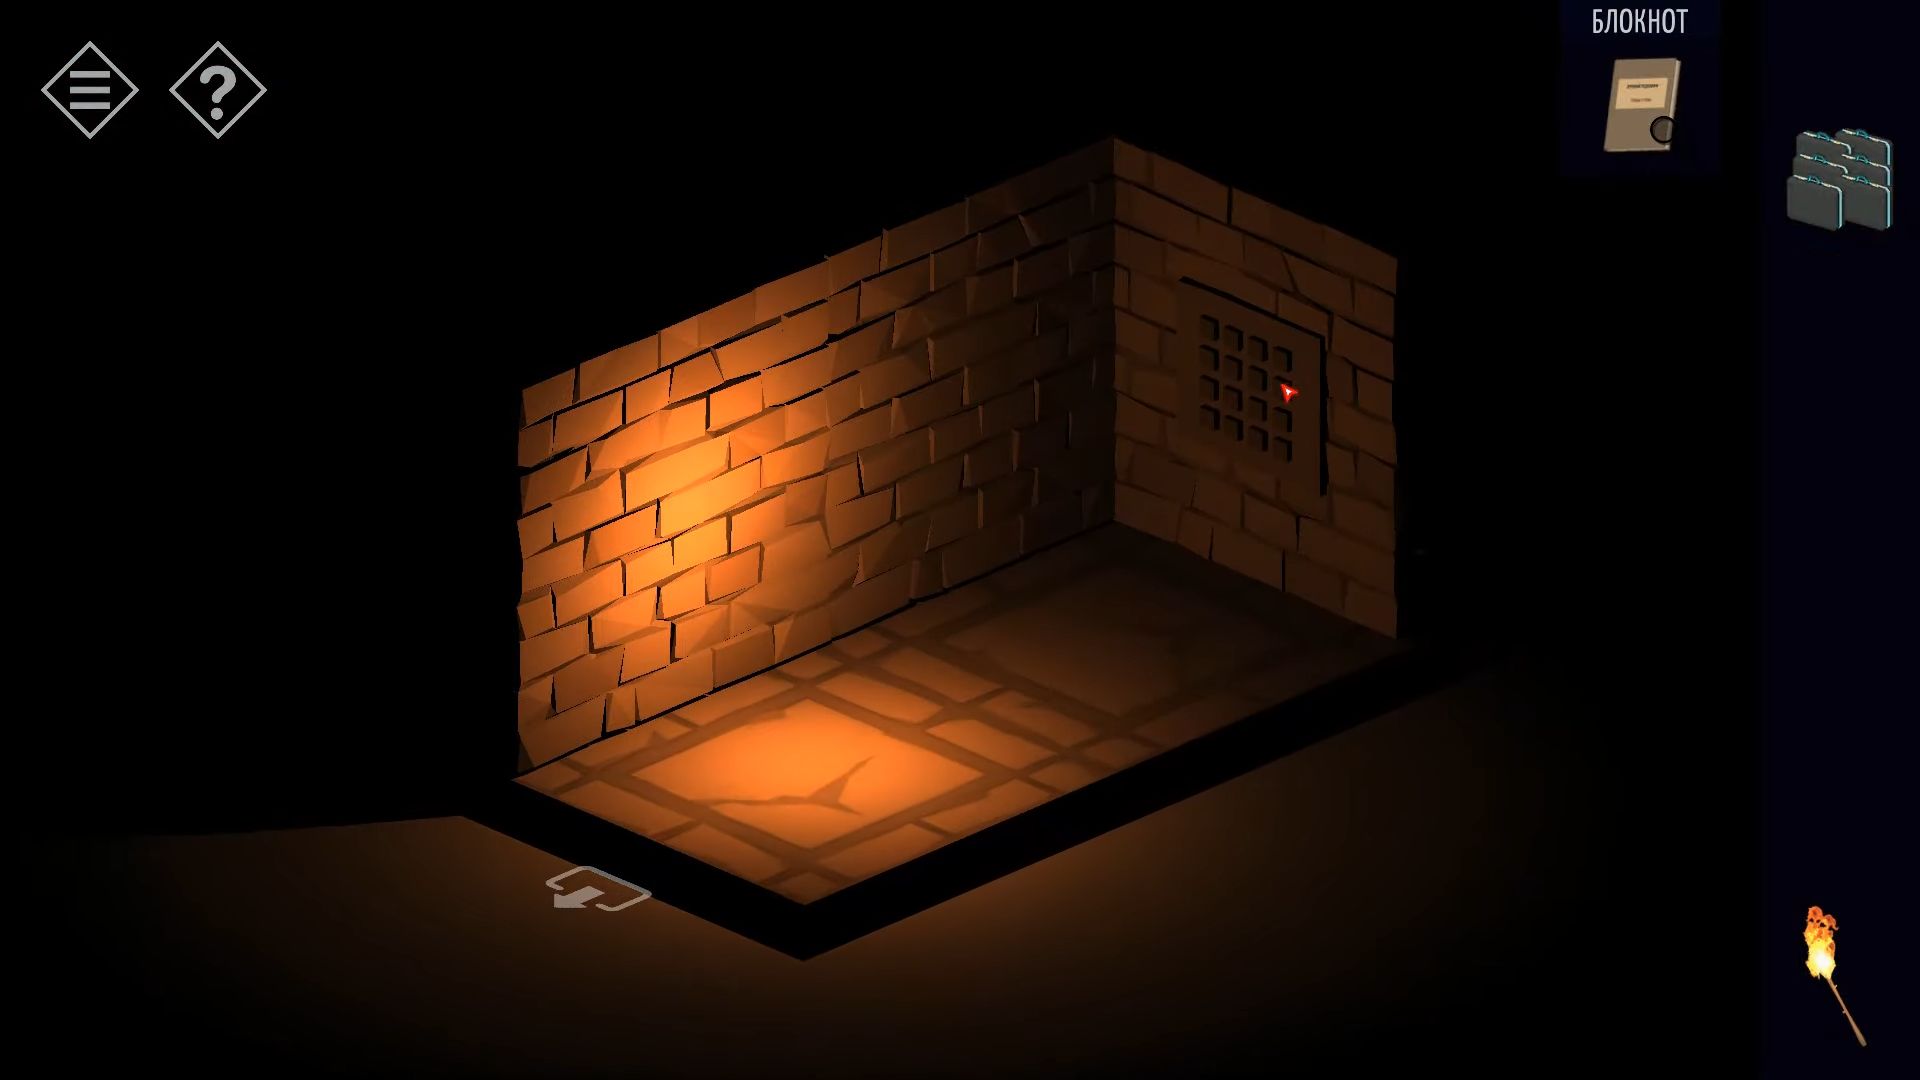
Firstly, you’re on a road with a barrier and a gatehouse. To keep going, open the barrier. Look around and spin to find the door at the back of the gatehouse. Knock on the bars next to the building to grab one.
Then, head to your inventory, use the bar, and tap the door to open it. Now, you need to navigate inside the building.
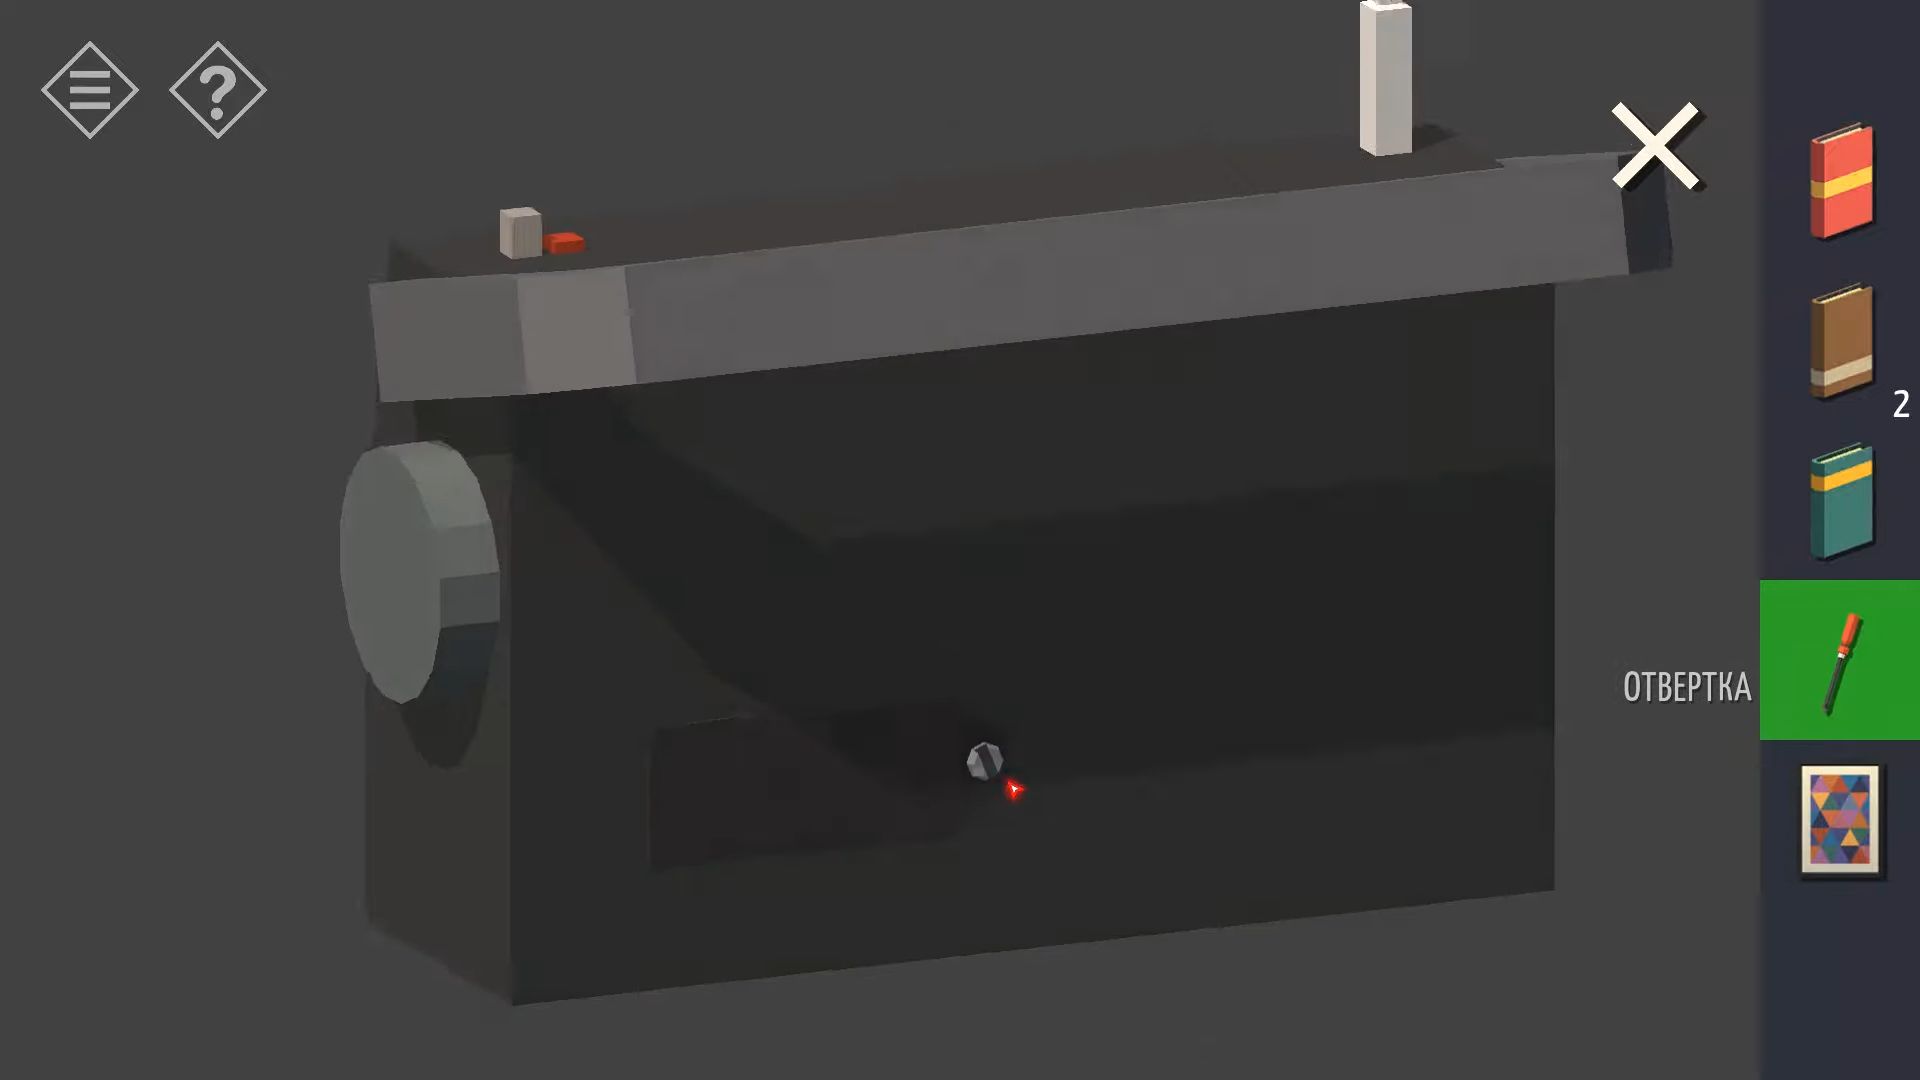
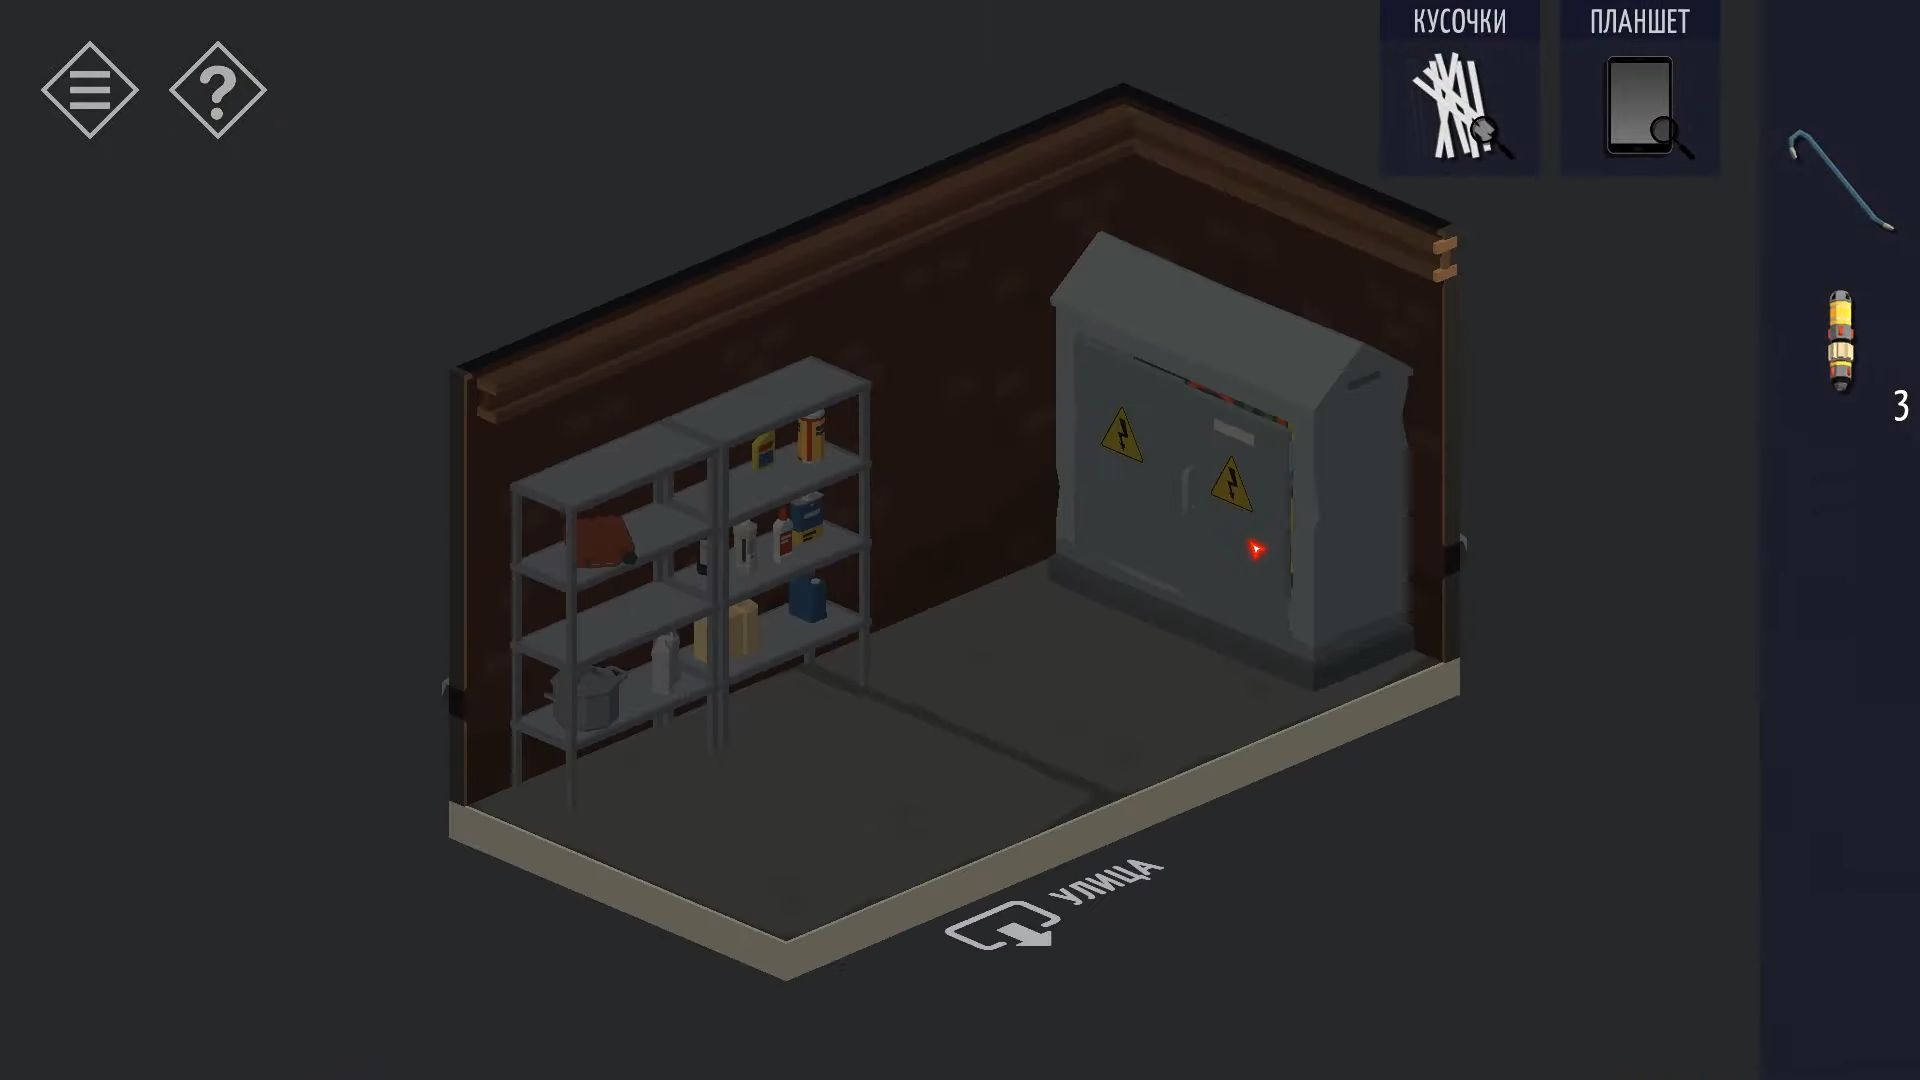
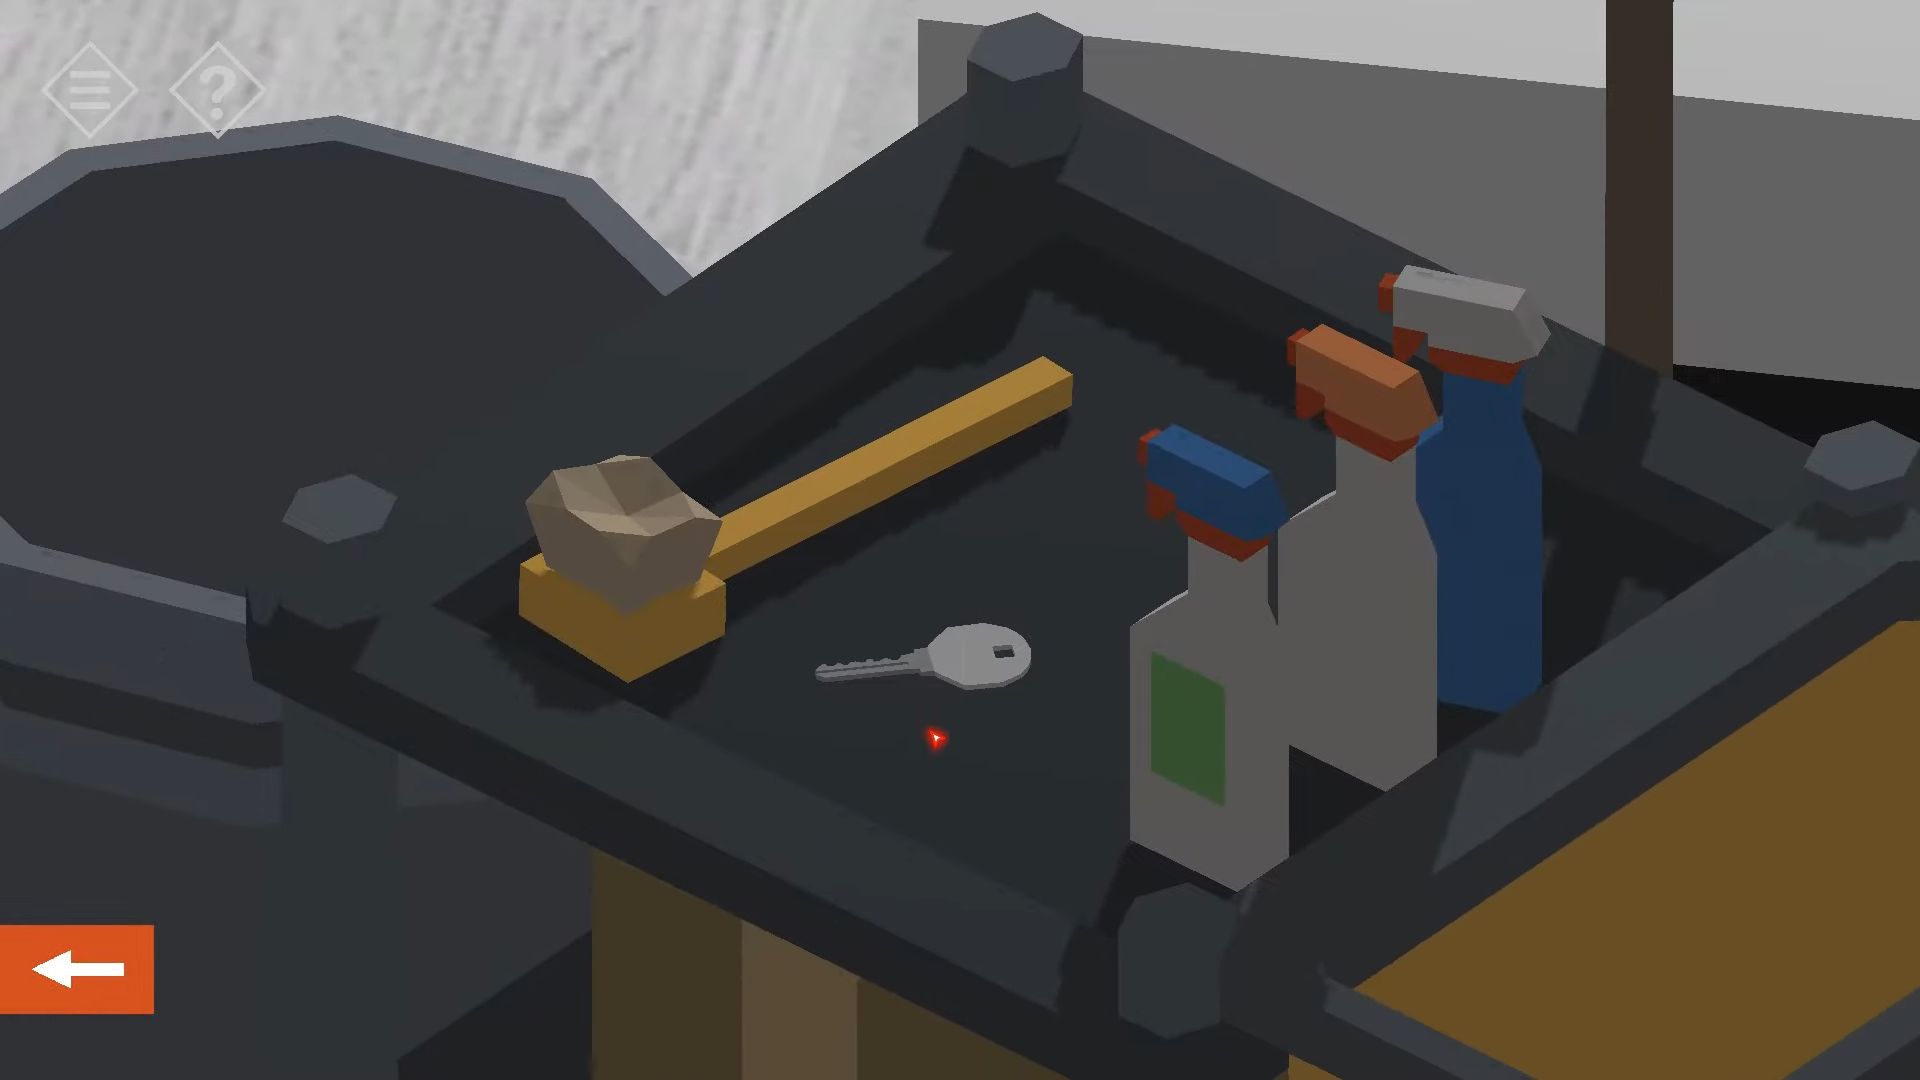
Turn around to see the back wall where there’s a cabinet next to a ladder. You have to open the cabinet to discover a toolbox and gather some tools. Now, turn to the right and tap on the wall with the broken power box.
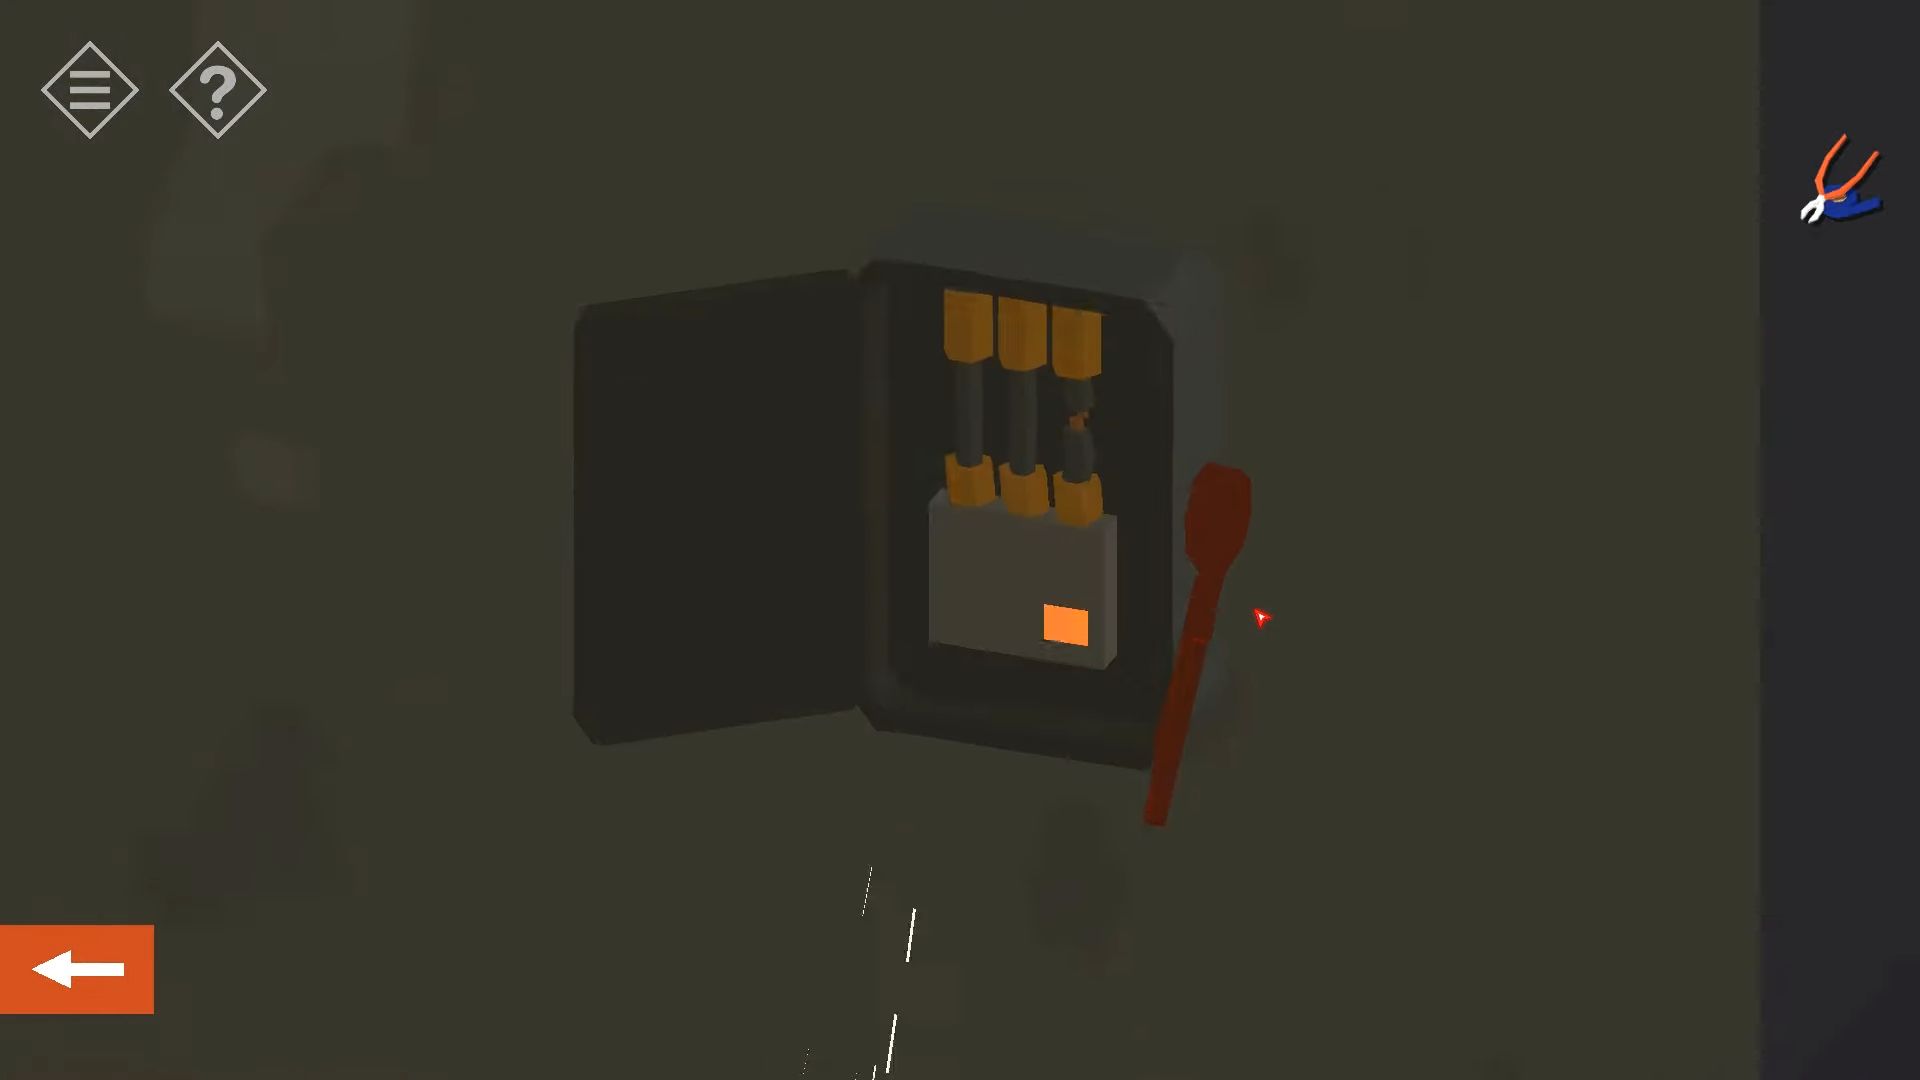
Next, press the switch to turn off the power. After that, pick the tools, knock on the box, and fix it. Now, turn the power back on and rotate to the right once more. Look at the desk on the left with a microwave on it, check the drawers, and find a key.
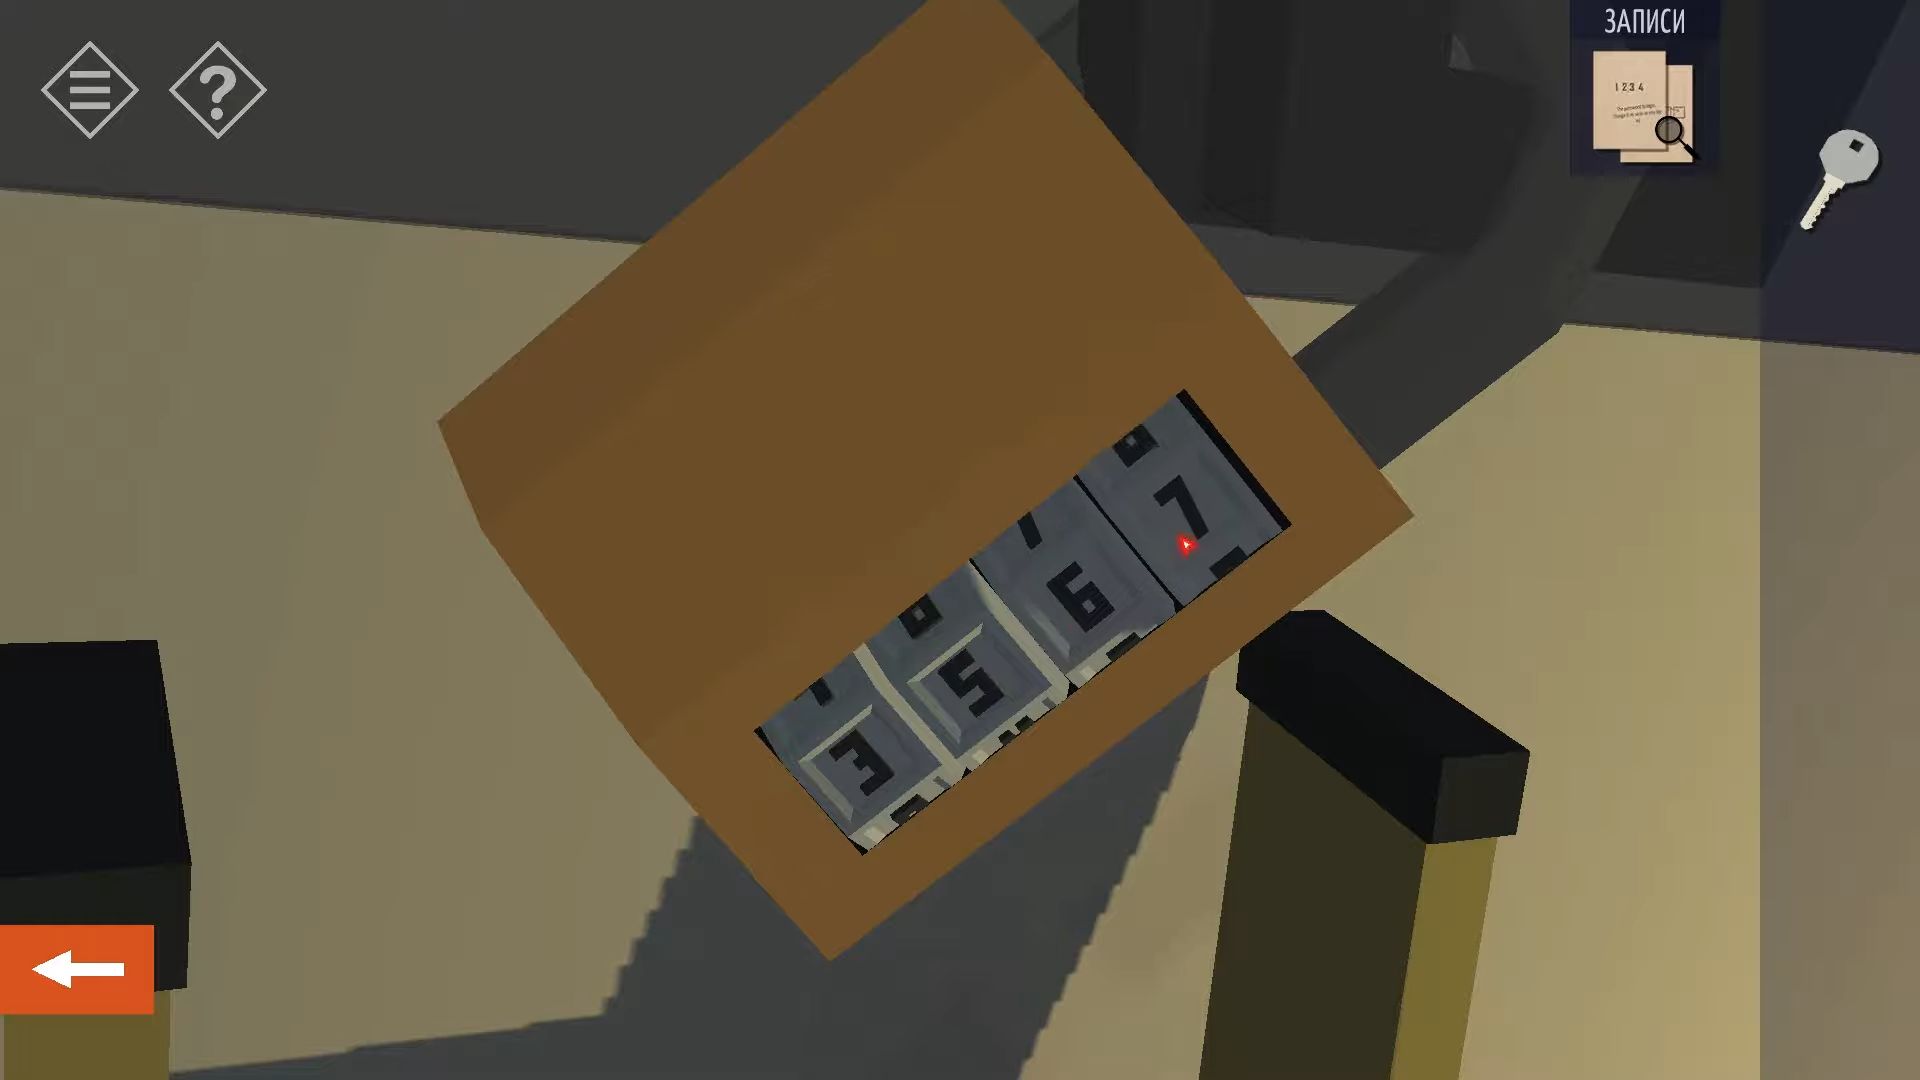
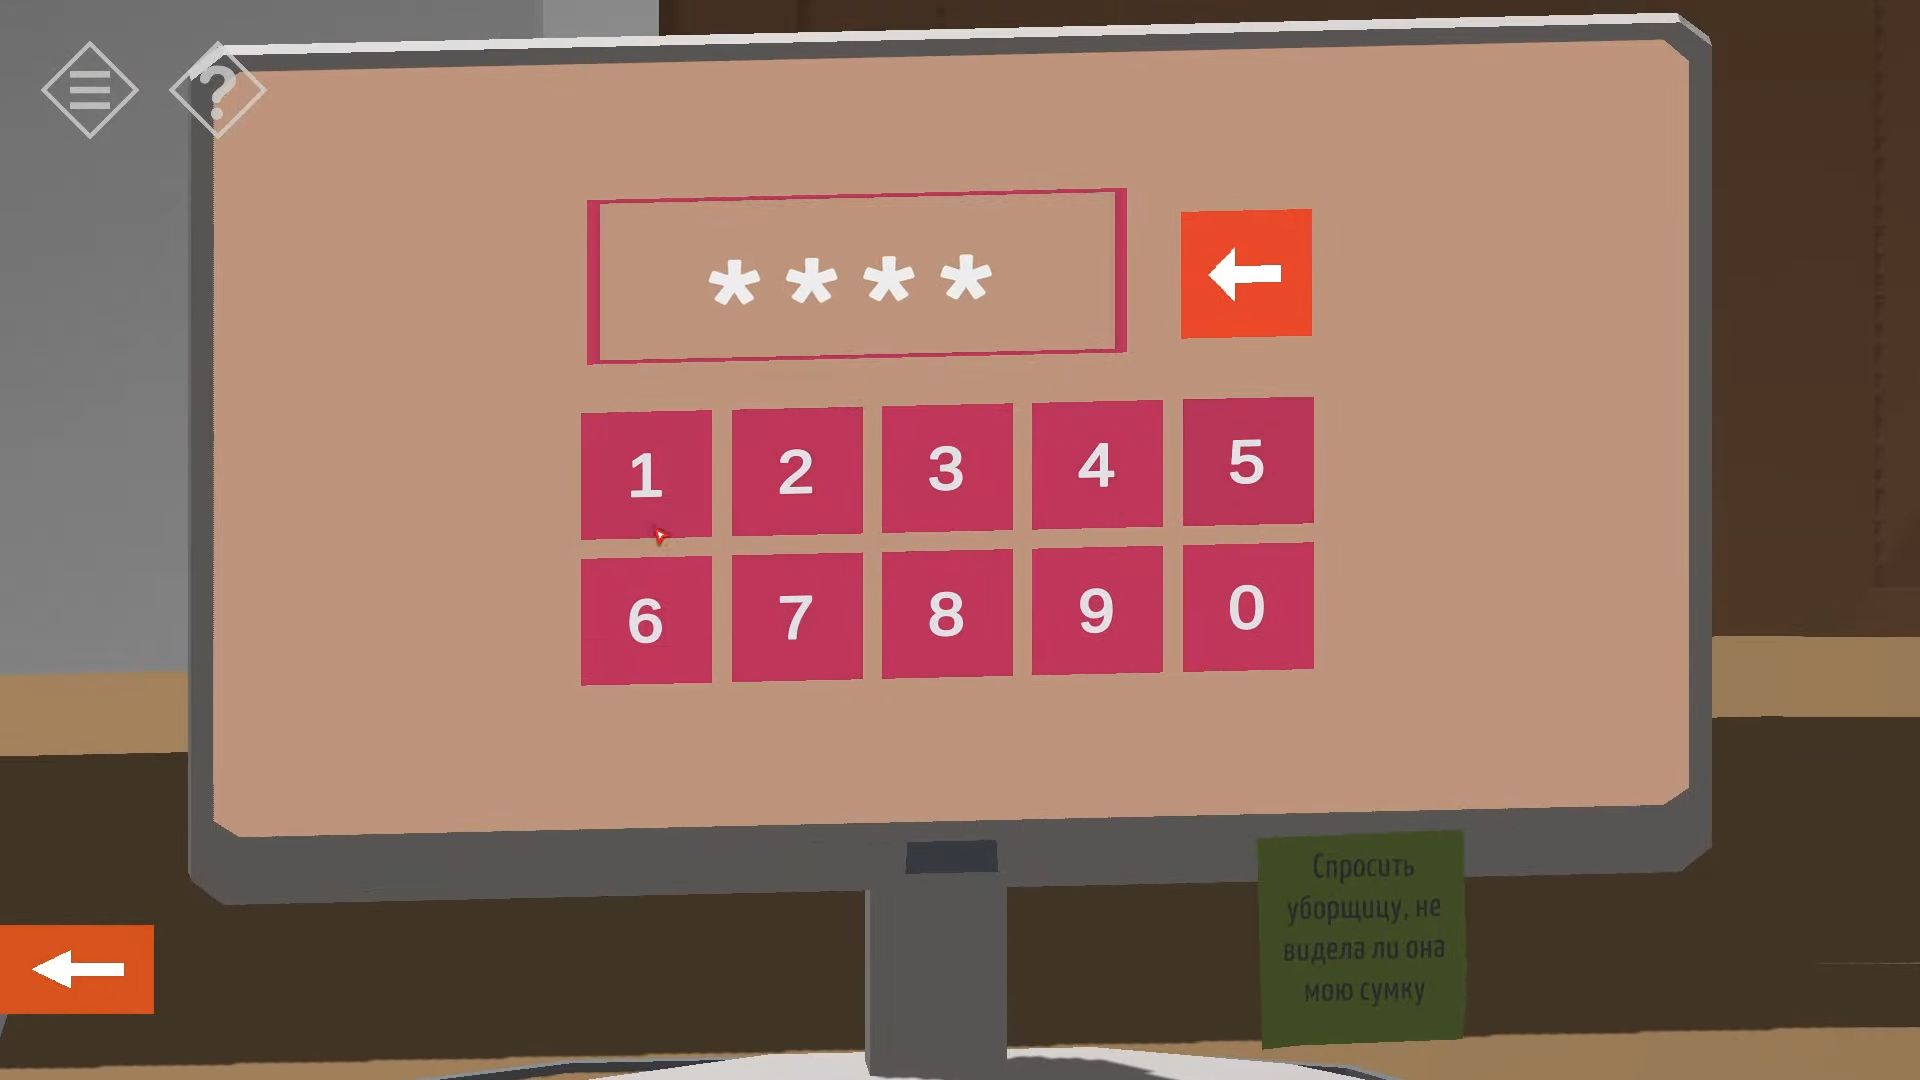
Check out the big desk on the right. Look at the papers on the left side of the desk to get a clue for the password. Tap the keyboard, move it, and find a password change. Use these two things to figure out the password combo (1423).
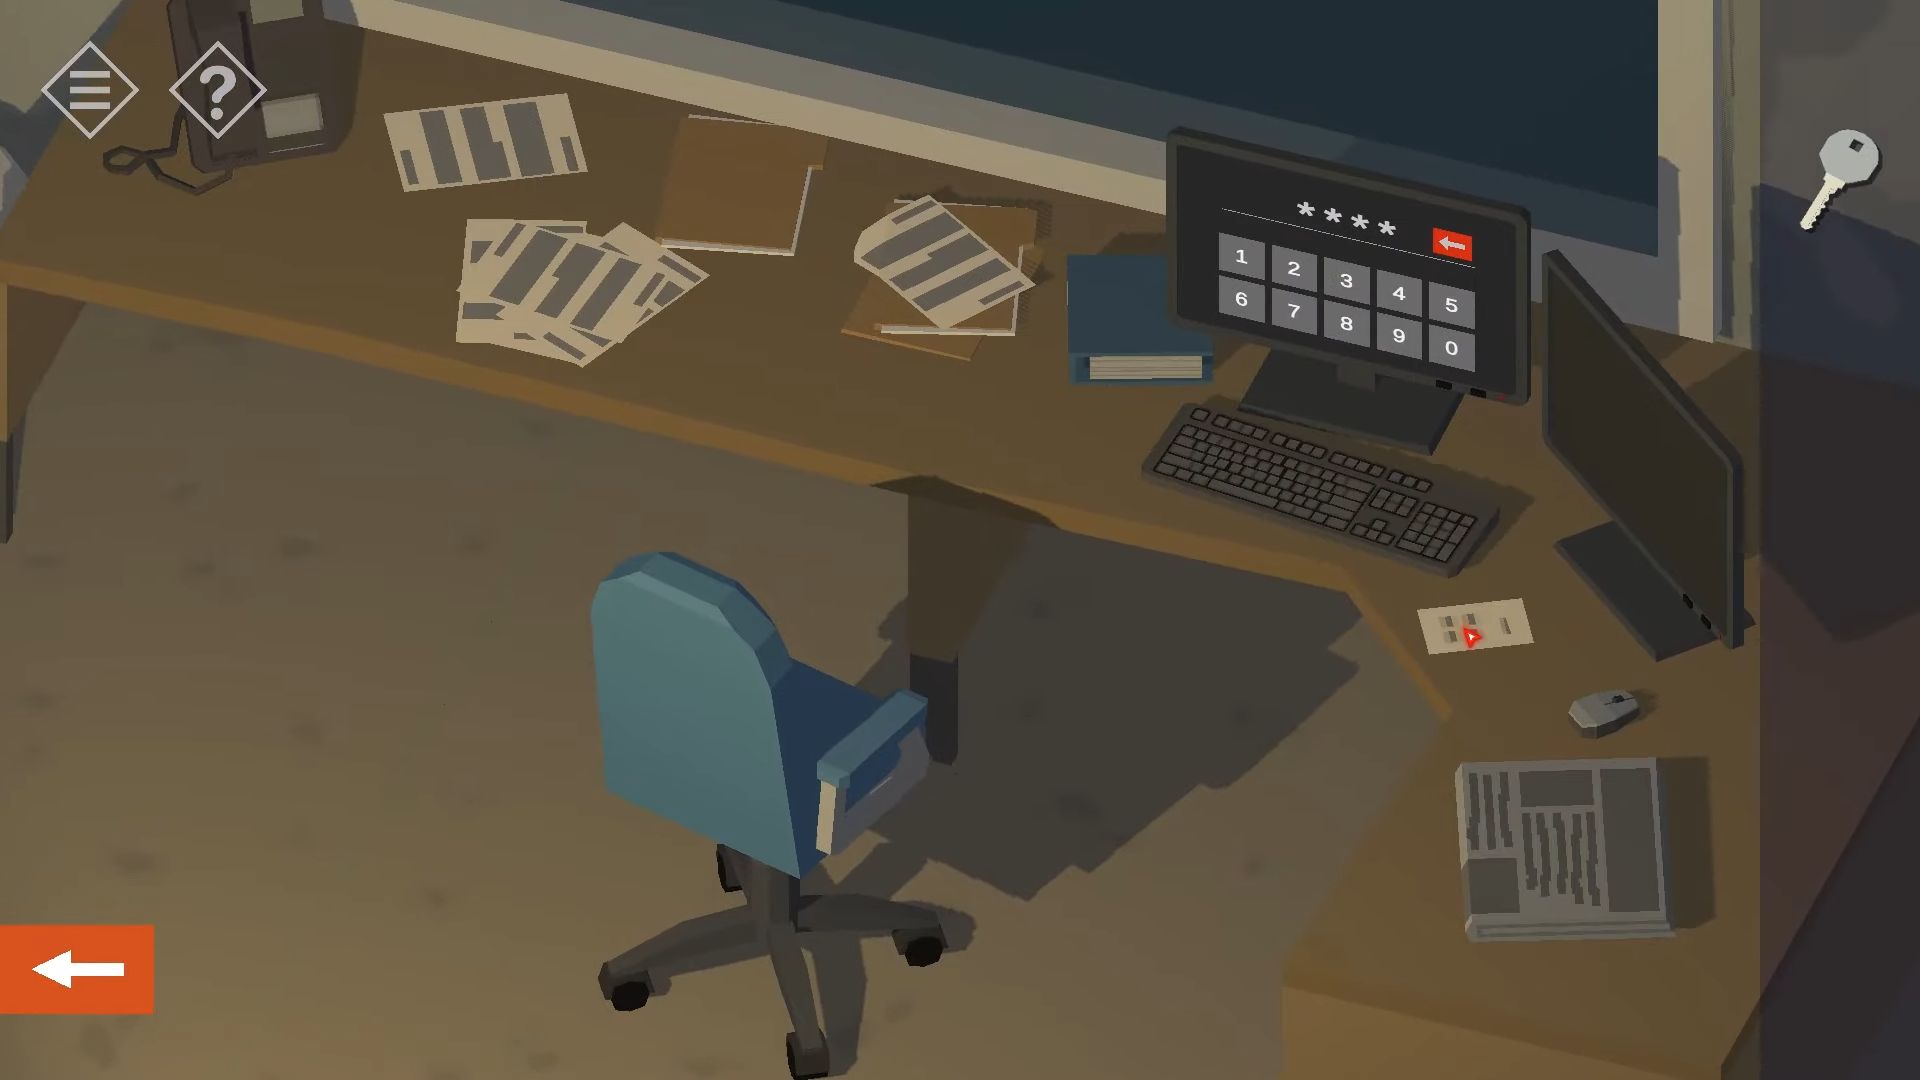
Now use the key to open the computer, and you can look at emails and more. Head to the right side of the screen to find the Notes app and open it to read a note with the combination for the roof padlock. Go back and turn the view to see the ladder. Tap on the ladder to reach the roof hatch and unlock the padlock using the combination (3569).
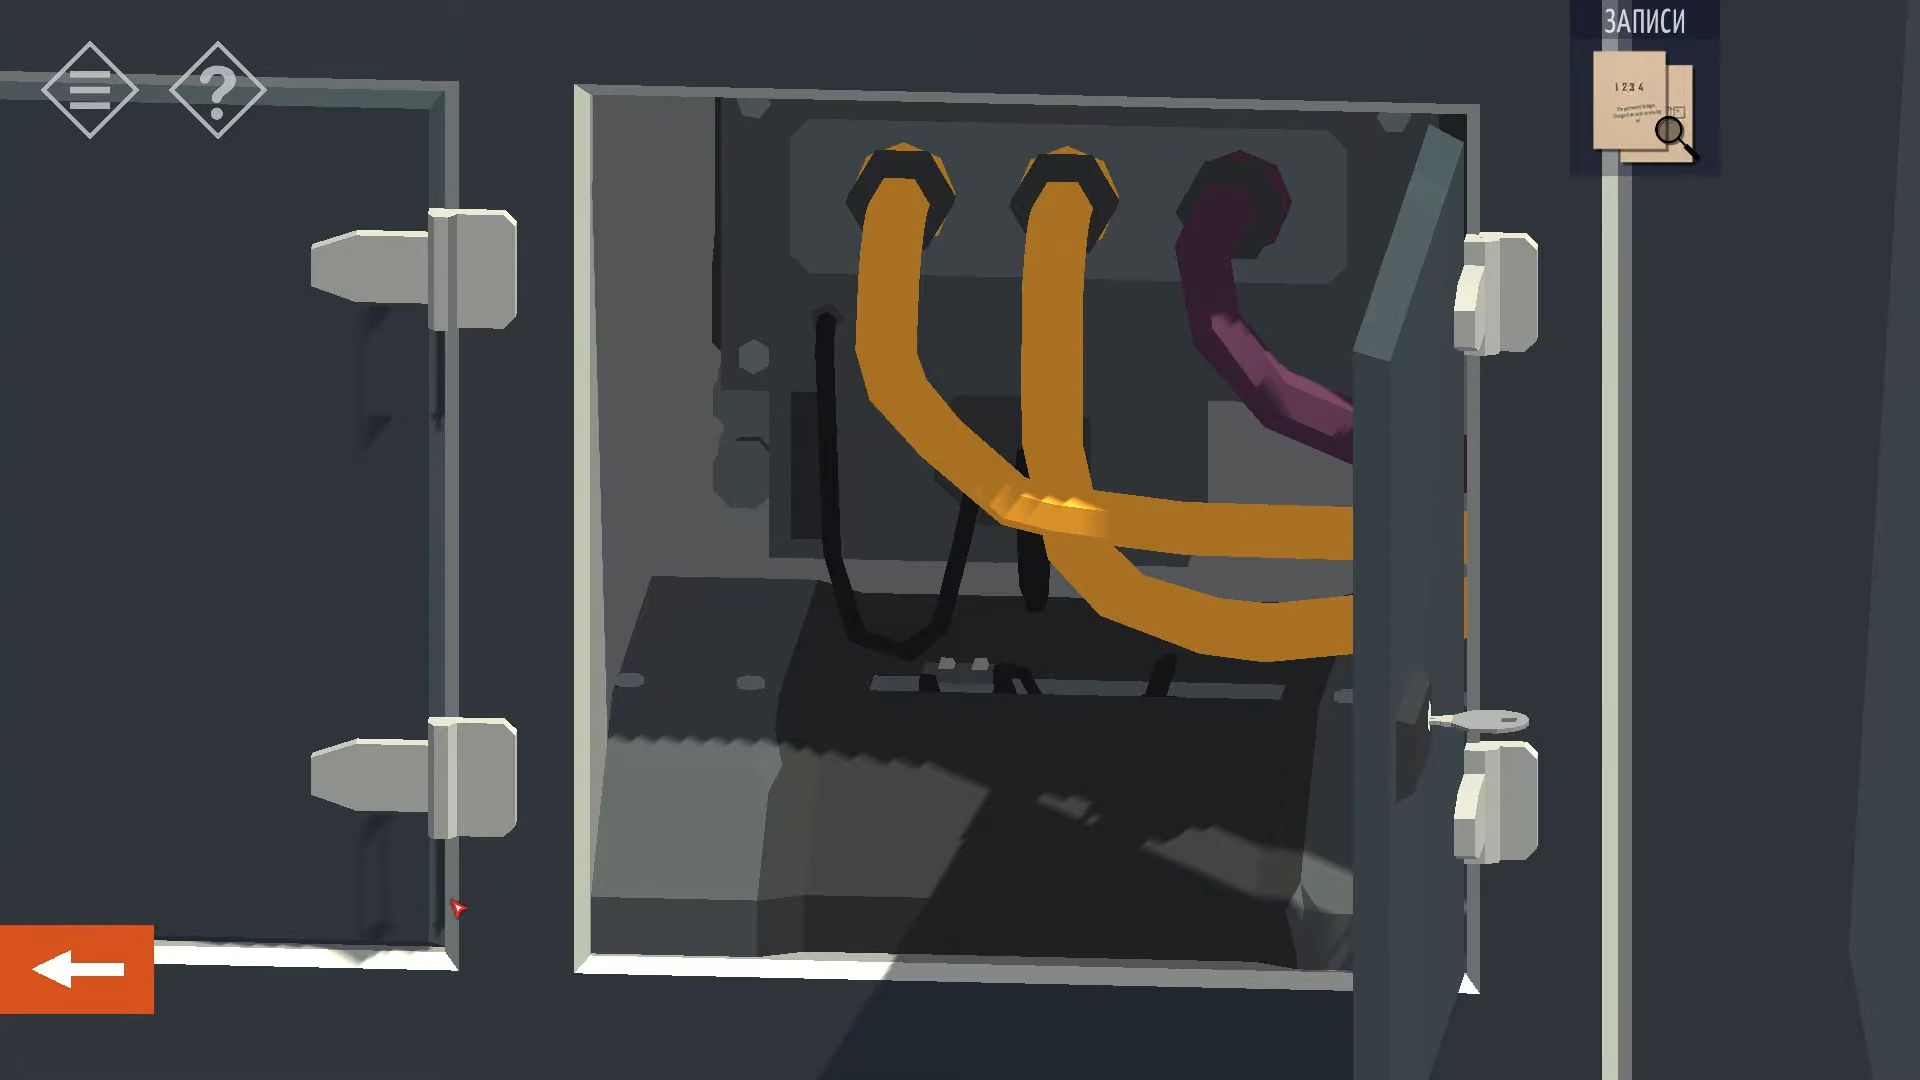
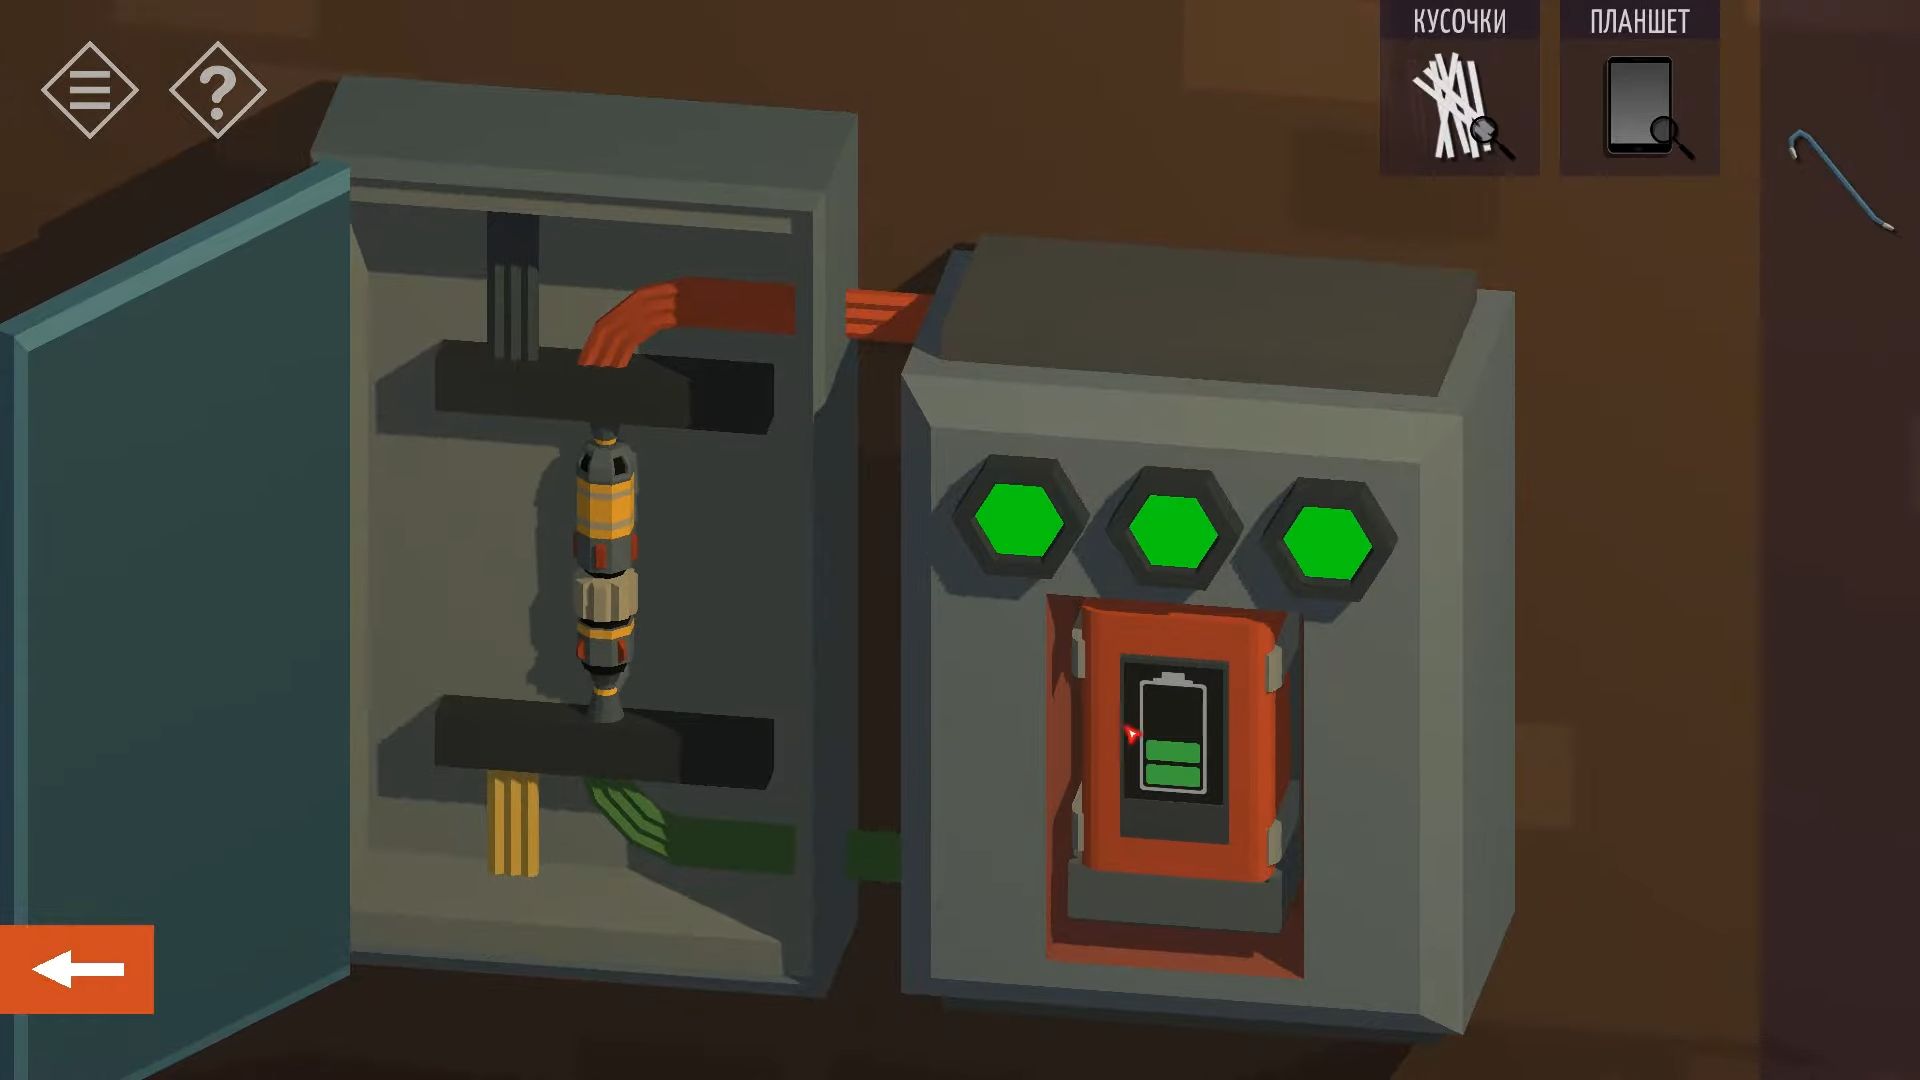
Climb up to the roof, then look at the black cabinet there and use the key to unlock the right door. Tap on the cables inside to connect the purple one. After that, go back down and use the computer once more. Locate the gate control and use it to open the gate, then head back to your car to complete this part.
Chapter 1
Here’s the complete guide for Chapter 1 in Tiny Room Stories: Town Mystery. Each step and clue has been explained with pictures and codes, and you can check them if you need help.
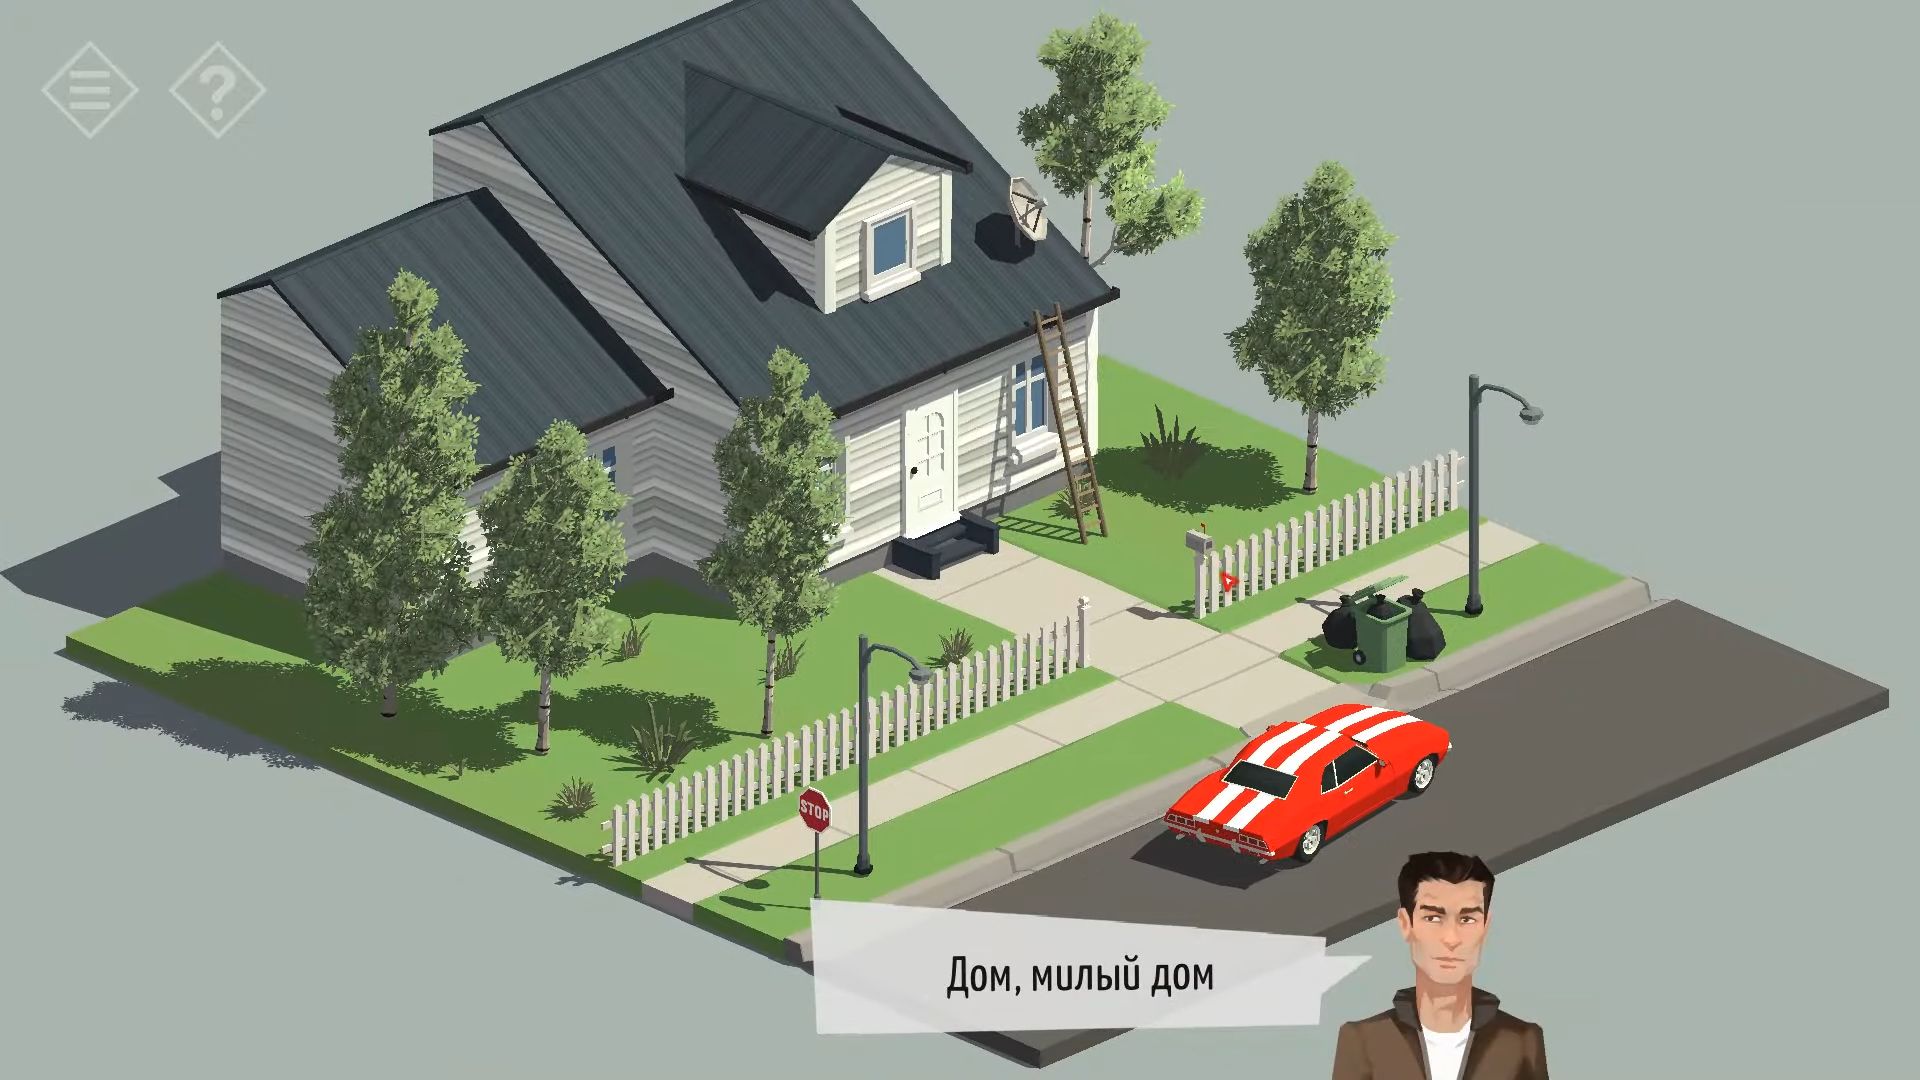
The beginning of the journey
While driving through the city, you haven’t seen anyone. Now grab the ladder from the front yard and tap near the object on the roof above the door to put it there. Then you have to knock again to get a closer look at the mailbox on the roof. Click on this mailbox to open it and grab a Black Key.
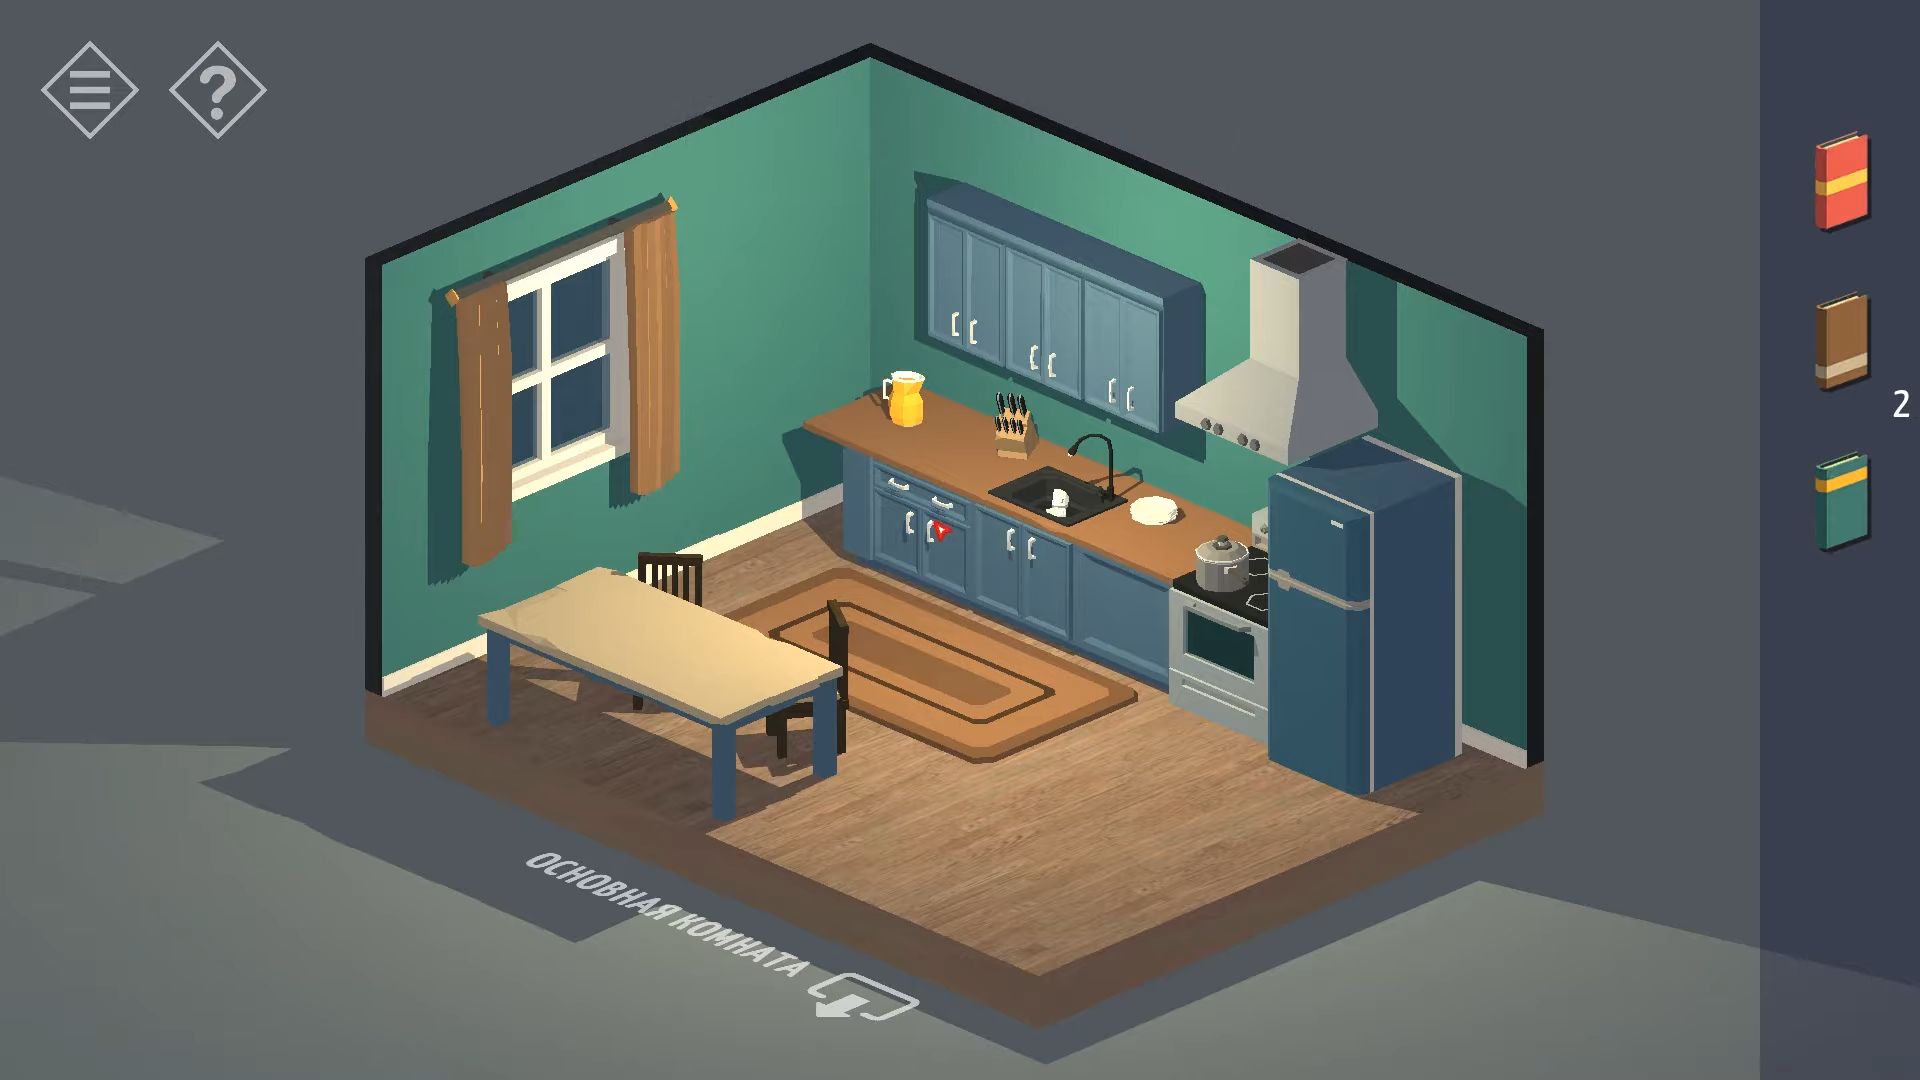
After that, choose the key, knock on the door to unlock it, and knock again to go inside. Head into the kitchen. Knock on the counter next to the oven to check it, then knock to take the green book and touch the knife block to collect a knife.
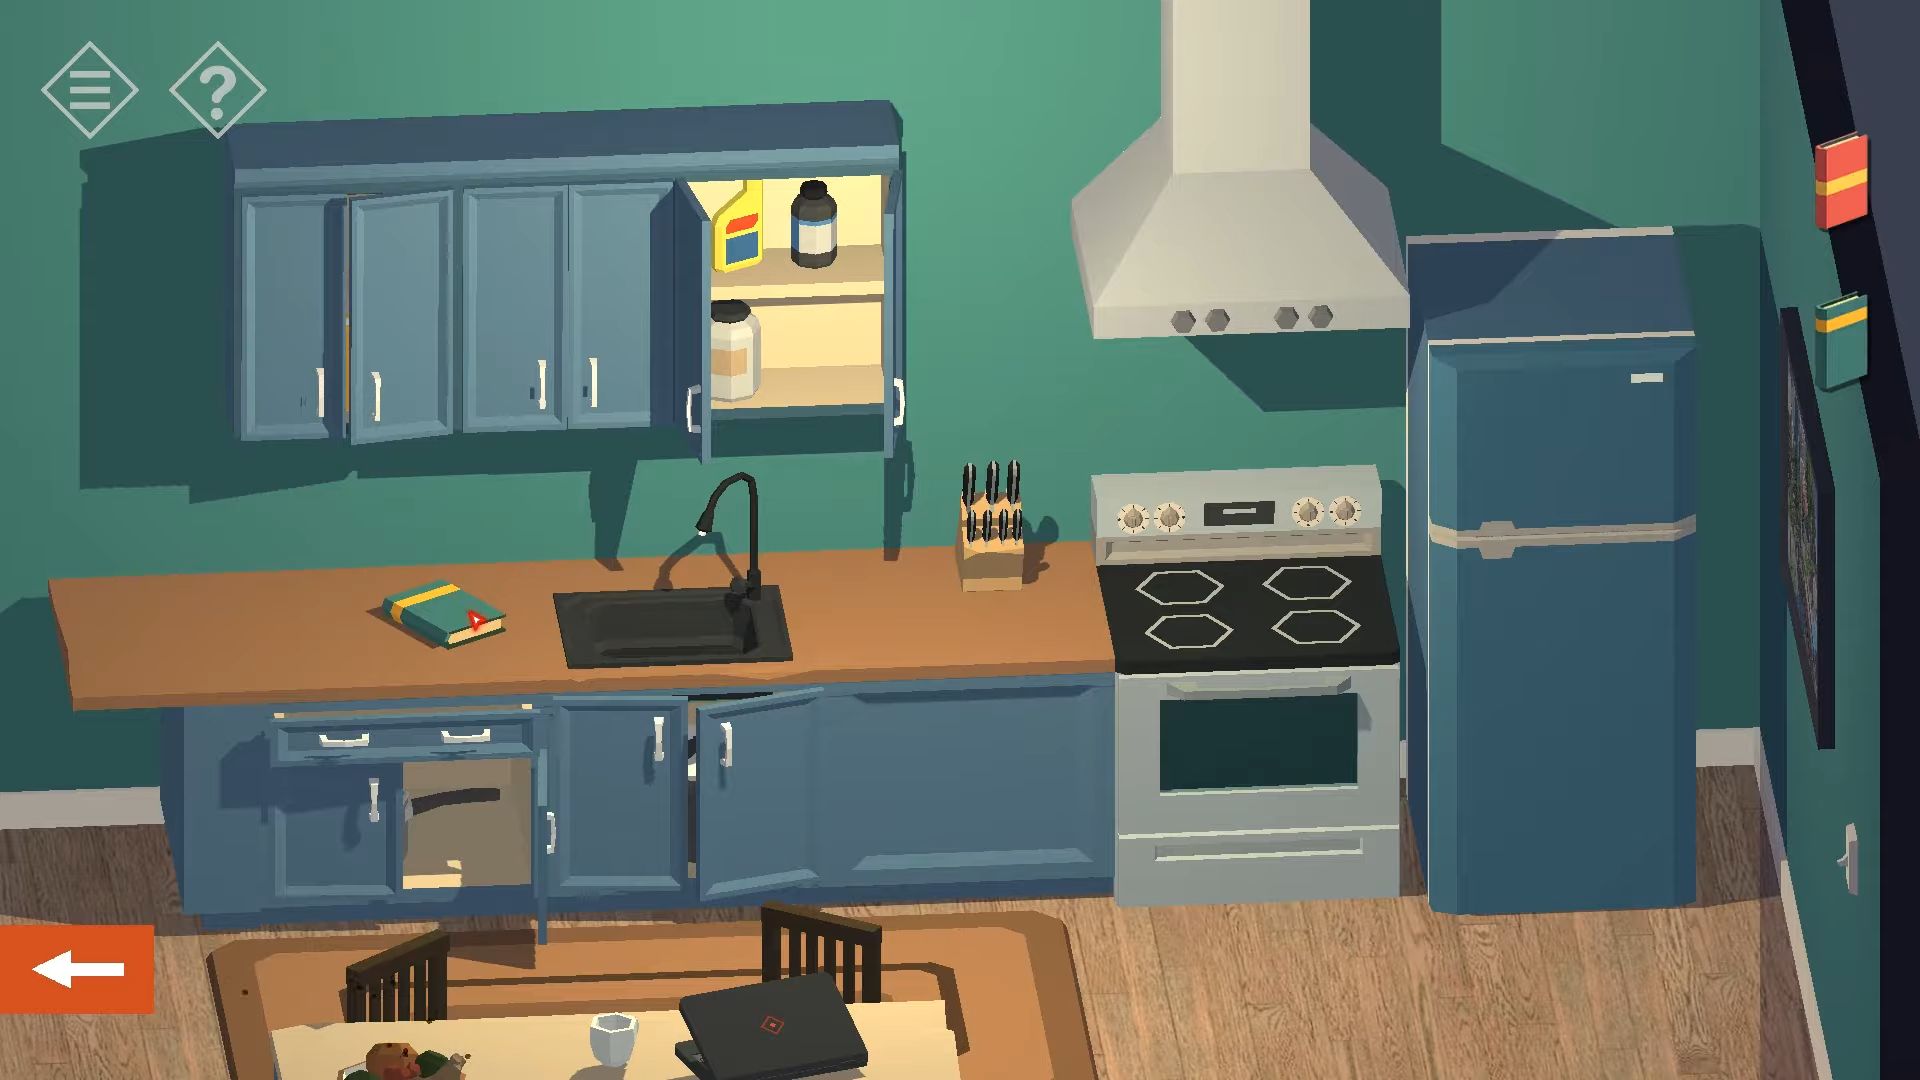
Now you need to touch the top of the oven to see the 4 dials controlling the hobs. Knock them to turn on and notice the directions they point to. This gives you a clue; Left, Right, Down, Left. Spin around to see the kitchen table. Touch it to take the laptop; you’ll need to find the password later.
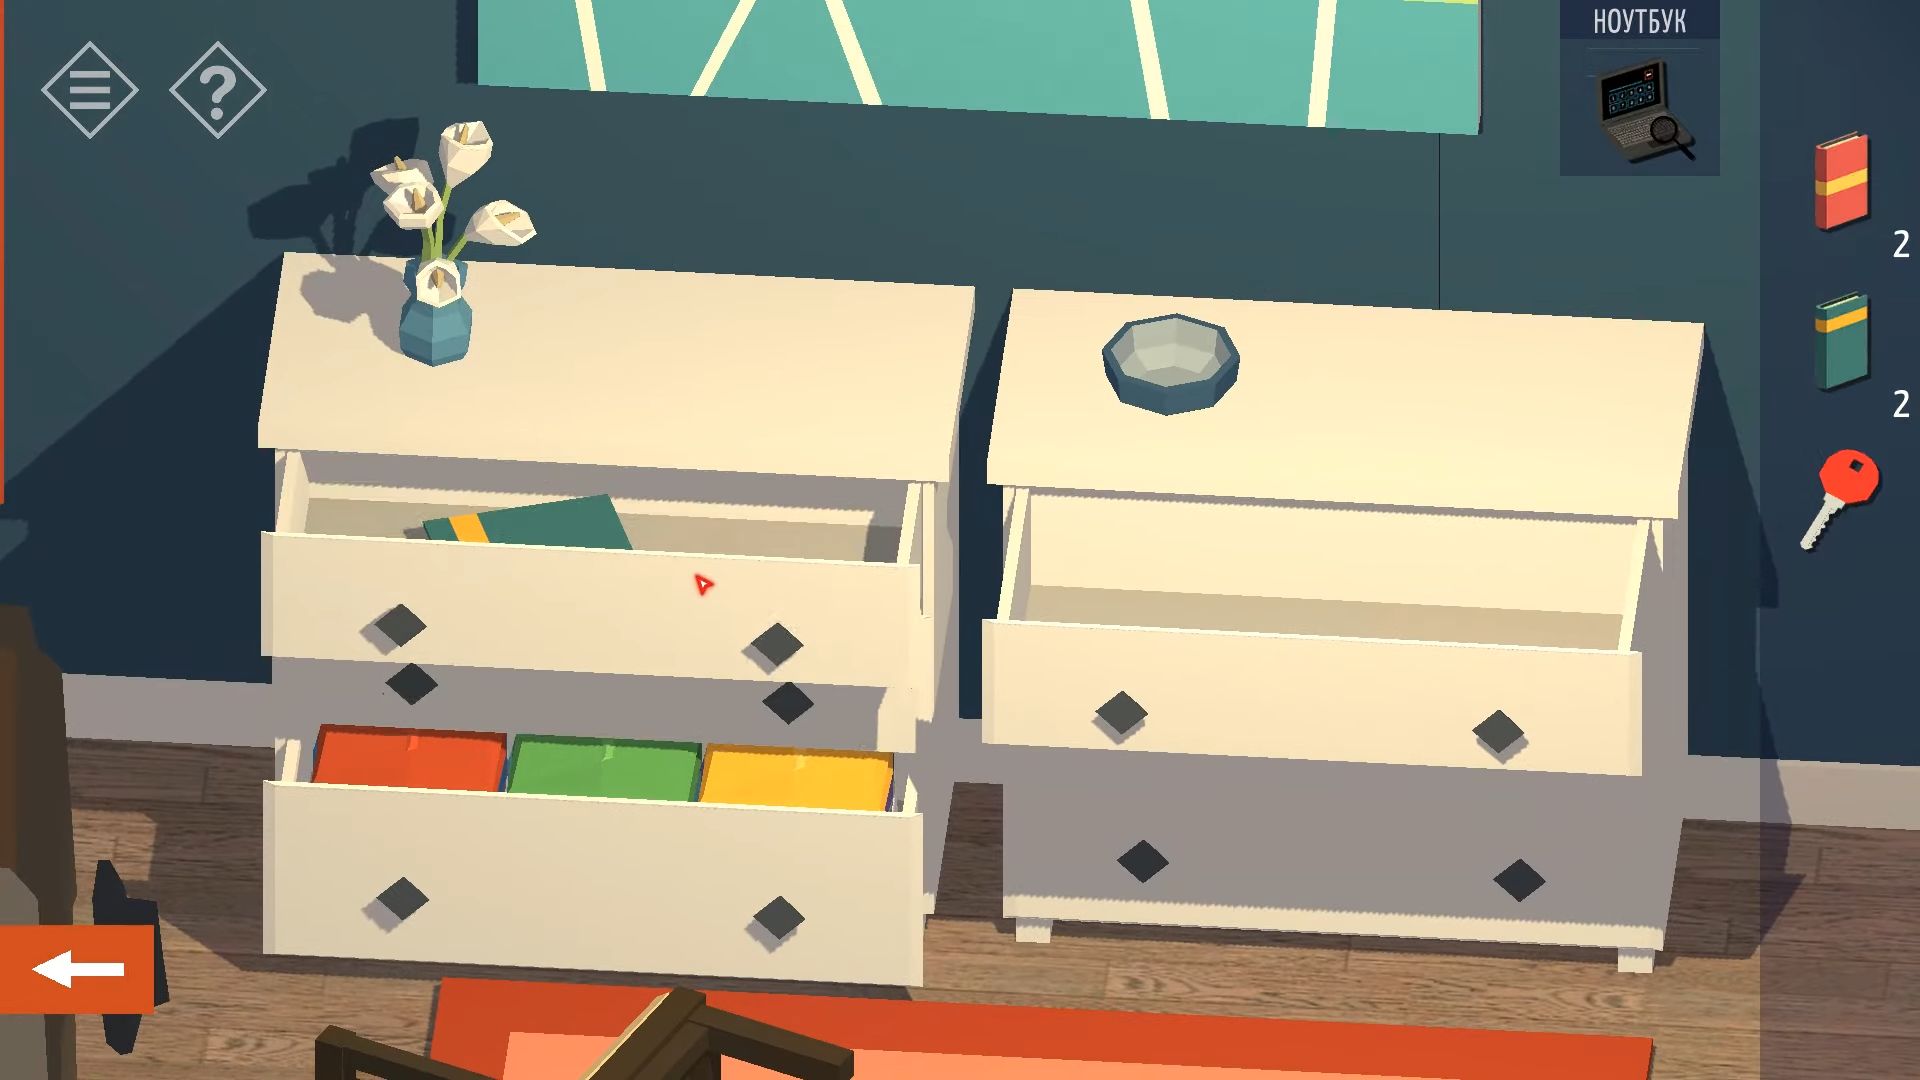
After that, go back to the main room and turn around to see the sofa. Knock it to move it forward, then spin to look behind it and tap on the back to zoom in on a spot. Use the knife to cut it and find a Red Book. Now, turn to see the two sets of drawers. Get a red key from the bowl on top and grab a second green book from the upper left drawer.
Next, check the drawer at the bottom right to find a place to enter a code. There are 4 dials set as per the clue mentioned earlier. Open the box and take the paper with a clue from inside.
Step back and tap under the table to discover another green book. After that, you need to knock to pick it up, utilize the red key to unlock the closed door, and go into the next room, the Bedroom.
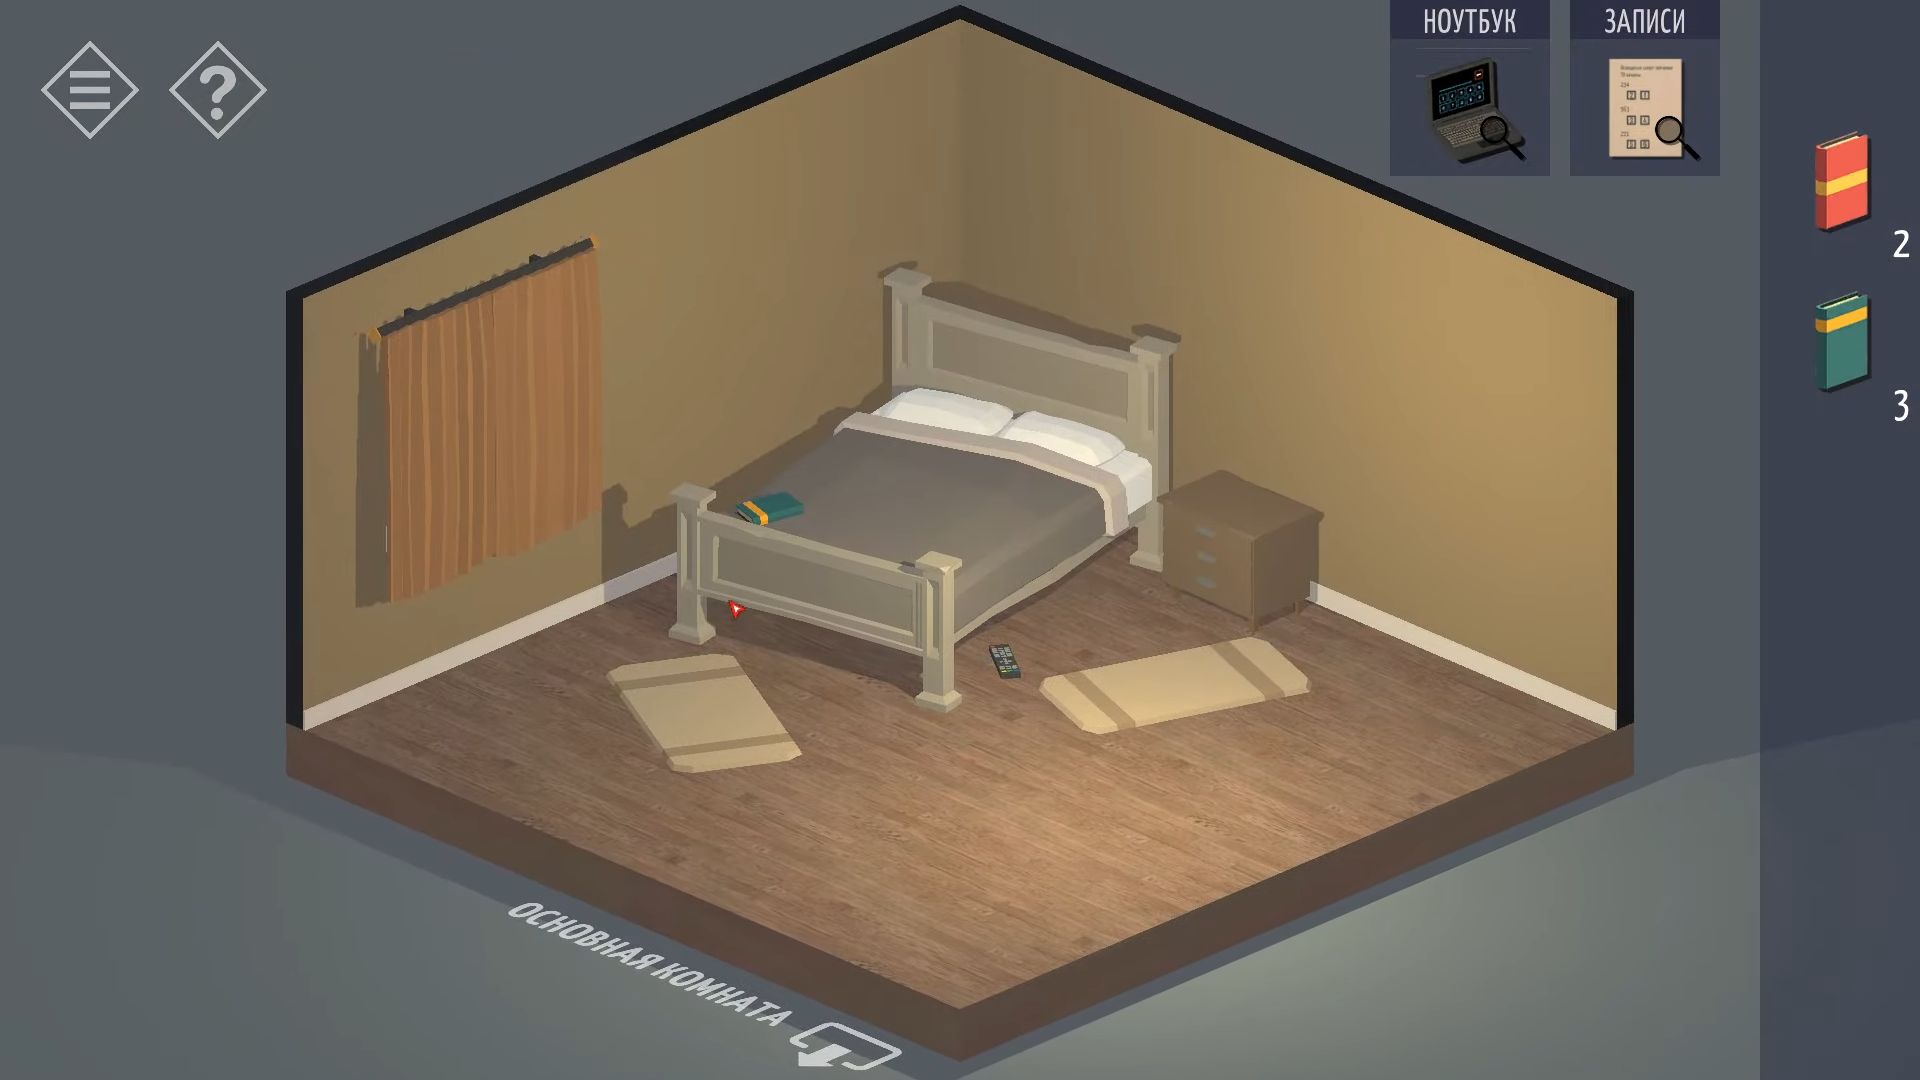
Grab a book from the bed and then pick up the remote control from the floor. Check the bedside table and open the drawers to find a screwdriver. Knock the washing basket by the wall to lift it and grab a red book. Then open the cupboard and take another red book.
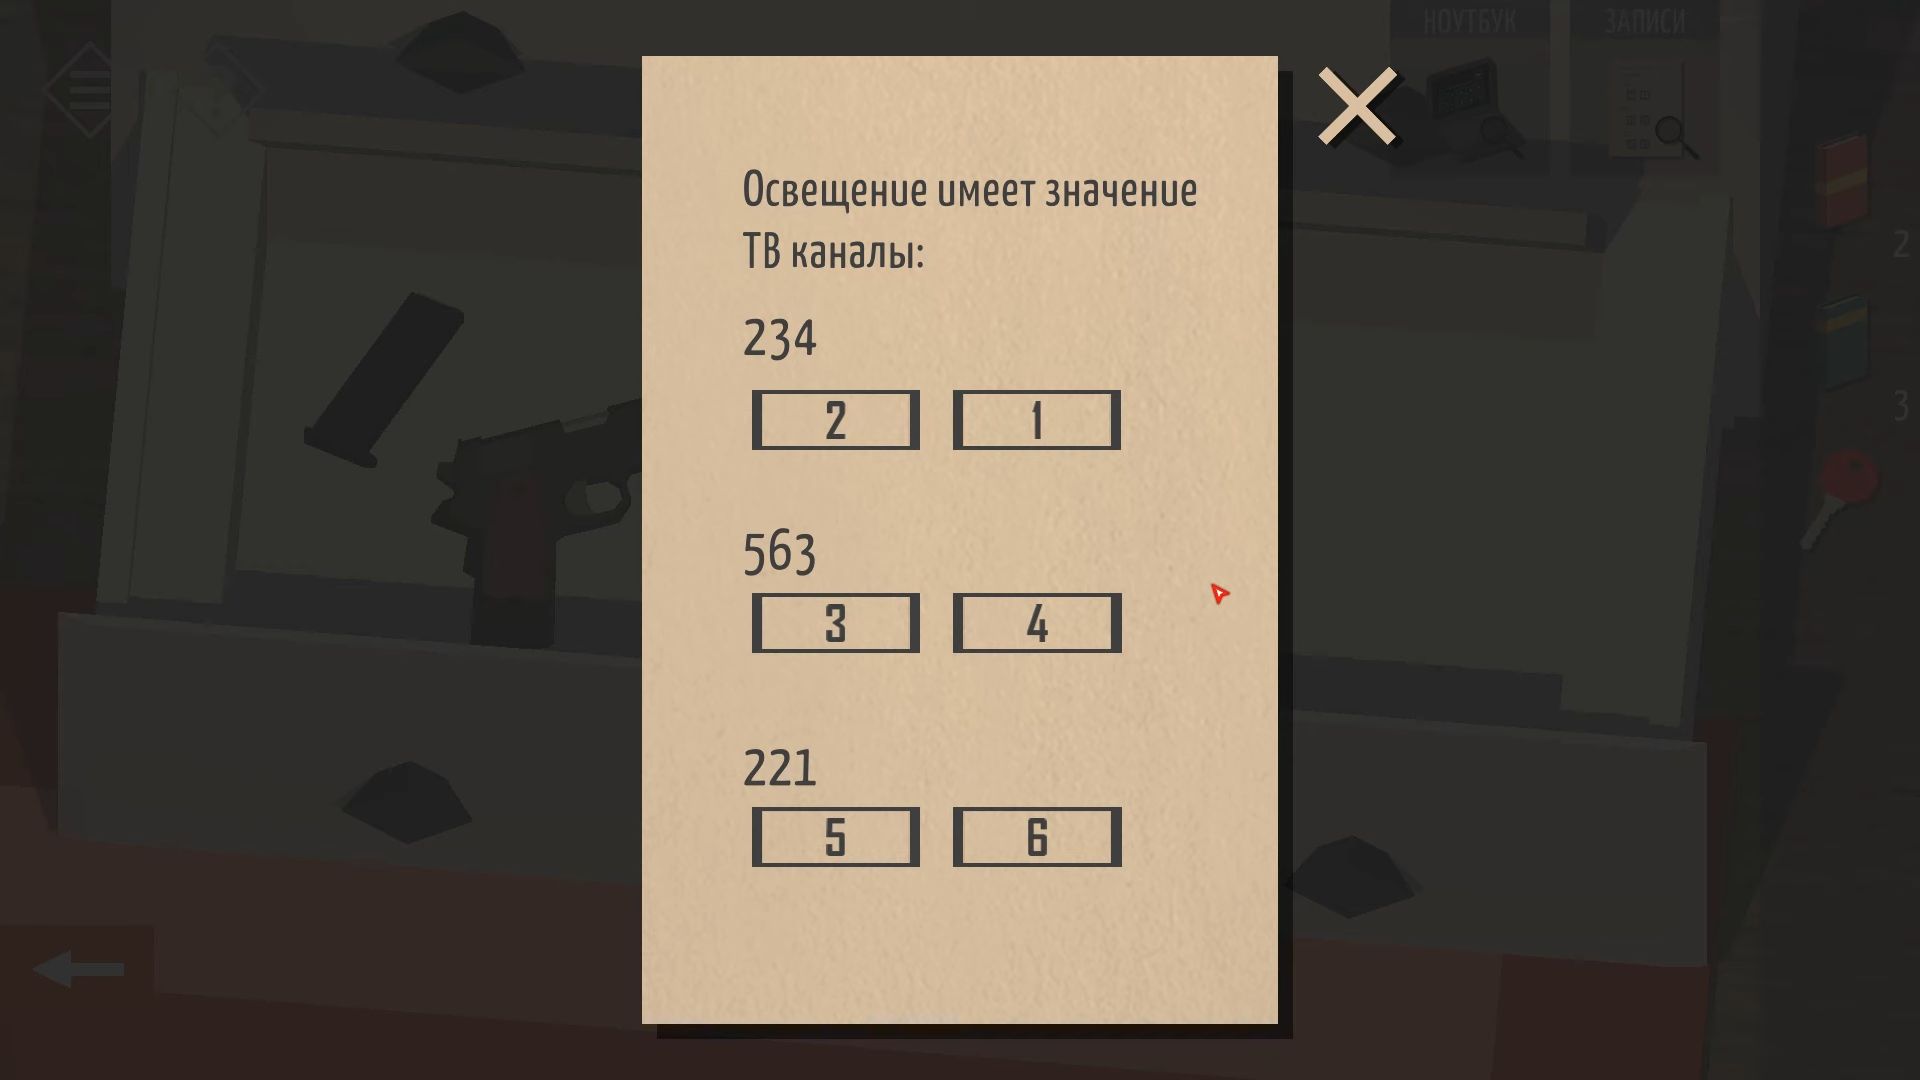
After that, find the light switch on the wall; even if it doesn’t work, look above it at the light fixture. Knock it and use the screwdriver to remove the cover. Touch the light bulb to take it out and with the room now dark, knock to turn towards the TV. Next, use the remote control to turn it on and take note of the symbols now appearing on the drawers underneath.
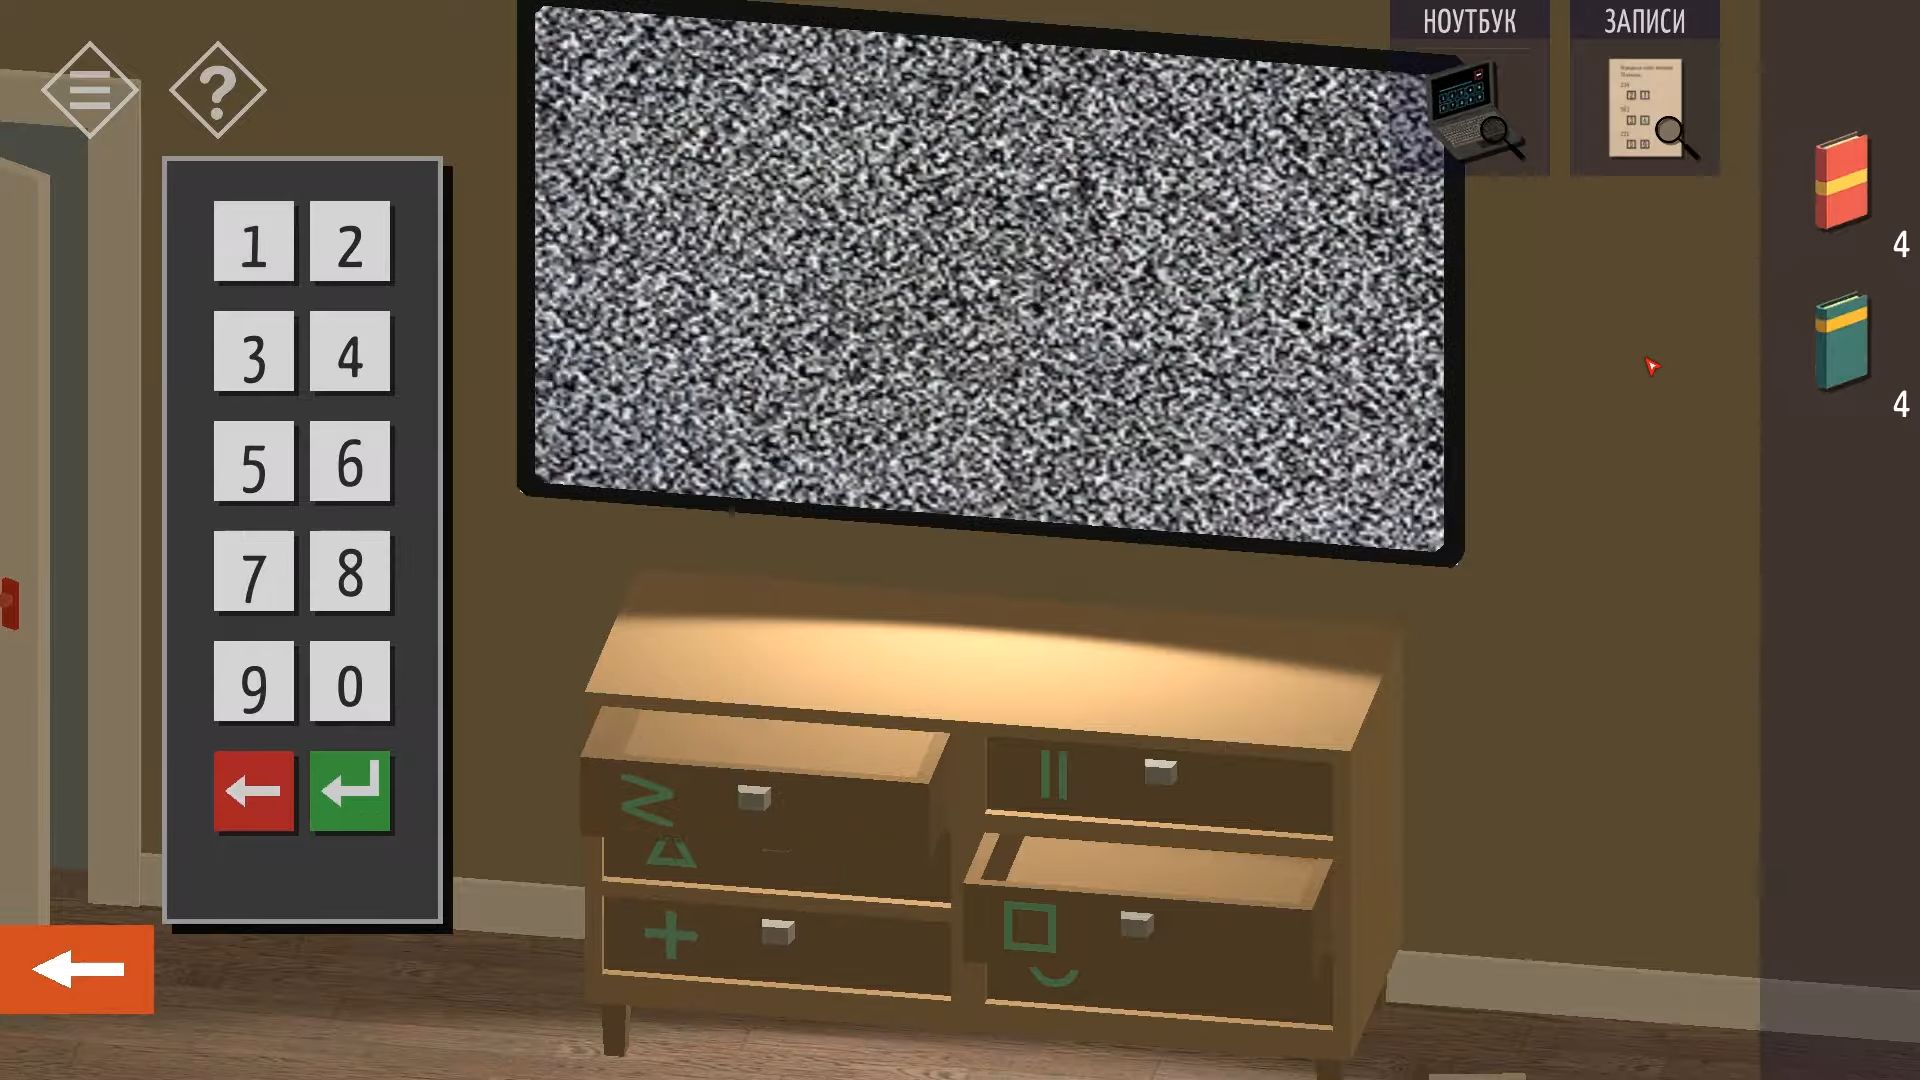
Now, use the hint from the note to find channel numbers for the TV. Knock the numbers and hit enter. This will open 2 drawers, each showing a symbol. The order for these symbols is on the note. After that, check the laptop again and input the passcode (||, Triangle, +, Square, Z, Square). Once it’s unlocked, tap the photo button to see a picture clue of bookshelves.
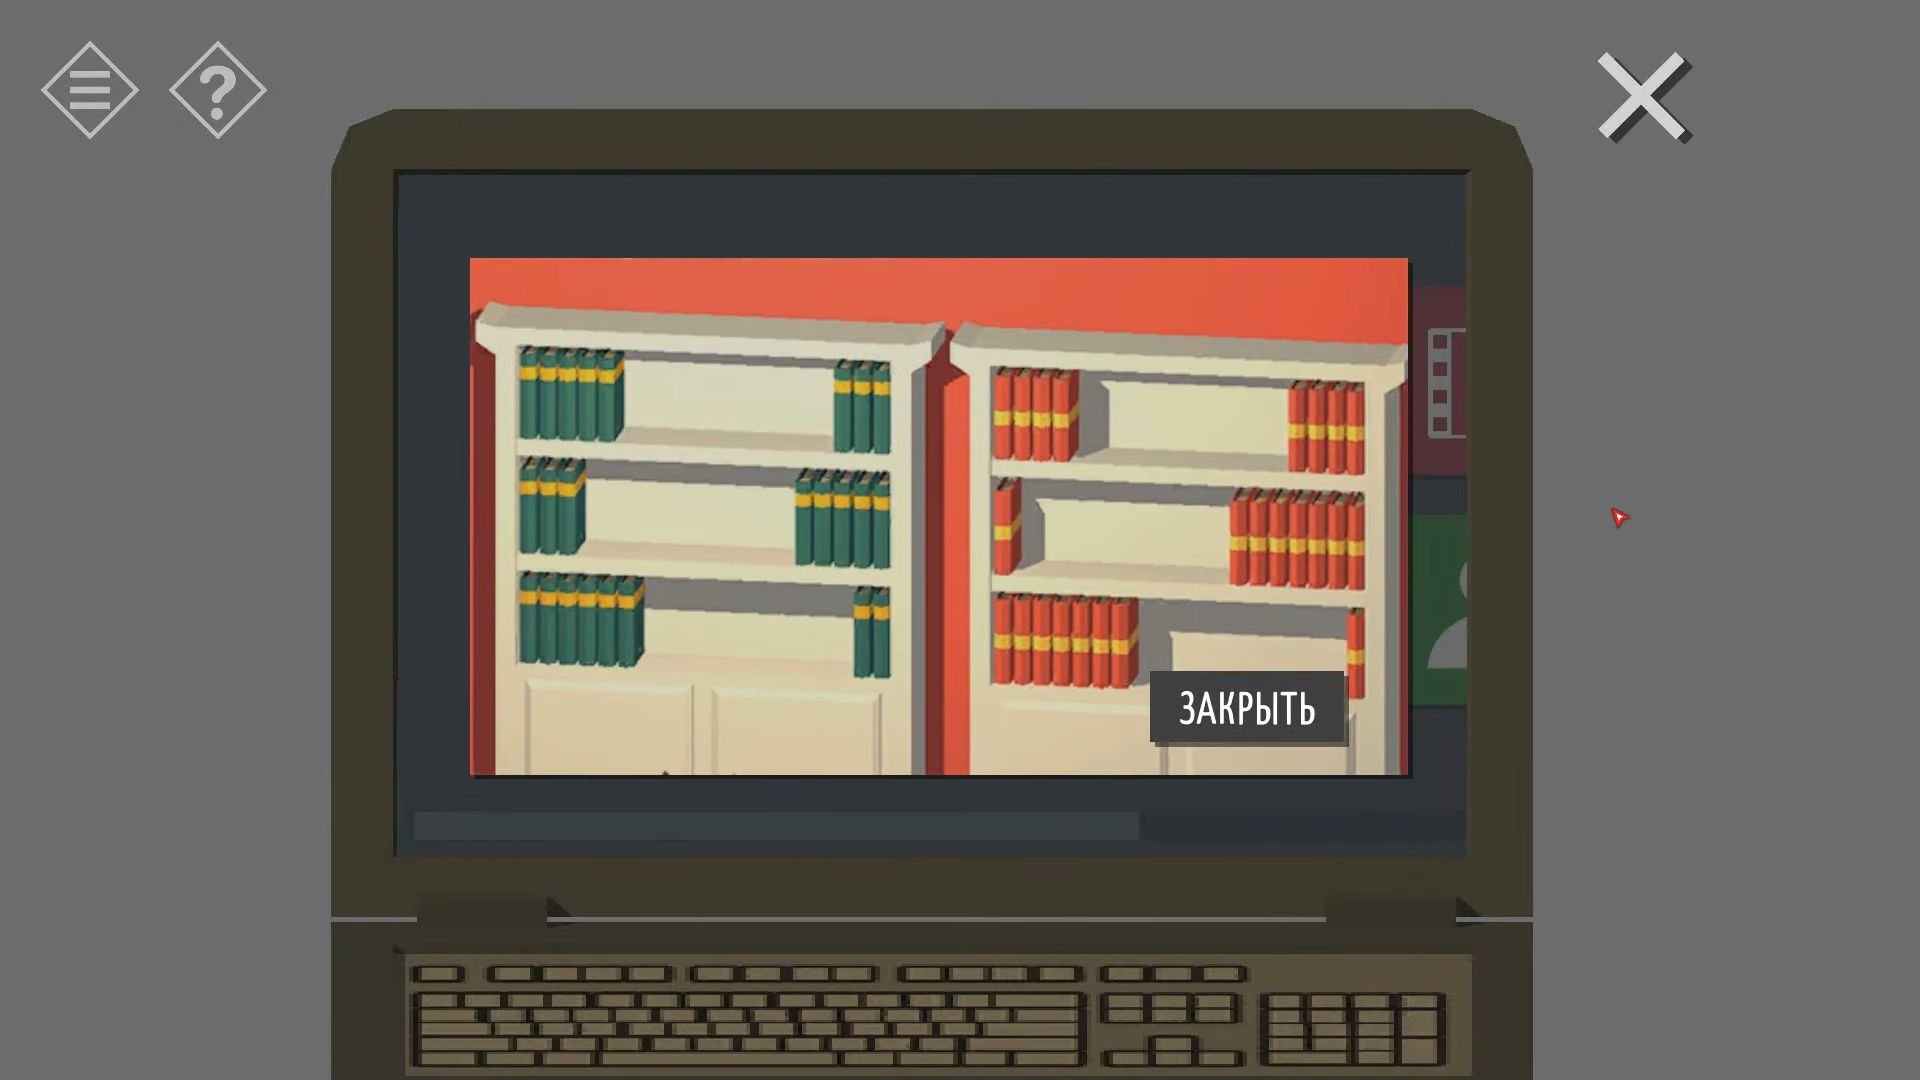
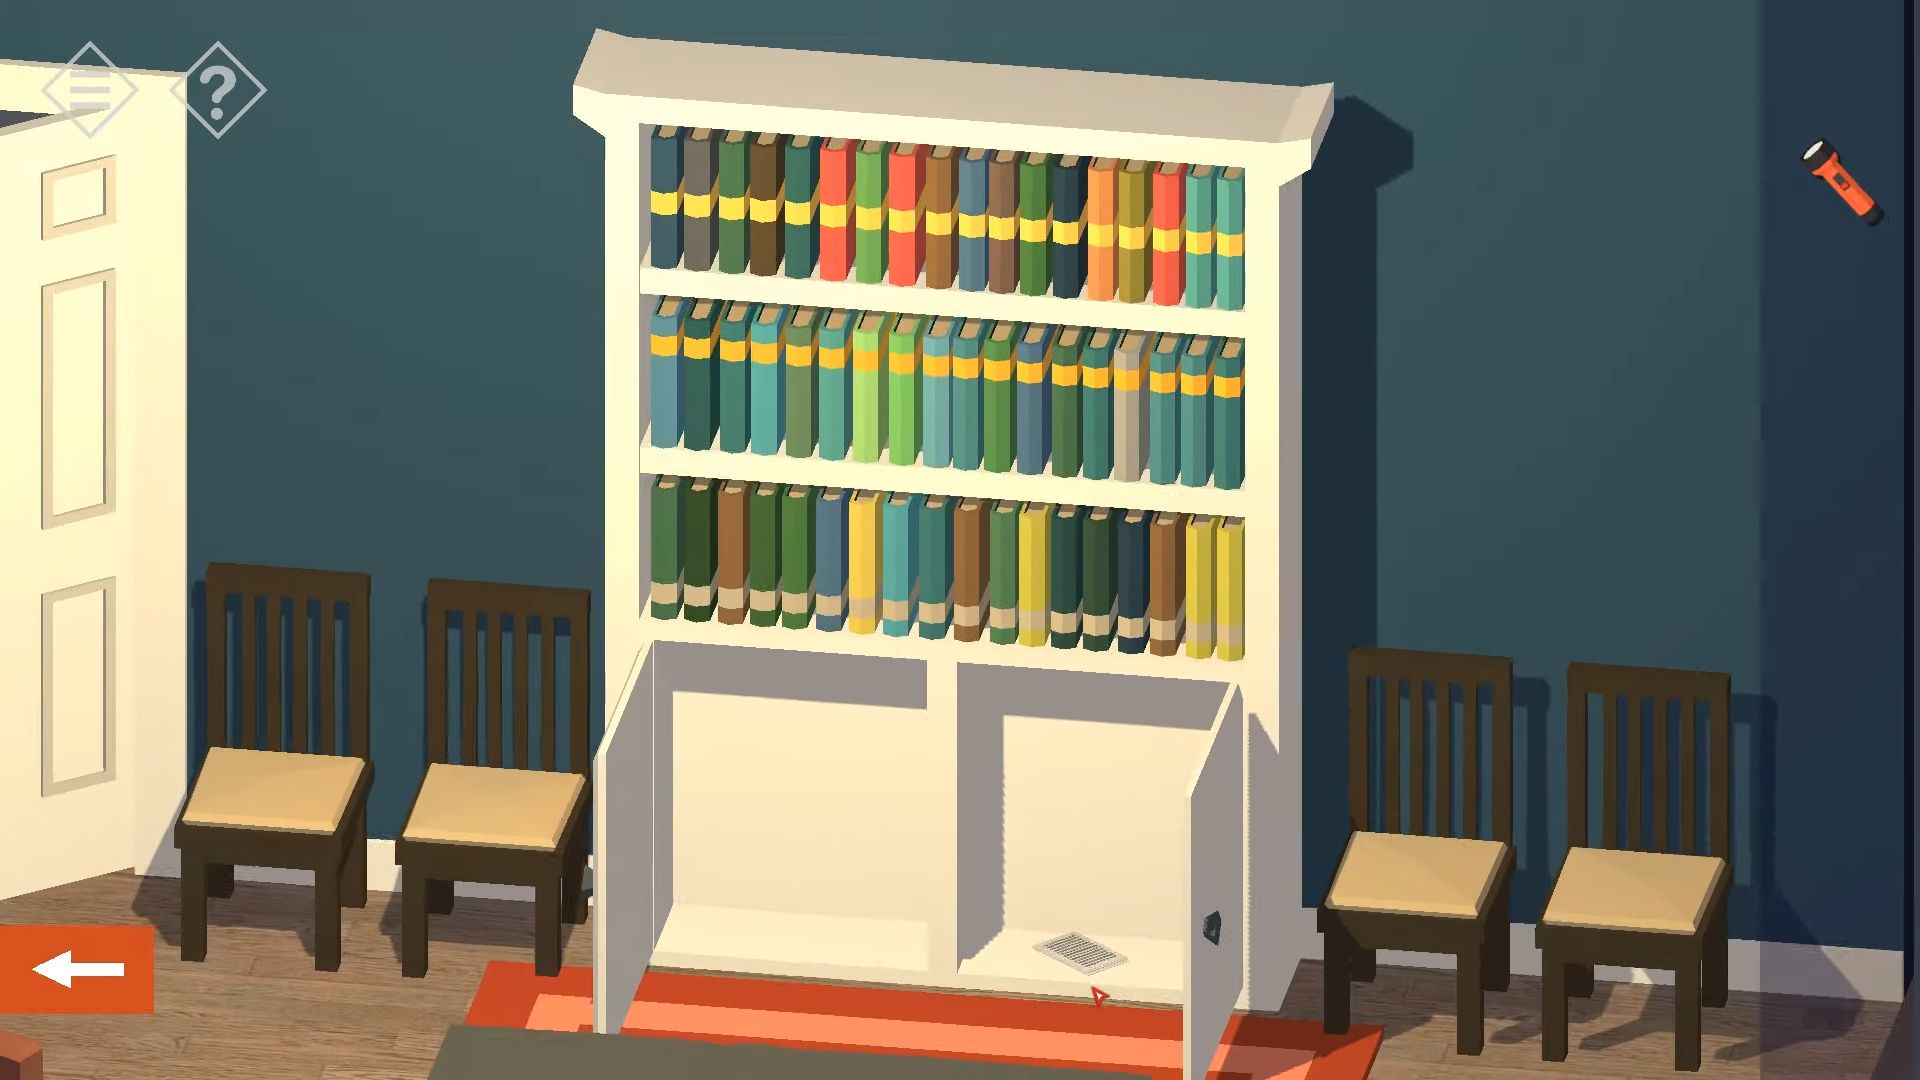
Go back to the main room and look at the bookshelves. Open the bottom right door to find another book. Now, you can put the 4 red and 4 green books on the shelves. Tap each shelf to organize the books and use the clues mentioned earlier to put them in the correct spots. A door on the left will open and you need to navigate through it into the corridor.
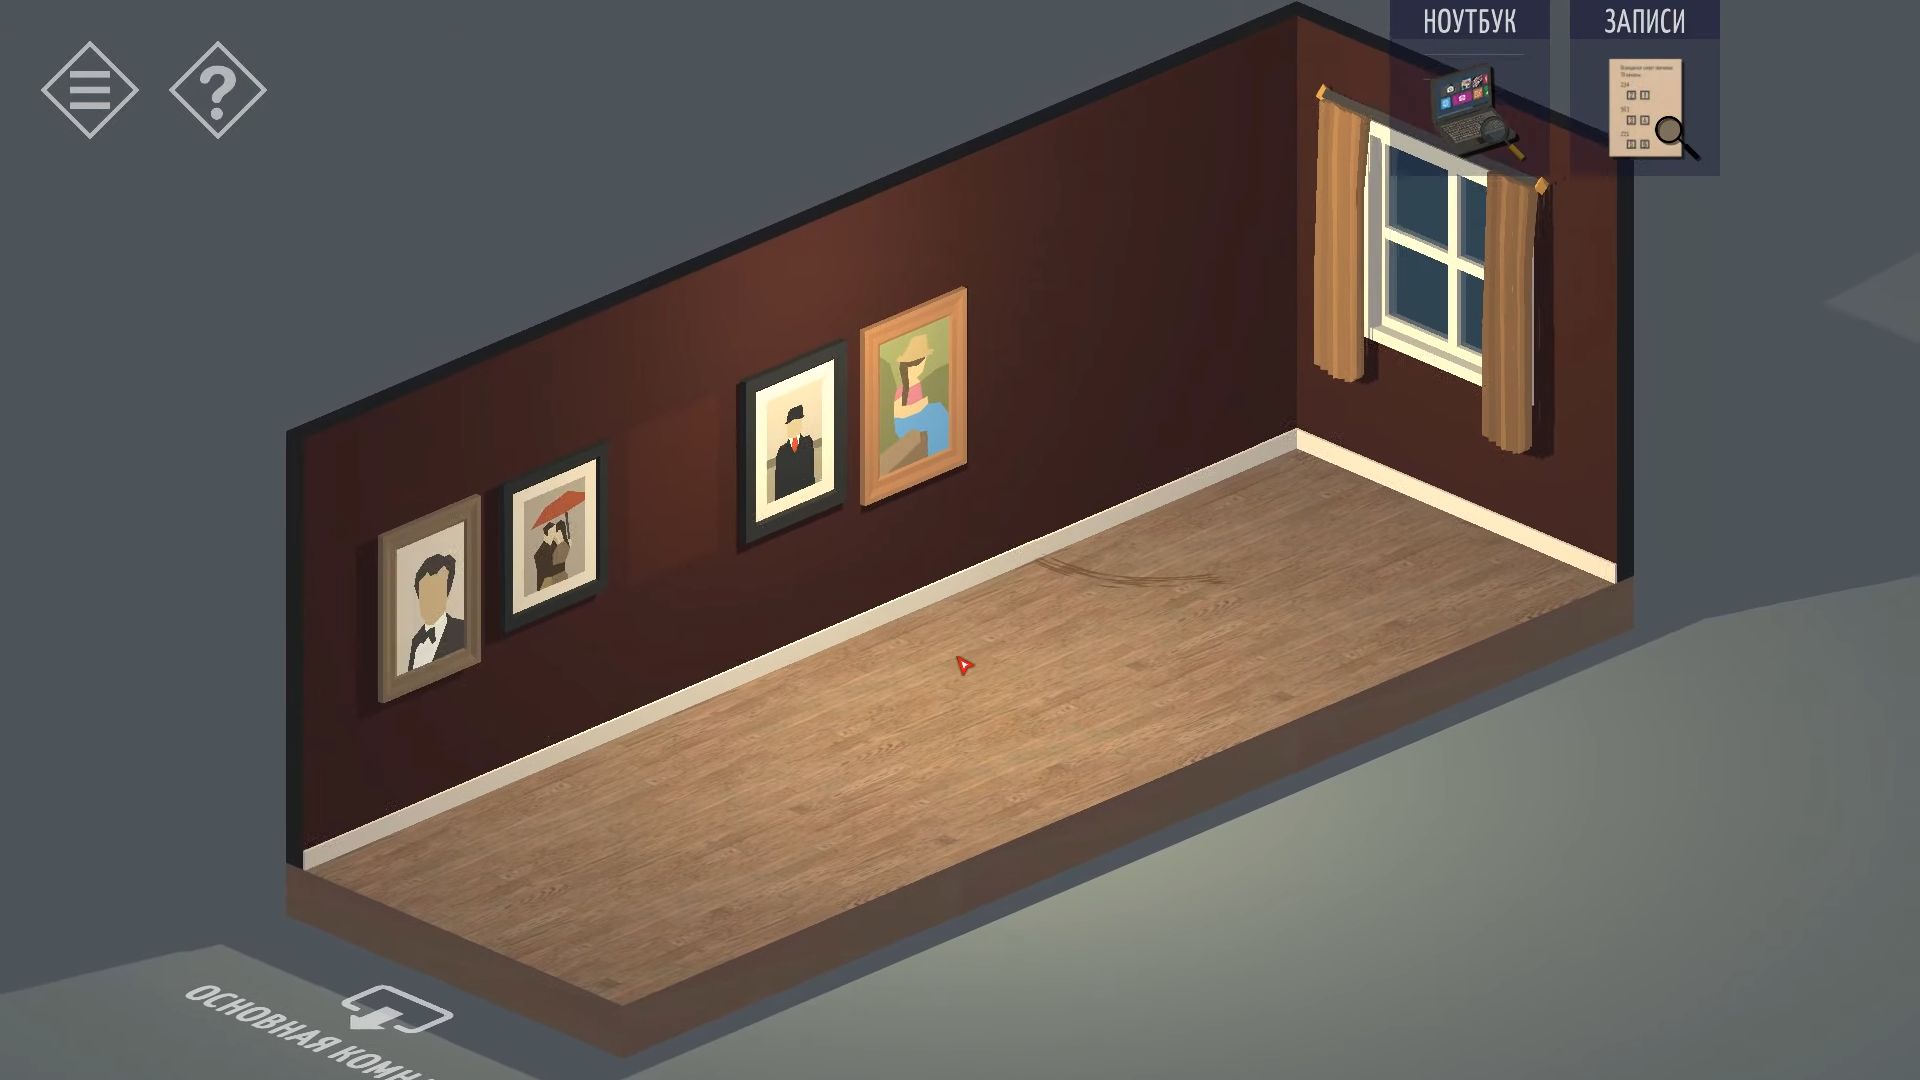
Turn the view around and pick up the crowbar. Now, leave the house and head back to the street. Tap on the roof near the ladder again to go up, and use the crowbar on the attic window.
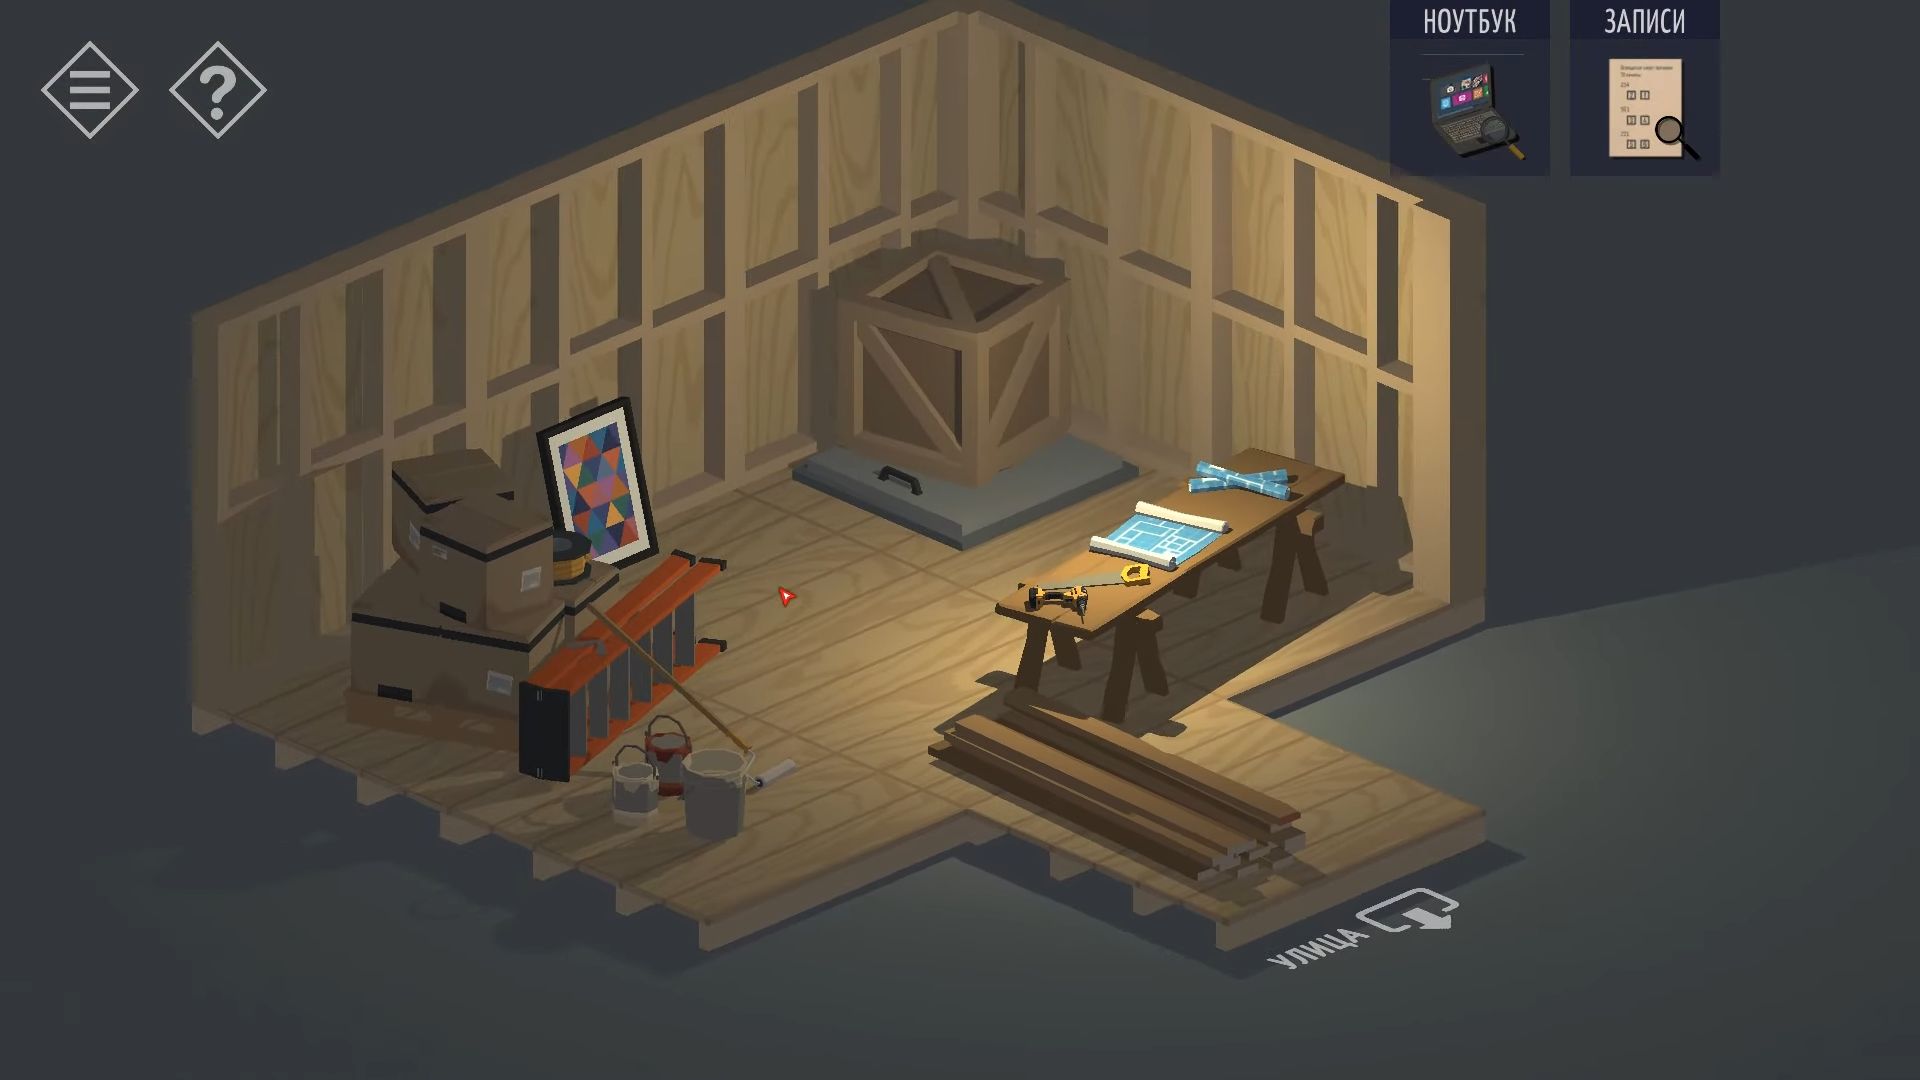
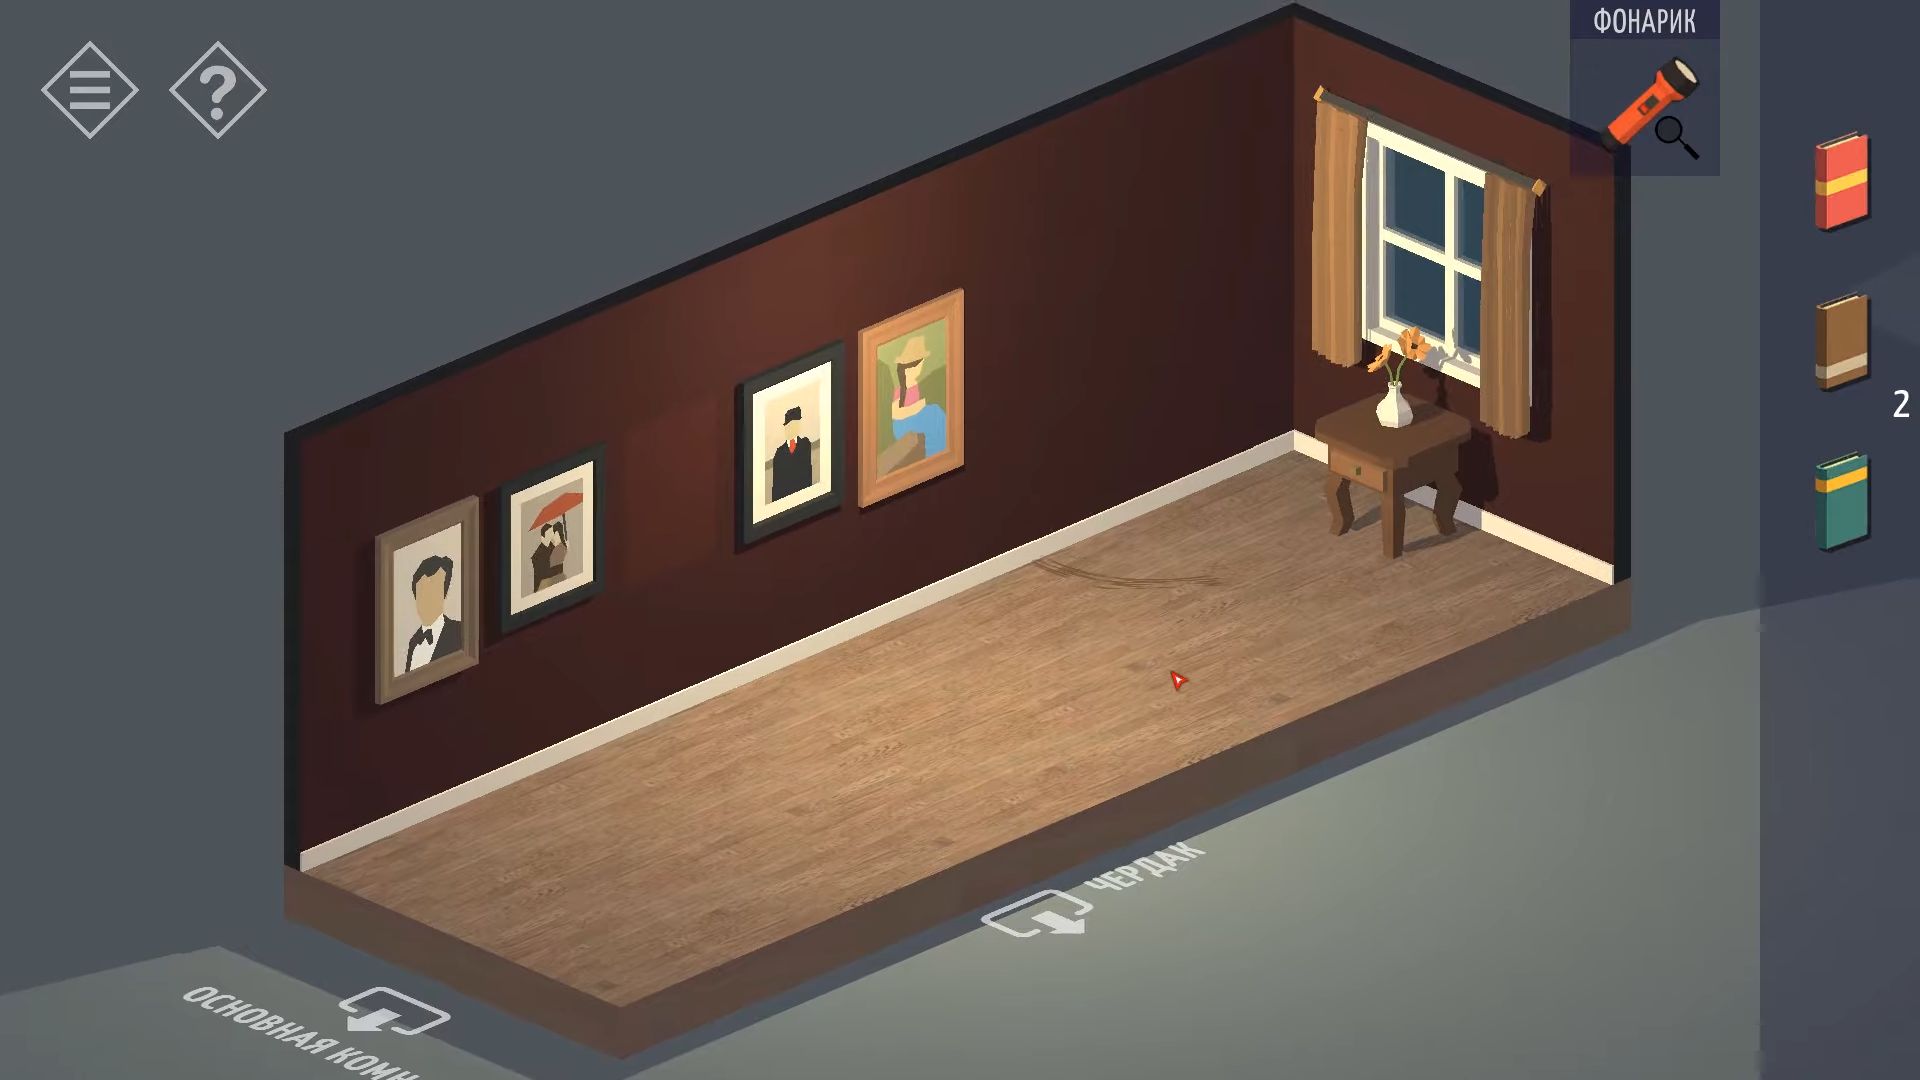
In the attic, take the painting leaning at the back and knock on the big box on top of the floor hatch. Tap it a few times until it moves and the hatch opens. Go back down to the corridor, use the painting, and put it on the wall in the middle of the others.
Now, touch the paintings to make them all straight. Once you have done it, a secret door will open. Knock to navigate into a basement room and slightly touch the single red dot you can see to turn on the lights. The room is flooded.
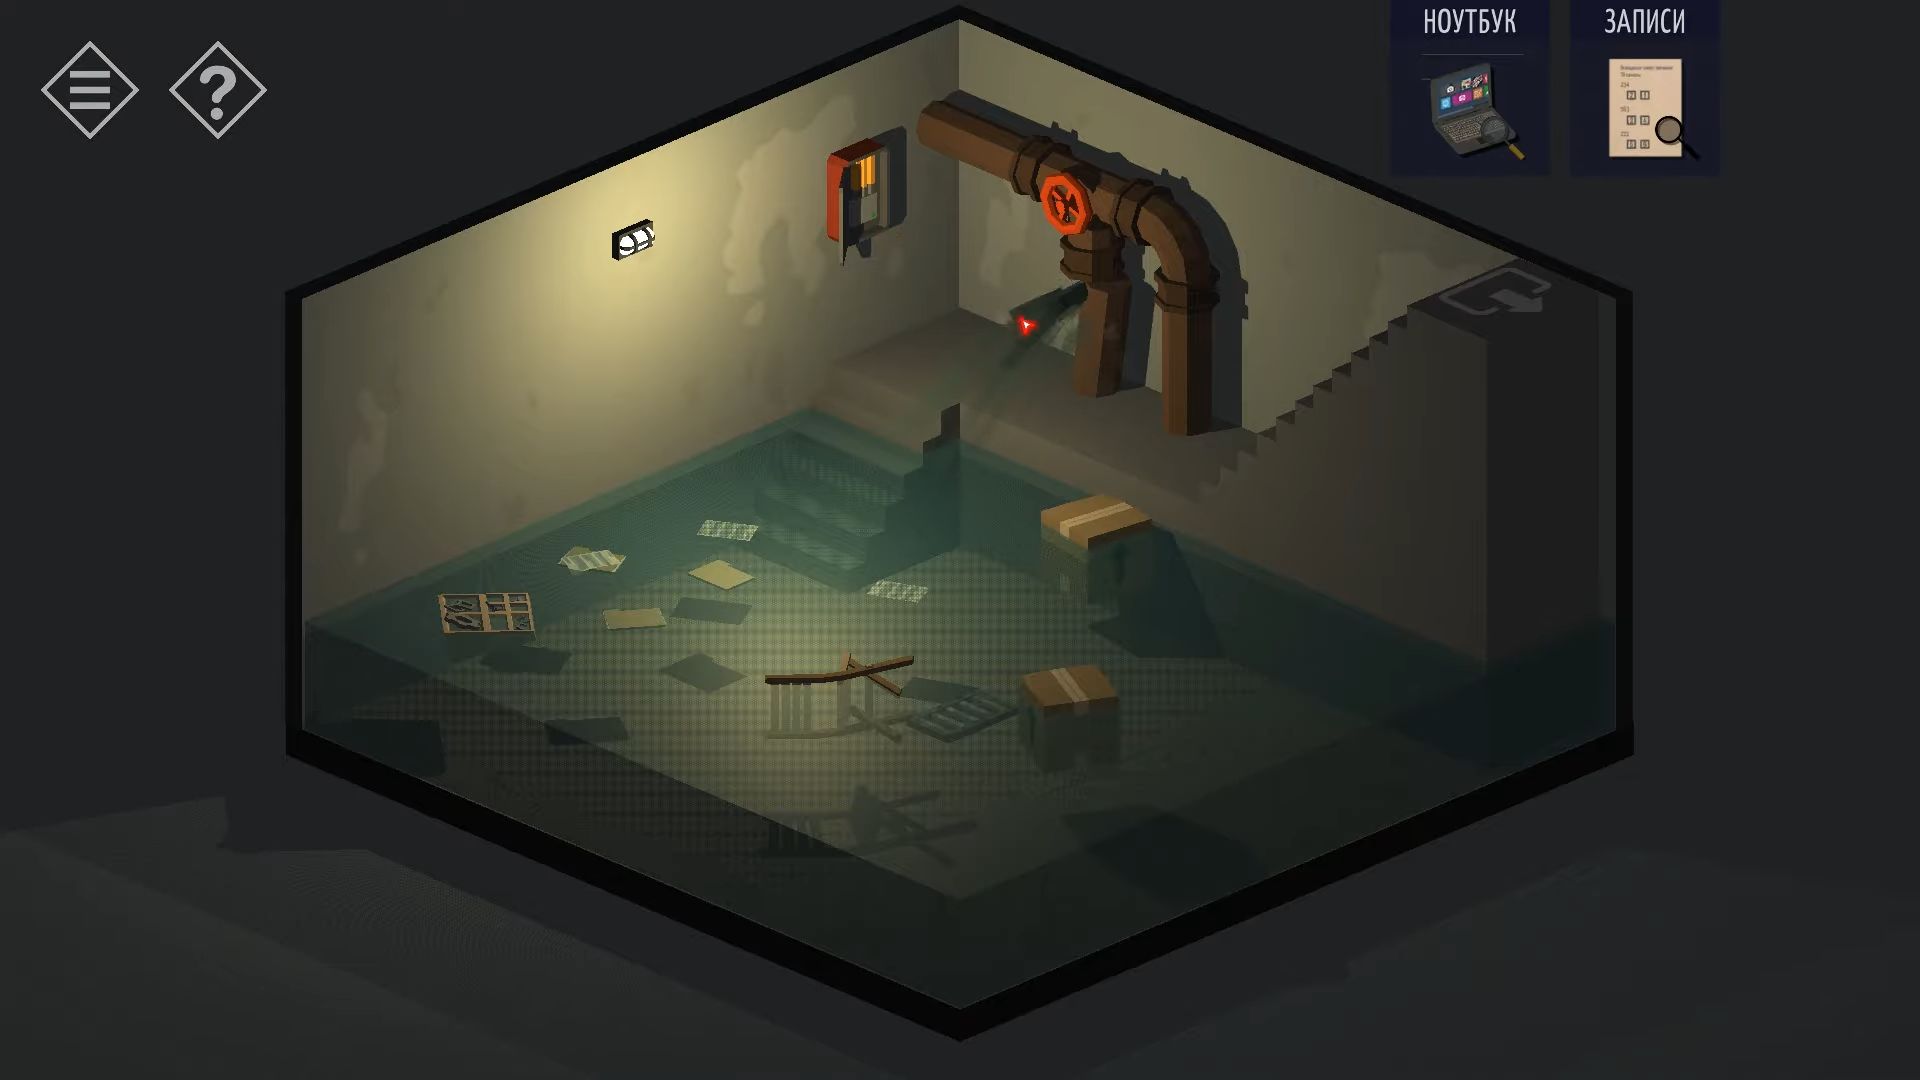
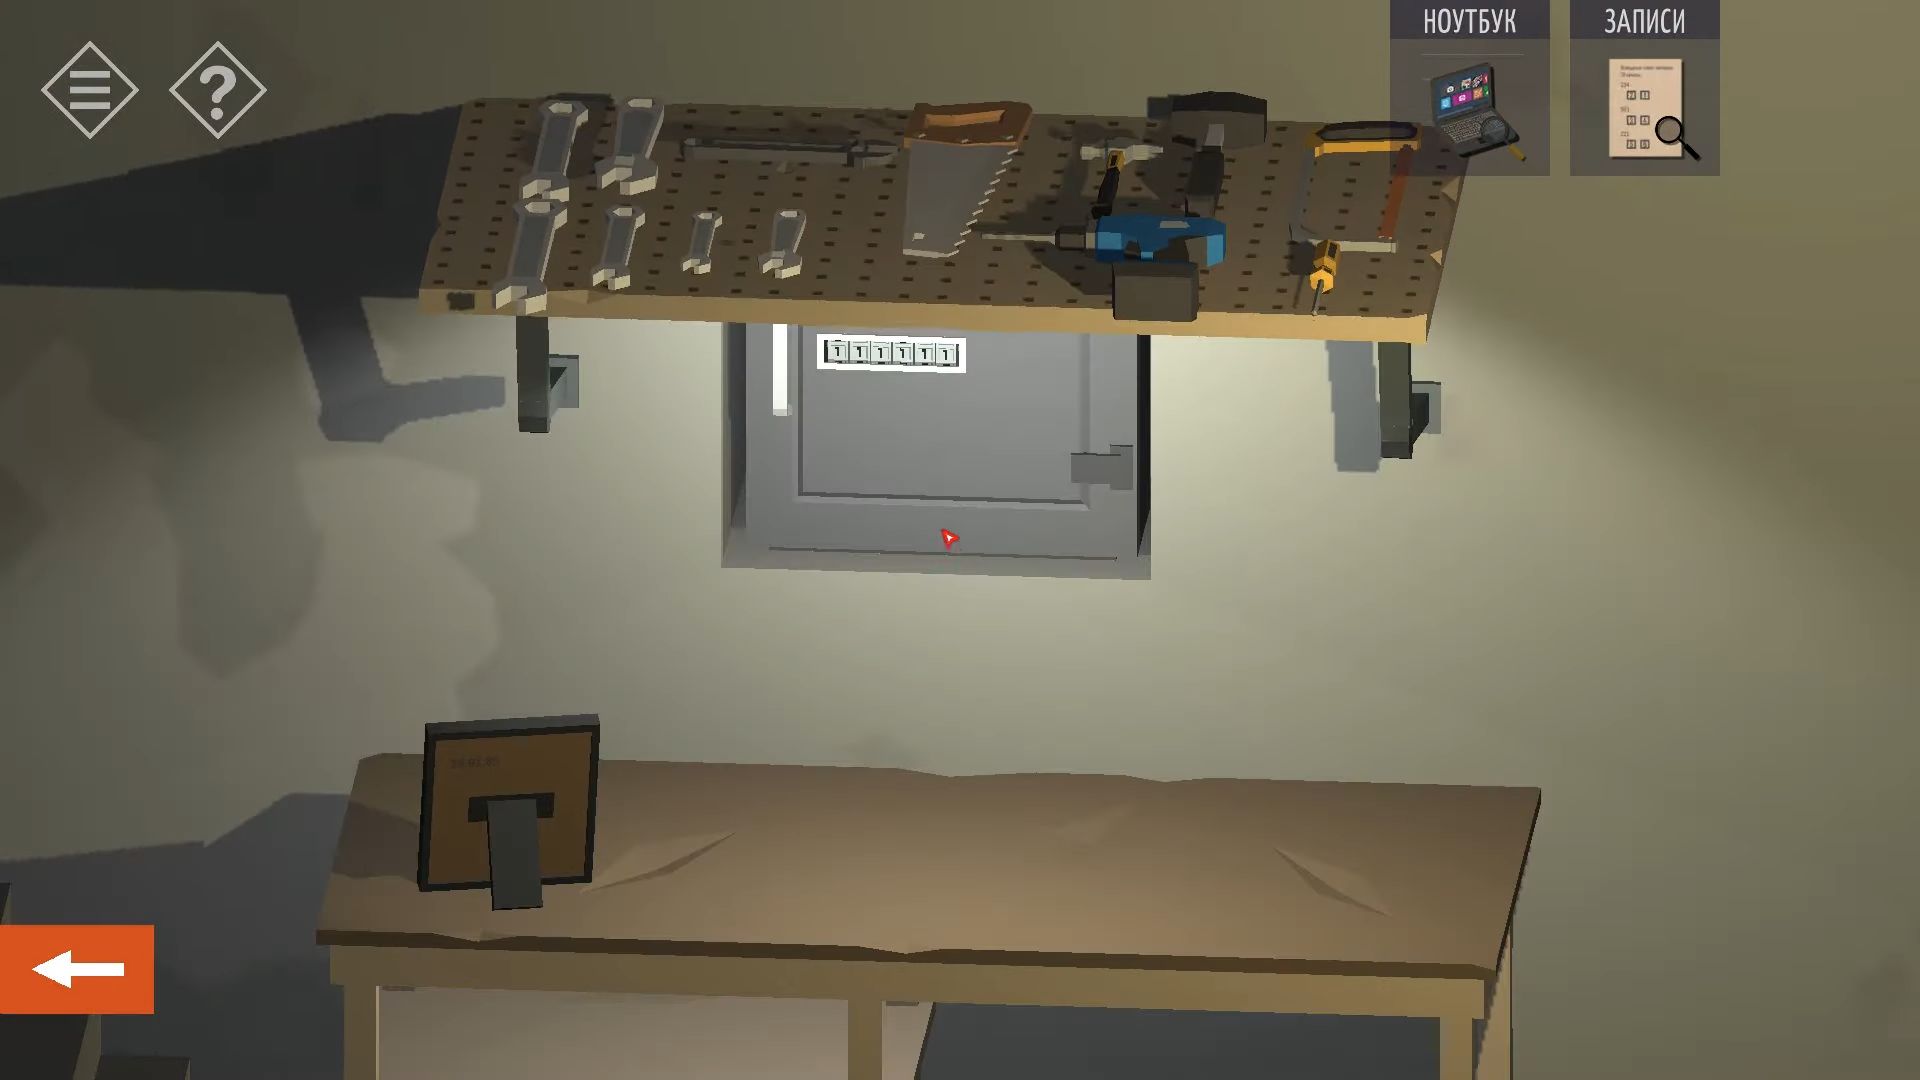
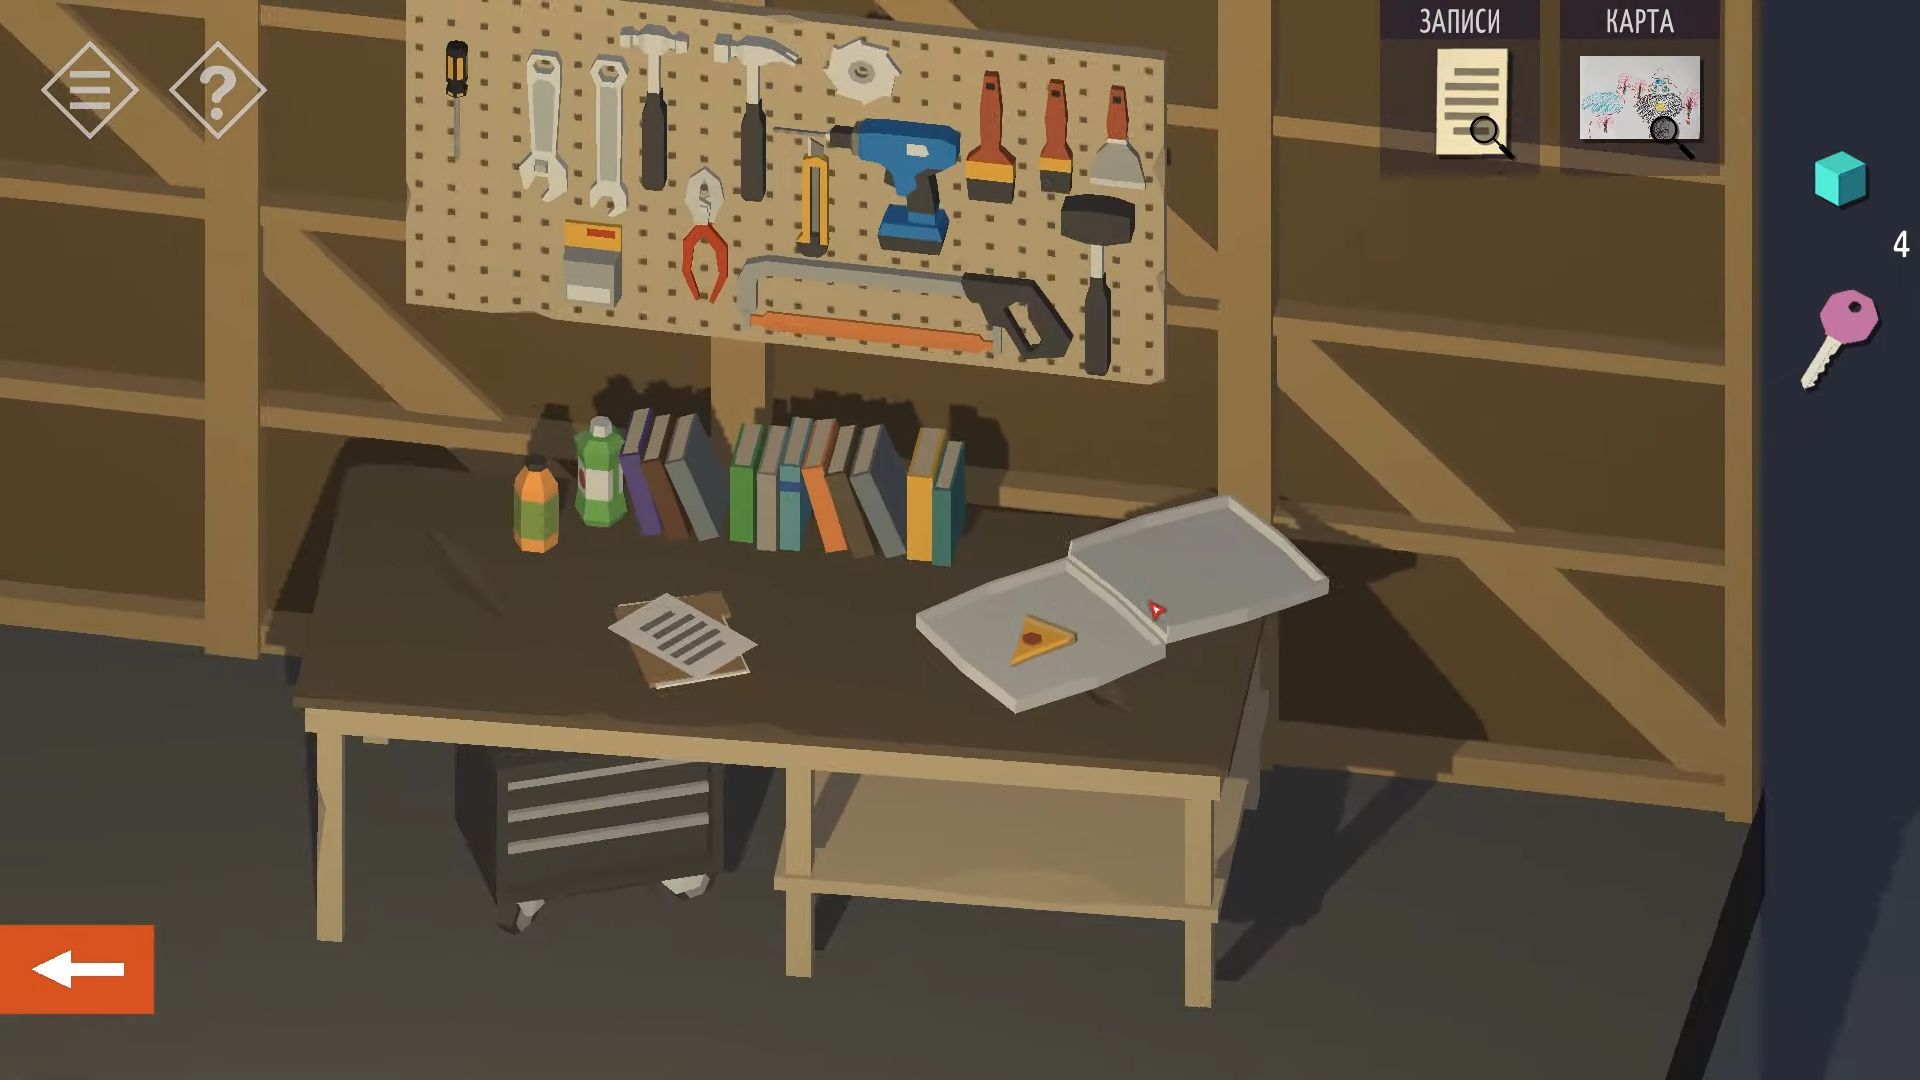
After that, touch the red valve wheel to stop the water. Turn around to see a work table and a rack with tools. Tap the photo on the table to read the date 19.01.85 and knock on the tool rack. Knocking one of the wrenches on the left will open a secret panel and show a safe.
Now utilize the code 190185 from the photo on the combination safe to open it and get a Blue Key – a key for a bank deposit box numbered 1302. Go back to your car and knock on it to finish this part and move on to the next chapter.
Chapter 2
Here’s the complete guide for Chapter 2 in Tiny Room Stories: Town Mystery. Each step and secret is explained with pictures and codes, and you can check them if you need help.
Money Trace
After driving through the empty city, you will reach a local bank. Turn the view to the far side of the building to see a Dumpster and a broken fire escape. Tap the dumpster a few times to move it under the fire escape, now, you can get to the roof.
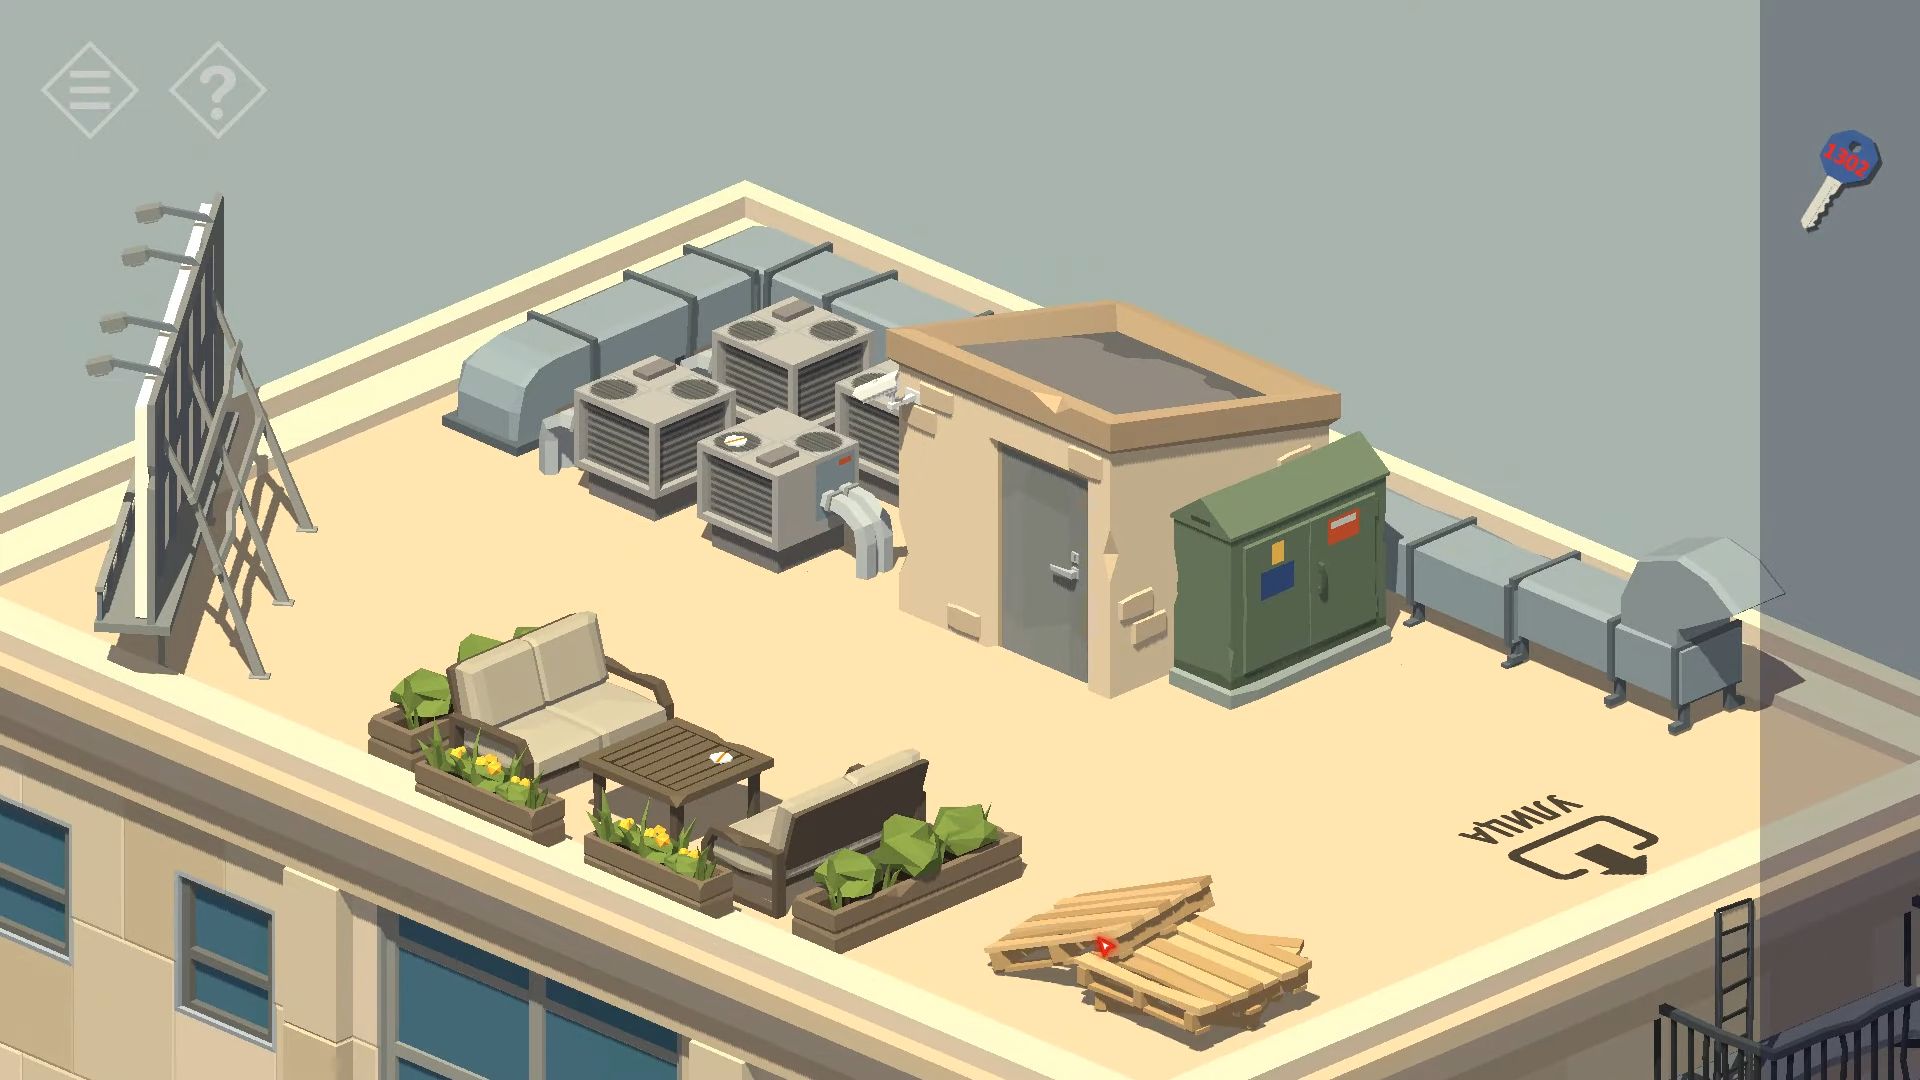
On the roof, knock on the three pallets in the lower right. Touch them again to move them and discover a Device Part that you can pick up. Zoom in on the small table and seats, and collect another Device Part. Touch the grey air-conditioning vents on the back left of the roof to find a third Device Part. Turn the view to the back of the door block to find a Crowbar on top of the duct.
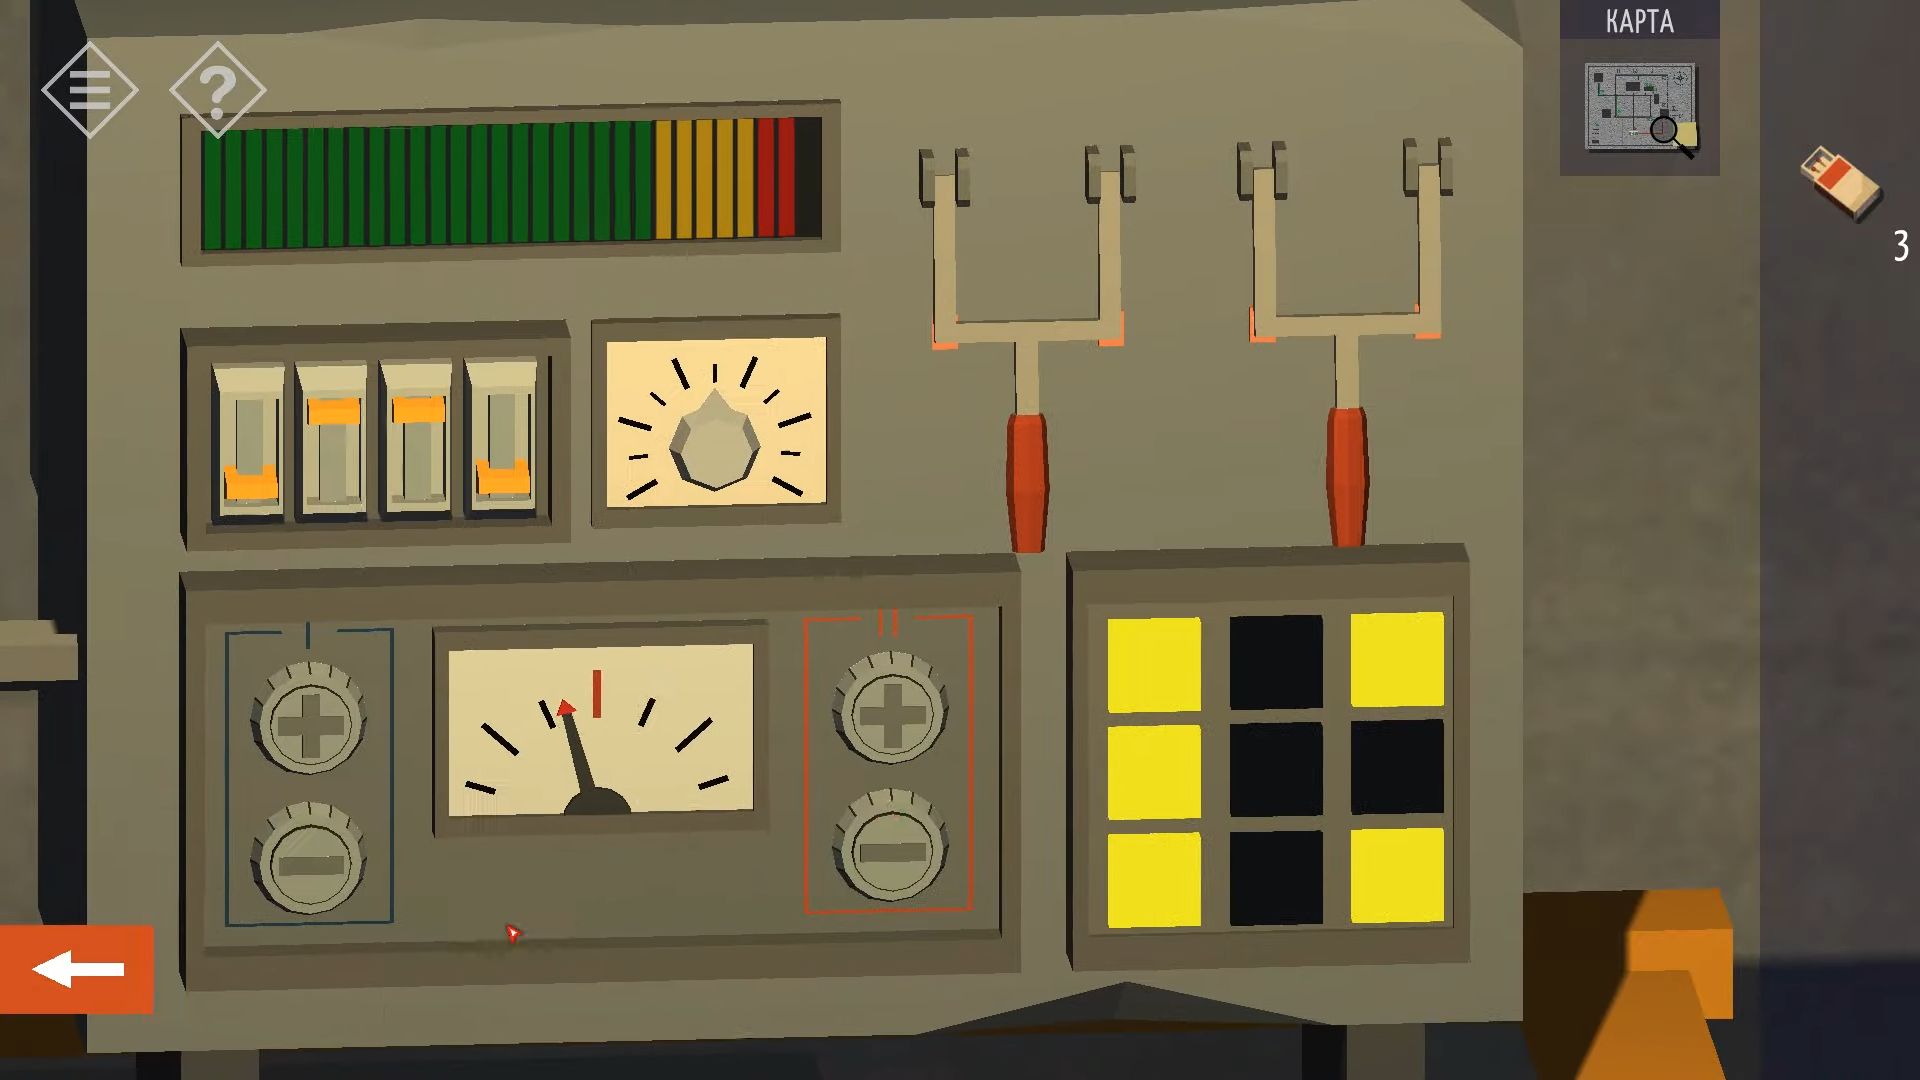
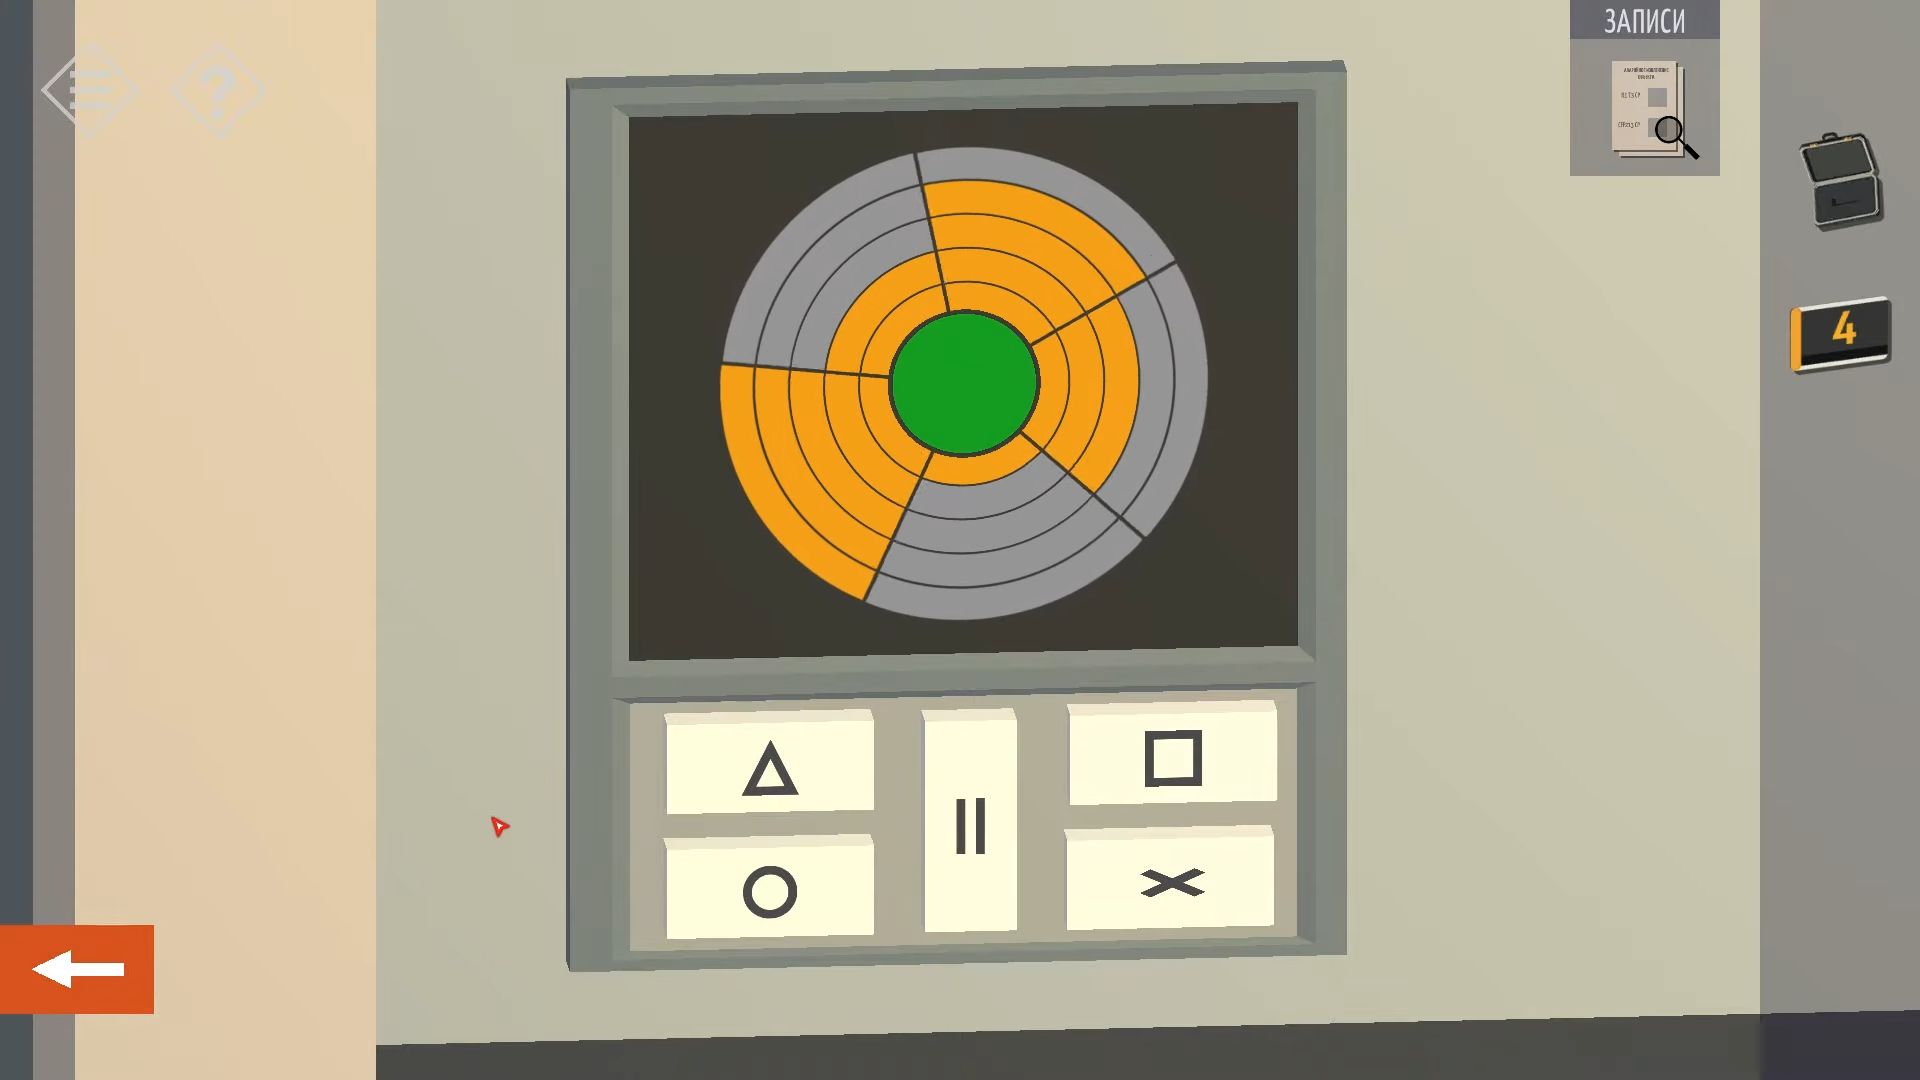
Now you have to tap the green unit next to the door to zoom in and use the crowbar to open it. Inside, there’s a puzzle with three missing parts. Use the three parts collected earlier to place them in the missing slots, then rotate the pieces to align and connect the orange lines without any breaks.
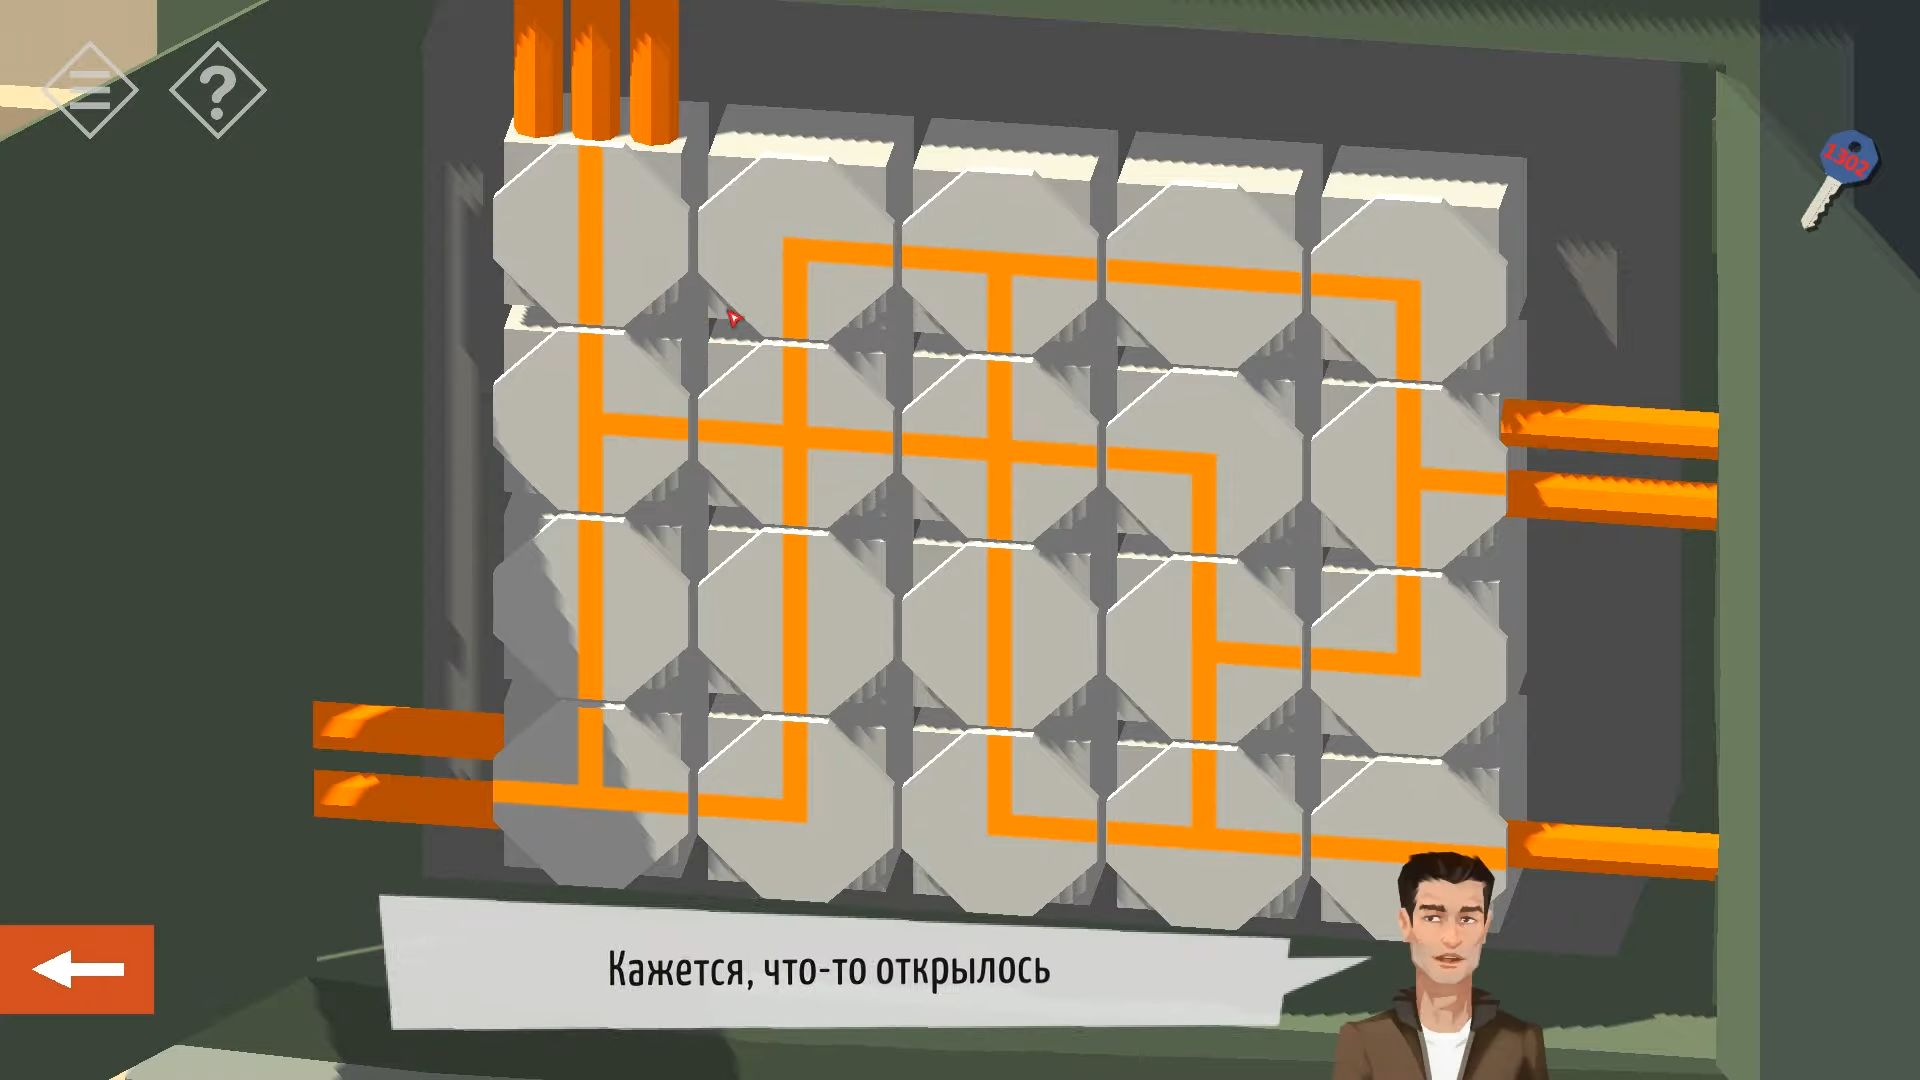
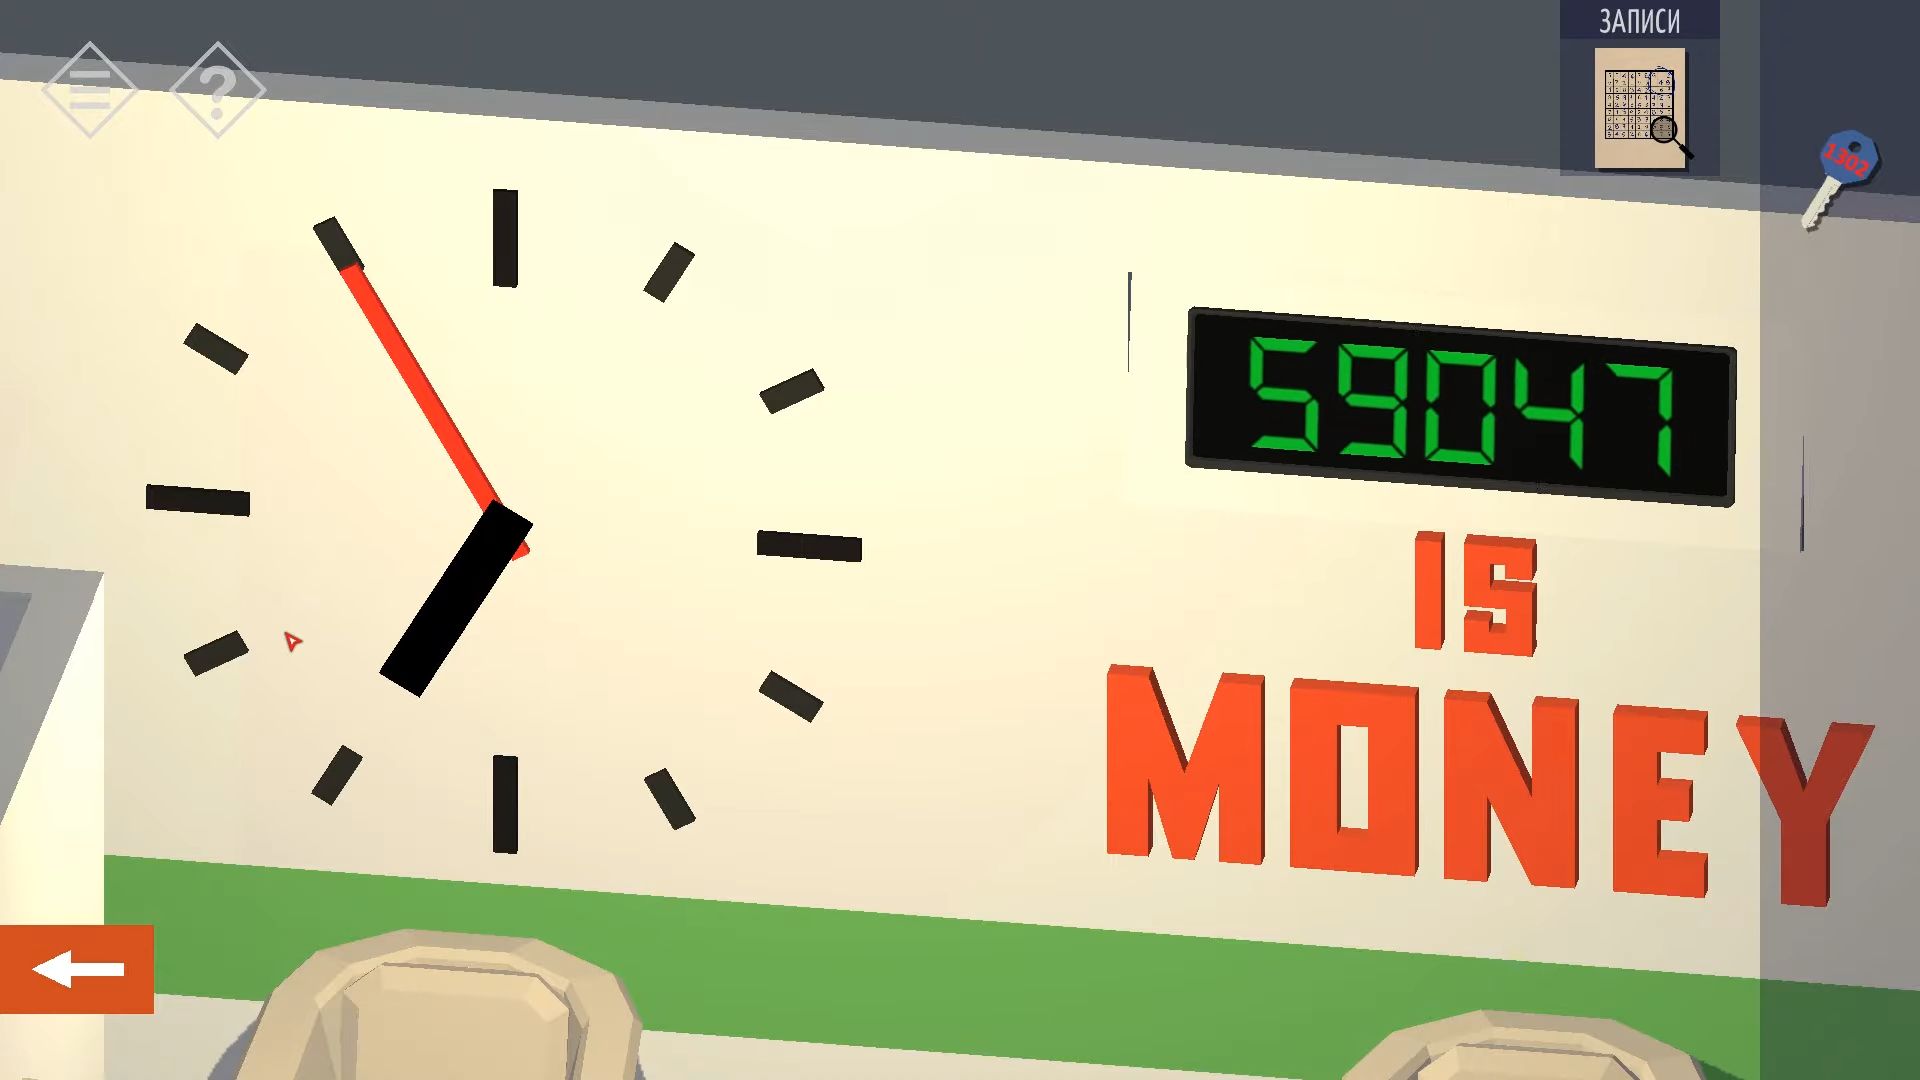
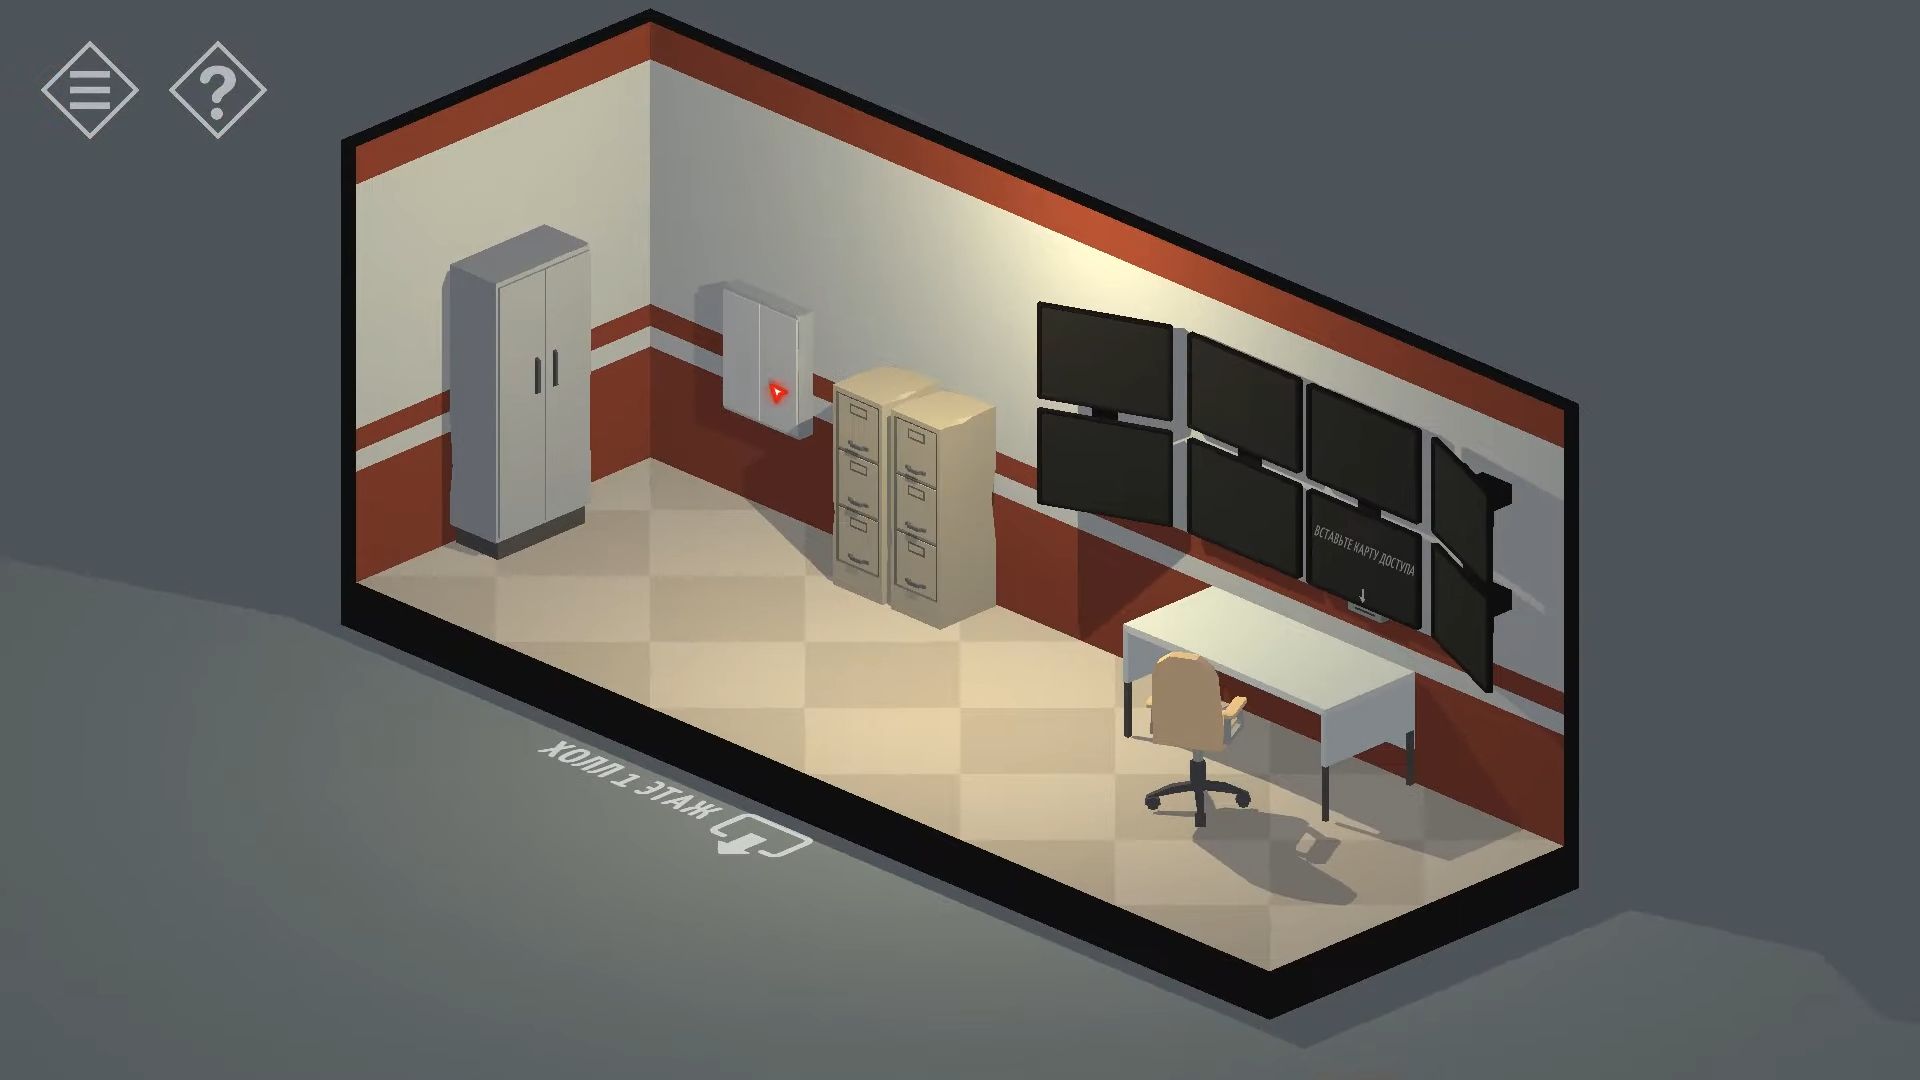
The door will open, and you can head to the 3rd floor. Use the stairs to go down to the 2nd floor and then to the 1st floor. There’s a clock on the wall with the wrong time, remember where the clock hands are. Turn the view to see the back of the desks, then tap on the left desk to look at it. Open the bottom drawer to pick up a Green Folder.
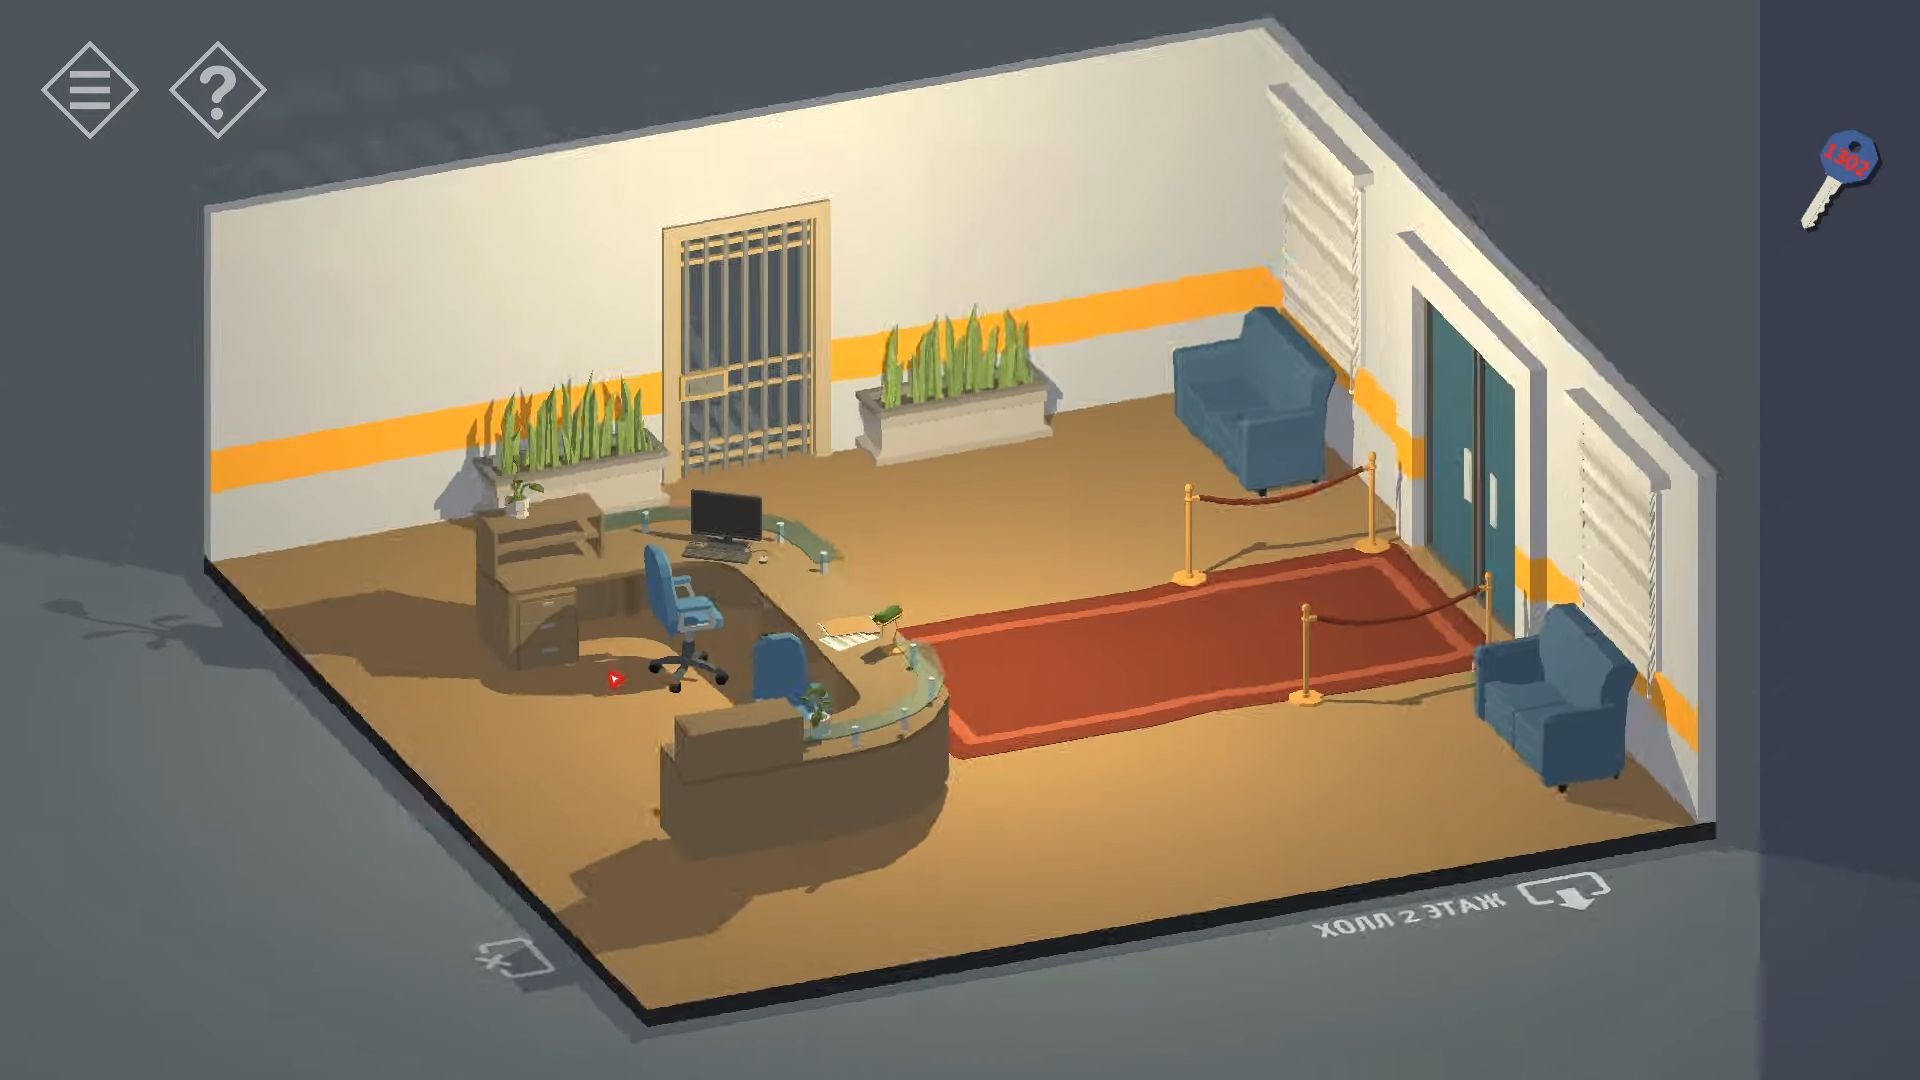
Turn around to check the right desk and open the middle drawer to get a necklace. Return to the second floor and turn the view to see a big clock that says Time is Money. You have to tap the clock and adjust each hand to the same position as the clock downstairs.
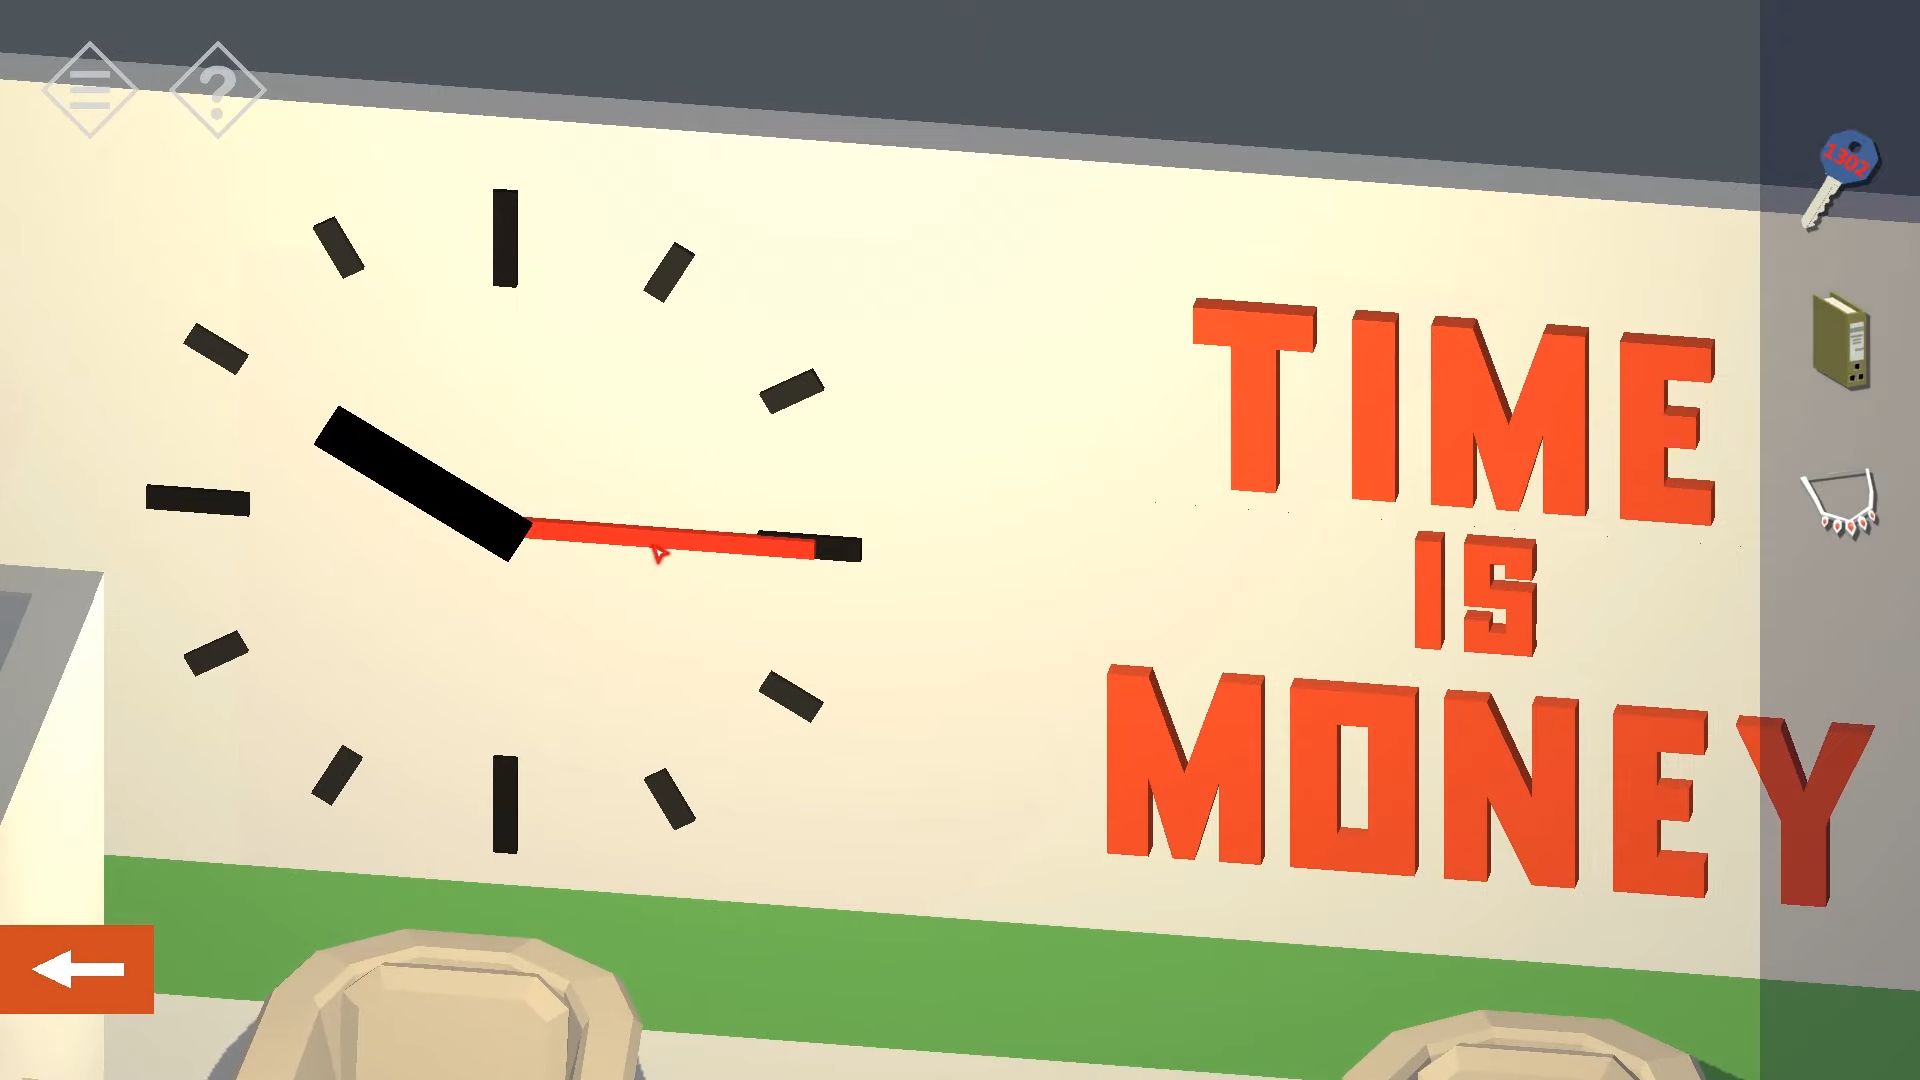
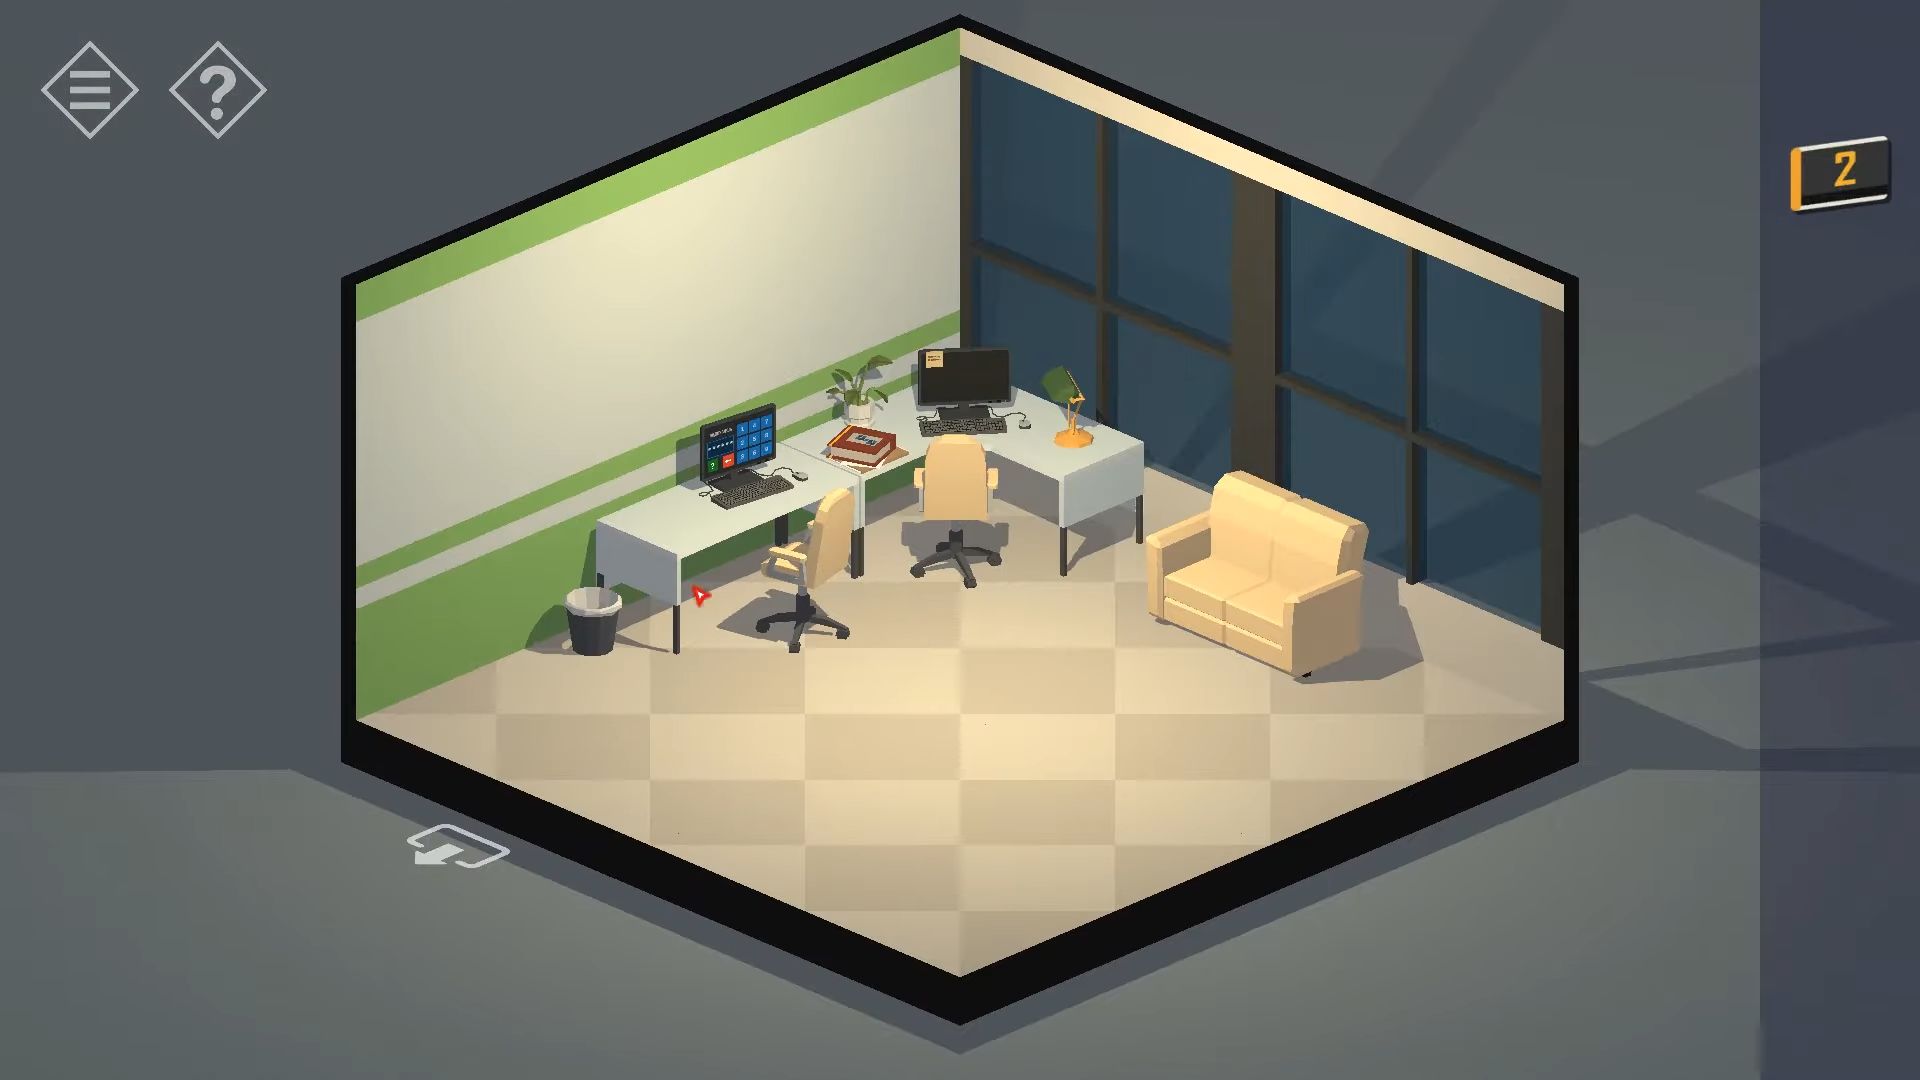
A door will open up, and now you can go into an office room. Inside, tap the grey table to get a key called the WC key. Also, you need to pick up the Red Folder.
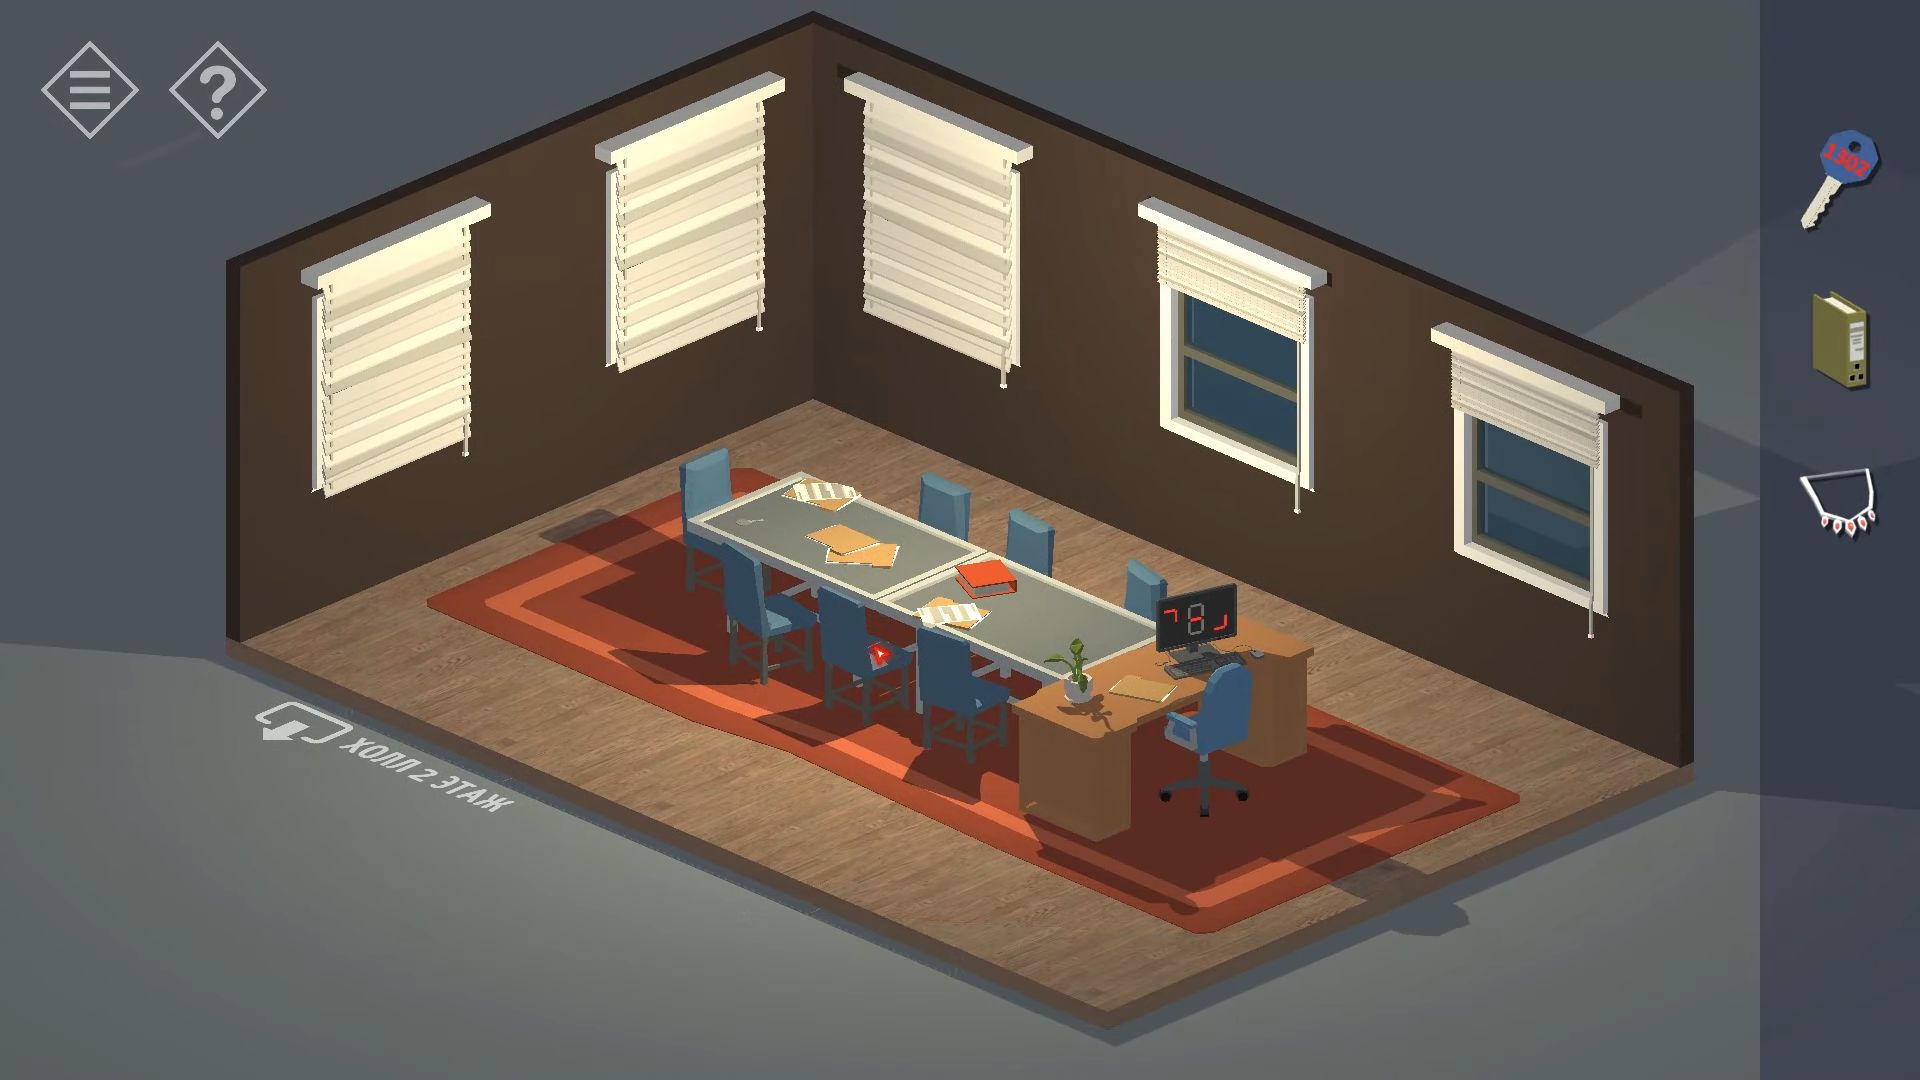
Look around the room and focus on the computer screen to see a moving ‘3’ shape. Remember this as it’s a clue. Knock the desk chair to move it, and then pick up a model shuttle from the floor. Leave the room and use the WC key to unlock and enter the WC on the second floor. Open the right stall door and collect a second Red Folder.
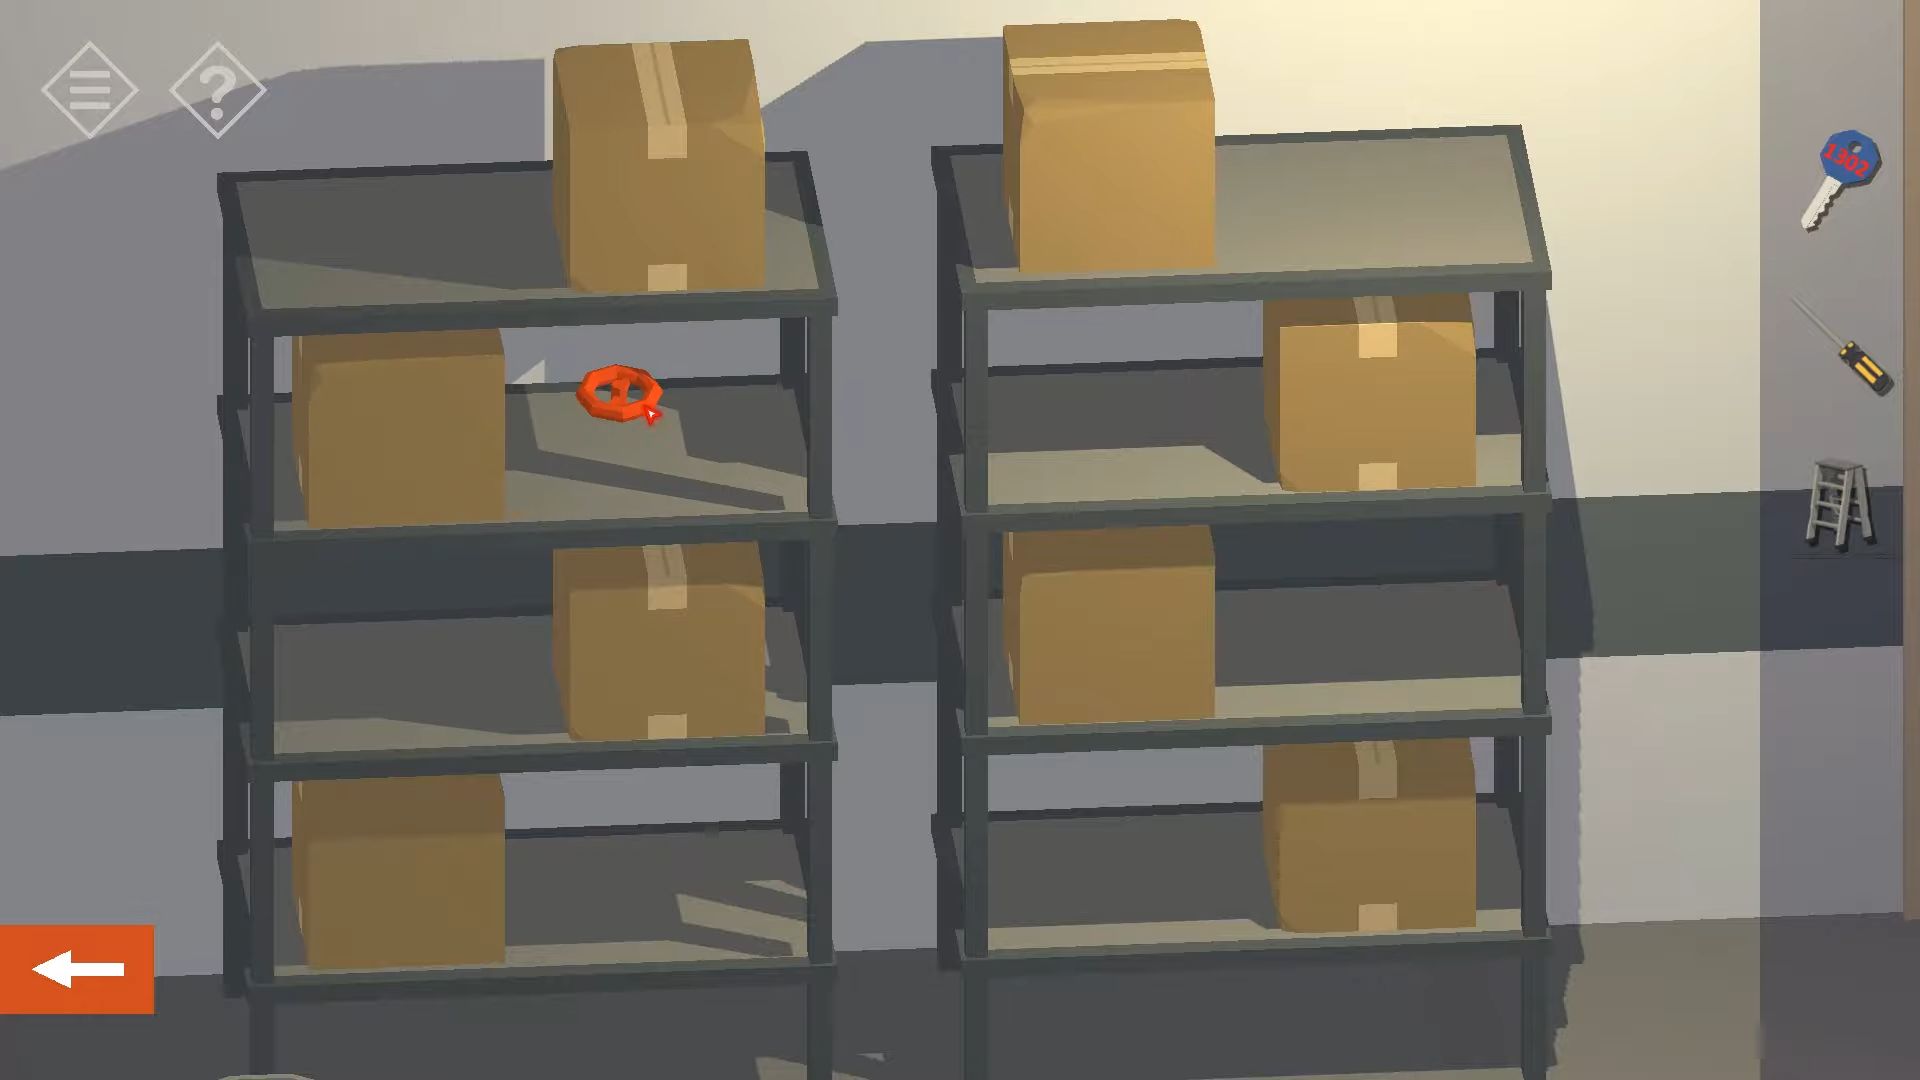
From the sink, grab another red key. Now, go back downstairs to the reception. At the back is a room with a red handle. Use the red key to open it and enter the storeroom. On the back wall, tap to get the step ladder, then turn around to see shelves with boxes. Move each of these to uncover and collect 2 valve wheels.
Afterward, return to the second floor and head to the conference room. Change the view of the room to look at the 2 bookcases on the wall.
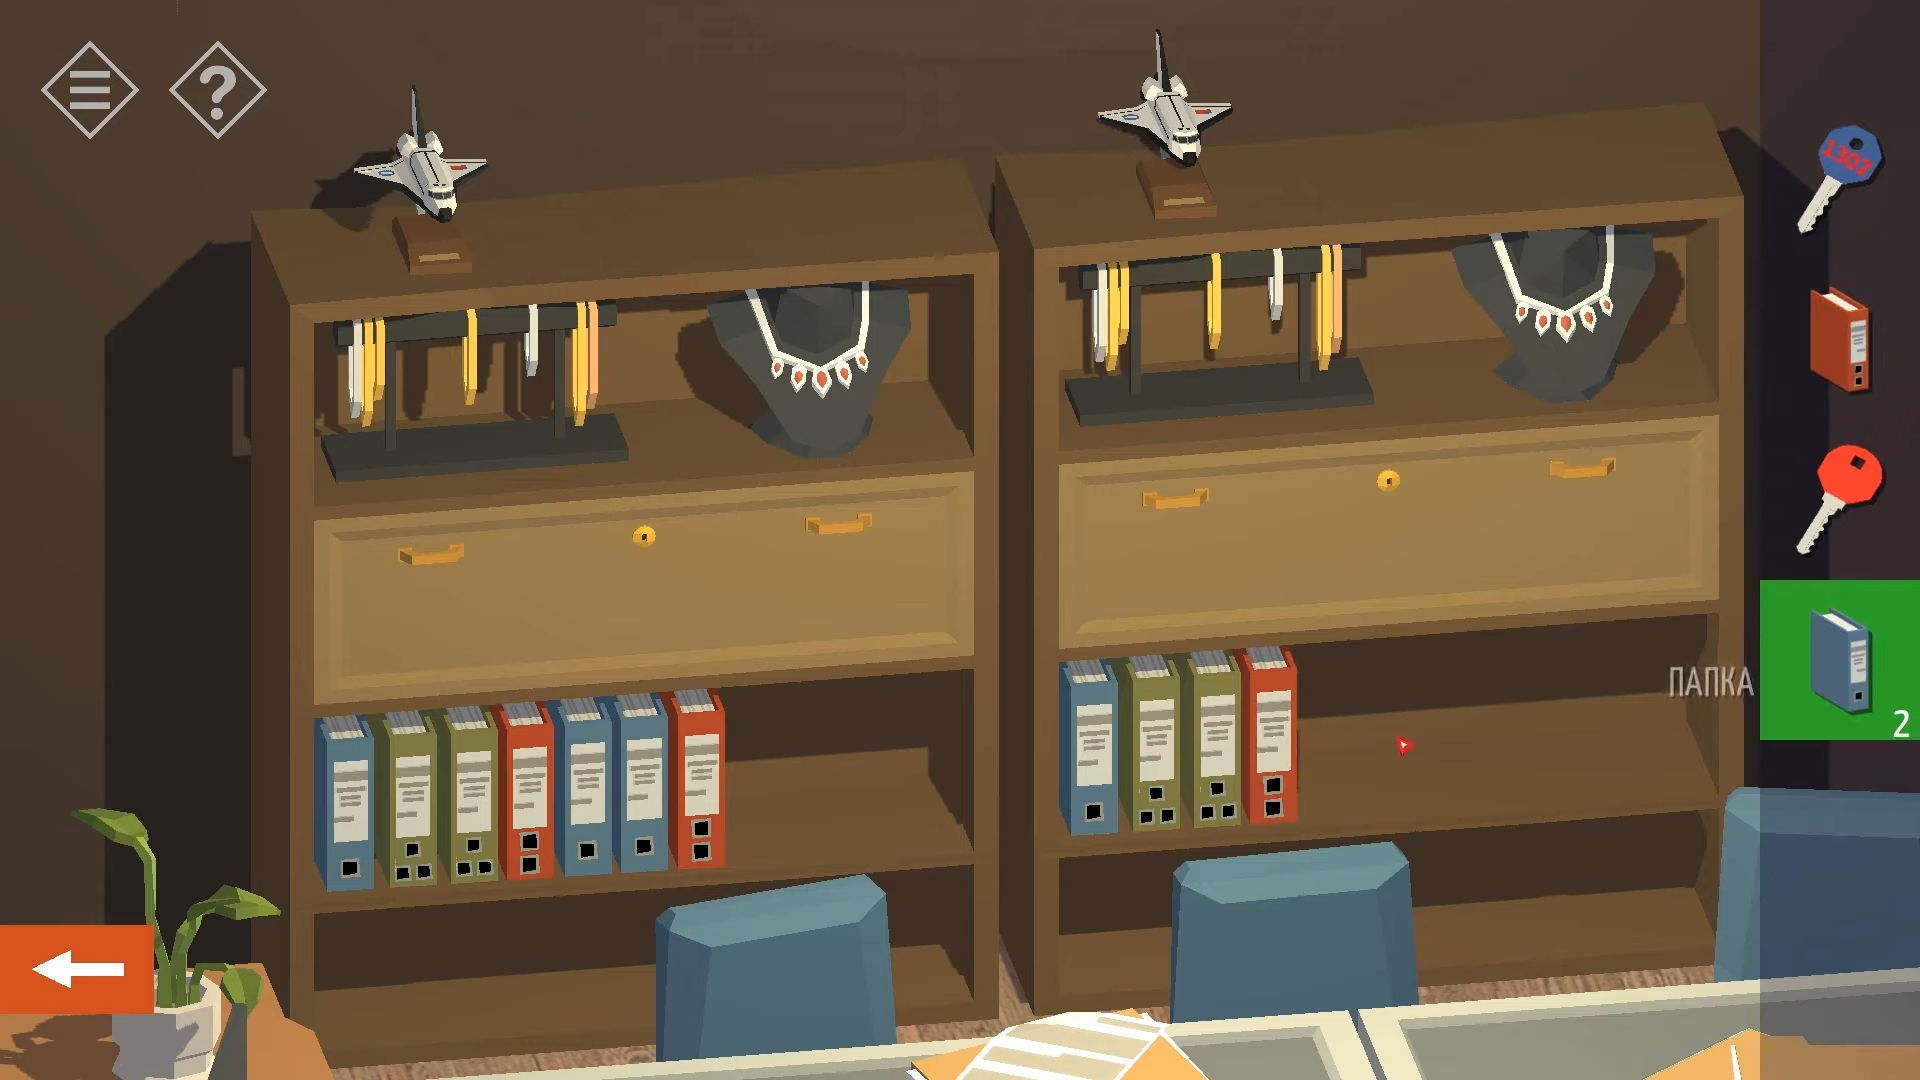
Next, touch the screen to make it bigger. Put the space shuttle and necklace on the right shelf, just like the left one. Get the folders from the bottom shelf, then put them back to match the left side. A hidden panel will open and you need to press the button to find a secret area.
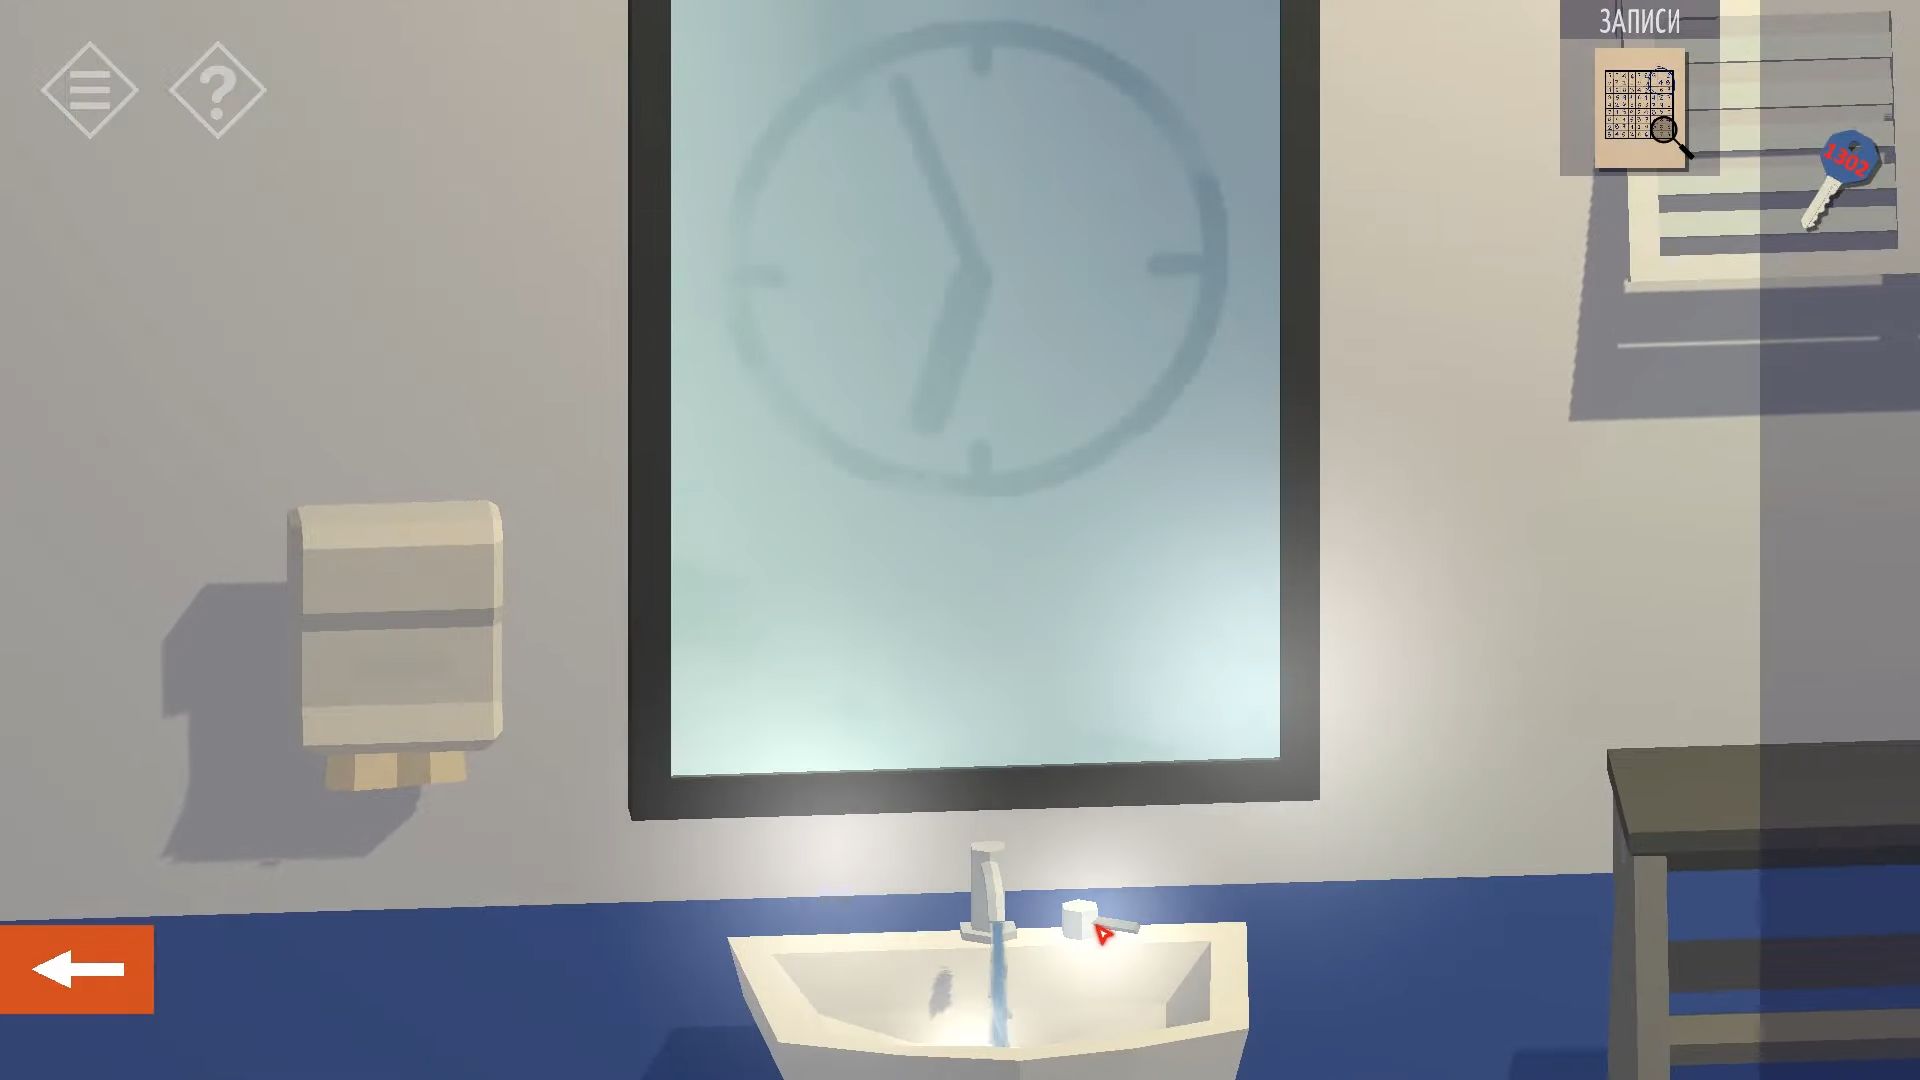
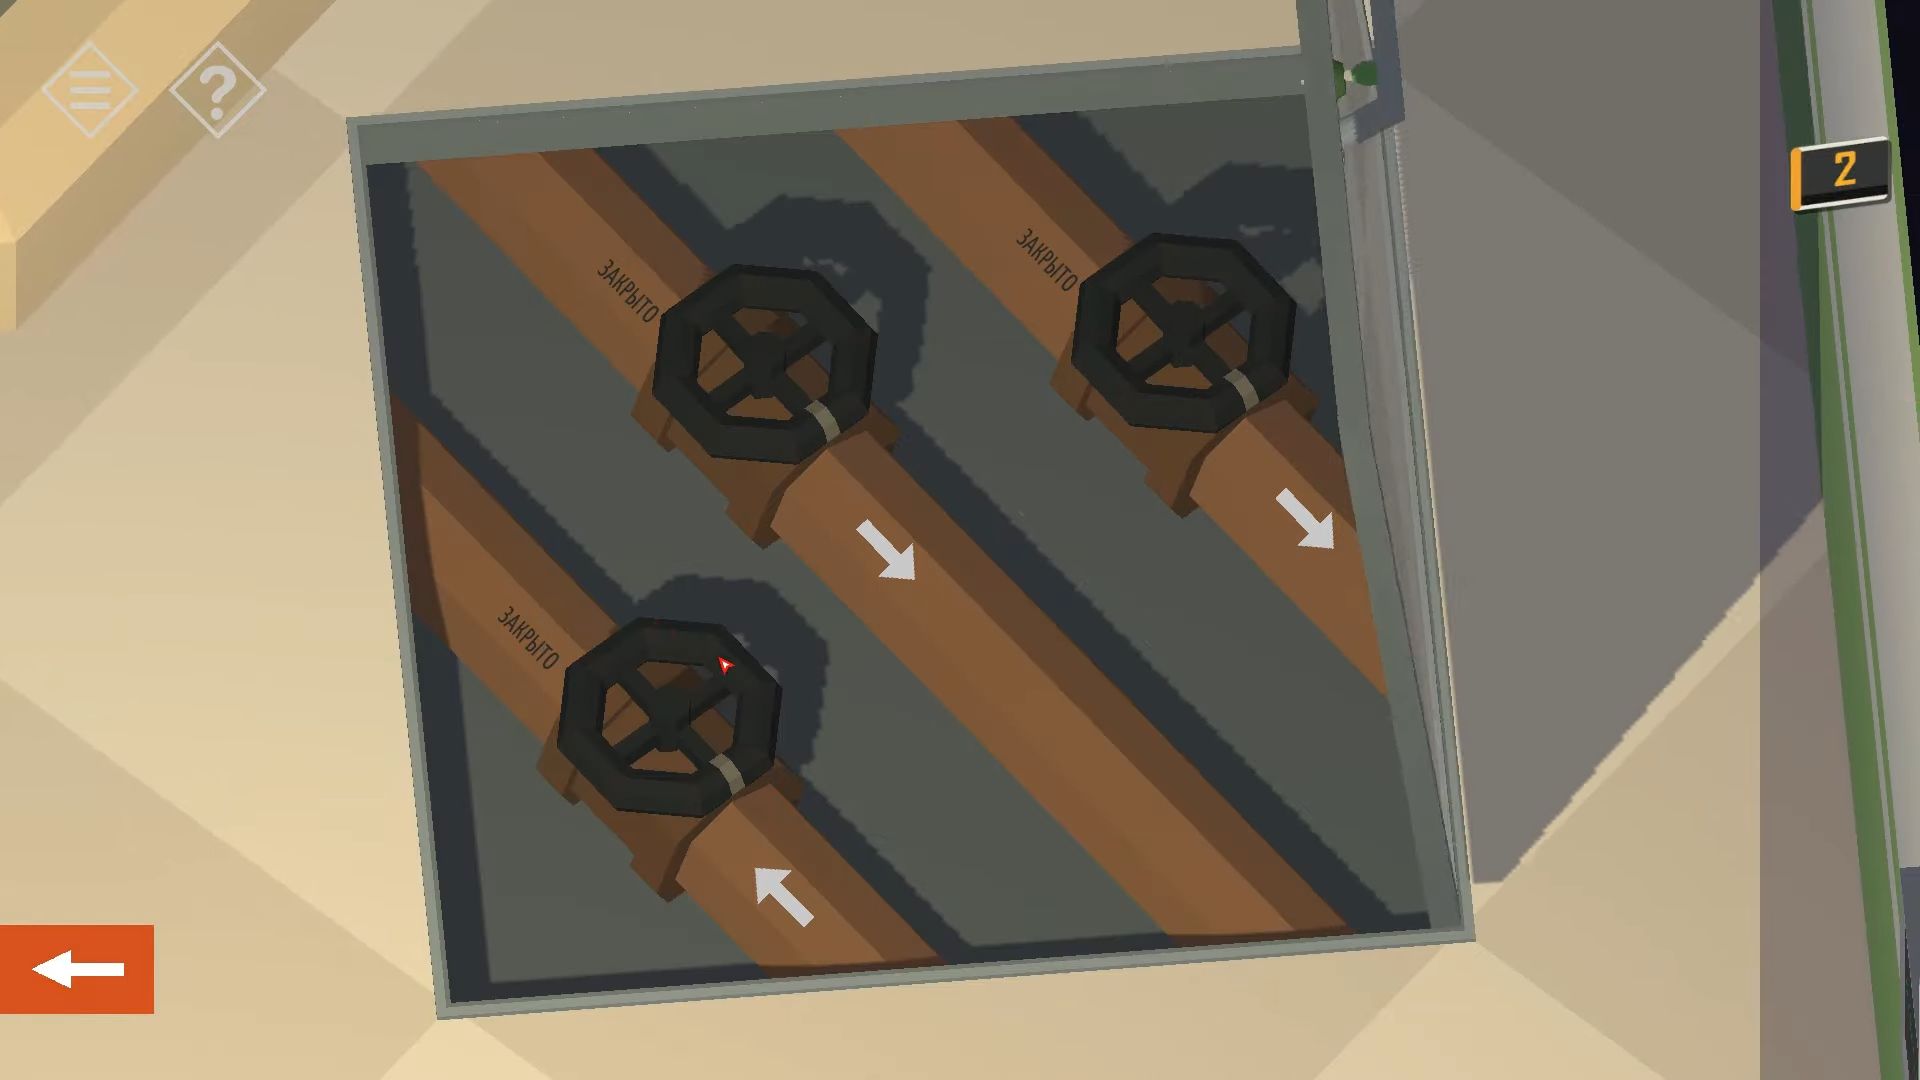
Zoom in and take the screwdriver stuck in the panel. Touch the TV, then press the button to turn it on. You’ll find a picture of a safe deposit box room and go back to the bathroom. Put the ladder under the vent near the sink and use the screwdriver to open the vent panel. Collect the paper with a clue and a Sudoku puzzle. Turn to the opposite wall with three pictures. Tap the right one to open a panel with pipes.
Attach the two valves to the pipes and knock them to turn on the water. Only turn on the hot water. Return to the sink and turn on the tap. With only hot water, the mirror will fog up and reveal a clue.
Go back to the hallway on the second floor and touch the big clock again. Move the clock hands to match the new position you found in the bathroom. This will show a secret code.
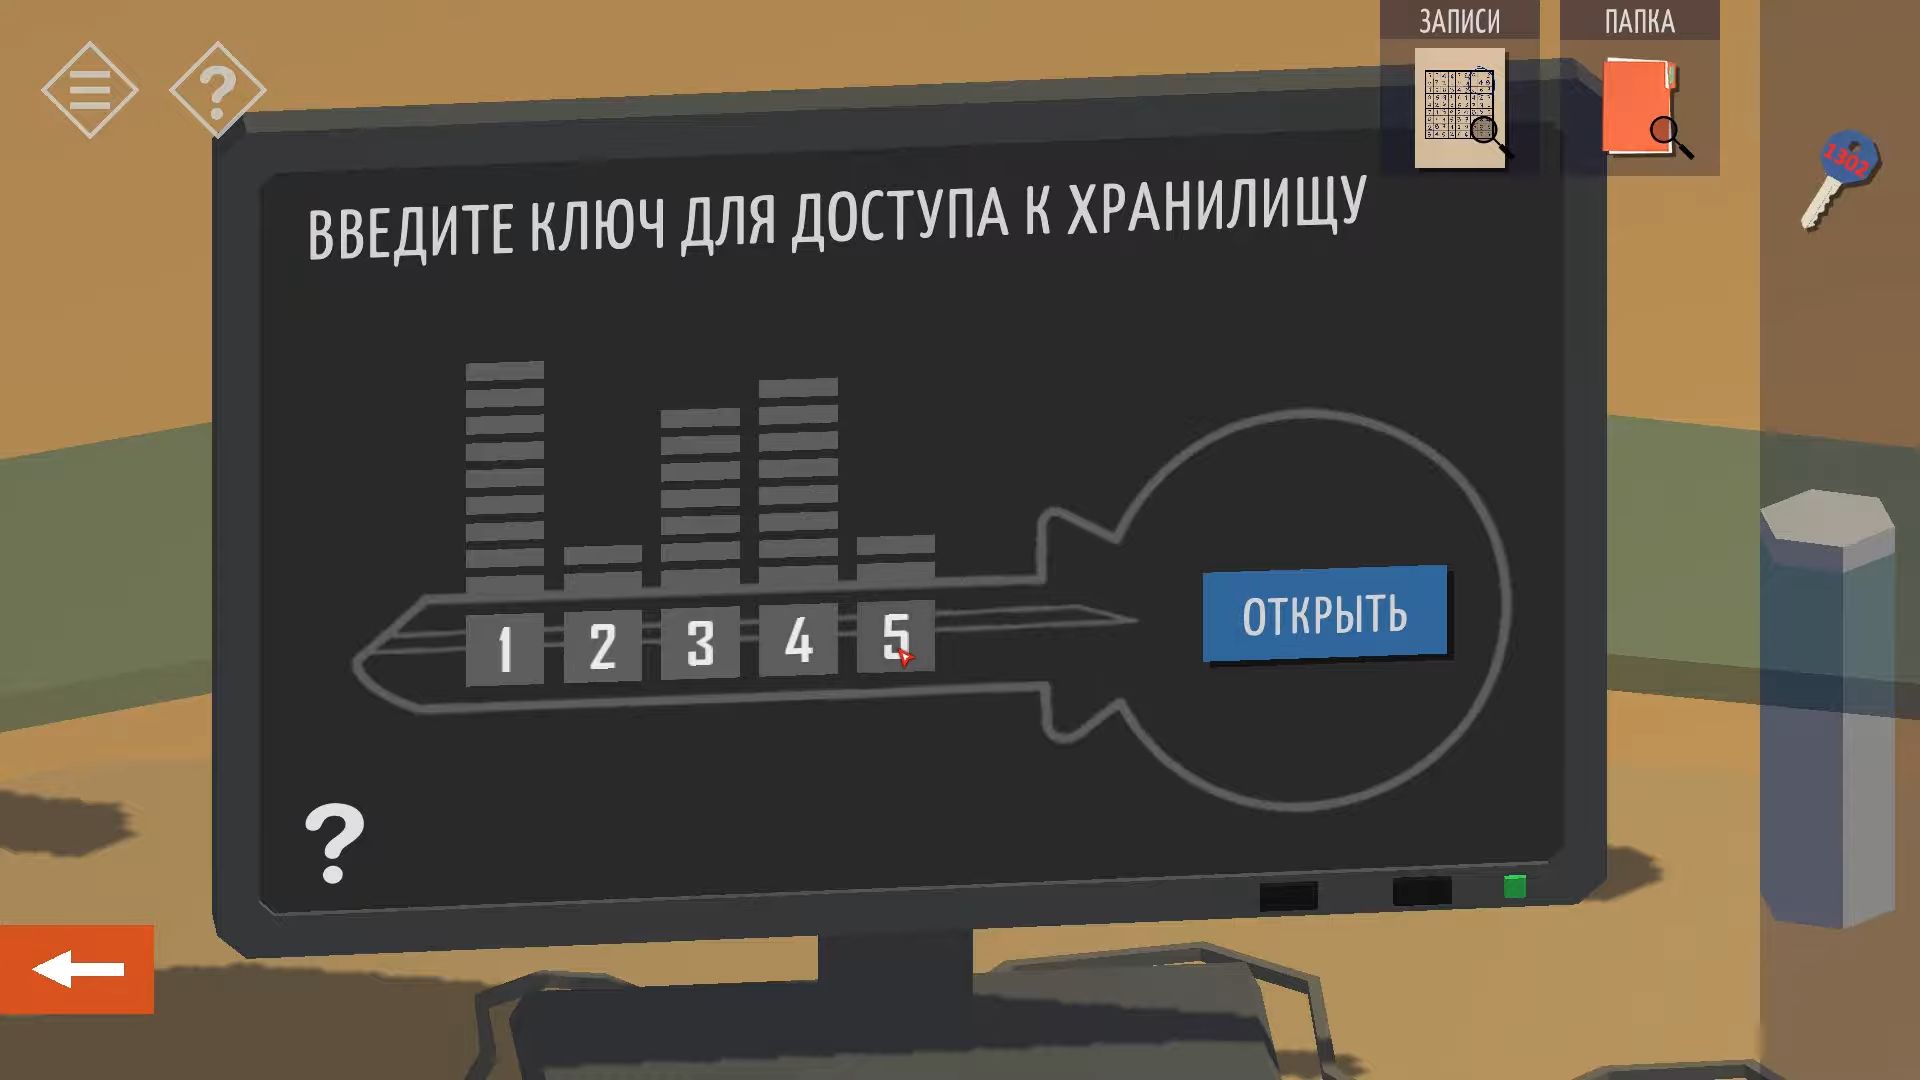
You have to put a special code in the hidden safe in the office, but the keys are not working right. To get it right, type 48936. Open the safe, grab the folder, and check the papers. Go down to the first floor and touch the computer screen on the left desk. There’s a 5-digit code (92784) you need to enter by tapping the numbers. Use the clue above to set the right levels for each number.
Push the OPEN button to get into the vault. In the room where you entered the vault, touch the desk and pick up a yellow key. Now, go back upstairs to the conference room. Press the red button to close the hidden space and look at the two bookshelves again. Use the yellow key on the left panel to open it and collect the paper.
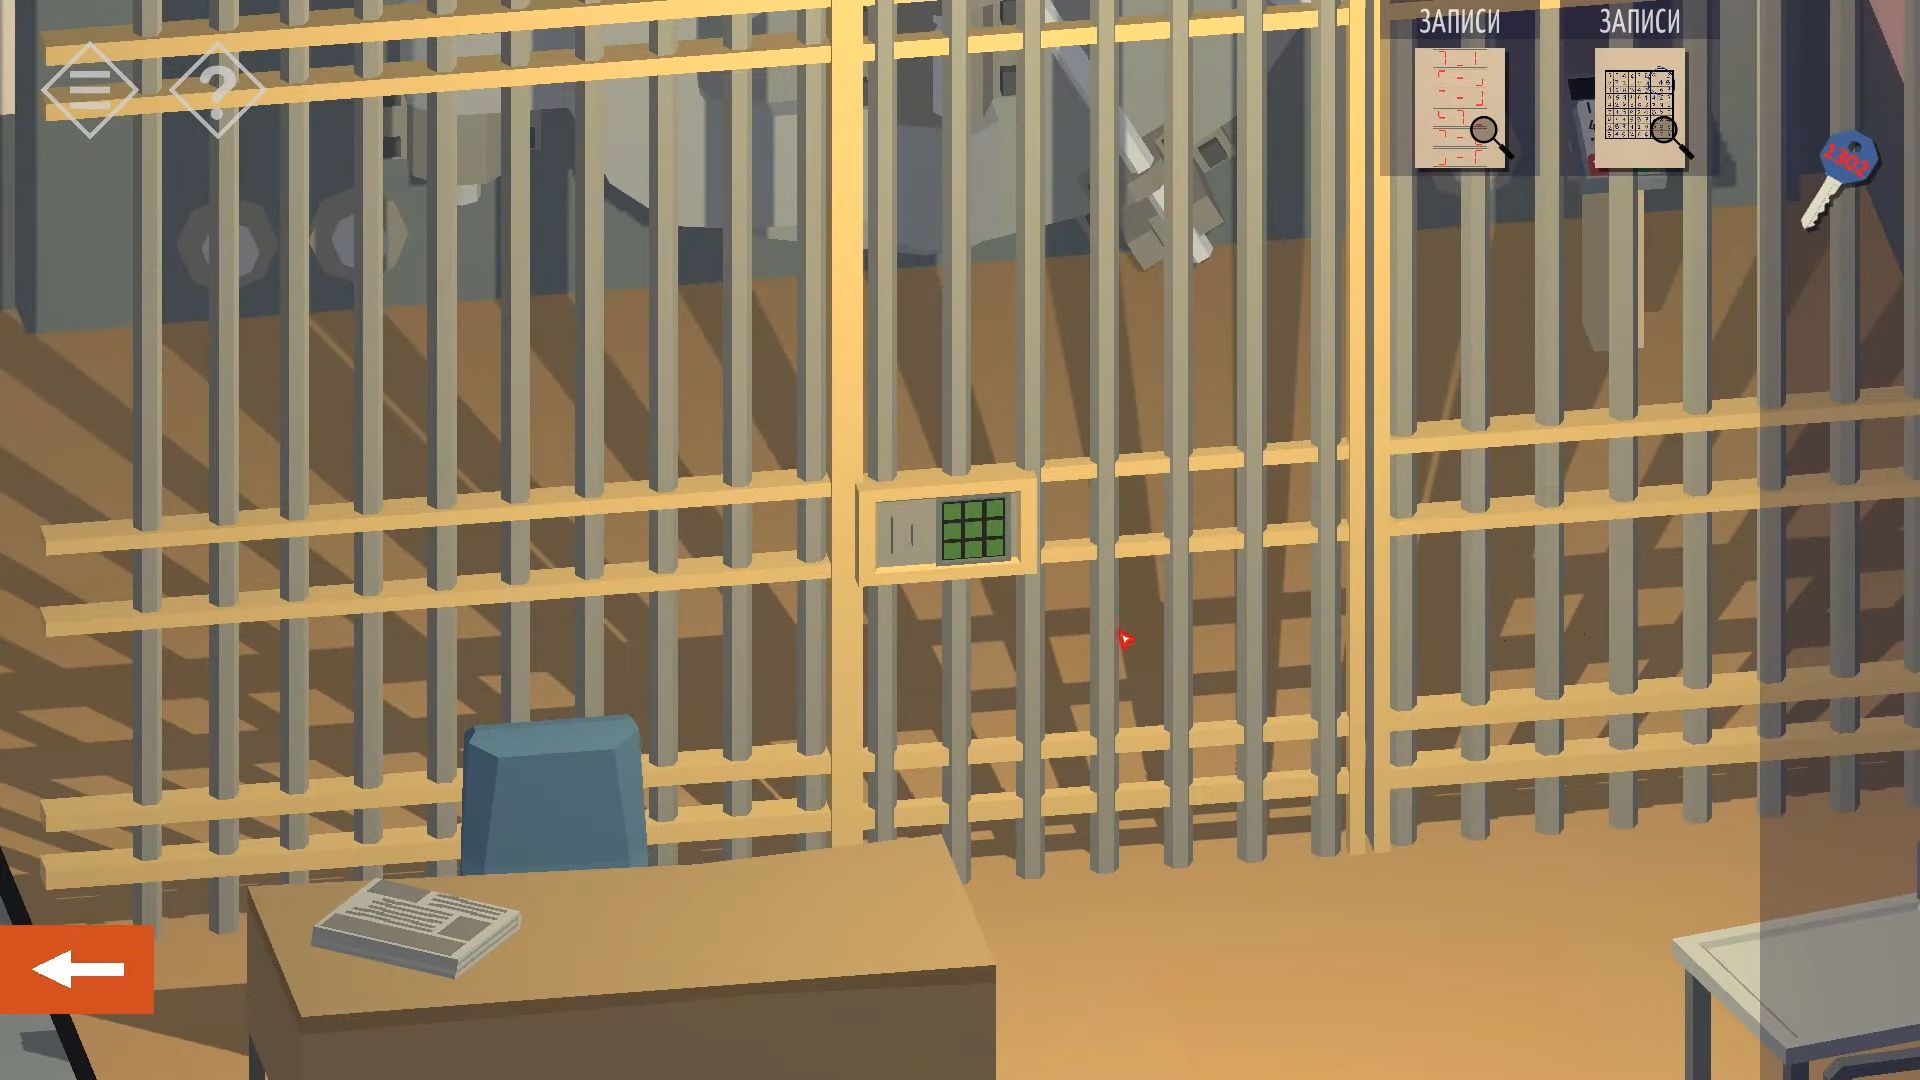
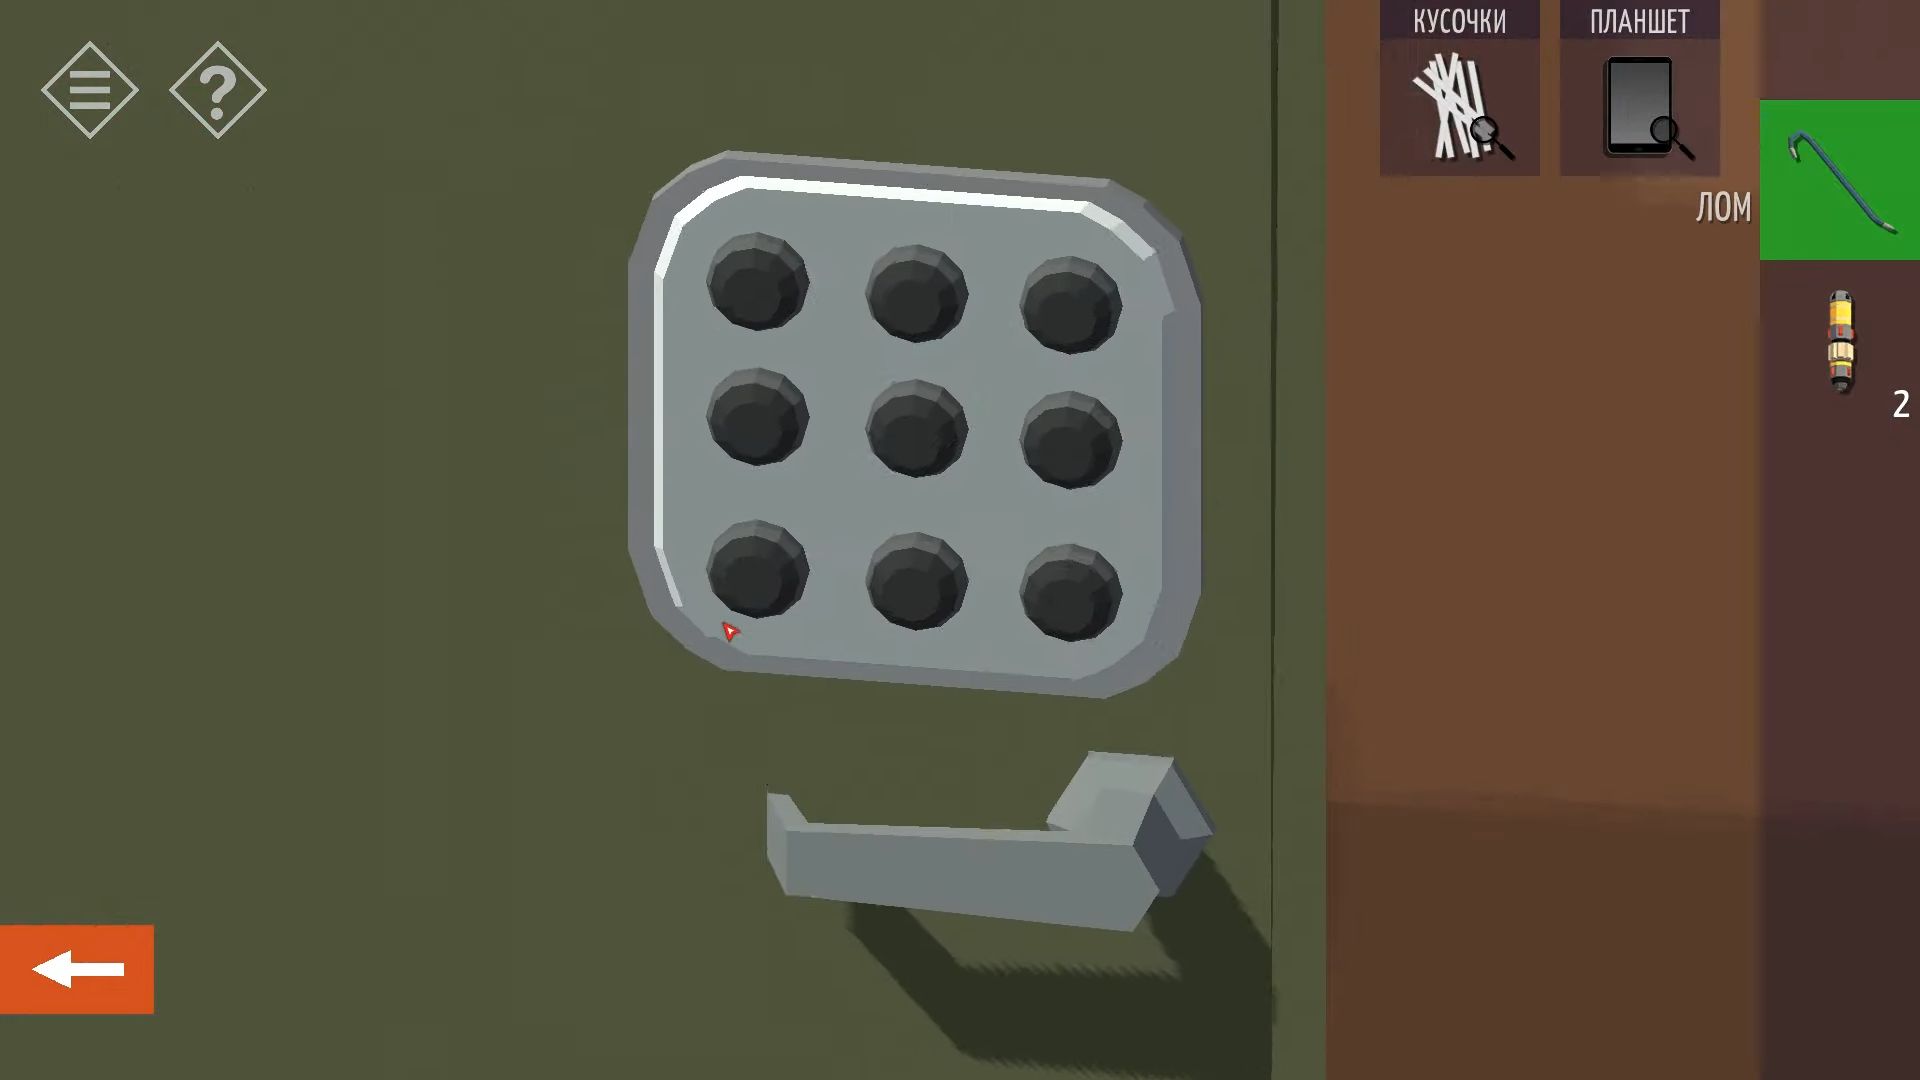
Go back to the entrance of the vault and touch the locked door. You’ll see a keypad with 9 buttons. Put in the code to figure out where the missing numbers should be. Then, touch the buttons in the order shown in the top right square. Tap in order from 1 up to 6, and that should unlock the door.
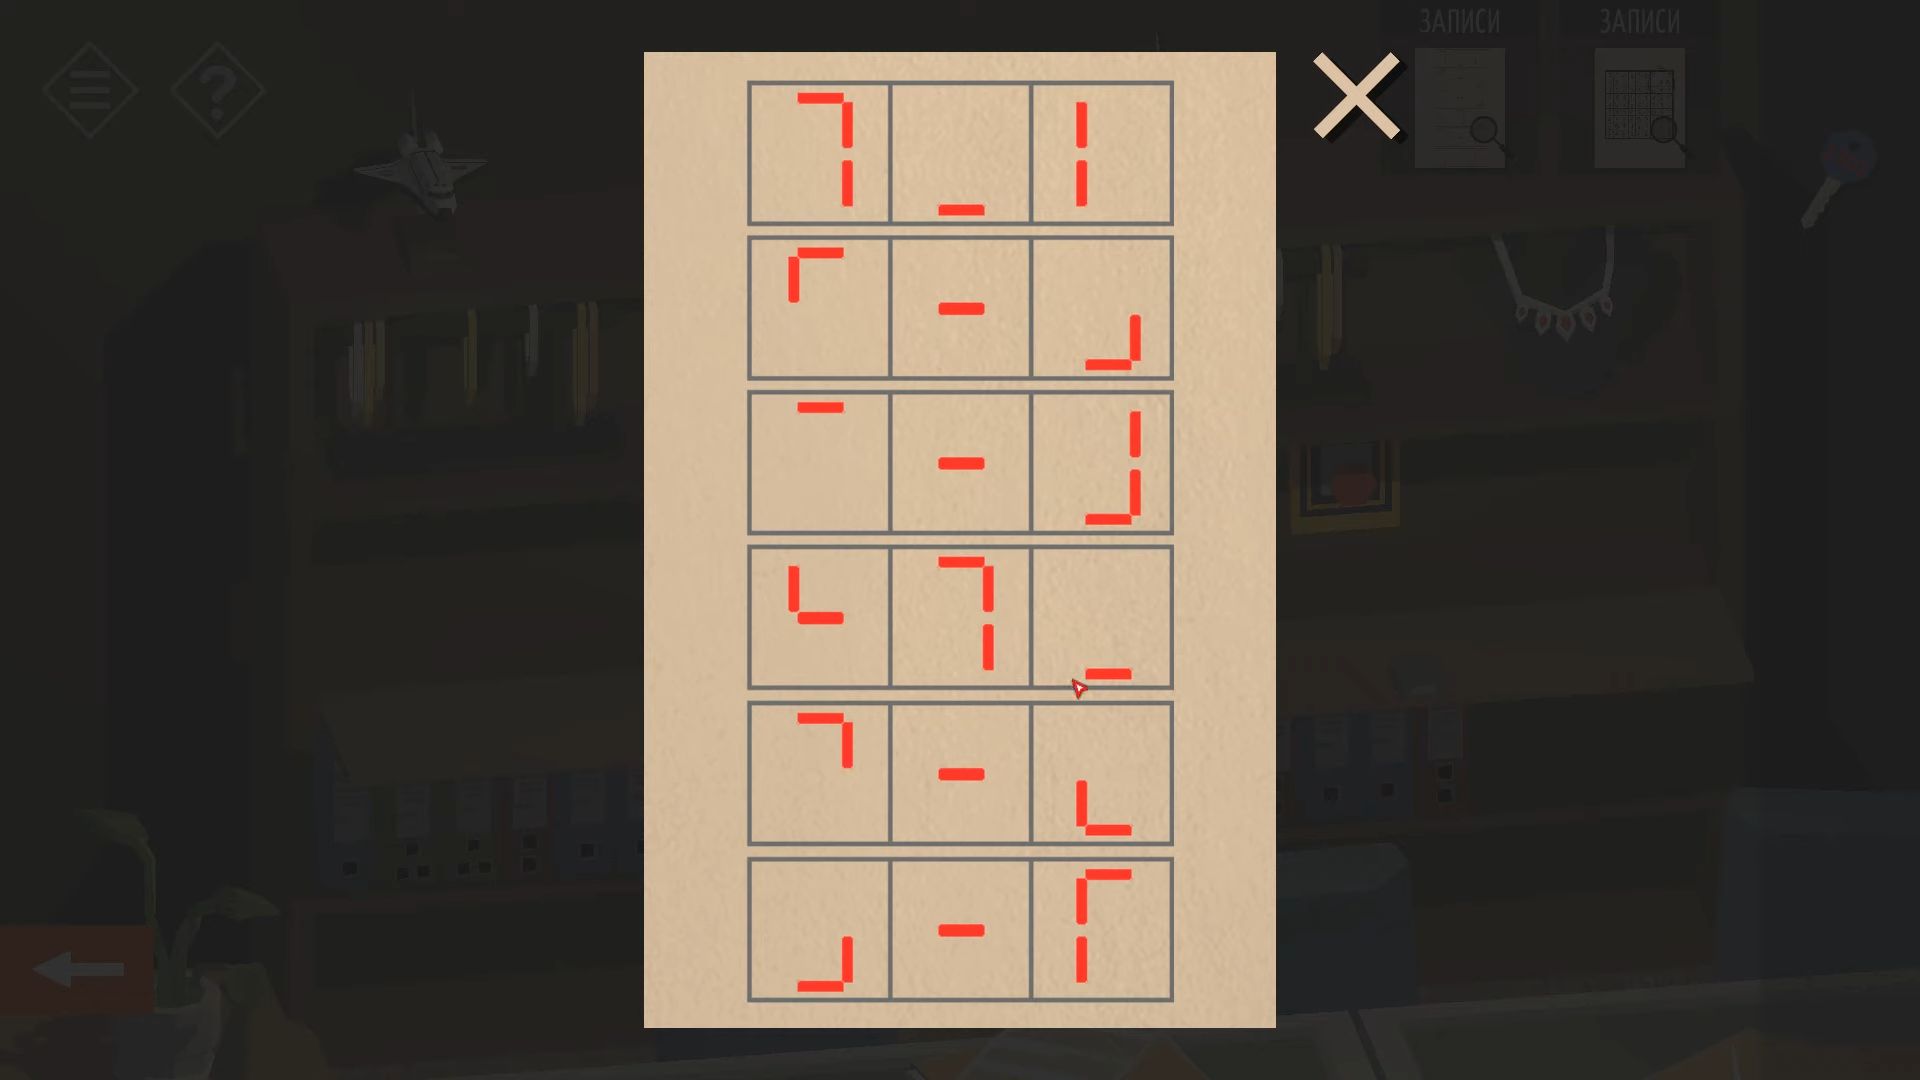
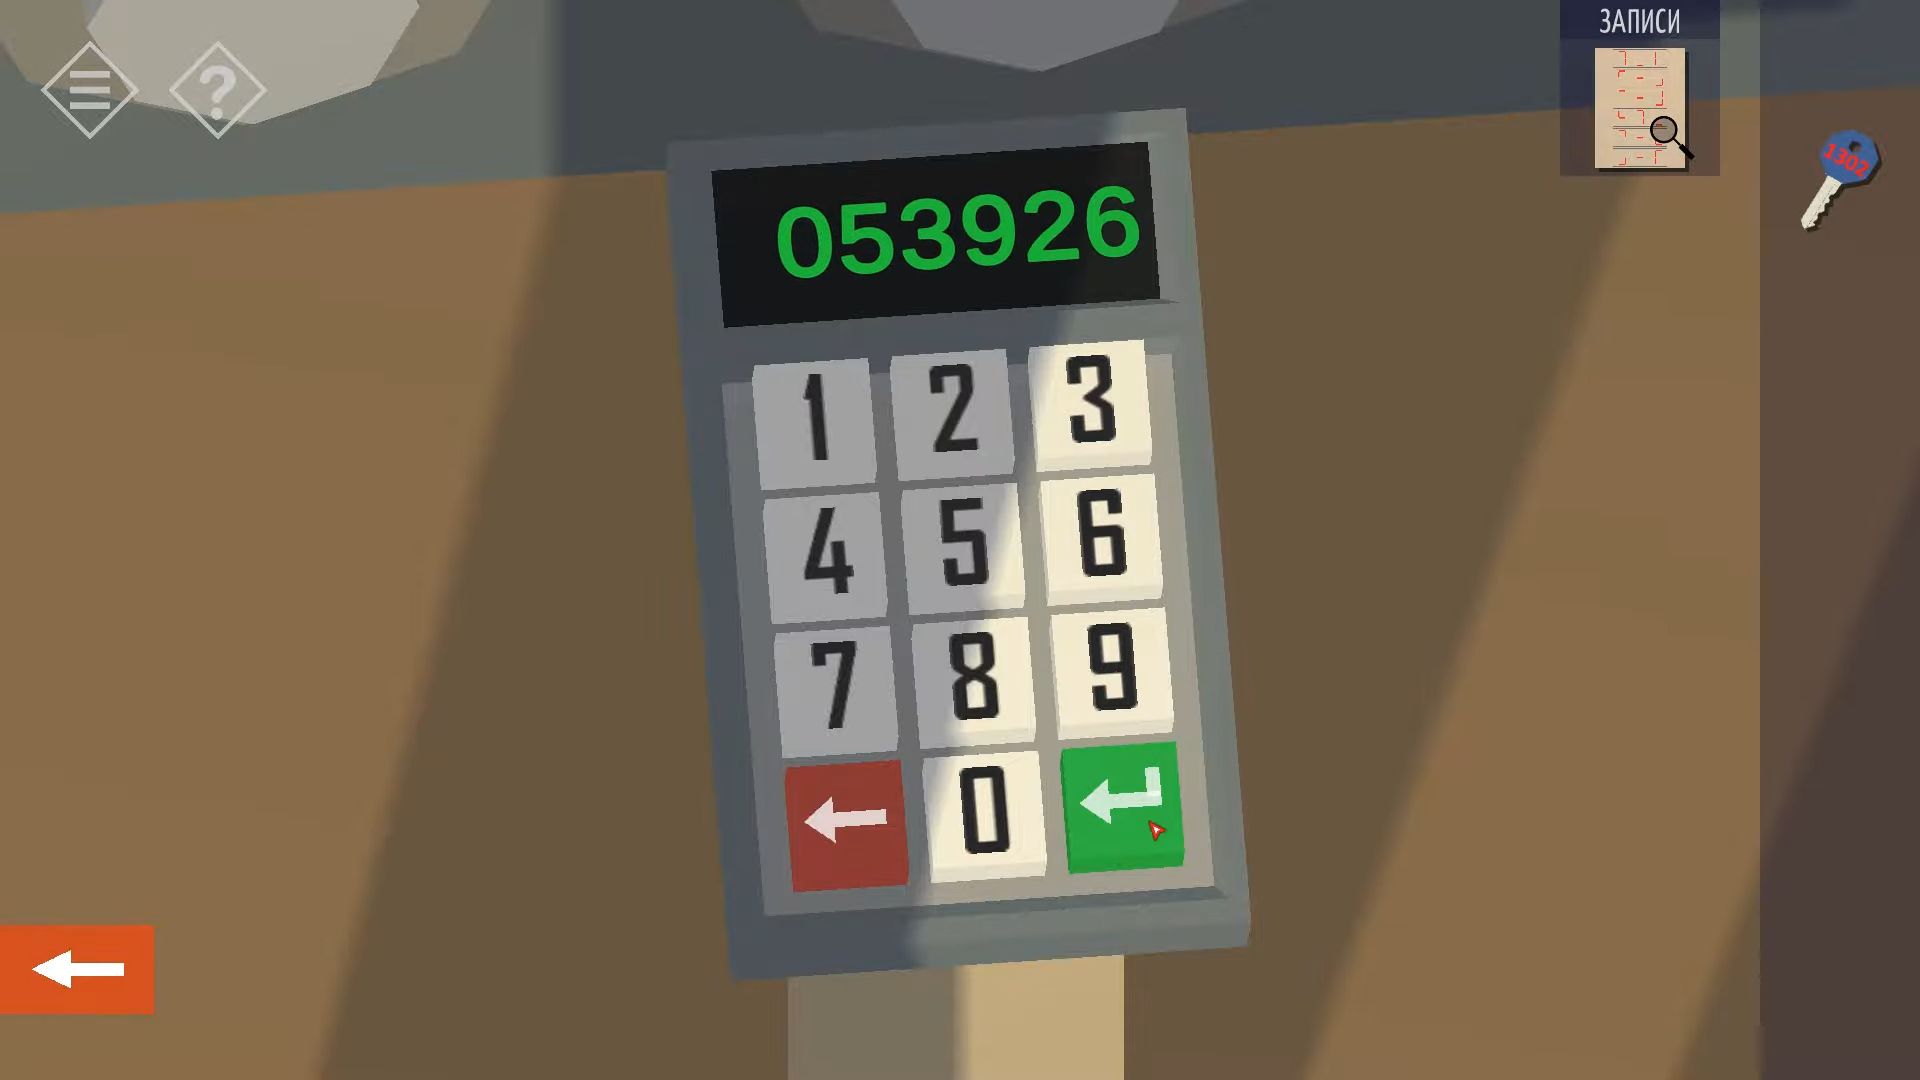
After that, tap on the right side of the vault door to go to the keypad. Now, you need the second paper clue. The paper has markings like the parts of digital numbers, just like the 3 on the conference room computer. Combine the parts on each row to make a single number (0 5 3 9 2 6). Type this number into the keypad to open the bank vault door.
Inside the vault, there are lots of deposit boxes. They don’t have numbers, but you can find a plan on the back wall that shows where to find the box you need. The key is for box 1302. Look for the wall marked with 1, in the third row down, and the second column across.
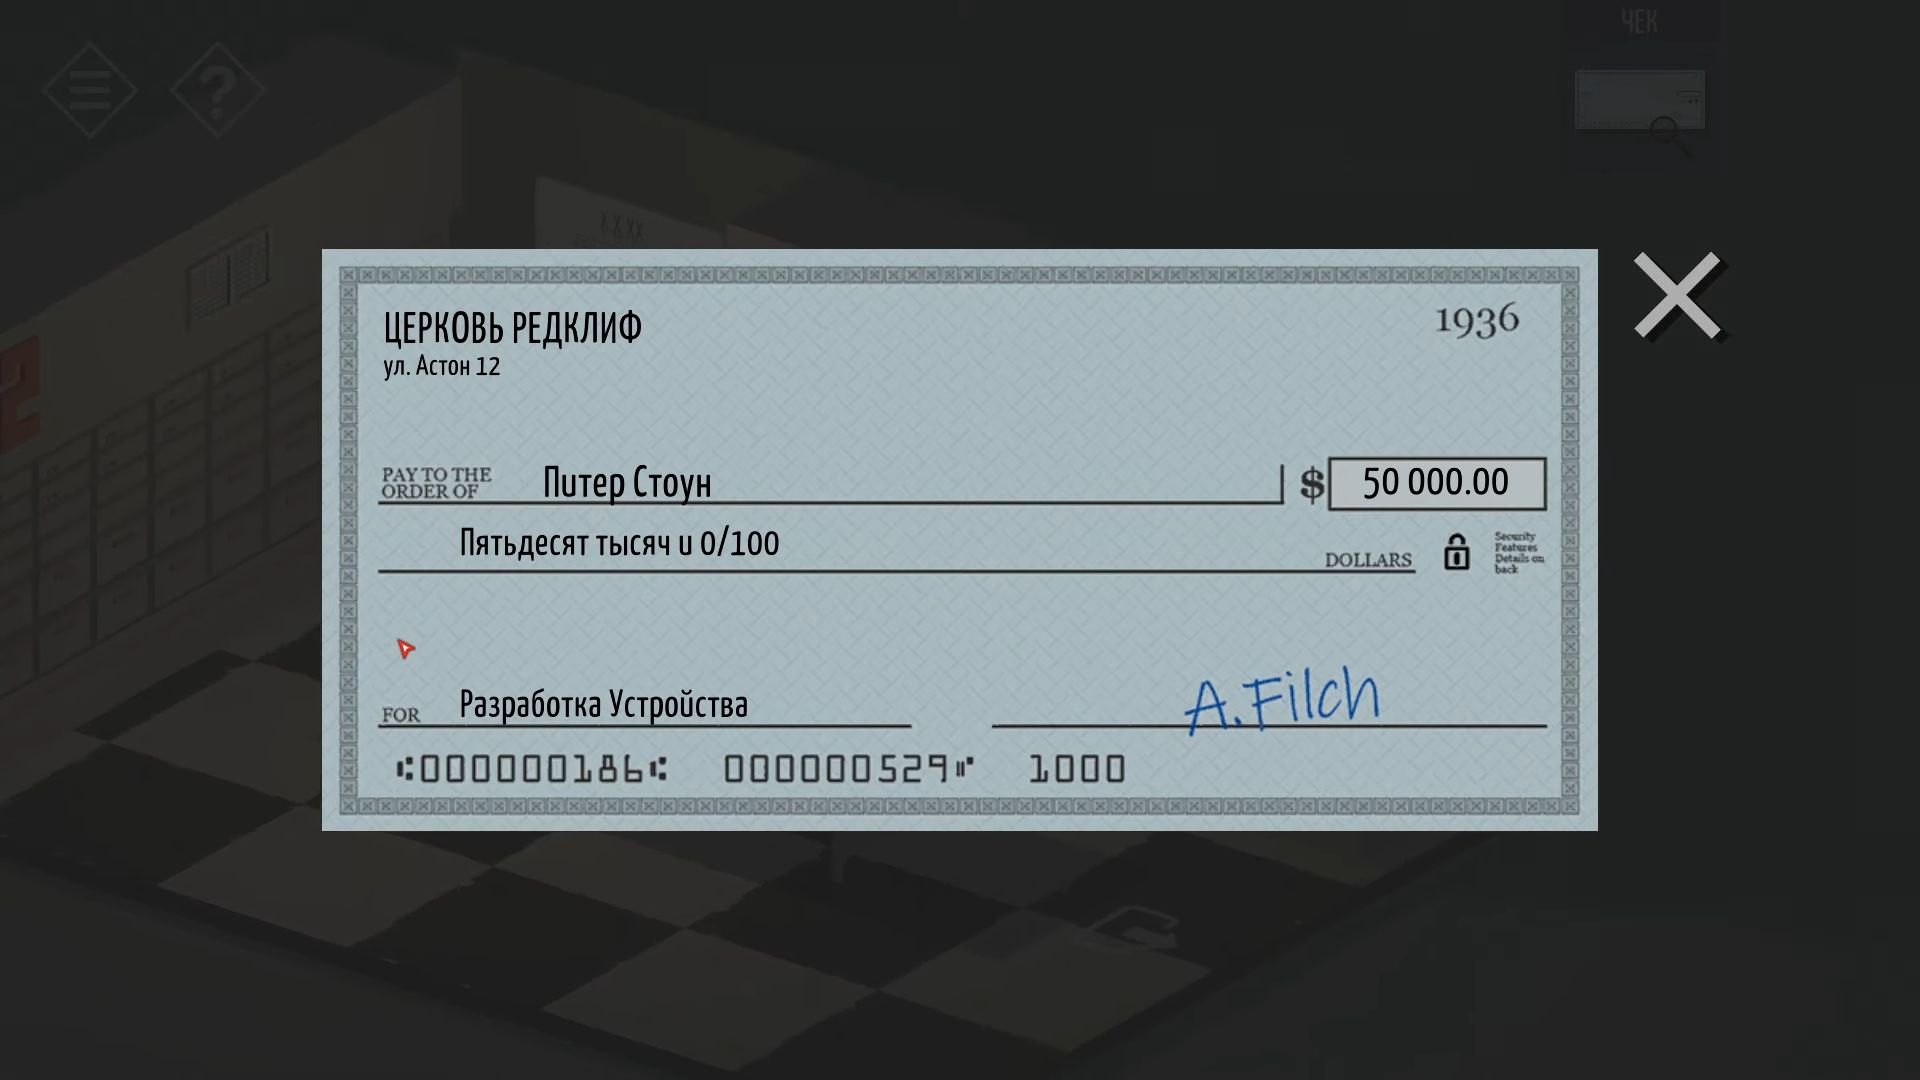
Now you have to open that box. Inside, there’s a check for Peter Stone from A. Filch of Redcliff Church, and it’s for $50,000. This gives you a new clue and marks the end of this chapter.
Chapter 3
Here’s the complete guide for chapter 3 in Tiny Room Stories: Town Mystery. Each step along with the hidden clues has been explained including pictures and codes that you can see if you want help.
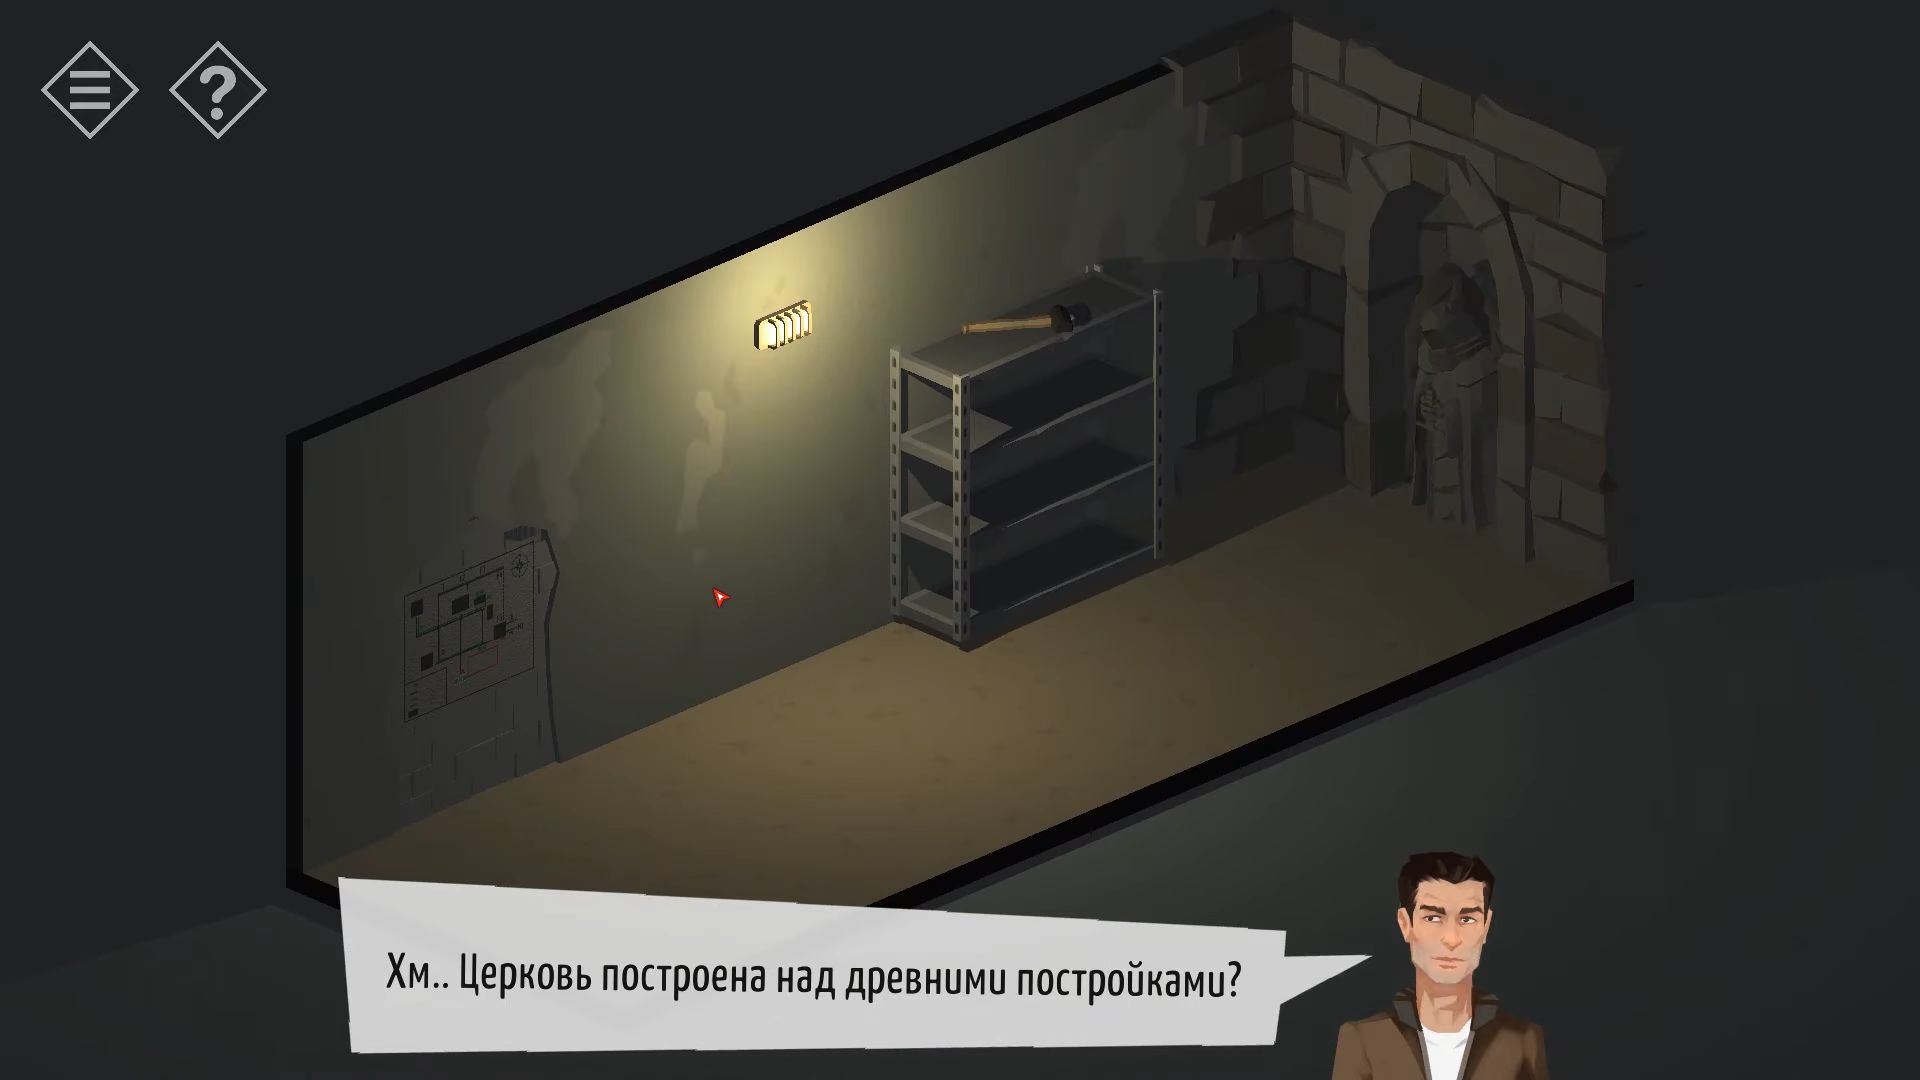
Church
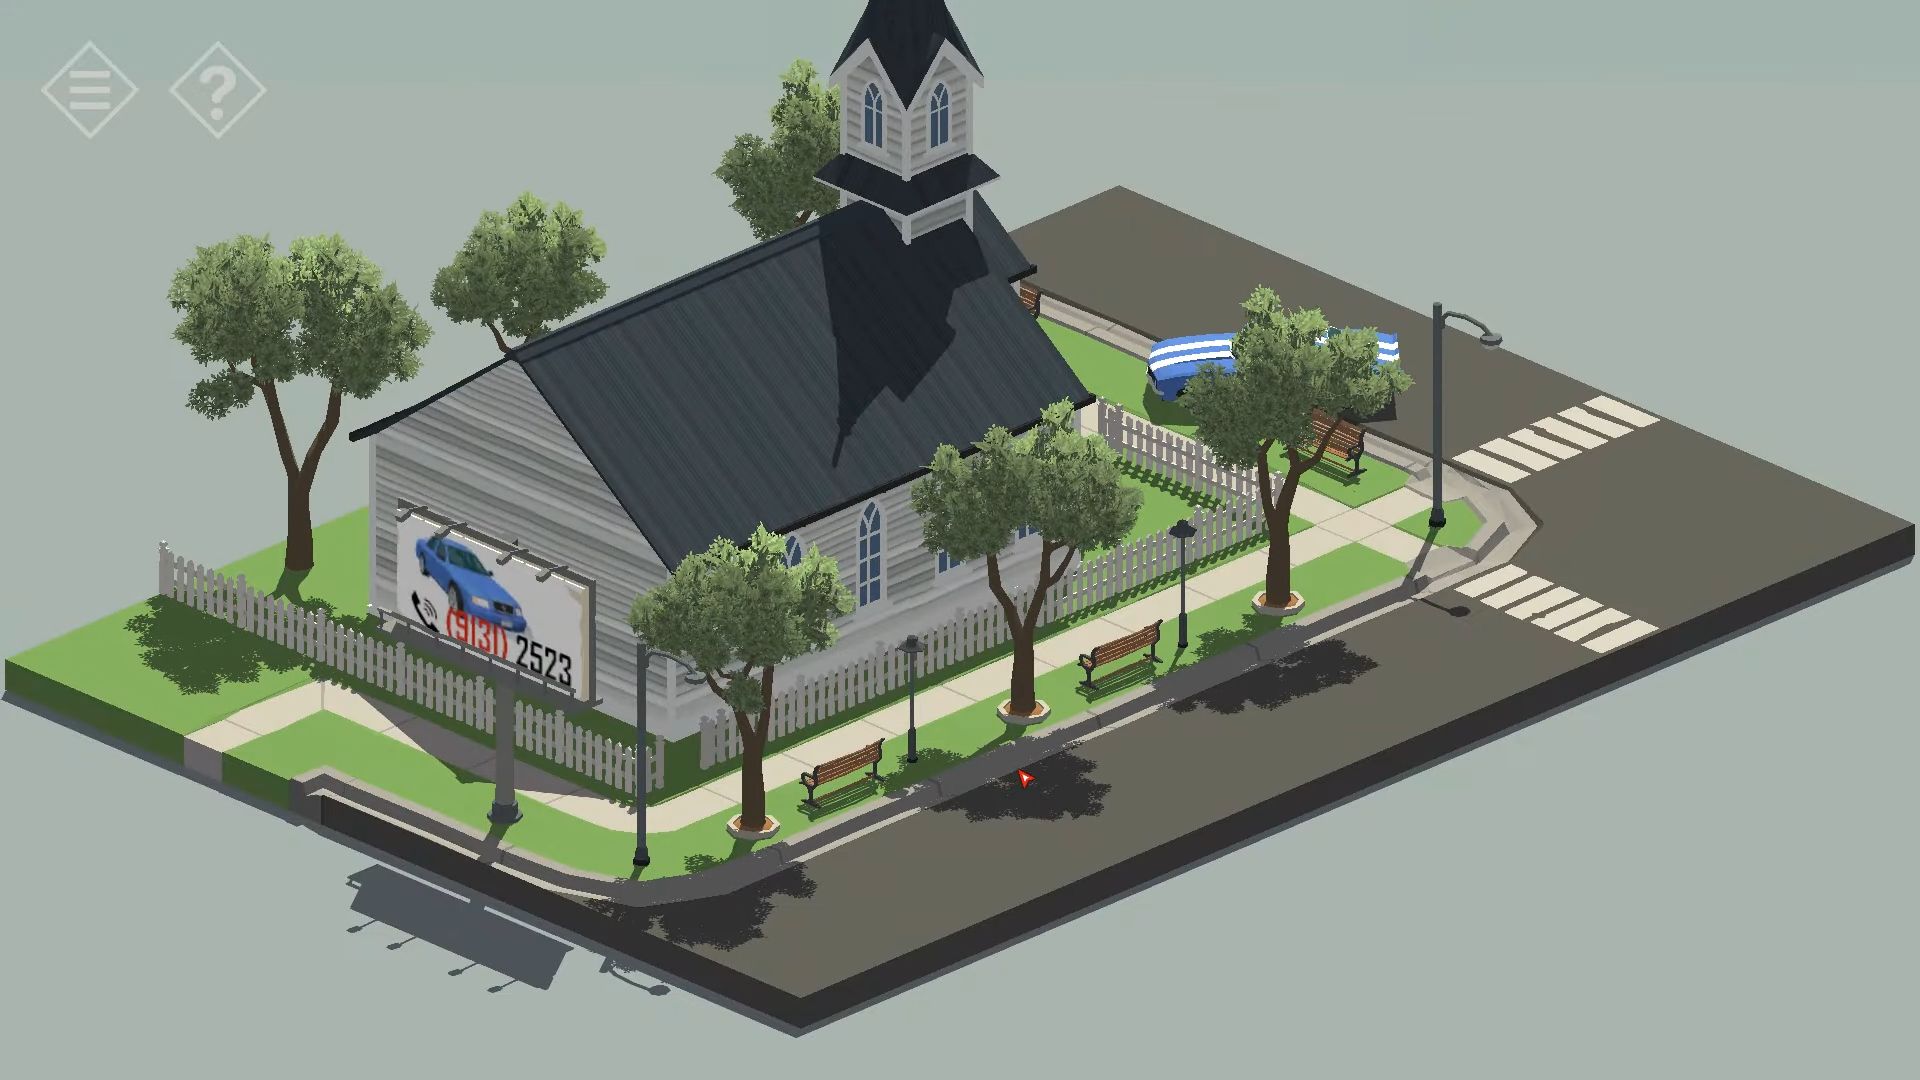
First, you have to turn the church view around to find a sign with a car on it. Remember the phone number shown: (9131) 2523. Touch the church’s front door and tap again to enter.
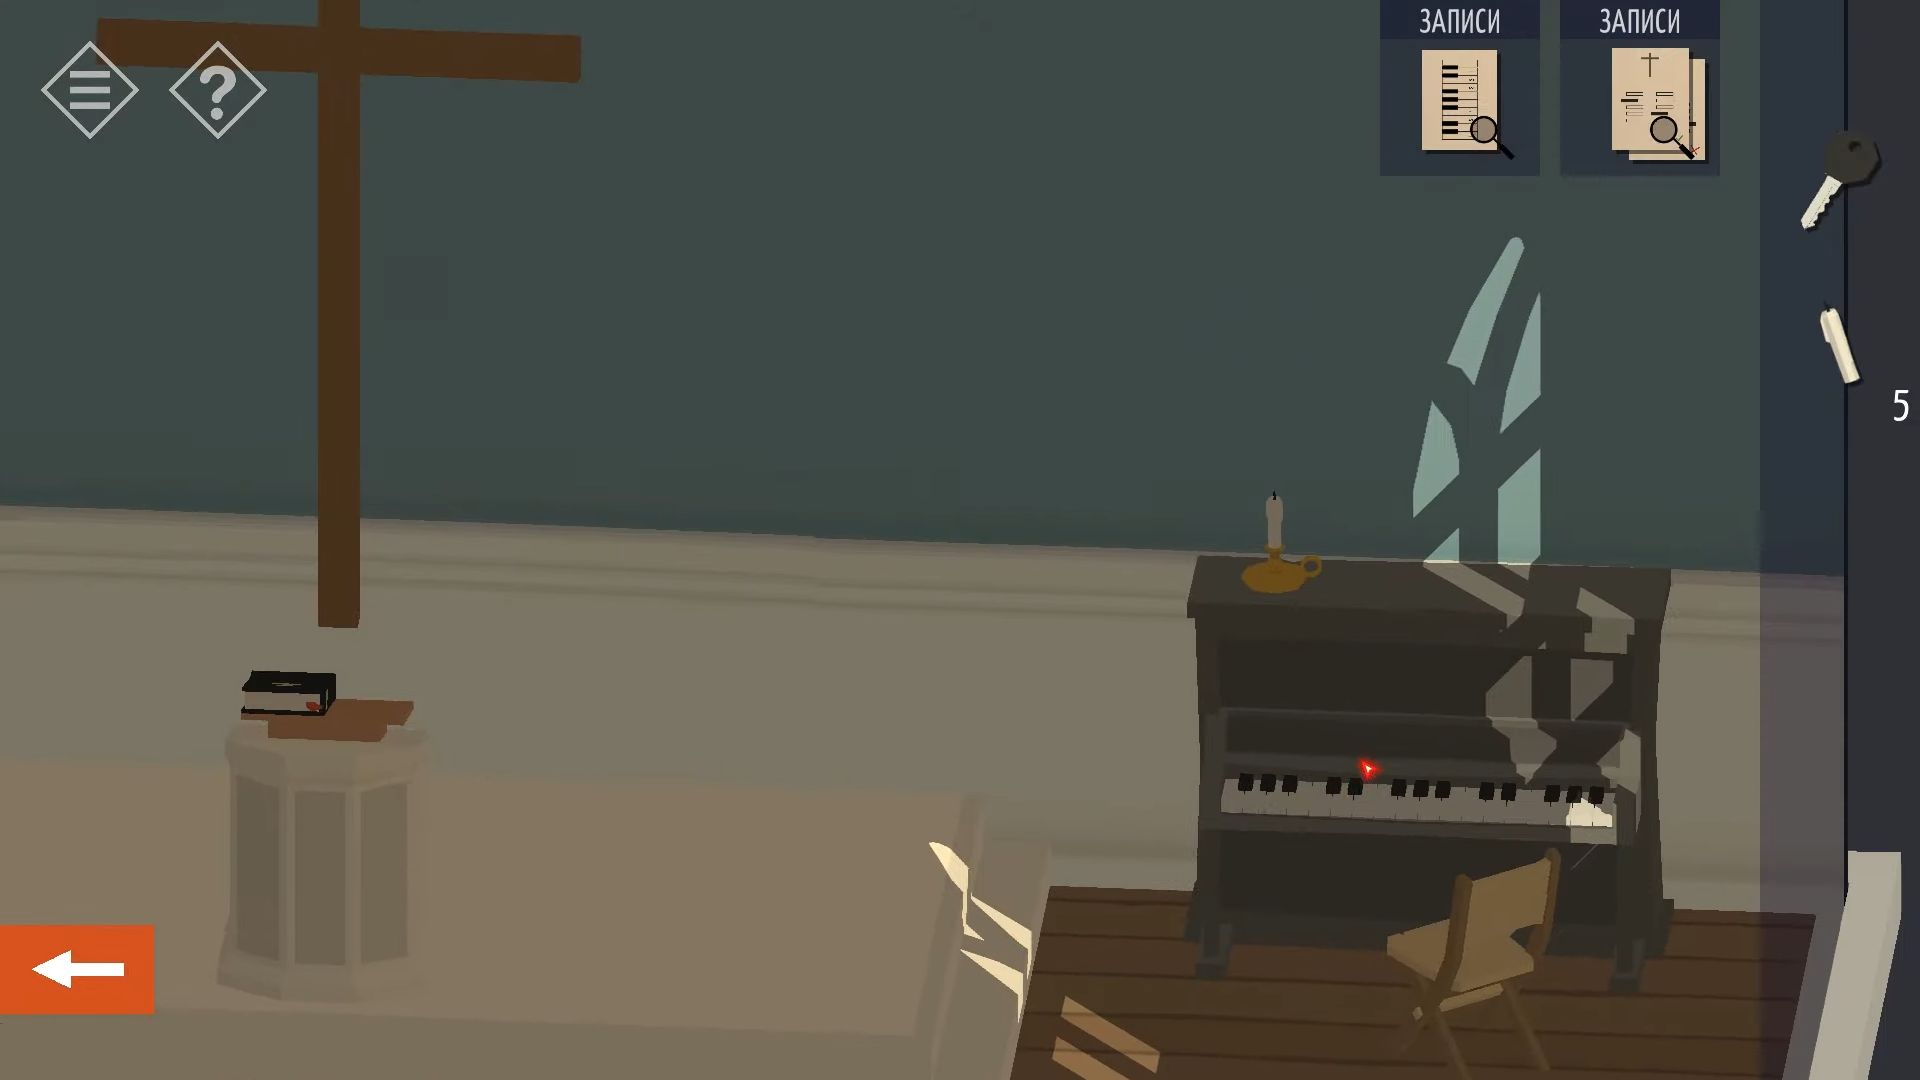
Now the hallway is dark and you have to find a light switch near the door at the end of the hall. Touch the bookshelves on the left to see and take a candle. Tap the piano in the opposite corner for another candle. There are 5 pictures on the walls, each with a symbol. Remember them for a safe combination. Touch each picture; one will have an arrow indicating it’s the first.
After that, follow the sequence by moving from the + symbol to the left and going around the room. On the right of the double entrance door, there’s a locked box. Enter the code obtained from the pictures to open it and get a black key. Rotate the view to see the back wall, knock on the left-side door, and go through to the back room.

On one side, there are six drawers. Get a third candle from the top right drawer, and then grab a fourth candle from the desk. Touch the computer screen; there’s a code input option. There’s a picture of a car behind the desk, which hints at the code origin—it’s the number from the car billboard outside, and it’s 2523.
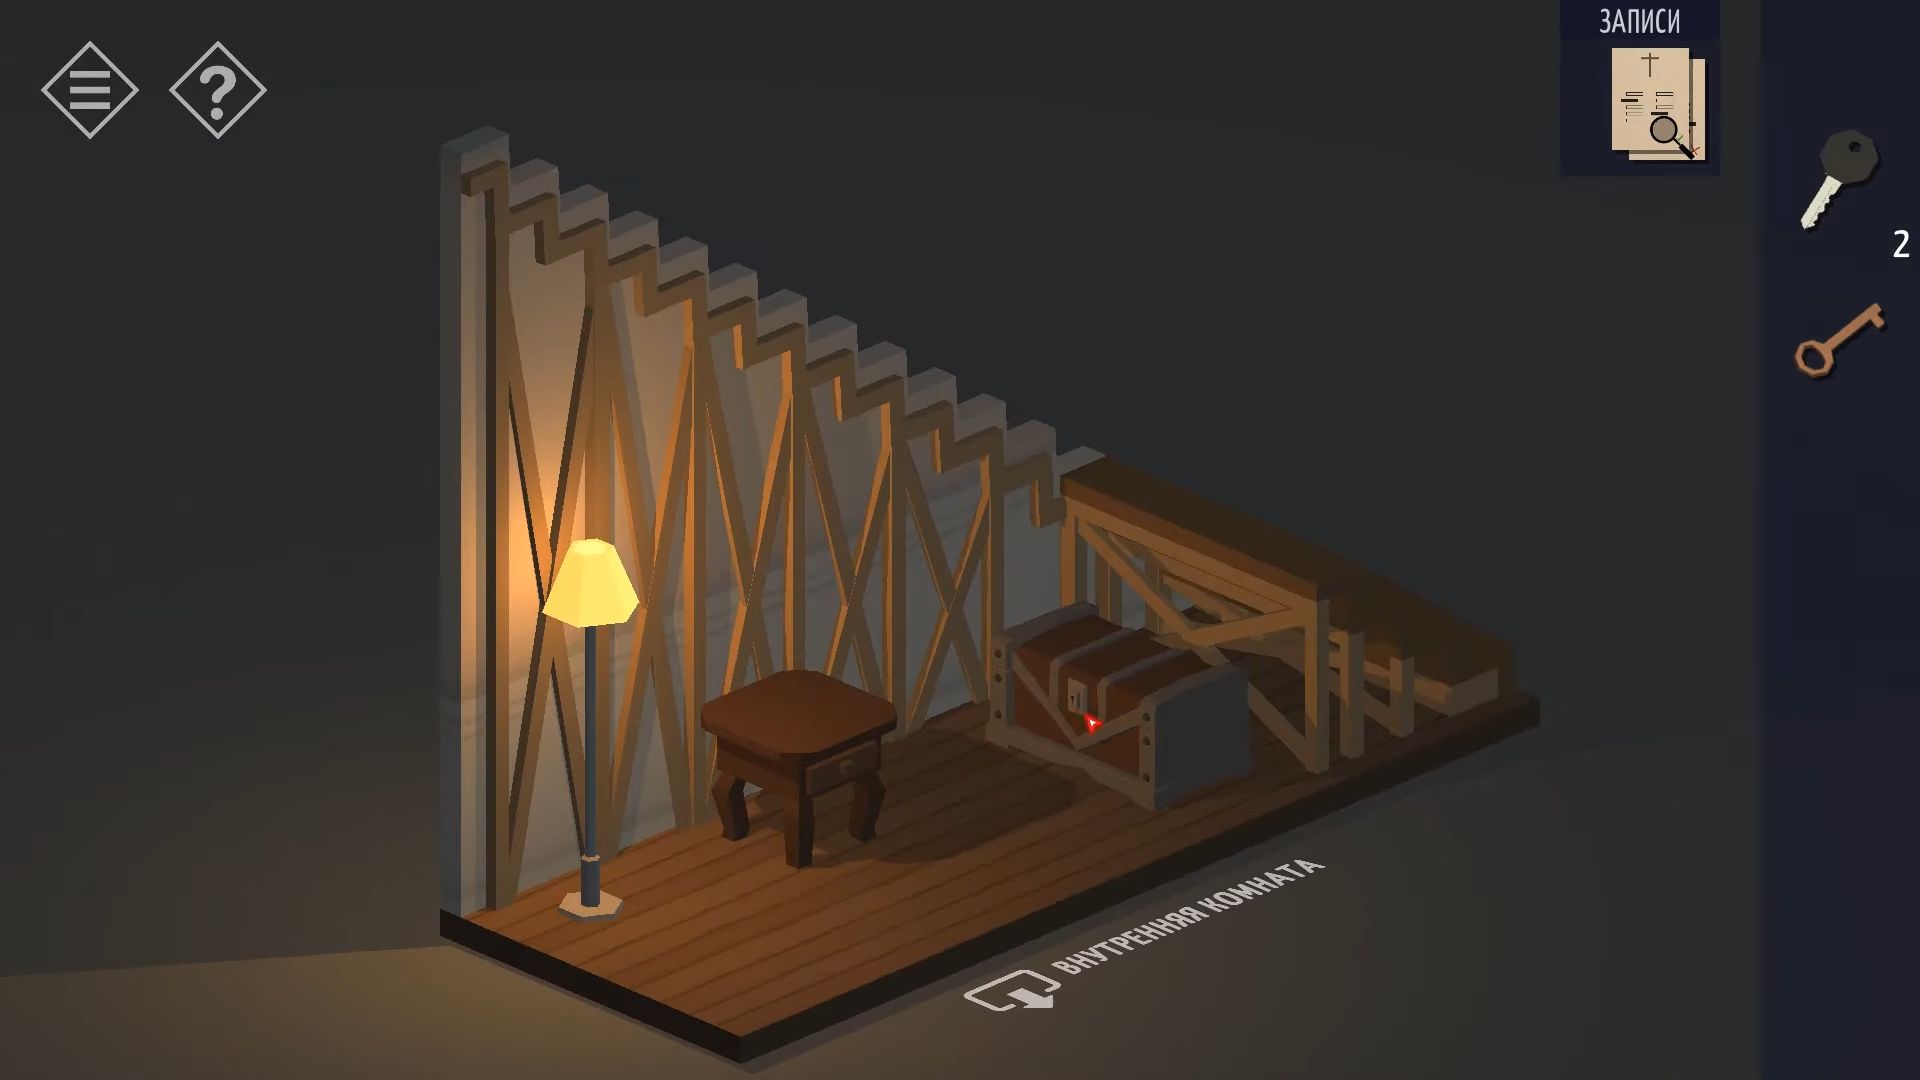
Touch the Controls Button, and tap Open on the appearing image. Use the Mail option, and knock printer to collect a clue printout from the printer. Lastly, touch the book on the right for a hint about glowing ink. Head to the door under the stairs and open it. There is a storage area Inside it, turn on the lamp, and open the small drawer unit to collect another (fifth) candle.
Beside the door to the storage room, there’s a chair. Touch it to move it and get another paper from underneath. Now go back to the church hall and tap the piano to see the keys. Press the keys in the order shown on the paper clue. When done, a secret door will open in the wall with the cross and then you have to grab another candle (6).
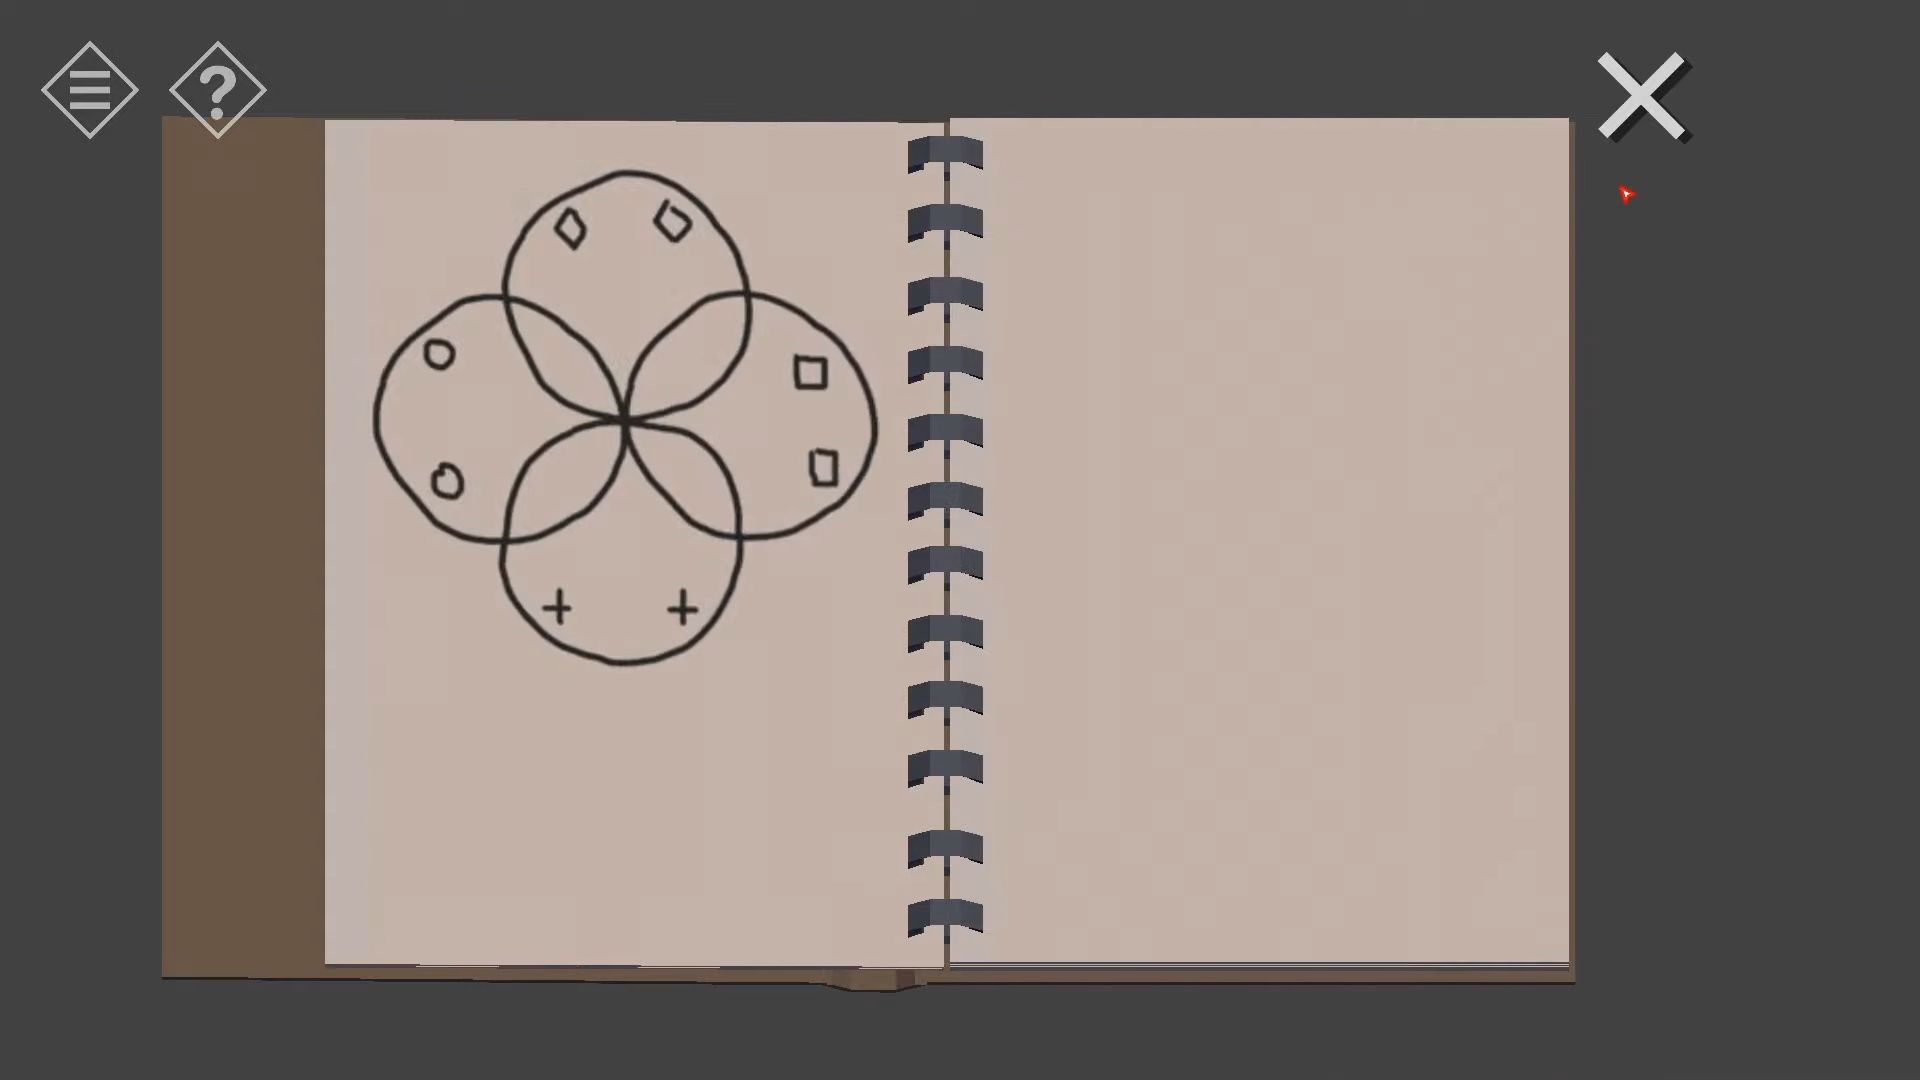
Ensure the lights are turned off in the church hall (the switch is near the back door). Touch each book to find patterns made with glowing ink and identify 4 patterns that match the shapes on the dials below. Pay attention to the orientation of the books, as some are upside down. Knock the dials to align them the same way as the books. Once done, a panel opens, revealing a second black key.
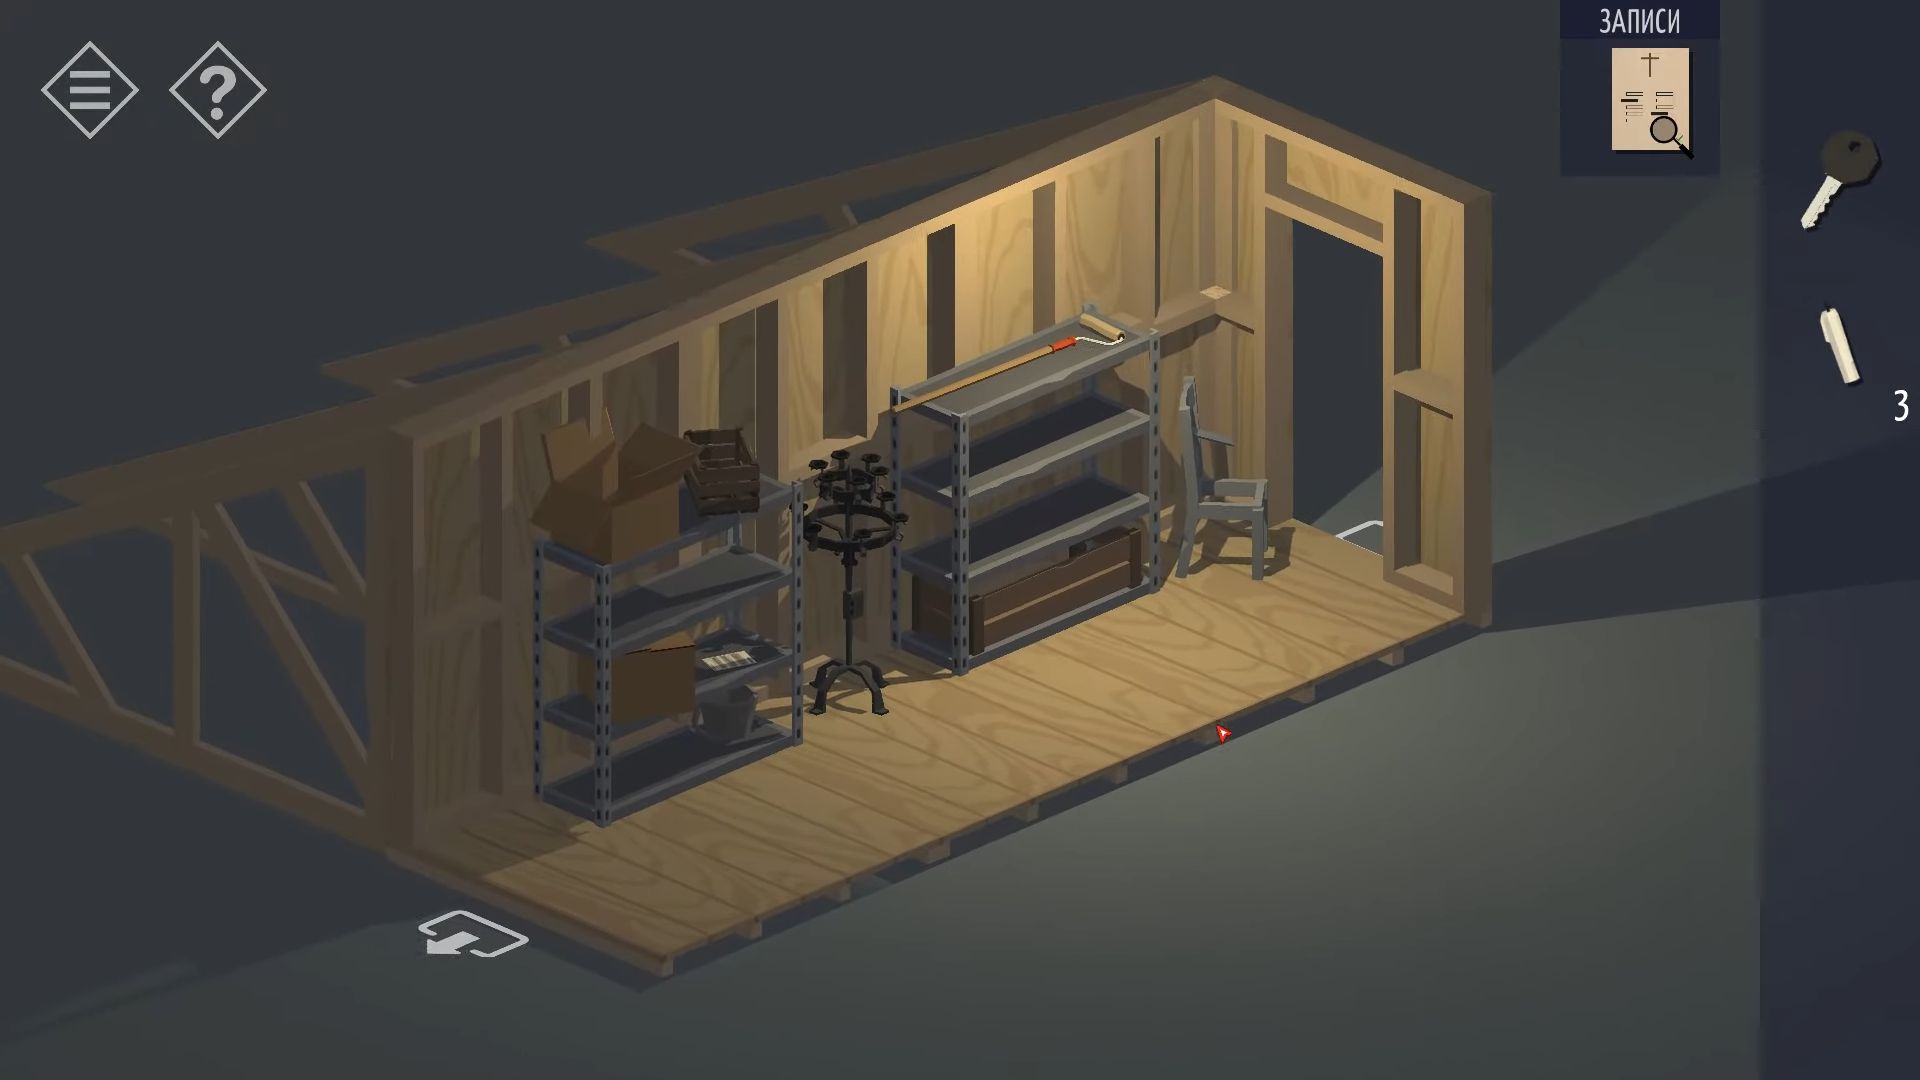
After that, return to the back room and tap the stairs to go up to the roof storage room. Rotate the view to see the shelves on the right side of the room from the door, and touch the paper on the first shelf with a red cross.
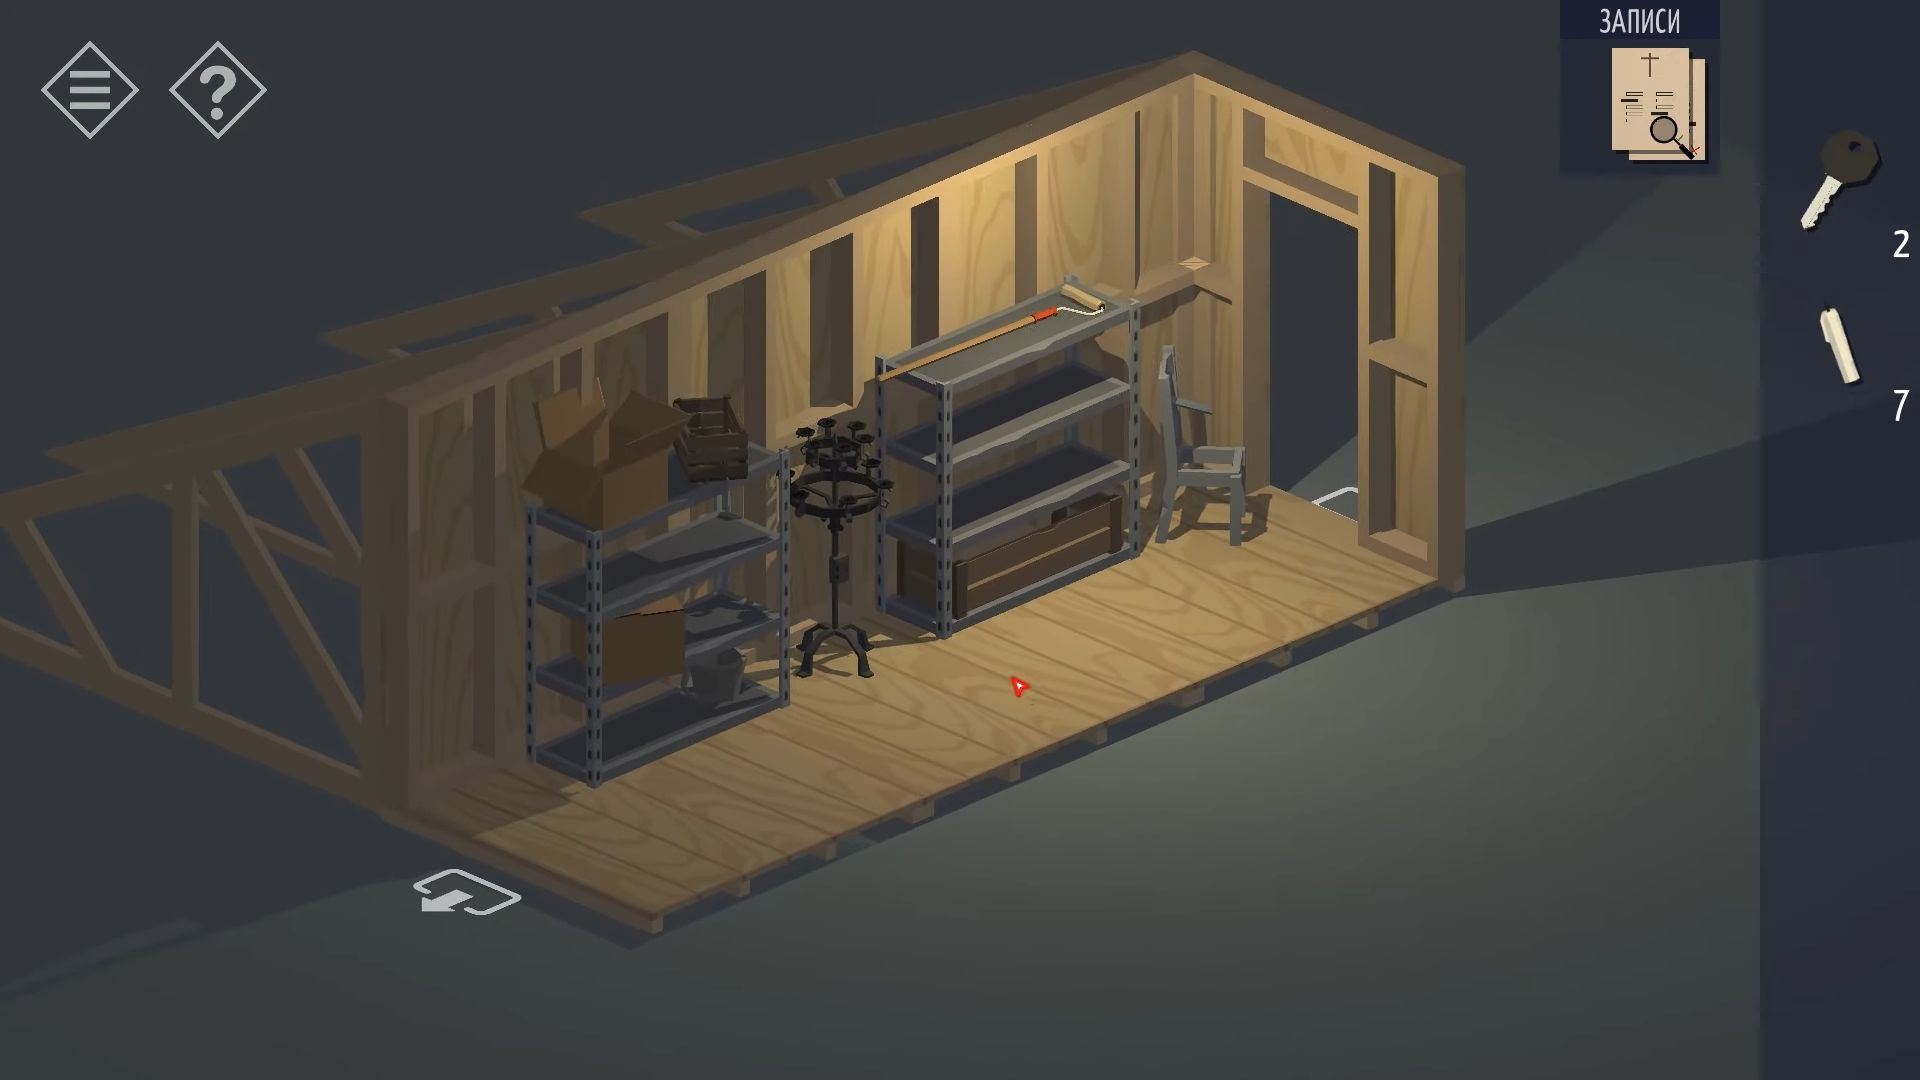
Now you can get the seventh candle from a box on the highest shelf. Tap the candle holder in the middle to take a closer look.
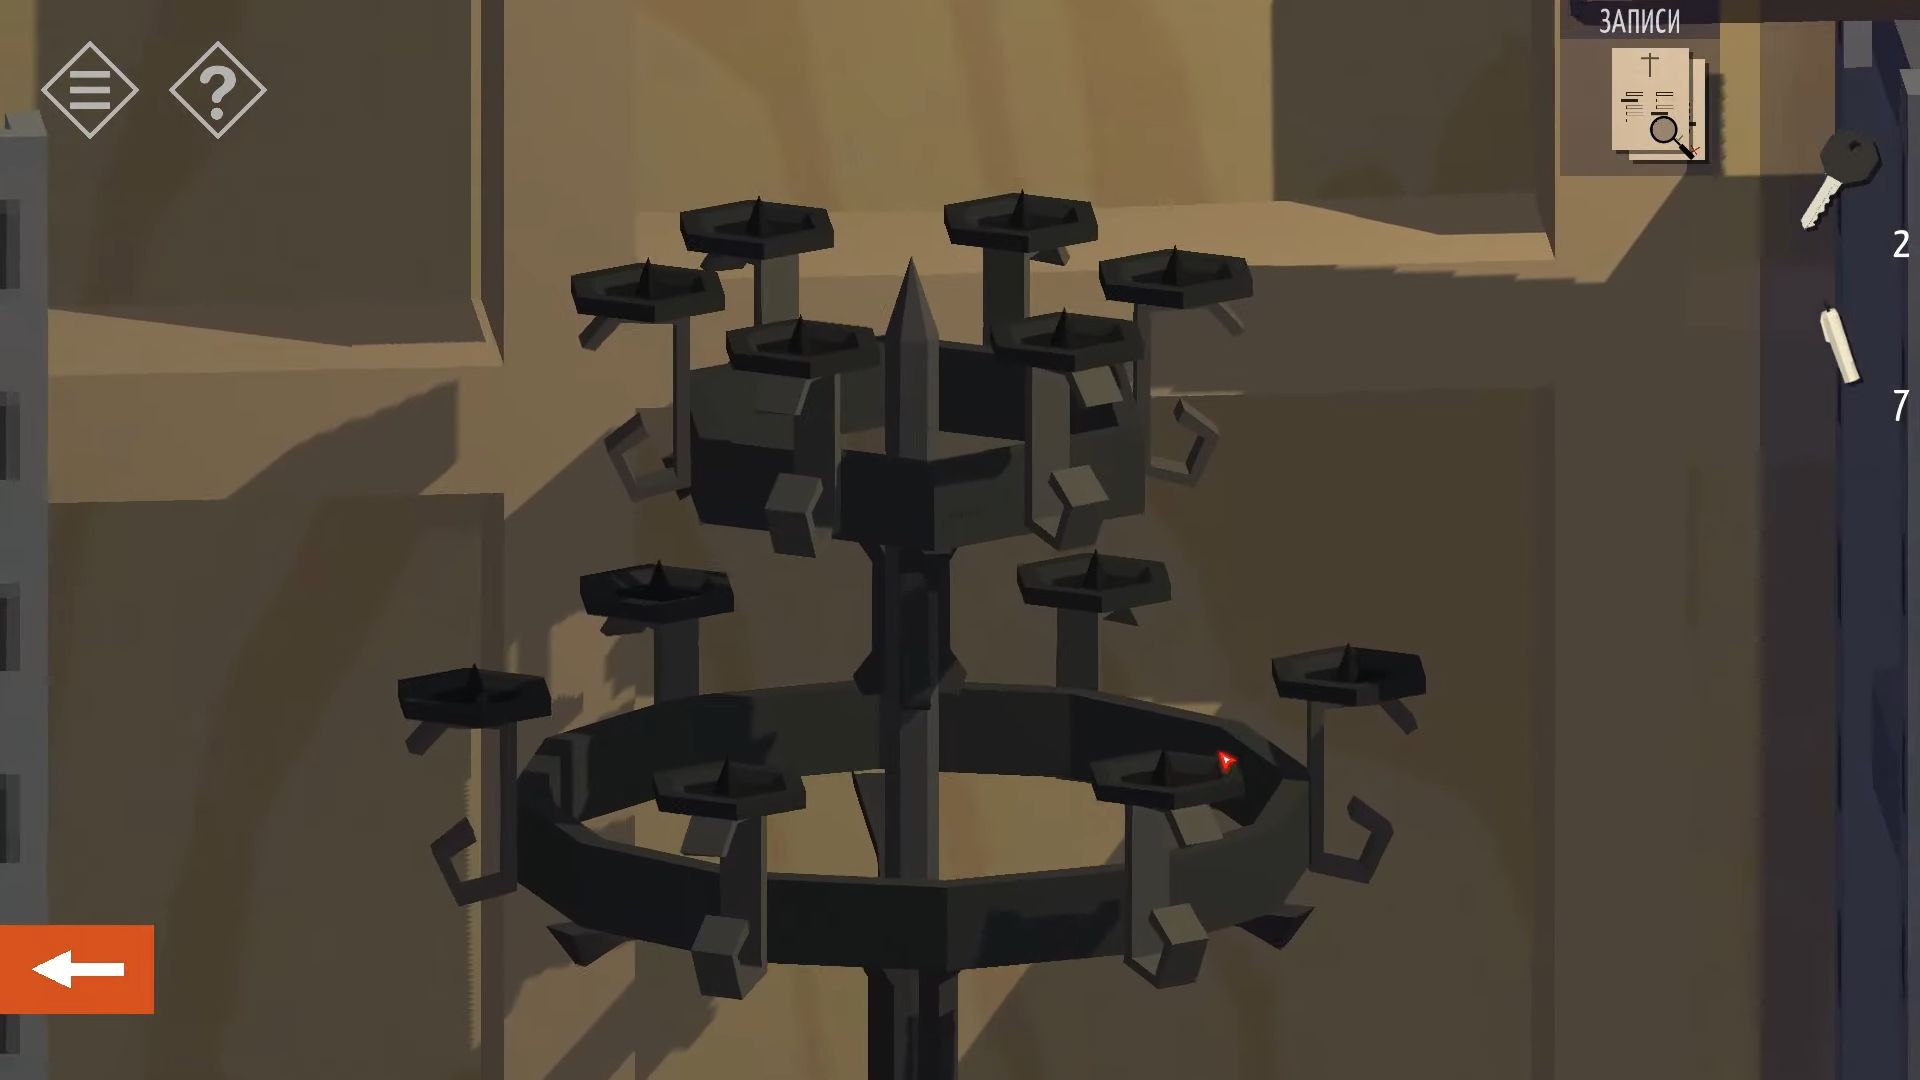
On the top, there are spots to put the candles. Place the candles on the holders, but only where the holder for each one drops down as you place it. If it doesn’t, collect it again and move to the next. Put 4 on the top and 3 on the bottom. Once you finish, open a small box below the holders and get an old-looking key.
Then you have to move through to the bell tower at the end to find the bell and rope. Tap the rope several times to ring the bell, and eventually, it will fall through the floor. Go back to the back room and into the small cupboard under the stairs. Knock on the chest and use the old key to open it.
Go inside and grab a paper with a green checkmark. Also, you have to get a locked box, then check the box and look underneath for a hint to the code (4132). Unlock the box and take a third black key. Head to the church hall and locate the bell by the door. Look inside to find another paper with a different pattern of lines and a green checkmark.
Now you need to tap on the pews in the church hall to see them from above. Use the four papers (only three have a green checkmark) and knock on each pew until they match the pattern on the checked paper.

After completing the previous steps, turn the view so you can see the Bible on the stand. Tap to take a closer look and then touch to open it. Inside, there’s a switch. You have to knock on it, and the passage will open. Enter the passage and knock on the white wall box to examine it. You’ll need to input the three keys, then touch each one to turn them.
Now enter the door to the catacombs. On the left wall, you’ll find a map to pick up. After that, grab the sledgehammer from the shelves. Use the sledgehammer to open the blocked doorway on the left. This marks the end of Chapter 3.
Chapter 4
Here’s the complete guide for Chapter 4 in Tiny Room Stories: Town Mystery. Each step and secret is explained with pictures and codes, and you can check them if you need help.
Underground
In this stage, you can use the map you discovered in Chapter 3. You can tap it whenever you want to see it. In the initial corridor, there’s a note on the wall telling you that there are puzzles you need to solve to enter each room. Touch the doormat in front of the door at the corridor’s end. Beneath it, you’ll find a Red key to pick up.
Use the key to open the door and go through. Now you’re in the passageways shown on the map.
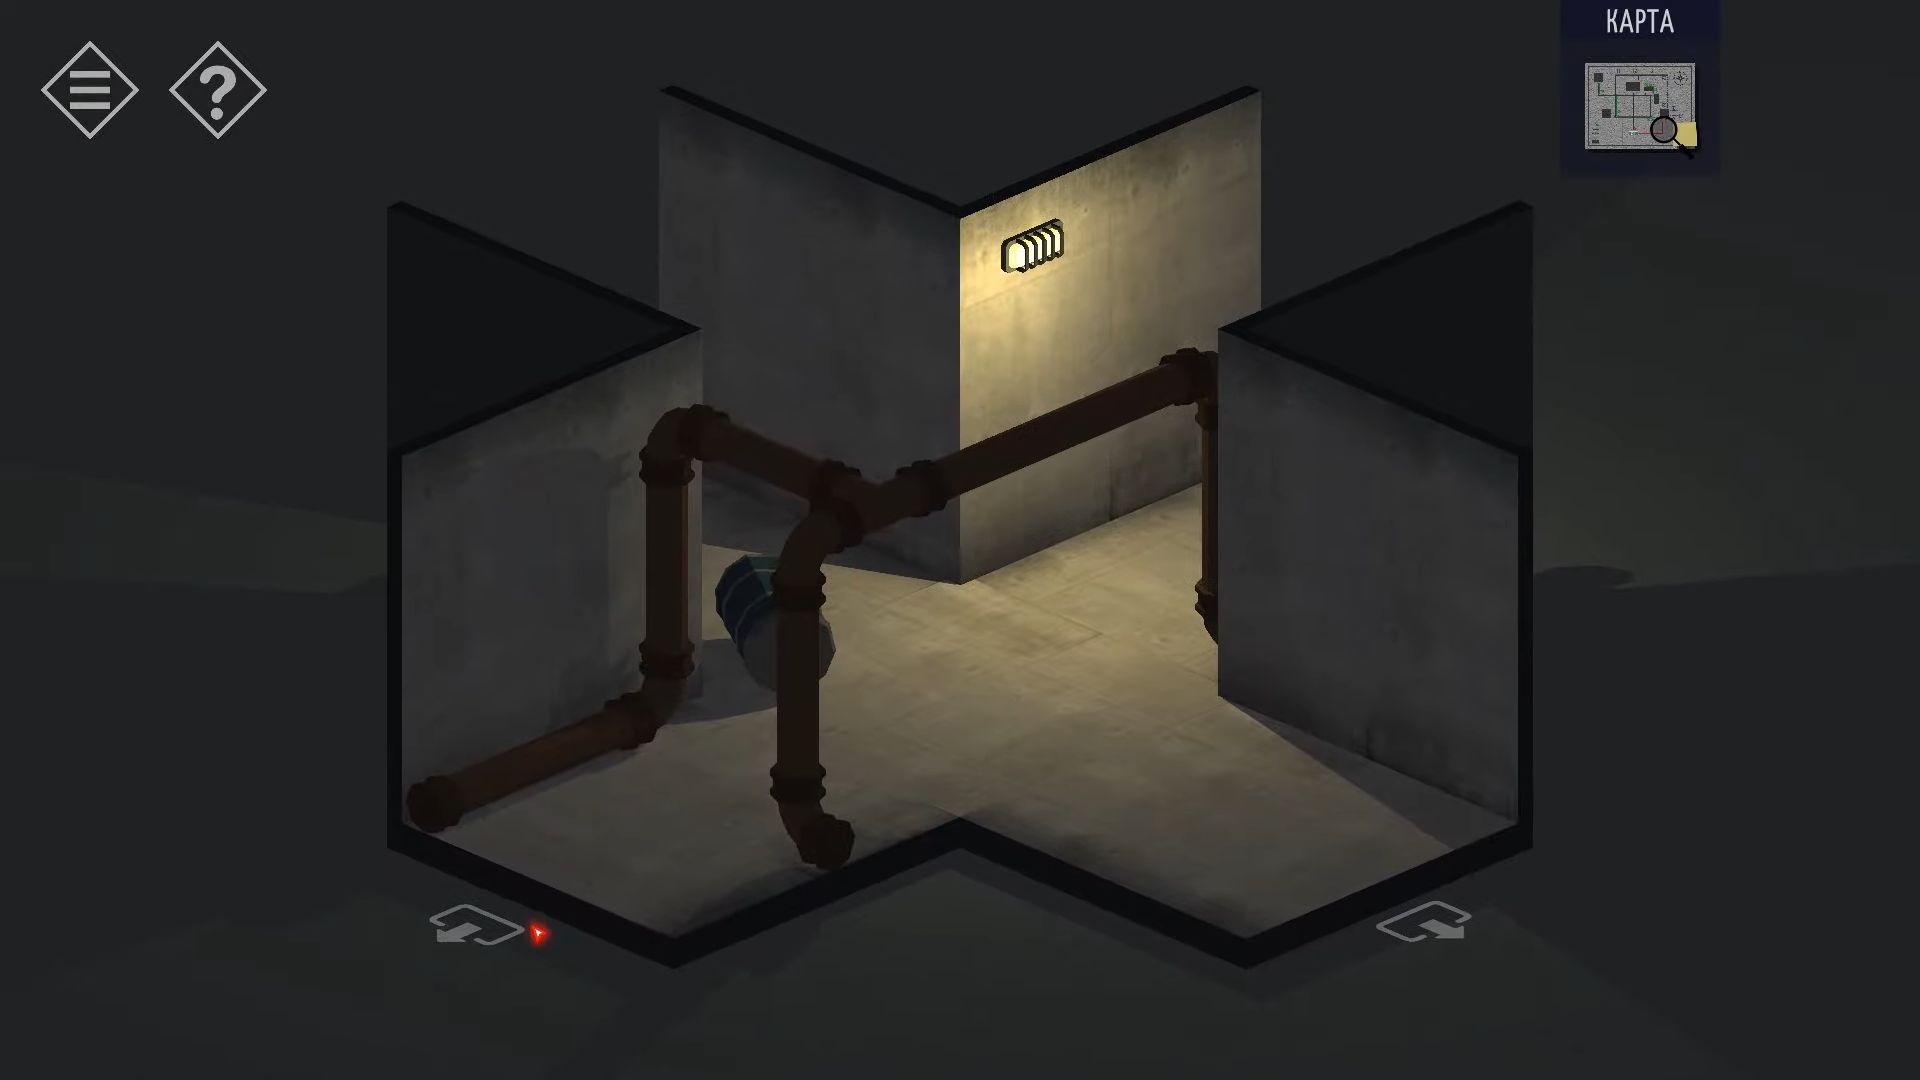
Start by going to the right, where you’ll see three red valve wheels on the wall. Tap each one three times to turn them completely off. After that, head back to the left from the entrance and locate the door to the Storeroom. It’s locked and requires a four-digit code to open. It’s not too tricky because each pad stays lit when tapped in the correct order. If you need assistance, the code is; Bottom Right, Top Left, Bottom Left, Top Right.
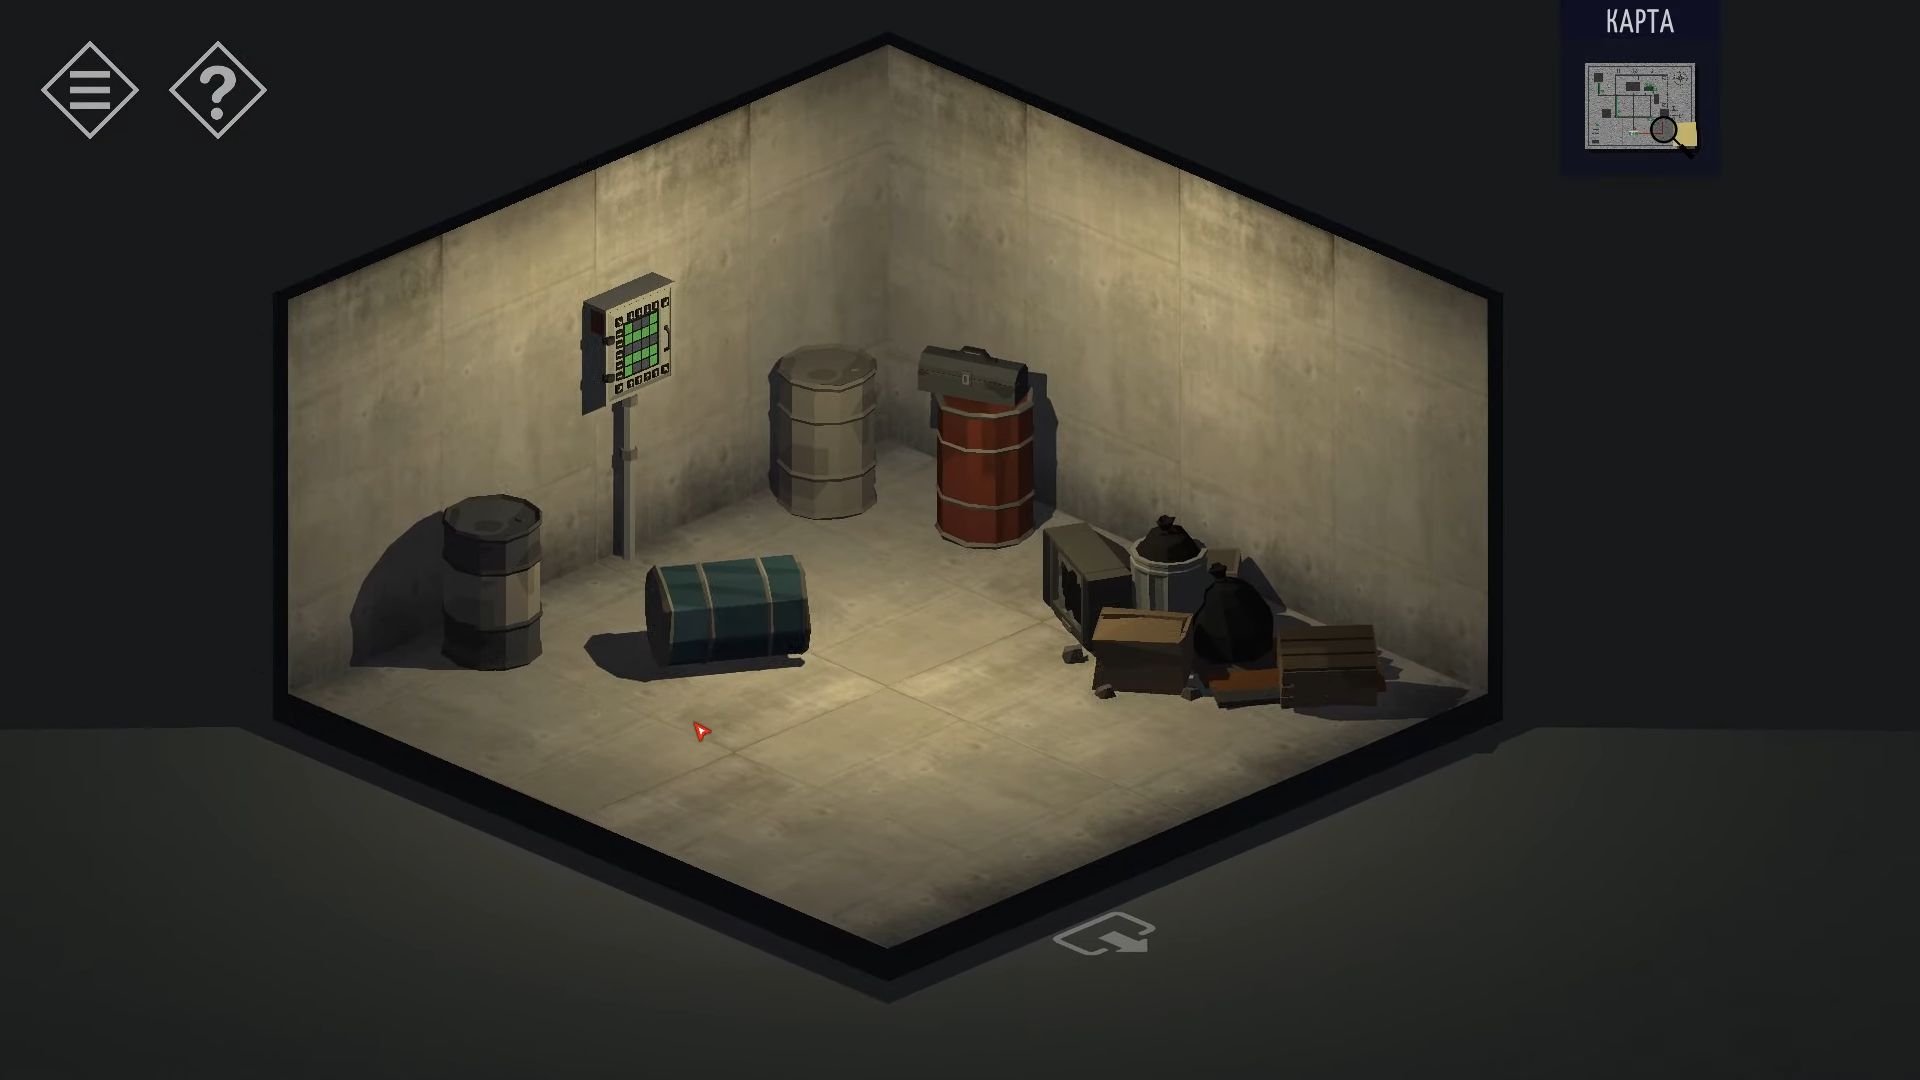
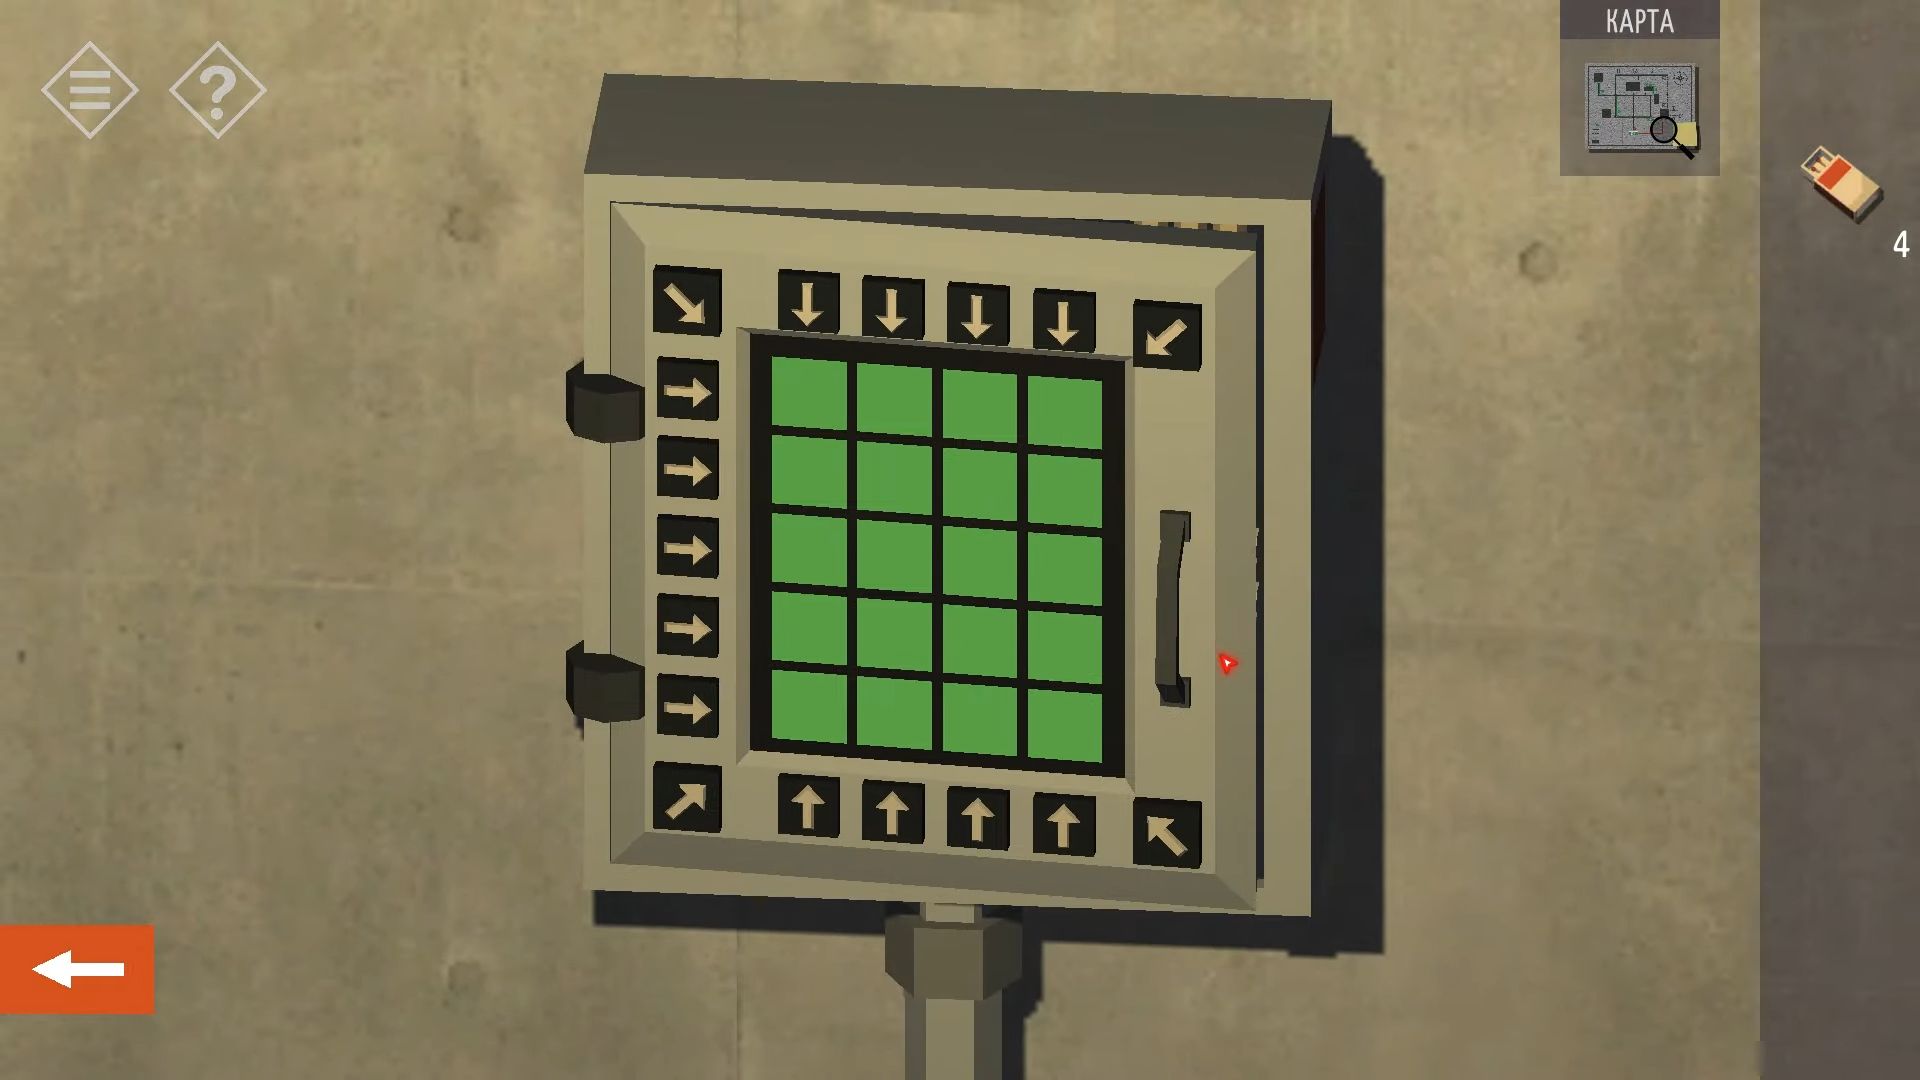
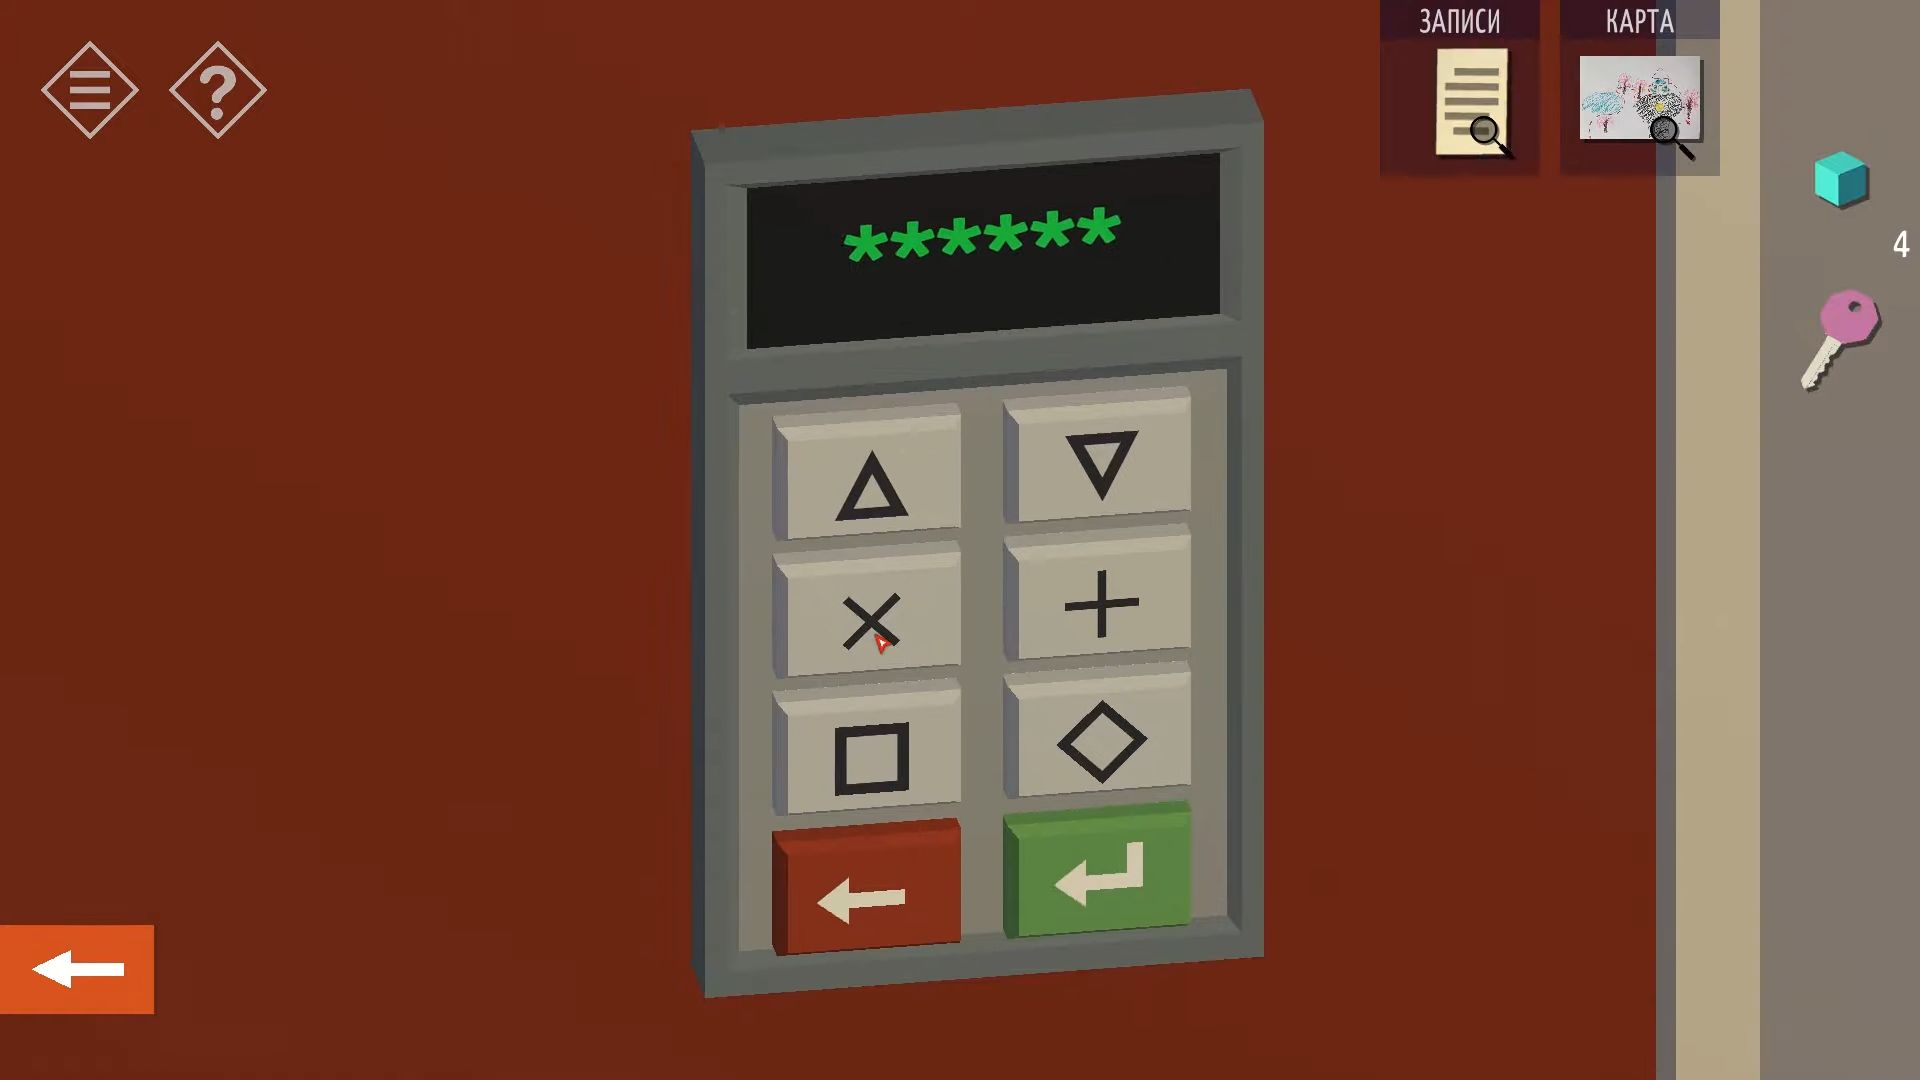
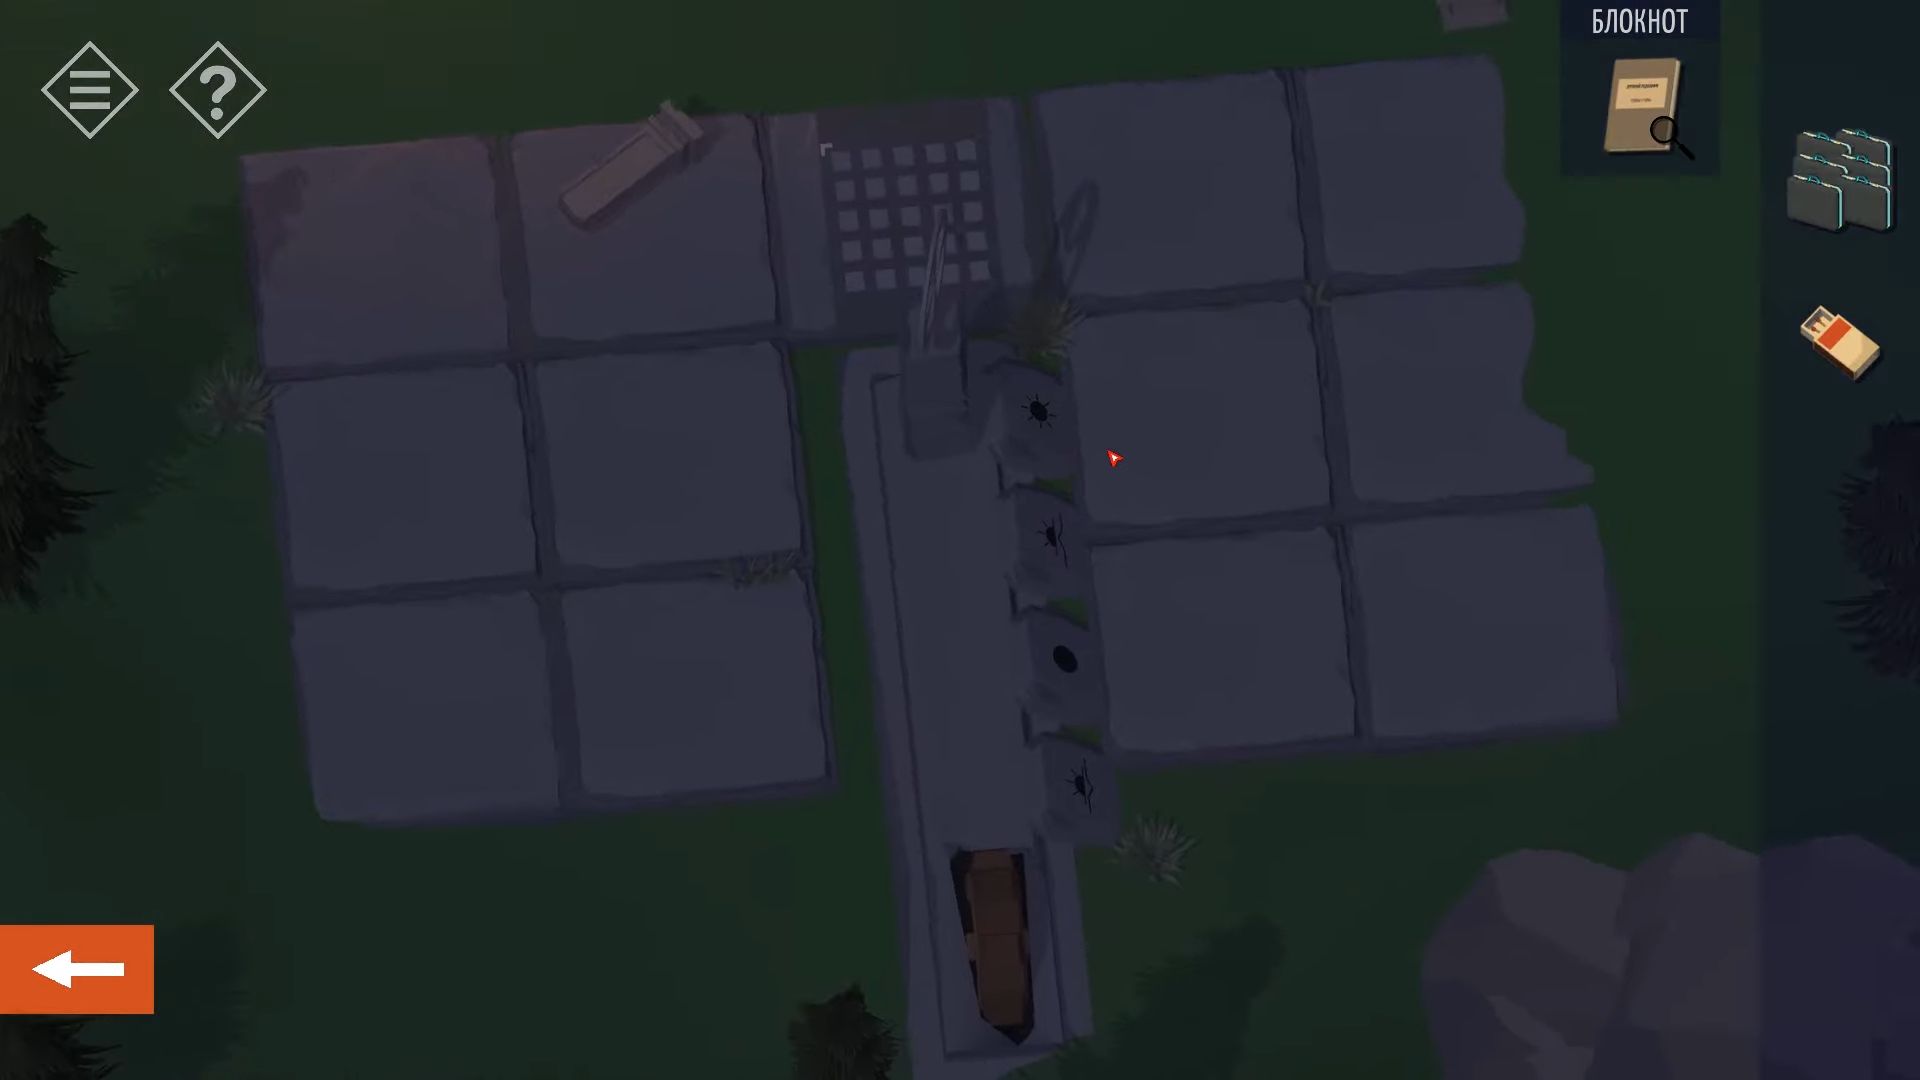
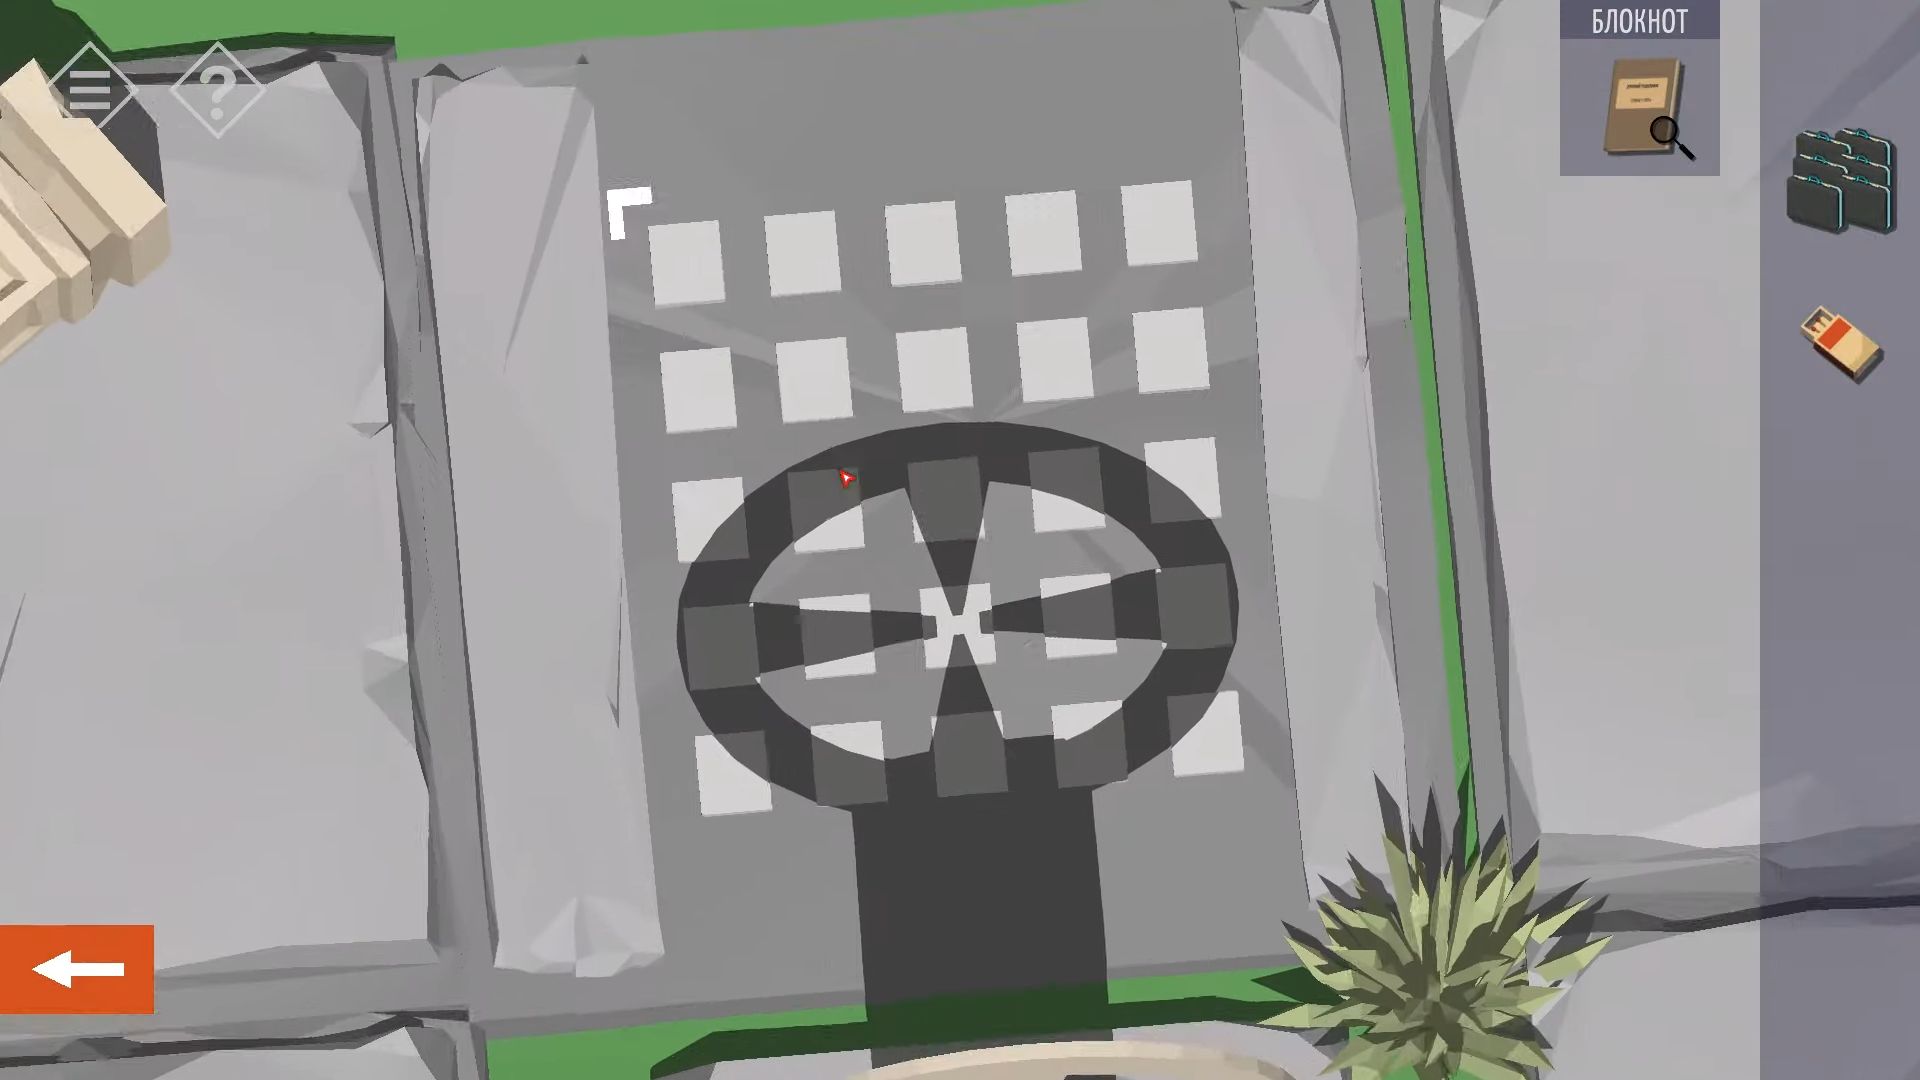
In the room, you will find a toolbox sitting on a barrel and open it to gather Matches. Next, on the back wall, there’s a lock box with a pattern of squares on it. It’s like a puzzle. You need to knock the arrow buttons on the side and below to change the squares the arrow points to. The goal is to turn all the squares green. It might take some practice, but it’s not too difficult.
Touch each of the 4 downward arrows, then tap each of the 4 diagonal arrows. Once completed, you’ll be able to collect a Black Key.
Now you have to leave the room and navigate to the hallway. Find the red valve on the wall across from you and tap it three times to turn it off.
The key you discovered is for the Lounge Room, but you can’t enter through the lower door on the map because it’s blocked. Go to the back corridor at the F2 position to locate the rear entrance and use the key to unlock the door. Once inside, move the furniture blocking the other door to regain access to the main corridor.

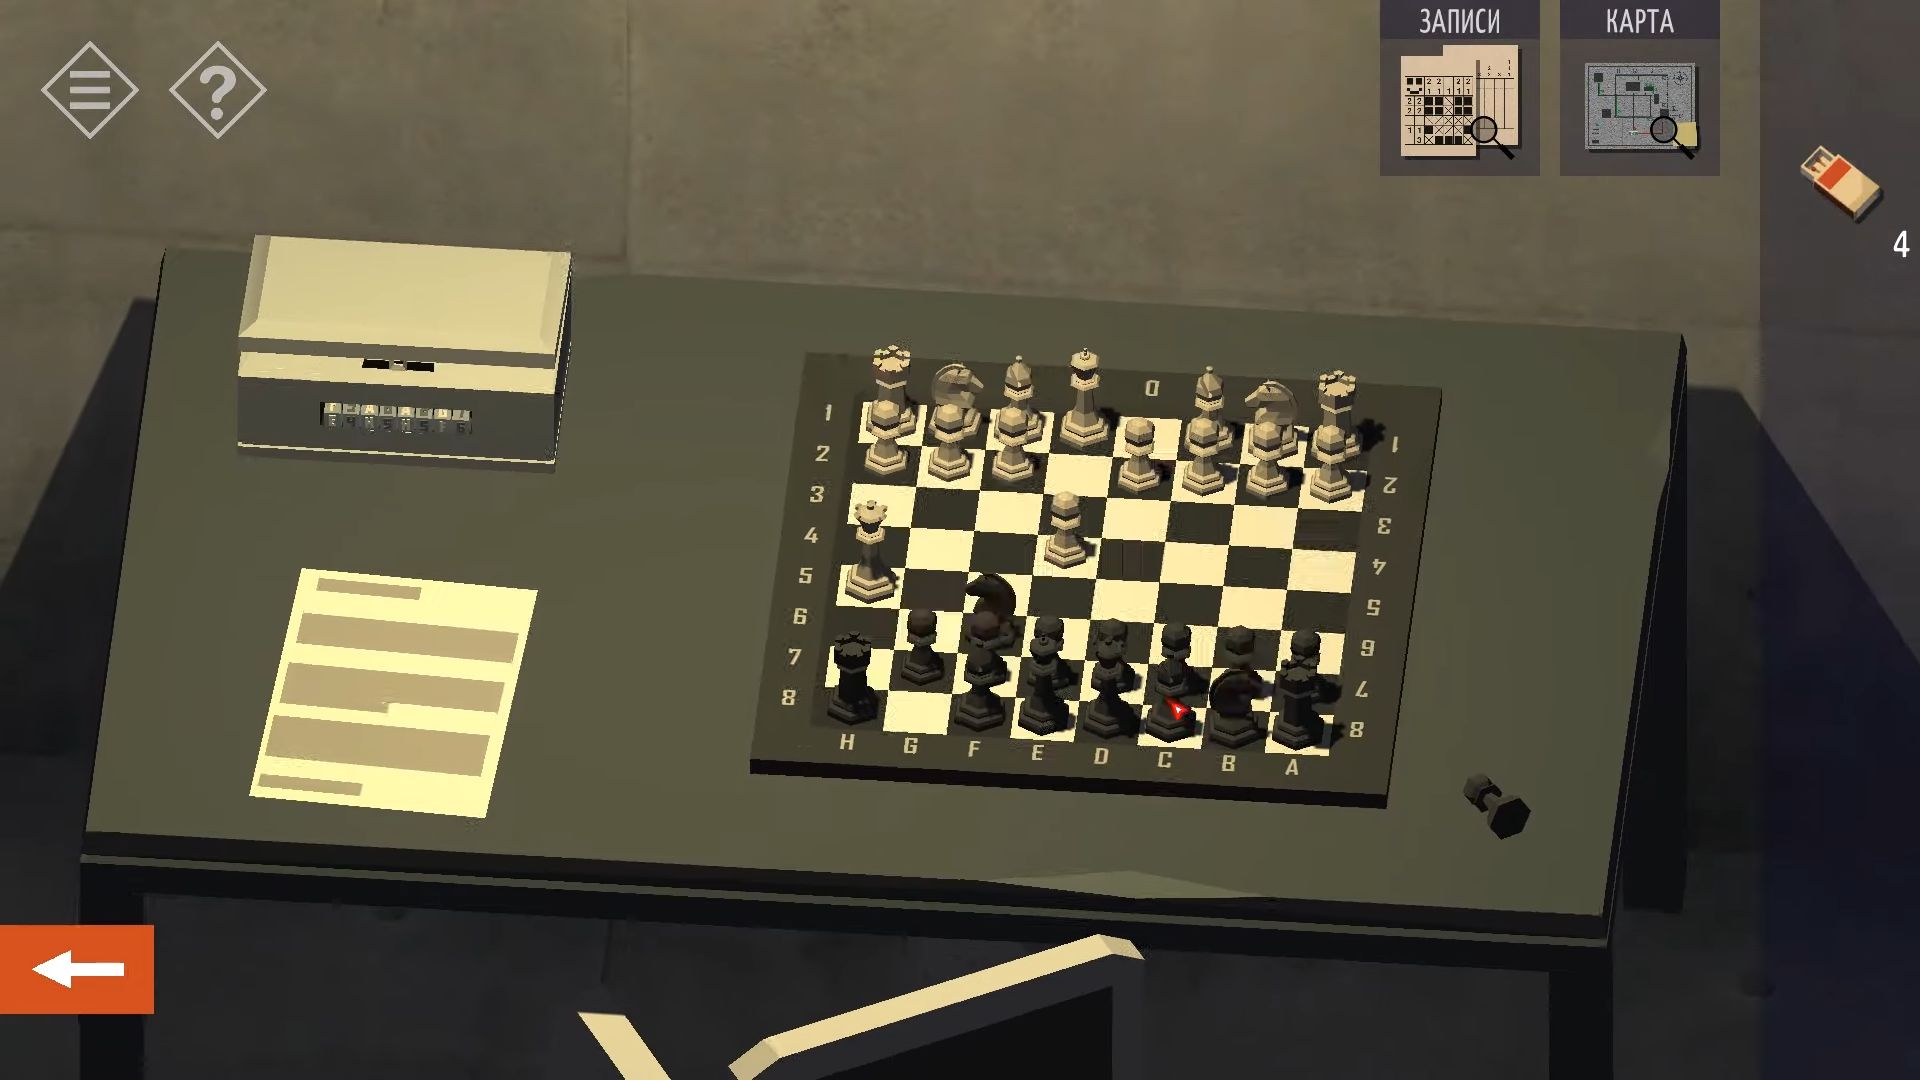
Inside the room, there’s a chess board on a table and a locked box with an 8-digit combination of letters and numbers. The hint for unlocking the box lies in the chessboard. You have to determine the sequence of 4 moves that result in the current positions of the chess pieces. It’s easier if you know how to play chess.
Take note of where each piece has moved, including the one that got captured. If you find it challenging, the code to unlock is E4 H5 H5 F6. Now, you can pick up a Blue Key.
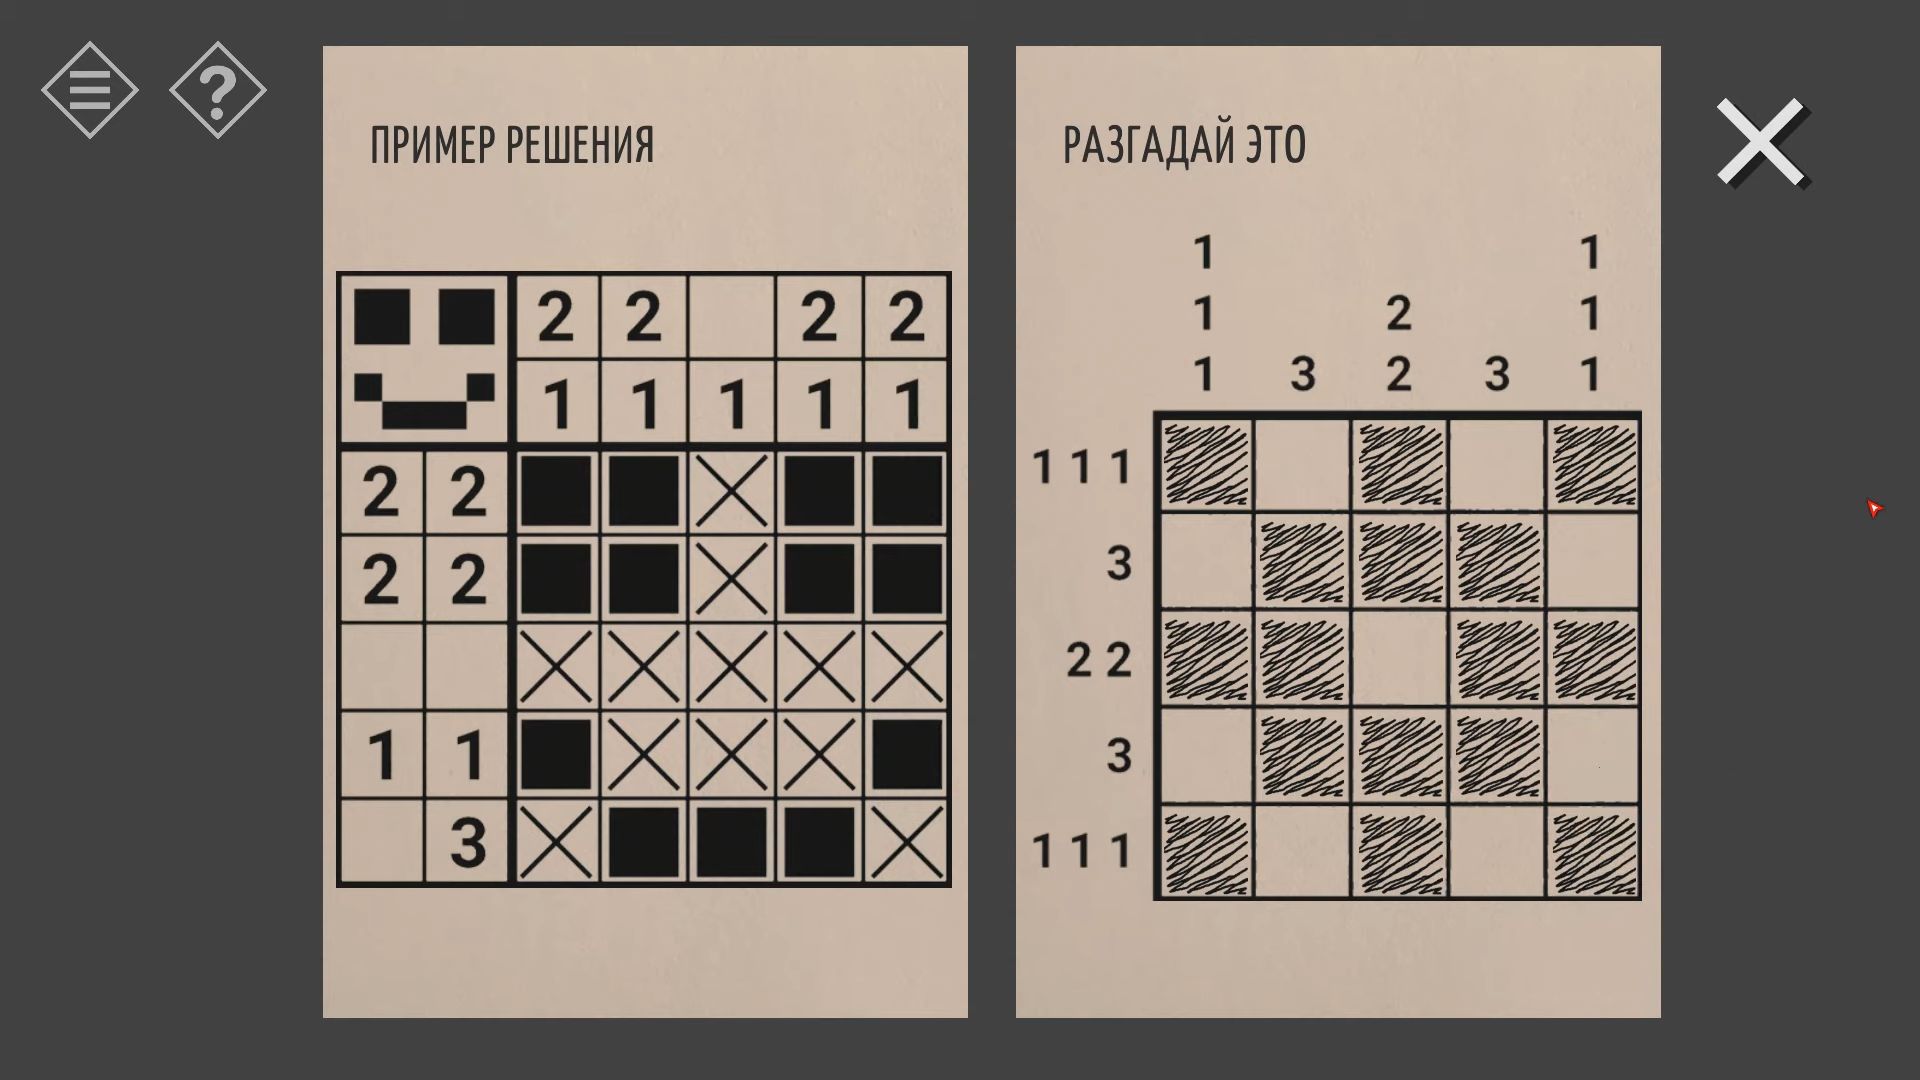
Turn the view to see a table with papers and a pencil. You can pick up these items, and they form a puzzle for you to solve. Use the numbers at the top and left to guide you on which squares to shade to create a pattern. This will come in handy.
Next, leave the lounge room through the lower door, which was blocked before, and head to the gas-feeding room. On the door of this room, there’s a 5×5 keypad. You have to input a pattern. Tap each square to light it up, following the clue provided. Once inside the Gas Supply room, turn off all the valves.
Rotate the view to find a cupboard that you can open, and inside, there’s a Valve Wheel to collect. Now proceed down the corridor to the Power room and there will be a gas leak causing a fire and blocking the door. Use the valve wheel on the nearby pipe, and touch it to turn off the gas.
If you’ve already turned off the other 6 valves, the gas should now be off, allowing you to enter the power room.
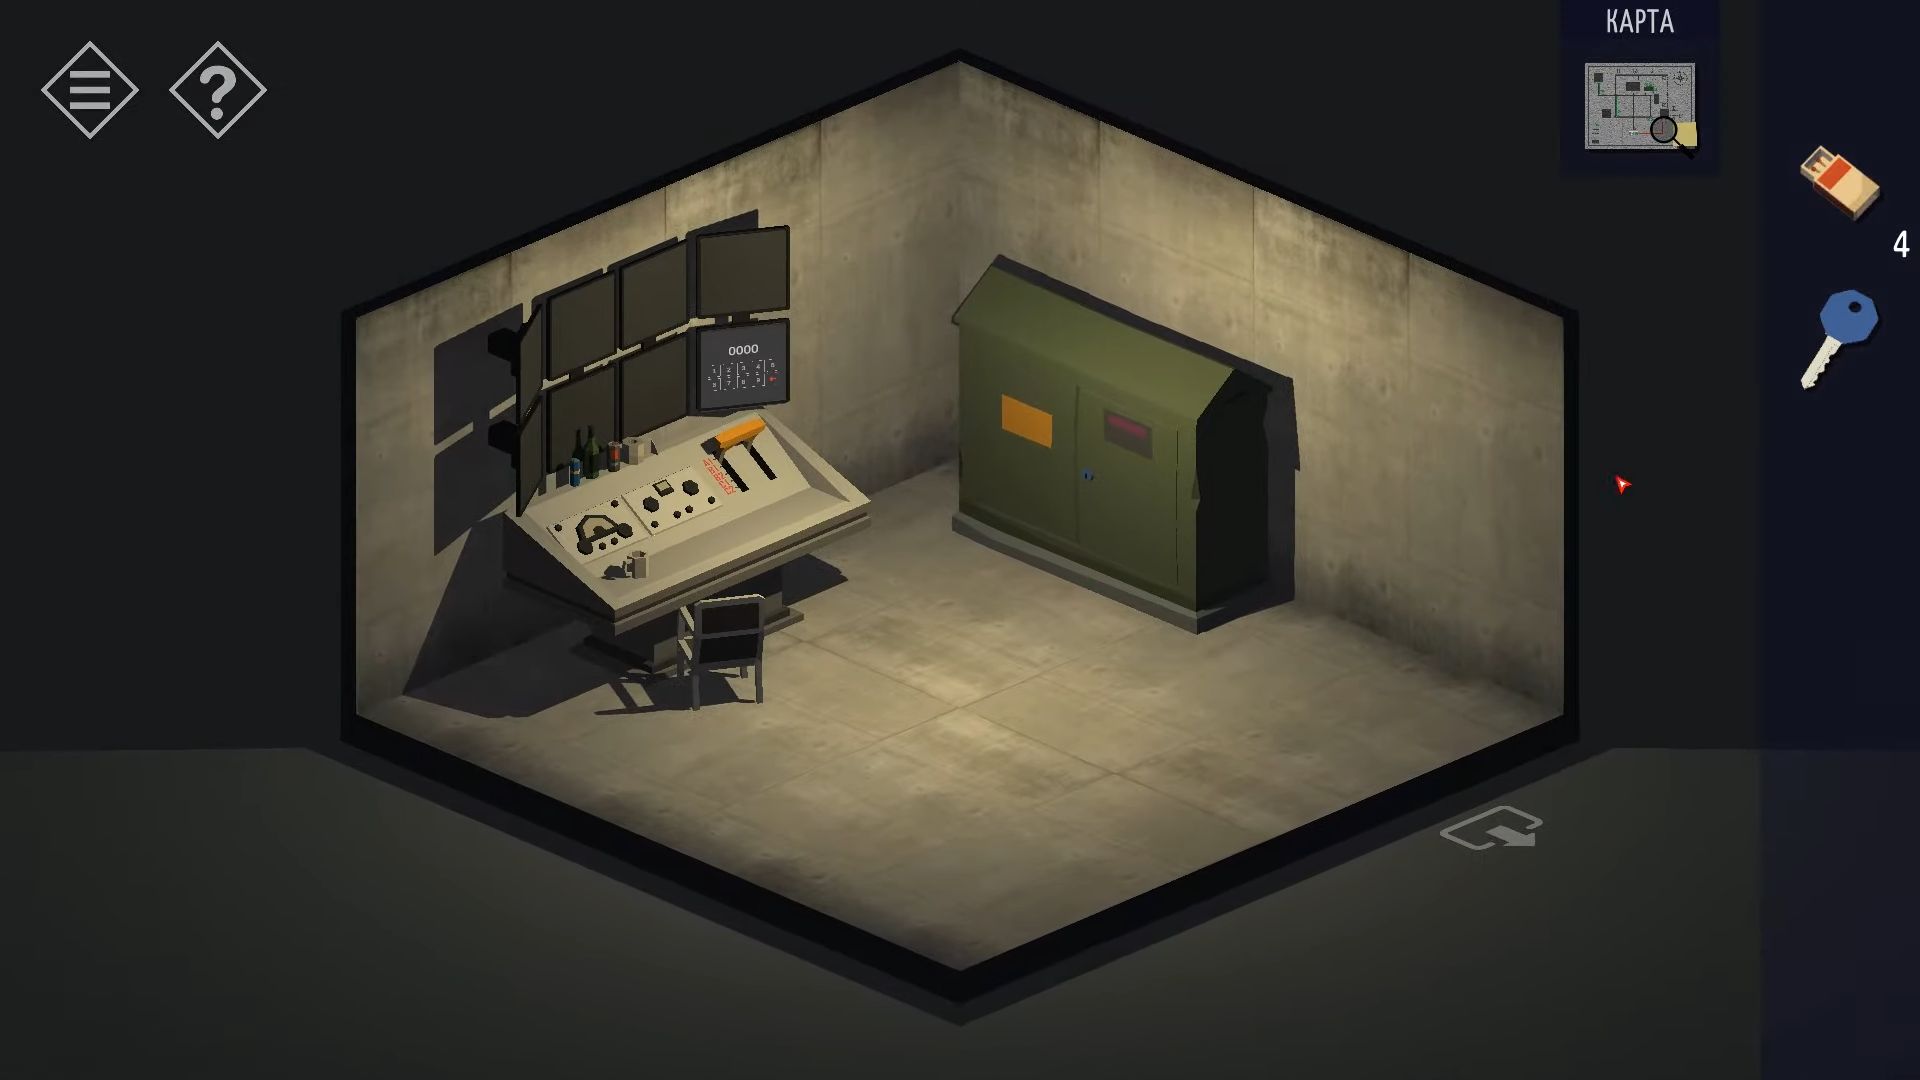
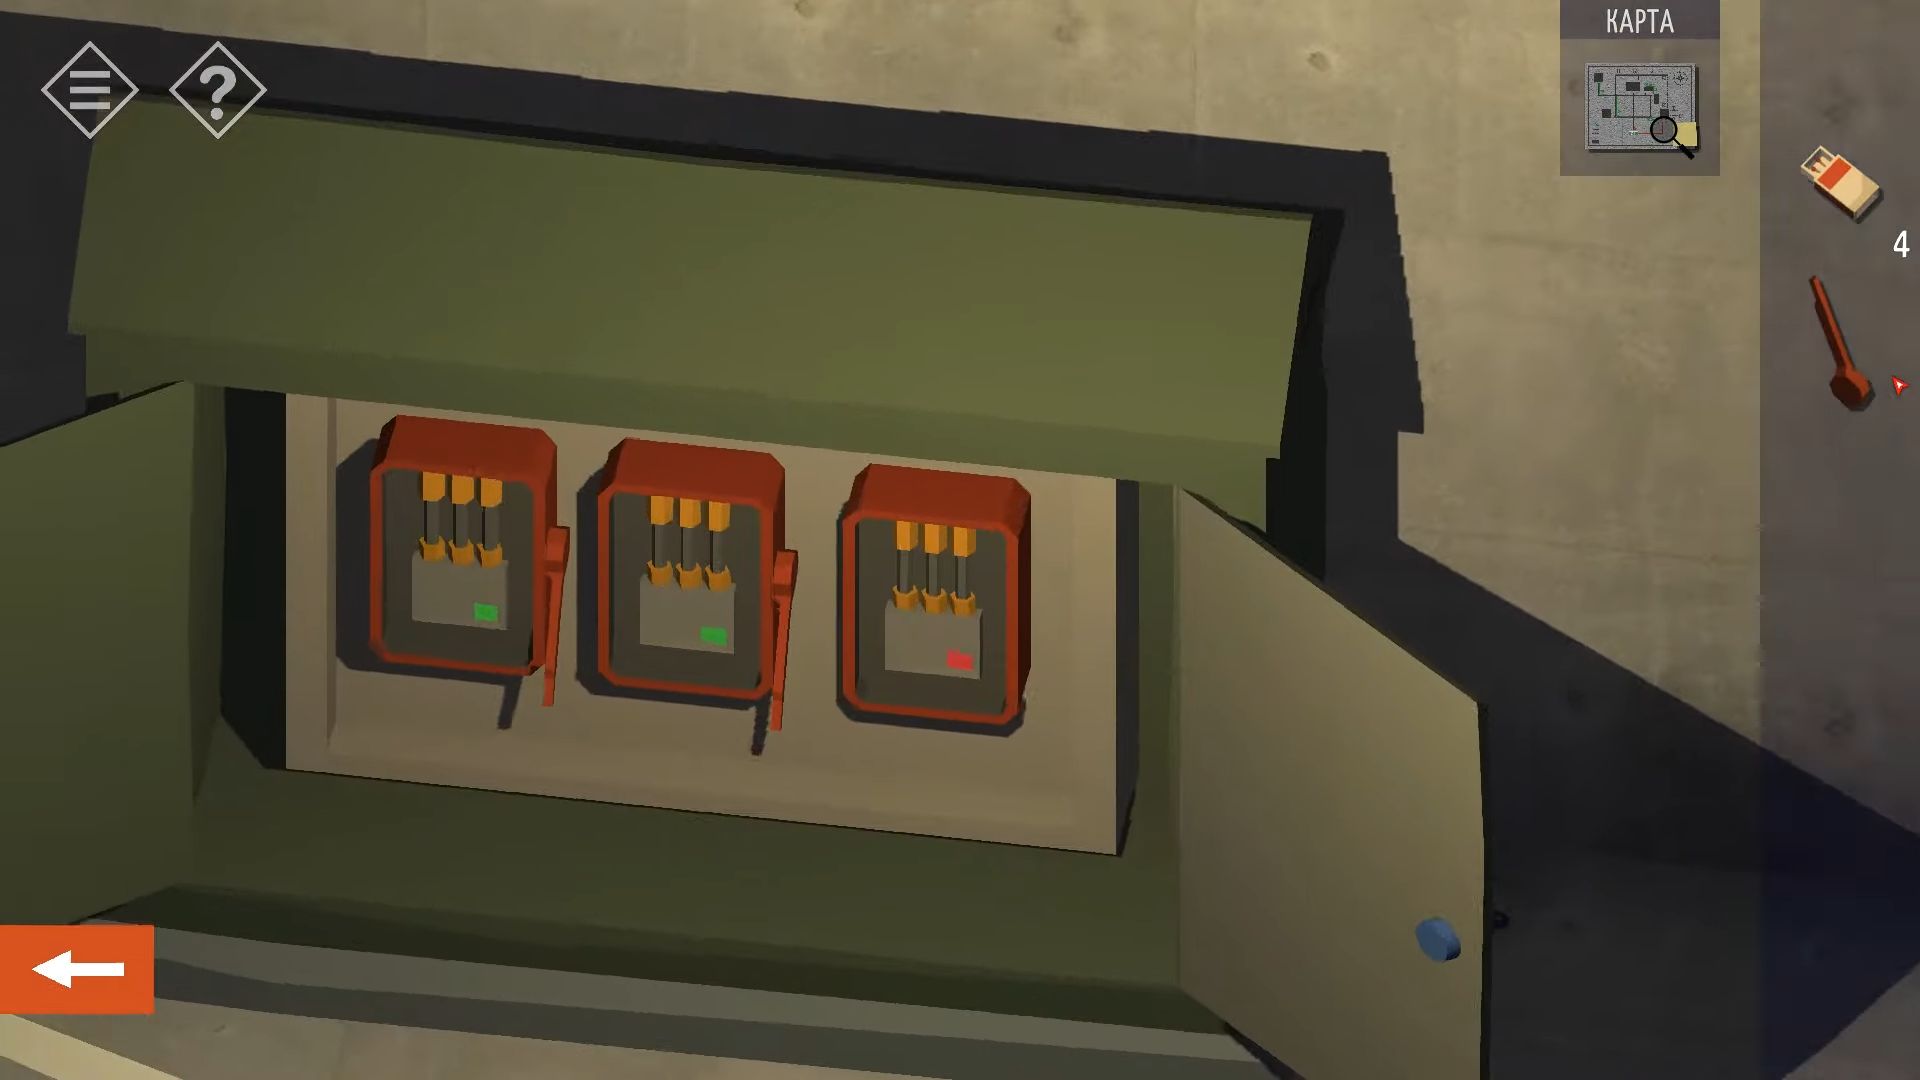
In the room, there’s a control console that doesn’t work and a code entry with four items on it (cans, bottles, toilet rolls). On the left wall, you’ll find two grey cabinets, and if you rotate the view, you’ll see two more grey cabinets. Open each cabinet to discover various items inside.
To move forward, you need to input a code to unlock the console (4958). Open each grey cabinet and count the number of items of each type that match those on the desk. Some cabinets might have other items that don’t match; you can ignore those. Don’t forget to count the items on the desk as well.
Now, adjust the power switch to turn off specific fans. Adjust the settings until Fan 2 (F2) is turned off. Go to the back corridor, to the F2 position, and you’ll notice that the fan is no longer moving. Continue to the F3 position in the back corridor; it’s dark, but you can find a pallet on the floor. Head back to F2 and place the pallet in the water. Tap the other floating pallet to align it with the first one, creating a bridge to reach the fan.

Tap on the fan to see a red handle that you can pick up. Go back to the power room. On the opposite wall, there’s a green locked cabinet with a blue keyhole. Use the blue key to unlock it. Inside, there are three power boxes. Two of them are already on, and the third one doesn’t have a switch handle. After that, use the handle you collected to turn on the third box.
Now, go back to the back corridor. But, before you leave the power room, make sure to adjust the console switch to C2. This will turn off fan 4 and fan 5.
Proceed along the back corridor to the end position, F4. Tap on Fan 4 to pass through and exit the vent through Fan 5 into a small room with several fans. In this room, there’s another blocked doorway that you need to figure out how to break.
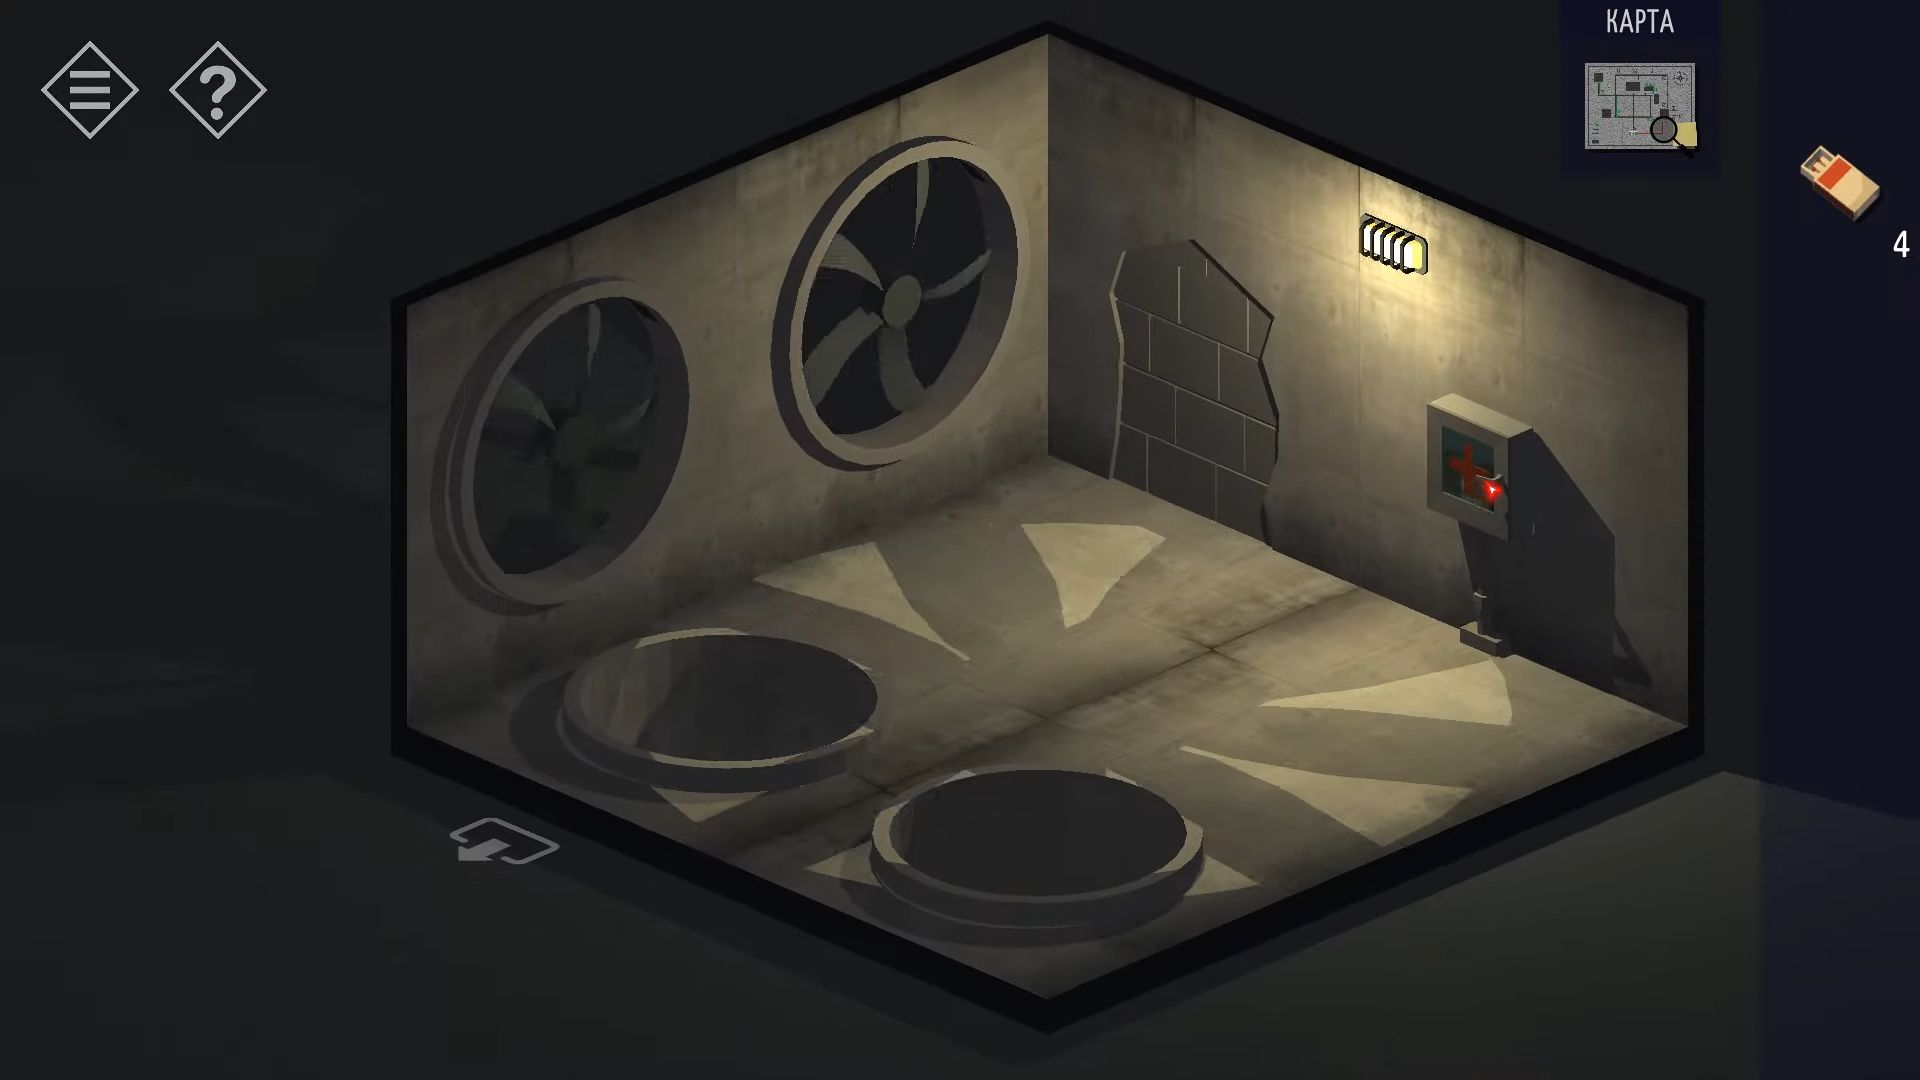
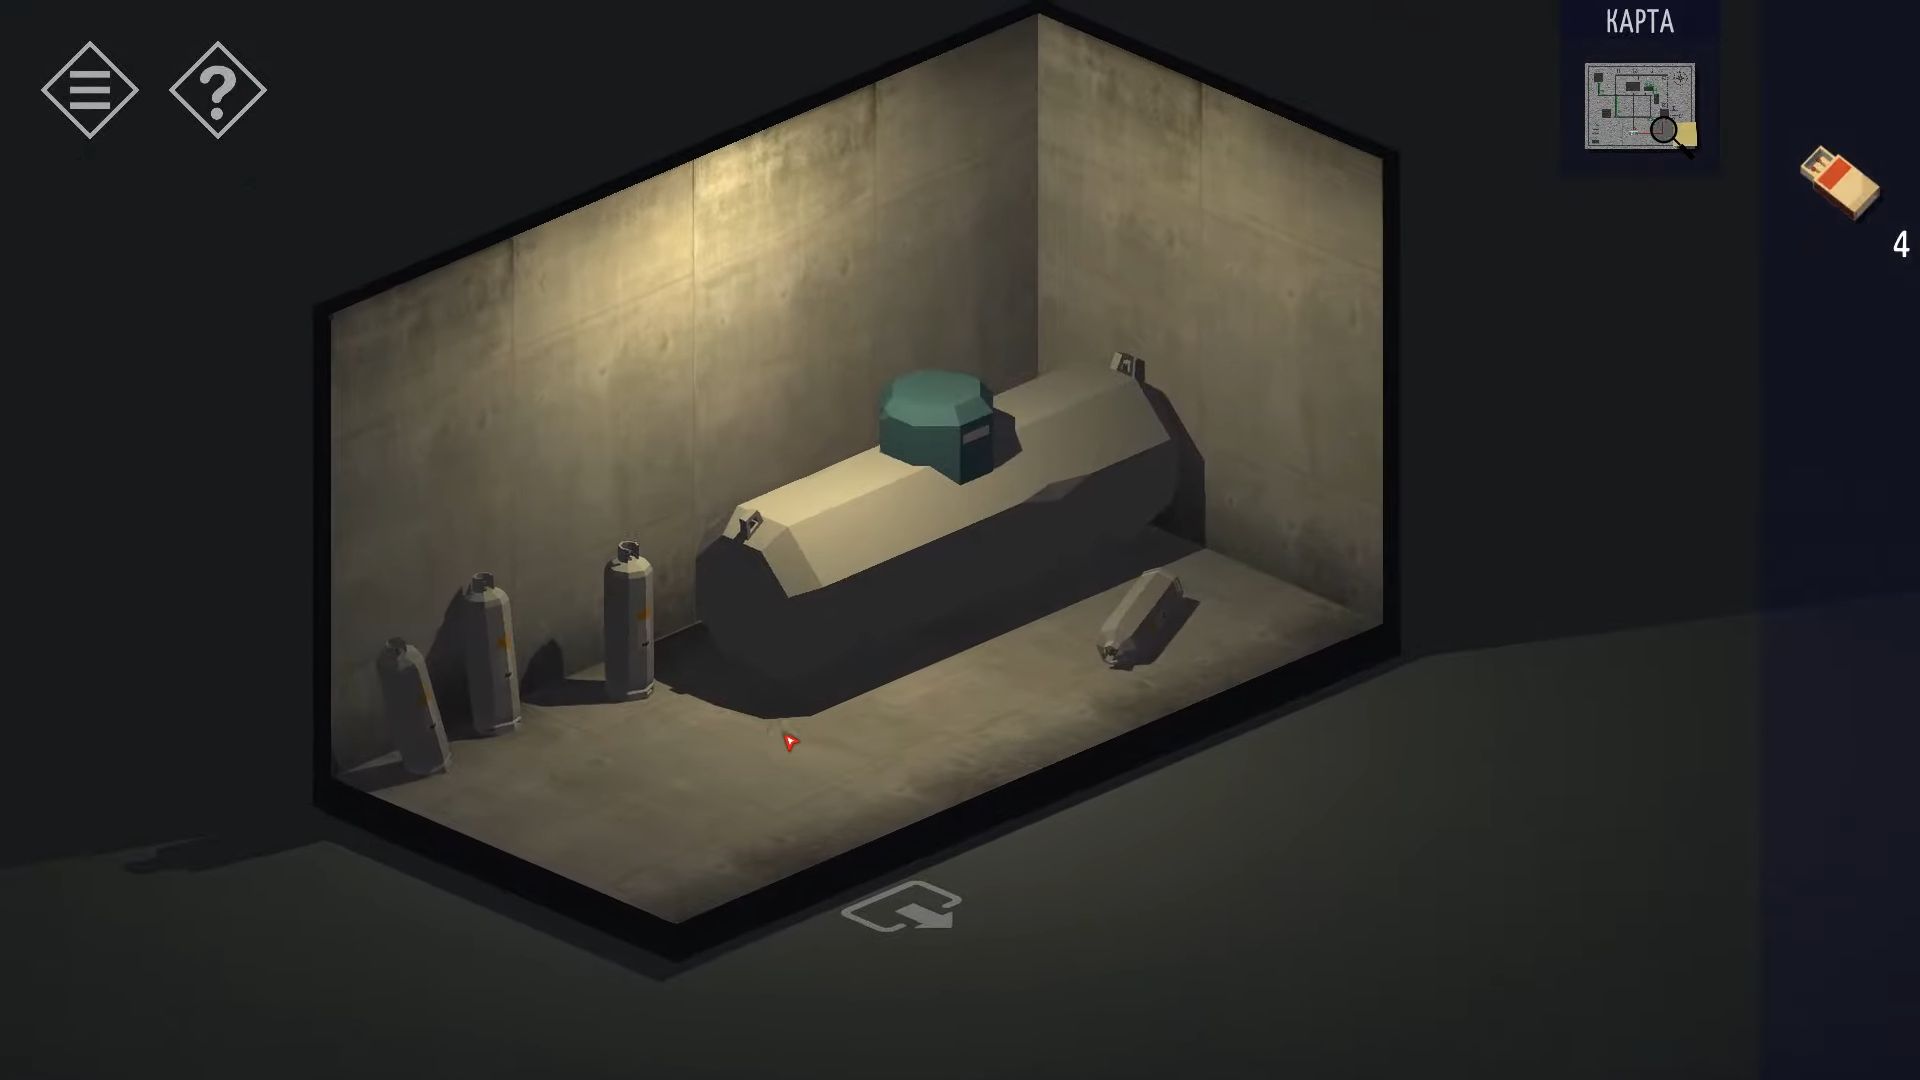
Turn the view to see the door, which is blocked, but now you can open a first aid wall box. Open the box and take a Yellow Key. Now leave this room and go up on the map to the small unnamed room next to the gas-feeding room. Use the key to unlock the door and inside, there are several gas tanks. They all seem to be empty, but turn the view to find a red tank behind the large cylinder and you need to collect this.
Now, go back to the Power Room and switch the lever to turn off Fans F6 and F7. Return to the small fan room and position the gas tank in front of the blocked doorway. You have to use the matches to light the cylinder. However, they won’t ignite if the big fan above your head is still moving.
Tap on Fan F7 to enter the tunnel behind it and look to the left to spot a red ladder. Climb up to reach the large fan control area.
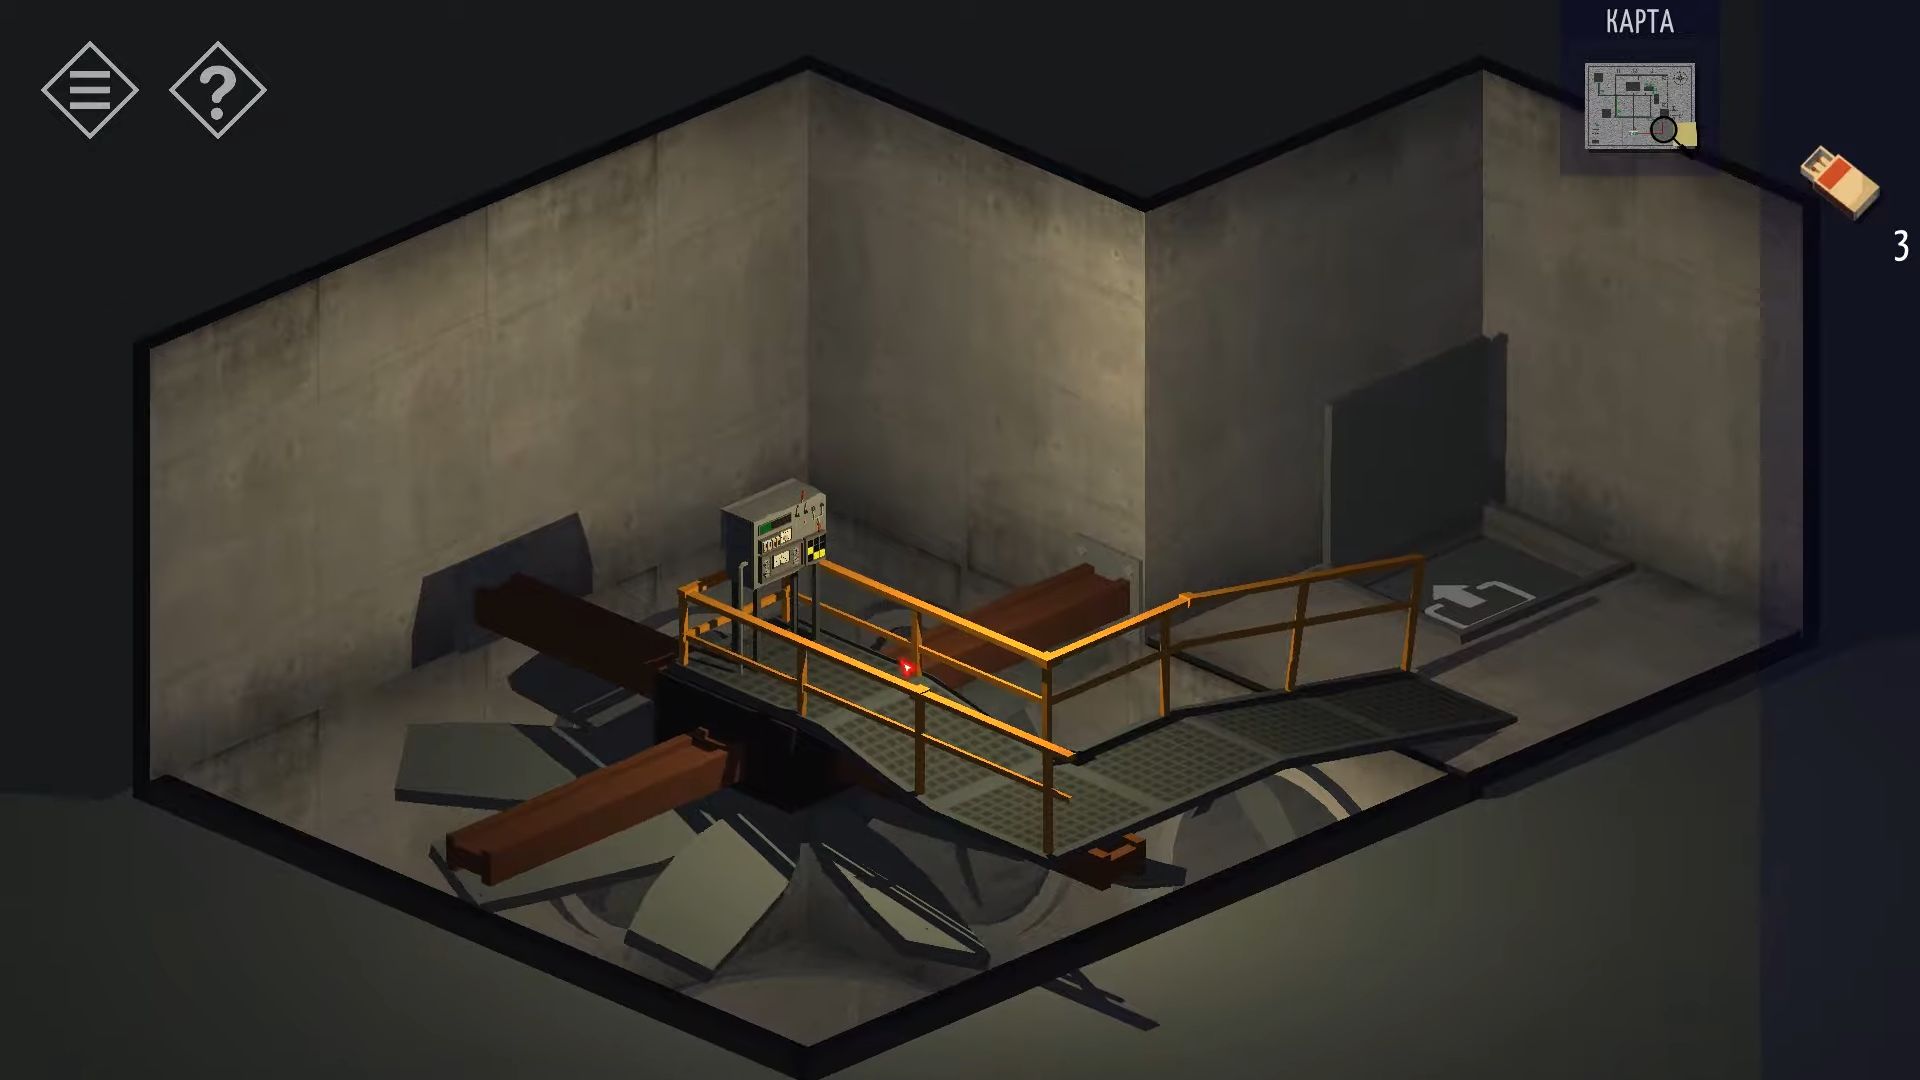
Tap the control box in the middle. You can’t completely turn off the fan, but by experimenting with various switches and dials, you can increase the speed (displayed on the top left) until it overloads. Your goal is to fill the bar and keep testing different combinations. The clue below is nearly complete.
After completing that, go back to the lower room and use the matches on the Gas Tank. It will explode, creating a hole for you to leave through. Now, you will find yourself in a dark chamber where you can’t see anything. Luckily, you still have matches. Tap them and use them to light a small torch on the left wall.
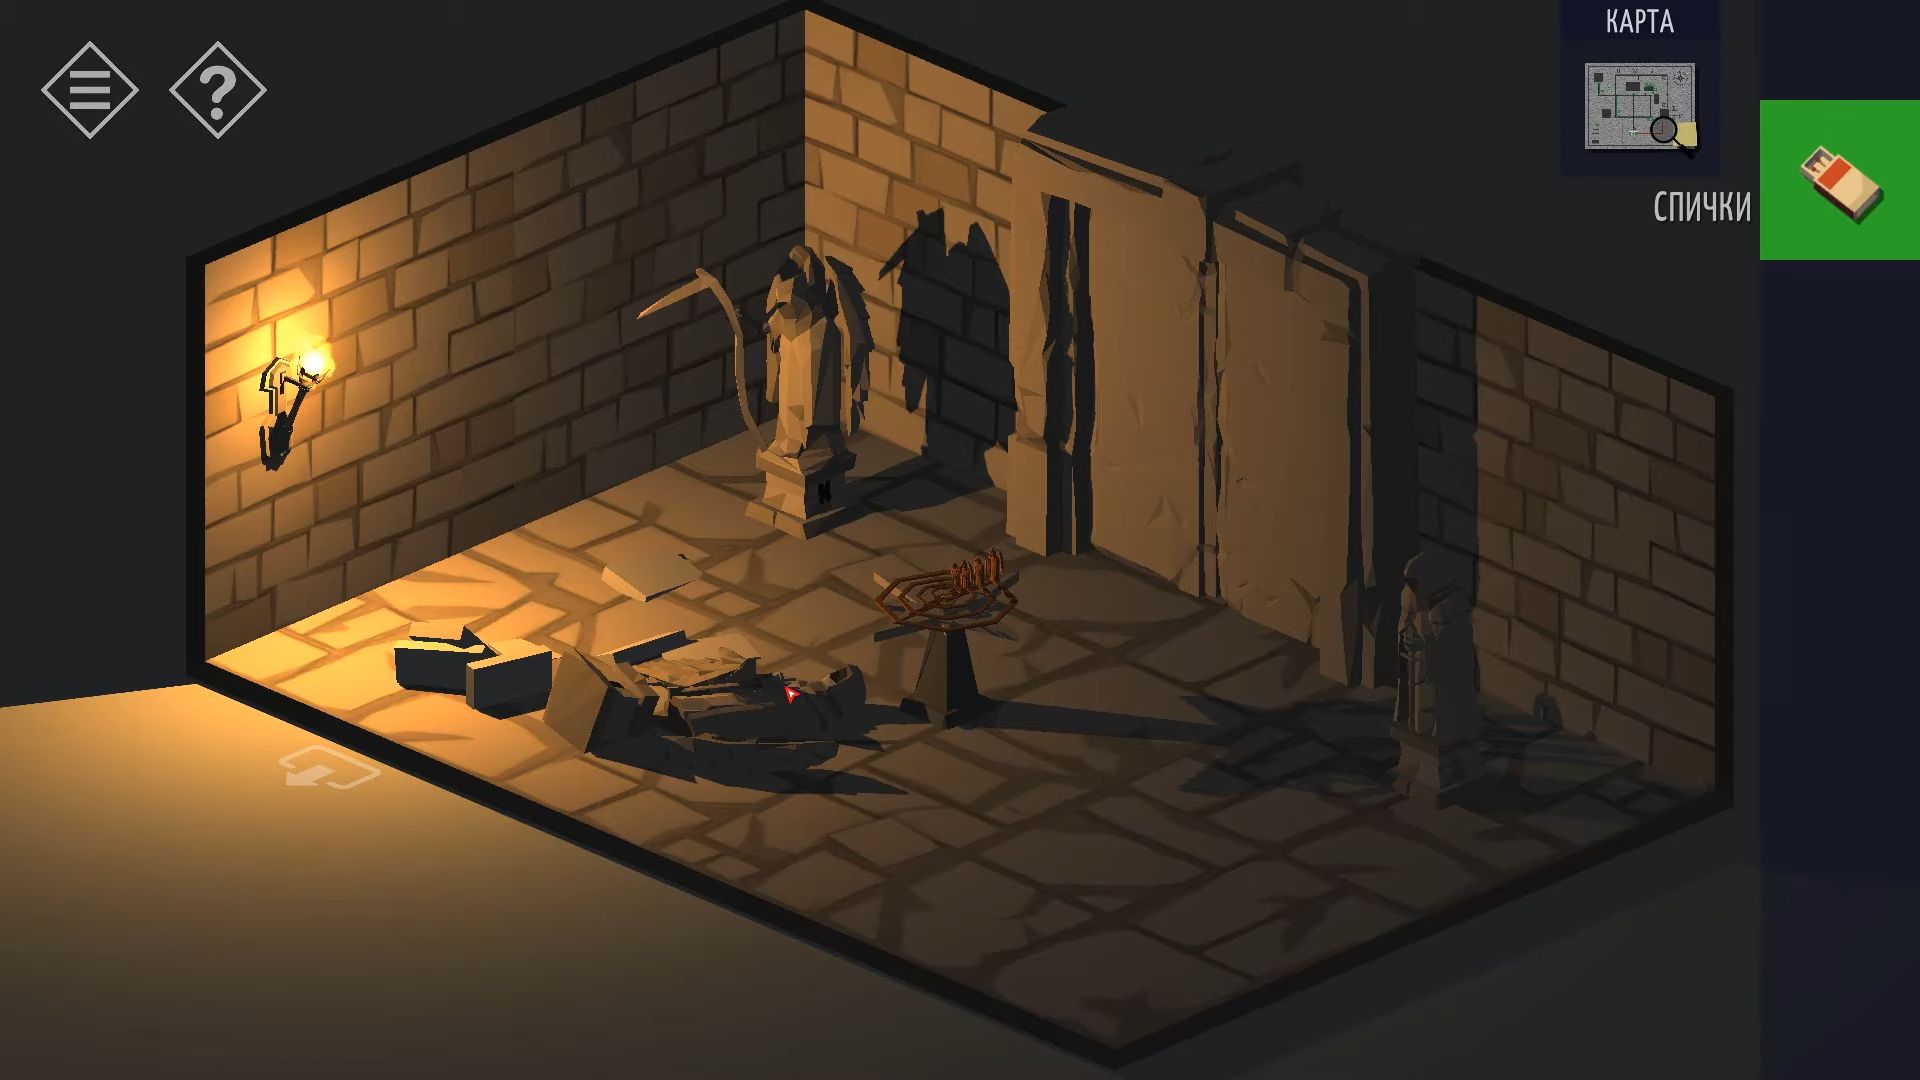
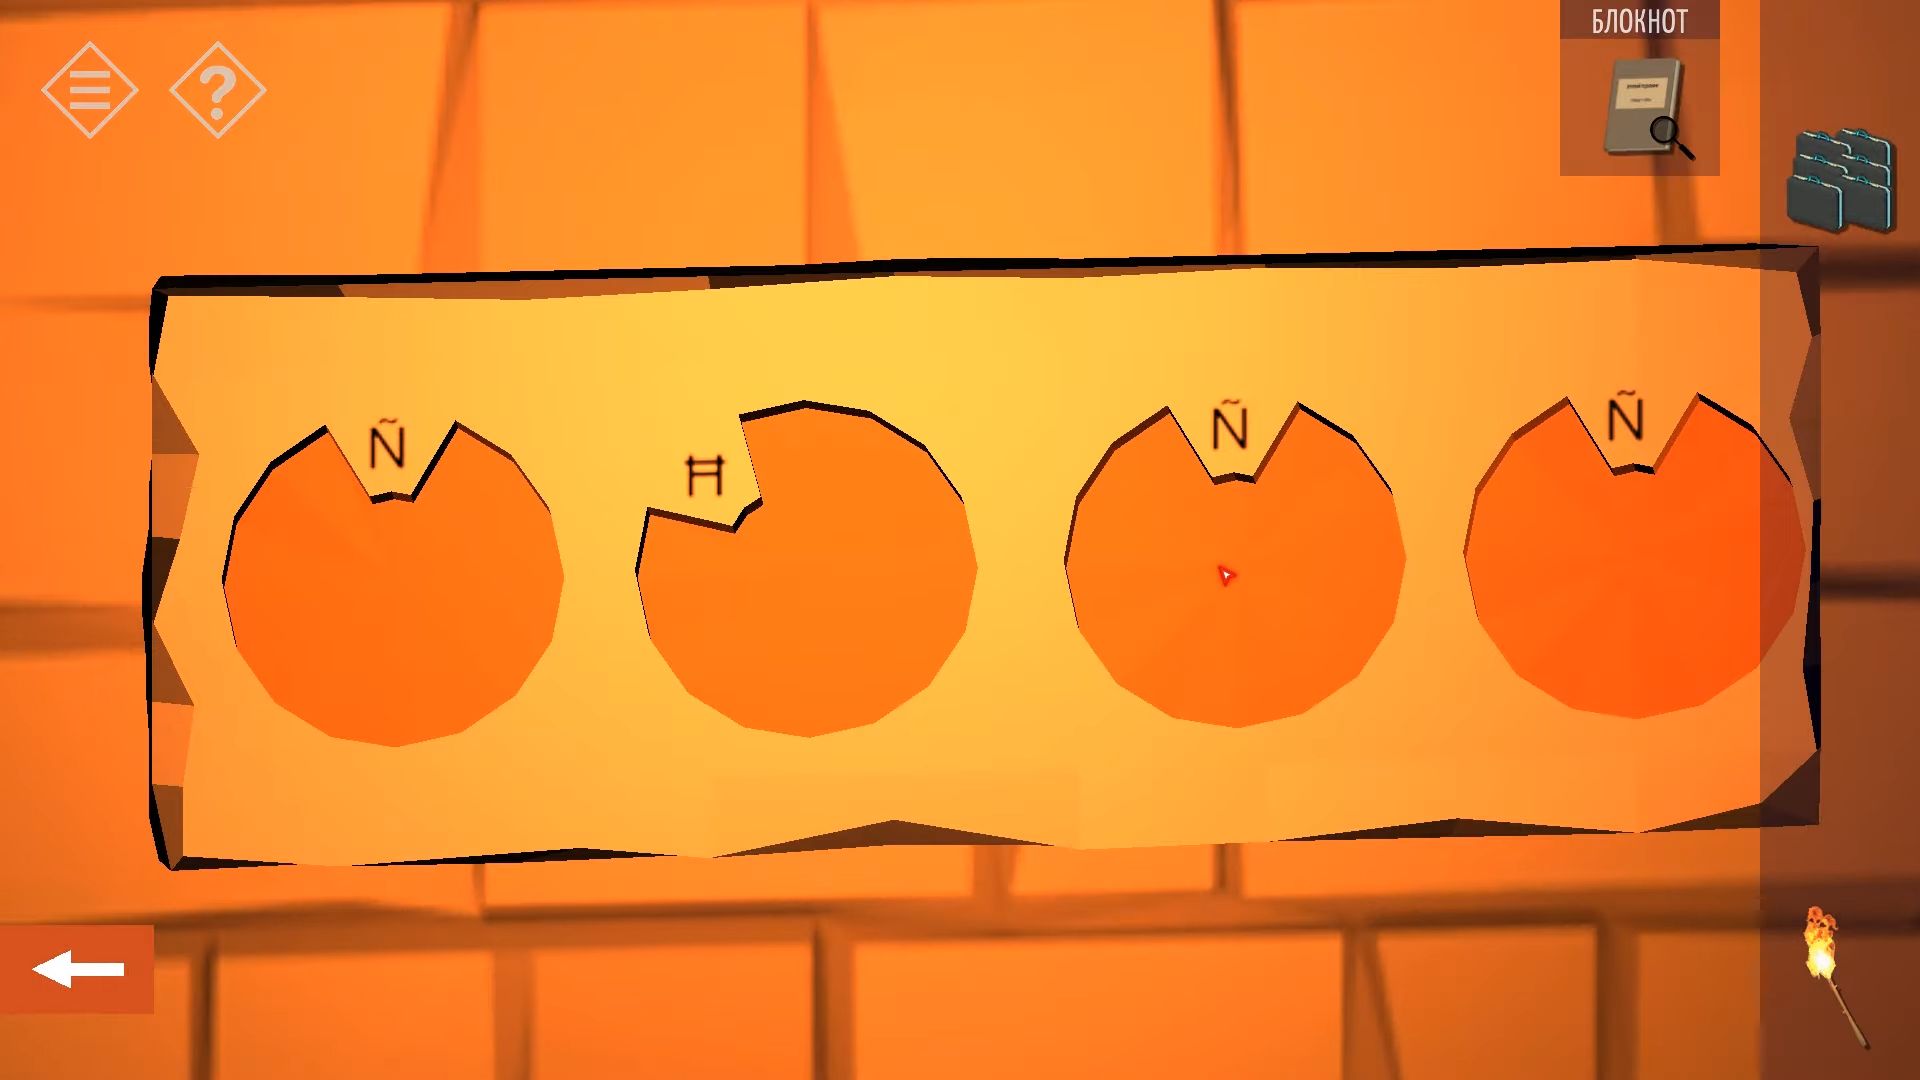
The room has a big door, with statues on each side and a small display in the middle. There’s a puzzle on the display with a compass dial consisting of four rings that can be moved. Your task is to align each ring in the correct position.
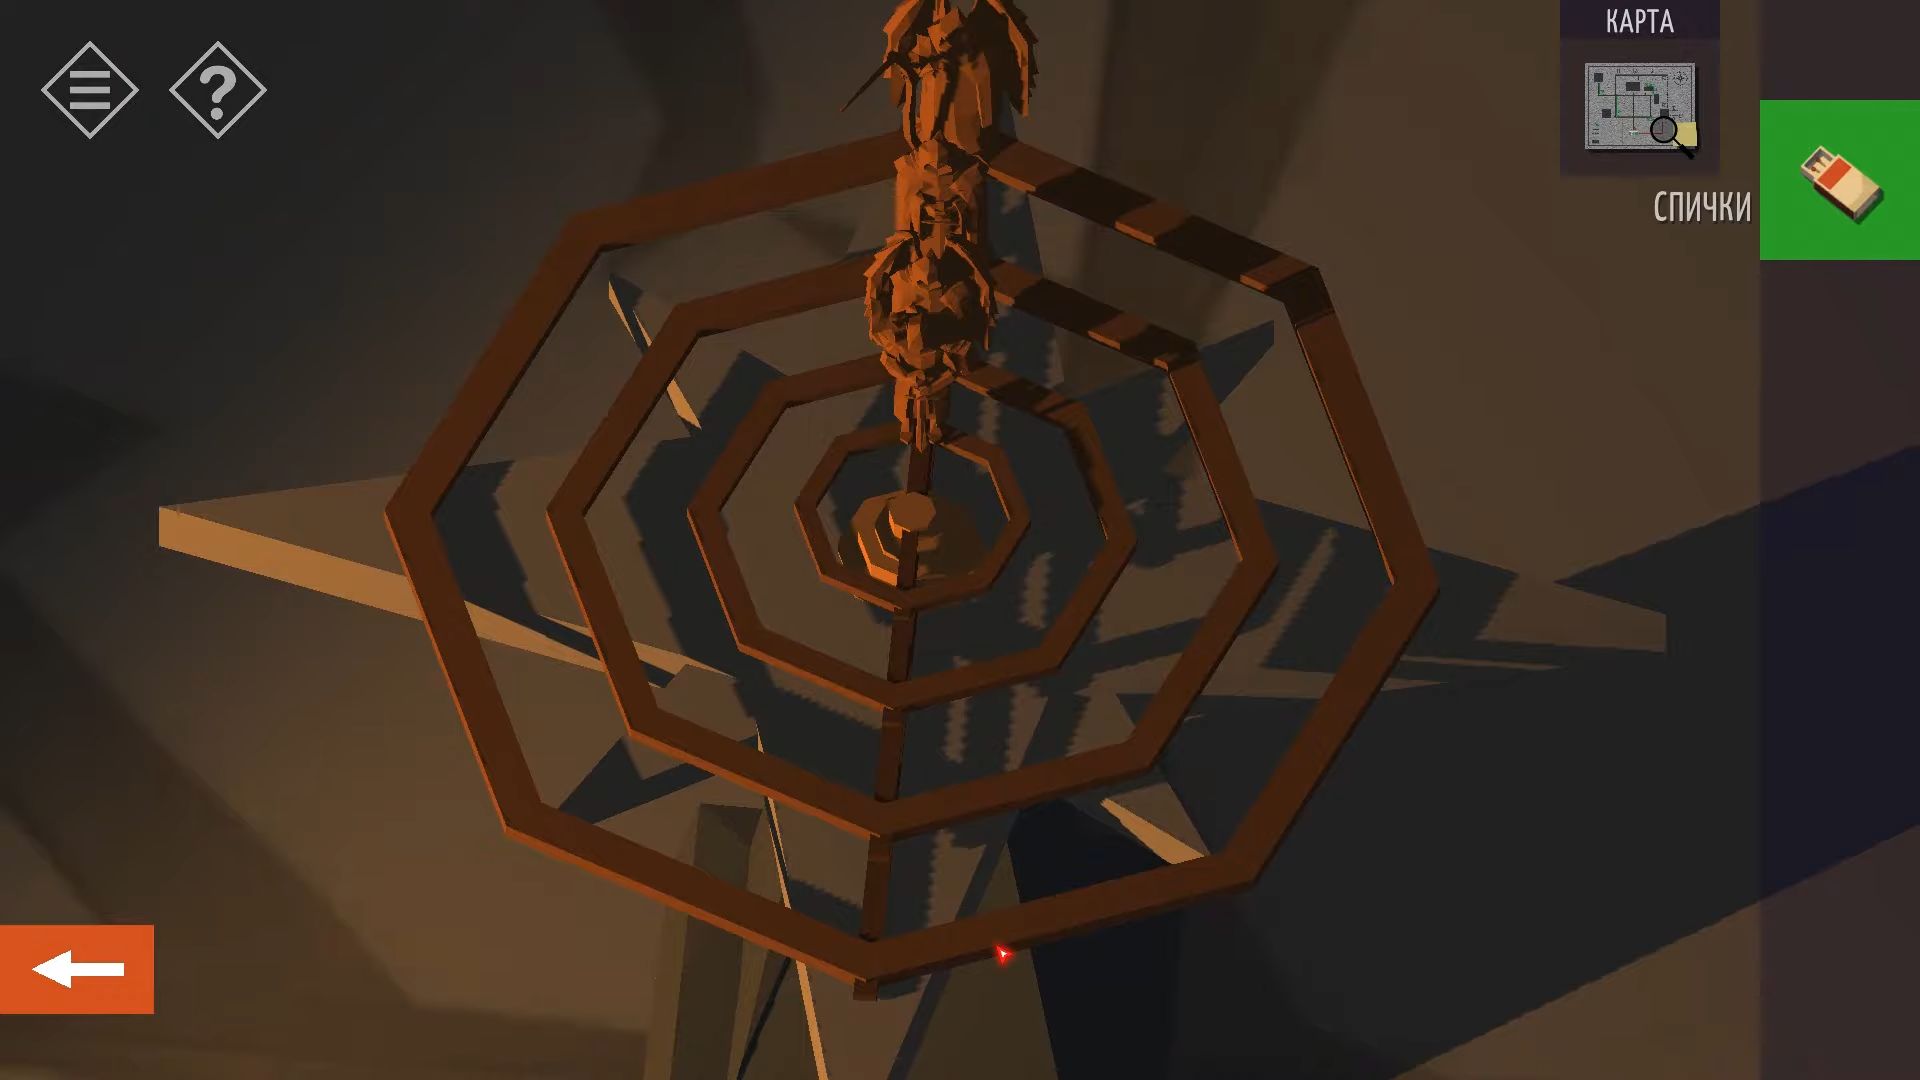
After that, look at the view of the back wall to find pieces of two more broken statues. Tap to view and rotate each of the intact statues to see letters on the base. Examine the letters beneath each statue and figure out which of the small figures on the rings match the statues.
Next, move that figure to the compass position indicated on the statue; outer ring – North, 2nd ring – West, 3rd ring – South, Inner Ring – North East. However, the dial is upside down as seen from the door. So, reverse the positions: North is at the bottom, and West is on the right. Now, you can enter another dark room. Use the matches again to light the fire in the center.

In the room, there are tables with things on them that you can look at but not take. Turn the view to the left to see a painting on the wall. Tap it to look at the small table below, which is a clue to where you should go next, and take the Pass from the table.
On the wall with the closed door, there are two holders for torches. Touch them to move and open the door. Now, you can leave back into the church basement corridor and then knock to exit the church. It’s raining and touch your car to finish the chapter.
Chapter 5
This guide covers all the steps for chapter 5 in Tiny Room Stories: Town Mystery. You have been provided clear instructions along with pictures and codes that you can see if you require assistance.
Olympus Project
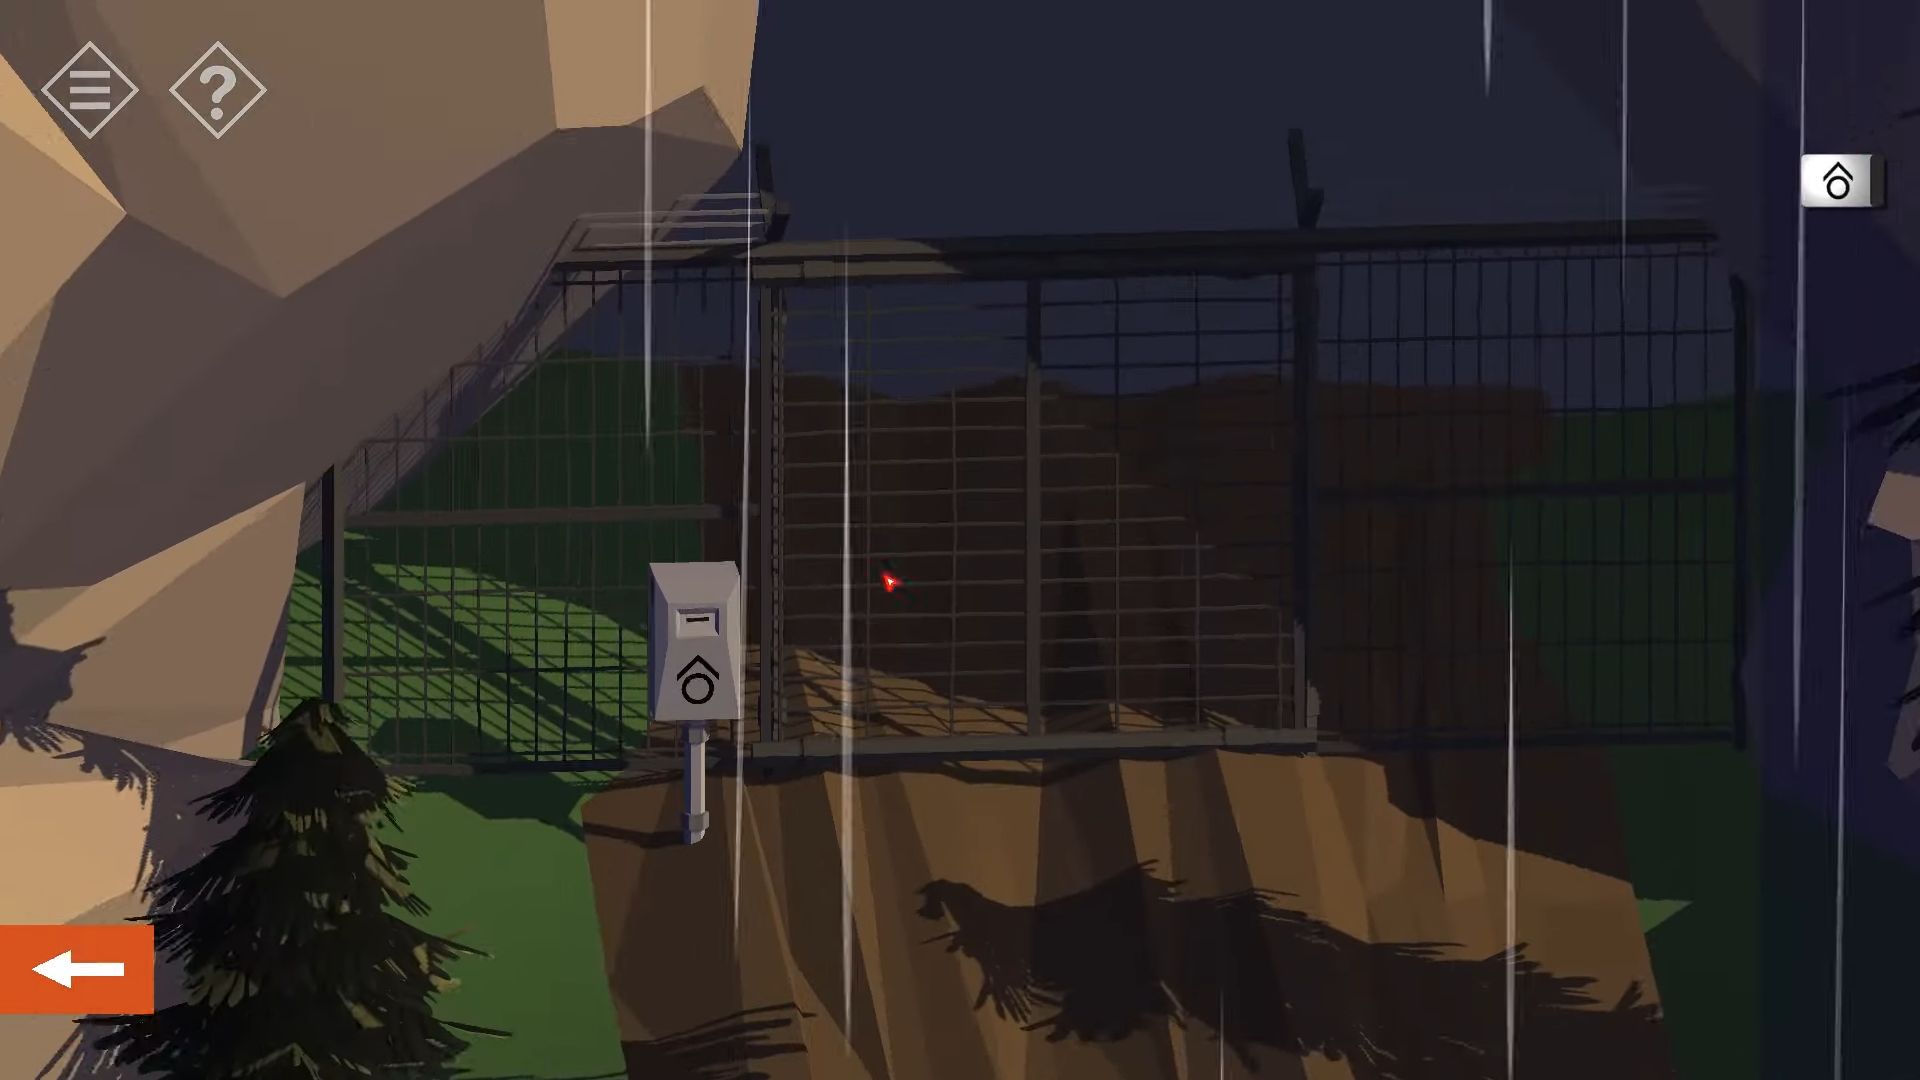
In the hidden space beneath the church, you will discover a picture of Mount Redcliff and different pieces of a gadget. There’s also a closed-off path and a gatehouse. Tap the gatehouse door to unlock it and then enter.
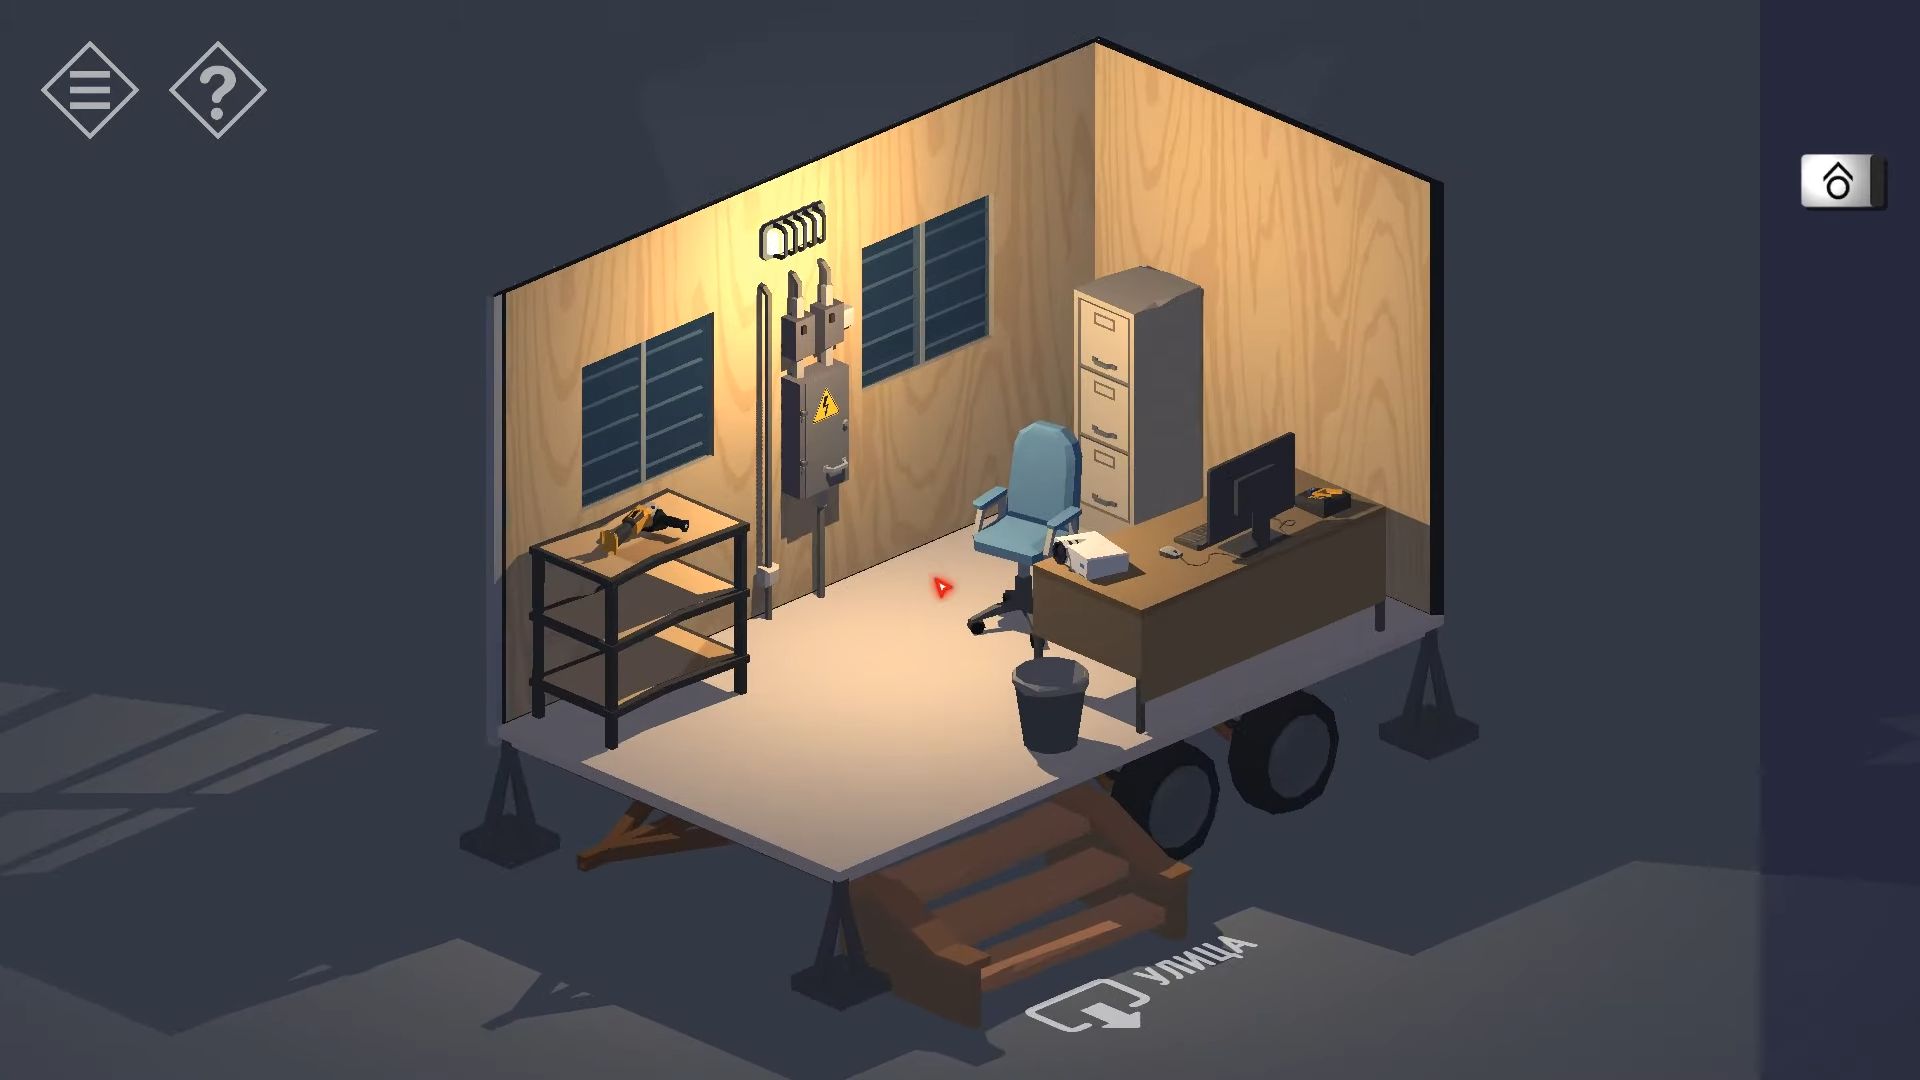
Once you get indoors, tap to collect the angle grinder from the shelves which needs a disc and a battery. Check the tall cabinet on the wall, open its second drawer, and grab some pliers. After that, look at the bin near the desk, knock on it, and collect 2 papers with clues.
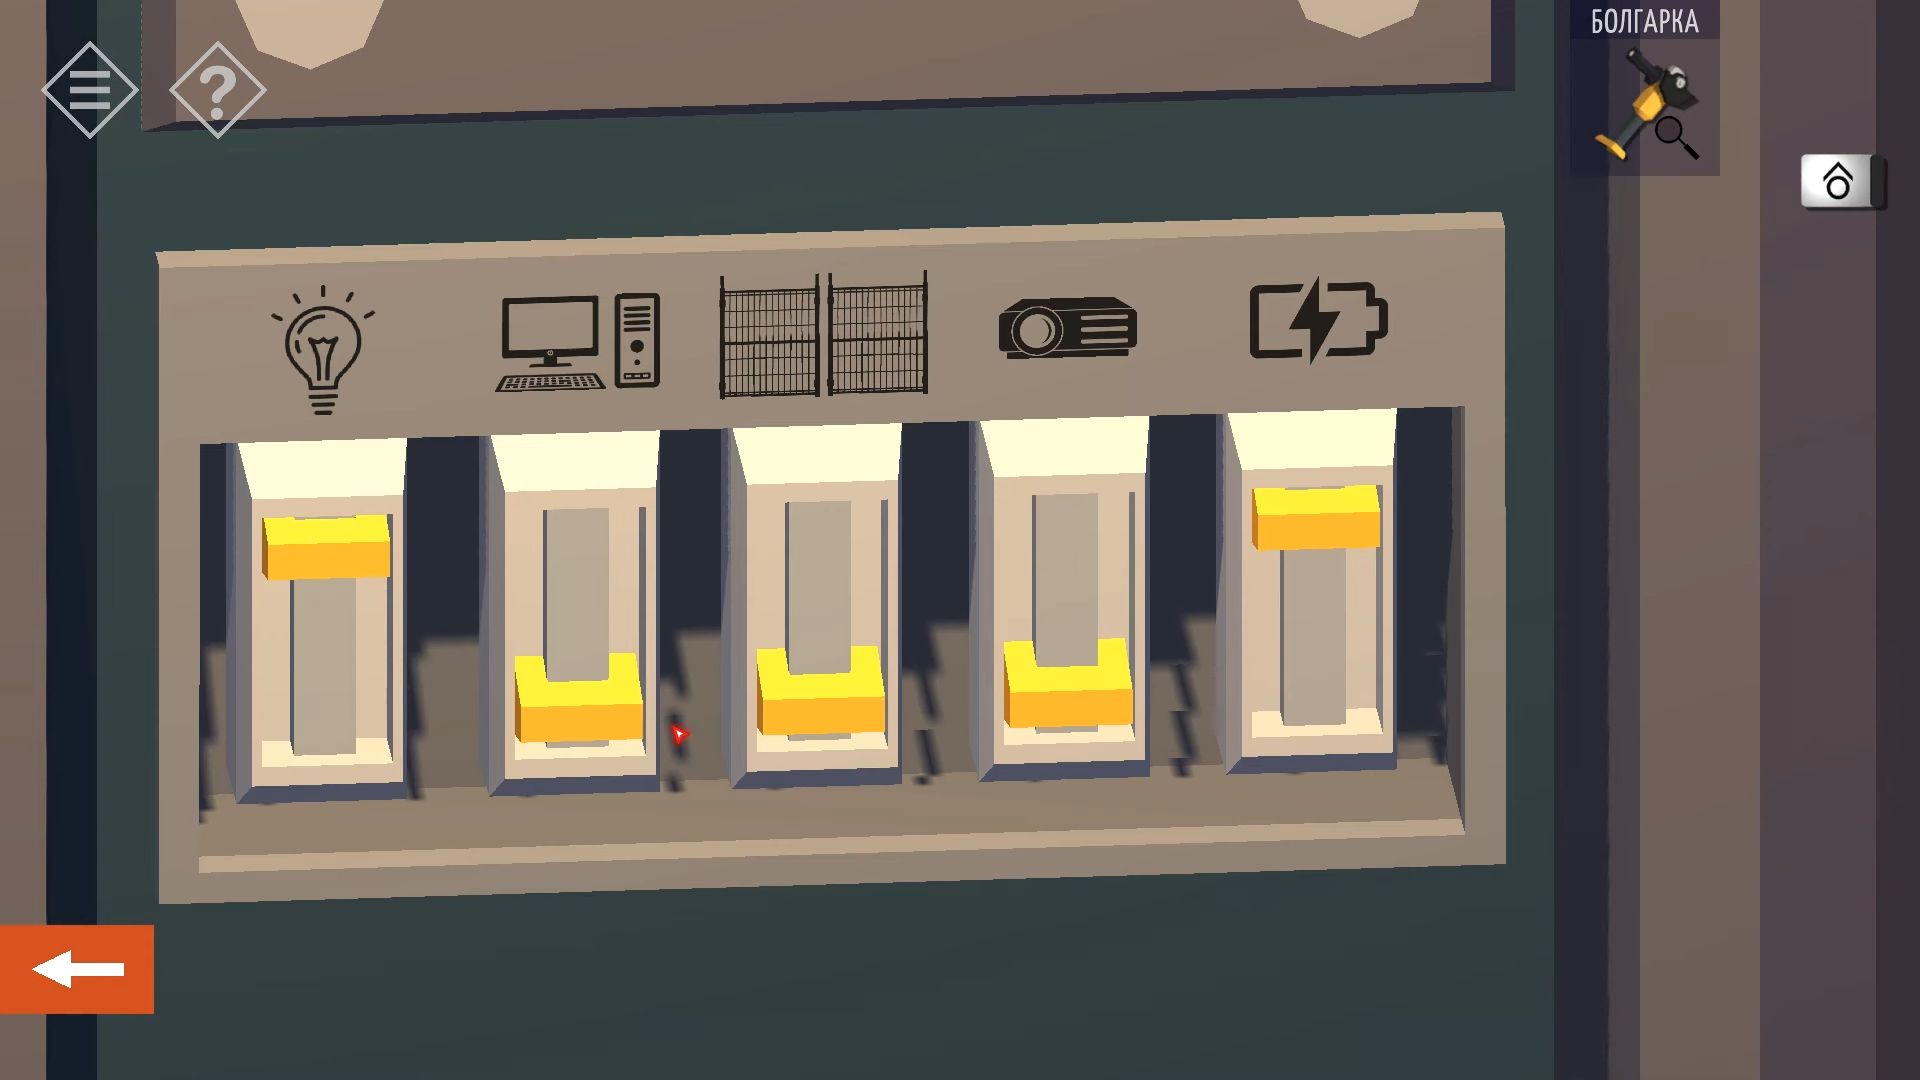
Now, check the power box on the back wall, it’s locked. Use the pliers to take off the hinges and open it, there will be 5 power switches. Turn them all on, but be careful because turning some on might make others turn off. Then figure out the correct order to turn them on.
After finishing, look at the desk and tap the projector on the right to switch it on. Now, a picture will be projected onto the whiteboard, and you need to touch it to gather the notes about passwords.
The picture hints at combining the image and paper clues to figure out the computer password. The image displays a sequence of shapes from the biggest to the smallest. Use these shapes to get numbers from the papers (750718). Use the computer’s Control option to unlock the gate, then go back to your car and knock the game to move forward.
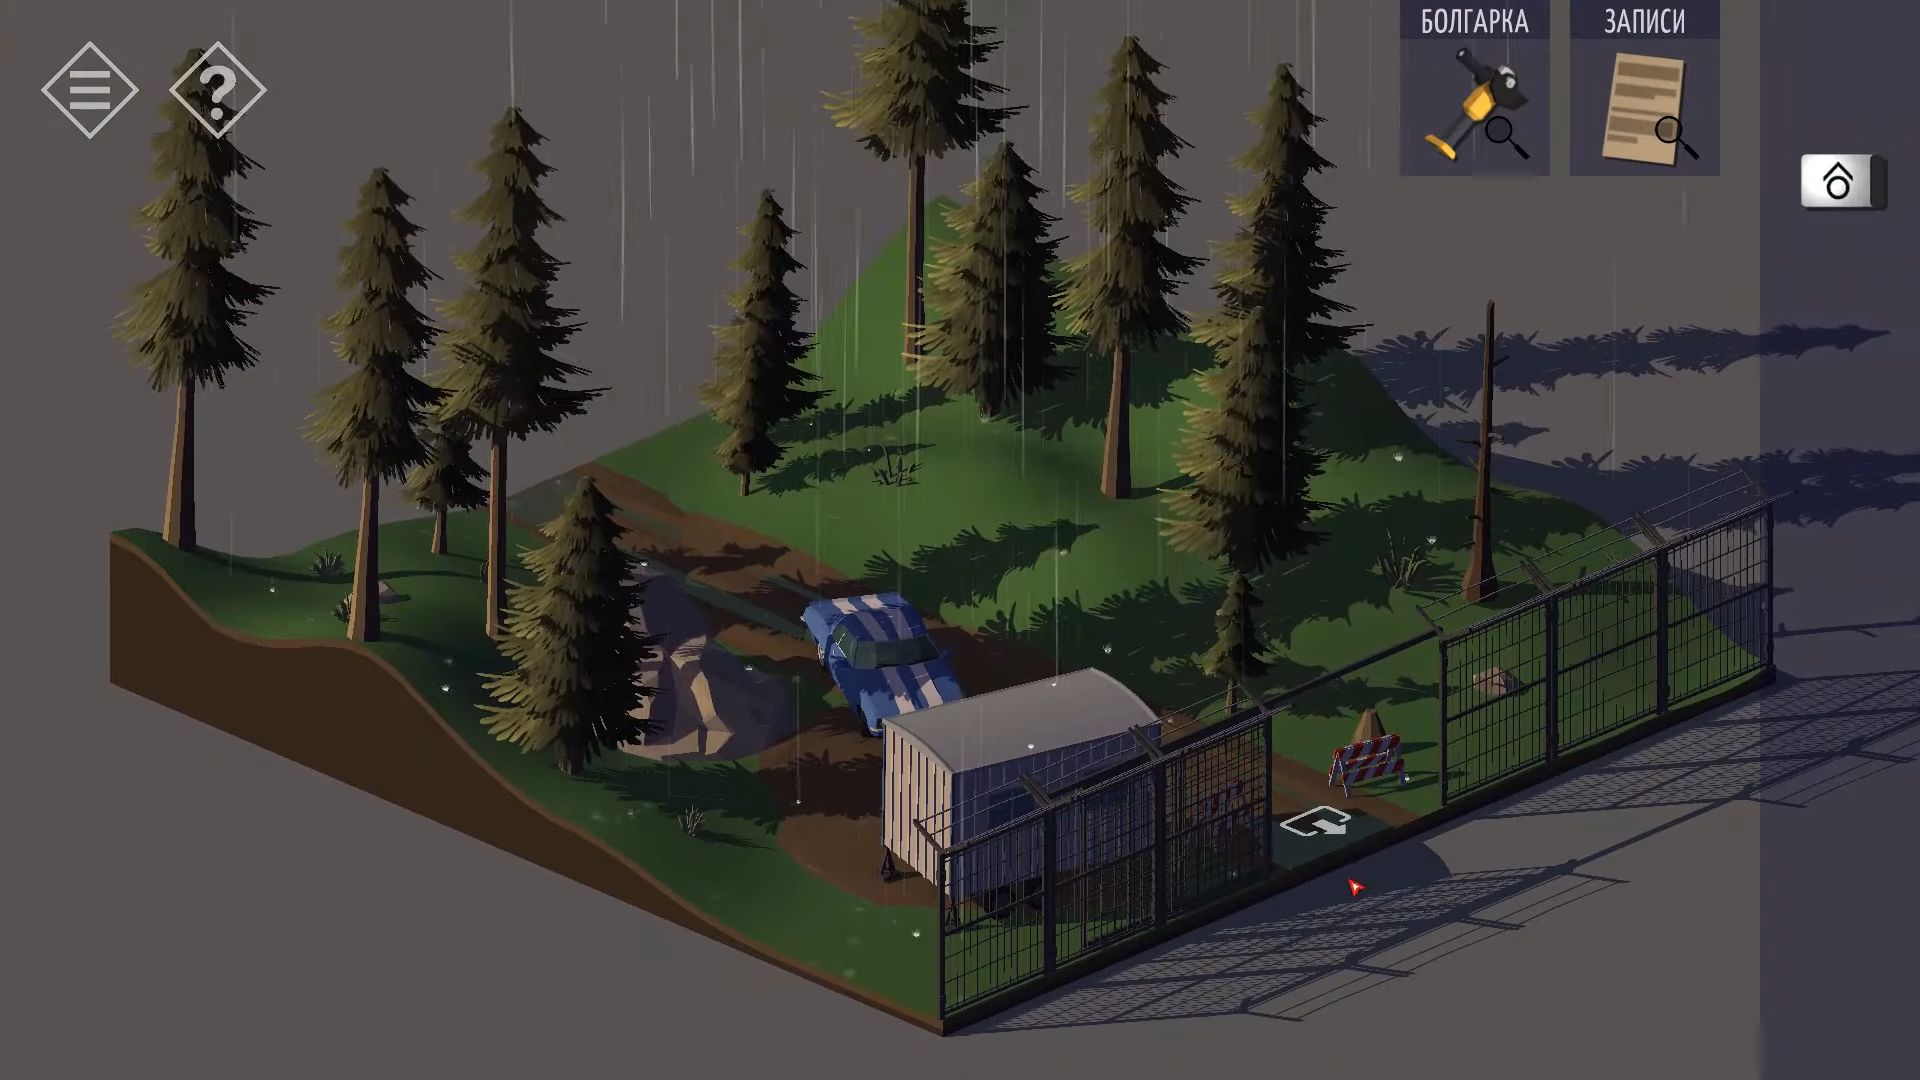
In the next part, there’s a table on the right side near a blue cover. You have to look at it, then tap to open the toolbox on the left and get 3 Jumpers from there. There’s also an open truck, but you can’t pick up anything from there at the moment. Proceed to the next section.
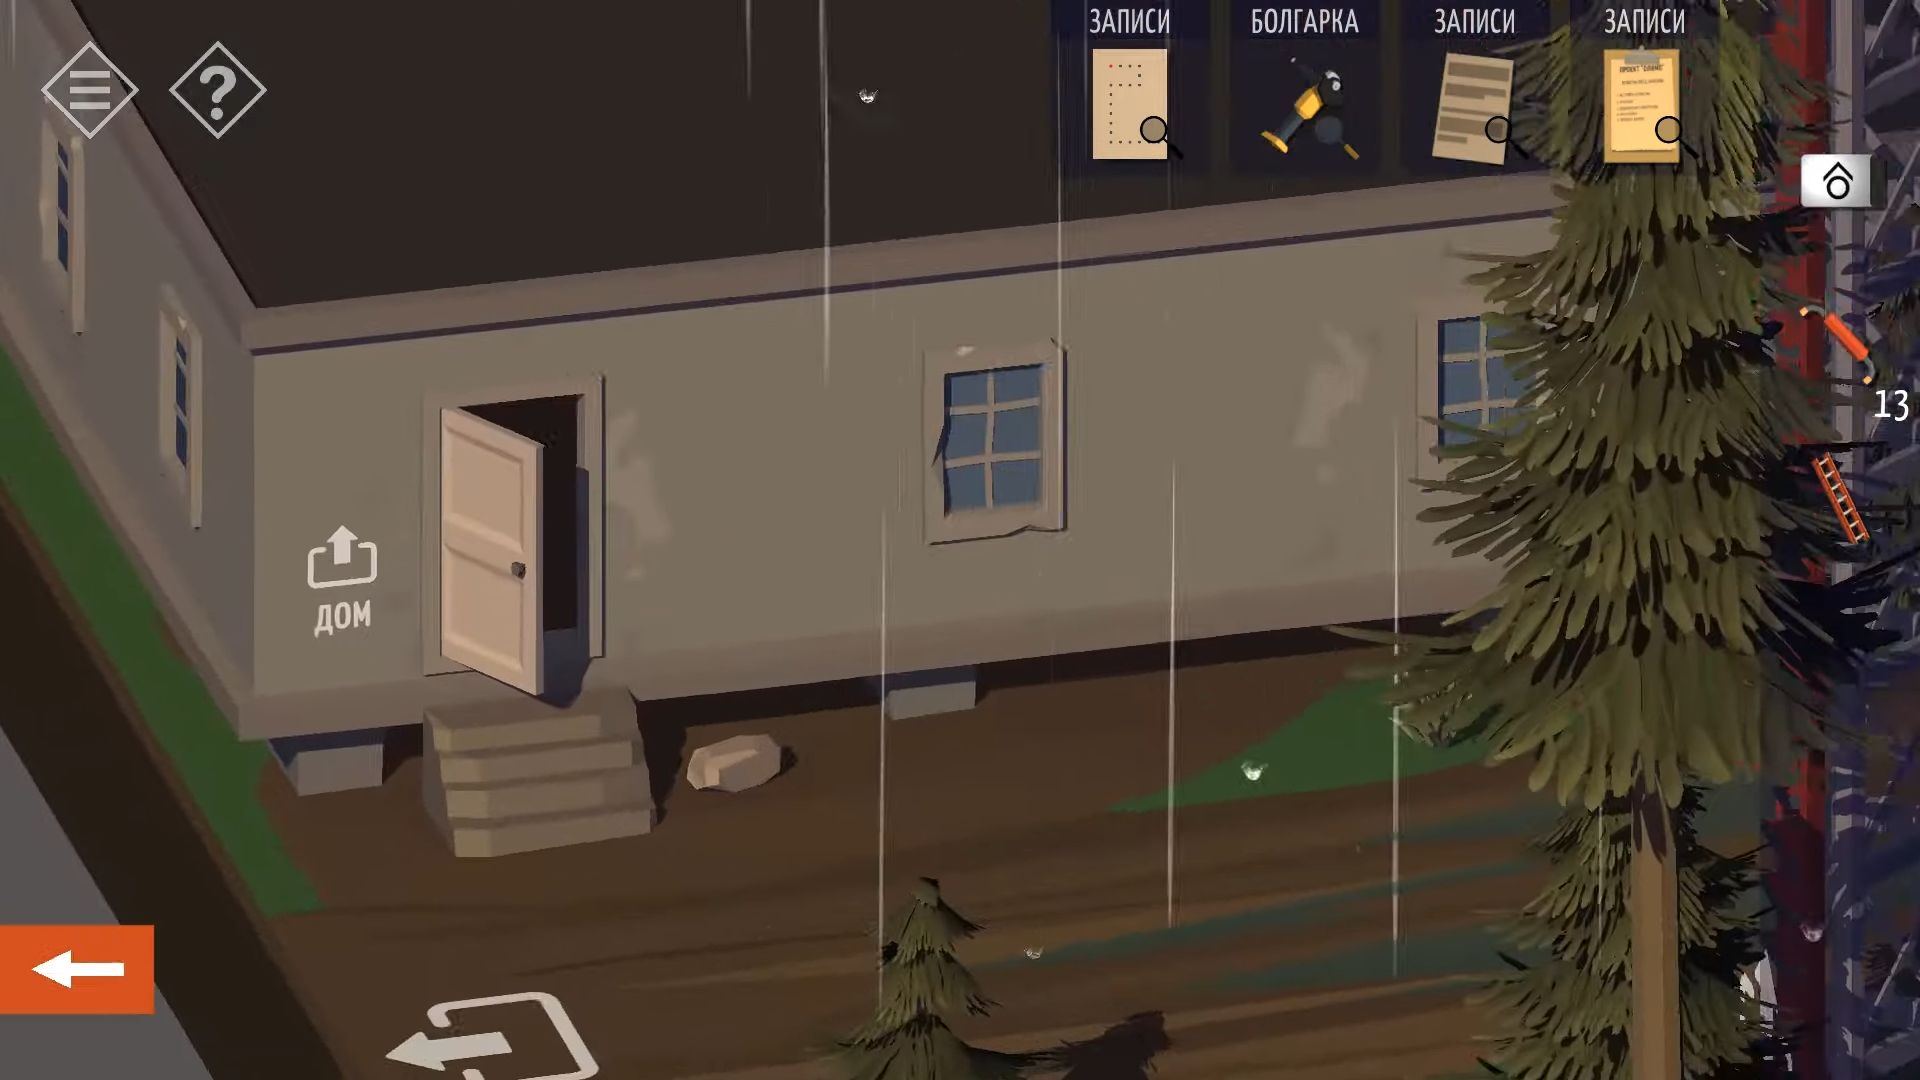
In the third place, there’s a locked building. Tap the entrance to take a closer look, then knock the rock on the ground. Touch again to shift it and discover a key. Use this key to unlock the door and enter. Inside, there are four additional doors.
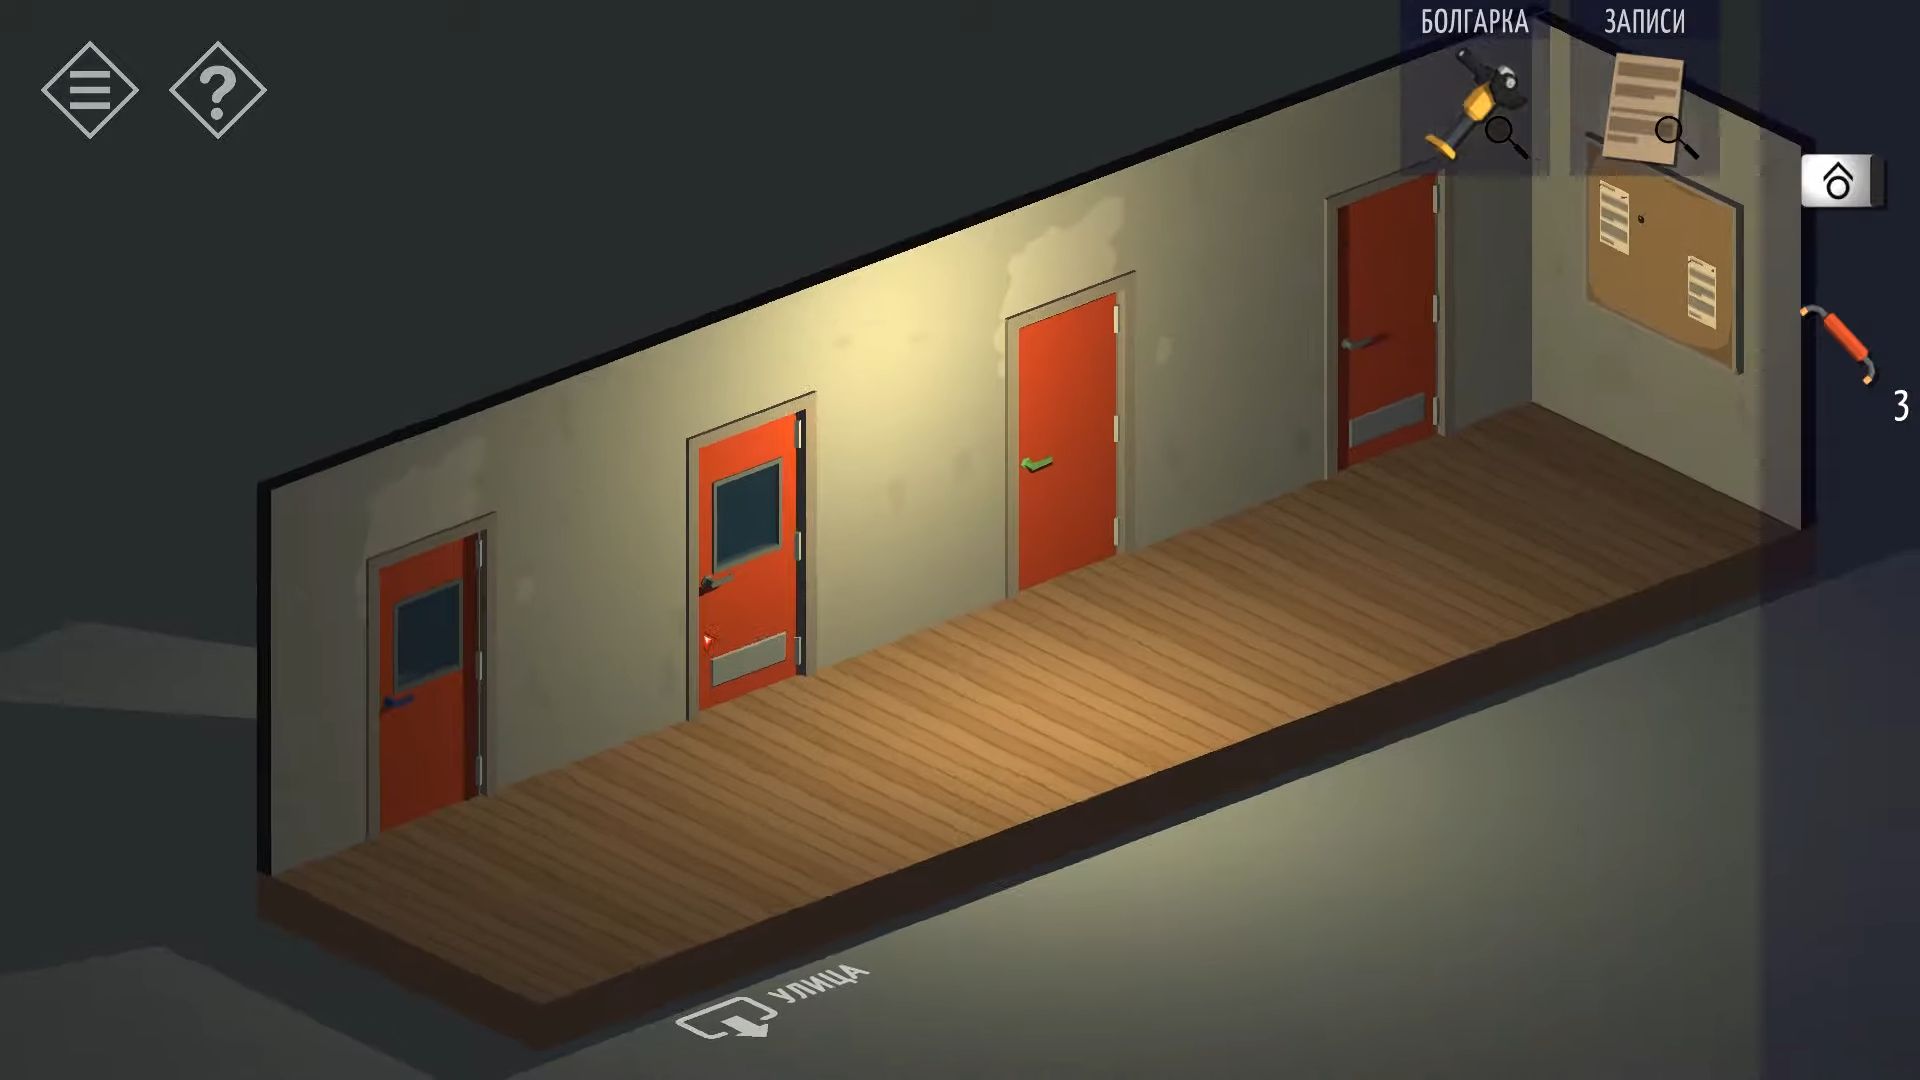
At the notice board’s end, there’s a message to Harry and a Black Key. Pick it up and there’s also another note advising on strong passwords. Look for boxes on the wall opposite the doors and tap the top one to get 3 more Jumpers.
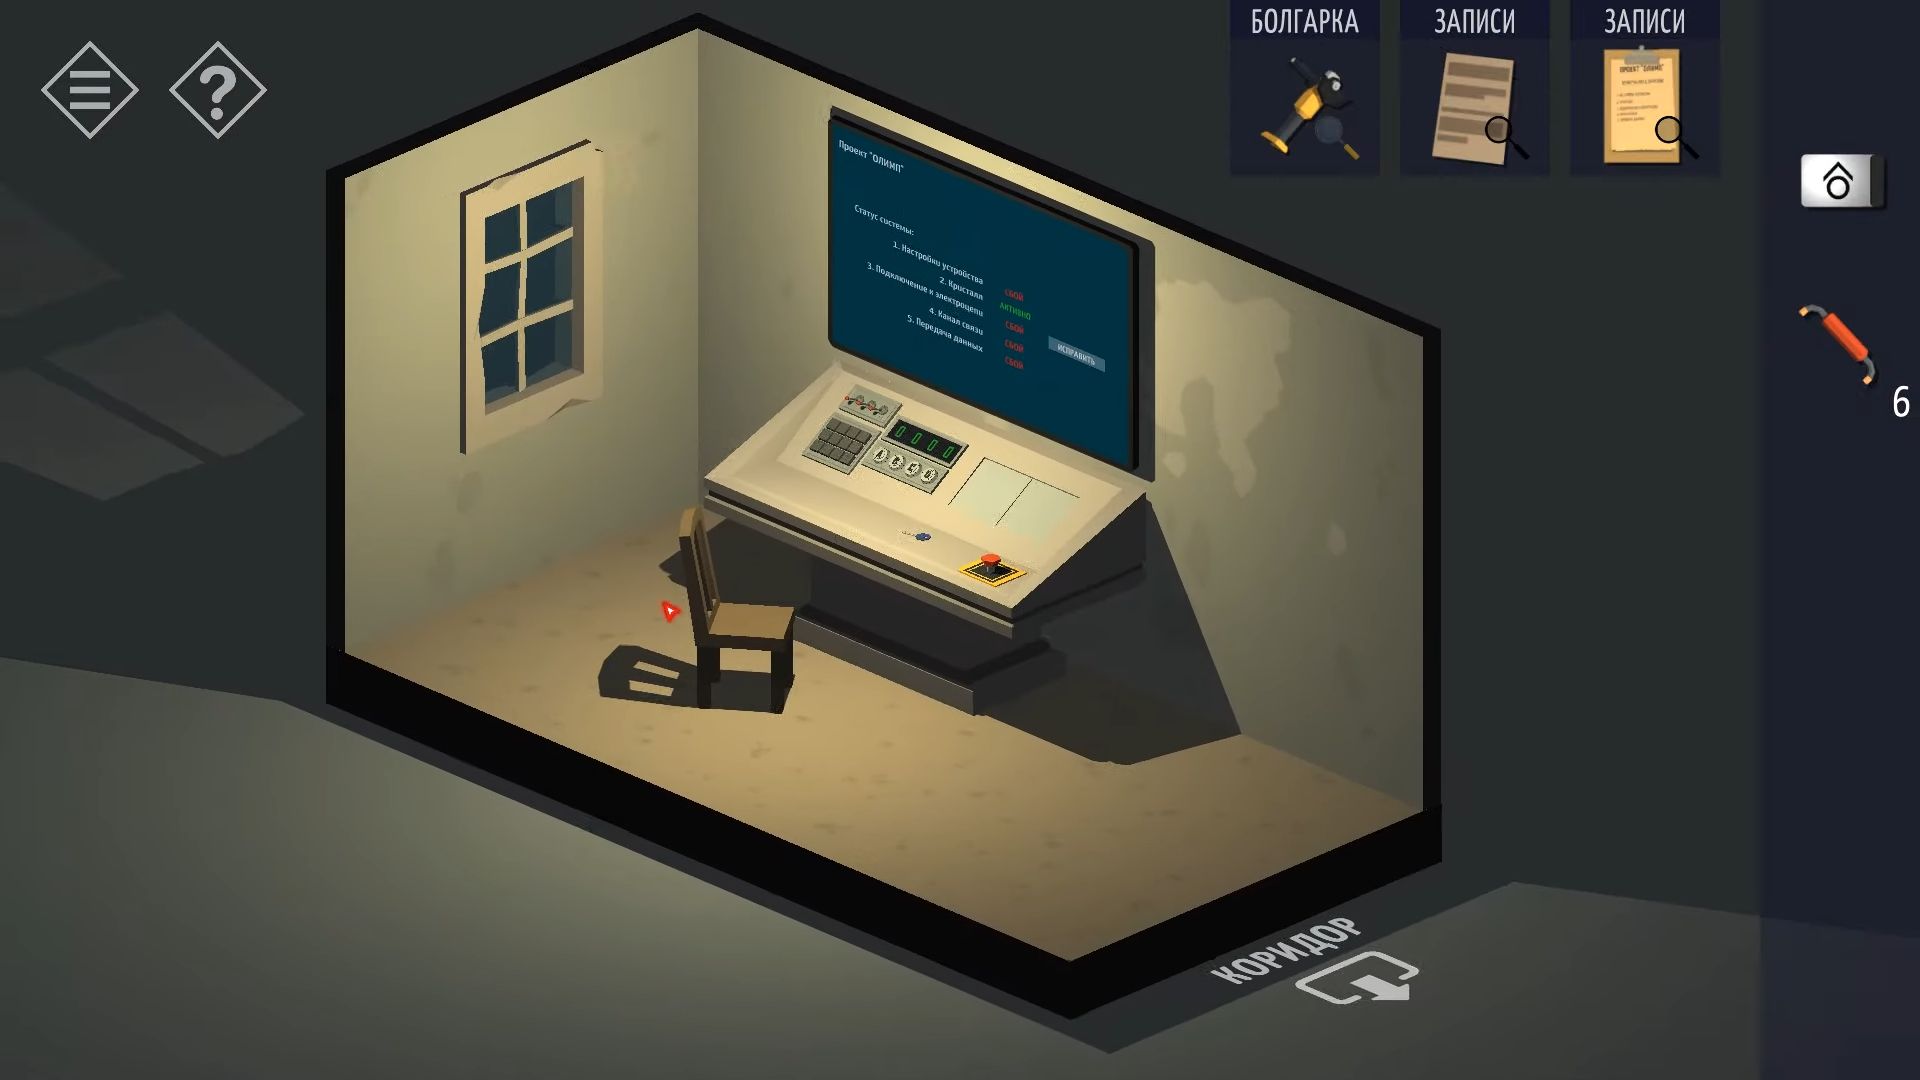
Also, on the left, find a clipboard with project details to collect. The second door will open. Inside the room, a TV screen and a console mentioning Project OLYMPUS. On the console, there’s a Blue Key to collect.
Turn your view to locate 2 shelf units on the back wall with boxes. Examine all the boxes to discover 4 additional Jumpers. Now, you should have a total of 10 Jumpers. Go back to the corridor and use the blue key to unlock the first door. Inside this room, there are bookshelves on one wall and cupboards and a desk on the opposite wall.

Start by picking up the ladder and tap the grey cupboards to see that they are locked with a combination. Turn to look at the shelves and touch to zoom in on each. Collect 3 more jumpers on the right shelf and knock to shift the books, revealing the combination for the cupboard (6 1 3 8).
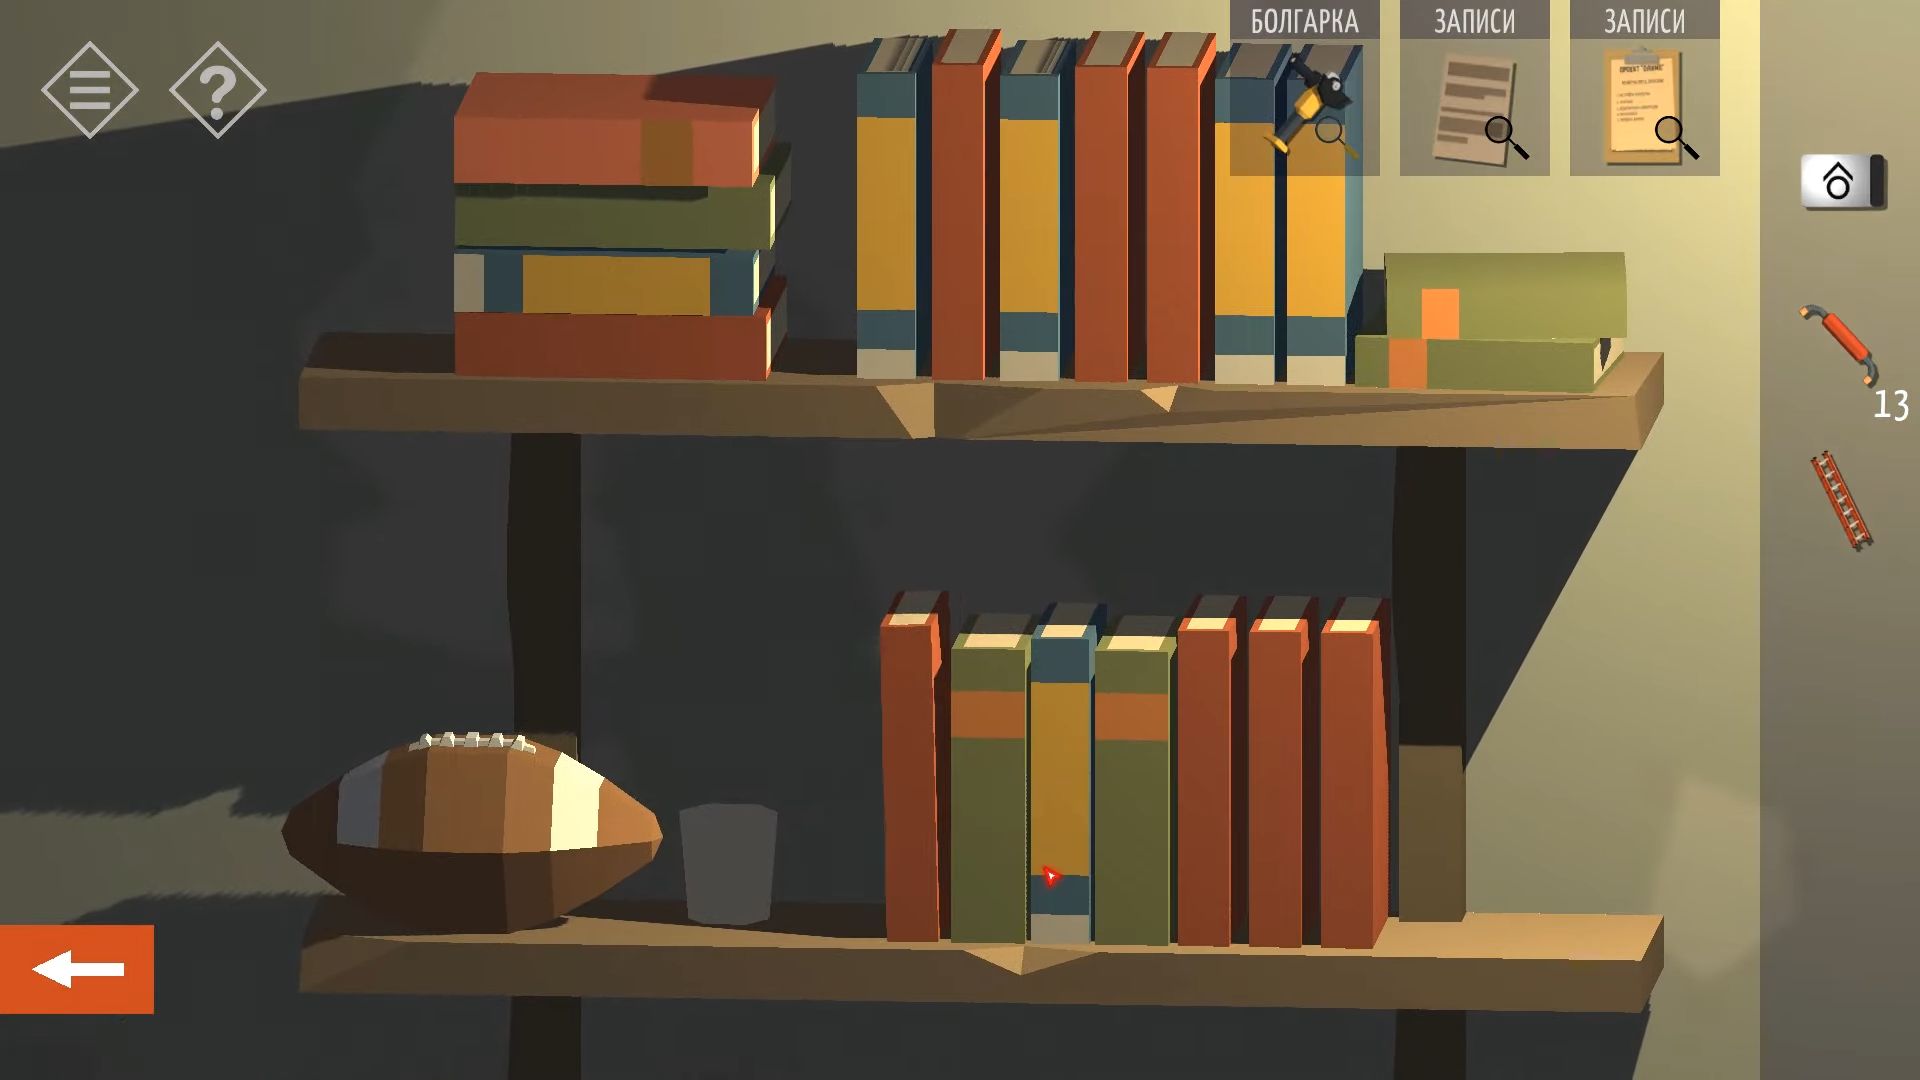
Unlock the cupboard to find a piece of paper with a series of dots on it. Take this, go back outside, and head to the second area with the truck. Get into the truck and use the black key to open the case, allowing you to collect a battery.
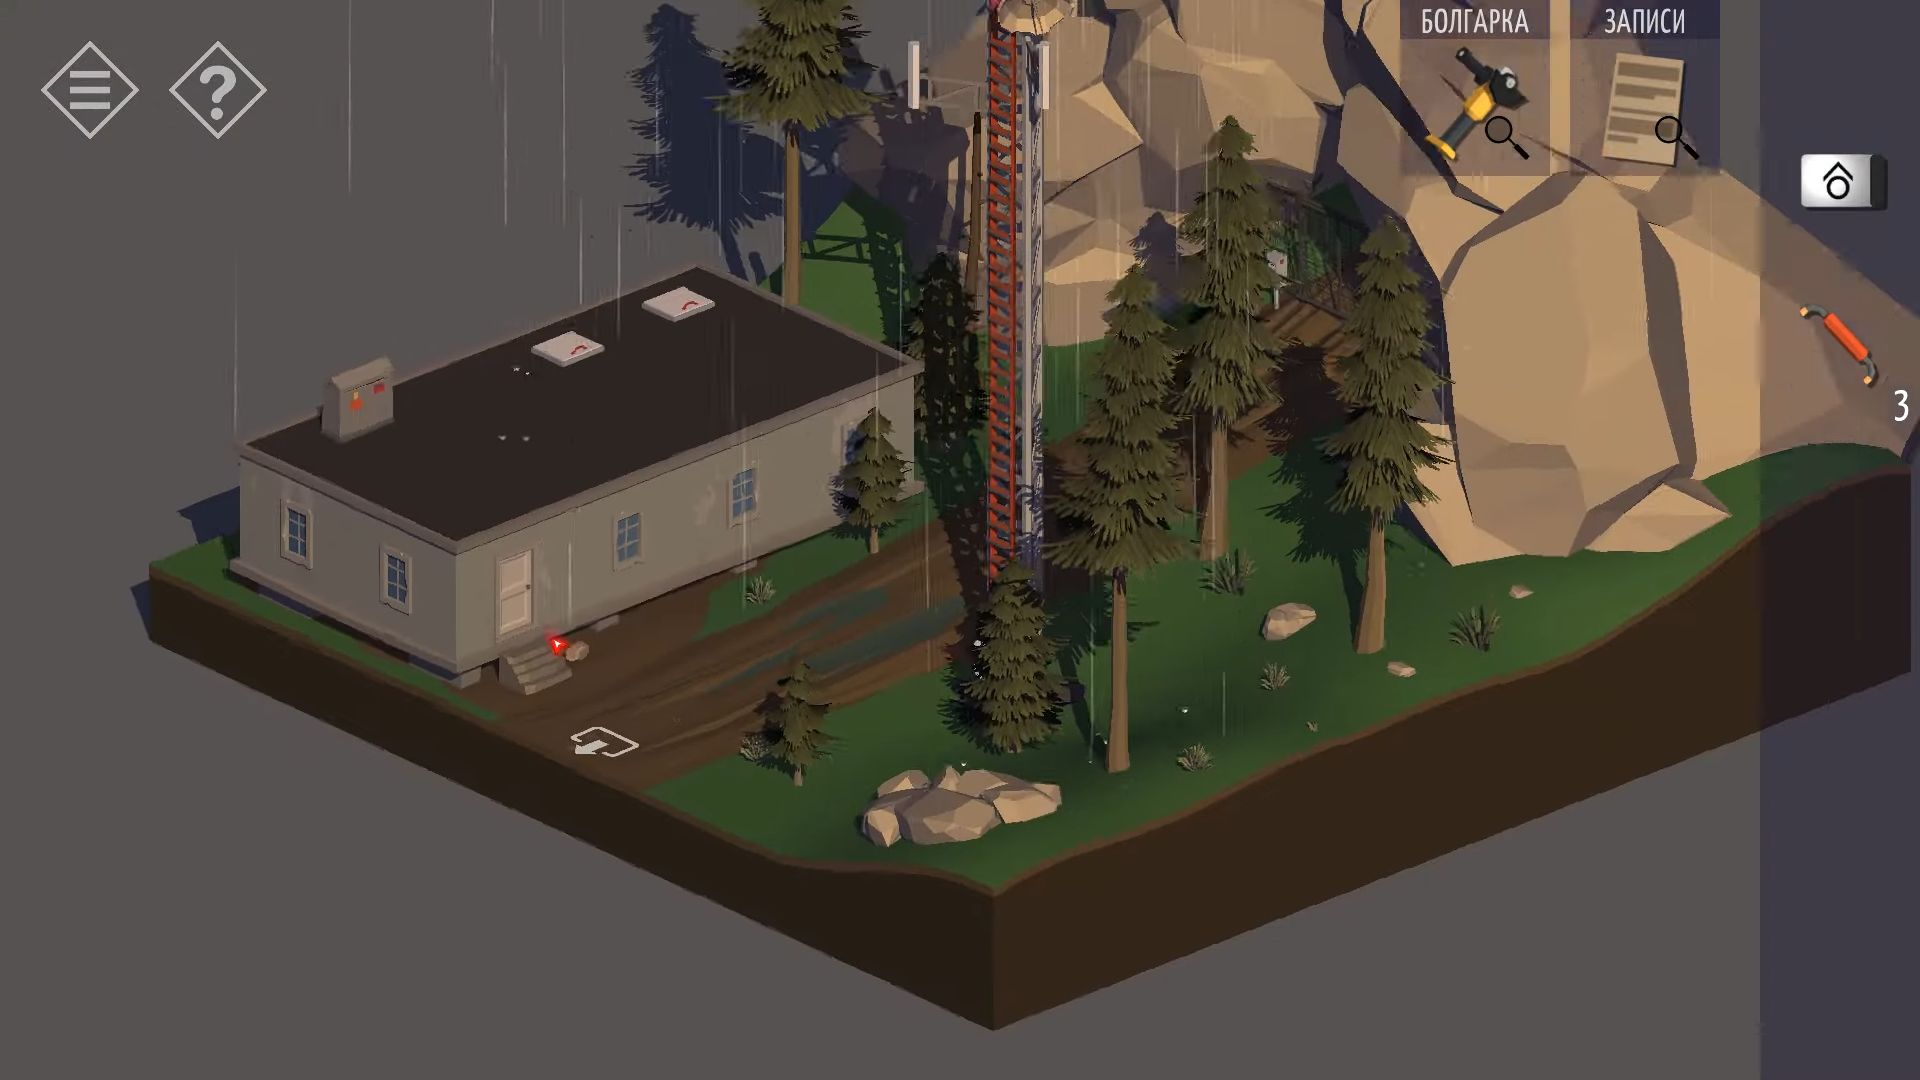
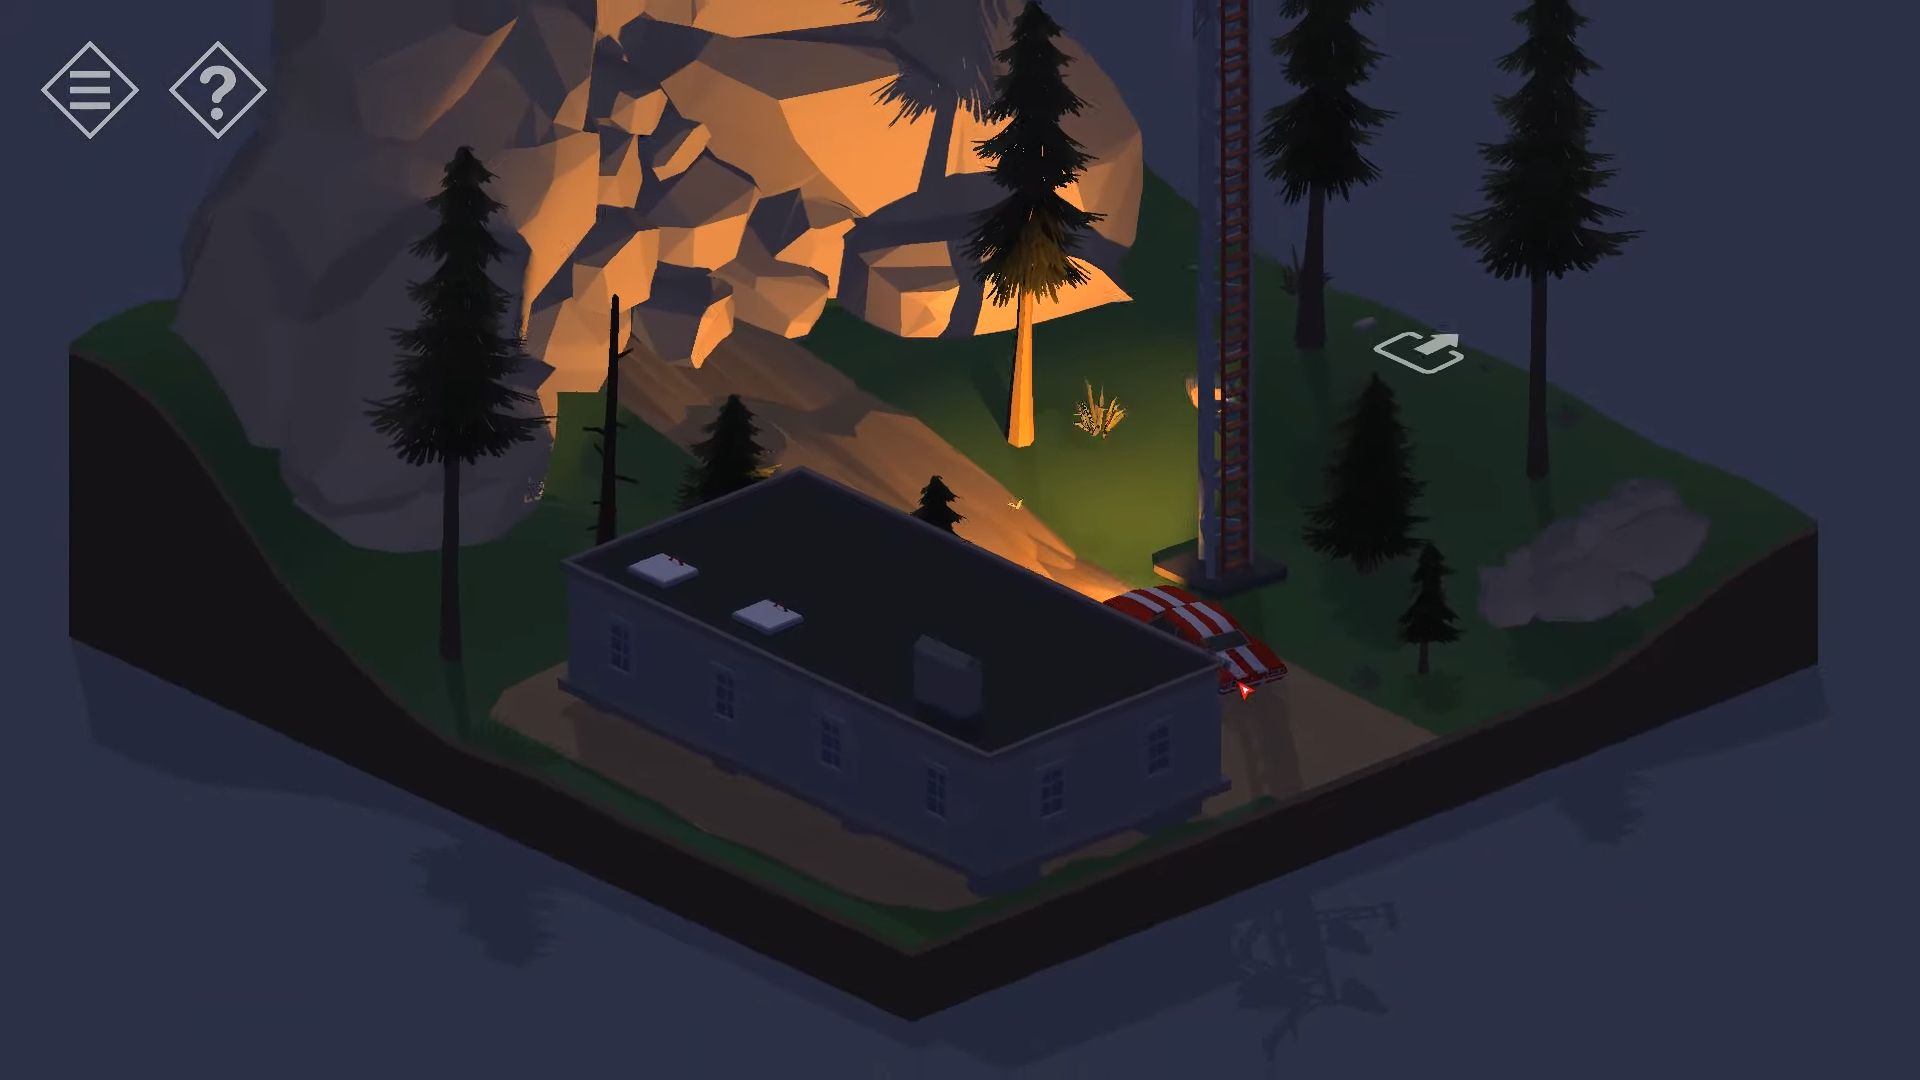
Next, return to the first area with the gatehouse. On the desk, there’s a battery charger. Put the battery in it and press the start-up button. After a few seconds, the battery will be charged and you need to take it. Now, navigate back to the third area, tap near the building’s door, and use the ladder to position it against the side near the window. This way, you can access the roof.
After reaching the roof, tap the skylight at the back right and go back down into the building. Touch the boxes on the floor to shift them and gather a green key. Turn your view to see shelves and cupboards on the opposite wall.
Examine the boxes on the shelves to find 4 more jumpers and check inside the cupboards to collect another cut-off wheel. Now, leave the room through the door to return to the corridor, and use the green key to unlock the third door with the green handle. Inside this room, you’ll find beds, a desk, and a cupboard.
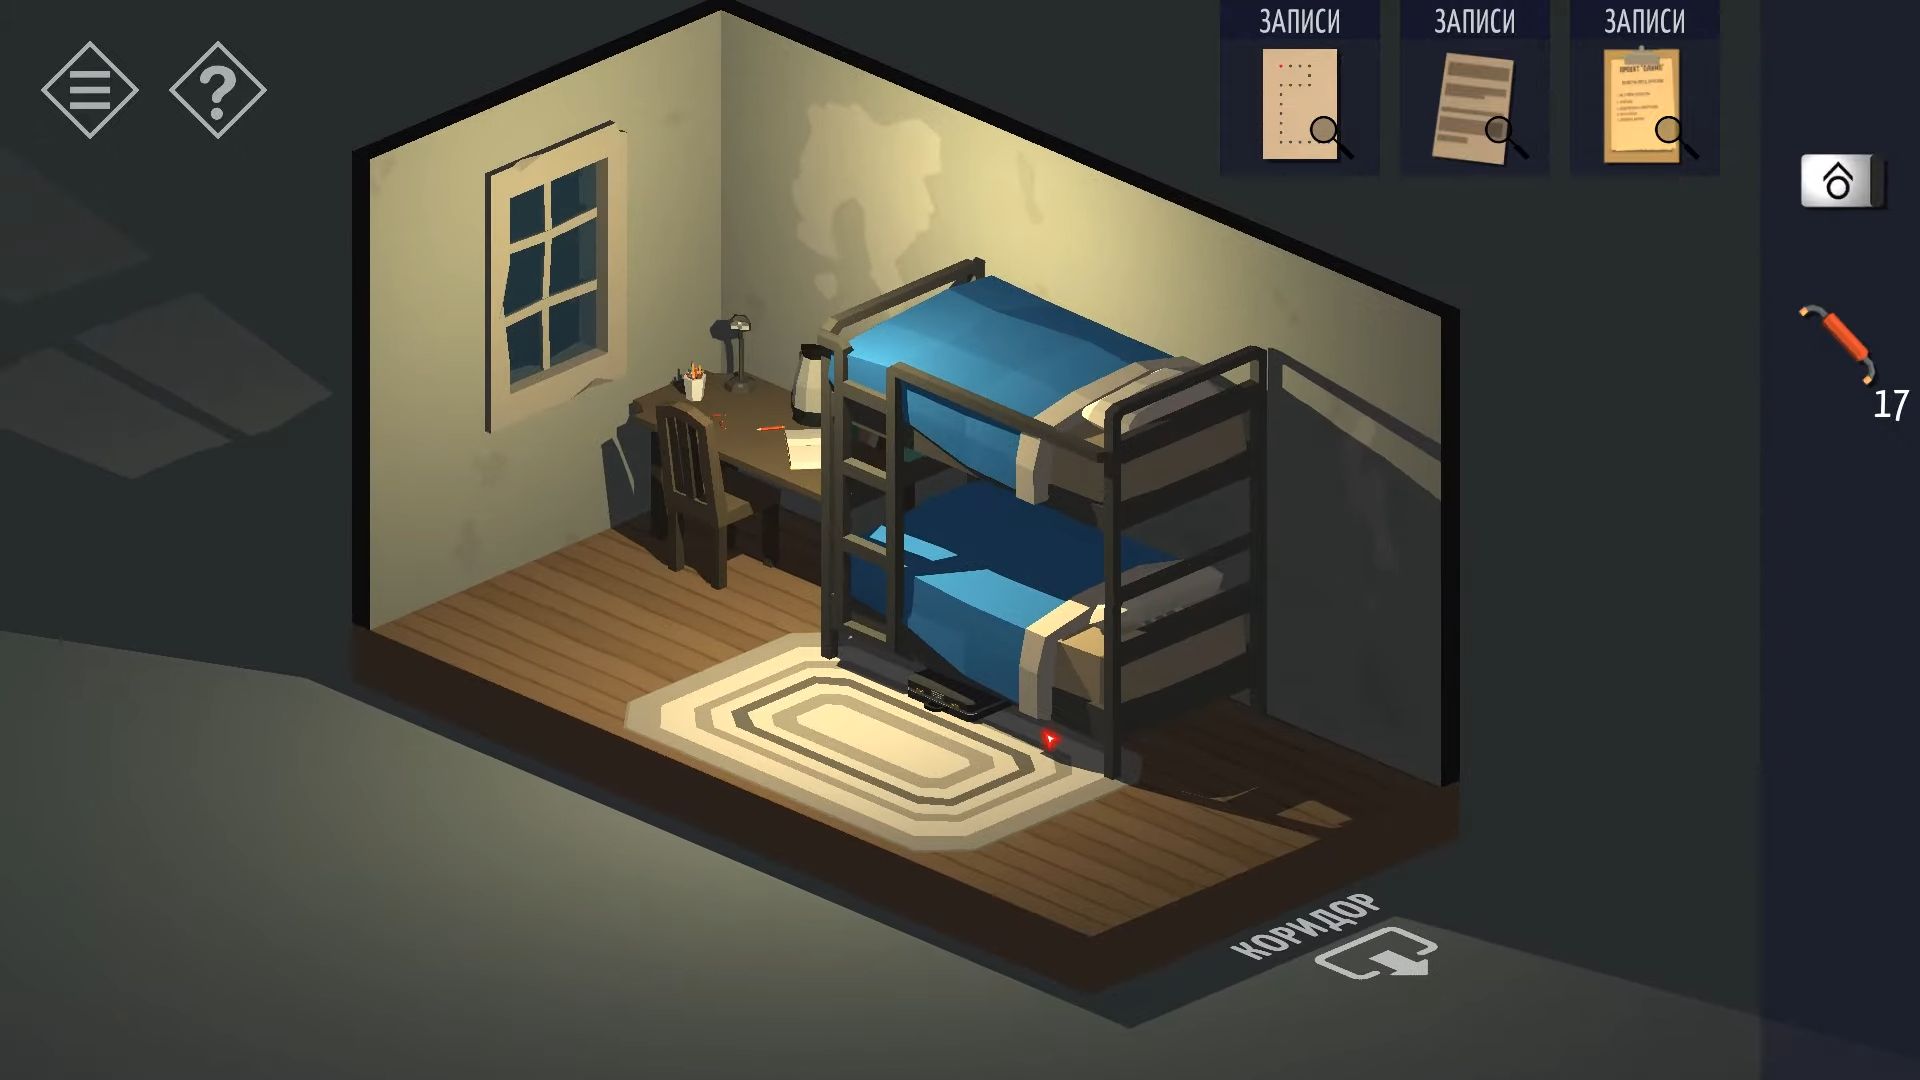
After that, look at the desk and gather 2 more Jumpers. Touch the bed and then the pillow for the lower bunk. Beneath it, discover a paper with a clue. Beneath the bed, there’s a briefcase with a 4-digit lock. Use the code from the clue to unlock it.
Go back to the corridor and notice a number inside each of the 4 doors. The paper clue shows outlines of the 4 doors to provide you with an order (5279). Tap to open them and get an access card. Now, return to the roof and knock on the electrical cabinet in the corner. You need to open the angle grinder in your inventory and add the charged battery and the cut-off wheel. Now you can use it to open the cabinet.
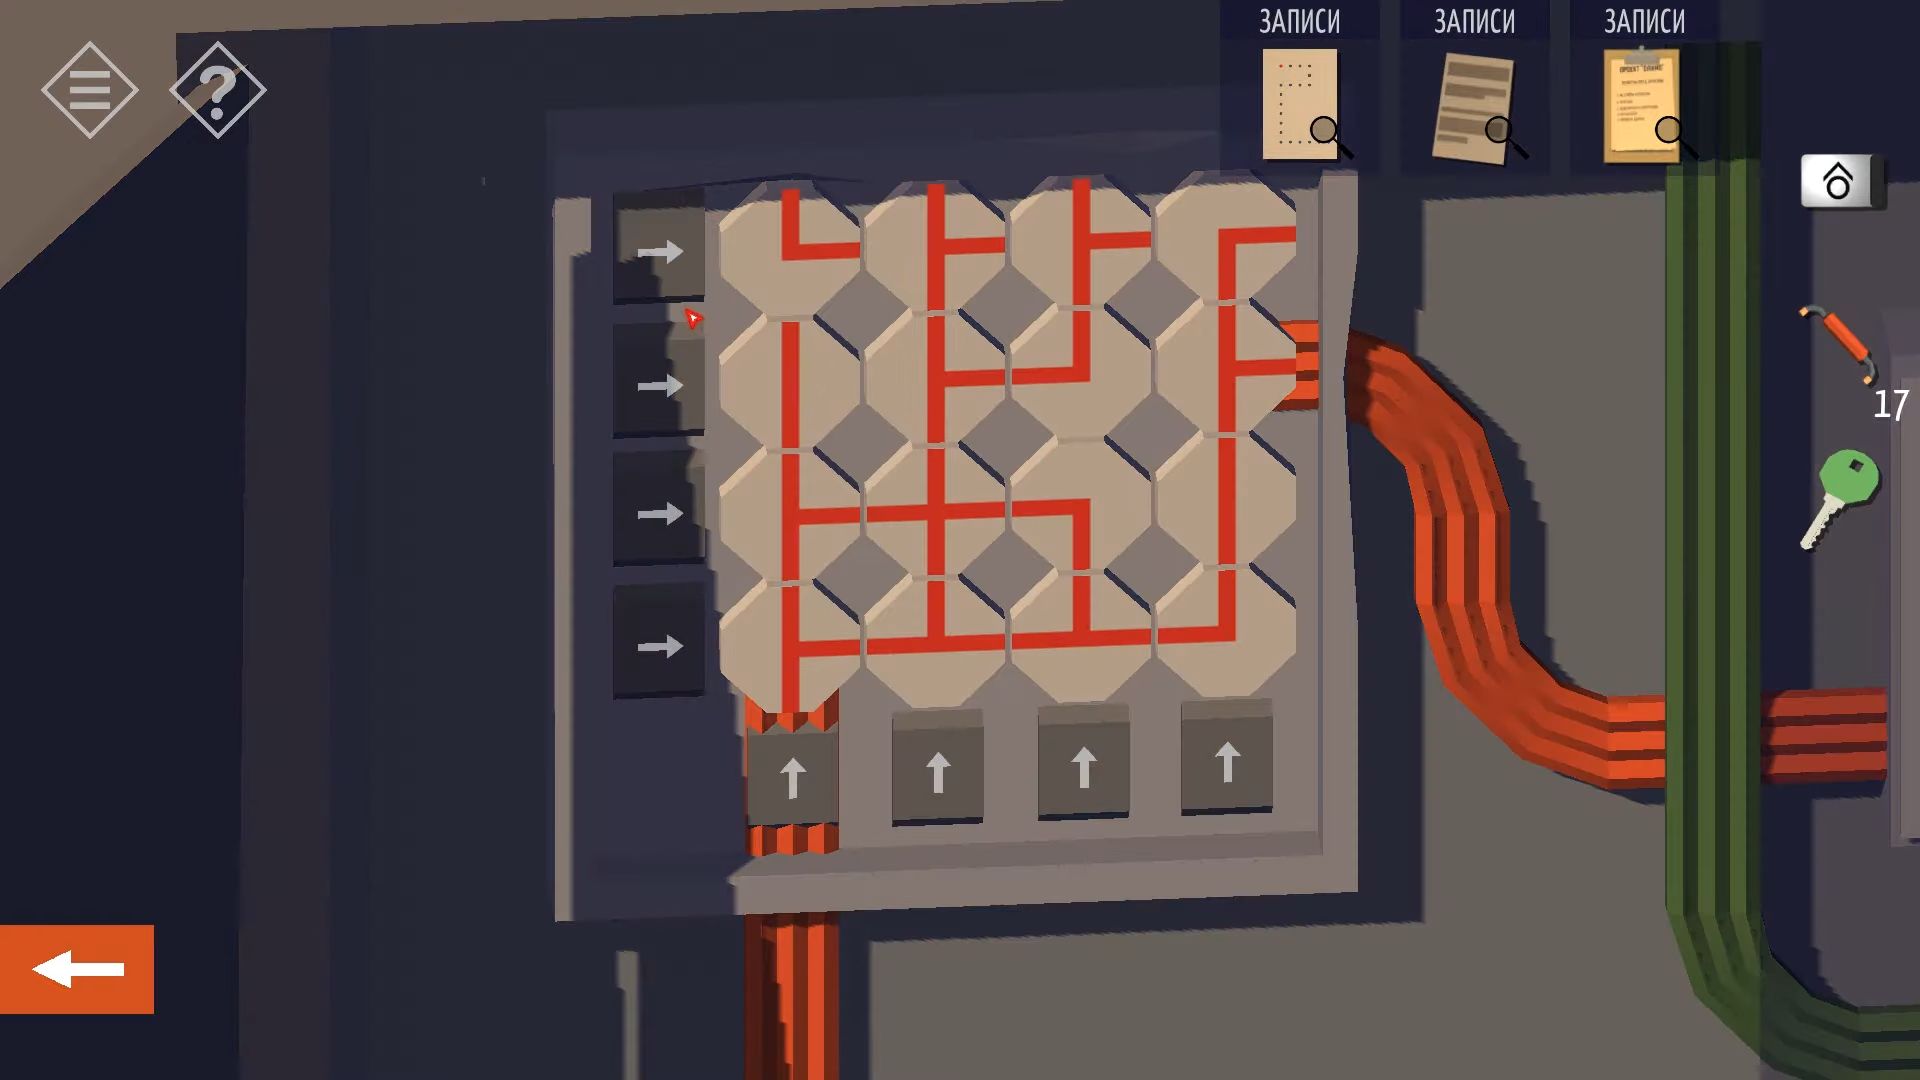
Once inside, encounter a puzzle similar to the one in Chapter 2. However, this time, tap the arrow indicators to turn the parts until the lines connect to form a complete circuit. Afterward, descend from the roof and touch the tower on the right to climb it. Open the control box at the top.
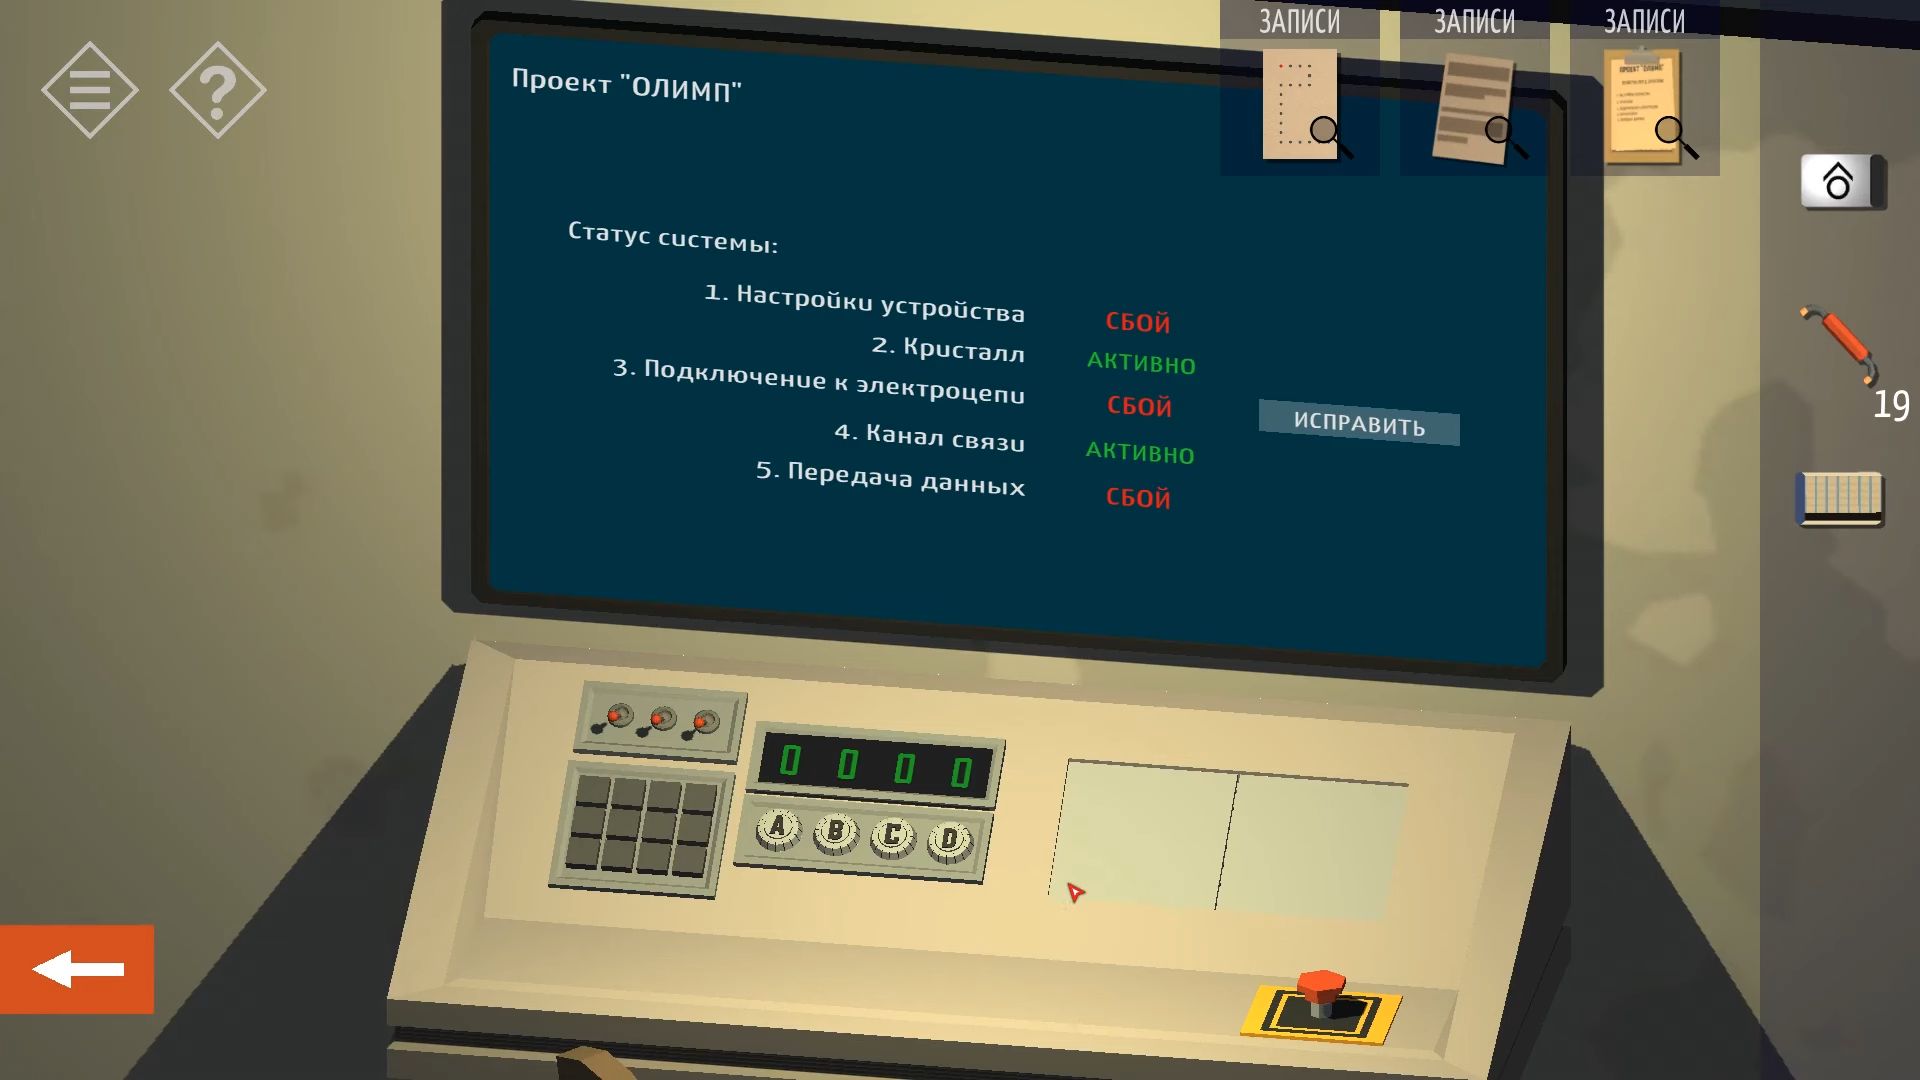
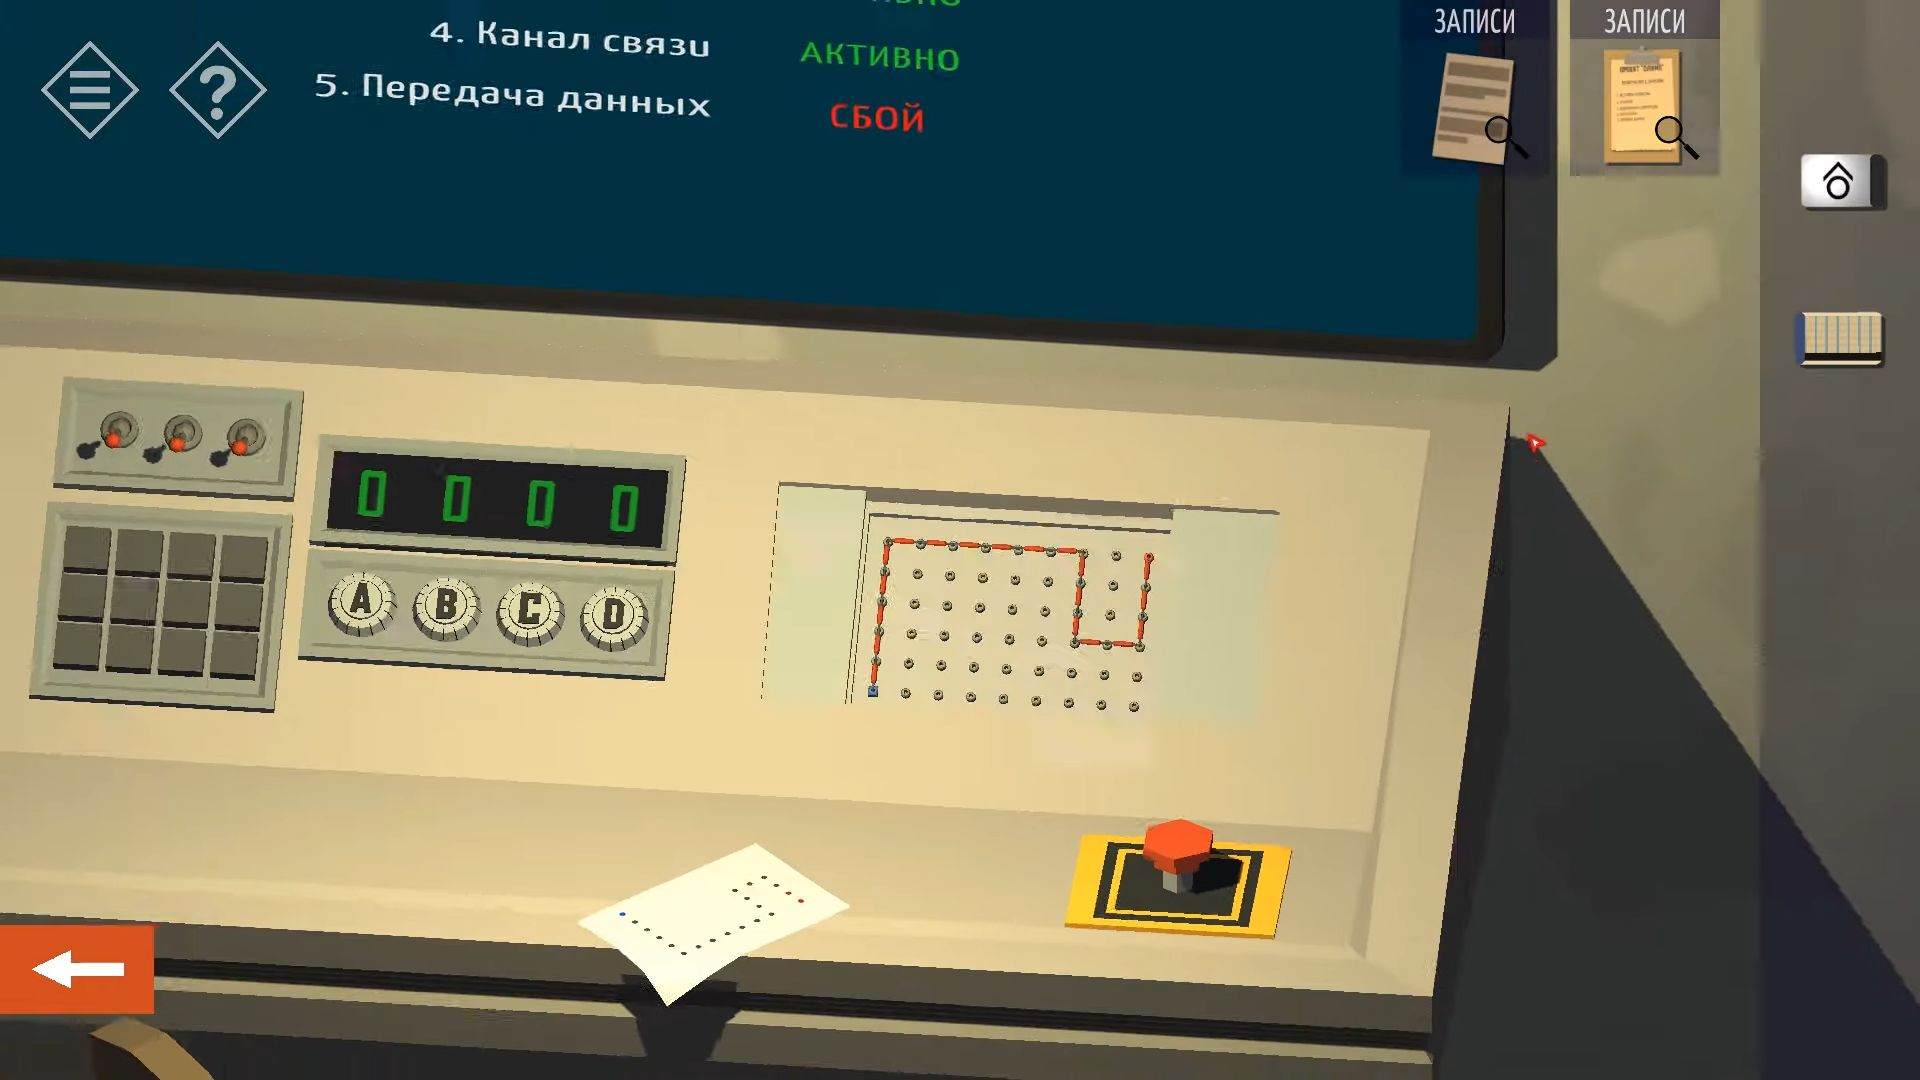
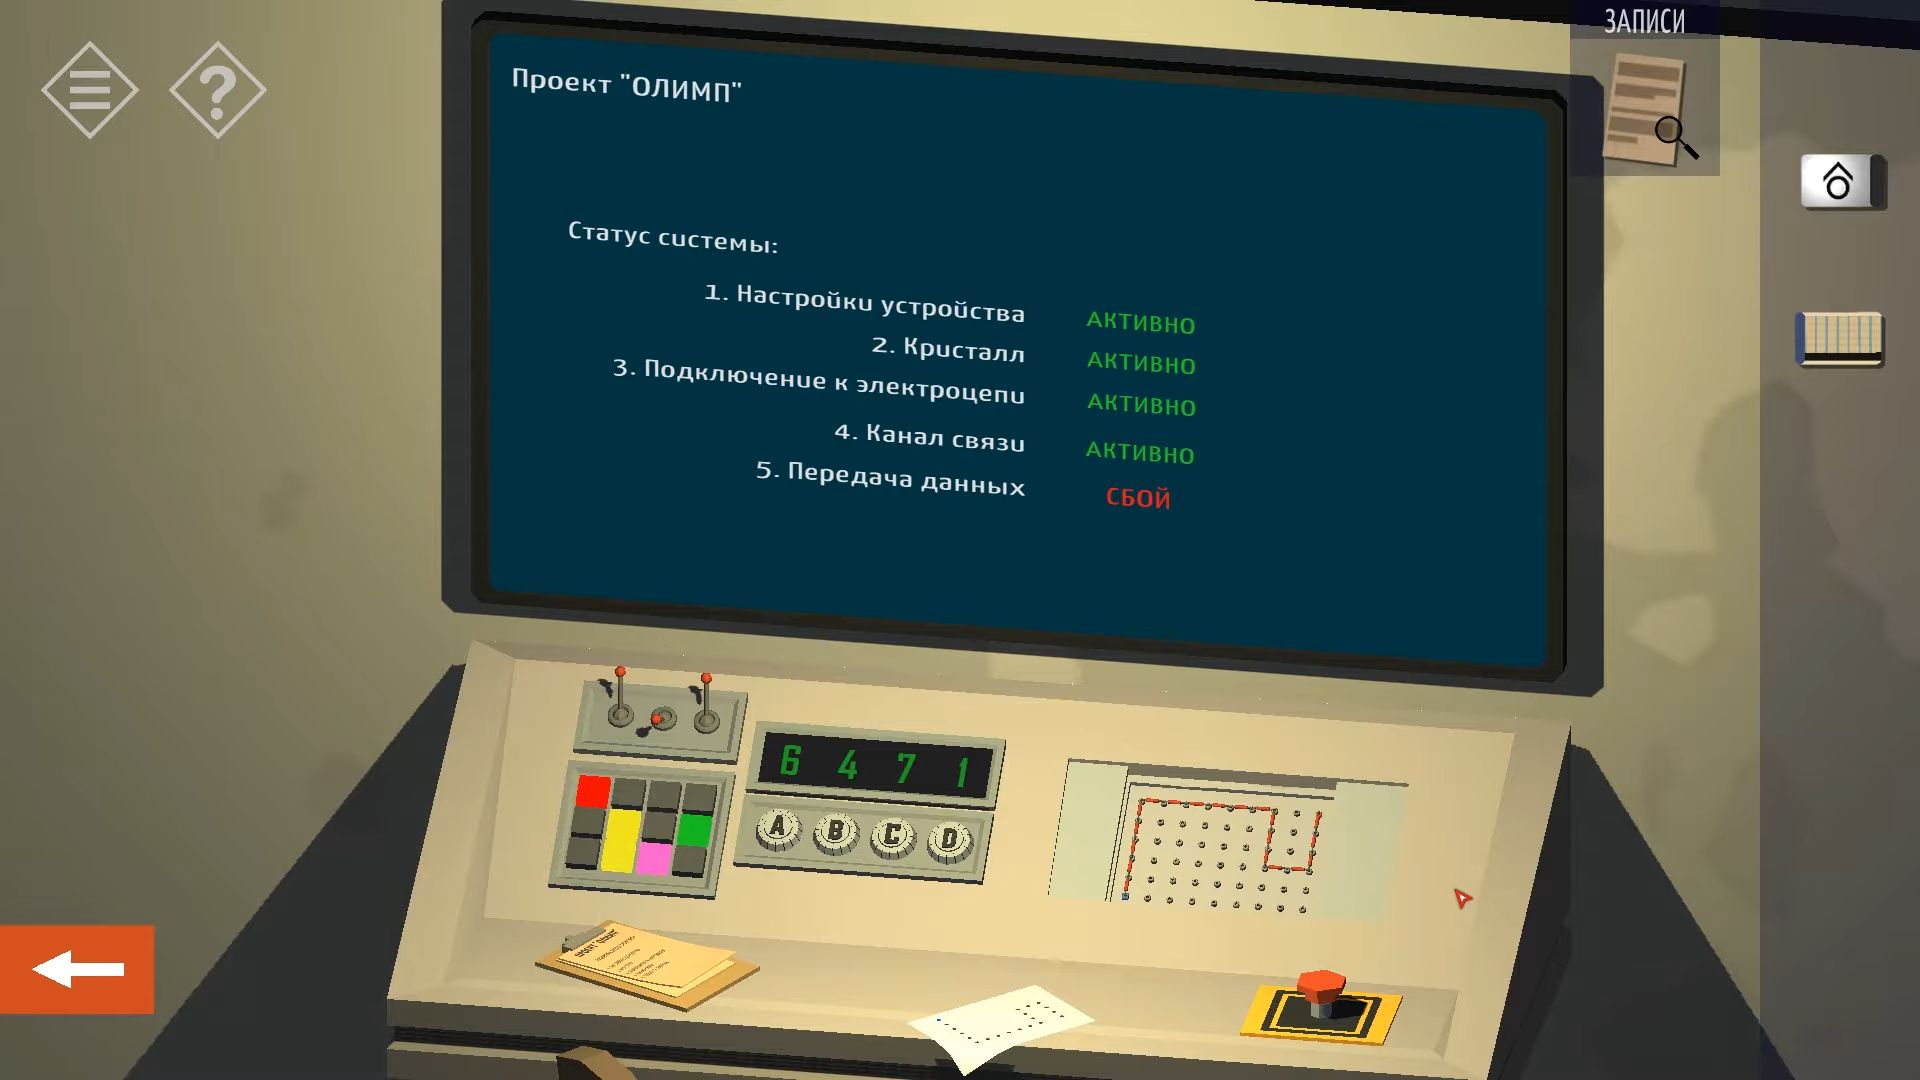
Insert the access card you just got, and now you need a passcode. The hints for this are in the notes about strong passwords (123456789). Go back to the corridor and enter the first room with the console. You’ll see that you now have ACTIVE items 2, 3, and 5. Knock on the screen to fix the circuit connections, and then tap the panel on the right side of the console that opens.
Now, you can use the jumpers to connect between the blue and red sockets on the board, following the diagram on the paper you found earlier. Notice that the red and blue sockets on the paper are opposite to those on the board, so you need to reverse the diagram to match.
Finally, let’s fix the Device Configuration by looking at the clipboard you picked up earlier with the checklist. Tap the paper to see the next page for the settings. Set the toggle switches Up, Down, and Up. Set the numbers on the right to 6471 and use the code from above and the diagram on the second page of the notes to set the lights on the lower left.
Once done, the screen should show all 5 steps as ACTIVE and you have to touch the red button on the desk. The device is now active. Go back outside and enter the mountain cave. There is a car entry and you can use the access card from the previous chapter to open the gate.
It’s dark inside, but locate the switch on the side and turn on the power. Now, you can continue into the cave, marking the end of Chapter 5.
Chapter 6
Here’s the complete guide for Chapter 6 in Tiny Room Stories: Town Mystery. Each step is explained with pictures and codes that can be shared if you require them.
In the Cave
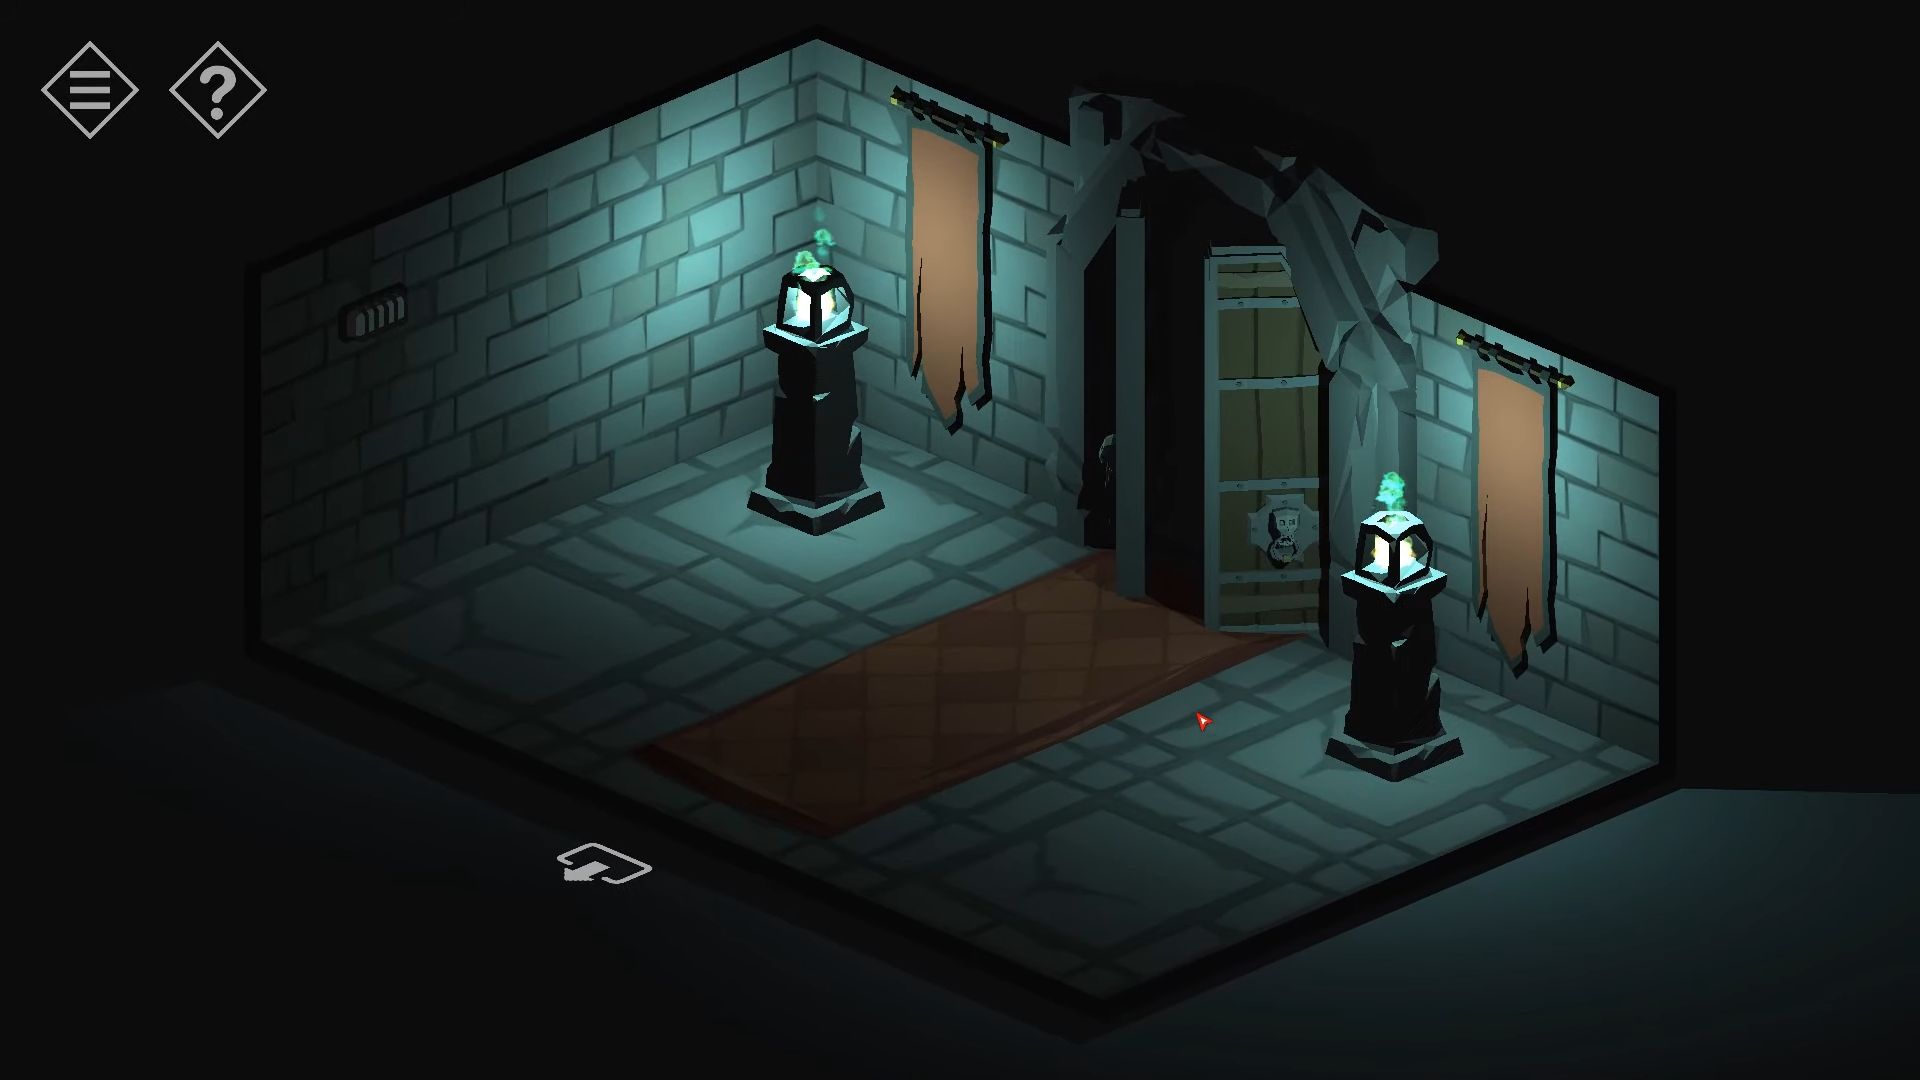
In the first room, there’s a statue in the middle facing you when you enter, and there are three closed doors on the other three walls. If you tap the statue, it will turn toward each door one by one, and the door it faces will open. There’s a small stone block on the floor by the statue for you to pick up.
In the left room (next to the entrance), there’s a floor puzzle with four dials and four handles to move them. In the center of the dials, there’s a tall platform with a stone block on top for you to collect. In the second room (across from the entrance), there’s a large wooden door with two pillars. Behind the left pillar, there’s a stone block on the floor for you to collect.
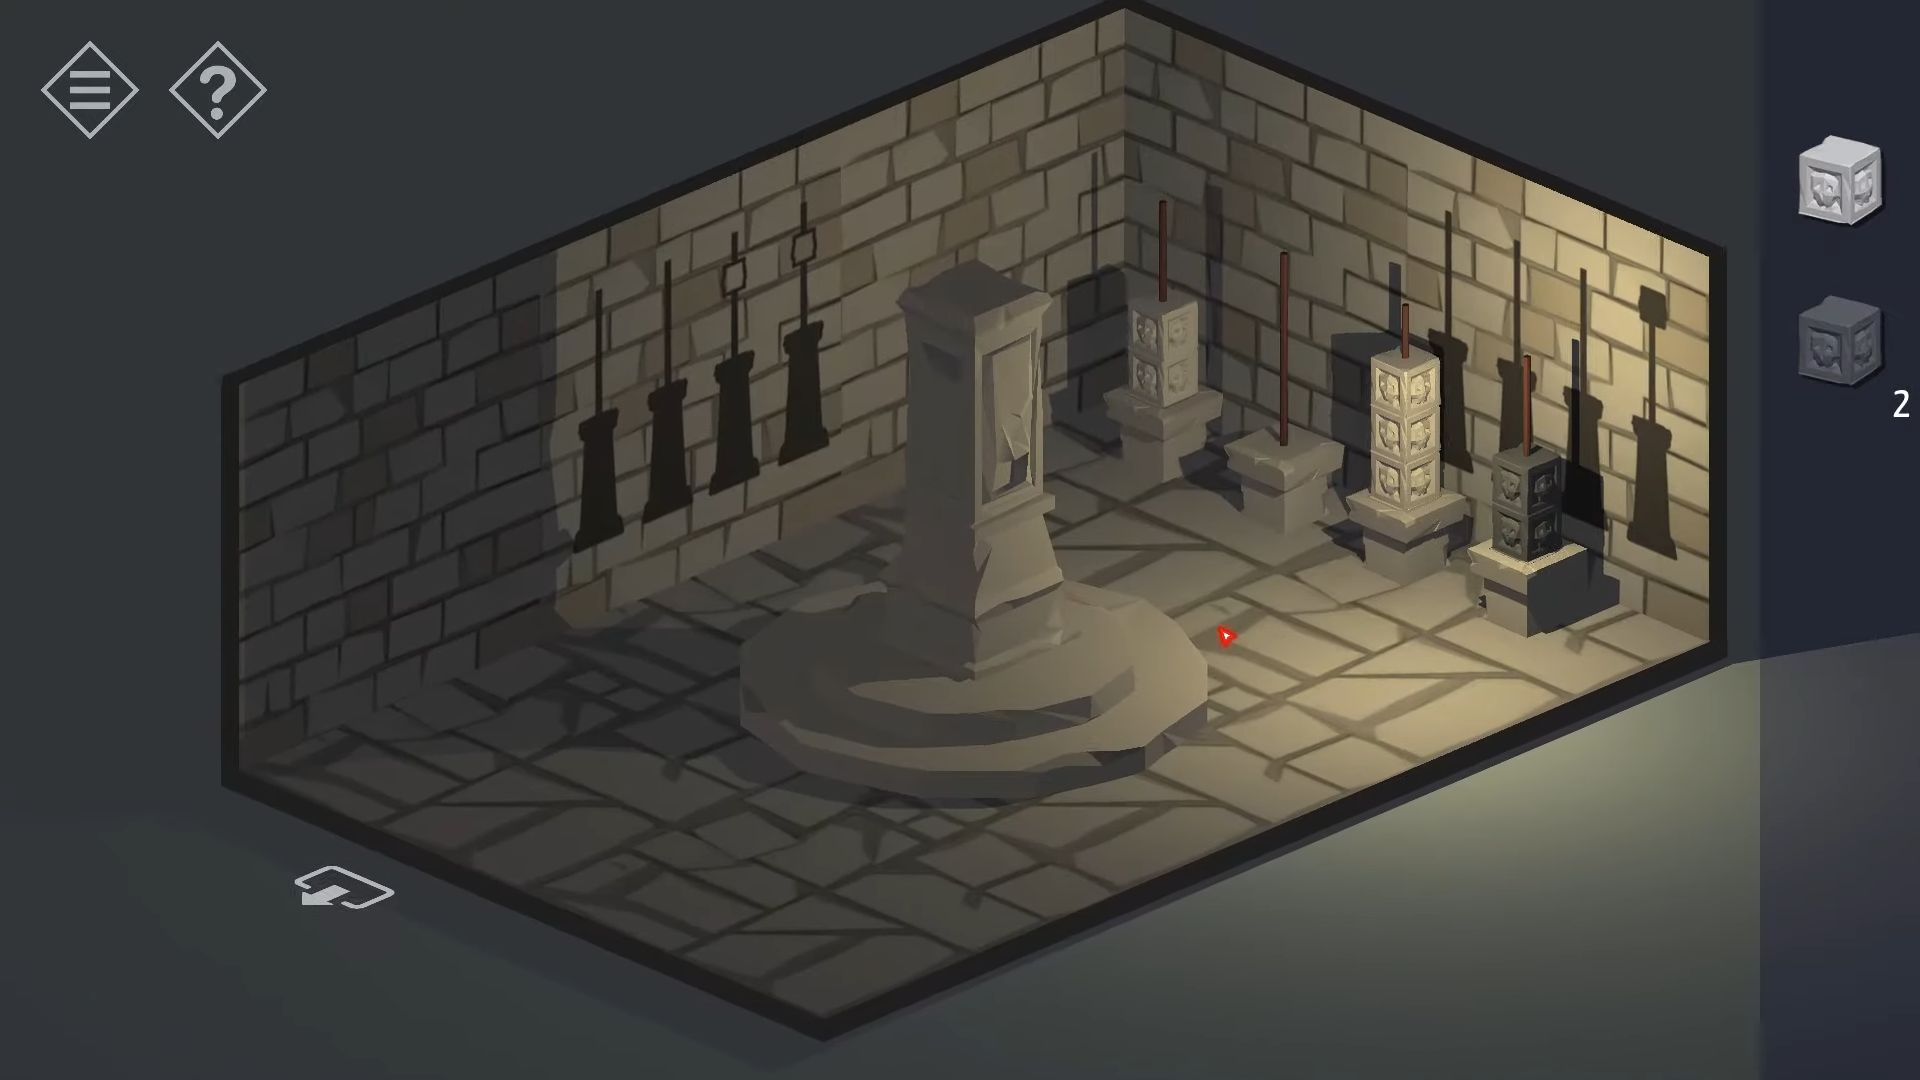
In the third room (to the right of the entrance). There’s a puzzle with four stacks of blocks on plinths with spindles on top, each having a different number of blocks. On each of the four walls, there’s a different diagram. In the center, there’s a big stone pillar. You can collect all the stone blocks on the four spindles into your inventory. Arrange them on the four plinths to finish the puzzle, using the diagrams on the walls as guides for which block goes where.
From left to right on the plinths:
- Place 1 dark block on the first (left) plinth.
- Put 2 light blocks on the second plinth.
- Arrange 1 light, 1 dark, 1 light on the third plinth.
- Set 1 dark, 2 light, 1 dark on the fourth plinth.
Once the stones are in place and have descended, revealing lever switches, you can move on to the next part of the puzzle. Pulling the levers will shift an orange section in the center stone pillar, revealing symbols in the gaps. There are four gaps, one on each side, and they are at different heights. Note down the symbols and their positions from top to bottom as you do this.
To complete the puzzle, keep pulling the levers until all four symbols are visible at the same time. This might take some patience or luck. It’s helpful to start with the bottom symbol and work your way around. Once the puzzle is done, the room shakes, and the lights go out. Return to the first room above with the dials puzzle. Tap the dials to get an overhead view and then use the levers to align the dials.
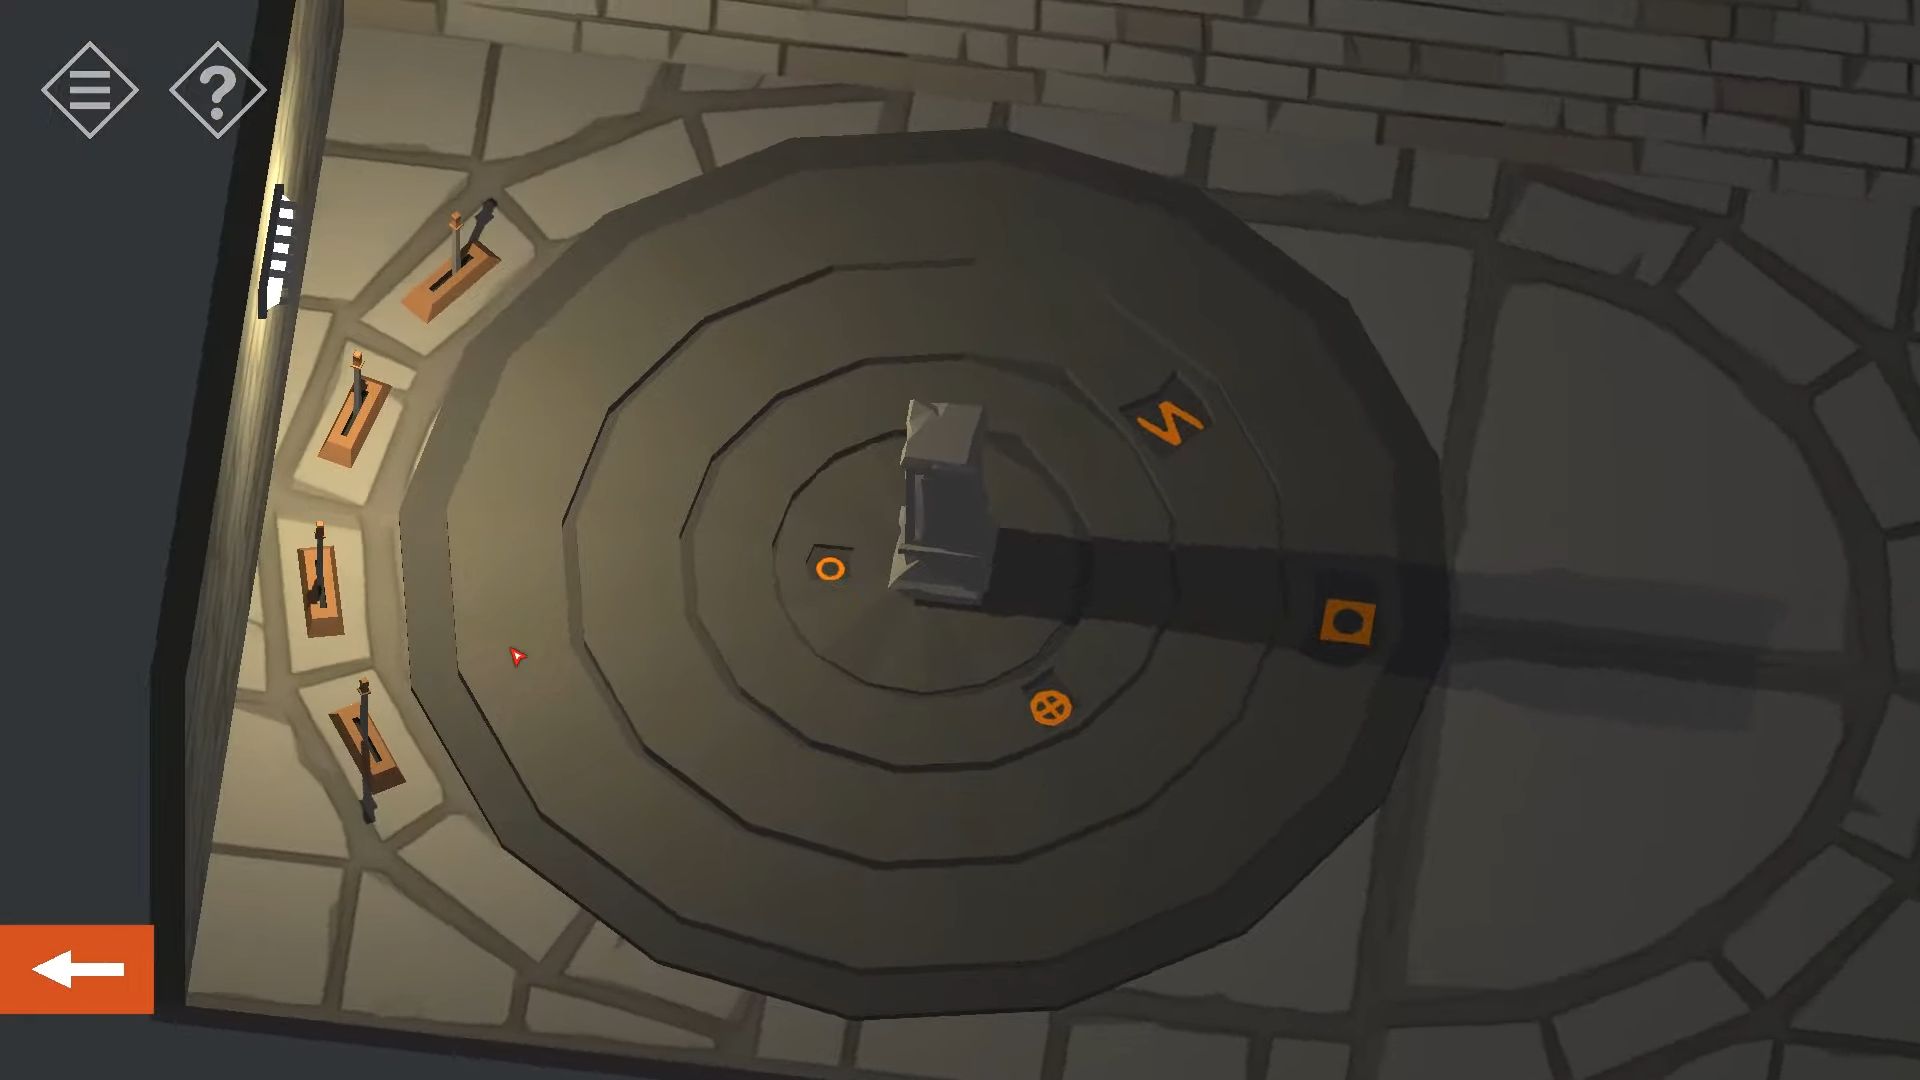
Spin the four dials until the symbols they show match the ones on the pillar above. Put the top one on the outer ring and the bottom one on the inner smallest ring. The symbols are Square, Triangle, Square with Circle, and 2 Vertical lines. When the symbols match, the room shakes. Now, you can go back to the second room.
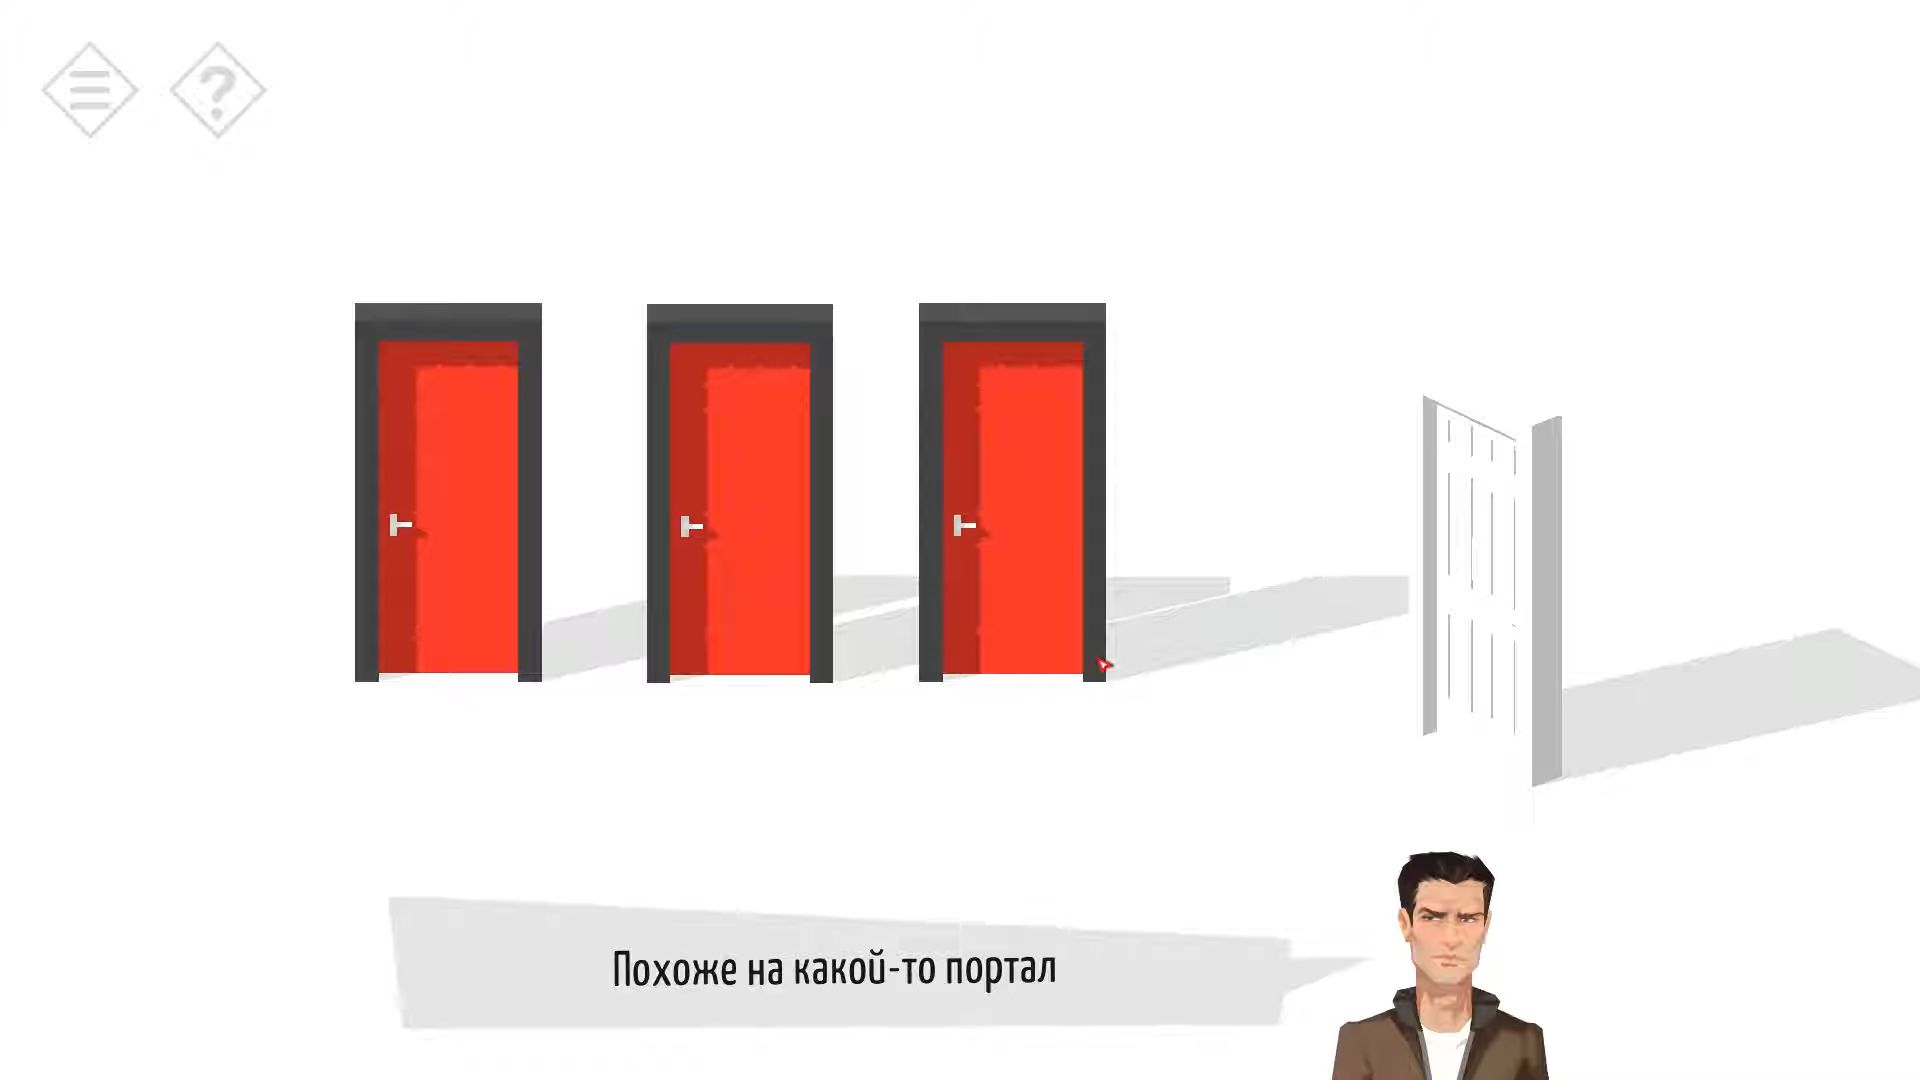
In the second room, the door to the next area is now open. Navigate through it, and you’ll find yourself with the device. Now, you are in a white room with a white door in the center. Knock the door to add some color to it. Tap again to open it, and once more to go through. There are now three red doors and one white door. The white door is closed, but the three red doors are open. Behind each is a puzzle room that you need to solve.
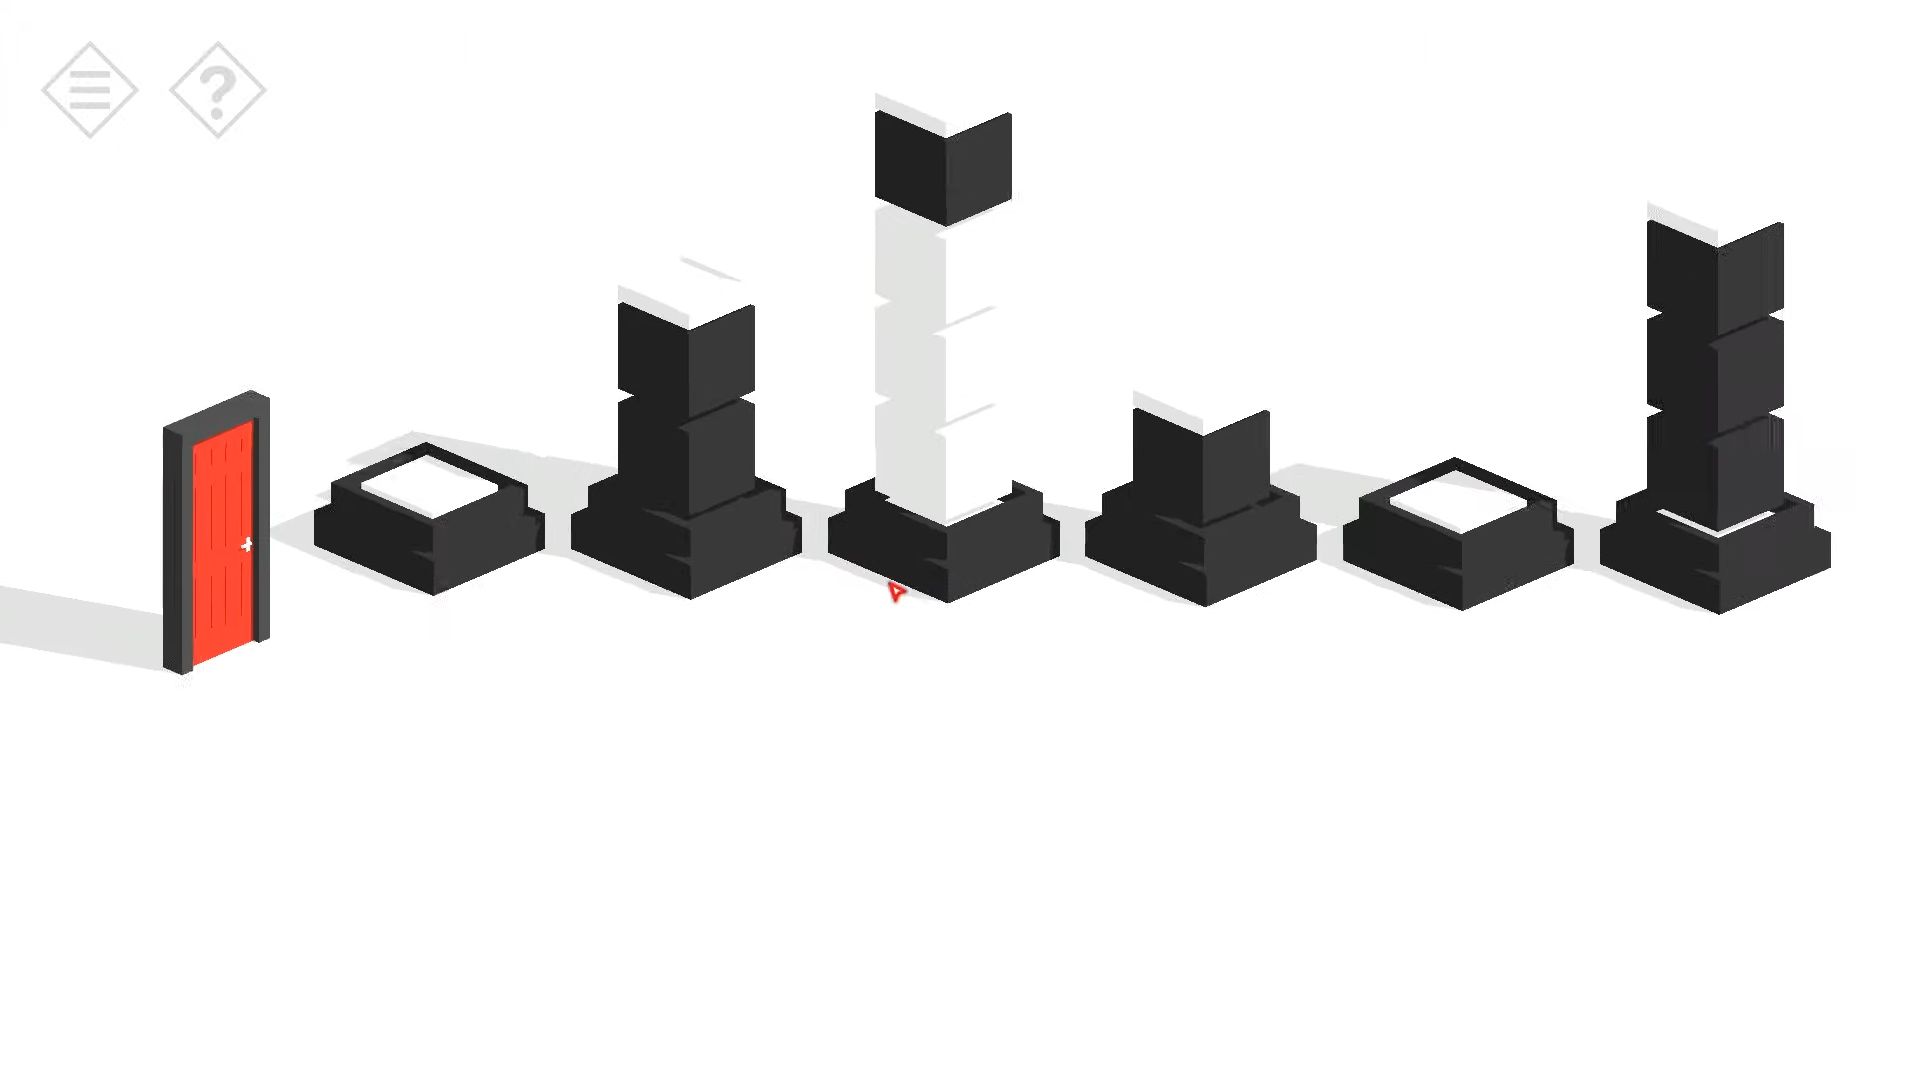
In the first door, there is a room with 6 pillars of blocks, some are white and some are black. The pillars move up and down. You can tap on each pillar to make it stop moving and knock again to make it start moving. Touch each pillar to make it stop when only the black blocks are showing. If there are any white blocks on the pillar, they should go underground.
In the second door, there are 7 red doors around a central block with 2 more doors in it, and the exit door is on top. You need to rotate the view to see all of them. Simply tap each door to open it and complete the puzzle to open the exit door.
In the third door, there’s an exit door frame but no door, and there are red pieces on the ground. Now, you can go back to the room with 3 doors and see that the exit is fully colored red. Touch to open it and exit. Now, you’re back outside the mountain at the communications building, and the rain has stopped.
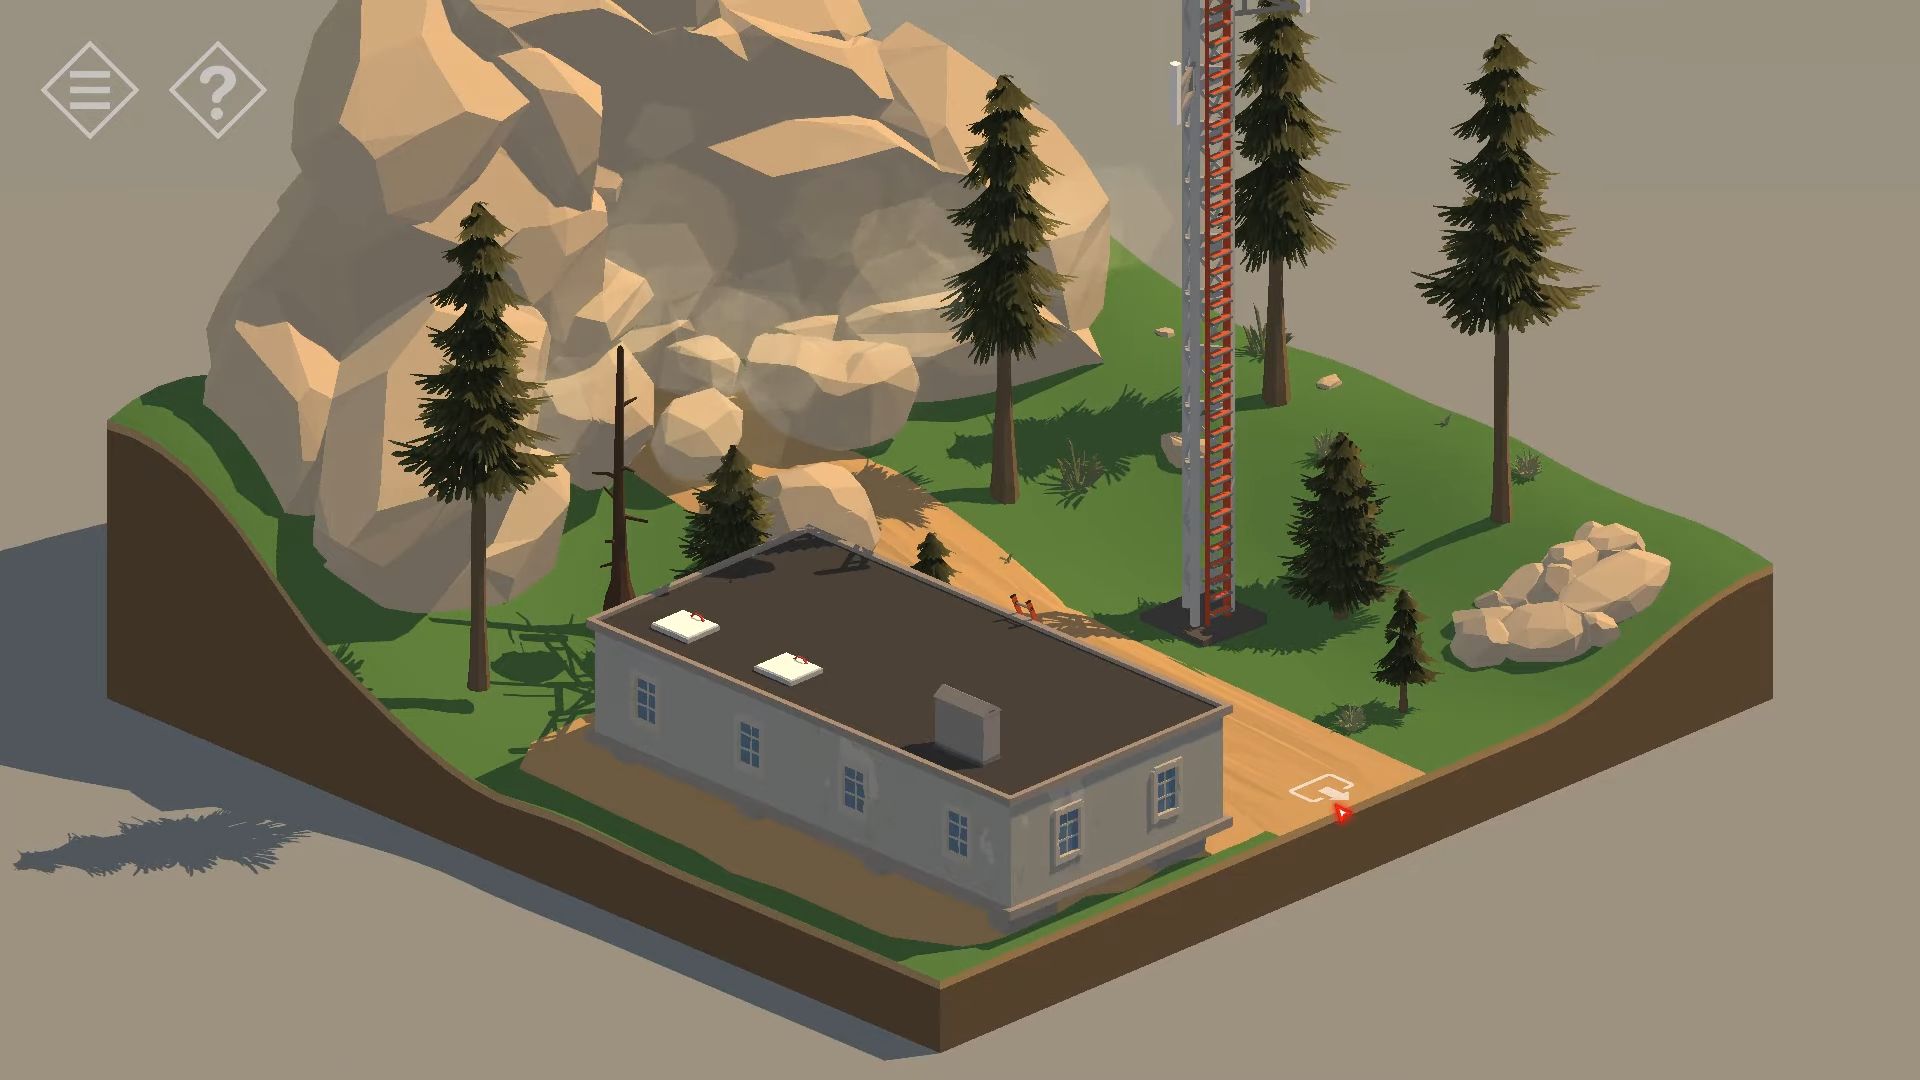
The cave has fallen, so you can’t head back inside. You can’t go into the building either, so navigate back to the place with the trucks. Tap on the trucks to receive a message telling you where to move next. Go back to the gatehouse area to find your car and knock on the car to finish the chapter.
Chapter 7- Part 1
Here’s the complete guide for chapter 7, part 1 in Tiny Room Stories: Town Mystery. Chapter 7 is divided into three parts.
Forest
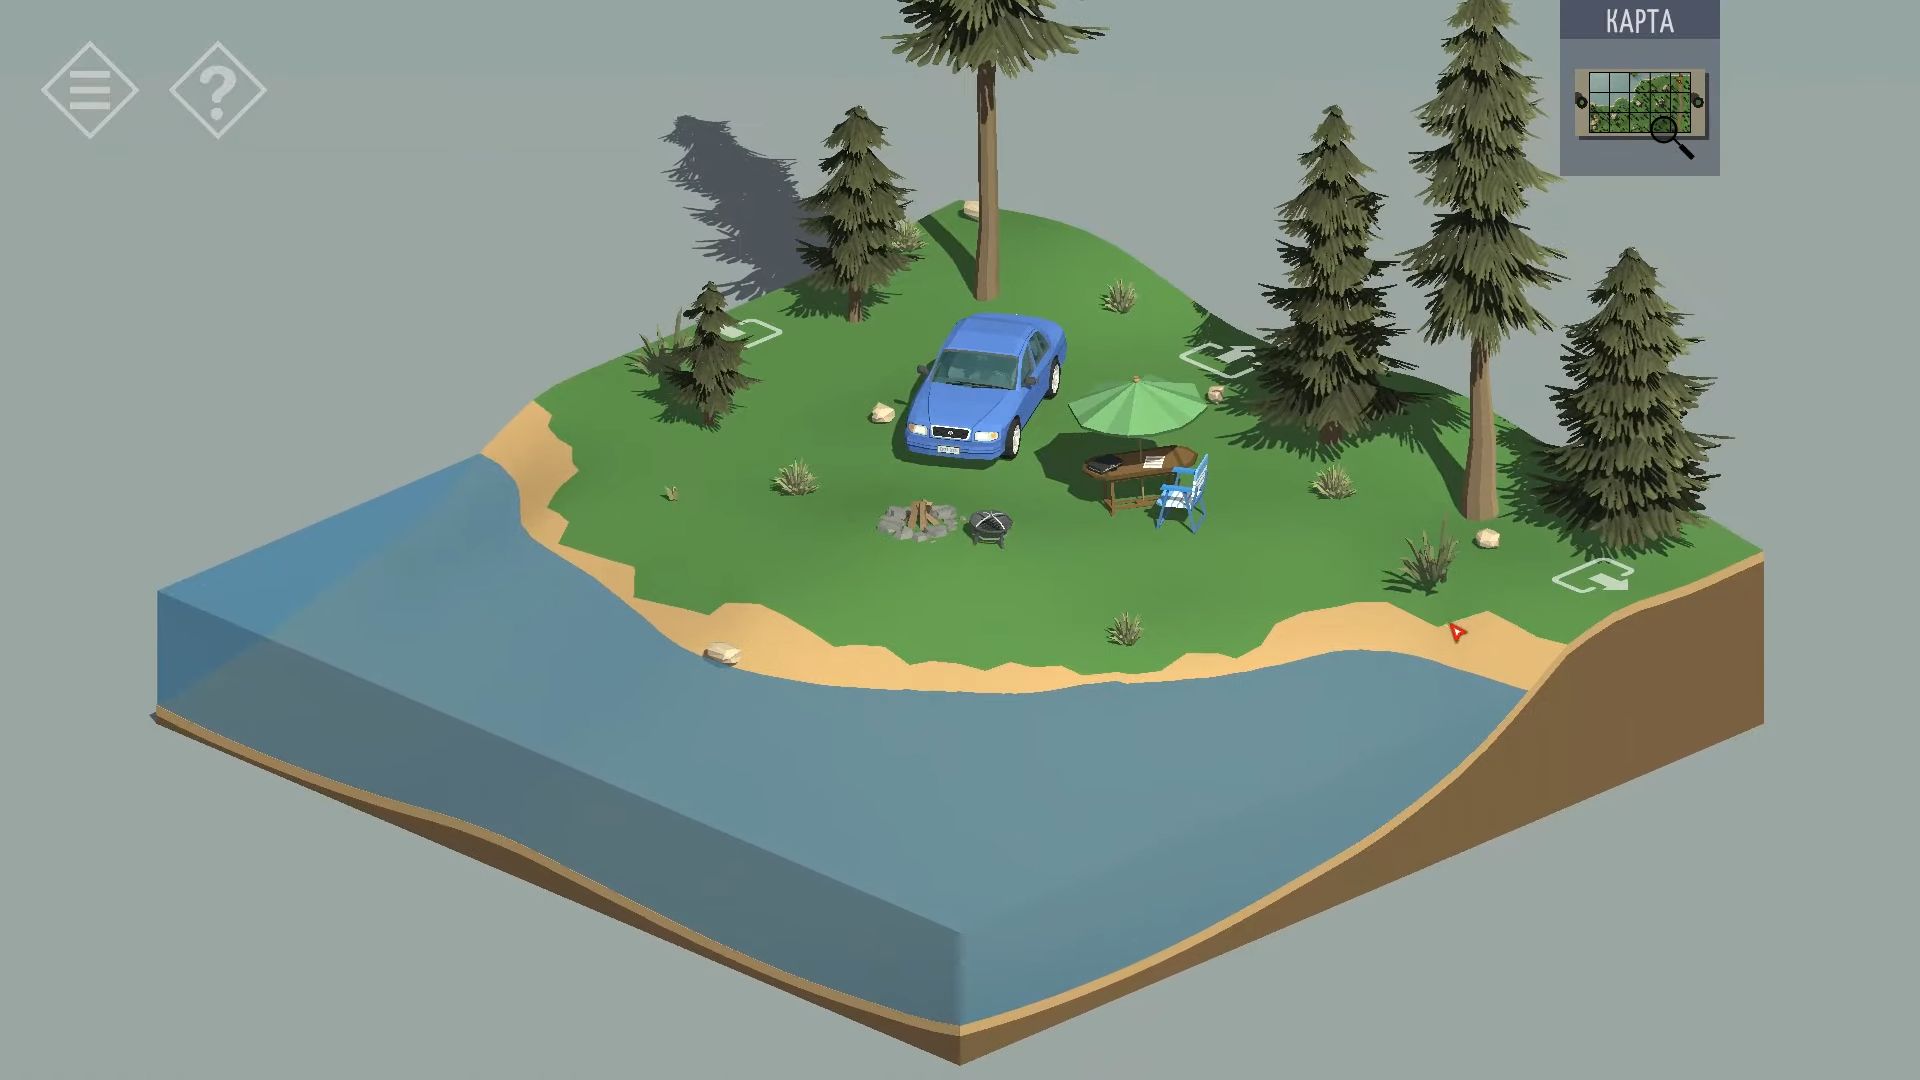
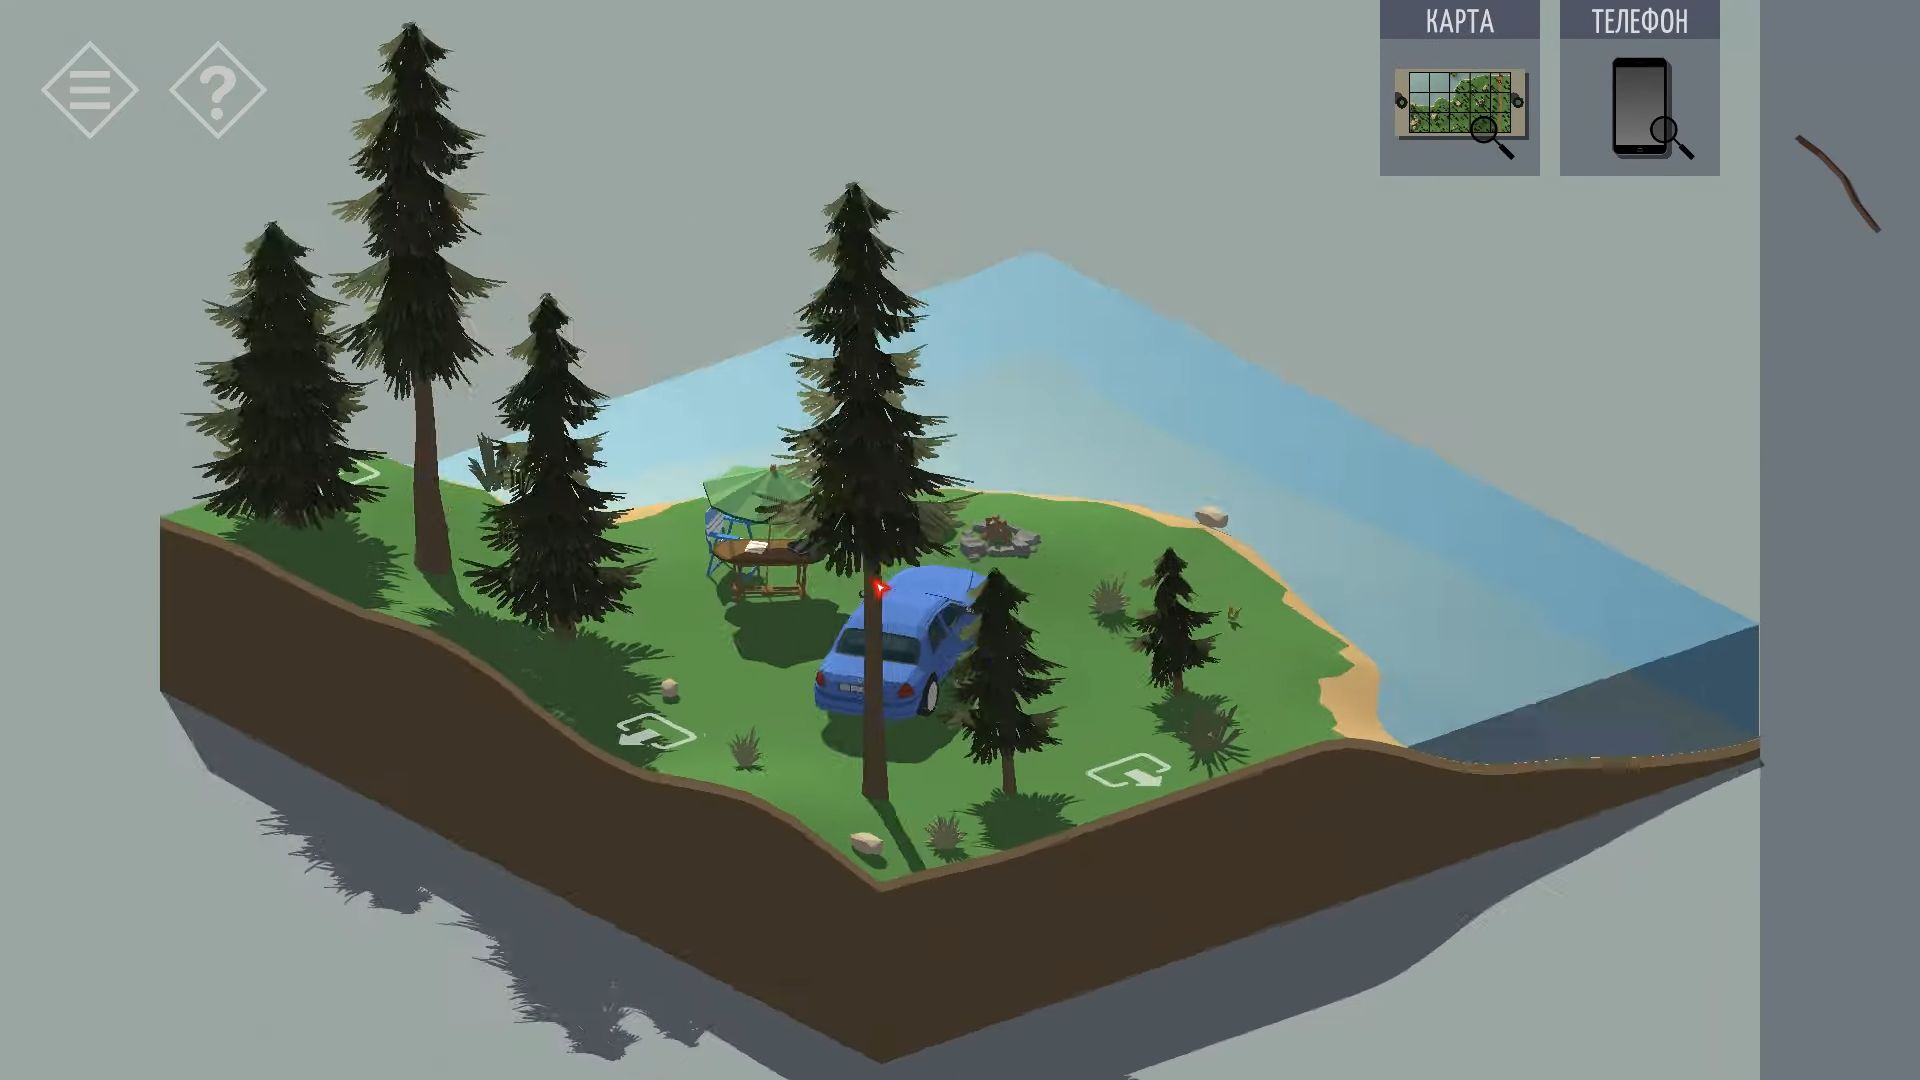
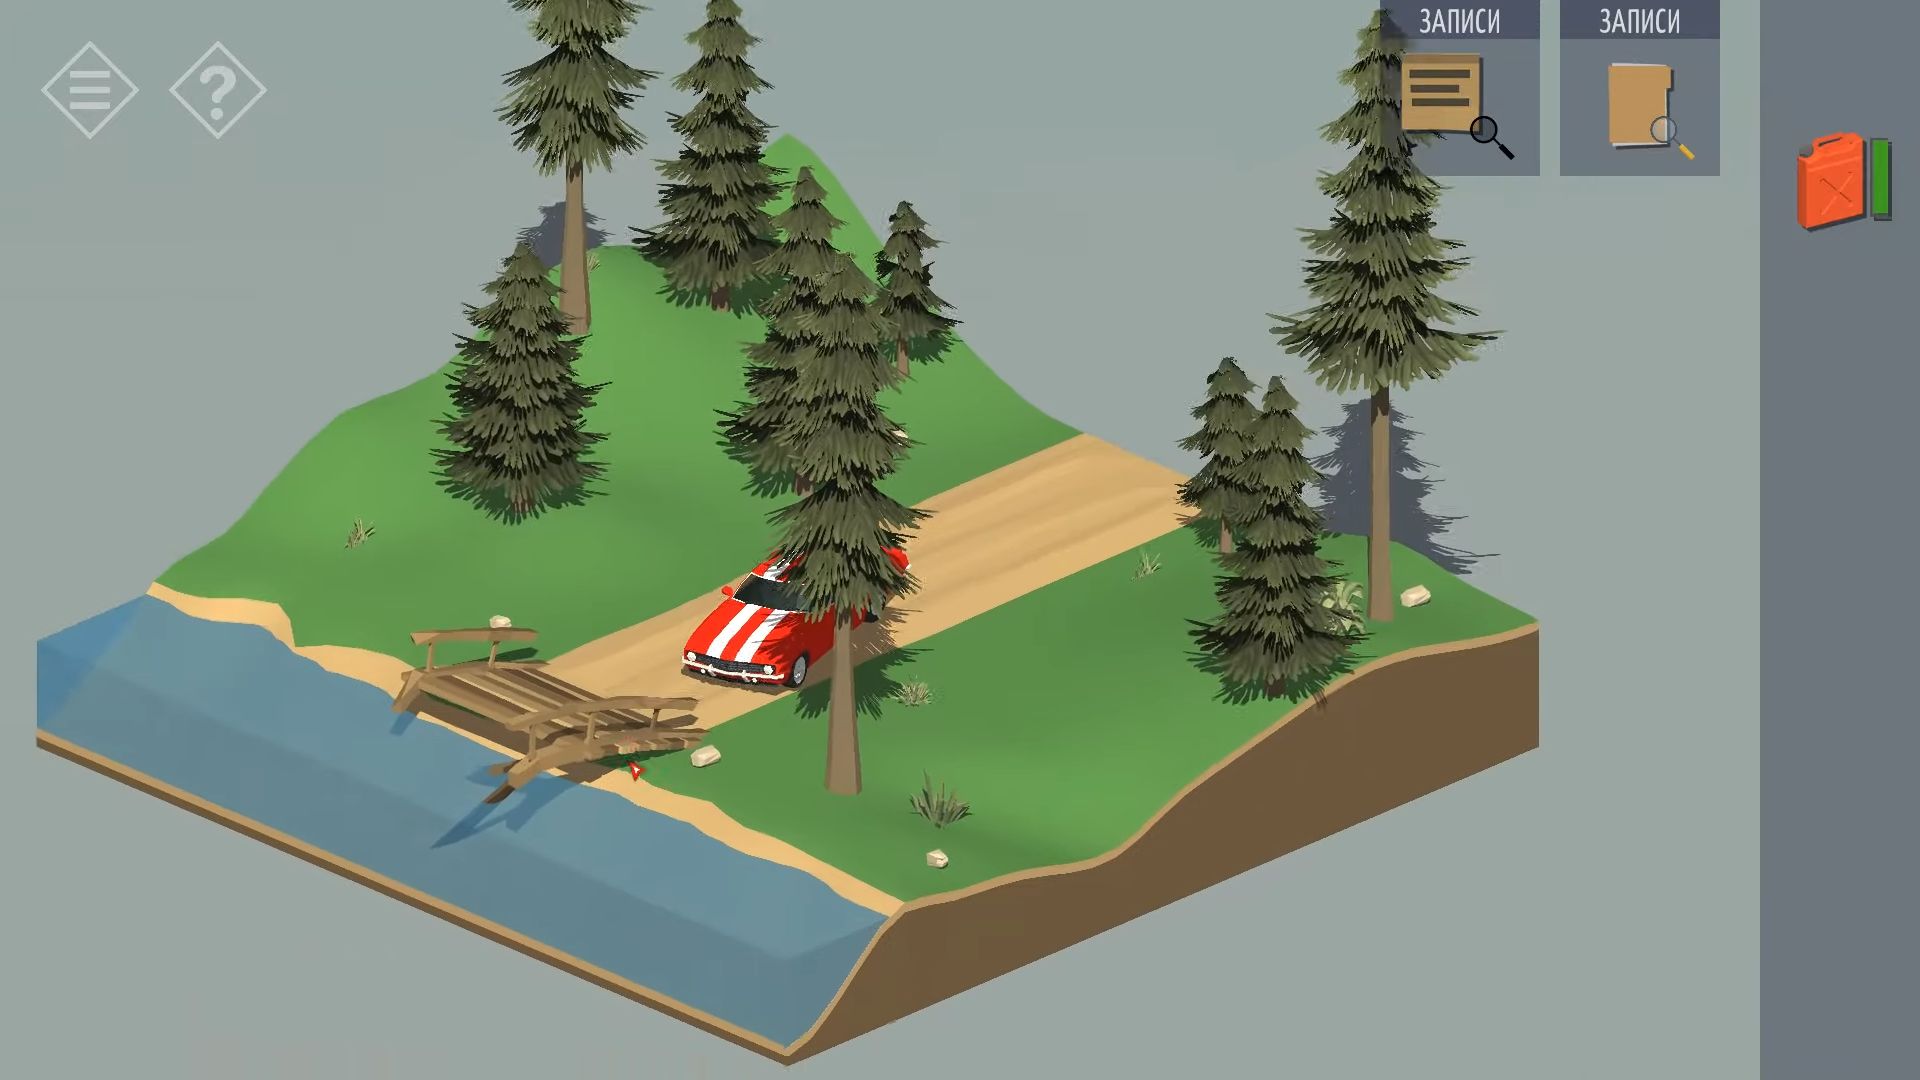
After returning from the strange place, you’re wondering if everything has changed or if you’ve ended up in a different world. Now, you and your red car are by a river that you need to cross. You can’t go back yet, so explore along the riverbank. There’s a chair and a fishing rod there.
You need to tap the chair to find a control tablet and look around to spot a drone on a big rock in the back left. Use the control tablet and touch the drone to make it fly. You can use the tablet to see the nearby area and figure out how to navigate along the riverside.
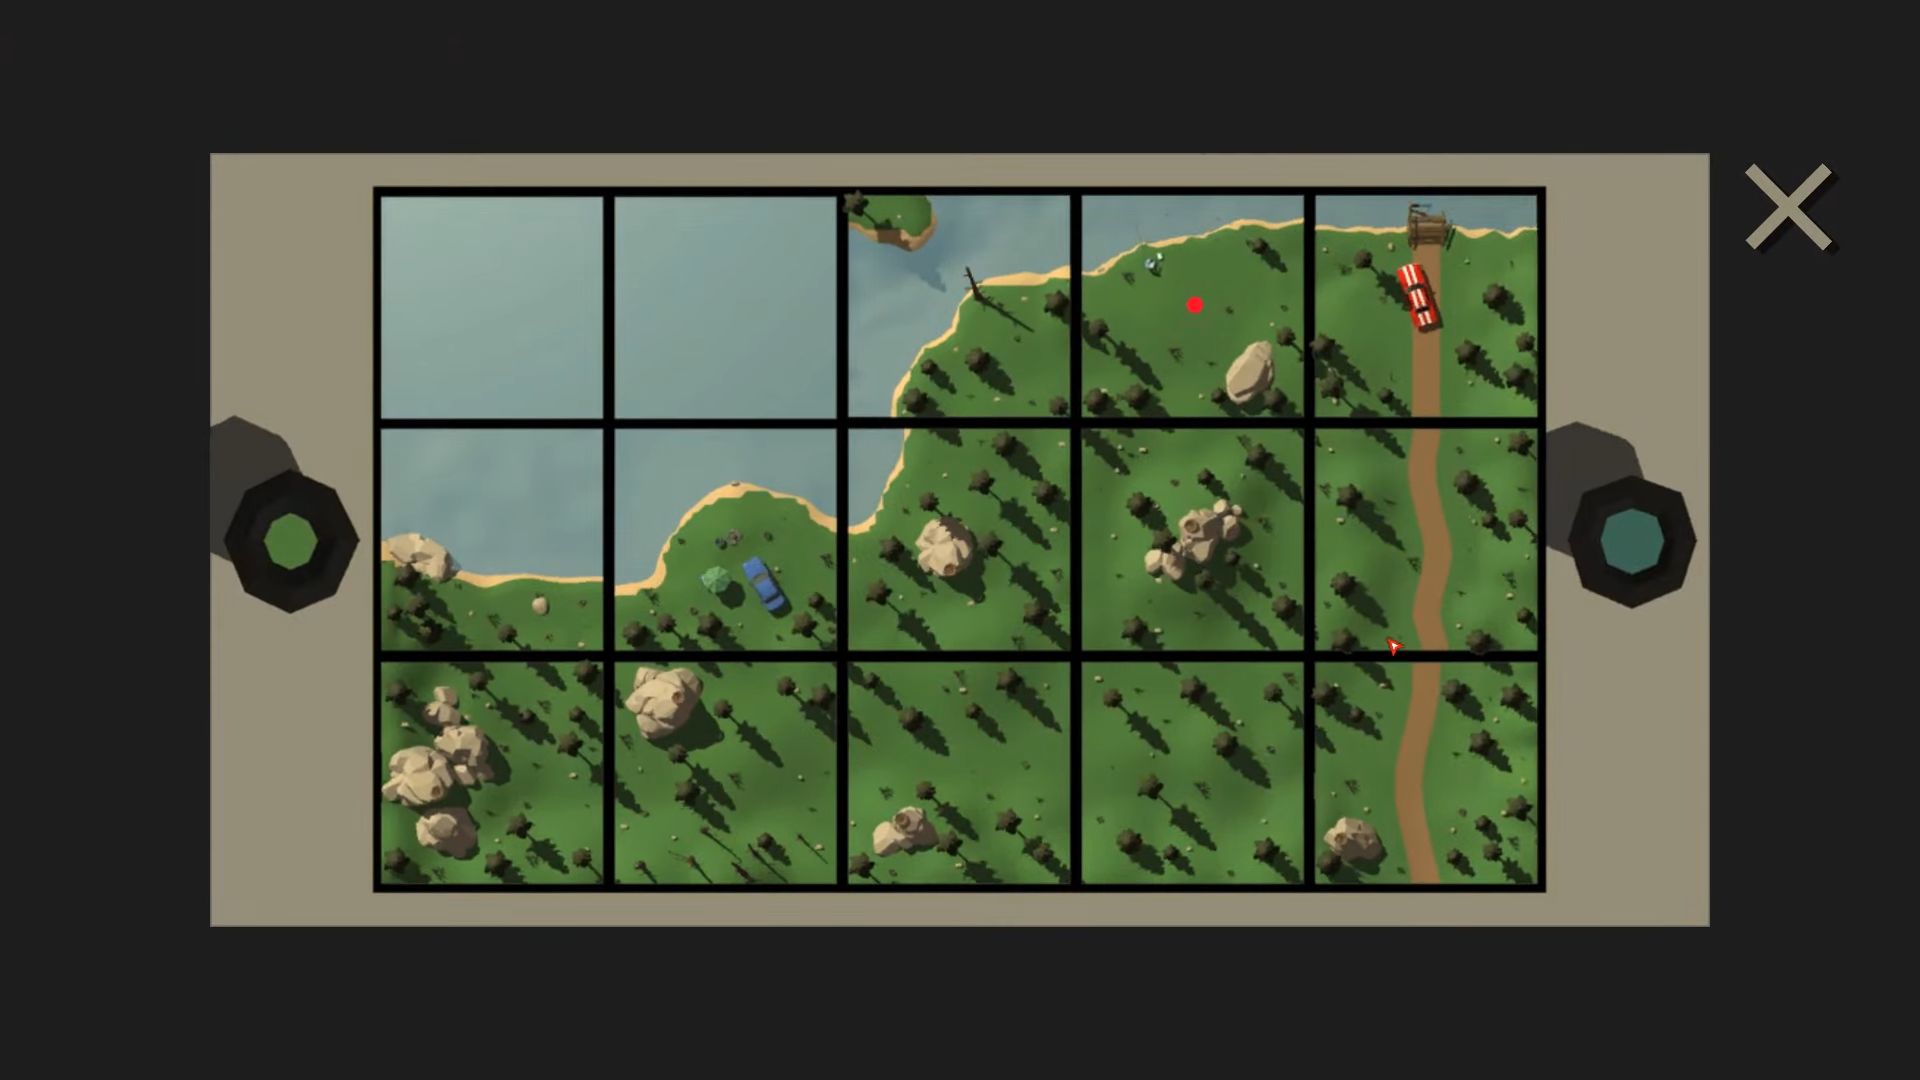
With the help of the tablet/drone, go along the riverbank to where the blue car is. Tap the table to find a locked briefcase and a note. The note has info about finding a phone and some dog tags, along with a hint on how to locate them.
Keep going along the left side of the drone view to the last part of the river bank. Tap the small round rock to zoom in and collect a dropped phone. Move to the area inland from the blue car, the second scene from the left in the bottom row of the drone view. Look for dead trees at the back, rotate the view, and touch the trees until you find a long stick you can collect.
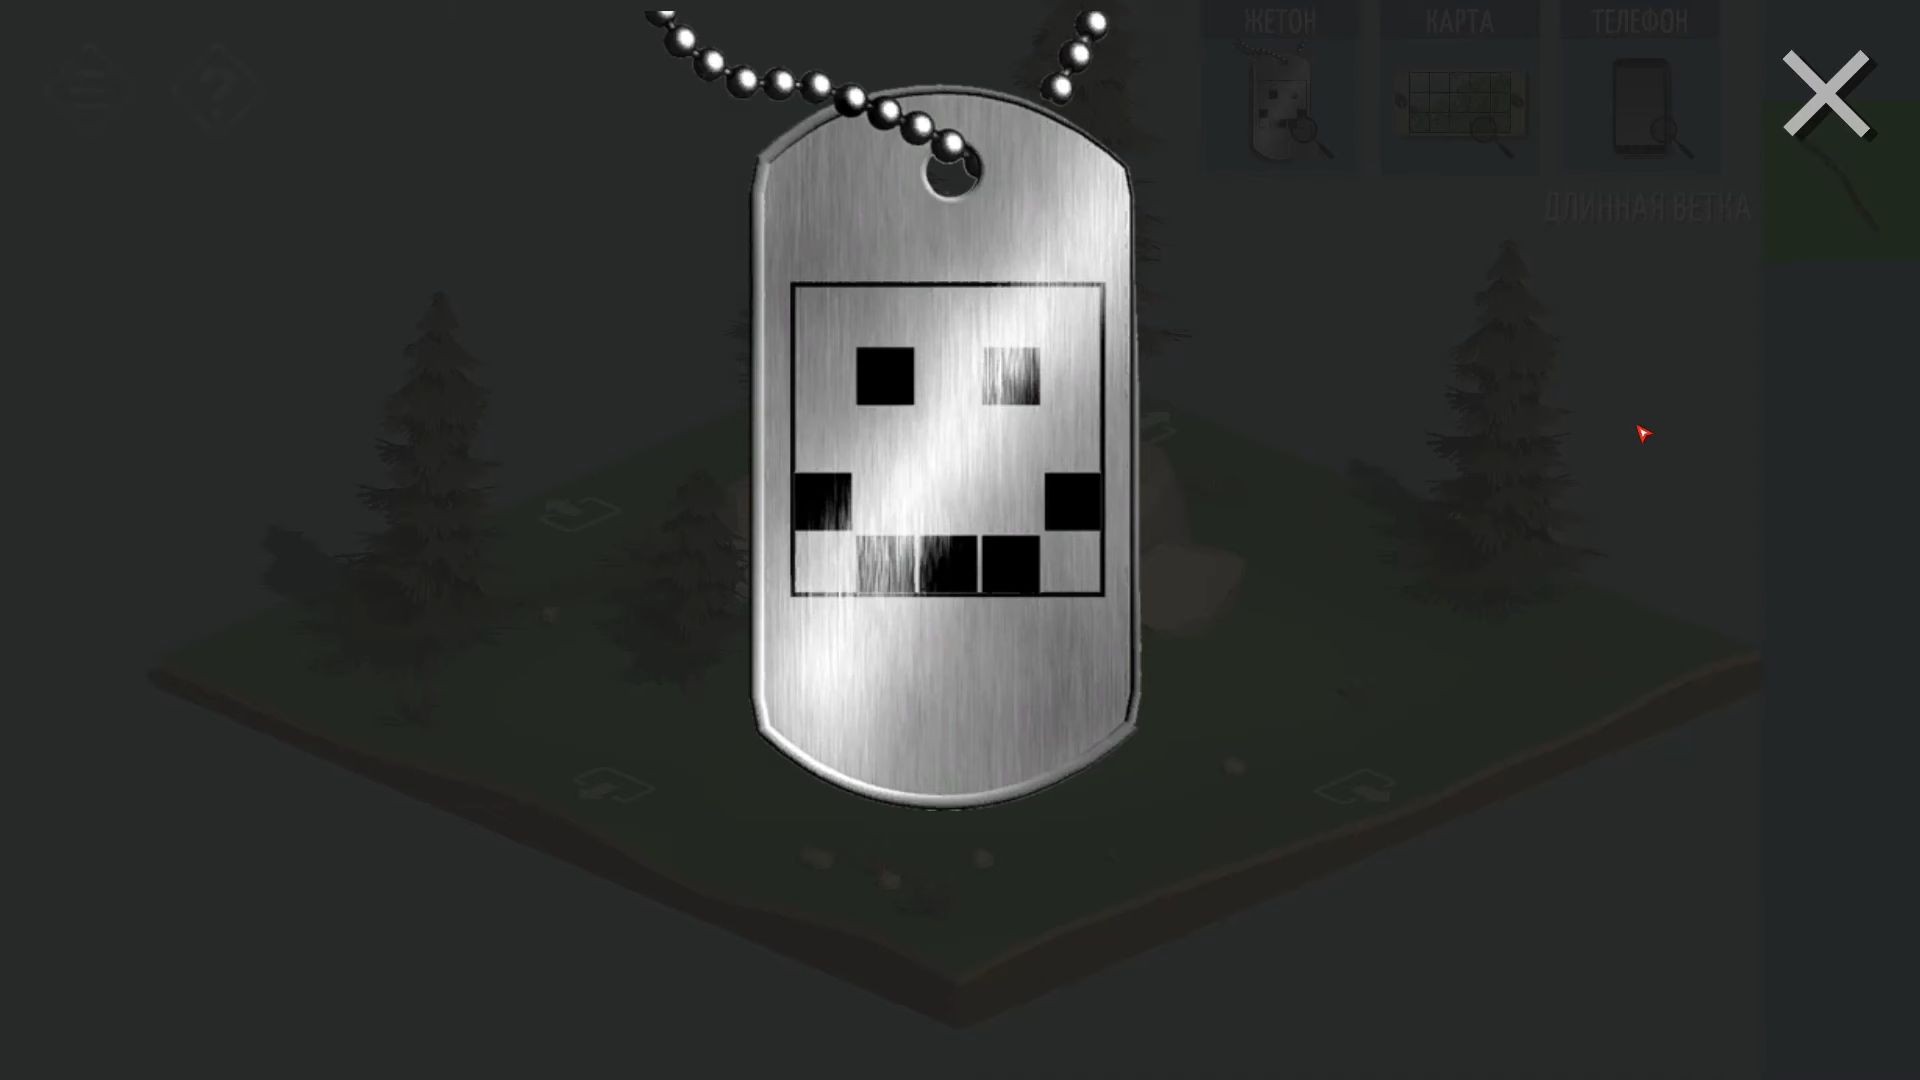
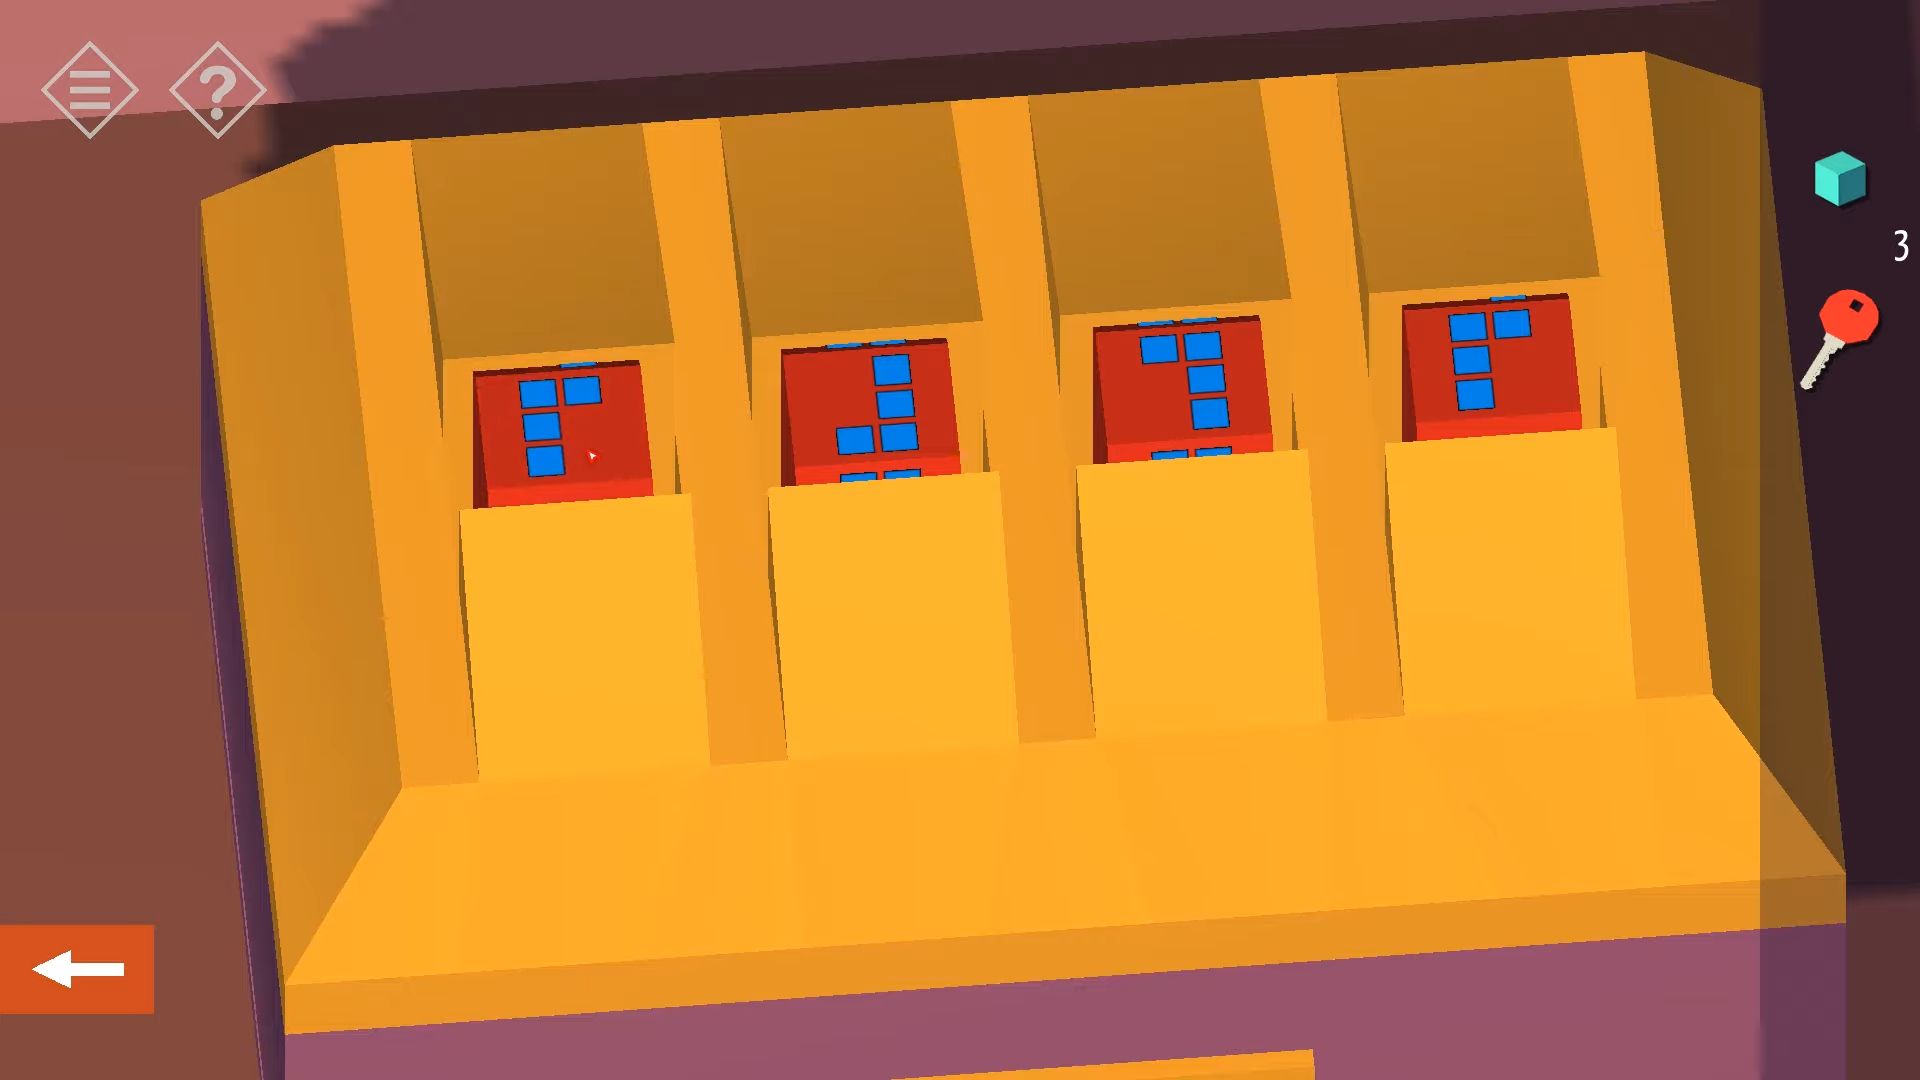
Now, use the stick to tip over the bird’s nests on top of the rocks in different areas. After each nest falls, touch it to check for a dog tag to collect. Next, knock the phone in your inventory and press the home button at the bottom to activate the screen. There’s a puzzle to unlock with 3 Tetris-style shapes that change when tapped. Solve the puzzle by tapping each shape until all three fit together in a single block.
The top and bottom ones must match shapes that fill gaps in the center block. After completing the first part, use the dog tag to finish the second part of the puzzle. Tap the squares on the 5×5 grid to match the black squares on the dog tag image.
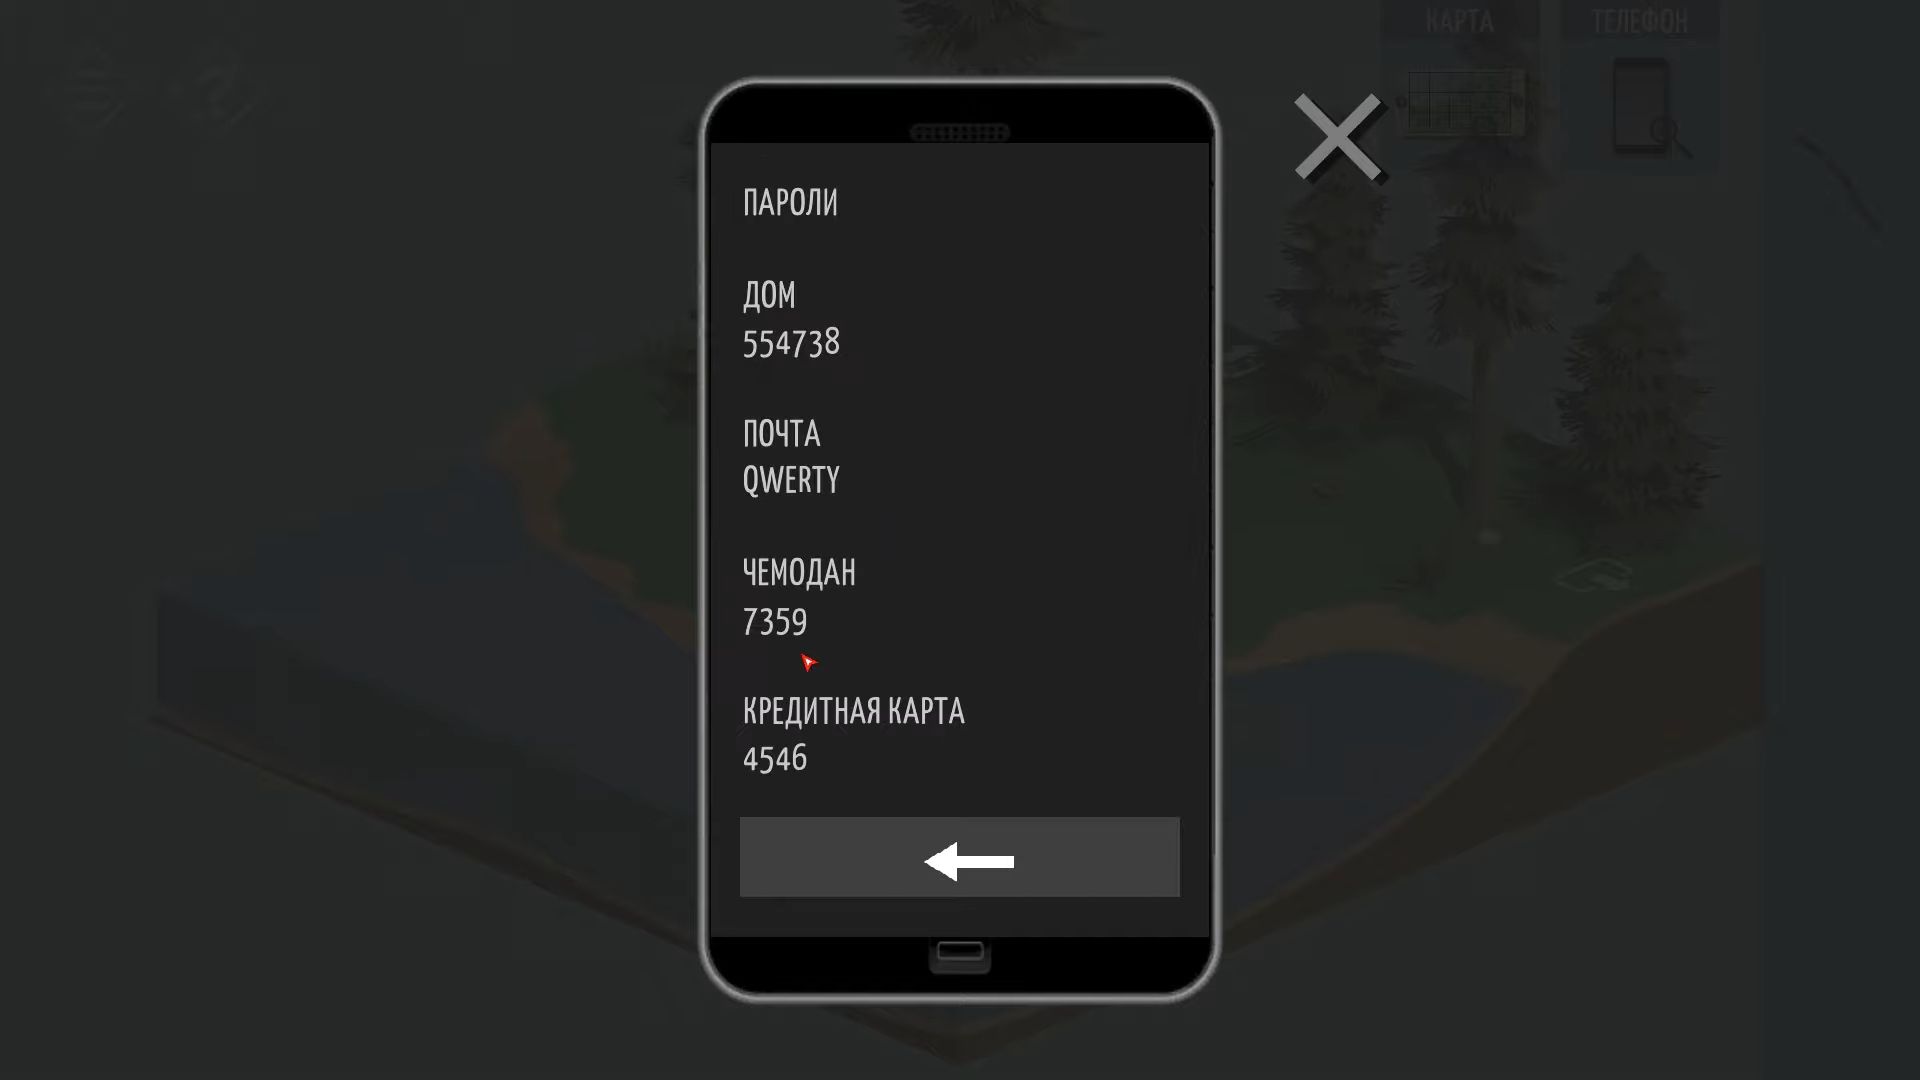
After that, you’ve opened the phone. The important thing you’re looking for in the phone is the notepad with a list of passwords. Look through the list to find the code for the briefcase. Close the phone and go back to the scene with the blue car and the briefcase on the table. Use the code you found (7359) to unlock the briefcase.
Grab a black key from the case and turn the view to see the back of the blue car. Zoom in by tapping, then use the black key to unlock the trunk.
Take out a Fire Ax from it and then go back along the river bank to the middle section (top middle square on the drone map view). There, you’ll see a tall dead tree leaning over the water. Use the ax on it multiple times until it falls, letting you cross. It ends the part 1.
Chapter 7 – Part 2
Explore Chapter 7 – Part 2 with the complete guide for Tiny Room Stories: Town Mystery. You will be provided step-by-step instructions, accompanied by images.
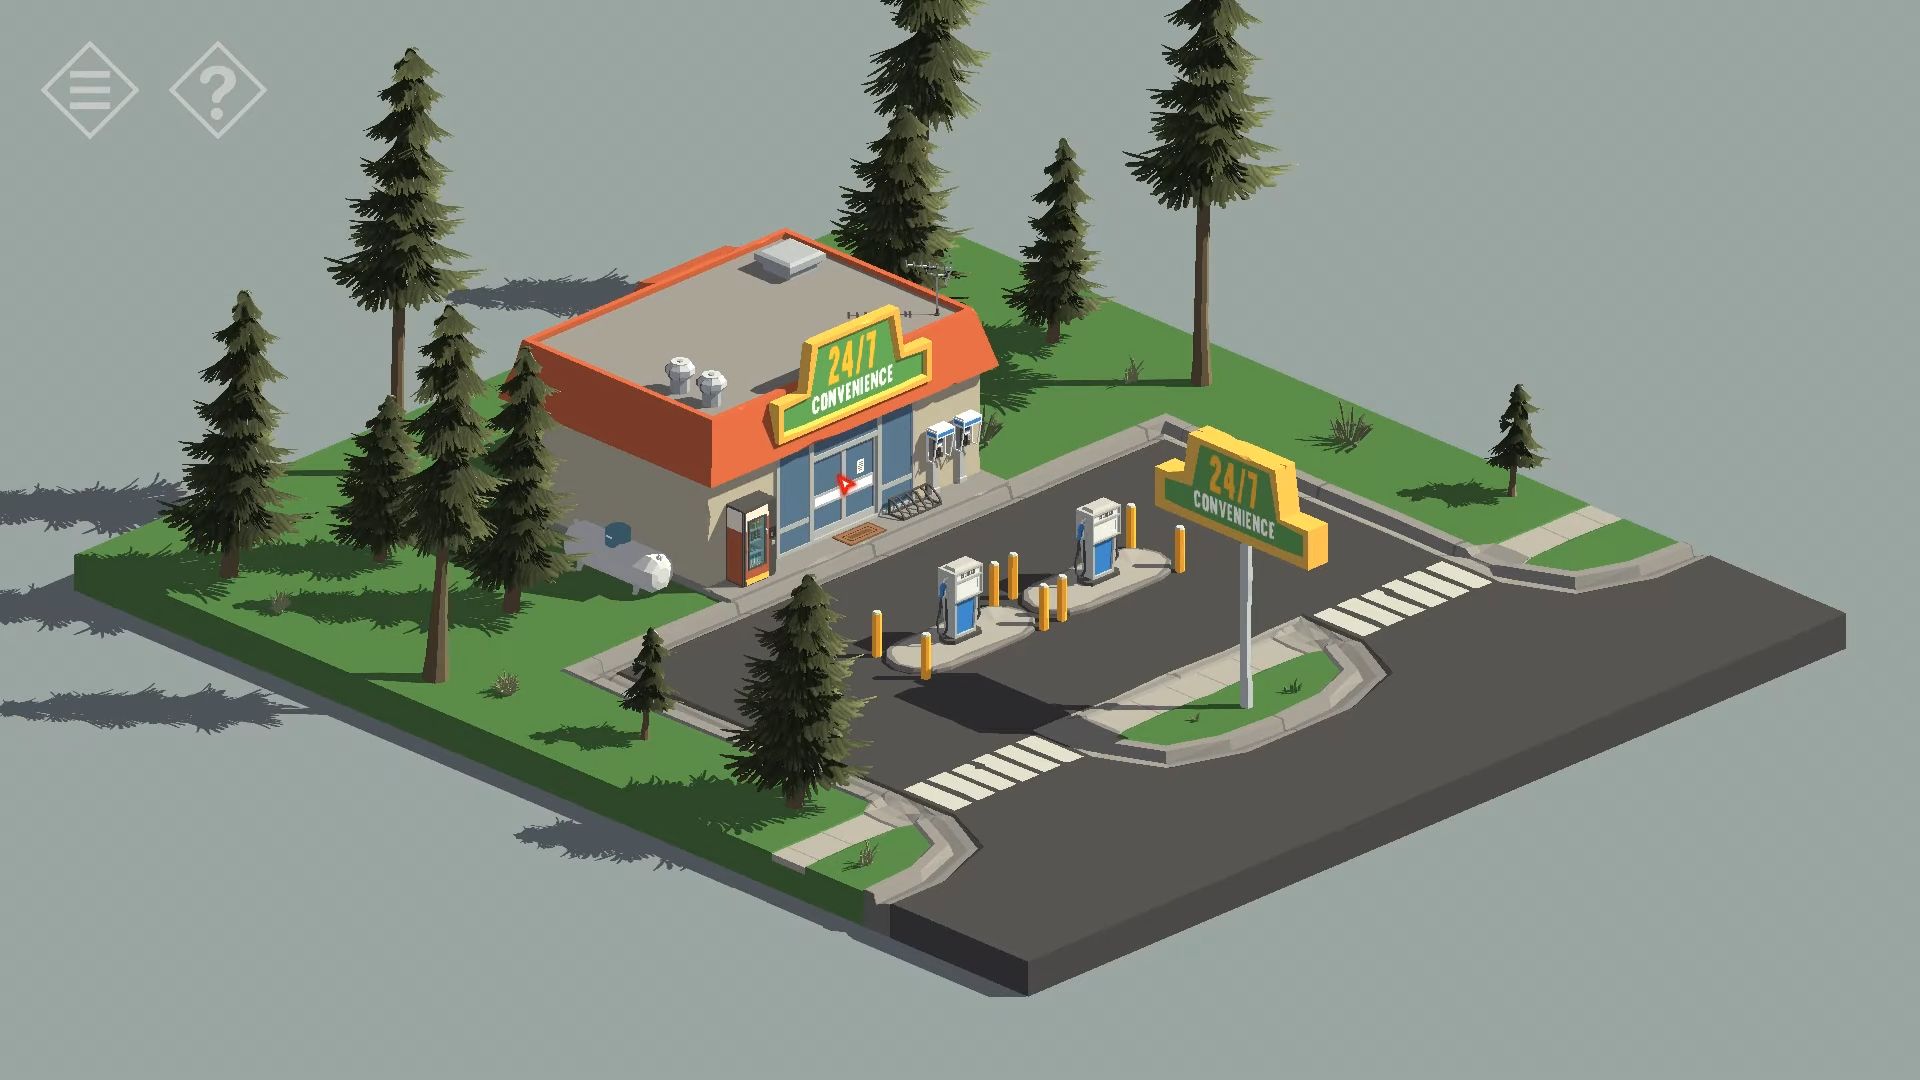
Gas Station
Once you’ve crossed the river, you’ll find the gas station easily. Now, your task is to get a container and fill it with gasoline. Zoom in on the front of the building, then touch the pay phones on the right side of the door. Open the left phone to find coins, and collect them. Move back and tap the snack machine on the left of the door, and use the coins to grab a Remote Door opener.
Head back and knock on the doors, use the opener to open them, and tap to go inside.
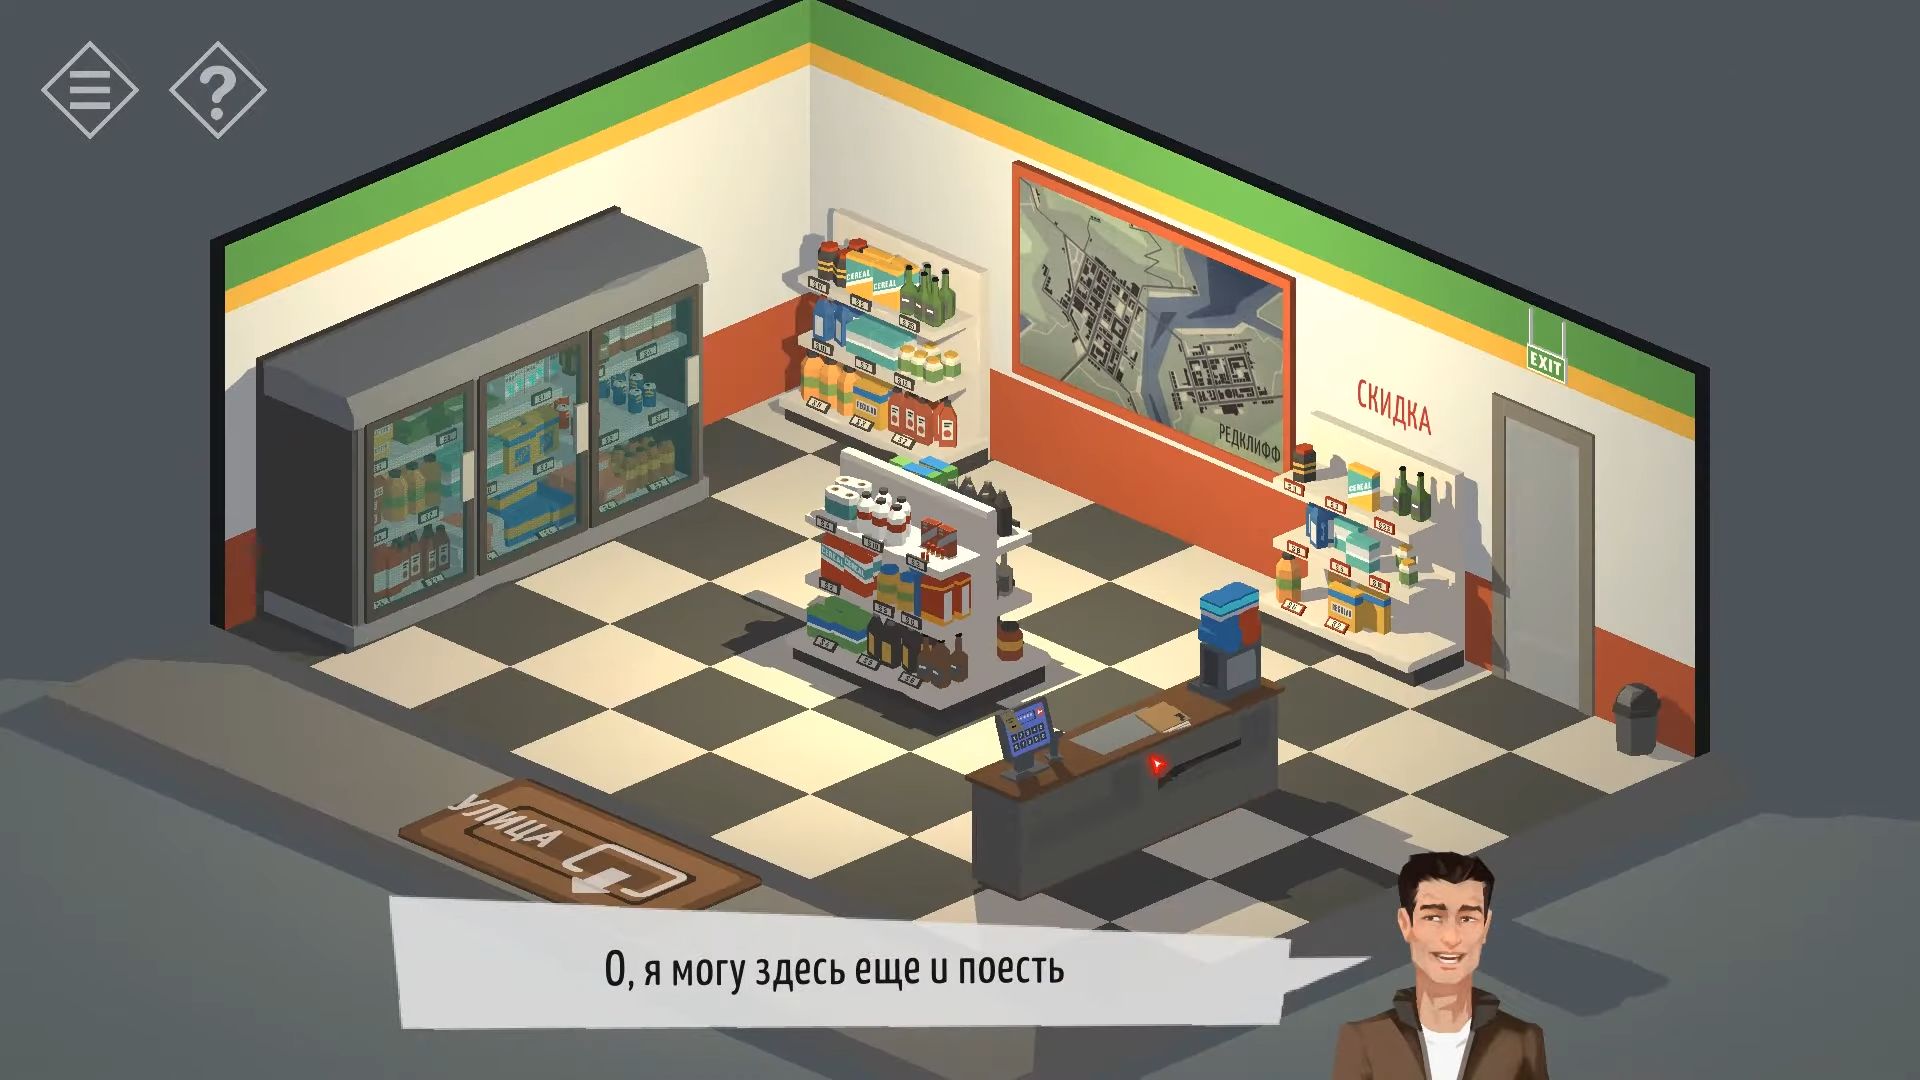
Knock on the shelf in the middle of the room with things on it. On the top right of the shelf, tap to collect 2 shotgun cartridges. Step back and turn around to see the back of the counter. Touch the counter to get a closer look and find a shotgun on the shelf. Use the cartridges on it to load the shotgun.
While at the counter, notice the computer/cash register, which needs a password to unlock, and a folder with some papers on the countertop. Now you have to touch the papers to view various receipts. Leave the building and turn around to see a door at the back. Touch to zoom in and then use the shotgun to shoot the lock. Now, you can enter the small back room.
Inside, there are two locked items; a safe on the back wall and a cabinet by the boarded door leading back into the main shop. Tap the boarded door to open it and easily access the shop.
Start by checking the back wall where the safe is on the shelves. There’s a note on it with a hint for the passcode. The note has drawings of things you can find in the shop, and some are cheaper on the discount display. Find 5 items, matching the patterns exactly, and one should be on the discount rack.
Use their prices to create a six-digit code (9 11 3 2 1). Open the safe to collect the access card. Move to the big cabinet in the back room.
There’s another paper with a clue for the passcode (N: 25.05.19). Combine this with another clue above to find the 6-digit code for this lock. Look for a receipt on the counter with the same date and get a 6-number code from it (999112). Collect the Gas Canister and go outside to one of the gas pumps. Use the access card on it to activate it and then use the gas canister to grab it ready for fuel.
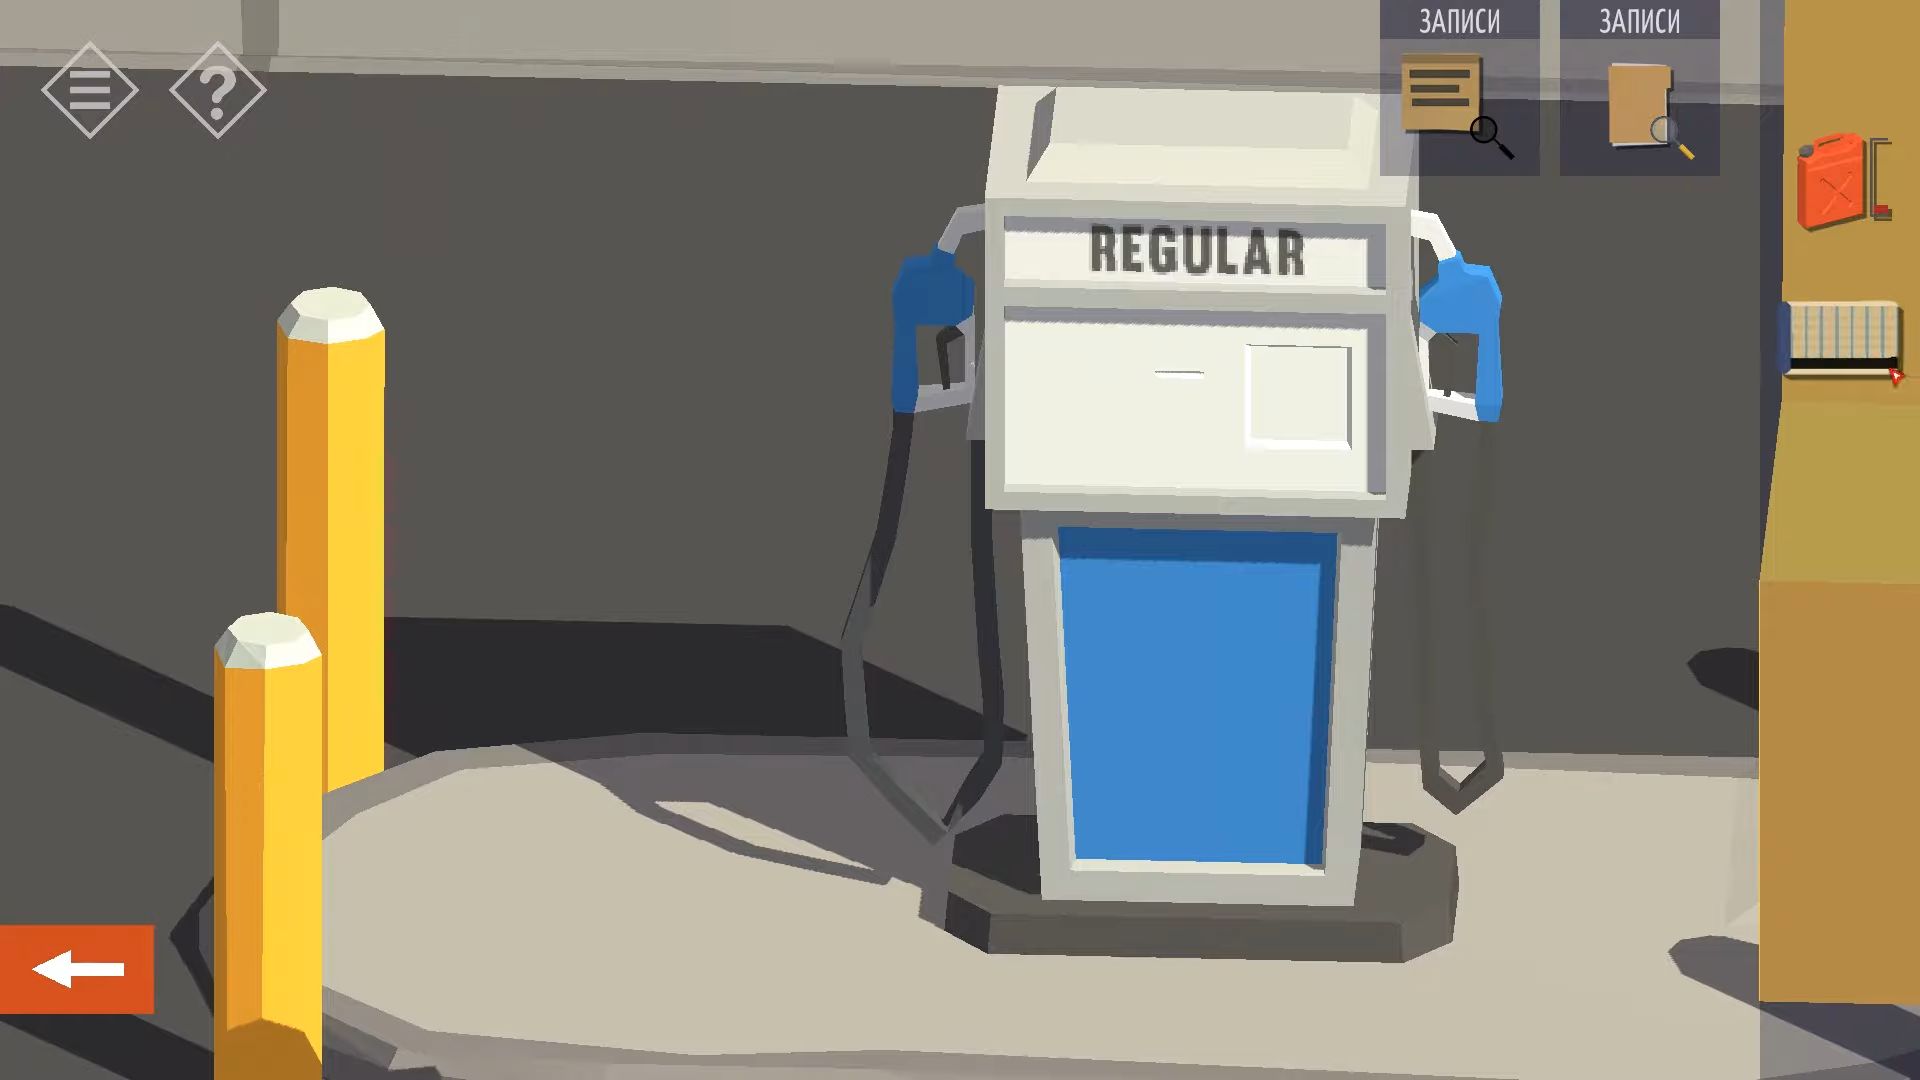
Now, let’s proceed back to the counter with the computer screen and unlock it. On the screen, there’s a note for Today’s password with an arrow pointing left. Look at the wall where the arrow points to find a shelf with 5 bottles. Knock each bottle to turn it until you can see the level in each. Use the scale on the left to get the number for each level (4 0 2 1 3).
Once it’s unlocked, if you’ve already placed the gas can as mentioned earlier, you can go ahead and activate the pump to start fueling. Return outside and touch the gas canister to collect it. Tap the bottom of the screen to head back to the car, then use the gas can on it to finish this part of chapter 7.
Chapter 7 – Part 3
Explore the complete guide for Chapter 7 – Part 3 in Tiny Room Stories: Town Mystery.
52 Cardon Street
Tap on the mailbox next to the front gate to open it and grab a black key. Use the key on the front door to unlock it and go inside. In the initial room, grab a red book from the table at the center. Rotate the view to spot two drawers on the back wall and get a brown book from the top of one of them.
Locate the sofa on the wall and touch it to move it, revealing another brown book underneath. Proceed into the kitchen.
Get a green book from the table and open up the drawer in the bottom left to discover a flashlight. Proceed to the corridor at the back.
Tap the little table at the end to take a look, and then open the drawer to get a screwdriver. After that, touch the ladder to go up into the attic. Pick up the picture leaning against one of the walls, and then tap to grab the radio beside the blueprints. Take a look at the radio, knock it to turn it around, and see the back.
Use the screwdriver to open the battery case and get the battery. Open the flashlight and insert the battery into it to make the flashlight work. Go to the bedroom and turn to see the TV screen. Tap the unit below the TV, and look inside to find another red book and a green book.
Also, touch the TV control on top of the unit to collect it. Return to the main room and knock on the bookcase. It’s missing some books. Use the books you found to fill the bookcase. The books have colored stripes either at the top, middle, or bottom. Make sure to place them so that they match the others on the shelf.
This action opens the lower cupboard on the furniture, and now you can gather some notes with numbers. In the main room, take a look at the wall with the painting.
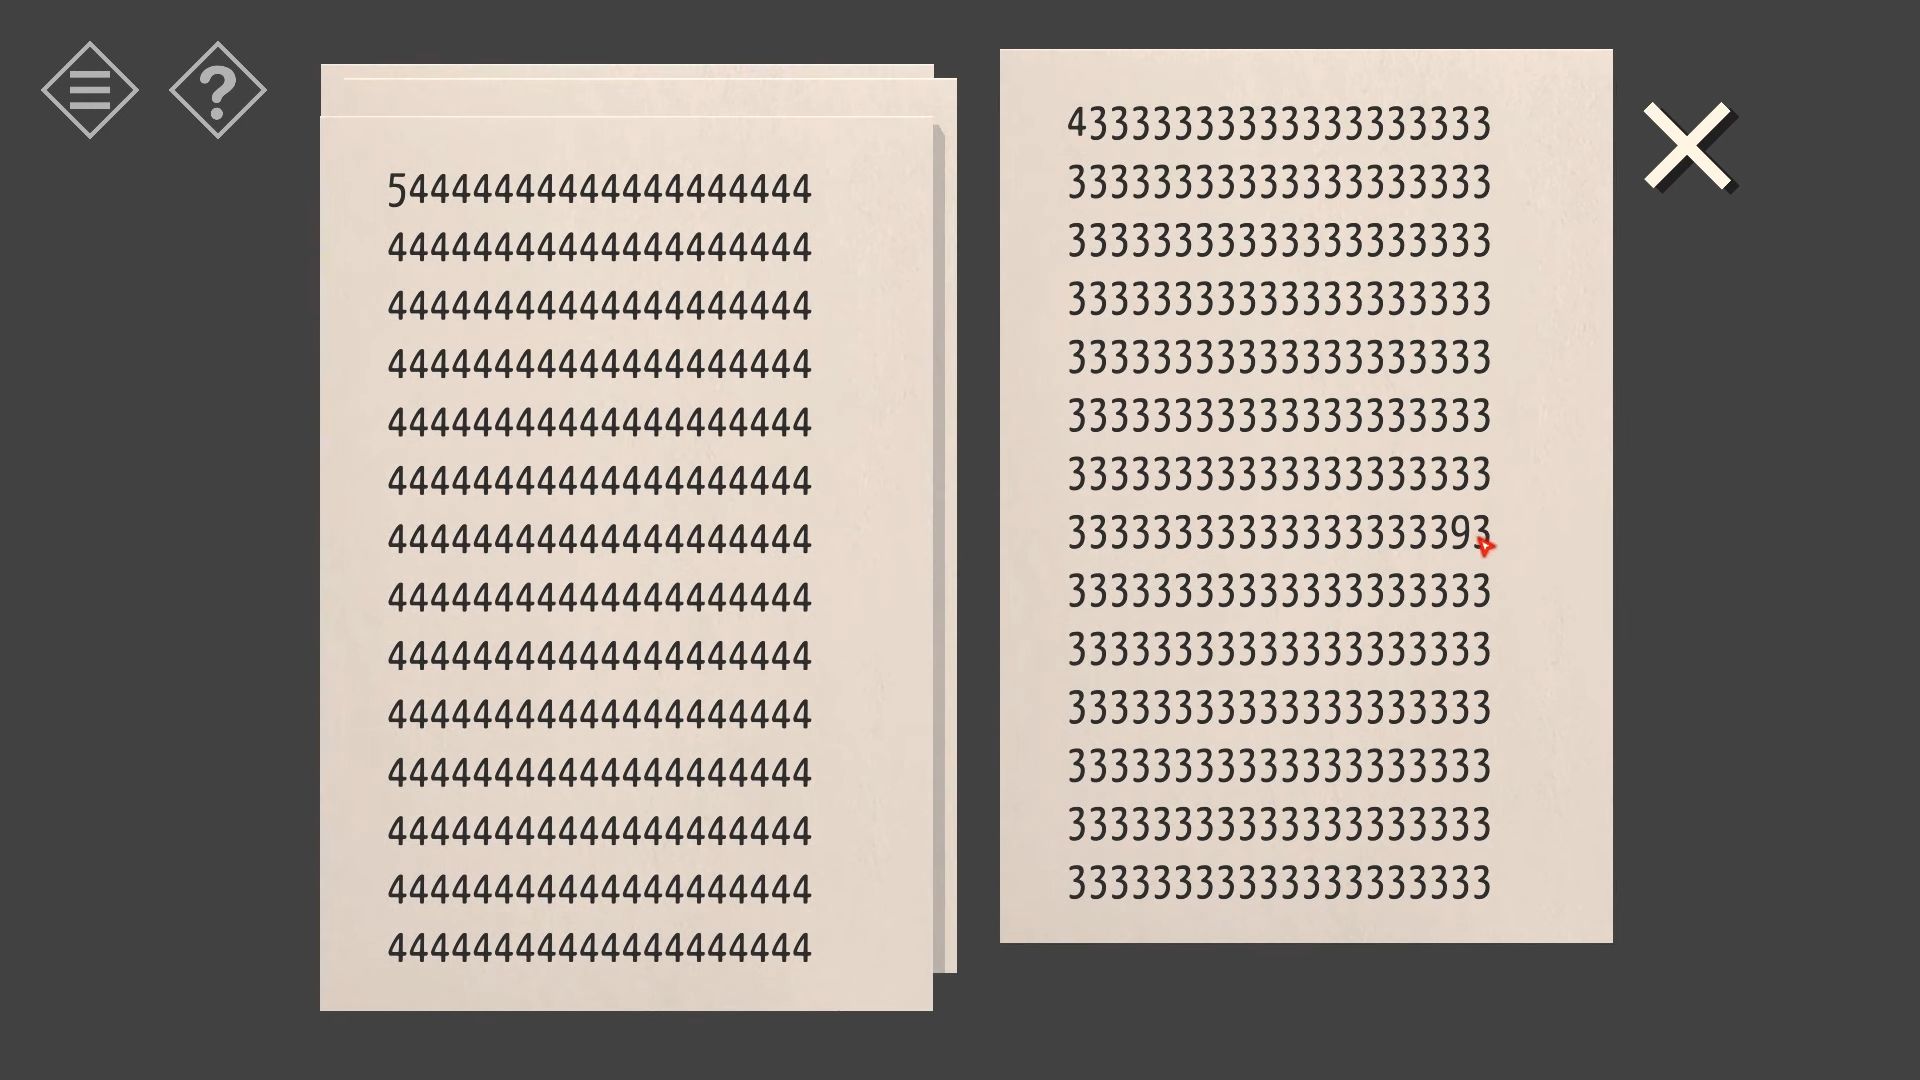
Tap the painting and notice a small bump on the left. Touch it to open the painting and uncover a keypad lock with a 5-digit code. Examine the papers you found with numbers printed on them. There are 5 papers, and the first number on each sheet indicates the order (2 are not in order). The number needed for each entry is on each paper, but you have to check carefully to find it. It might not be the one that is printed many times (like 61394).
Once you’ve entered the code, you can touch the control to open the locks. Return to the corridor, and now there’s a secret door open at the end. Knock to go down to the basement. The basement is dark, and you can’t turn on the lights. Use the flashlight to explore the room.
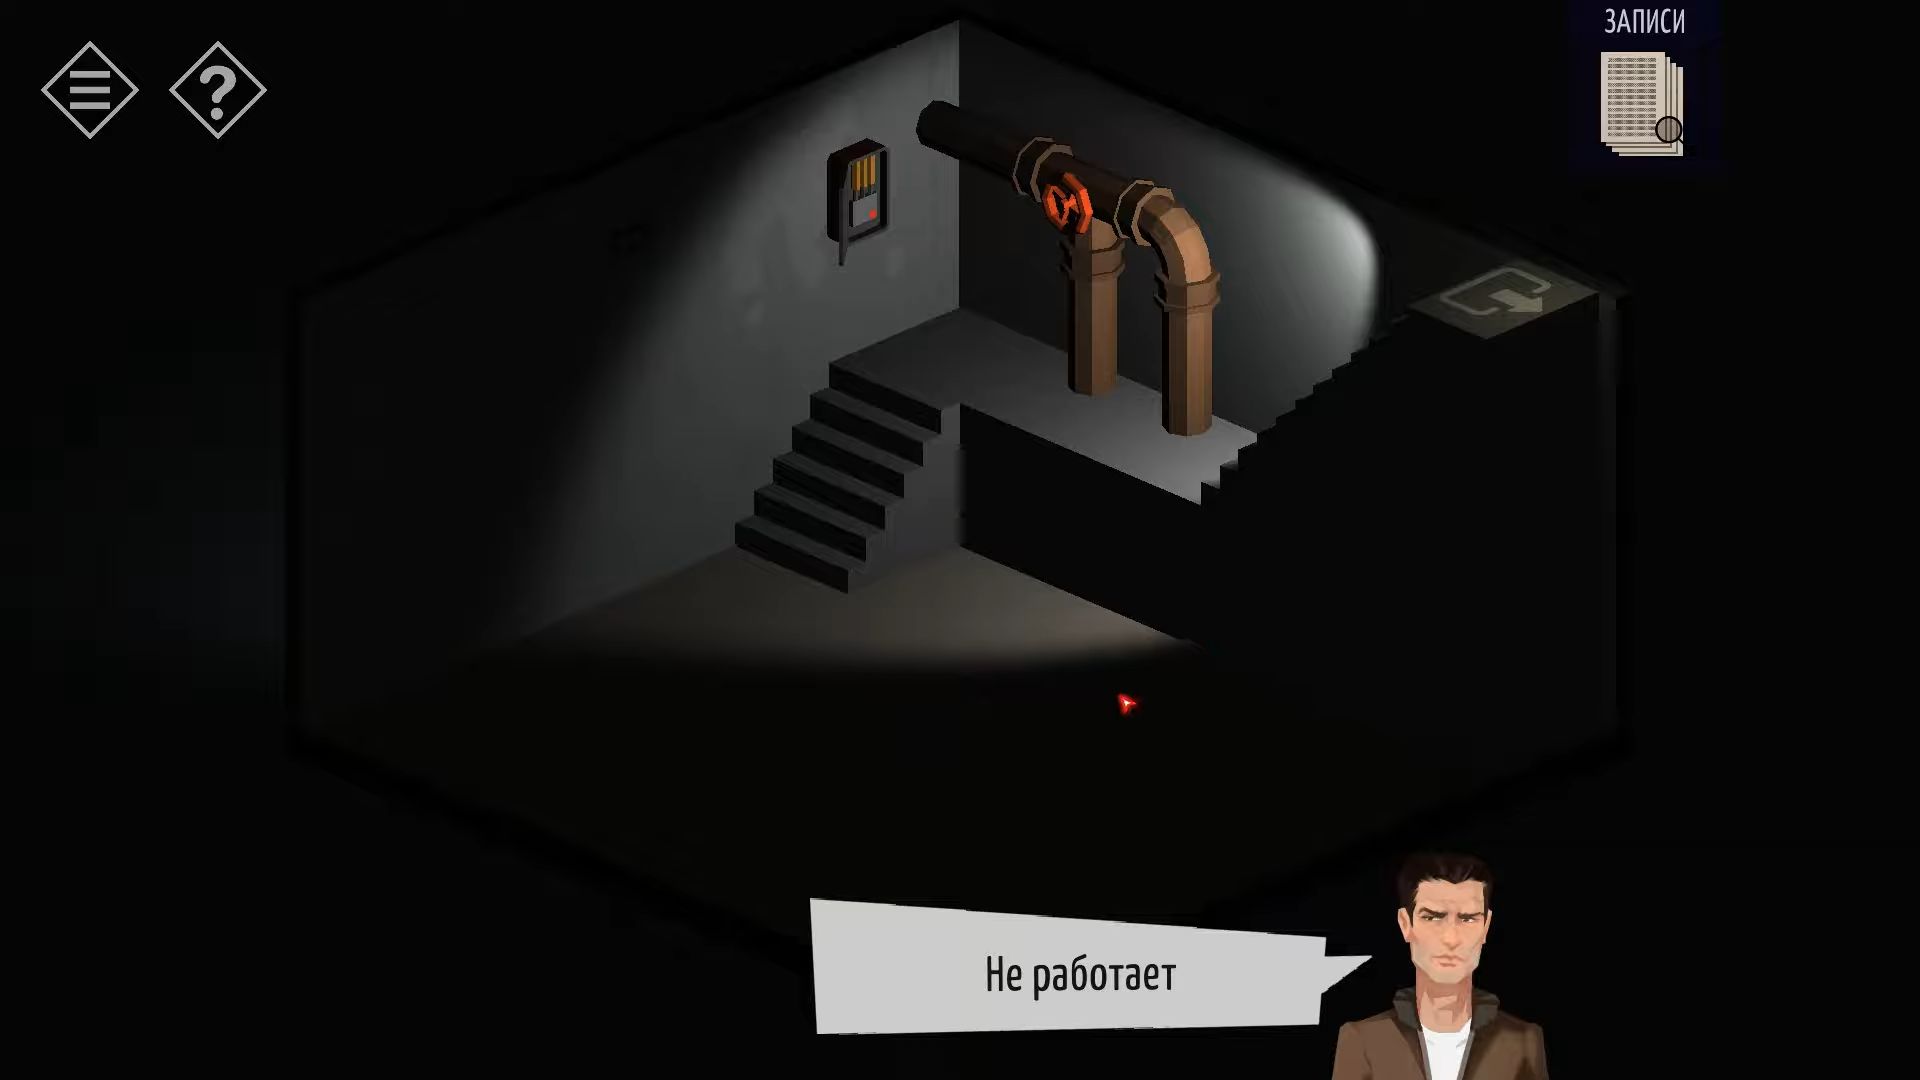
Turn around and locate the workbench on the back wall. Tap it to see a note about driving your father crazy when you were a child. This then prompts you to turn off the lights in the bedroom.
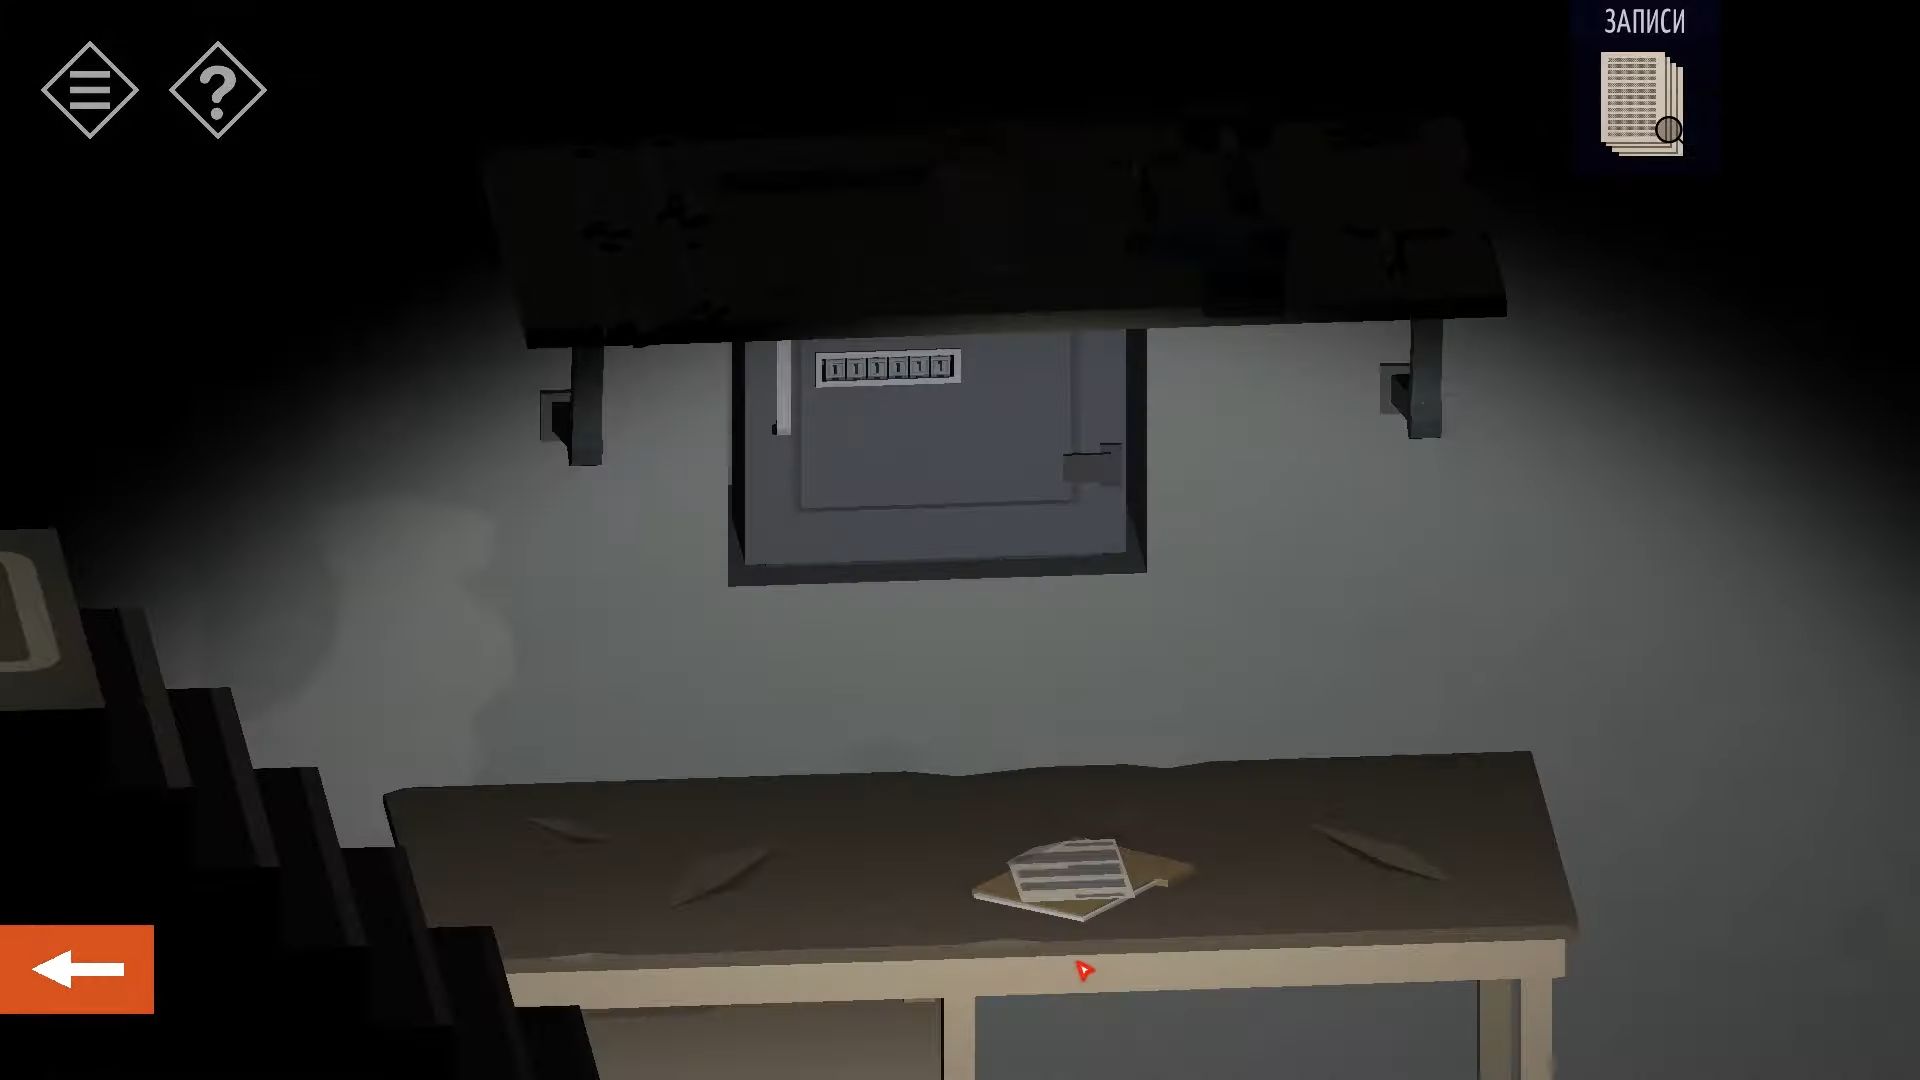
Above the workbench on the wall, there’s a safe that requires a combination. Follow the instructions regarding the lights in the bedroom. Return to the bedroom and use the light switch to turn the lights on and off. Occasionally, when you turn them on, the room will look different than usual.
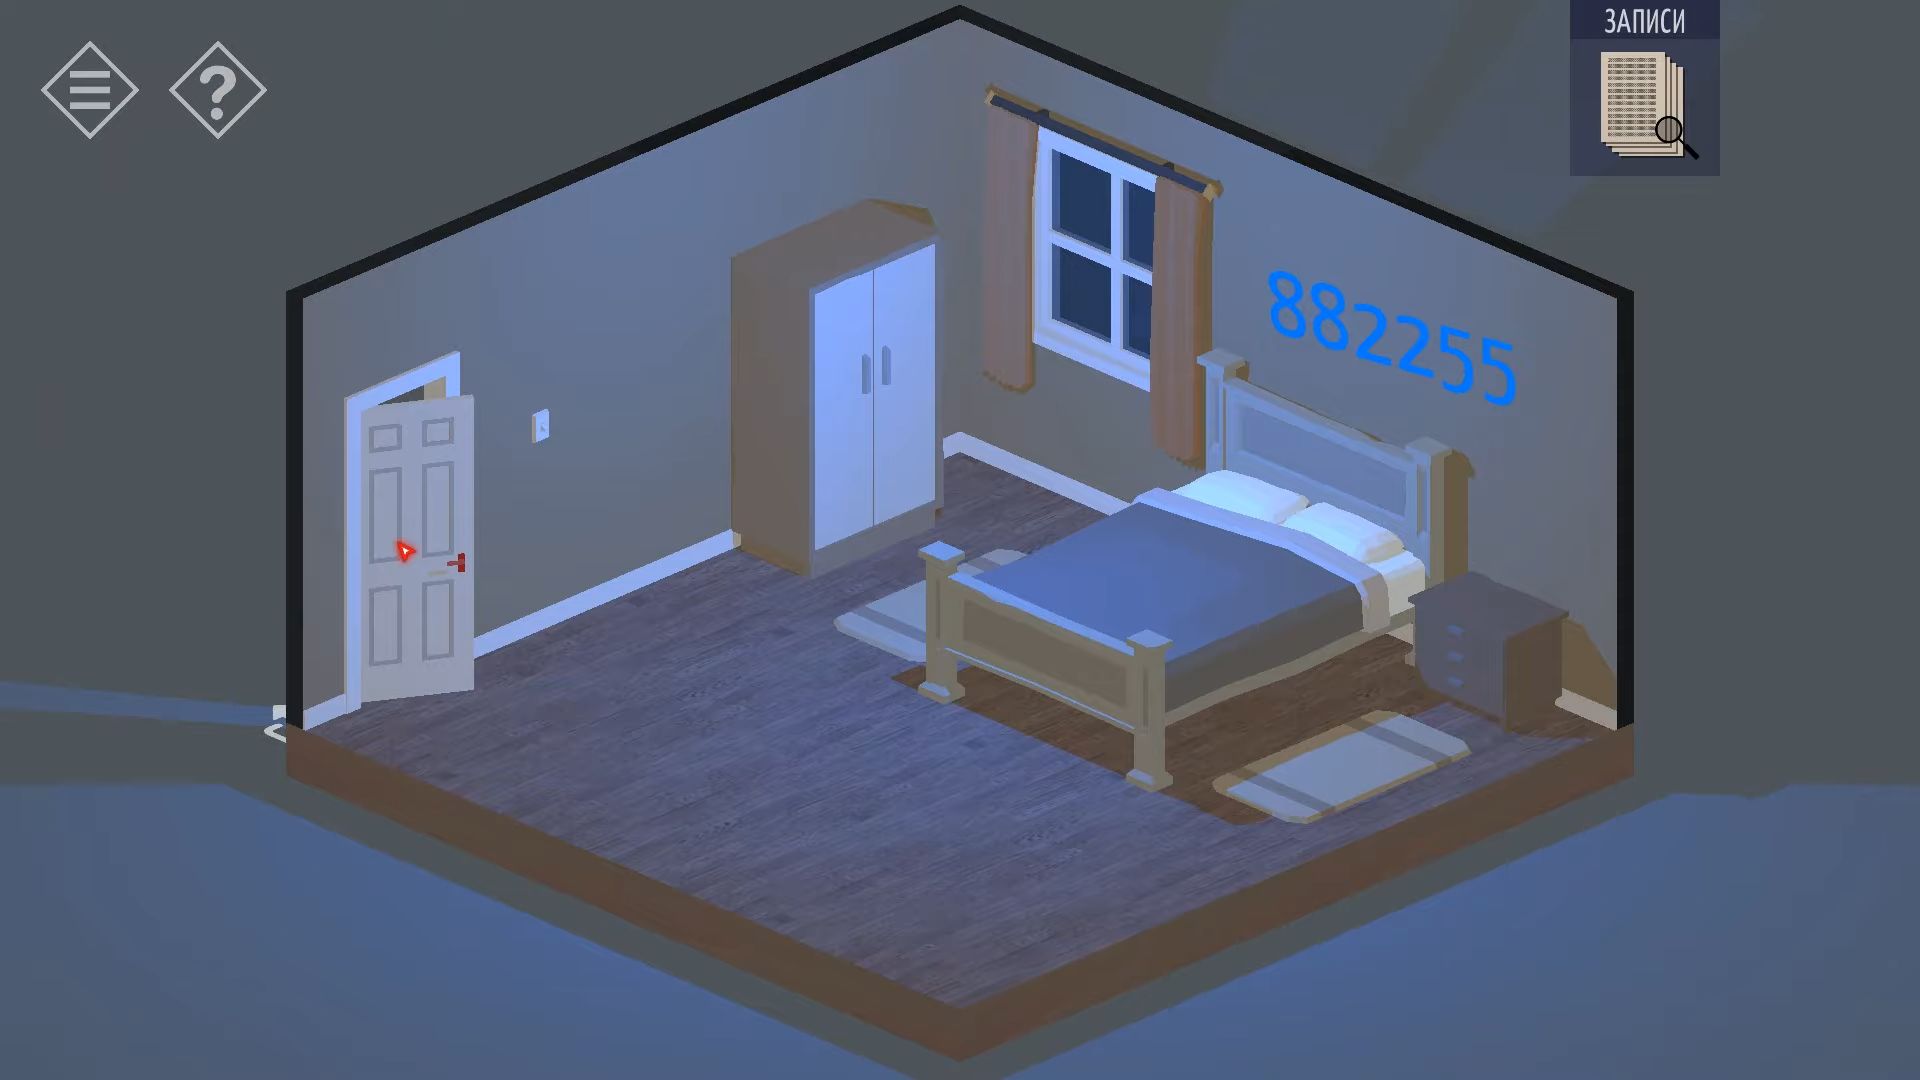
When this happens, check the room (882255). Open the safe to find a paper with details about the device and crystal, and the location of your next destination—the NEXT lab. With this, you’ve finished Chapter 7.
Chapter 8
Here’s the complete guide for Chapter 8 in Tiny Room Stories: Town Mystery.
NEXT Lab
After visiting your father’s house for the second time, you will discover a letter from him meant for you. It explained what happened before you arrived and shared the laboratory’s address, where your father believes you will find answers and know what to do next.
Now, you’re standing outside the NEXT lab building. Look around by turning the view to see the parking lot and the front door of the building. Tap the doors once more to open them, and then touch them to enter inside.

Turn the view around to see the reception desk from the back and inspect the two cups on the desk. Tap the drawers on the left, open each one, and gather a WC Key and a roll of tape. Step back and knock on one of the cups to look at it.
Keep tapping until it turns around and shows a fingerprint on it. Use the tape to collect the fingerprint and repeat this process with the other cup on the desk.
Now, step back and knock on the small table in the opposite corner of the room. On the table, there is a file and another cup. Tap the cup to reveal a fingerprint on it. Use the tape once more to collect this fingerprint. Turn the view toward the WC door, use the key to open this door, and go inside. The storage room is locked.
Enter through the middle door and turn the view to see the mirror on the wall. Use the tape to collect a fingerprint from it. Return to the reception area and check the locked door on the back wall with the fingerprint scanner. Try each of the fingerprints on the scanner, one of them will unlock the door and then enter the room.
Inside the room, tap on the small white wall cabinet on the left of the back wall. Open it to get a Red Key and knock on the filing cabinets. Check the drawers, and in the bottom left drawer, you’ll find a clue; Reception password: 37825. Return to the WC corridor and use the red key to unlock the store room. On the shelves at the back, collect a screwdriver.
Now, go back to the reception and exit the building to the front parking area. Tap on the blue can to view it, then use the screwdriver and knock on the glove compartment to open it. Next, you have to knock to collect a Level 1 Access Card.
After that, head back into the reception area and rotate the view to see the reception desk computer. Use the code found above to unlock it, use the Access Card on the card reader, and touch the option to raise the access level to Level 2. Collect the Level 2 access card, and tap on the elevator doors to the right of the desk. Use the elevator control to move to the third floor, which is a Biology Lab.

Turn the view to find a door with a card reader. Use your access card to open this door and enter the lab. Go through the next door into an office area and rotate the view to see two desks.
On one of the desks, find a green key and take a look at some notes on Experiment N: 000013. Notice the folders on the left of the screen with squared patterns. Check the other desk in the room, and you’ll see a screen that needs a password, along with another folder with a similar pattern. Knock on the screen and then on the green question mark to get a clue: Tree + Water.
Return to the first desk and touch the computer screen to see a 5×5 square grid, which is a puzzle. Tap the squares to turn them blue, and notice the outlines that appear. Match these outlines to the arrangements of squares on the folders in the room to figure out the pattern of blue squares needed. Only 3 folder patterns are required, and one of the folders is upside down. Once solved, you’ll unlock a message on the screen with instructions for combinations.
Go back to the first room on this floor and observe a tree in a glass case and a trap door on the floor. Knock on the trap door and use the green key to open it.
On the floor, there are three pipes with control valves. Adjust the valves to turn off (close) the 2 pipes leading away from the tree position. Keep the remaining valve open. Knock on the control panel in front of the tree case and use the option to turn on the water. The case will fill up with water. Next, use the option to rotate the tree to reveal a code: 193757.
Notice the arrows that appear as you rotate; they are also a clue. The arrows indicate that you should read the code backward, which is > 757391. Return to the office room and use this code to unlock the password computer screen. View the message revealed and scroll down to see 5 green waveforms that you will need. Go back to the lab room and tap on the large screen above the control panel.
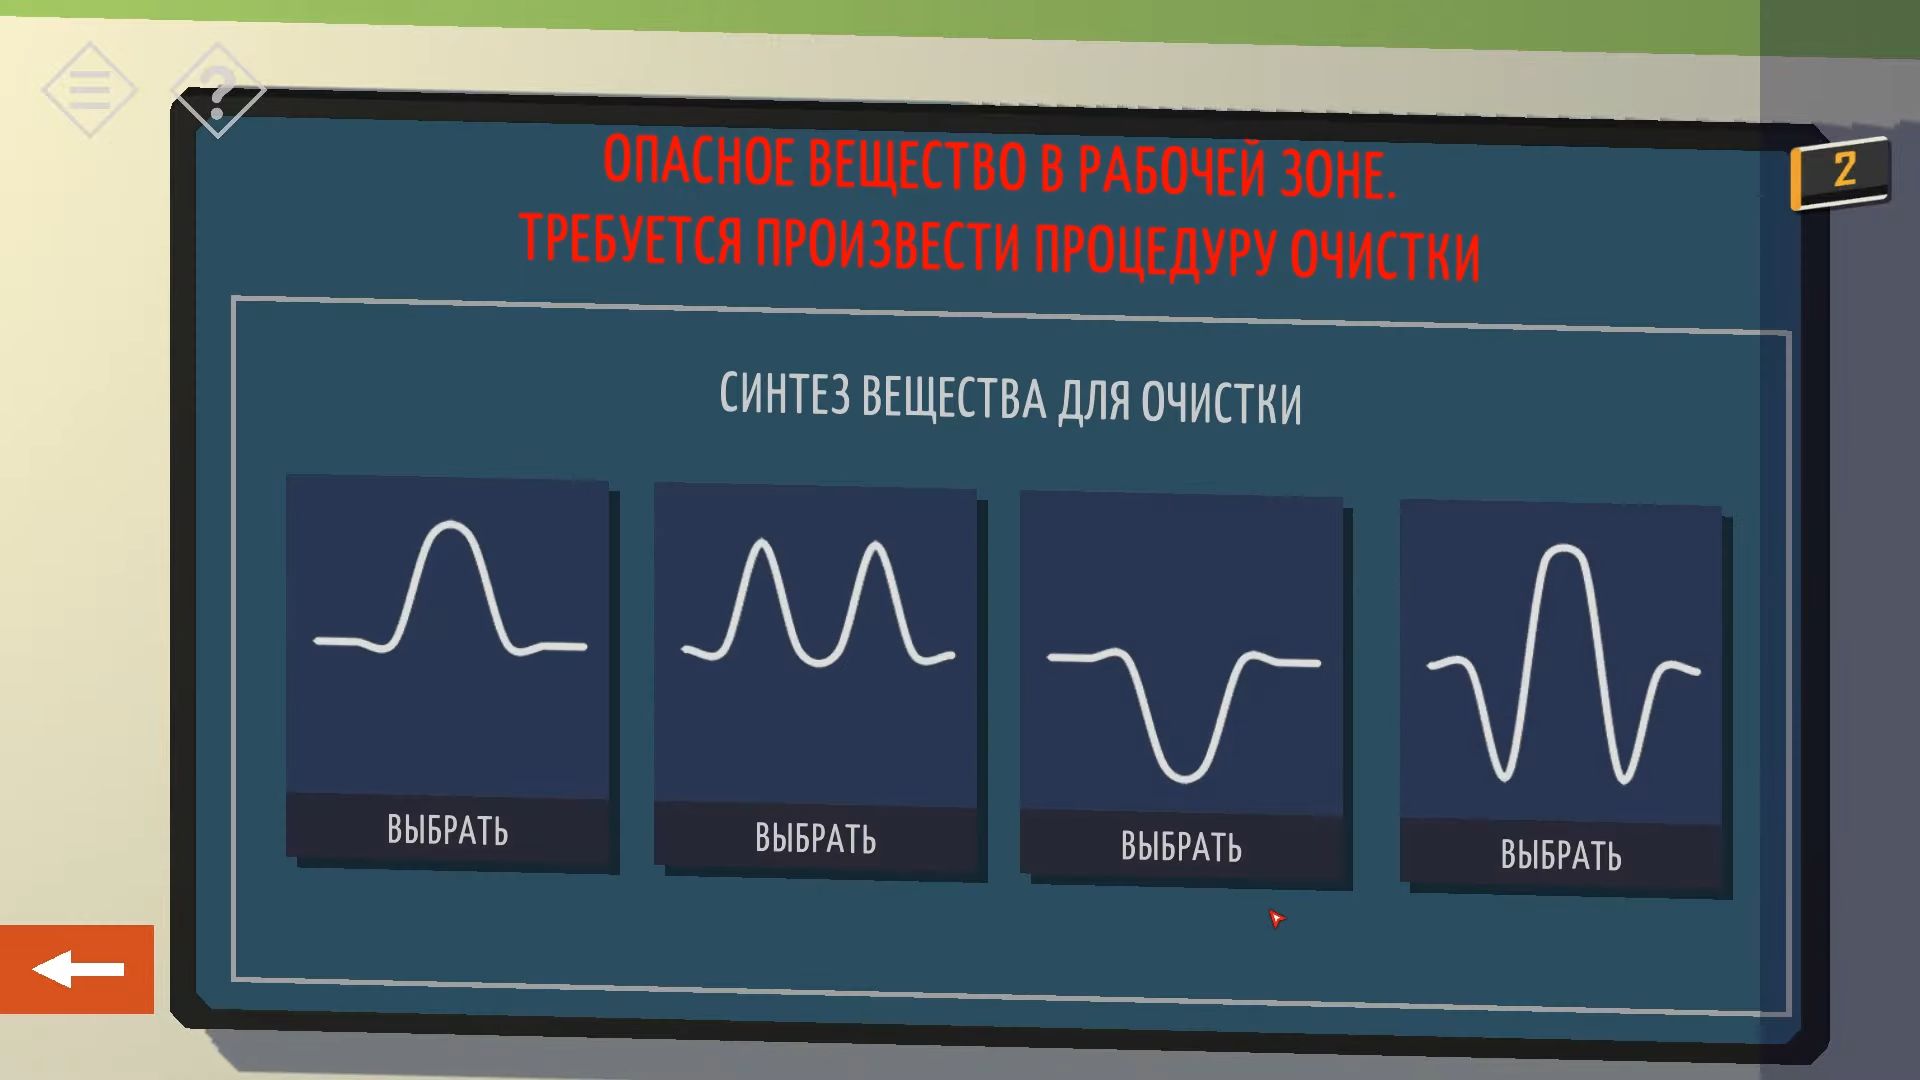
There is a dangerous substance that needs to be cleaned before you can use it. You will need to touch and select 4 waveforms to create a substance to clean the area.
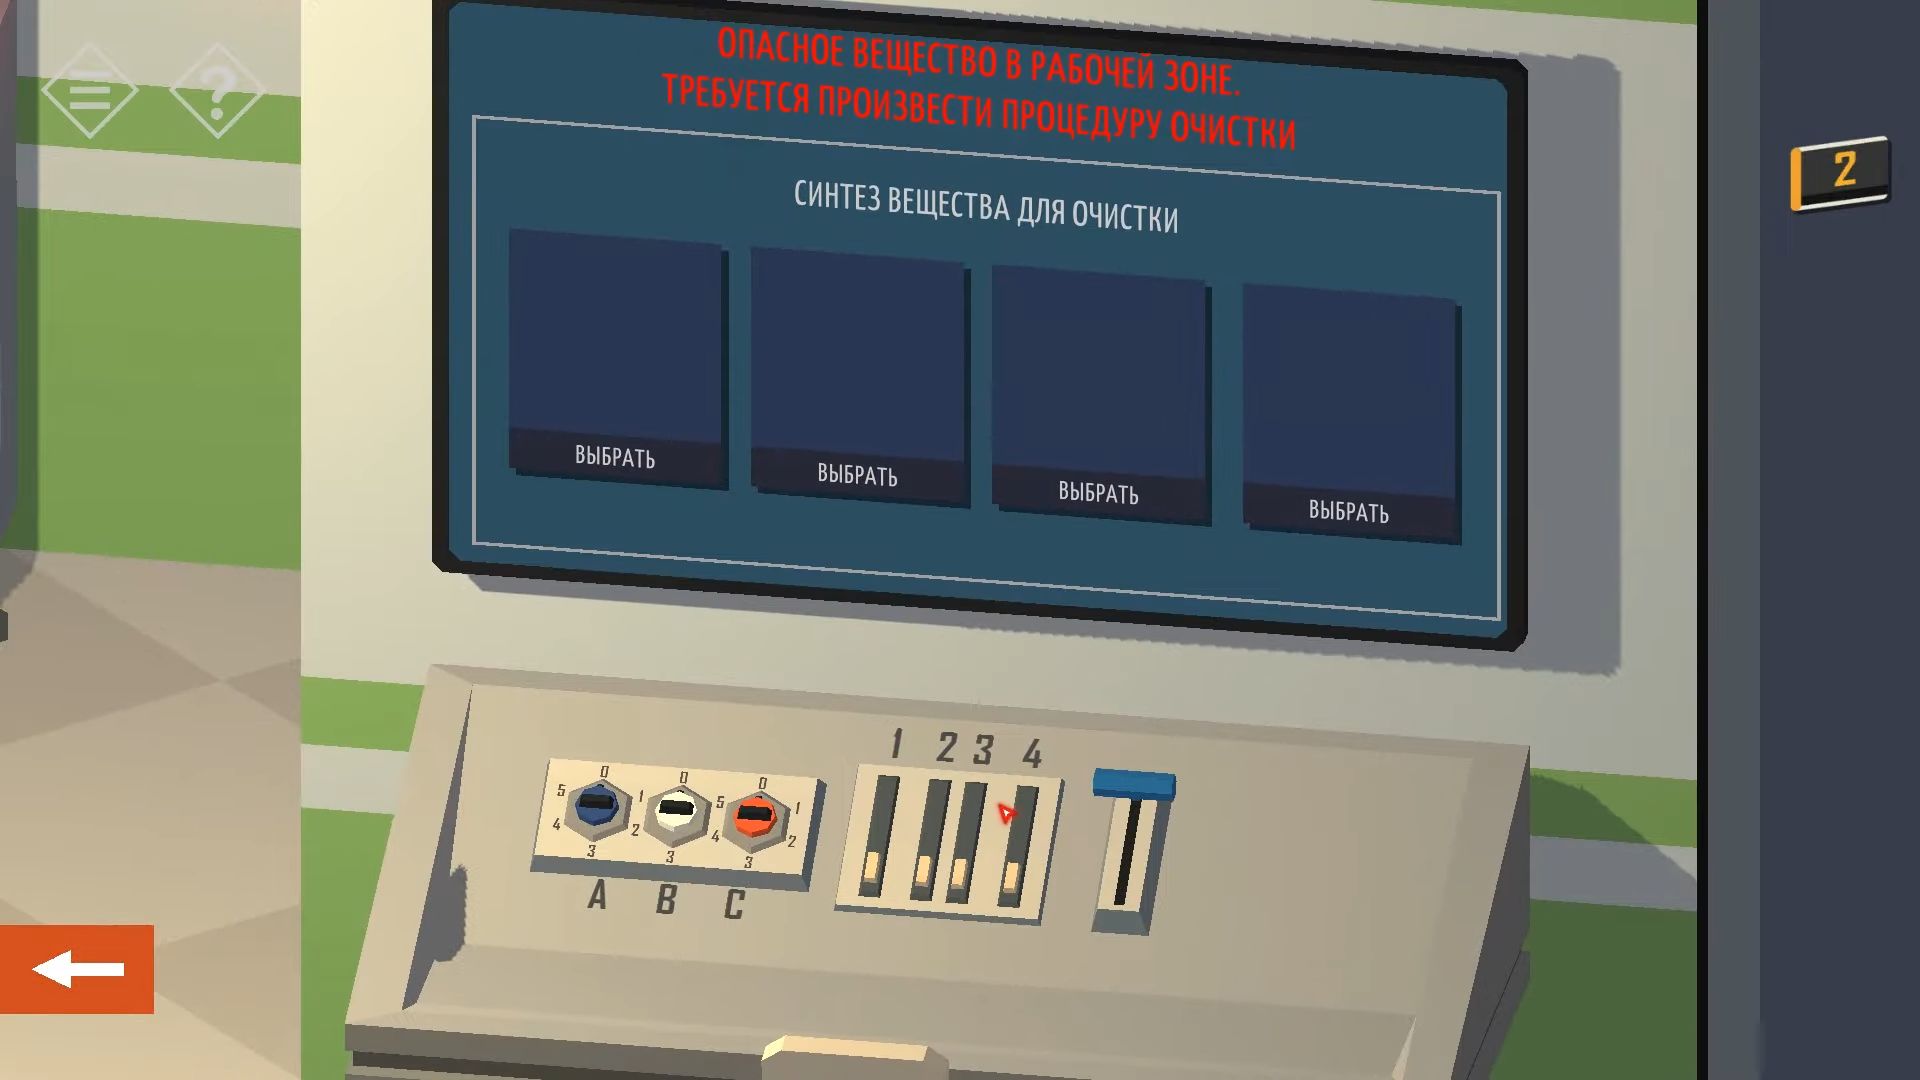
Tap each waveform and use the hint from the waveforms found above to choose the correct ones (one is made up of two in the clue).
Now adjust the dials on the control desk. The clue for this is the message from the other computer screen. A represents the number of positive peaks on the waveform, B is the number of negative peaks, and C does not touch. The values for A, B, and C are between 1 to 4 at the maximum. Set A=4, B=3, C=0, and tap each slider with numbers 1, 2, 3, and 4 until they reach the top.
Once you have all of them correct, touch the blue handle to activate it and complete the synthesis. Now, you can access the other door in the room with the red light above it. Navigate to the experiment room with plants and rotate the view to see a desk. There will be an access card Level 3 and a cage for mice.
Tap the cage to see that the mice have escaped and wonder what they will do tonight. Collect the Level 3 Access Card, exit the room, and go back to the elevator. Head to the fourth floor, which is the Laboratory, and you can use the Level 3 card to open the door to the lab. Inside is a room with chairs and a display board.
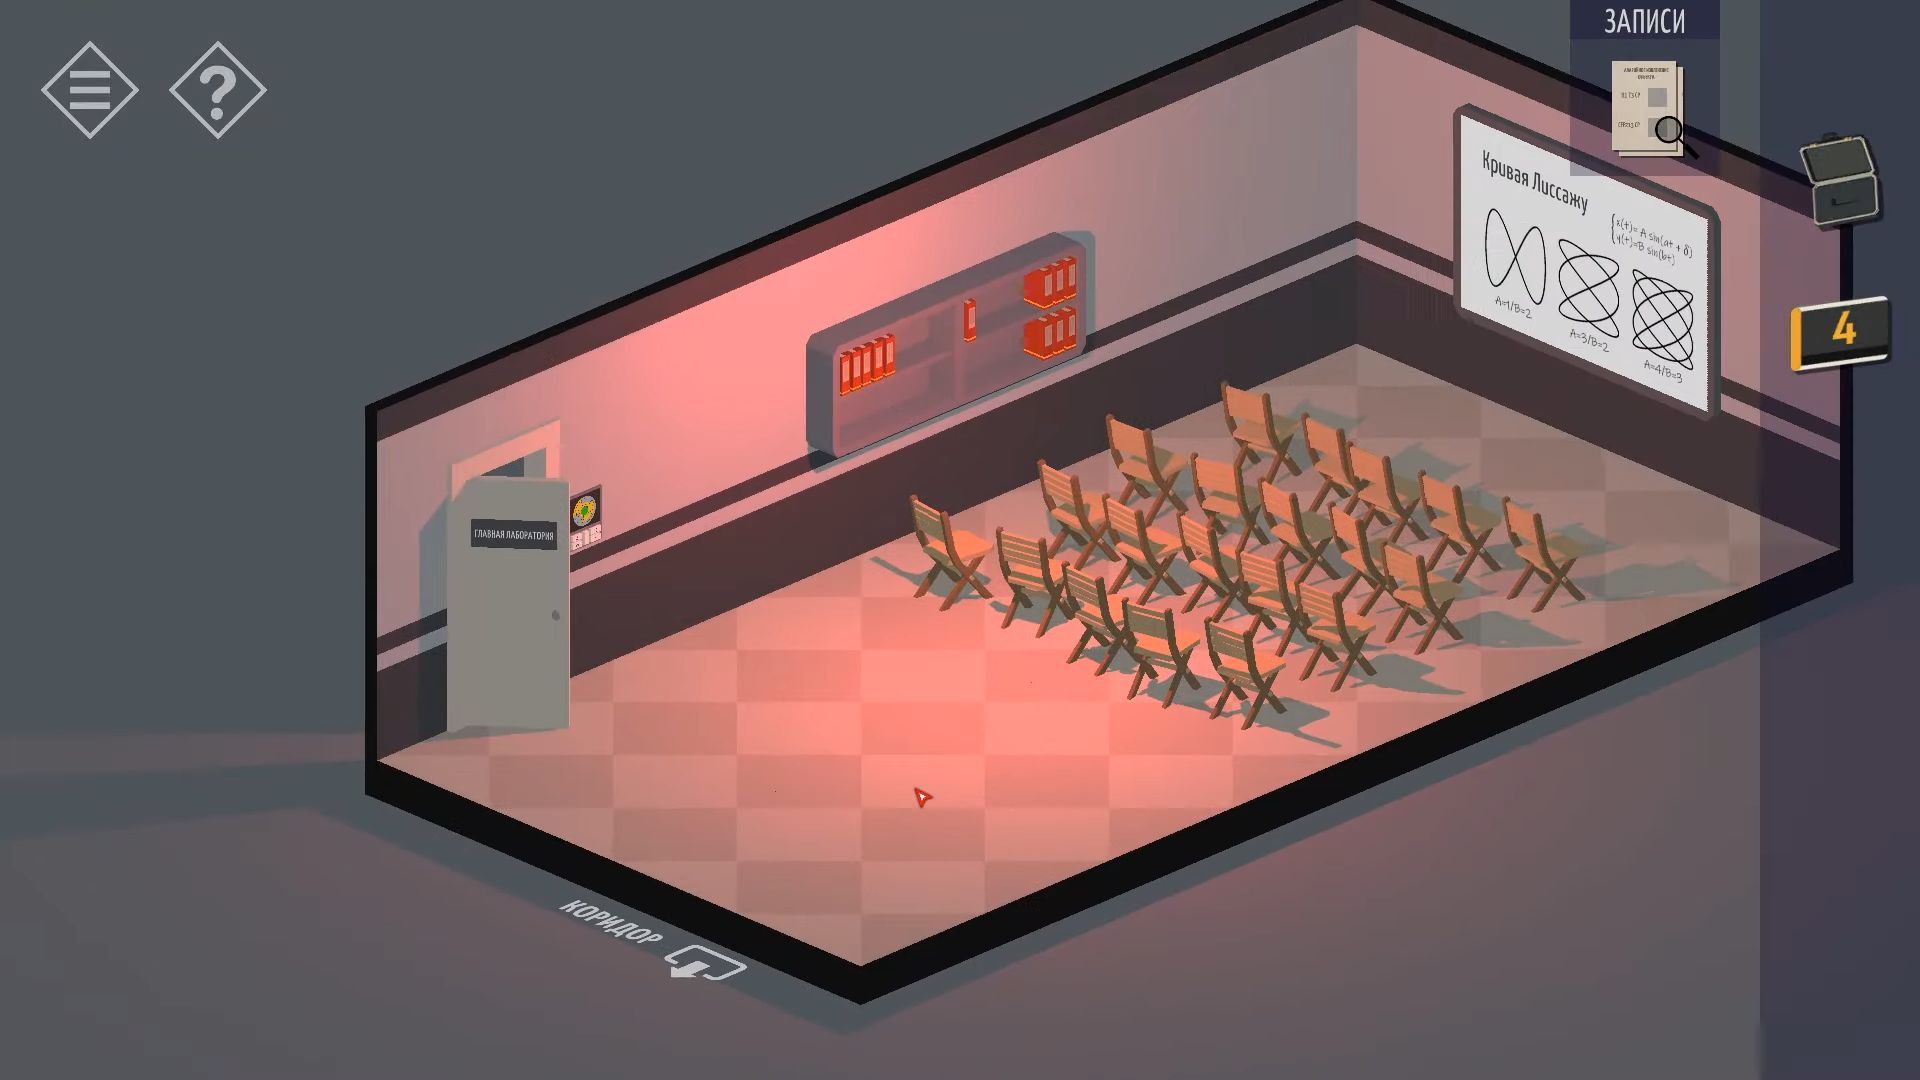
The board displays 3 Lissajous Curves and some calculations. Turn the view to look at the shelf on the wall. Tap the folders until you collect some papers from the shelf. One set of papers has details about Emergency Object Ejection, and the other has details about System Settings. Leave the room and go to the fifth floor, which is a control room.
After that, on the fifth floor, use the Level 3 access card to open the door to the right labeled Peter Stone (the other one requires higher-level access). In the room, there is a desk and a whiteboard with a partially erased drawing. Turn the view and tap the desk to take a look. Knock on the briefcase to open it and then collect it. Touch the photo to get a clue and touch the screen to enter the password 190185.
Now you have to check the Mail to read a message about the crystal and a hint about what to do next. Use the Level 3 access card in the reader and increase the level to 4, then collect the Level 4 access card. Look at the Whiteboard to see the drawing showing a triangle above 2 blocks and a square above 5 blocks.
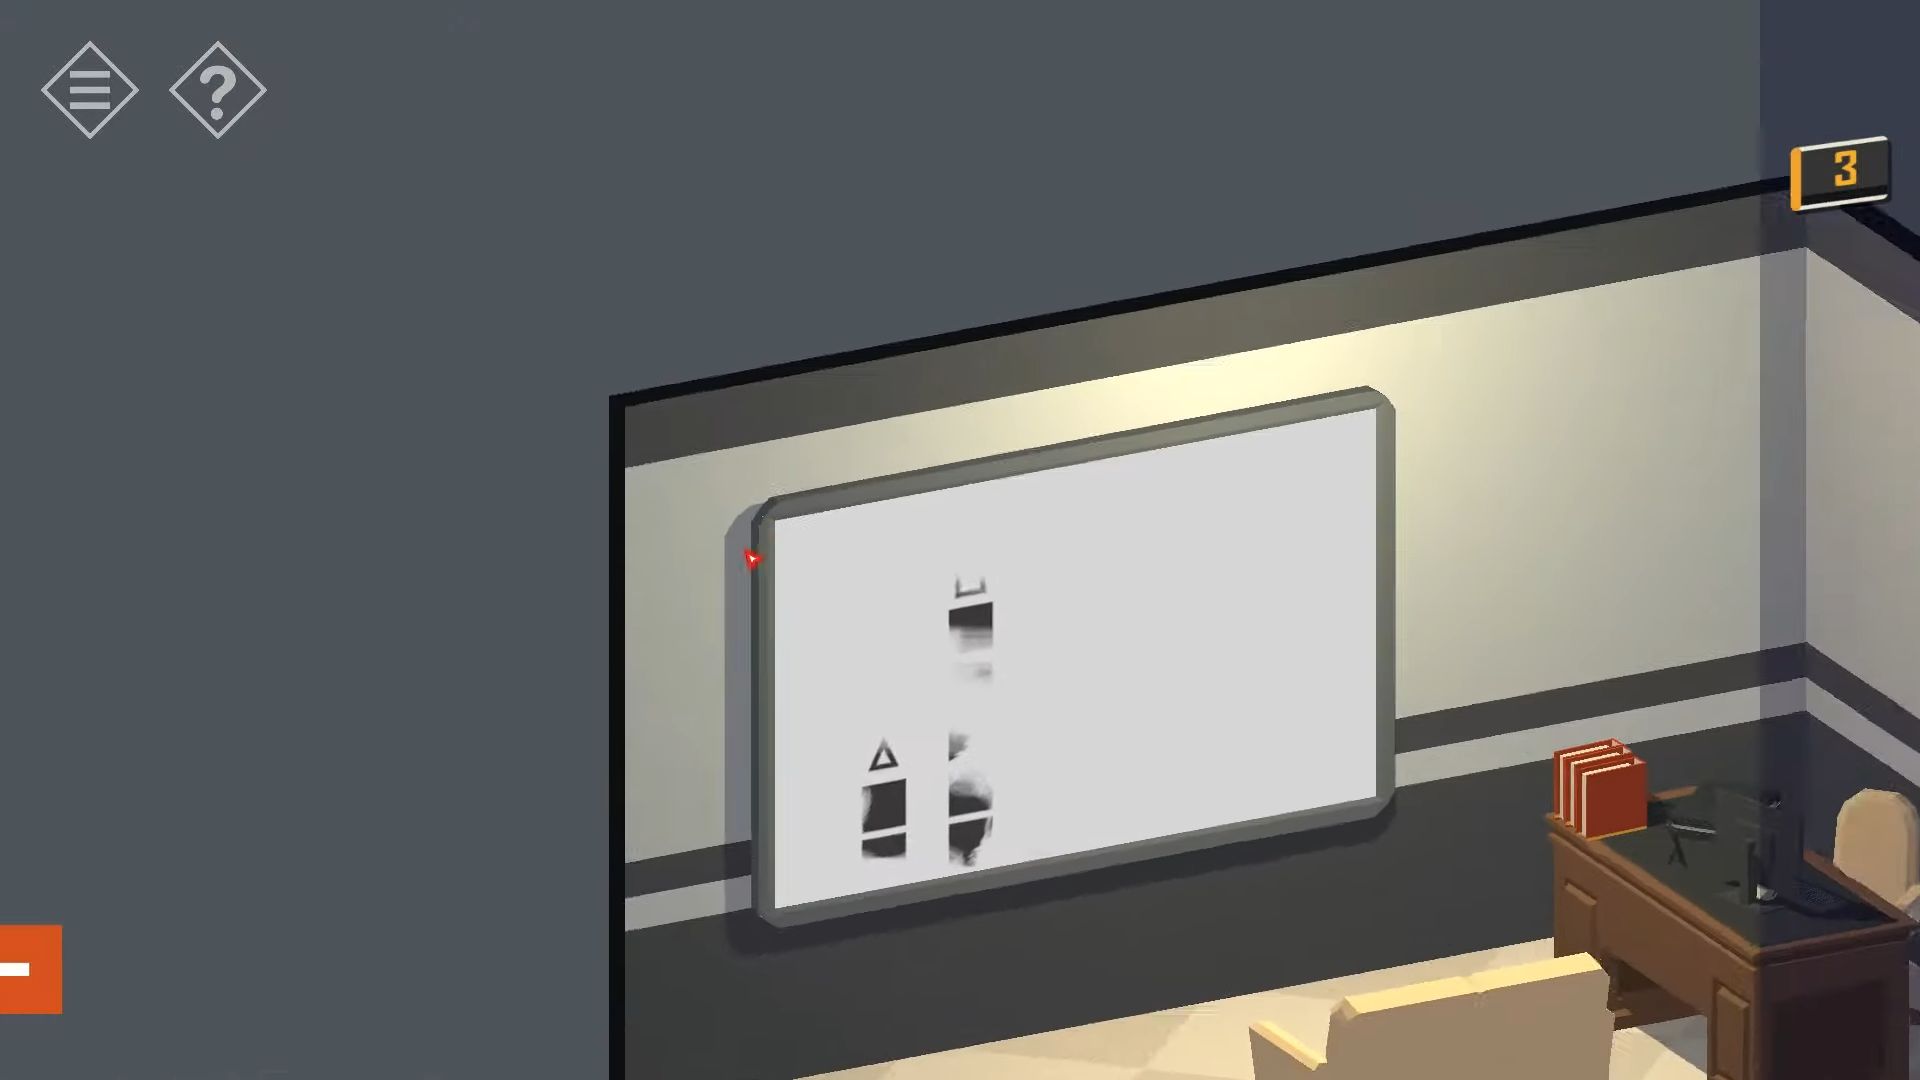
Head back to the elevator and go down to the first floor. Enter the security room behind the desk and use the access card on the screens to activate them. Observe the screen displaying the fifth-floor office with the whiteboard still showing the complete drawing. Make a note of the other values under the symbols; Lines: 1 block, Circle: 3 blocks, X: 4 blocks.
Return to the elevator and navigate to the fourth floor. Enter the main room and tap the other door to find a puzzle entry. There are 5 buttons with symbols, and each press will change the number of orange segments highlighted. Use the symbols from the whiteboard above; touch the triangle 2 times, square 5 times, lines 1 times, circle 3 times, and X 4 times to unlock the door.
Go into the room and observe a crystal shard in a device. On each side are panels with the option to eject the object. Now you have to tap each and choose the option. This starts the procedure but doesn’t eject the shard immediately.

Now you have to leave this room, go back to the fifth floor, and use the Level 4 access card to open the other door.

In this room, you’ll find a crystal shard in the device and a control panel. There’s a red button for ejecting the object, system settings, and another control panel. Tap the control panel to the right and use the Emergency Object Ejection paper found above as a clue to set the controls correctly.
Use the system settings paper to set the values for A, B, and C. A and C are given on the paper. For B, you need to change it until the Lissajous curve on the screen matches the diagram on the paper.
Once all the settings are correct, tap the red button. You’ll see a countdown, and the device will shut down.
Go back to the fourth floor and the lab room with the crystal. Use the briefcase to gather the crystal and then go back to the elevator. Descend to the first floor and leave the building to observe the results of your actions. Tap your car to finish the chapter, and thus, Chapter 8 is completed.
Chapter 9
This section describes a complete guide for chapter 9 in Tiny Room Stories: Town Mystery.
Warehouse
In the lab, you learned about experiments with crystal shards. Your dad believed they needed to be stopped, and the shards should go back to the cave to avoid a disaster. After discovering one shard, you went to the warehouse to find the others.
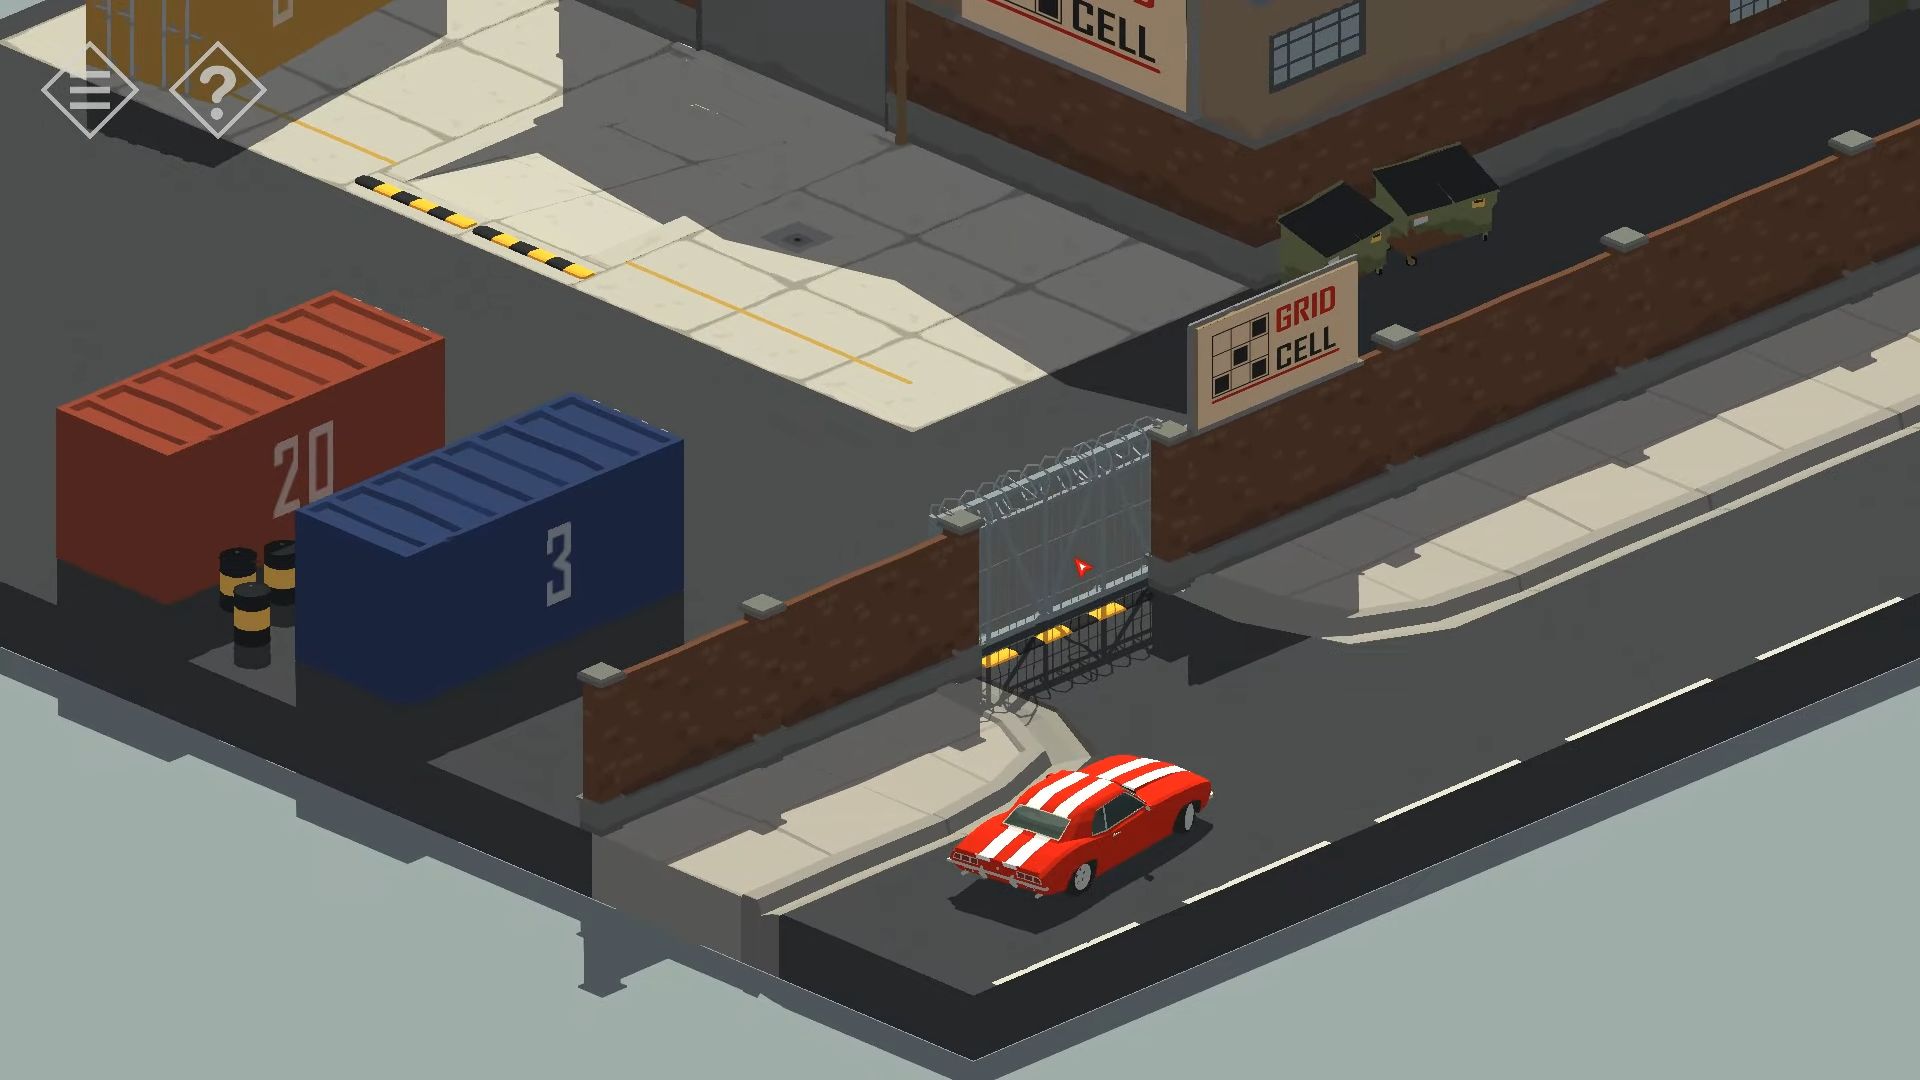
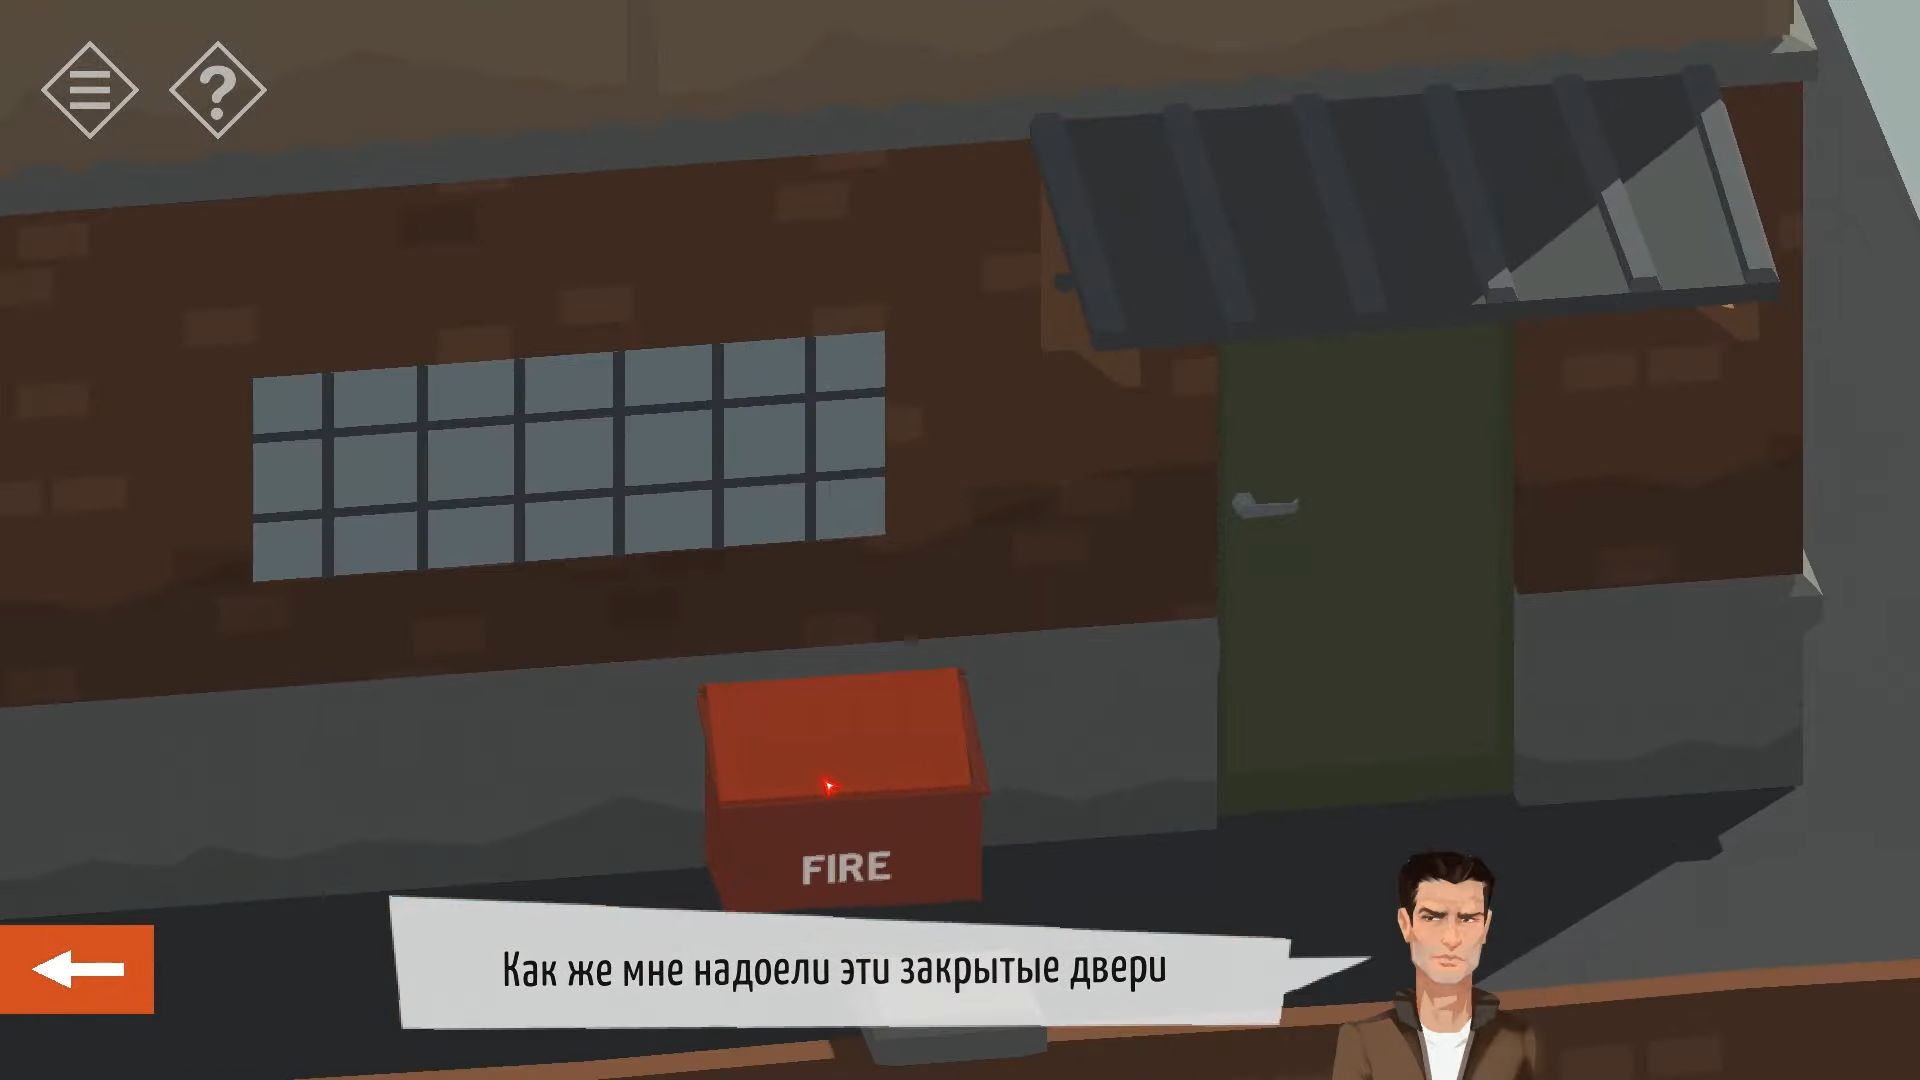
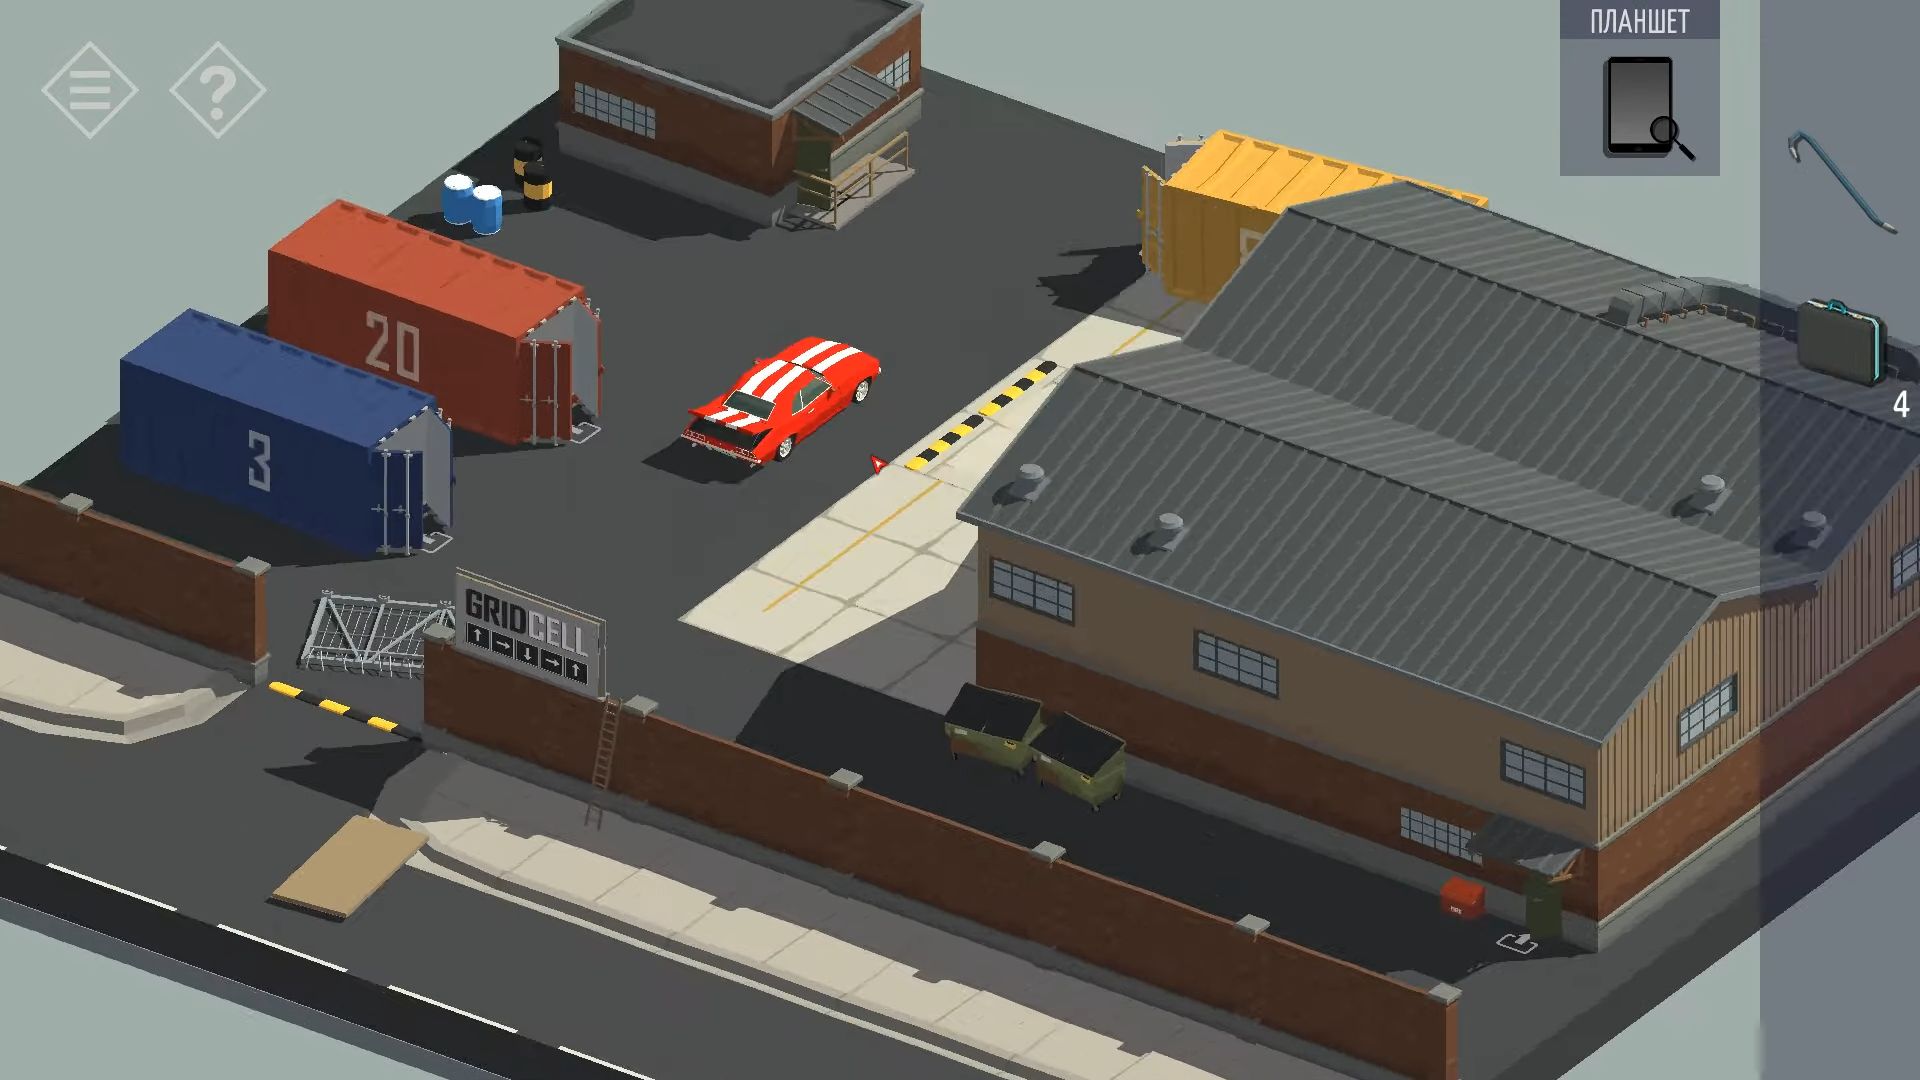
You reach the GRID CELL warehouse, but a gate is blocking the entrance. Tap the gate to get a closer look, then touch your car to drive through and break it open. Once inside, go to the green door on the far right with the little red box beside it. Open the Firebox, and you’ll find a crowbar inside.
Move back and turn the main scene to see the back of the building, where there’s a small flat-roofed section. Inside the warehouse, tap on the forklift on the ground floor, and then knock on the dead battery at the back to pick it up.
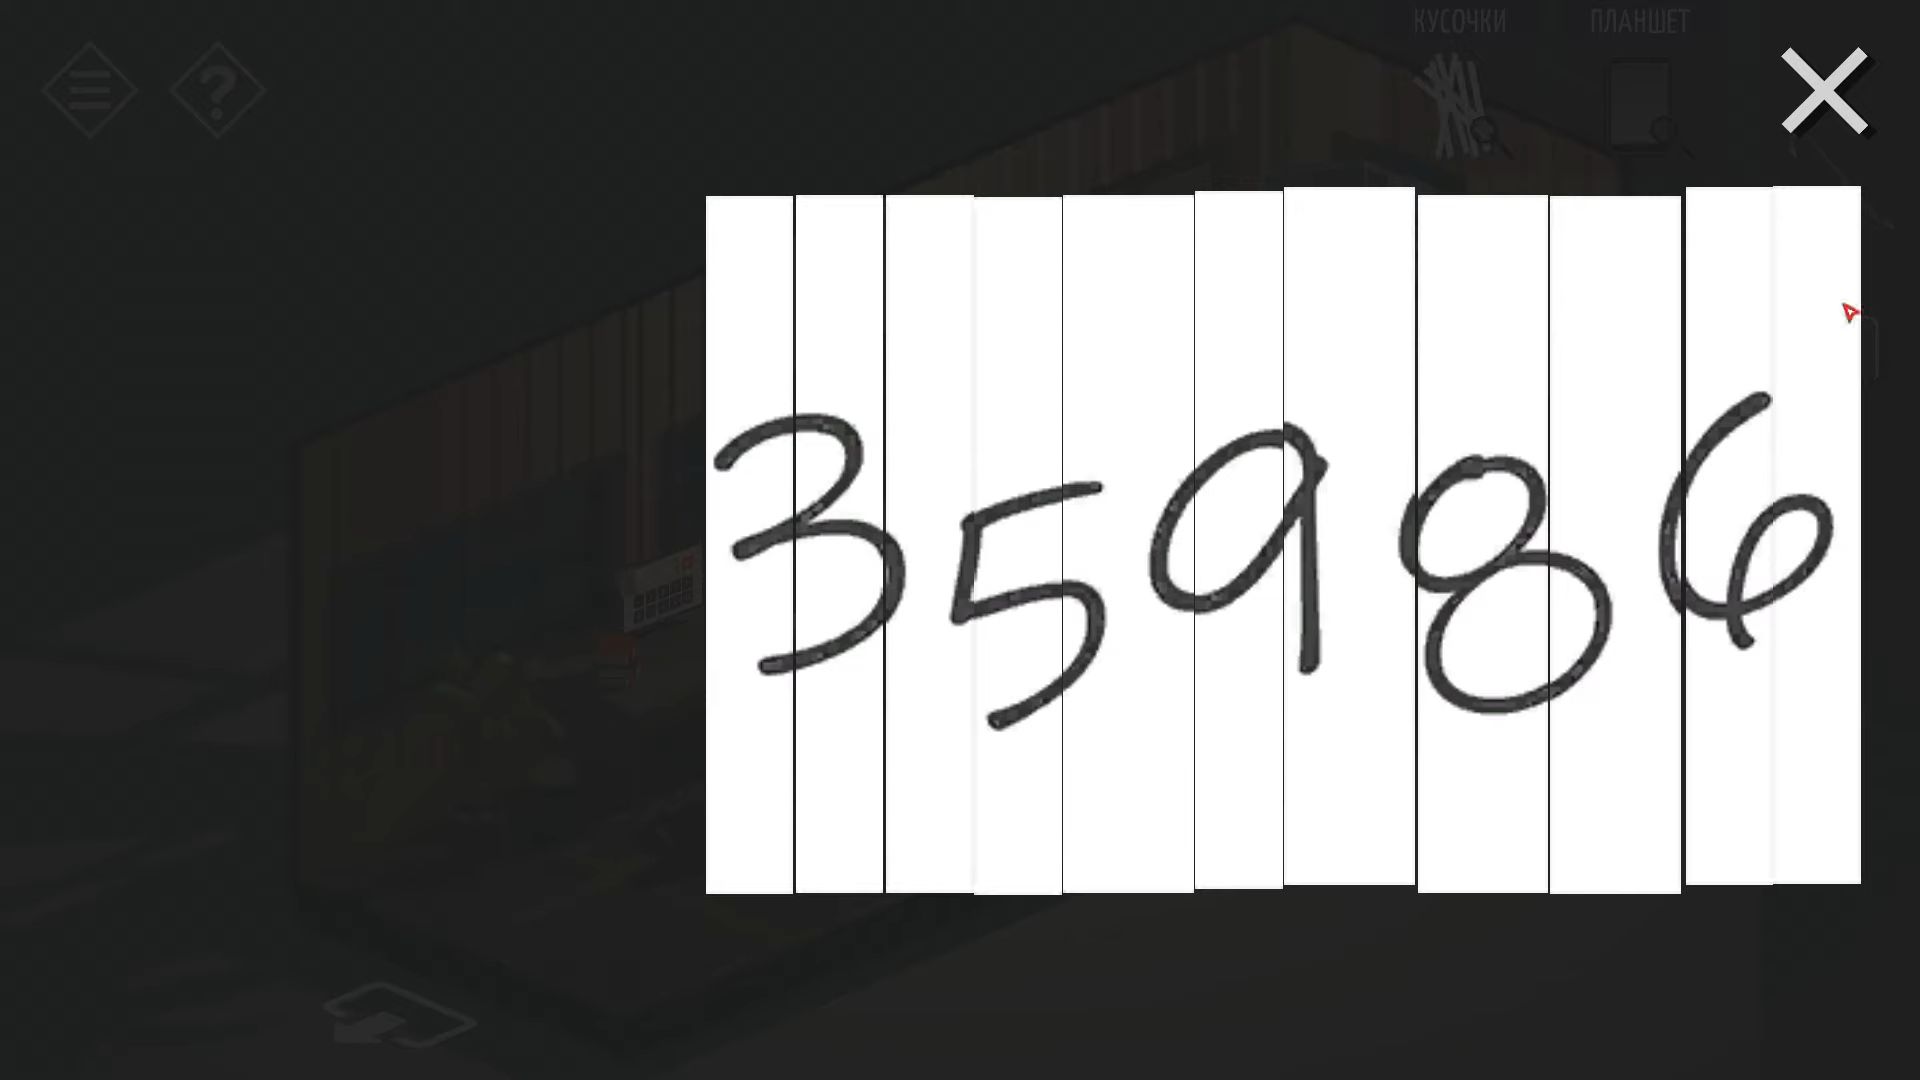
Now, rotate the view to find another door on the ground floor, to the left of the shelves. Touch it to enter the next room. Inside this room, tap on the shredded paper on the floor under the stairs. You can arrange the pieces to form a 5-digit number (35986).
Next, turn the view to spot an electrical box on the wall near a ladder. Tap the box to open it and collect a fuse from inside. Use the dead battery in the slot on the right and leave it there. Step back and touch the ladder to pick it up.
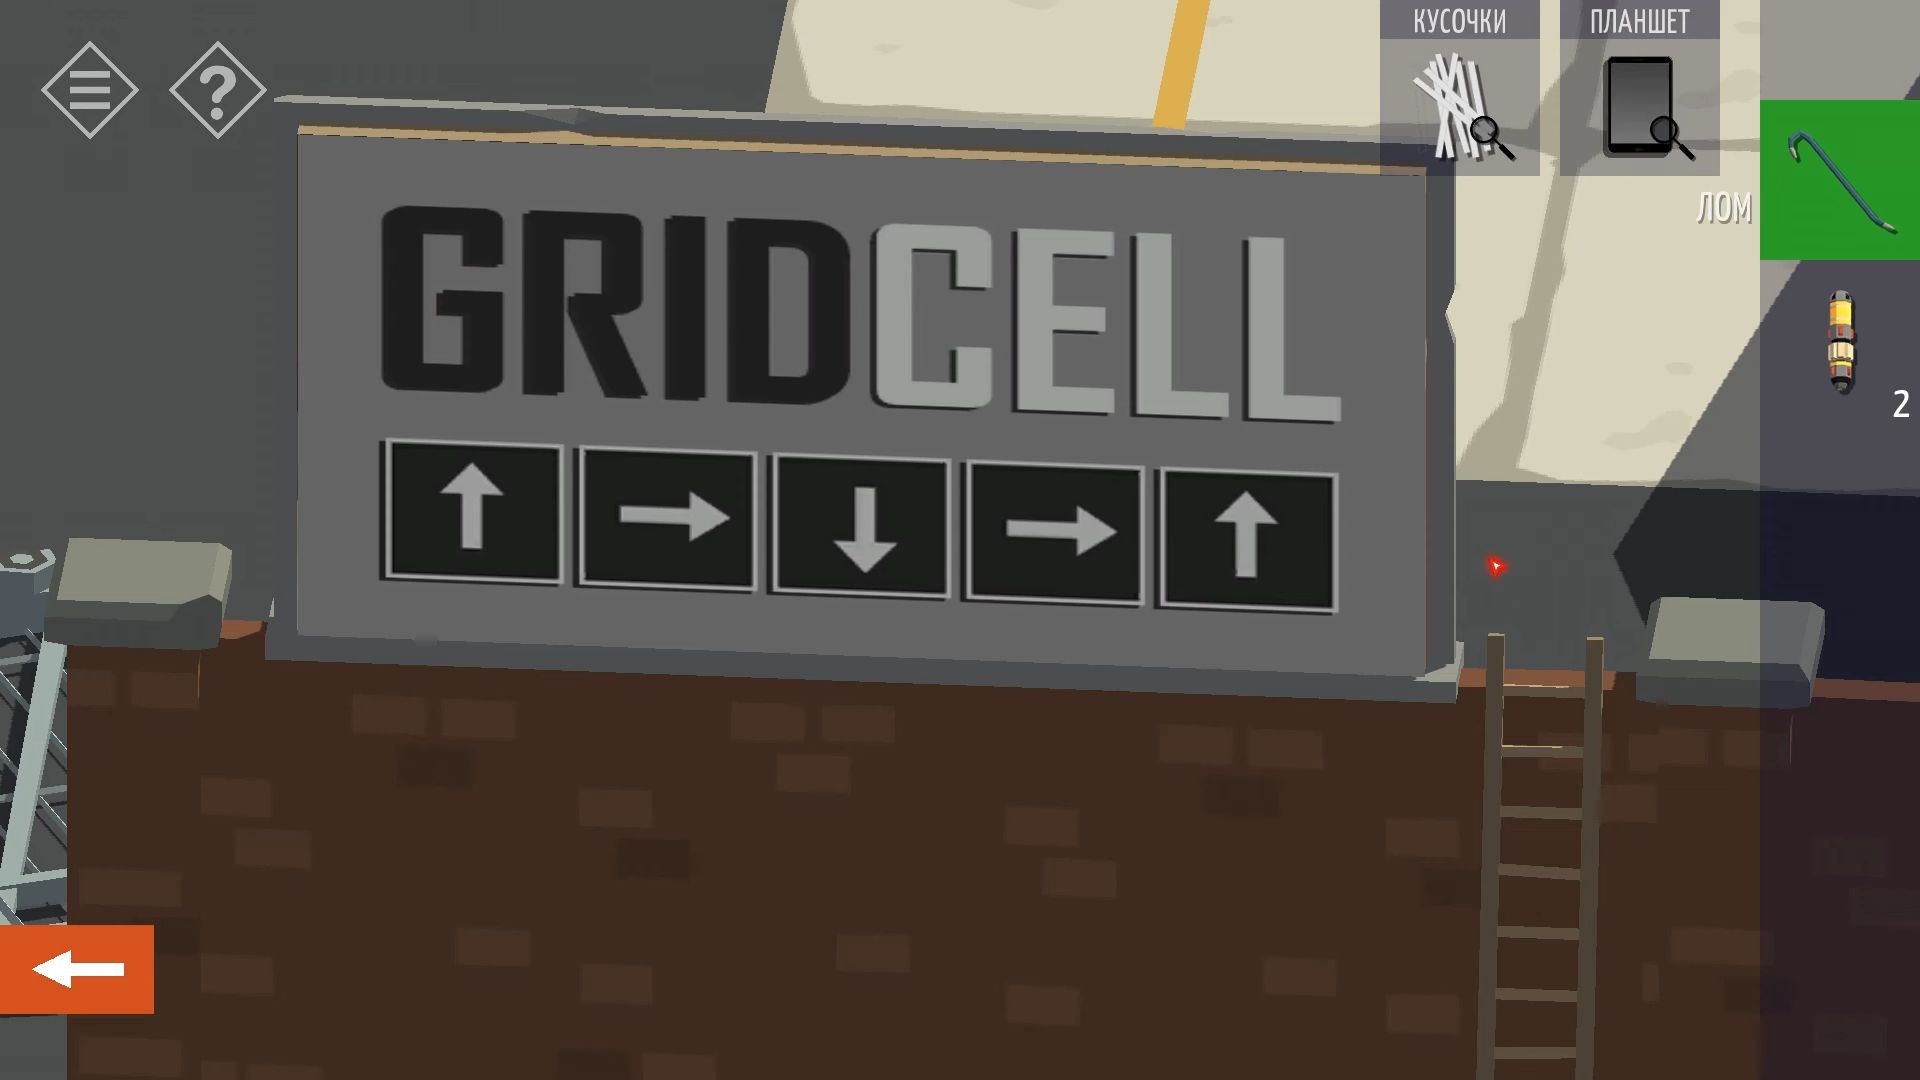
Afterward, tap the door next to where the ladder was and exit the building. Rotate the view to see the front gate, then use the ladder and knock on the company sign beside the gate to place the ladder. Now, you can closely examine the sign and use the crowbar to remove the top part, revealing an old logo underneath. This old logo has 5 arrows as a clue.
After that, leave the room and head back to the parking area. Use the key you found to open the three containers. Look inside each one; they’re all empty, but one has NEXT lab printed inside. Remember the container number. Now, go back to the rear of the warehouse with the small flat roof.
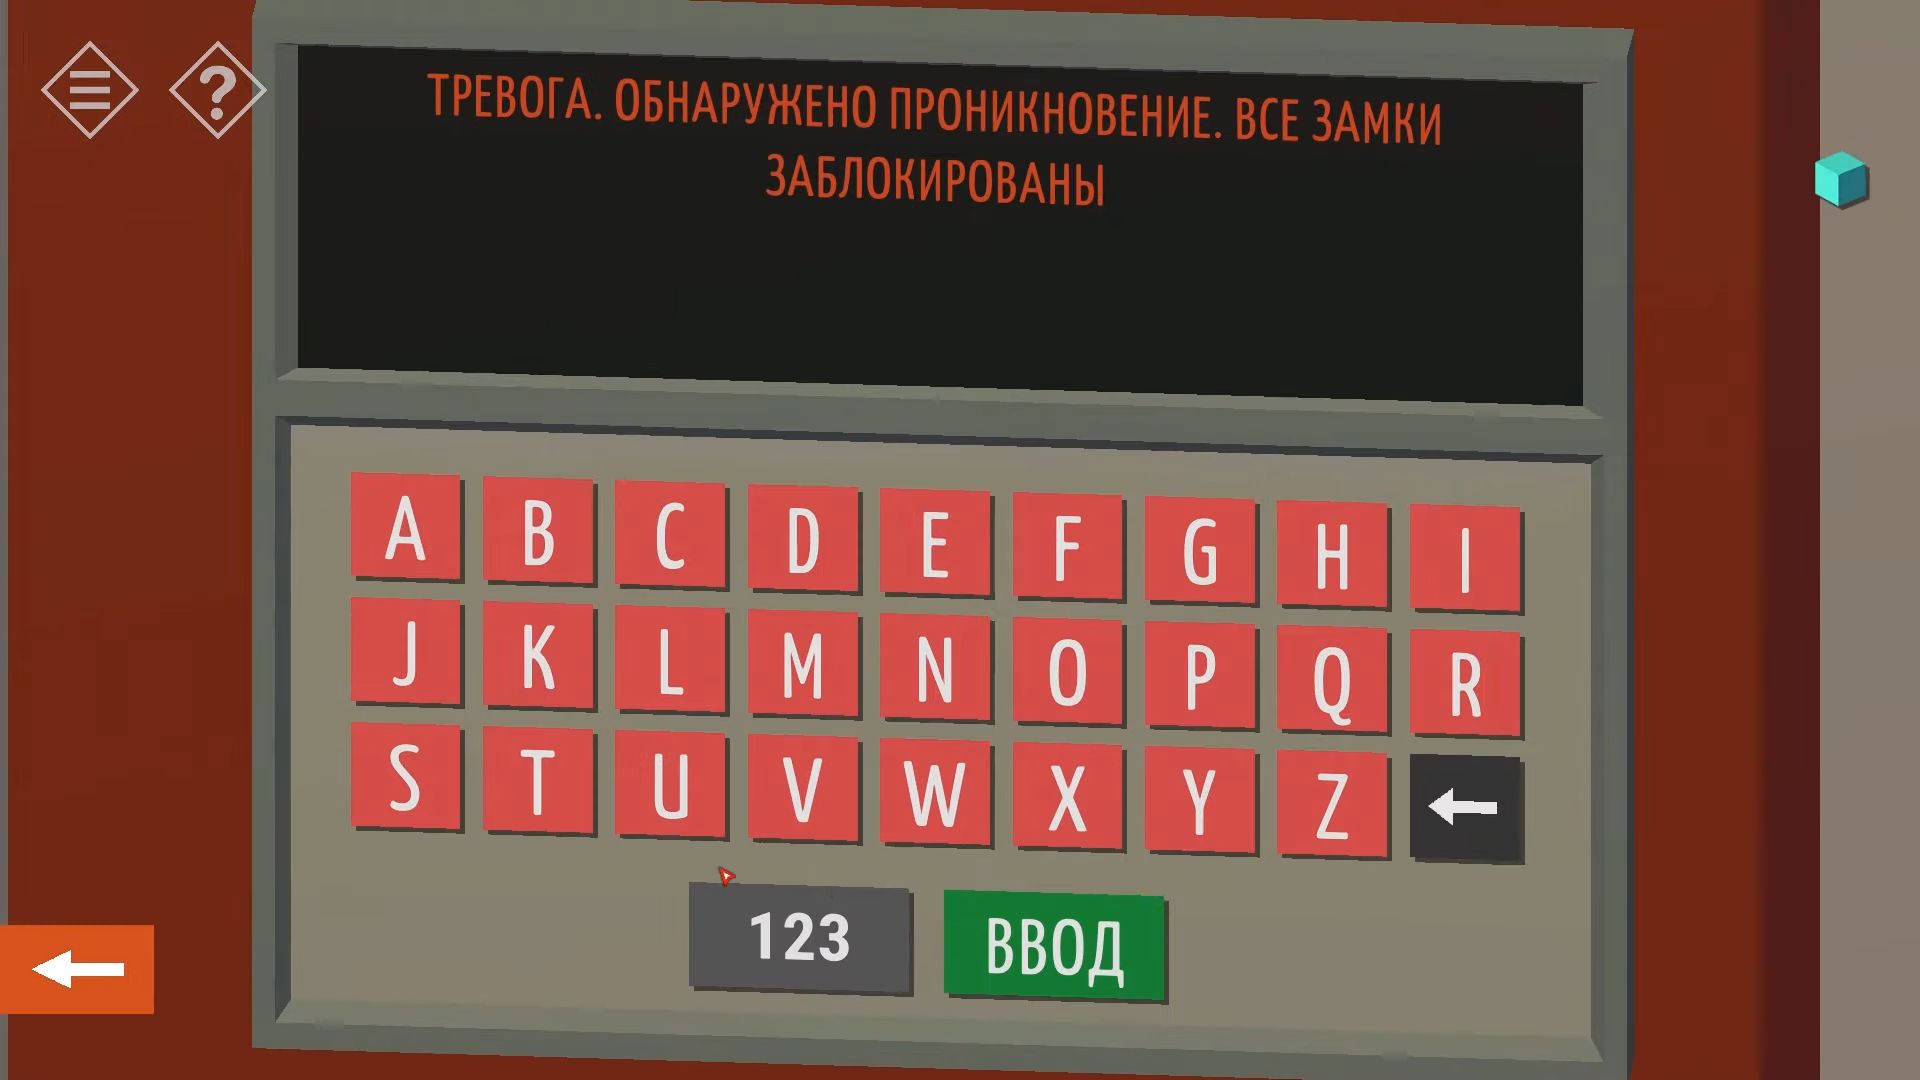
Tap on it to see the door, and then touch again to look at the door lock. There are 9 buttons on the lock, and you need to press them in the right pattern.
Turn the scene around to see the front of the small building at the back left of the area. There’s a green door that you can open and navigate inside after opening the door. On the table at the back, grab a key for the containers. Rotate the view to find a dartboard on the wall. Tap it to see the knives stuck in it.
Next, you have to pay attention to the knives and their positions, as they have numbers on the handles. Around the building, there’s another pattern with 9 sections. Use the (new) company logo to choose 4 buttons to press. Enter the code, then touch the handle to open the door and go inside.
Now, look at the computer screen on the desk and check the note that says the NEXT lab number changed to 51 on April 26th. Use a code from the shredded paper you found earlier to unlock the computer. Once unlocked, check the mail for info about important shipments from NEXT lab on April 24th, and April 27th, and one more in May, along with an address.
Choose to synchronize the database. This updates the tablet you found. Lastly, turn the view in the room to find an electrical box on the end wall. Open it and take the fuse. Now, open and go through the door at the other end of the room to return to the small room with the battery charging station.
Use the fuse you just got to activate the charger again and let the battery charge. Take the battery when it’s ready.
You need to get 3 important shipments from the Next lab and you must use the right inventory numbers. You can figure out which numbers in the database match the packages you want using the info above. Tapping those inventory numbers will bring a box from storage, and the correct ones will be labeled NEXT lab. When they arrive, you have to use the crowbar to open them and take what’s inside.
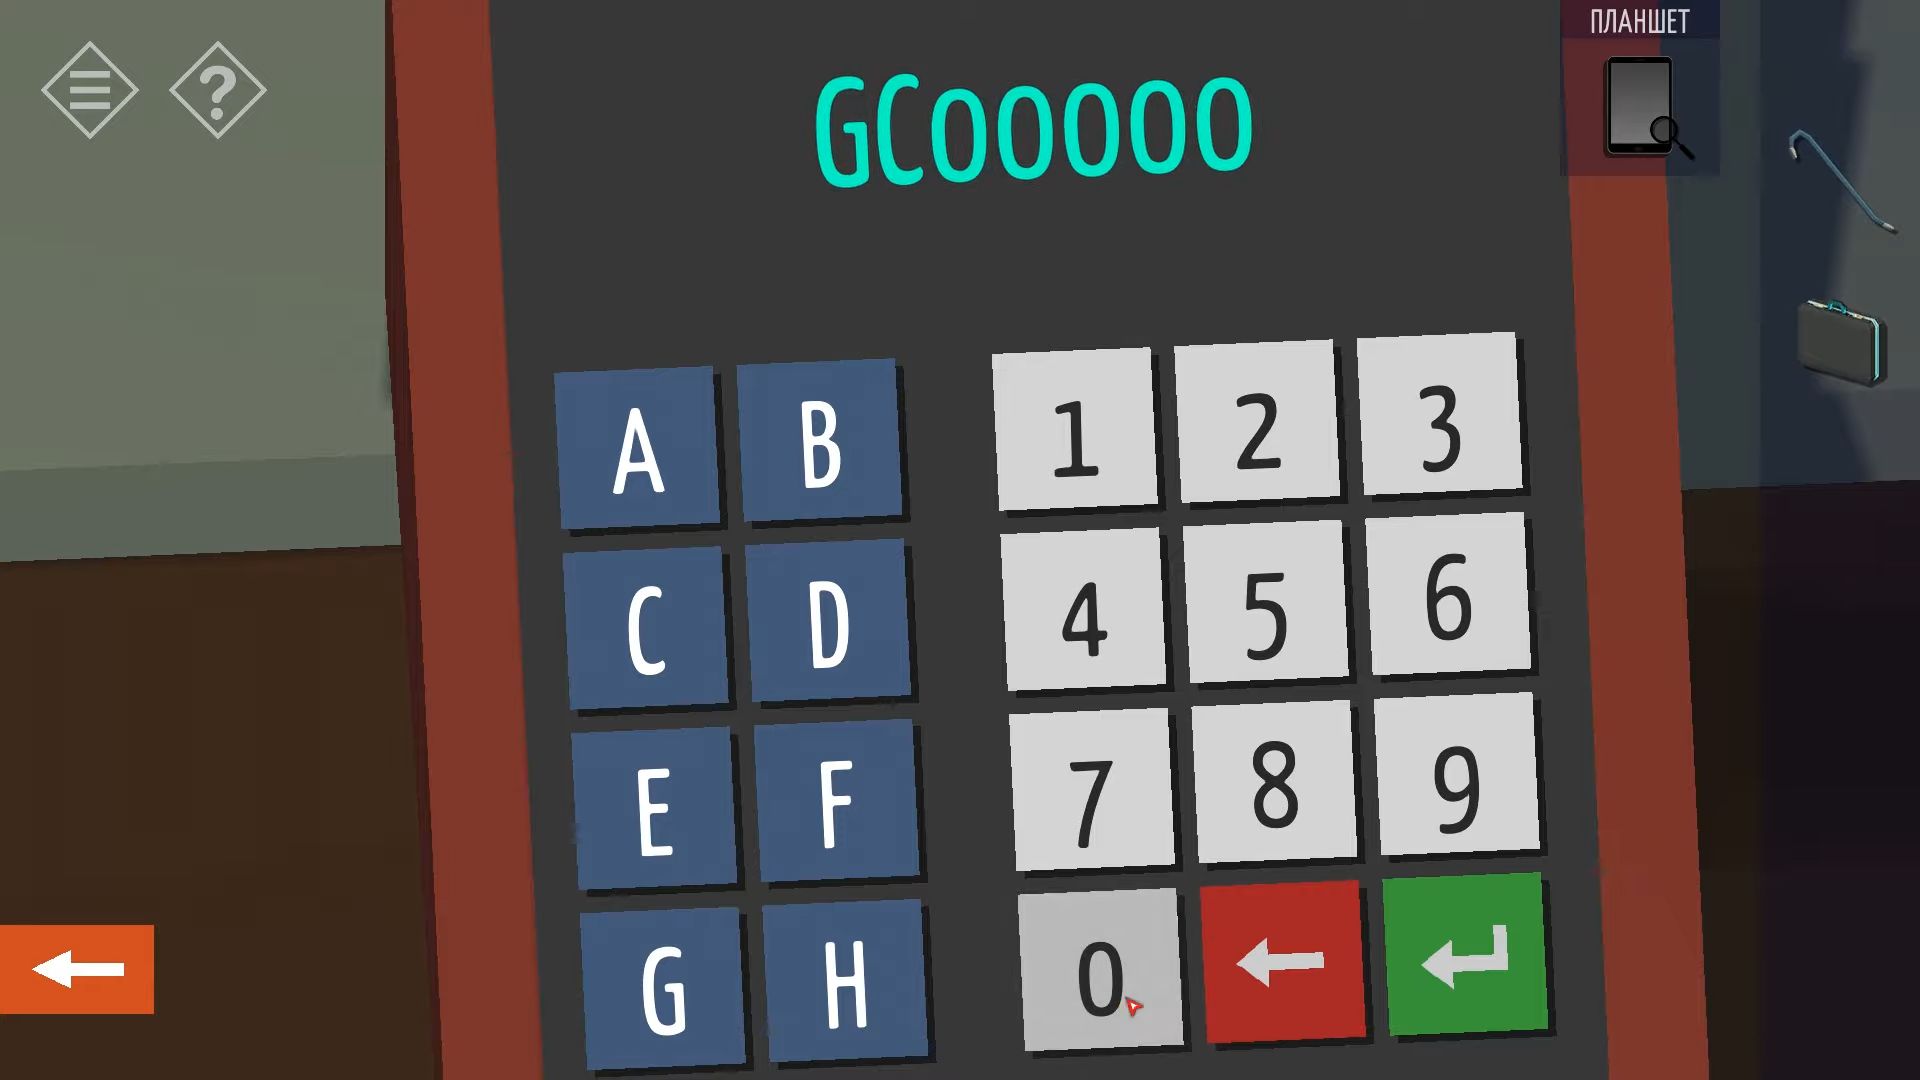
The first package came on April 24th, and on this date, the code number for Next Lab was still 24 (from the notice board paper). Check the tablet database for a shipment starting with 20190424 and with company code 24 (GC0000053151). The second package arrived on April 27th, and the company code for Next Lab was then 51. Find the shipment starting with 20190427 and with code 51 (GC0000053156).
The last package arrived in May, and though most of May’s data is lost, you can check the tablet for shipment arrivals to see that container number 8 (the one from above with NEXT lab) came on the 15th. The database then gives you the inventory number (GC0000053168). Now you should have 3 briefcases with crystals. There’s one more to find. Go back to the forklift and put the battery back. Tap the forklift, and it will move and bring a box from the top shelf. Use the crowbar to open it and get a fourth briefcase.

Besides the charger, there’s a control panel that you can use now. It’s for entering the inventory number of a package so you can get it.
After that, leave the building and turn around to see the back of your car. Tap it to open the trunk and put the briefcases inside. Step back and touch the car to finish this chapter.
Chapter 10
Here’s the complete guide for chapter 10 in Tiny Room Stories: Town Mystery.
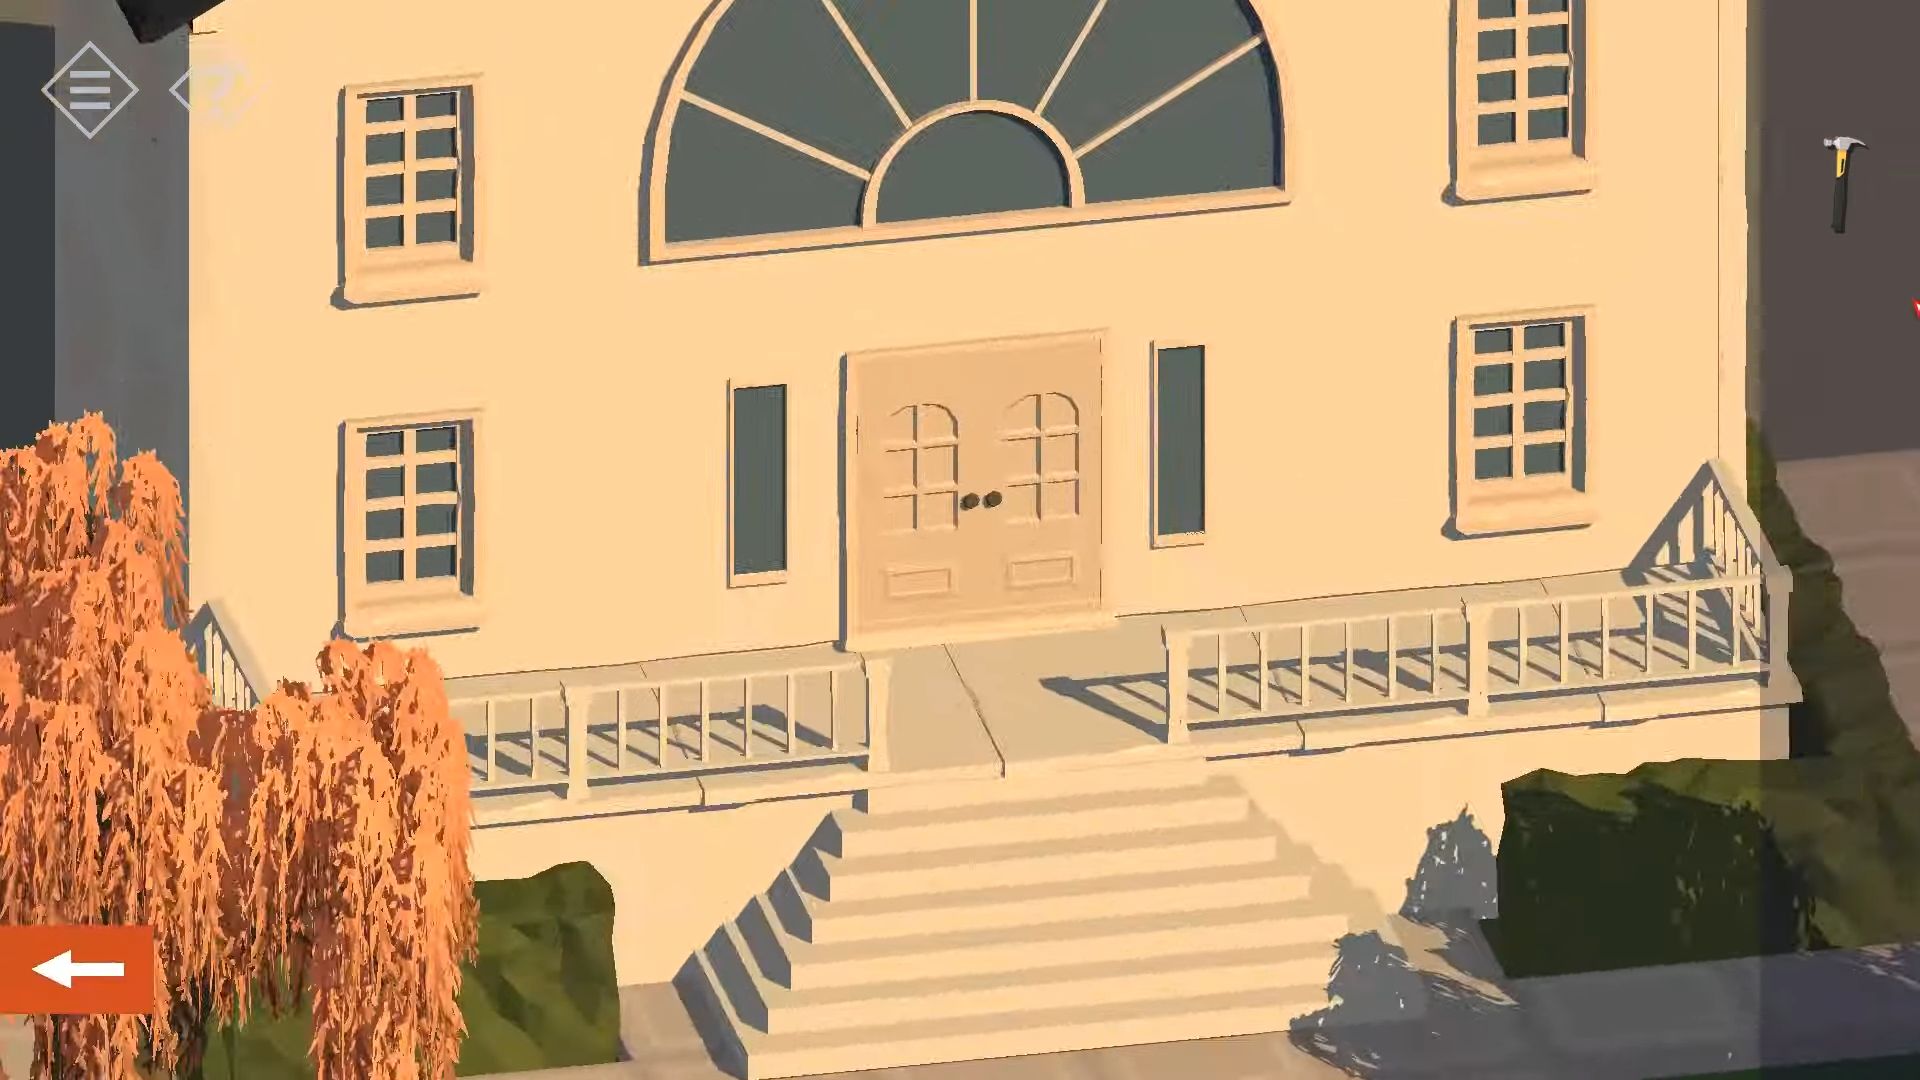
Large Mansion
Once you went to the address from the warehouse, you arrived at a big house. It seems the mayor put the final shard in his own home. The house is locked, so start by going down the path on the left to reach the swimming pool.
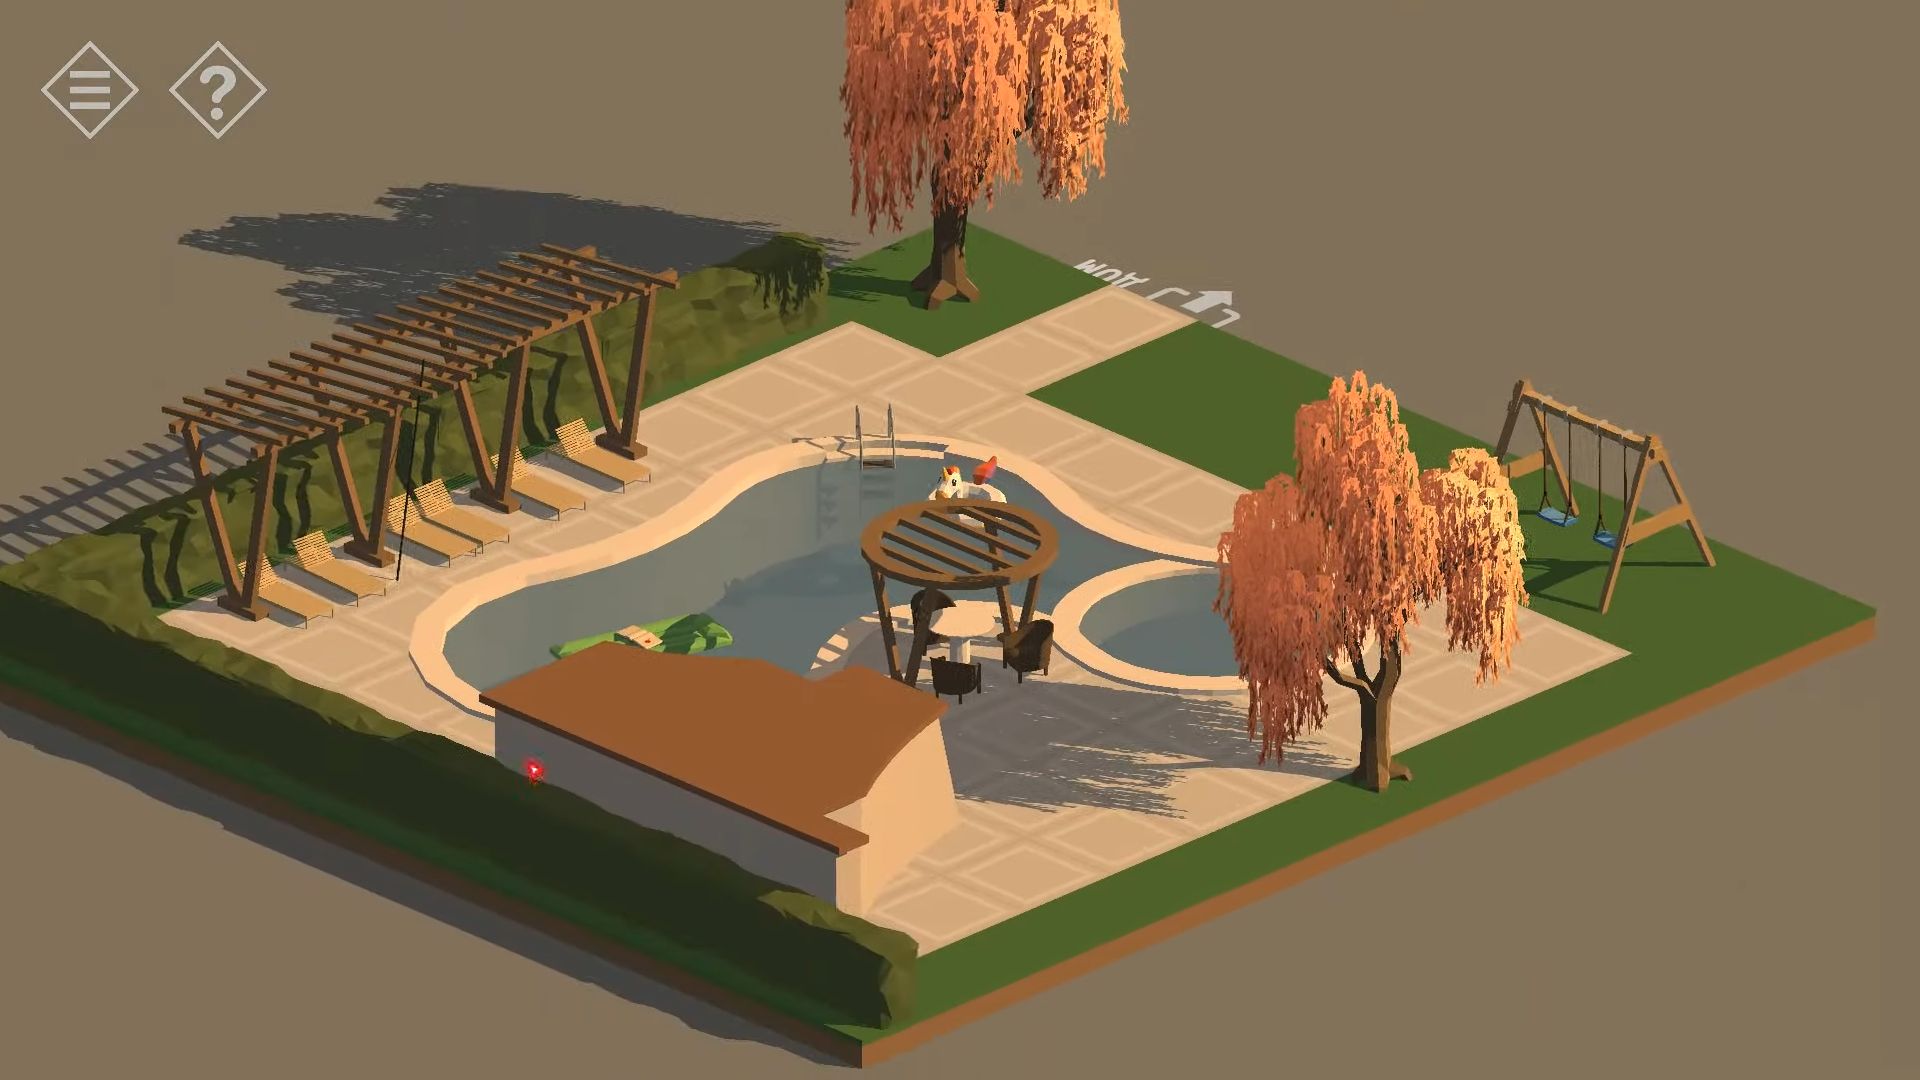
Touch the structure with the sun lounger behind it, called the pergola. Grab the long pole from there, step back, and tap on the pool to see it from above. Use the pole to push the green lilo towards the side, and then pick up the red key from on top of it.
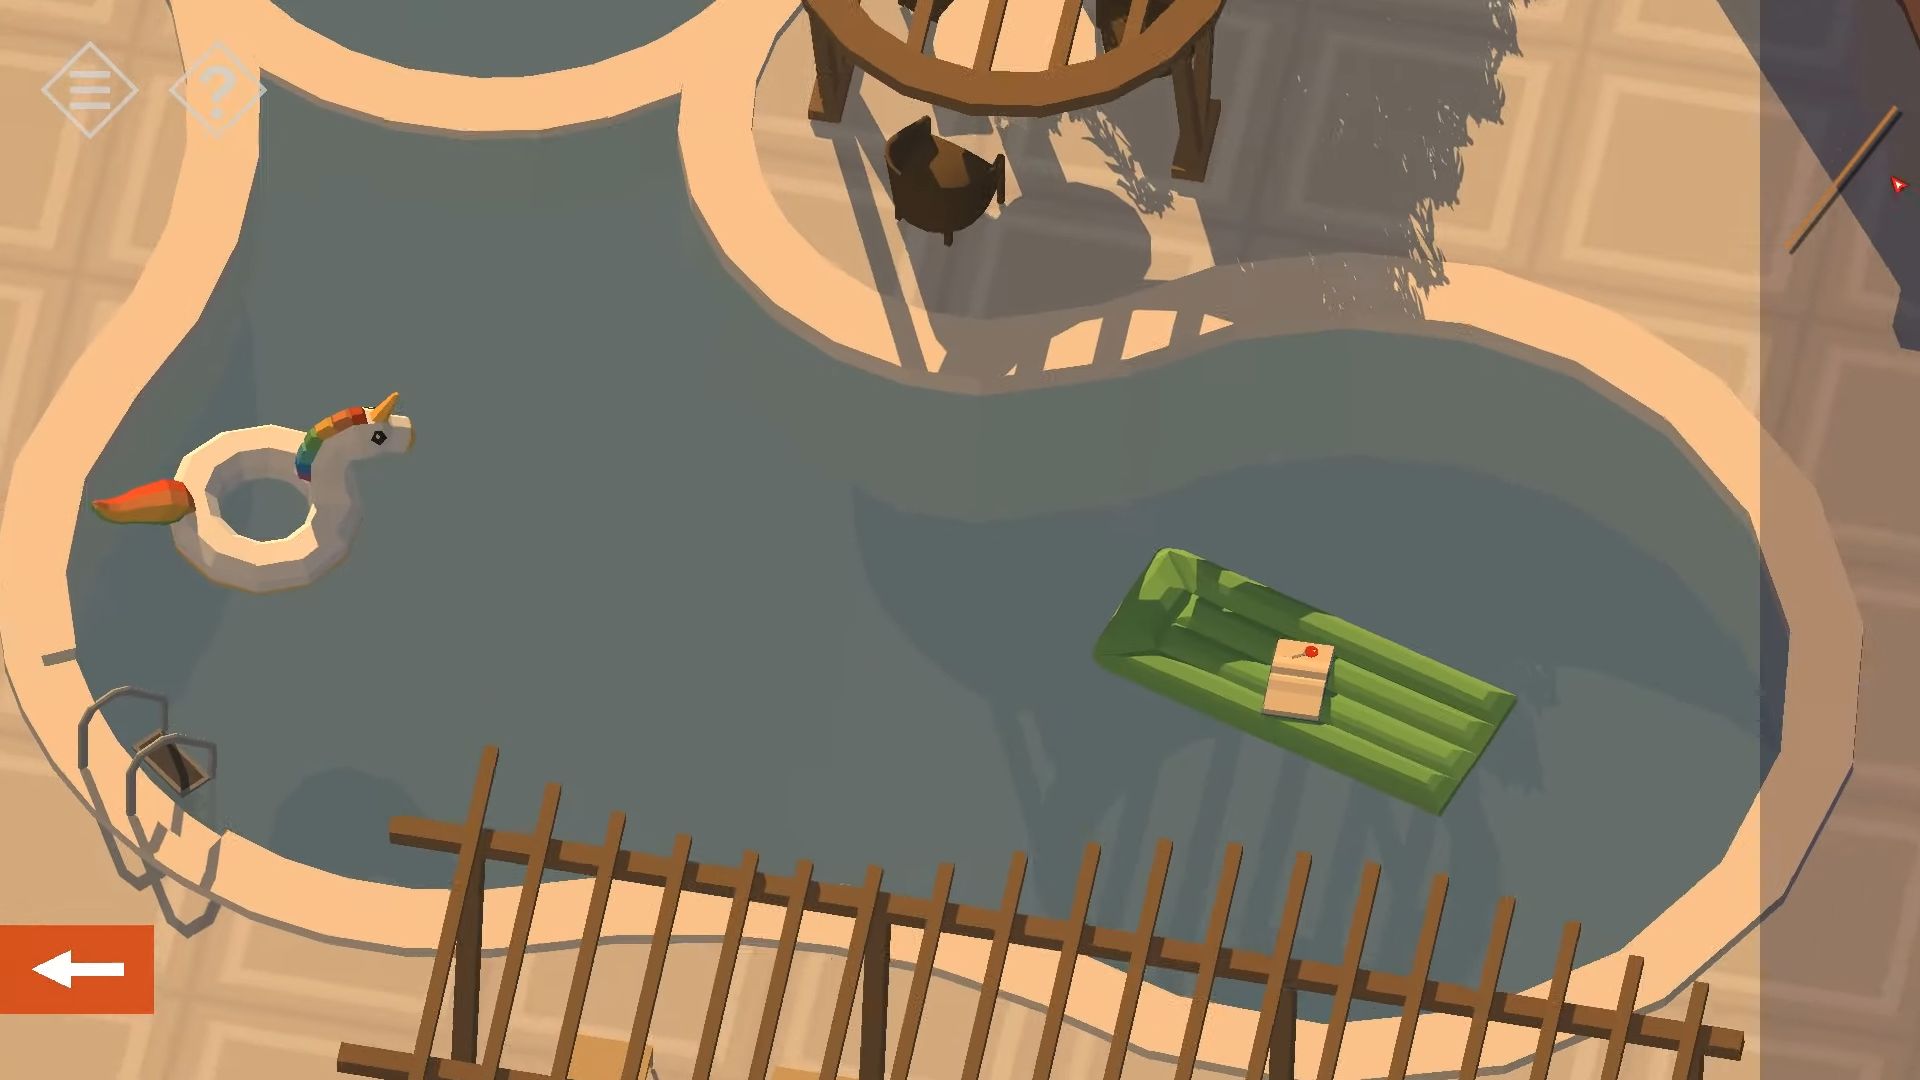
Step back and turn the view to look at the front of the pool house. Open the door at the top using the red key, and then go inside.
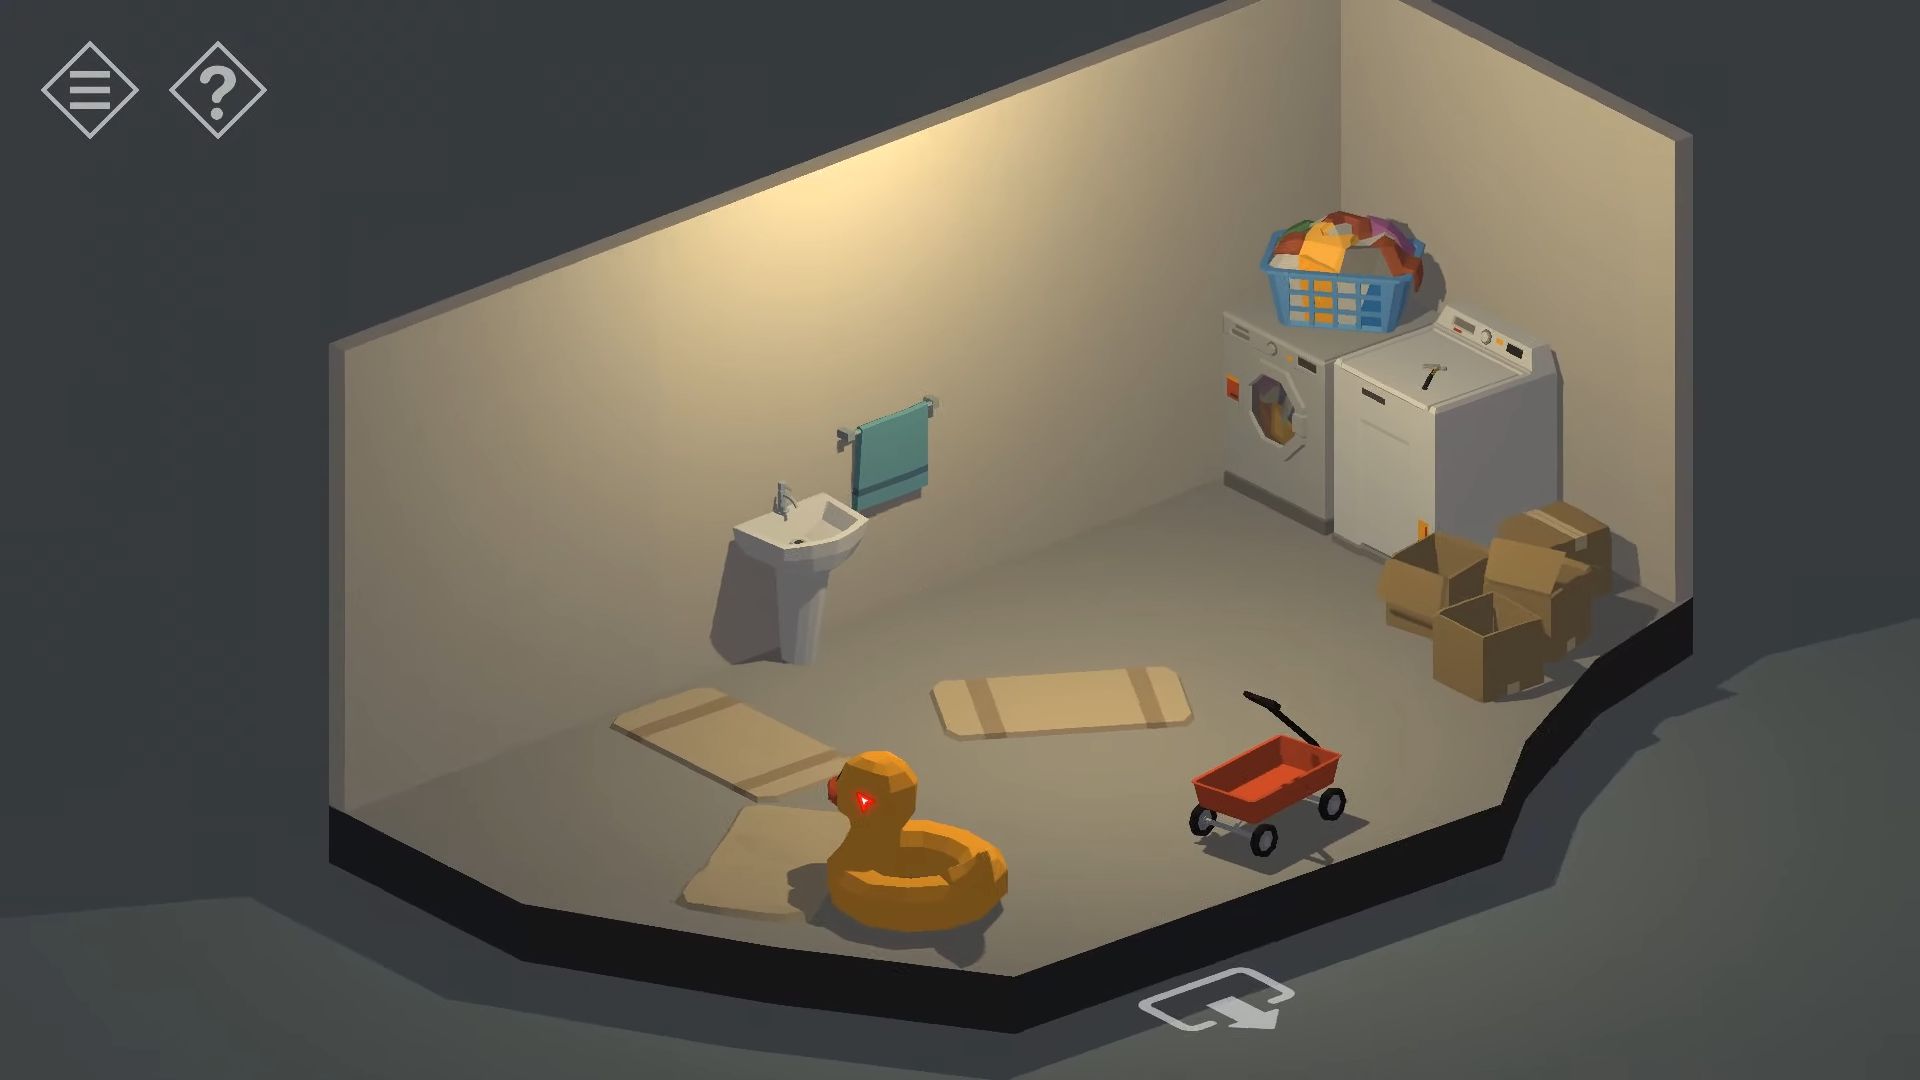
Next, touch the washer and dryer to look at them and take a Hammer from the top. Leave the pool house and go back to the front of the main house. Now, you can use the hammer on any of the ground-floor windows to break in.
Go through the window on the left to get into the kitchen and look in the bottom left cabinet of the kitchen to discover a pumpkin. Turn it to reveal the carved face.
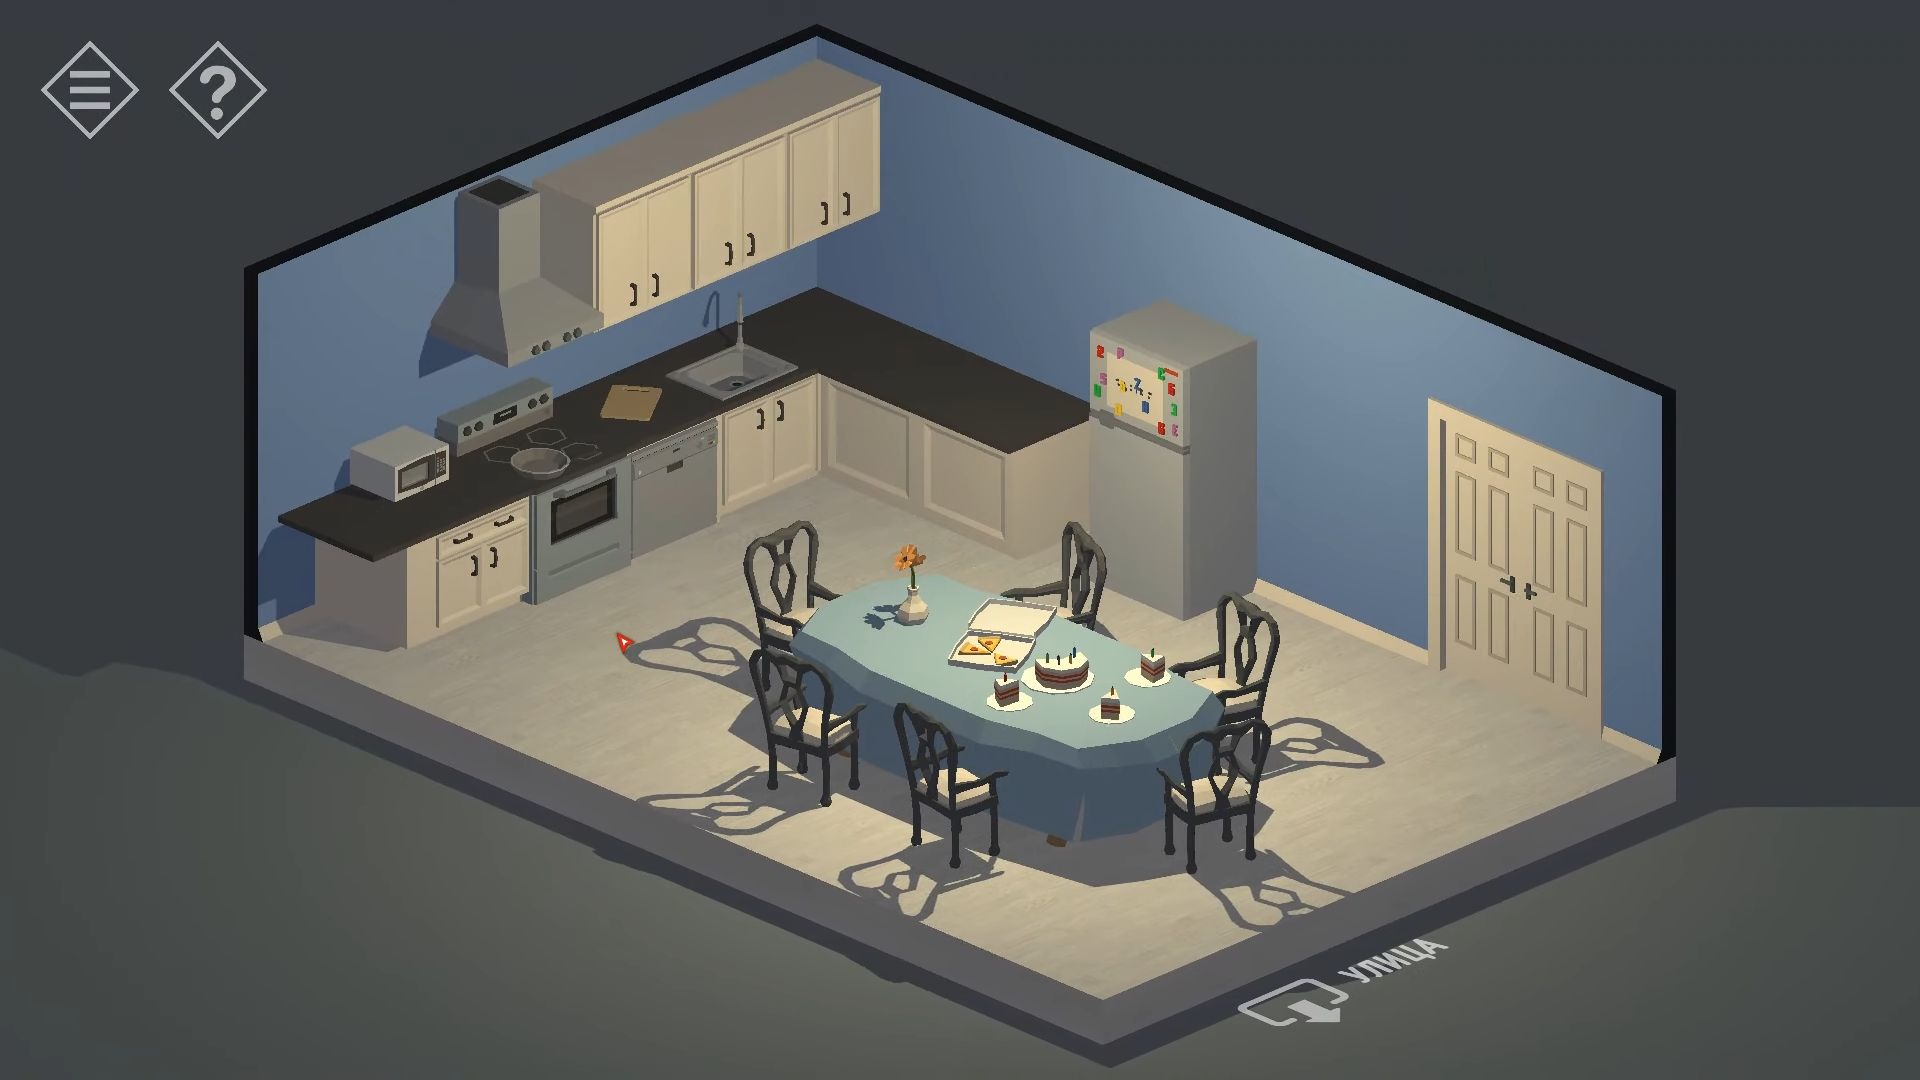
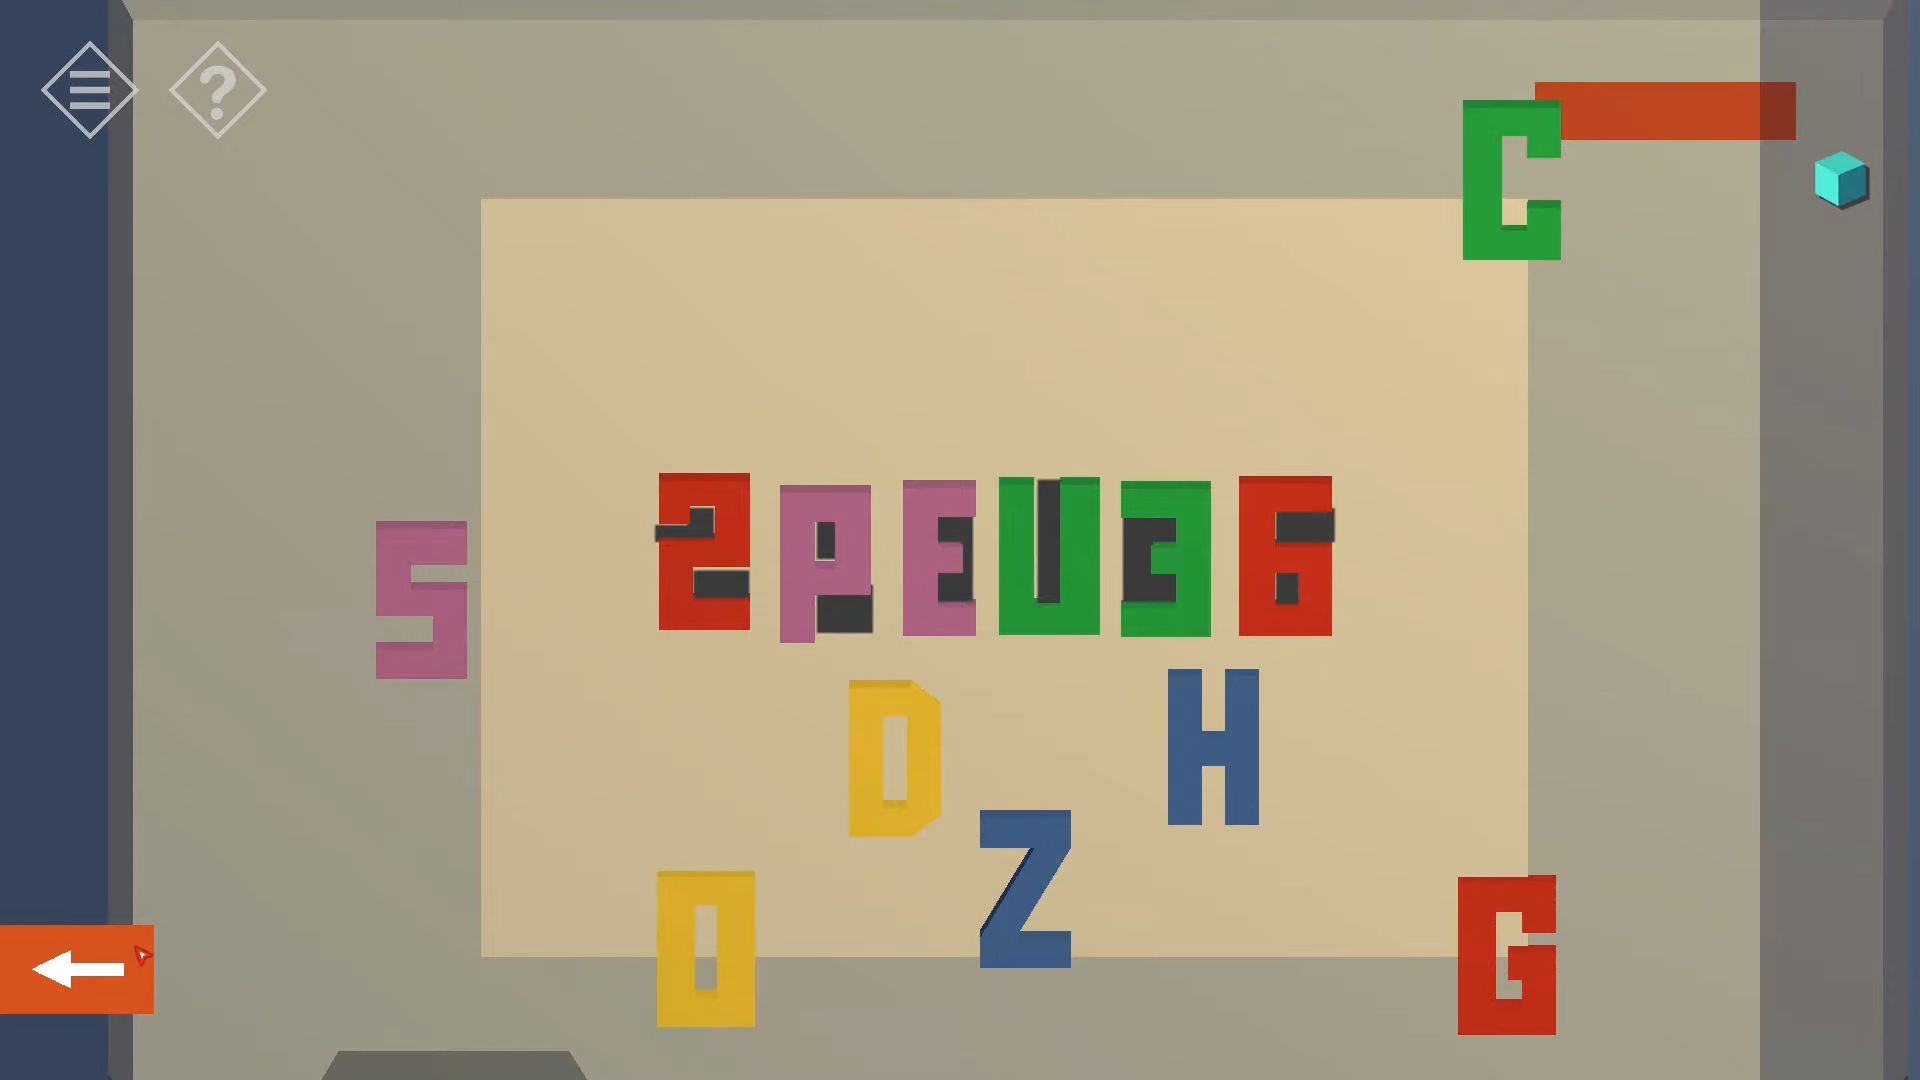
After that, look in the upper left cabinet and tap to shift the jars to uncover a small weight. Knock on the fridge to see magnetic letters and some dark shapes. Rearrange the letters to match the shapes and reveal a code.
Since the door is locked, go back out through the window. Now, enter the house through the other window on the right side of the door, and you’ll be in the guest room.
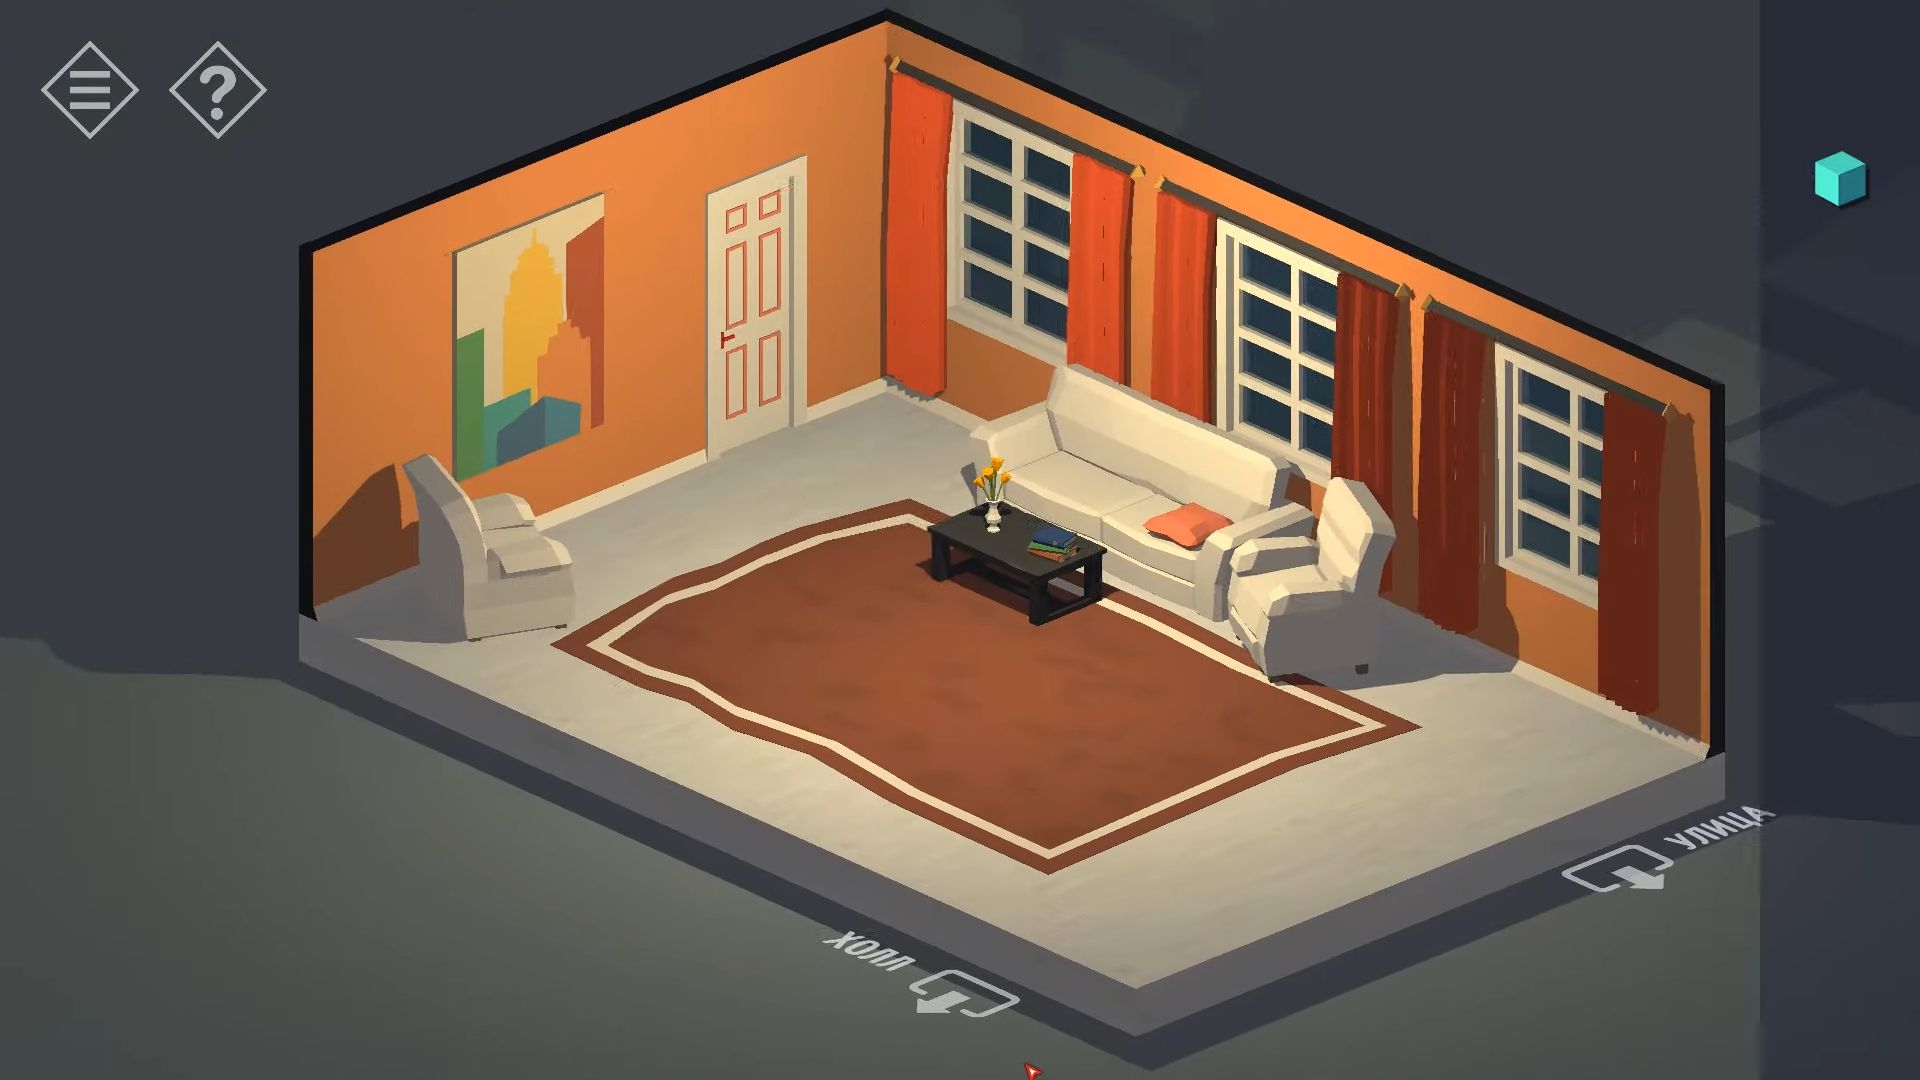
Touch the sofa, and then shift the orange pillow to discover another small weight. Change the view to see the low unit by the open window. Tap to look at it, and open the center doors to find another small weight. After that, open the door on the right to get the TV remote.
Leave the room and go into the hall. Rotate the view to see the front door and knock on the alarm panel to the right. Enter the alarm code (2PEU36) from the fridge puzzle above to deactivate the locks and stop the alarm noise.
Now you can go into three rooms upstairs. Head to the left door on the upper left balcony to enter a pink bedroom.
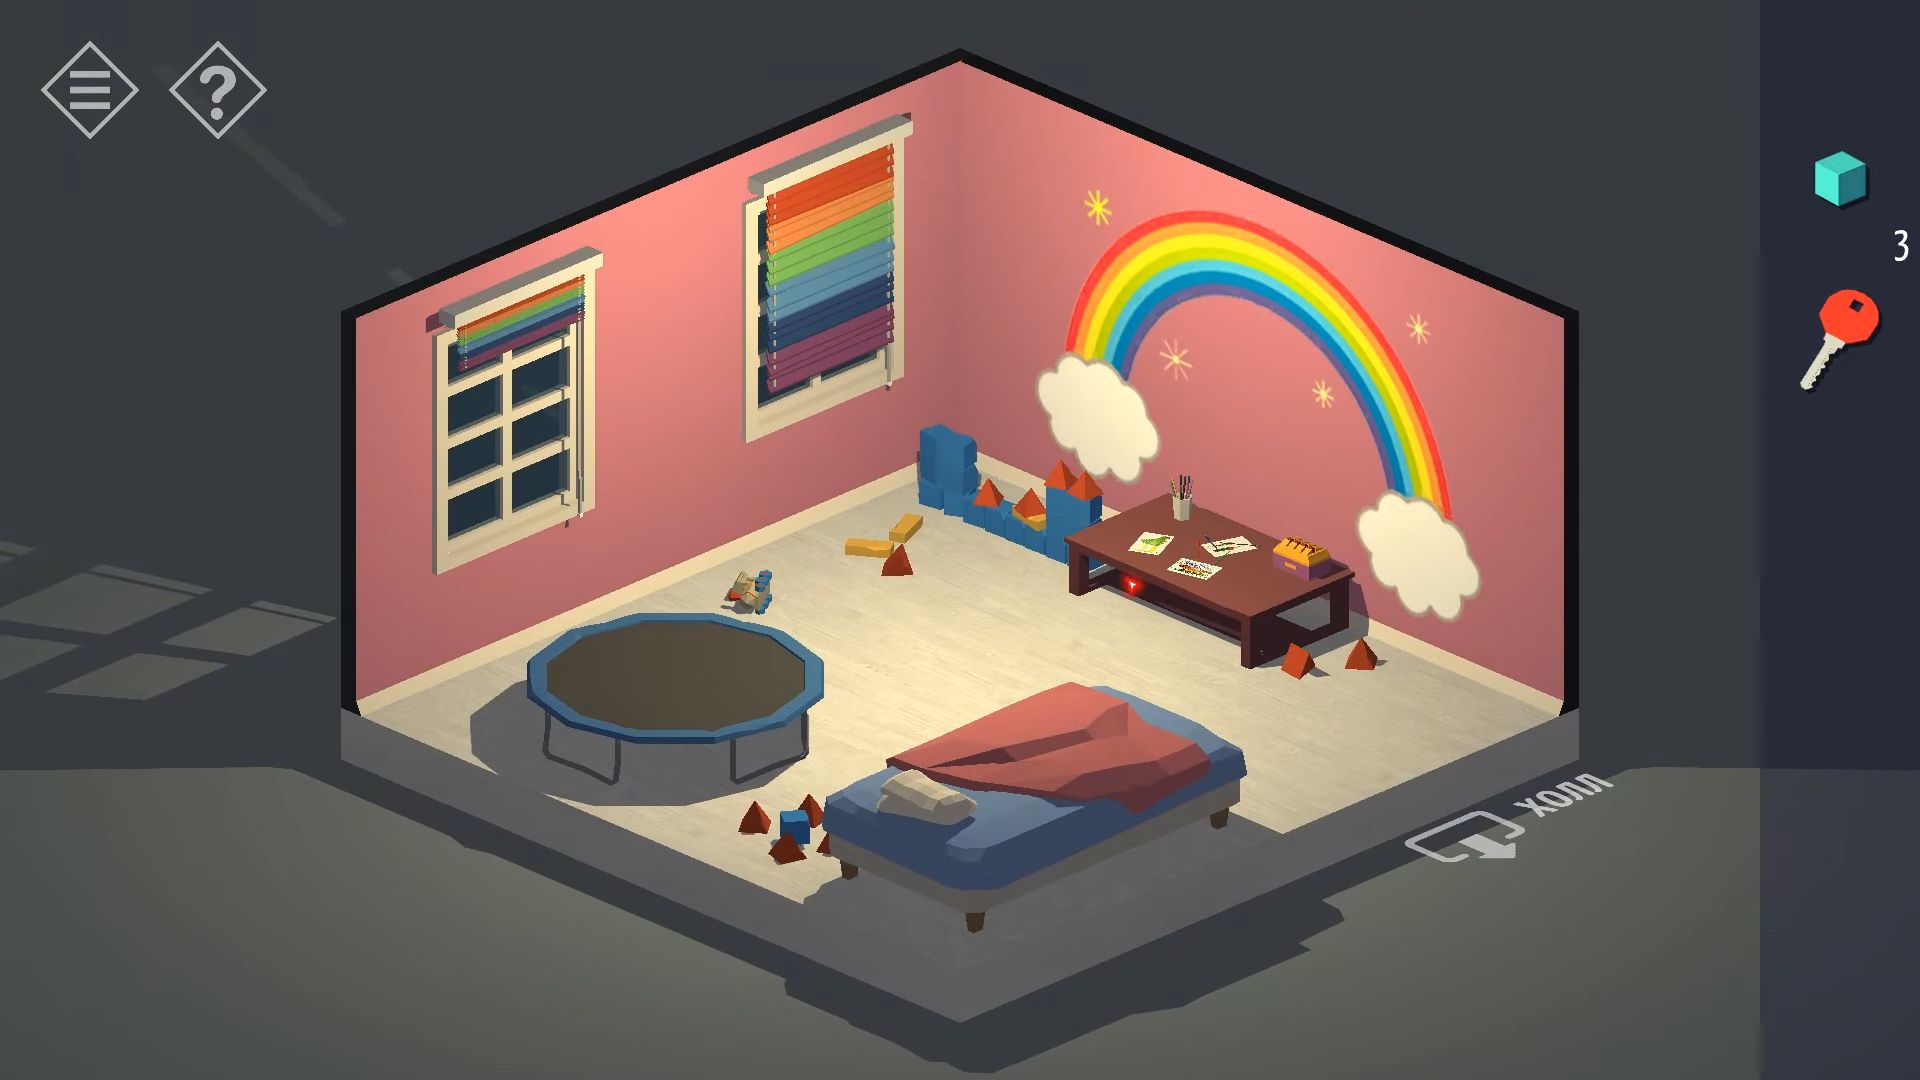
On one side, there’s a bunch of blocks and a table. Tap to get a closer look and observe the arrangement of the blocks. Knock on a box located on the right side of the table to reveal a combination lock. The lock has 4 dials with blocks of various shapes and you have to adjust the combination to unlock the box. Align the 4 shapes in a way that fits together, matching the blue blocks next to the table.
Turn the view to see a bookshelf, and tap on it to find a blue key. Explore the room and notice the shirt on the bed with the number 6. Knock on the bed, and touch the book on the side table, this book is like a secret code pad. Open the wardrobe door and head inside to find 4 more shirts hanging up, with one more on an ironing board.
Use the shirts to figure out the code for the keypad. You have six numbers, but you need to figure out their order. After that, look at the hangers closely; they have markings from 1 to 6 rings. The one on the bed has 3 rings. In the wardrobe, there are 5 other hangers, with one missing a shirt (7 9 6 2 1 5). The drawer opens, and you can collect another red key. Go back downstairs and under the stairs, there are two locked doors at the back.
Use the blue key to open the one on the right and enter the wine cellar. There’s nothing to collect here, but you can play music on the speaker. Take note of the lower shelving and the shapes it forms.
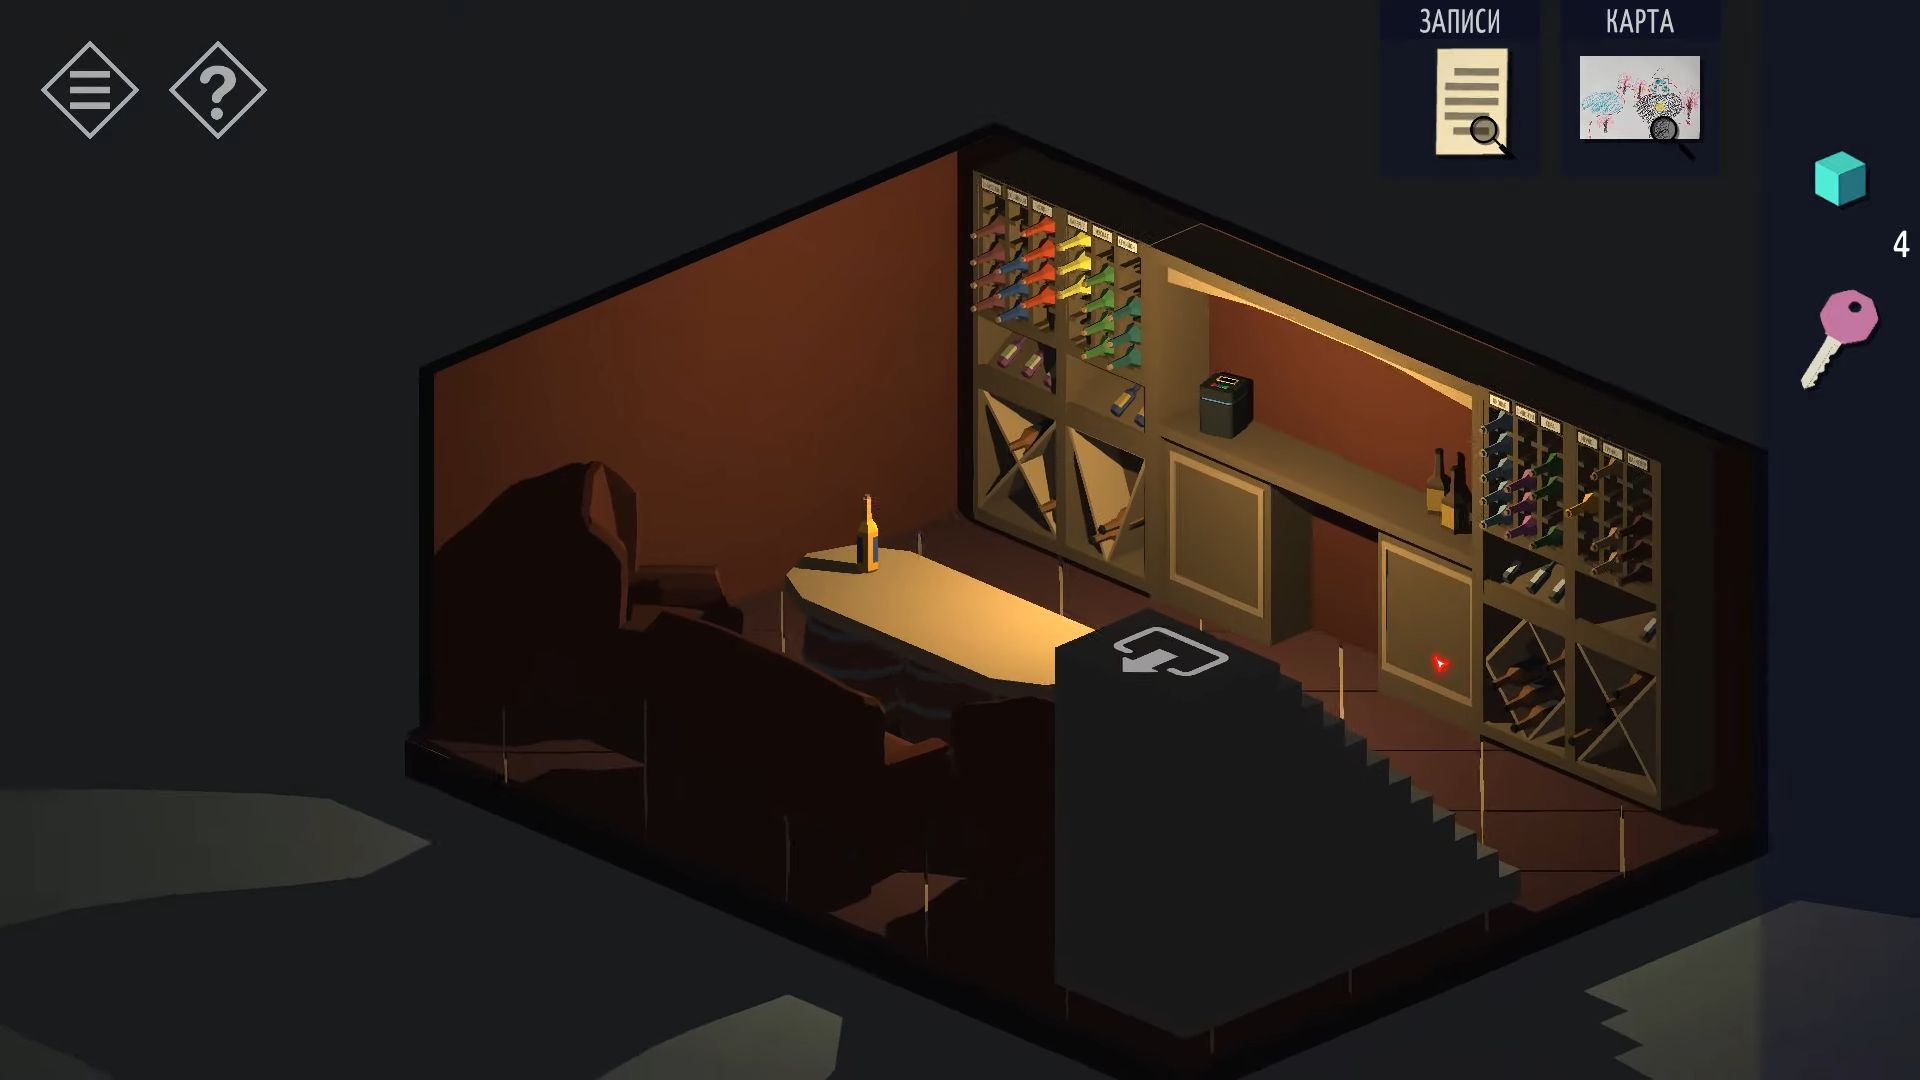
Now you need to leave this room and tap on the door on the other side of the stairs to find a keypad entry that needs 6 symbols. Look at the wine cellar shelves and cabinets, and you’ll see 6 shapes: X, Inverted Triangle, Square, Square, Diamond, X. Open the door and go into the garage.
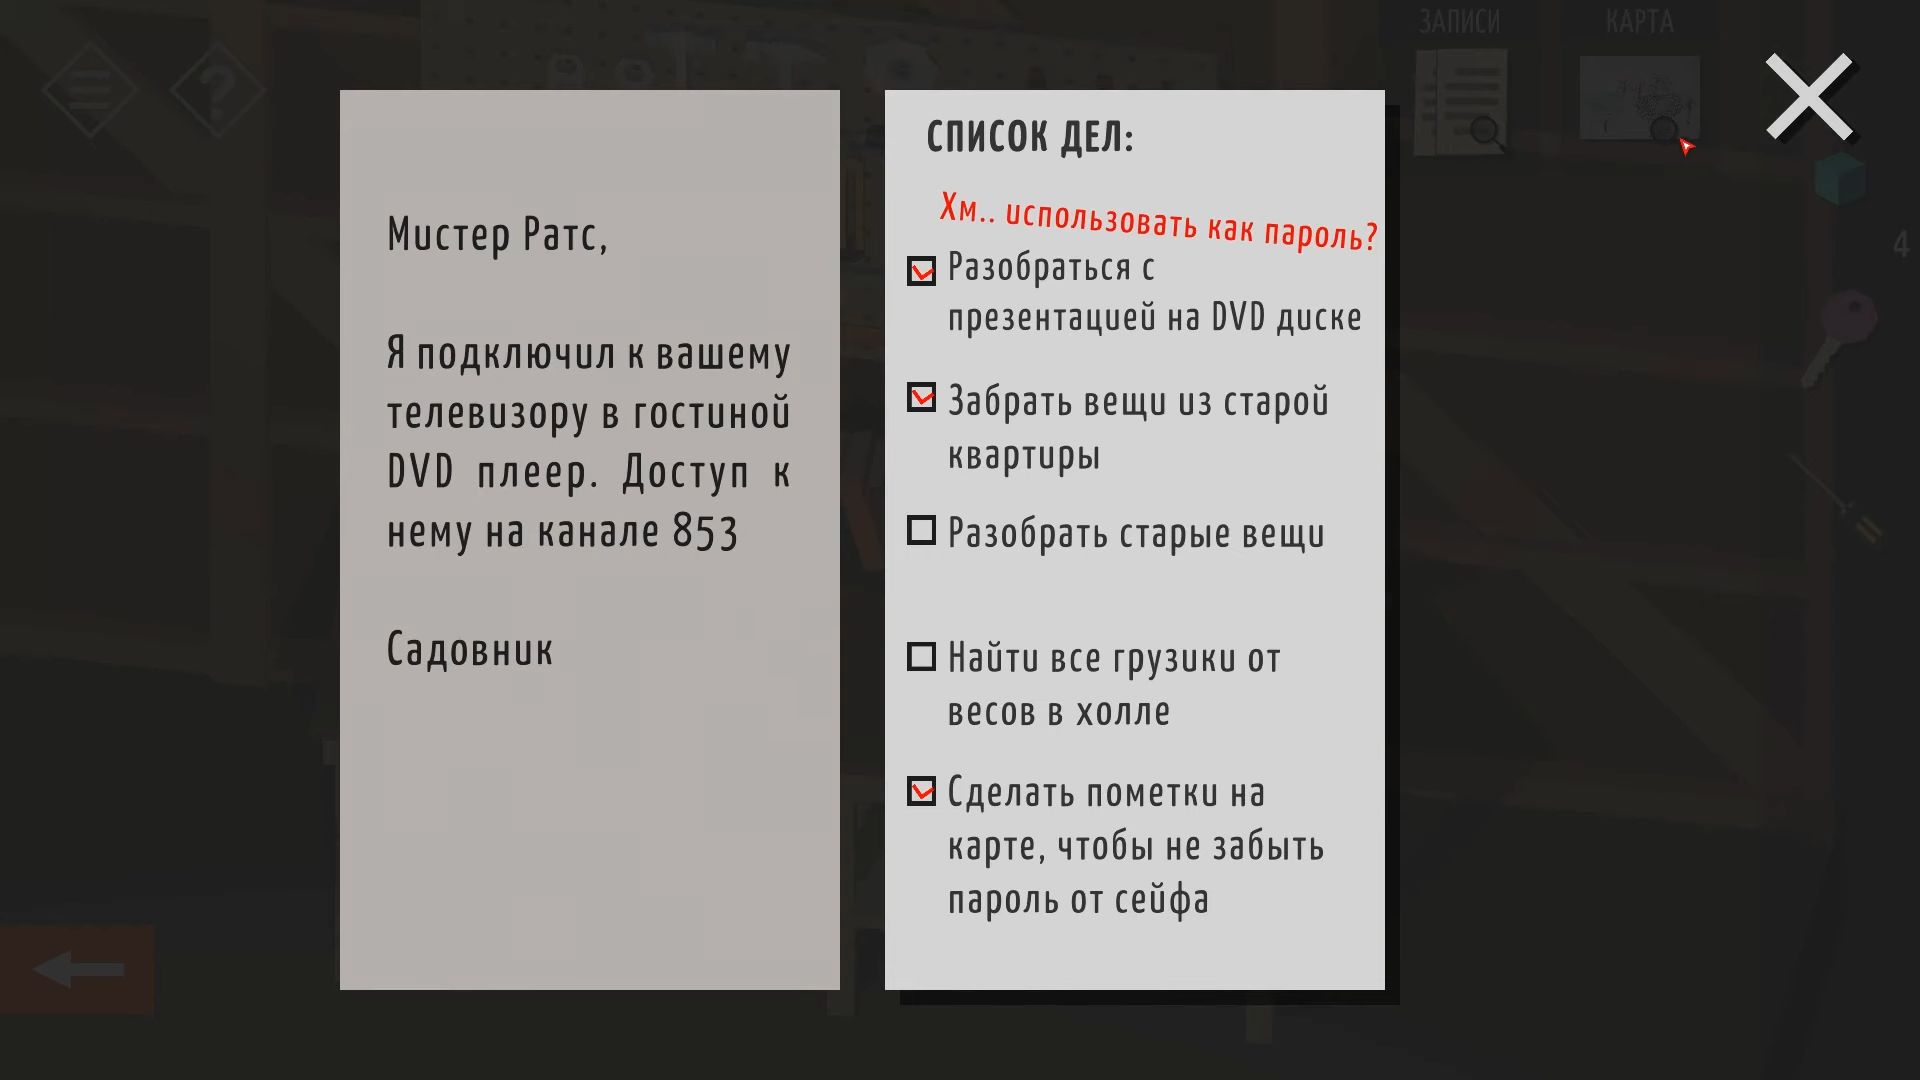
Touch the tool rack at the back and take a screwdriver. Tap on the trolley under the back to slide it and collect another small weight. Then, knock on the paper on the table to read a note about the DVD player.
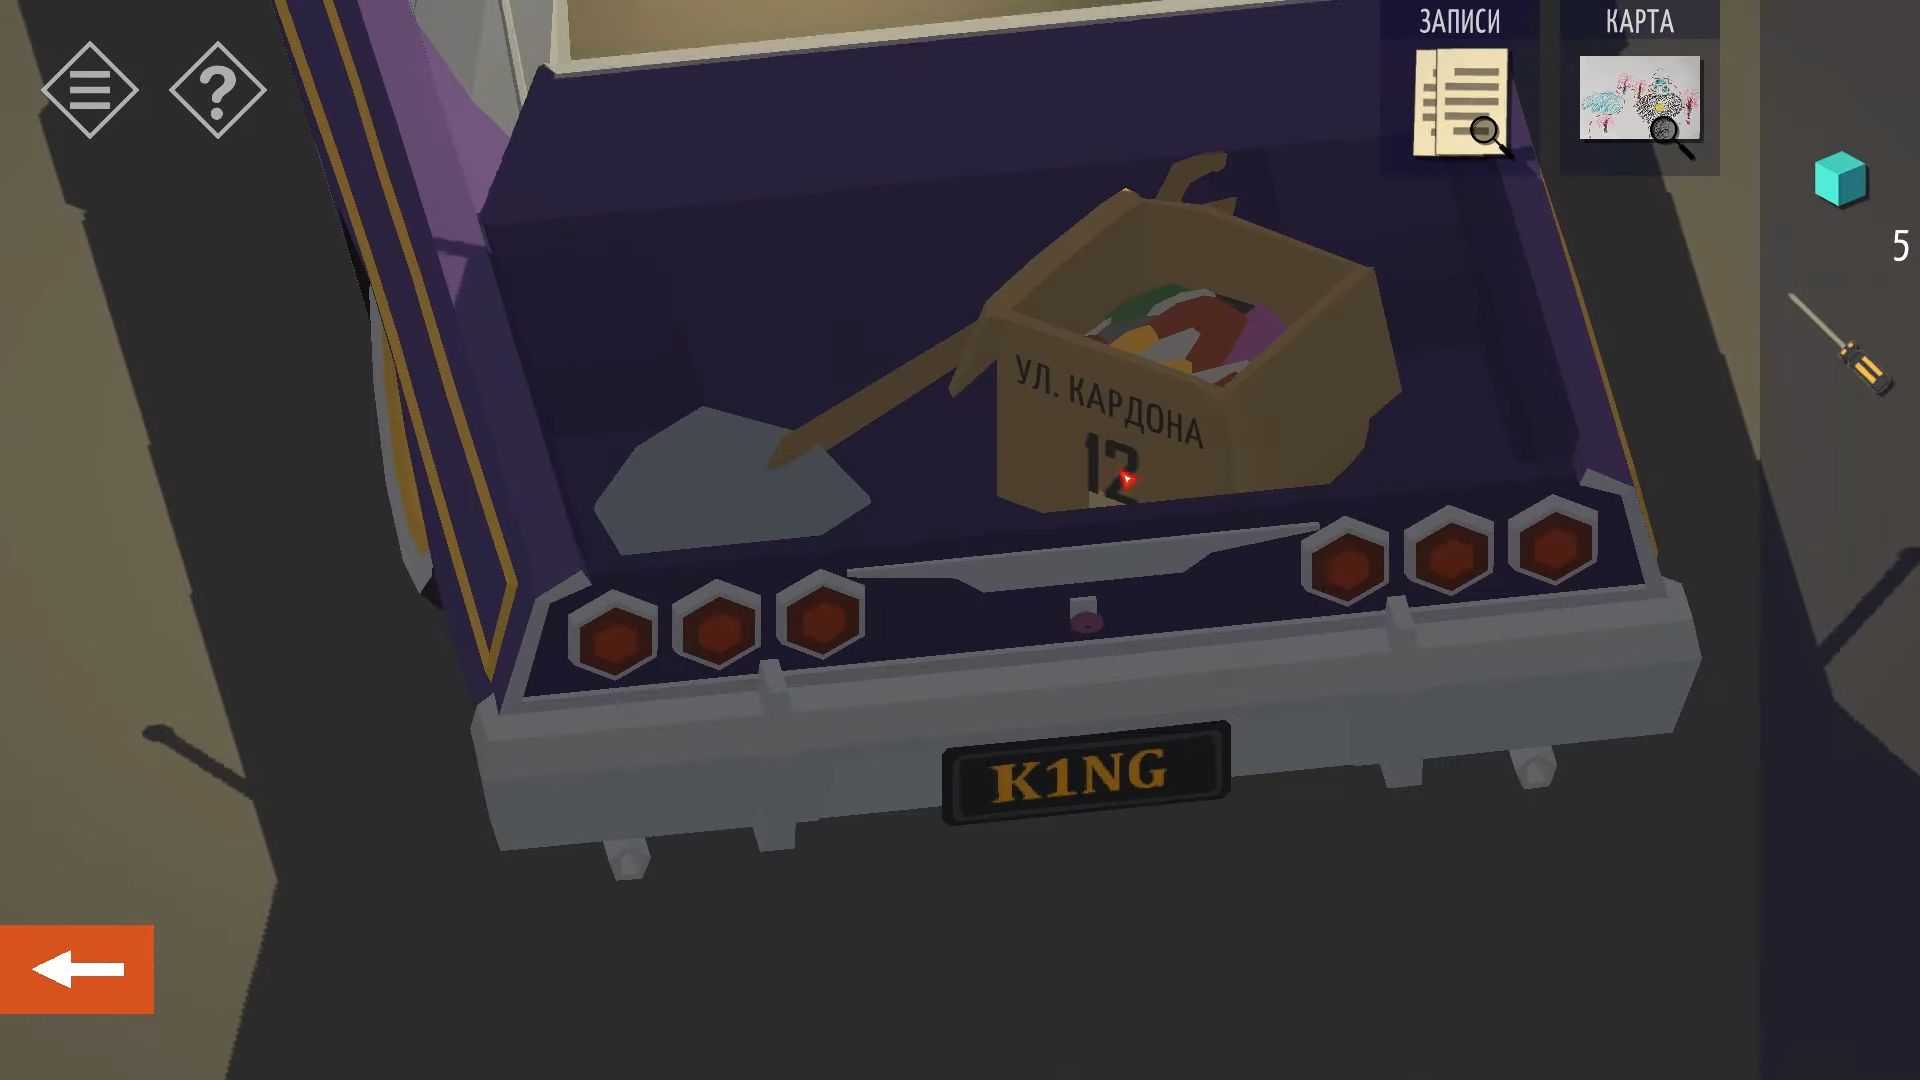
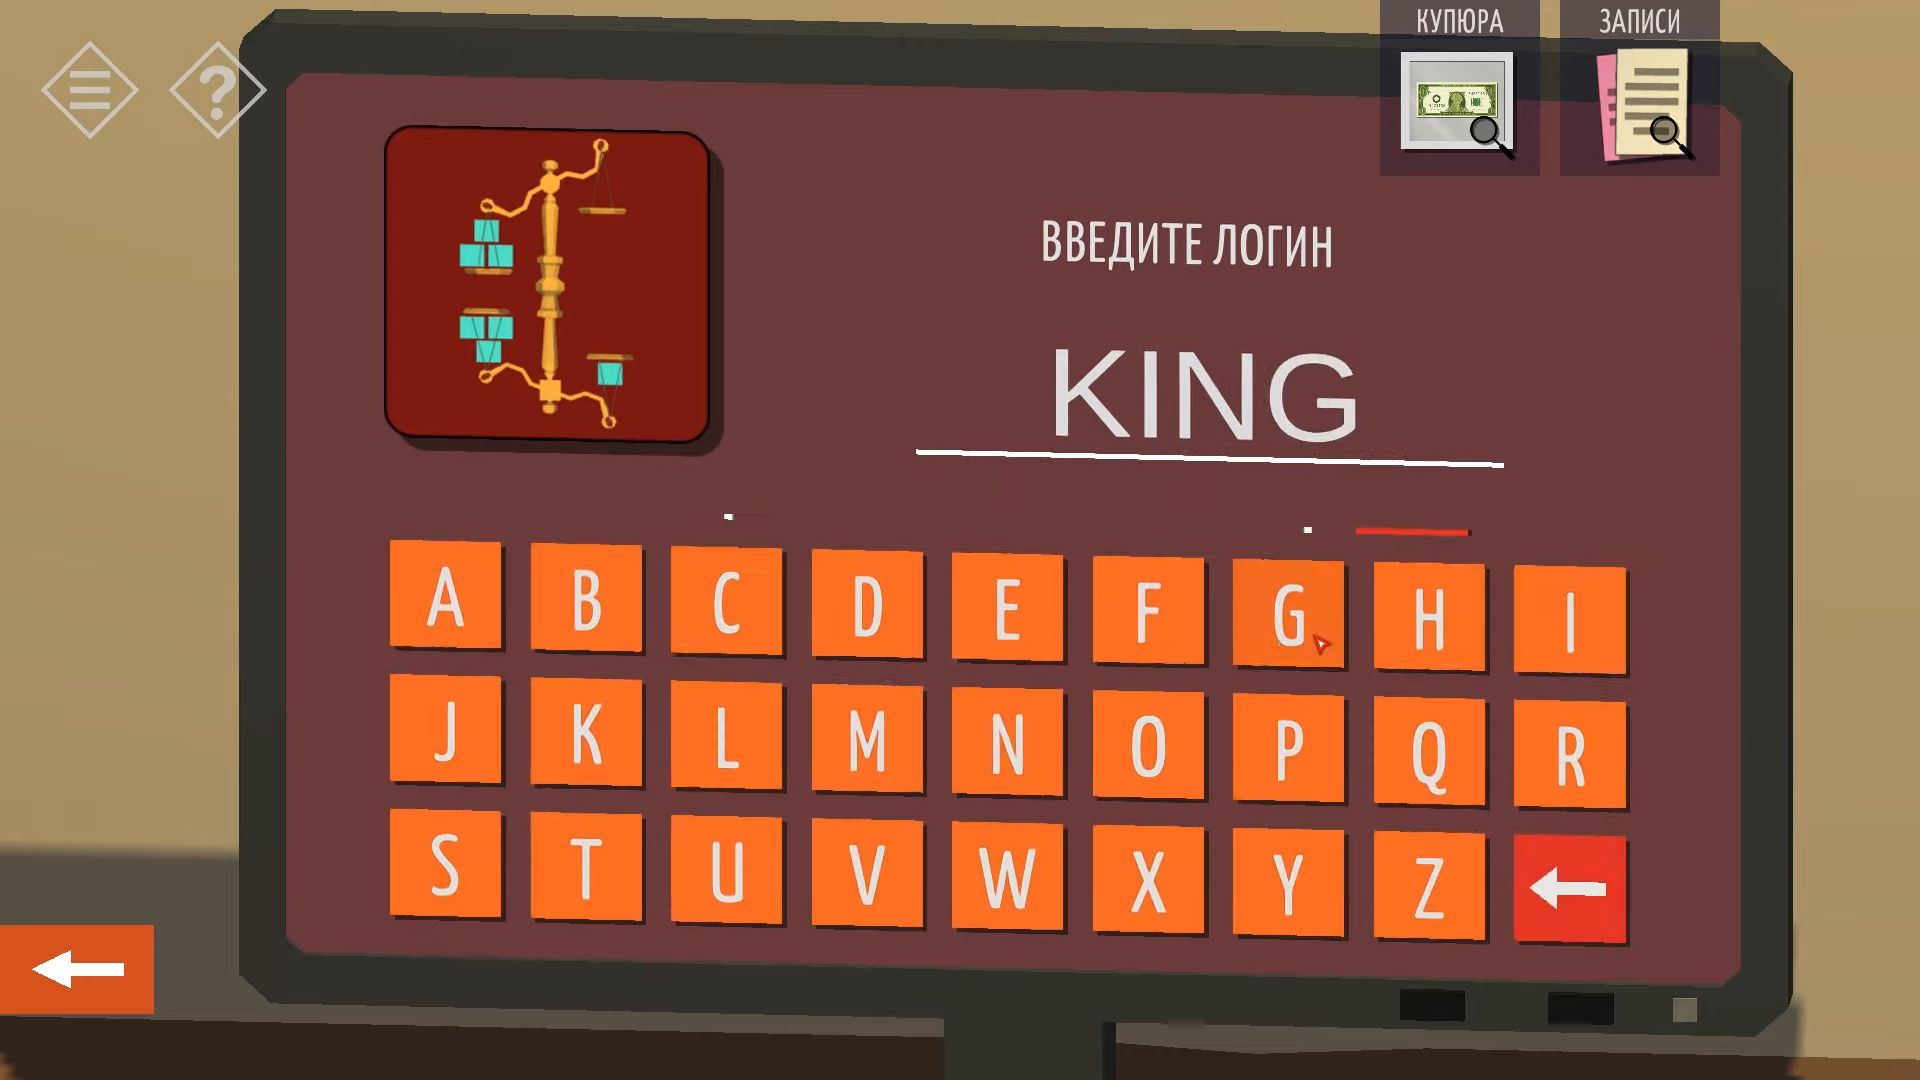
Return to the garage and turn the view to see the back of the car. Use the purple key to open the trunk and get a shovel. Also, notice the box with an address on it and the license plate on the car: K1NG.
Now leave the building and go back to the parking area. Look at the Treasure map you found earlier in your inventory, the map guides you to a spot with an X next to a tree. Find that tree and tap on it. You will zoom in and can use the shovel to dig there.
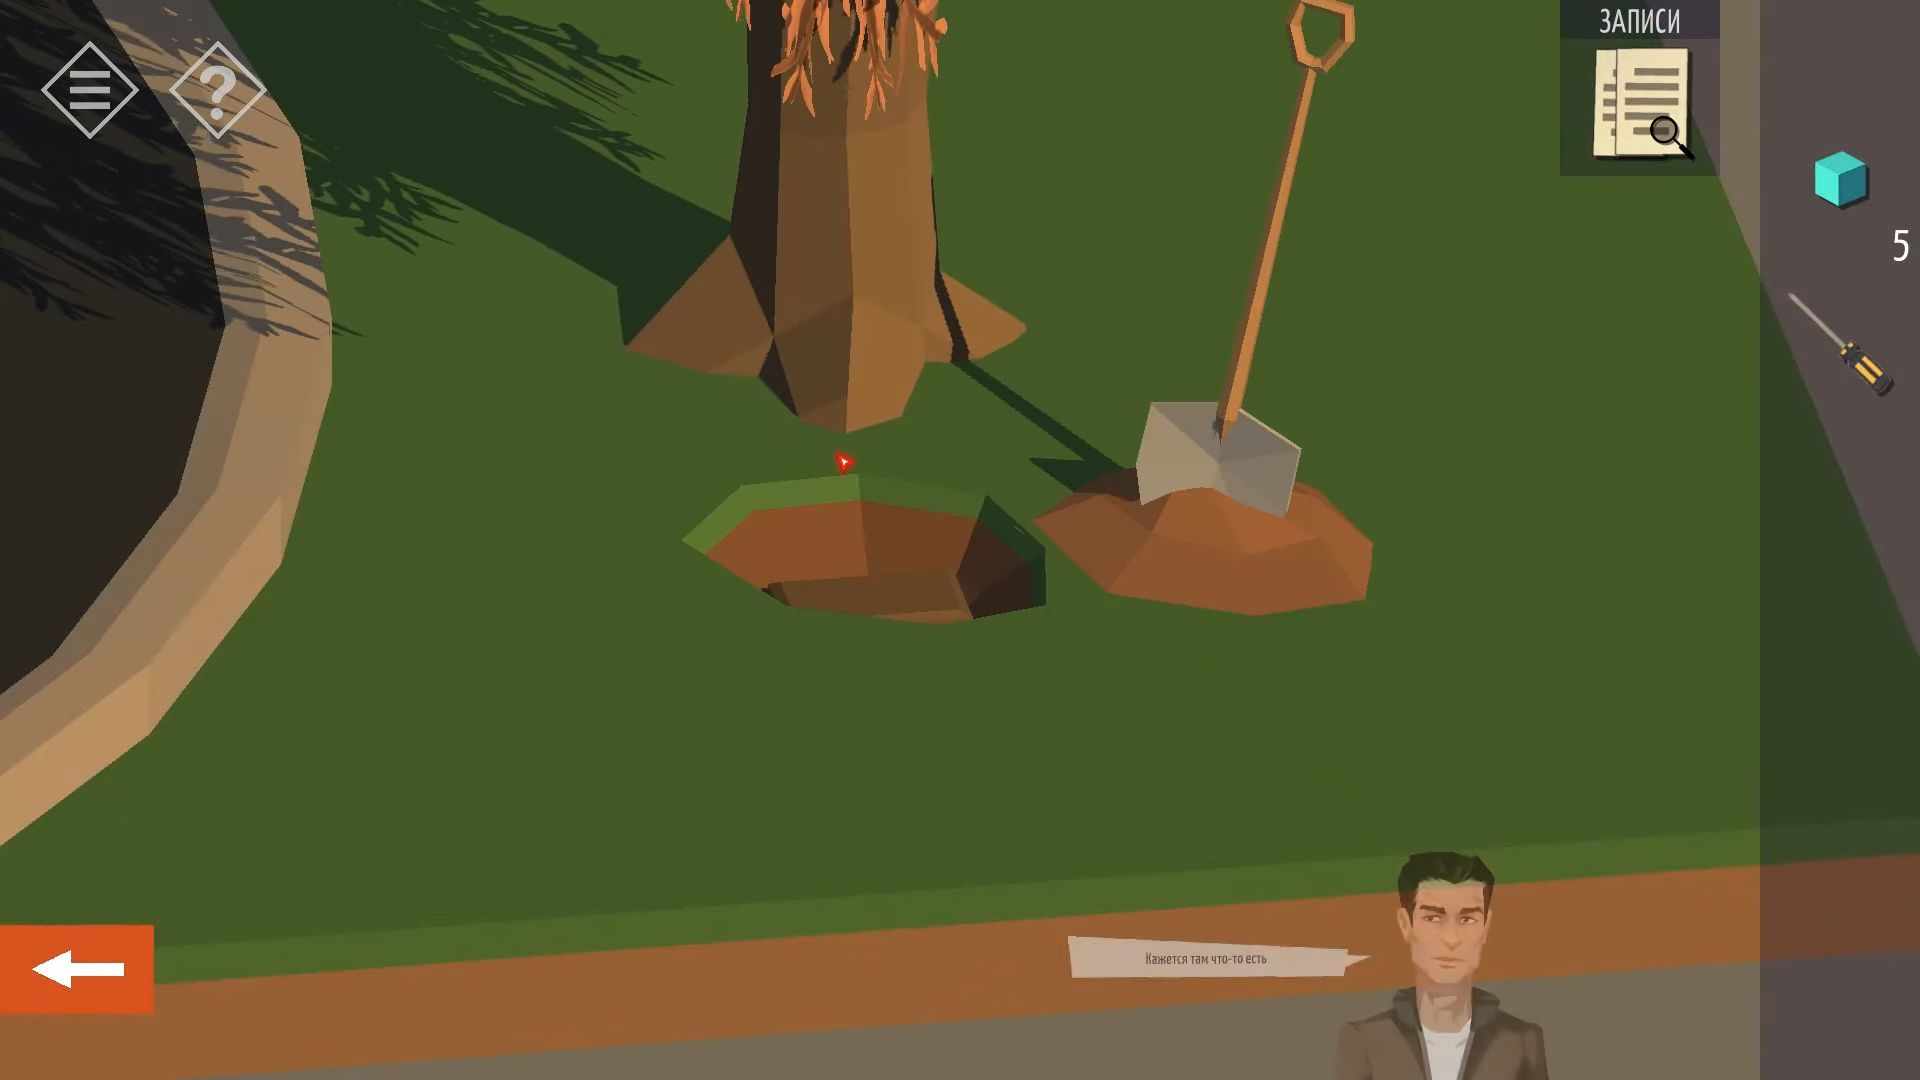
Open the box you discover, take another small weight and a note from a child about their birthday.
Now, let’s go back inside and move towards the big picture at the top of the stairs.
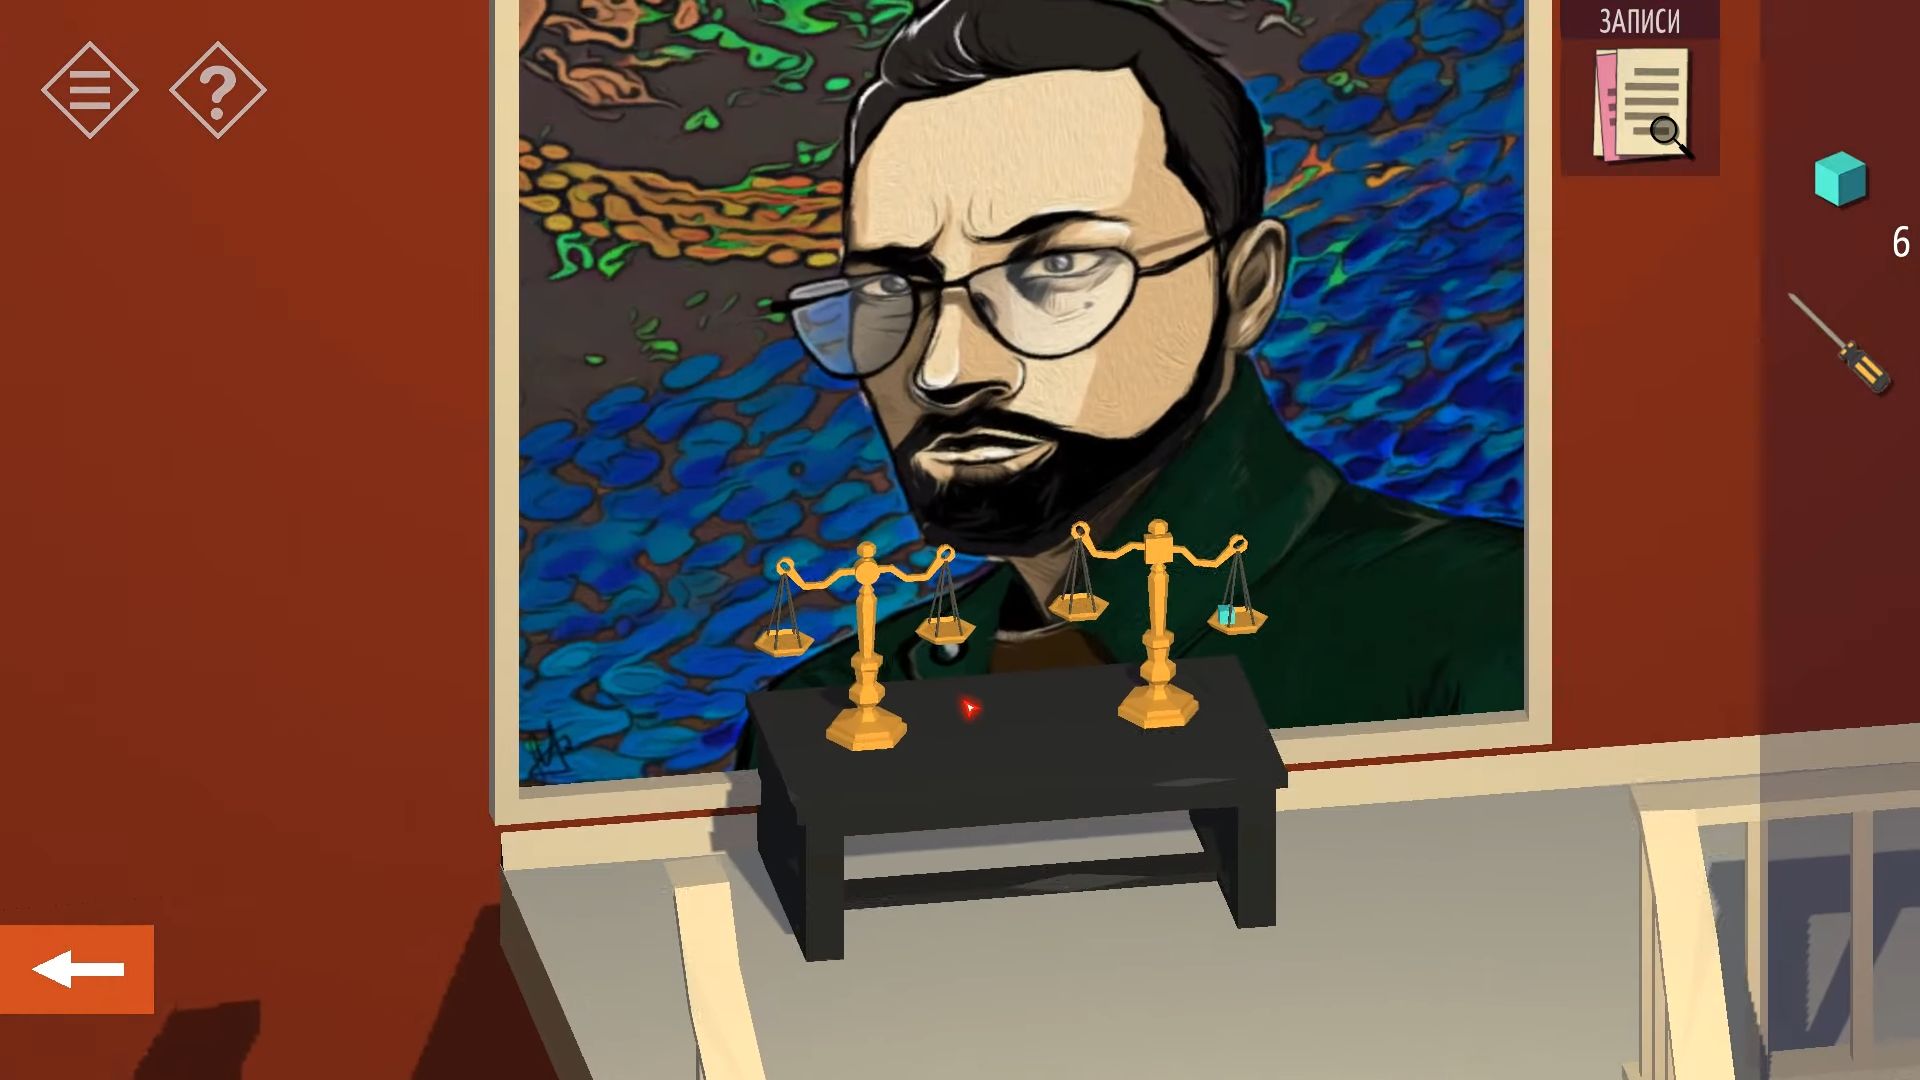
There’s a set of scales with one more small weight to find. By now, you should have seven weights. Use the clue from the scales image on the computer above to arrange them on the scales in this order from left to right: 3 0 1 3. A panel will open, revealing a safe with a code entry. The note you found earlier tells you that the safe code is in the notes on the map, which is on the study wall.
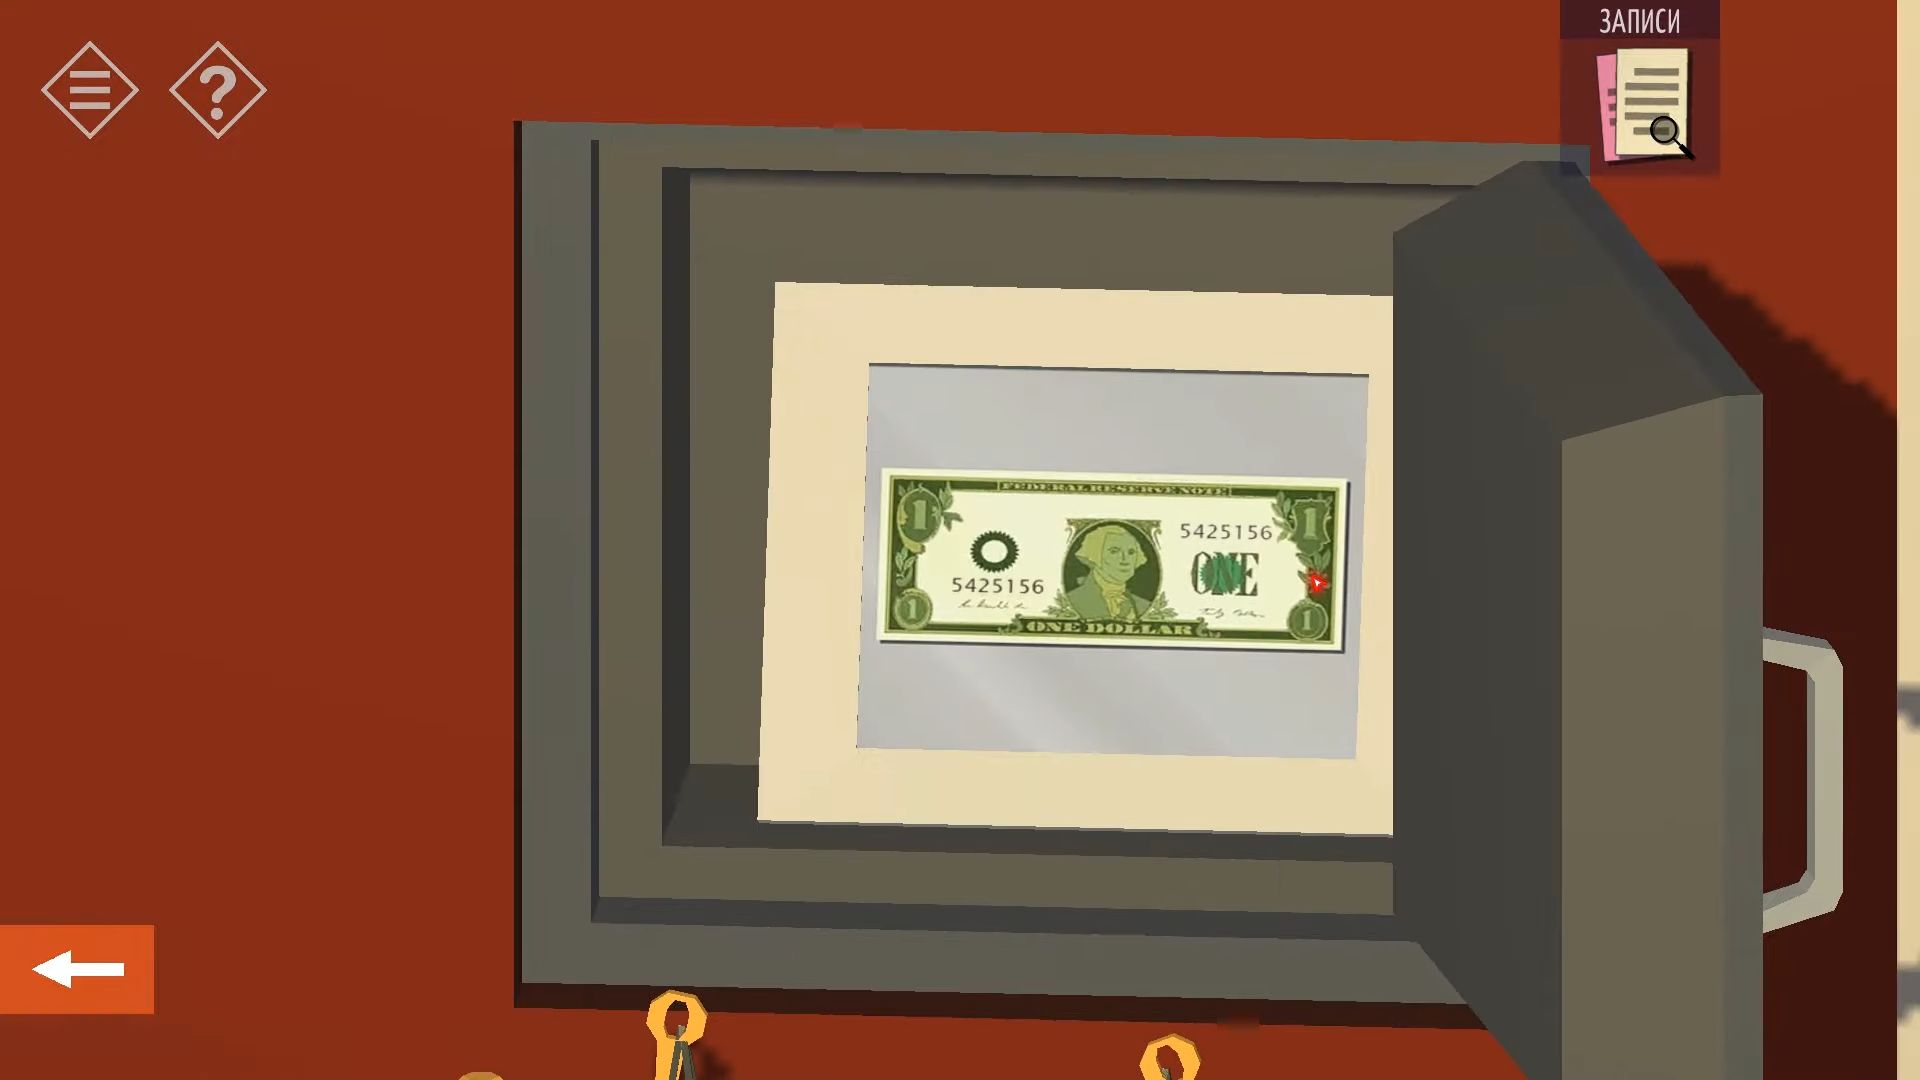
To figure it out, you use details from the DVD image. The DVD image indicates that the note format has changed from letter/number pairs to number pairs, read with the horizontal axis first. Check the map in the study and note the three pairs of coordinates, replacing the ABCD letters with 1234 numbers (323362). Open the safe and collect the dollar bill inside.
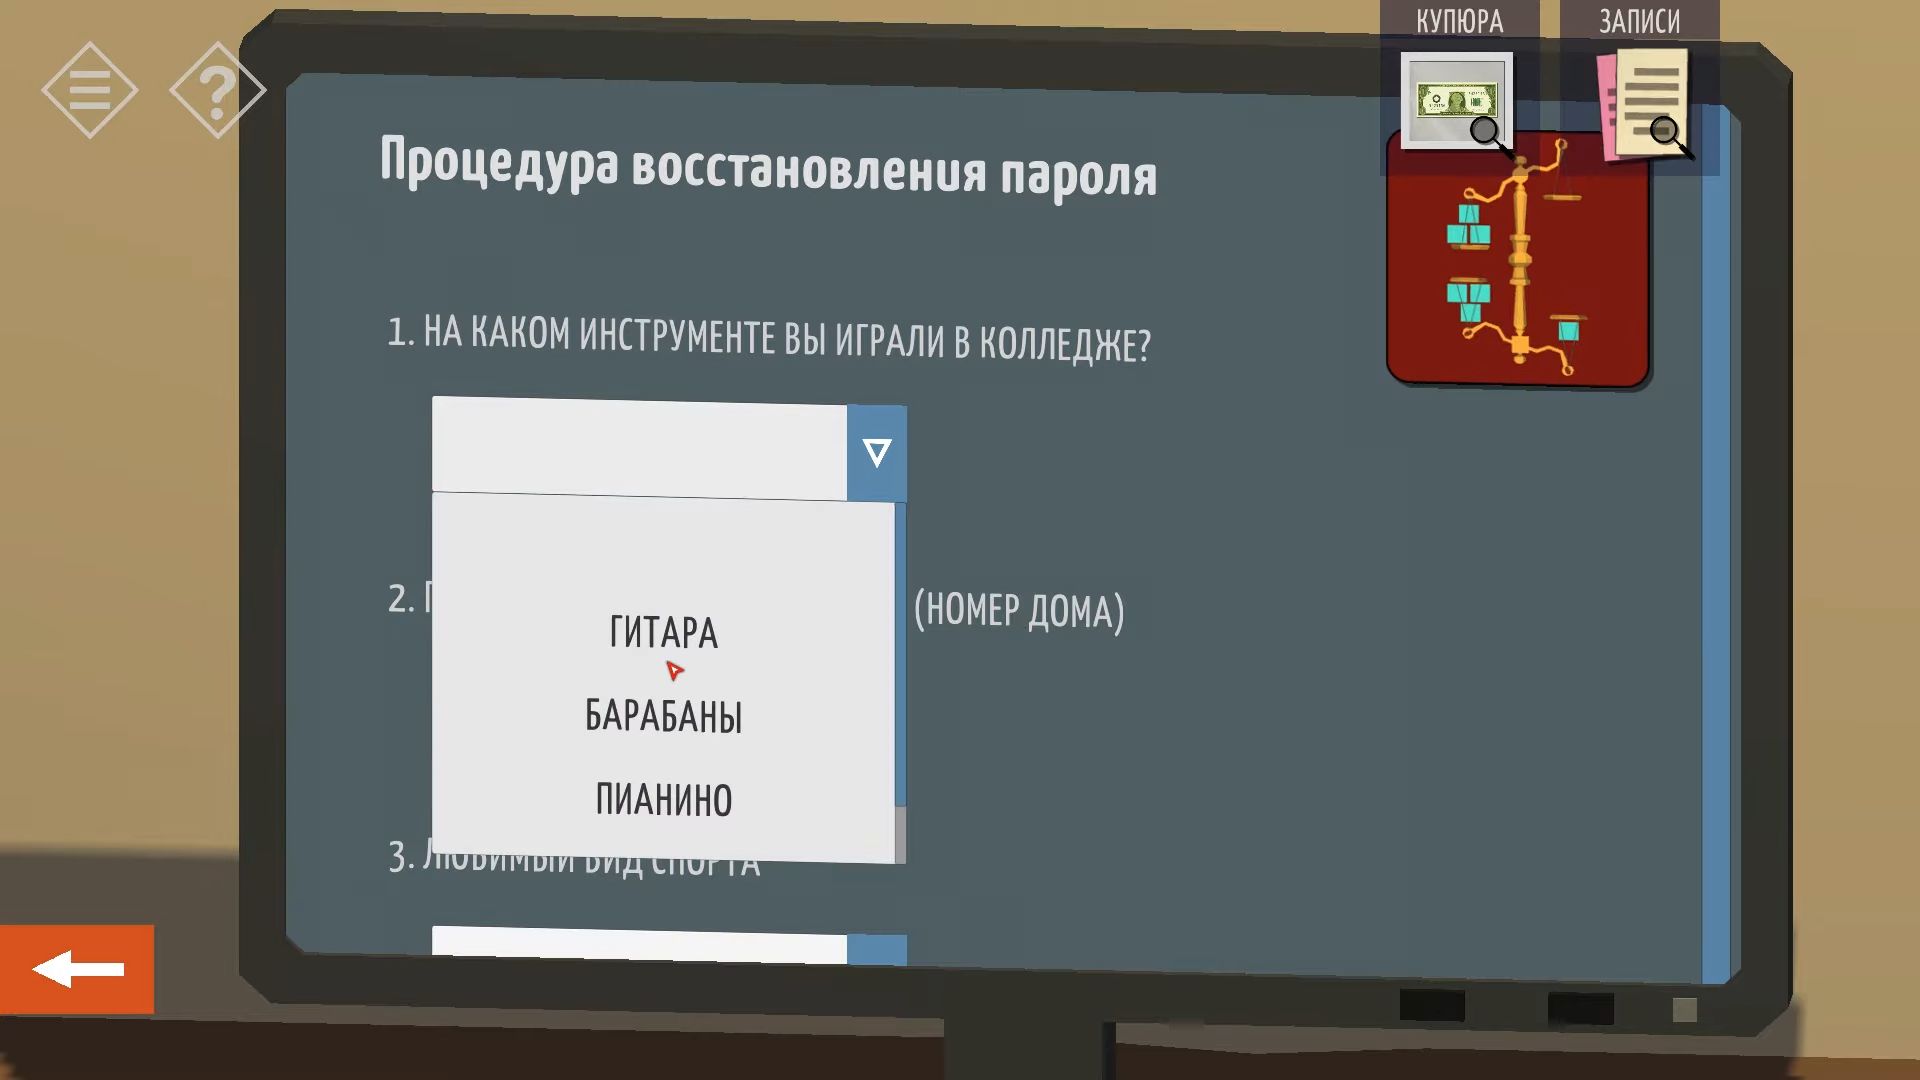
Go back to the Study once more and touch the computer screen. The login name is a 4-letter word you found a clue to earlier: KING. The mayor, who likes his car a lot, is a bit vain. Although you don’t have the password, you can use the “Forgot your password” option. After that, tap on that.
Even though you don’t know the password, you can use the “Forgot your password” option. Tap on that. The form to fill in asks for information that you have seen clues for around the house. You must try to fill it in; the solutions are below:
- Instrument in the bedroom wardrobe – Guitar
- Previous address on a box in the car trunk – 12.
- Found in the garage – Football.
- Check the wine cellar for the wine with the least full bottles – Merlot.
- A dated note from the daughter said her birthday was 2 days earlier – 31 May 2012.
- Check the items and drawings in the daughter’s bedroom – No Fairy.
- Check the bathroom in the main bedroom – Gold.
- The serial number from the dollar bill from the safe – is 5425156.
This will unlock the computer and you can see an email about the experiment and access the Panic Room control. Tap this to open the Panic room.
Step away from the computer and look at the big bookcase on the right. Notice that 6 books have yellow markings on their spines. These books can be pushed in to reveal a secret. You need to figure out the correct order to press them. If you make a mistake, the books reset, and you have to start over. It’s like a guessing game.
On the top shelf, there are 2 books, which you’ll call 1 and 2, and then on the lower shelf, there are 4 books, labeled 3, 4, 5, and 6. Press them in this order: 3, 6, 2, 1, 5, 4.
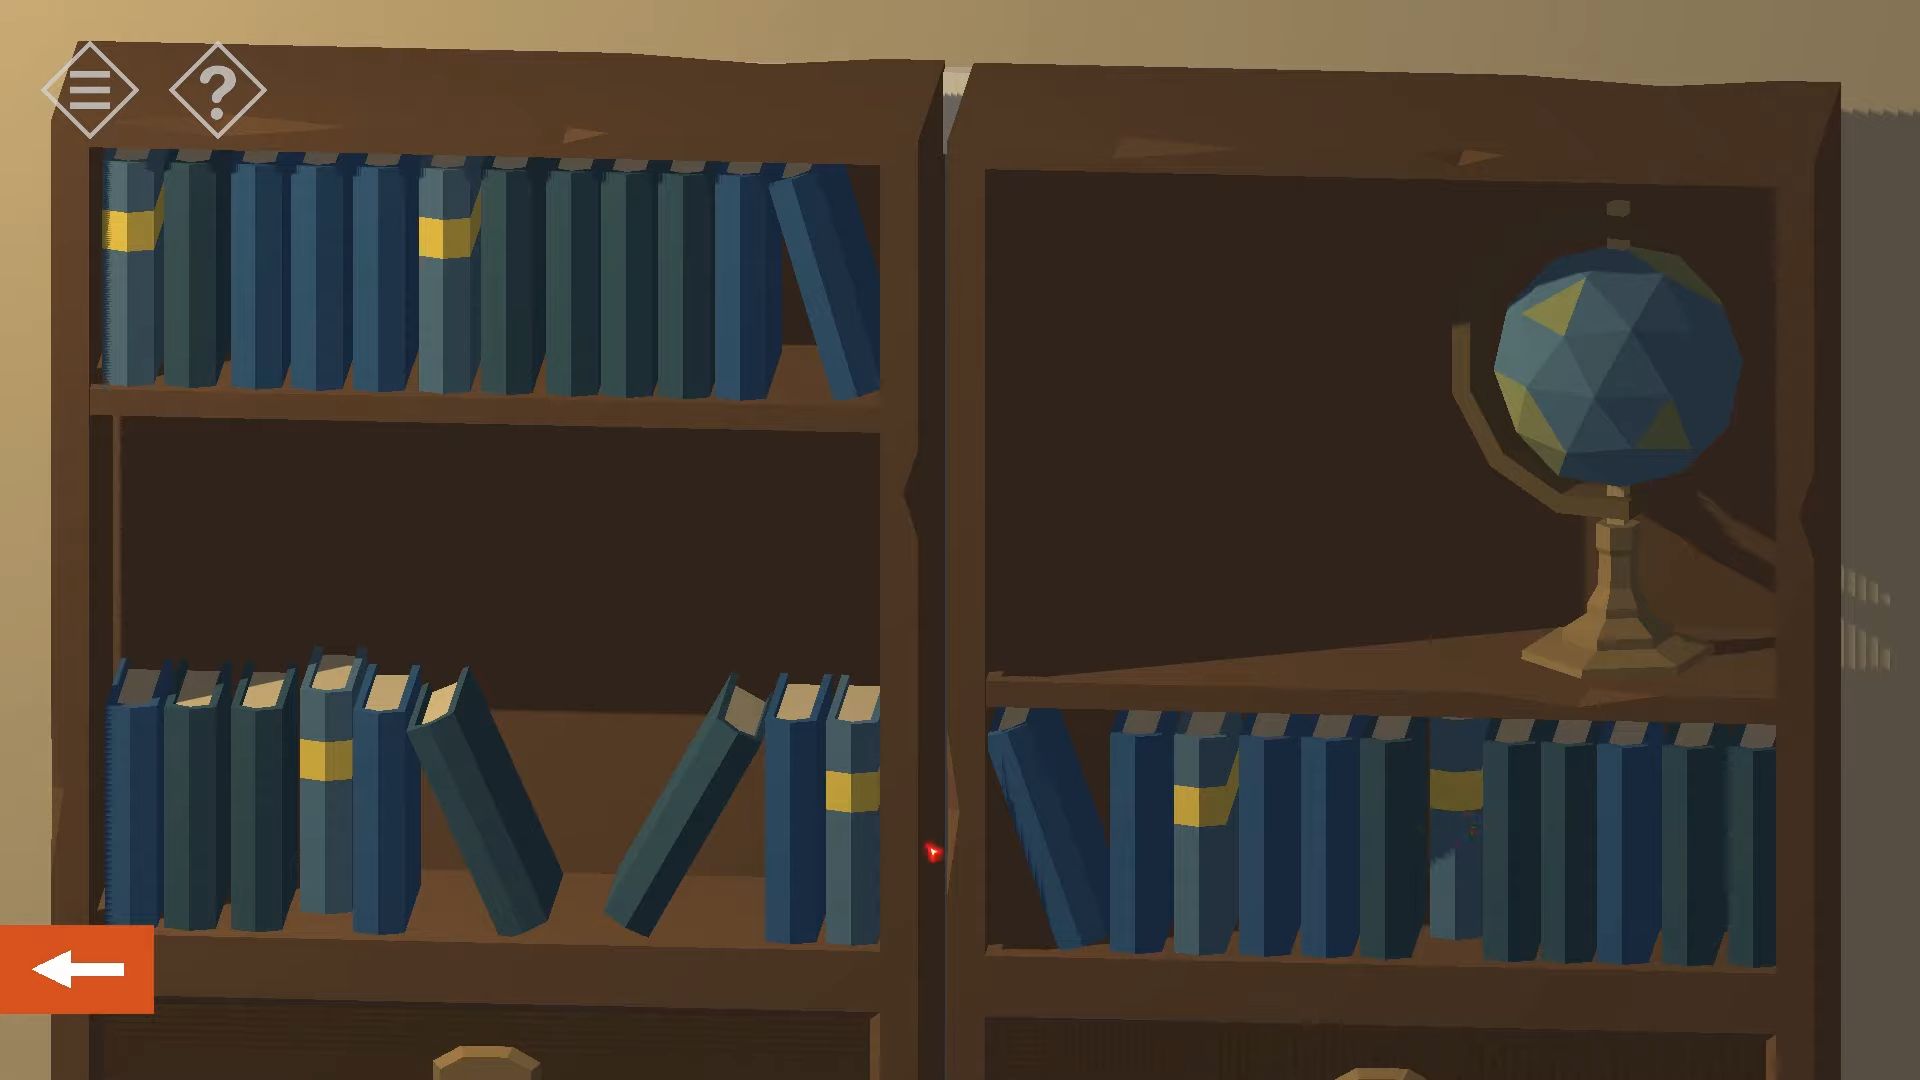
Doing this will open the bookcase, revealing the open doors to the panic room behind it. Tap to go into an elevator and use the controls to navigate down to the panic room.
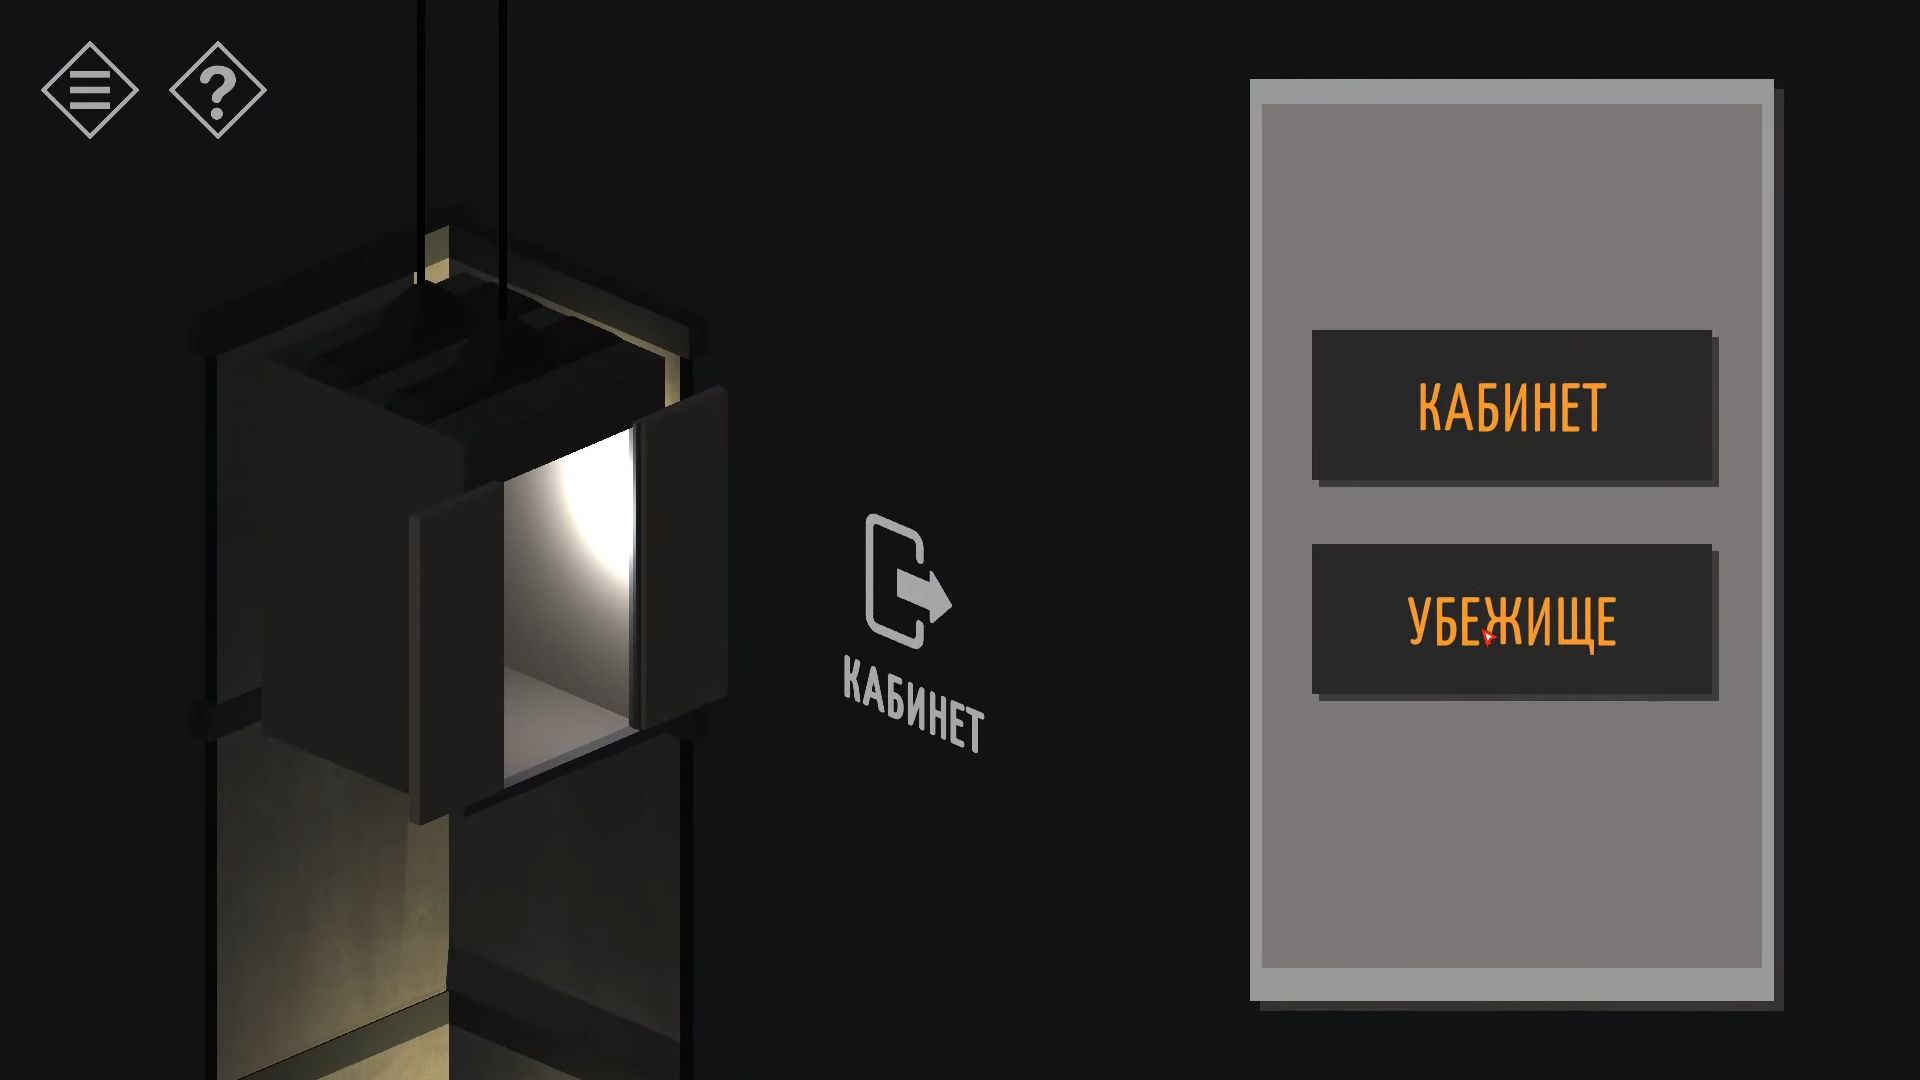
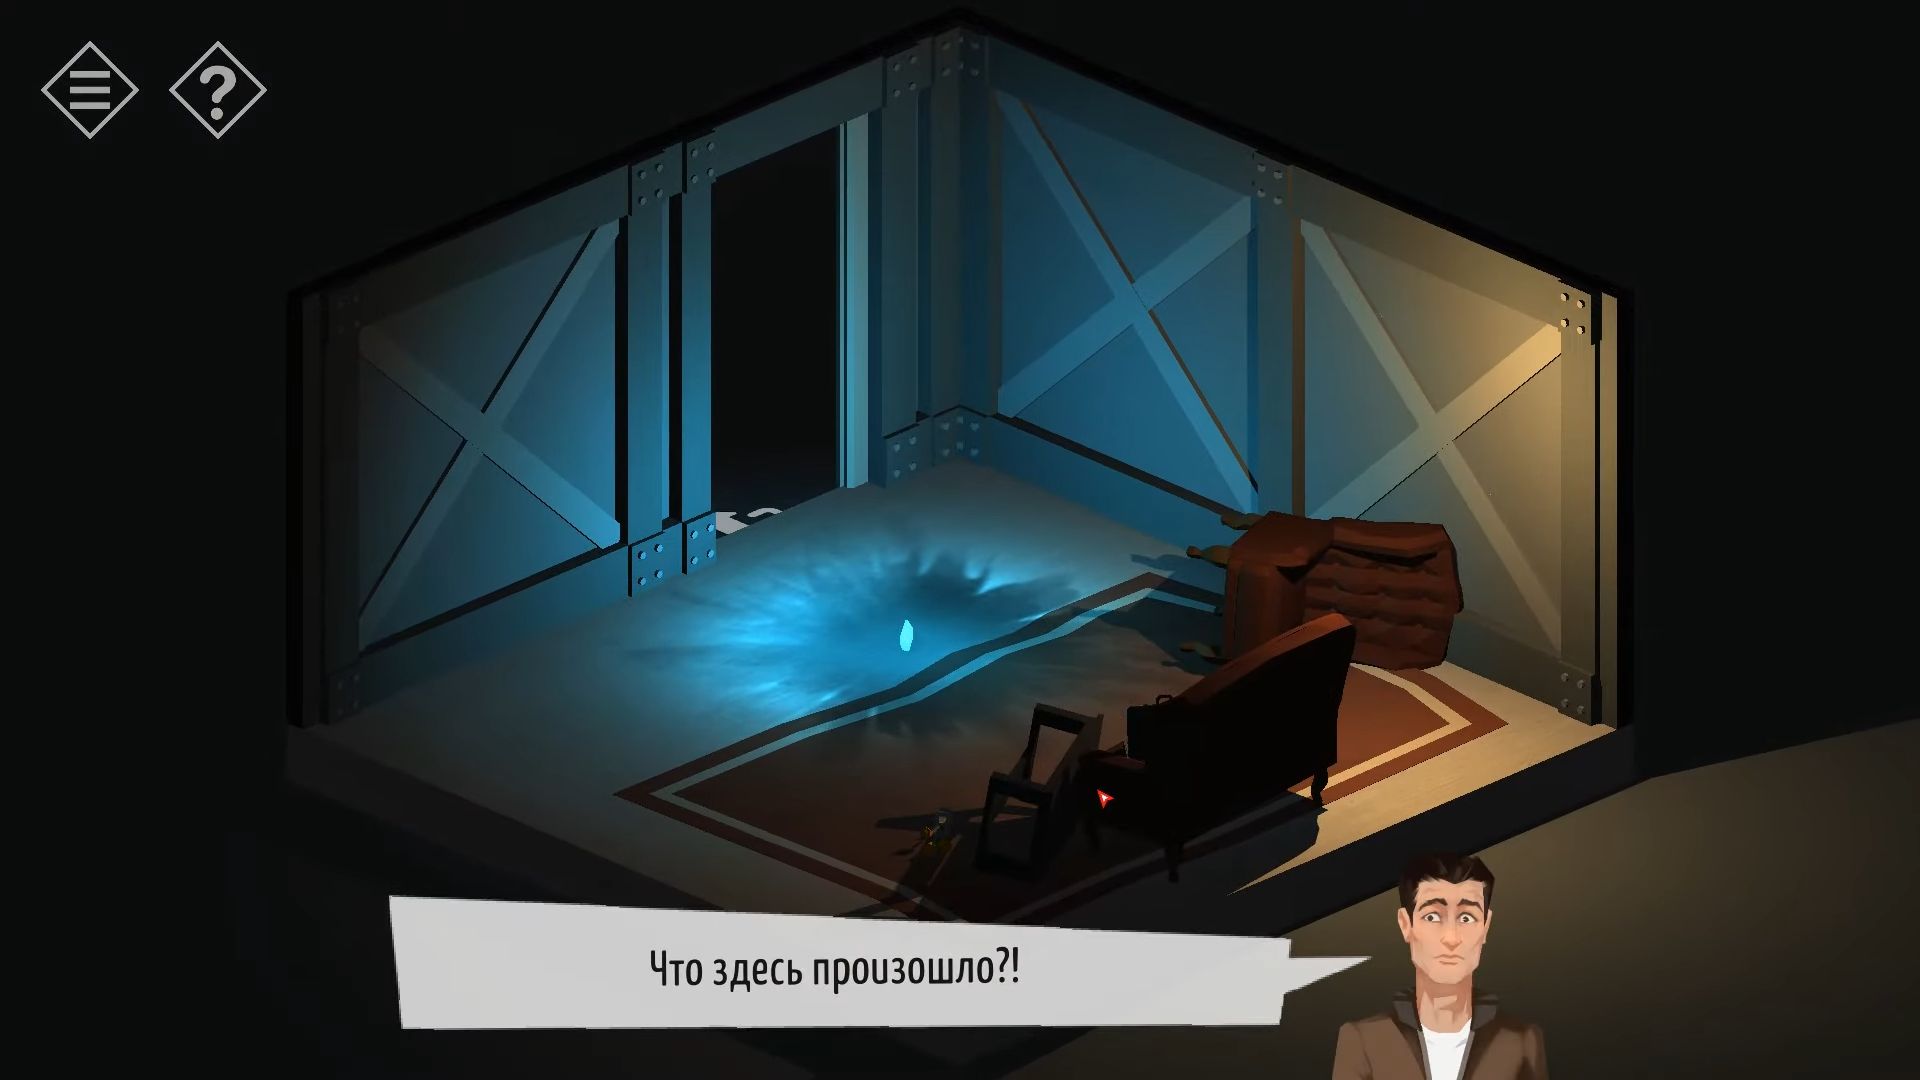
In the room, it looks like there is a big explosion. Turn the view around and get a briefcase from the chairs. You have to use this briefcase on the shard on the floor to pick it up. Now, tap on the elevator exit to go out of the building. Touch the trunk of your car to open it and put the briefcase with the others. It’s time to go, and that’s the end of chapter 10.
Chapter 11
Here’s the complete guide for chapter 11 in Tiny Room Stories: Town Mystery. You’ve been provided step-by-step instructions along with pictures.
Cave
After gathering all the pieces you’ve learned about, you’ve come back to Mount Redcliff. The cave entrance you used last time is now blocked because it has collapsed.
Touch the car to see the back, and then tap to gather the cases from the boot/trunk. Move to the next space on the right side of the car.

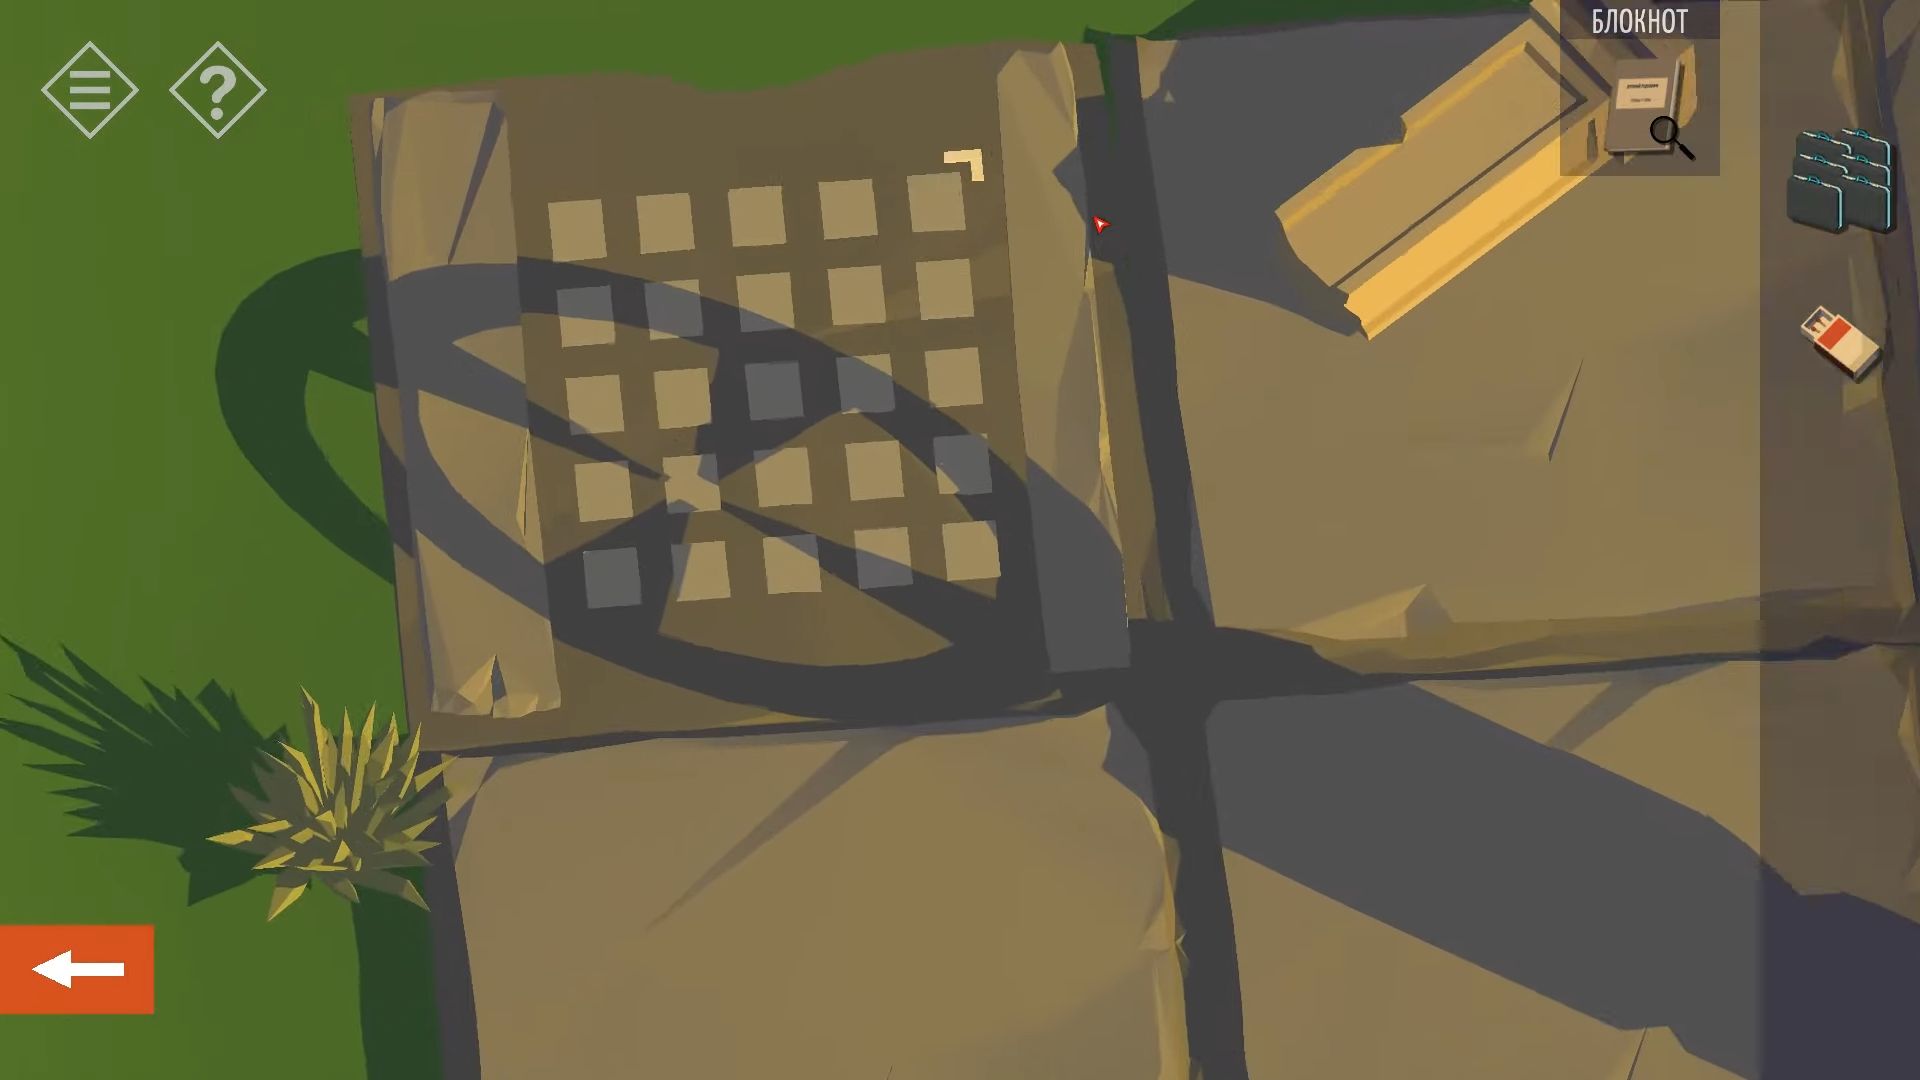
On the right side of the table, there’s a stone tablet between two pillars. One side has a symbol, and the other has a puzzle with 25 squares. Next to it on the ground is a fire, use the matches to light the fire.
You’ll see a message about waiting for the right time of day. Tapping the fire will cycle through 4 stages day and night. Now, tap on the back side of the stone tablet to see the symbols, then touch them. Notice that they are now drawn into the diary page for you to remember.
In the middle of the space, there’s a puzzle with a stone pillar and a circle on top. Around it, there are 4 plaques with symbols representing different times of the day (sunset – night – sunrise – day). You can tap on a brown wheel to move the central pillar to each of the 4 positions.
Touch the campfire, and the time will shift to night, making it dark. Tap the central area and use the wheel to move the stone to the night symbol (black circle).
Pay attention to the floor area that opens and the pattern of squares. Also, notice the arrow position, then go back and knock on the puzzle side of the stone tablet to see the 25 squares. Match the squares from the floor with the arrow position and touch them to switch them over to the dark.
After that, tap the campfire once more to make the time for sunrise. Do the same steps to move the central puzzle pillar to the sunrise position. Notice that it now puts a circle with a crosshair over a new set of squares on the floor. Identify the square in the center of the circle, then go back to the puzzle tablet and switch that one over to the dark.
Touch the fire once more to advance time, and do the process again. You’ll discover one more square. Tap the fire again to go back to sunset time and find the last square. When you have all 5 squares set on the board, a passage will open in the floor.
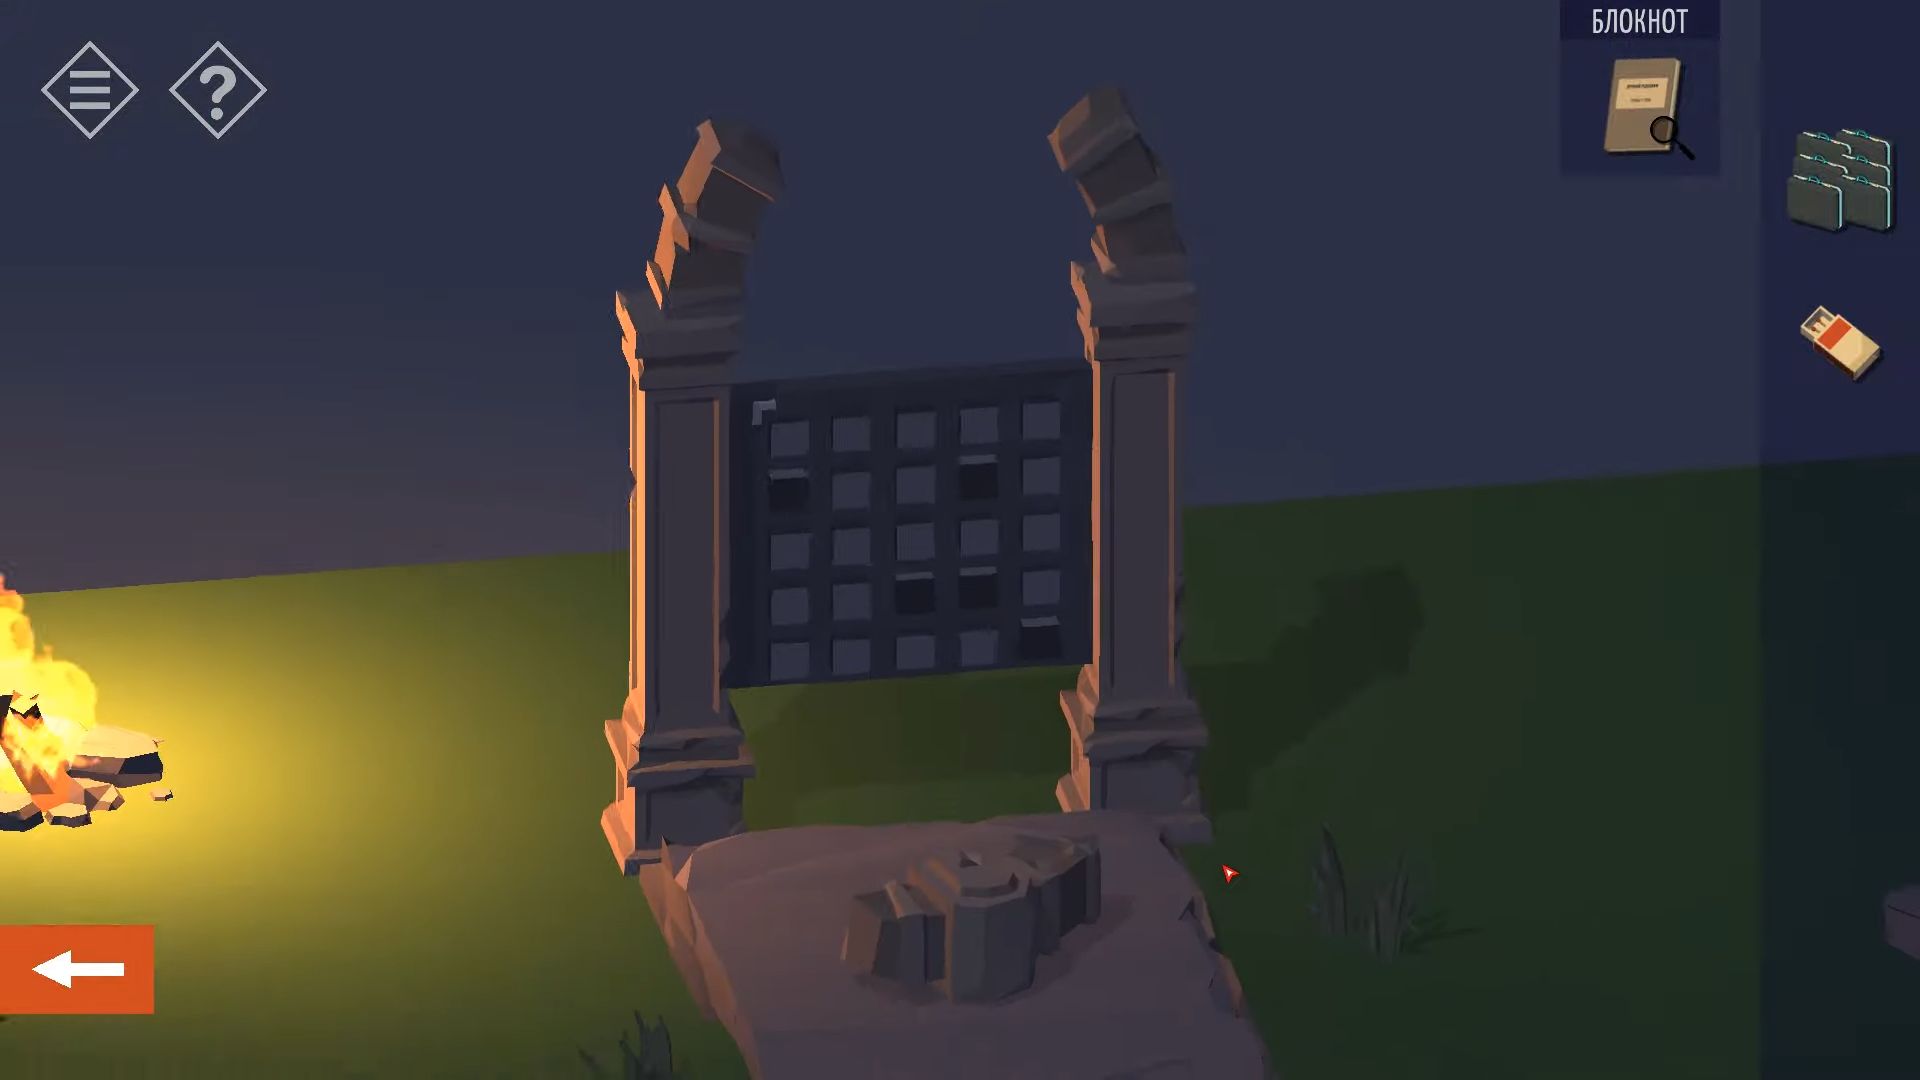
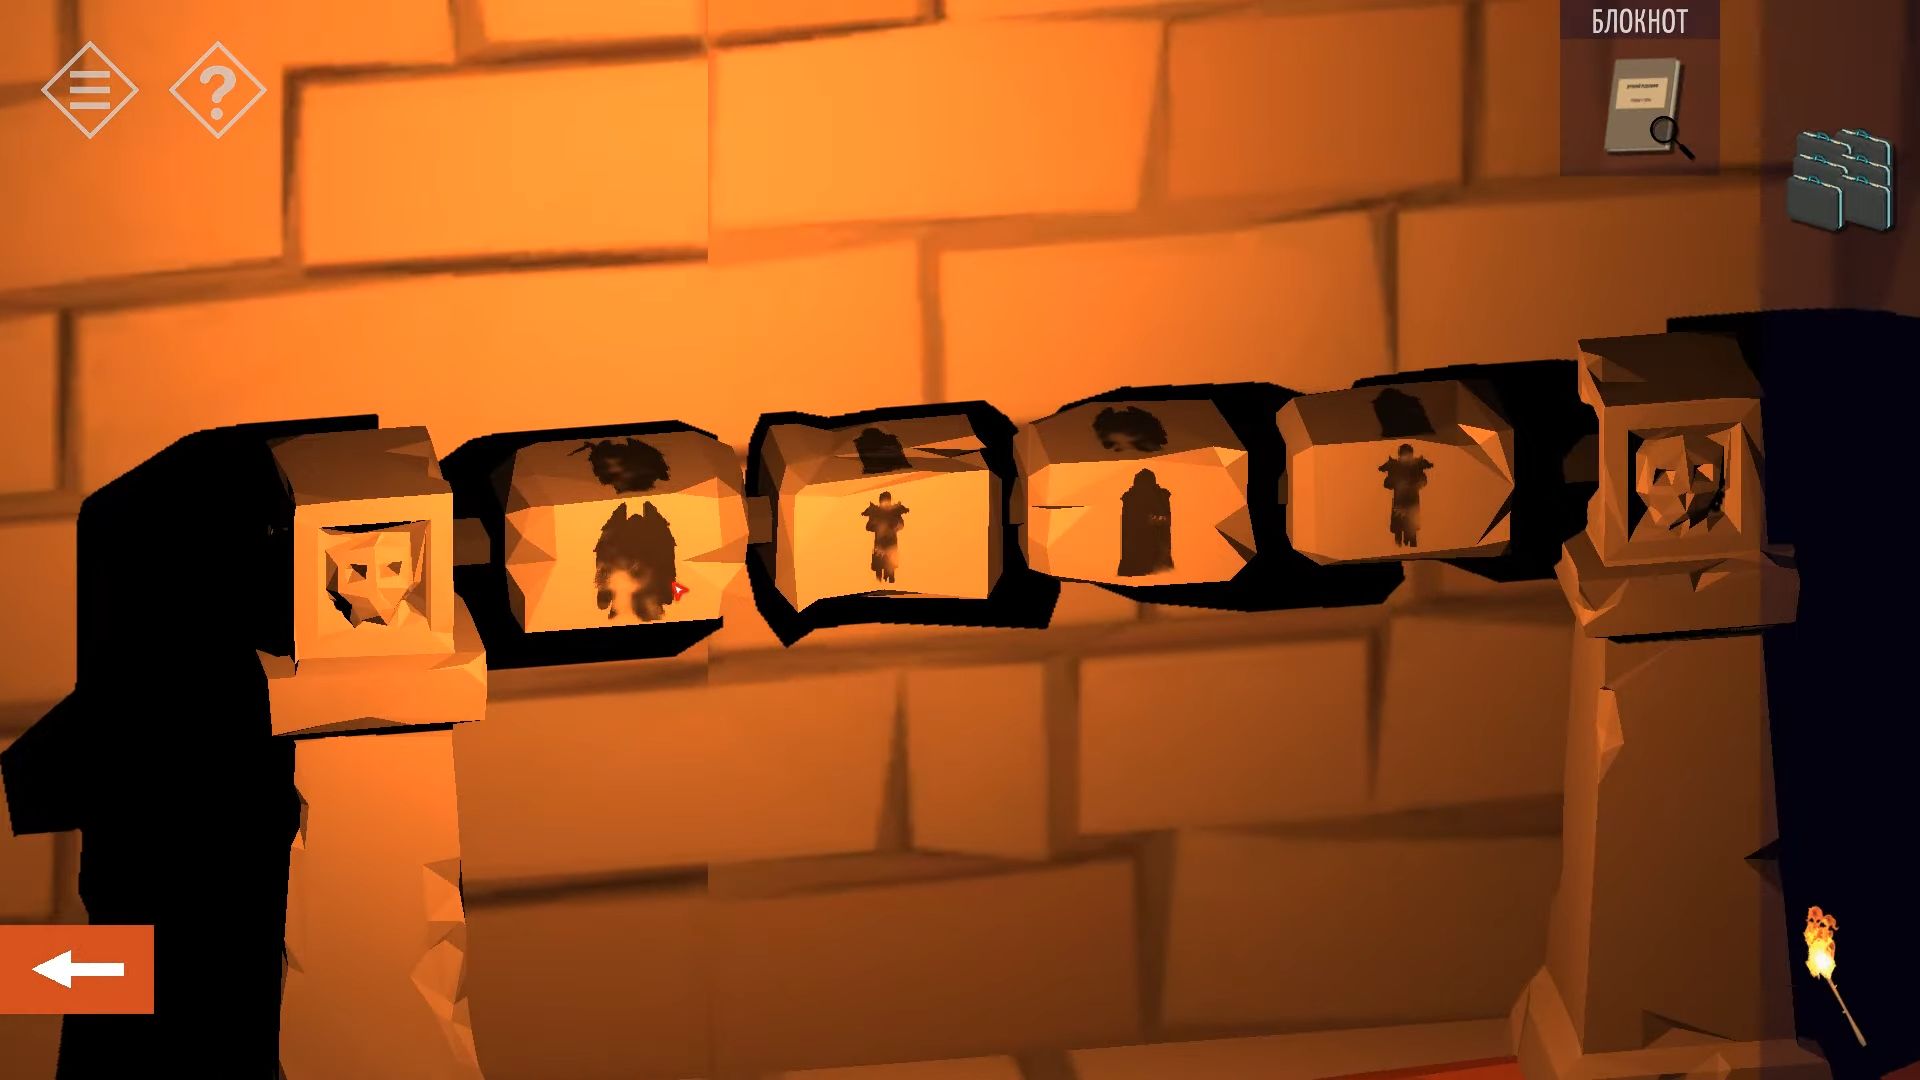
Tap to go into the passage; it’s dark inside. Touch near the top of the steps to grab a torch, then look at it and use the matches to light it. Now you have a lit torch. On one wall, there are 4 alcoves with statues in them. Each has a symbol of a time of day on the plinth, and each is damaged or missing something or has fallen. Take note of each statue, its appearance, and the symbol. From left to right, they are Day, sunset, sunrise, and night.
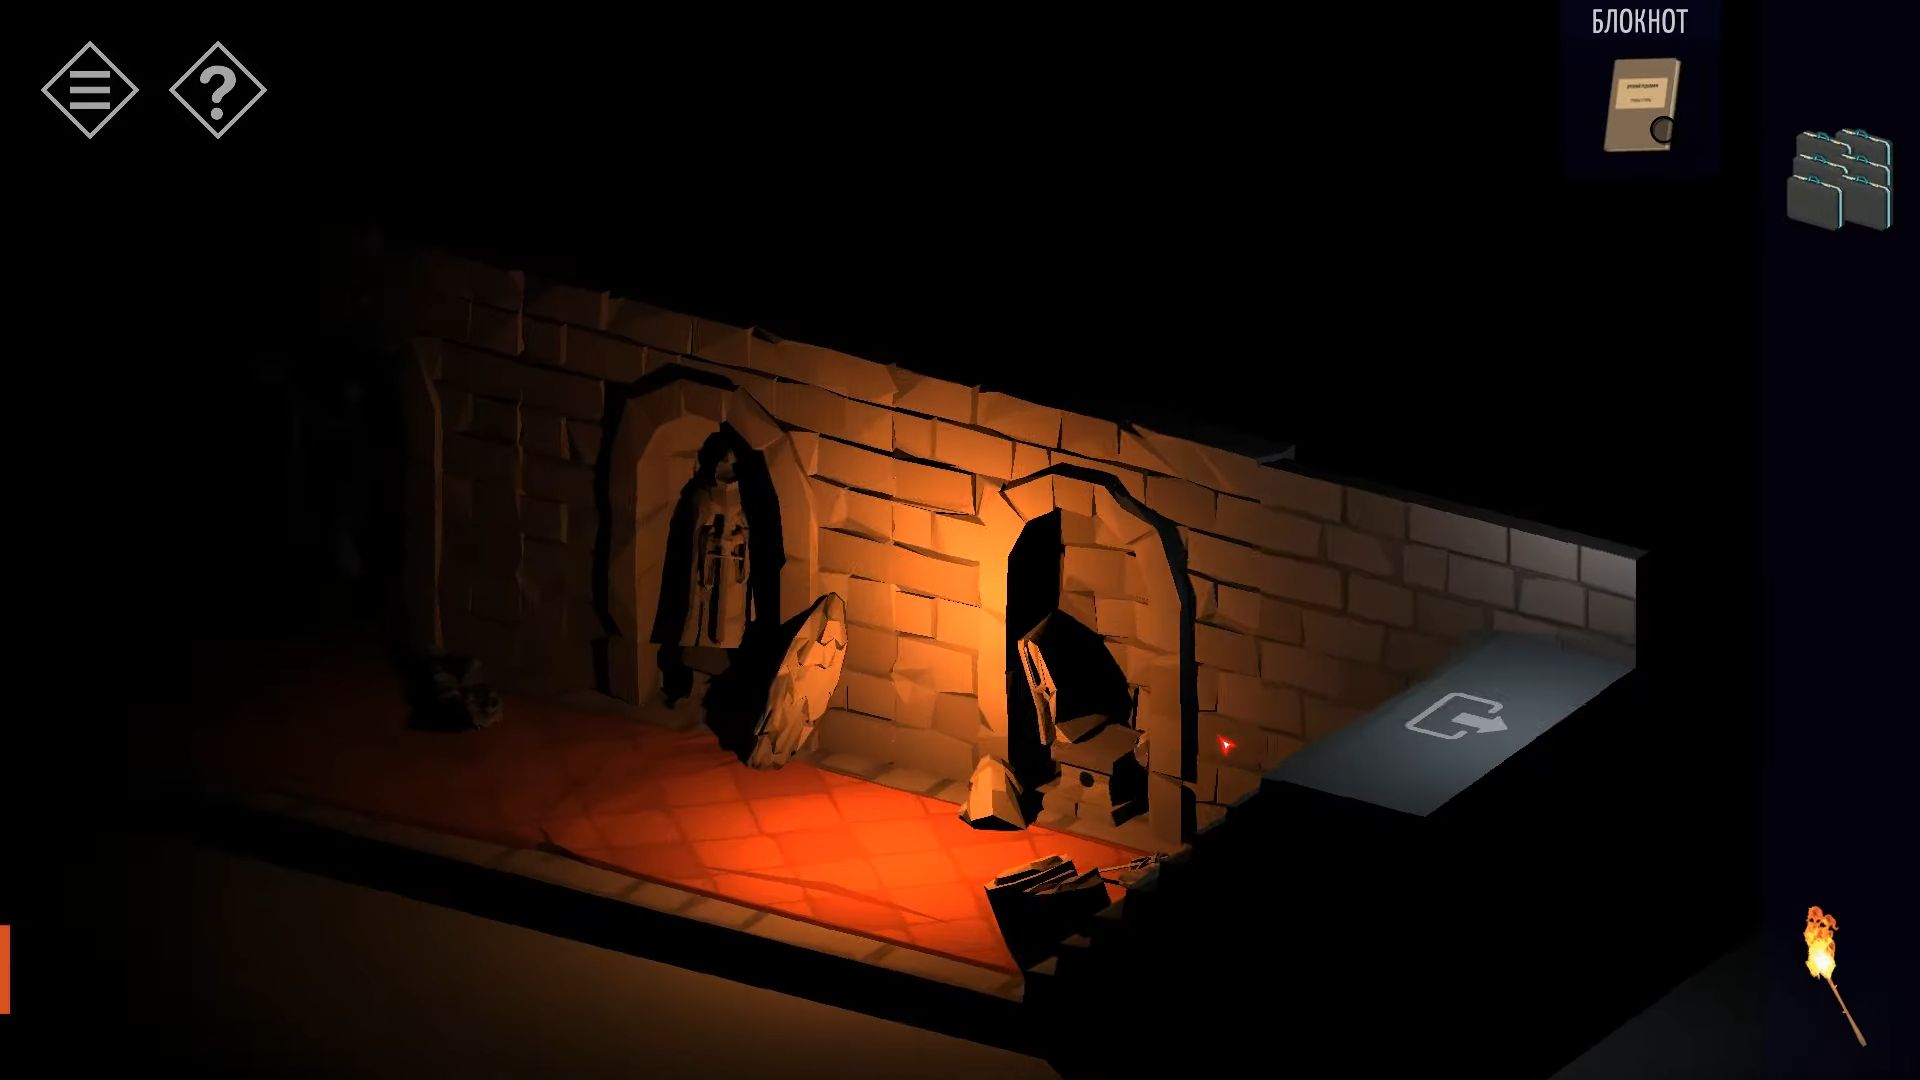
Turn the view to look at the opposite wall where there’s a code entry puzzle on the right, near the closed door. Tap each of the 4 sections to rotate it and match the needed code. Match the outlines or silhouettes for the 4 statues in the correct order. The required order is found in the diary pages; Day, Sunrise, Night, Sunset.
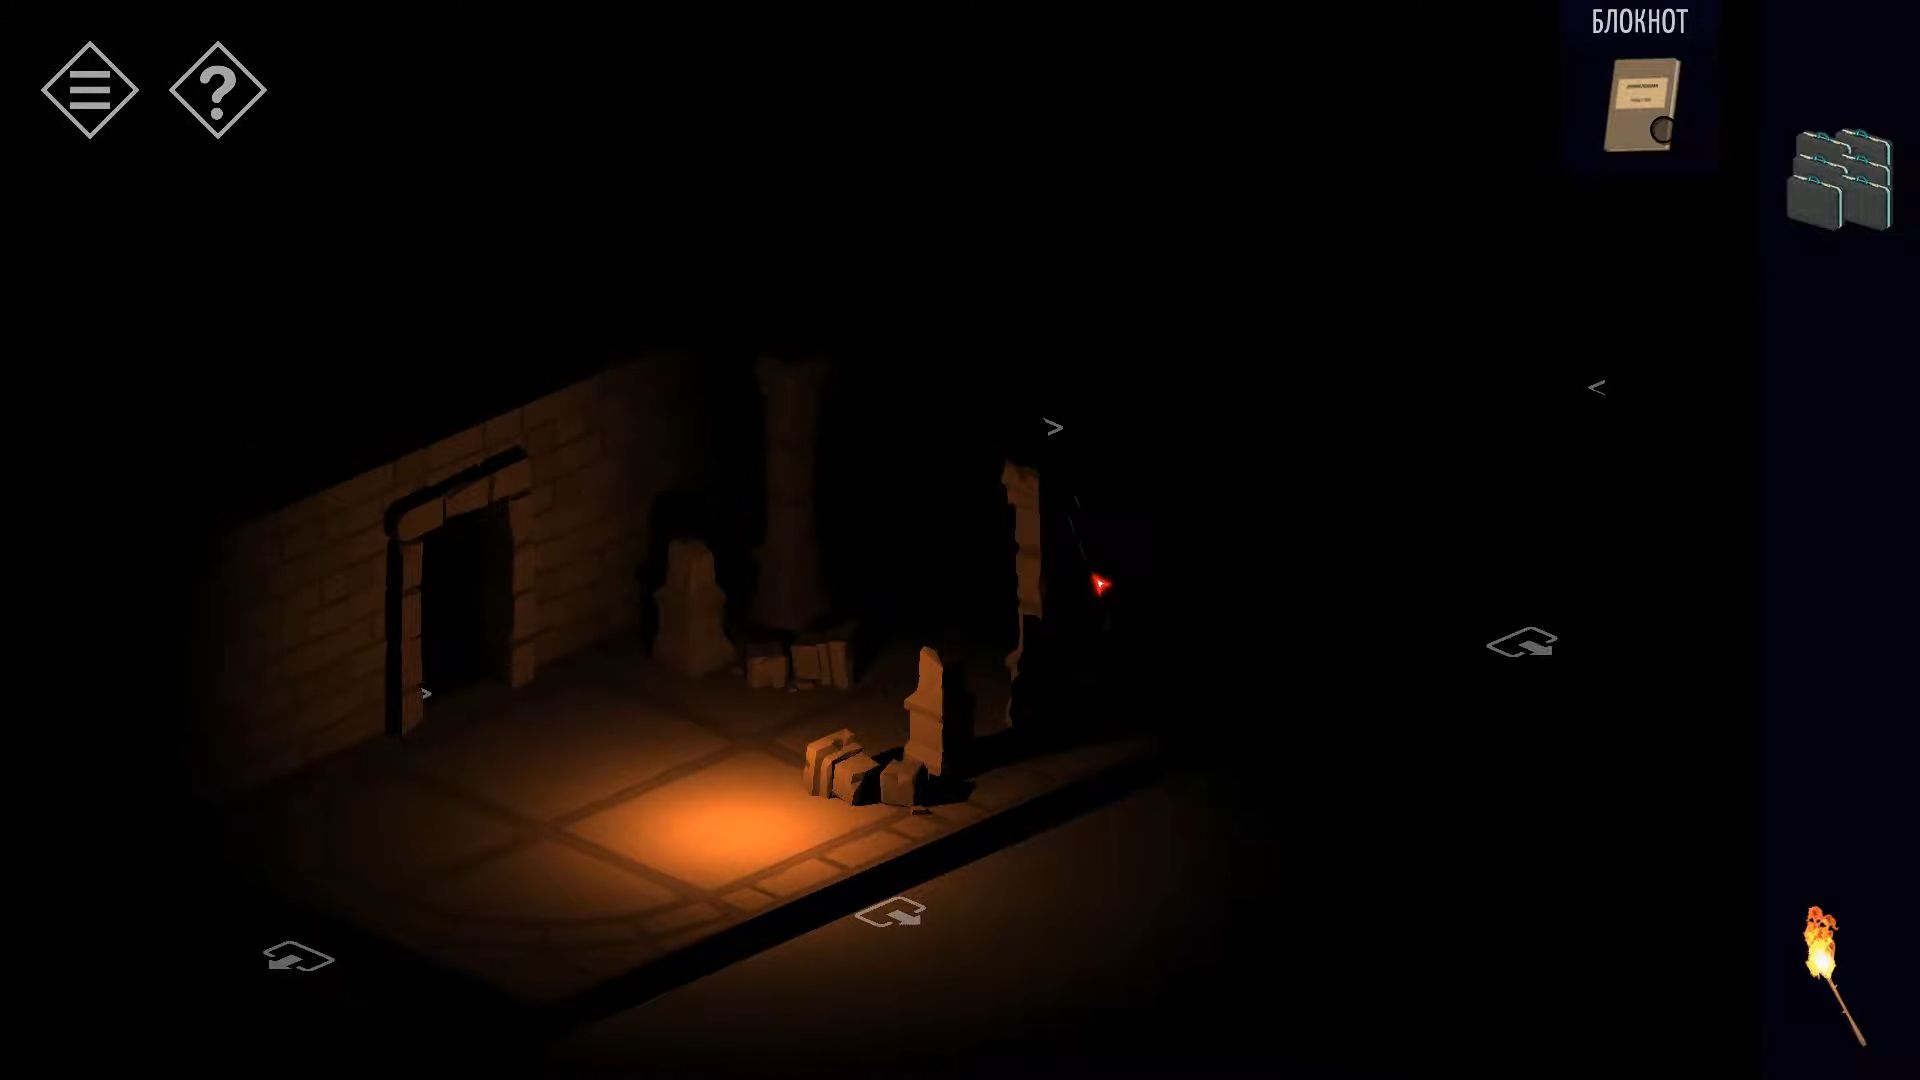
When you set them correctly, the door at the end of the passage will open, and you can go through into a circular room with 4 pillars.
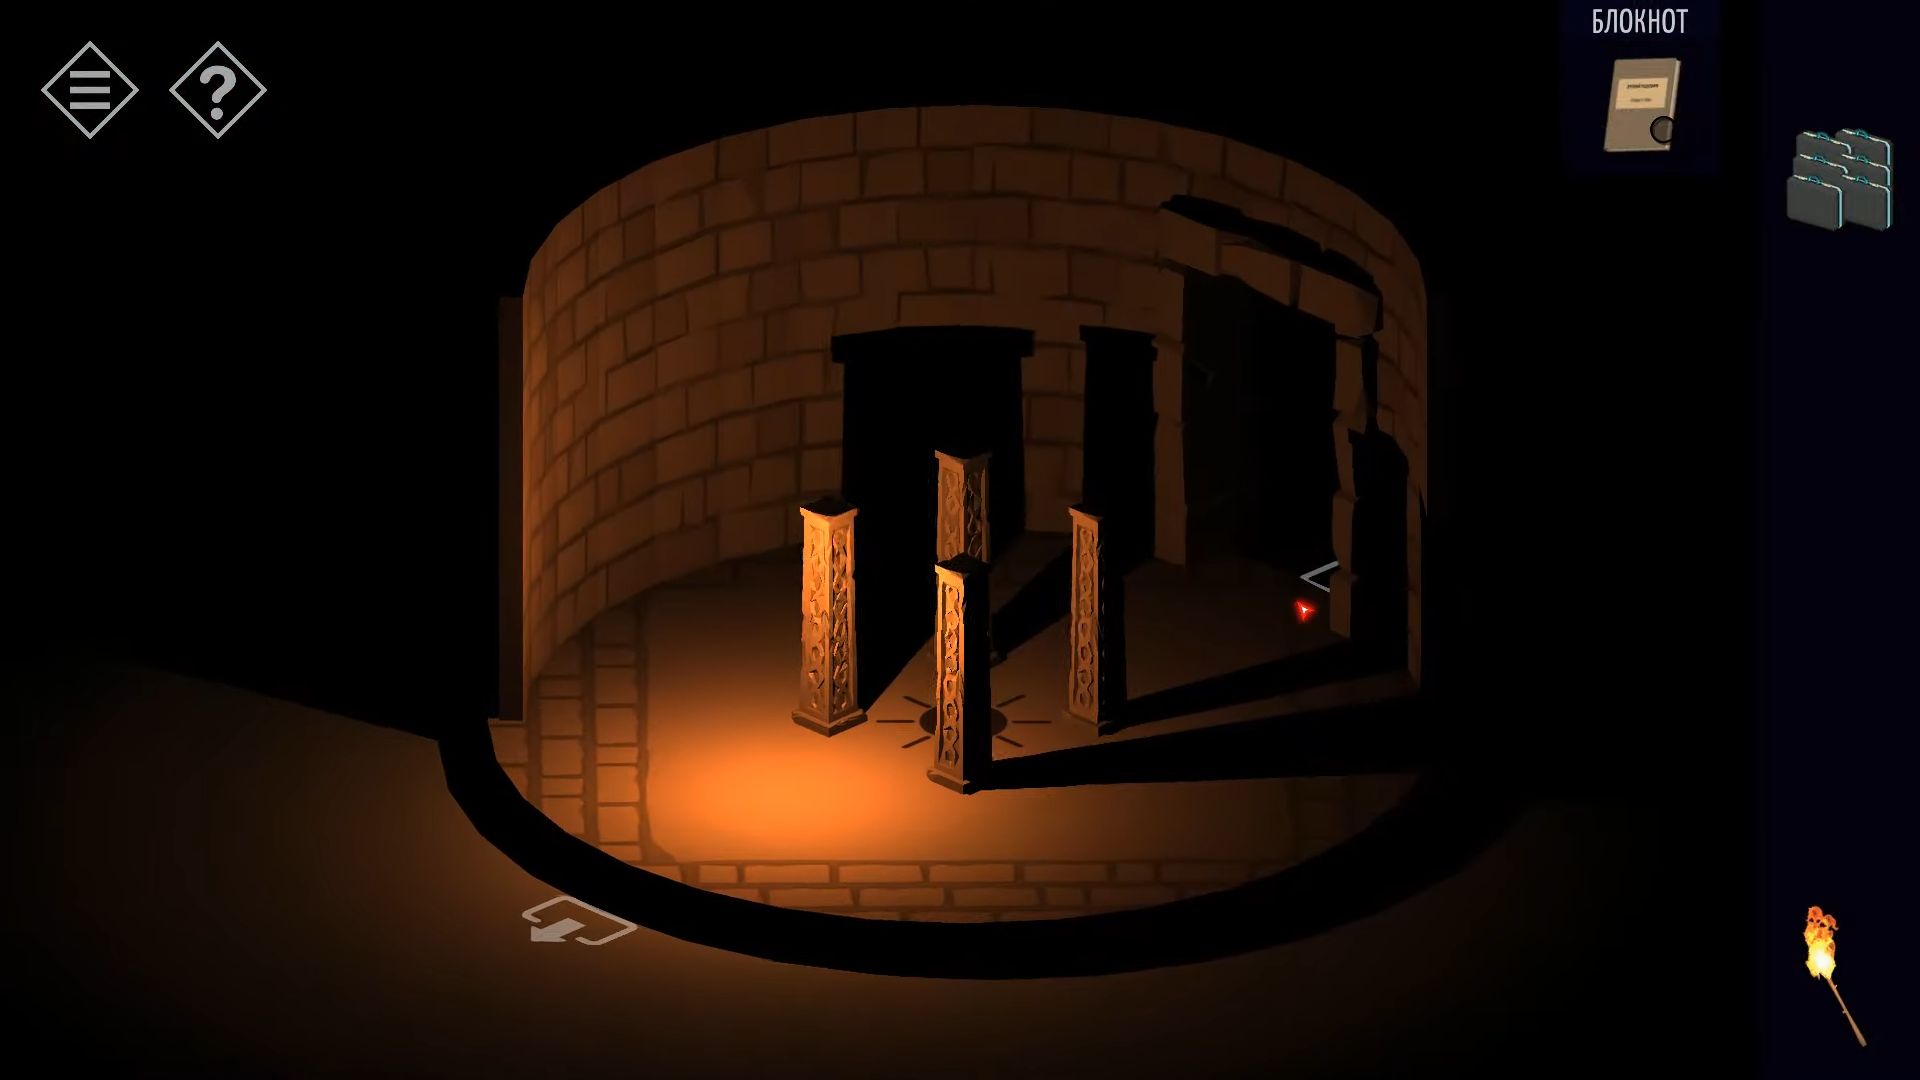
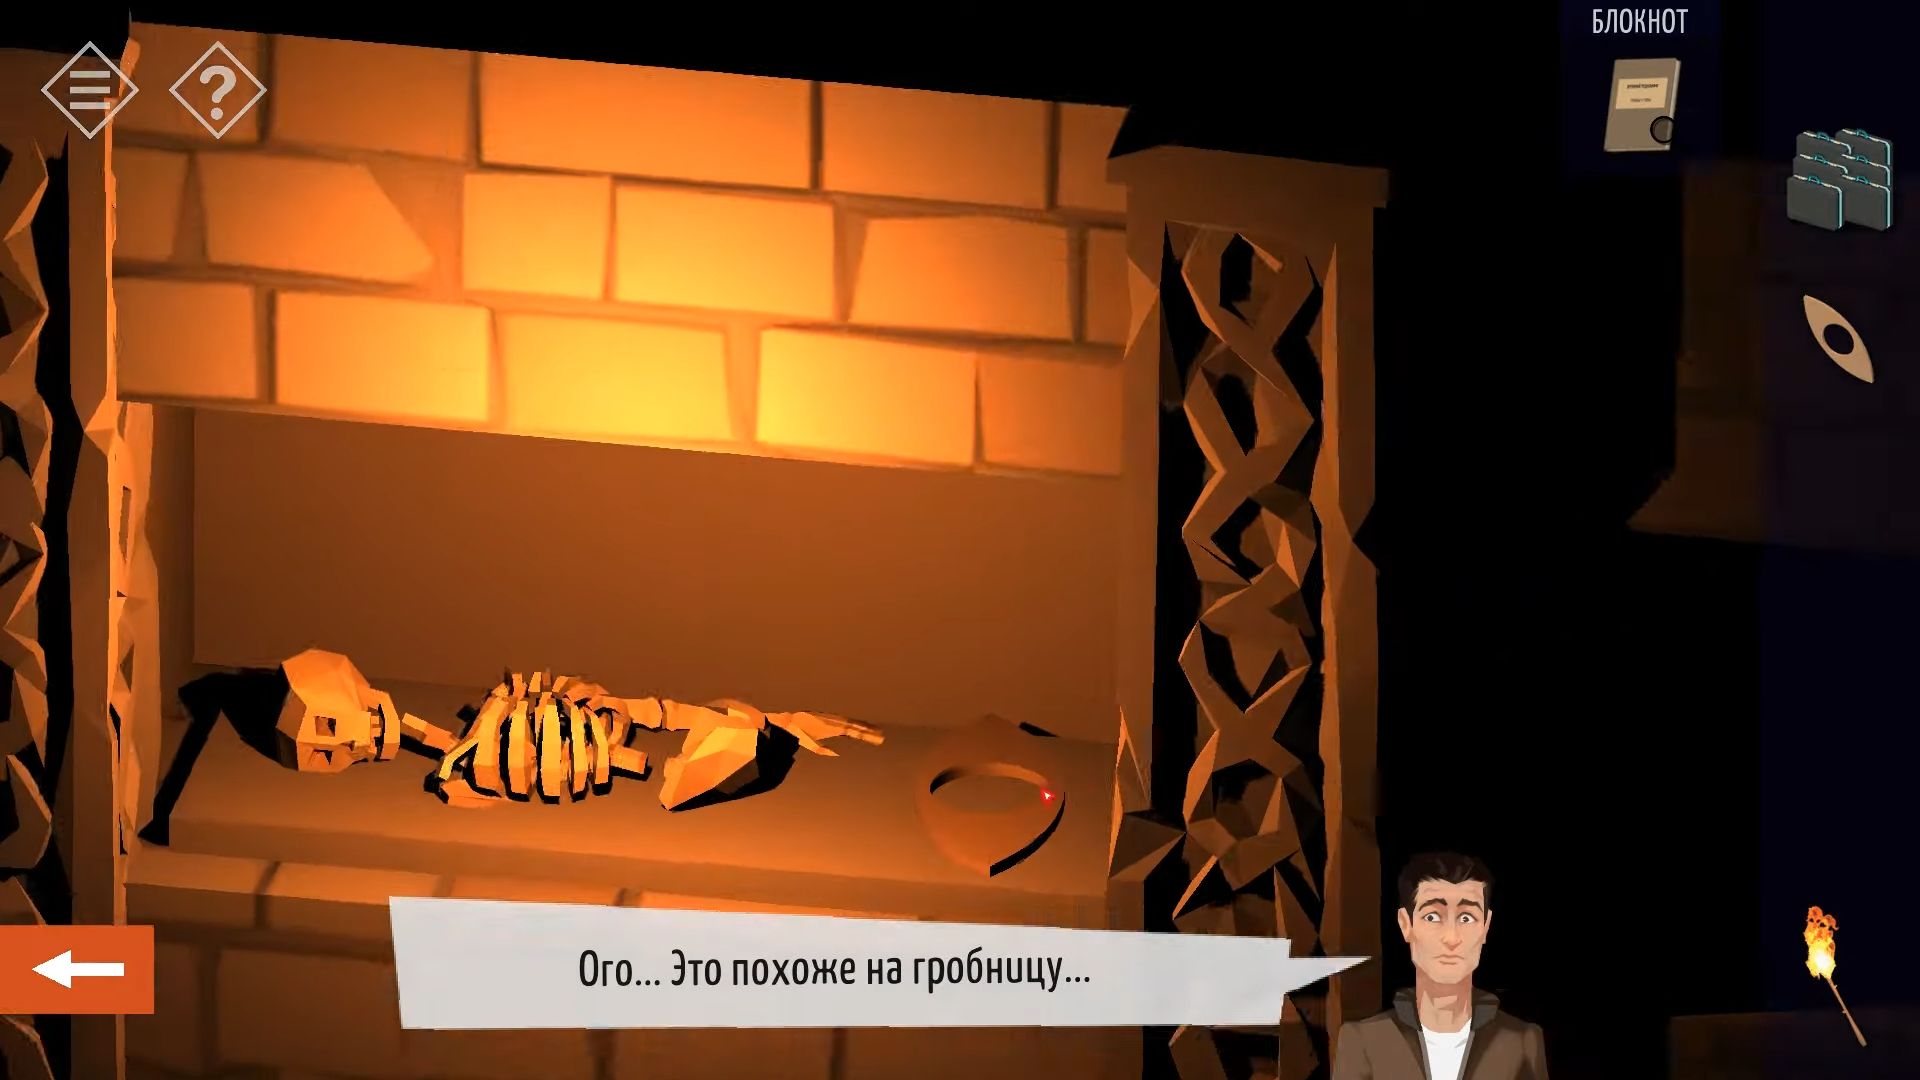
Go through the next door to discover a bunch of rooms to check out. On the opposite side of the entrance, there’s a big round door that you can’t open. Head to the right of this to enter another room and find a part of a device in the middle of the floor. Go to a second room where there’s a tomb area with skeletons. Look in each of the alcoves and on the floor with the torch to find 2 more parts of the device.
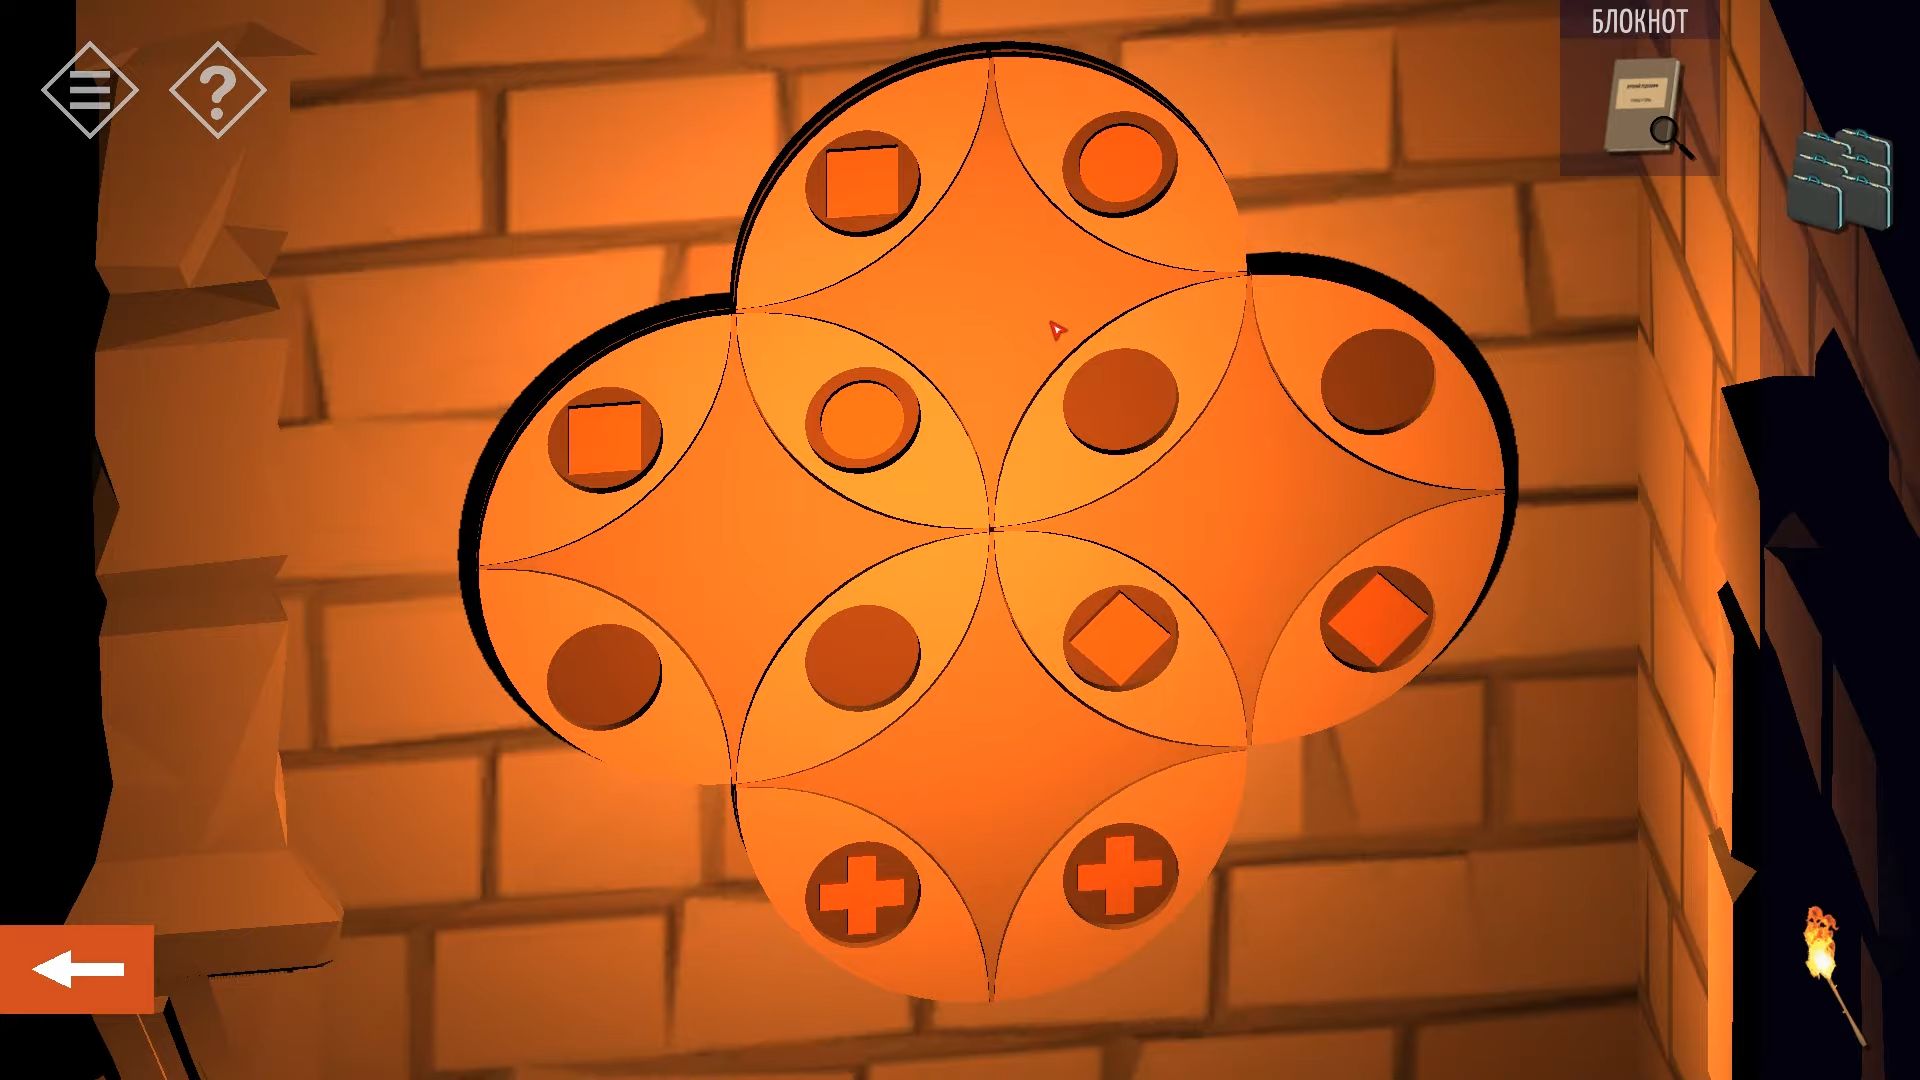
Return to the room with the round door and then go to the left of it, passing through another room to a second room where there is a device on the wall. Three parts are missing from it. Utilize the parts you have found to finish the device. Now, there’s a puzzle to solve, you need to match the pattern found above ground, which should now be drawn in your diary.
Tap each of the 4 circles to rotate them and move the symbols to the required places.
After completing the puzzle, a mechanism activates, and the round door opens. Go back to the center room and pass through the now-open door.
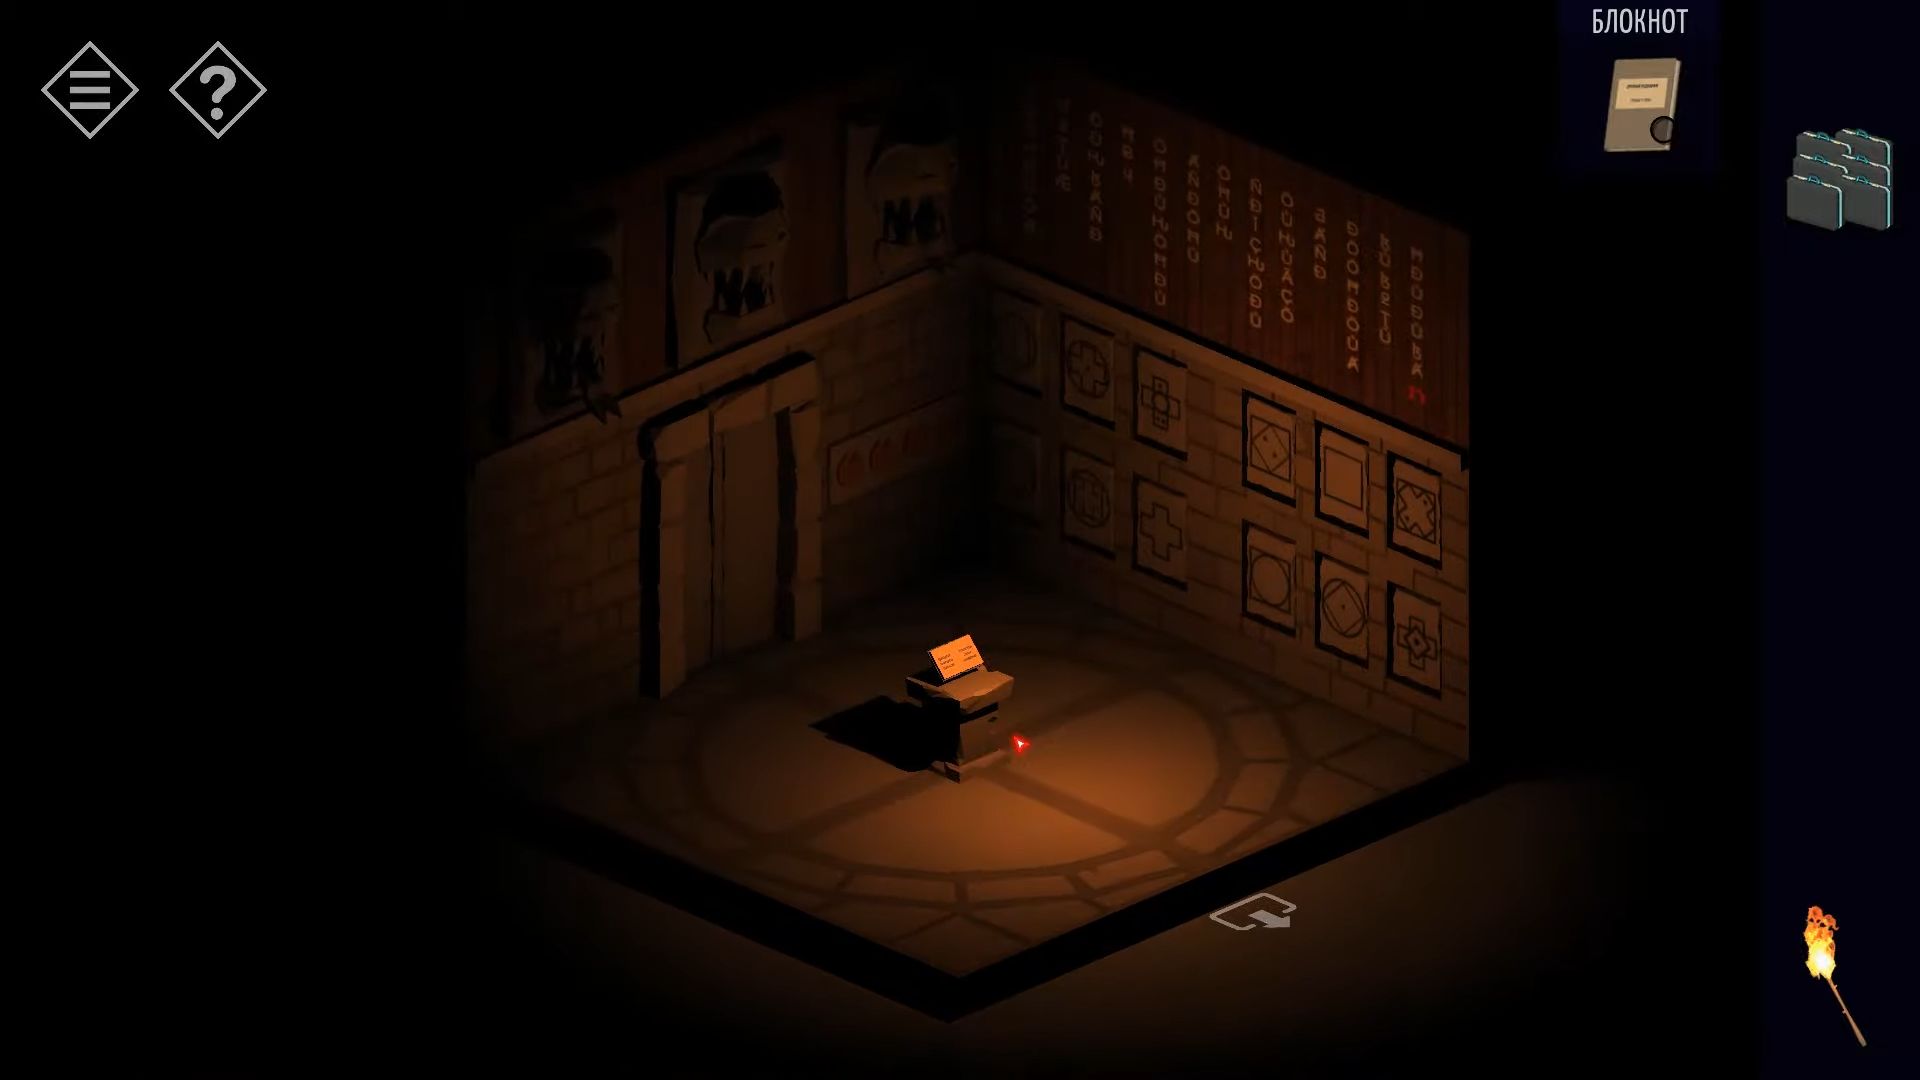
In this room, there are symbols on the walls and a locked door with a code entry on the right side. Look at the symbols on the walls and you can touch them to make them spin. Now leave this room and go back to the round room you started from. In that room, there’s a symbol on the floor, and there are four pillars arranged in a square shape around it.
You need to check the rooms on either side of the round door. One has a cross-shaped room with a sunset symbol on the floor, two pillars in one part, one pillar in the other, and a square on the floor. On the opposite side is a room with a sunrise symbol. It’s a square room with three pillars in the middle, forming a triangle inside a circle.
Return to the room with the locked door and tap the book on the stand for the final clue. Flip through the pages to find a fourth symbol next to the night symbol. Identify the four shapes on the walls and touch them to reveal the code symbol for each. Then, use these symbols on the code entry wheels to unlock the door.
Go through the door that’s open now, and it will shut once you’re inside. Walk across the bridge with the red floor and enter the next group of rooms. It’s a bit like a maze with lots of rooms to explore. Start by going to the left from the entrance into a side corridor. There, you’ll see a skeleton on the floor with a clue and you have to tap it to have the clue copied into your diary.
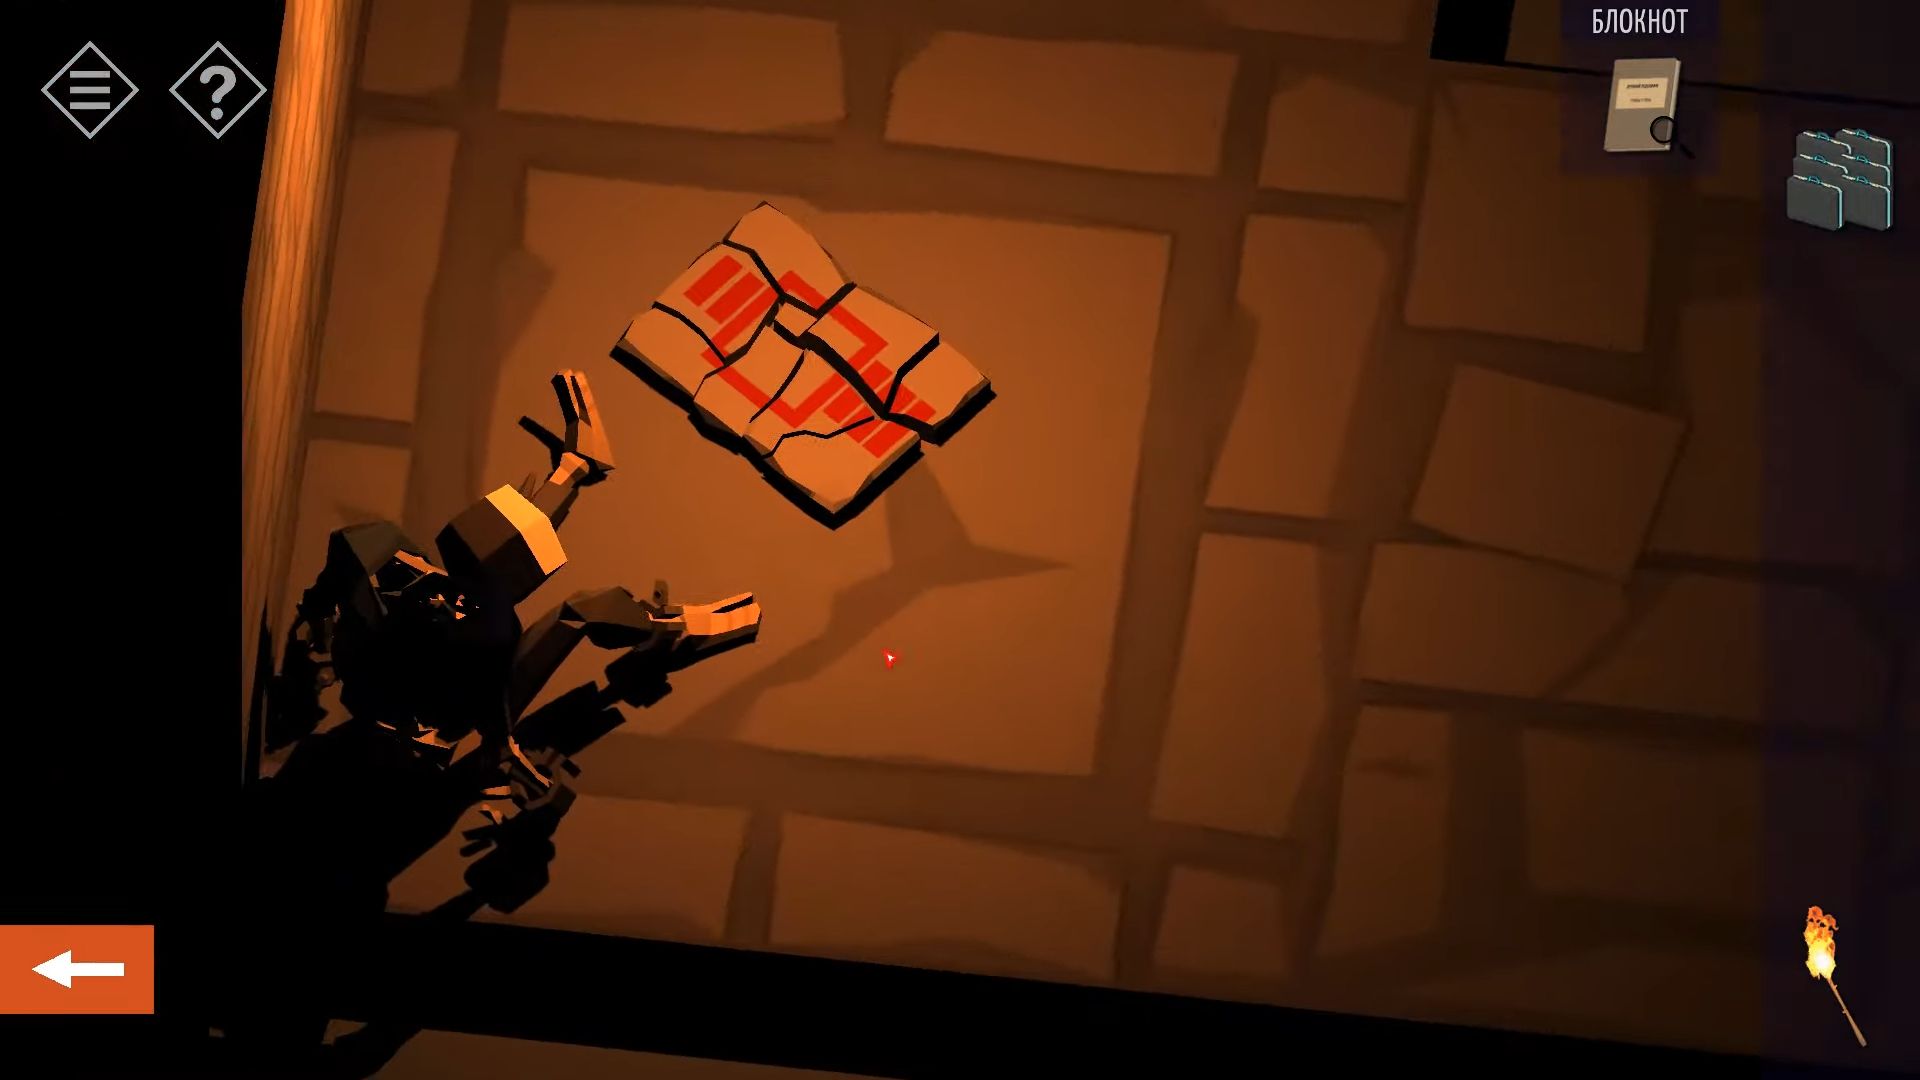
Go past the skeleton and then turn left to enter a room with nothing in it. Look around by rotating your view and notice a brick sticking out of the wall. Now you have to tap it, and two more bricks will appear. Keep tapping these protruding bricks until a part of the wall opens, revealing a symbol. Touch the symbol to have it copied into your diary.
Return to the main room and go to the right of the entrance, then again to reach a balcony. Tap to pick up a torch from the ground, and then touch the dark area at the lower right to throw the torch and light a lantern in the darkness. If you miss, you can try again with more torches. Once lit, rotate the view to spot another symbol on the wall. Knock it to copy it into your diary.
Go back and move further on this side of the room to discover a real maze. Navigate through the maze to find a fun surprise—a hat and a whip. While you’re there, rotate the view to spot a fourth clue symbol on the wall. Tap it to add it to your diary.
Return to the central room and enter the room at the far end from where you came in. You’ll find a big door and a puzzle pillar in the center. Touch the pillar to see the four symbol entries. Change each one by tapping and setting blocks on either side. Consult your diary with the four clues you’ve found to figure out the symbols and patterns needed to solve the puzzle.
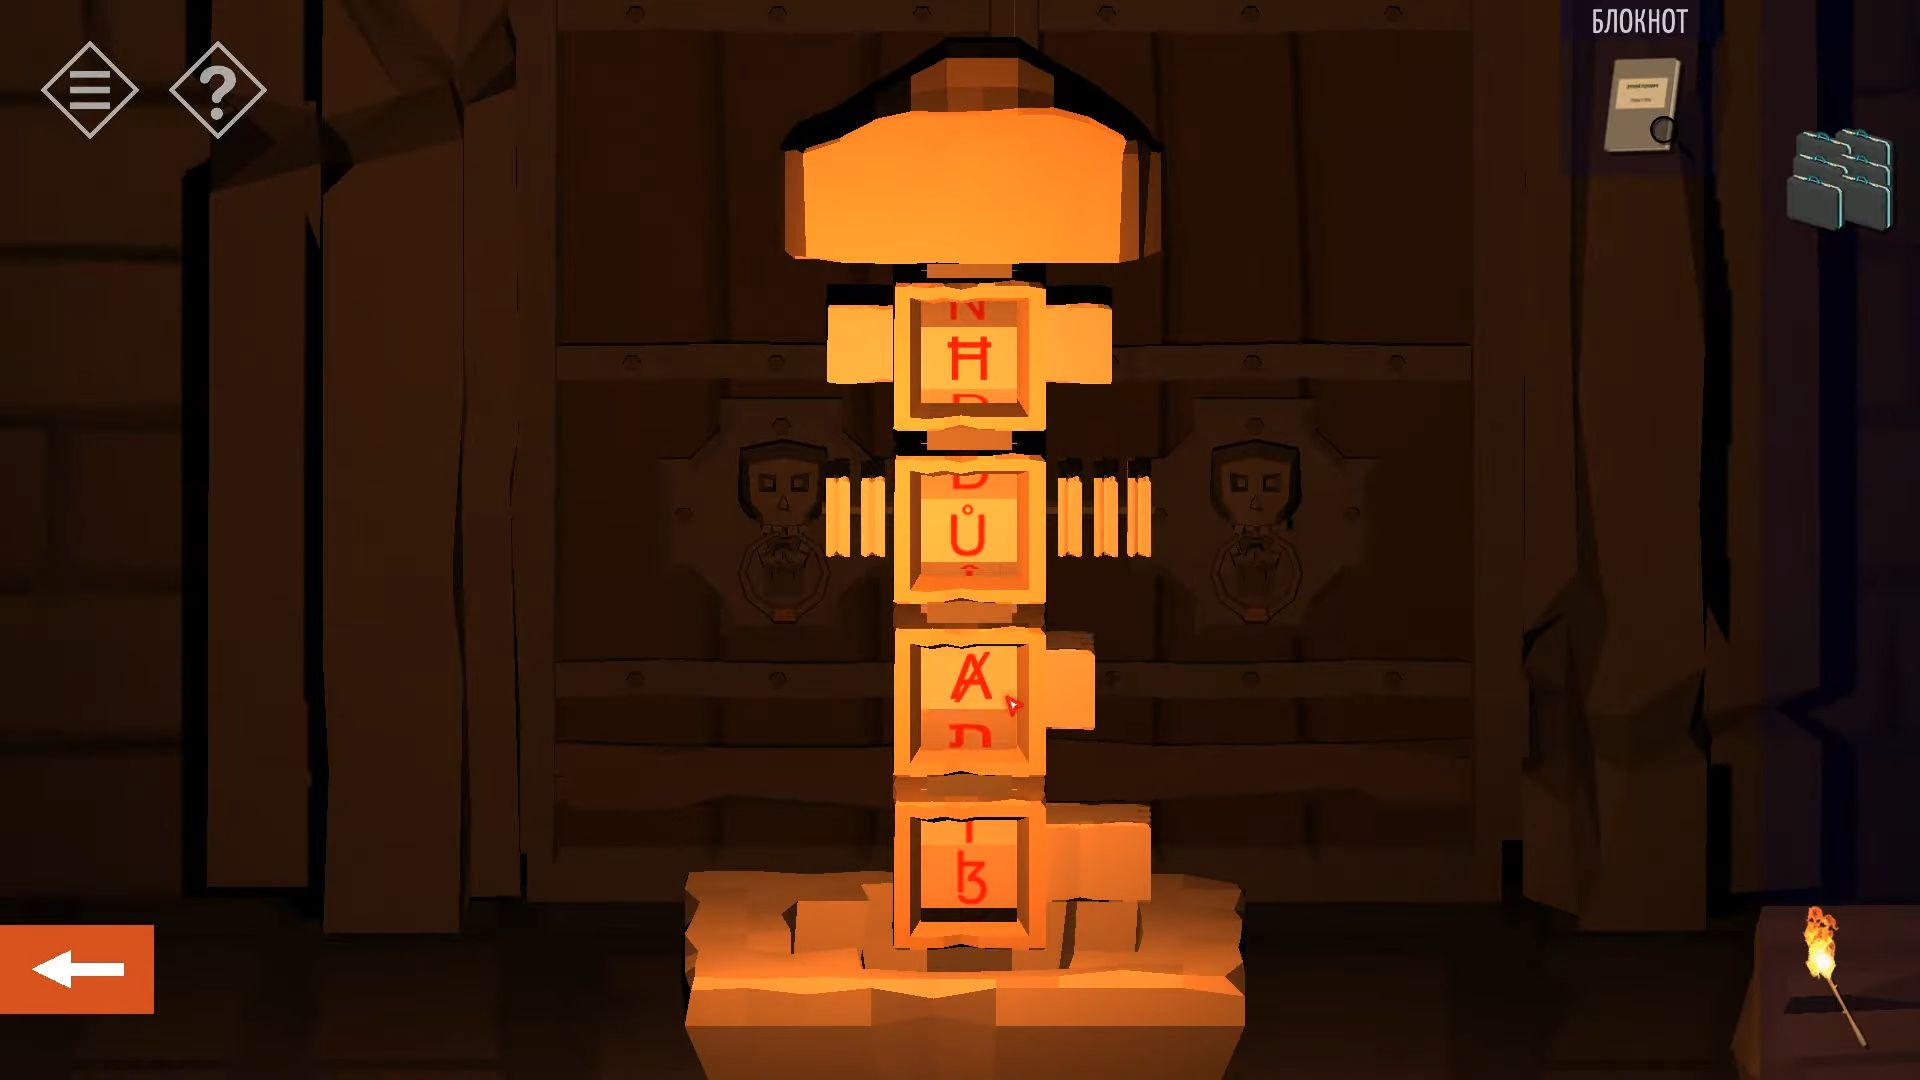
Once you’ve adjusted all four, tap the block at the top to lower the key and unlock the door.
Go through the door into a closed passage with a puzzle on the end wall. This is one of those tricky puzzles where you have to touch each square to make it light up, but tapping one also affects the ones next to it. Pay close attention to how they influence each other, and keep trying until you figure it out.
After you finish, a gap will appear on the wall, allowing you to enter the last room. In this room, there’s a big crystal and a control panel. The crystal is not working. Choose the briefcases and tap the crystal to turn it on.
After that, look at a map of the city and tap to see places where you can find more fragments. When a door shows up, touch to open it and leave the map.
Now, you’re outside the mountain again. As you move away from the entrance, you’ll recognize places you’ve seen in earlier chapters. When you get back to your car, it’s the right color once more. It looks like everything is back to normal. Tap the car to watch the last scene and finish the chapter.
Chapter 12
Here’s the complete guide for chapter 12 in Tiny Room Stories: Town Mystery.
Cultural Education
You’ve reached a location revealed by the crystal, and it happens to be the Redcliff Museum.
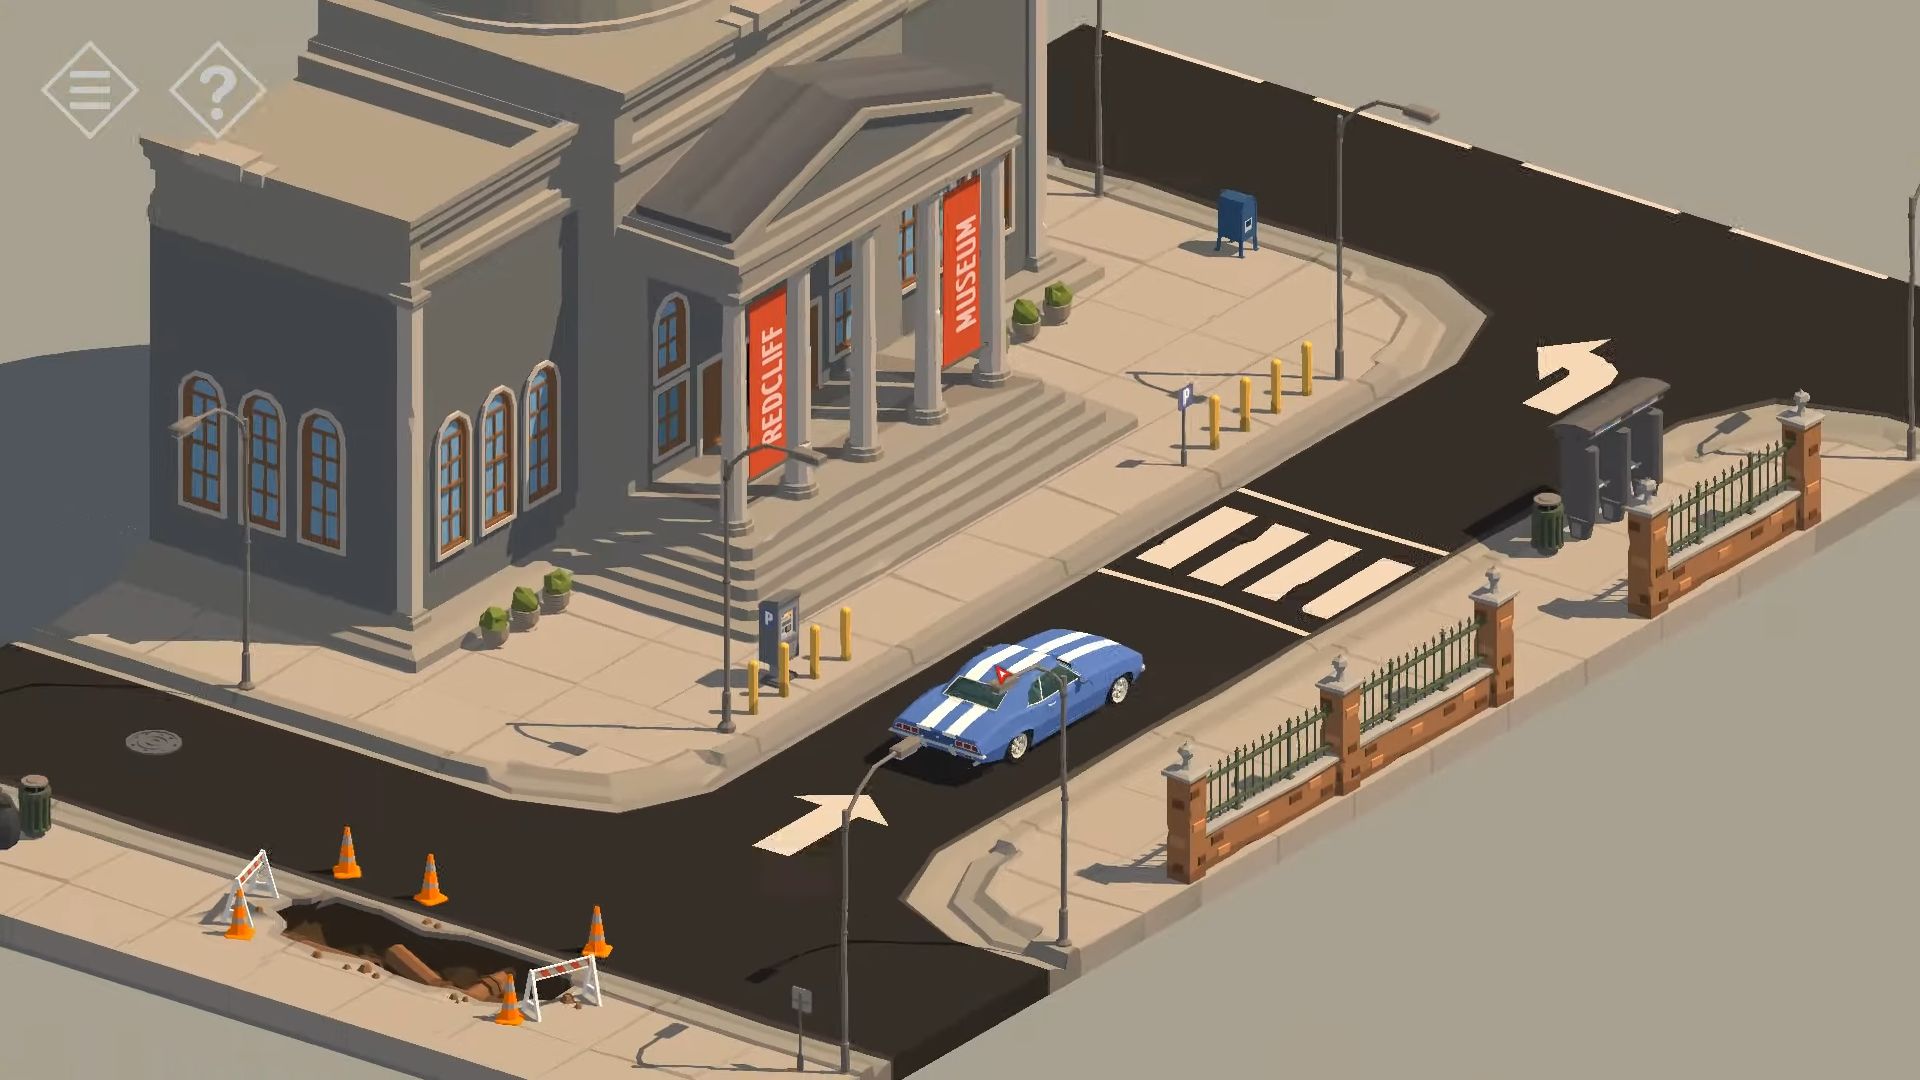
Touch the front of the building to see the entrance, and then tap a door to enter.
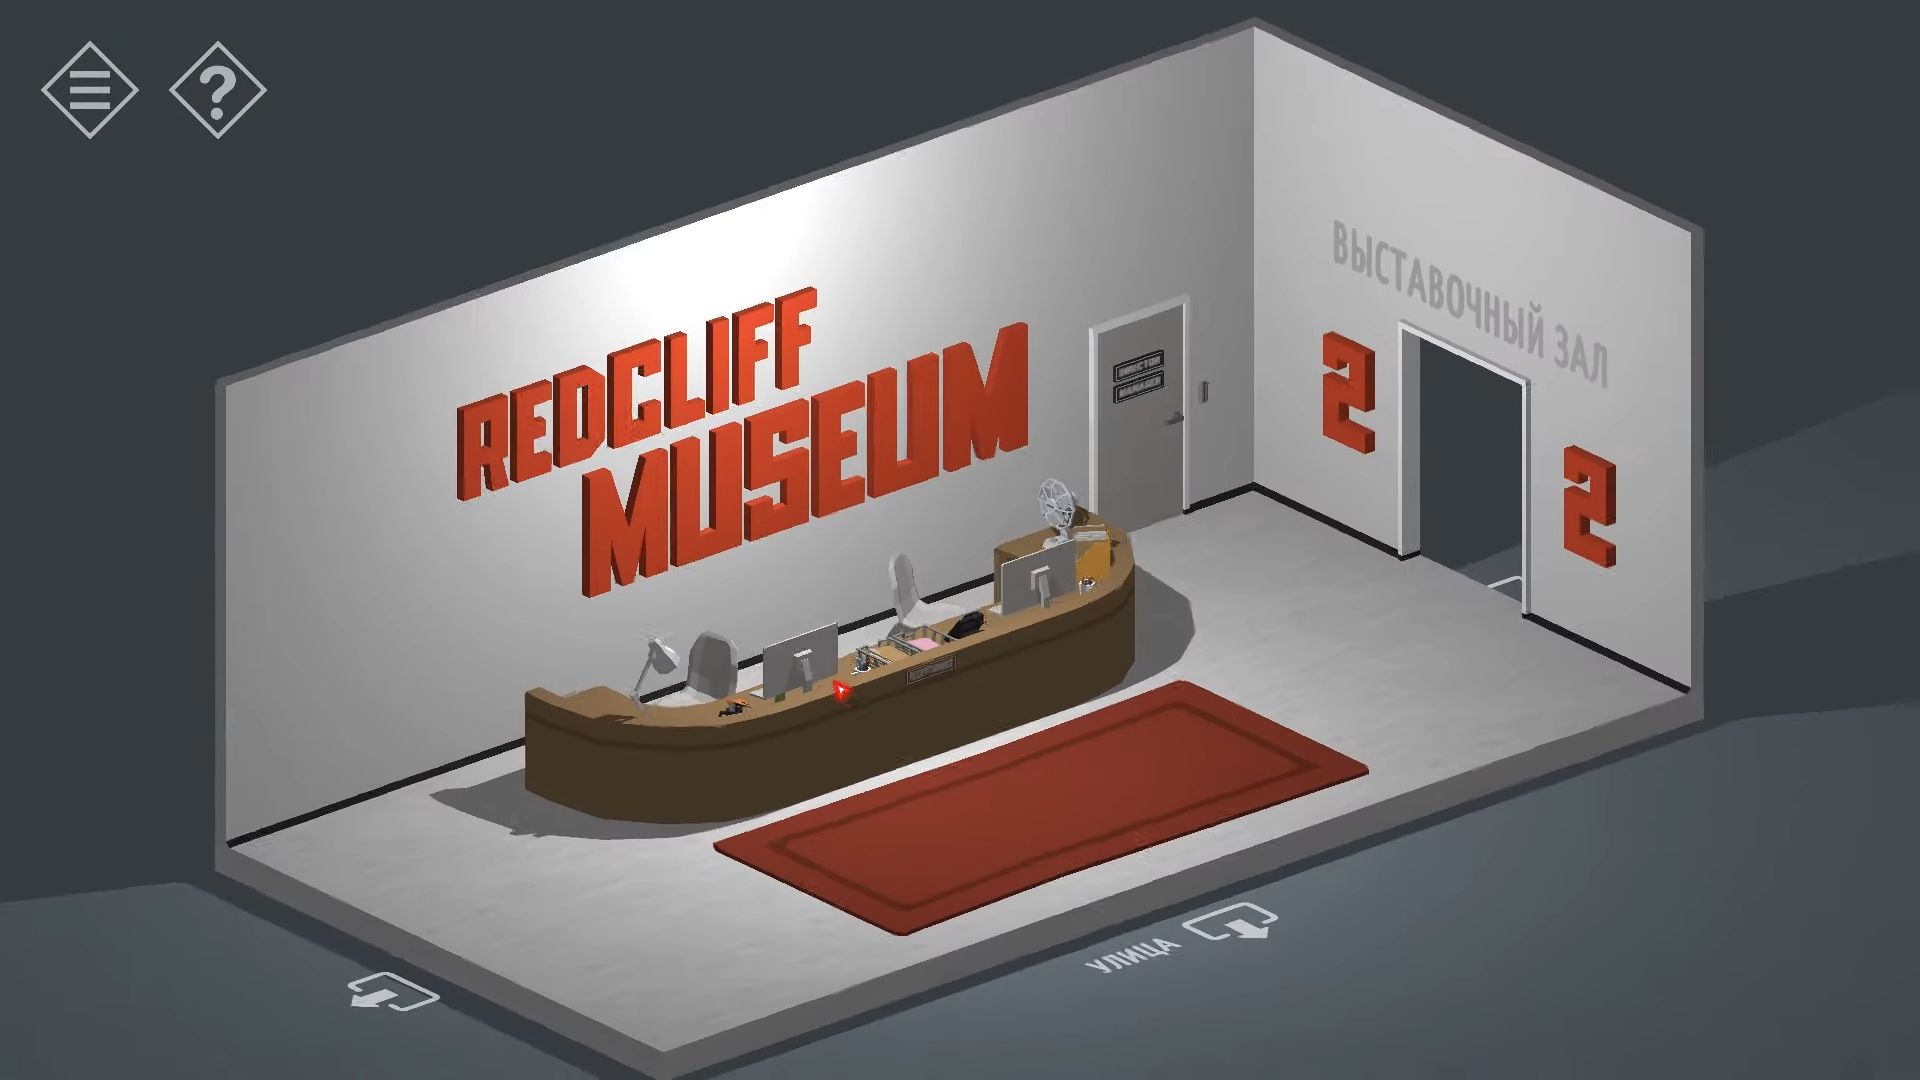
Inside the entrance area, there is a reception desk. On the left, you’ll find Exhibition Hall 1, on the right is Exhibition Hall 2, and at the back, there’s a locked door leading to an office.
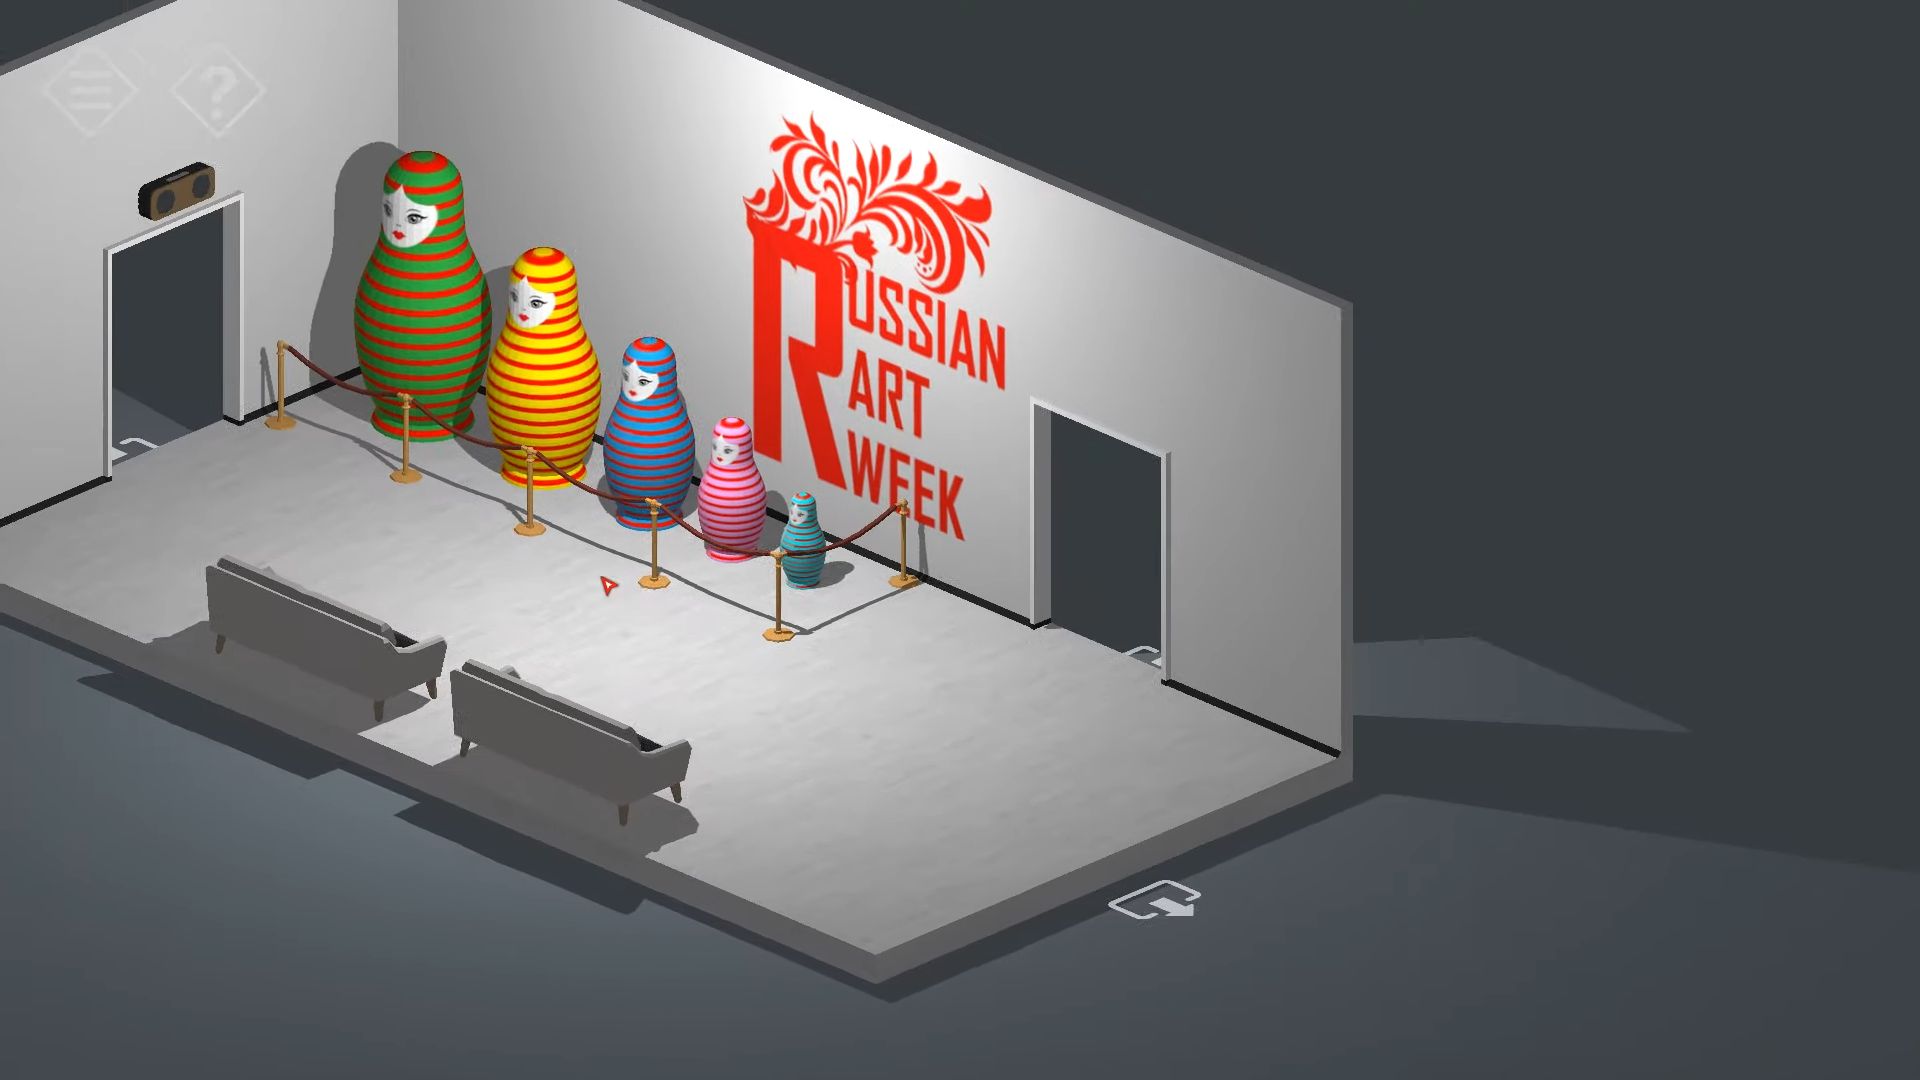
Go into Exhibition Hall 1 and go through the display of Russian Art. Walk past the Russian dolls and enter the room dedicated to Viktor Vasnetsov. After that, move on to the room featuring Ivan Shiskin, and then proceed to the next room showcasing Nicholas Roerich. In this last room, you’ll find a cleaning trolley.
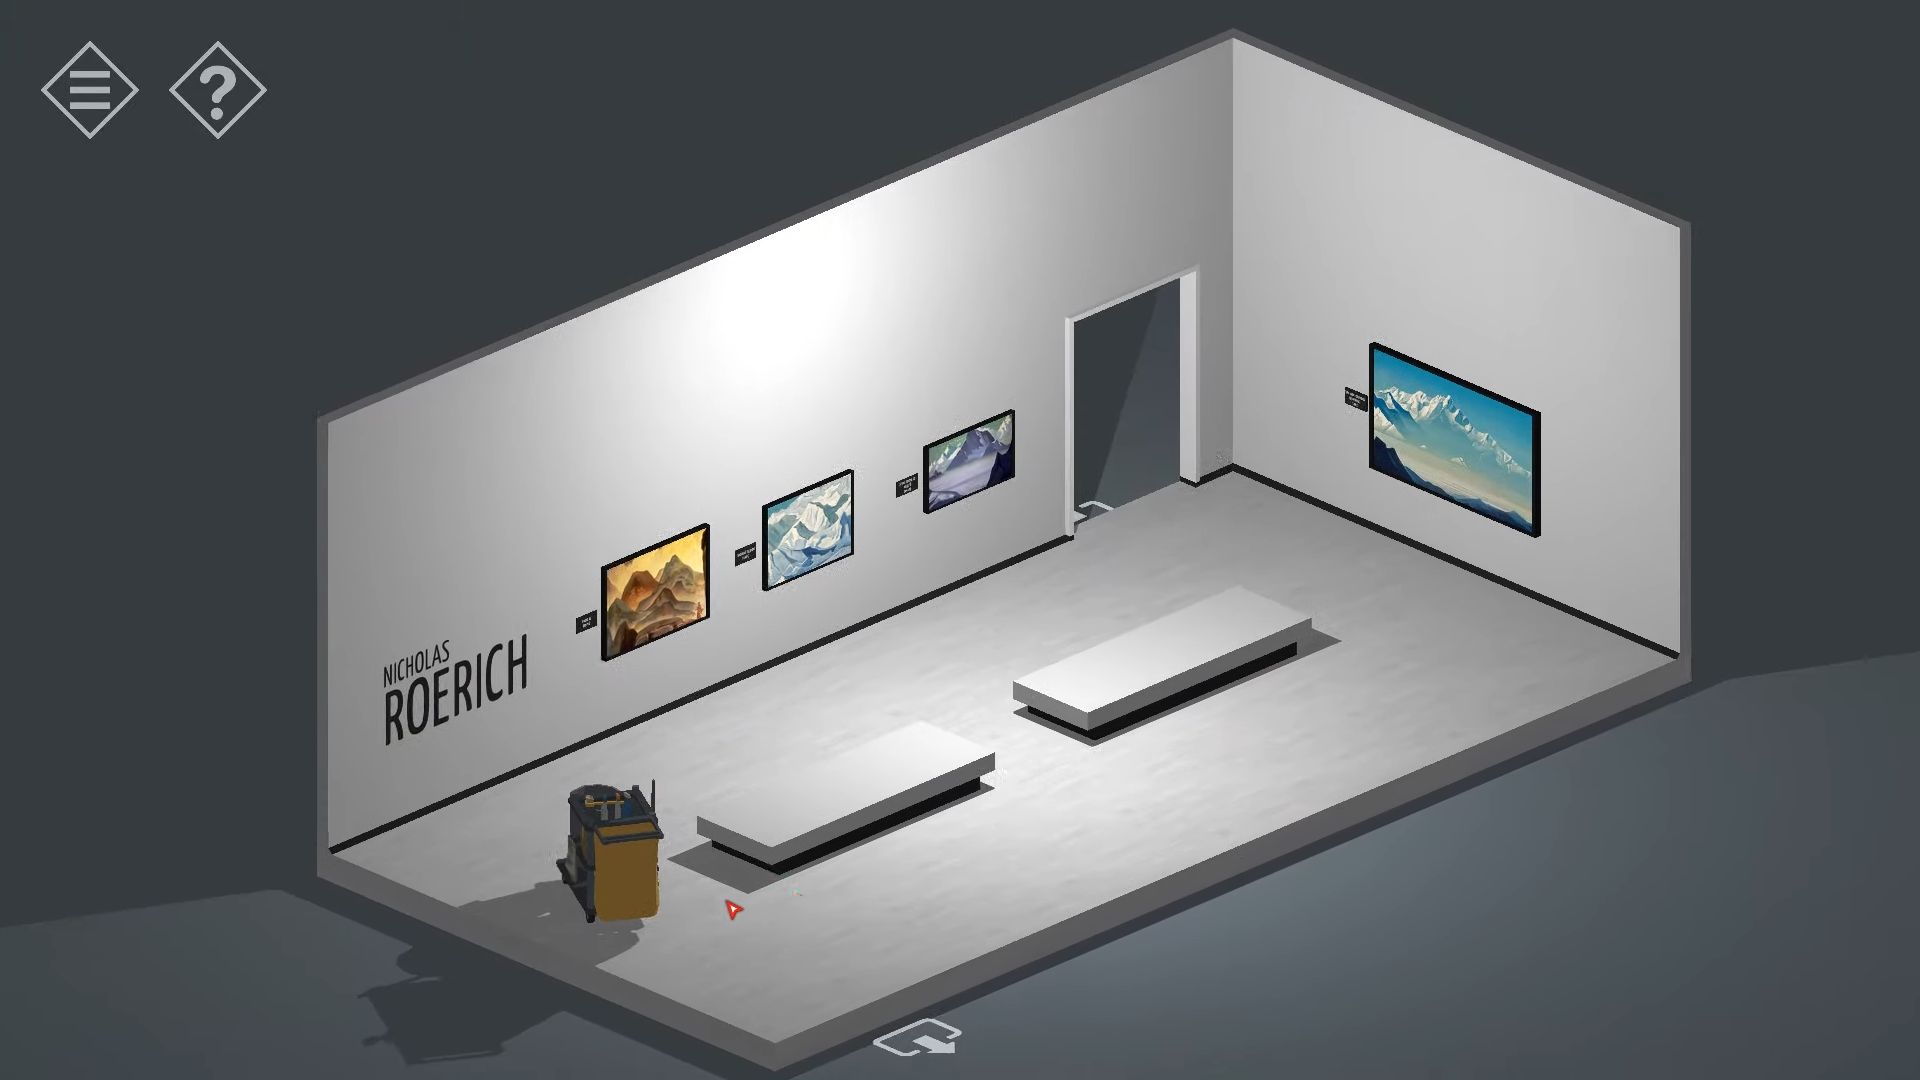
Tap the trolley to look at it, and gather a key from the top.
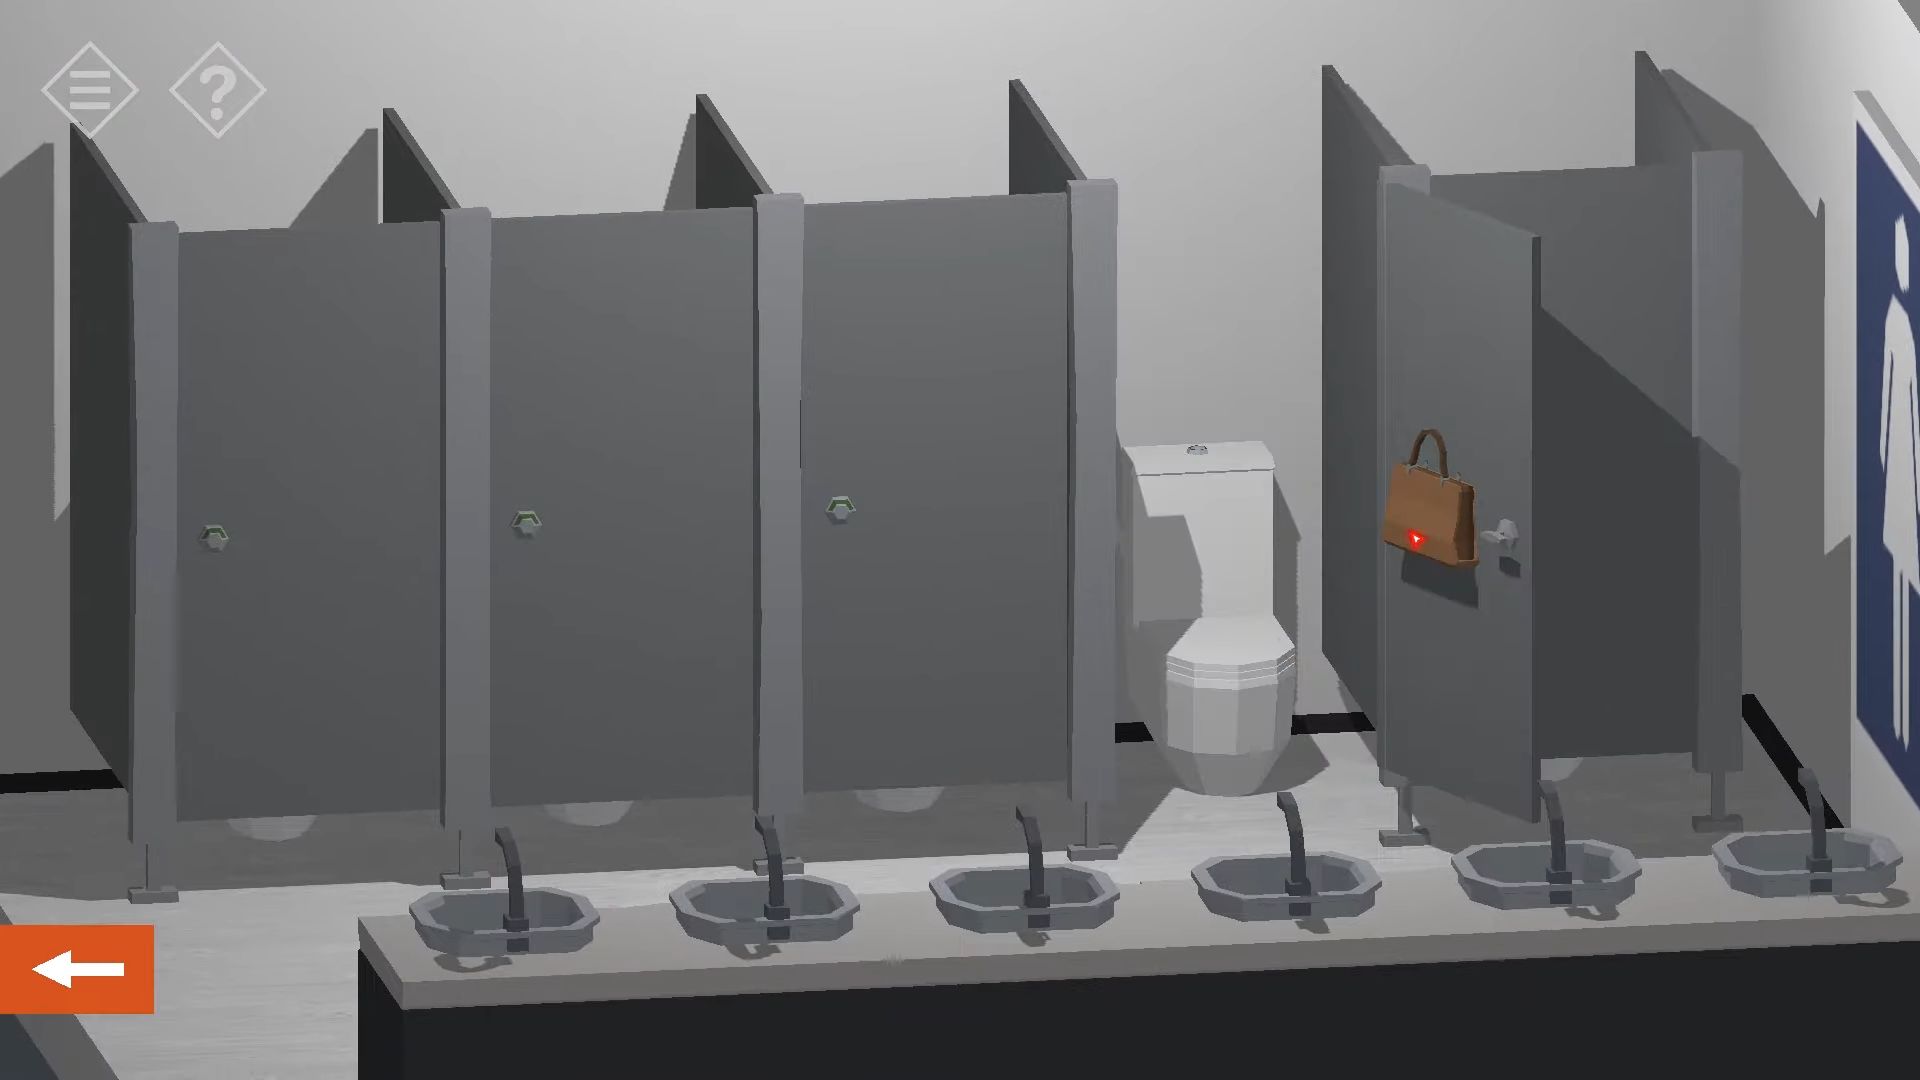
Go back to the Lobby, then go through the other doors to Exhibition Hall 2. On the back wall, there’s a Toilet door that says out of order, and use the key to unlock it.
Go into the ladies’ room, and tap the fourth stall door to open it. Grab a notepad from a hanging bag. The pages of the notepad appear to be empty.
After that, come back to the lobby once more, and turn your view to look at the computer screen on the desk. Touch the left part of the desk to take a closer look and open the top drawer on the right side. Inside, there is a paper with some numbers written on it. Step back, and tap the desk on the right. Touch the mug to read a message about a pen with invisible ink.
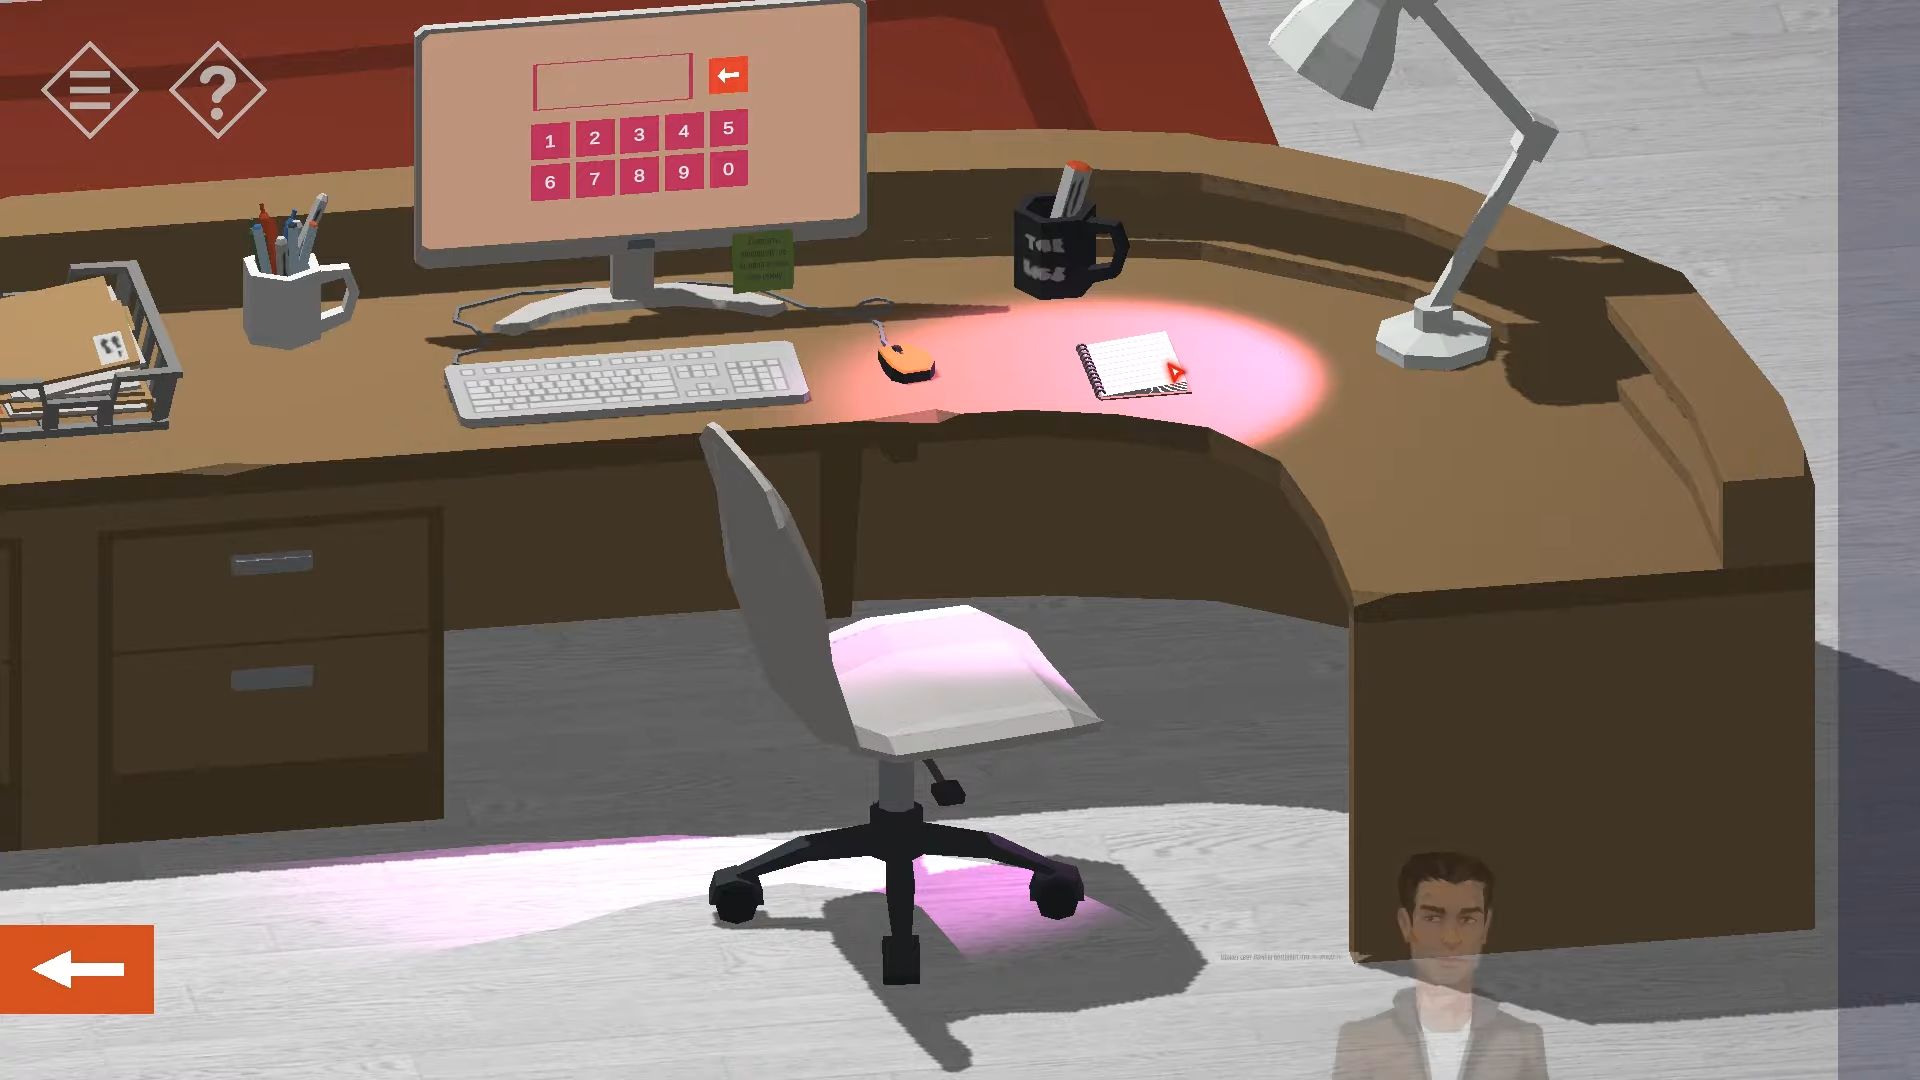
Touch the lamp to switch it on and notice the unusual colored light. Pick the notepad from your inventory and put it on the desk. Then, tap on it to open it and keep tapping to flip through the pages until you discover a six-digit code.
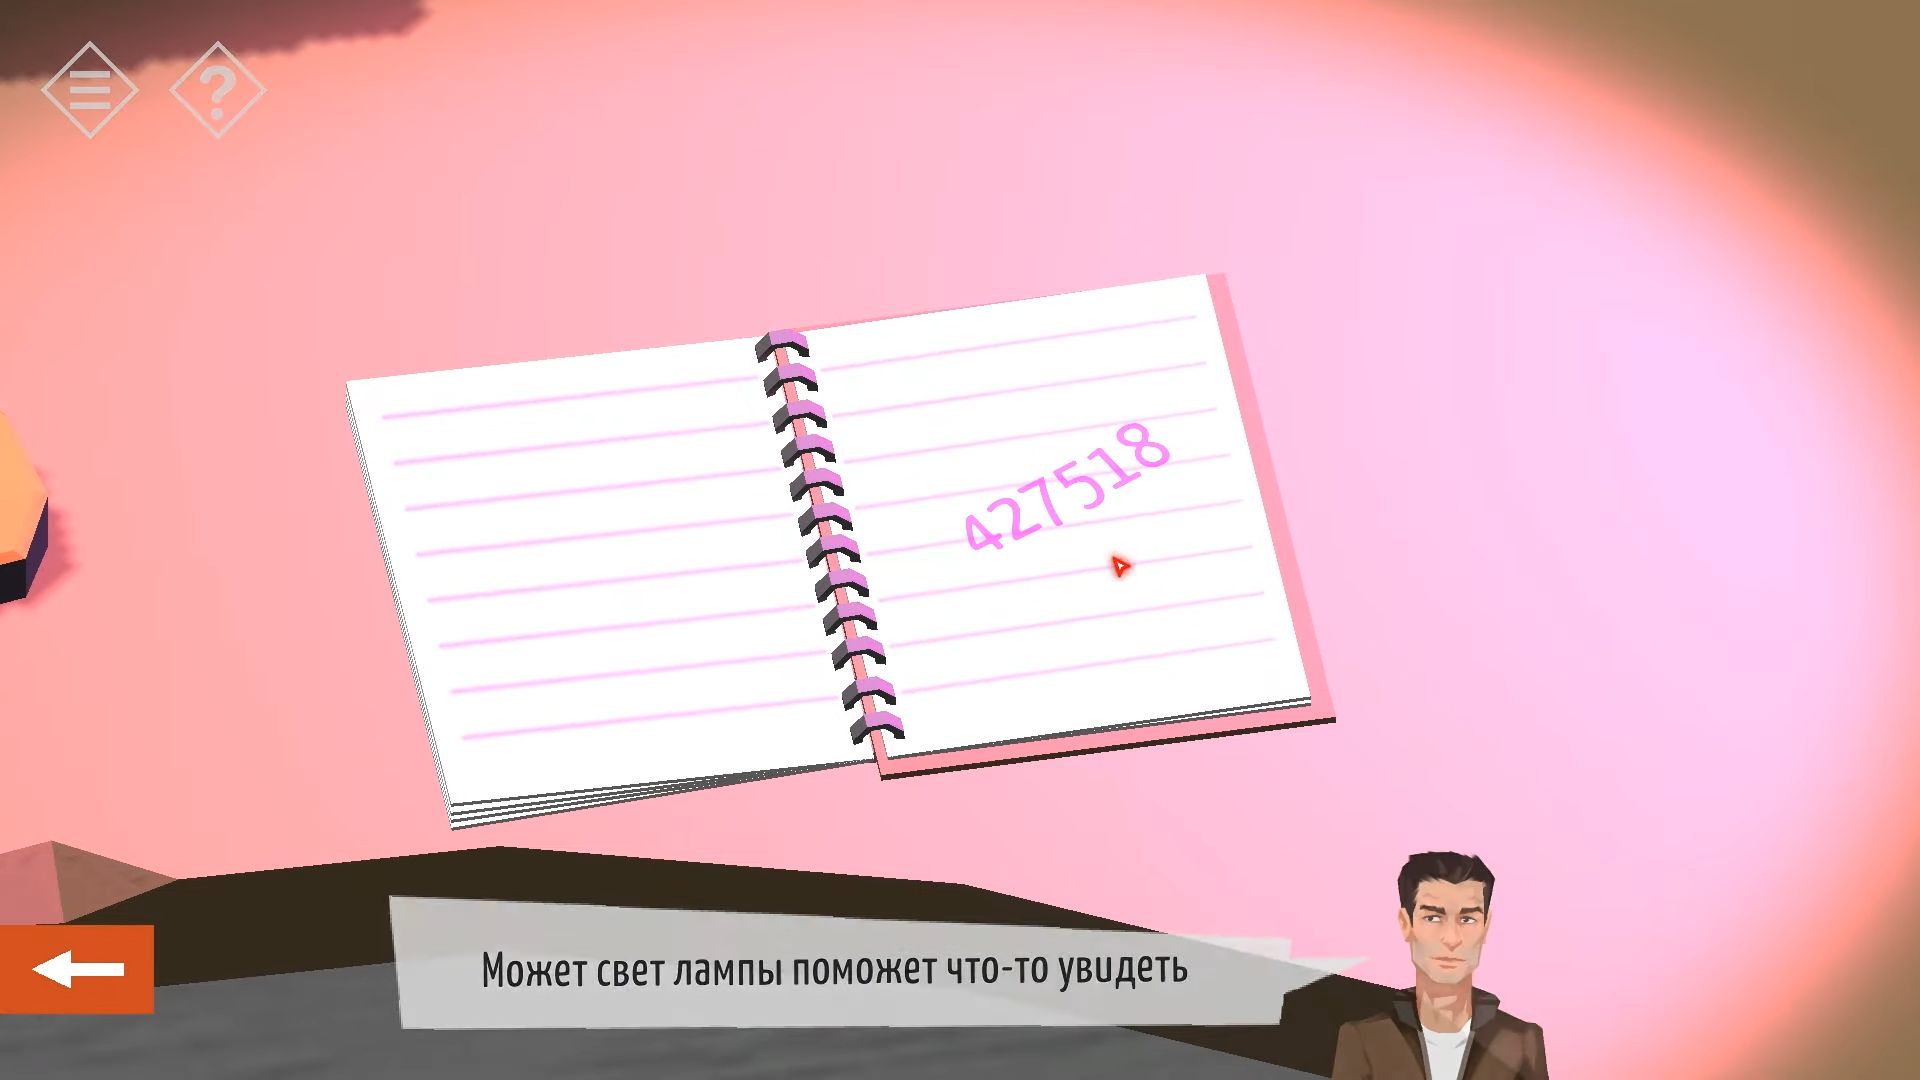
Touch Lucy’s computer keyboard to see what’s on her screen, then tap it to input the passcode (427518). Check the email on the computer for information that might give you a hint about the park.
Leave the museum and walk to the park on the other side of the road.
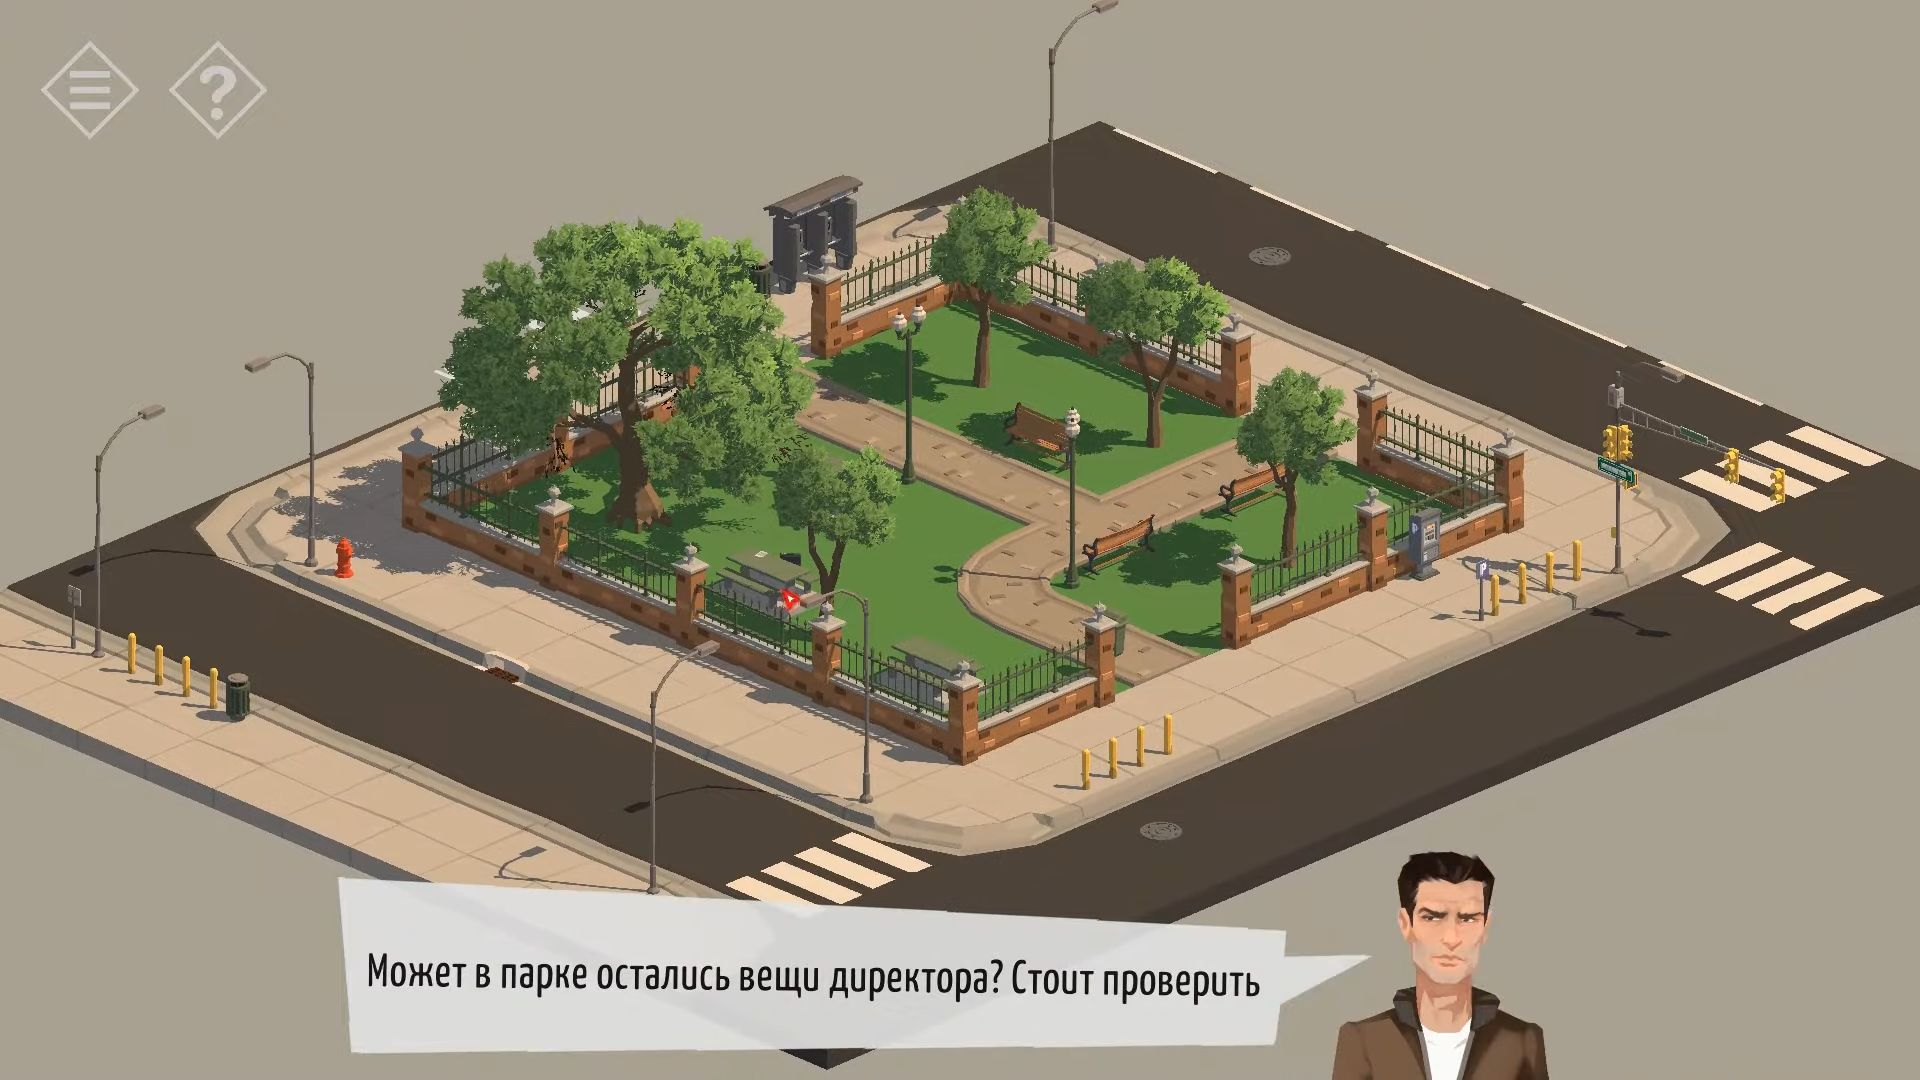
In the park, there’s a table with a briefcase and some paper. Tap to look at the case (you can’t open it right now), but you can pick it up. Read the note on the paper for a clue about a favorite painting.
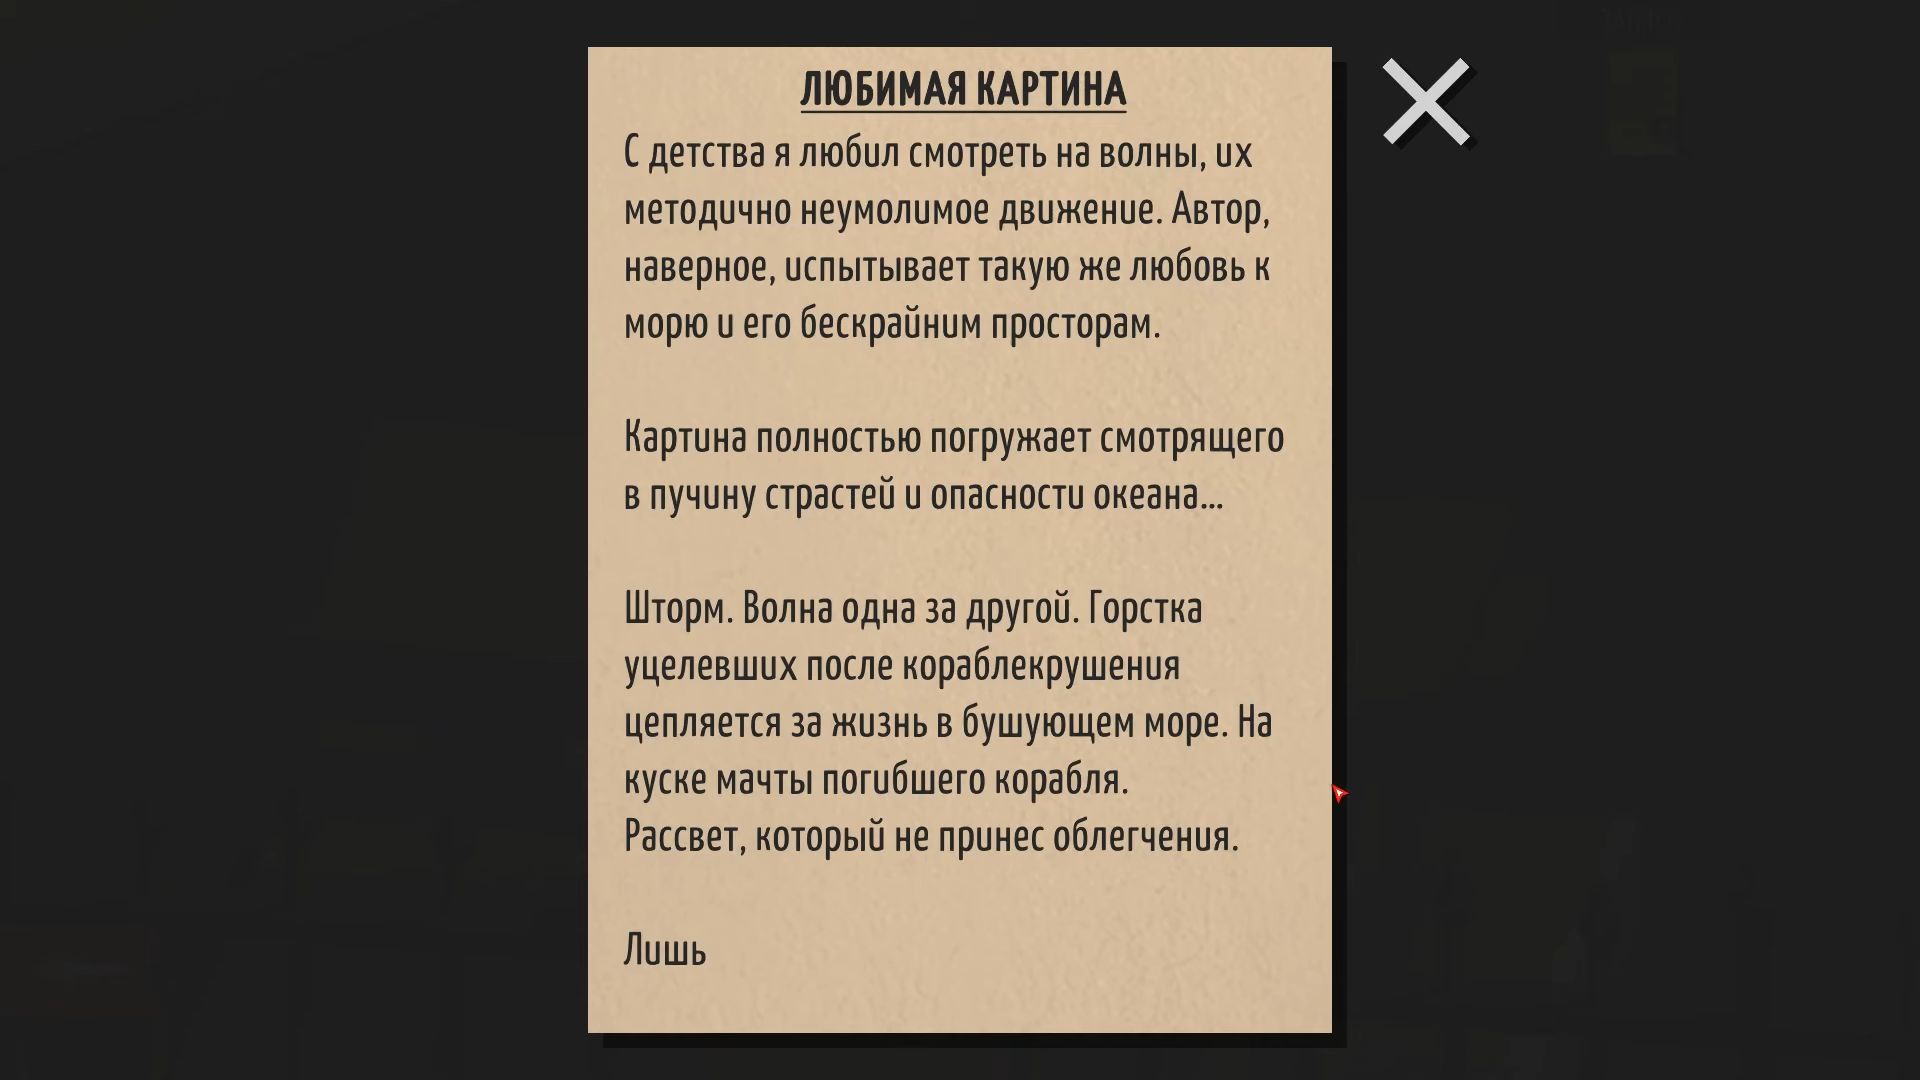
Go back to the museum and head to the Russian Art exhibition. Explore different rooms to locate a painting that matches the description in the note. The Ninth Wave by Ivan Aivazovsky. Use this information to unlock the briefcase with the code: 1850.
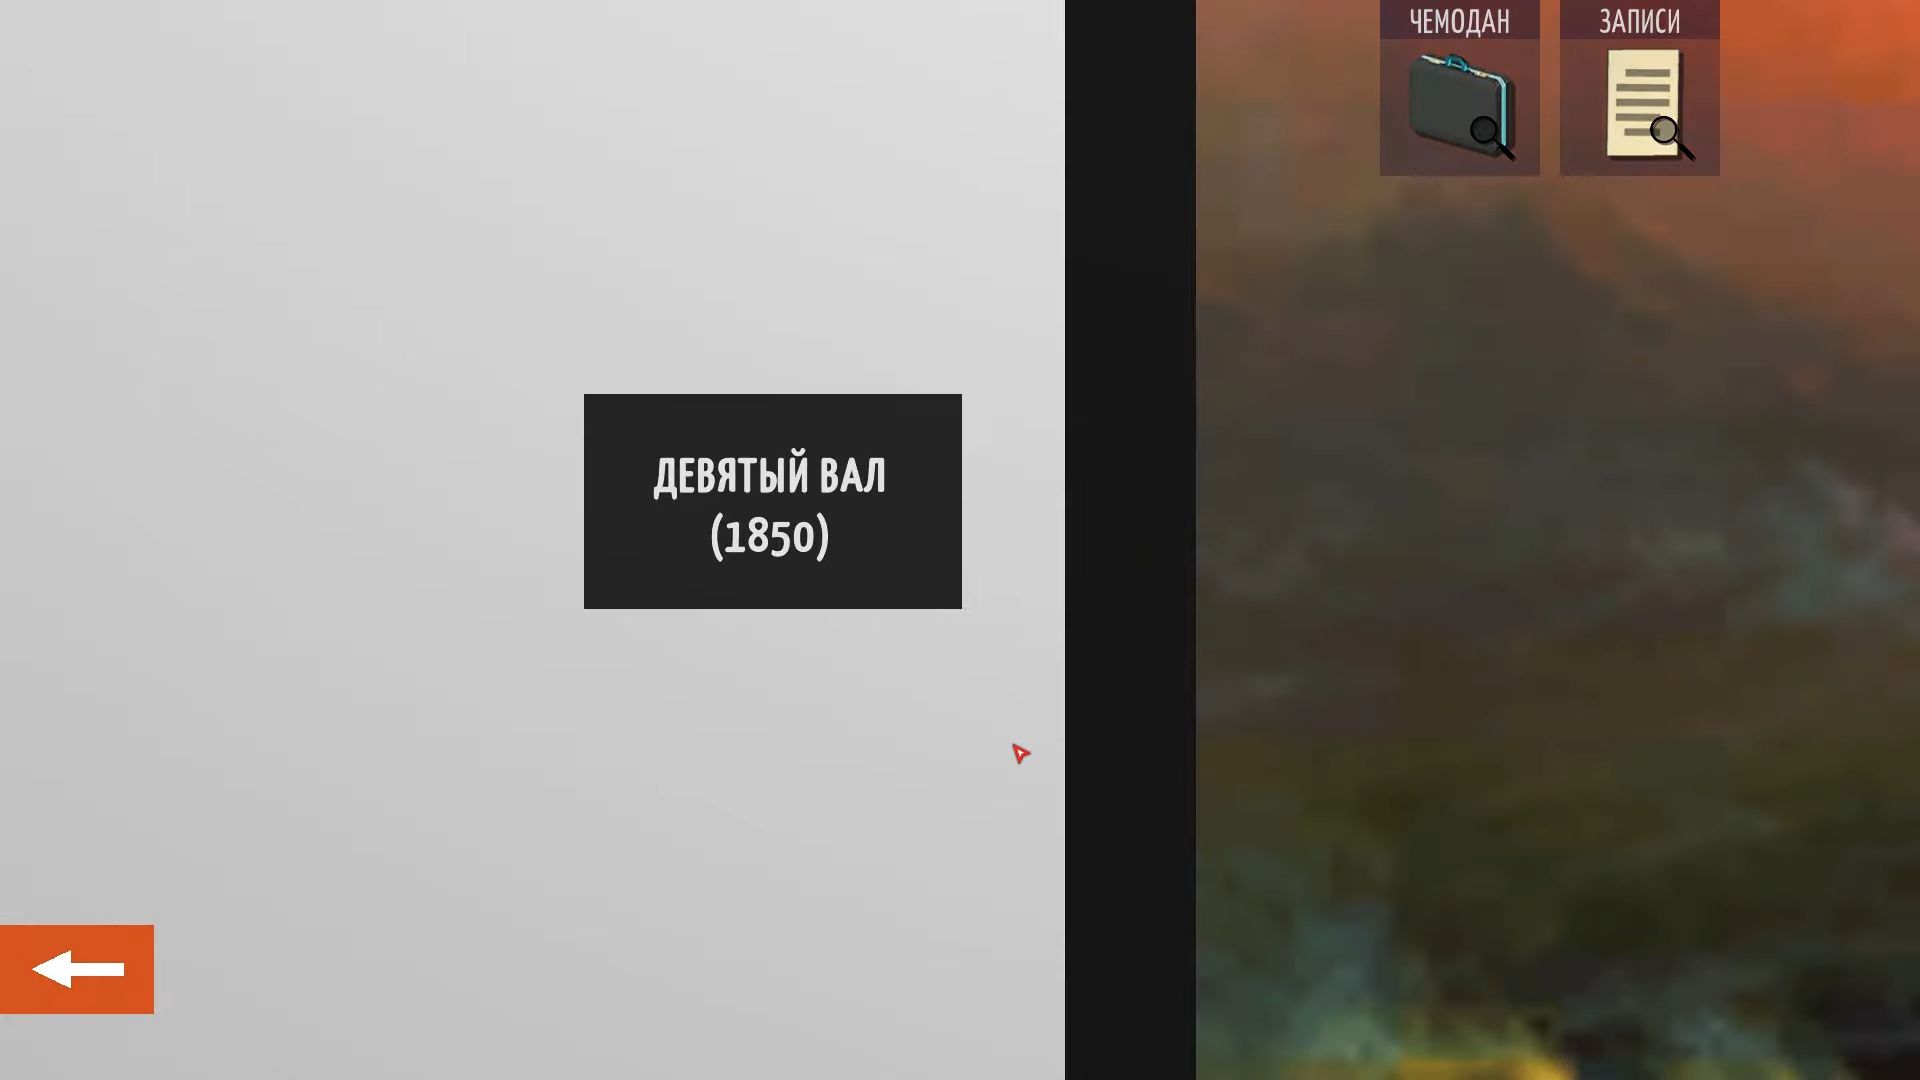
Remove all the items from the briefcase and pick up a key card from underneath. Tap to see the painting and then touch again to reveal a hidden code/symbol on the back.
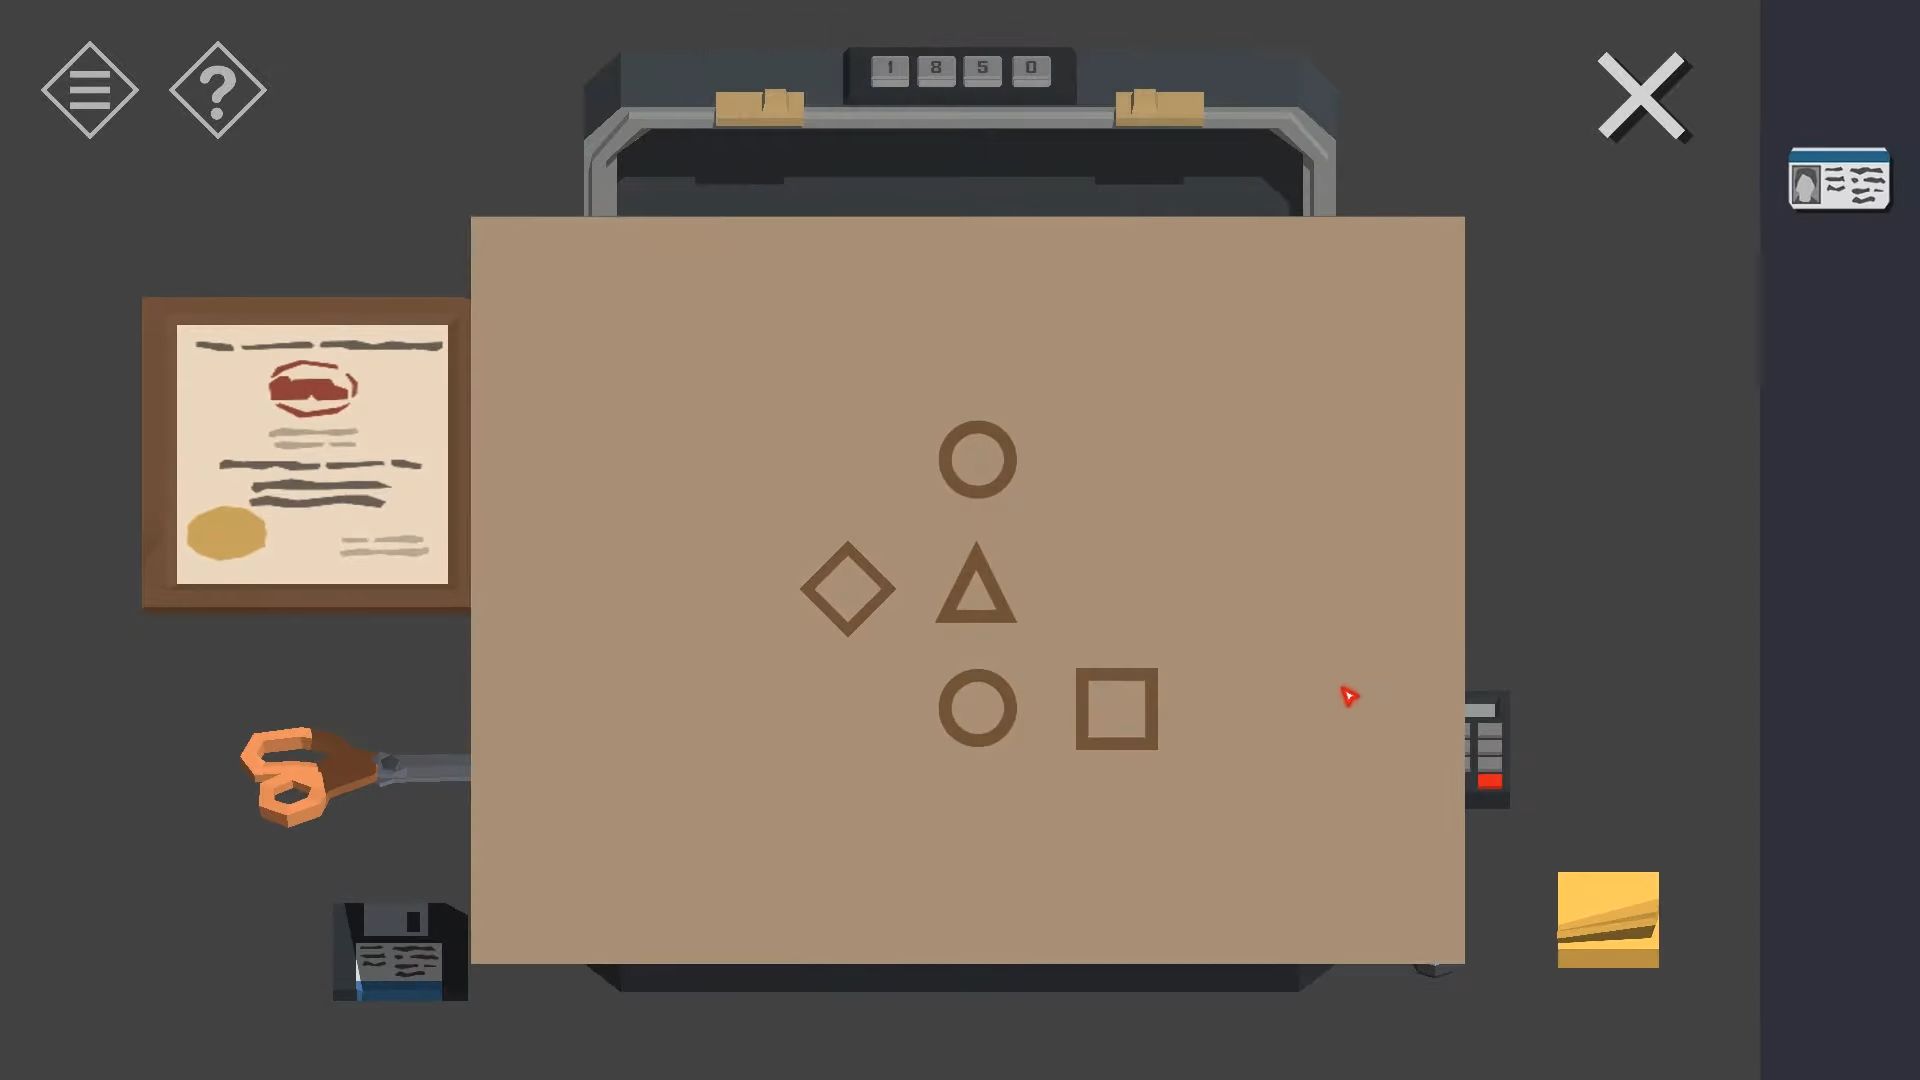
Go back to the museum lobby and tap the door at the back that leads to the Director/Manager’s office. Use the key card to unlock it and you will reach a hallway that goes to a place for fun and some offices.
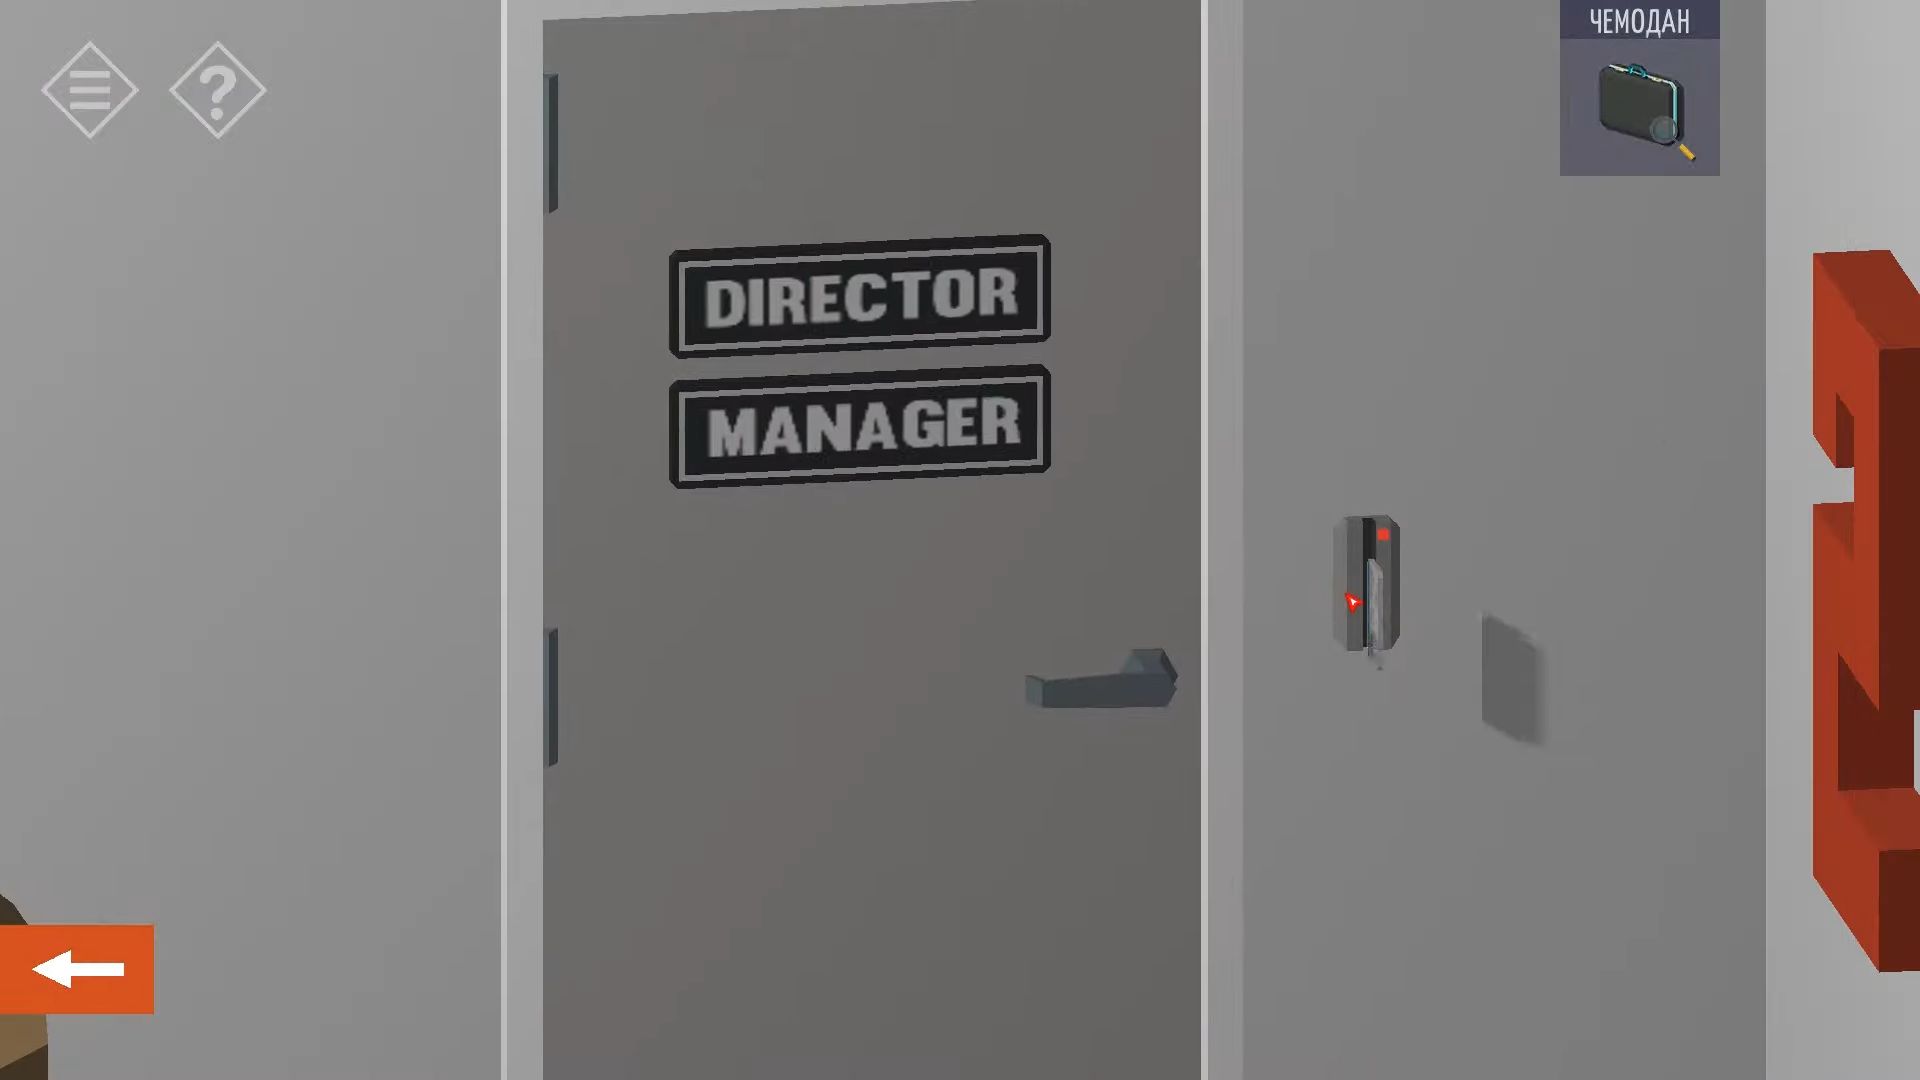
There’s a sign on a wall that says Employee of the Month, and the main picture is of Katrin. On the other wall, there’s a calendar with the year 2019, and the number 2 is marked, but you don’t know the month.
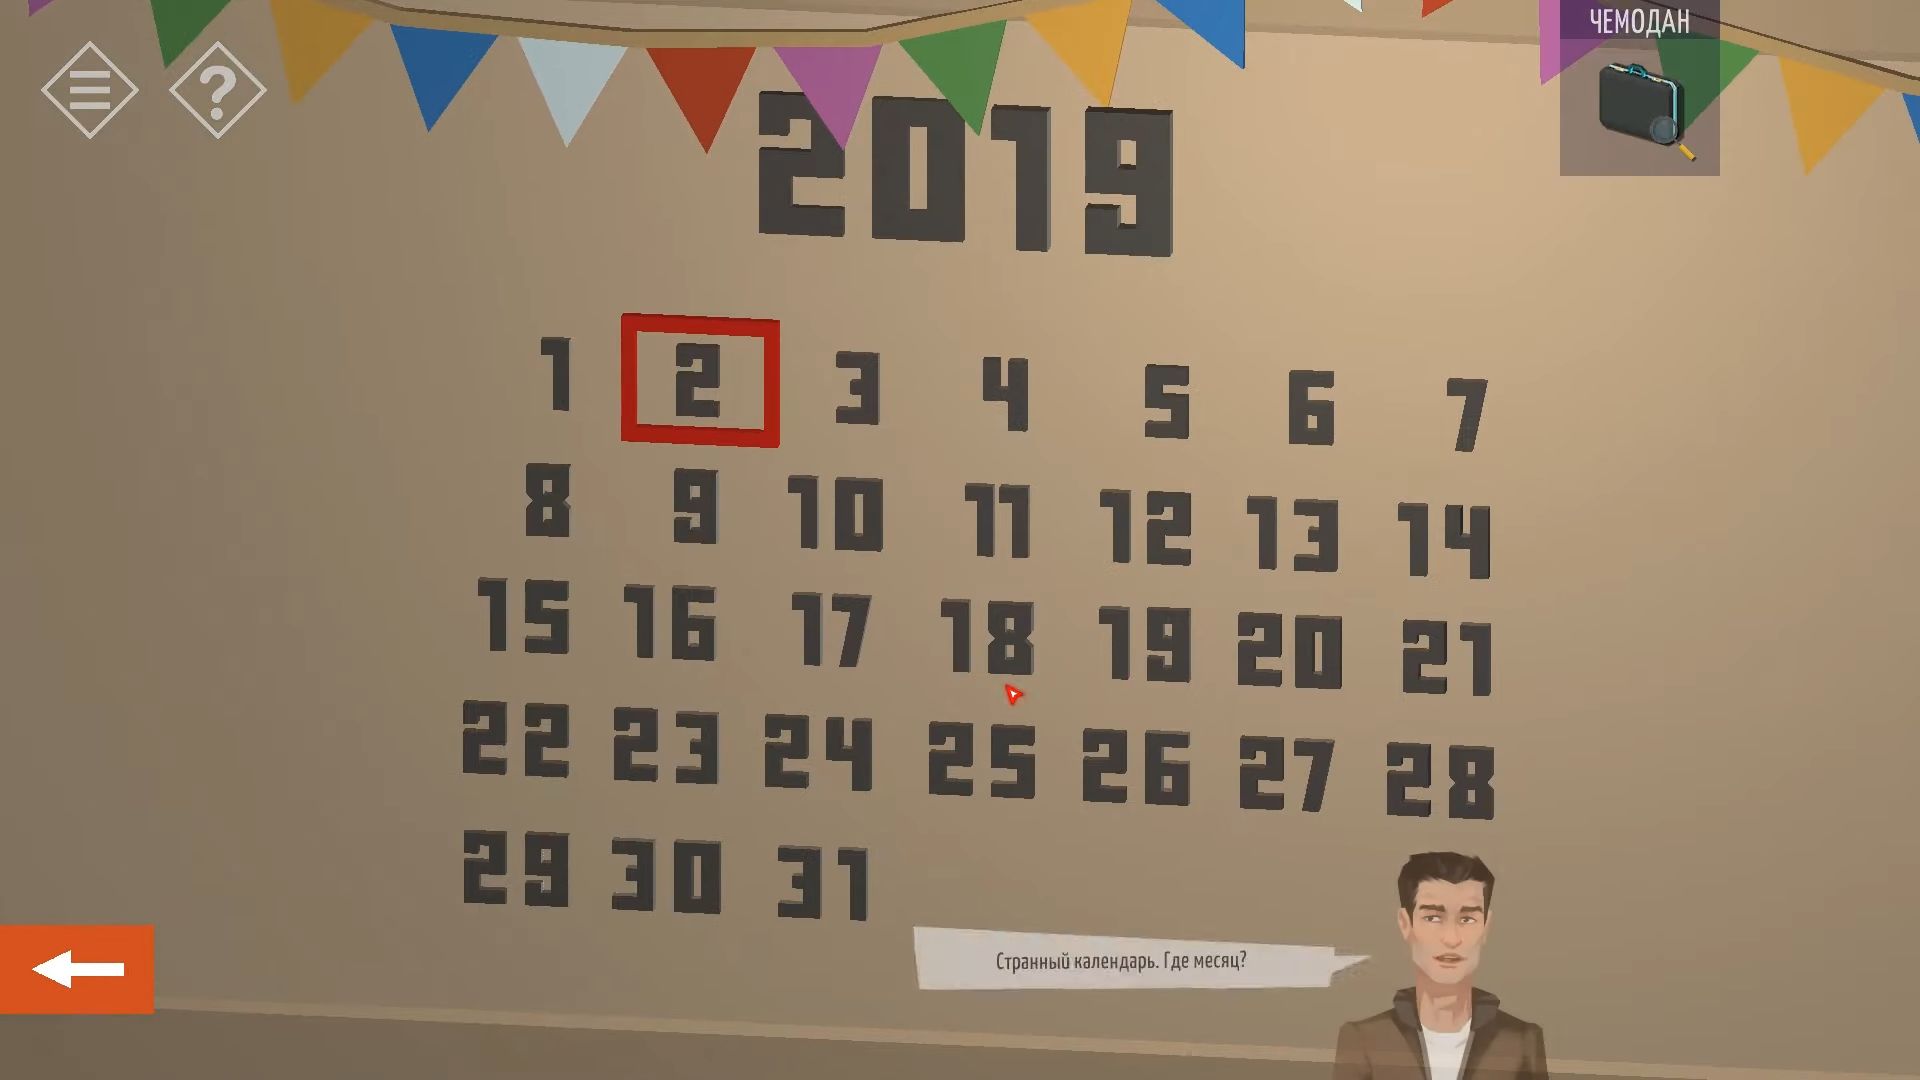
Now, go to the other office with the glass front and find the desk labeled Ashley. Utilize the green key to open the top drawer and take out a Flashcard memory stick. Leave the glass-fronted offices and head to the door on the opposite wall with the Director written above it. On the right side of the door, there’s a keypad that needs a shape pattern to unlock.
The pattern can be found inside the briefcase on the back of the painting.
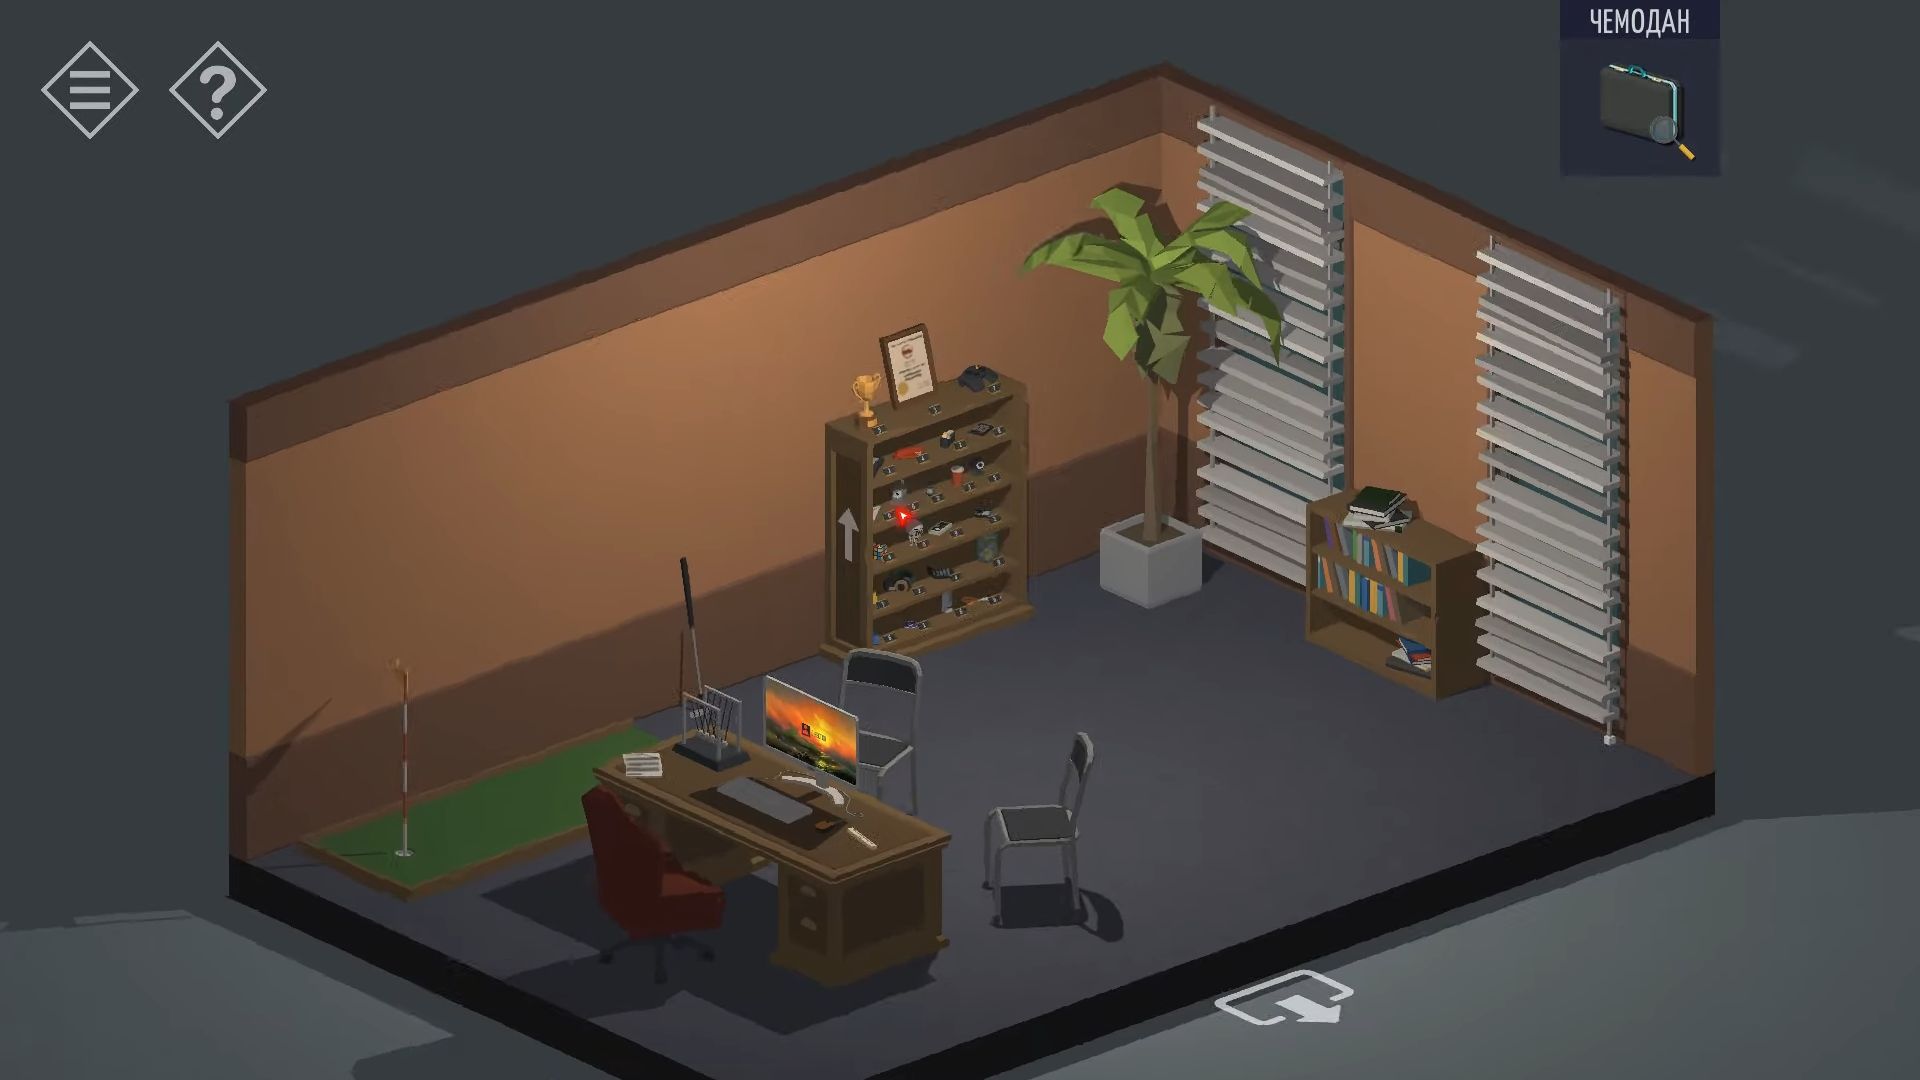
Go into the director’s office. There’s a big bookcase on the wall with many things on it, and each thing has a number. This is a hint for a code for the computer. Look at the briefcase in your inventory, and tap the items to take them out.
Remember the items and match them with the numbered things on the shelf. Calculator – 8, Floppy Disk – 1, Pills – 2, Scissors – 0, Sticky Notes – 3, Diploma – 3. Each thing is on a different shelf. Also, notice a white arrow on the side of the bookshelf pointing upwards. Put the numbers in order from the bottom shelf to the top.
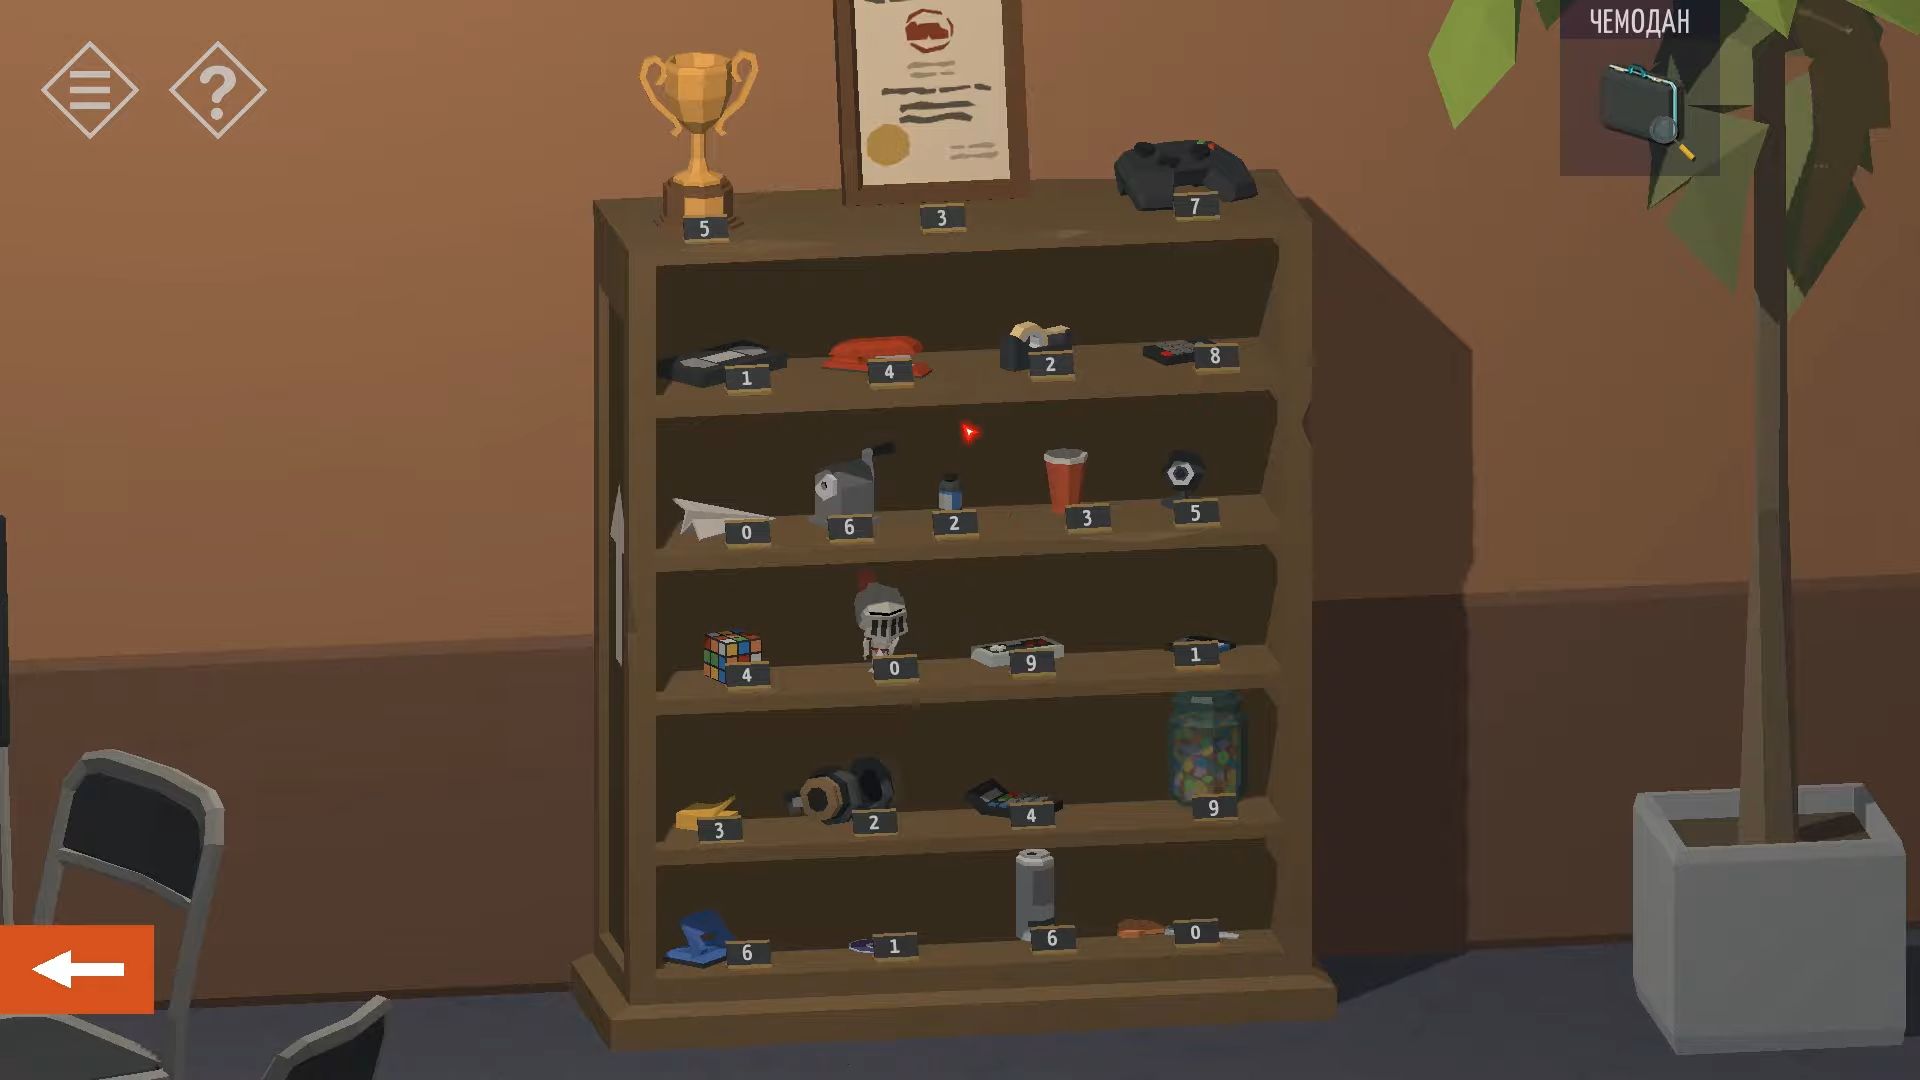
Go to the desk and touch the computer screen. First, pick up the paper from the desk that has a grid of days, and it’s titled ‘Open the safe.’
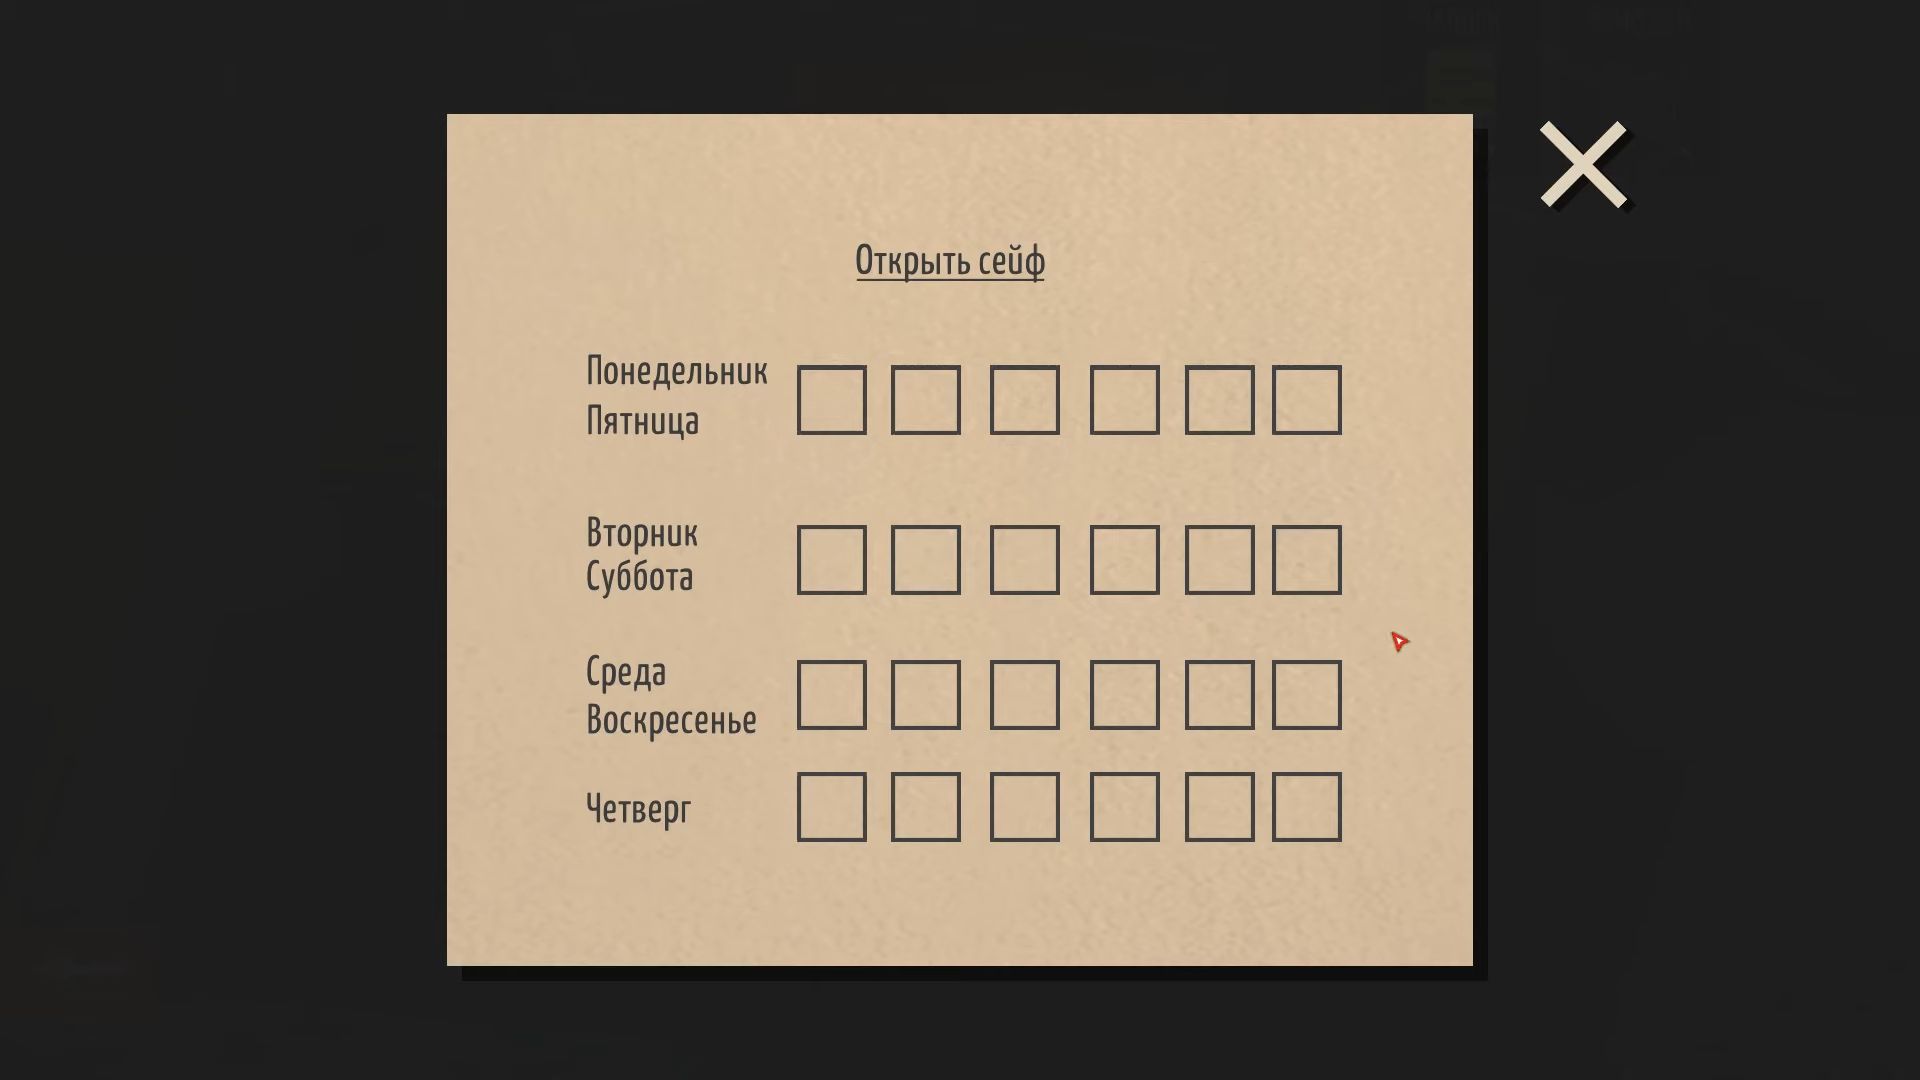
Touch the computer screen and use the code “031283” to unlock it. Read the email to discover a hint for everyone’s passwords. Tap the option to open the safe. On the desk, a hidden compartment on the left is now open. Gather a green access card from there.
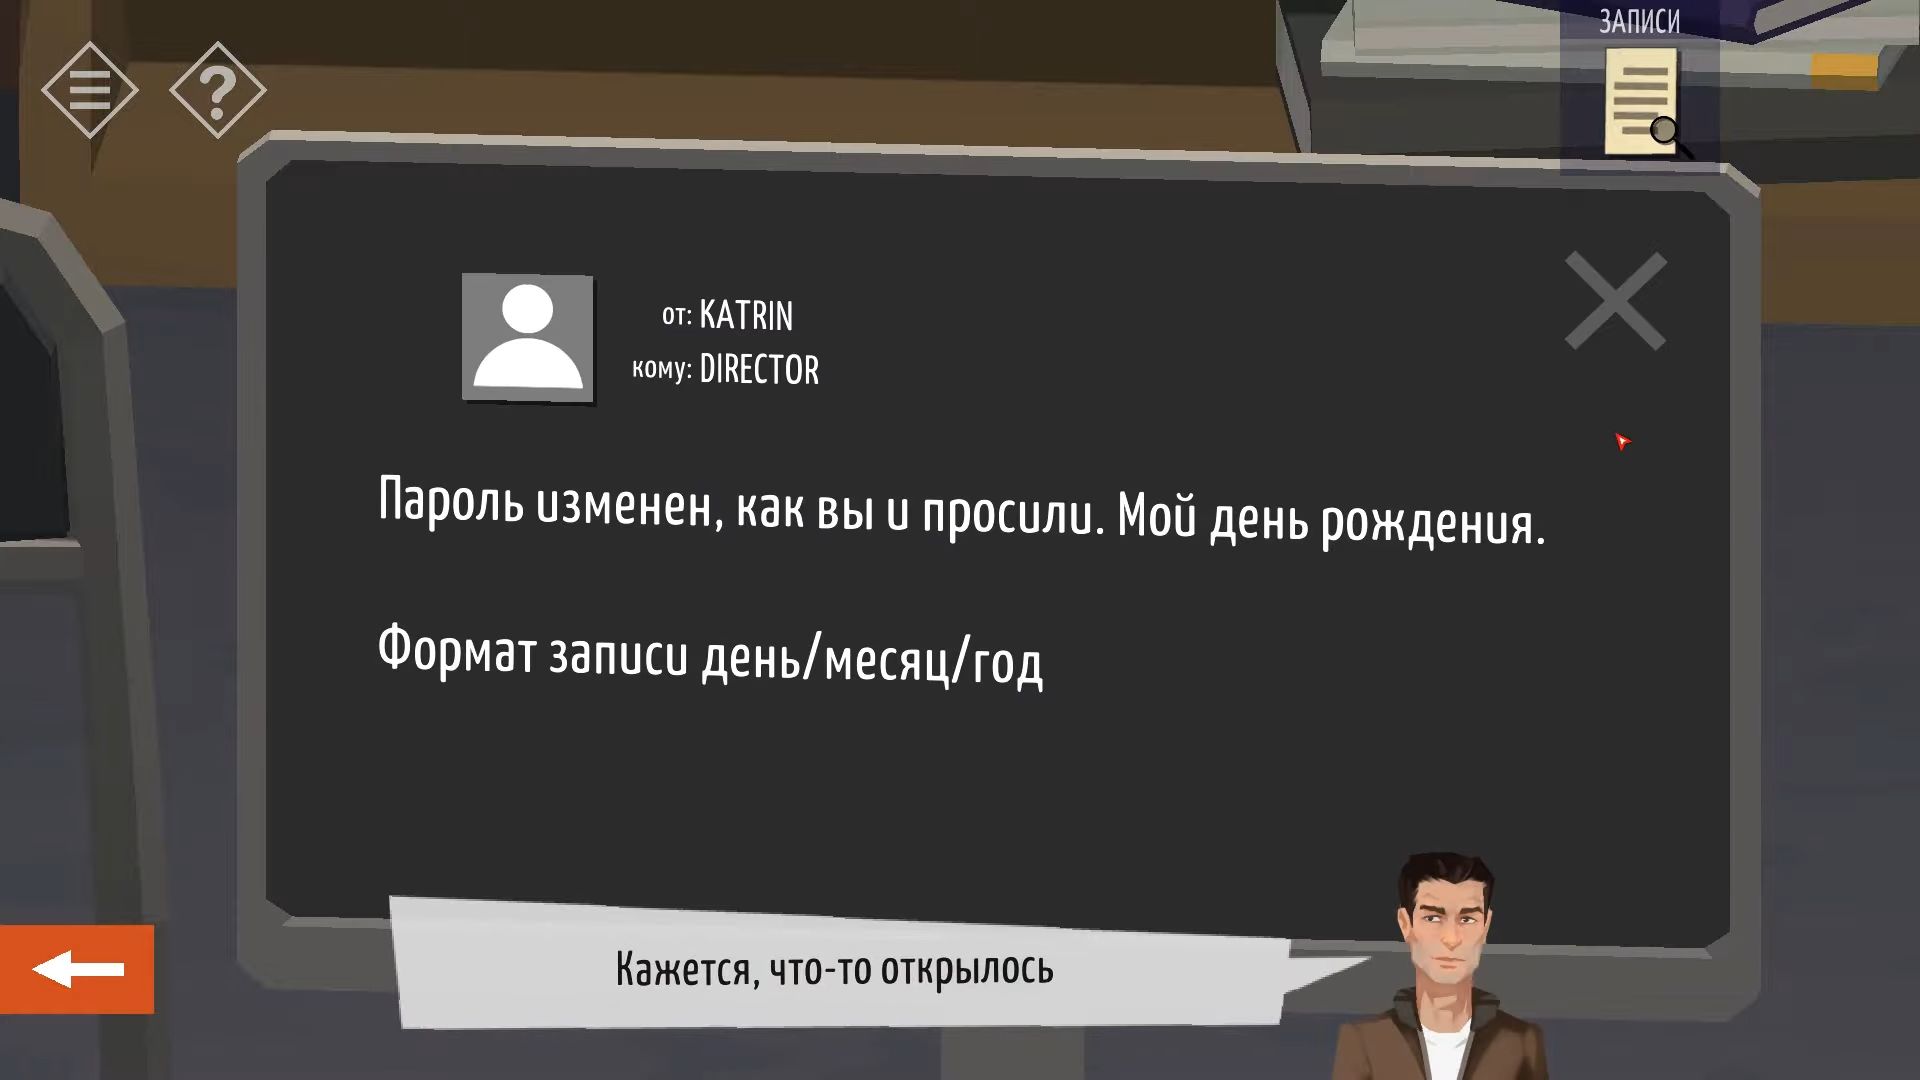
To the right of the desk, tap to see another clue. It’s a container with pills. Open it to find that there is one pill remaining from Sunday. Leave the director’s office and go into the other glass-fronted room across from the two glass-fronted offices. There’s a table tennis table set up here with drinks and pizza.
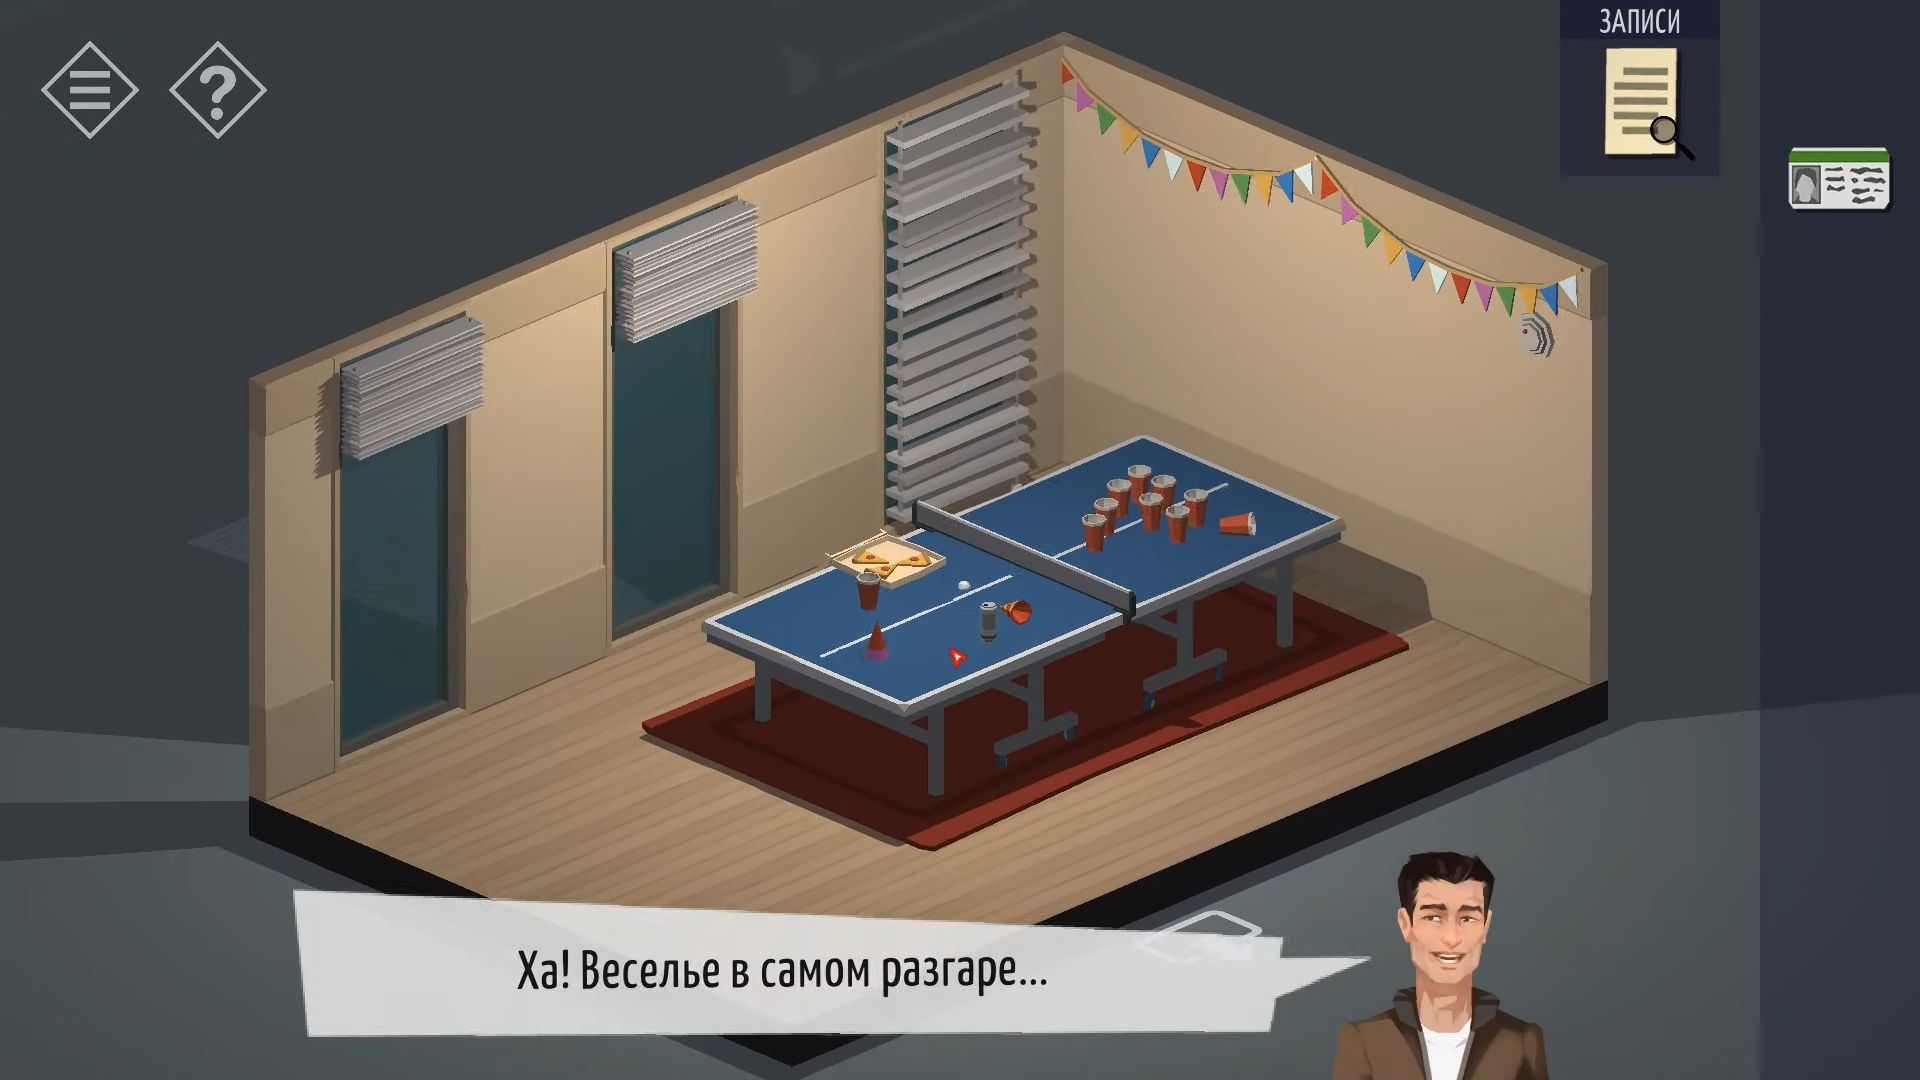
In the room at the back, open the first glass office door on the right. You’ll see three desks, each with a name on the computer screen. Tap to look at Martin’s desk (the one with drink cans on it), and then open the drawer on the right to discover a notebook with a code for the 3D printer (AC00015).
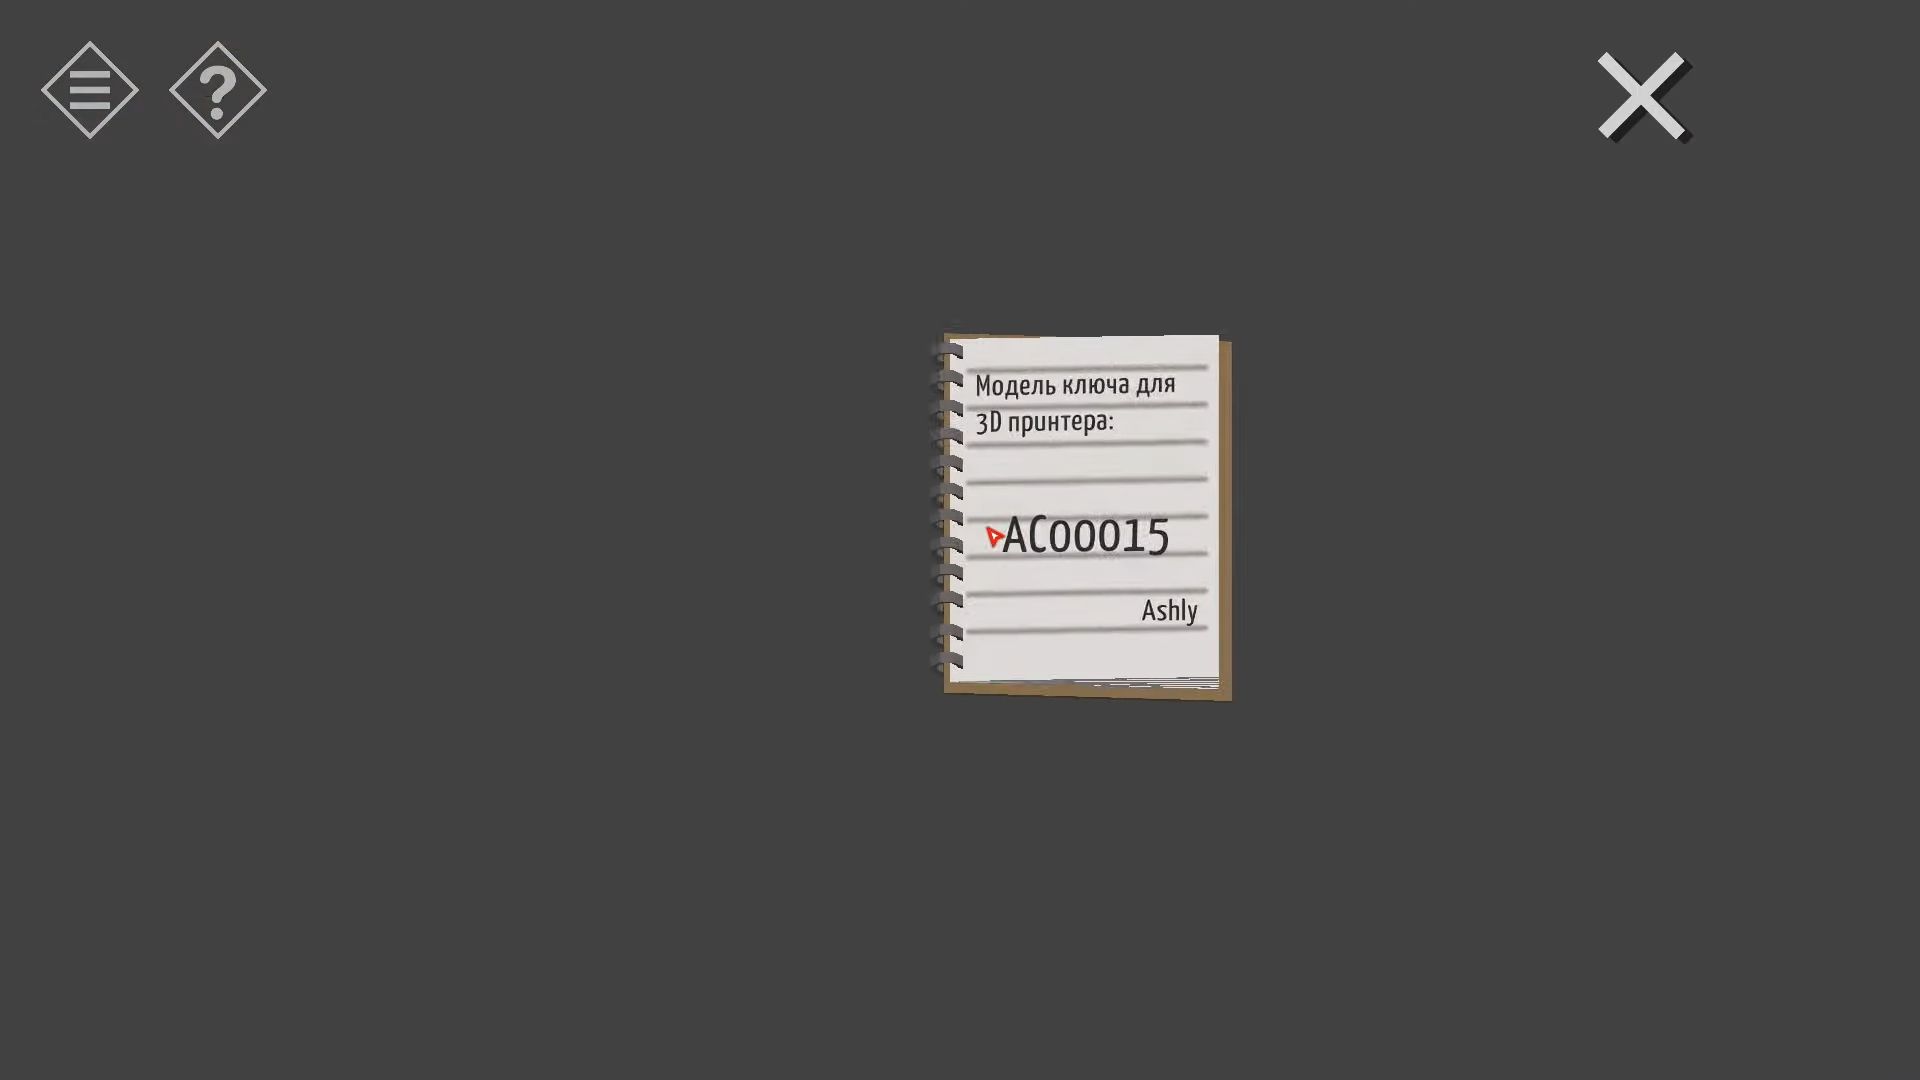
Go into the other glass-fronted office. There are three desks and a 3D printer in the corner. Tap to look at the printer, then enter the code you found earlier. Choose Print and pick up the green key it makes.
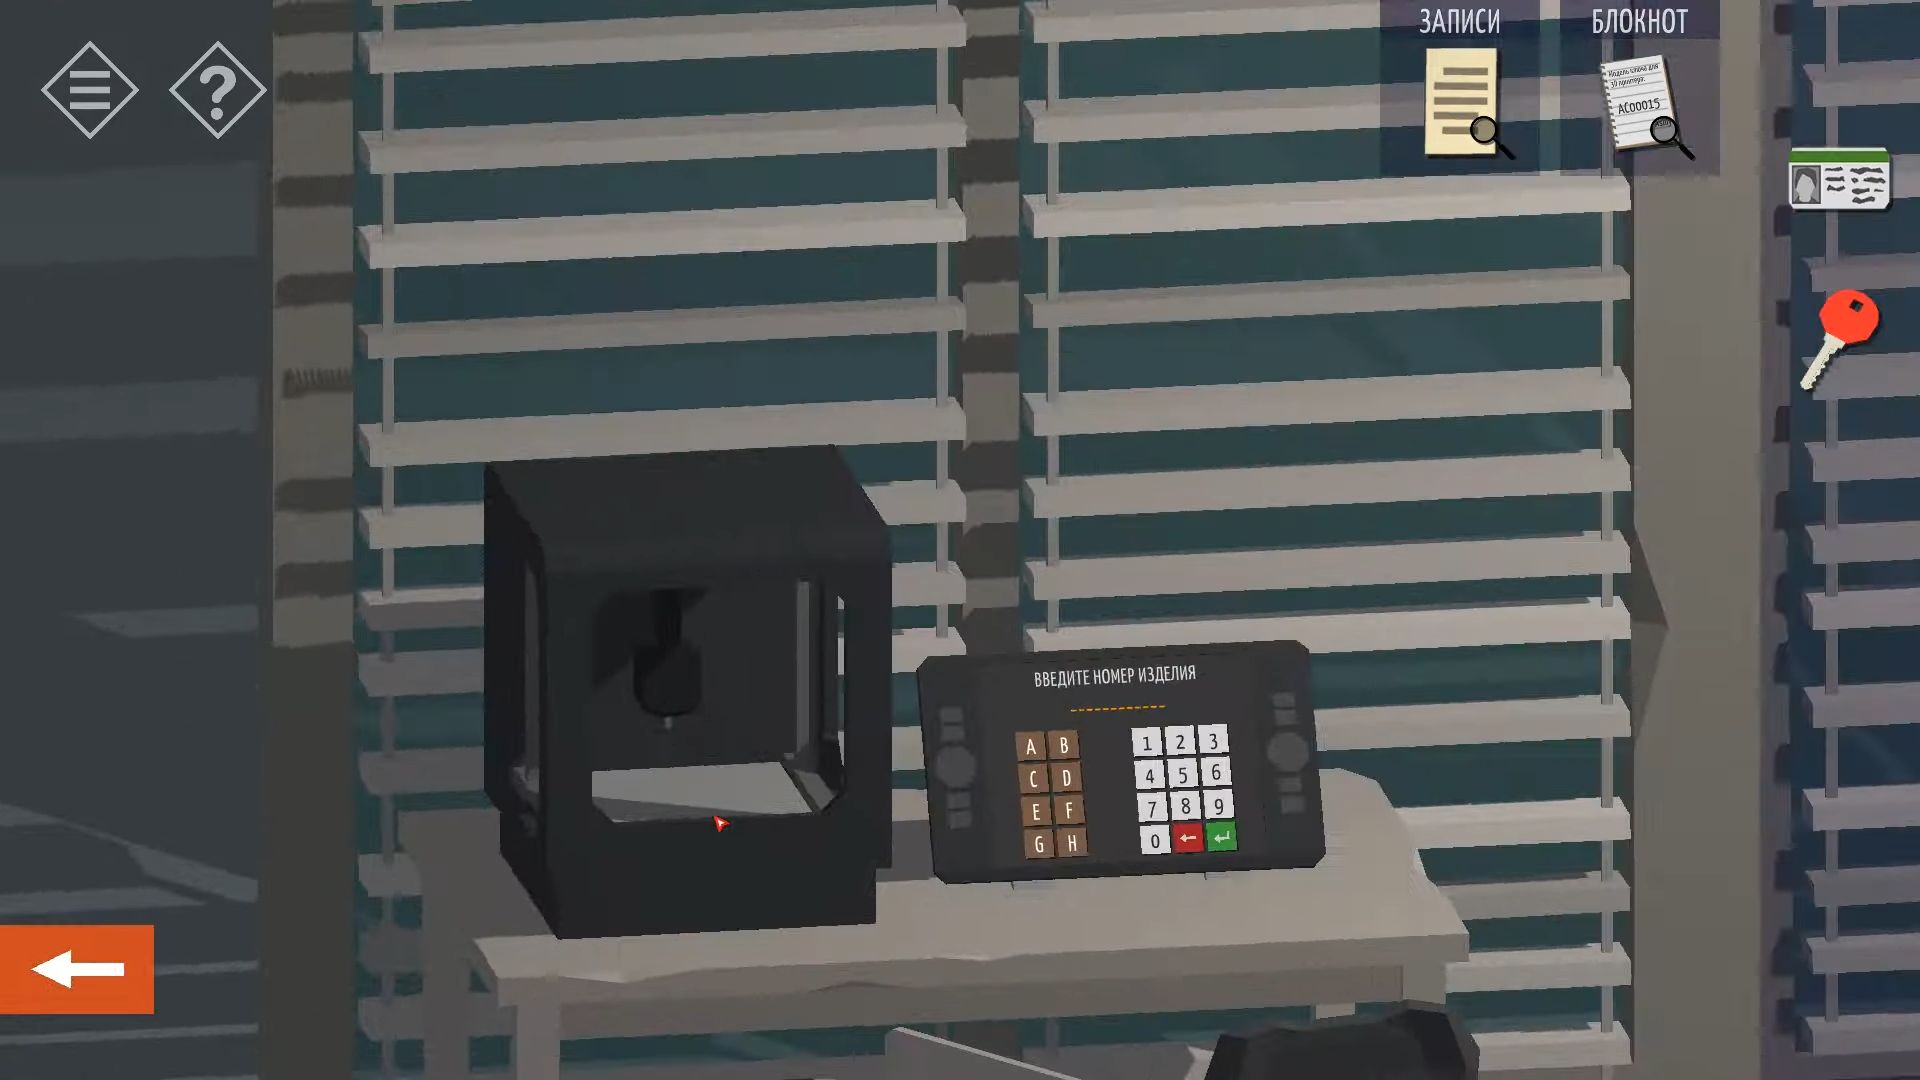
On the opposite wall, there’s a note saying it’s Katrin’s Birthday with a table of presents and a cake. The cake tells you Katrin is 37 today (or the day of the event). Tap to move the presents until you find a red key underneath. Pick it up, leave this office, and go back to the glass-fronted office with the 3D printer.
Move to Katrin’s desk with the flower vase and enter her password to unlock the computer. The password is her birthdate (DDMMYY), and her birthday is the day when the office had the party. Clues for this day are above. The calendar shows it’s the 2nd day of a month in 2016. The pill box indicates it’s a Sunday. The only Sunday on the 2nd in 2019 was June 2nd. The year is 2019 minus her age of 37 years (02061982).
Read the email to find information about printing tickets and the location of the printer paper. Use the memory stick on the PC on the left, then tap DOWNLOAD to save the ticket file on the memory stick. You have to collect it.
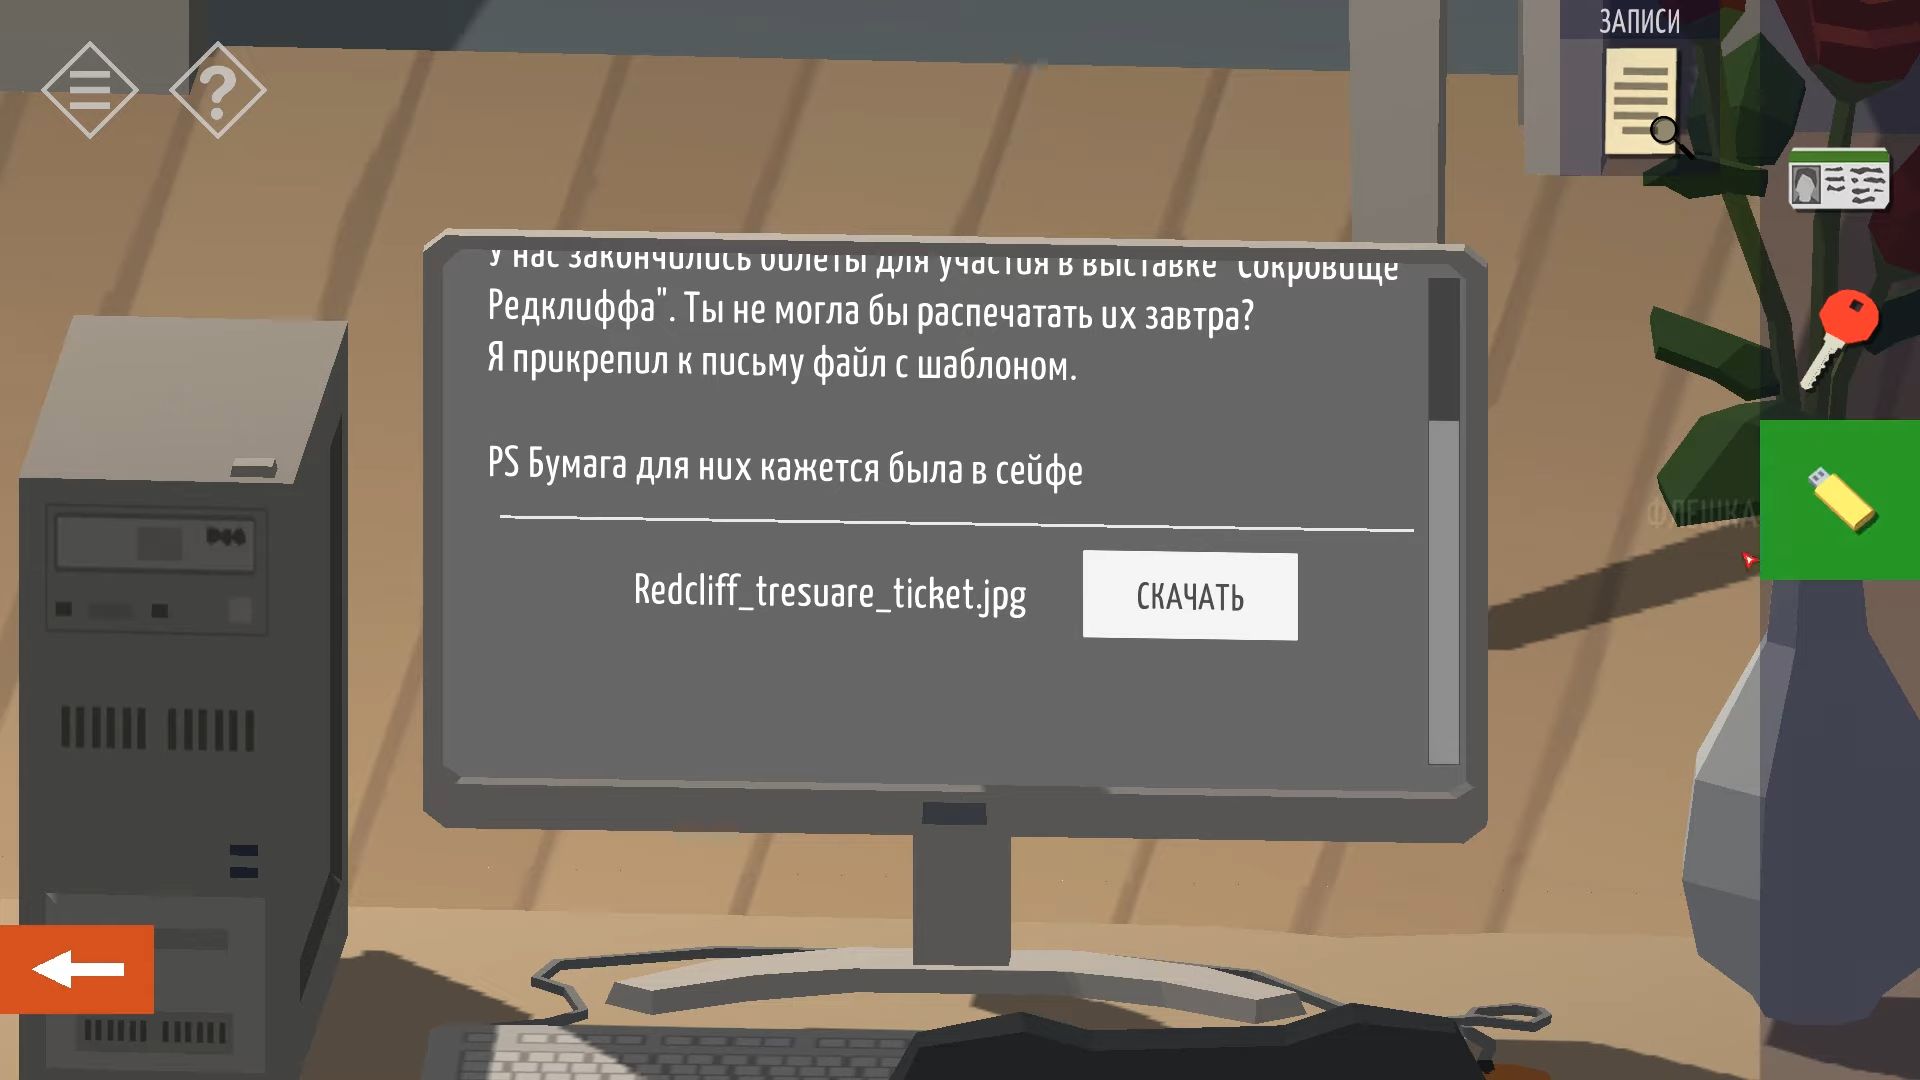
Go out of the space. There is a red-handled door in the rear of the common area. To enter, use the red key to open it. A printer sits on a table to one side. Four red power switches and a shelf full of pigeonholes are located on the back wall. See the power switches for the second floor’ and flip them on.
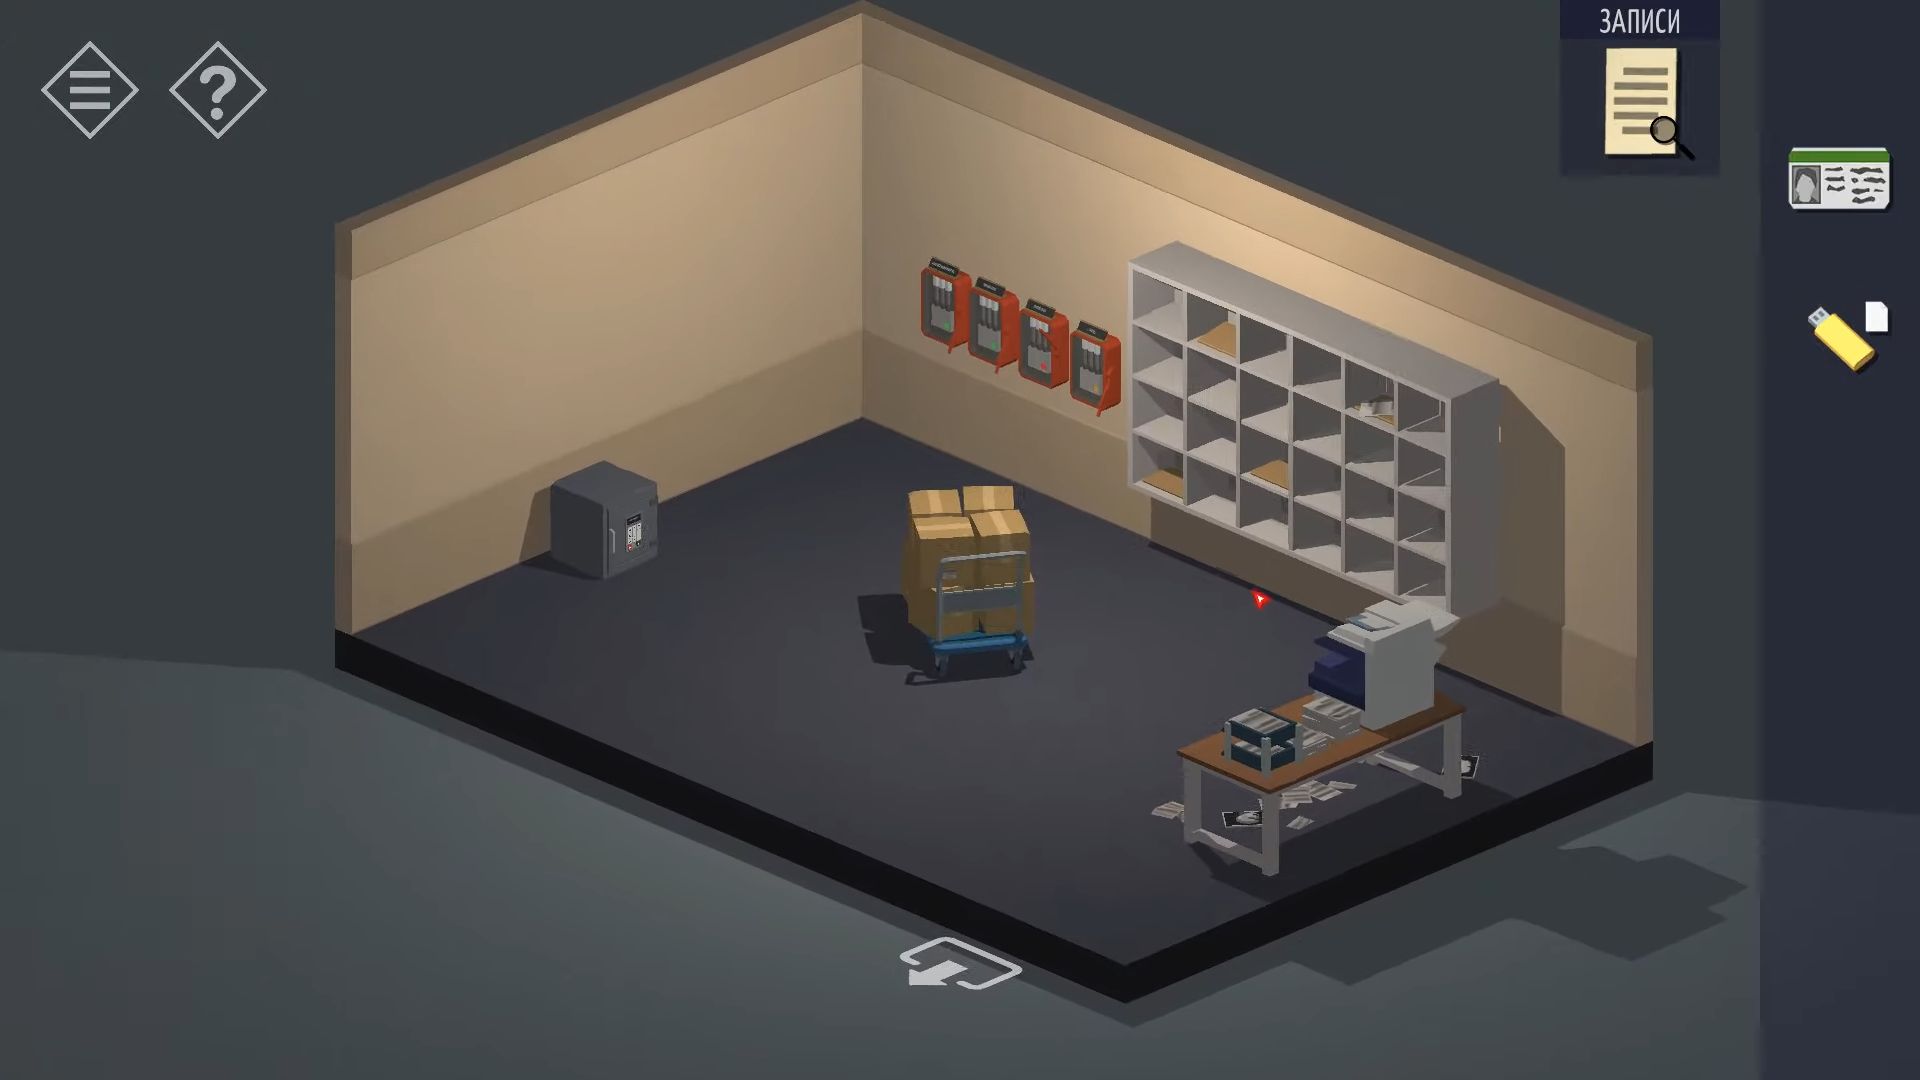
Inspect the pigeon holes next, these fit the above hint when arranged in a grid. Turn the room so you can see the safe on the floor across from the printer. Look at this and use the code to open it. You can learn how to extract the code from the pigeonholes by reading the paper titled Open the Safe from the Director’s Desk. It was a Sunday.
According to the publication, Sunday is located in the third row. Circle, inverted triangle, X, square, dots, and lines. Take out the safe and grab some paper for your printer. Use the paper on it to fill it in after rotating the view to the printer. Next, add it using the memory stick. A ticket may now be printed and picked up. Examine the wall shelves at the entrance (the ones that are opposite the pigeon holes).
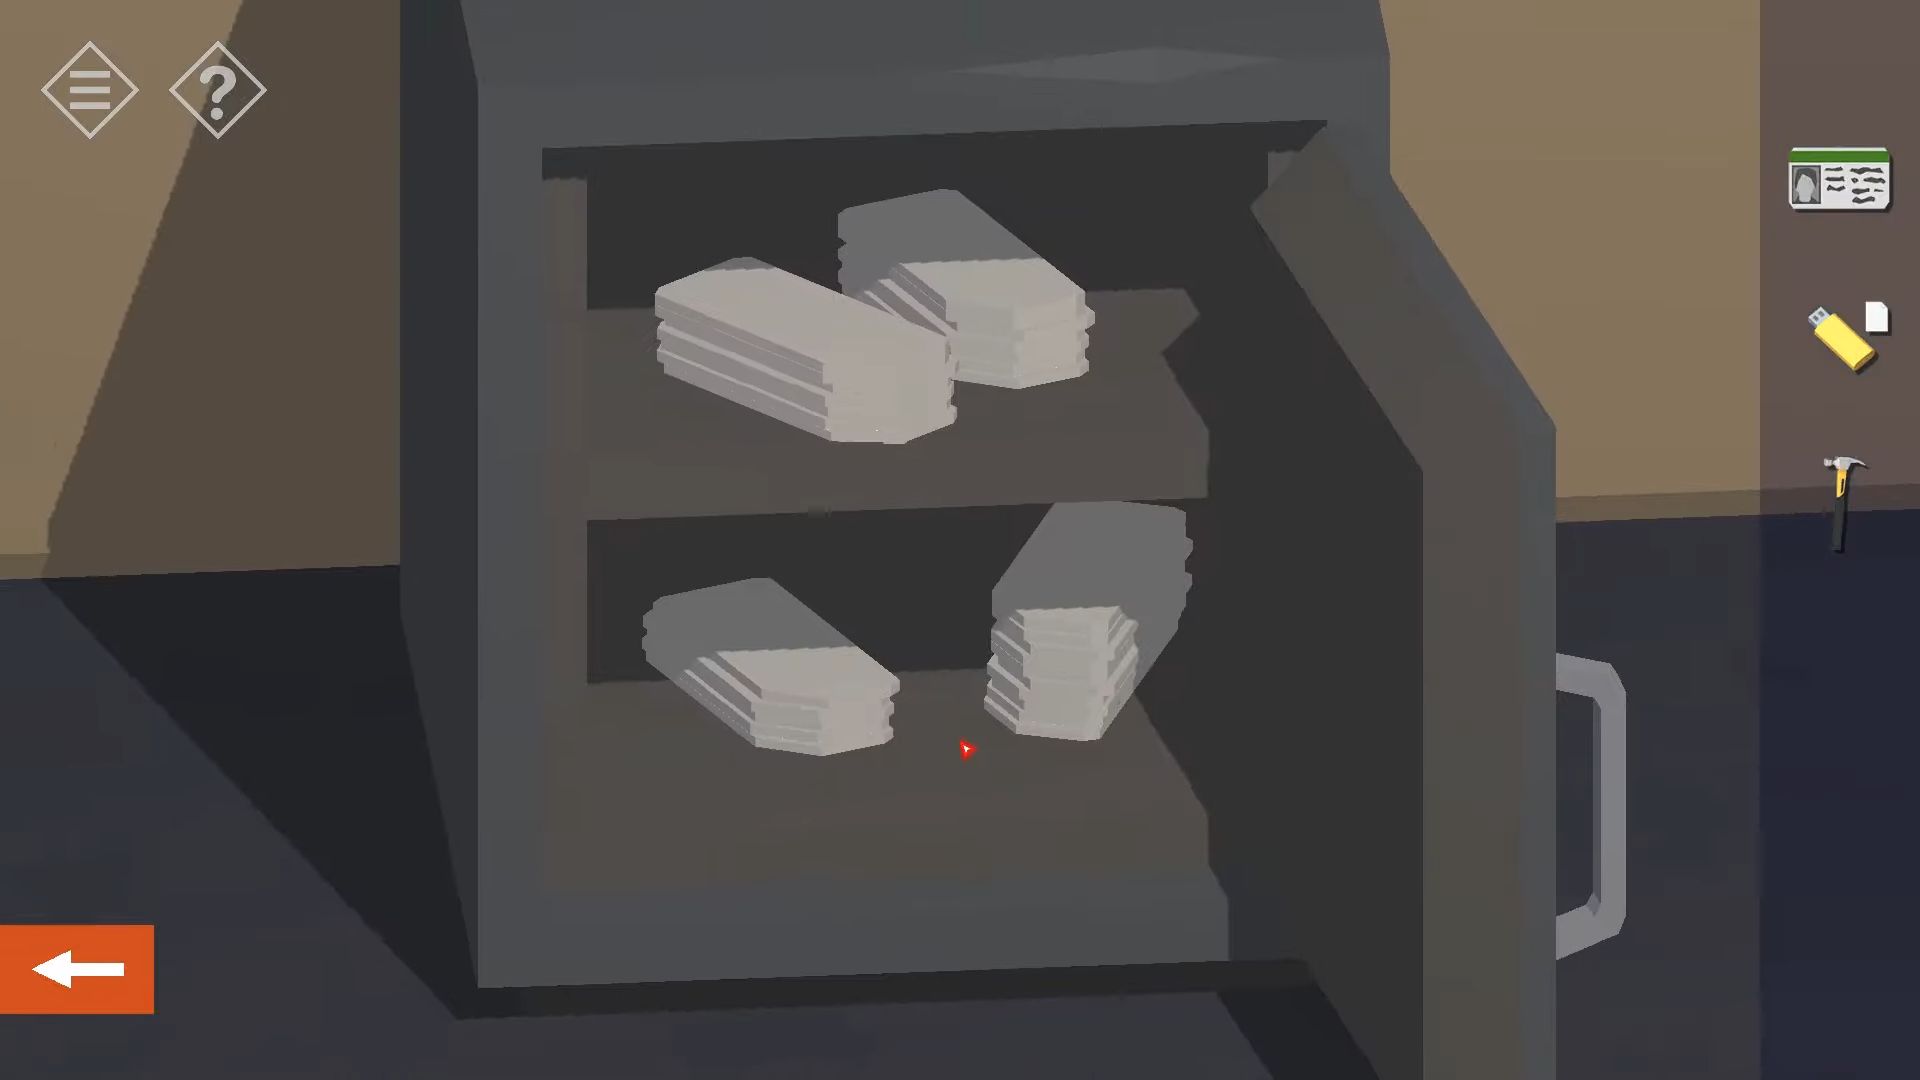
Leave the office and return to the lobby. Enter Exhibition Hall 2 and pass through the double doors to reach the stairs. Go up to the second floor to discover four additional exhibits.
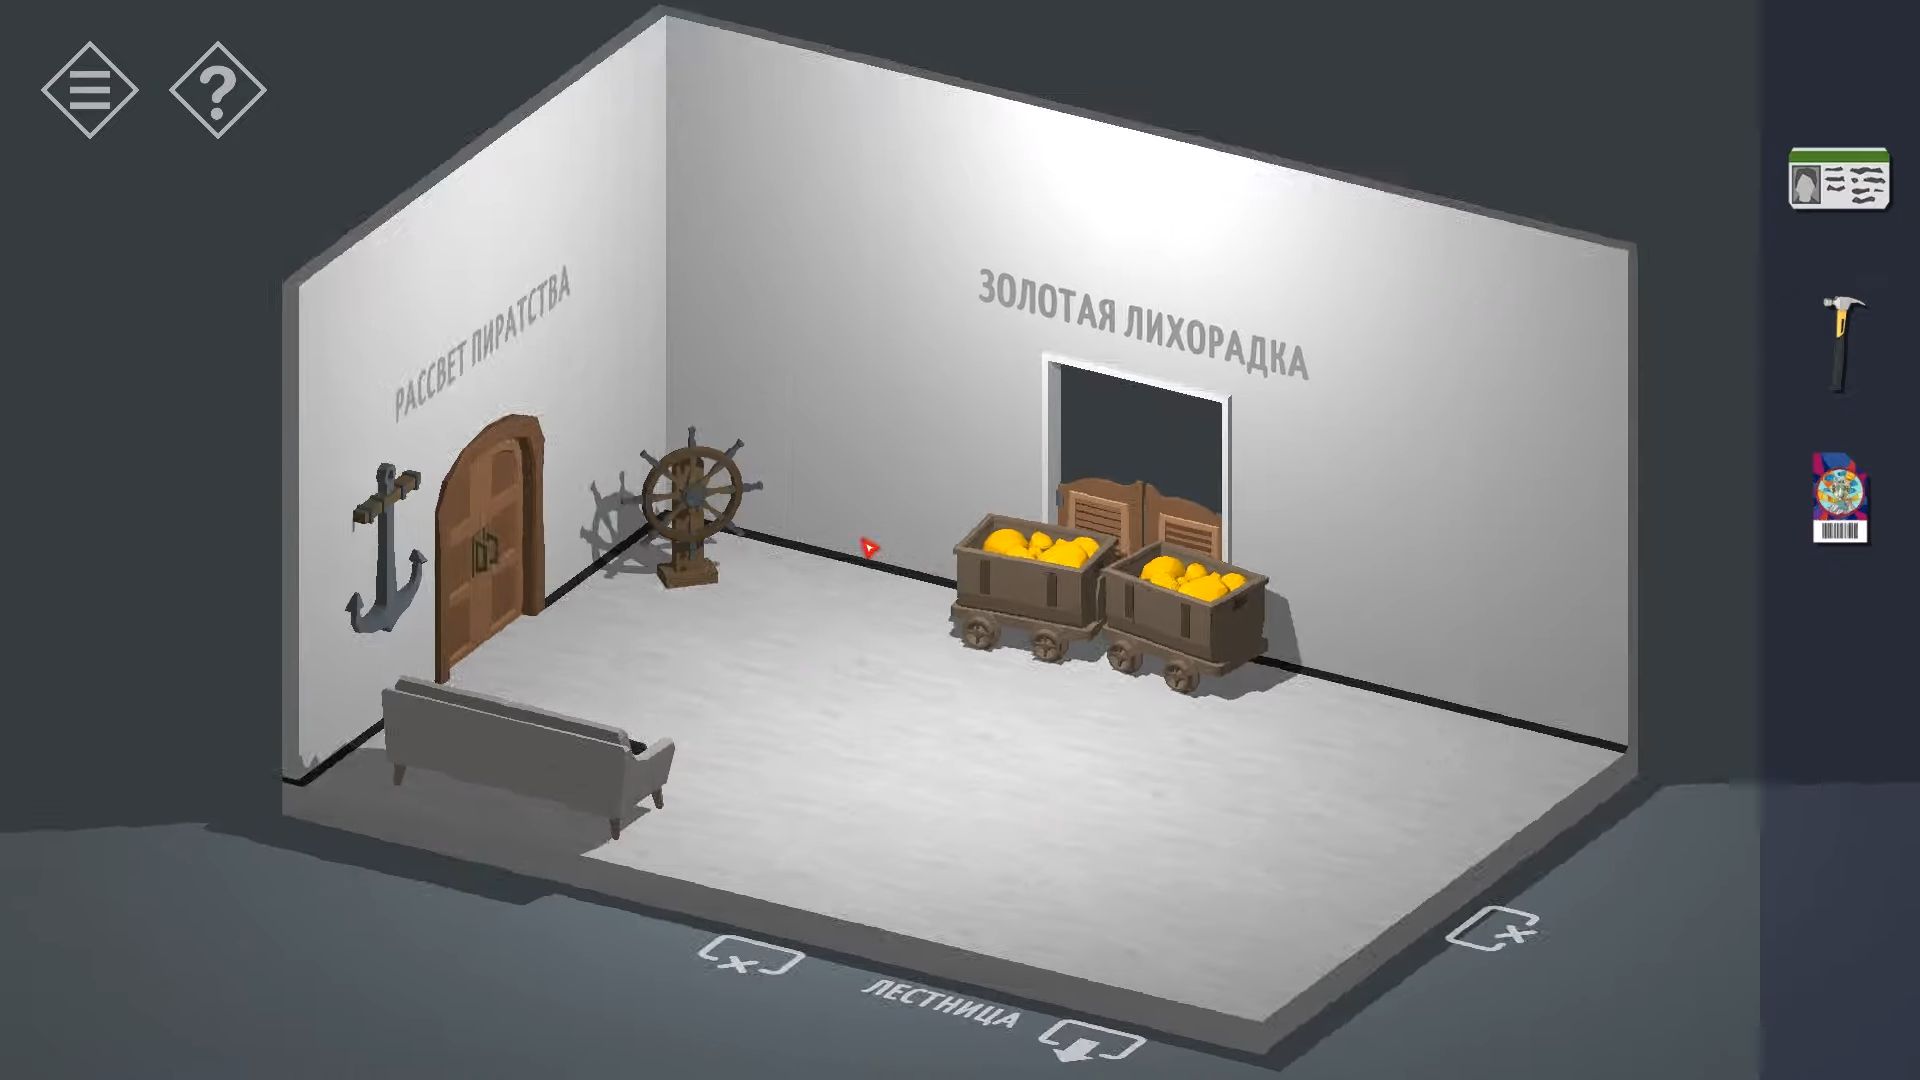
To join the fun in three exhibit rooms, find and scan your ticket in three different games. Start with The Dawn of Piracy. Touch the ship’s wheel in the corner to open the doors. Change your view to see the weapons cases and check out Captain Jack Sparrow’s poster. Rotate the view again to spot-closed double doors with three nooses above them. Tap these to match their positions with the clue above. Once they align, the door will open.
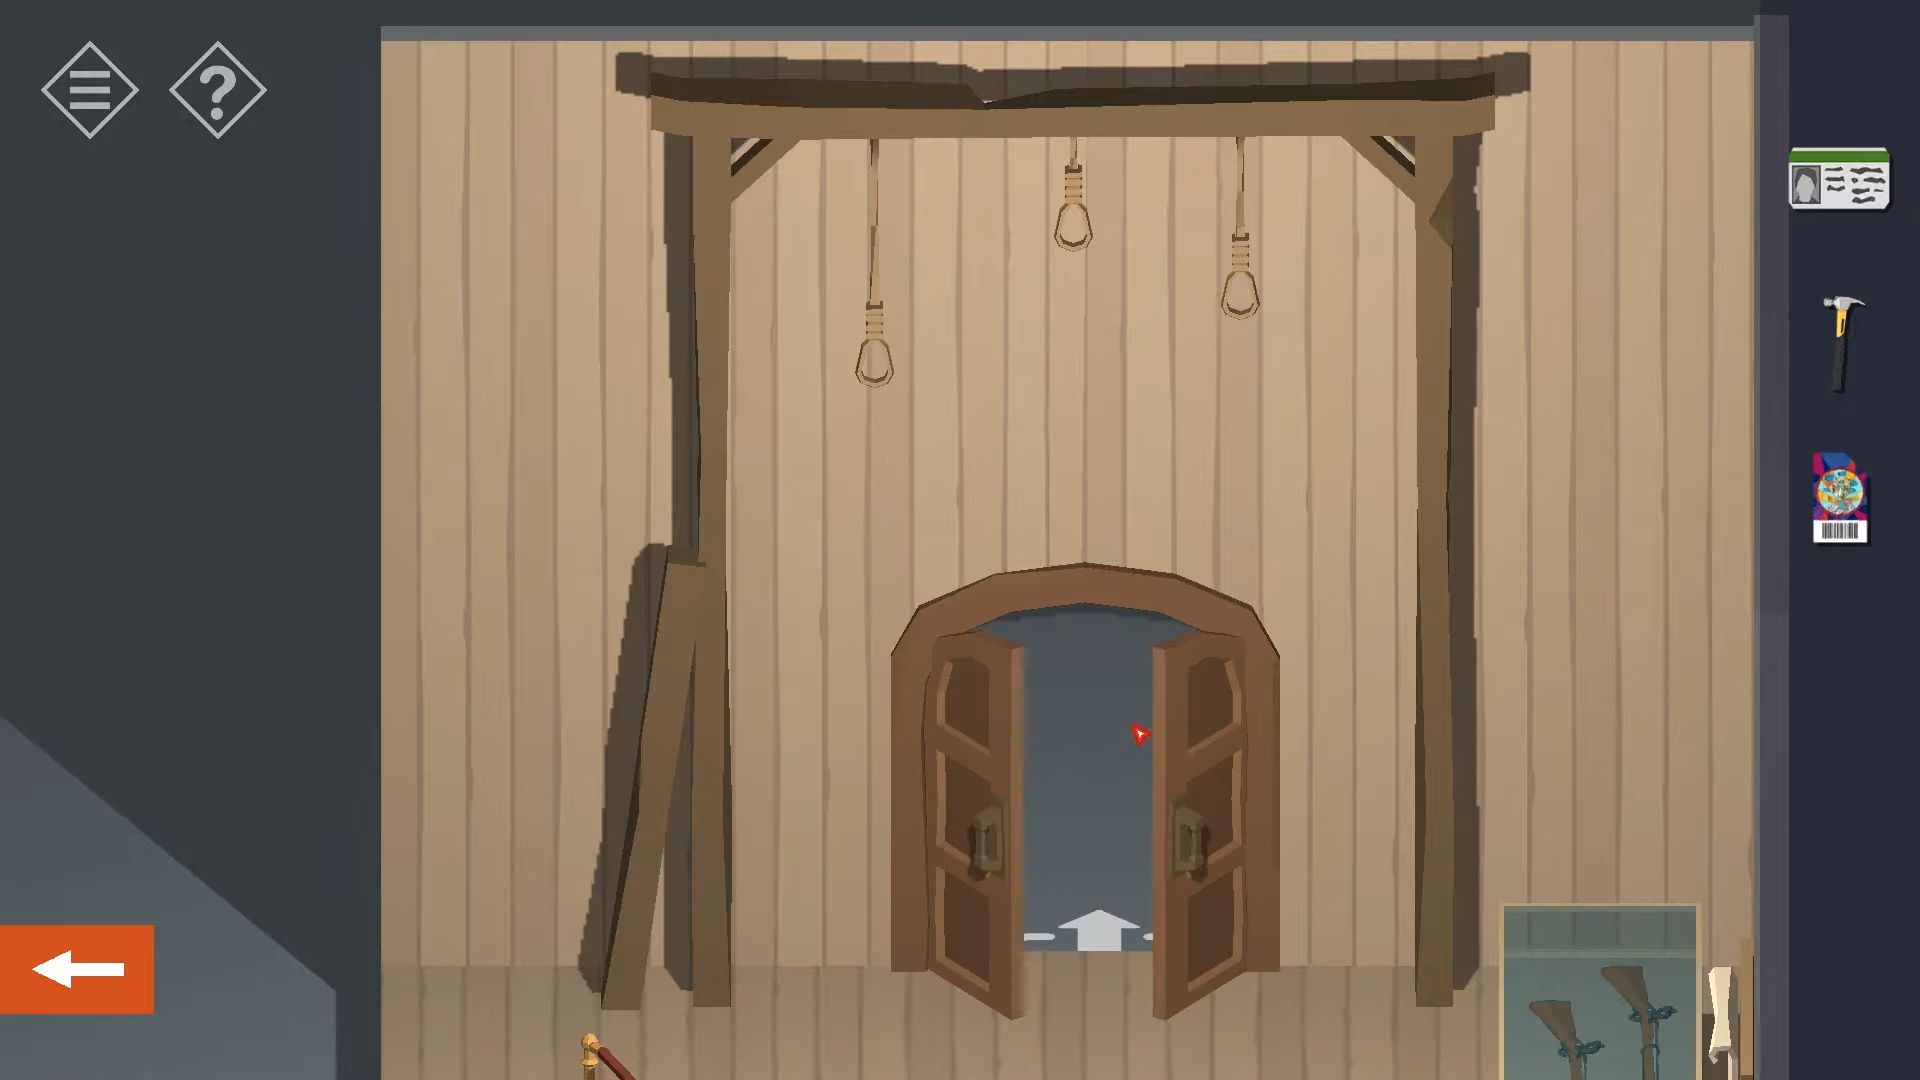
Go into the following room and use your ticket to begin the pirate game. You don’t need to achieve a specific score; just give the game a try.
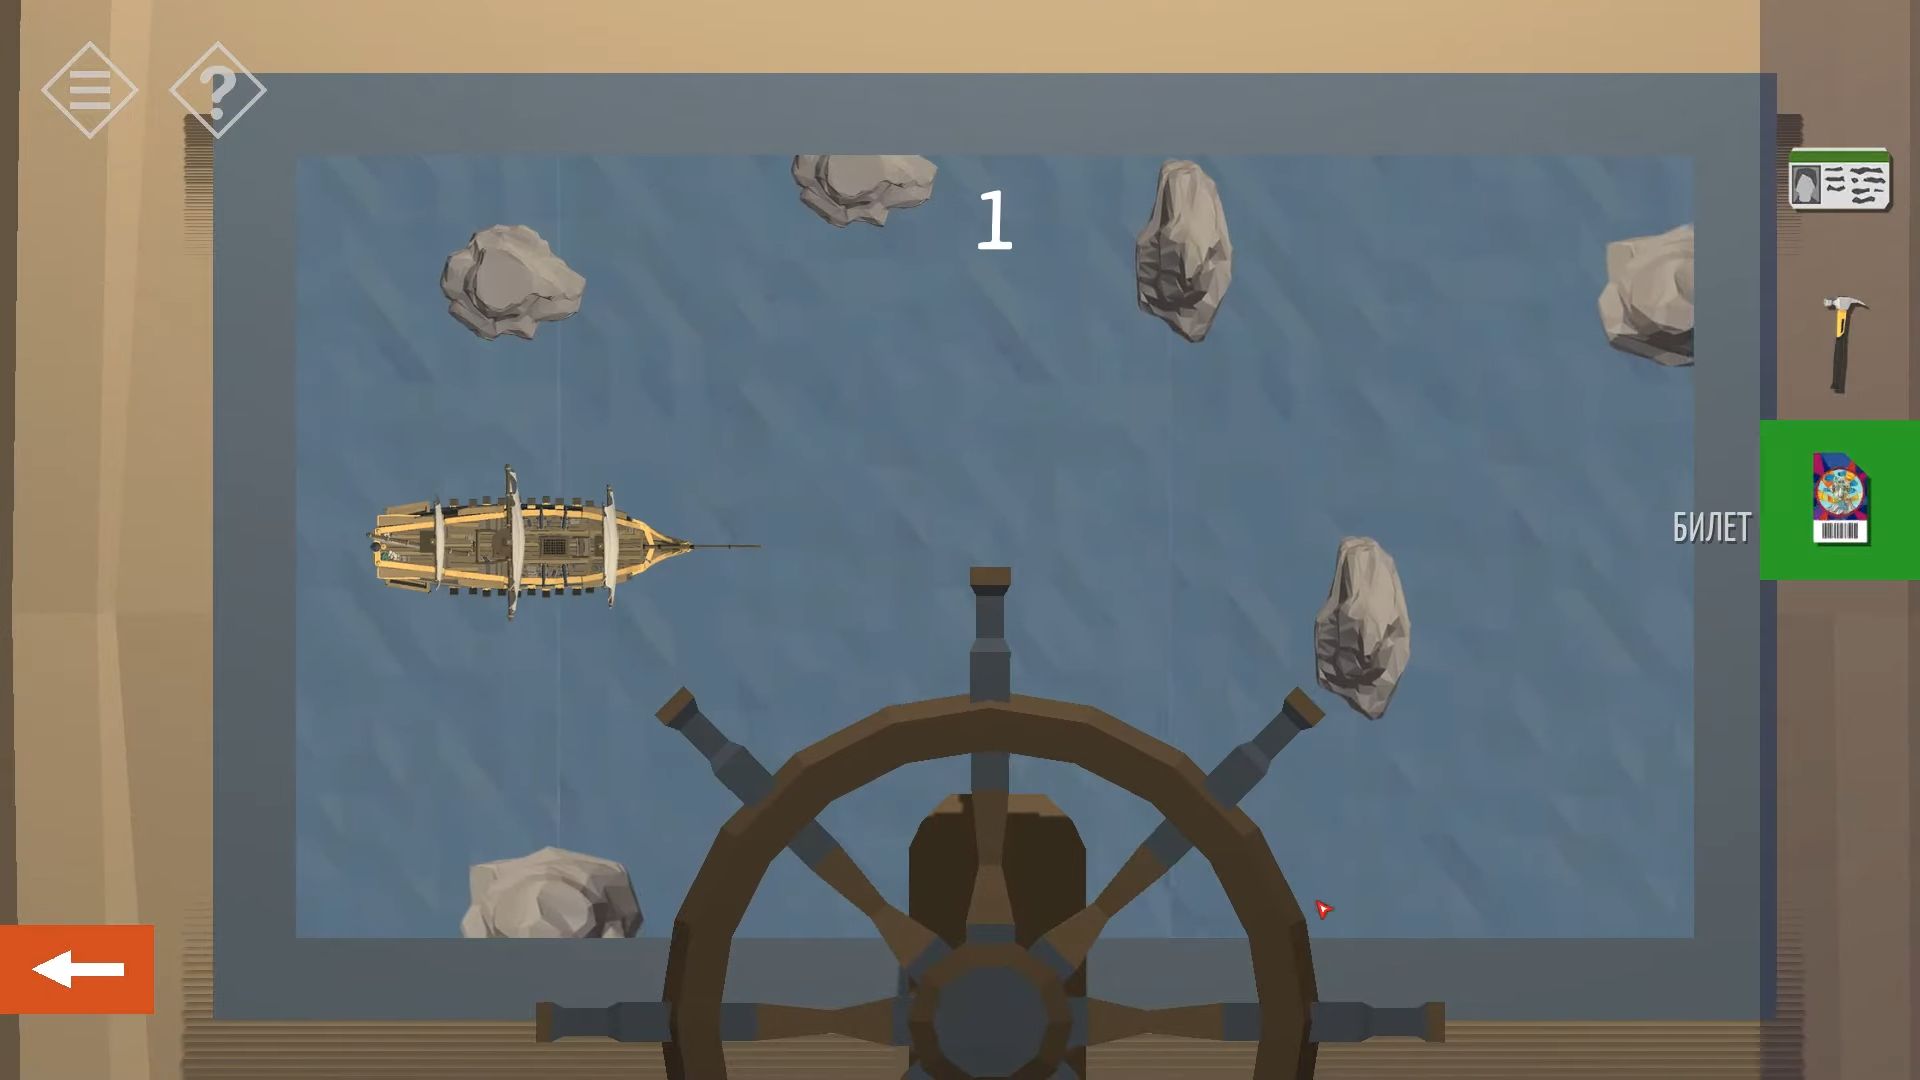
Step into Golden Fever. In one corner, there’s a piano and a table with cards. The cards on the table are 3 Clubs, 7 Diamonds, 4 Hearts, and 2 Spades.
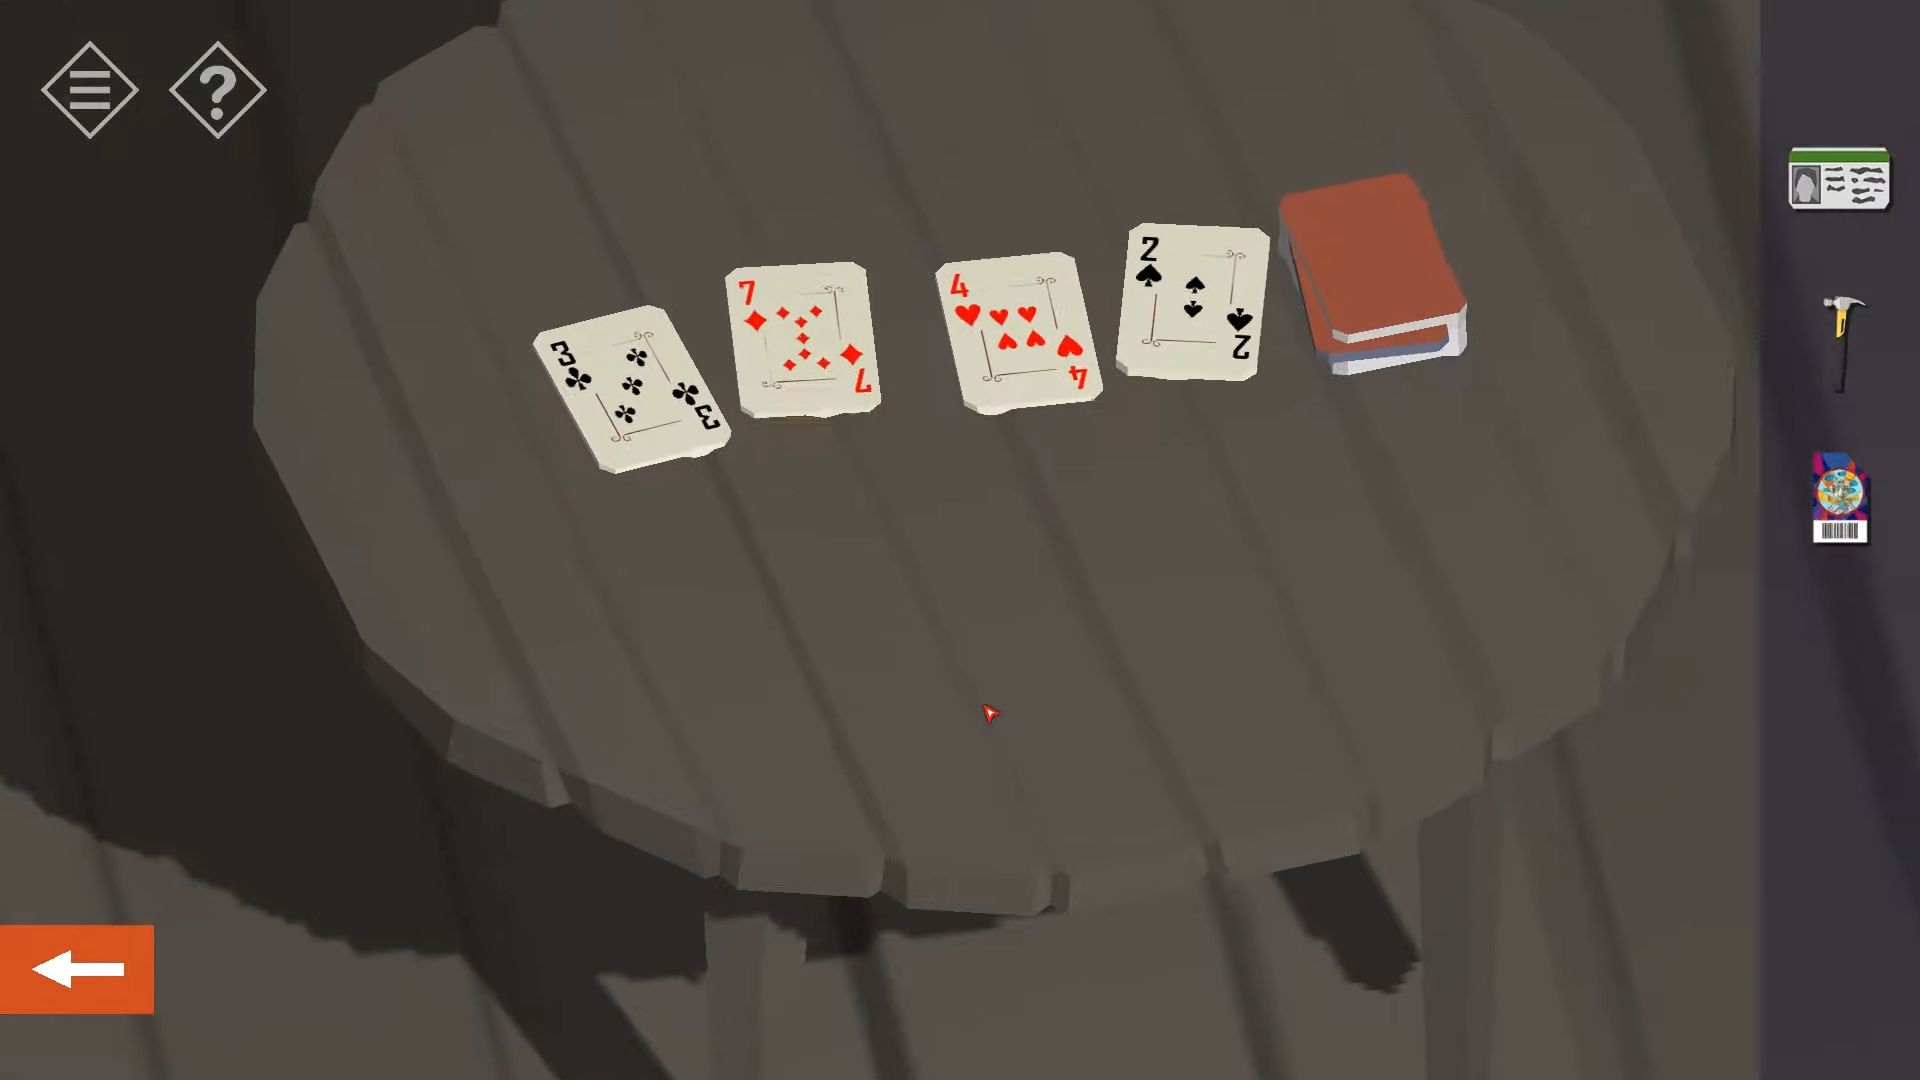
Explore the room for hints; there’s a heart on the piano, a club on the back of the rail track fence, and a spade on the back of the safe. Open the safe using the cards and the order suggested by these hints to get the code (4723). Grab a key and use it on the door at the back to find the Duel game. Scan your ticket and give the game a try. If it seems too hard, check the settings icon on the game screen to see if the difficulty is set to ‘insane’.
Move on to World War 2. Open all four window shutters by tapping on them. This action reveals a small game room. Enter and scan your ticket. Unfortunately, this game is ‘temporarily unavailable.’
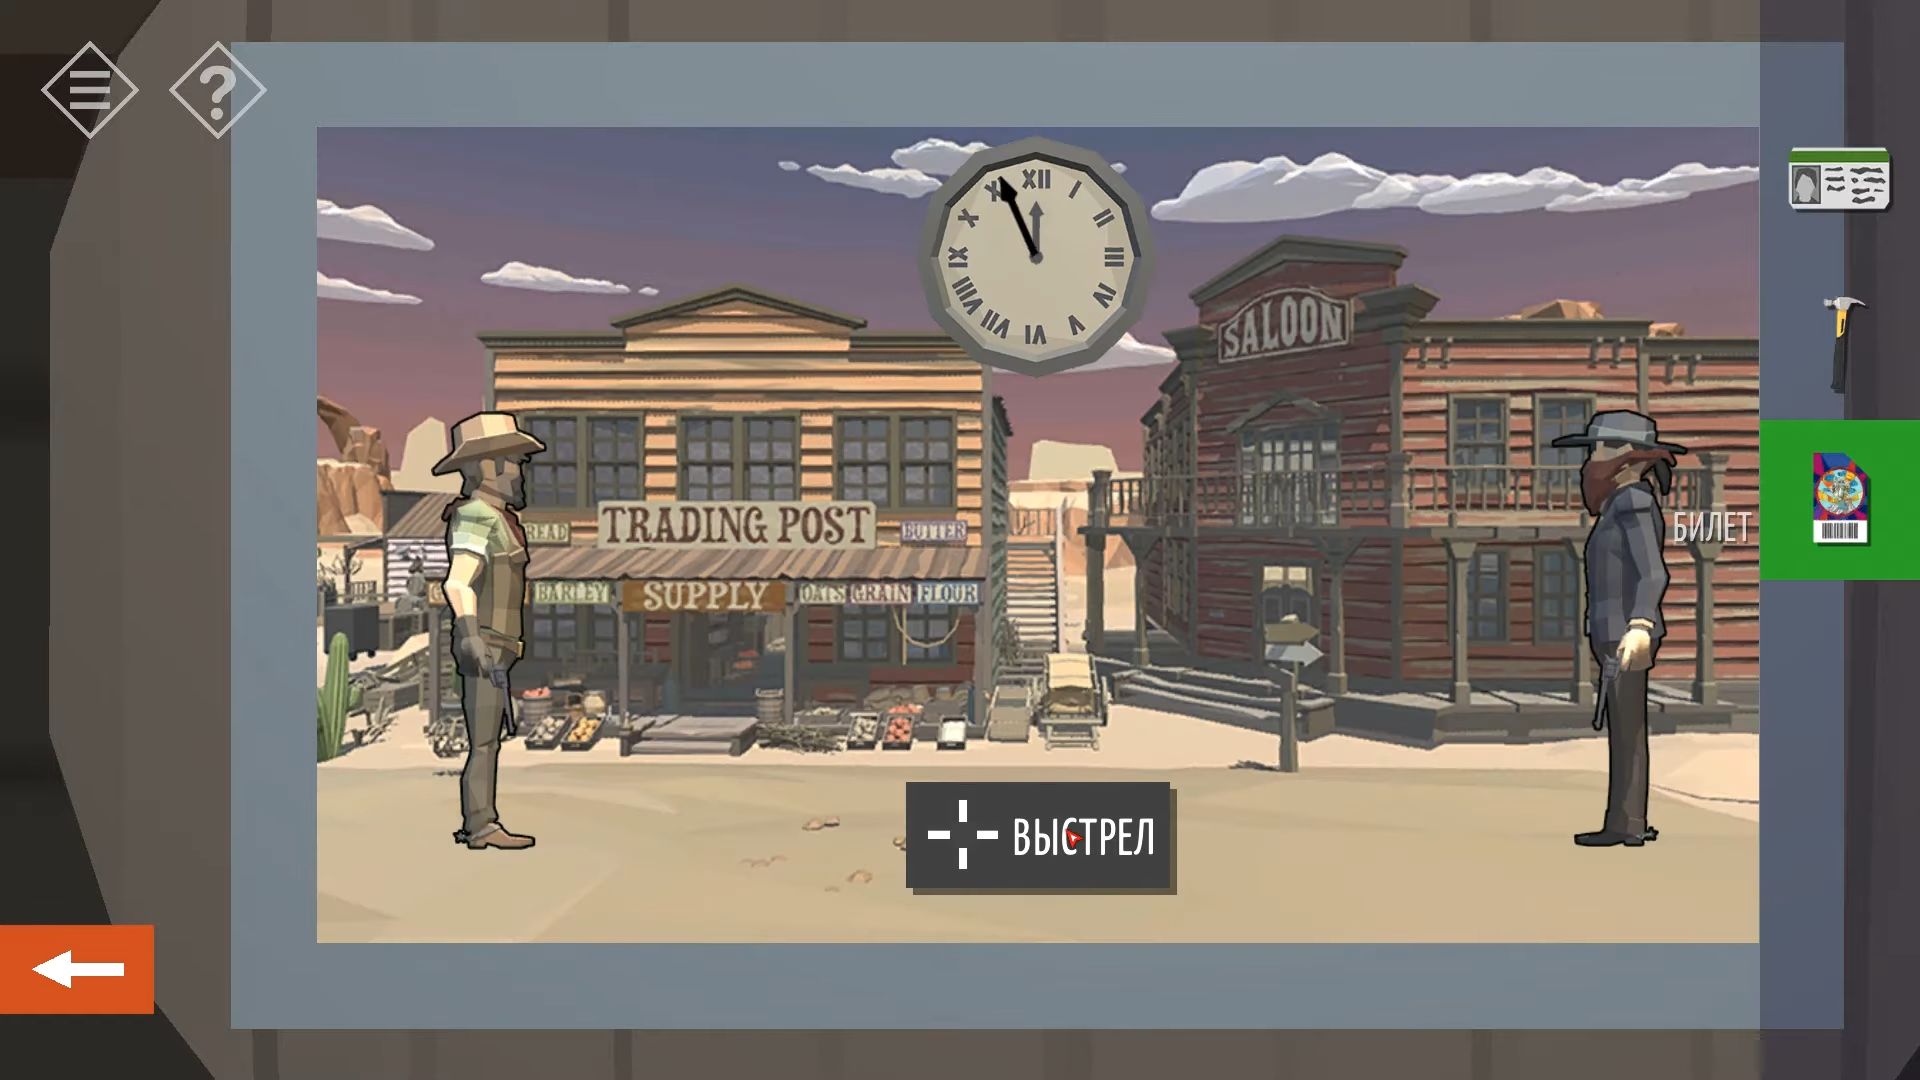
After scanning your ticket for all three games, go into the last exhibit room called Redcliff Treasure.
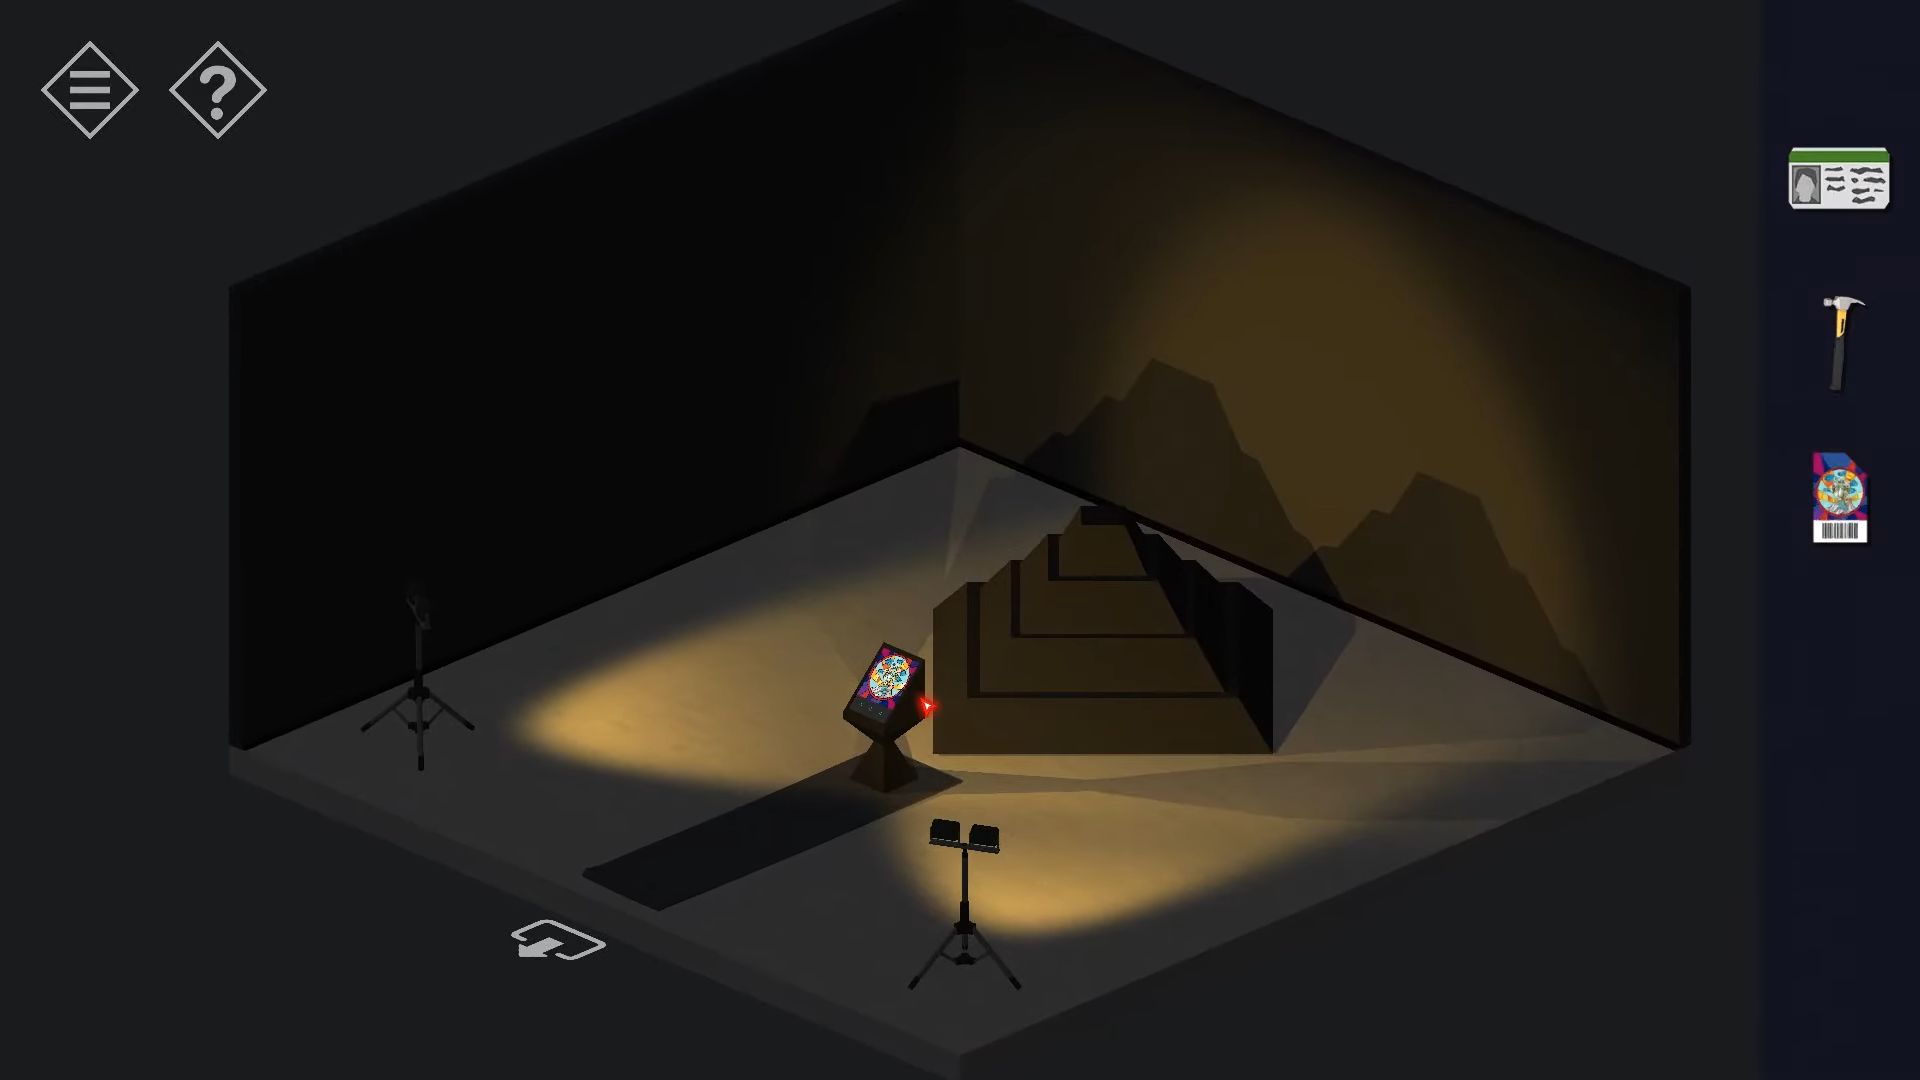
Touch the screen in the darkroom to reveal the symbol from the church in a previous chapter, and showcase it throughout the museum. If you’ve finished all the rooms mentioned earlier, you’ll notice three green shapes at the bottom.
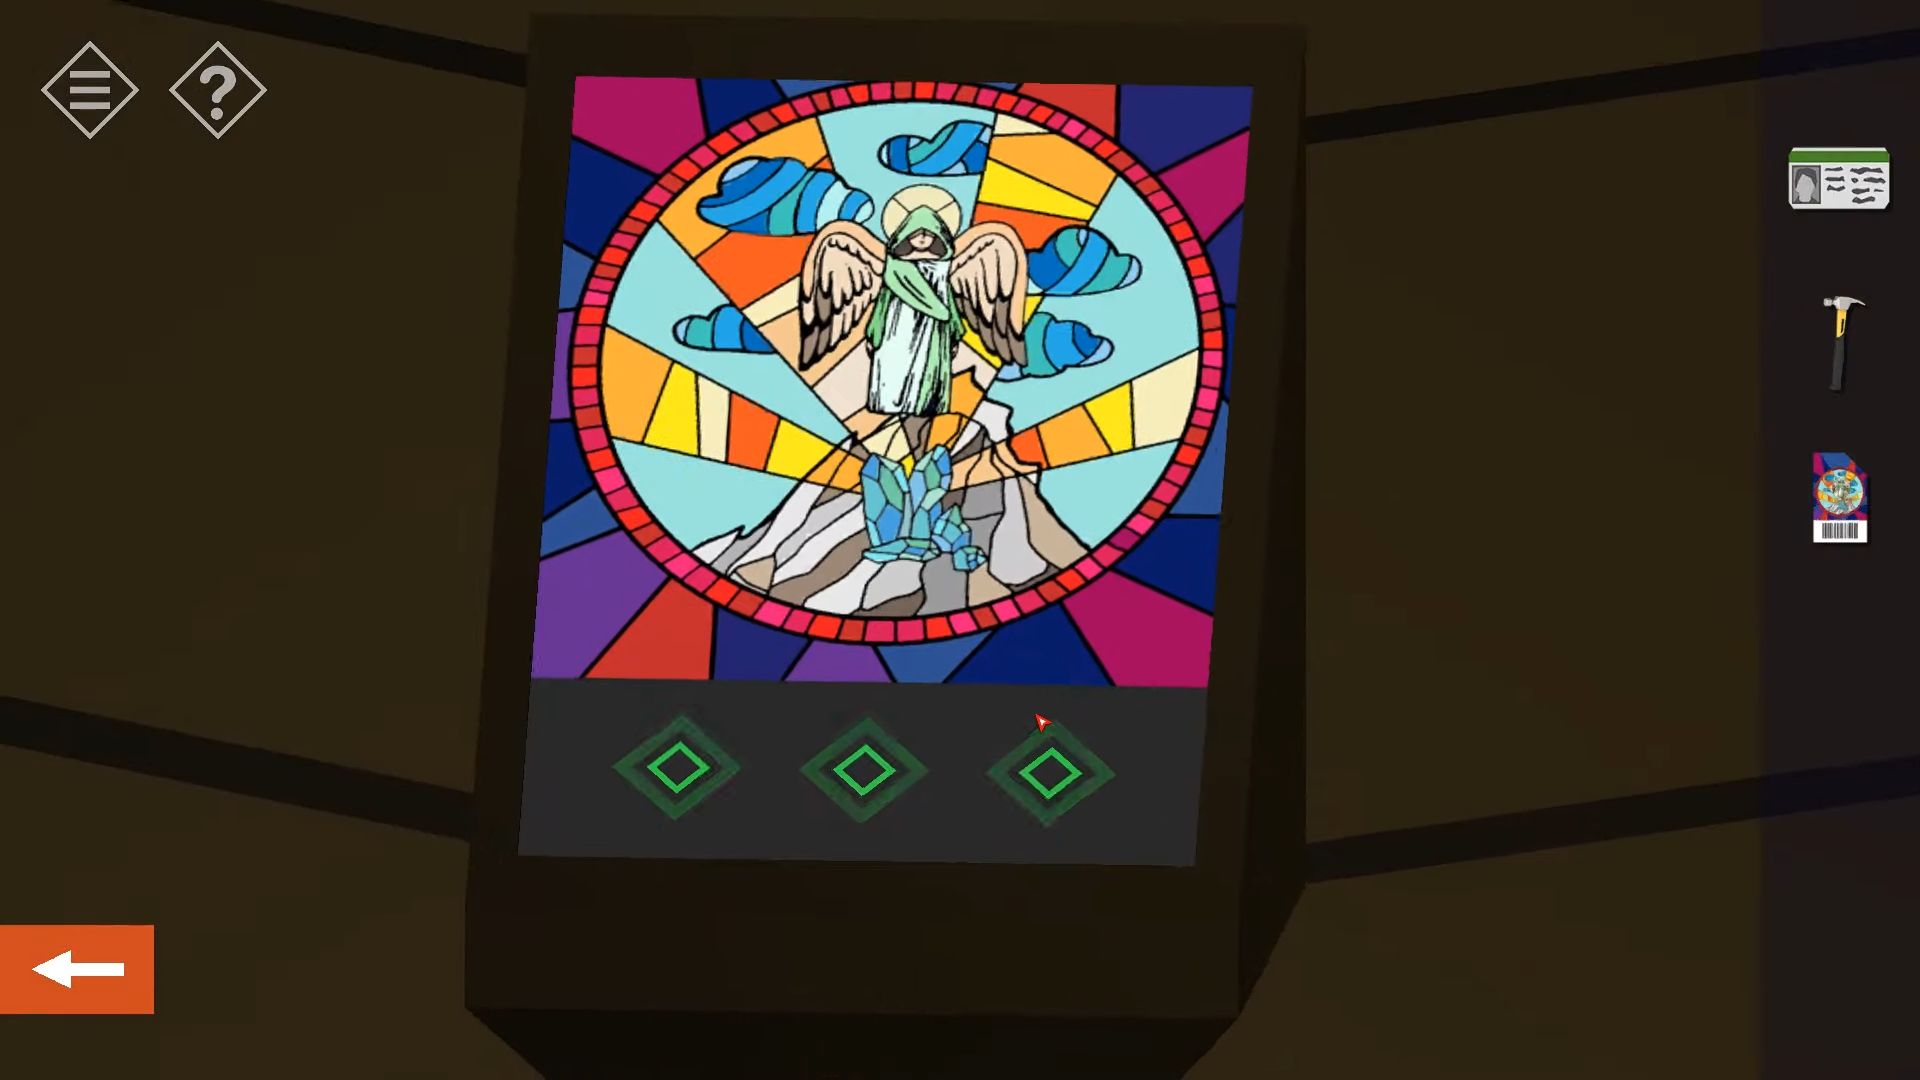
Press the screen to make a stand in the middle of the room active. On top of it, there’s an object inside a glass case.
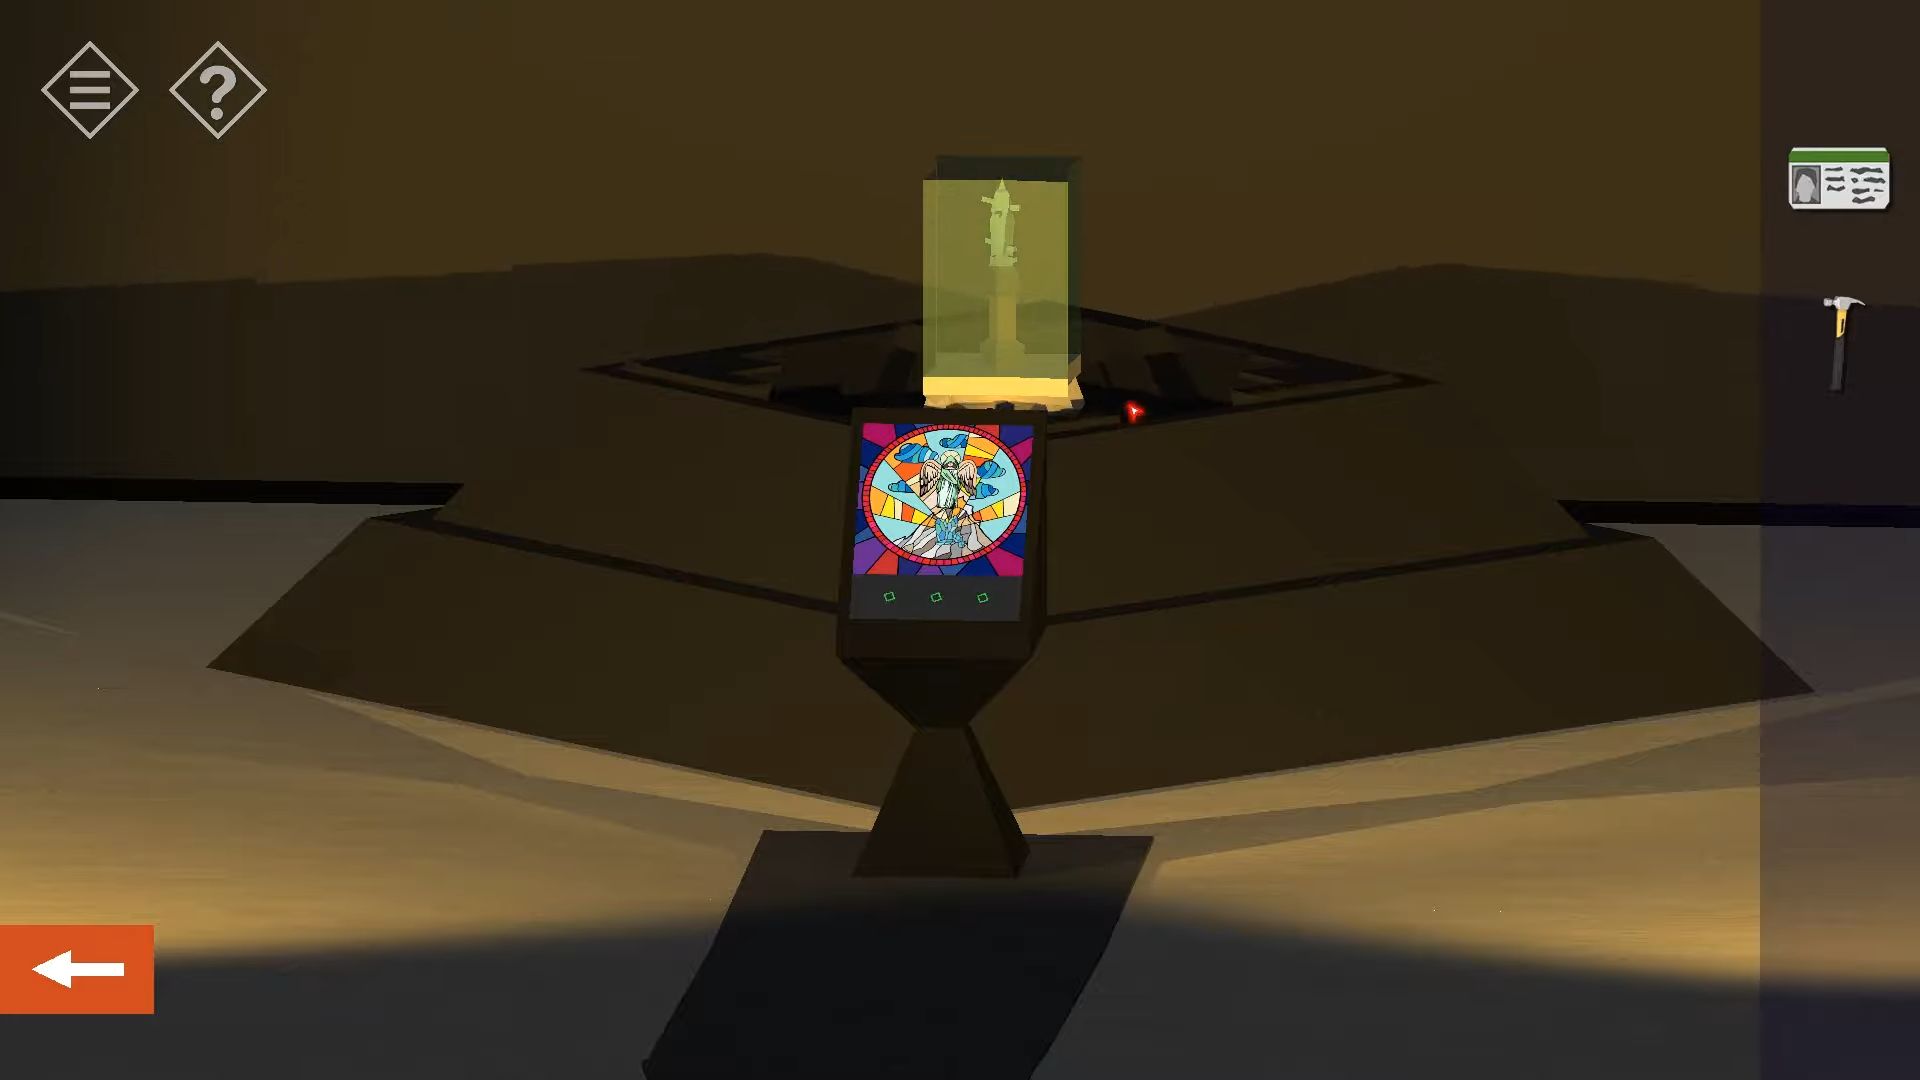
Take the hammer and smash the case to open it. Gently tap to gather and inspect the item inside. You’ll find a note at the bottom, and it’s a duplicate created using a 3D printer.
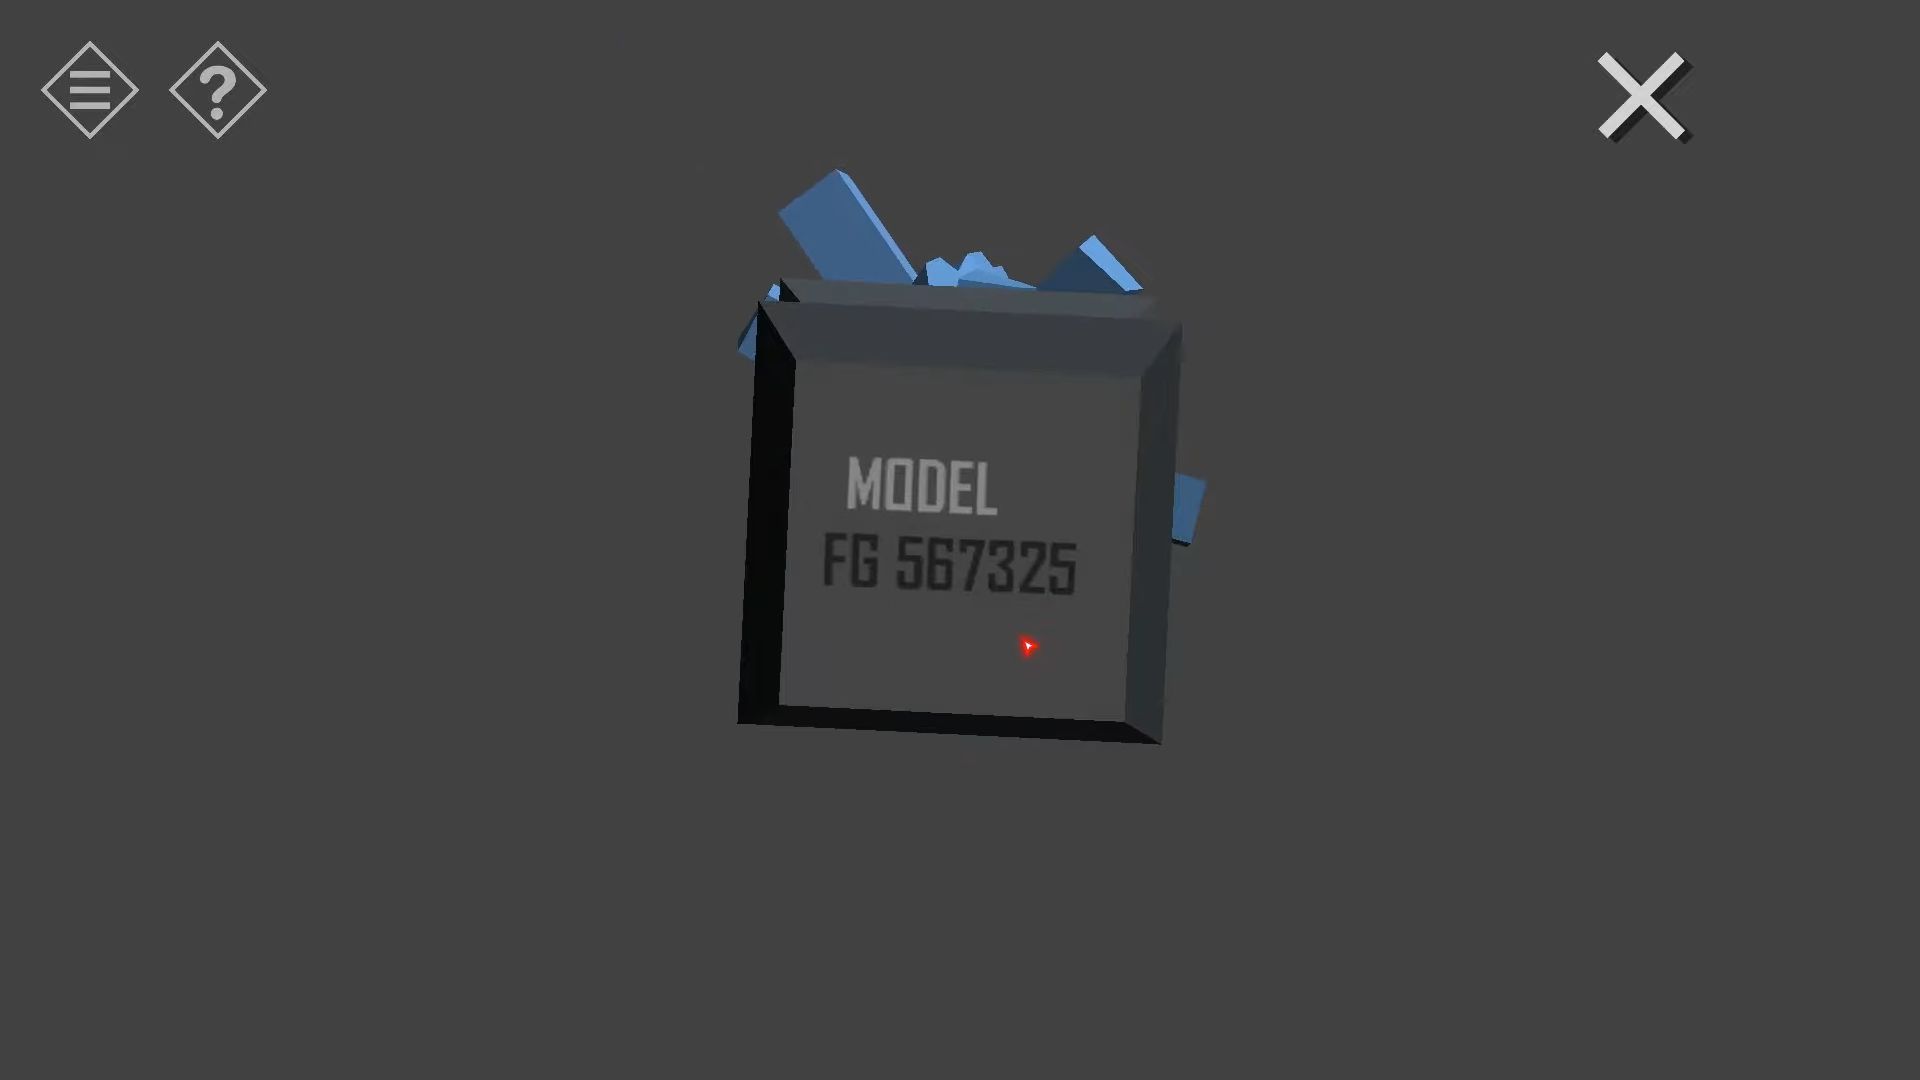
Let’s head back downstairs to the offices with the 3D printer. Check out the printer and type in the code from the item you found earlier: FG 567325. This will provide you with some details. The object was created by David, with the ID 115578.
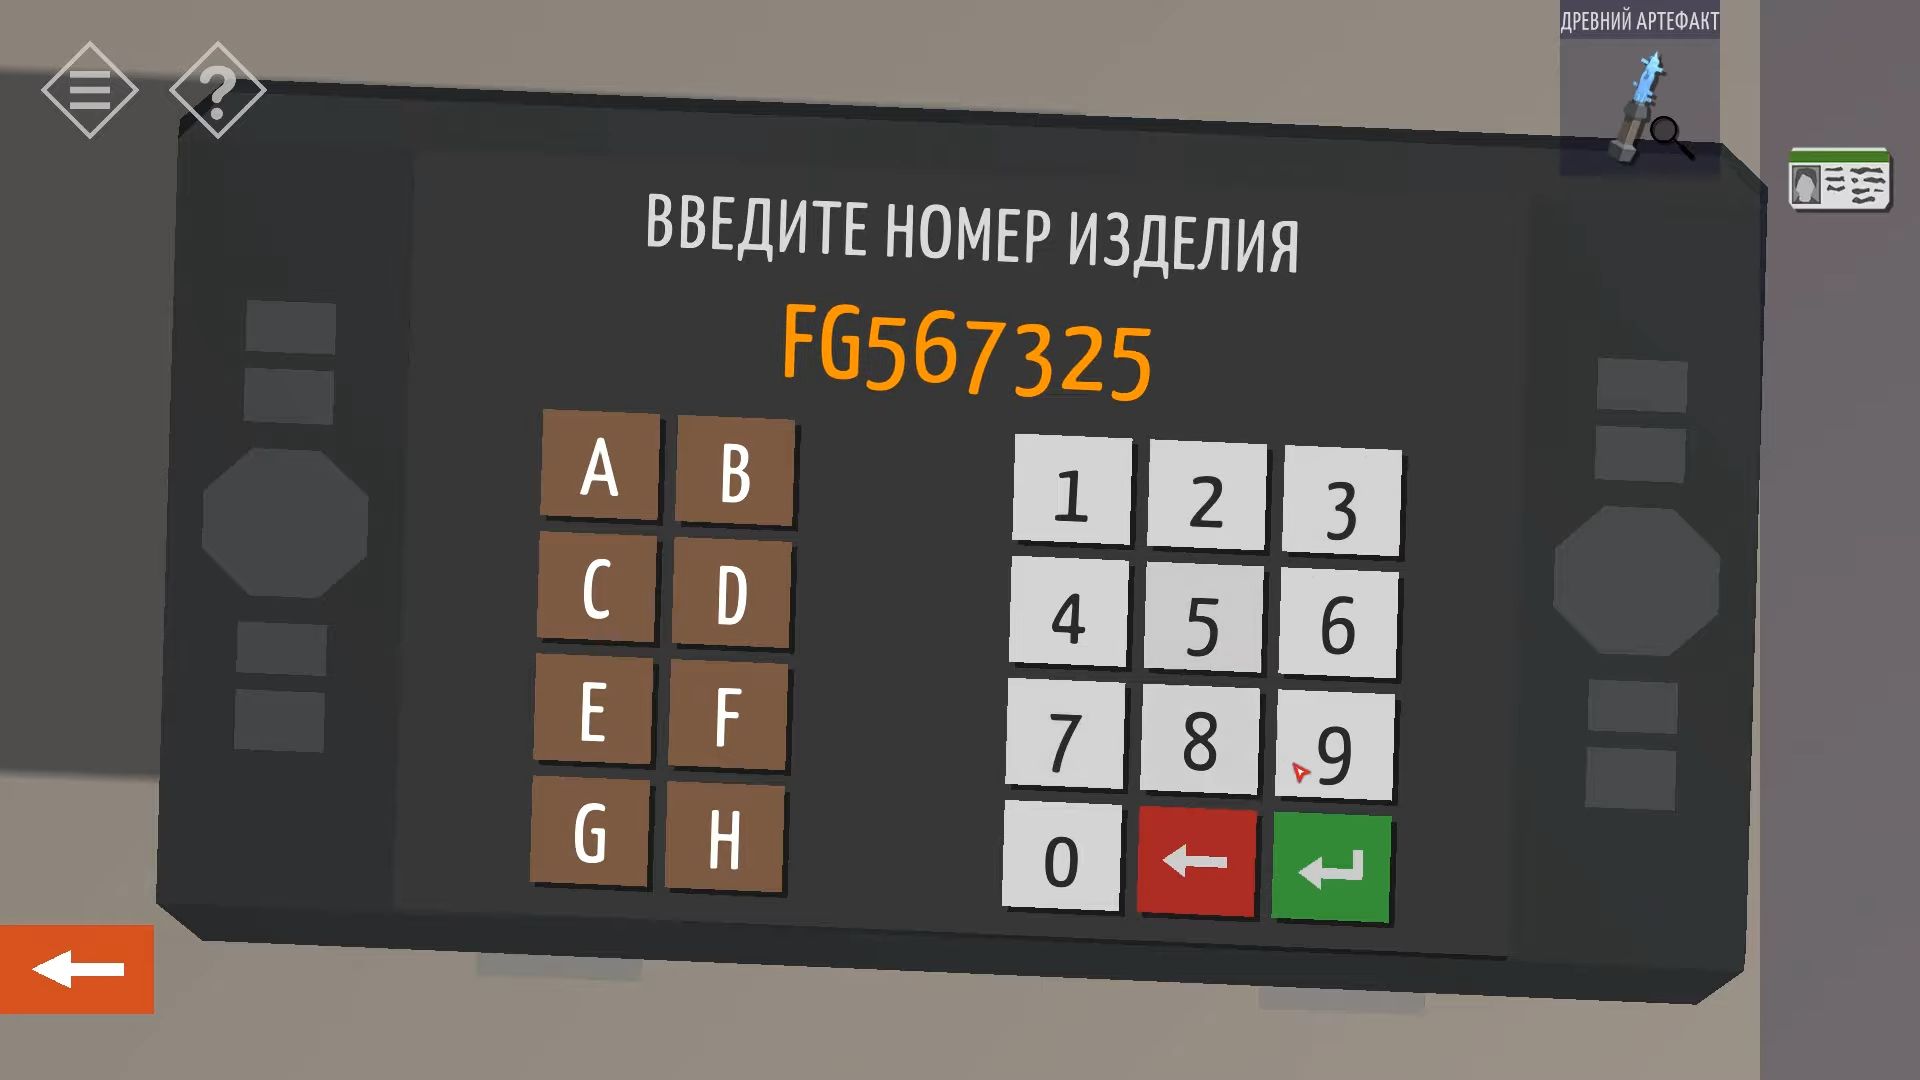
Go to a different office and look for David’s desk with the blue chair. Use the code mentioned earlier to unlock the computer. Read the emails to get details about the actual artifact and a password for the container. David, the car, is here. Put the artifact back and give it to the GRID CELL delivery service. The password is 911556.
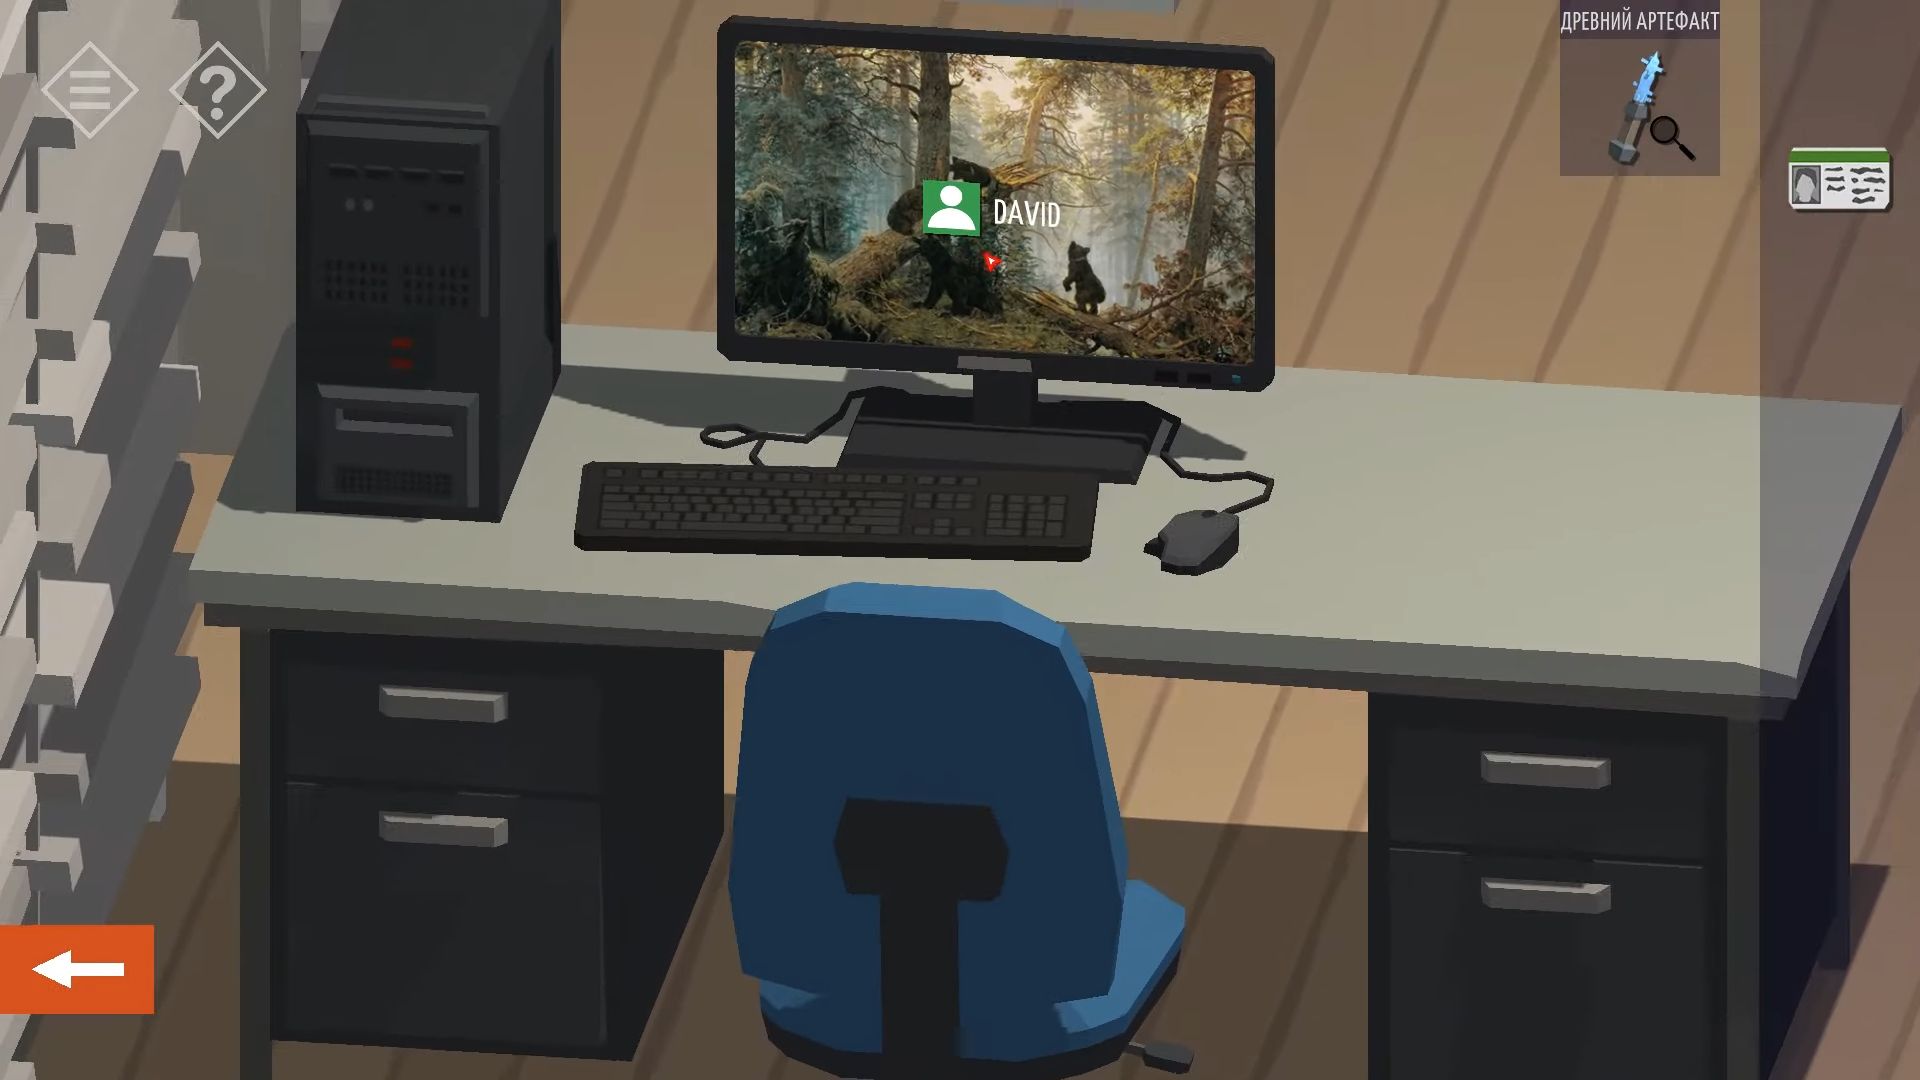
While you’re in the offices with glass windows, pull down the blinds to close them in both of the two offices. After that, go back to the shared area and check the glass windows of the offices to find a secret code on the blinds. Tap on the last closed door at the back of the shared area, look at the keypad, and use the code from the blinds to open the door: Square, Circle, Triangle, Dot, Inverted Triangle.
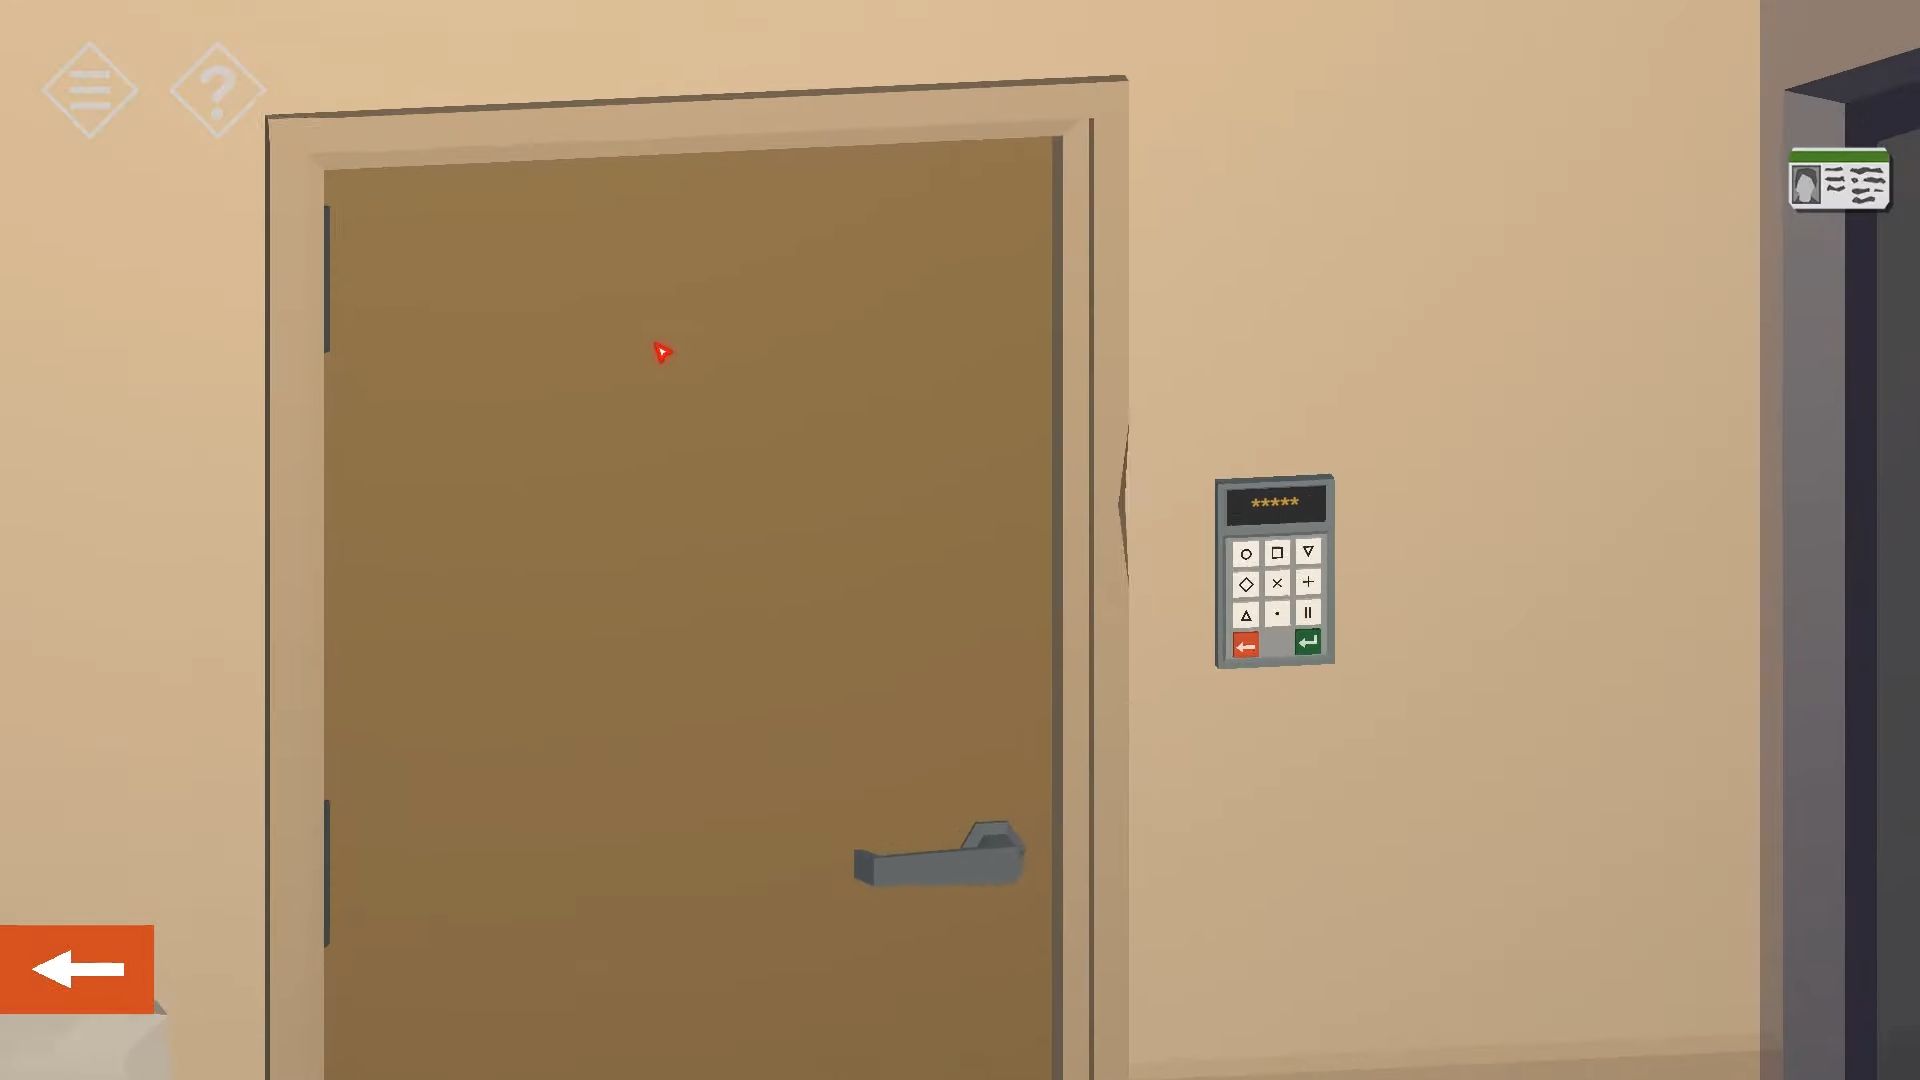
This leads you to a dim loading space with a truck parked in it.
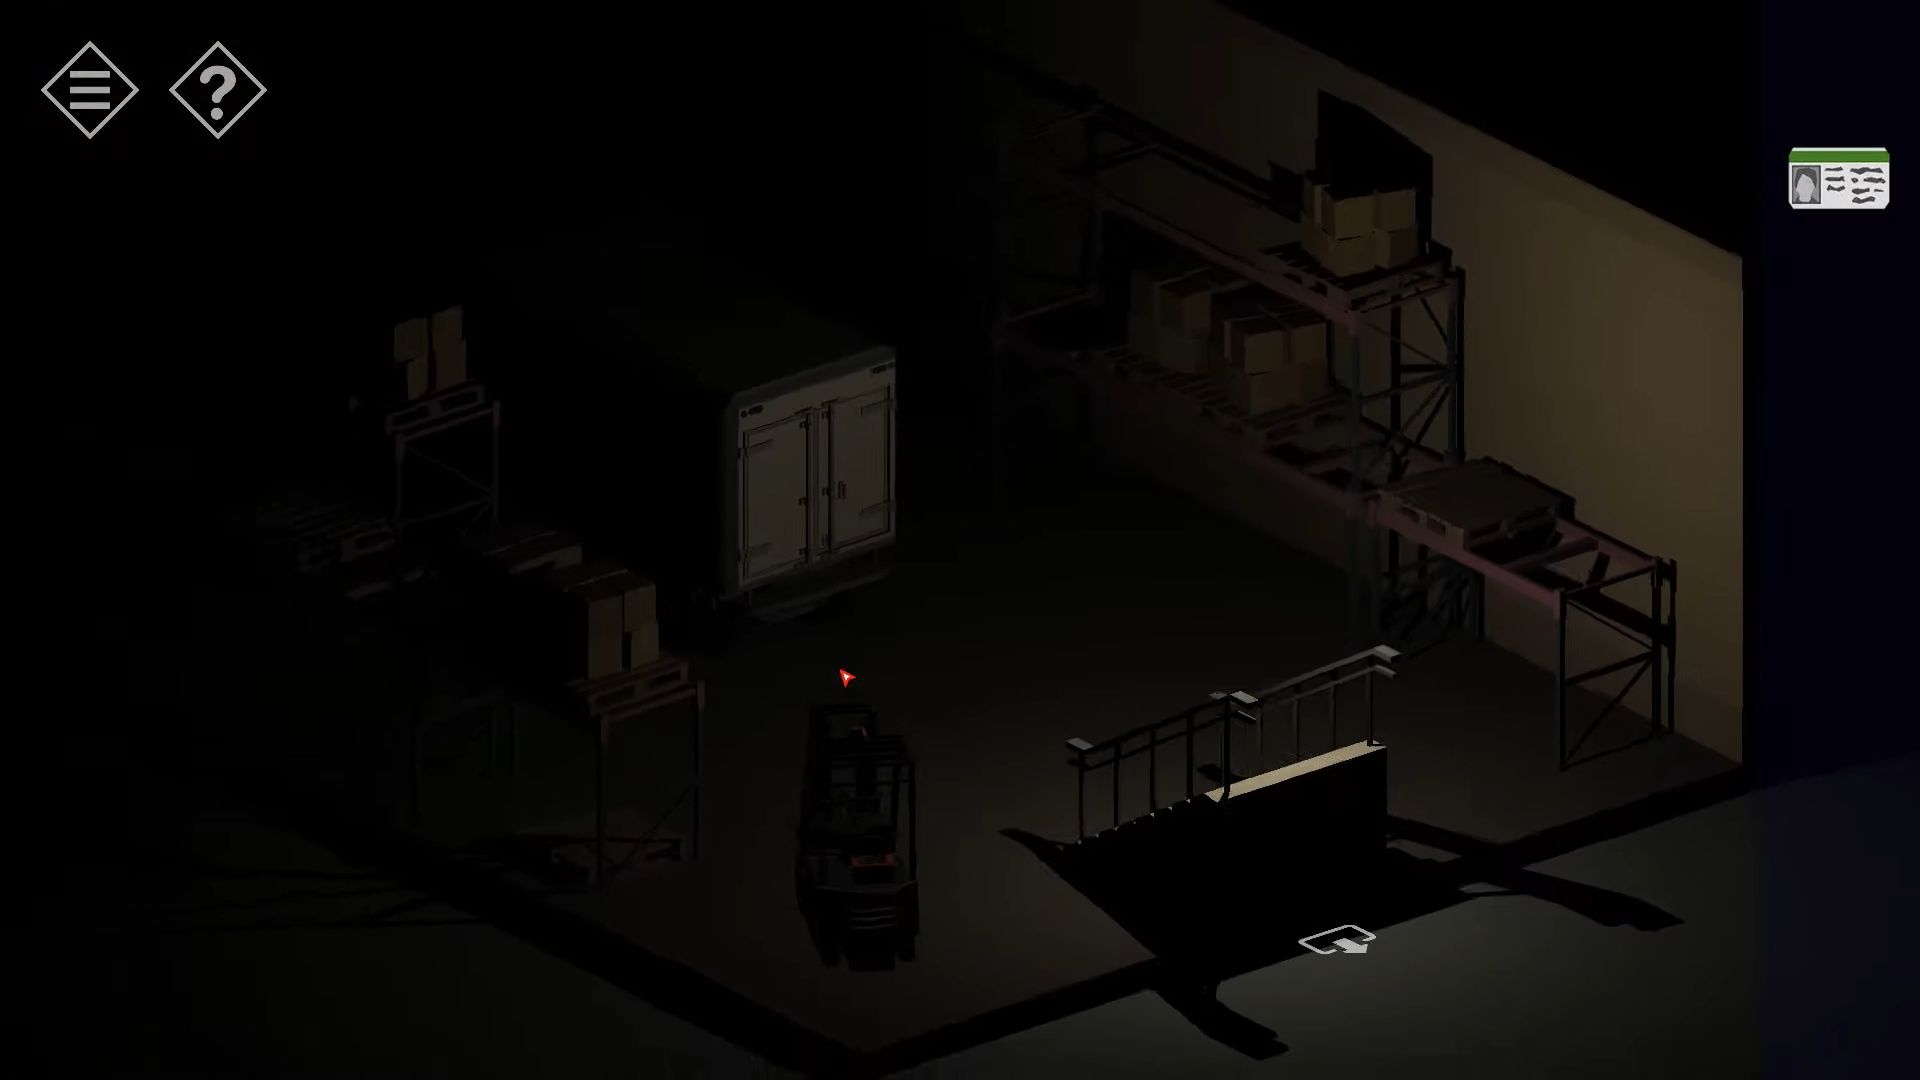
Touch the rear of the truck, and use the green access card to unlock it. There’s a big container inside. Tap on it to see the keypad and use the passcode mentioned earlier to open it. Now that you have the artifact, you can go back to the car and finish this part of the story.
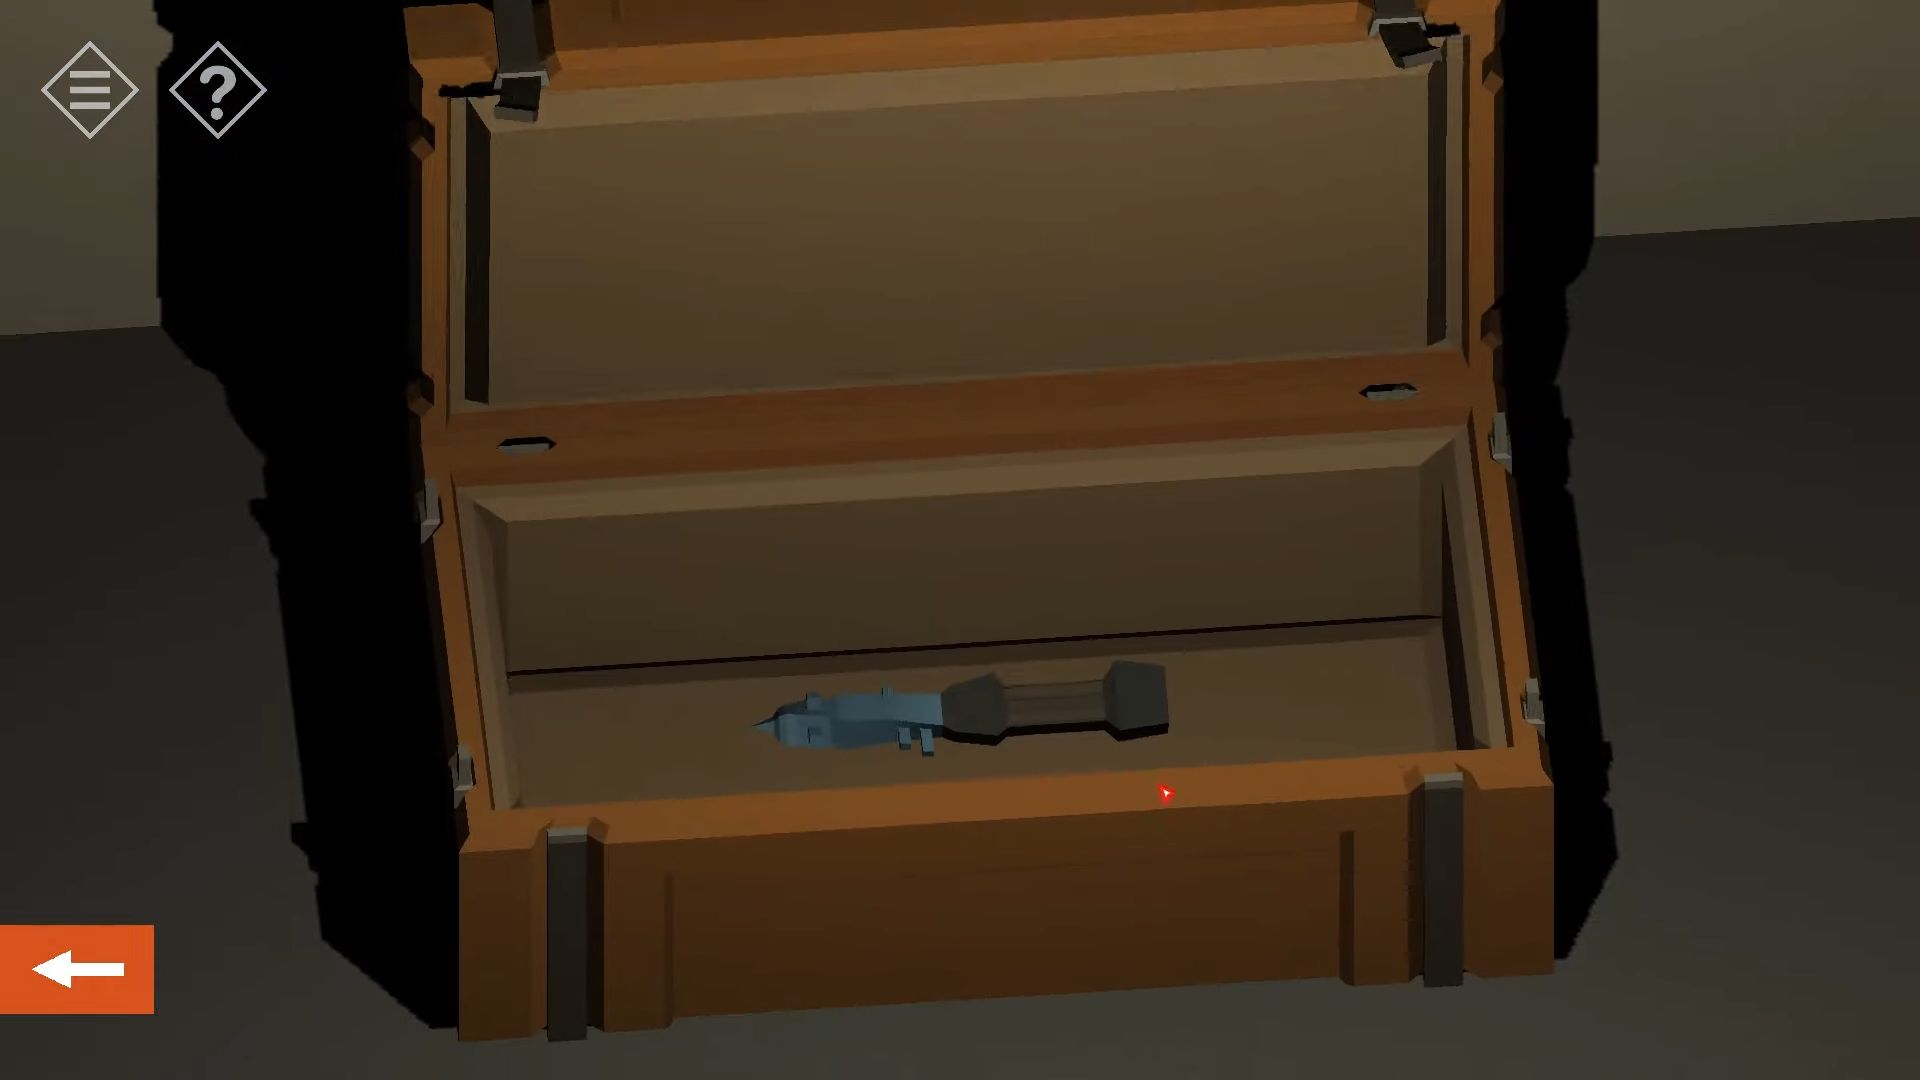
Chapter 13 – Part 1
Here’s the complete guide for Chapter 13 – Part 1 in Tiny Room Stories: Town Mystery.
House on the Beach
The crystals point to another place, right in the middle of the bay. As you look for diving gear and a boat, you discover a solitary house on the shore.
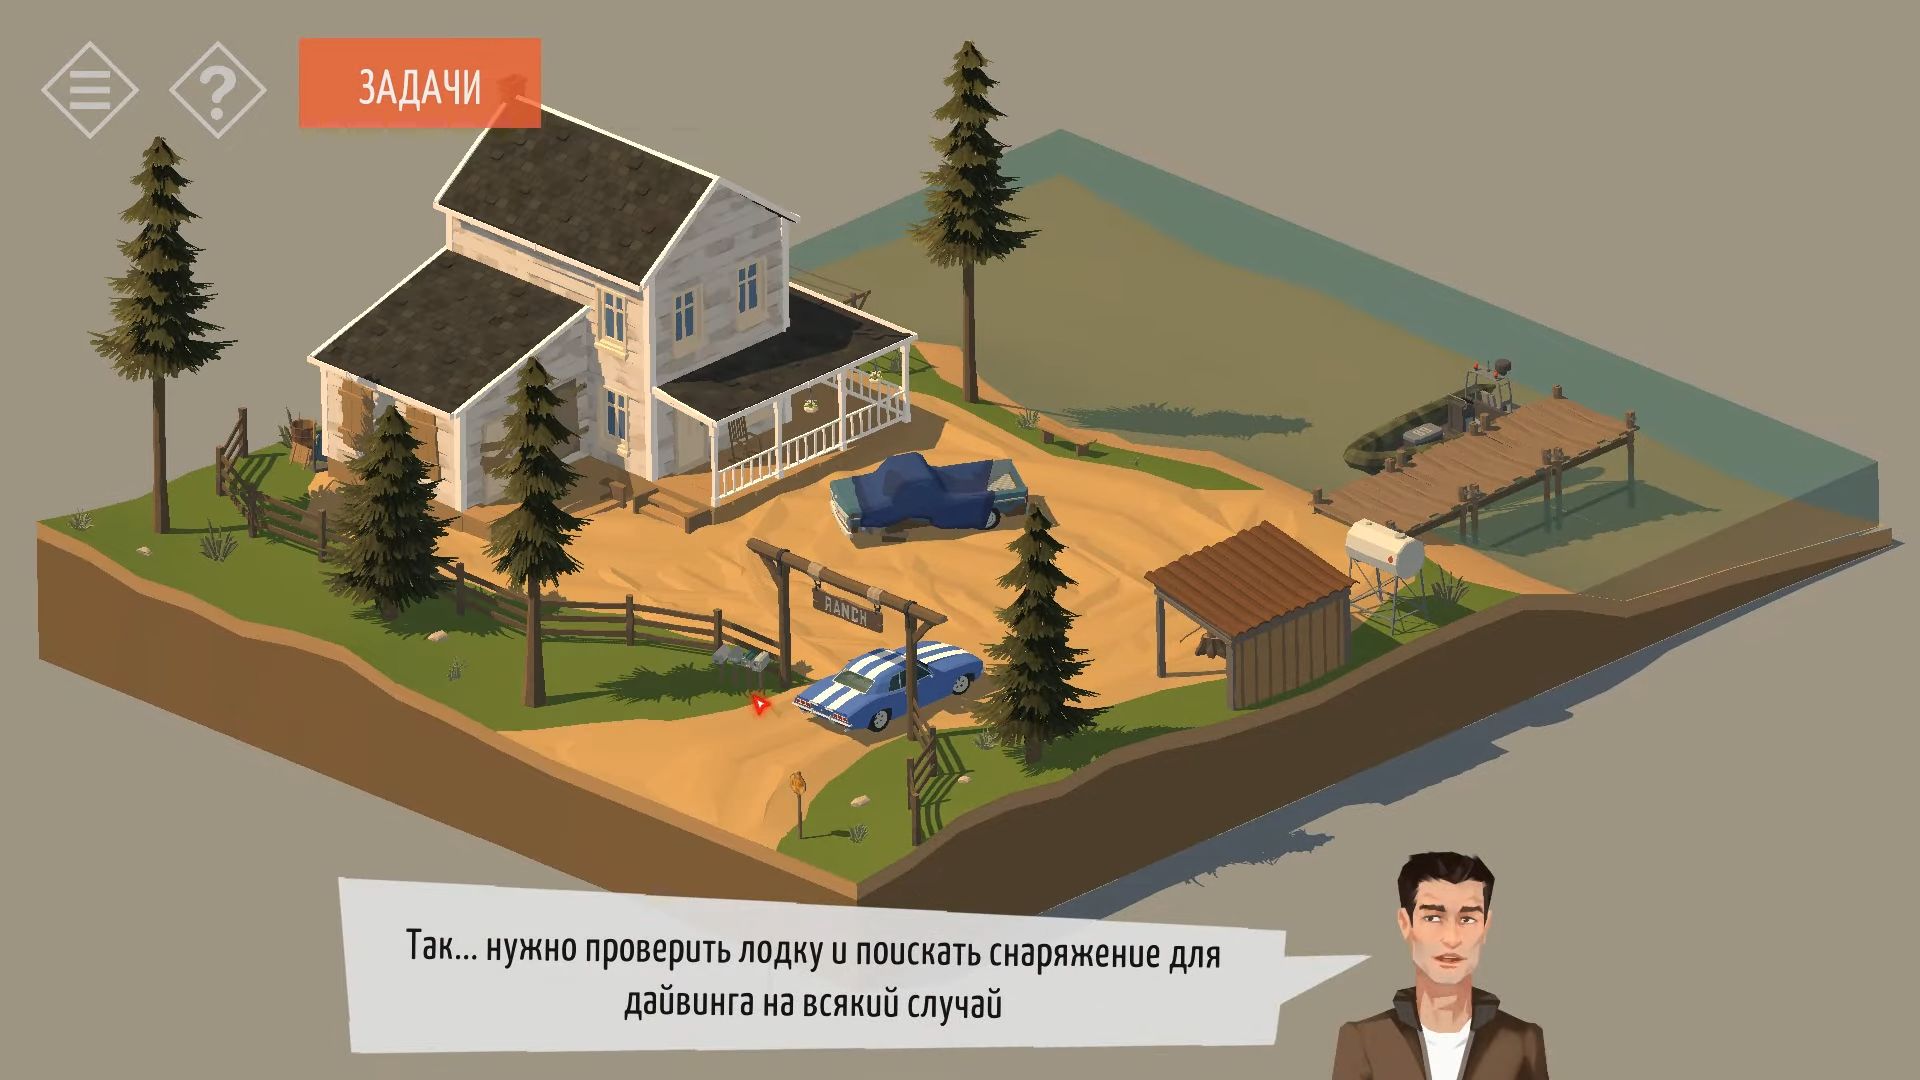
In this chapter, there’s a list of things for you to do while you check out different places. You have to find diving gear and a boat. You can open and close the list whenever you want. On the waterfront, there’s a boat. If you tap on it, you’ll find out that the boat is all fine, but it doesn’t have keys and a motor. Your list will be changed to include these new tasks and the boat has the letters B9 on it.
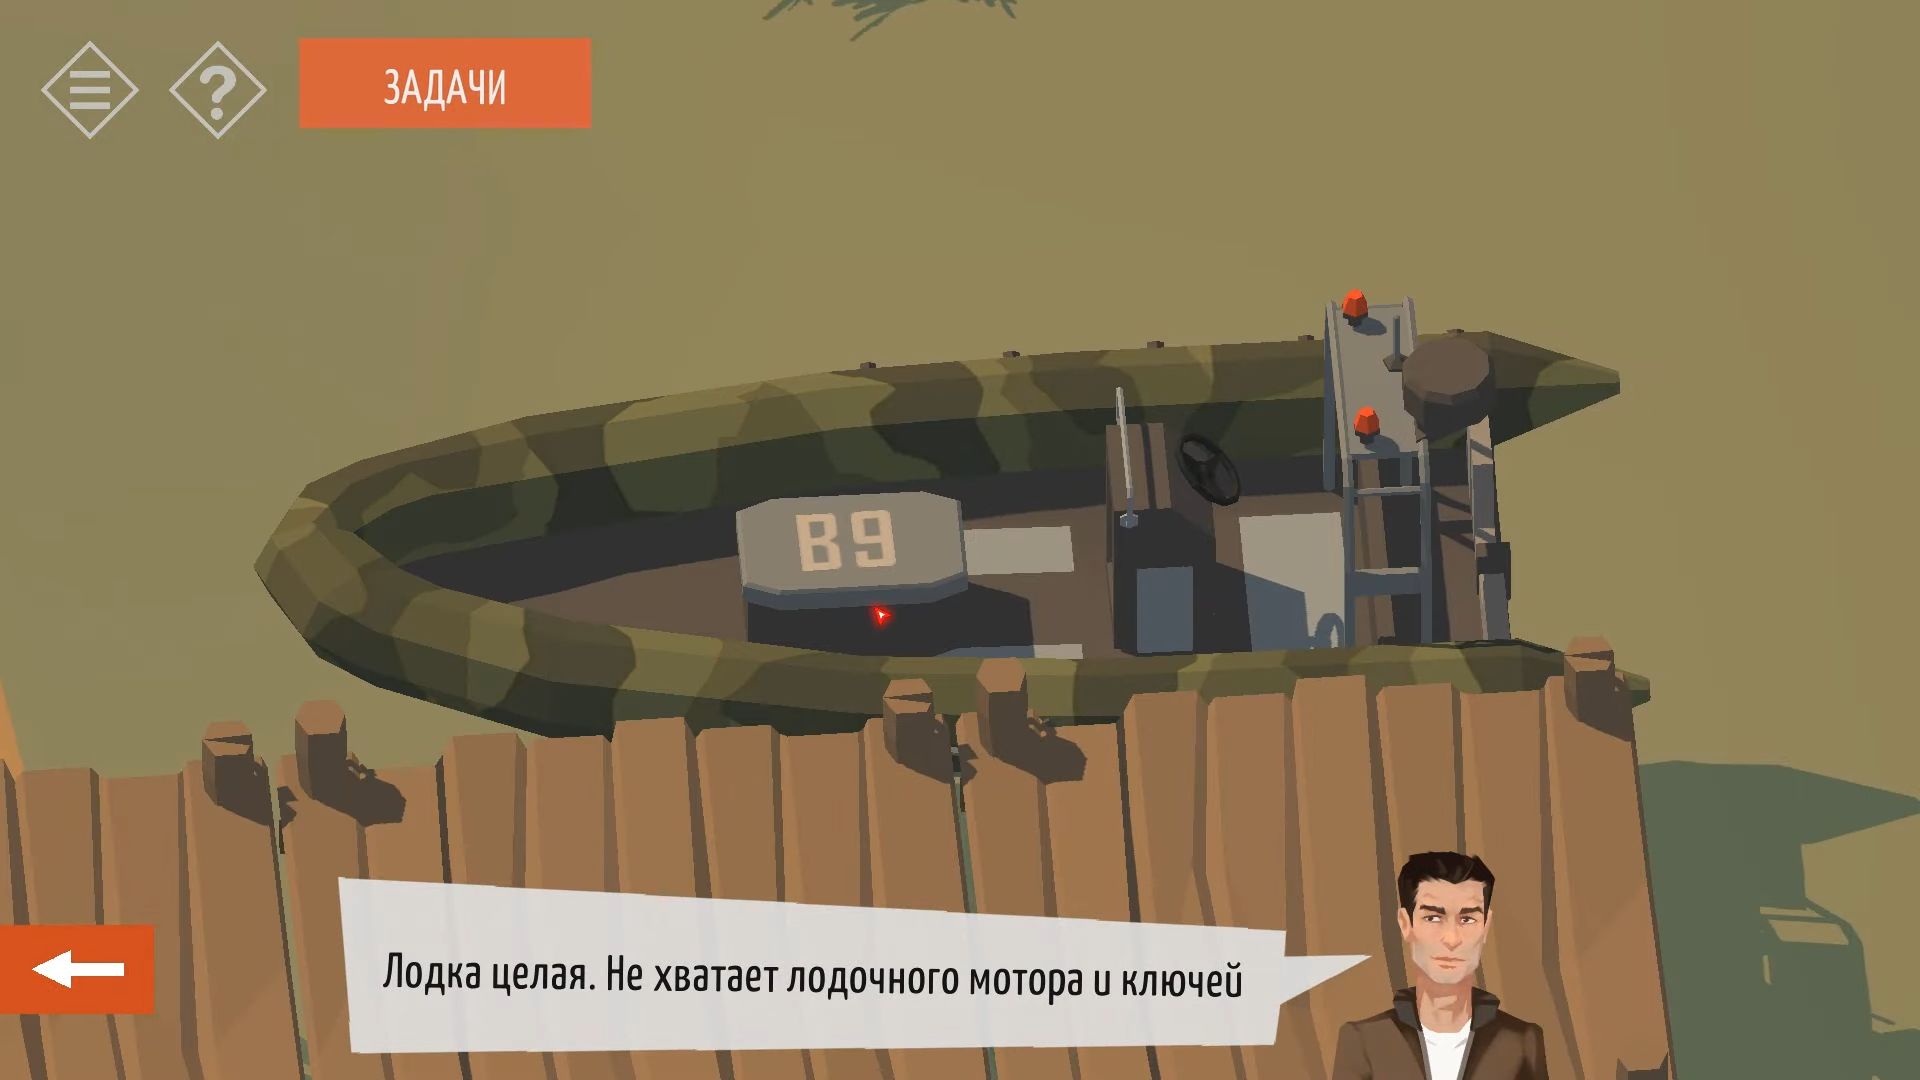
Tap on the place where your car is parked, and then knock on the mailboxes on the left. These will be important for solving a puzzle later on.
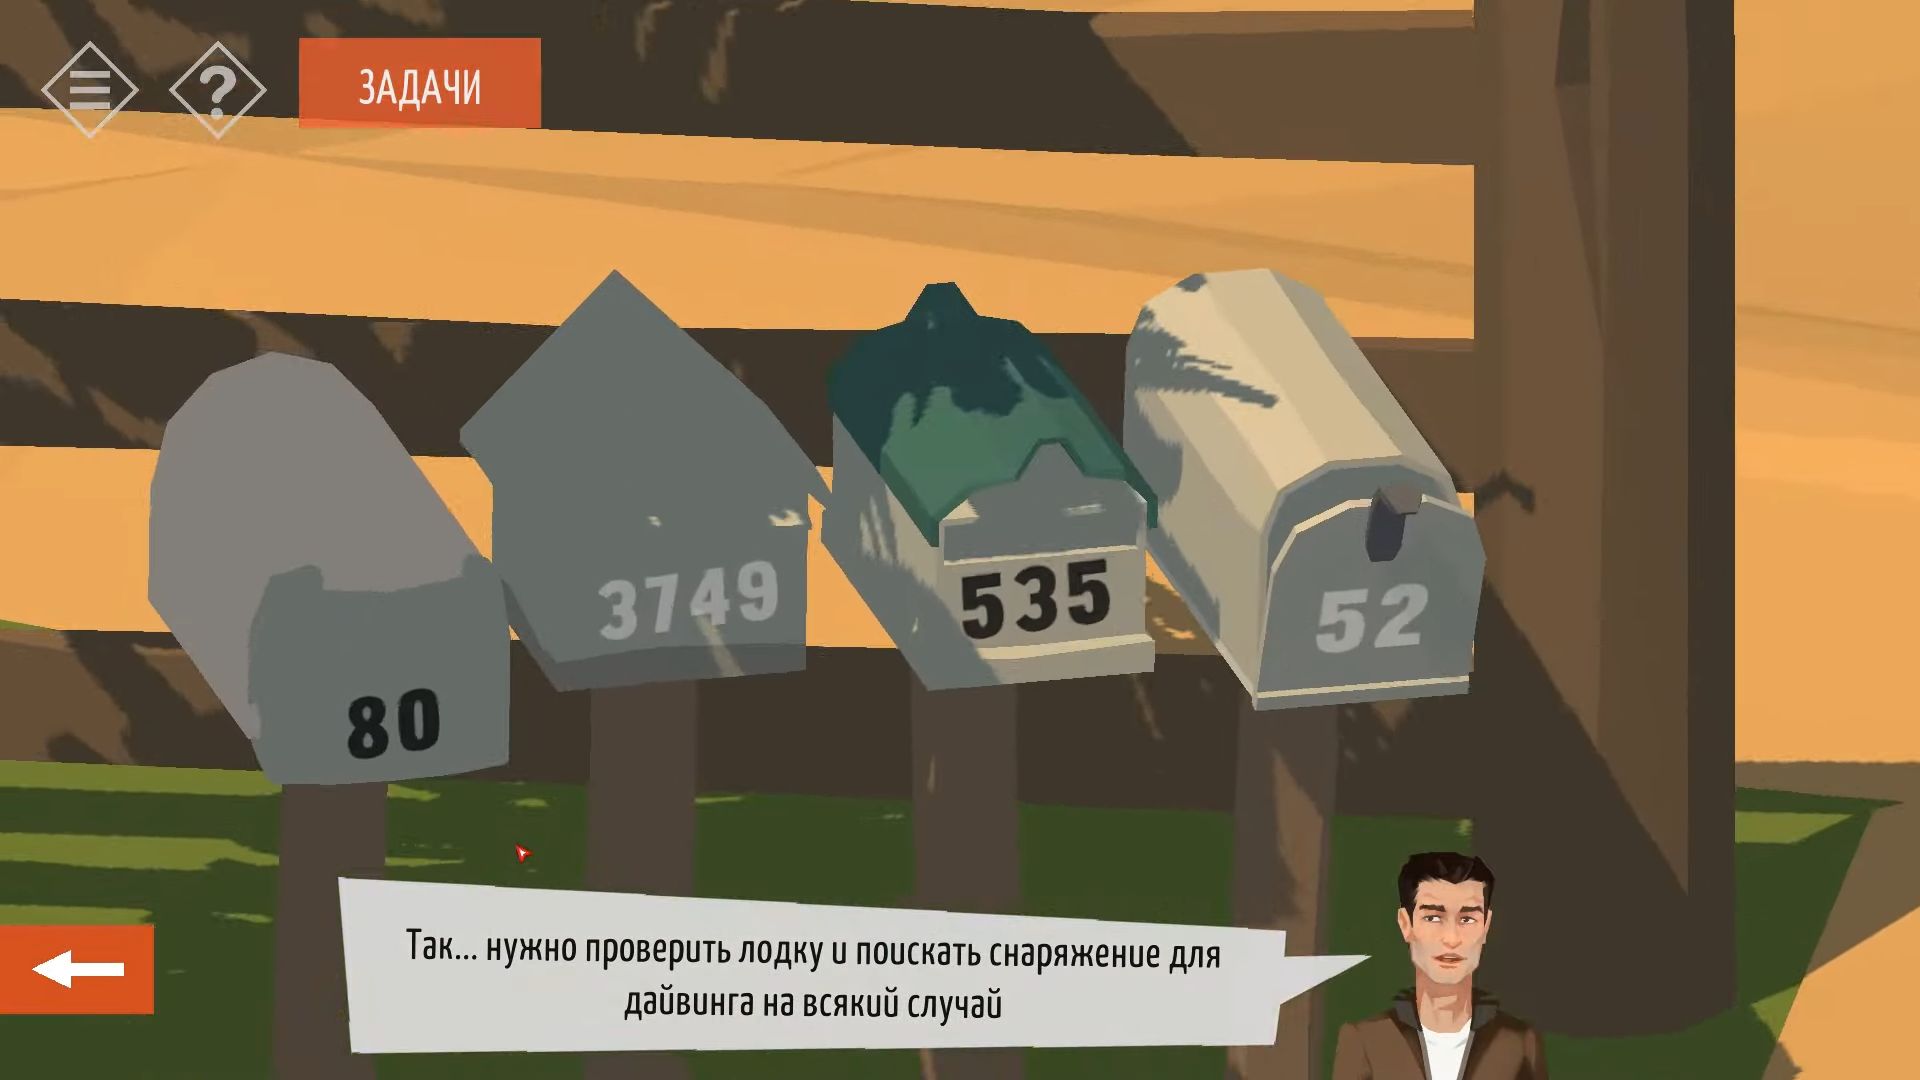
Tap on the truck that has a blue cover over it in the driveway and take note of the characters A4. Next, knock on the woodshed on the opposite side next to the gas tank. You can then touch the axe and begin chopping the wood. Collect some firewood and observe the characters C8 on the back wall.
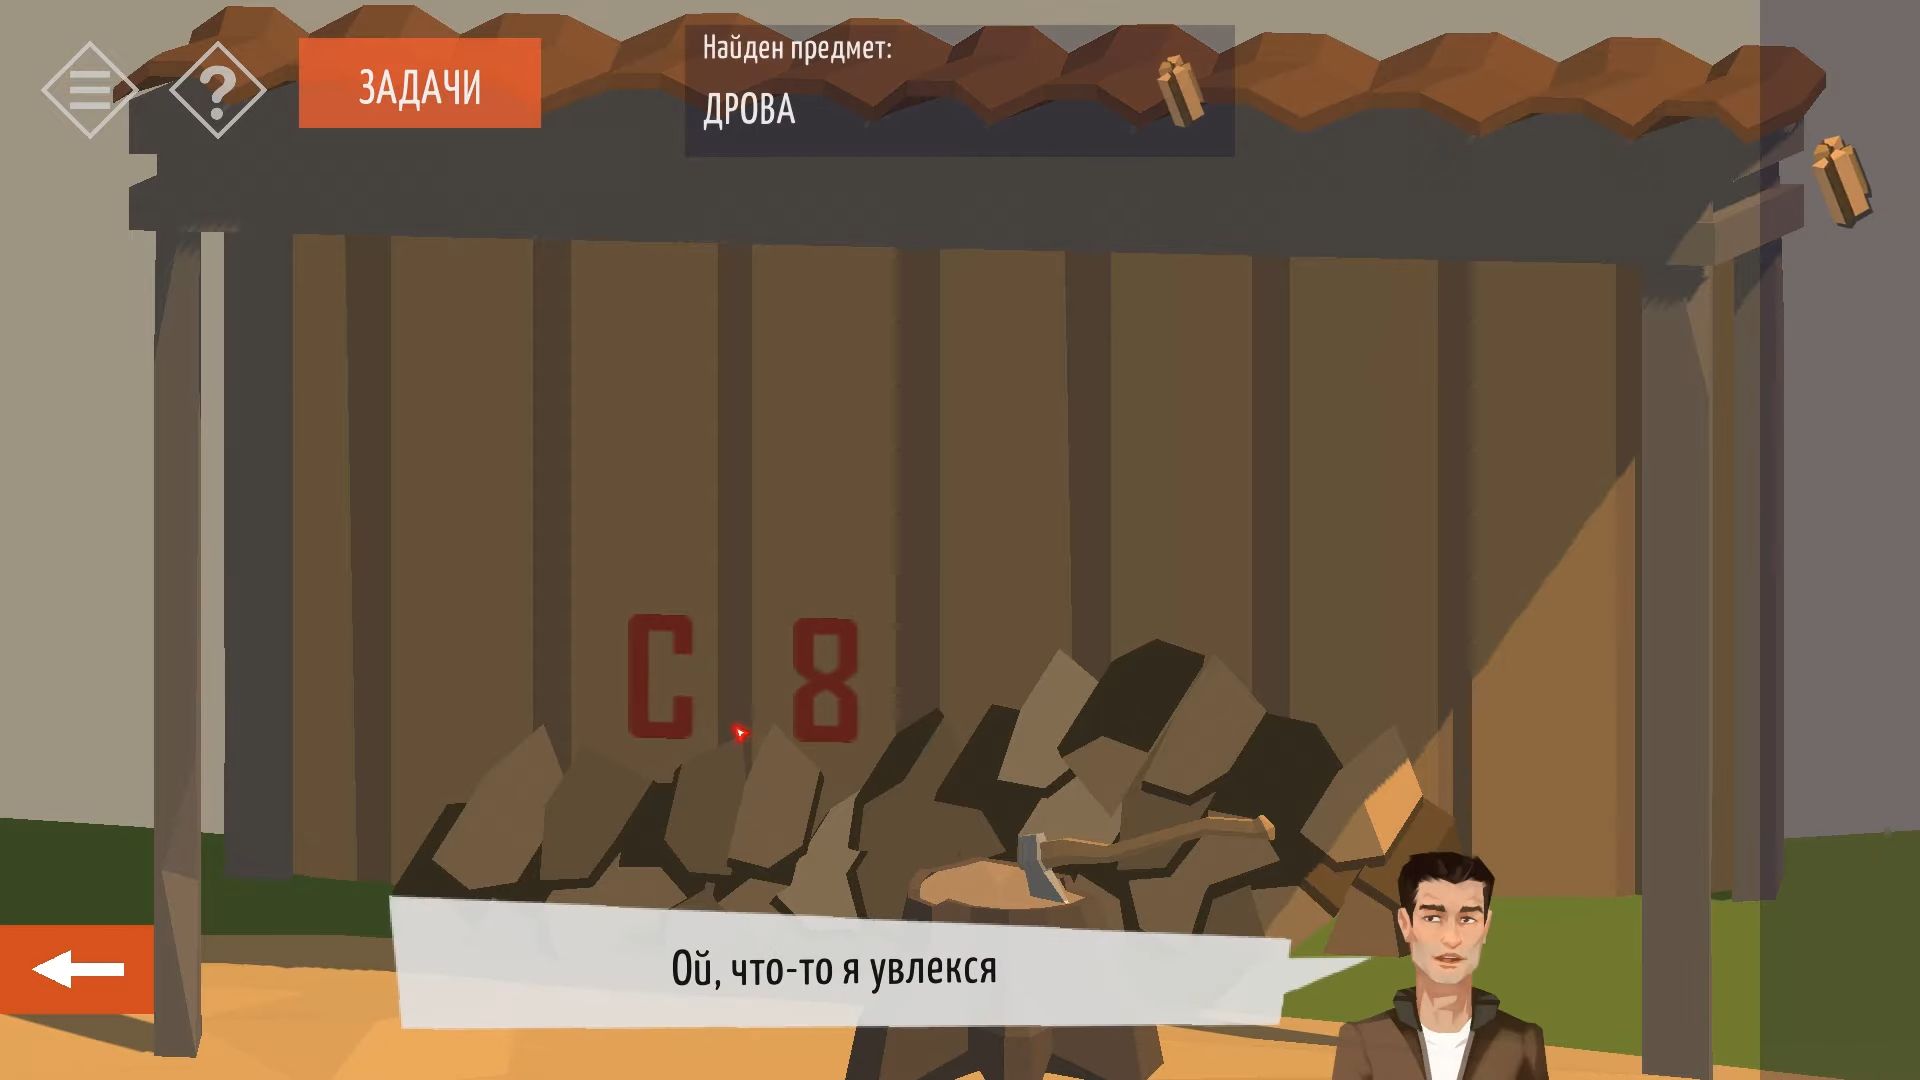
Move back and knock on the rear of the house to see this spot. Observe the characters D3, and then tap to pick up a crowbar.
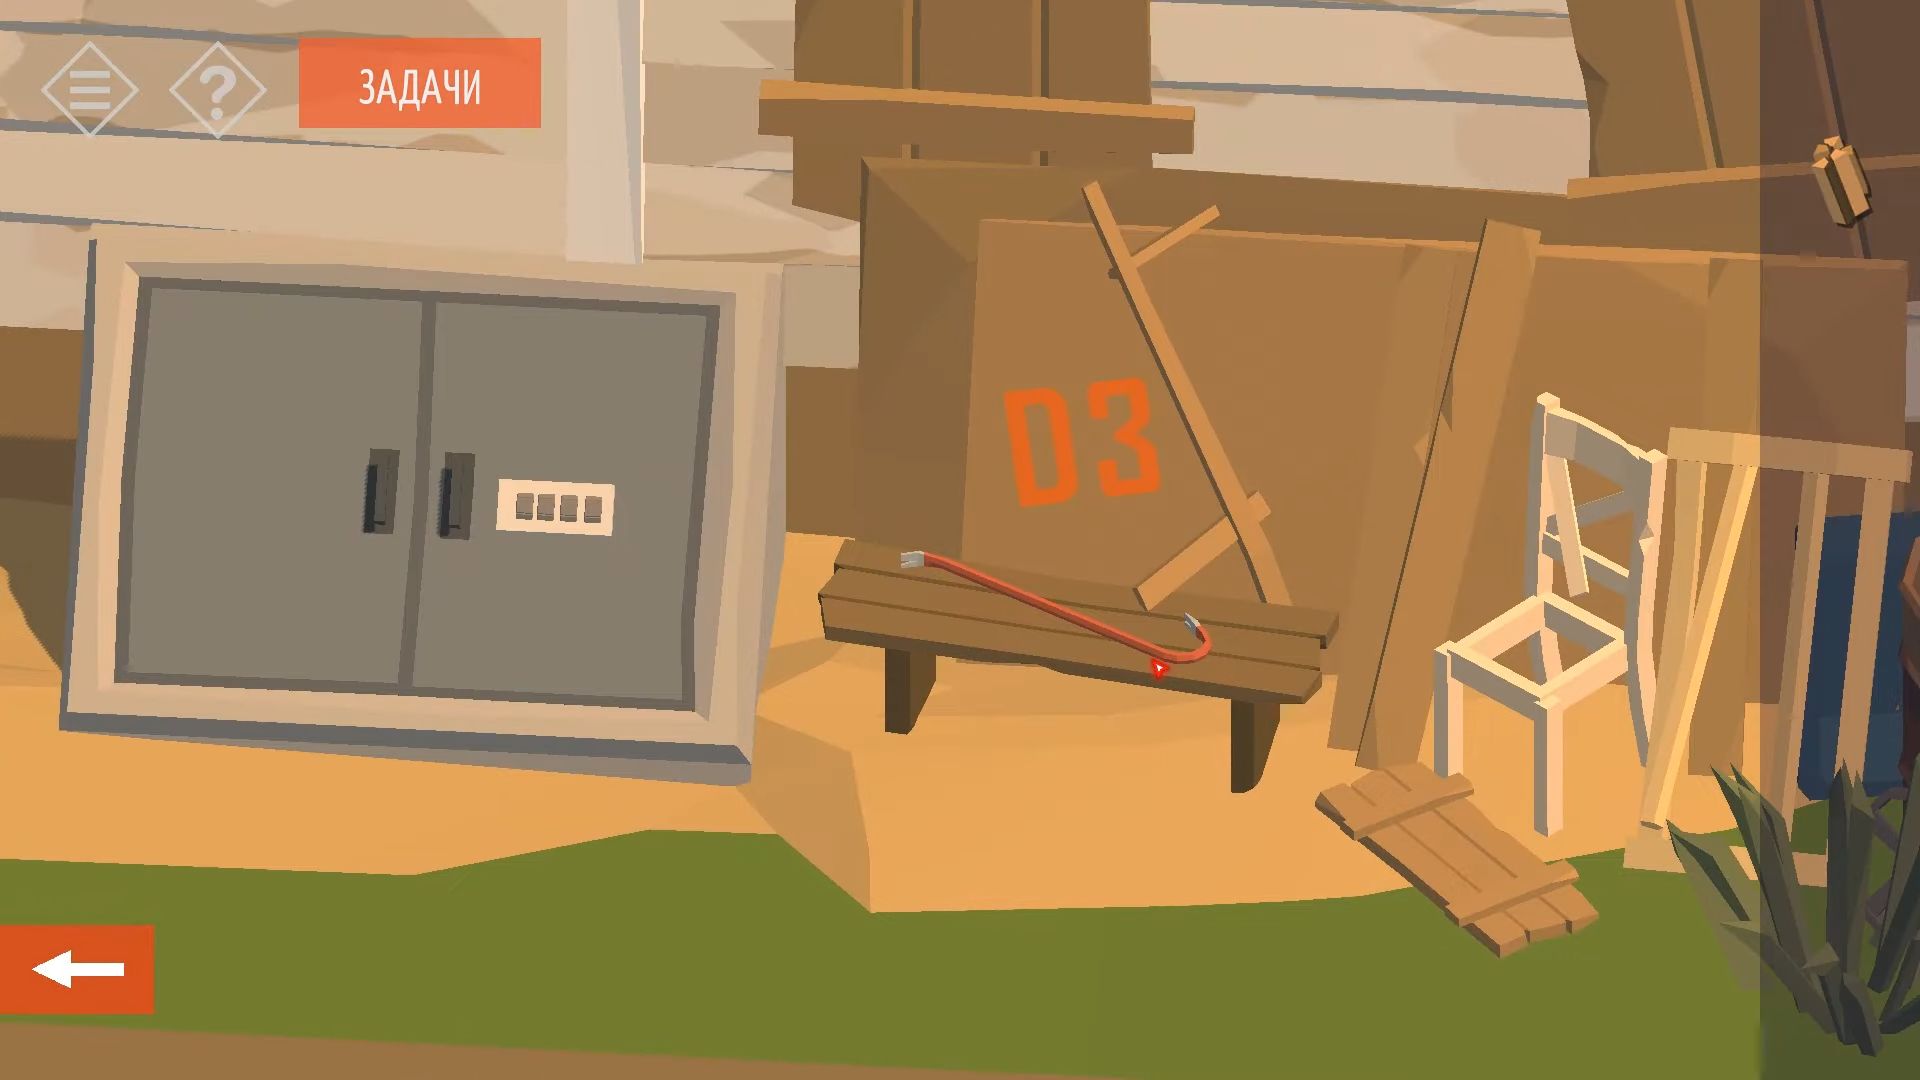
Return to the front of the house and tap on the area to the left where there’s a white door with boards on it. Use the crowbar to take off the boards, and use the key to unlock and open the door.
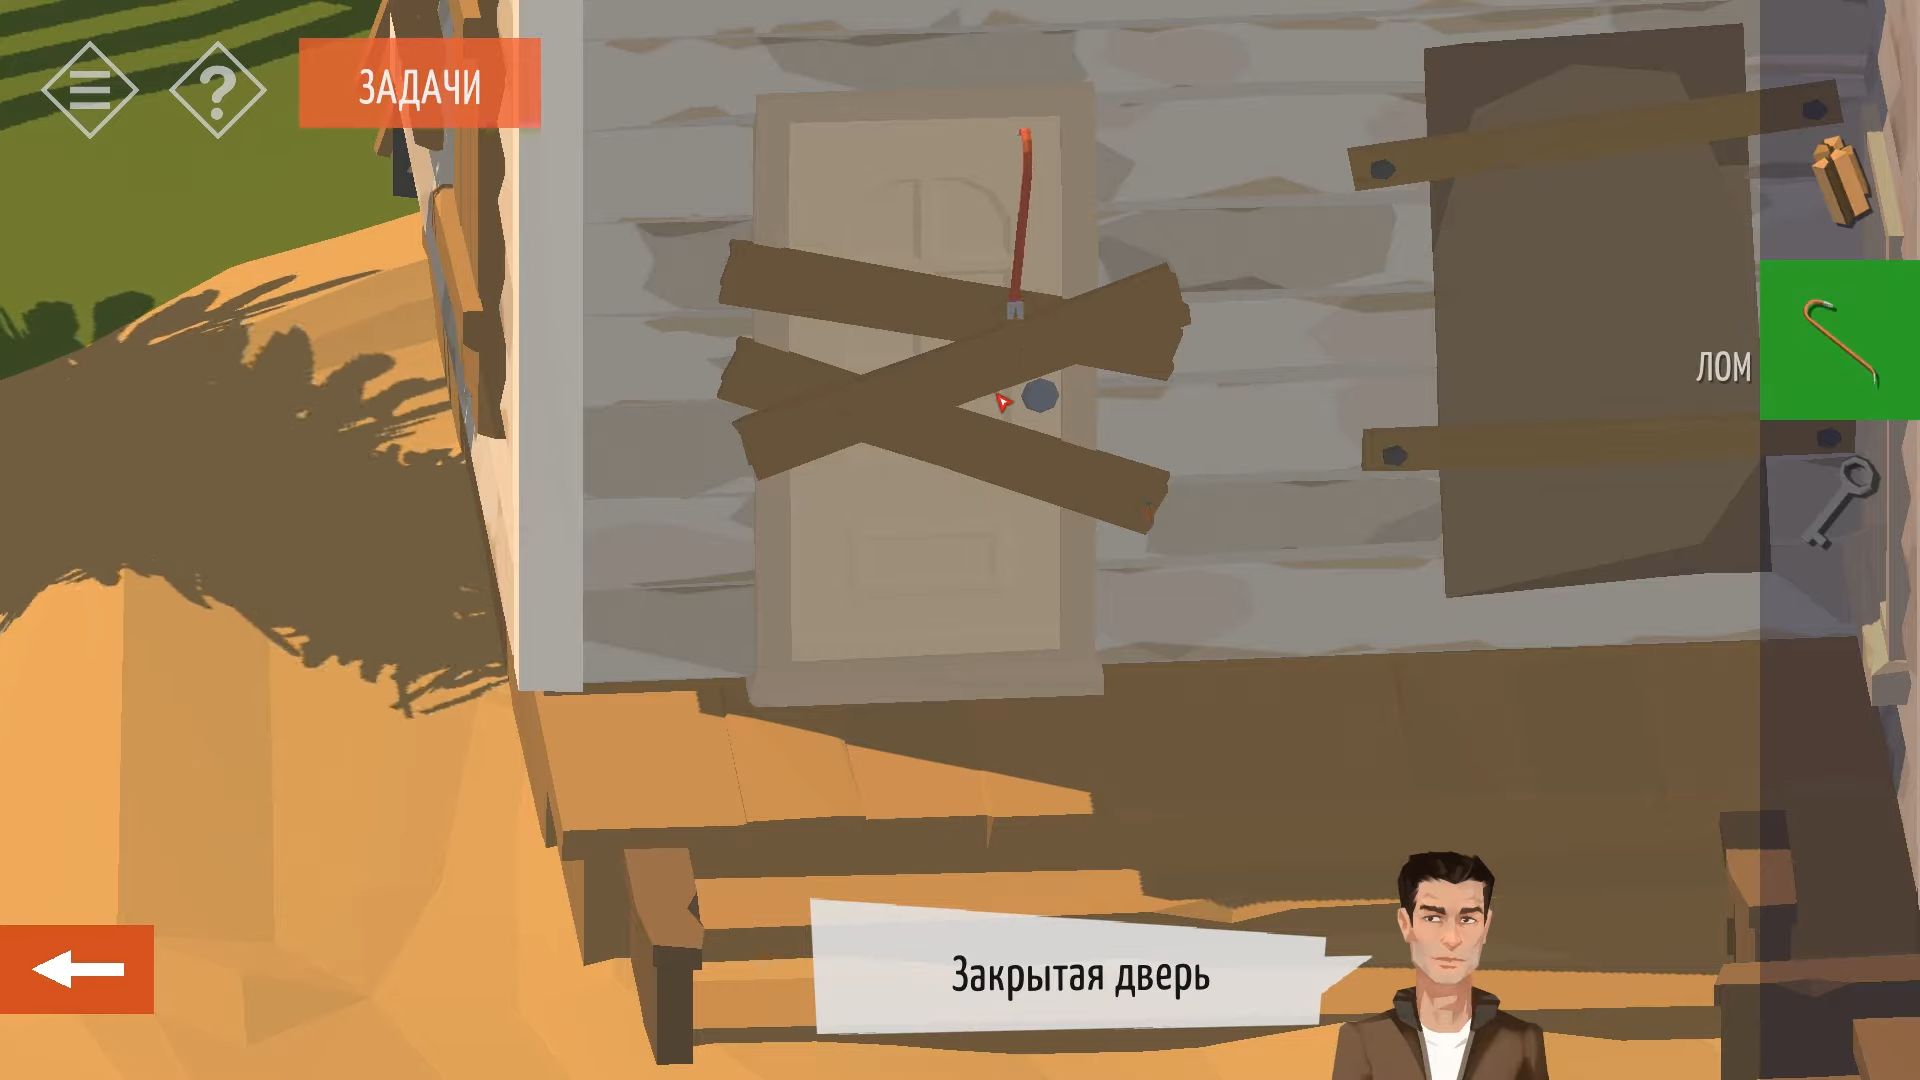
Go into the workshop room, check on the left side, and pick up a red canister from the floor. On the table, you’ll find the motor you require, but it’s taken apart. You need a manual for guidance.
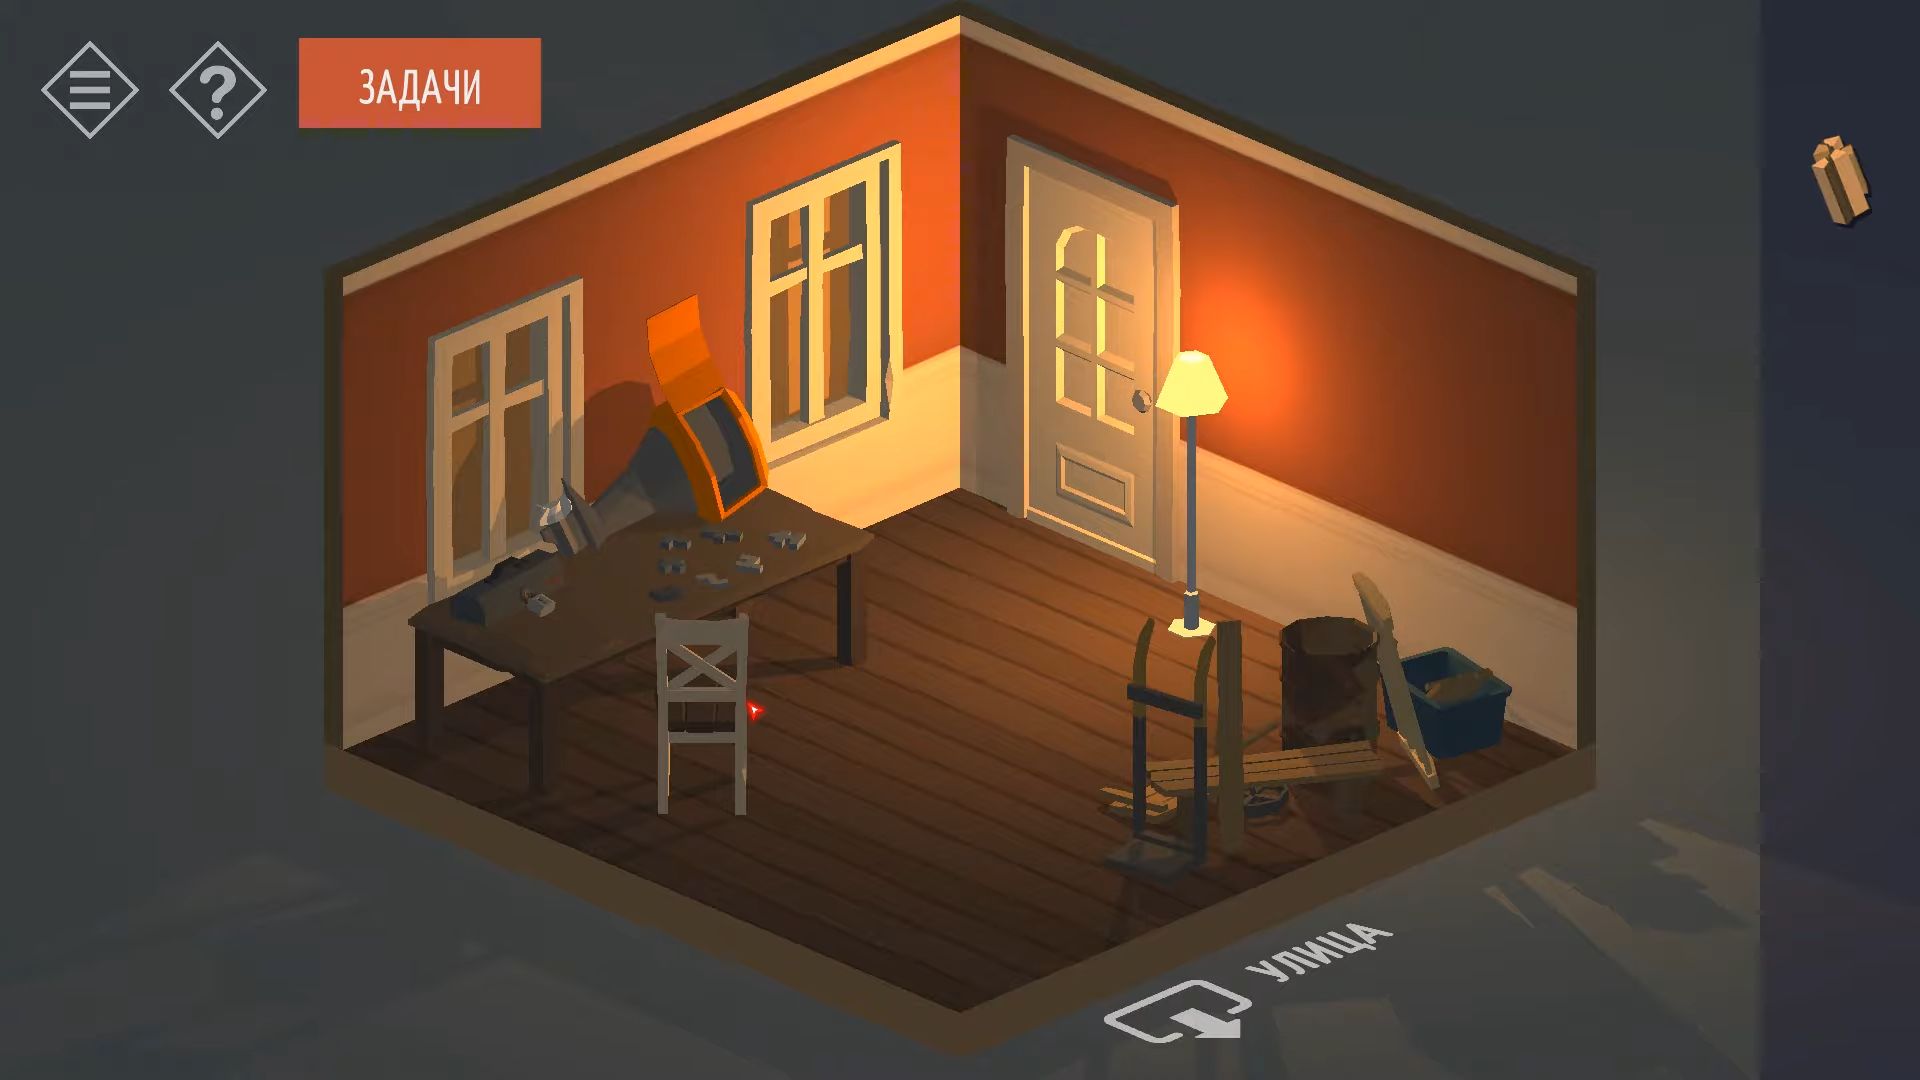
After that, head downstairs and leave through the front door in the kitchen. Tap on the gas tank near the woodshed and use the canister you found to fill it up.
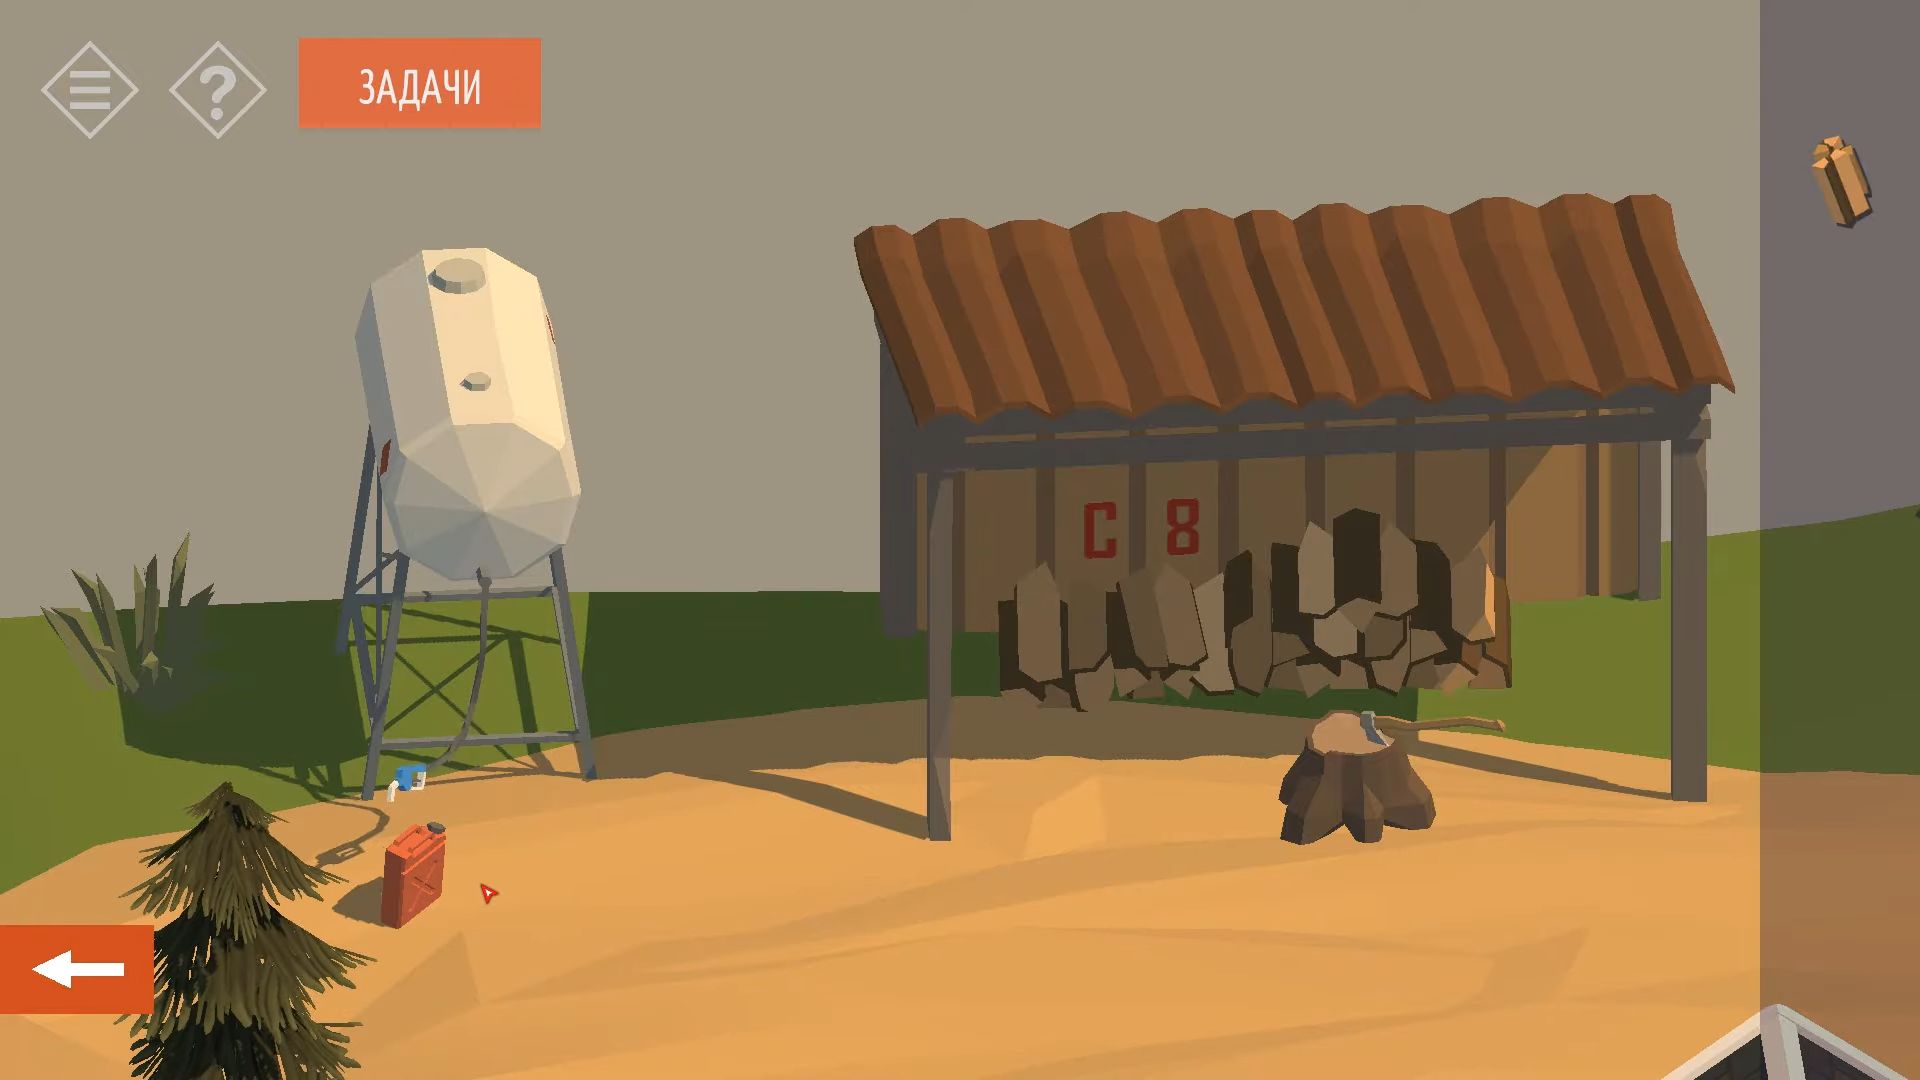
Now go back to the rear of the house and look at it. On the left, there are cellar doors with a four-digit code, and tap to see this. Input the code from the hints you found earlier: 4983 (the four numbers connected to ABCD above). Touch to access the basement and it will be dark inside.
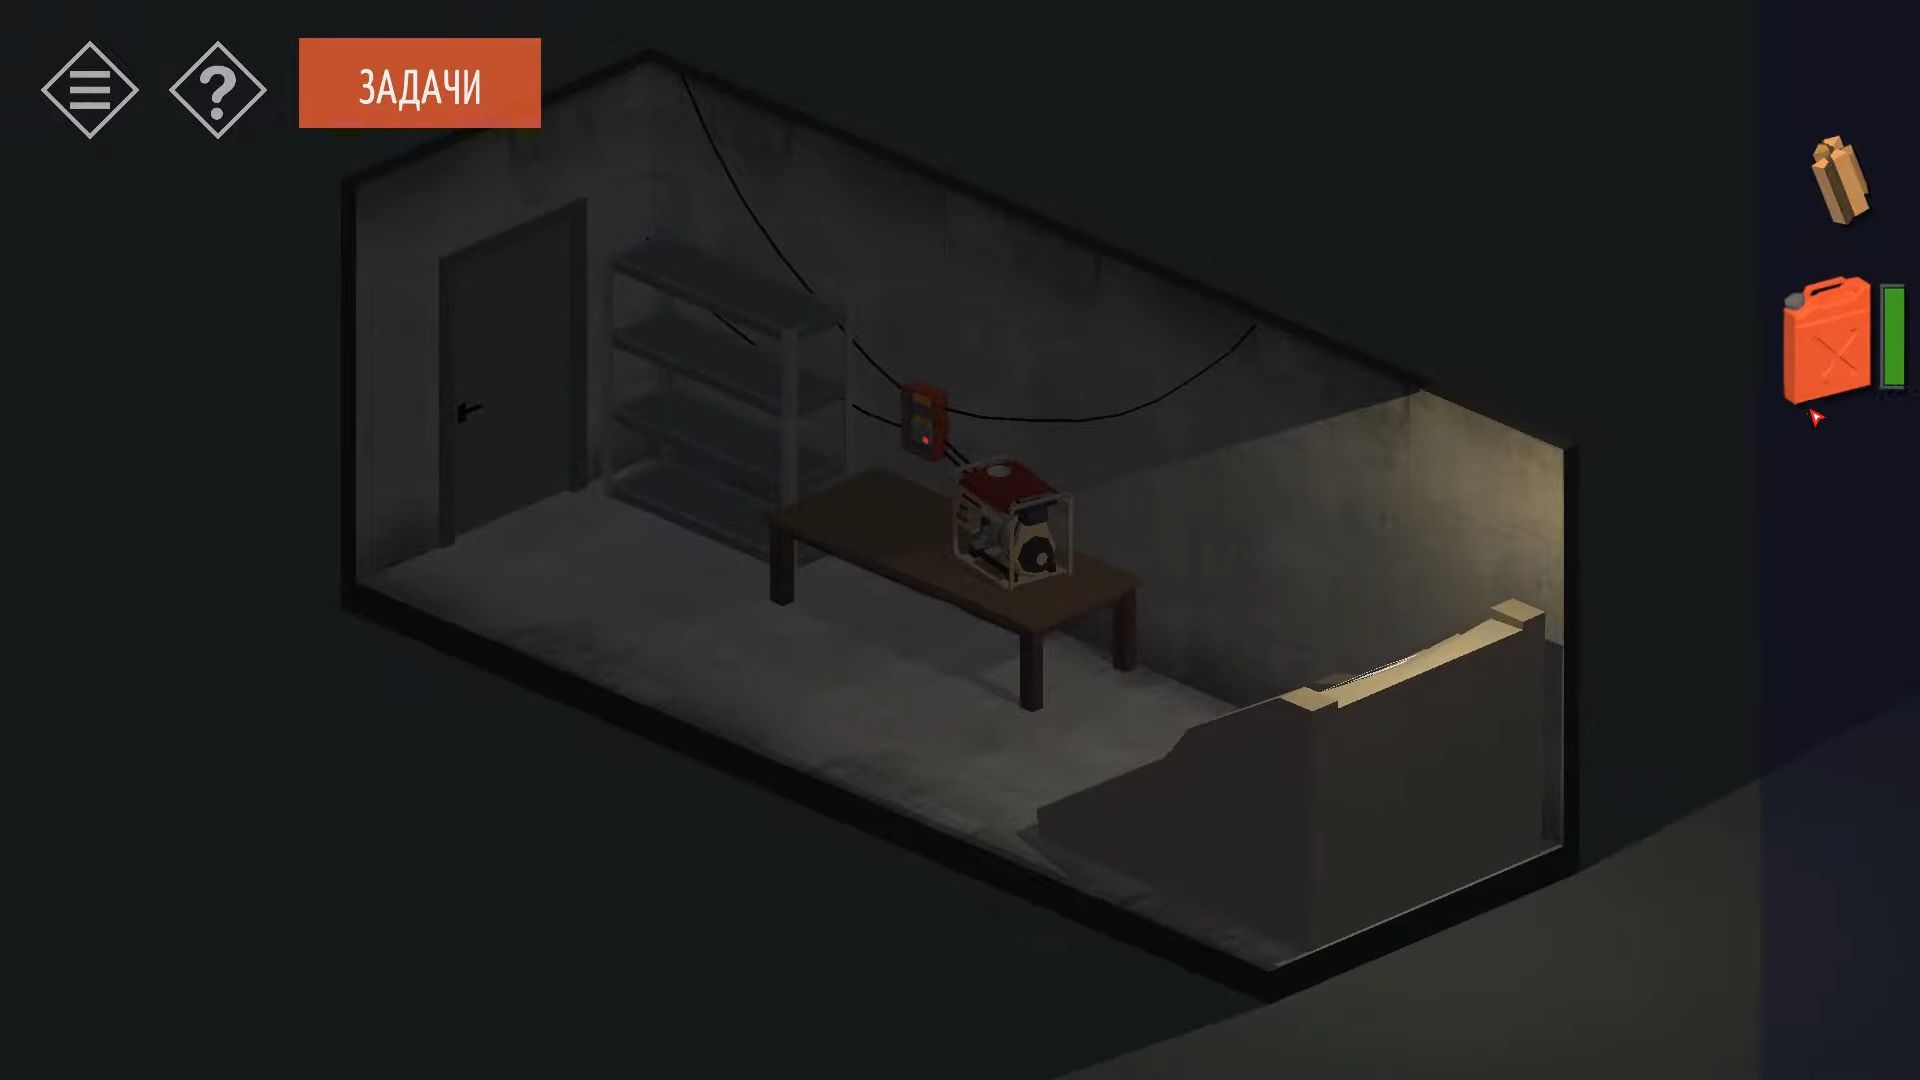
Turn the view around and tap on the generator sitting on the table. Use the gas tank to fill up the generator. The lights are on now and you have to pick up the empty canister once more.
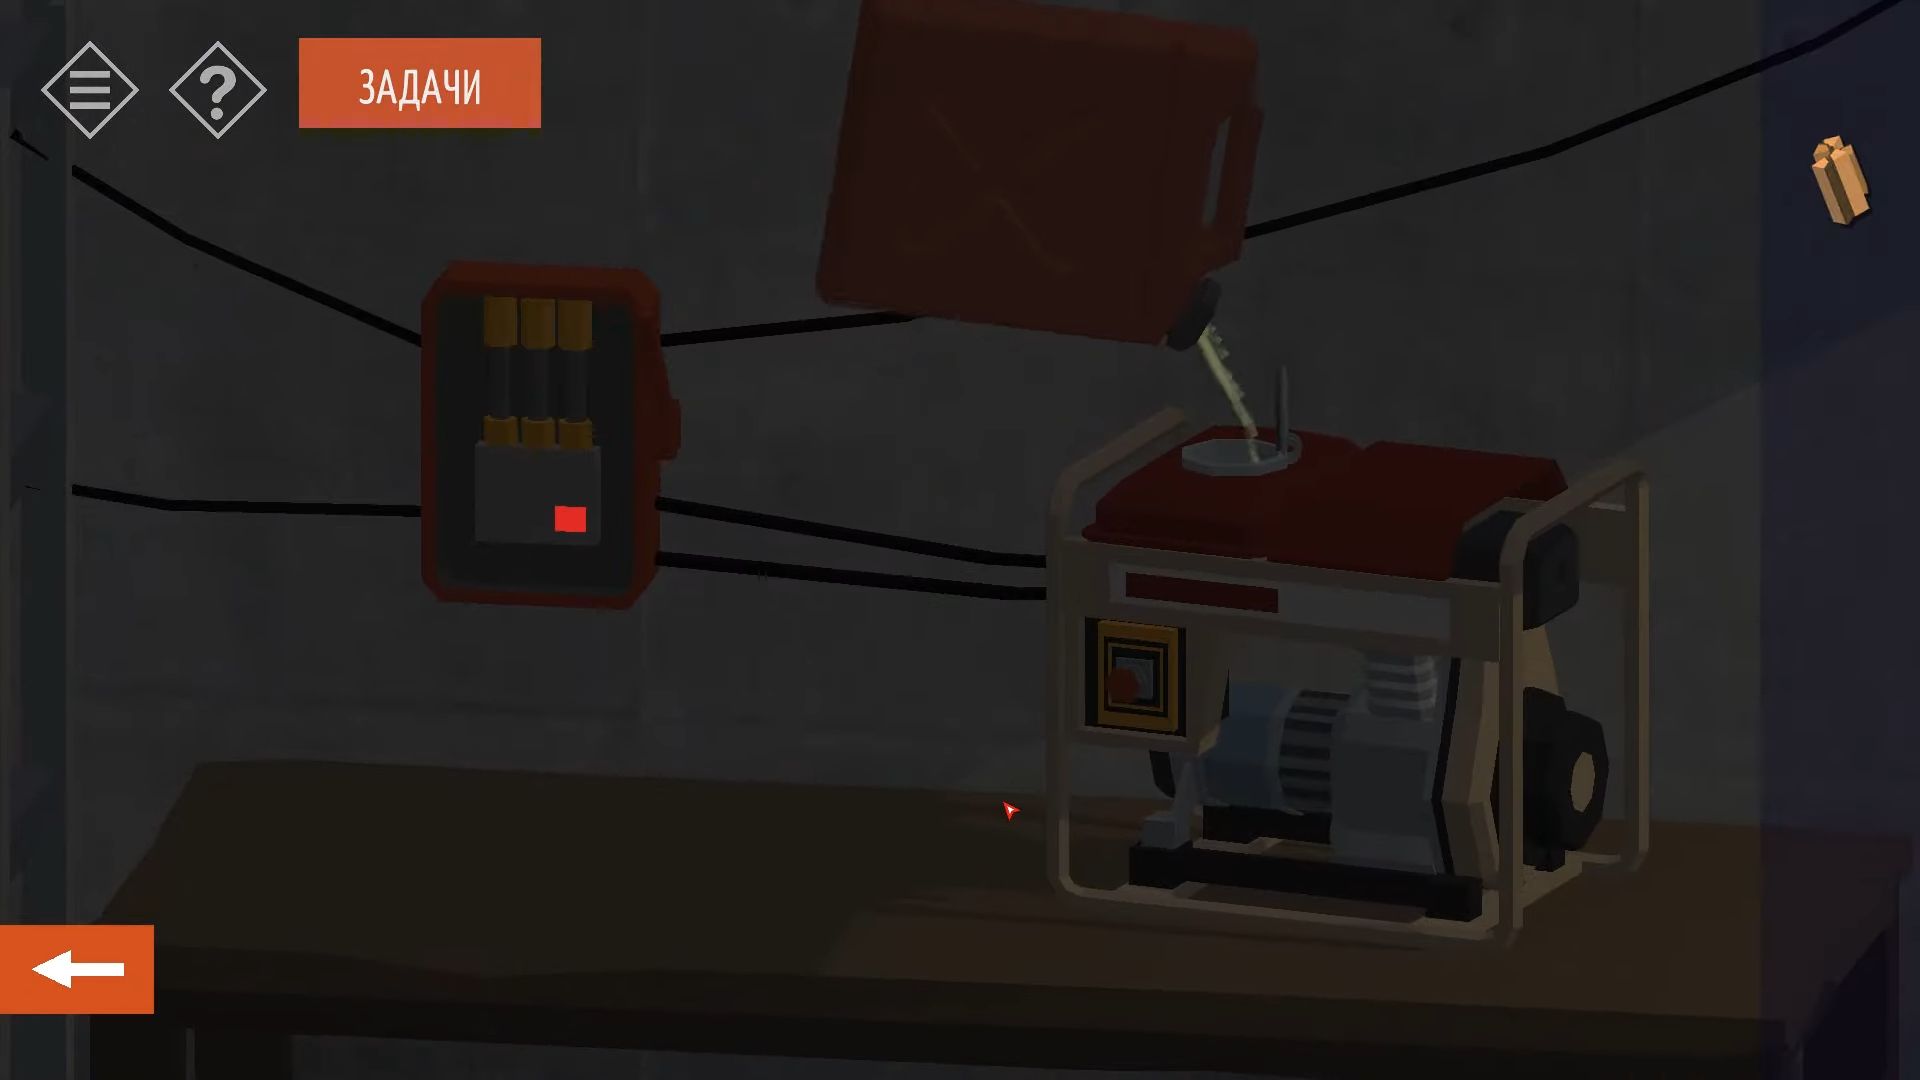
Turn the view to see a bookshelf. On the left, there’s a Golden Button award, and above it is a trophy shaped like a fish skeleton. Remember these for later. You can’t navigate forward here, so head back out of the basement and re-enter the house through the kitchen. Go into the kitchen and check the sink area again.
Open the top left cupboard and tap the switch inside to unlock the lower right drawer. Touch to see this and there will be 6 buttons to press to move the bars above to different positions. Figure out the right pattern to solve this puzzle. The fish skeleton in the guest room has 6 spines and each bar has 4 positions. Position 1 is the smallest and from the top: Positions 2, 3, 4, 3, 1, 4. Now you can collect the mask.

After that, go into the workshop and look at the table. Unlock the toolbox using the key, and then take a green key from it.
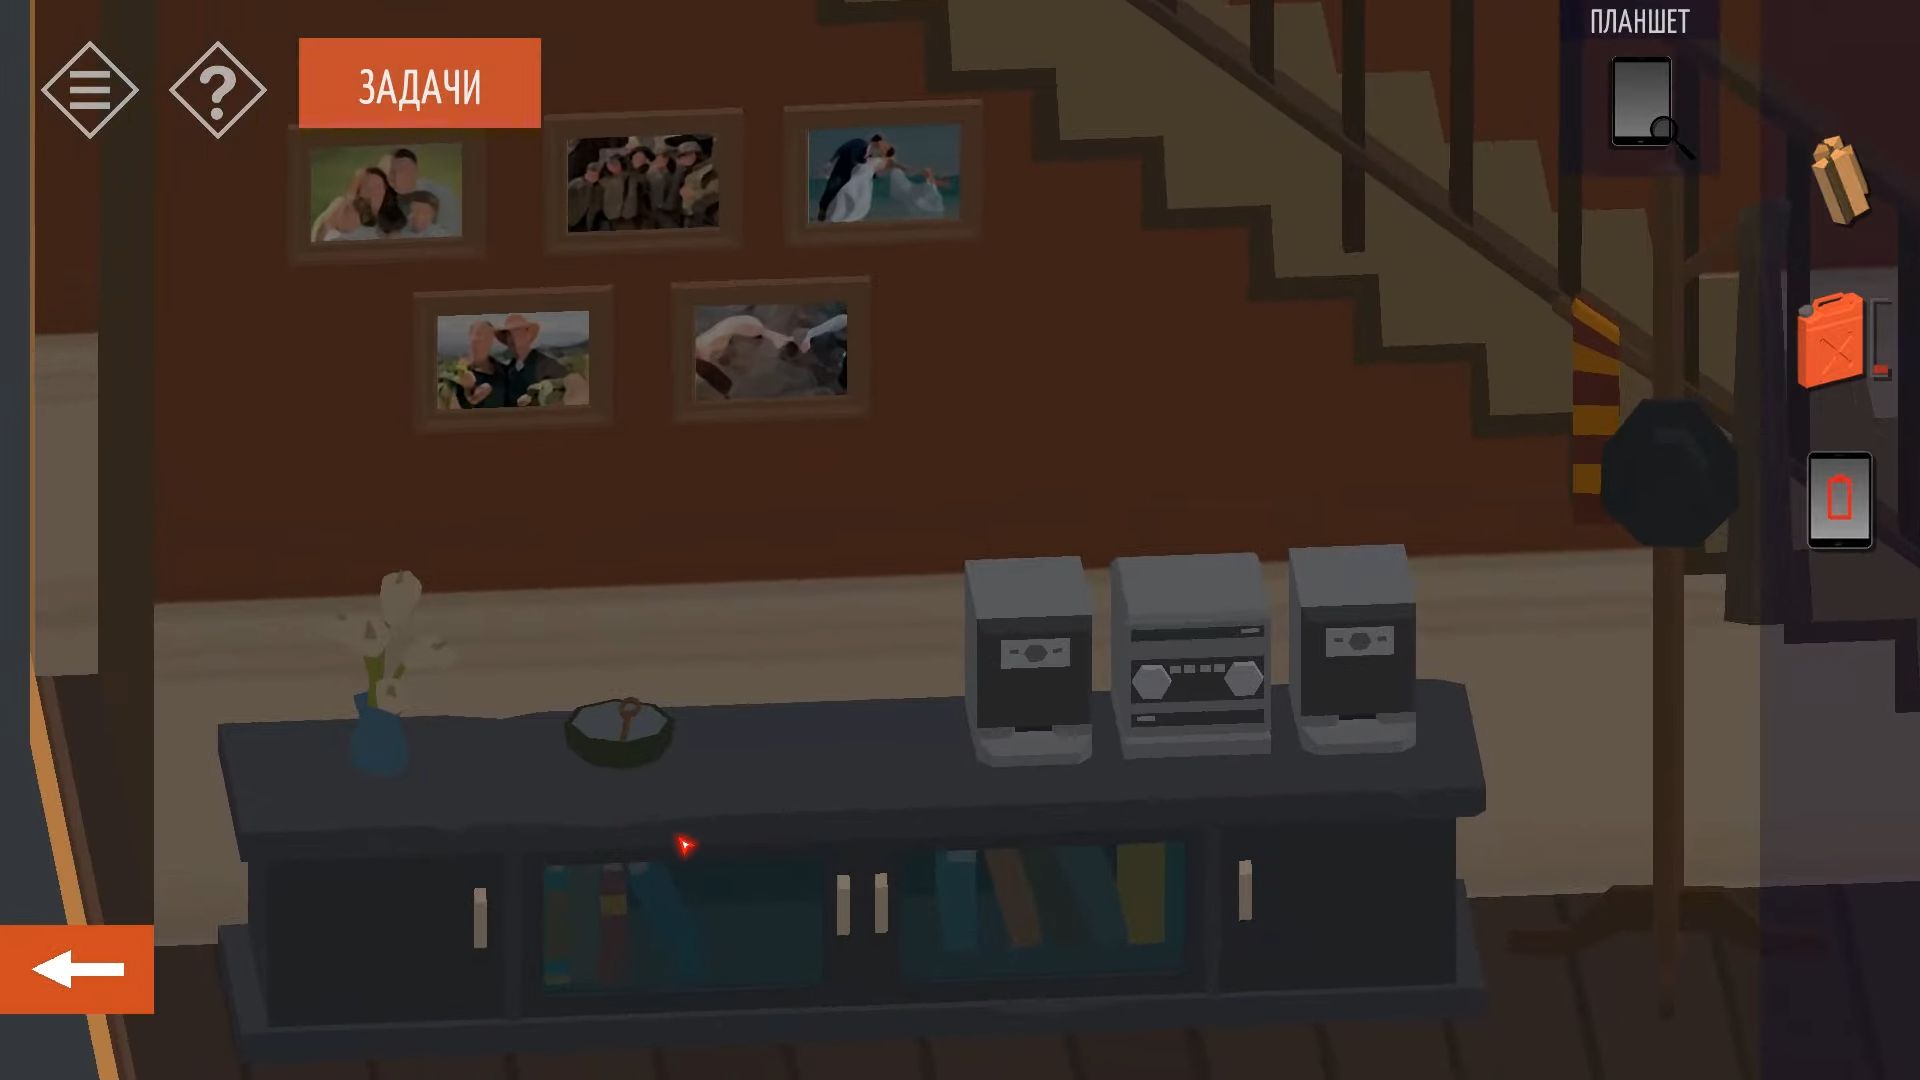
Knock on the coffee table and take the tablet that is not charged. You can also knock on each photo to look at them. Touch again to turn them around, and once more to see the dates and maybe other clues on the back. Go up the stairs to the top floor. Climb the stairs and use the green key to open the door on the left side of the desk.
Go into the bedroom, tap on the desk to check it out, and then move a chair to uncover a safe. Knock on the desk’s top to see various items. You can try to arrange each of these. Touch the folded paper at the front to open it and see the outline of 4 mailboxes. Slightly touch the safe to see the keypad and the clue Last Digit. Enter the code 0952 to open the safe. Tap the enter button, and the safe will open. Take the boat keys.
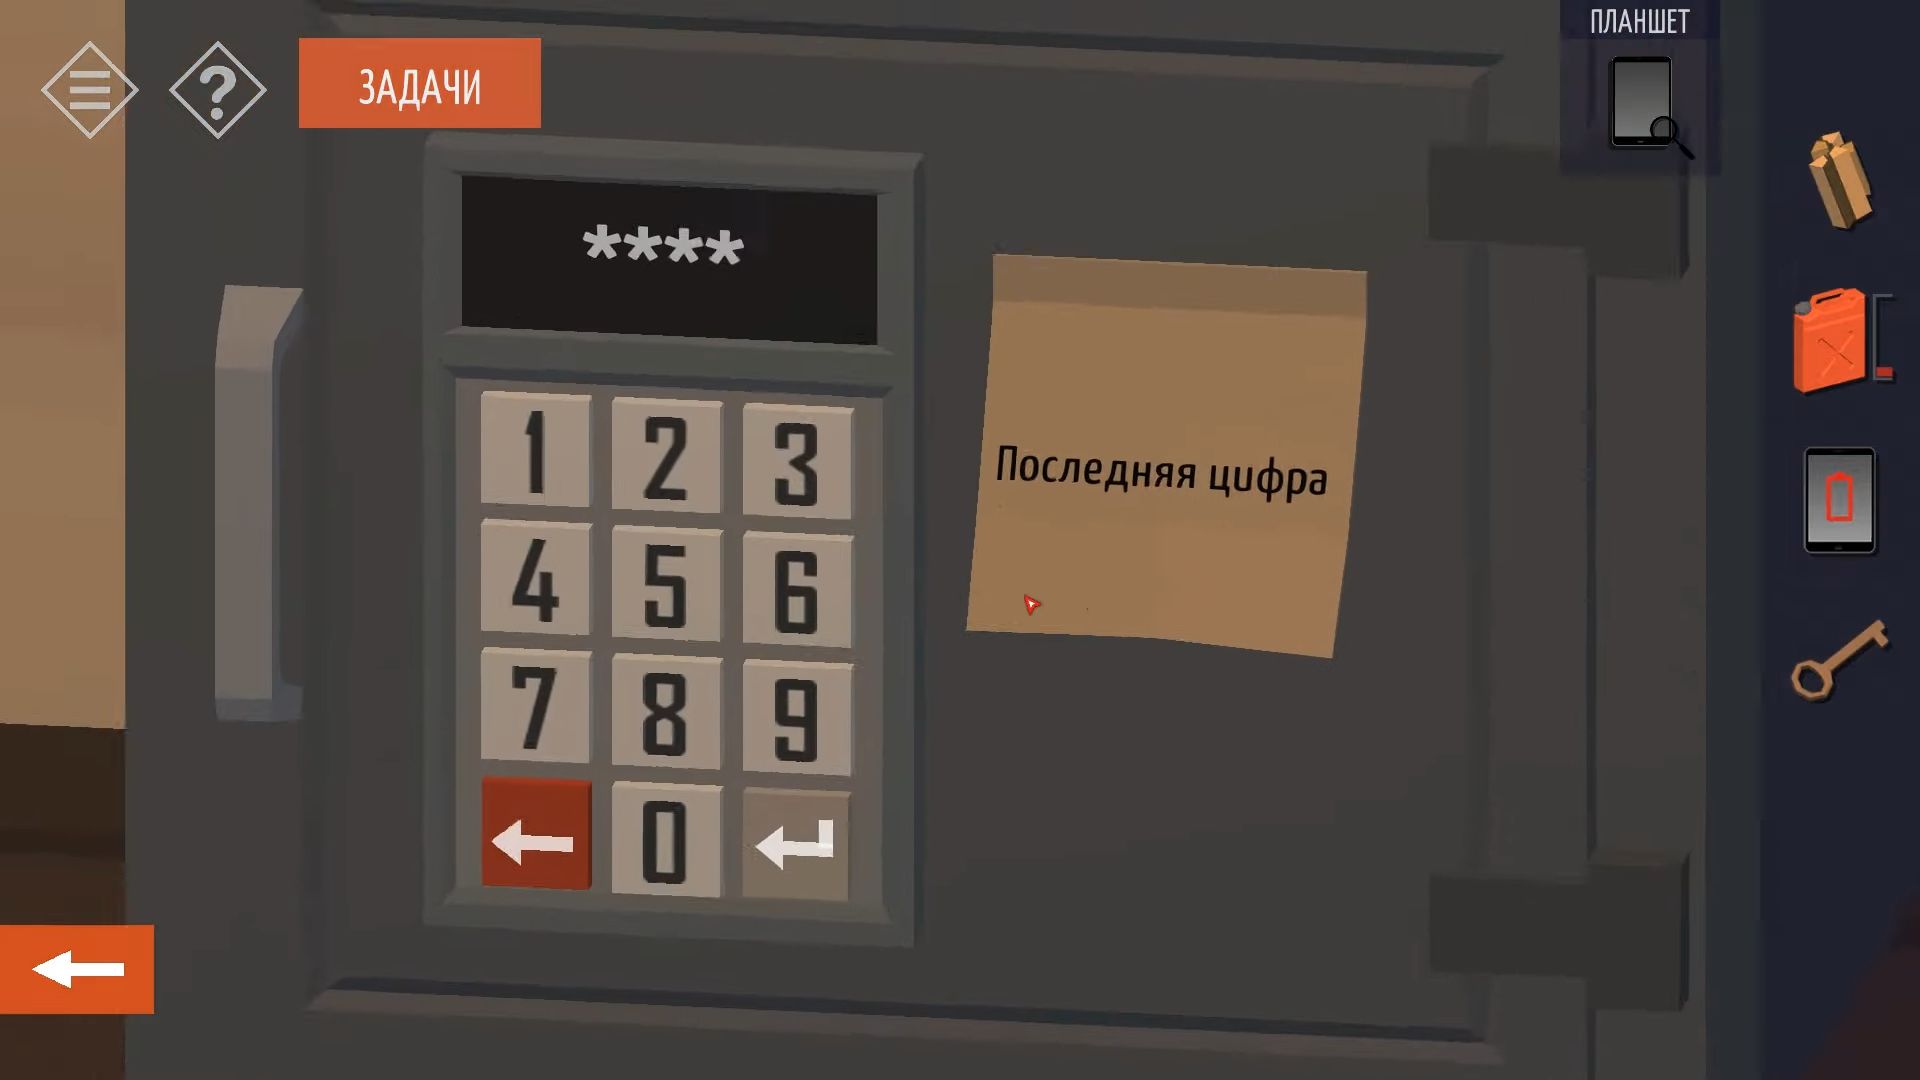
Turn the view and open the cupboard to the left of the door. Grab the flippers, which is another item you need, and go back to the bedroom. Tap to see the bed, and then open the drawers in the nightstand to get a black key. After that, use the tablet on the charging pad on the nightstand.
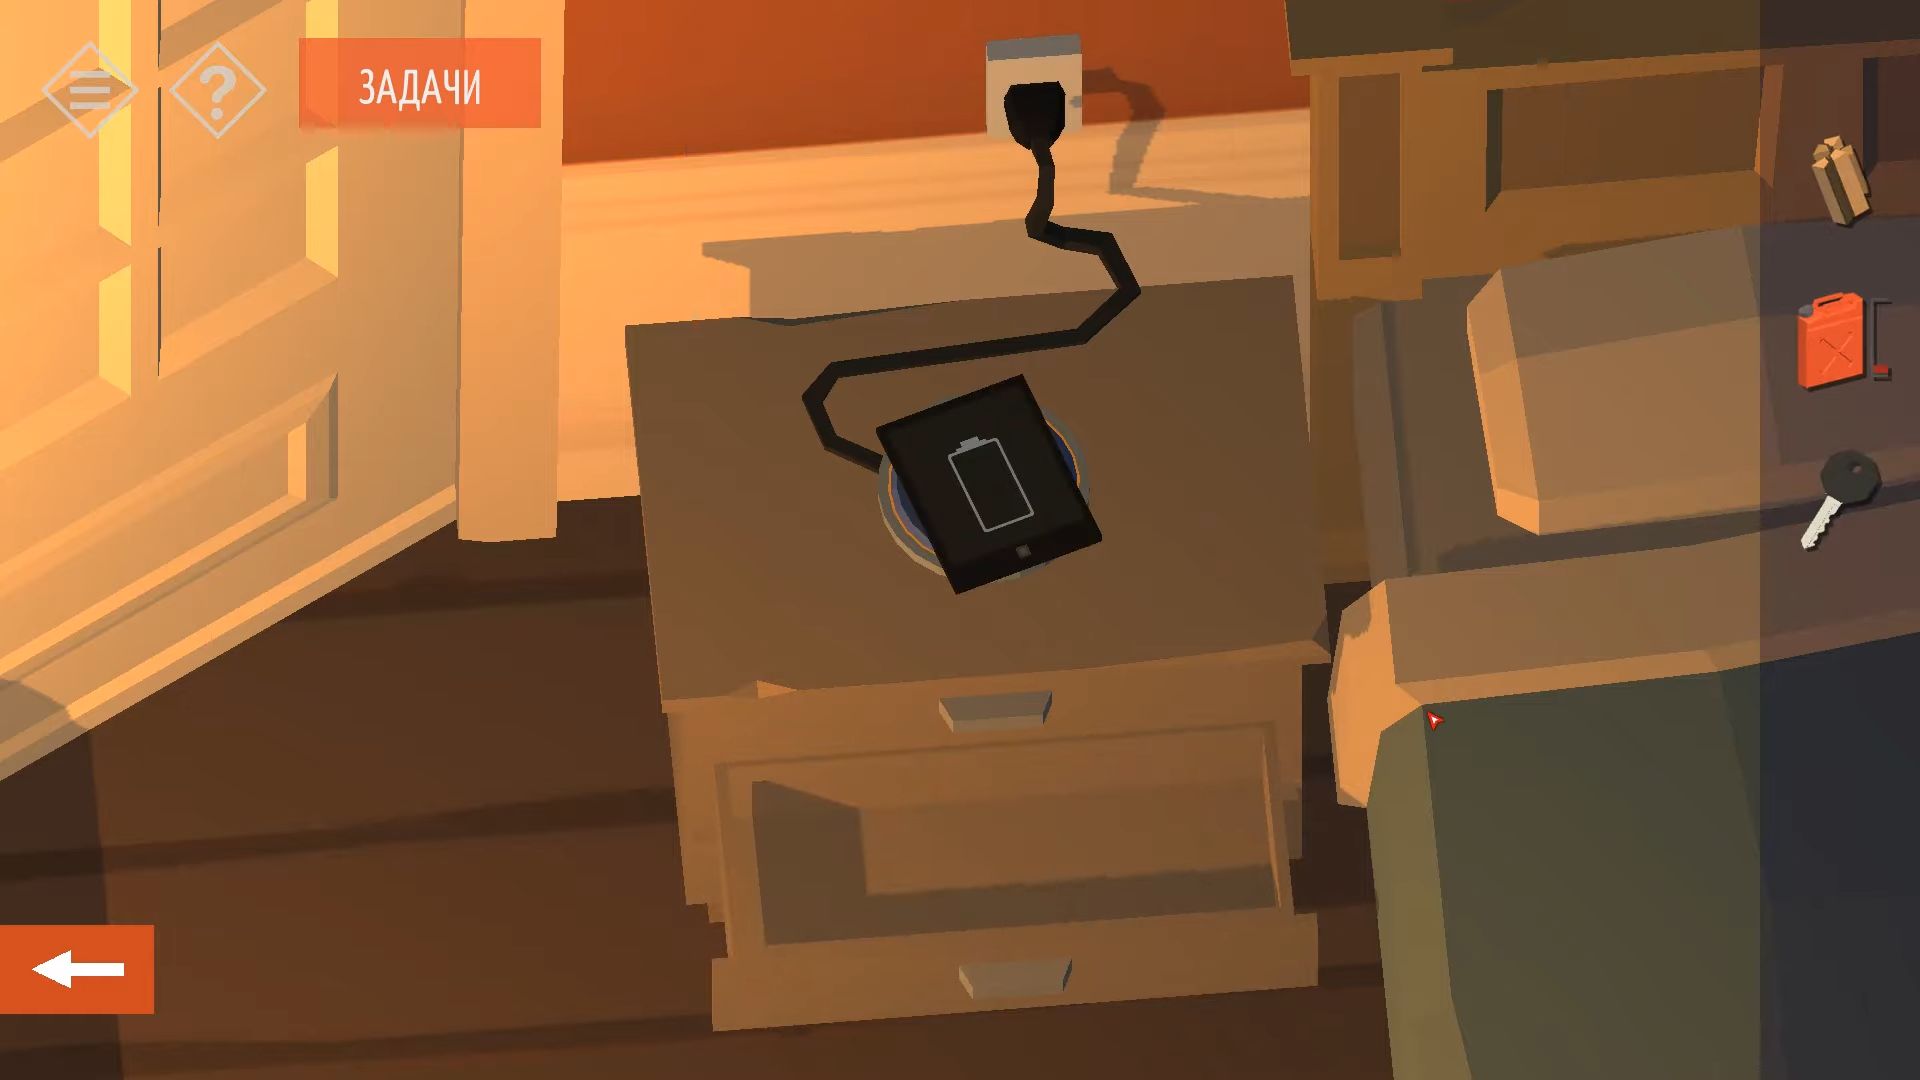
After it’s charged, tap to look at it.
The background picture is like one seen downstairs and looks similar to a photo of a friend from the army. On the back of the downstairs photo is a hint to find numbers from the dog tag in the bathroom. Look at these details to get the code: 3593. Now, you can check a manual on how to take apart the motor.
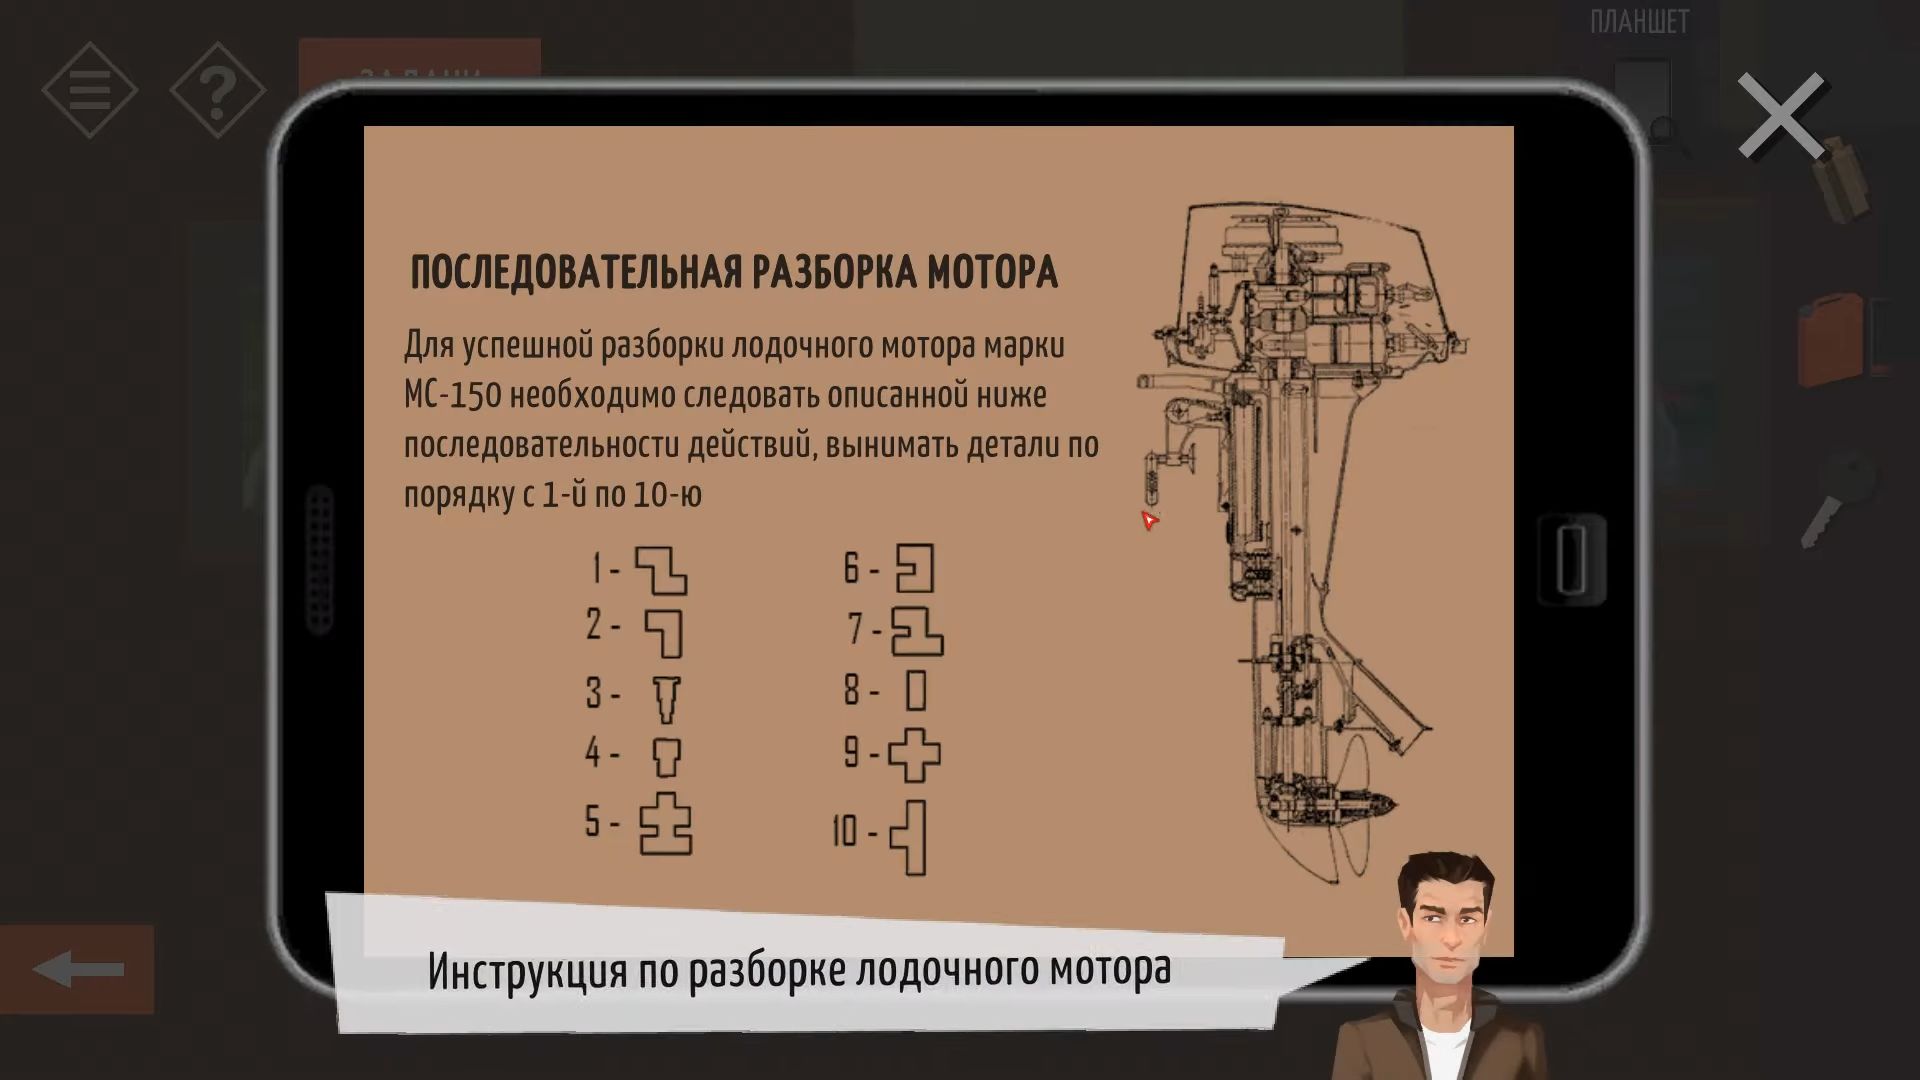
Next, while looking at the bed, tap to check a case underneath it. There’s a dial lock with four pictures on it and you have to rotate each dial by tapping on it. To open it, think about what the homeowner likes and take note that the person enjoys fishing. Rotate each dial until you find the image of a fish (sea creature) on each one. Open the case and take the wetsuit.
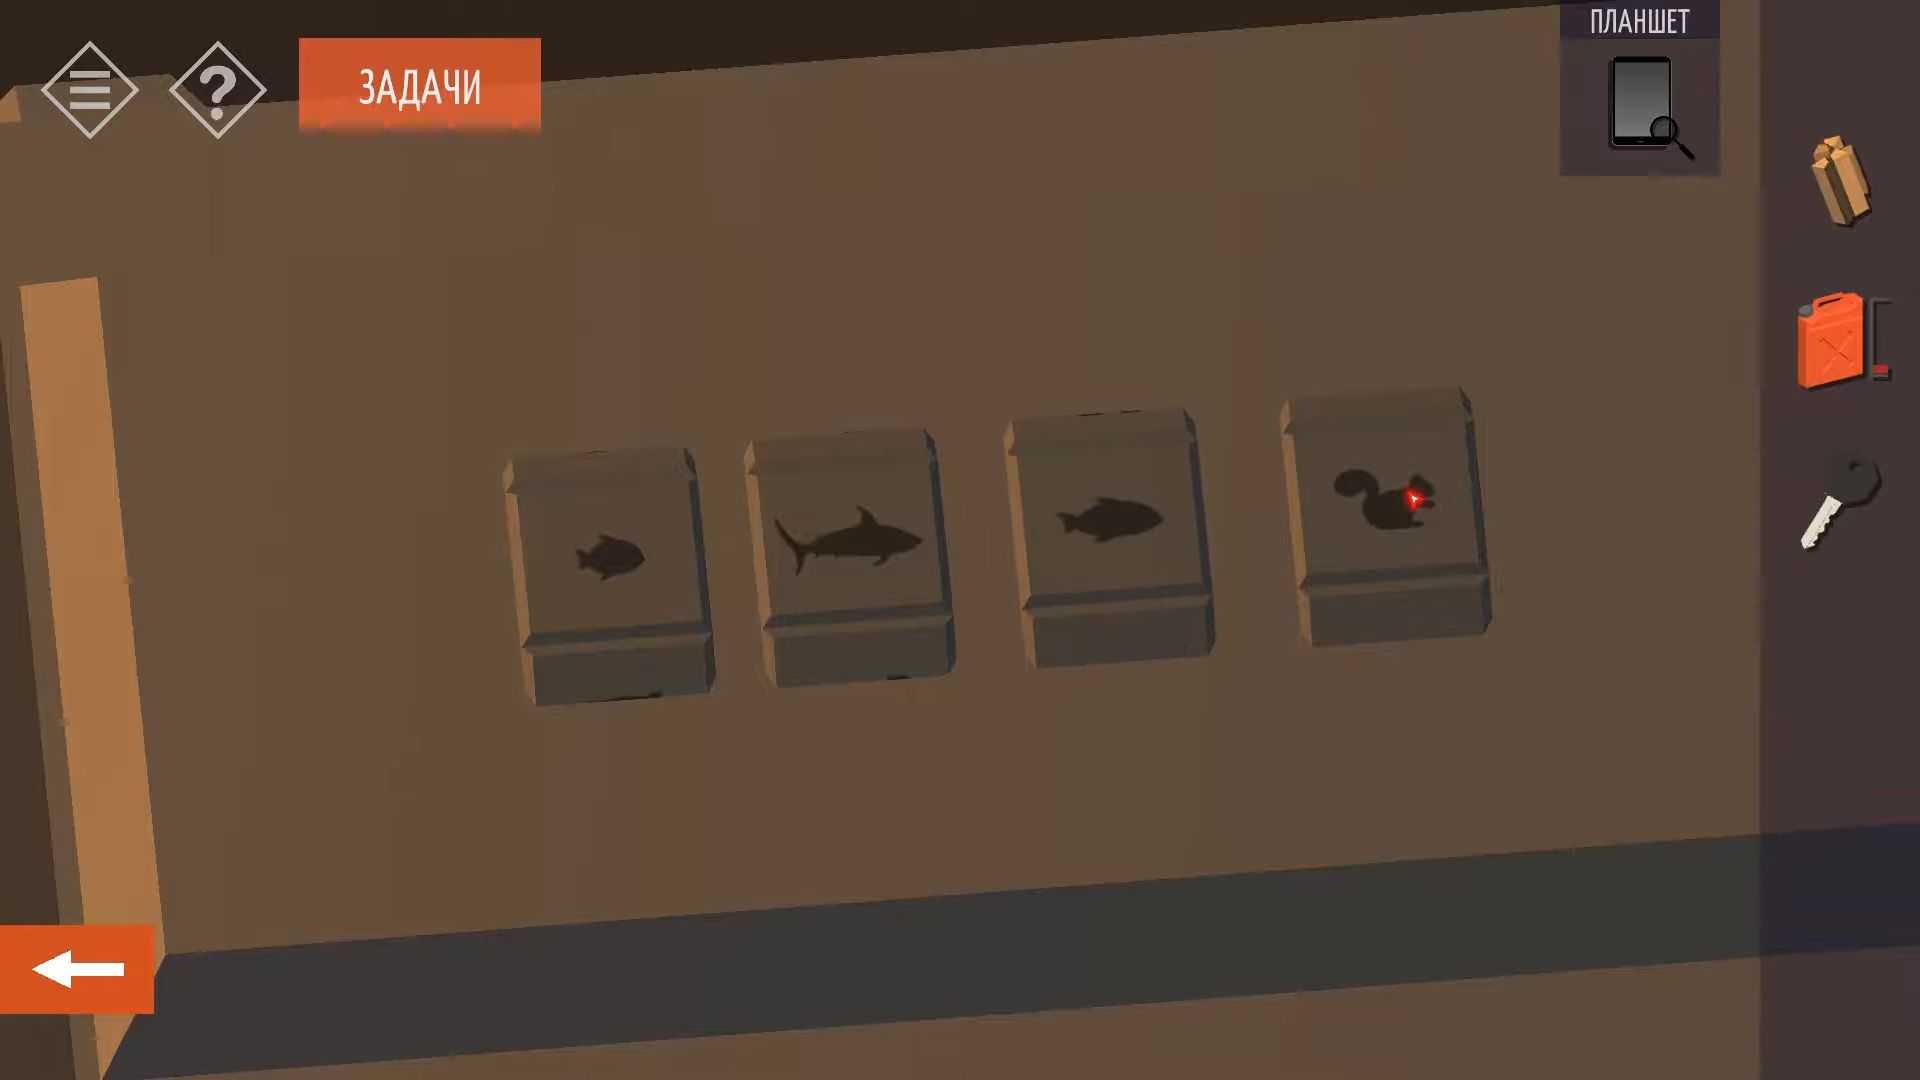
To start, go to the other door and head into the bathroom. Tap the sink to get an ID tag with information about the owner James Kovach.
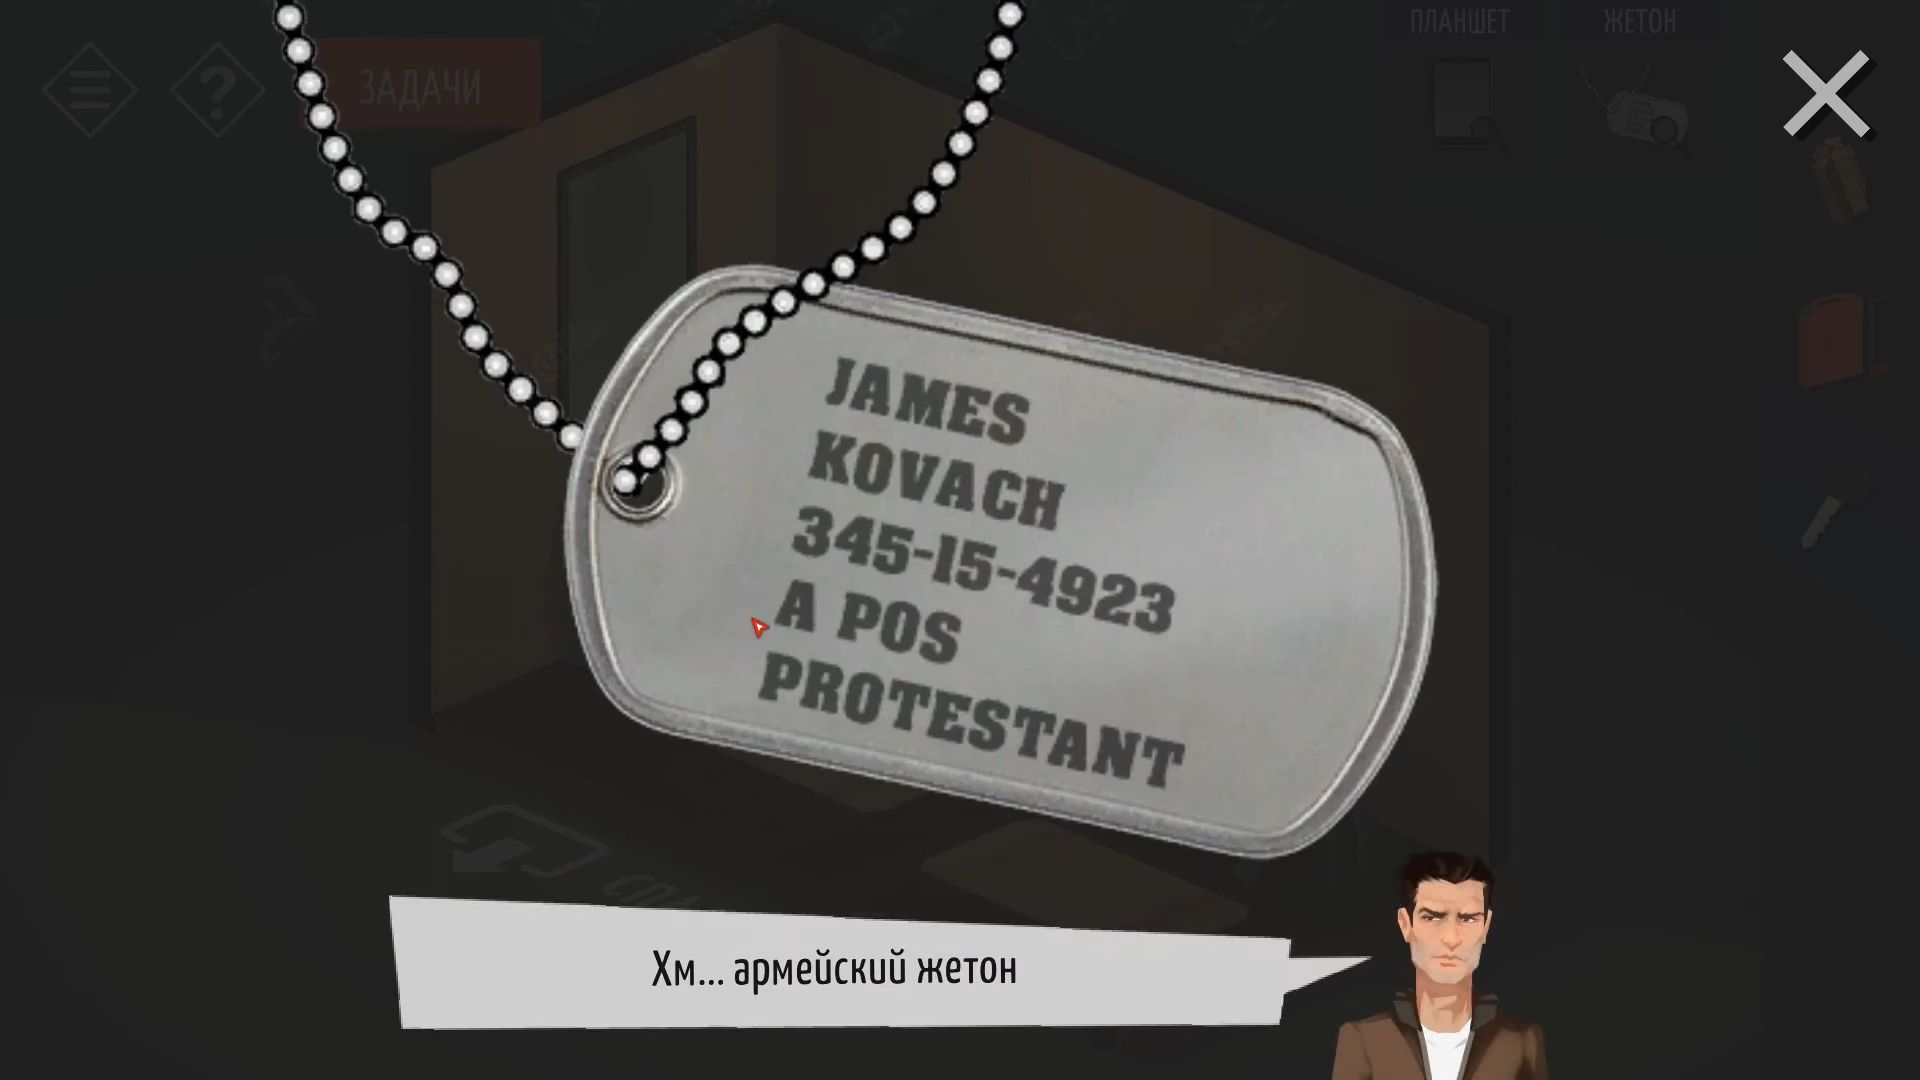
Go back to the workshop and check the motor on the table. Use the tablet to follow the instructions in the manual to assemble the motor. You have to do the steps in the opposite order to find some items in the toolbox. Now, you have the motor all put together.
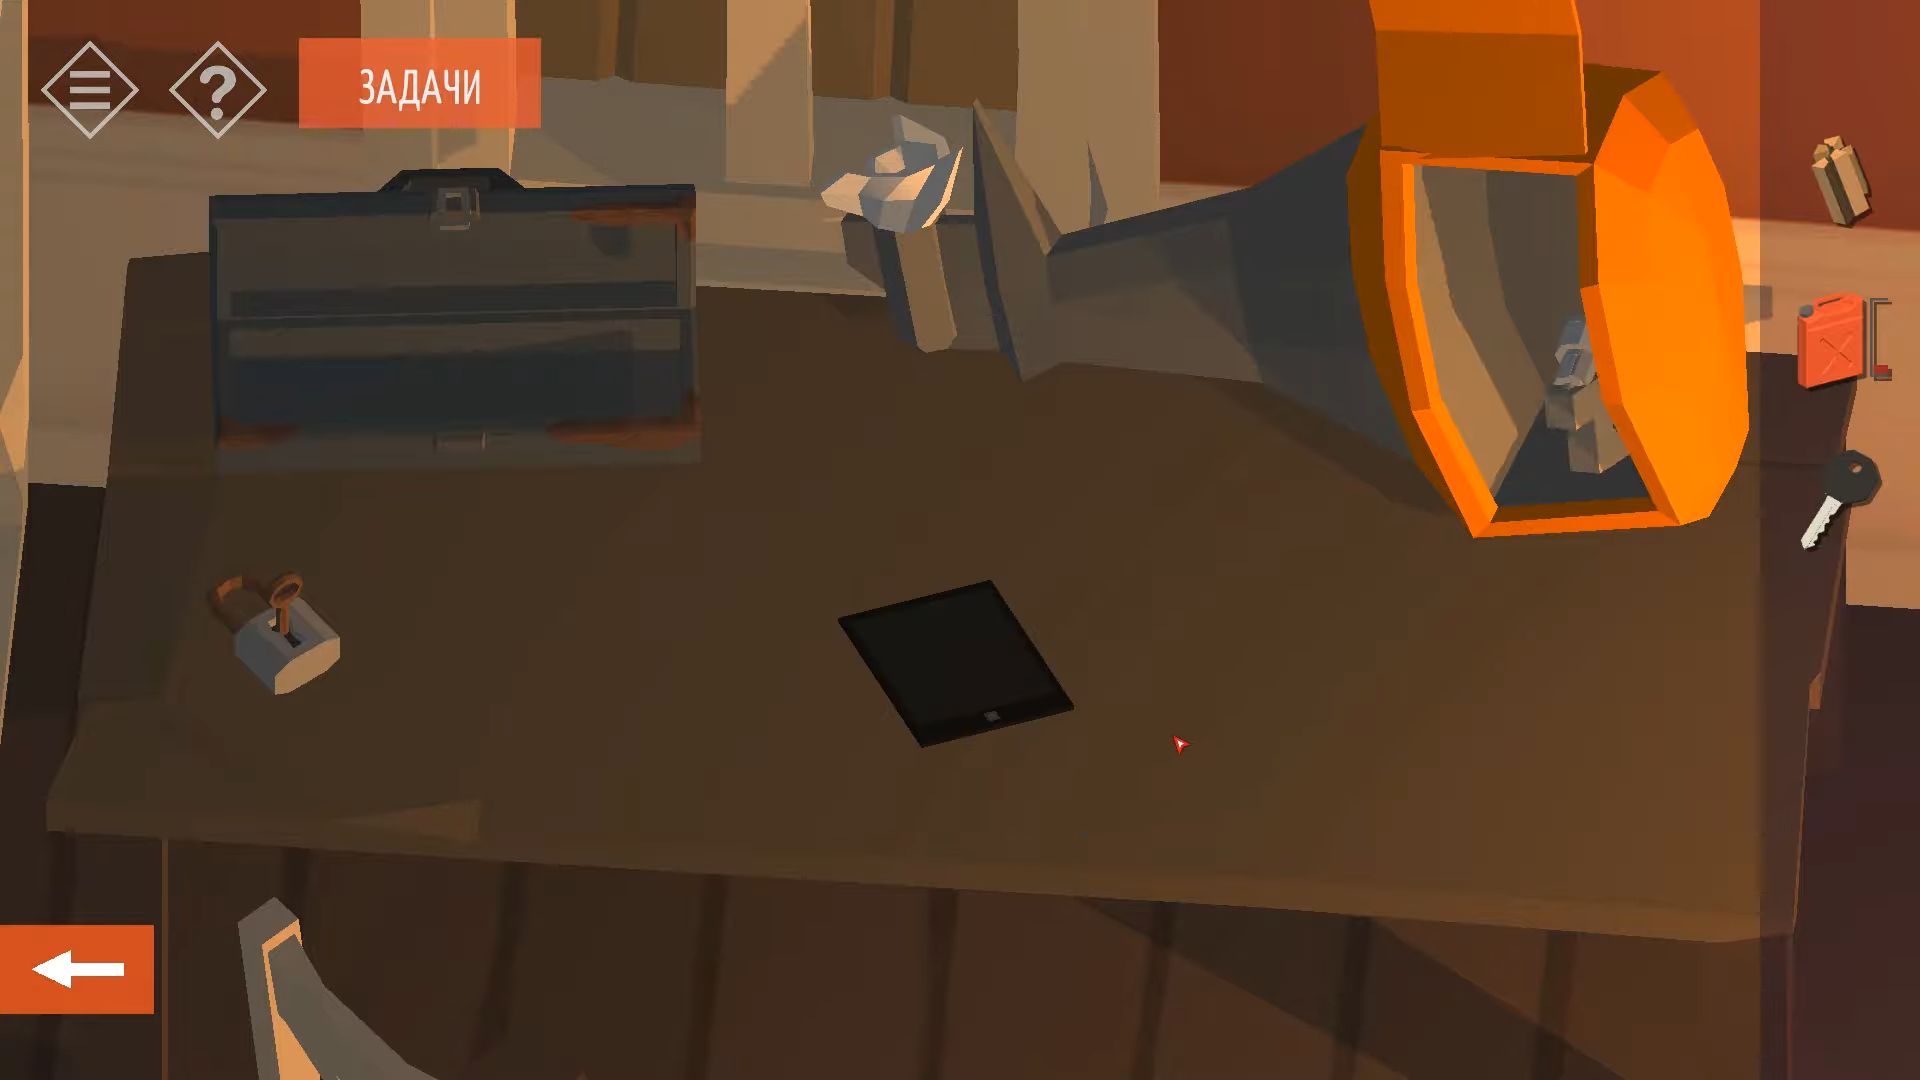
Go back to the basement and use the black key to unlock the door. Navigate through into the next room. On one side, there are O2 tanks; most are empty, but one is full. You need to find it and take it. On the other side, you’ll see a washing machine and shelves, tap the shelves to get a flashlight.
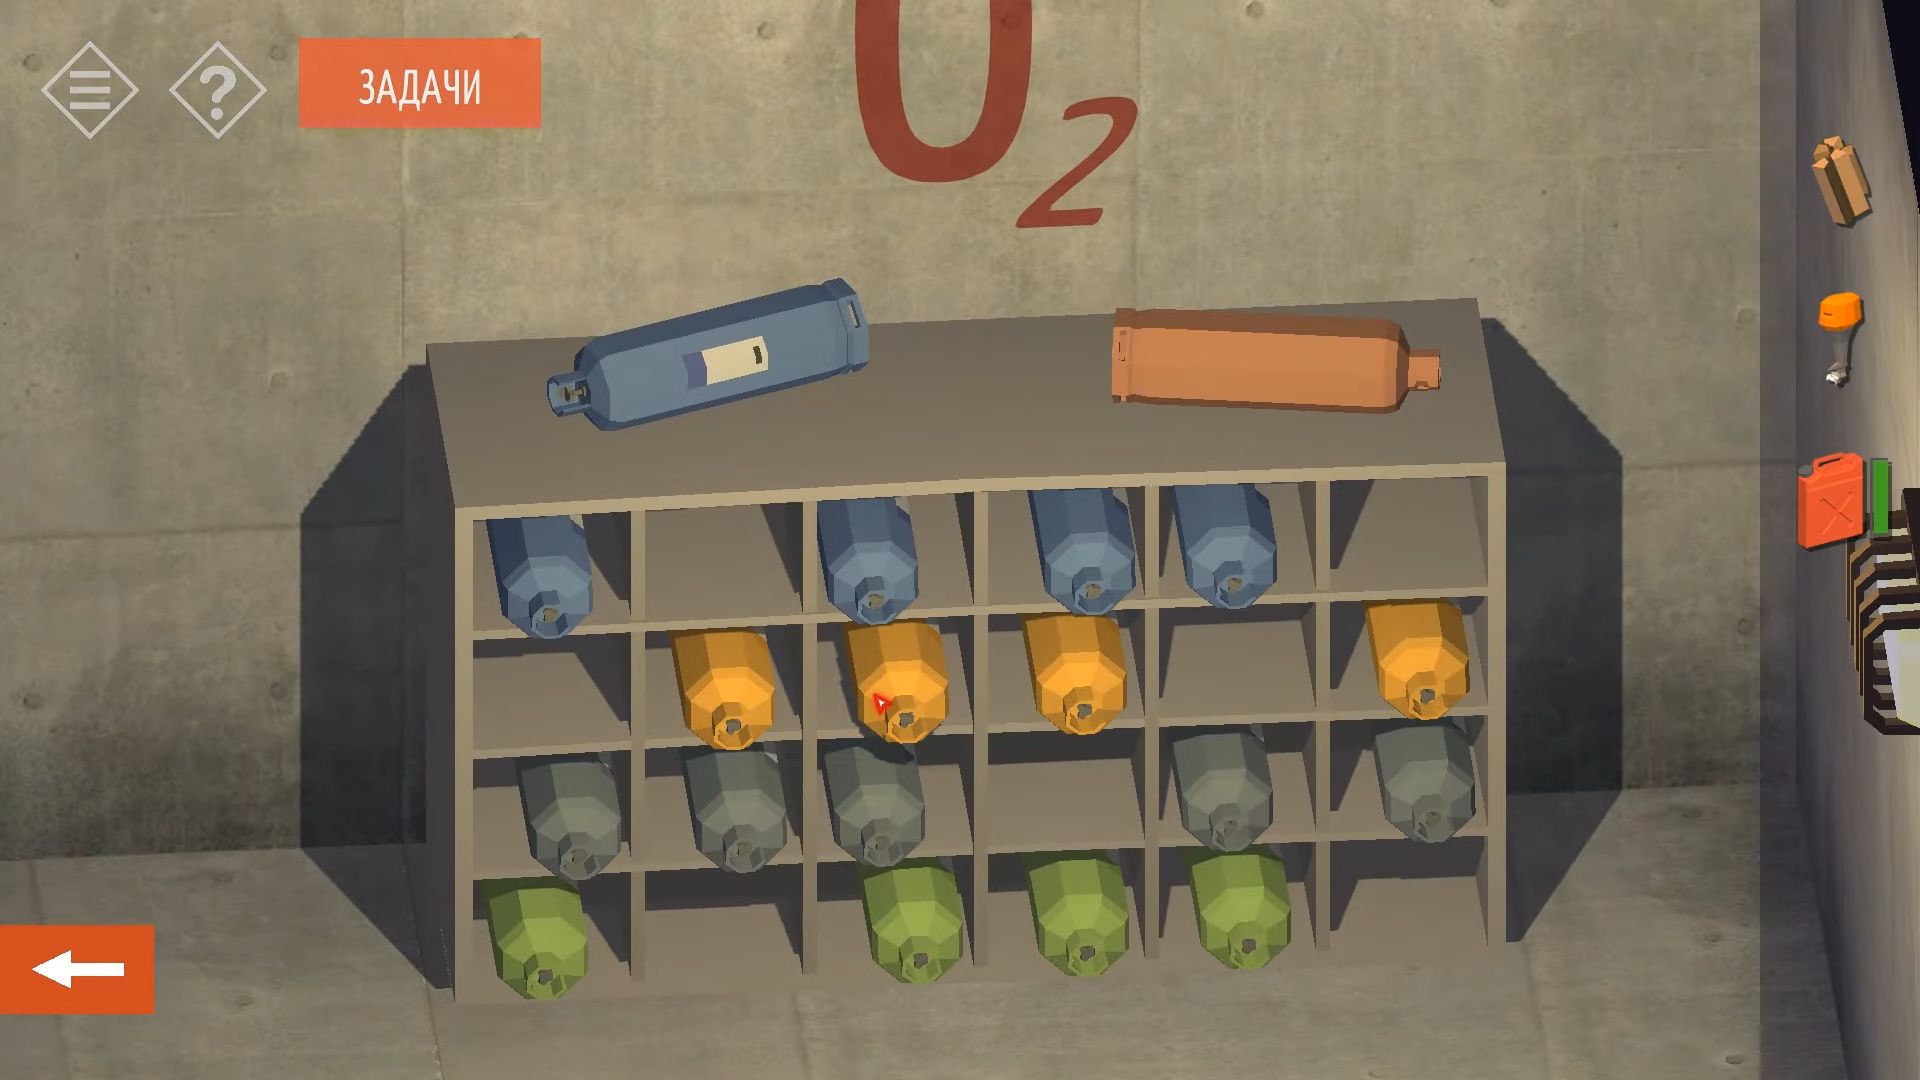
Now, you have everything you need, head to the gas tank and fill the canister again. Navigate to the boat, attach the motor to the boat, and use the full canister to fill it up. Now, tap the boat and sail away to finish this part of Chapter 13.
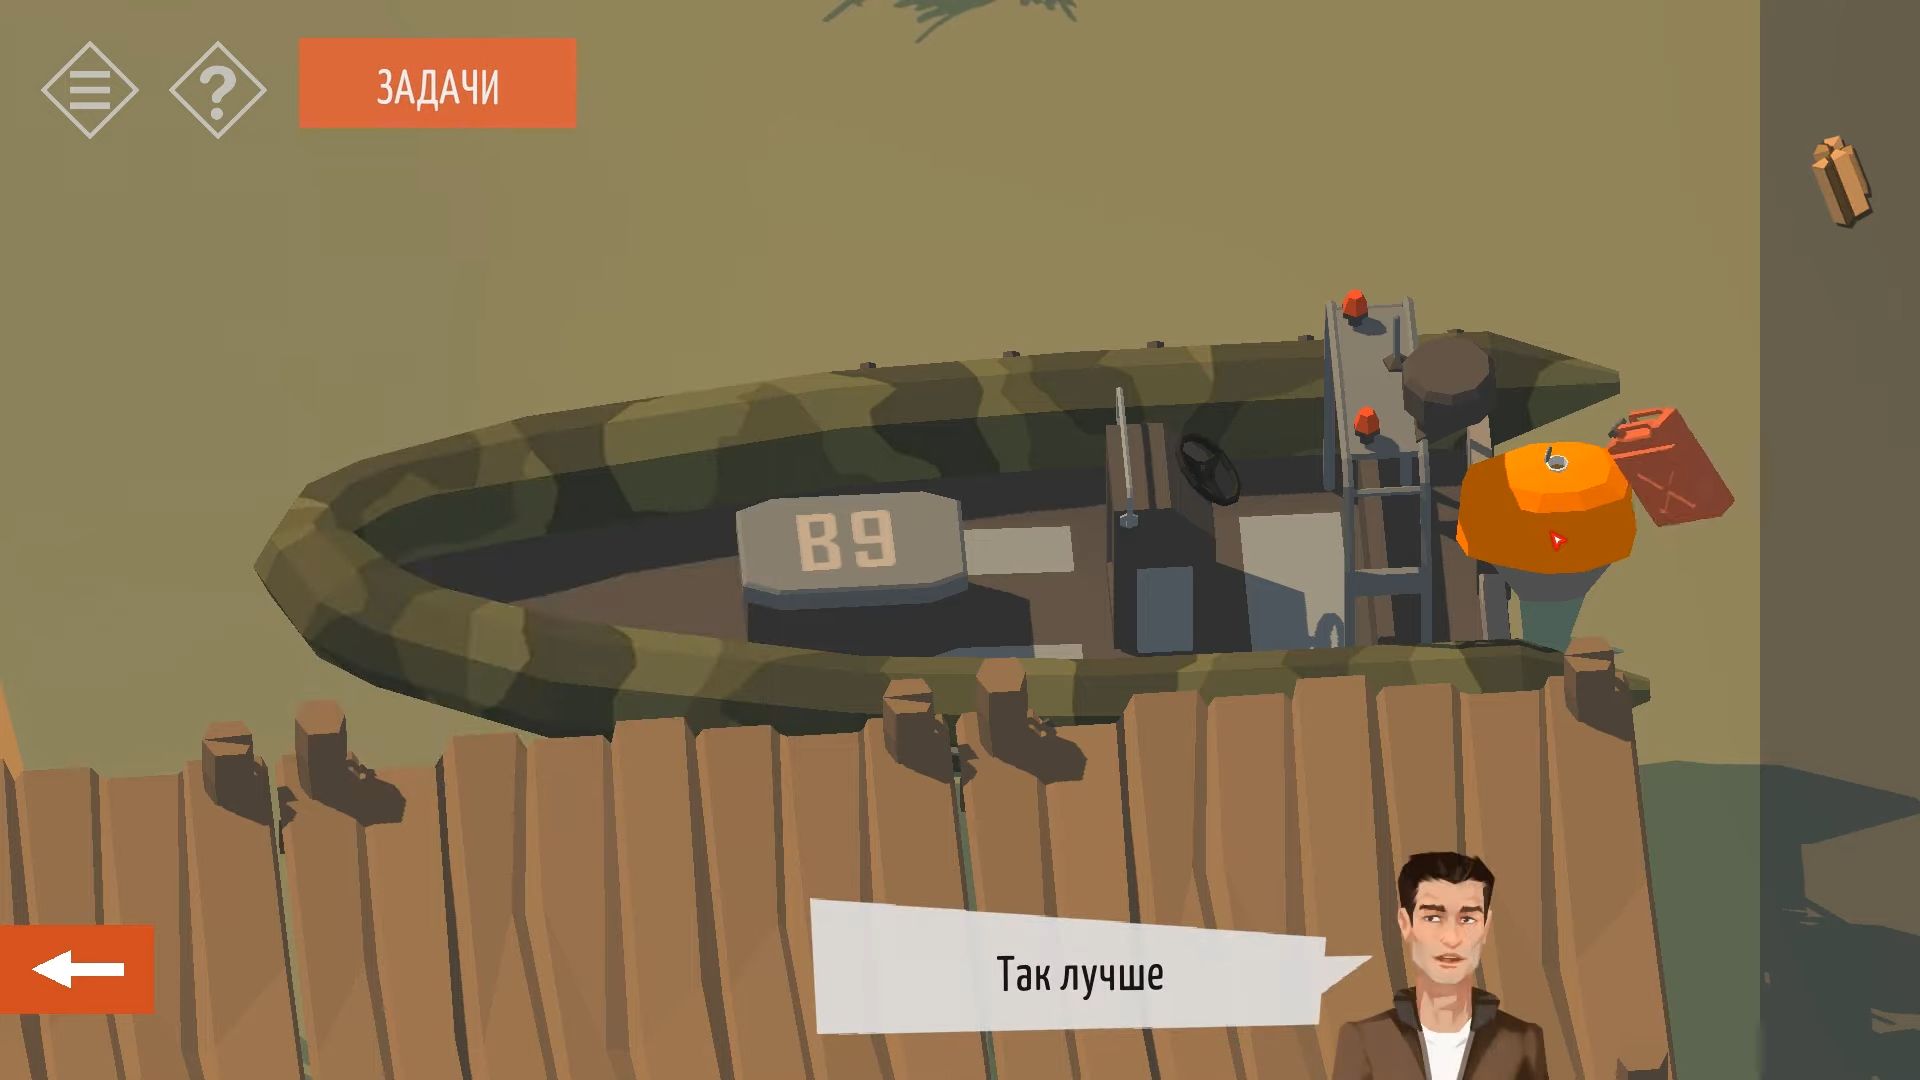
Part 2 – Under the Sea
After getting everything ready and fixing the boat, head to the spot in the middle of the bay indicated by the crystal. Now, you’re out in the sea with just water around you, tap on the yellow tank in the front of the boat to wear your diving gear. Next, knock on the indicator to start diving. Initially, there might not be much to see on the seabed, but signs are pointing you in different directions to explore. The seafloor is divided into 9 sections, arranged in a 3×3 grid. You will begin at the bottom left position.
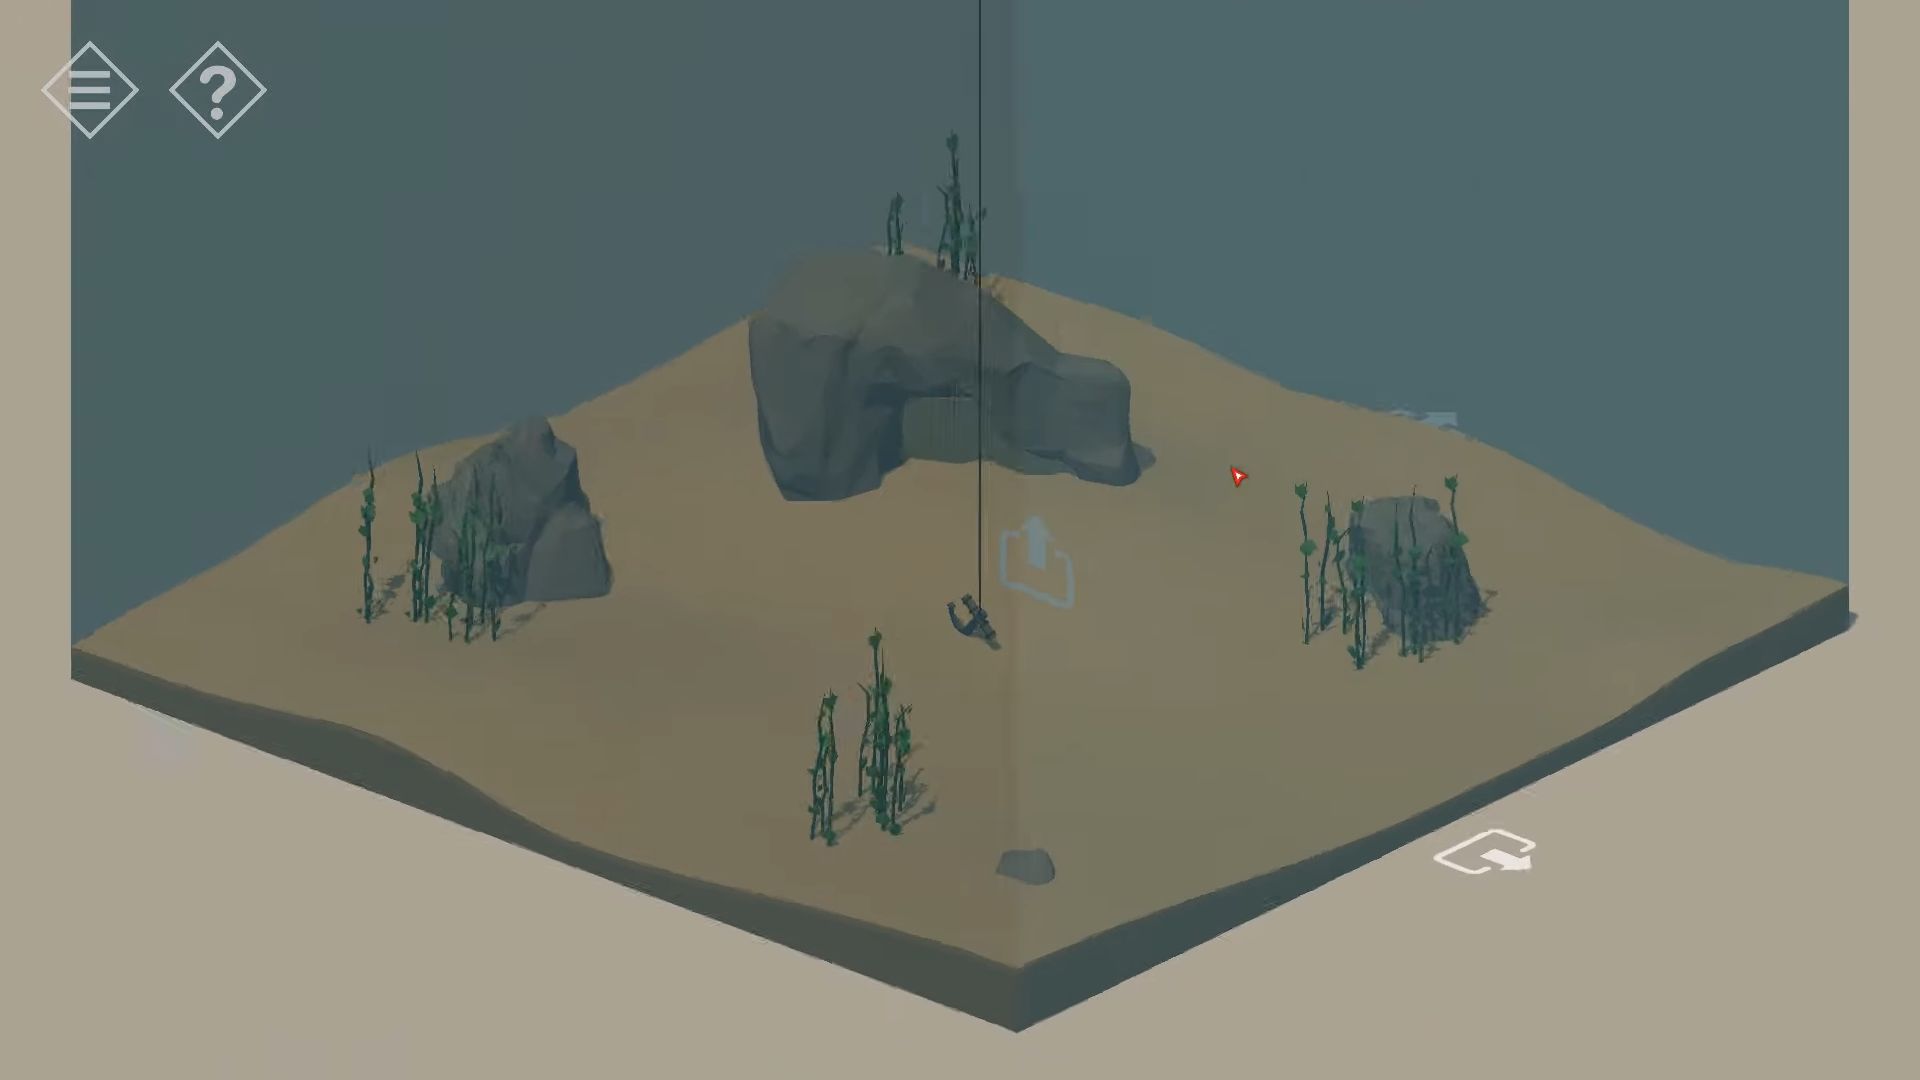
Go to the left and turn the view to find a treasure chest hidden in the tall plants. Go up to the next spot, and you’ll see another treasure chest. Inside, there might be something useful or it could be empty. If there’s an item, grab the octopus-shaped key. If you haven’t found the key yet, there’s a third chest waiting for you. Move two times to the right from where you started to discover it.
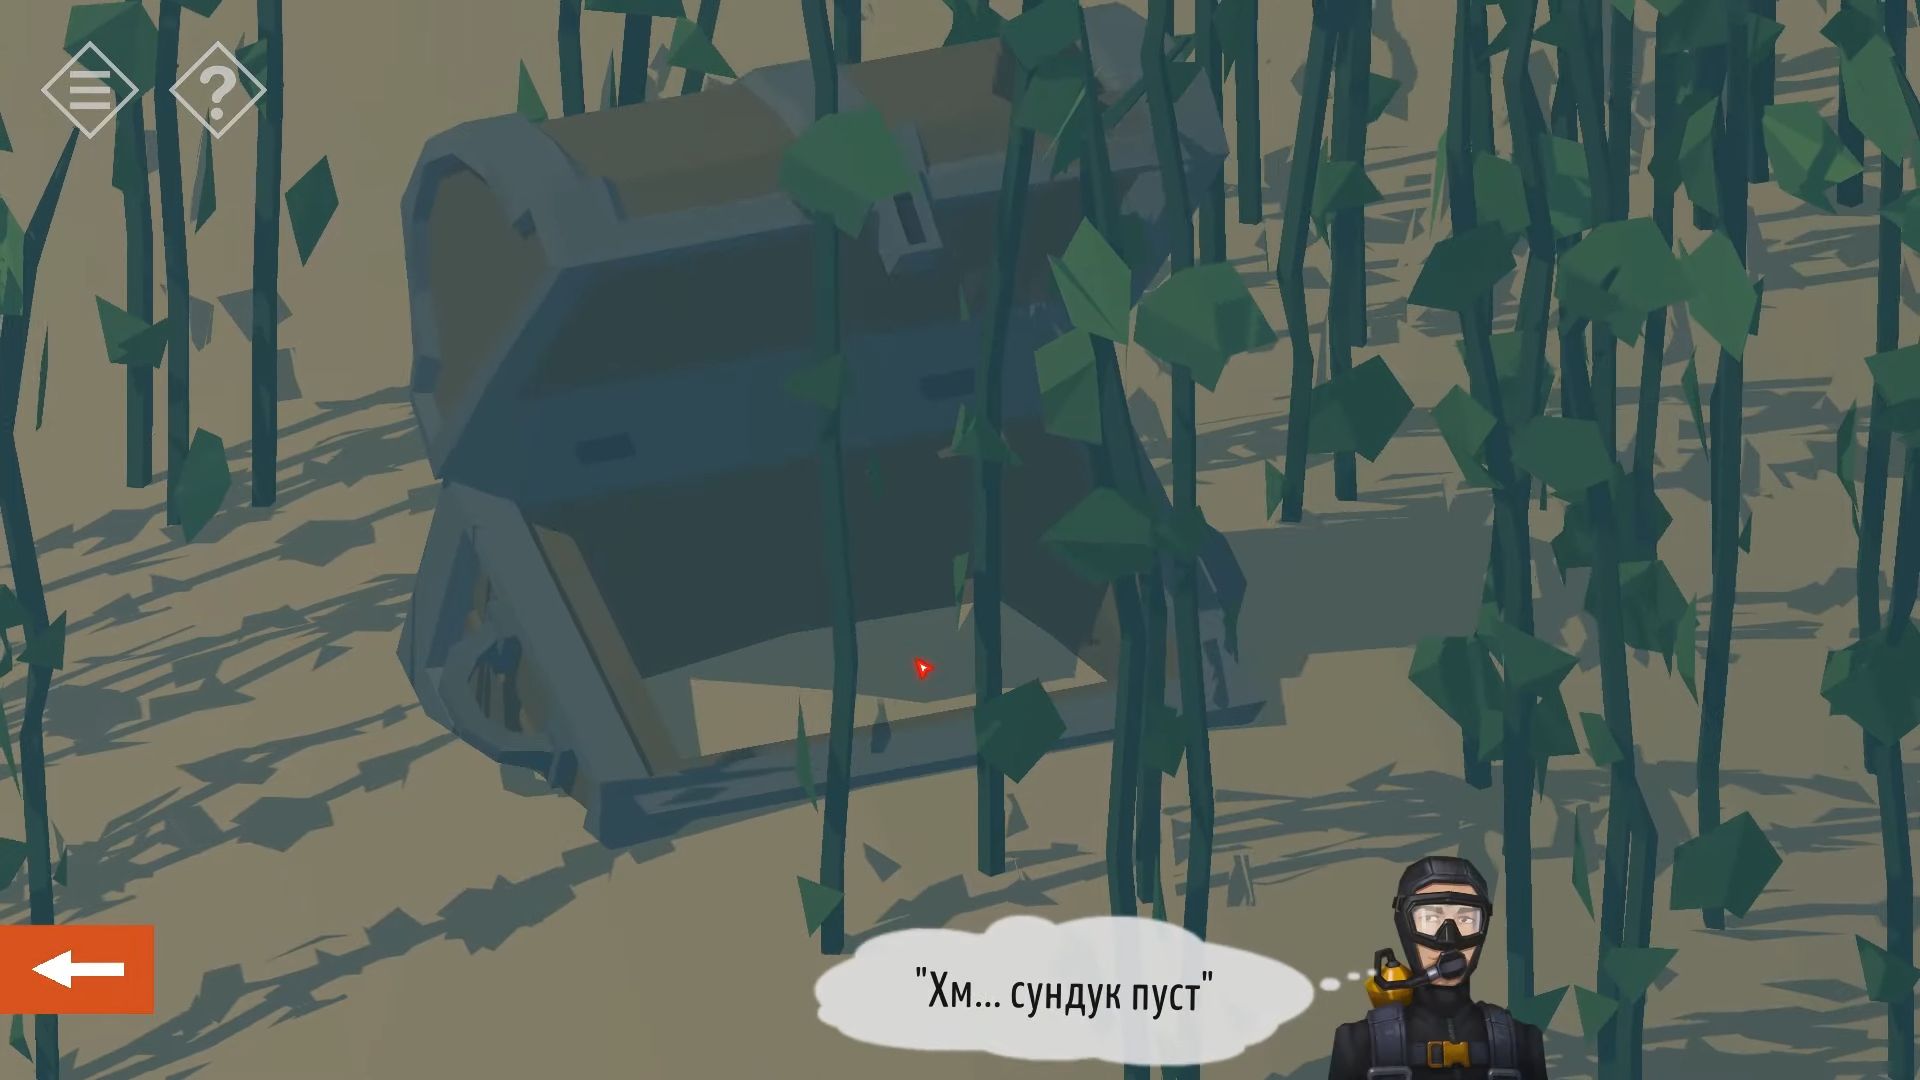
Starting from the upper left spot, go towards the right to locate this area and tap on the cannon lying on the ground. Pay attention to the symbol.
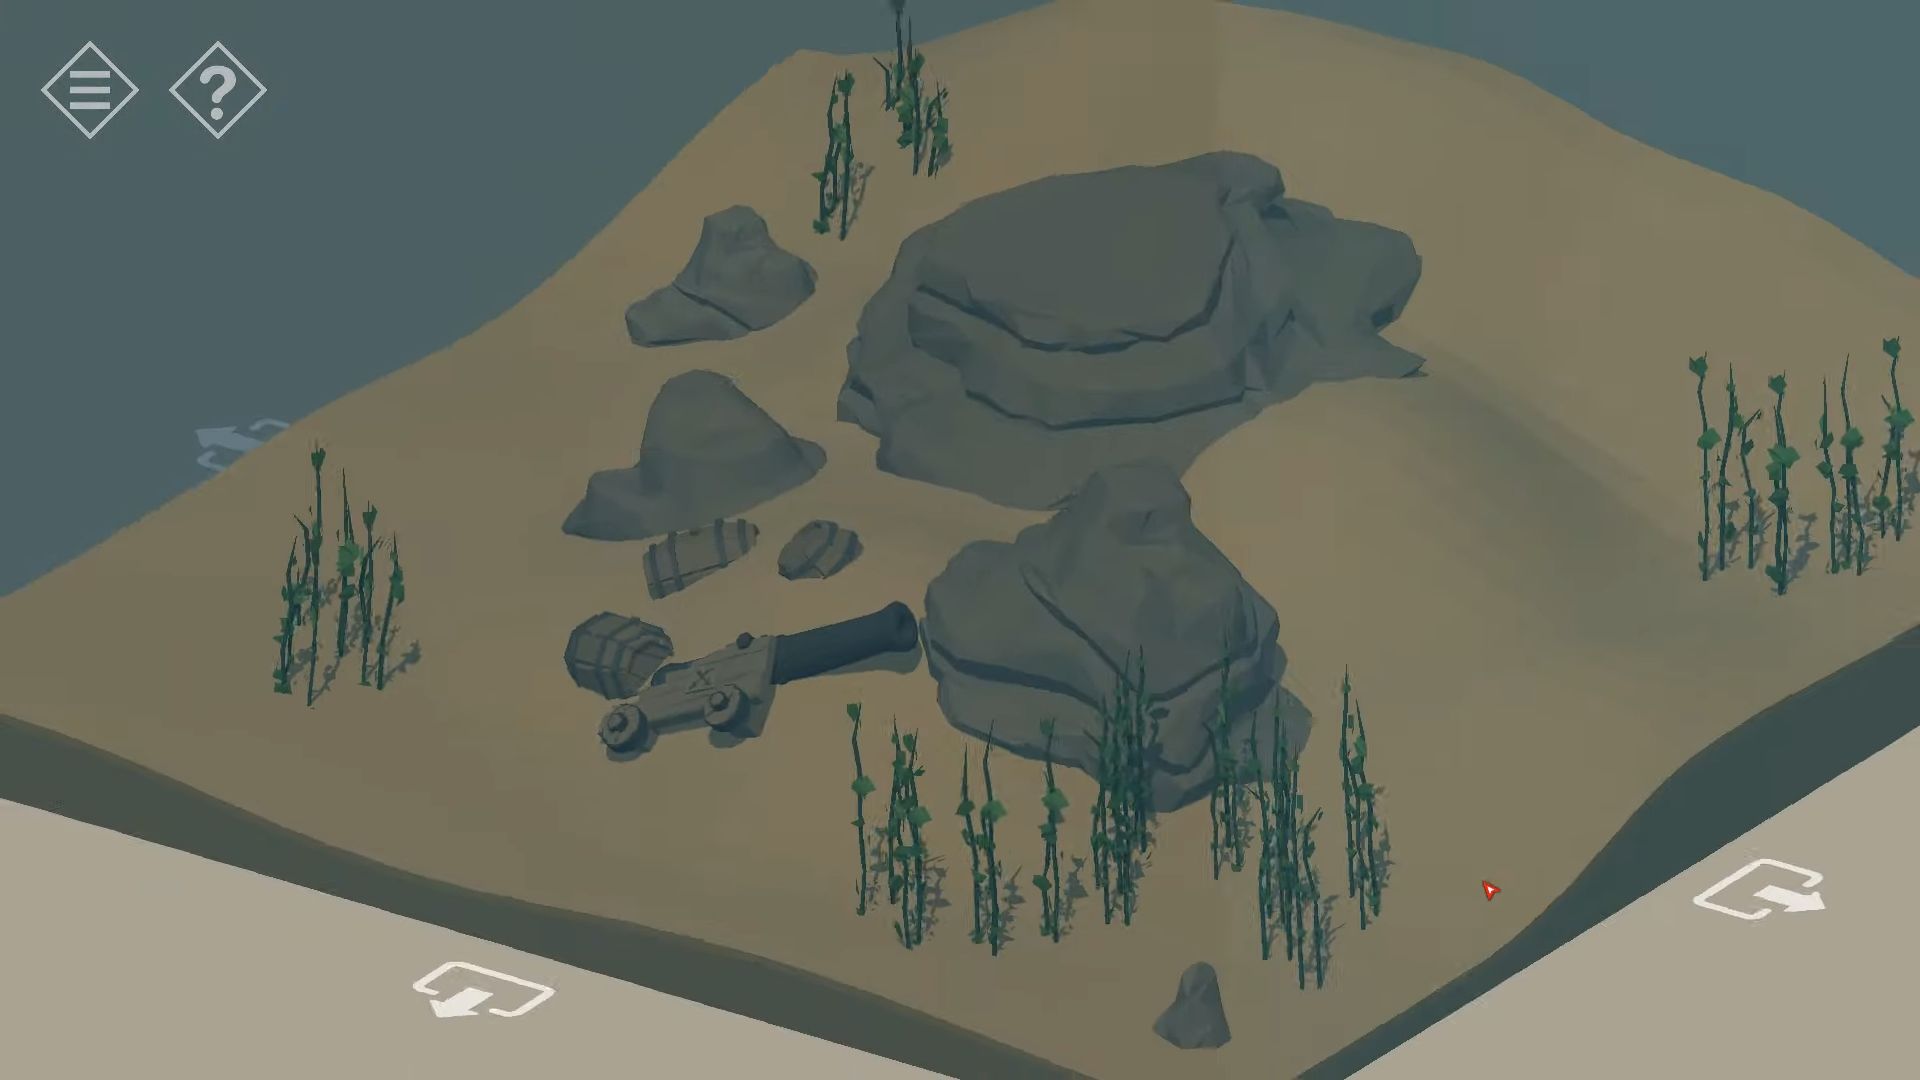
Go down to the middle part to discover the back of a shipwreck. Head to the sea area in front to find the front part of the shipwreck. Tap on the front to see the name and symbol – Renovacion, which means renewal in Spanish. Pay attention to the emblem and it looks like the key you found. Open your key in the inventory and tap on the legs to turn them to match the positions on the emblem.
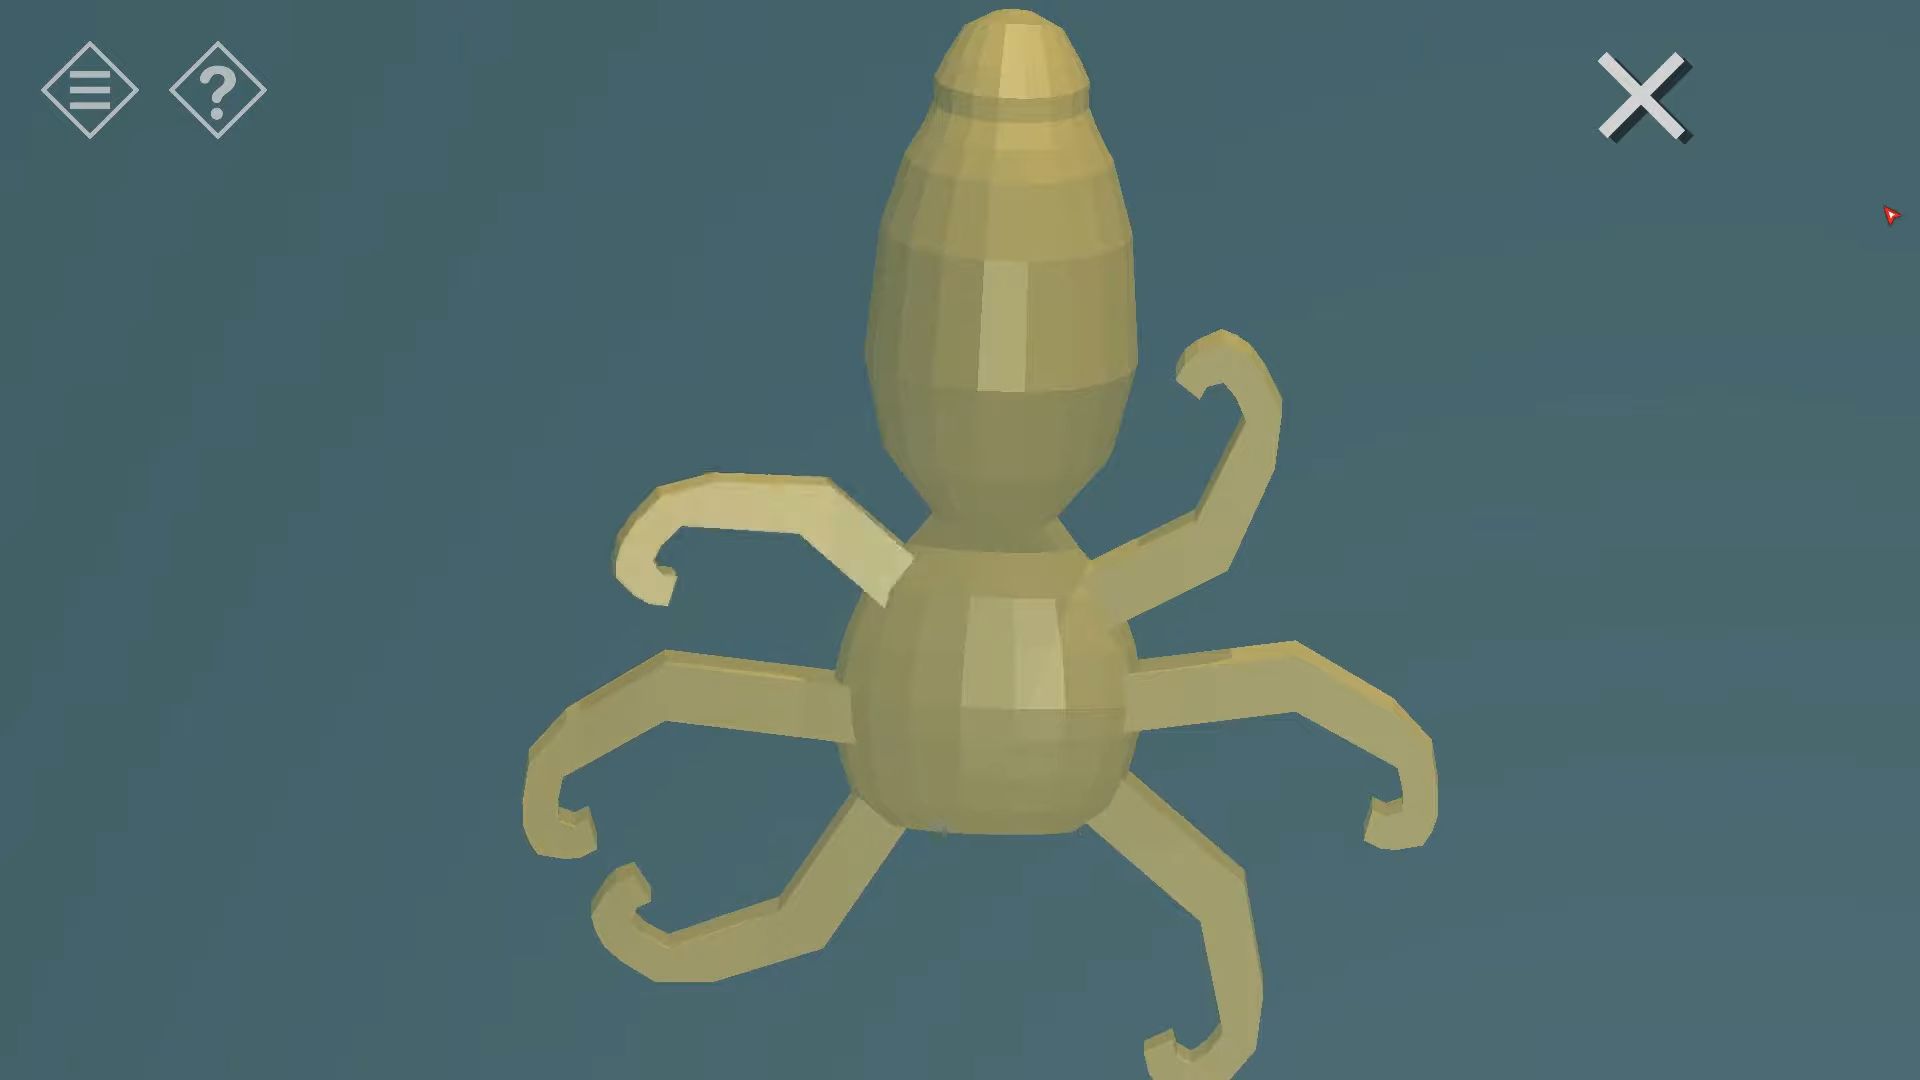
Now, go back to the back of the ship and turn the view to see the front part of the deck, then knock on the ship. After that, you can tap the doors to enter inside.
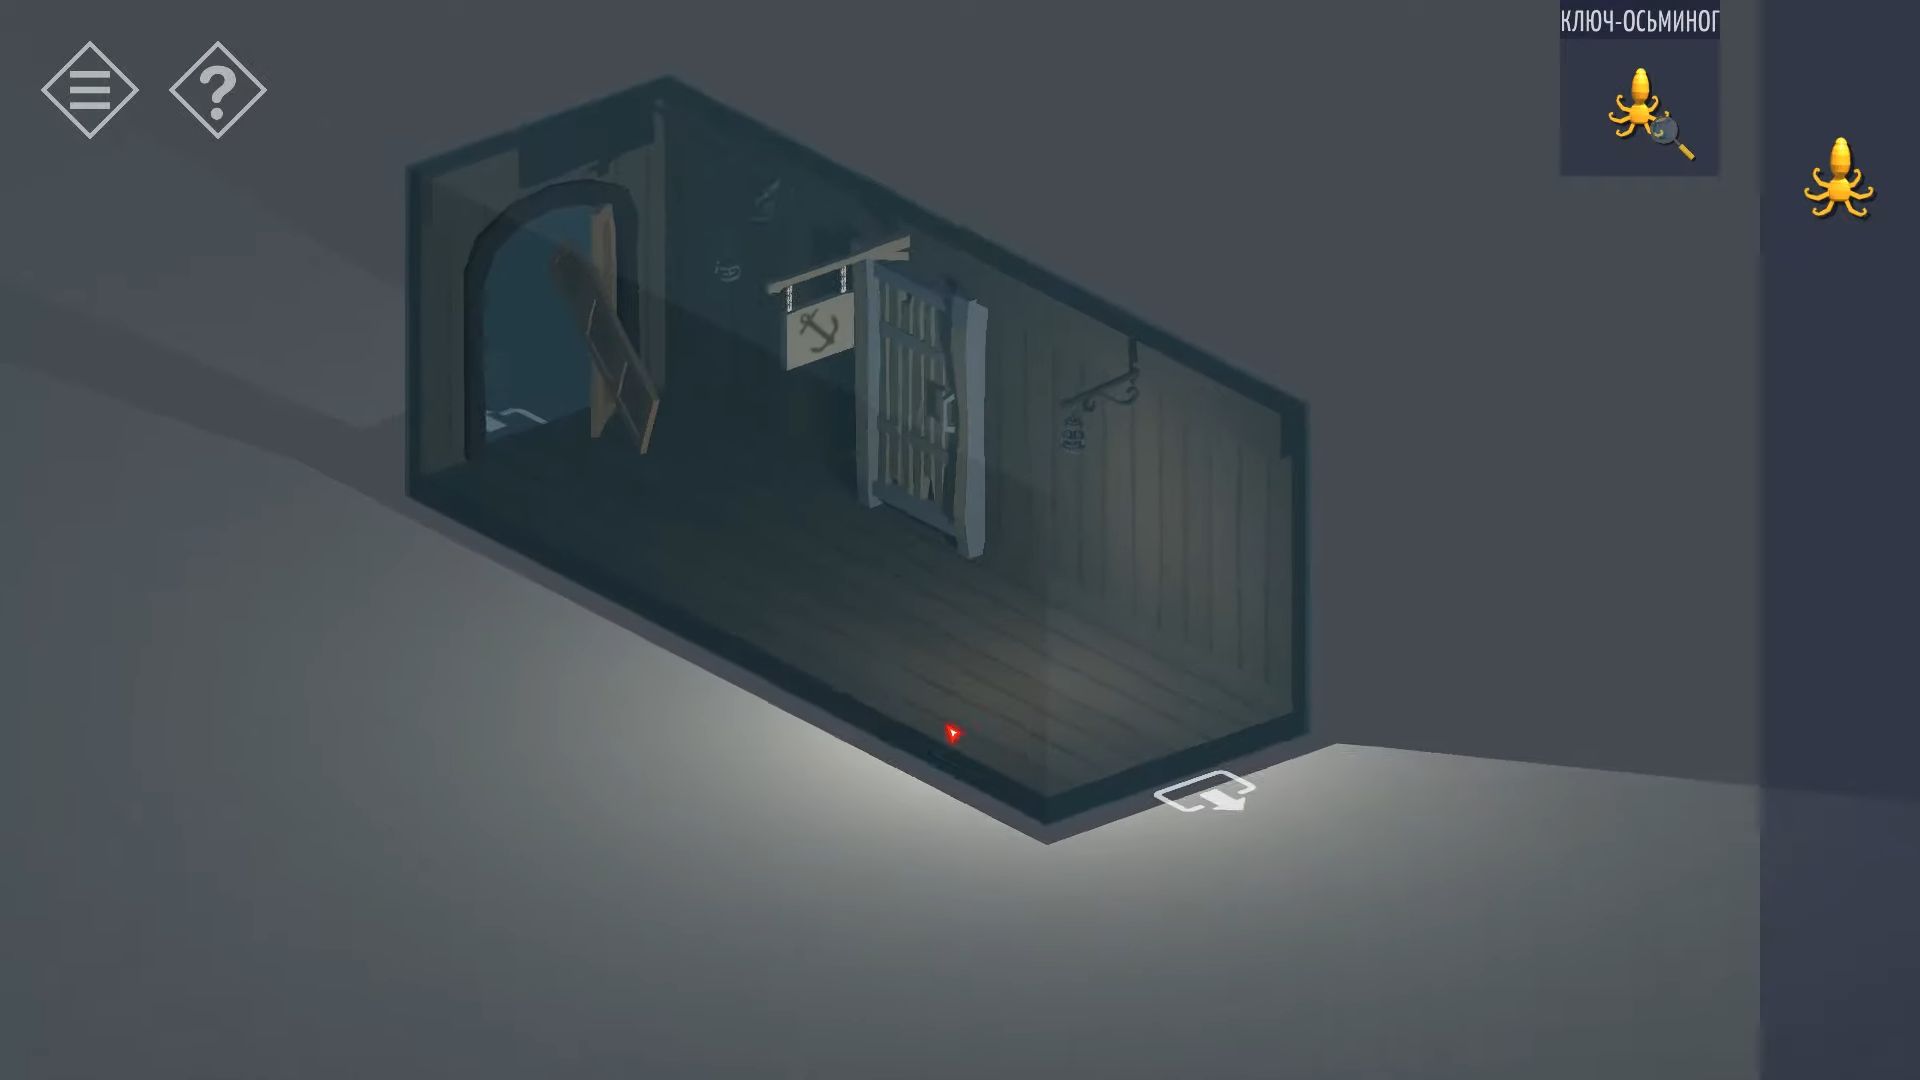
Go into the next room and knock on the table to look at it, then touch to pick up a gold coin. Turn the view and tap on the floating chest. Use the octopus key with the changed legs on the chest to unlock and open it.
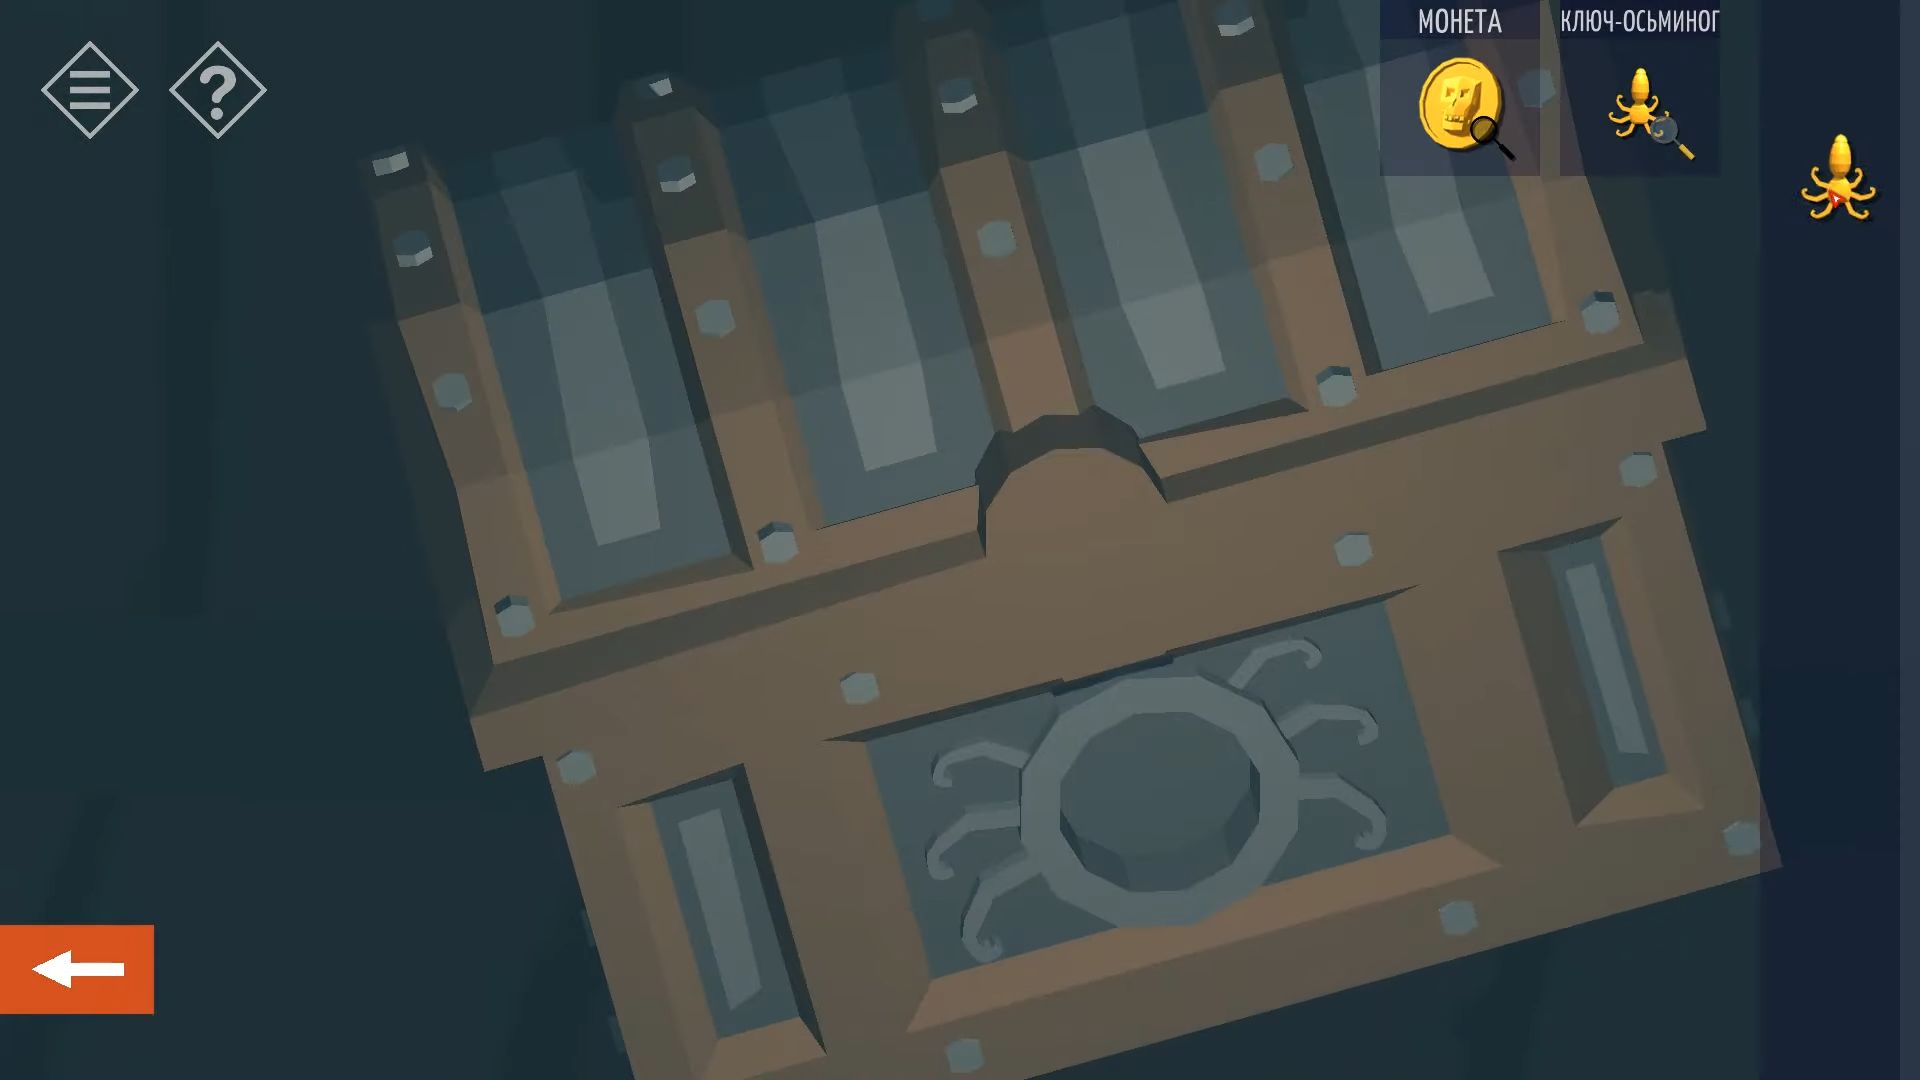
Gather a mysterious device from the chest and take a look at it. The device has a middle part with 6 parts that can turn. Tap each part to line them up in a way that makes the red lines connect across the item. Once you’ve done that, the panels on the left will open.
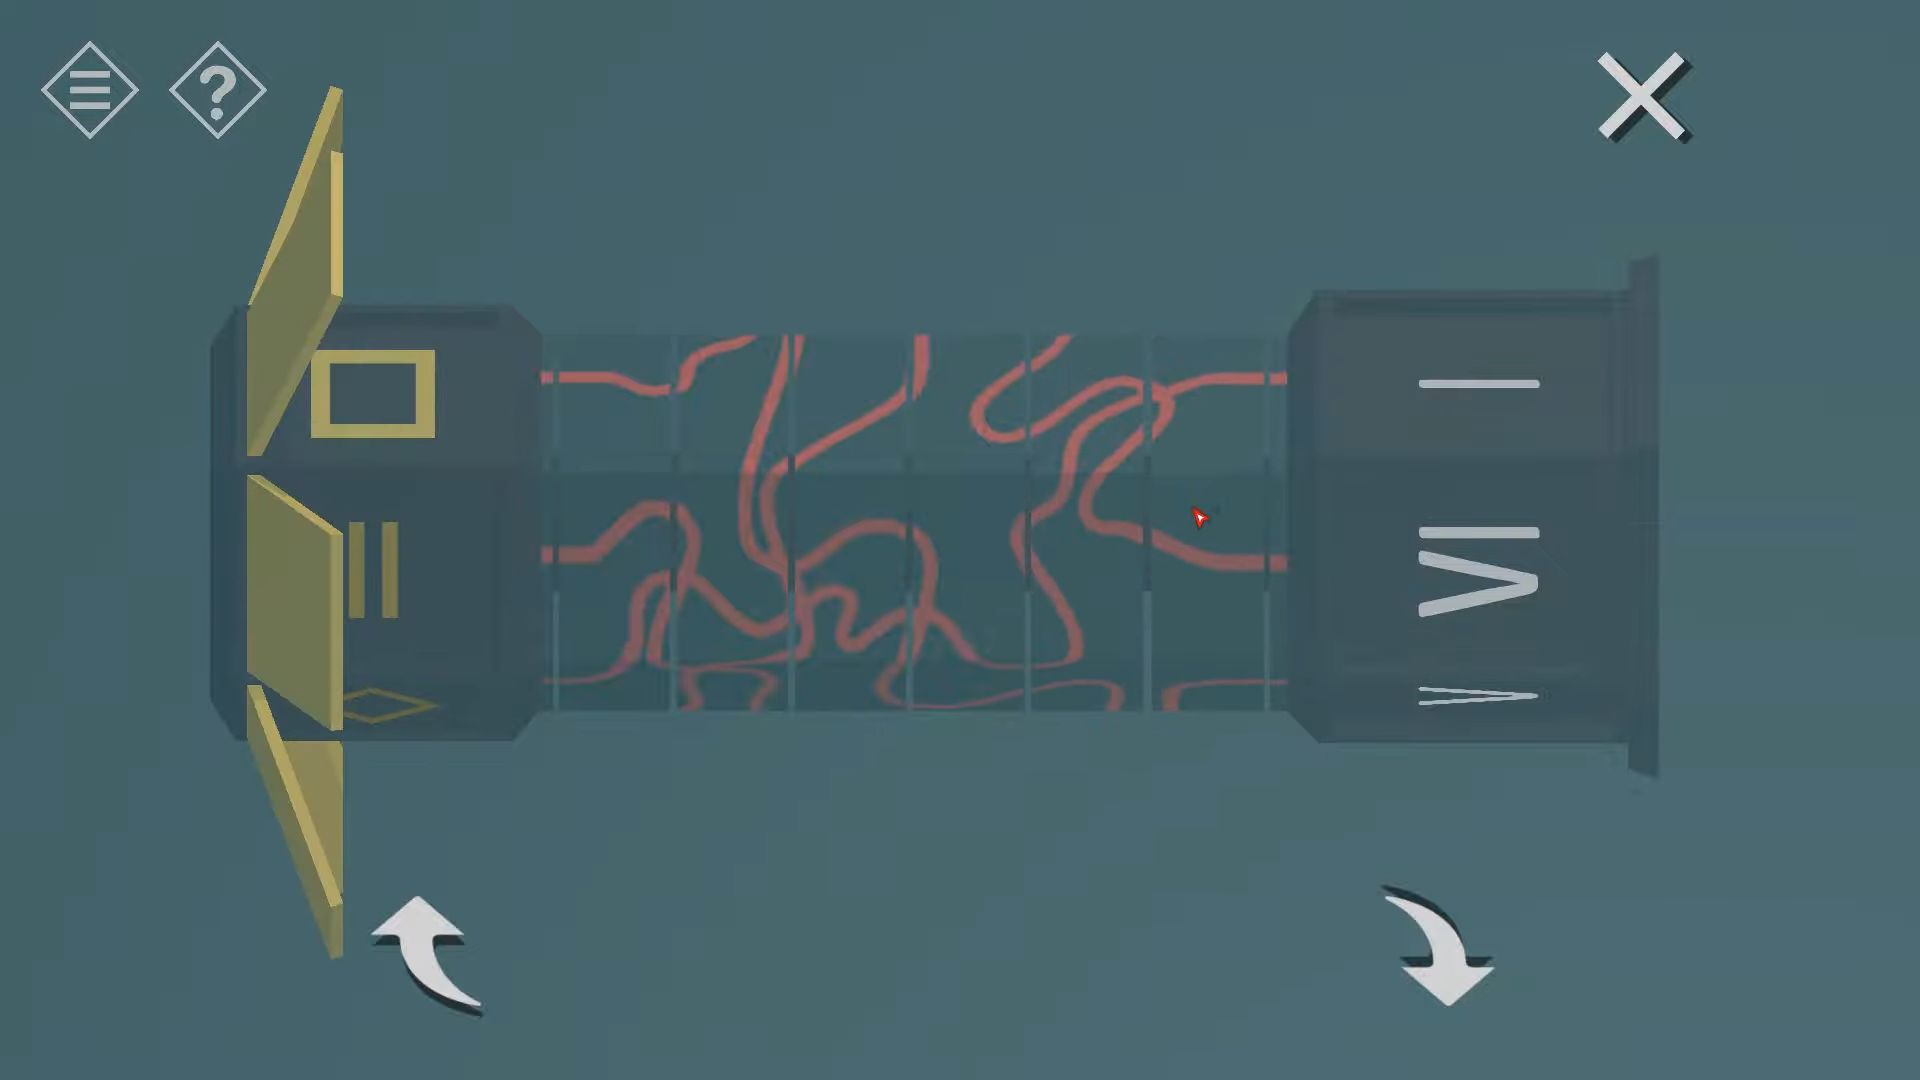
Now leave the ship and go upwards to the upper right part to discover the entrance of a cave that looks a bit scary.

Slightly touch to enter and this place has air. On one side, there’s a sword stuck in a stone, and behind it, there’s a puzzle. Tap to take a look.
On the left, 3 blocks can be turned to display various shapes. You can use the hints found above to set these accurately. The ship emblem has 1 sword on it and is inside a diamond shape. The cannon symbols have 2 swords on them and are square. The coin you found has 3 swords on the back and is in a circle shape. So, it’s Diamond – Square – Circle.
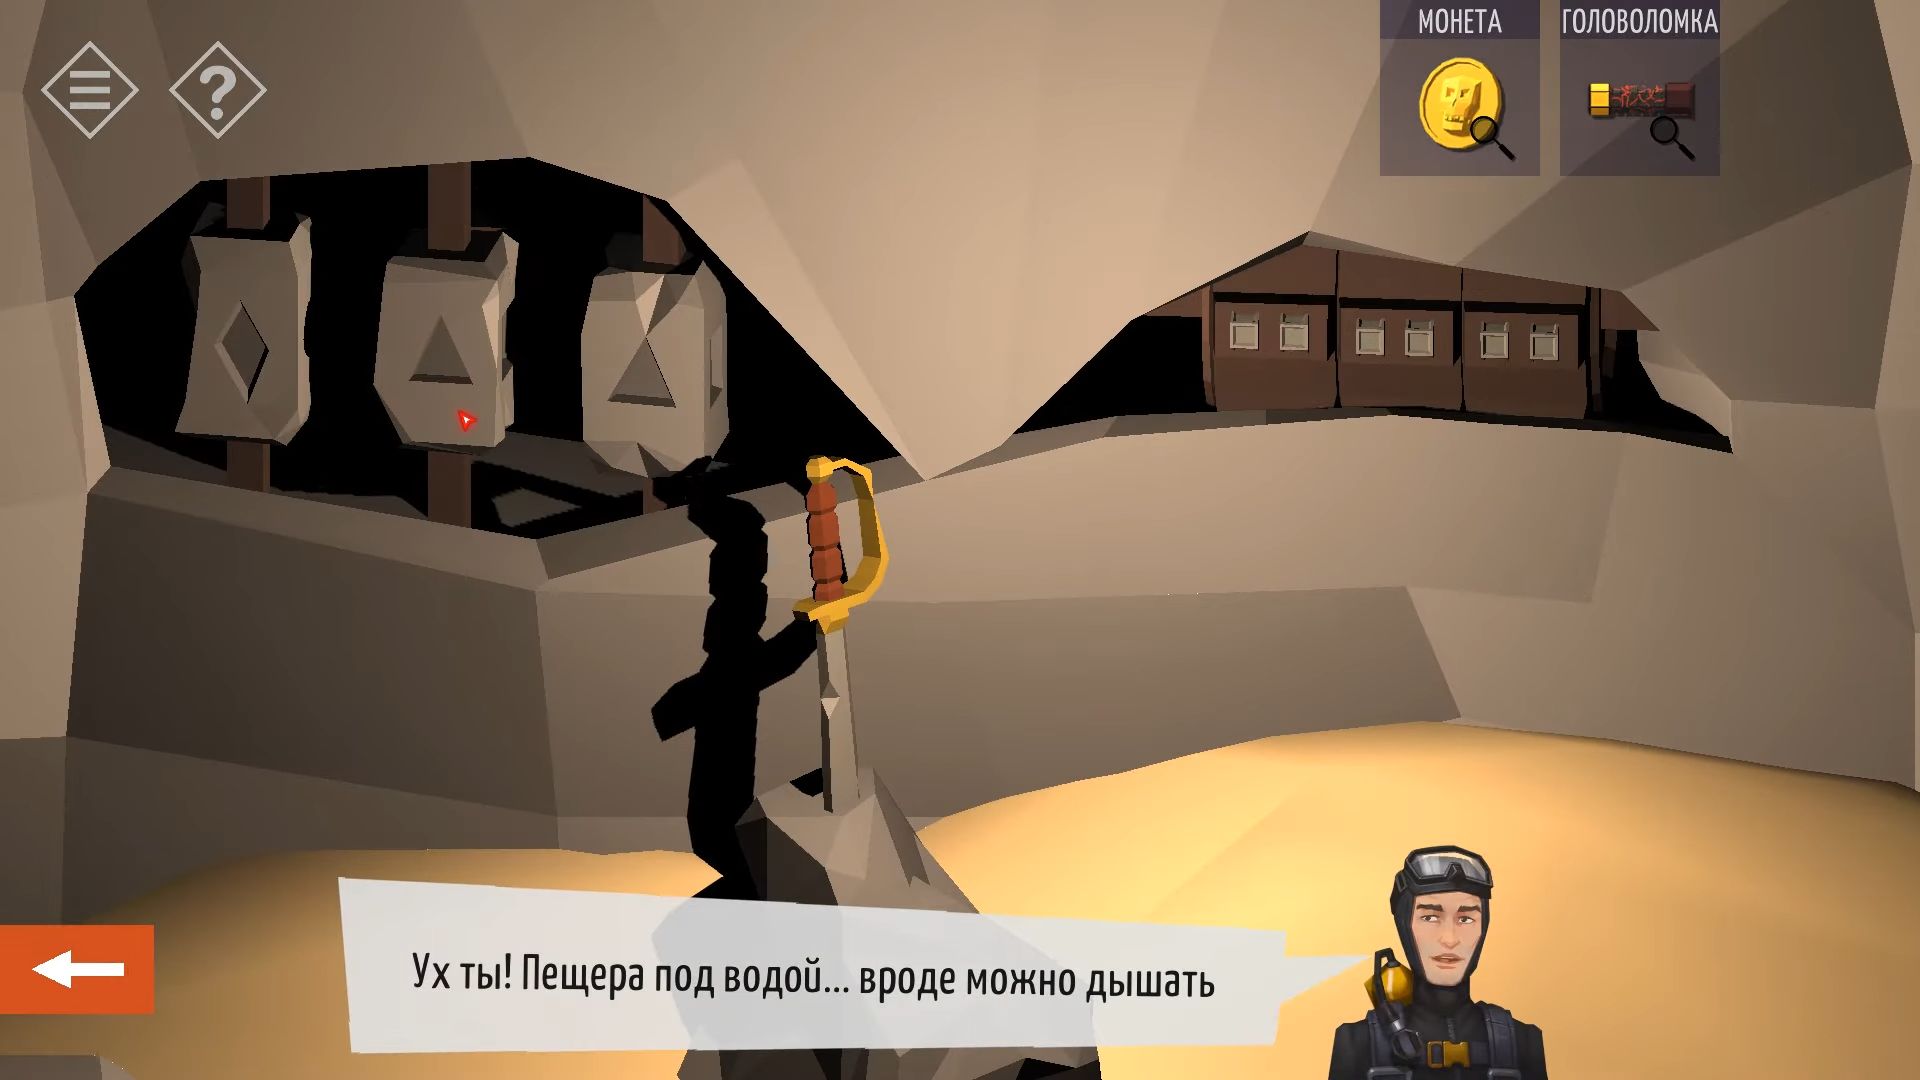
Now, let’s go to the puzzle on the right, it has 6 tumblers that you need to adjust. To figure out how to set them, use the device you discovered on the ship. On the right side, there are numbers, and on the left side, there are symbols. There are lines connecting them and follow these lines to understand the shapes needed for each position. 1 corresponds to Diamond, 2 to Square, 3 to Plus, 4 to Equals, 5 to Triangle, and 6 to Circle.
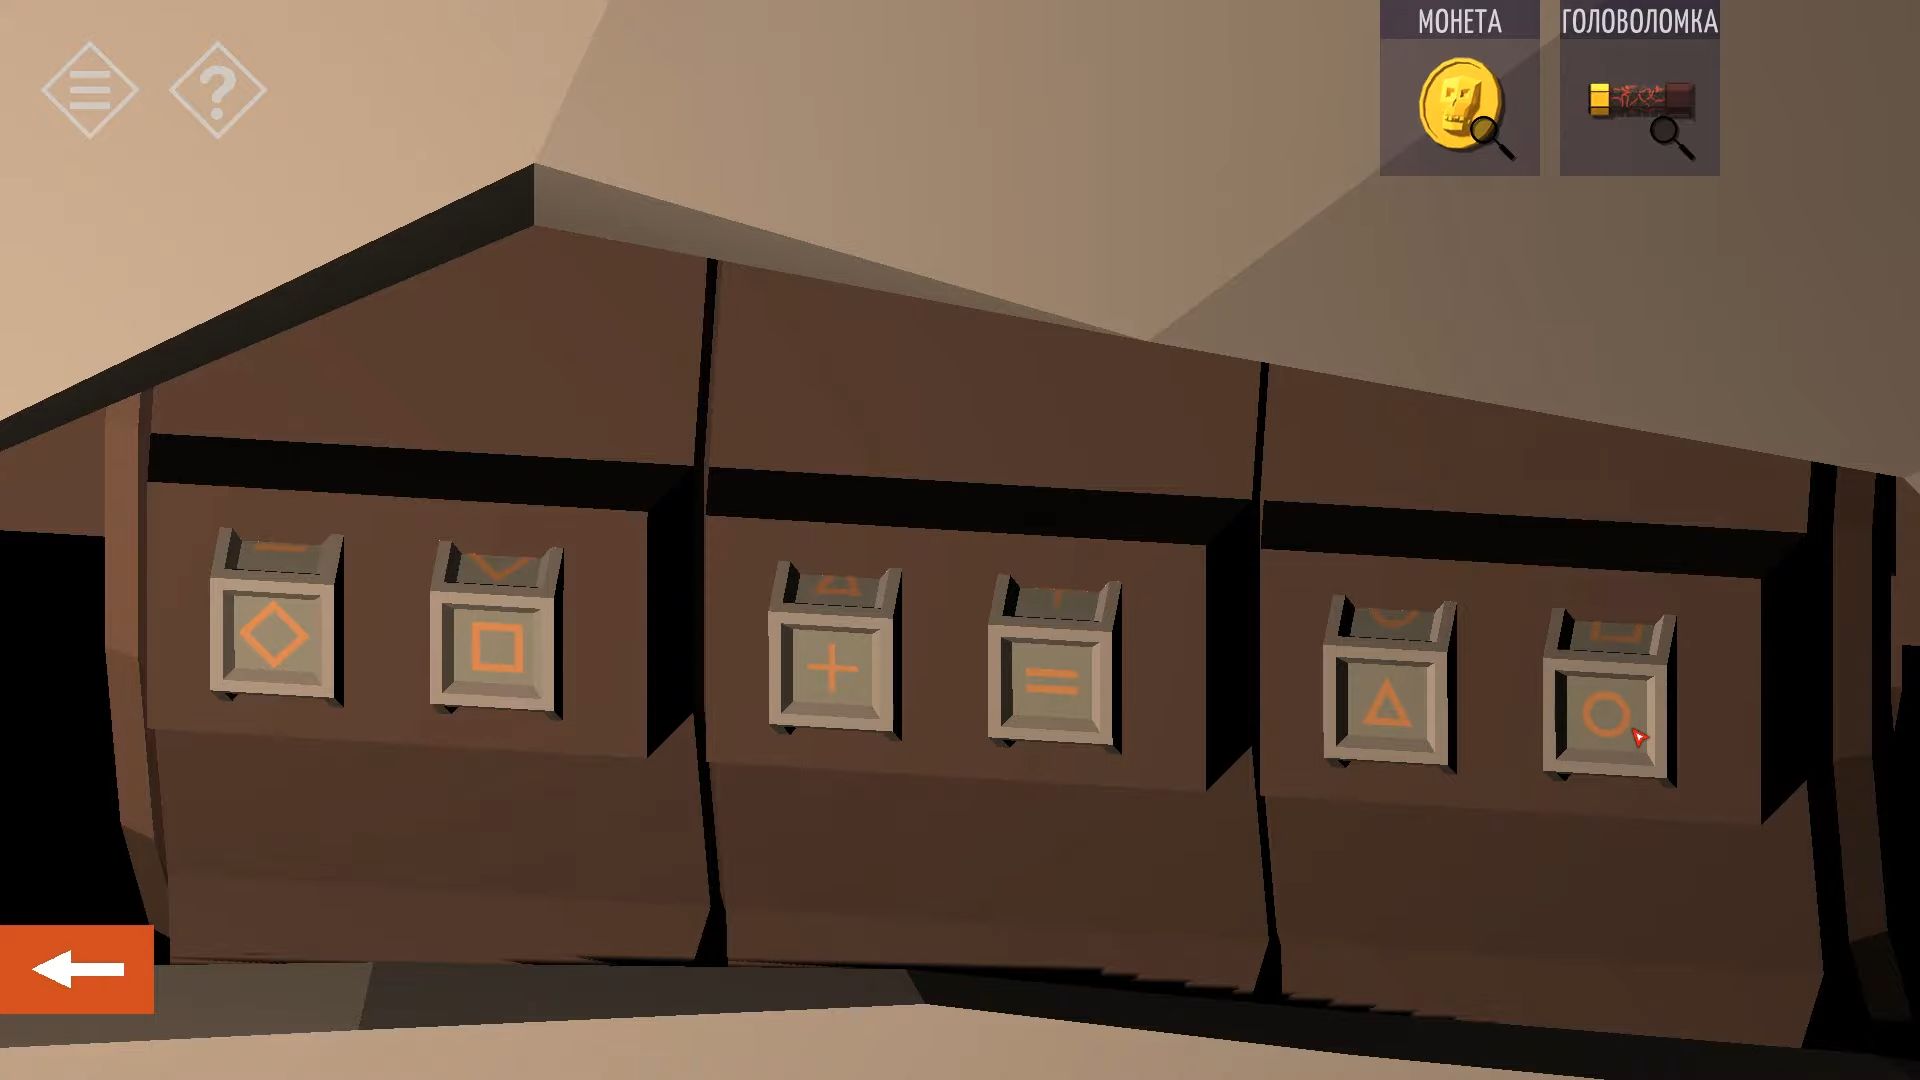
The doors on the right will open and go inside to find a cave full of treasures. On one side, there’s a way into a smaller side cave, and head in there. Inside, you’ll see a big skull in the room.
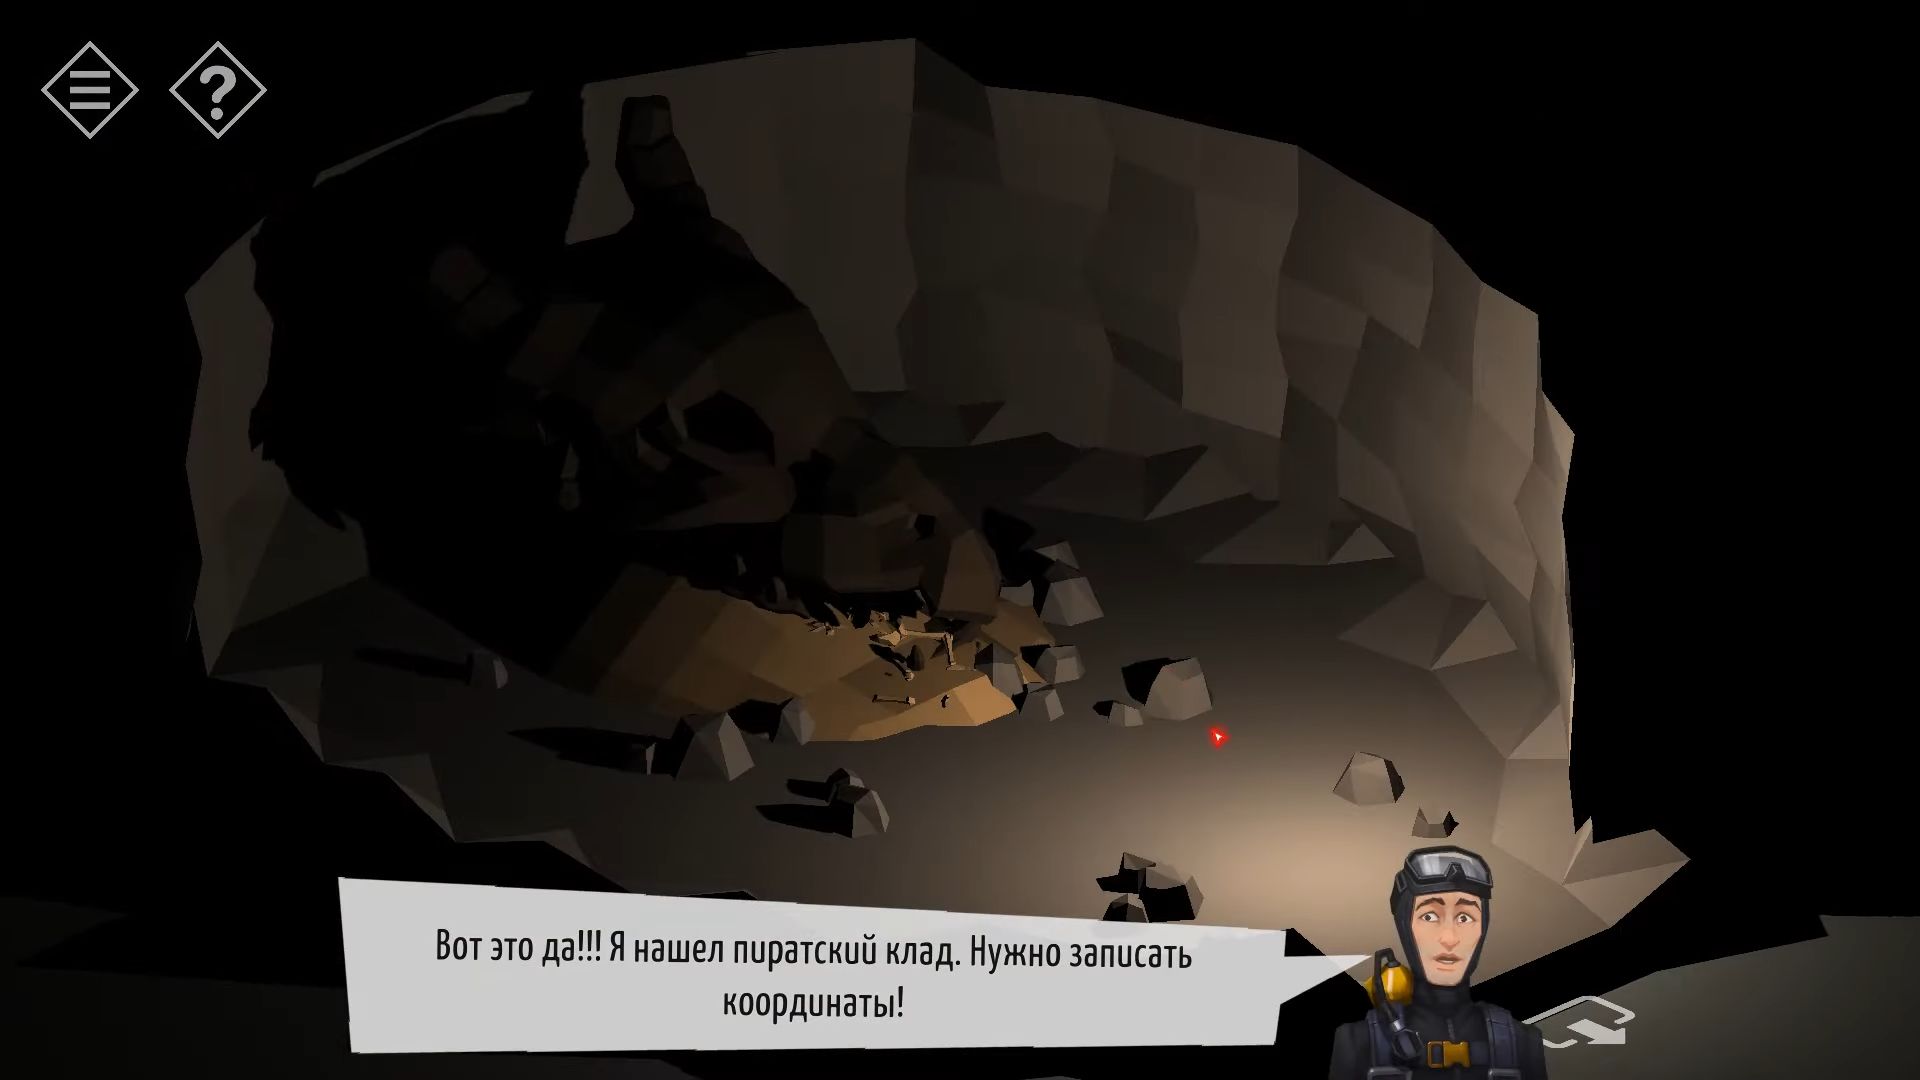
Turn the view to spot the entrance, and on its left, there’s a puzzle. Tap to make the buttons turn white. Keep in mind that each tap affects others, so be careful. Once you’ve finished, the skull will lift, and you can pick up a sword. You can also take a look at some cursed treasures.
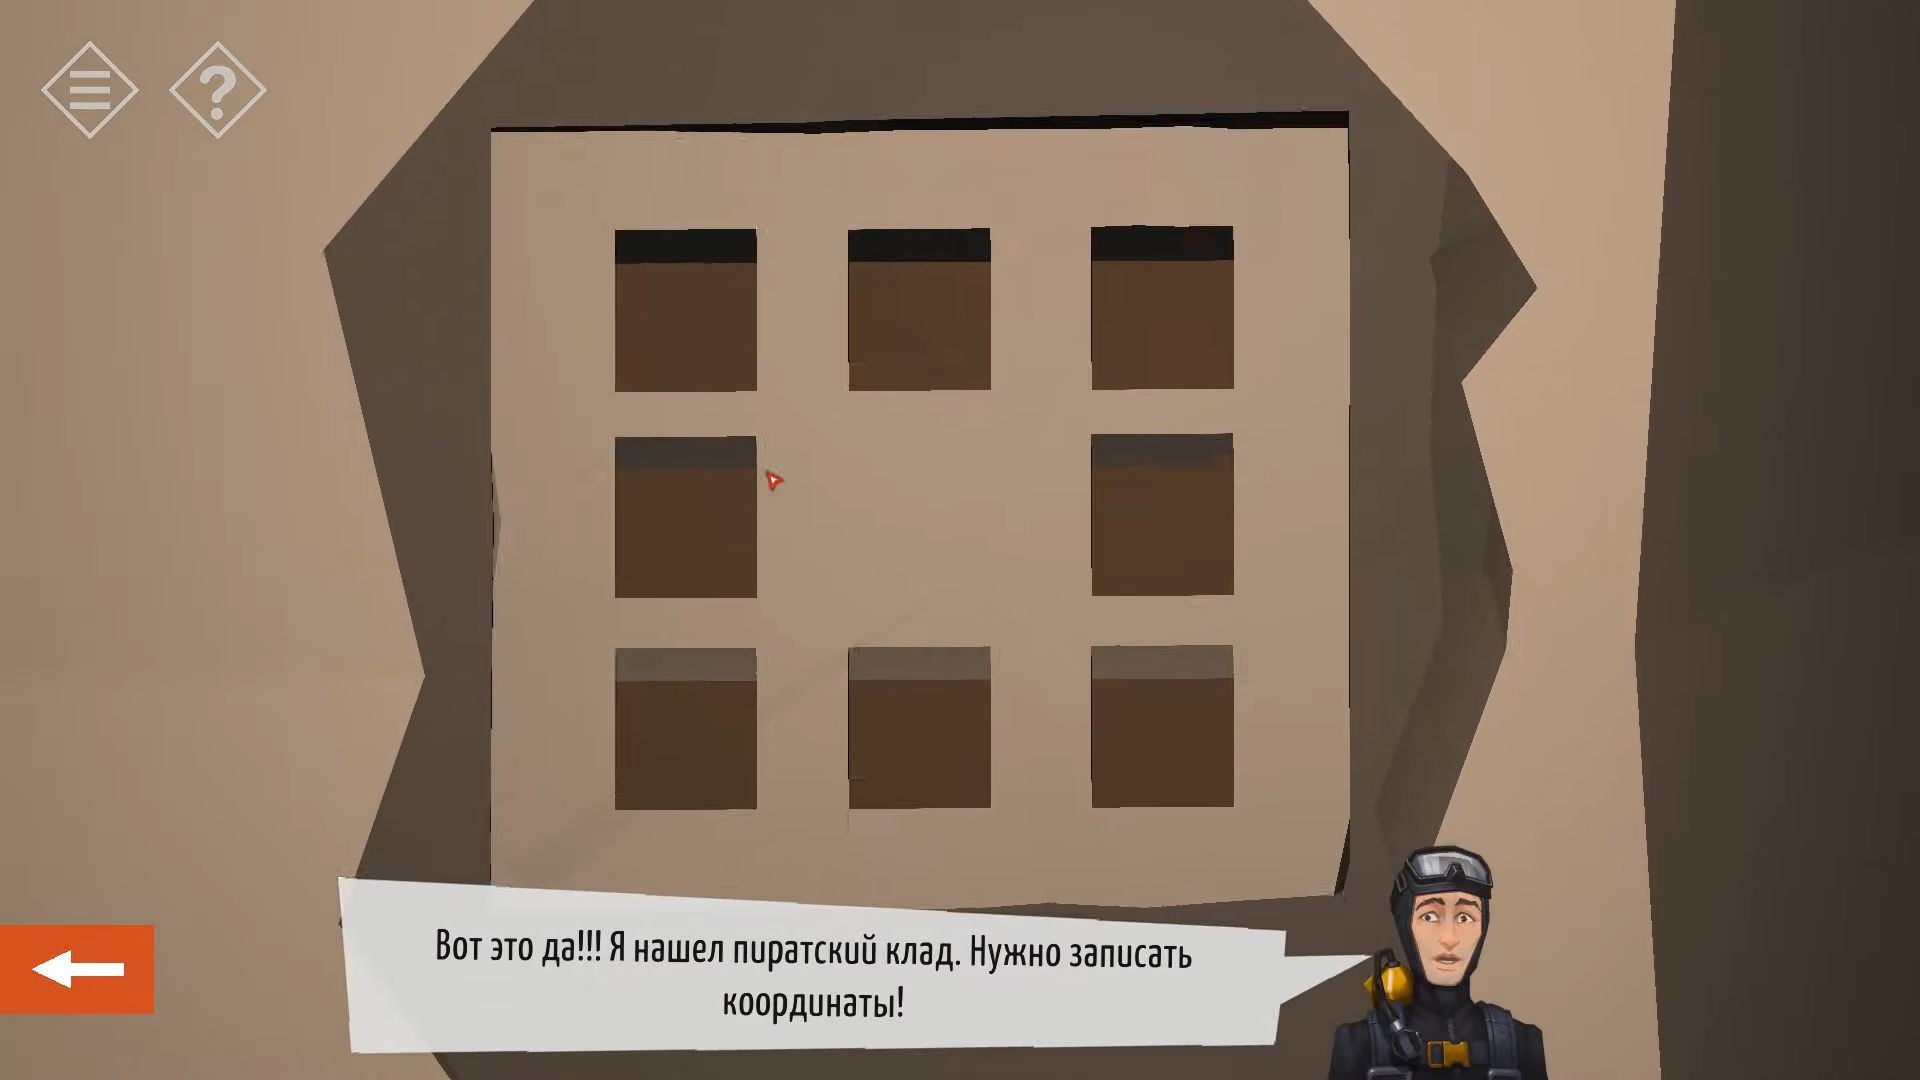
Go back to the treasure spot and then head to the opposite side of the room from where you entered to go into a different room. There are many skeletons on the ground, and one is near a chest. Tap to take a key from the skeleton and then use it to unlock the chest. Gather the 4 pieces inside and this is a puzzle. Take a look at them and then turn and rearrange them to make the edges match up.
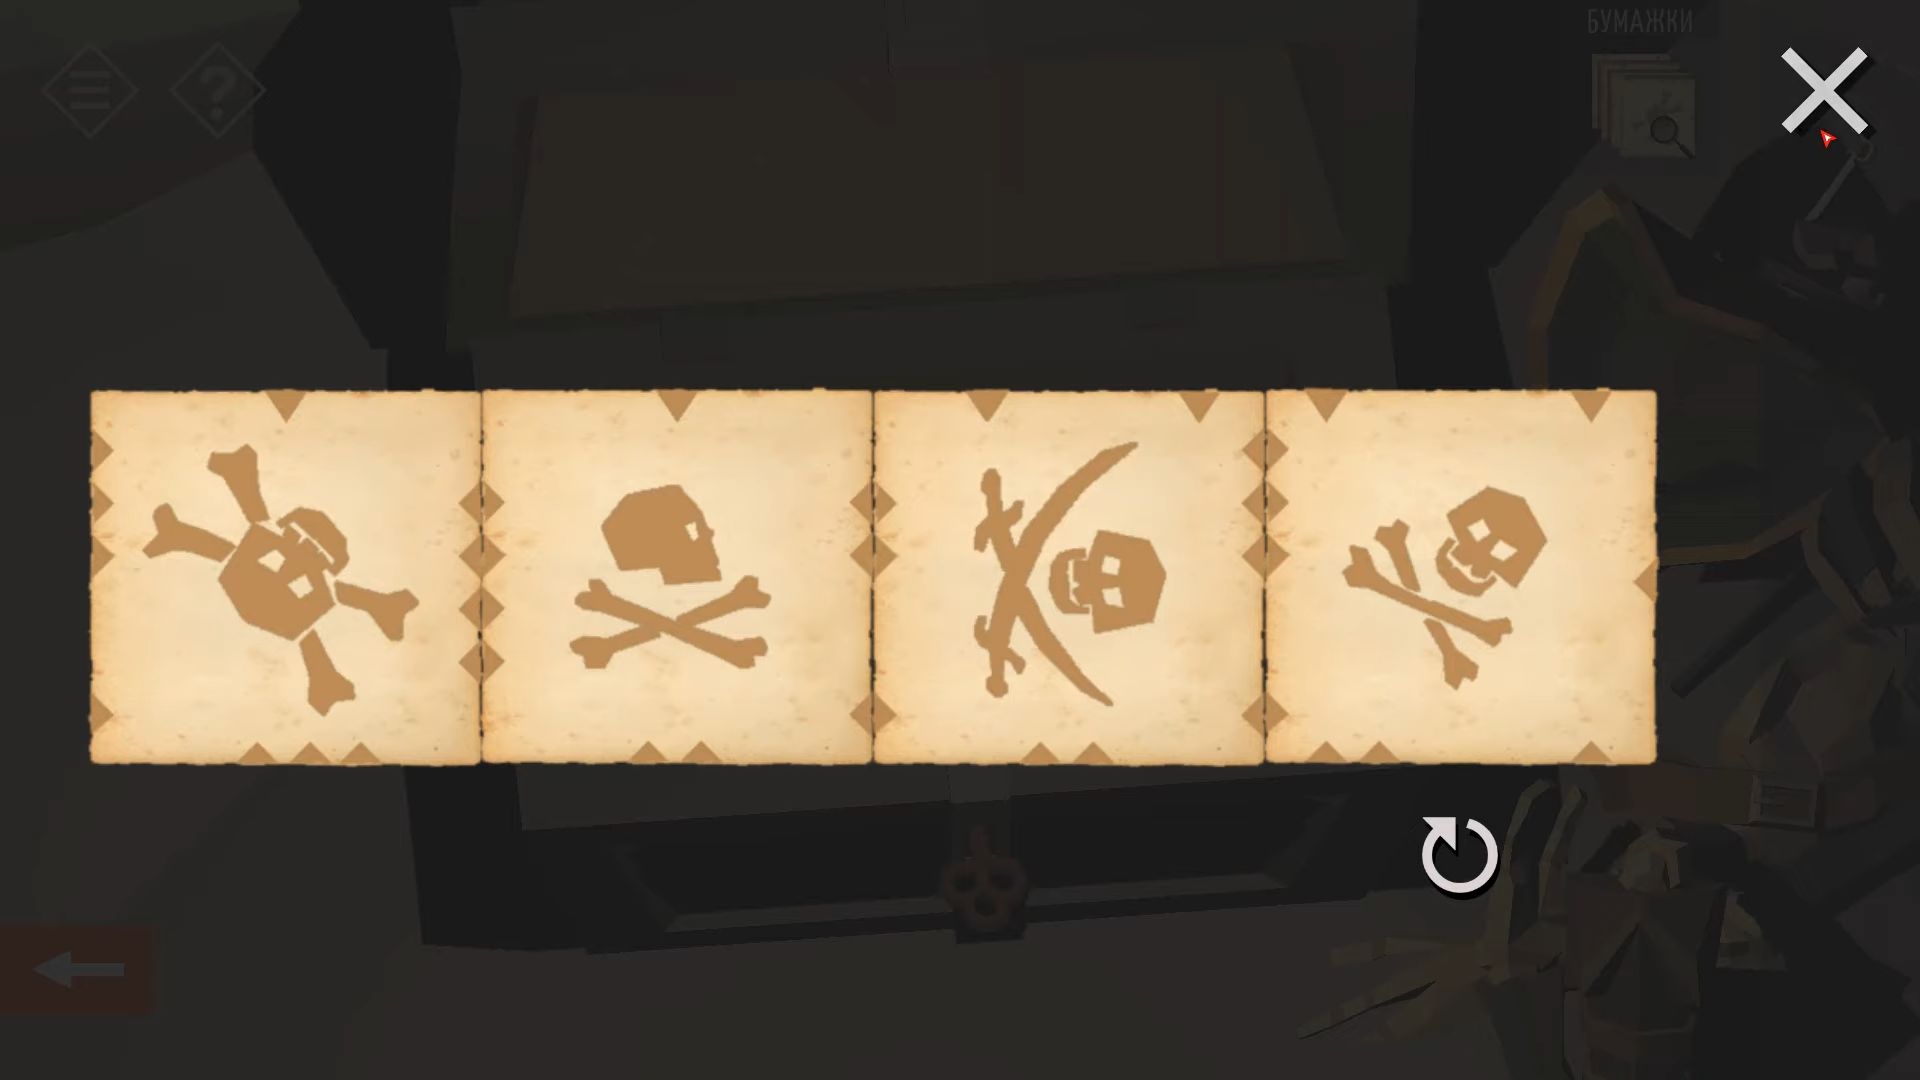
After finishing that, you should remember where the skull and crossbones symbols are. Then, tap to pick up the 3 swords from the ground. Now, you have a total of 4 swords.
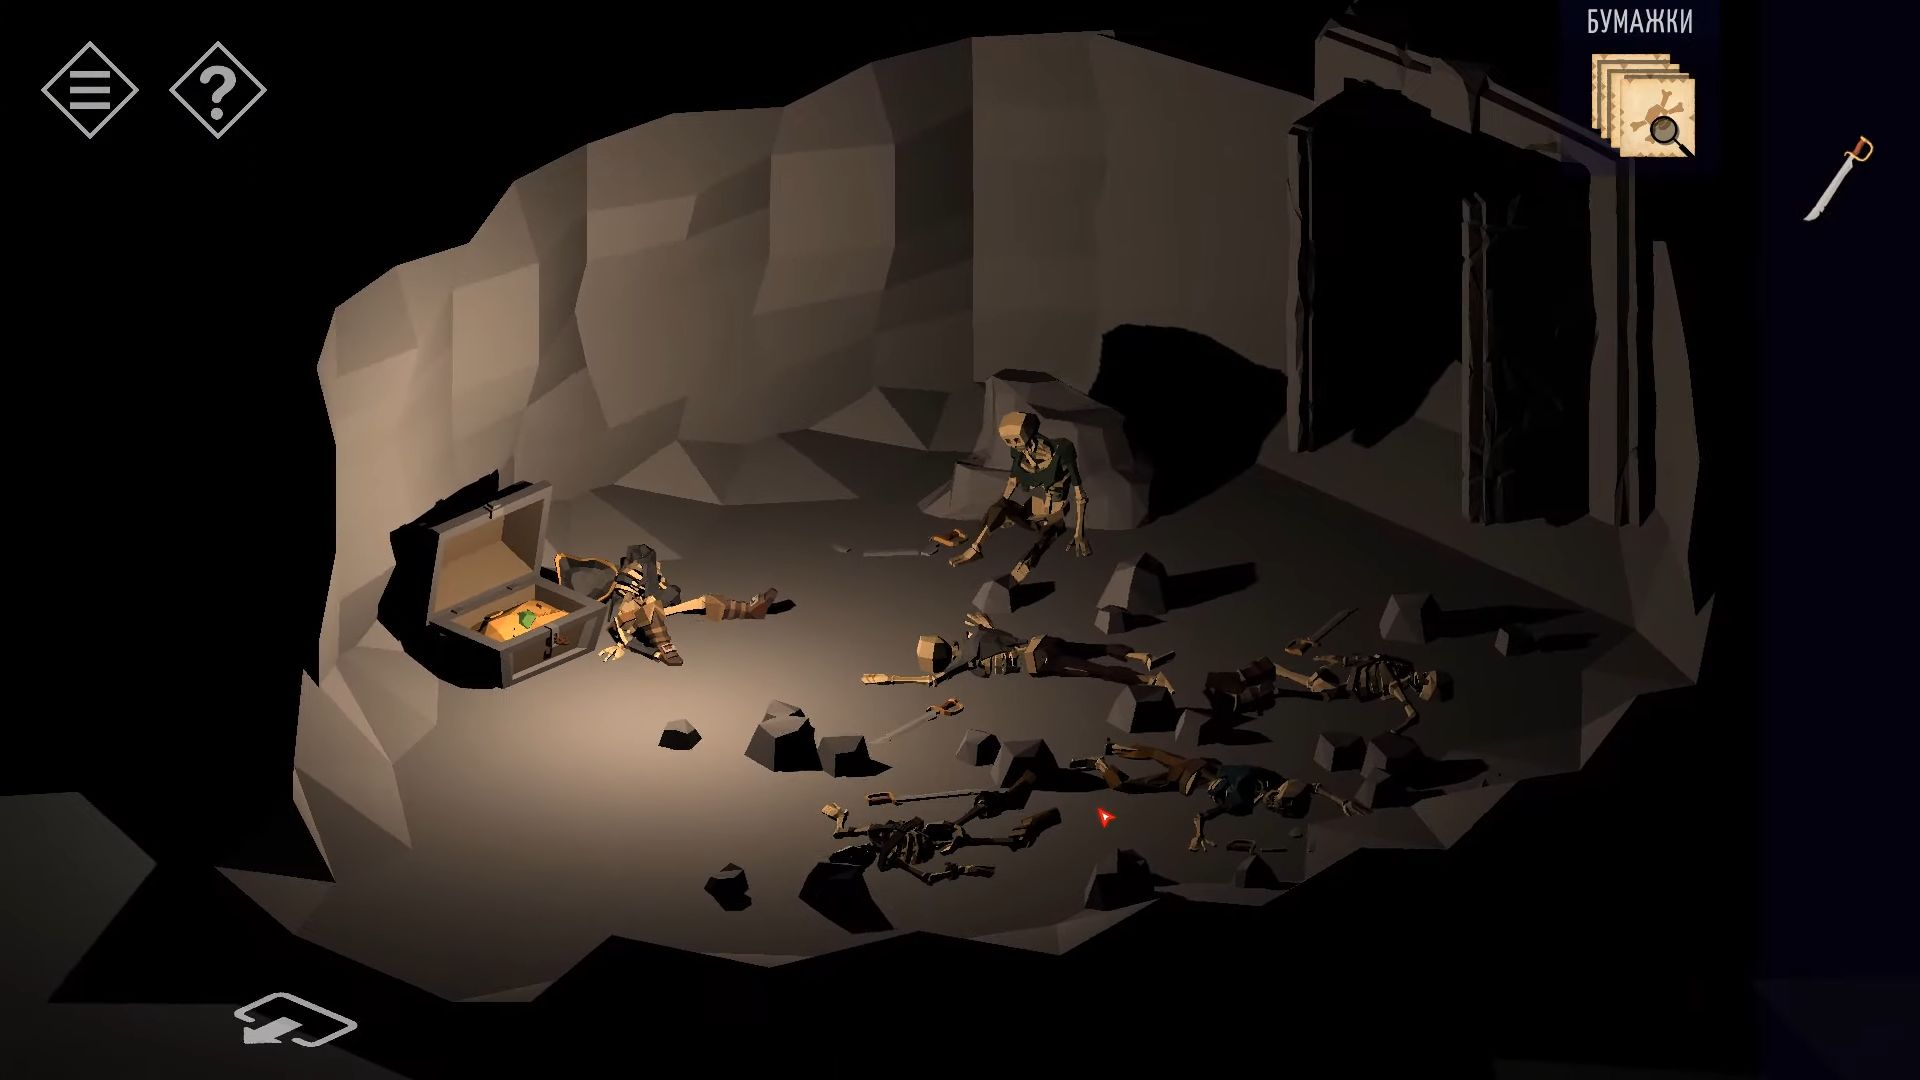
Go to the next room where you’ll see a statue or shrine. At the bottom, there are 4 slots. Tap on them and then insert the 4 swords. Now, you can see 4 dials with skull and crossbones symbols. Match each one with the symbols from the earlier puzzle and tap to turn them into the same positions.
Now, you can pick up the cube from inside. Take it and go back through the sea to the boat. You’ll come back to the house on the shore. Tap on your car to finish this part and go back to the town.
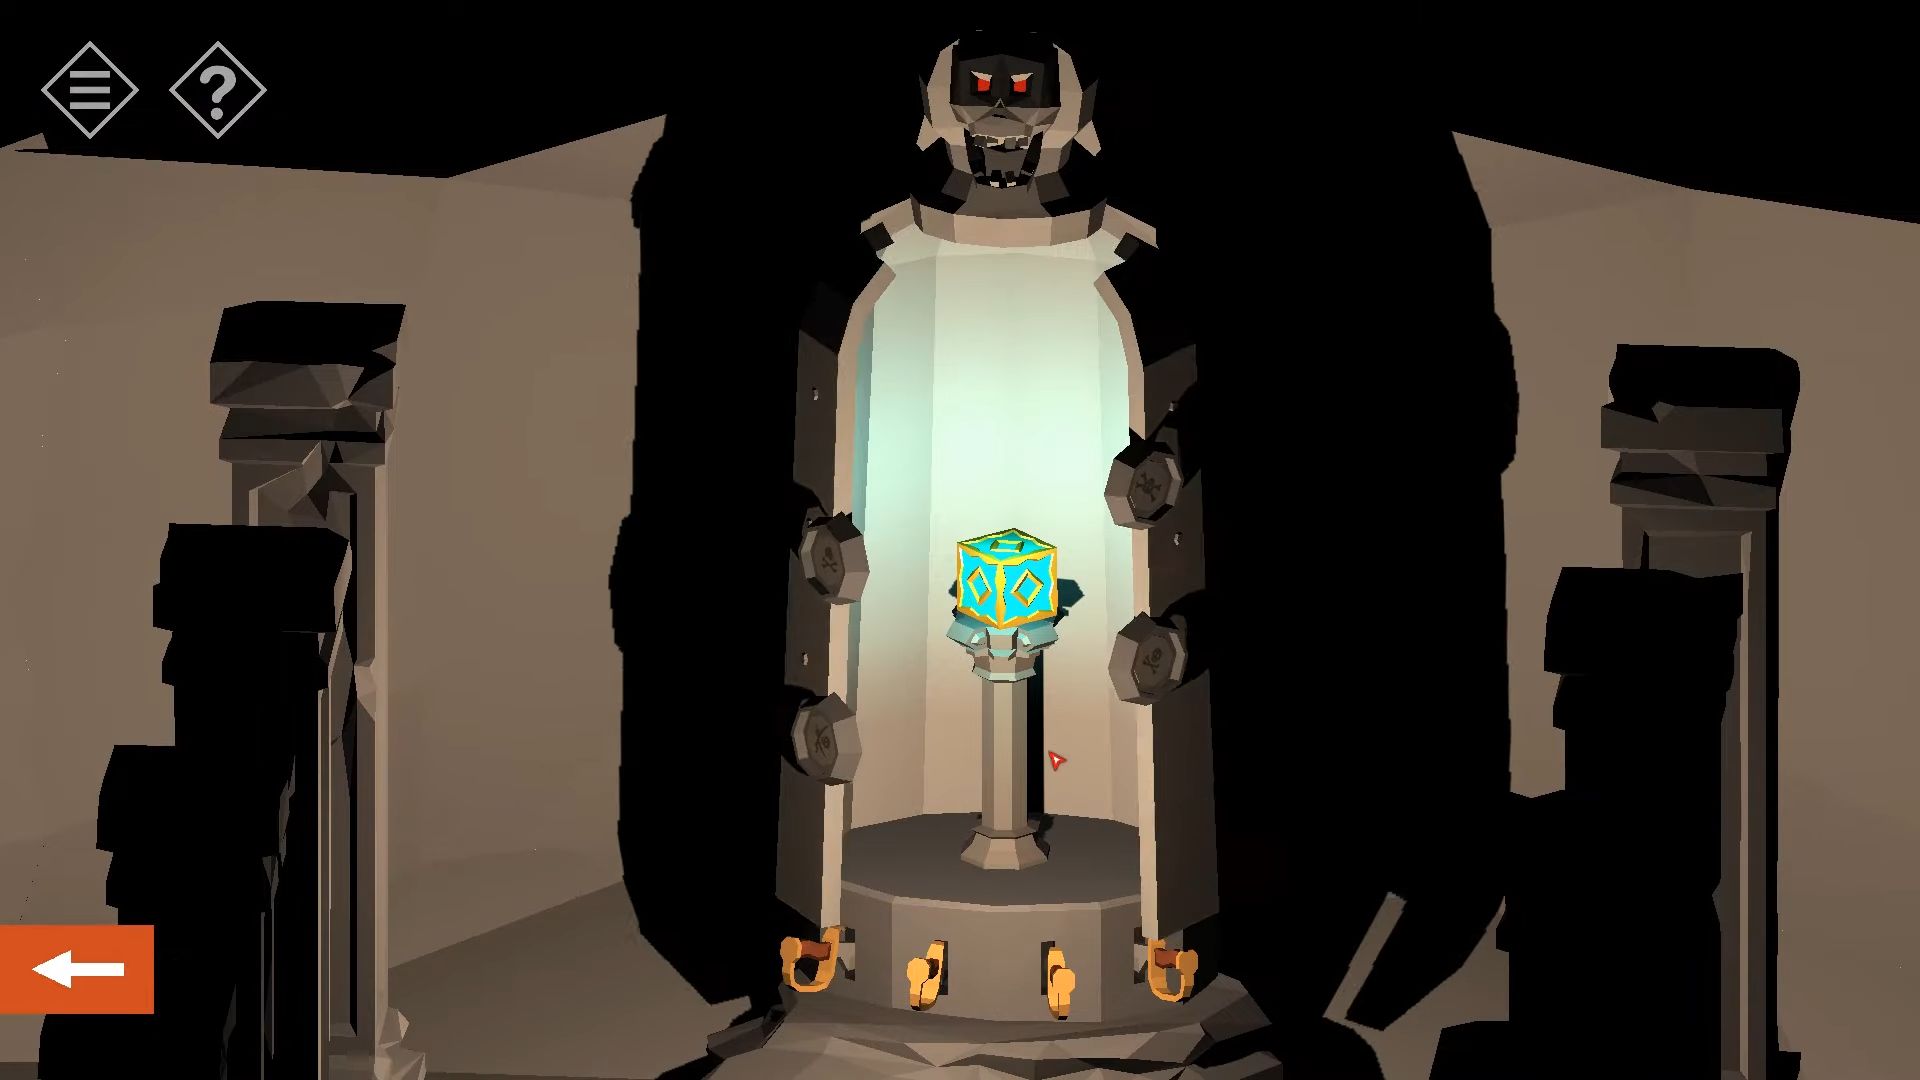
Chapter 14
Here’s the complete guide for Chapter 14 in Tiny Room Stories: Town Mystery. You’ve been provided all the steps along with pictures and codes that can be shown if you require them. This comes after the third section of Chapter 13 where you experience a car accident with an unidentified driver, leading you to lose consciousness.
Escape
You’ve regained consciousness after the accident. Your body hurts, but thankfully, there are no serious injuries. You will overhear a phone call discussing you and later find yourself in an interrogation room. Your father sends you a message, and now your goal is to escape and reach the crystal.
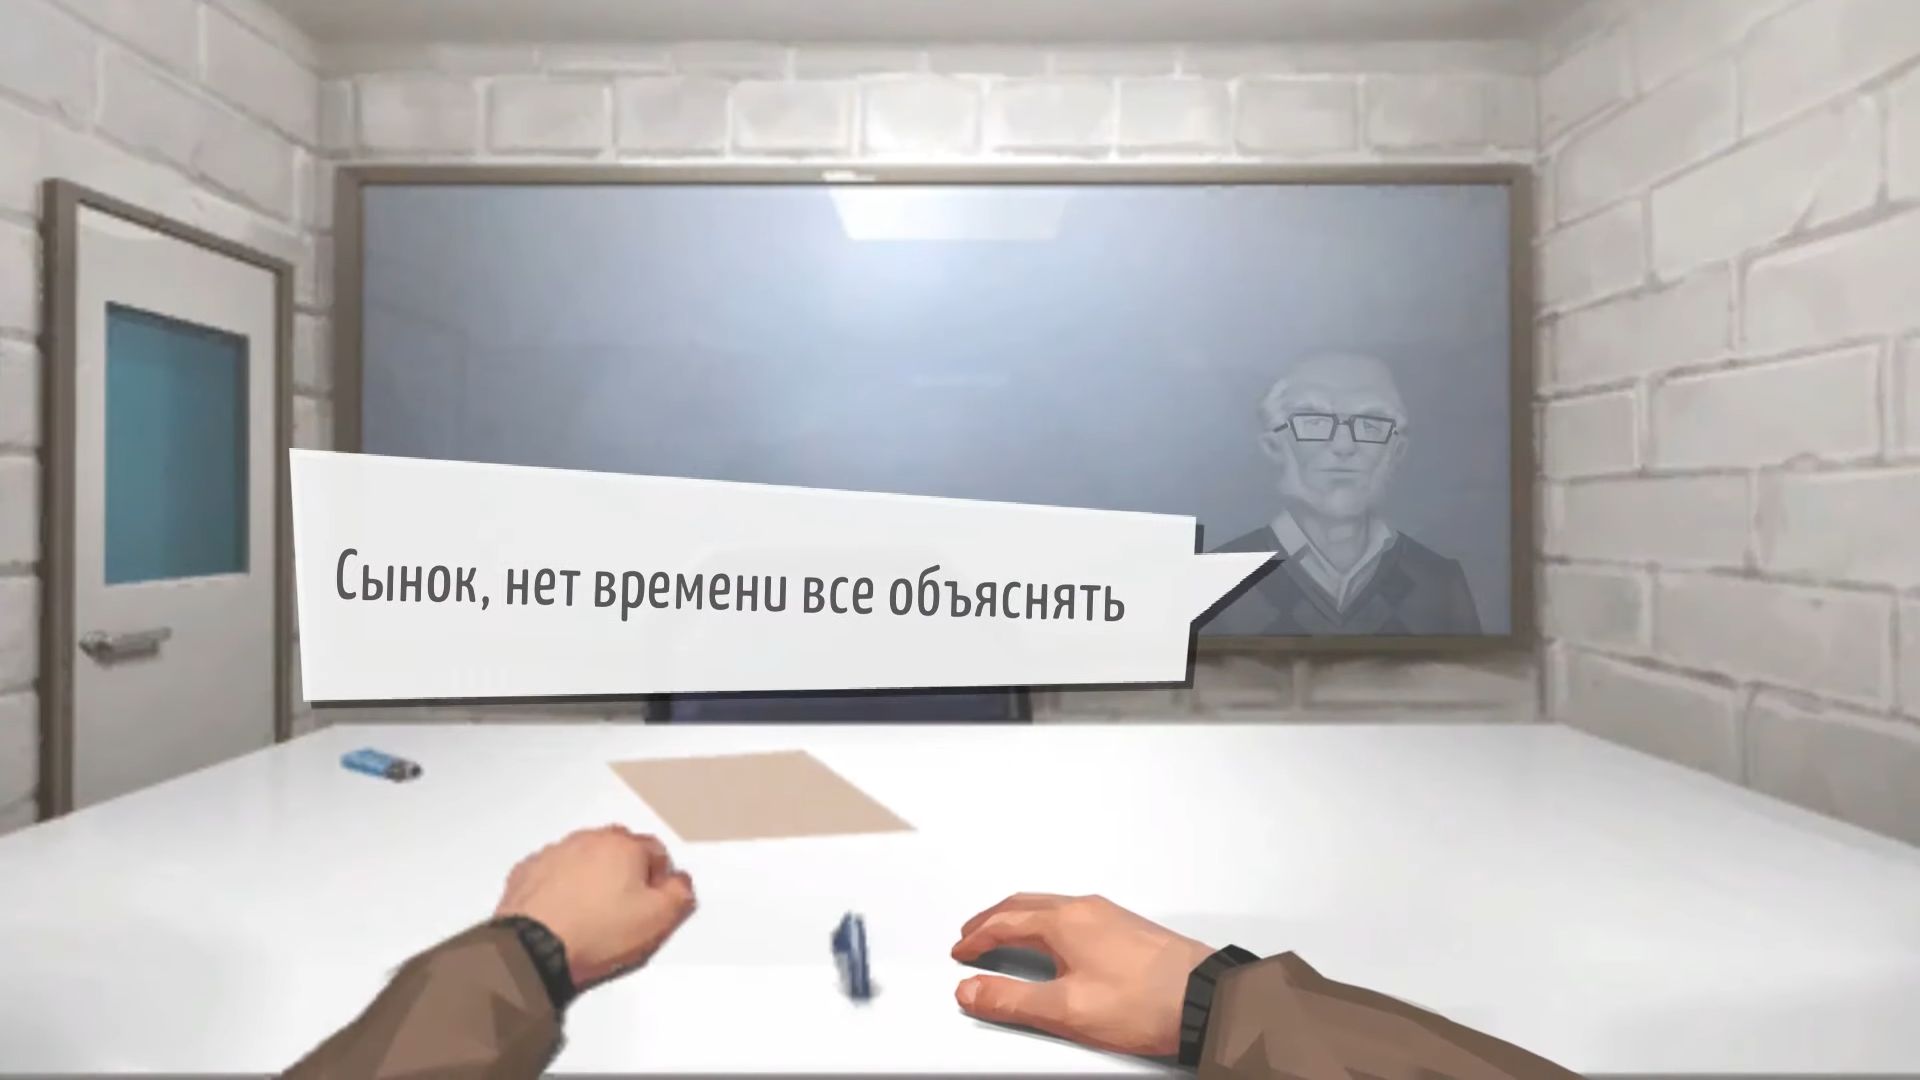
You can look at your task list in the top left whenever you want. Tap to see the desk and pick up a piece of paper along with a lighter. Turn the view to the other corner and touch to pick up the bin.
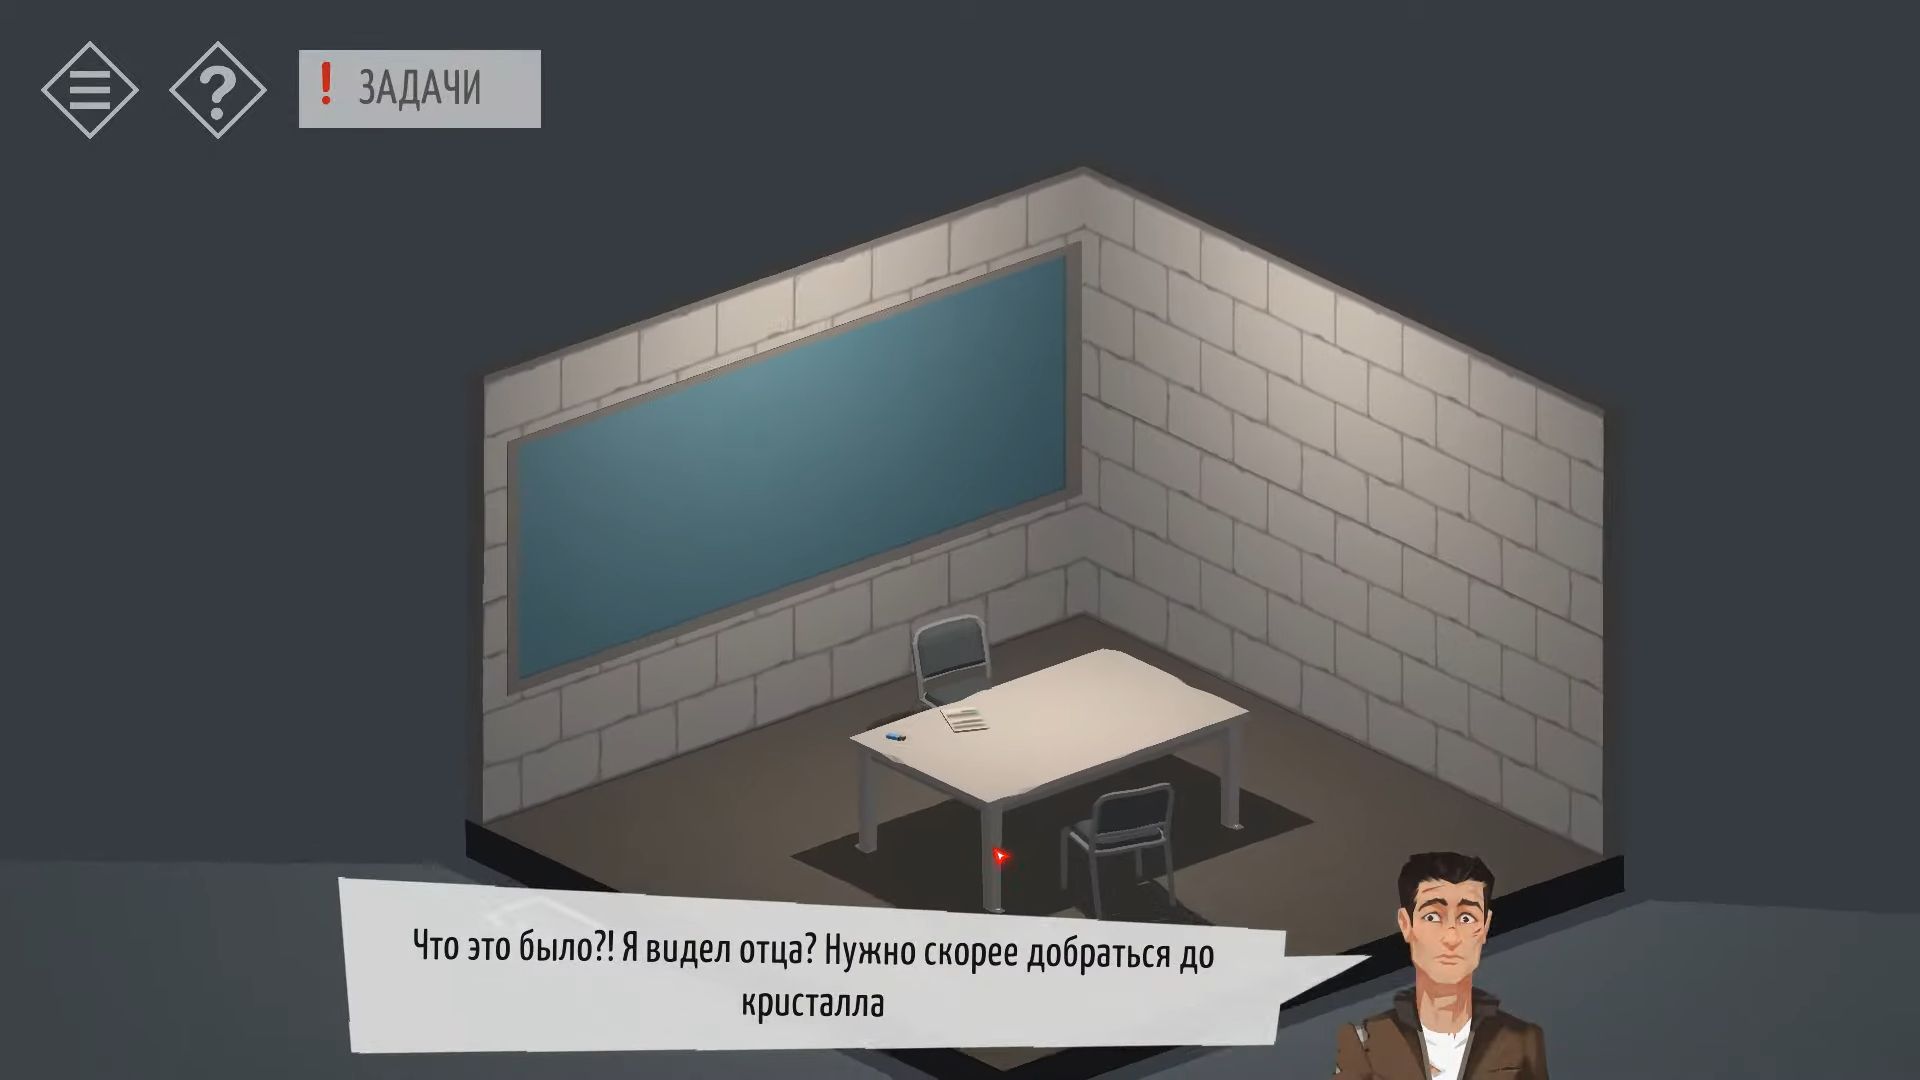
Tap to gather the two chairs in the room and one seems a bit unstable. Choose that chair and then knock on the wall to the left of the door or on the table. It might be a little tricky, but if you tap in the right spot, the chair will be thrown and break, allowing you to touch it again to collect a metal strip.
Now, tap each of the four legs of the table. At the bottom of each leg is a screw that you can remove using the metal strip. Knock the table to move it under the fire sensor on the wall. Pick the other chair and place it on the table. You have to put the bin on top of the chair, then put the paper in the bin and use the lighter to set it on fire. The door will open now. Walk out into the corridor.
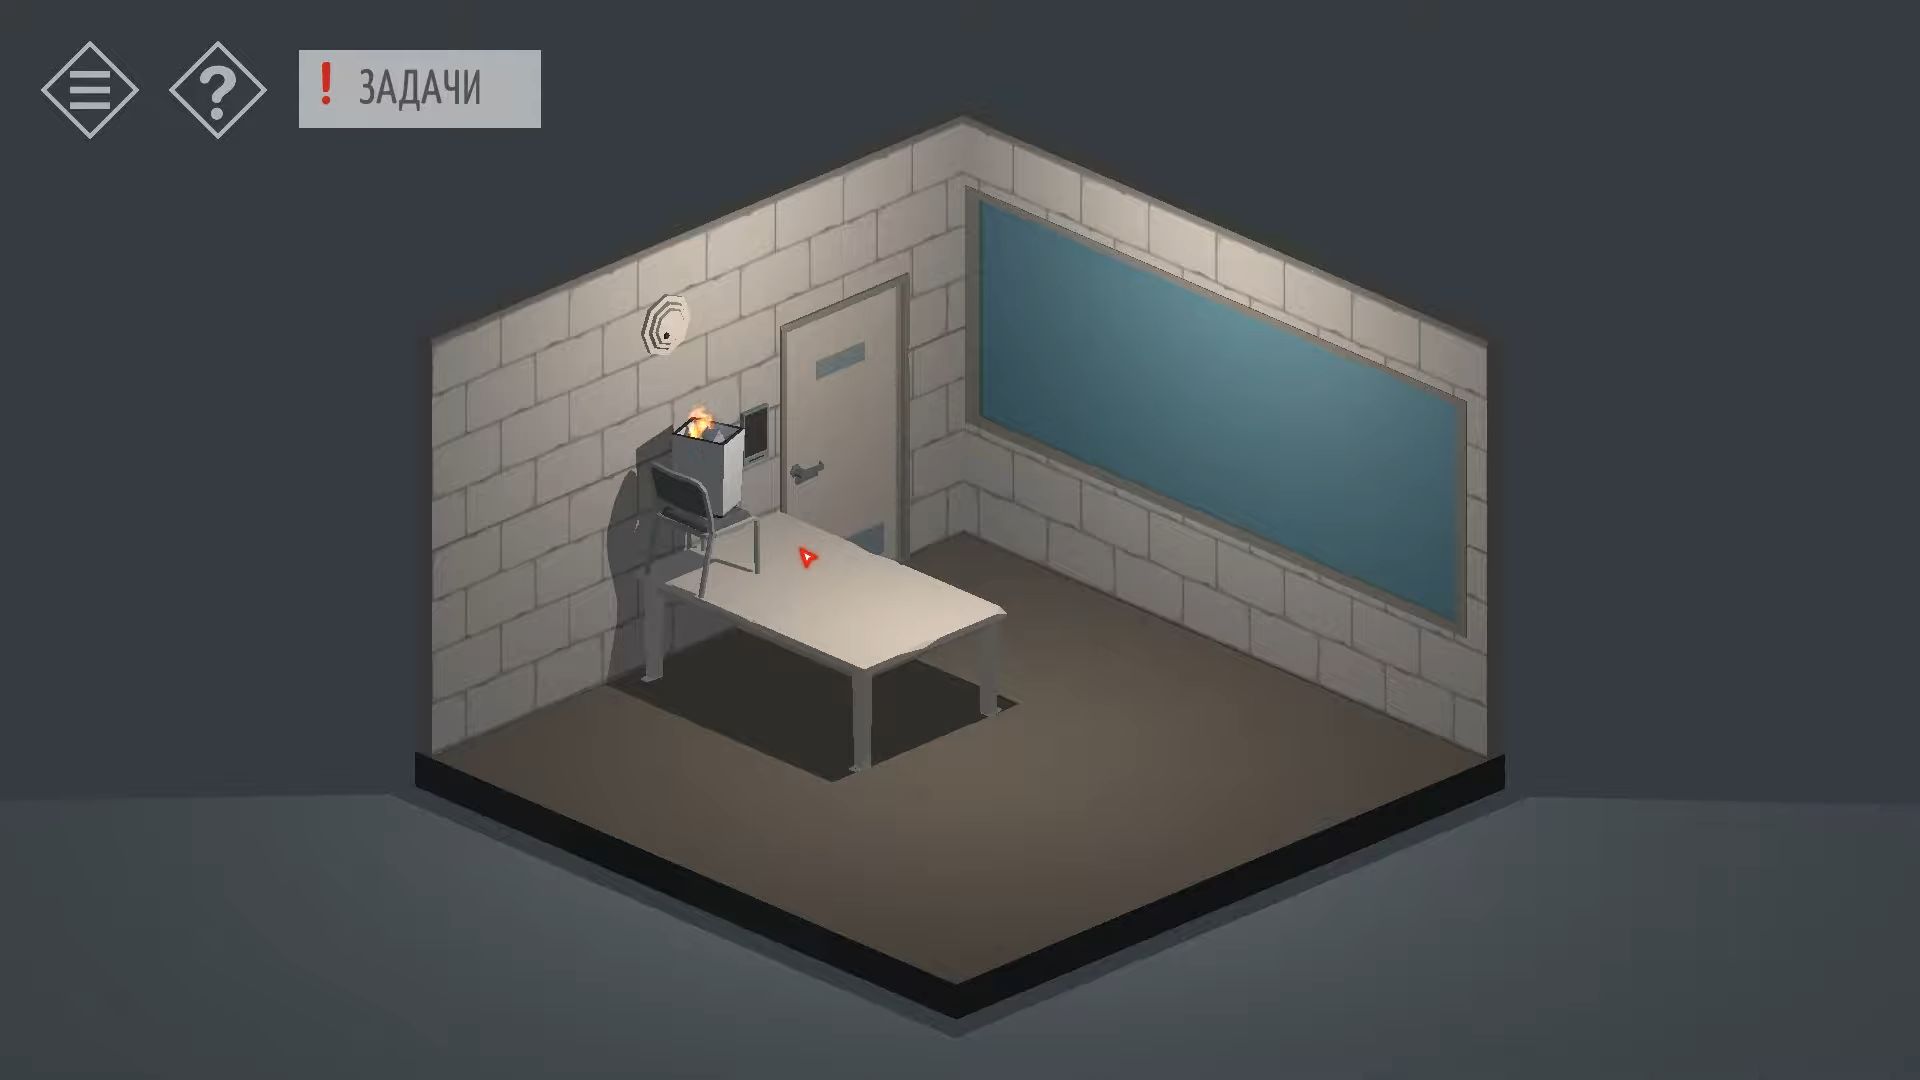
Turn the view and tap to see the desk with the balloons. Touch the papers on the desk to shift them to the tray until they are visible, and then collect an Access Card.
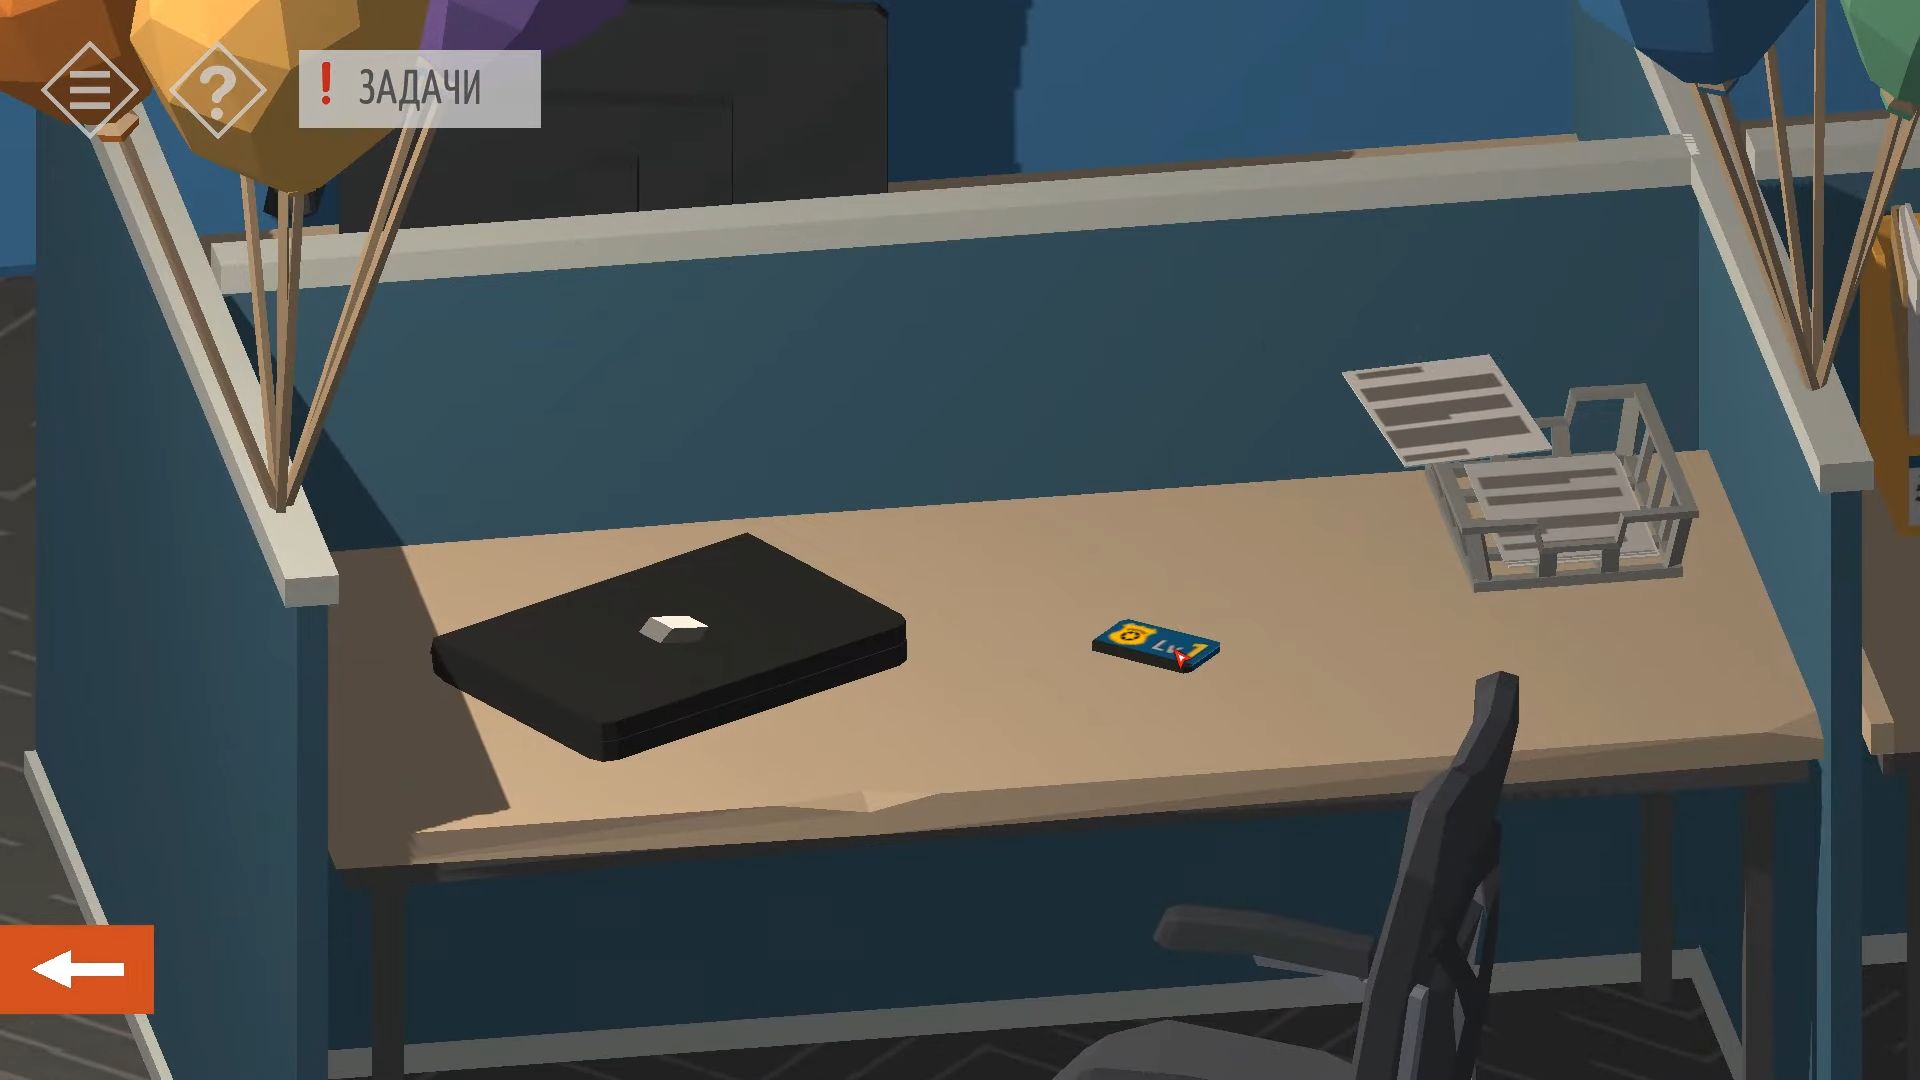
Tap to unlock the laptop and discover a message from the police captain regarding a test. It contains a hint for the laptop’s password. Go to the desks on the opposite side and locate the computer for ROSS. Utilize the hint to unlock it using the code 04062019 from the Save the Date mail.
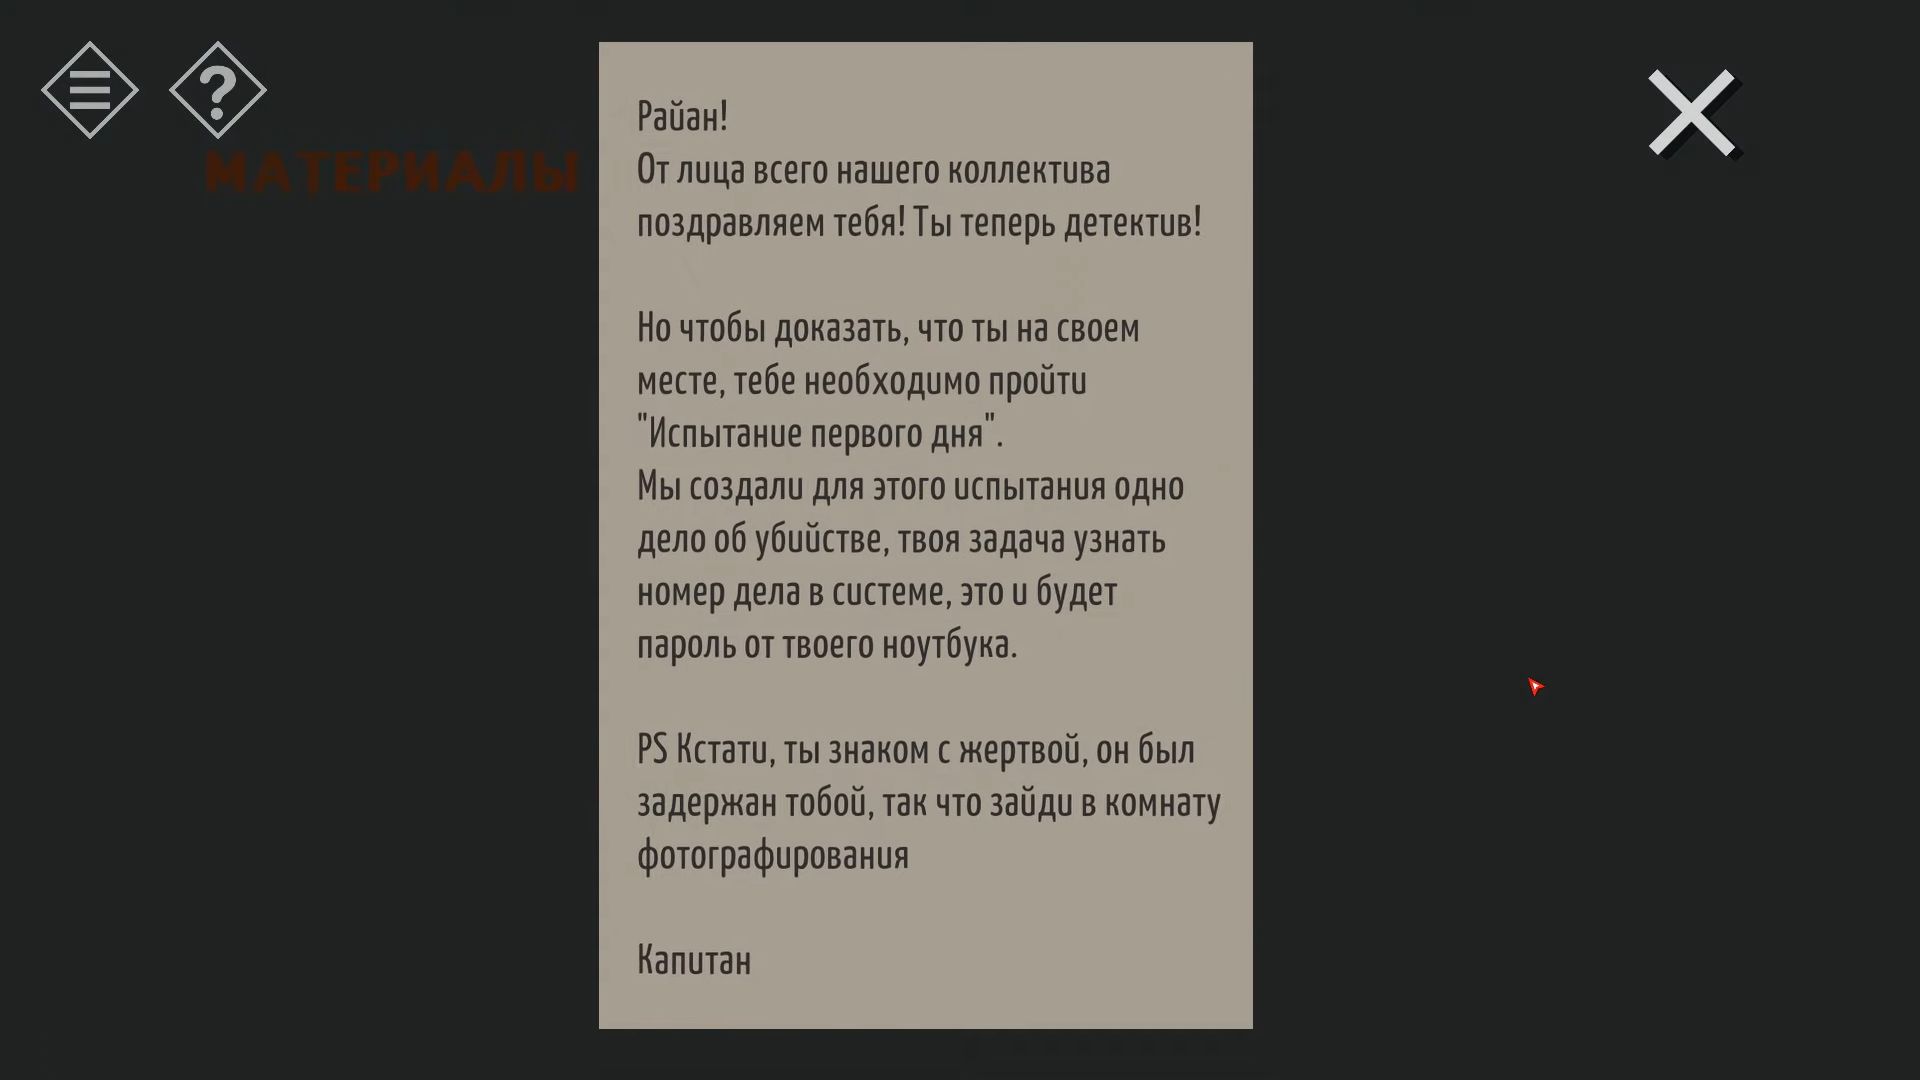
Turn the view to look at the 5 clocks on the wall. Check them out and remember where the hour hands are pointing. After that, go to the office at the opposite end of the corridor through the only open door. Turn the view to see the TV and notice board. Look at the TV to find many detective DVDs. Then, tap on the printer/photocopier to the left of it. Open the lid and tap to see a Wedding invitation card – for Ross and Rachel, seem friendly.

Go back to the corridor and at the opposite end, there’s a door labeled Exit that you can now unlock using the access card. This leads you to the Entrance Hall. There’s not much you can do here for now, but look into the top drawer on the right desk to discover a red key.
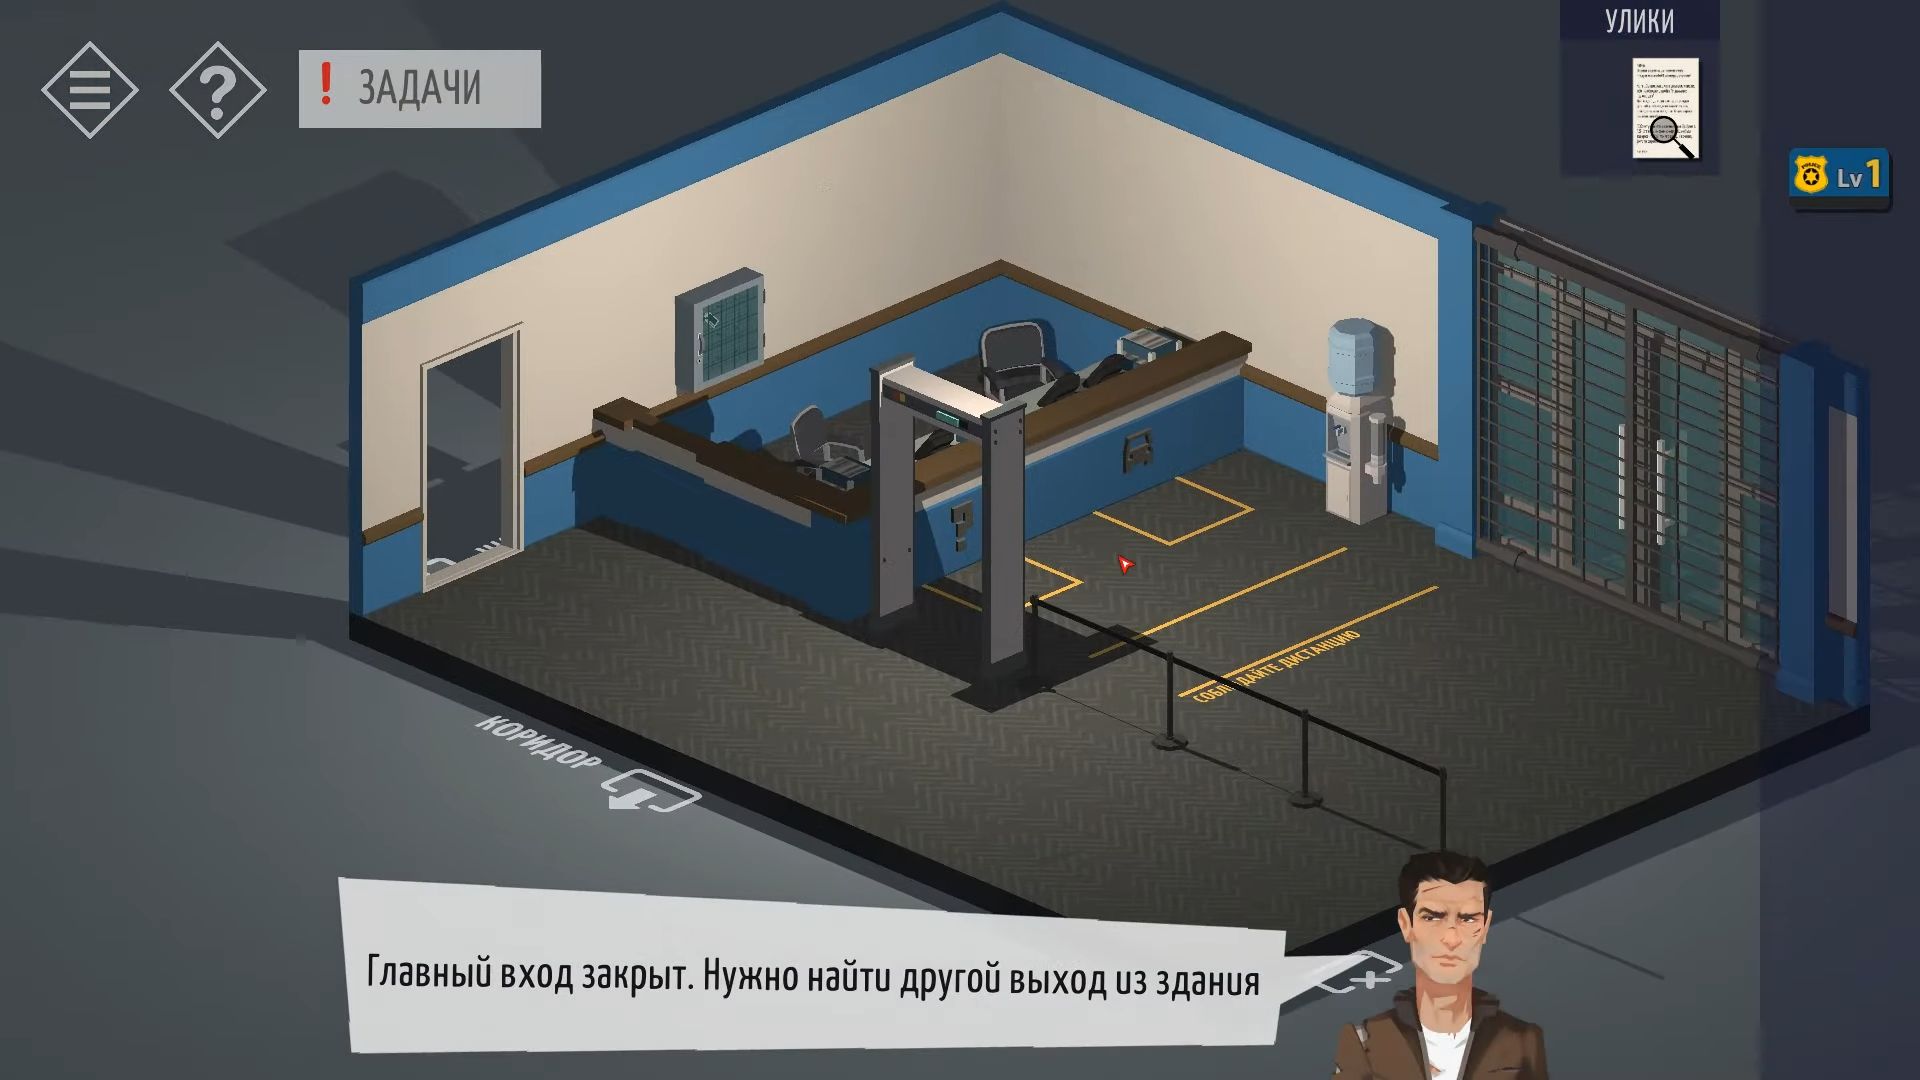
In the corridor, to the right of the Exit door, there’s another door that you can now unlock with the card. This leads you to the photo room. Turn the view to see a desk by the door and examine it. Open the top right drawer to find a Star Cylinder. On the desk to the left, there’s a stand with 5 holes where you can place the star cylinder.
Back in the corridor, turn the view to see a door with a red handle, which is the Lounge room. Use the red key to open the door and enter. Tap to look at the table on the left and pick up a Level 2 Access Card.
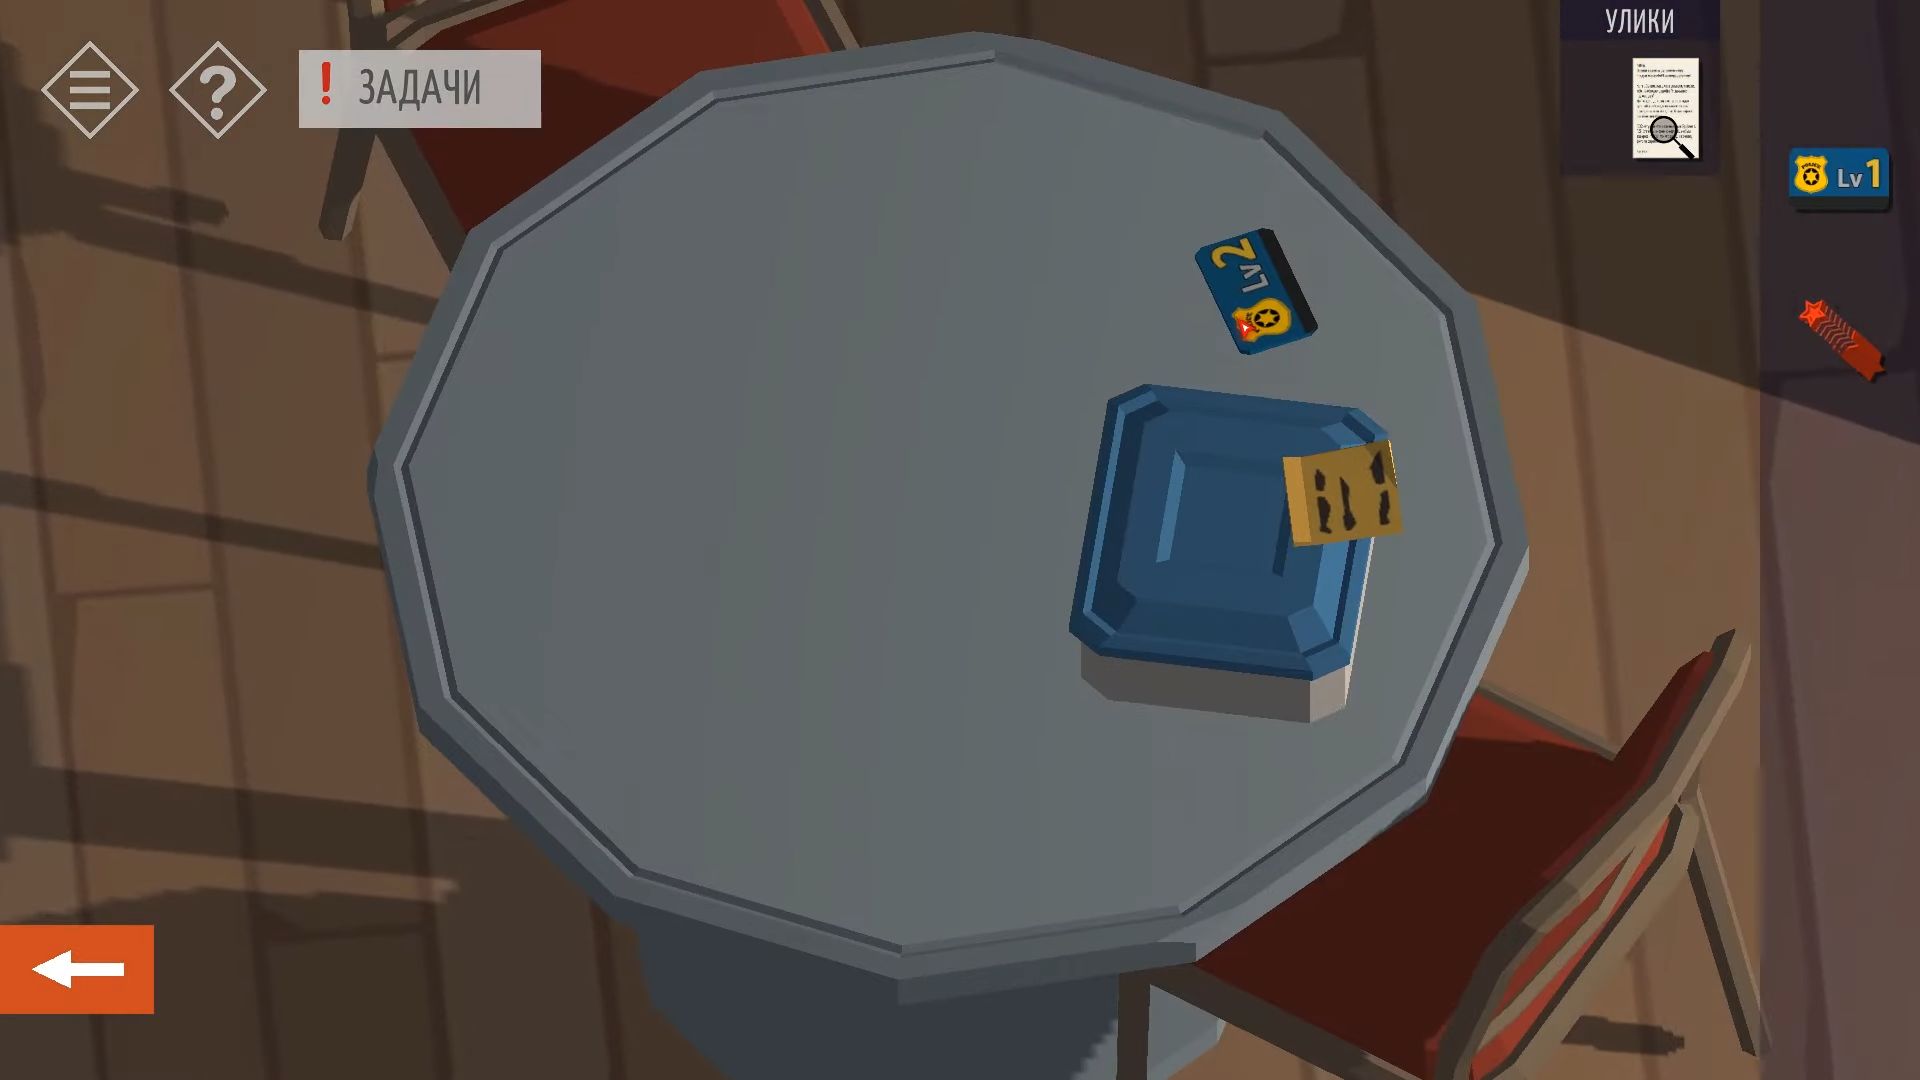
Afterward, tap the counter to the right and open the top right drawer to get another Star Cylinder. Step back and turn the view to look at the pictures hung on the other side of the room. Go back to the corridor and examine the door opposite the lounge room. This is the Gym, and it has a code lock. The lock needs four color patterns that are circular, similar to donuts. Replicate the shapes of the donuts.
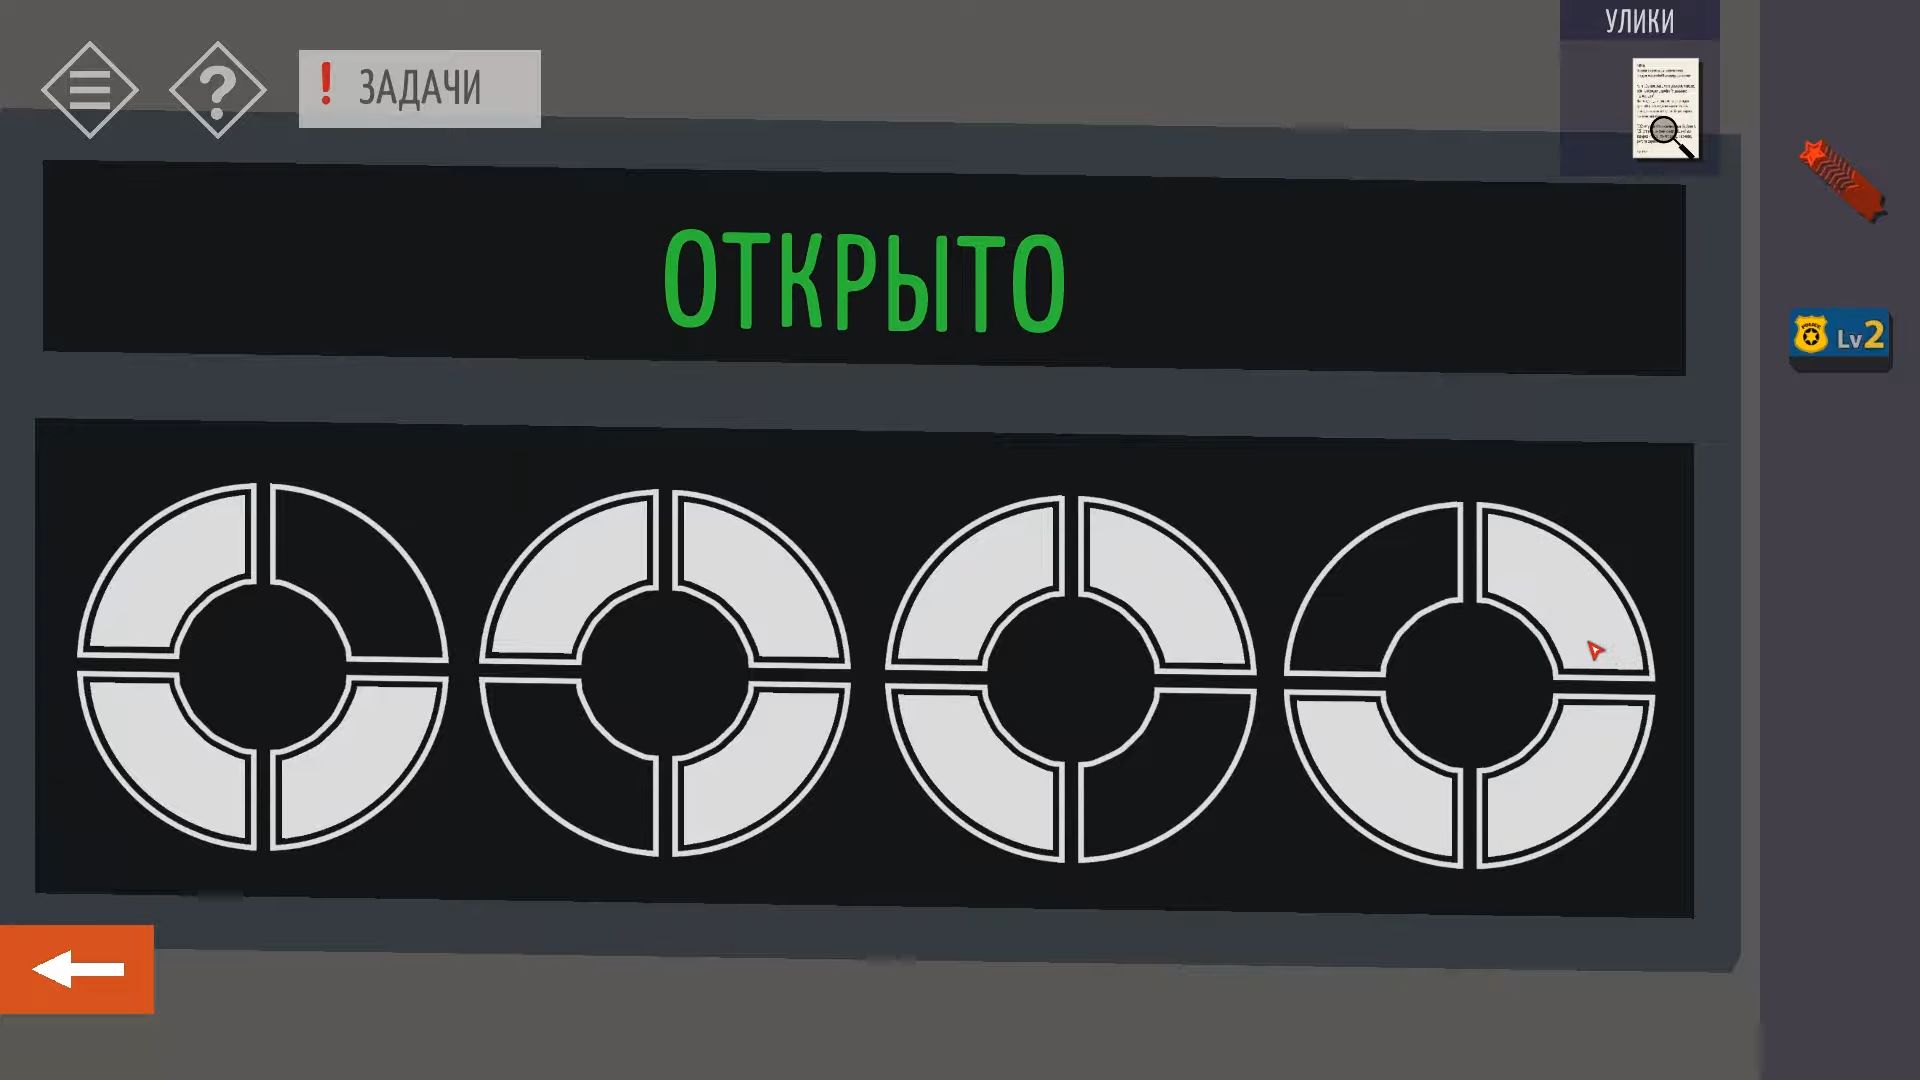
Go into the Locker room, there are 8 lockers, and on the wall, there’s a list of the owners. Locate the locker for Richard (Locker 4) and use the code mentioned earlier to unlock it (08642). Tap to see a folder with a memo and pay attention to the information on how to hack the console.
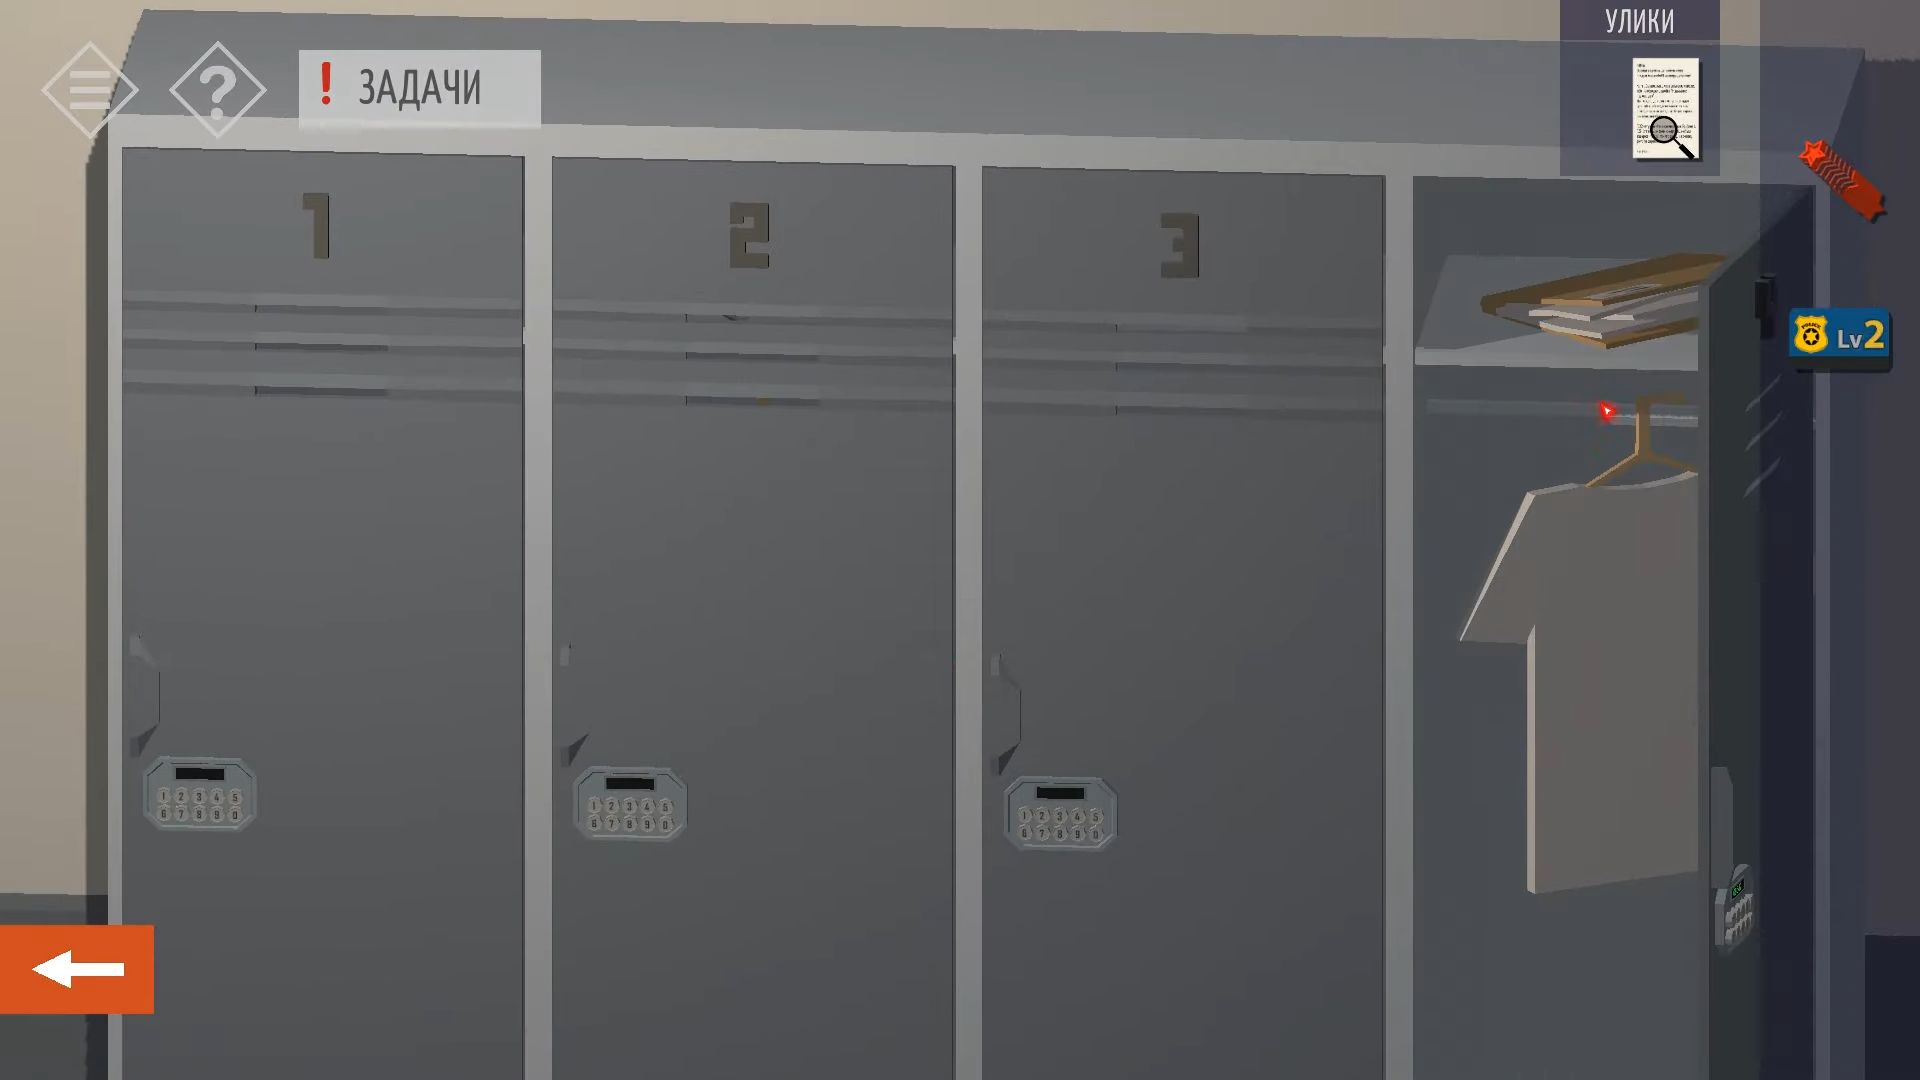
Go into the gym and turn the view to see a shelf near the door. Look at it to find an award for Garry. Go back to the locker room and locate Garry’s Locker (Locker 5). Enter the code from the award, which is 14325, to unlock it, and collect another Star Cylinder.
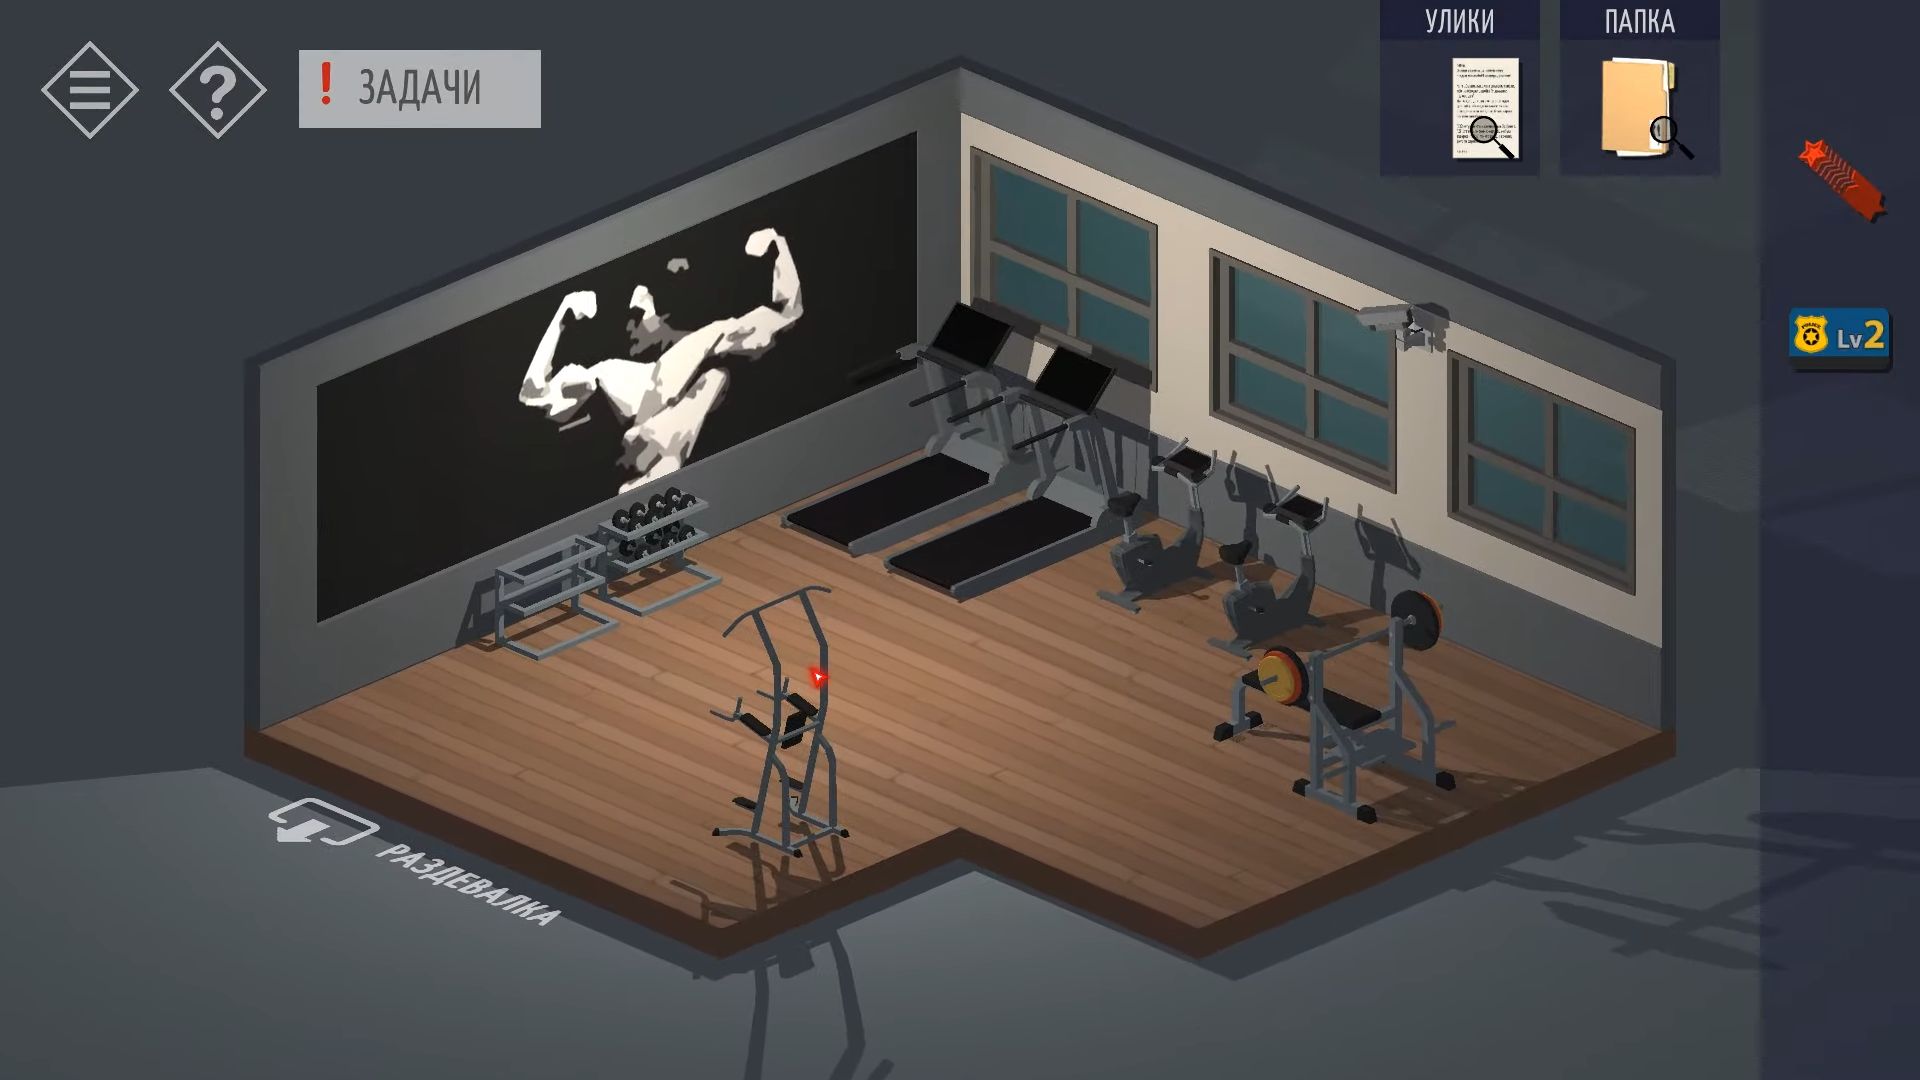
In the corridor, go into the Control Room, which is the door to the left of the clocks. The main terminal is not functional, but turn the view to see the 3 server racks. Start by tapping on the middle server in the left rack to slide it out and discover a folder with instructions inside.
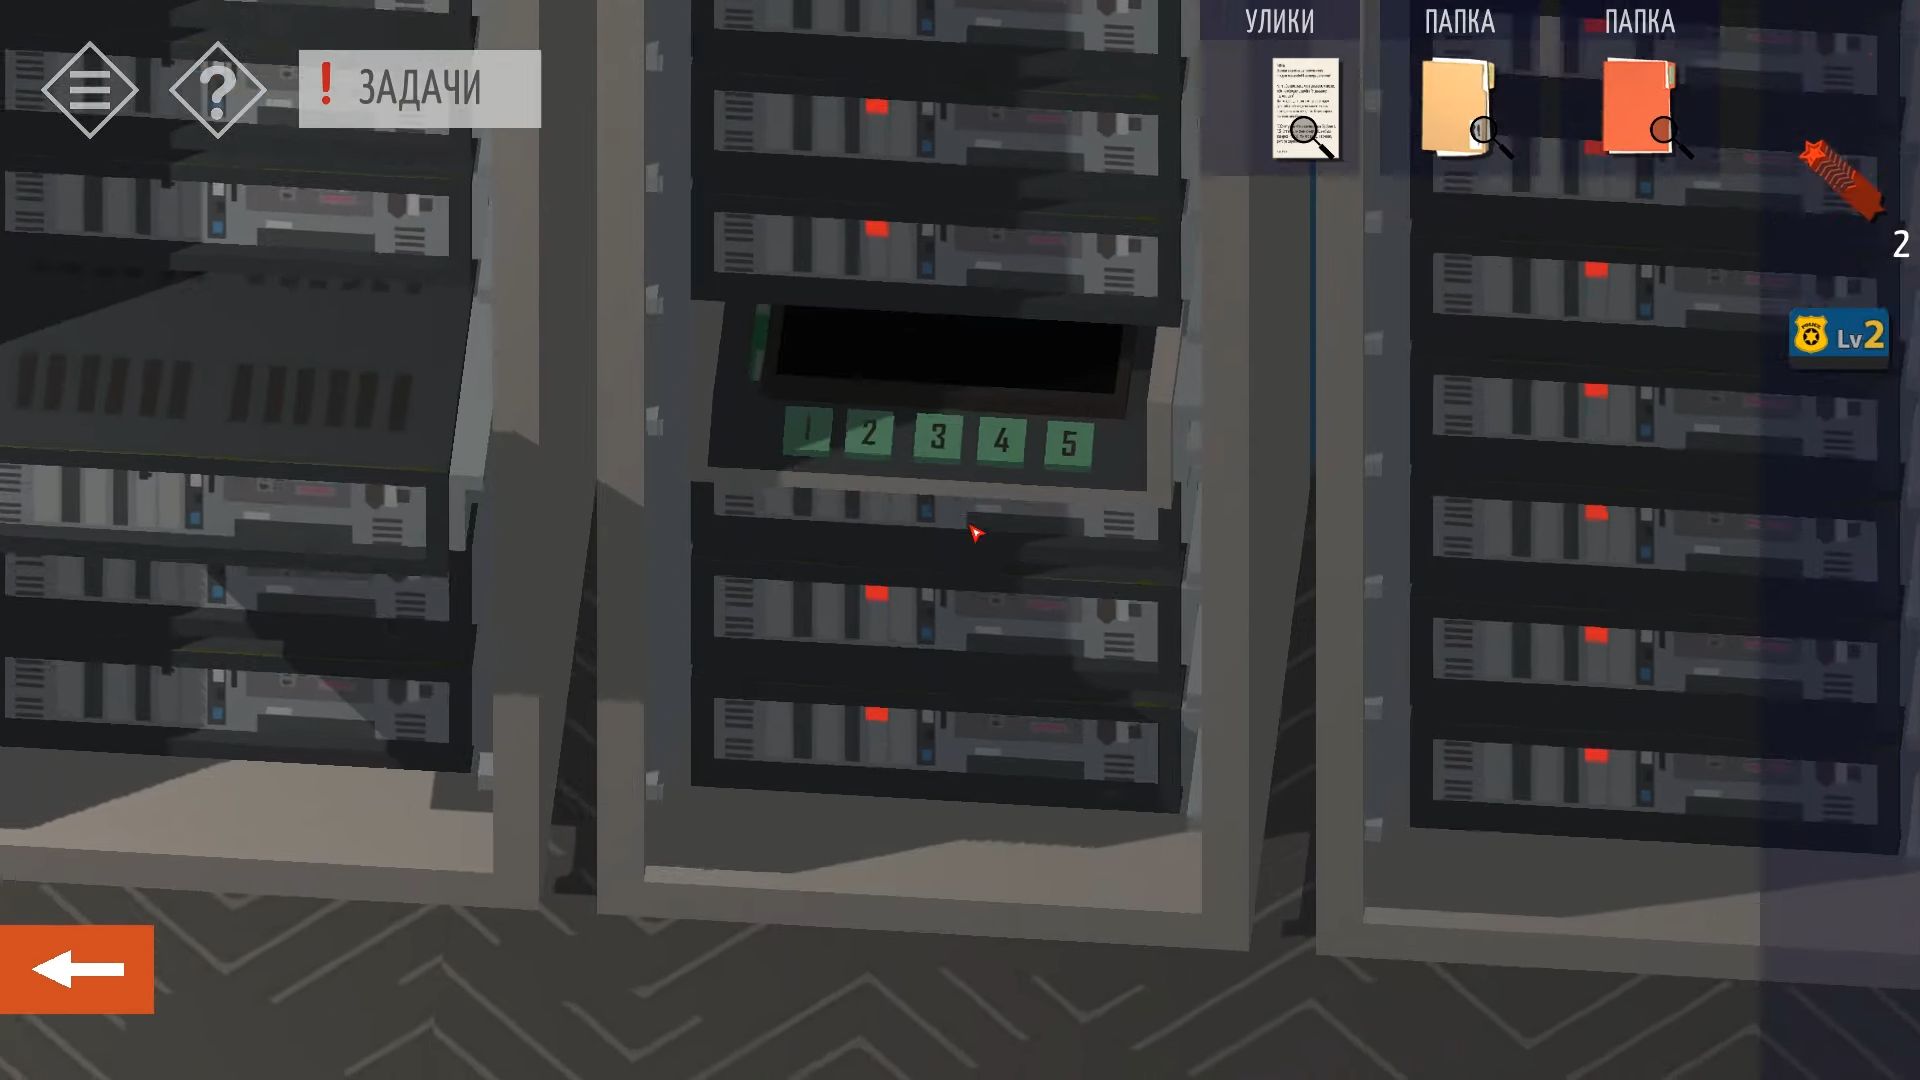
First, touch the control panel on the middle shelf to see a screen with the Server Routing setup. Use the five buttons below to adjust the settings and make the green icons on the right light up correctly. Follow the instructions on each page for steps 1 to 5 and set the status line numbers to 12021. Once the server is connected, you can check the terminal display.

Enter the password you discovered from the vulnerability mentioned earlier. This allows you to attempt to access the system. The login details are: user – admin, password – cmdhack. The hacking process is similar to terminals in the game Fallout. The password is one of the hidden words in the code displayed on the left side of the screen.
Tap to choose a word on the left screen, then press the Enter Button on the right. If you don’t guess the correct word immediately, the system will indicate how many letters are right in the actual password. Use this information to make a better guess in your next attempt. You have 5 tries to get it right before you need to start over. The code and words change each time, so persistence is key.
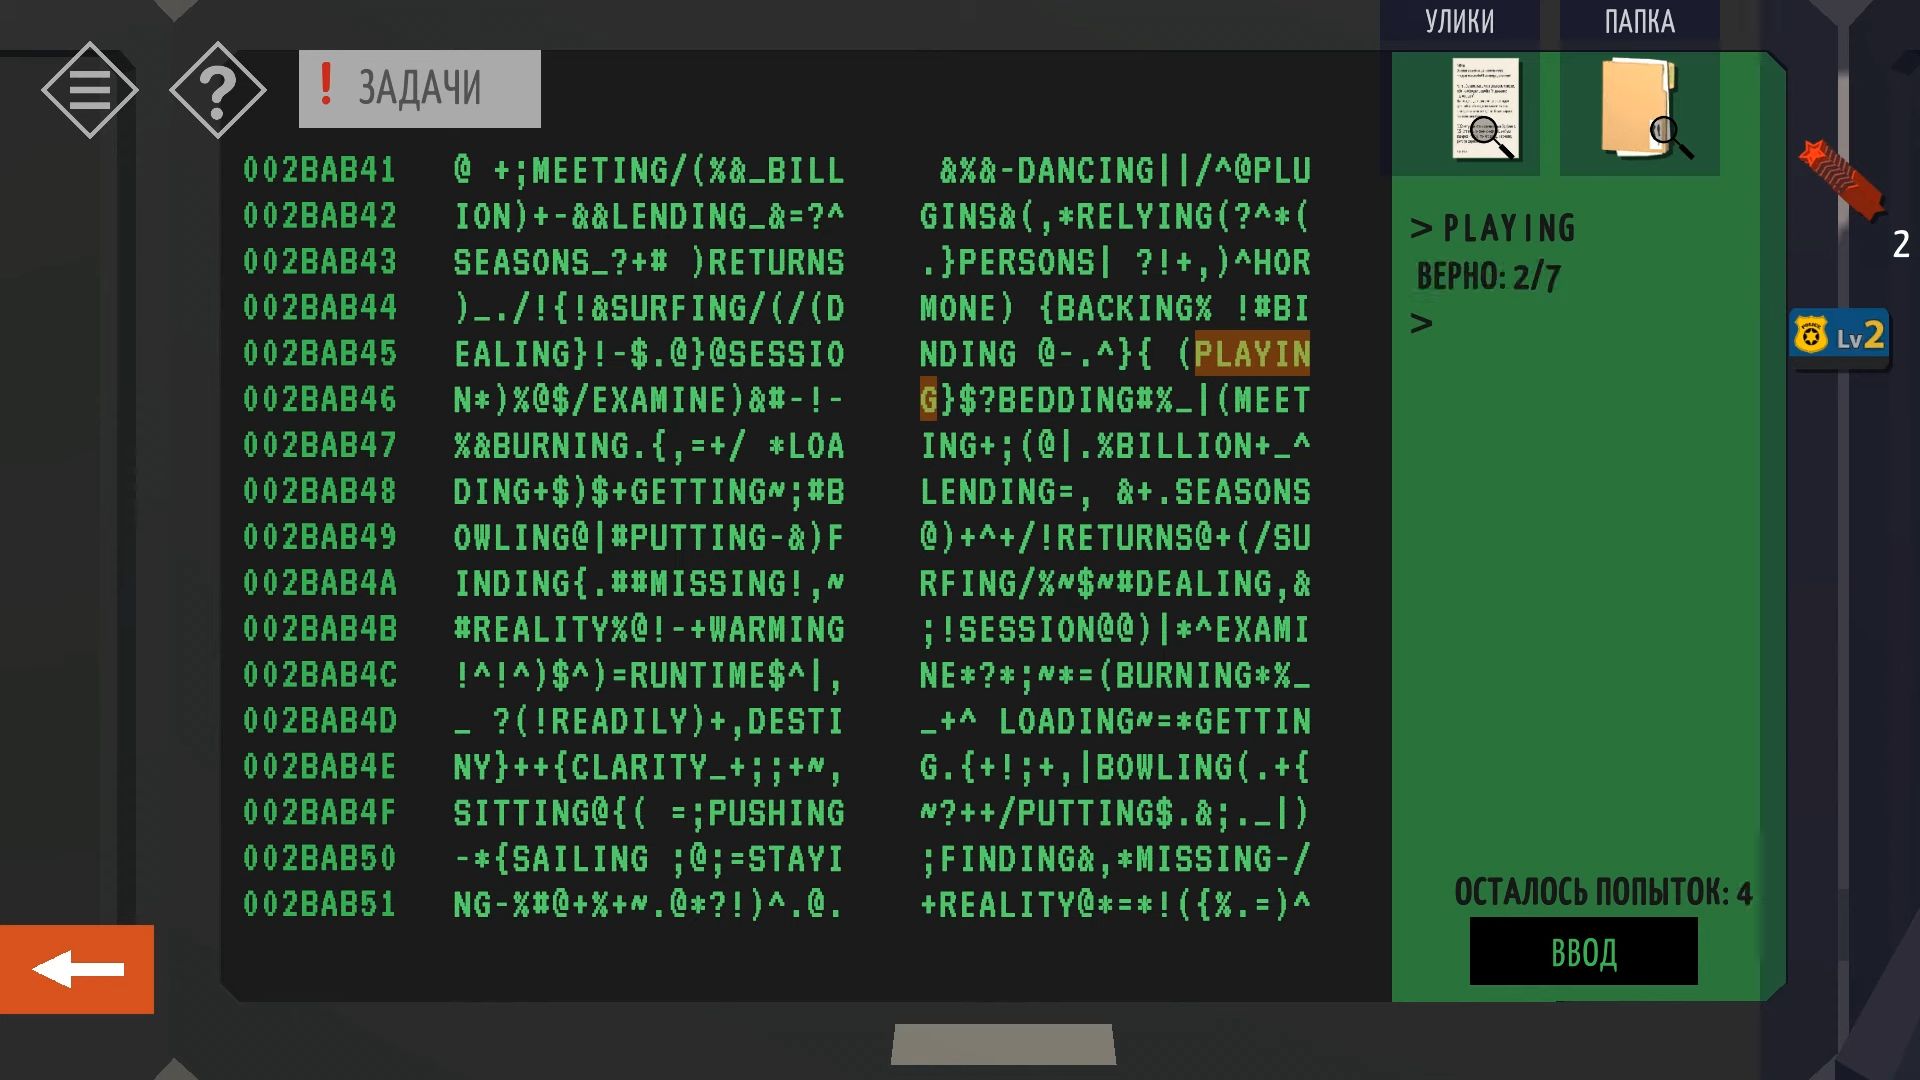
After entering, check the camera feed in the lower left screen of the Photo Room. Press the OPEN button to unlock the cell doors.
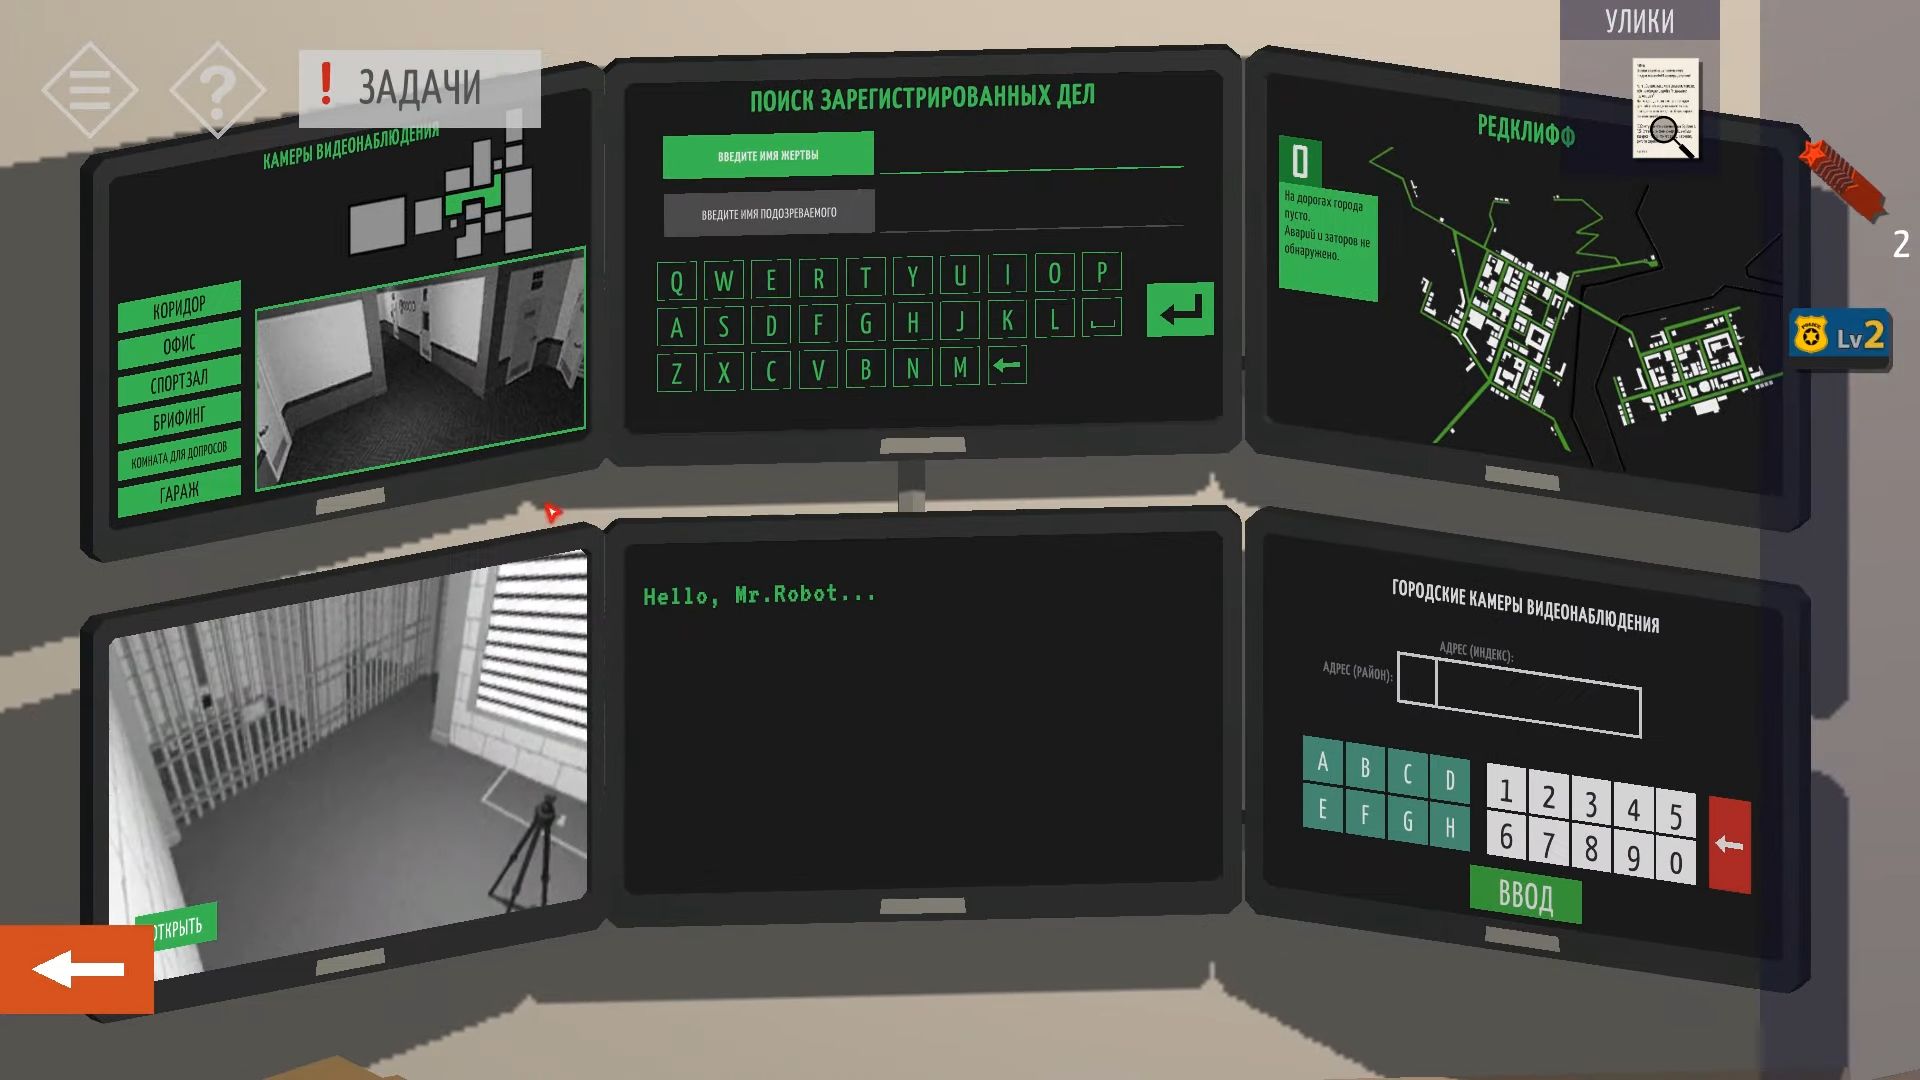
After that, you can touch the top left screen to see the CCTV and choose the Garage. Use the option to OPEN the blockers. Lastly, check the camera feed for the briefing room and look for a hint in the arrangement of desks.
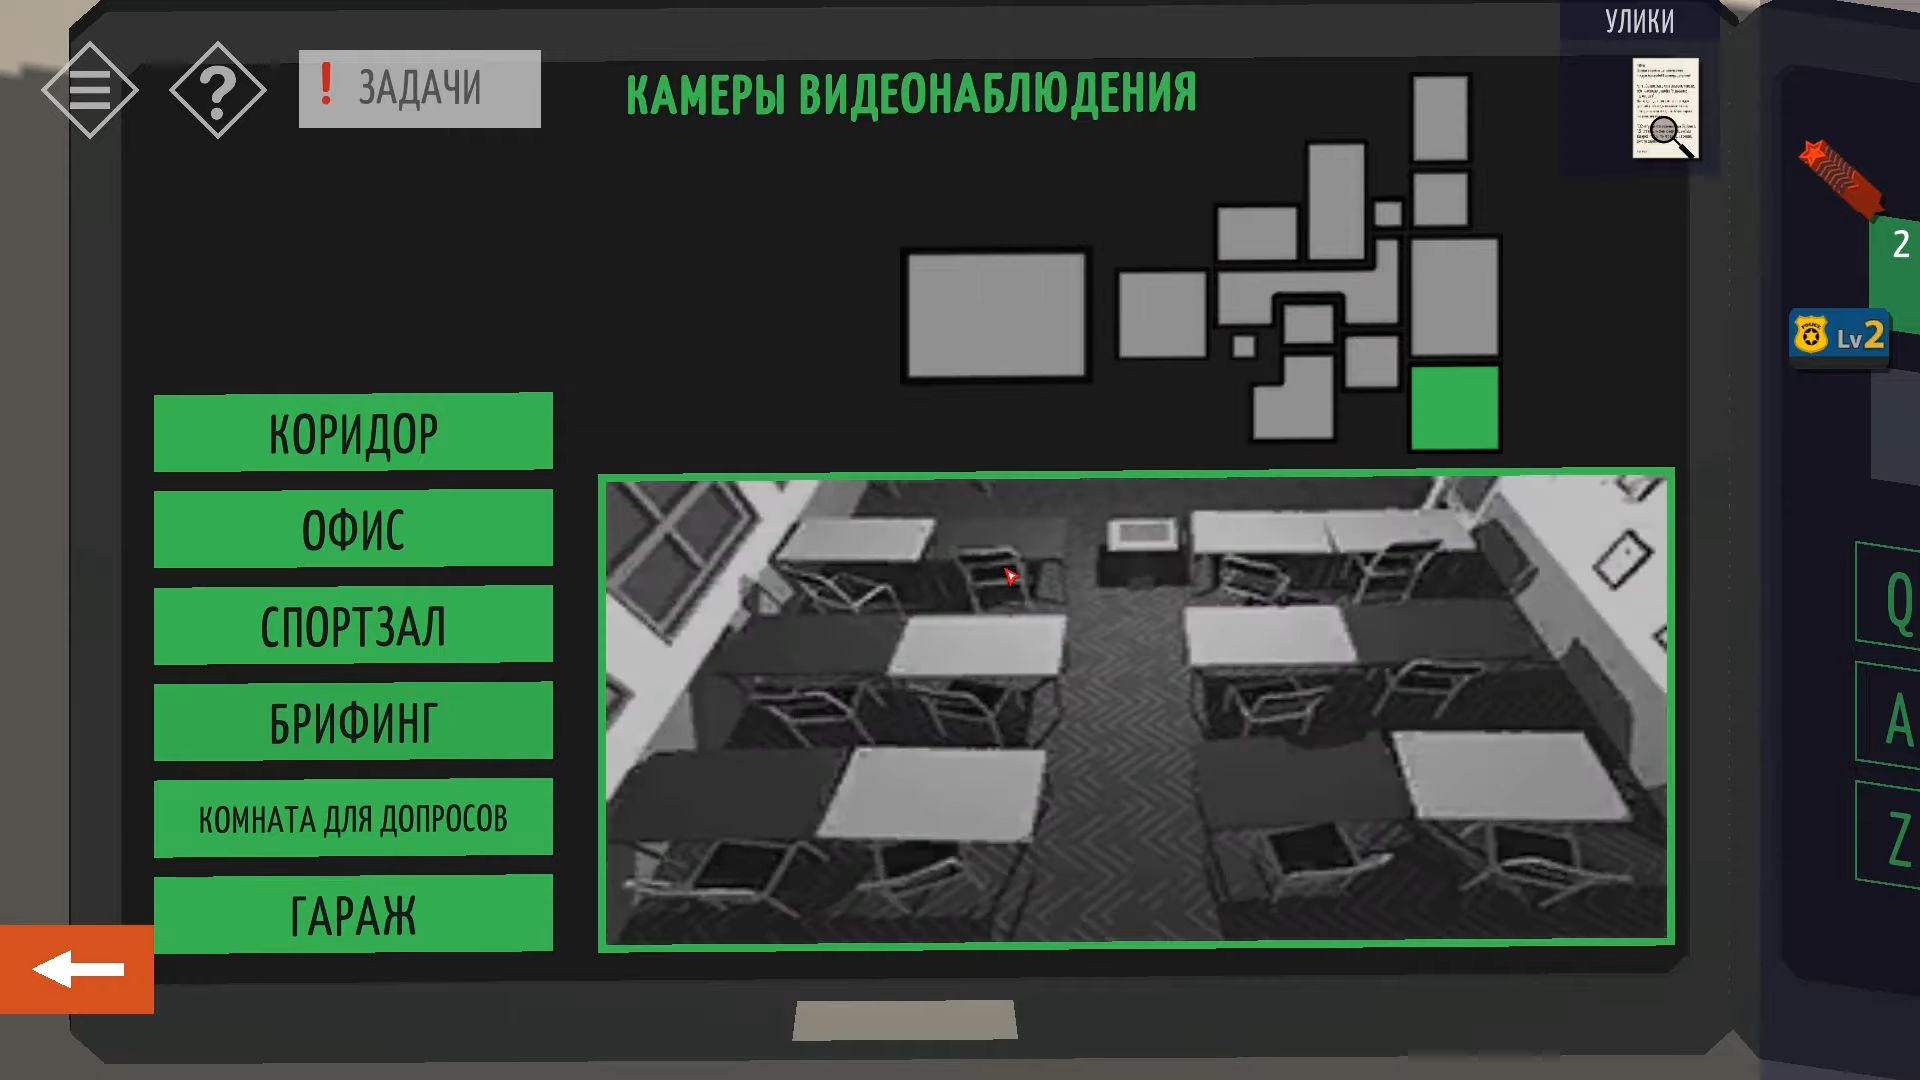
Next, leave this room and go back to the Entrance hall. Then, tap to see the door to the briefing room on the right. To enter the code, follow a specific pattern indicated by the clue above. Inside the briefing room, change the view to observe shelves on the wall and a screen that you can tap to bring down.

Now look at the shelves and grab a screwdriver and the projector. Put the projector on the little table in the middle of the front row. Press the light switch near the door to switch off the lights. Tap the projector to switch it on and see the clue message on display.

Go back to the Hall and go through the doorway on the opposite side to enter the Evidence Lockup. Touch the door to see a keypad entry and utilize the screwdriver to take off the 4 screws on the panel.
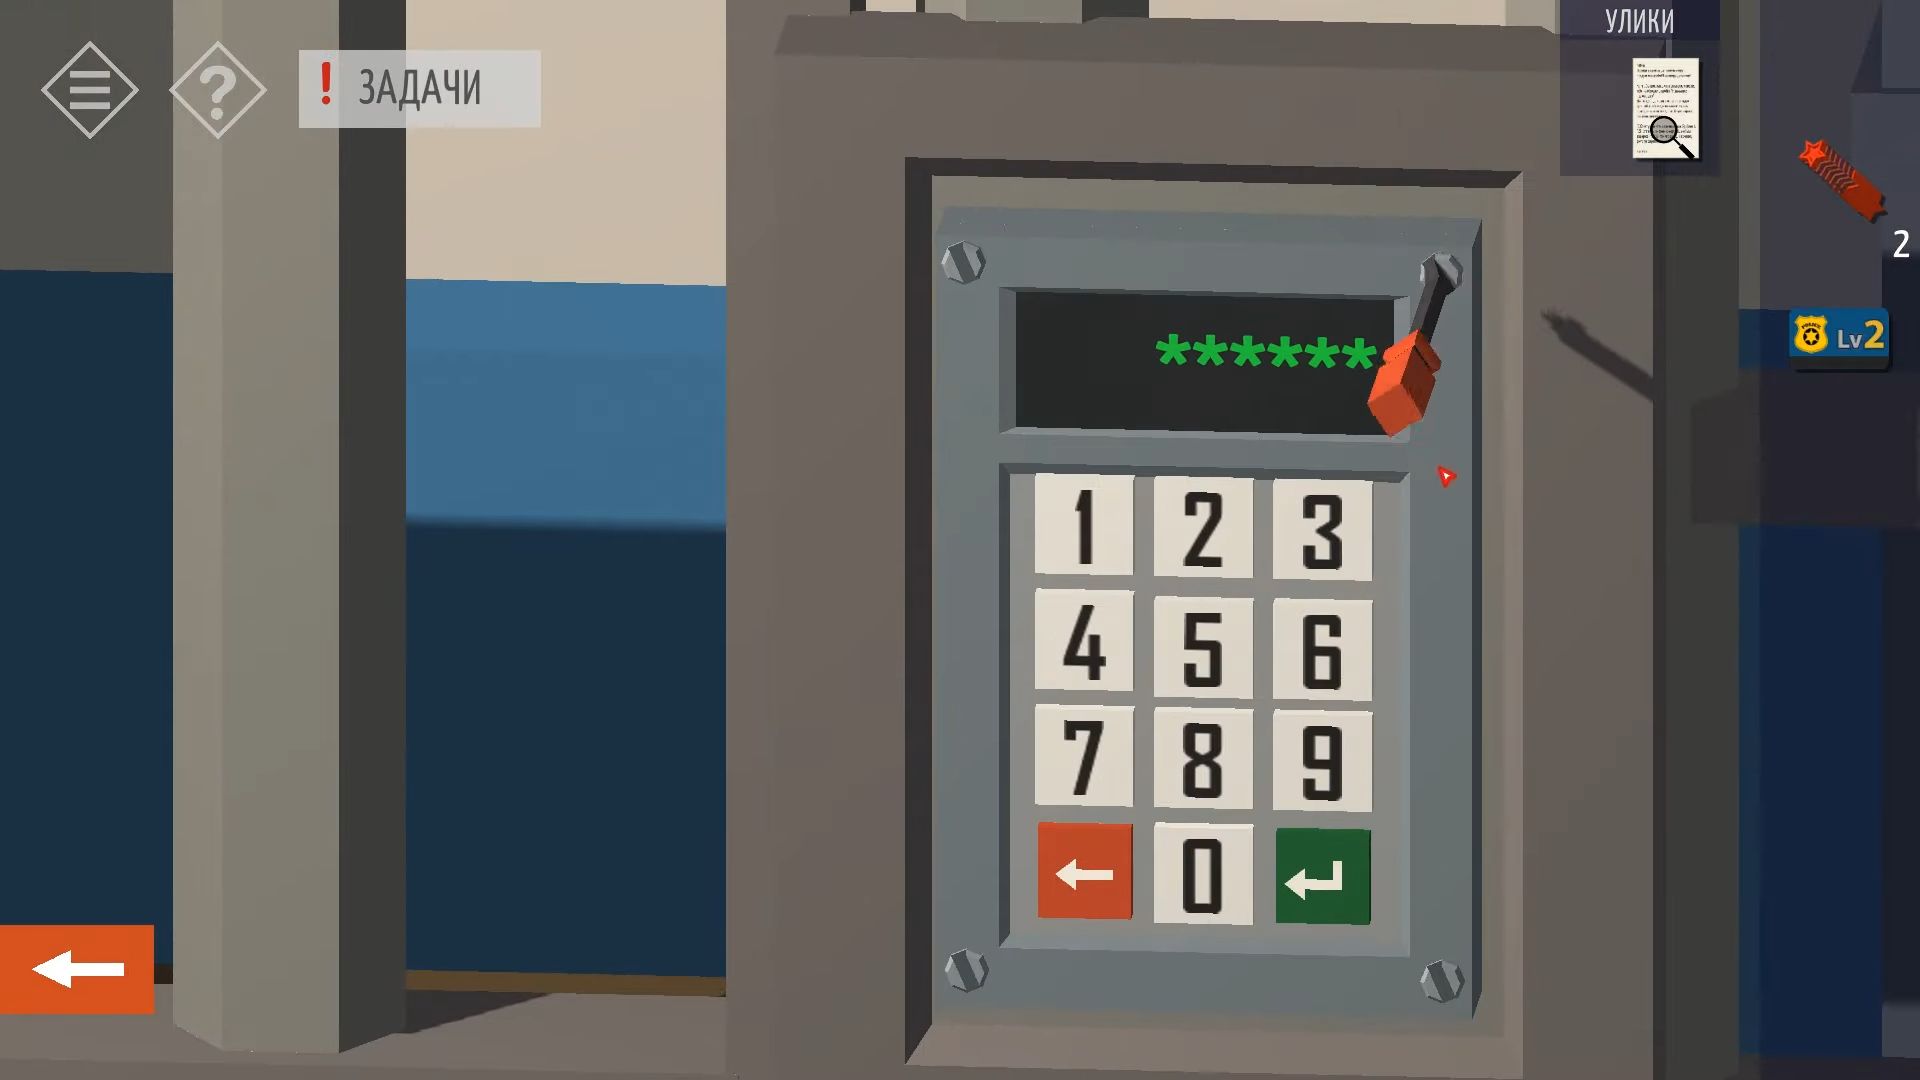
After opening it, you’ll notice that you need to make 5 entries at the top. Look at the yellow lines at the top and the blue ones on the keypad locations to figure out the code that connects all the lines (15496).
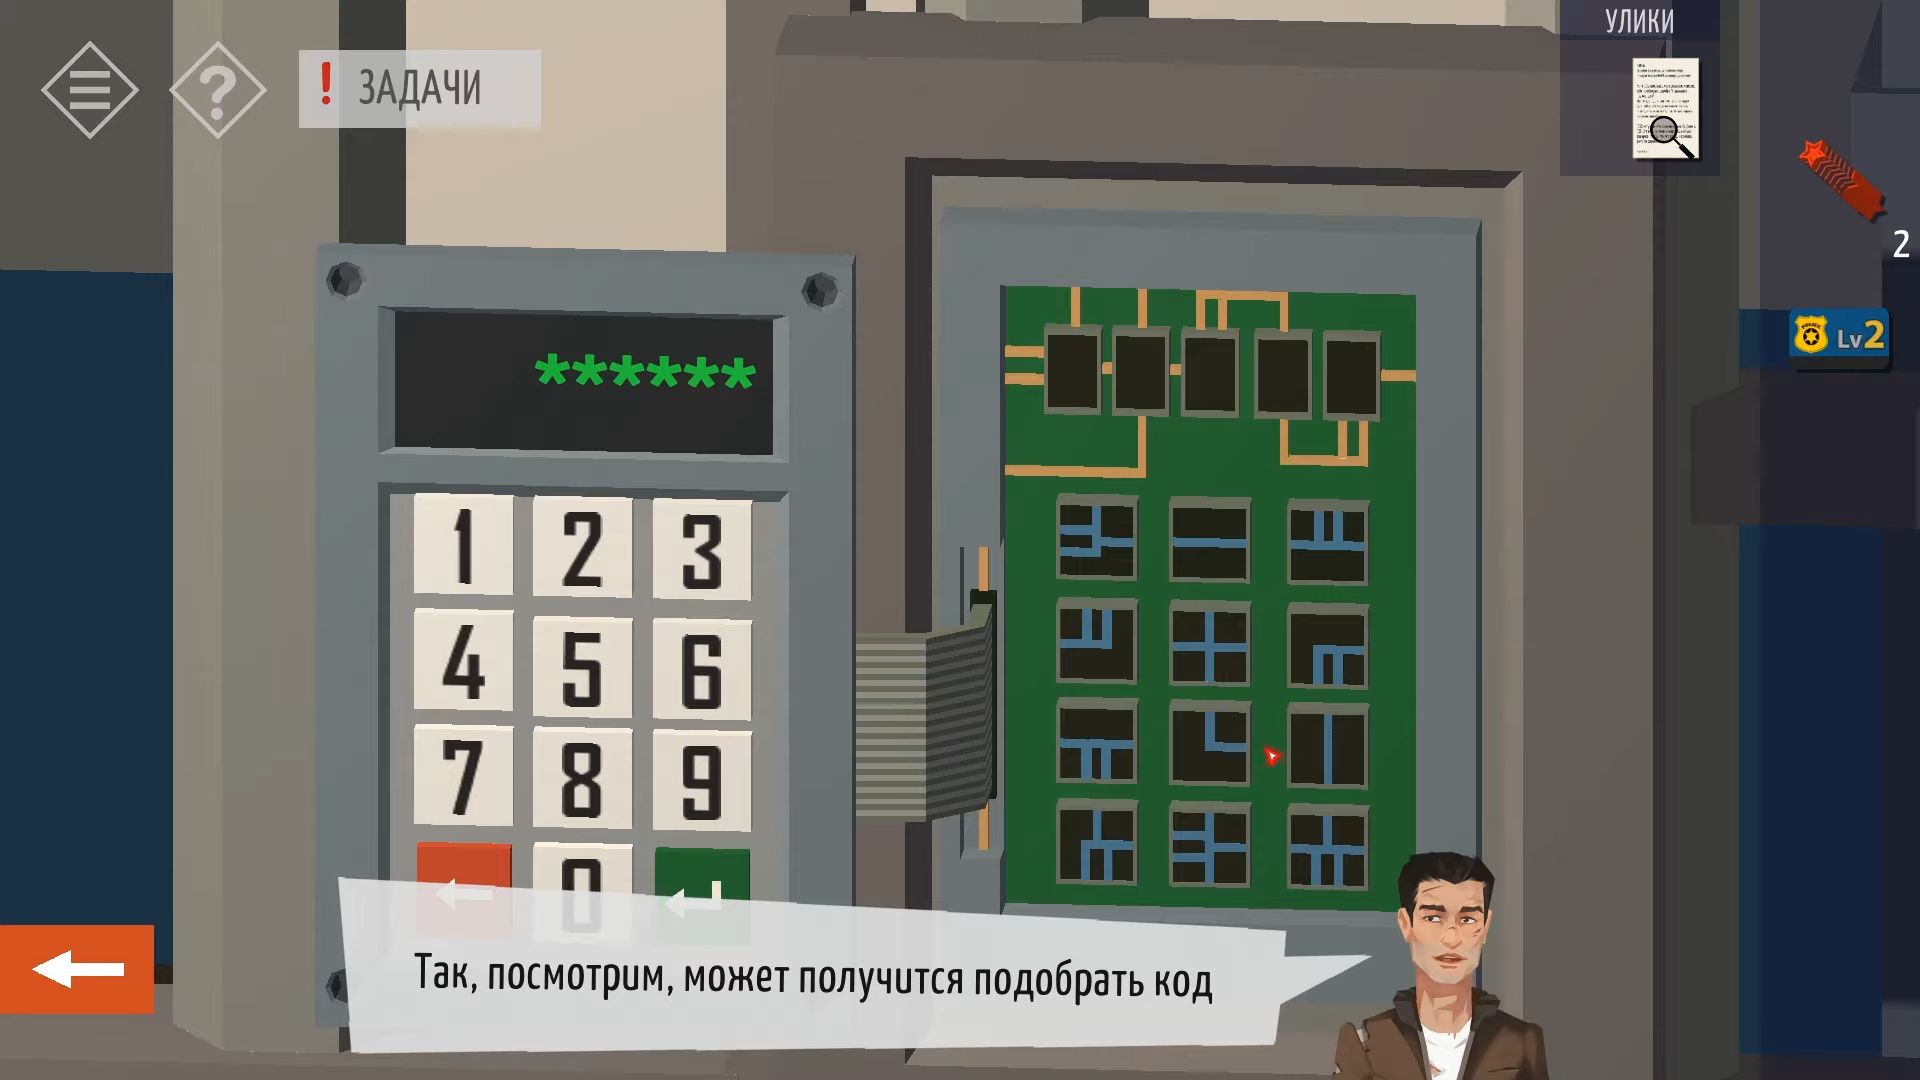
Turn the view to see some short shelves on the opposite side of the bars. Tap to gather and look at the Evidence Log.
Go through the next door into the evidence storage room. Examine the shelves to locate the item you are looking for on Shelf E2. Tap the item to get the Evidence number.
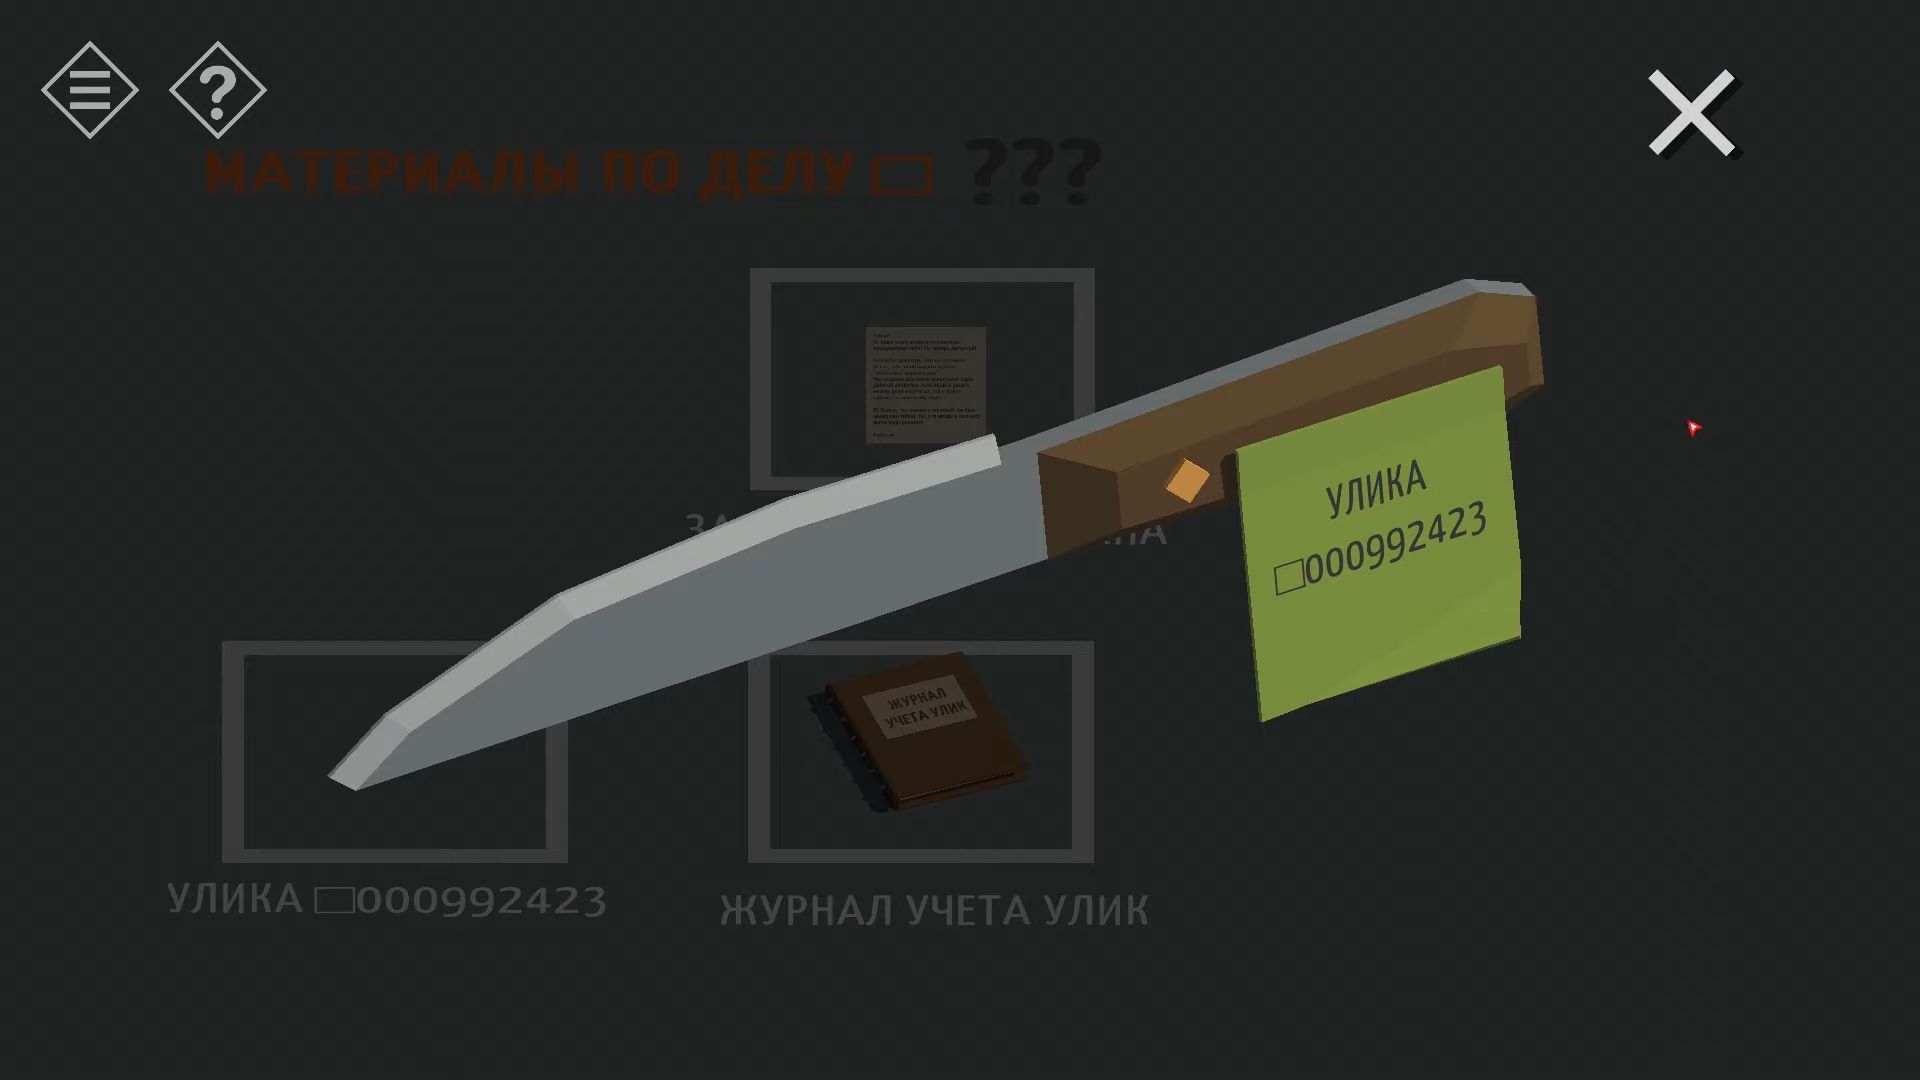
Finally, look for shelf C2 to discover another Star Cylinder. Return to the Photo Room and inspect the cell on the left to find a cake – it’s true. Then, check the other cell, look at the desk, and put the remaining star cylinders into the stand. They will now fit into place, revealing a code.
On the right side of the desk, there is a box with 5 dials. Adjust the positions according to the code above to unlock the box and set the positions to 0 3 5 1 4. Open the box and collect the camera to view the photo screen. There are 11 photos with information.
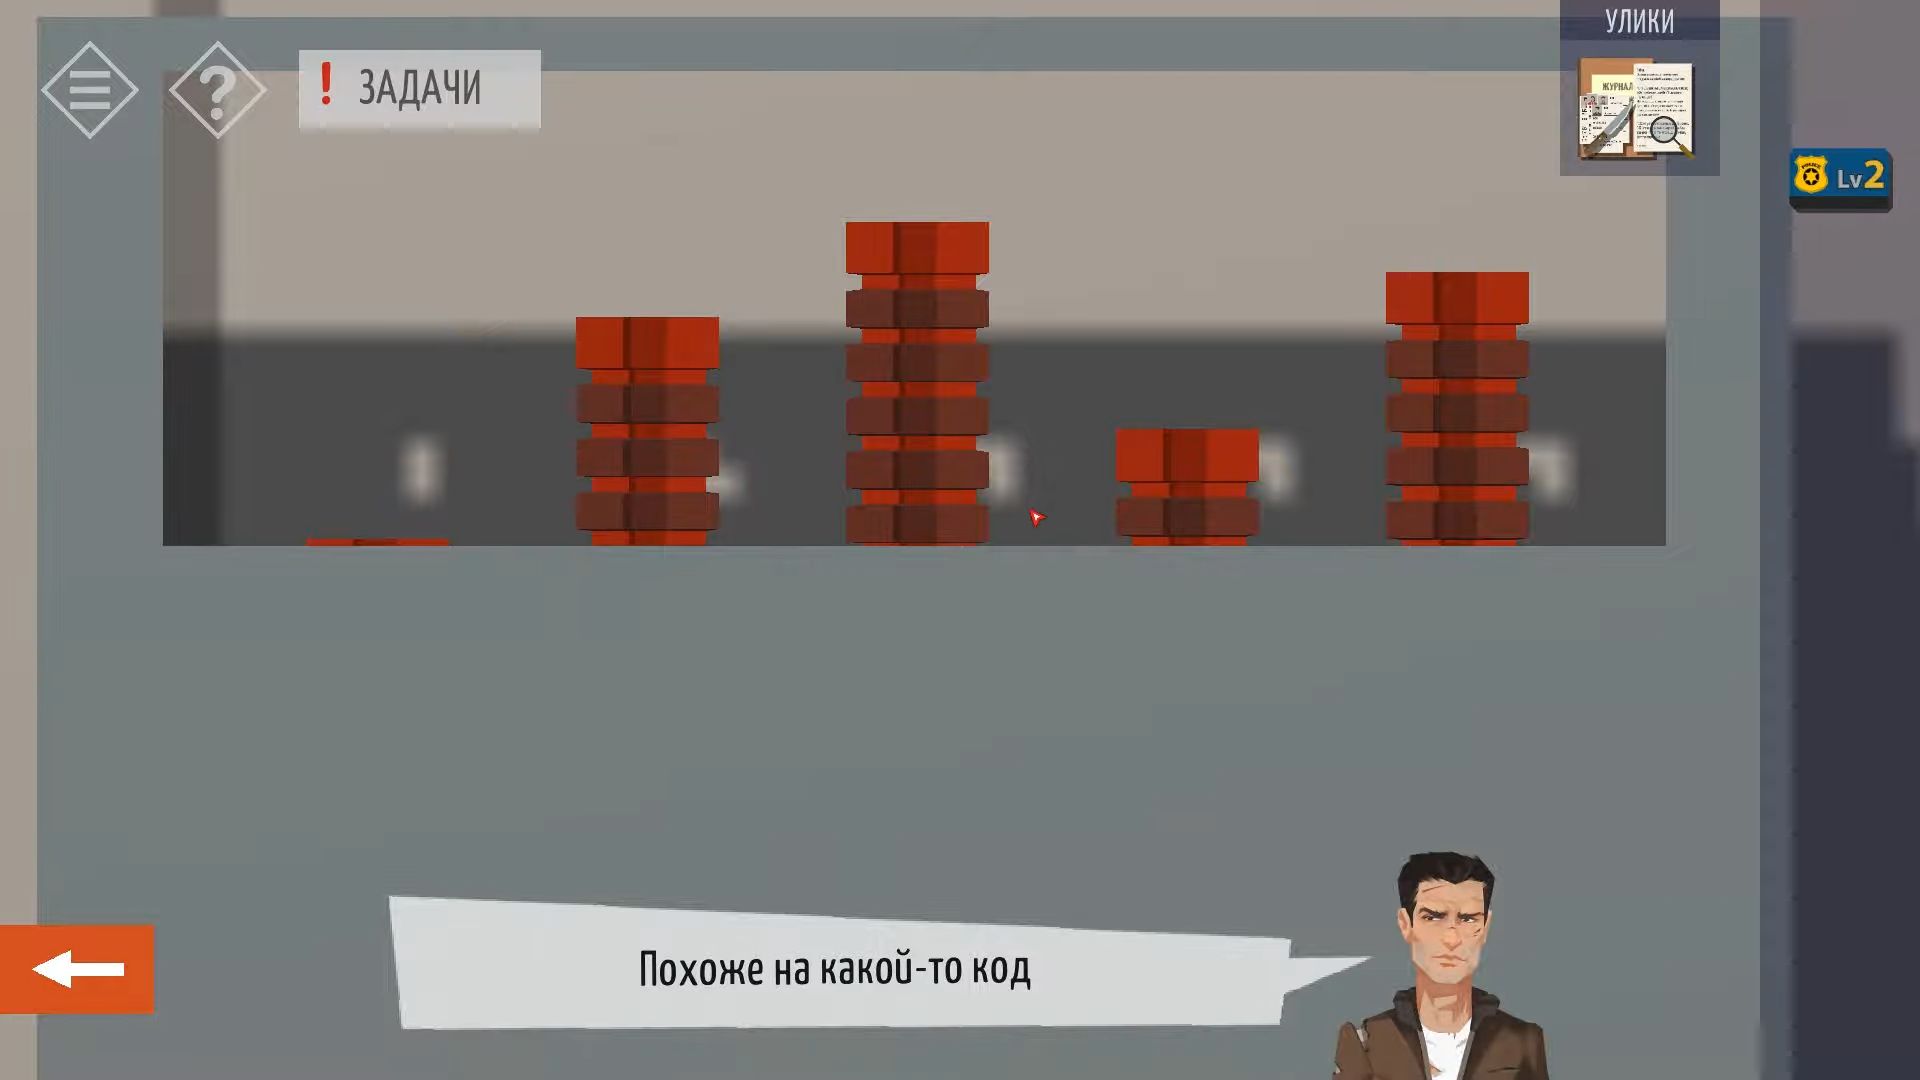
Now go back to the office, look at the computer screen for OTTO, and you’ll see many clocks. Use a clue to open this computer, and you’ll need a 4-digit code. In the corridor, there are 4 smaller clocks. Figure out how many hours each of these clocks is ahead of the Redcliff clock (7351).
Once unlocked, you can access the Coroners Reports and need a date. Check the Evidence log for the number on the knife from the evidence room to find the date it was logged – 17.05.19. This will allow you to print out 4 Victim reports from the printer, which have details but no names.
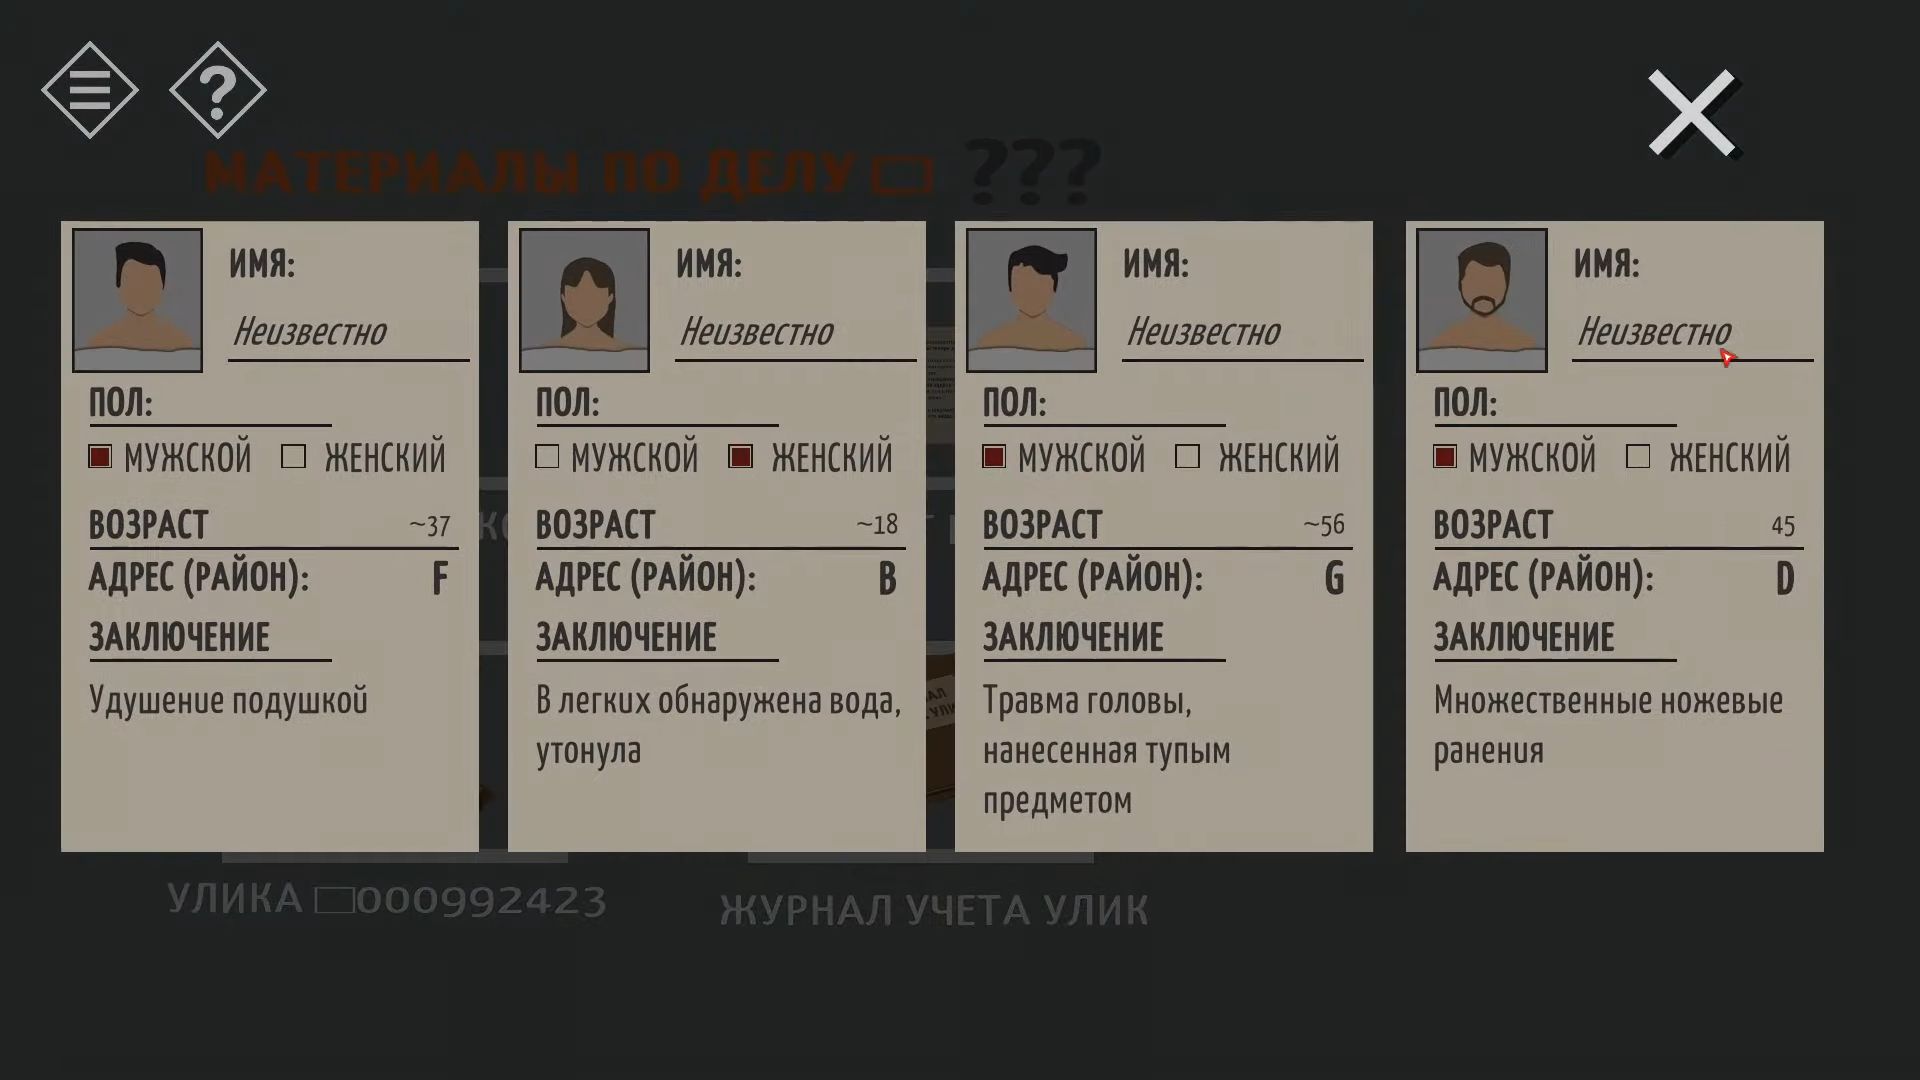
The tool used for the crime was a knife. This points to the 4th report which talks about injuries from a knife. The person, in this case, is a man, 45 years old, living in Locality D. Now, you have to examine the camera and search for a photo that matches the description on the coroner’s report – a man with a beard and mustache. It’s Joe Fisk.
After that, press the Info (i) button to obtain the zip code for this person – 378237.
Head to the control room and operate the terminal. On the lower right screen, input the Locality letter and zip code you found earlier. You will see a street view. Use the Threat Analysis button to identify a suspicious car, then tap it to see and note the license plate. After that, print this information.
Now go back to the Office and use Ross’s computer, which you unlocked earlier. This computer has a database of license plates, enter the number you found – 5 3 6 7 1 2. Print and gather the owner’s report. Now you have information about the suspect.
After that, return once more to the control room and use the screen at the top center to locate the information about the case. Enter the names of the victim and suspect. You will receive Case Number 5637281.
Finally, go back to Ryan’s laptop in the office, and you can use this number to open it. Click on the notepad icon to see some saved codes and passwords. Next, look for the code for the locker to open it.
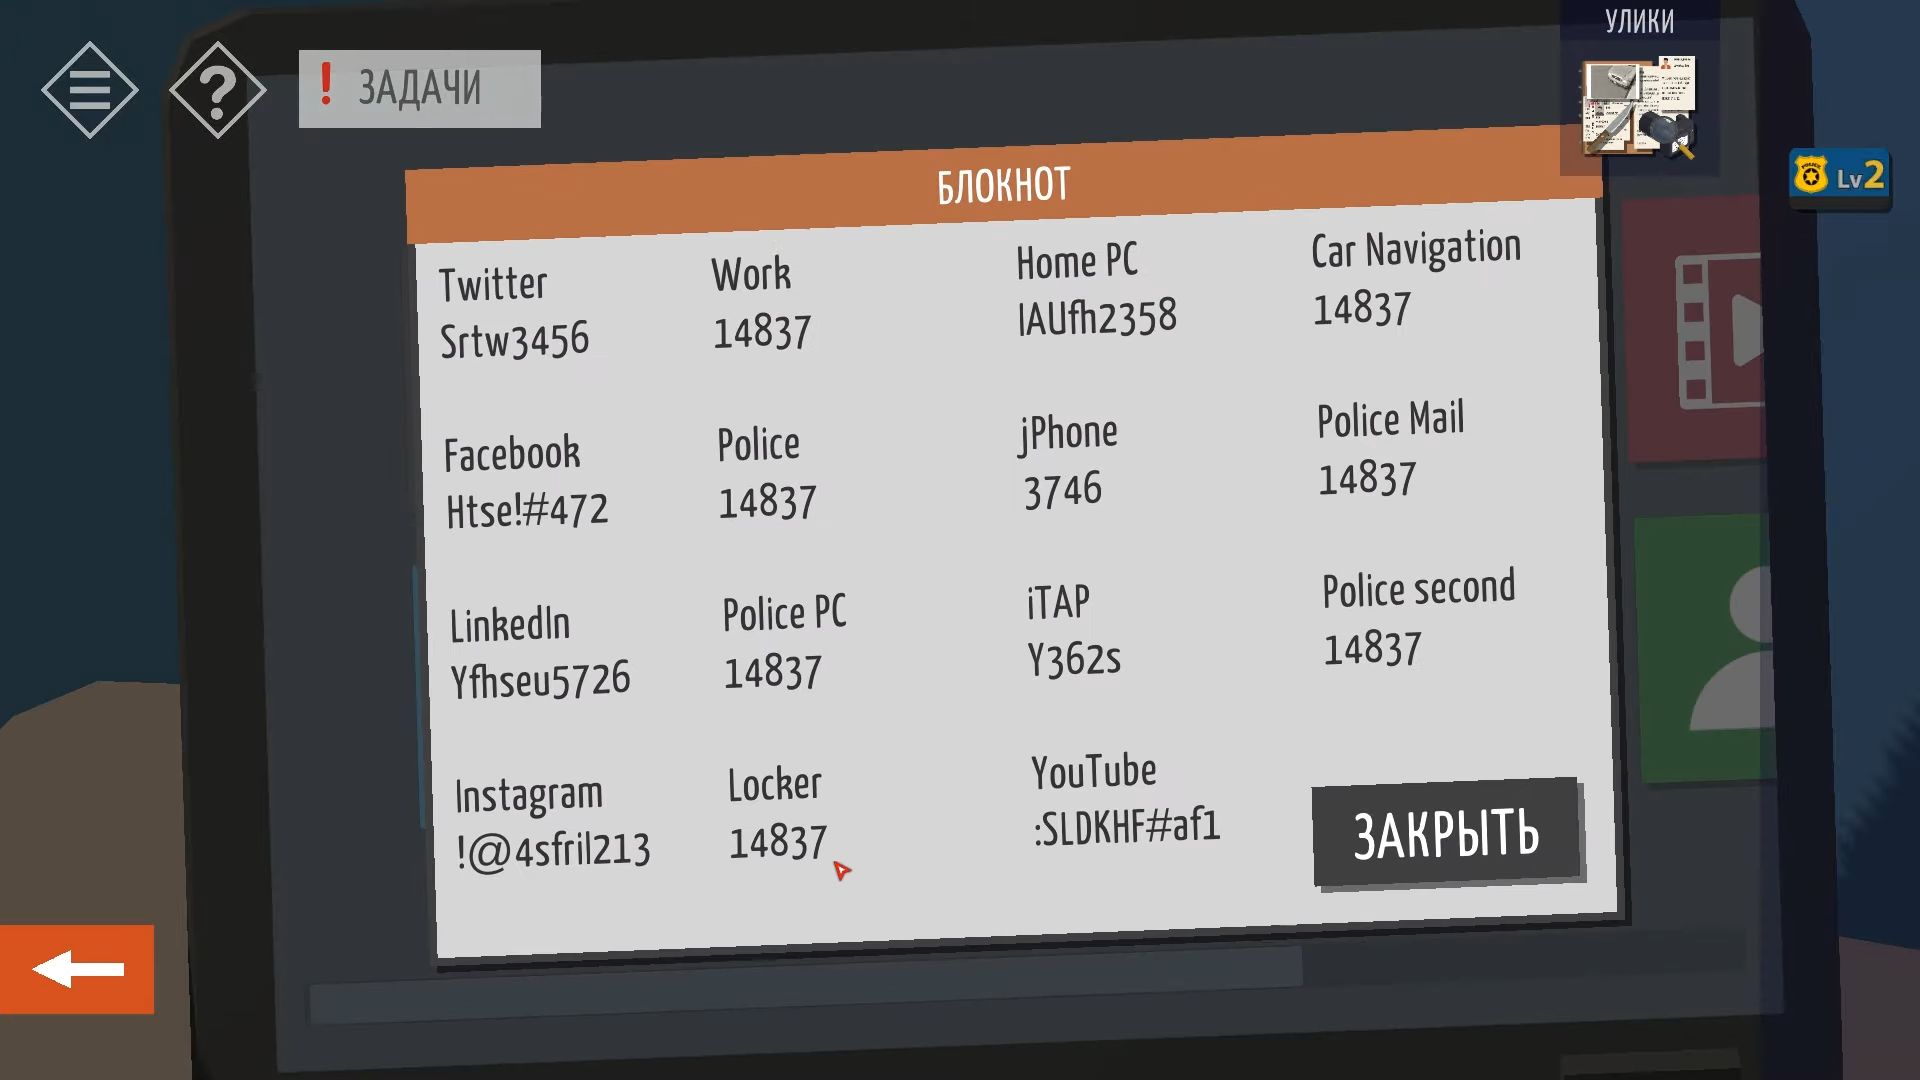
Go back to the locker room and locate Ryan’s Locker (2). Then use the code to unlock it and get a lock pick.
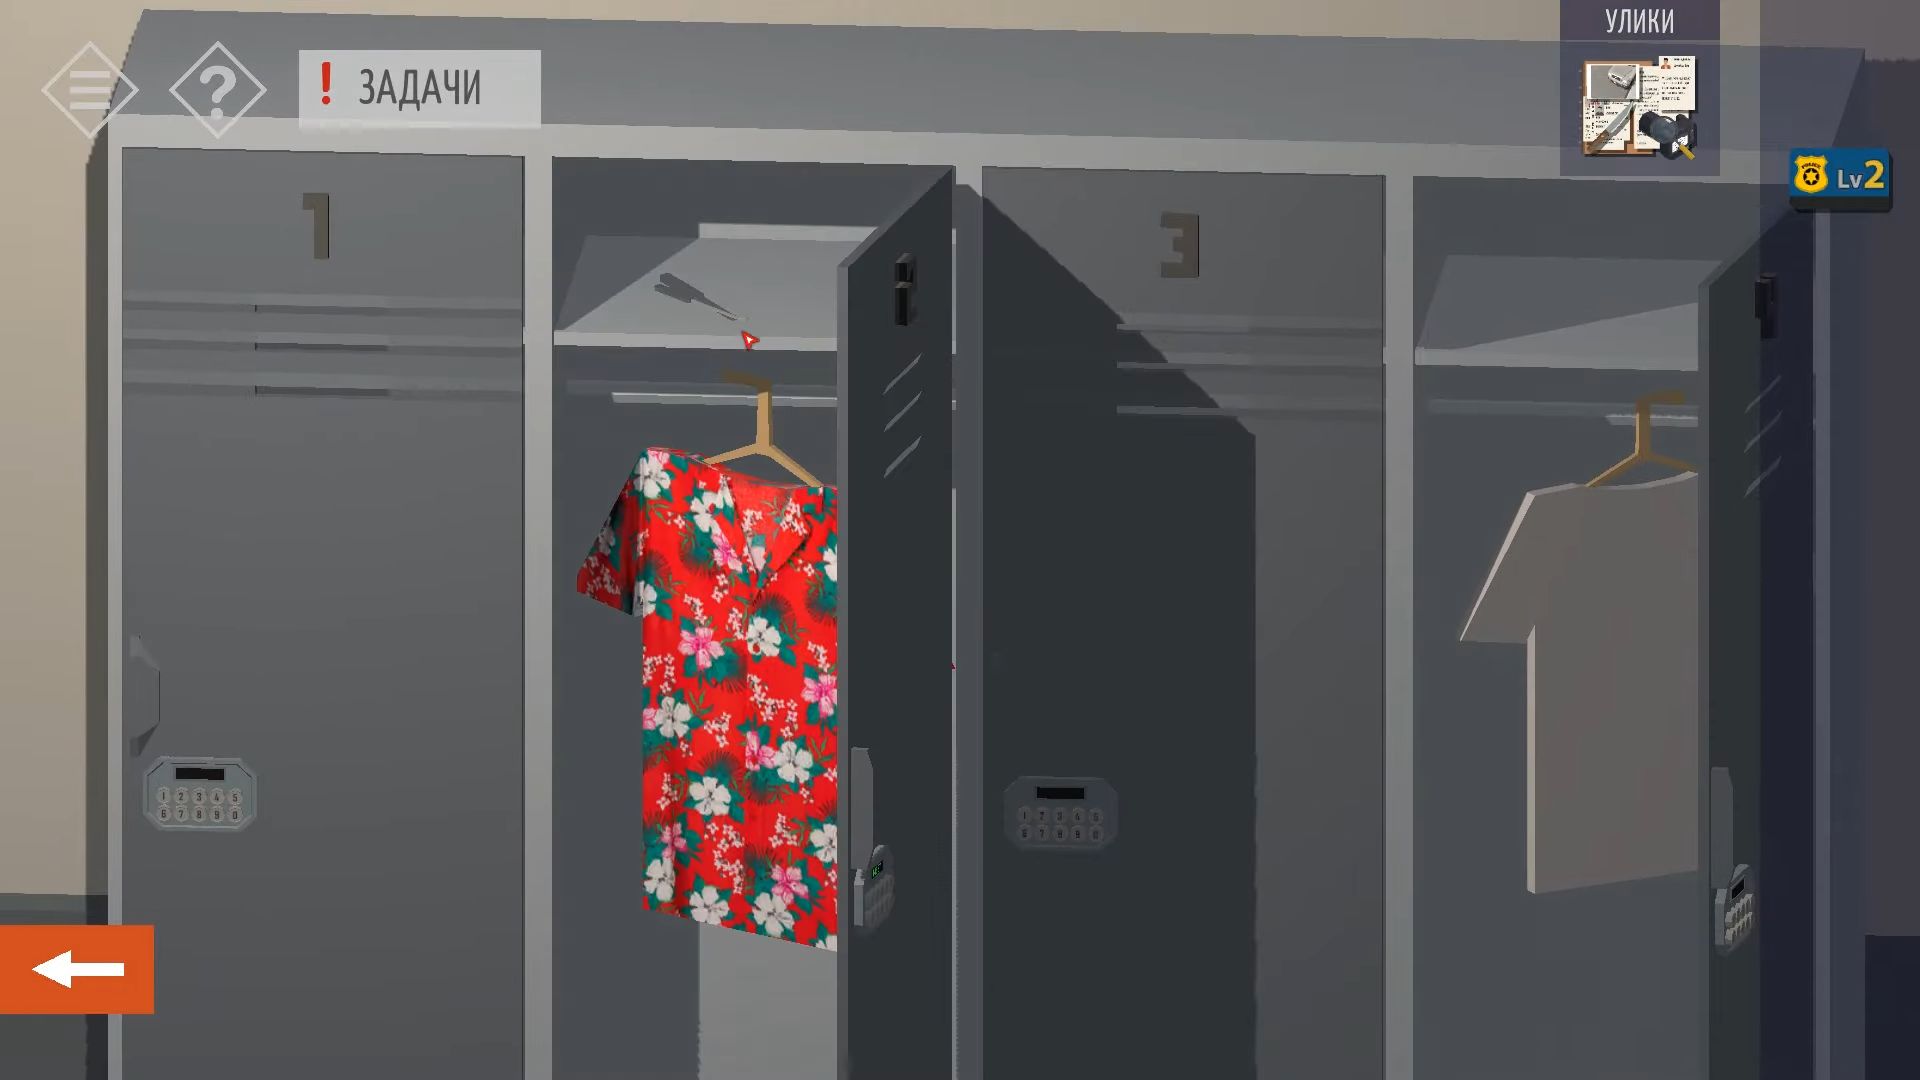
Head to the Entrance Hall and locate a key cabinet on the wall behind the desks. Use the lock pick on it to start a mini-game where you have to collect the lock. Use the controls at the bottom to move the pick left and right, and then push the blocks up.
When you tap the lock turn icon, it will attempt to open, and the blocks in the correct position will stay, while the others will fall back down. Experimenting will help you find the correct setting.
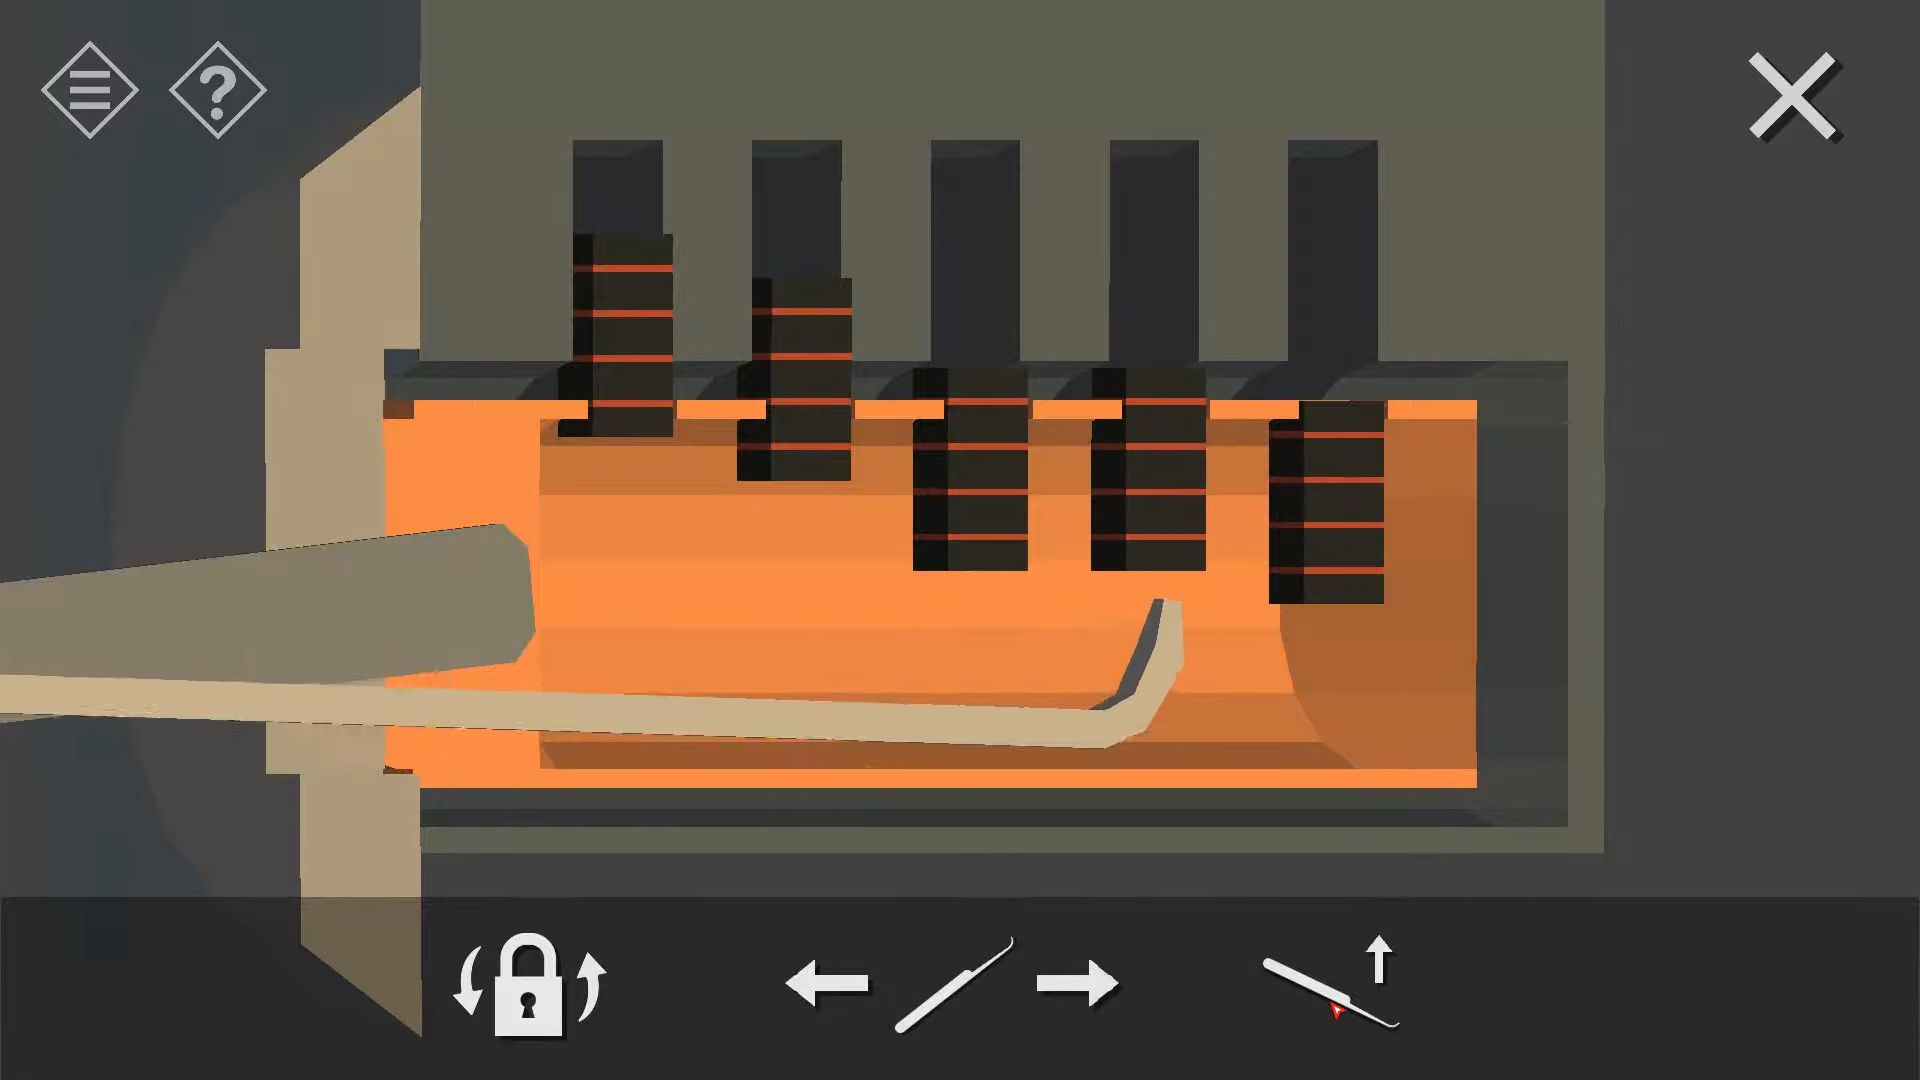
Pick up the car key by returning to the elevator and head to the garage. After that, use the key and tap on one of the cars on the right to drive away and complete this level.
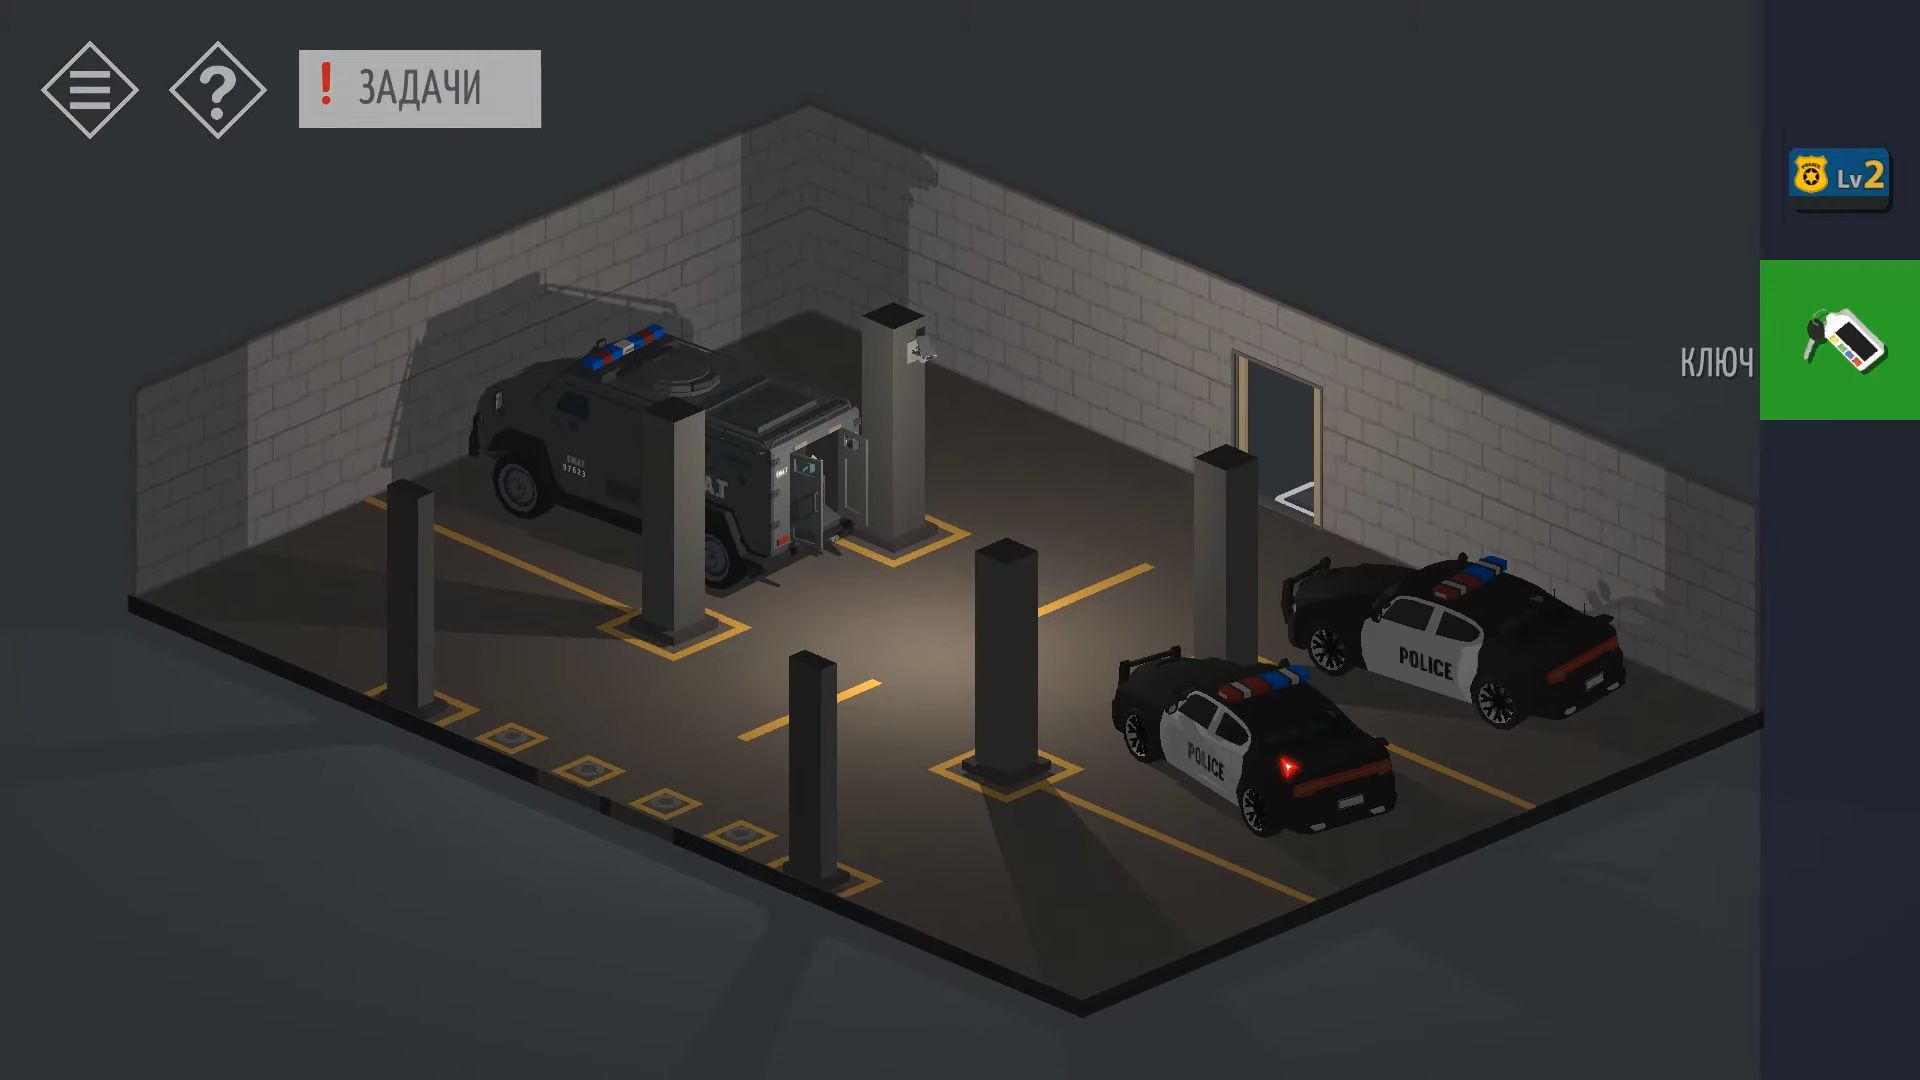
Chapter 15 – Part 1
Following Chapter 14, the last section of Chapter 15 marks the end of the story and the resolution of the mystery of Red Cliff. The small rooms have guided us through a town, into a mountain, and beyond.
Crystal
After managing to get away from the police station, you headed to the cave with the crystal. Follow the instructions from your unseen father and go into the cave with him. Tap the light to progress through the initial rooms.
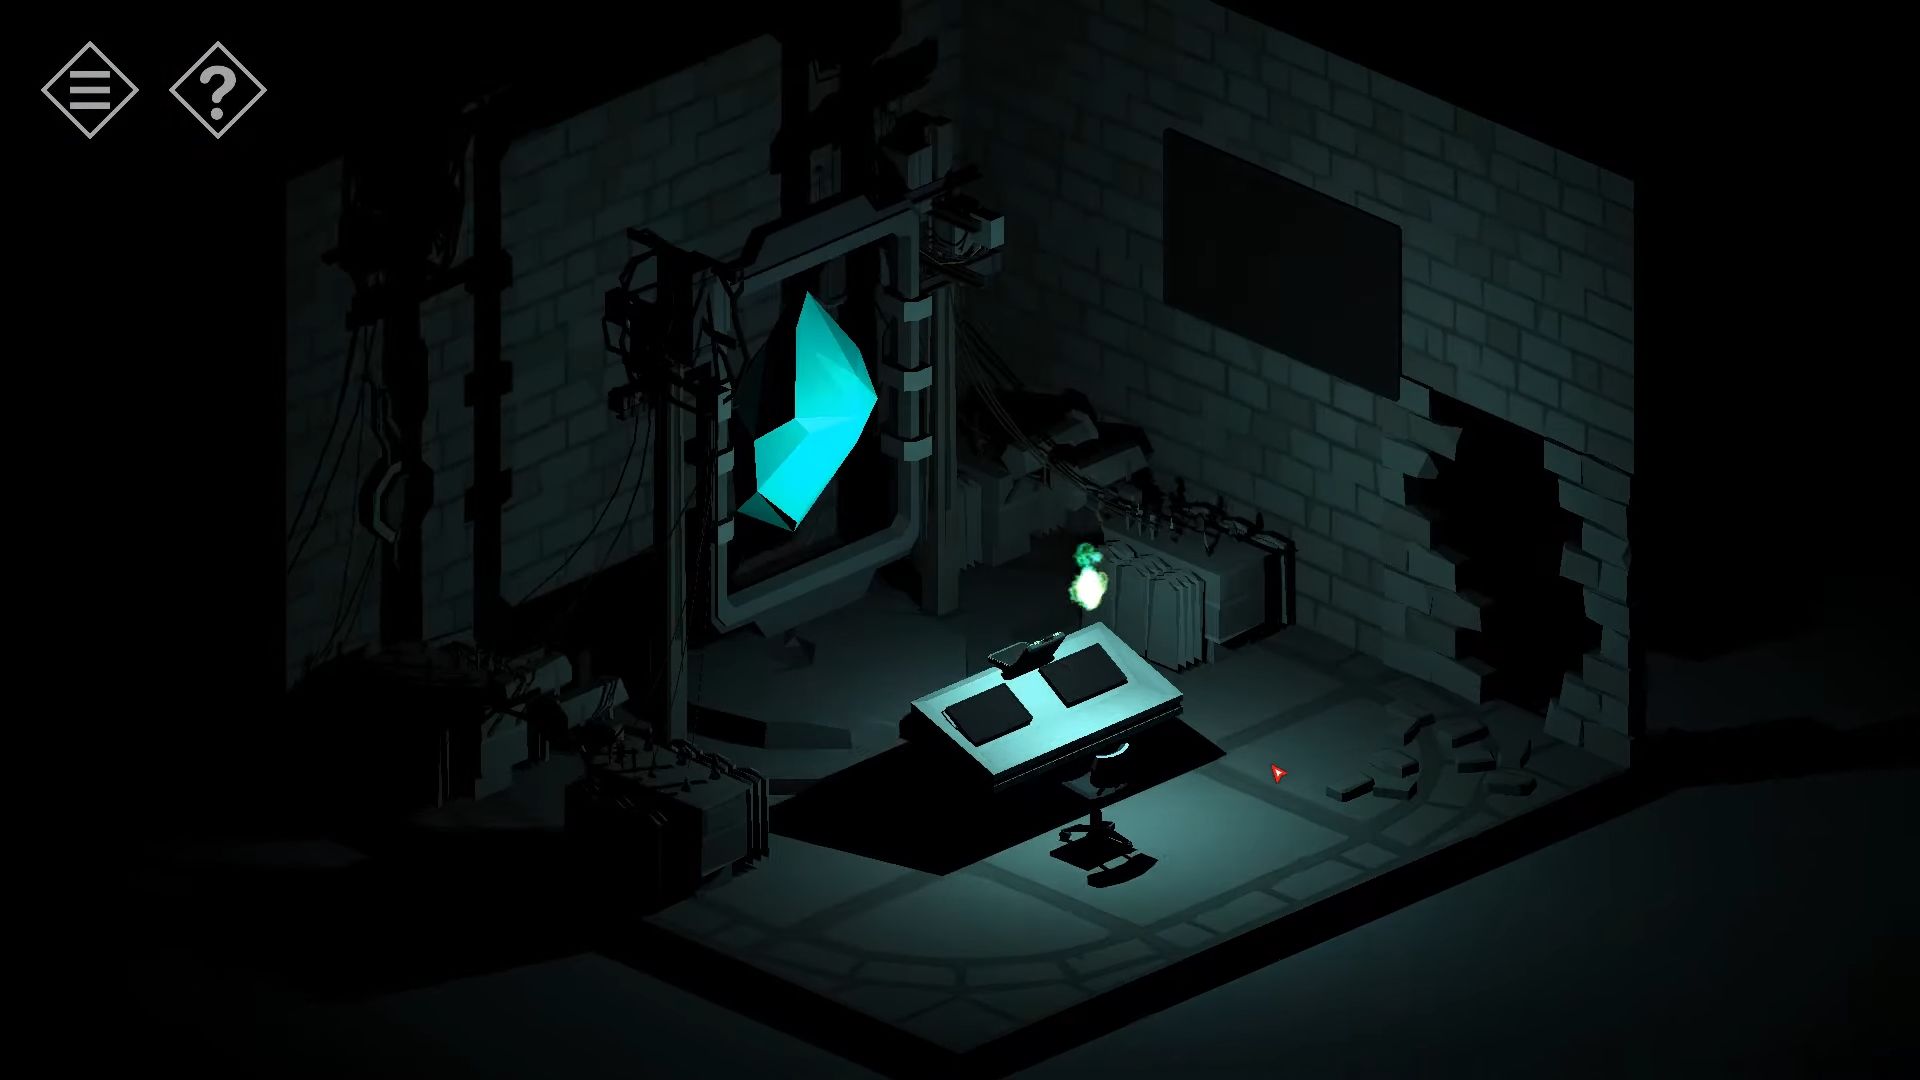
You will come to this room with the big crystal. Keep following the instructions as you get an explanation about the crystal and what happened.
After the explanation is finished, you will be in the same room, but now it’s empty. Navigate back through the rooms and leave the cave.
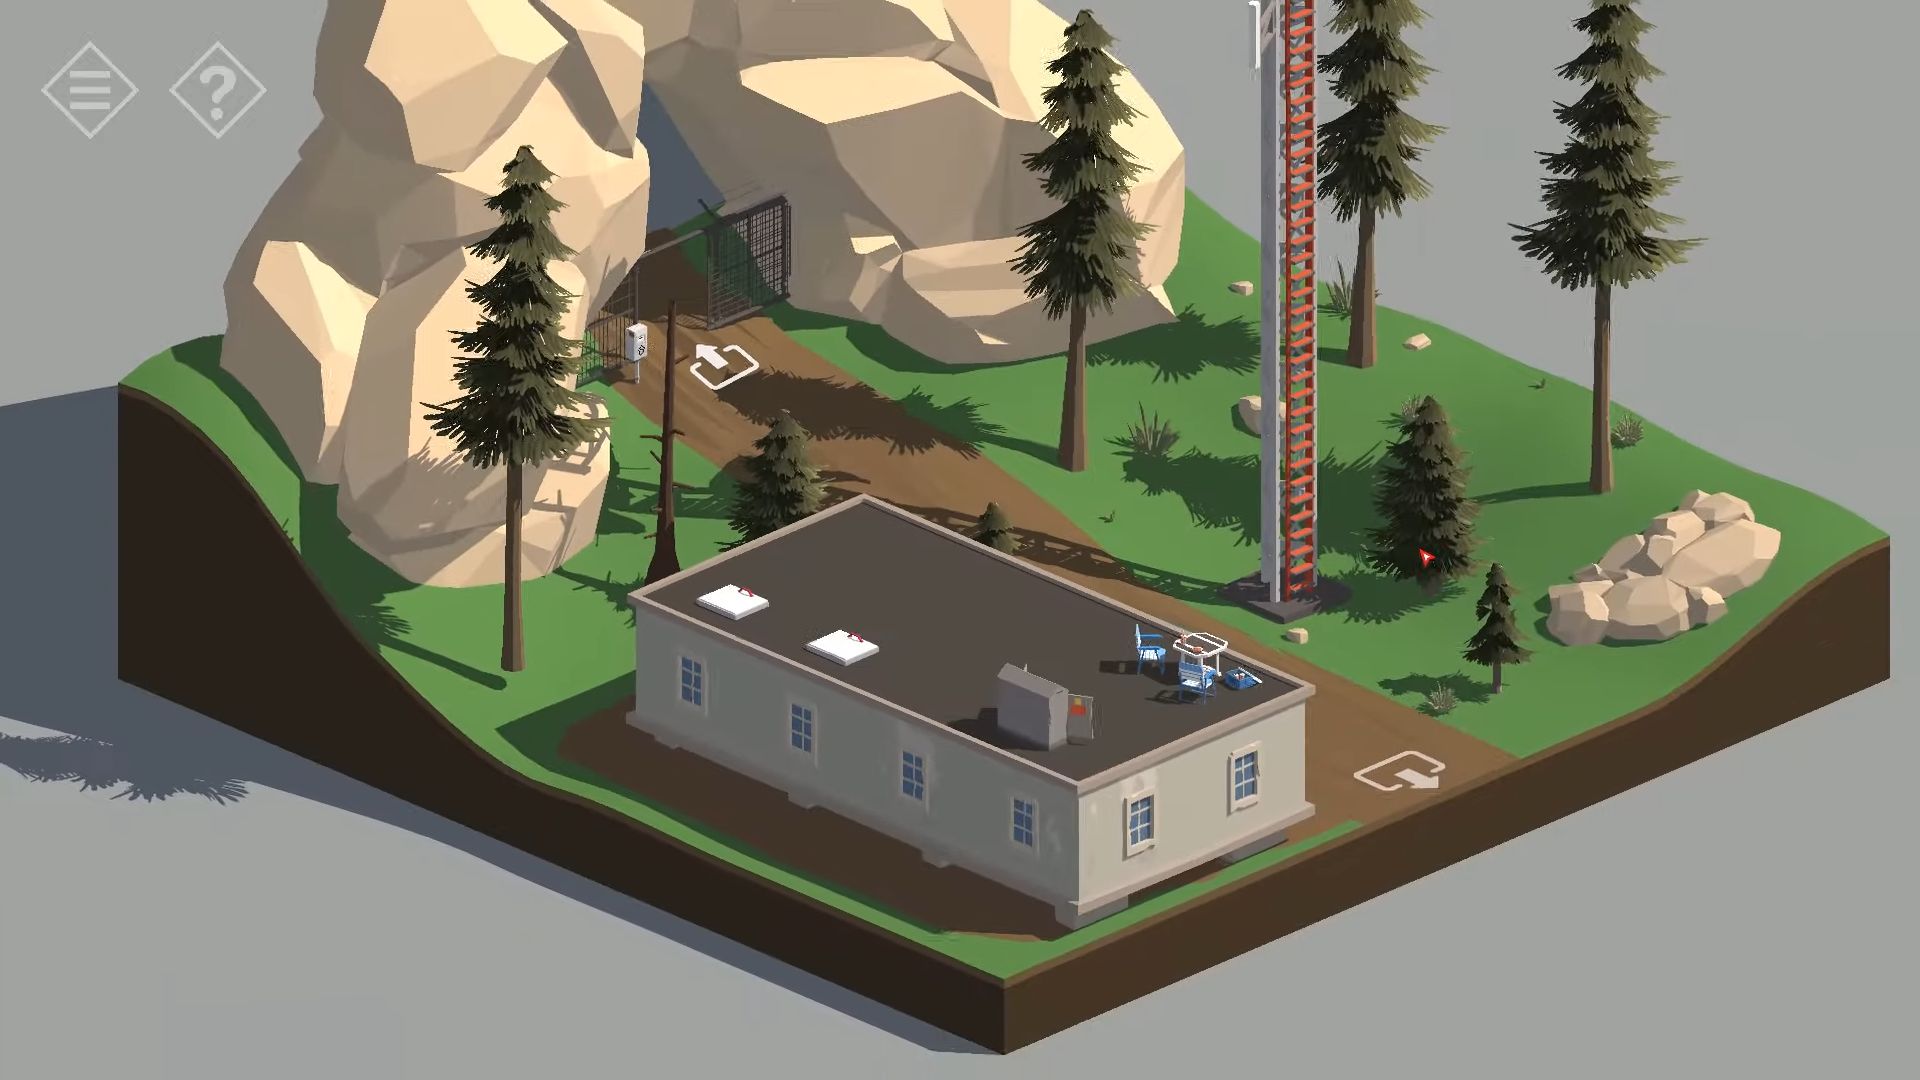
Go into the building outside the cave to check out the rooms. In the room at the far end of the hall, locate and pick up a Ladder. Leave the building and look at the front once more. Now attach the ladder to the side of the building and tap to go to the roof.
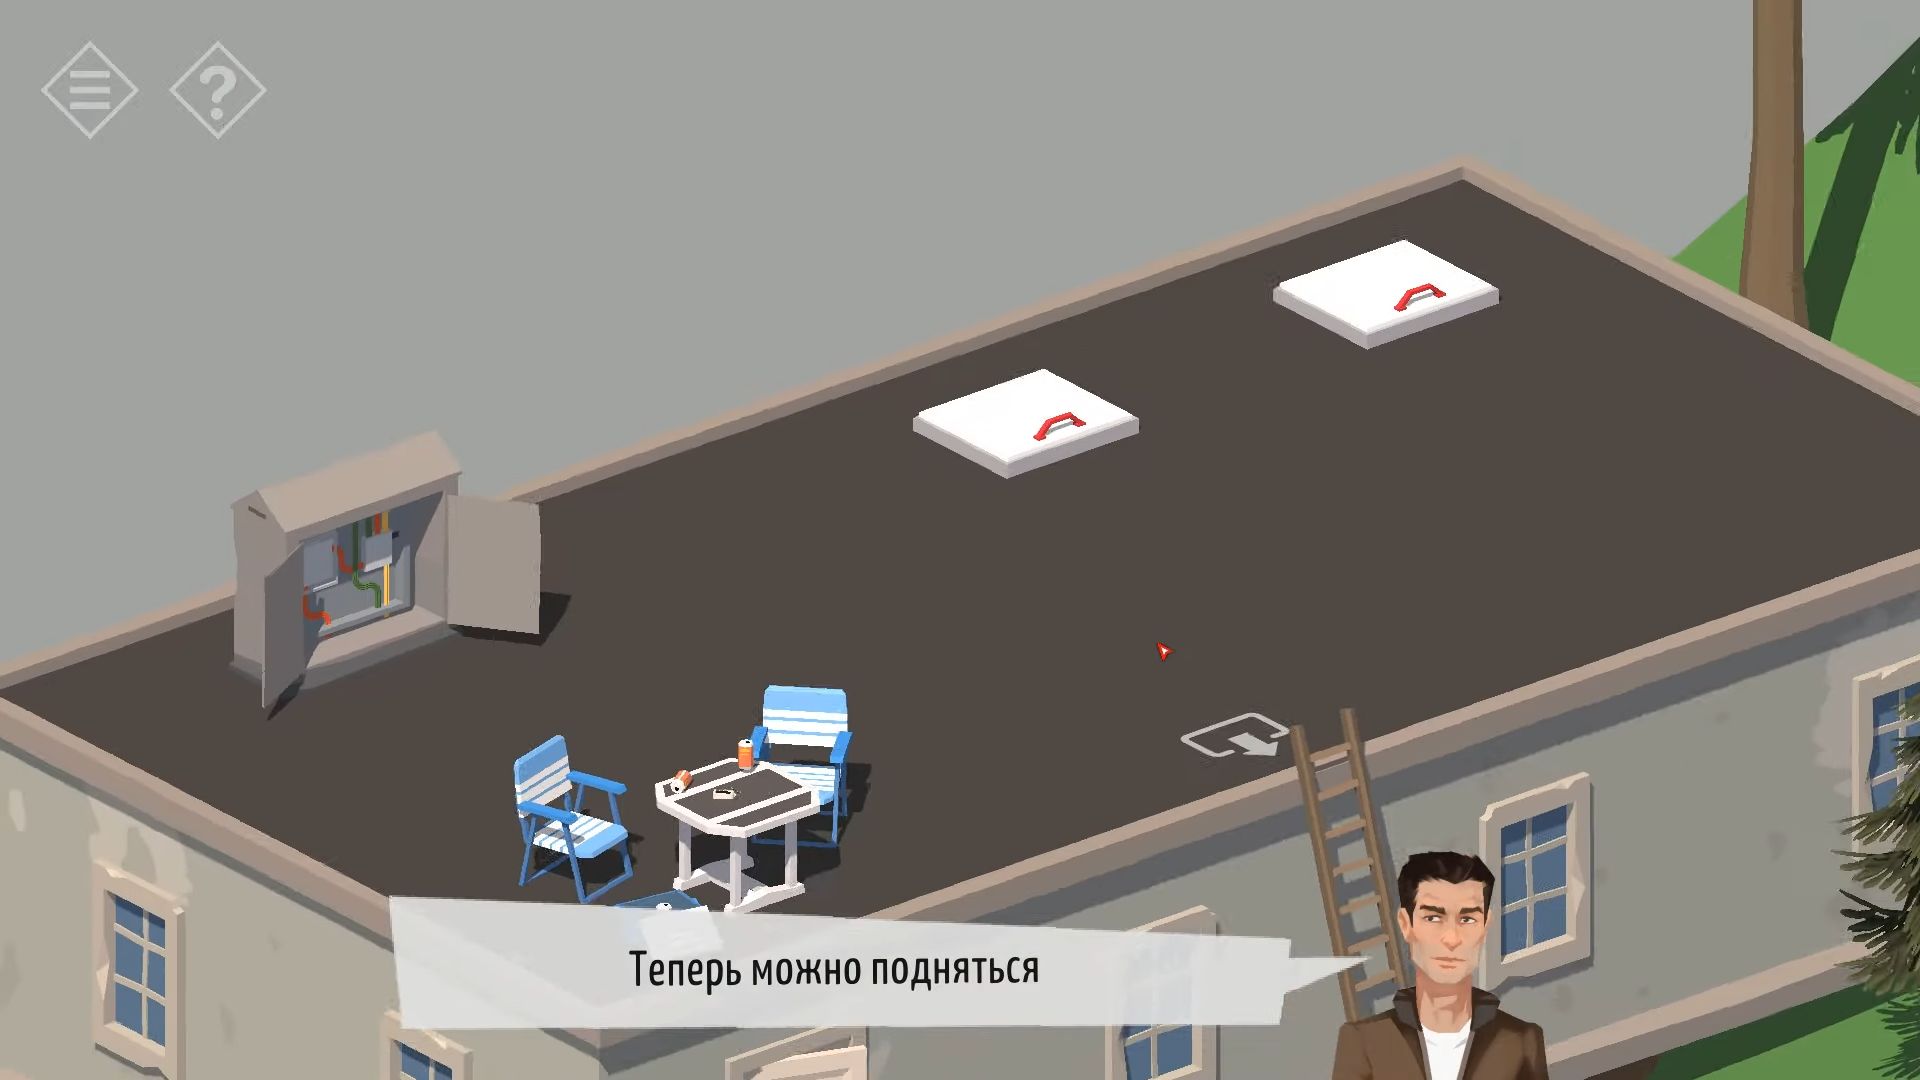
Go to the next place to see some military vehicles and apply the key to the smaller vehicle to allow access. Use the key once more to start the vehicle and this will turn on the tablet/control screen. In the Navigation option, choose Last Trip to check the route and then tap again to drive to the destination and finish Part 1.
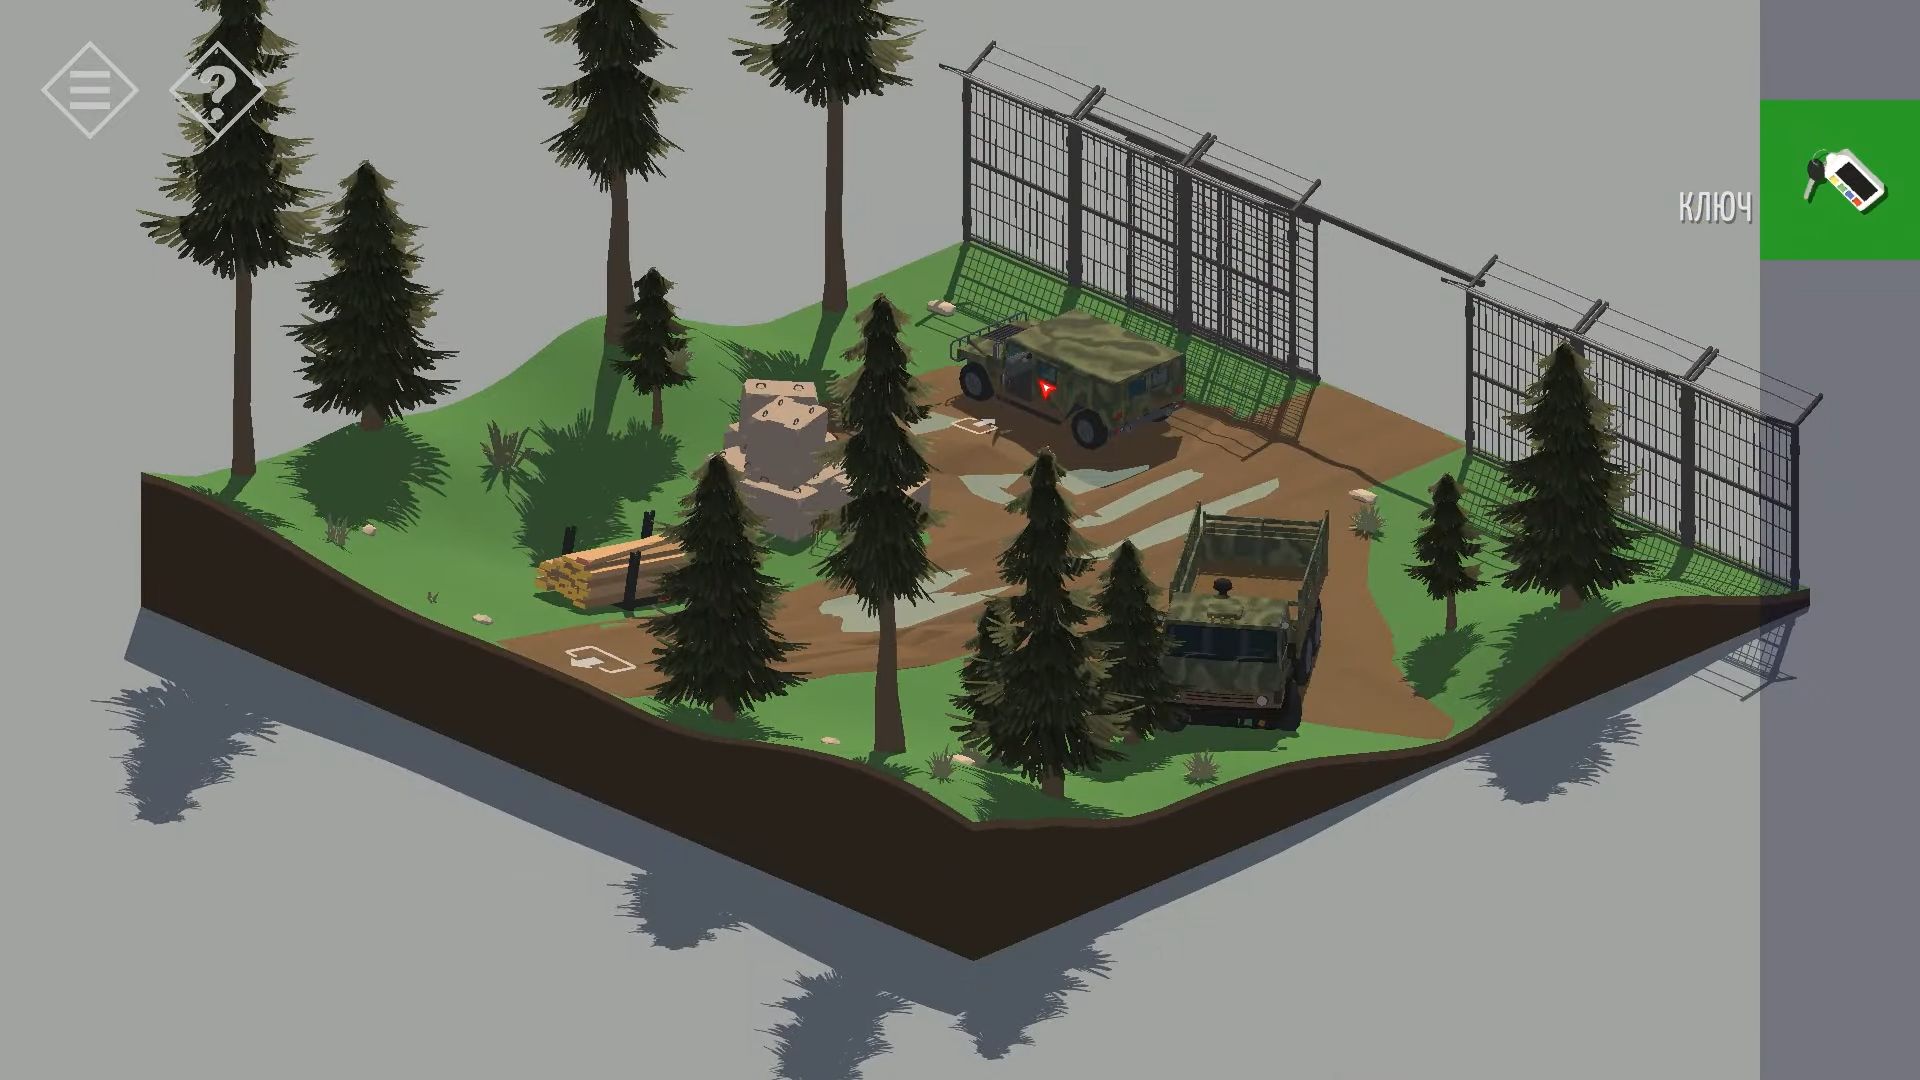
Part 2
The car’s navigator guided you to the Redcliff military base. Change your view and touch the little guard house by the gate to see it and the tower. Press on the ladder to go into the tower and you will get the Night Vision goggles. Return down and tap to go into the guard house. Turn around and look at the desk. After that, touch the plant pot on the right to shift it and discover a key (WC).
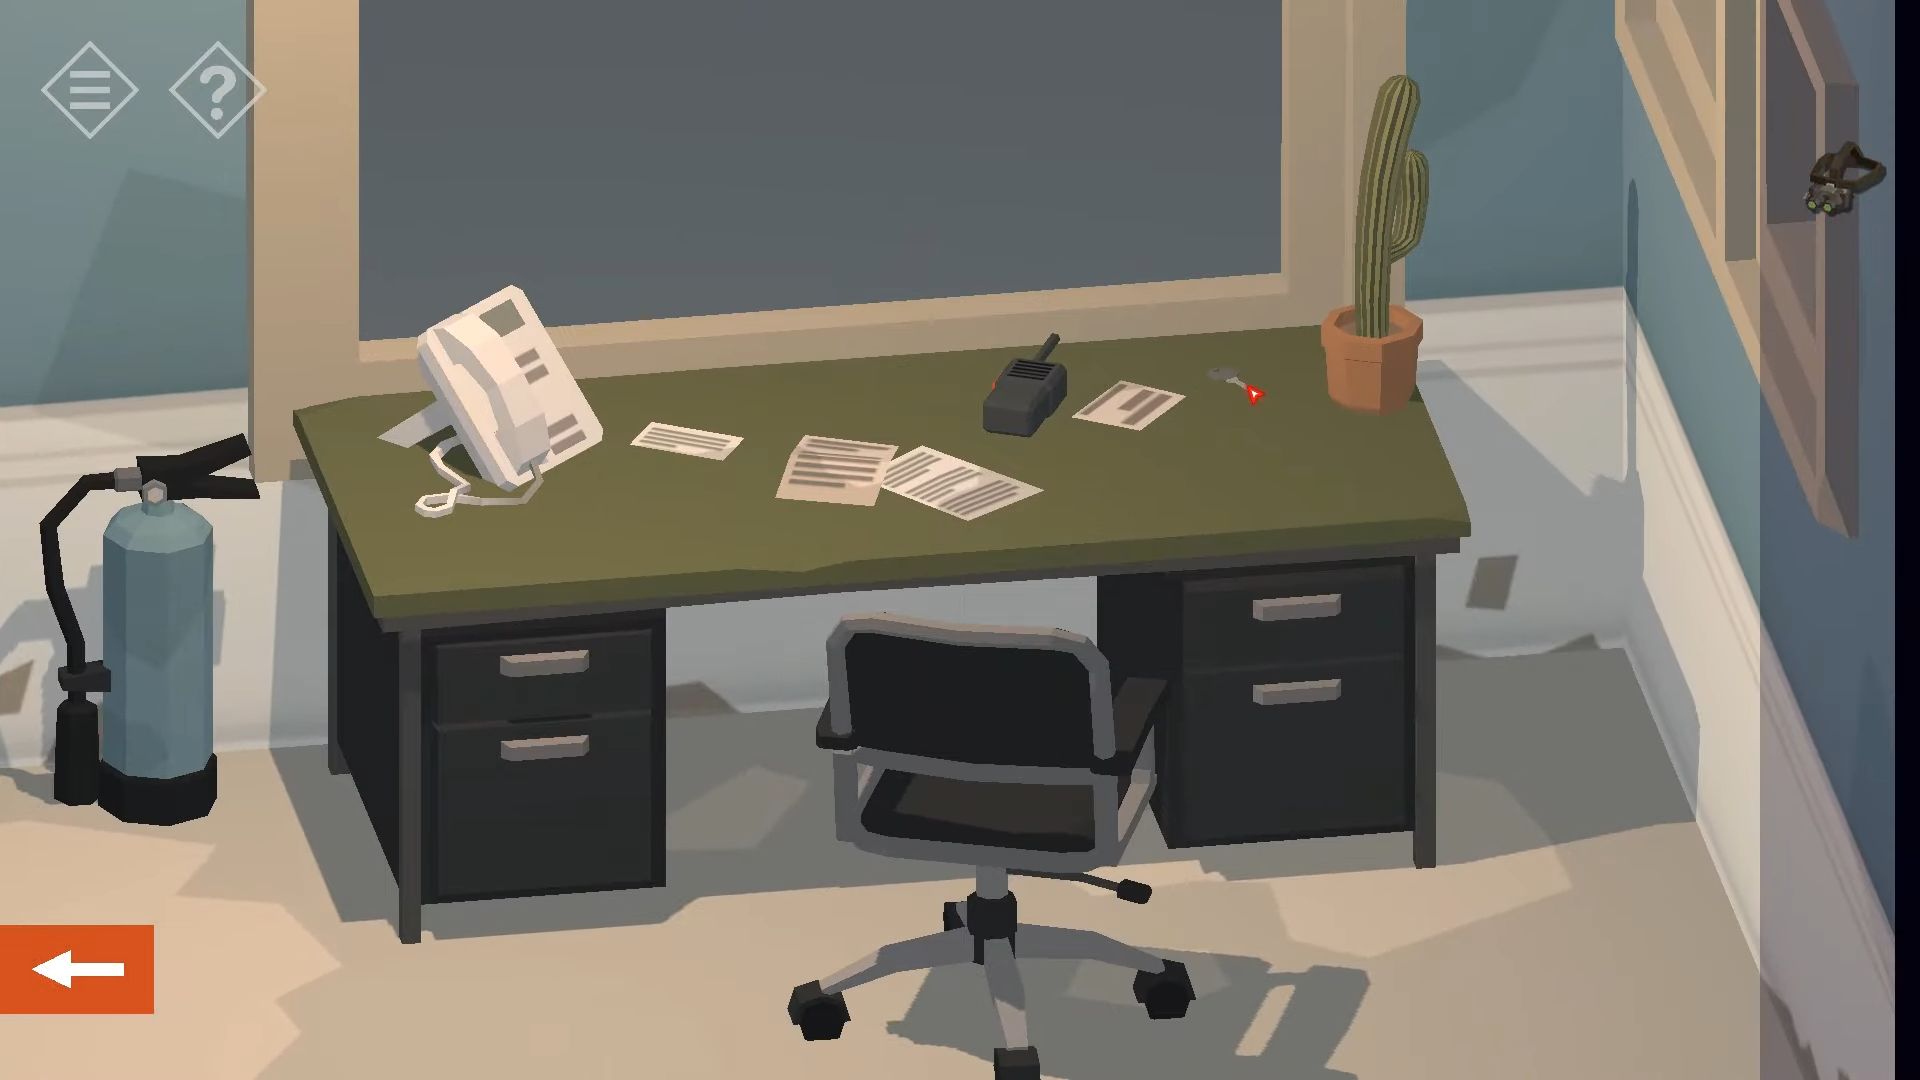
Now you have to leave the hut and tap on one of the yellow paths with arrows starting from the parking area. It will guide you to the next spot with a medical tent and other tents. Touch to go inside the medical tent.
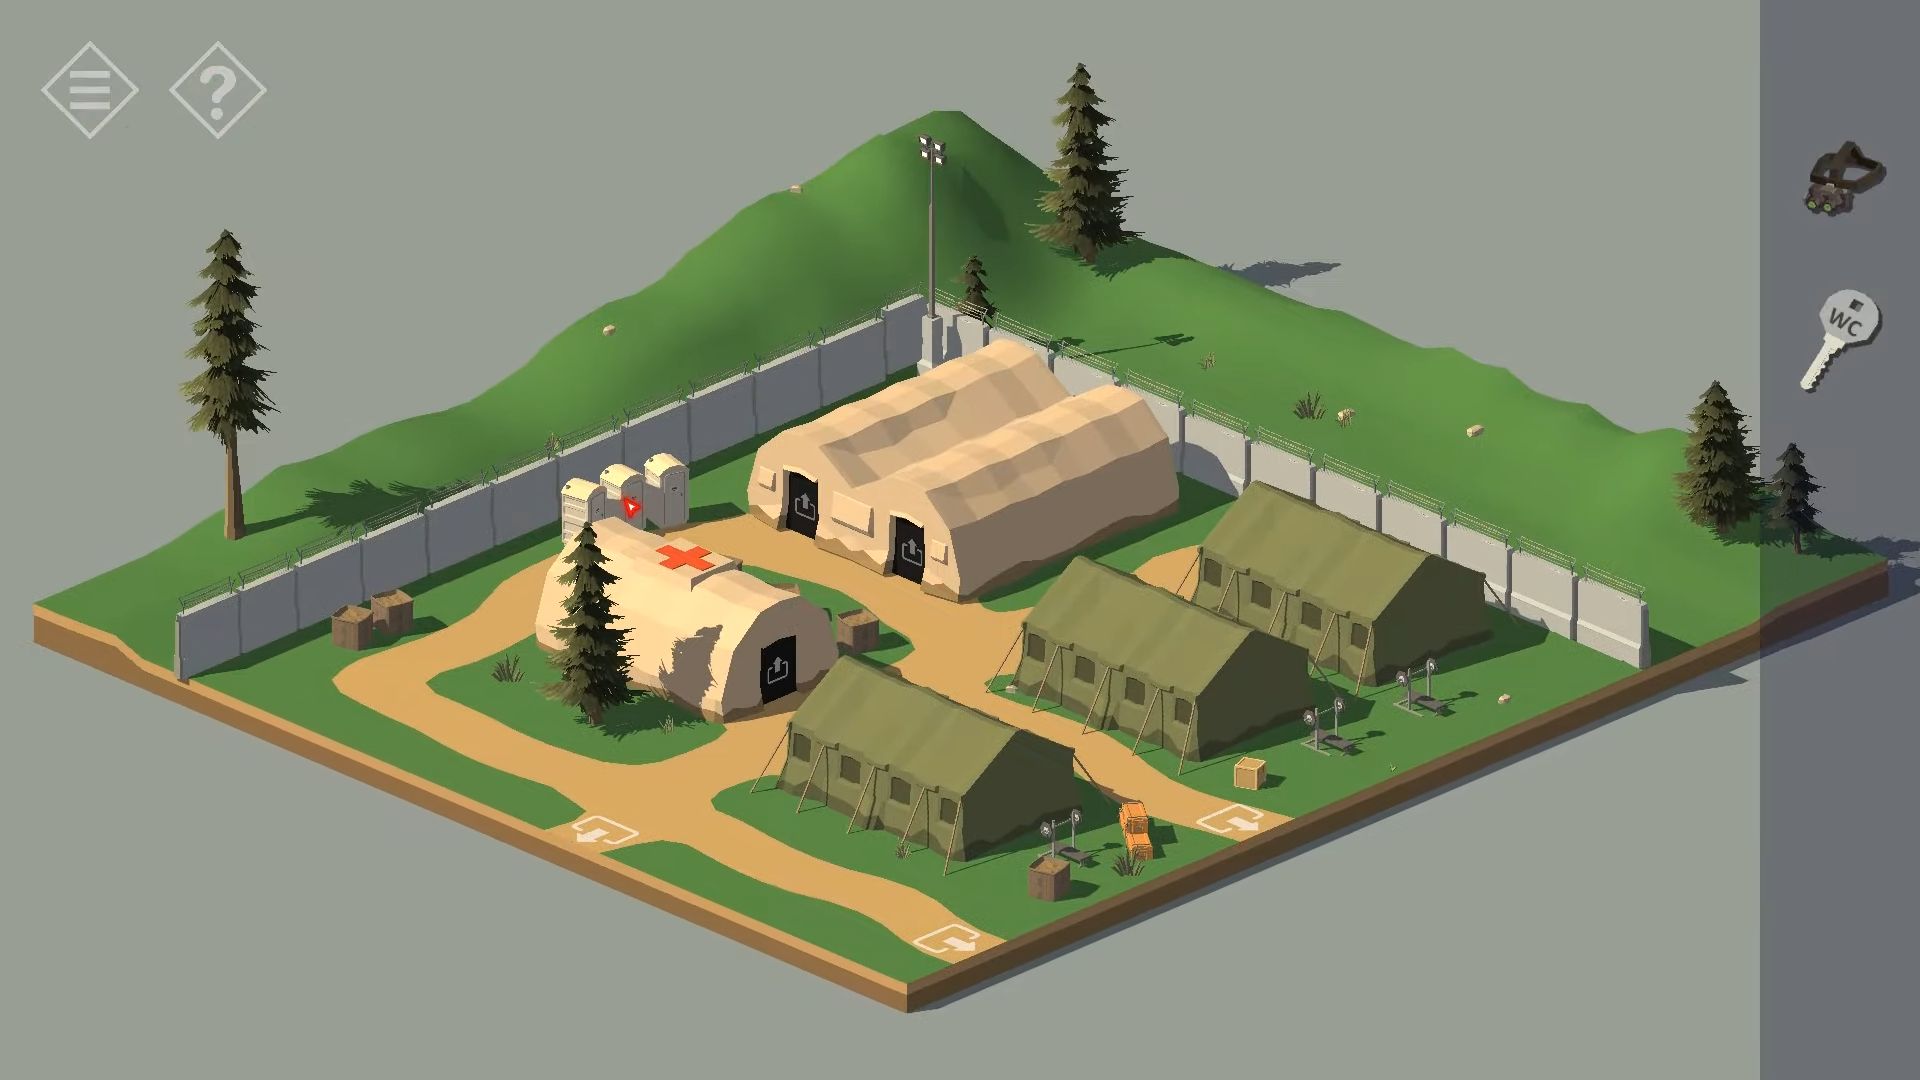
Check out the desk and take the access card. On the left side of the door, there’s a white noticeboard. Look at it and gather the two papers which hold clues. The torn paper suggests checking the trash. Go into the big white tent; it’s a dining area. Change your view to see the kitchen and cupboards. Open the lower doors to find a small clue on the left – the symbols are Spoon, Fork, and Knife.
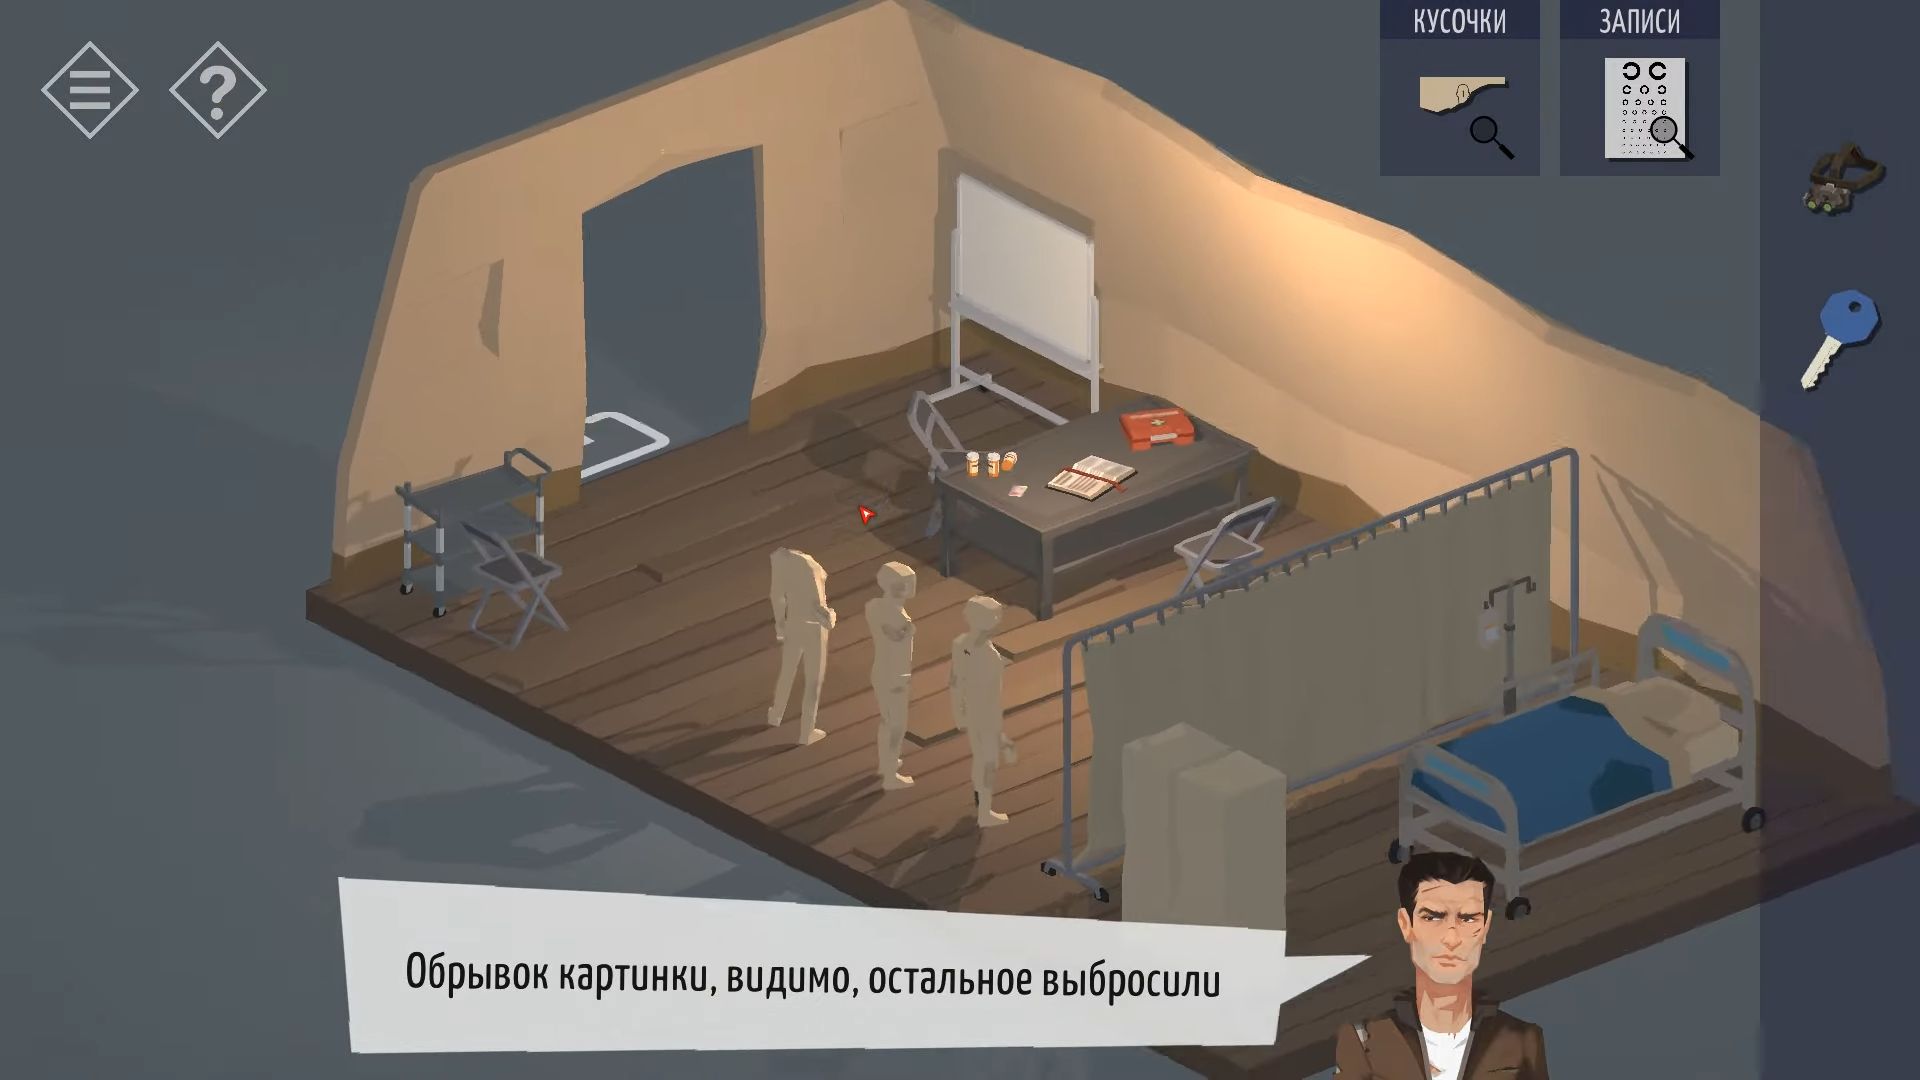
Touch to open the drawers above and check out the utensils by counting how many there are. There are also things on trays in the room. Now you have to touch the big cabinet; it’s locked and needs a 4-digit code. Count the utensils in the room and arrange them in the order mentioned earlier: 6, 10, 7.
After that, unlock the cabinet and take the Rope. Behind the medical tent, there are 3 porta-loos, then tap to see them. The one on the left is locked, use the key found earlier to open it. Now touch it slightly inside to get a Blue Key.
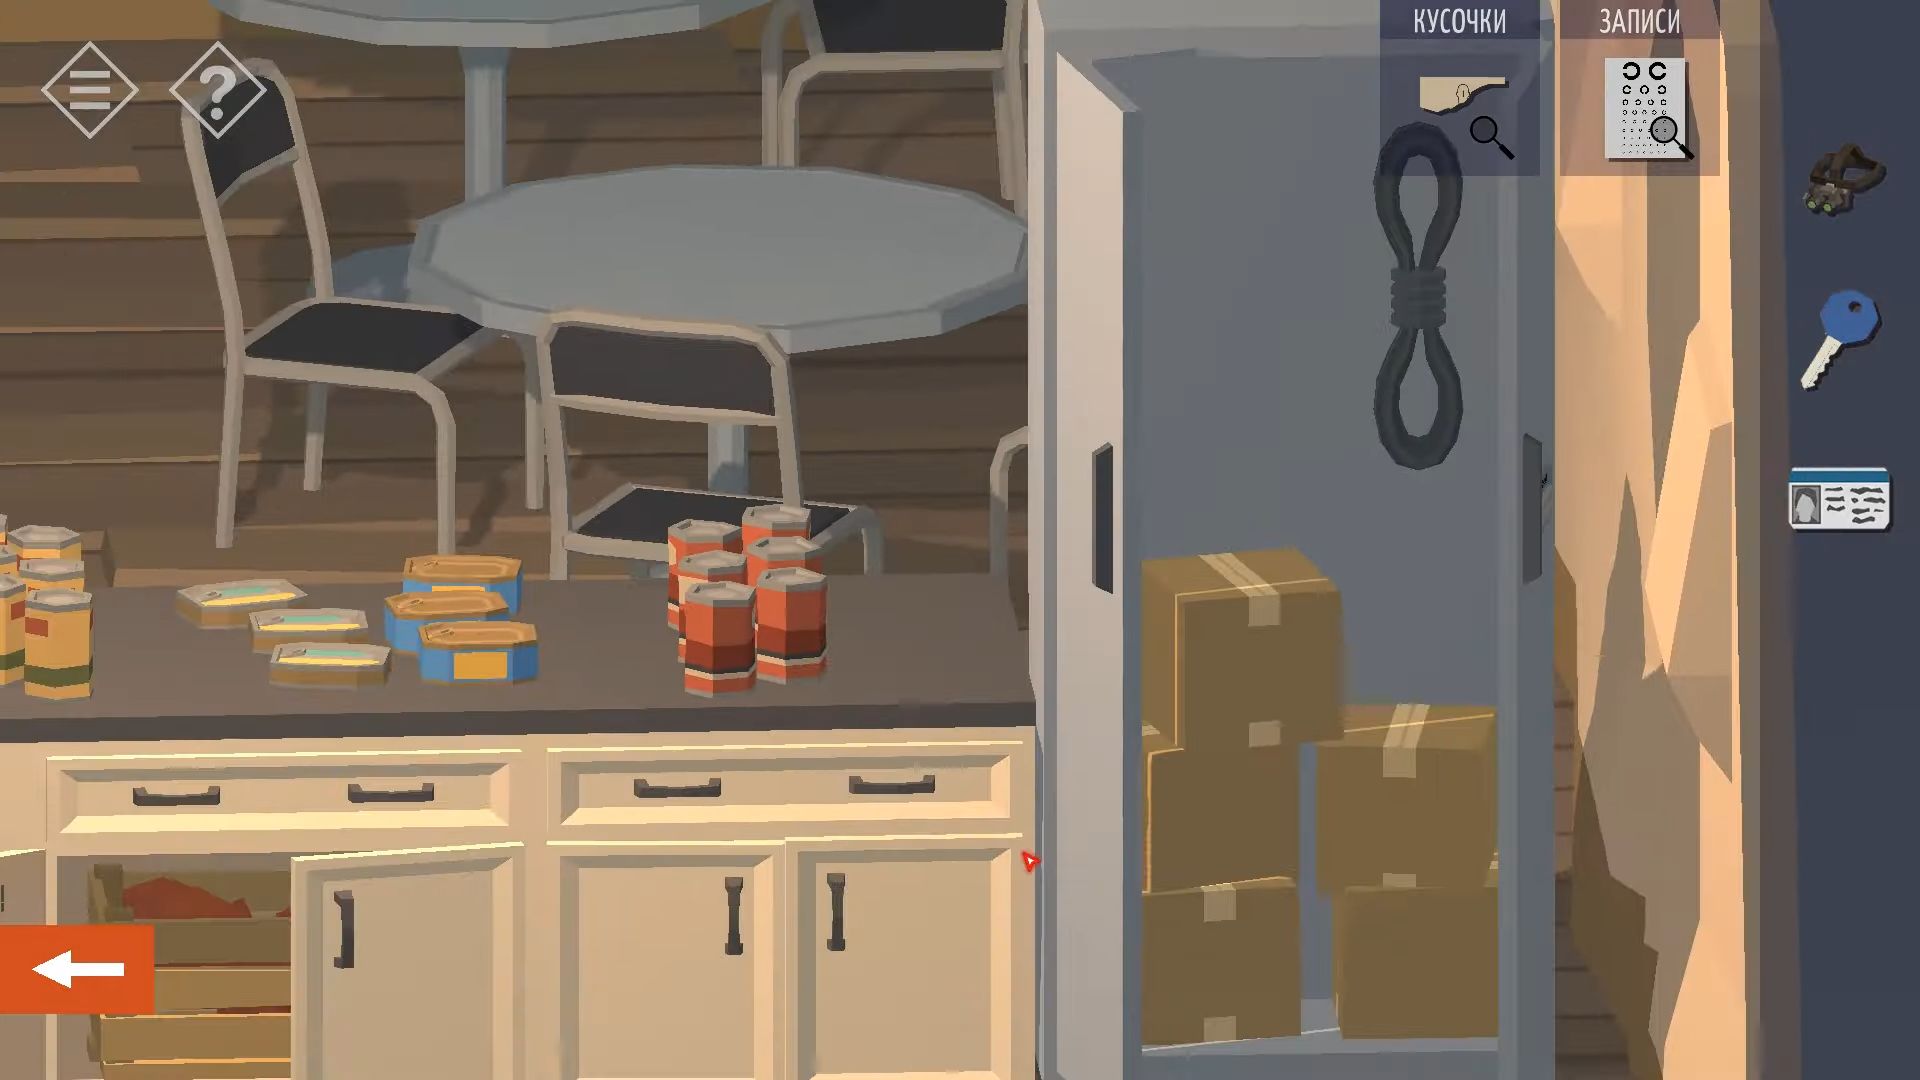
Step back and tap to the side to go into the next place. There’s a tall radio mast above a bunker and a parked truck.
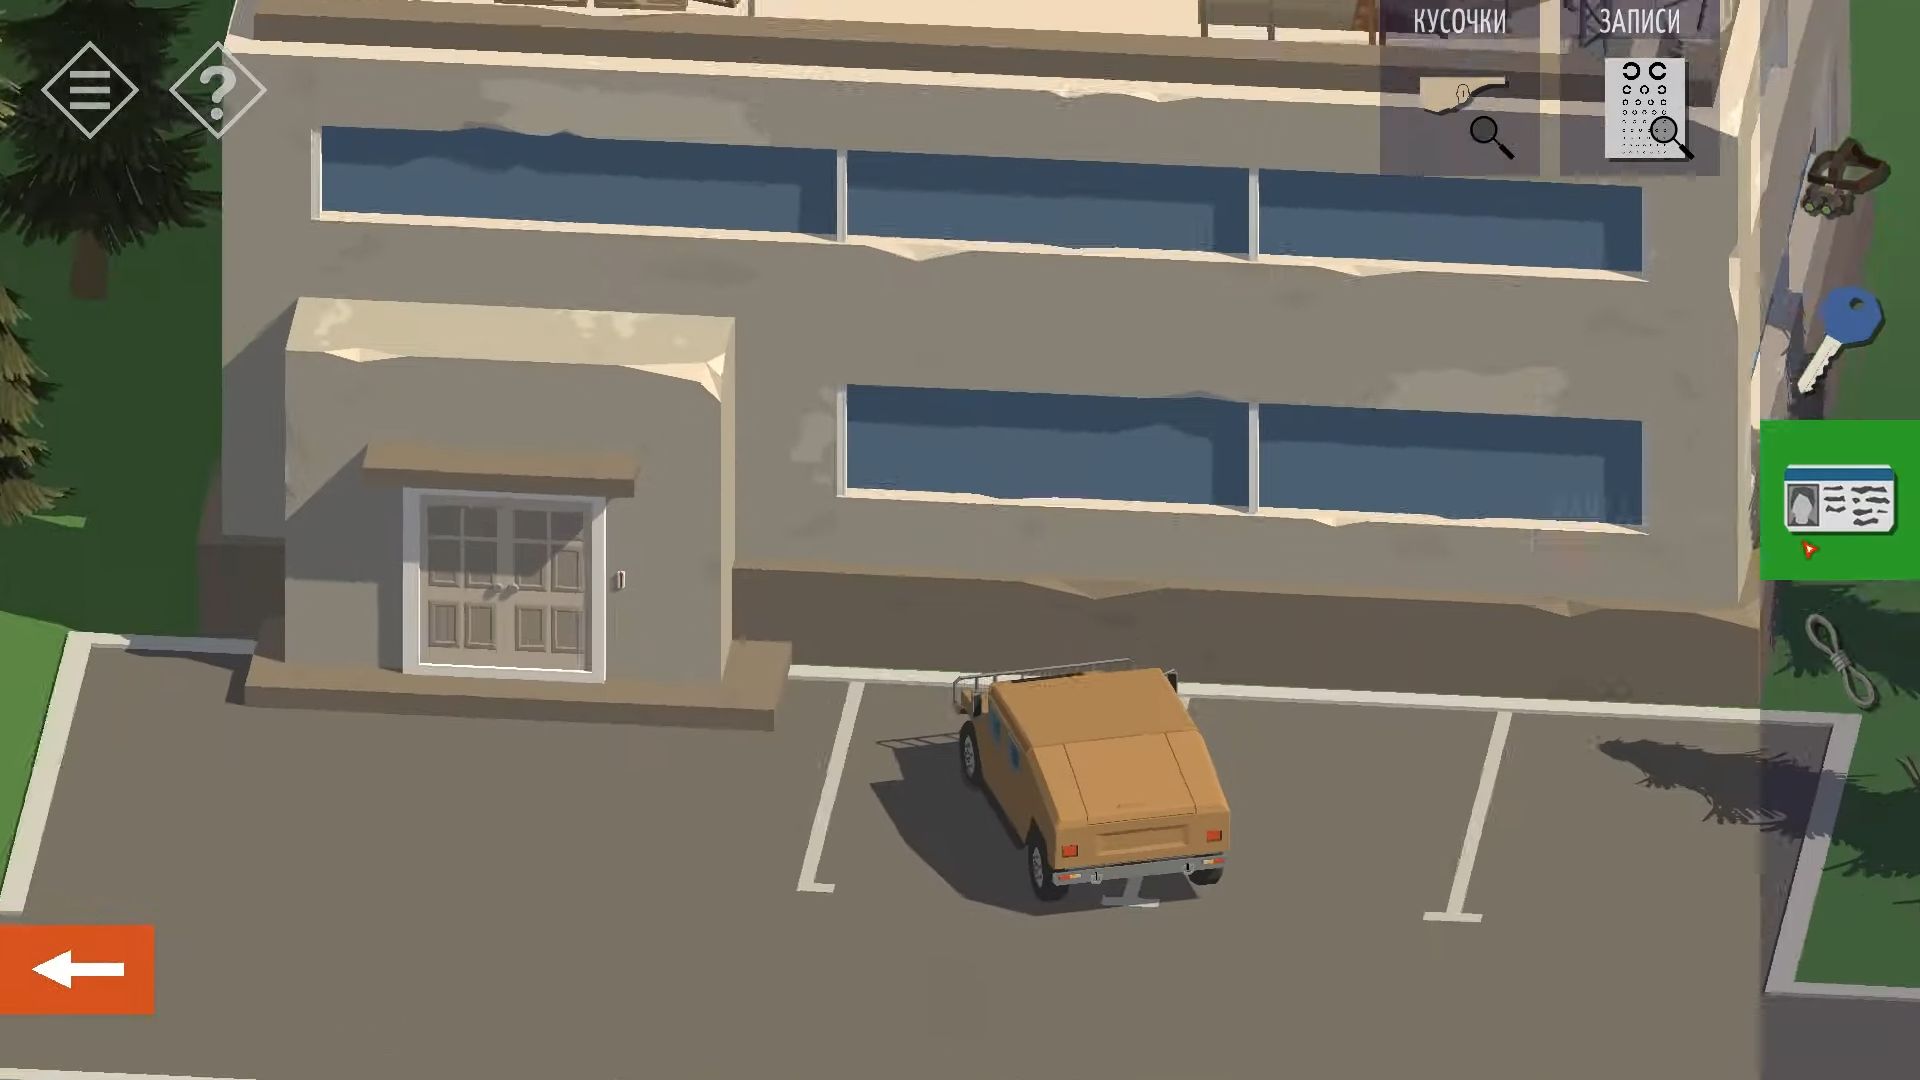
Go down and head into the building. At the rear of the room, there’s a door (under the stairs), and it’s locked. Unlock it with the blue key, then go down to the basement which is filled with water, and you will find that the power is on. Touch the power box on the wall near the stairs to turn it off.
Put on the night vision goggles and tap the room to enable you to see and move around.
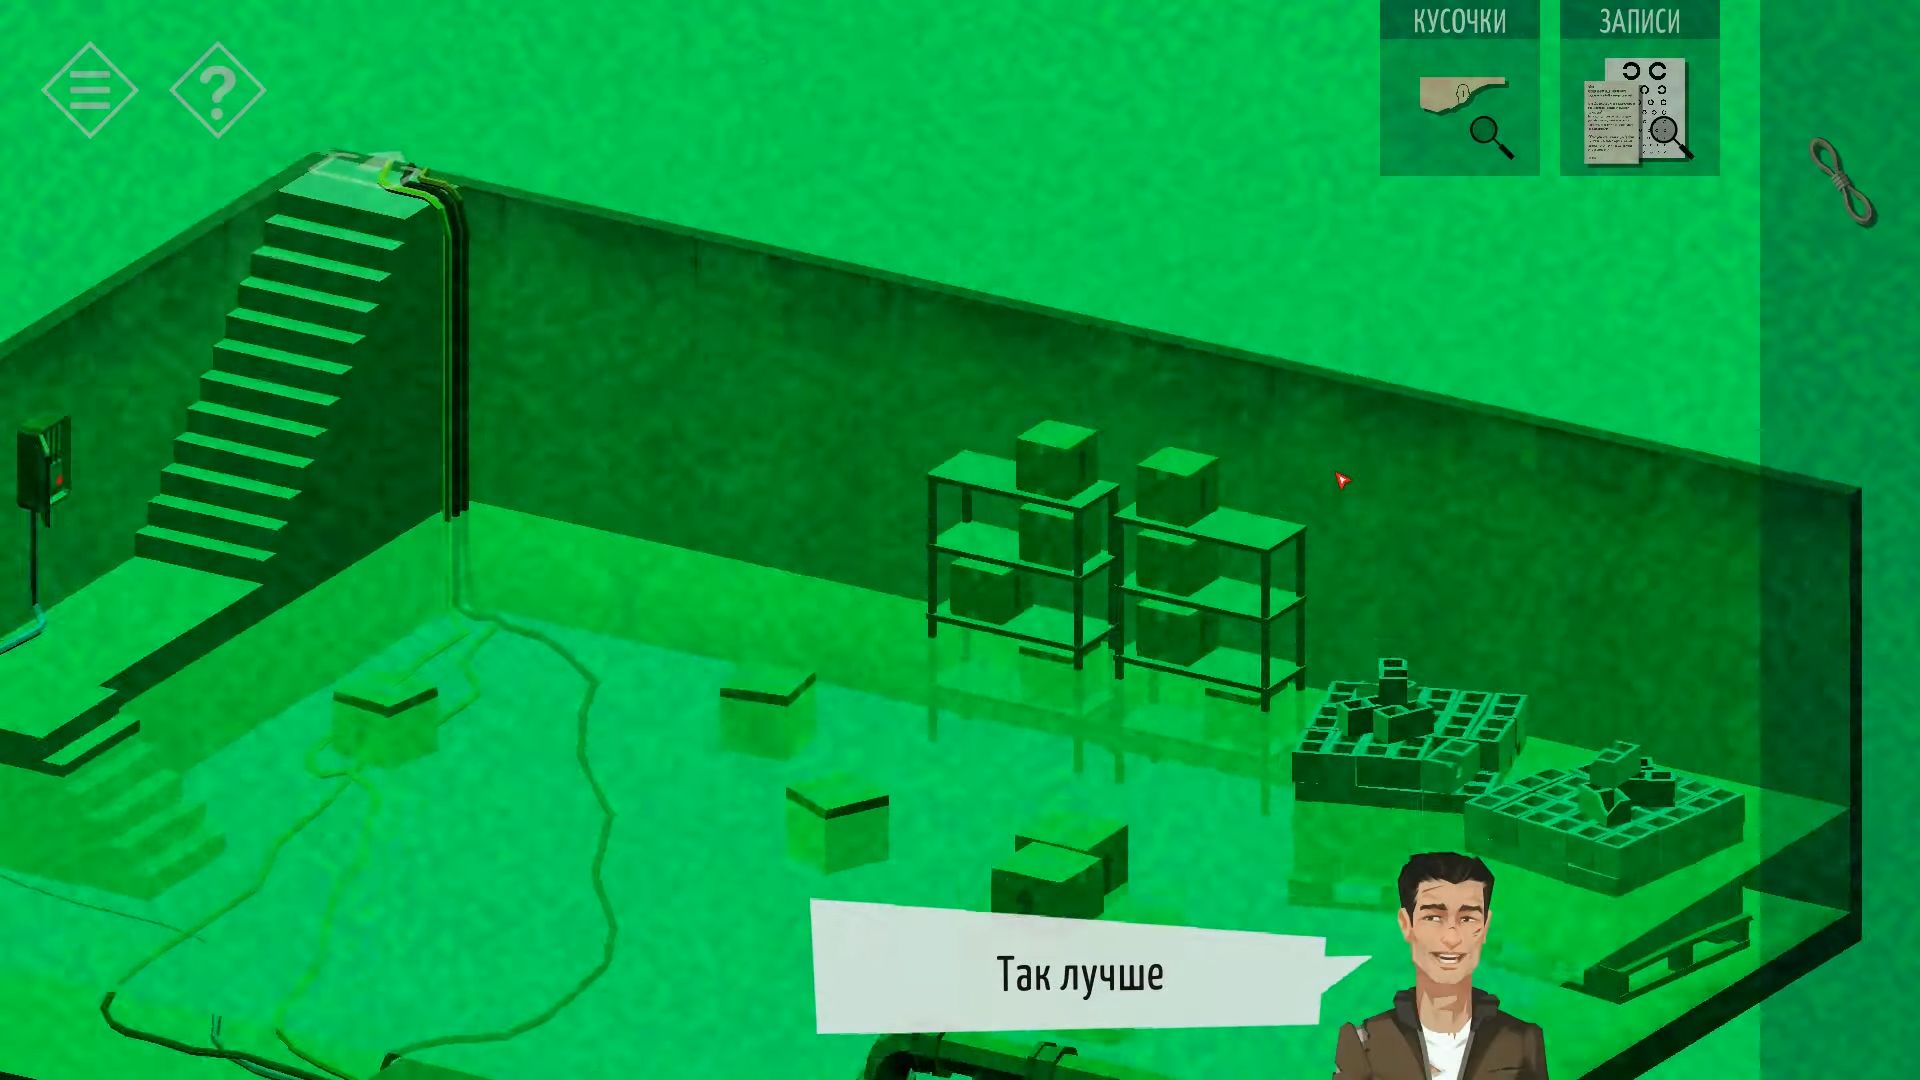
After that, tap under the bed at the end to discover a yellow case. The lock on it has 5 dials and you have to unlock it using hints from earlier. The medical tent chart shows a sequence of circular shapes matching the dials. The paper from the main building gives you the order: Left, Up, Down, Down, Right.
Now open the case and get the satellite setup details. Go back to the radio mast area and tap to climb the ladder to the top. Touch the small blue box to open it and see the dials. Then use the satellite details found earlier to set the dials. You need to observe the dishes to figure out which dial adjusts the angle for each dish; they’re not in order: 20, 10, 50, 30.
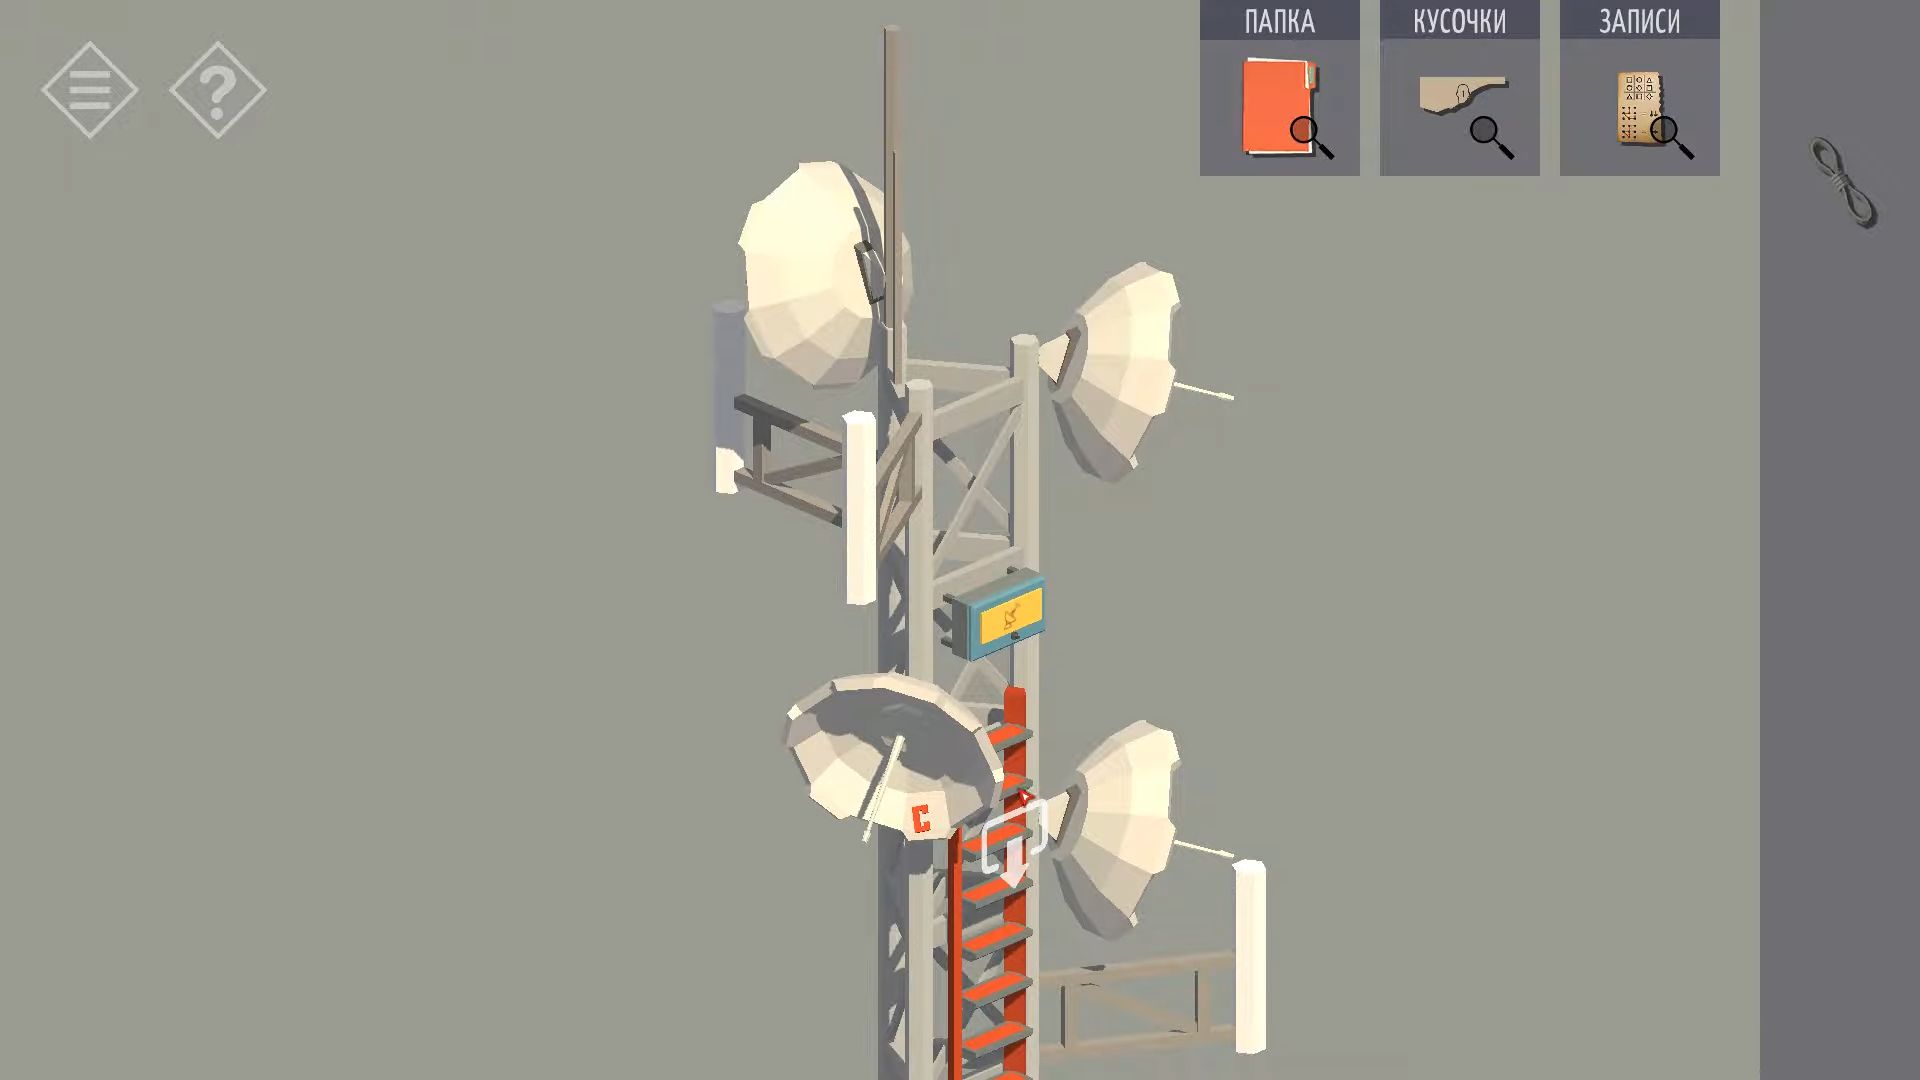
Walk along the yellow path to reach the next place where there’s a Hangar building. Look on the side, and you’ll see an open window. Tap on it to get a message about figuring out how to get there. Next to the window, there are bins with garbage. Check them out, and then tap to search and discover more torn papers.
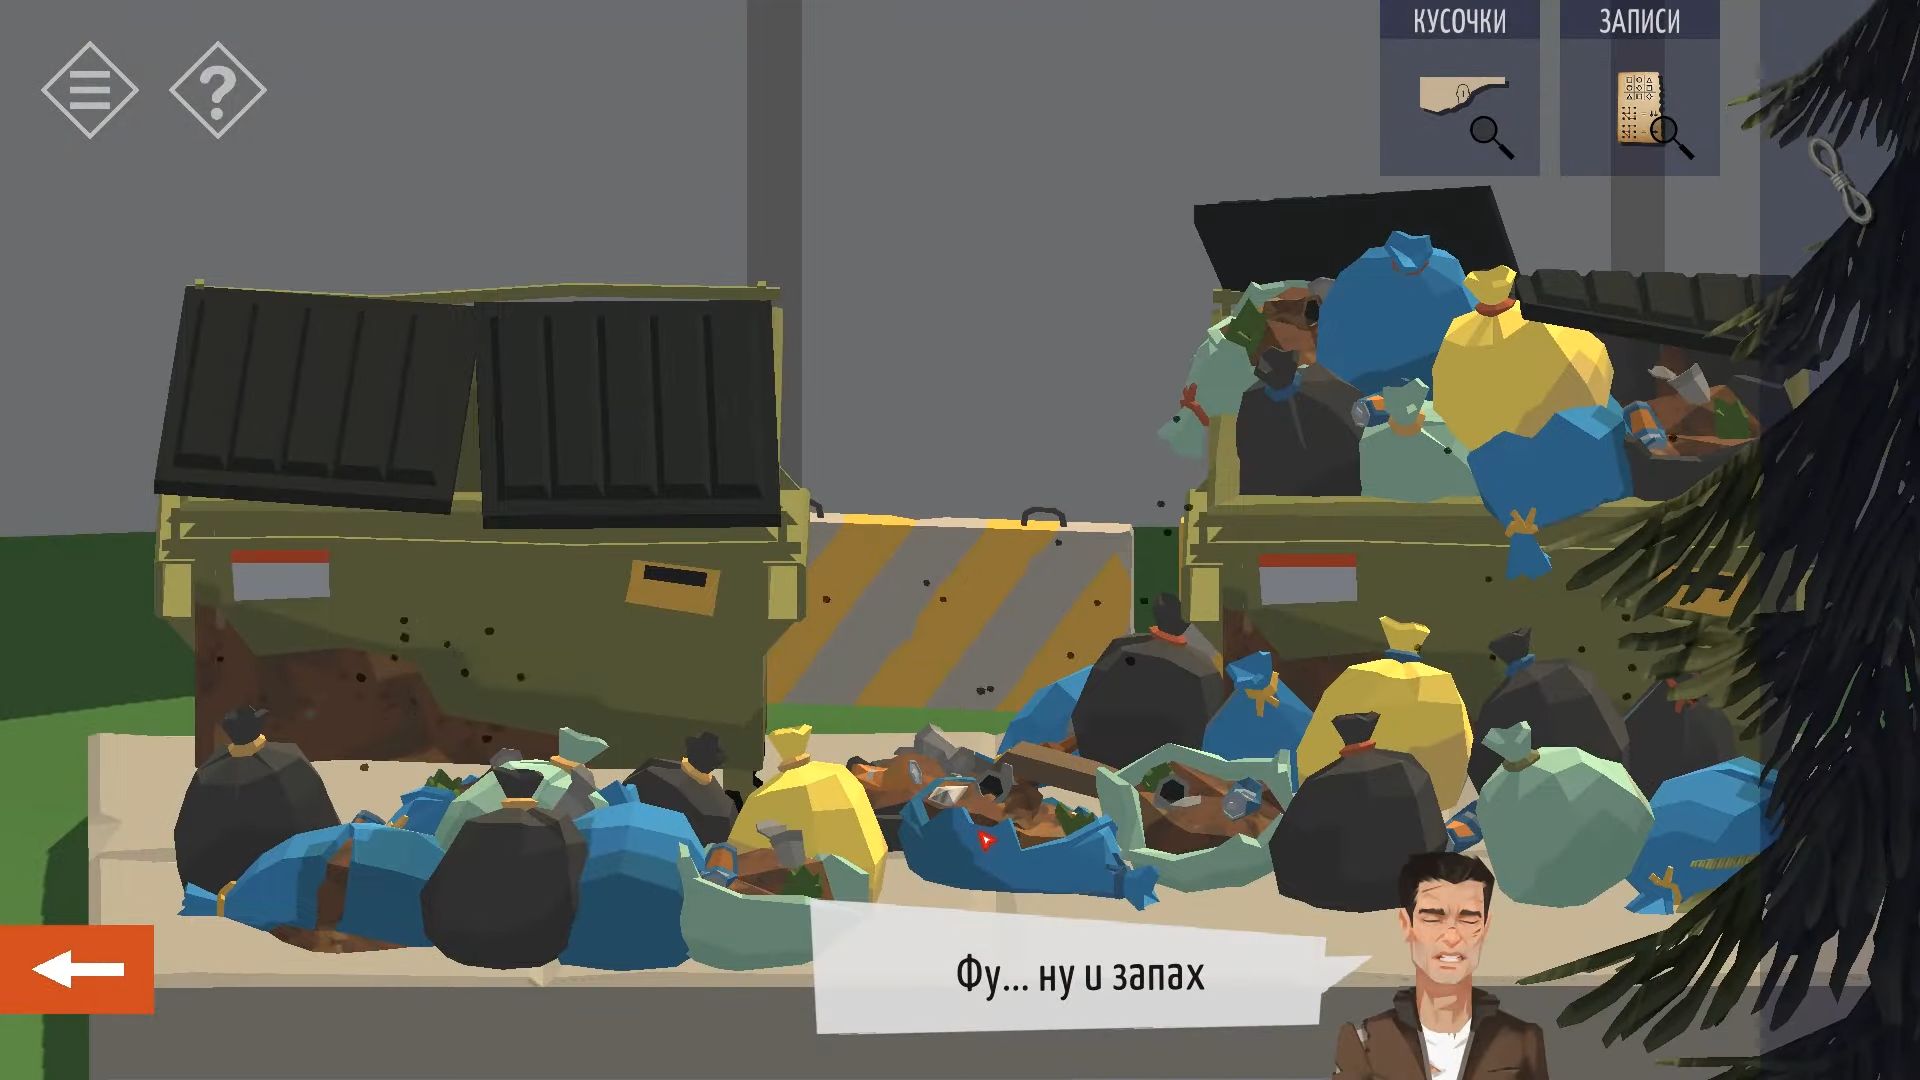
Now you have to arrange these to create a target shape with numbers.
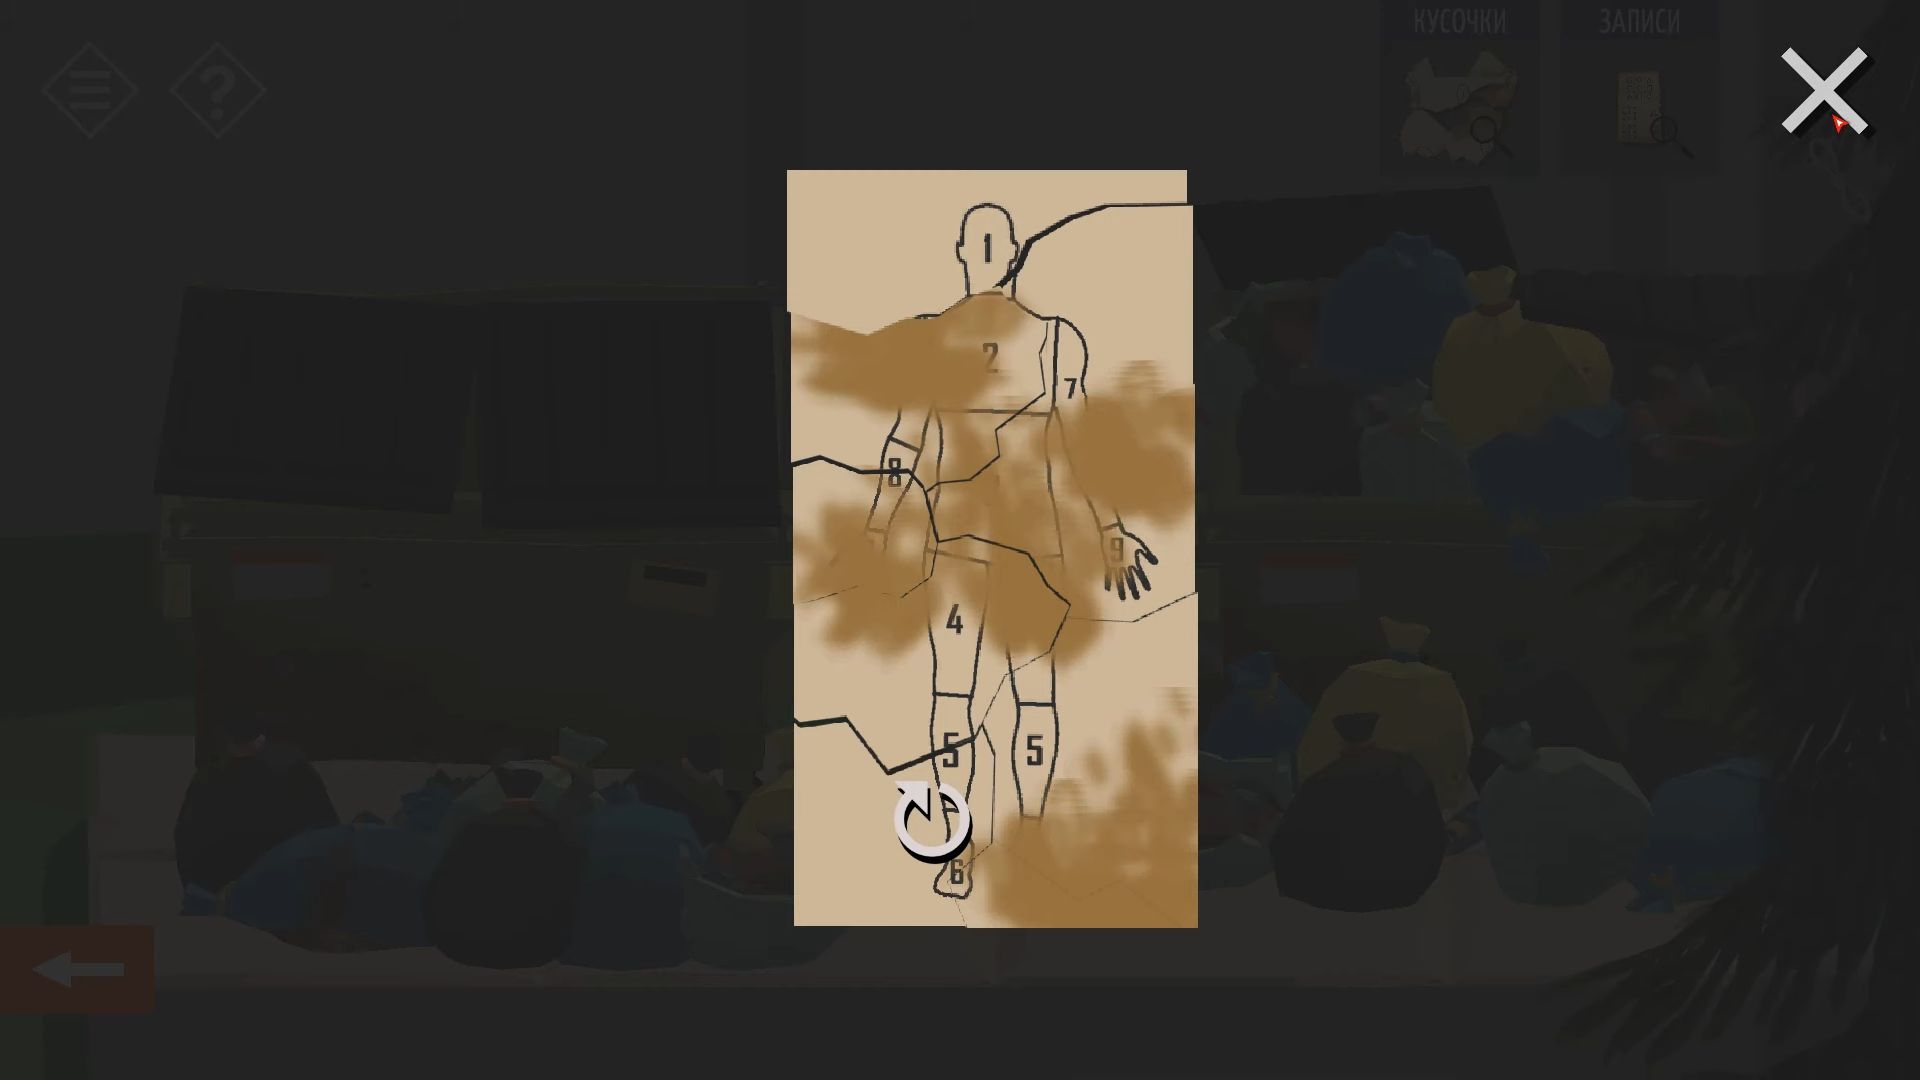
Go back to the medical tent and tap to see the three dummies standing. It’s a hint. In the back of the room, there are two filing cabinets. You can look and count the files in the drawers marked A, B, and C. For the locked drawer with three stars, you need a 9-digit code (69877891). Use the clues mentioned earlier to figure this out.
The dummies are missing body parts and you have to match these to the target to get numbers. Open the drawer to find the Officer’s medical records (4). This is another hint.
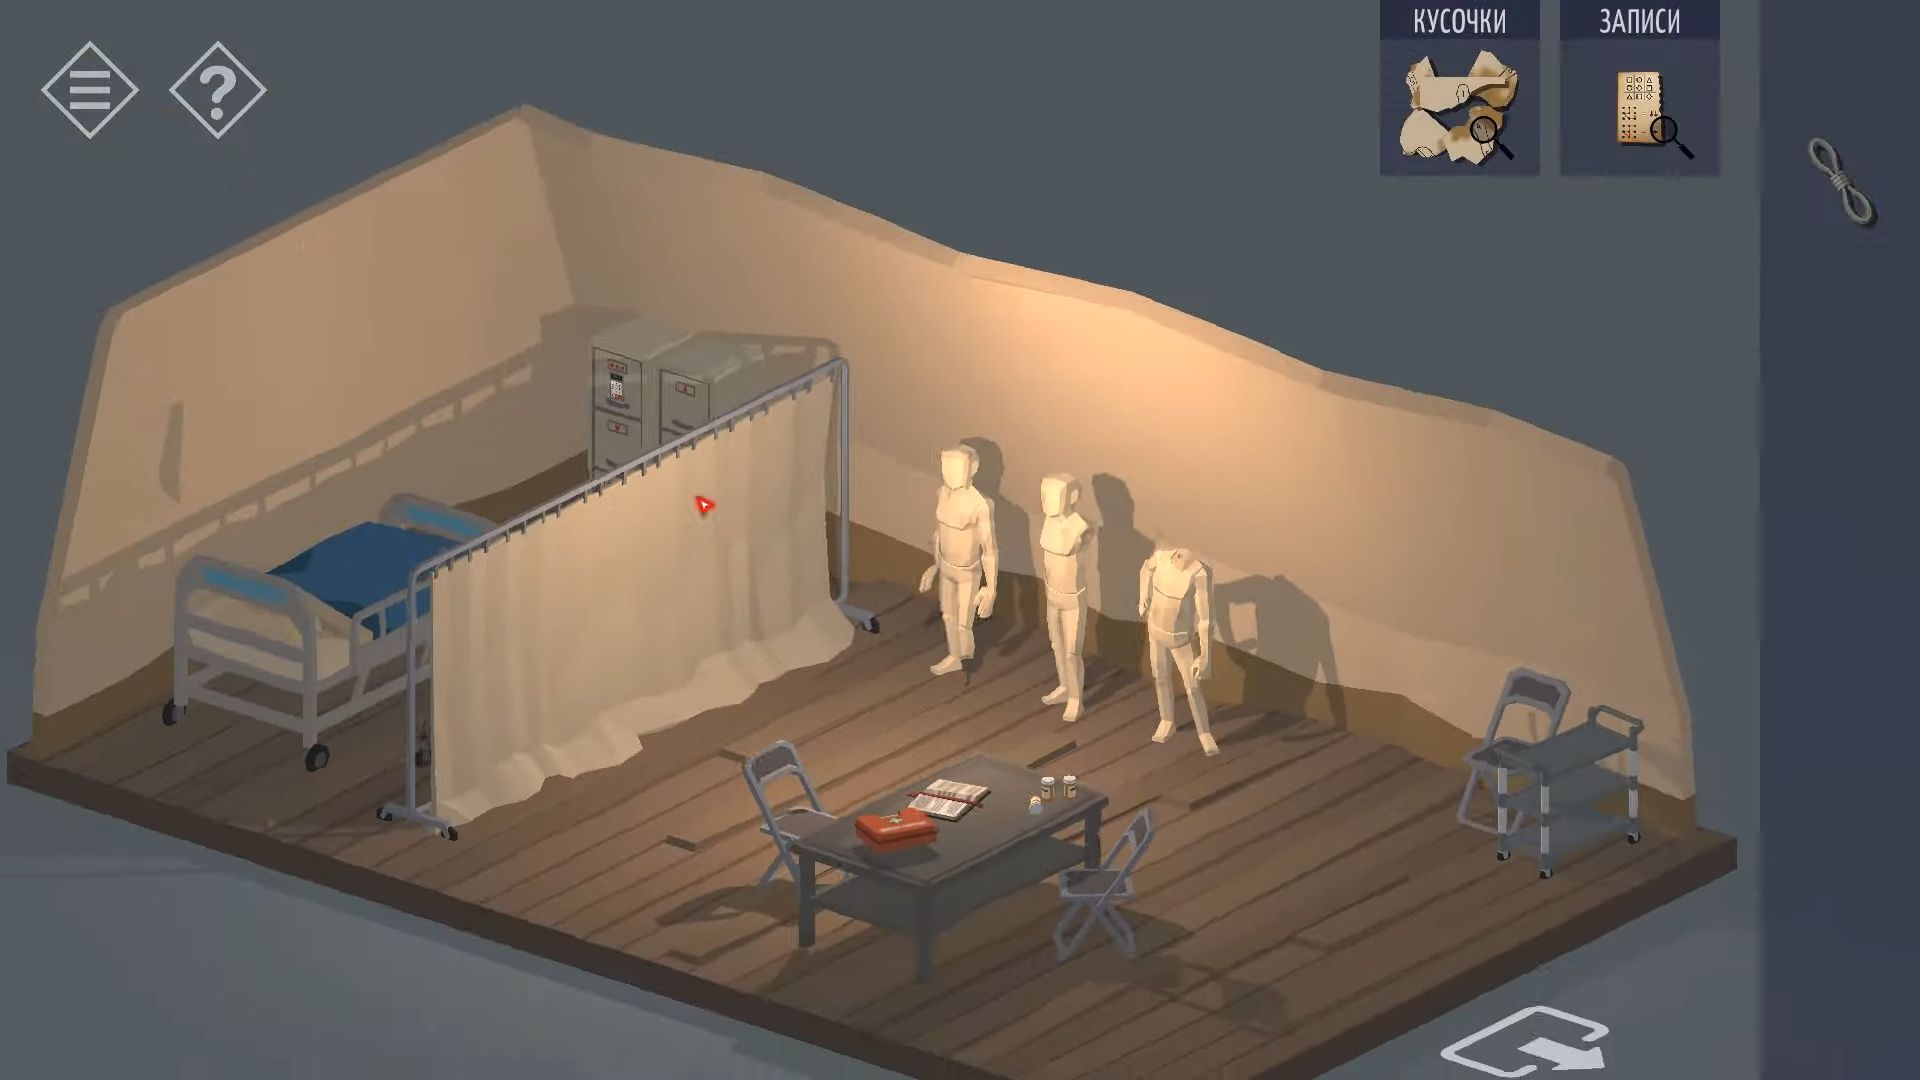
Step back and go to the first area with the main building. Tap on the front door and use the access card to open it. Go inside the building and head up the stairs to the upper floor. Tap to move the cleaning cart and find a paper underneath. Check this paper for a hint about the Captain’s password.
Next, use this information to unlock the double door to the office. You’ll need the number of records for the soldiers under A, C, and B, and then the number of officers (3244). Enter the office, rotate your view to see the desk and computer, and tap the right drawers to open the top one. Collect a Key from inside.
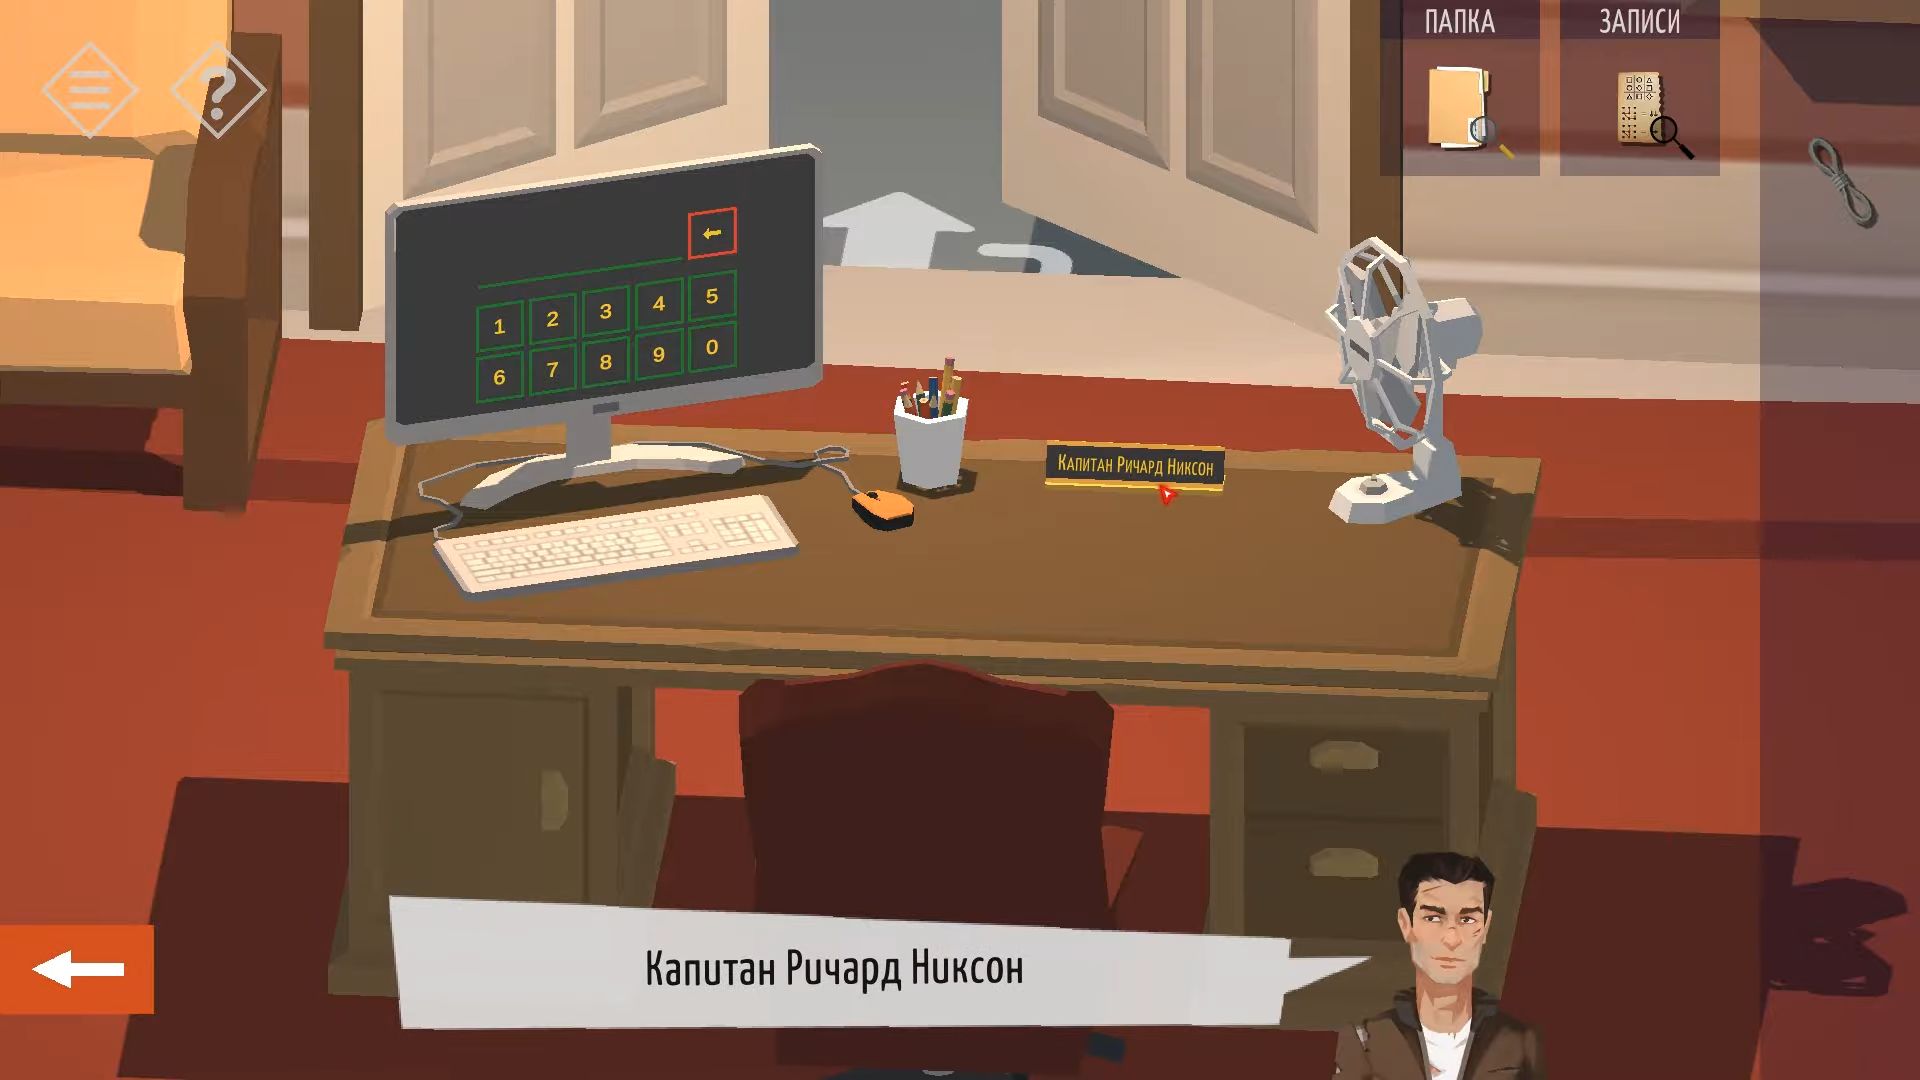
After that, look at the picture on the wall to the left of the door; it shows a direction arrow, which is a clue. Tap and look at the shelves to the right of the door to see toy figures.
Using the hints provided, form a 4-digit code (2713). The email mentions the value of each figurine. You have to check the order on the shelves following the pattern on the wall picture. In the lower-left cupboard of the desk, there’s a safe. Use the code to open the safe and collect encrypted access codes.
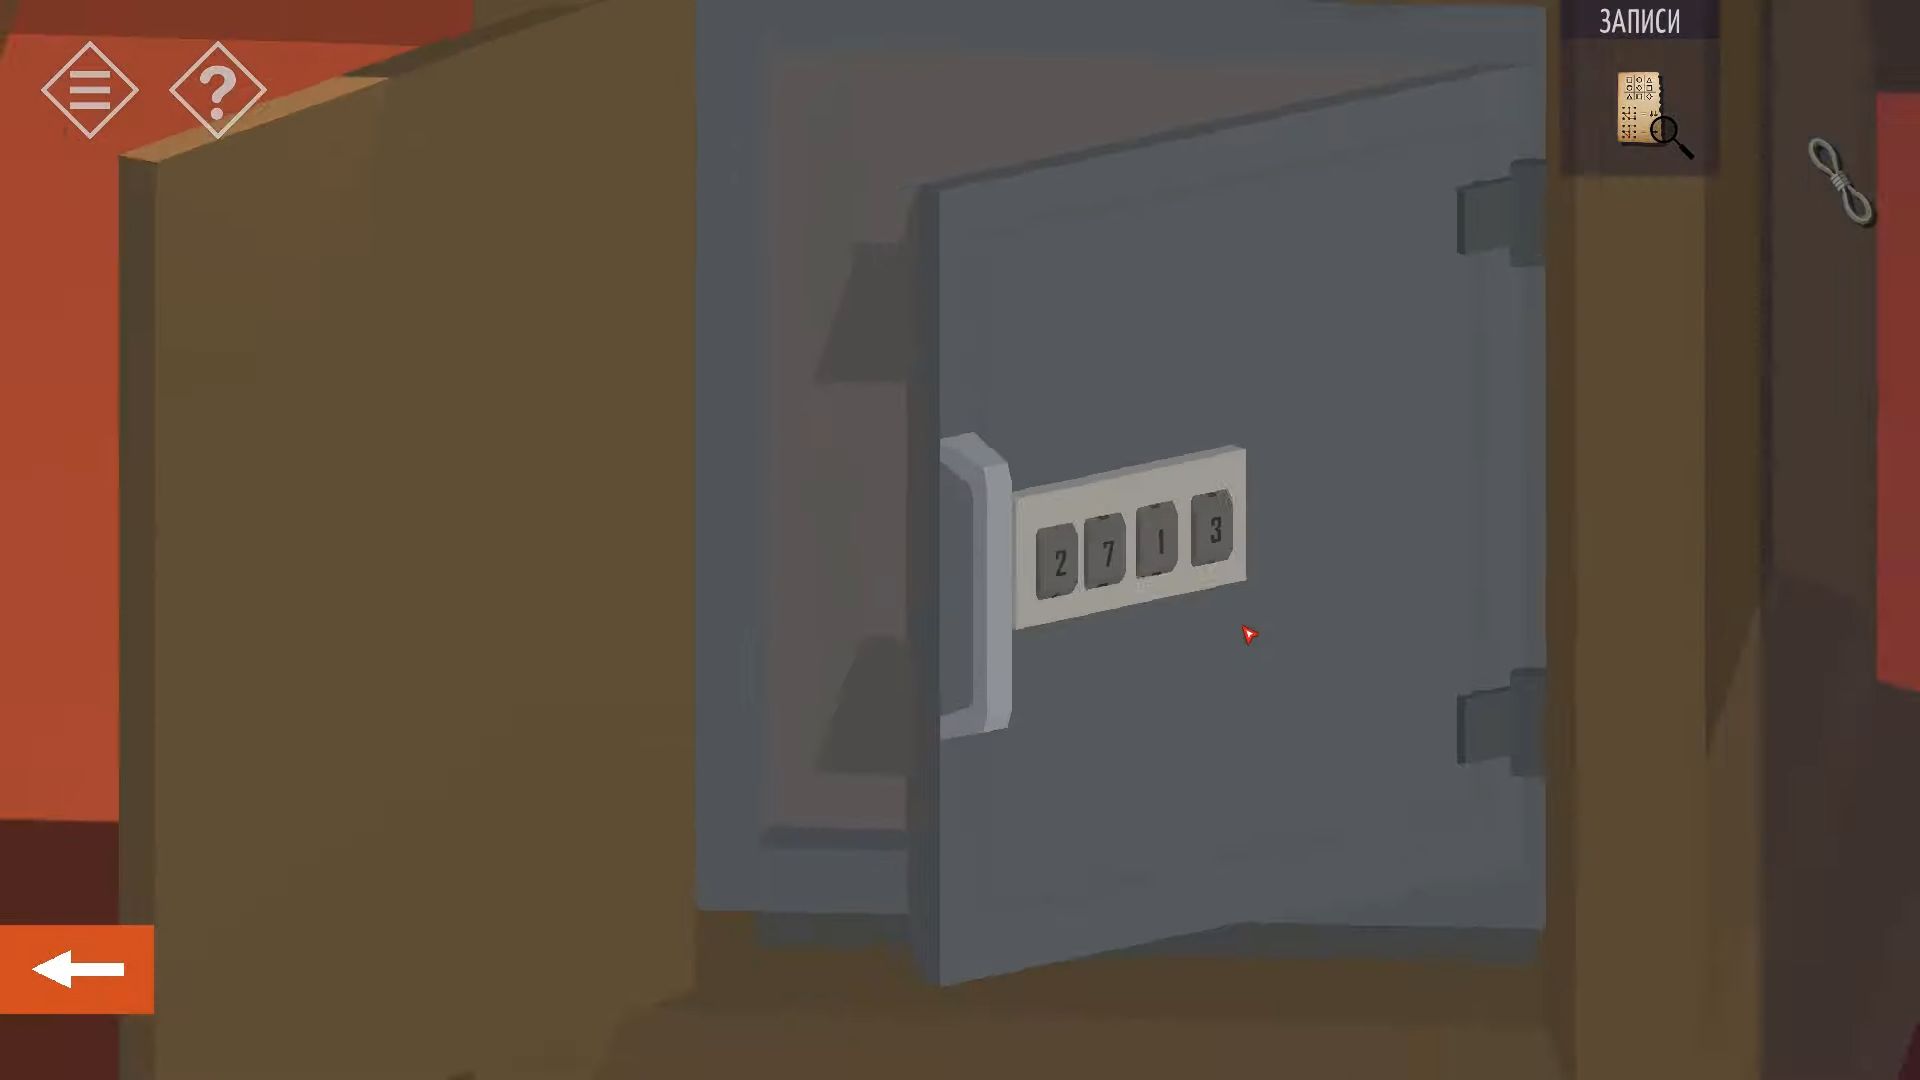
Now leave the building and go back to the parking area. Tap on the Humvee vehicle parked there, and use the key found on the desk to unlock it. Get inside the vehicle and employ the key again to start it. This will turn on the screen. Tap the Setting option and then the button to open the Trunk. Go to the truck and collect the gas canister.
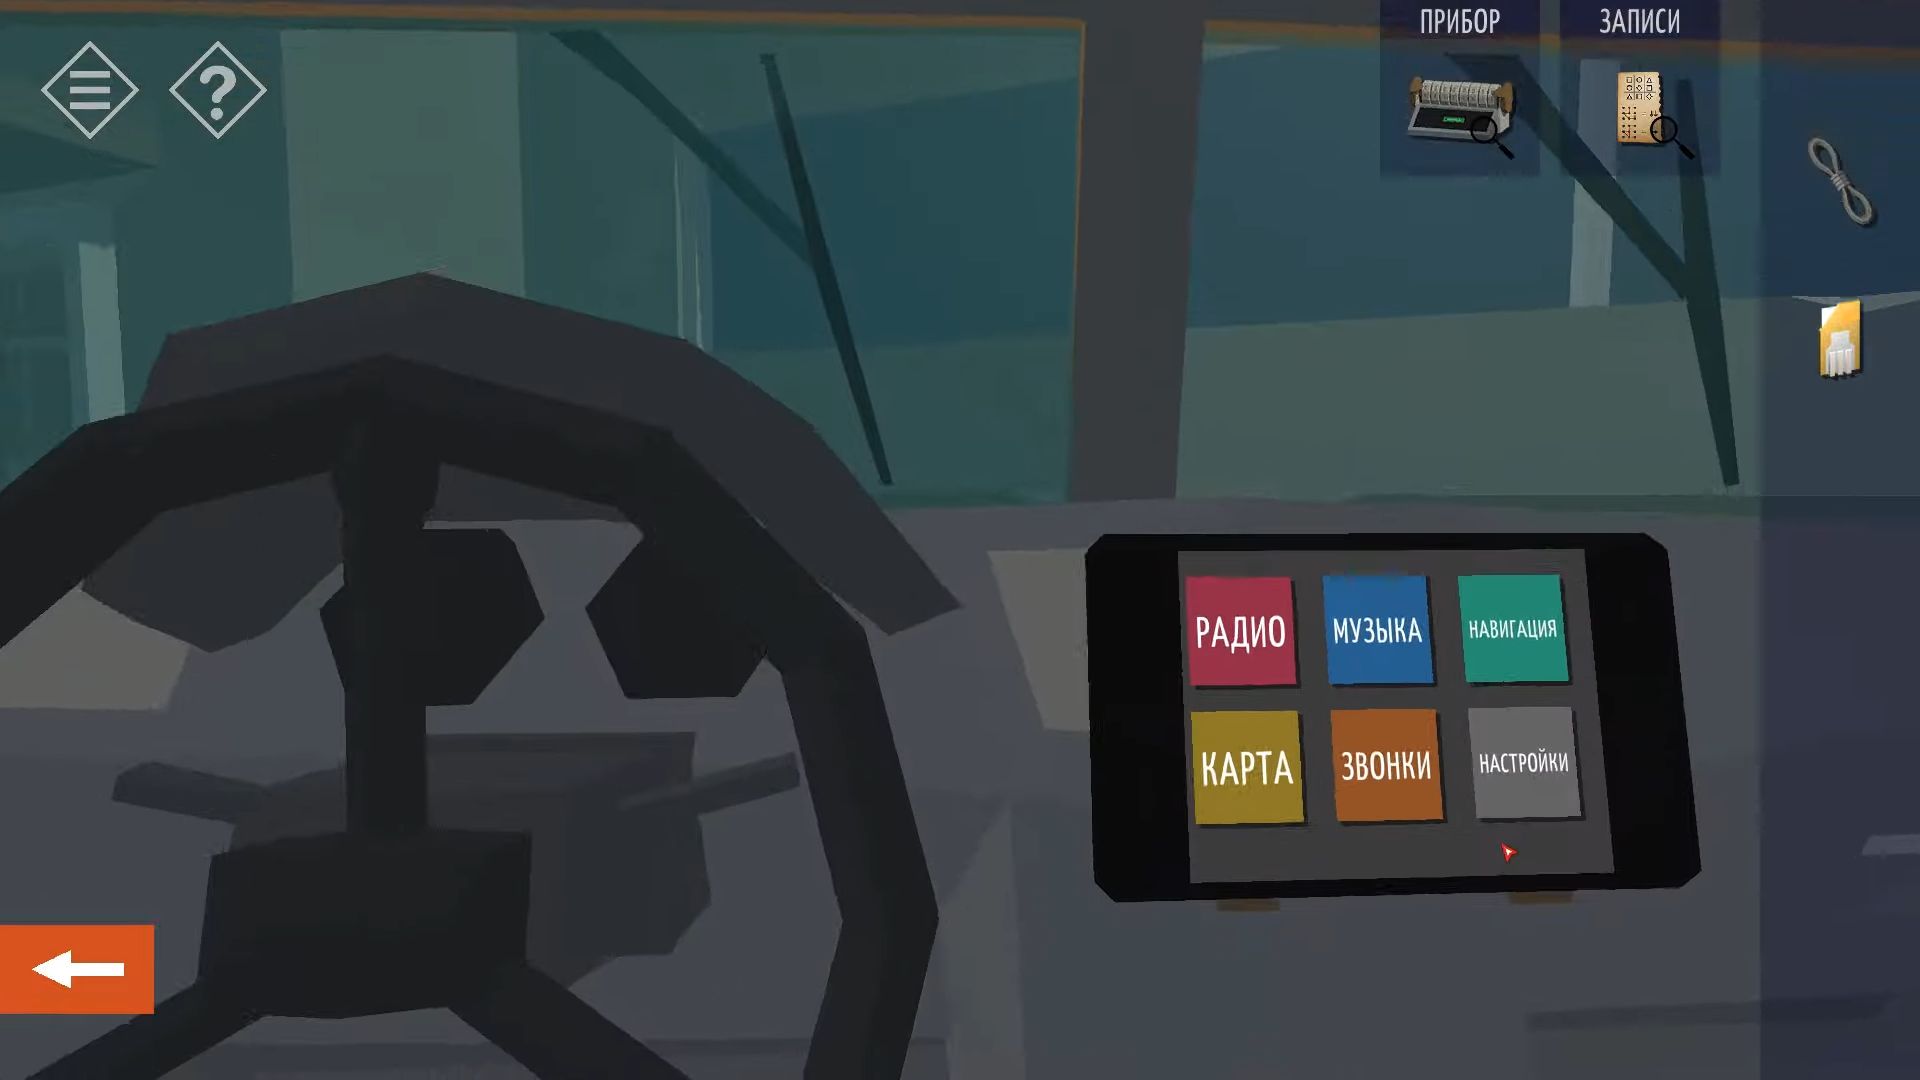
Go to the area with the Hangar building, and tap on the three gas tanks to the left. You have to use the gas canister on them to fill it. Next, go back to the area with the radio mast and look at the left side of the truck. Tap to get in, lower the left visor, and collect a Black Key. Try using the black key to start the truck, but it’s out of gas.
After that, leave and use the gas canister on the orange gas tank to fill the truck. Get back in and use the key. The truck will drive and park next to an open window in the hangar. Use the Rope on the open window to climb up and enter the hangar. Rotate the view to the doors and tap the button to open the one on the left. Then, you need to collect the red Valve.

Touch to see the power box on the right side of the pipes and then use the tools to fix the cables on the left. Now, you can turn the power back on the wall and rotate to look at the shelves on the back wall. Move the boxes to discover and collect a torn page. Return to the main floor and check the table by the exit doors.
After that, open the top right drawer and find a paper with clues for a code. Combine this with the chart from the medical tent. Go back to the tent area and tap the middle green tent to go inside and find a desk. Tap and read the paper on the desk to get some details on encoding tasks.
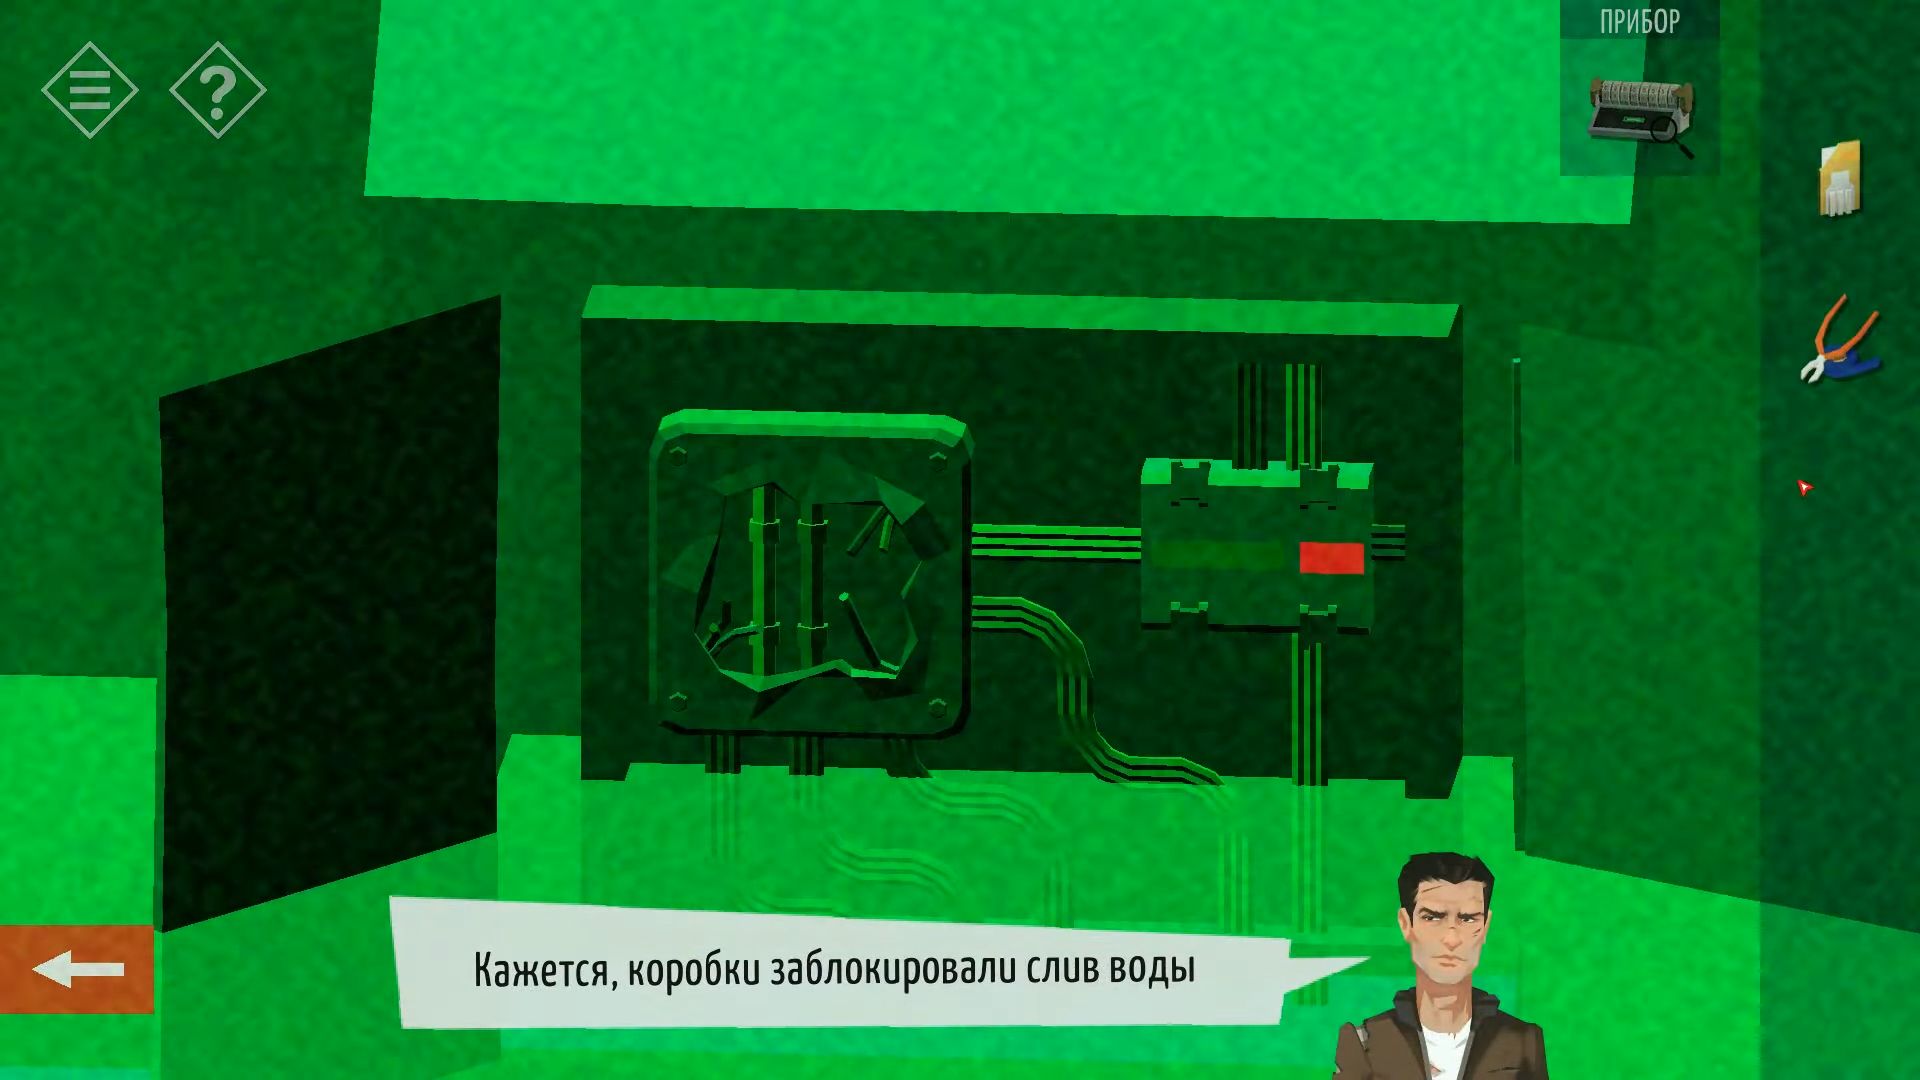
Go back downstairs, head to the group of computers, and then tap the screen (DECODER – 5000). Use the access codes item mentioned earlier to turn on the screen; now, you need an encoding key. Find the encryption key in the paper located in the tent above.
Enter a code in the Code – 5000 unit that will result in an encrypted code of 11111111. Set the Coder – 5000 dials to 11001011 WELCOME. After that, go back to the Hangar, rotate your view to see the gantry on the side wall, and check the table with a radio and other equipment. Tap to view and collect the book from the table. It contains button sequences for controlling the tank platform.
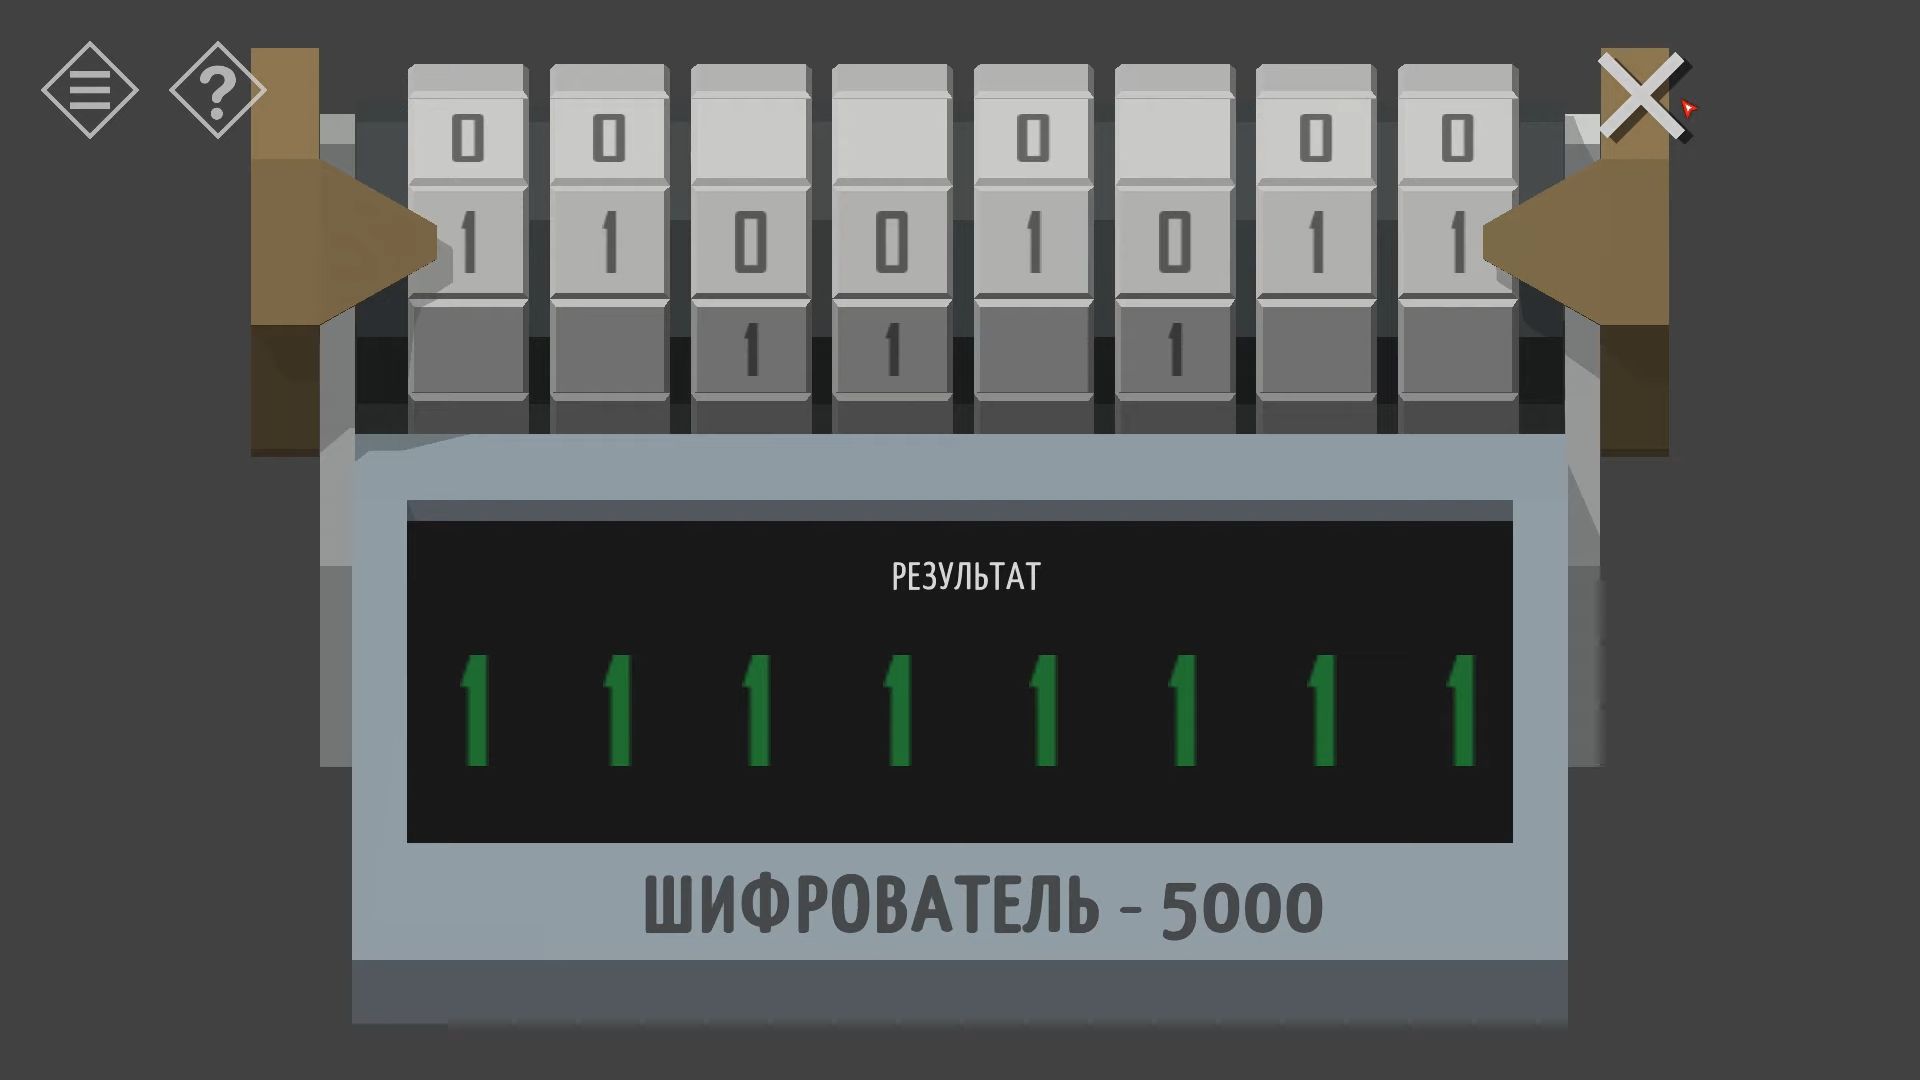
Next, look at the book and put the Down code in the left panel. After that, tap the joystick on the table to make a move. Press Circle, Diamond, Circle, Square, Diamond, Square. Look at the front left of the tank to find a control laptop. Now type in the Decrypted code on the laptop and the tank is ready to go.
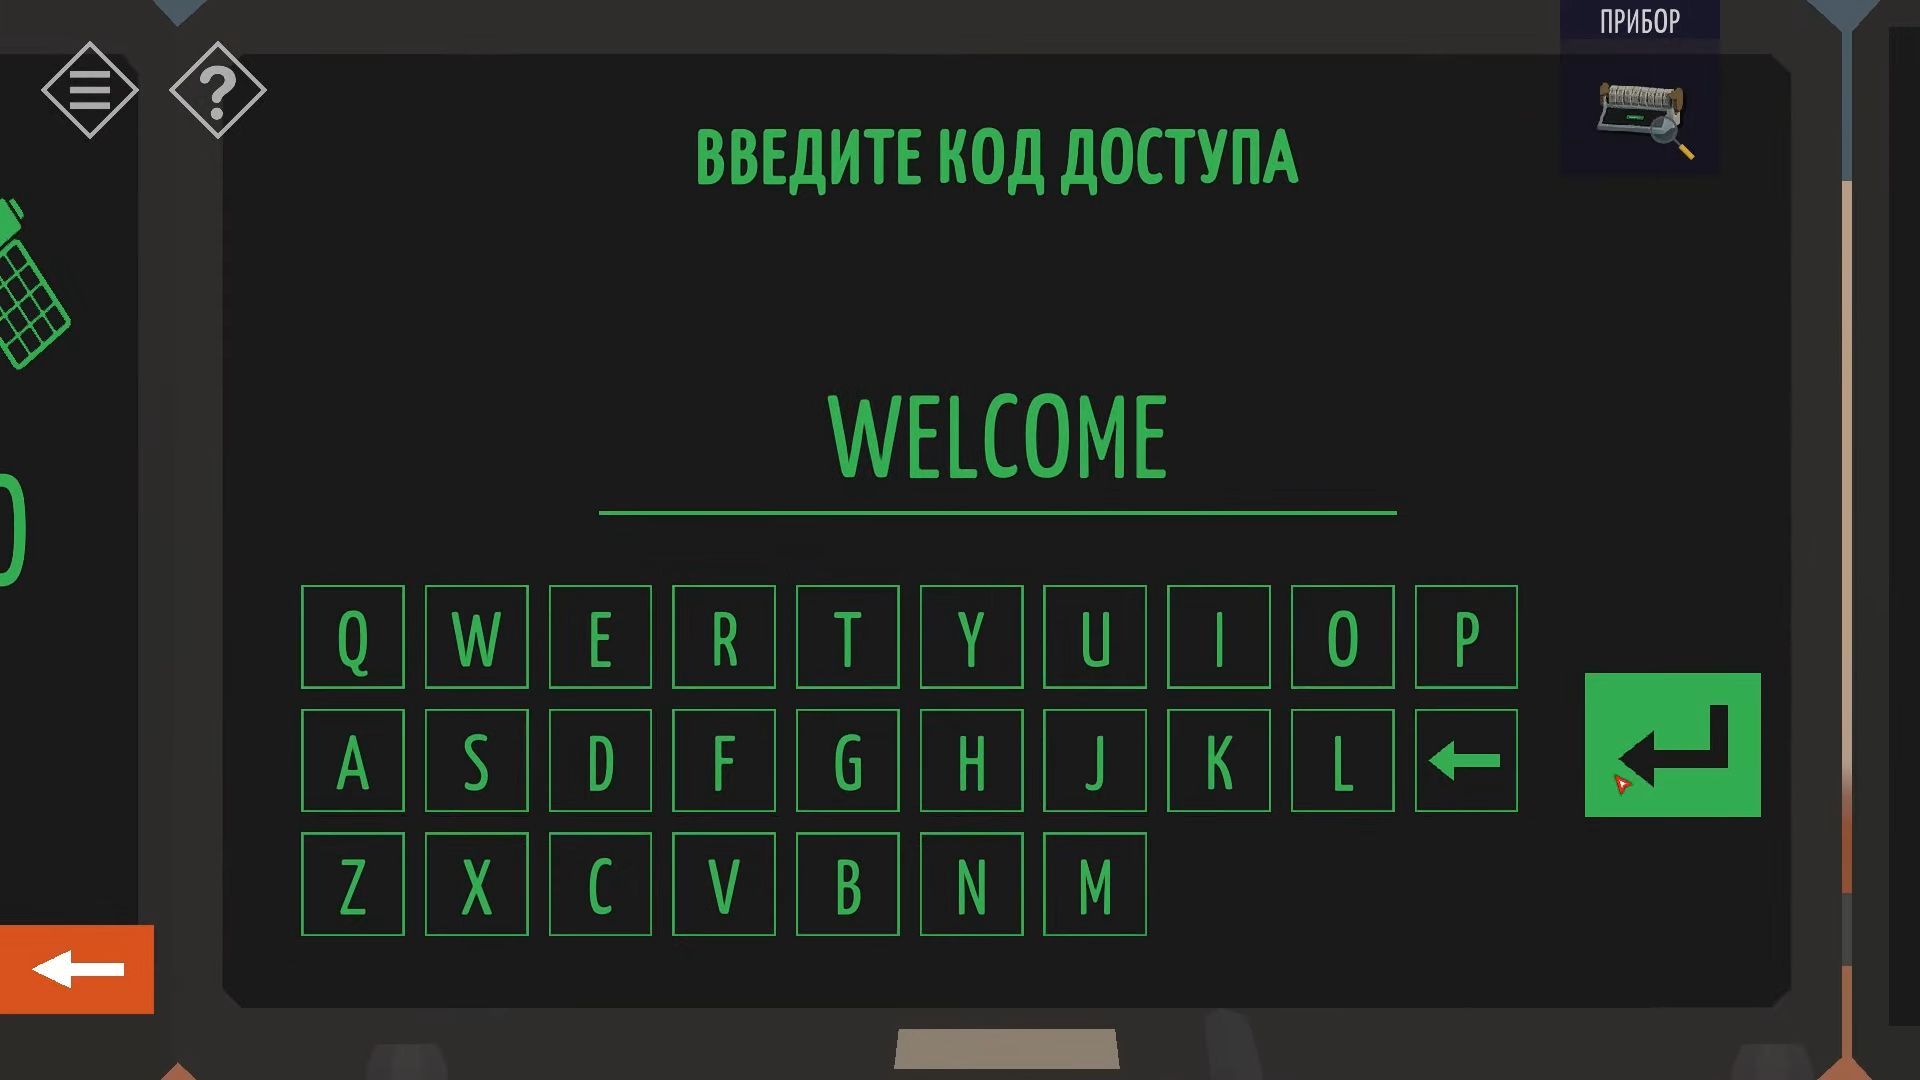
Go back to the main building and touch the three computer screens on the right to check if the tank is linked. Now, input the same code on the middle screen and you can begin operating the tank. A warning may appear about the turret not moving, but proceed. You’ll see the tank from above.
Use the controls to guide the tank to the bunker on the left of the hangar. Turn the tank to face the bunker door and shoot the tank to break the door. After that, exit the building and tap on the bunker to finish this section of Chapter 15.

Part 3 – The Solution
Following Chapter 14, the last section of the tale is Chapter 15, which unveils the resolution to the Red Cliff mystery. This guide belongs to Part 3, set in the bunker of Redcliff Military Base, where the crystal and artifacts you discovered are believed to be. Your task is to locate and eliminate them for good.
First, you begin in a hallway with a storage room door in front. Then touch the floor on the left to shift left, and tap again to reach a dimly lit area.

Touch the floor around the middle to open a door in the ground. After that, tap again to go down to the lower area and go to the right to discover a green board. Knock it to turn it around and see the code on the opposite side. Keep moving to the right until you reach the end of the hallway, then tap to inspect and pick up a red toolbox.
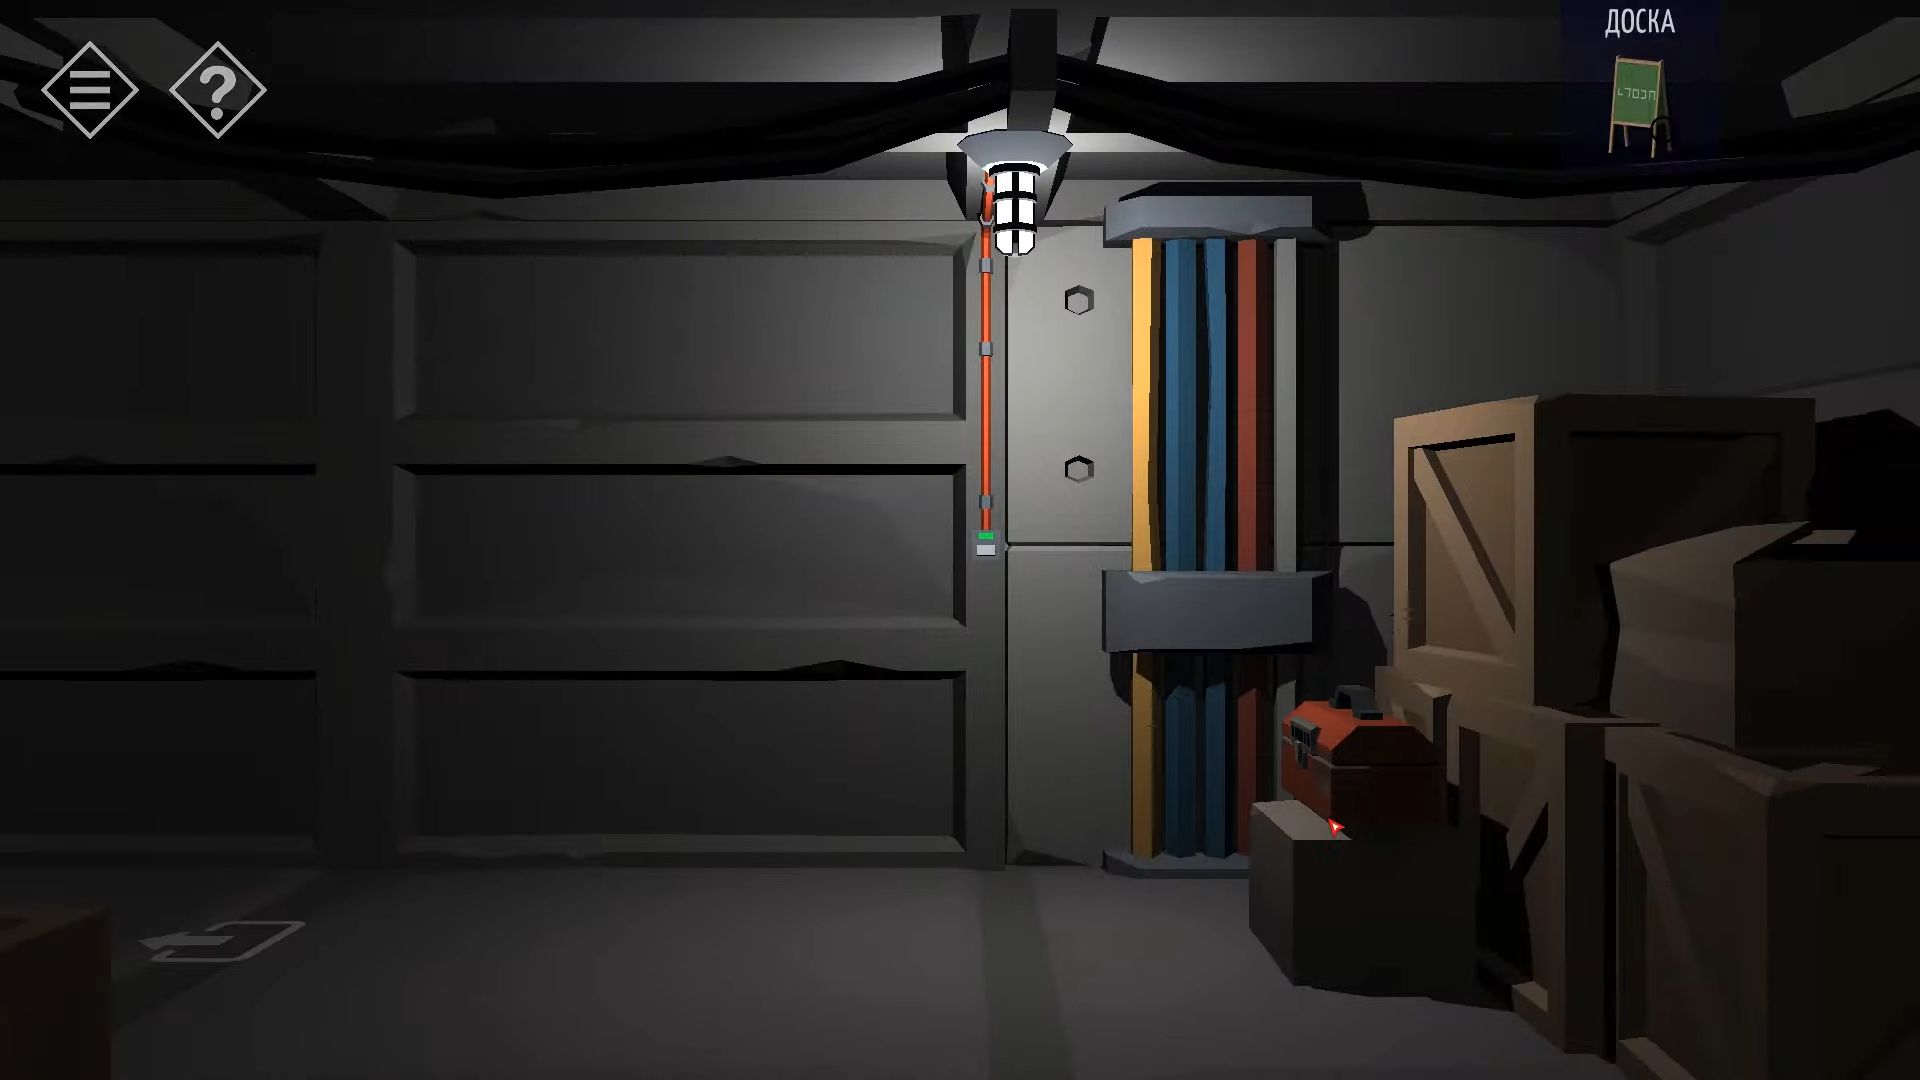
Now look below to see a map of the hallways and power boxes. Return to the ladder and climb back up to the upper hallway and the storage room door. Use the hint from the green board to unlock the door. The shapes on the board indicate the buttons for the code.
The lines show the separation lines from other keys. For example, the square represents the 5 in the middle because it has lines/buttons on all sides: 37548. Enter the storage room. Now you have to open the cupboard on the left and tap the small green box below the suit. After that, gather a Handle and a Key.
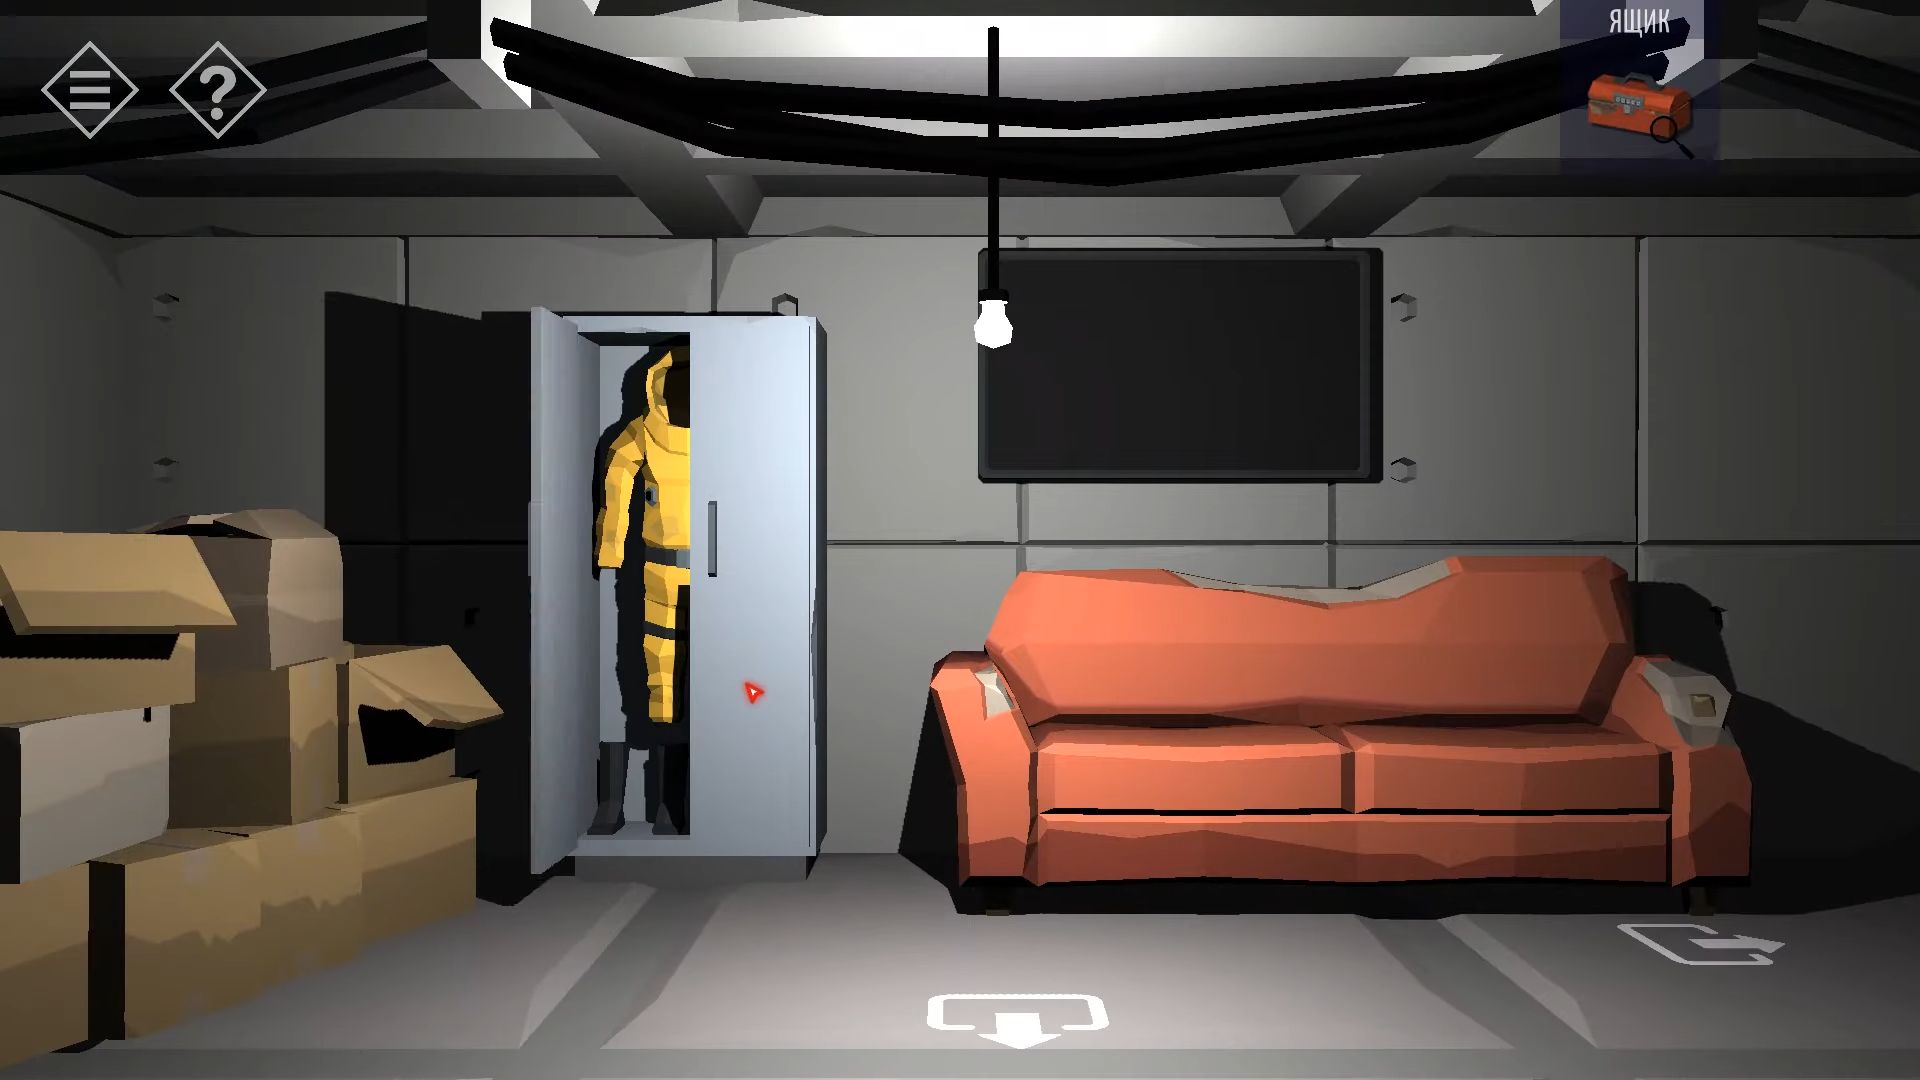
Next, leave the room and go into the hallway. Head left and unlock the electrical box on the wall using the key. Take note of the Red 4 inside the door. Descend the ladder again and go to the right. Use the key once more to open another electrical box. Obtain a second Handle from this one, and note the red 8. Move left to find a doorway with barrels; you can open it, but it’s too dark to proceed.
After that, continue left to discover a third electrical box and open it as well. Turn off the lights using the switch next to it to reveal a number on this door. Now, go all the way left in the corridor to find a large cabinet and open it. Use the two handles to place them in the two black holes. You can now manipulate each switch to control the cables. Tap each selector to rotate it and match the connecting cables. There’s a pattern where they all link together and match.
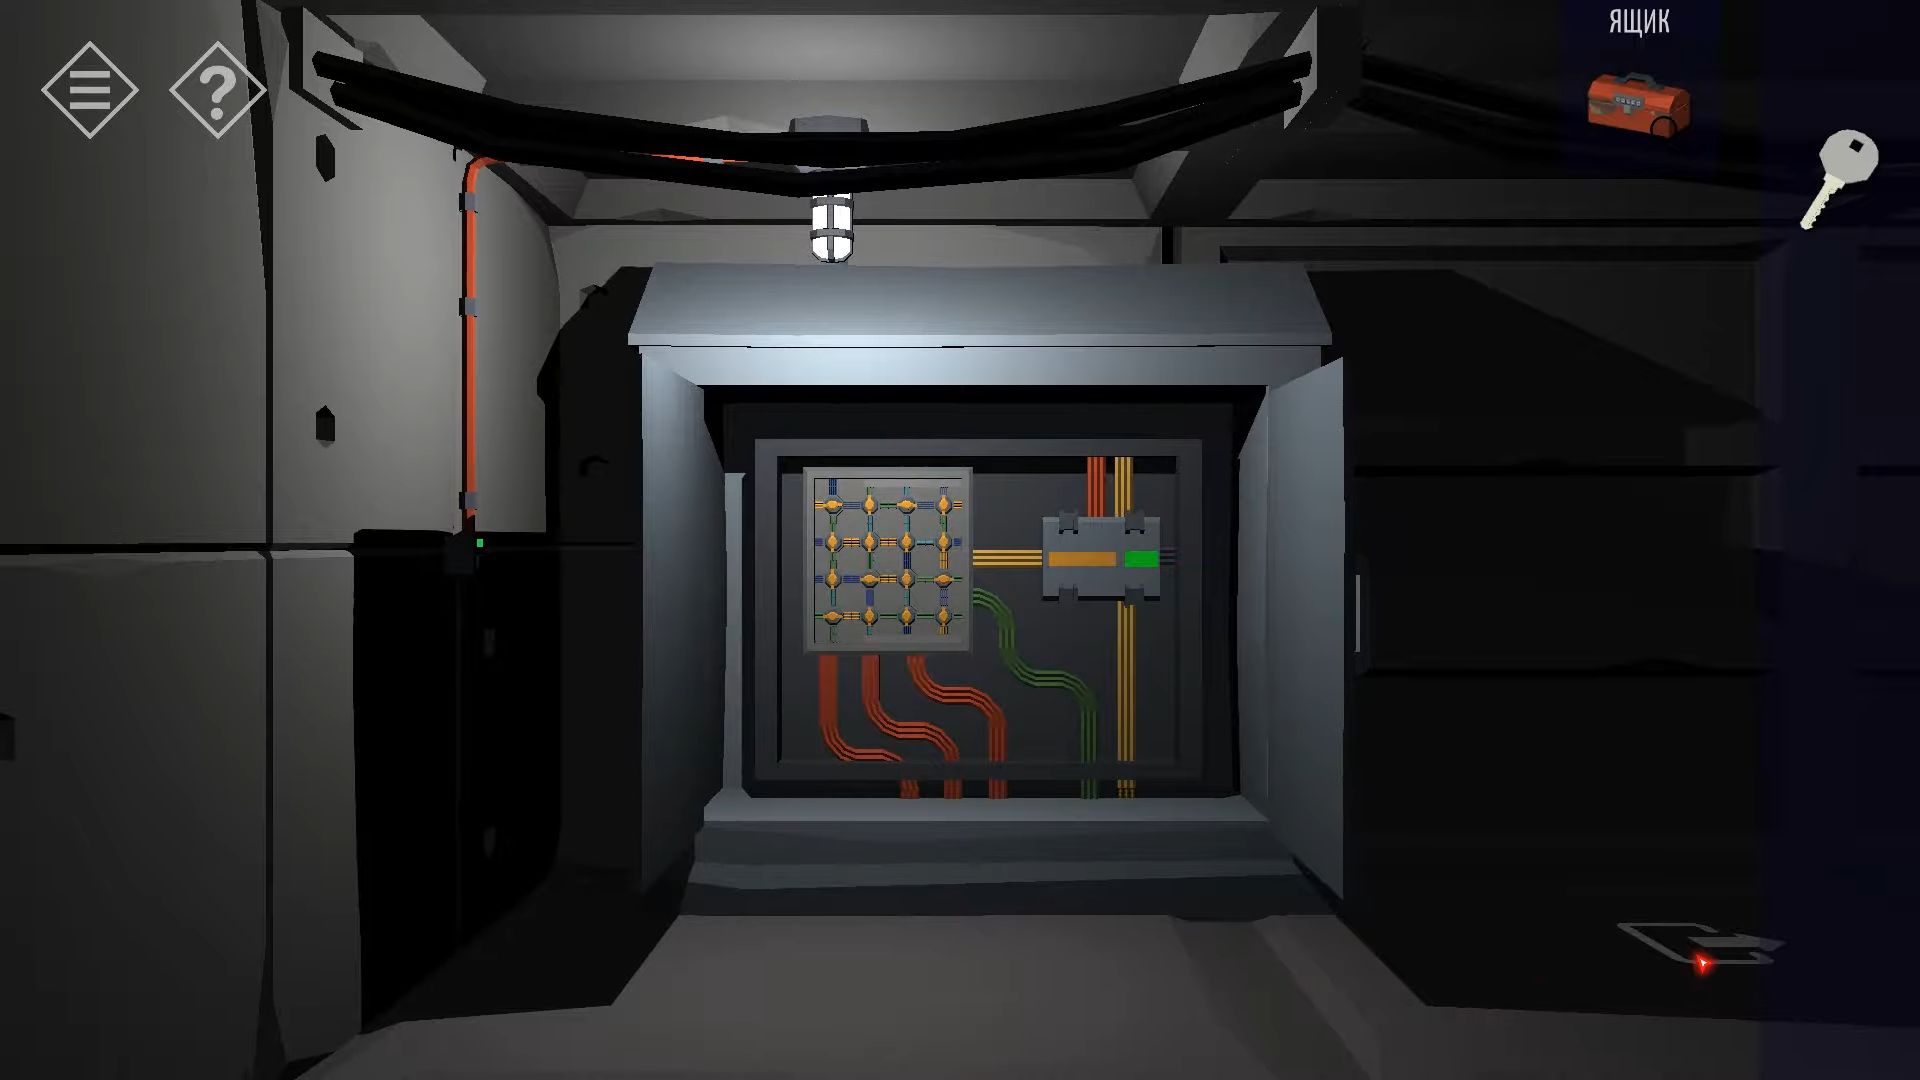
After completing these steps, the room you walked by before will have power. Go back to that room, enter it, and pick up the hammer from the floor. Utilize the key to unlock the box on the right, and take note of the two numbers on the box doors.
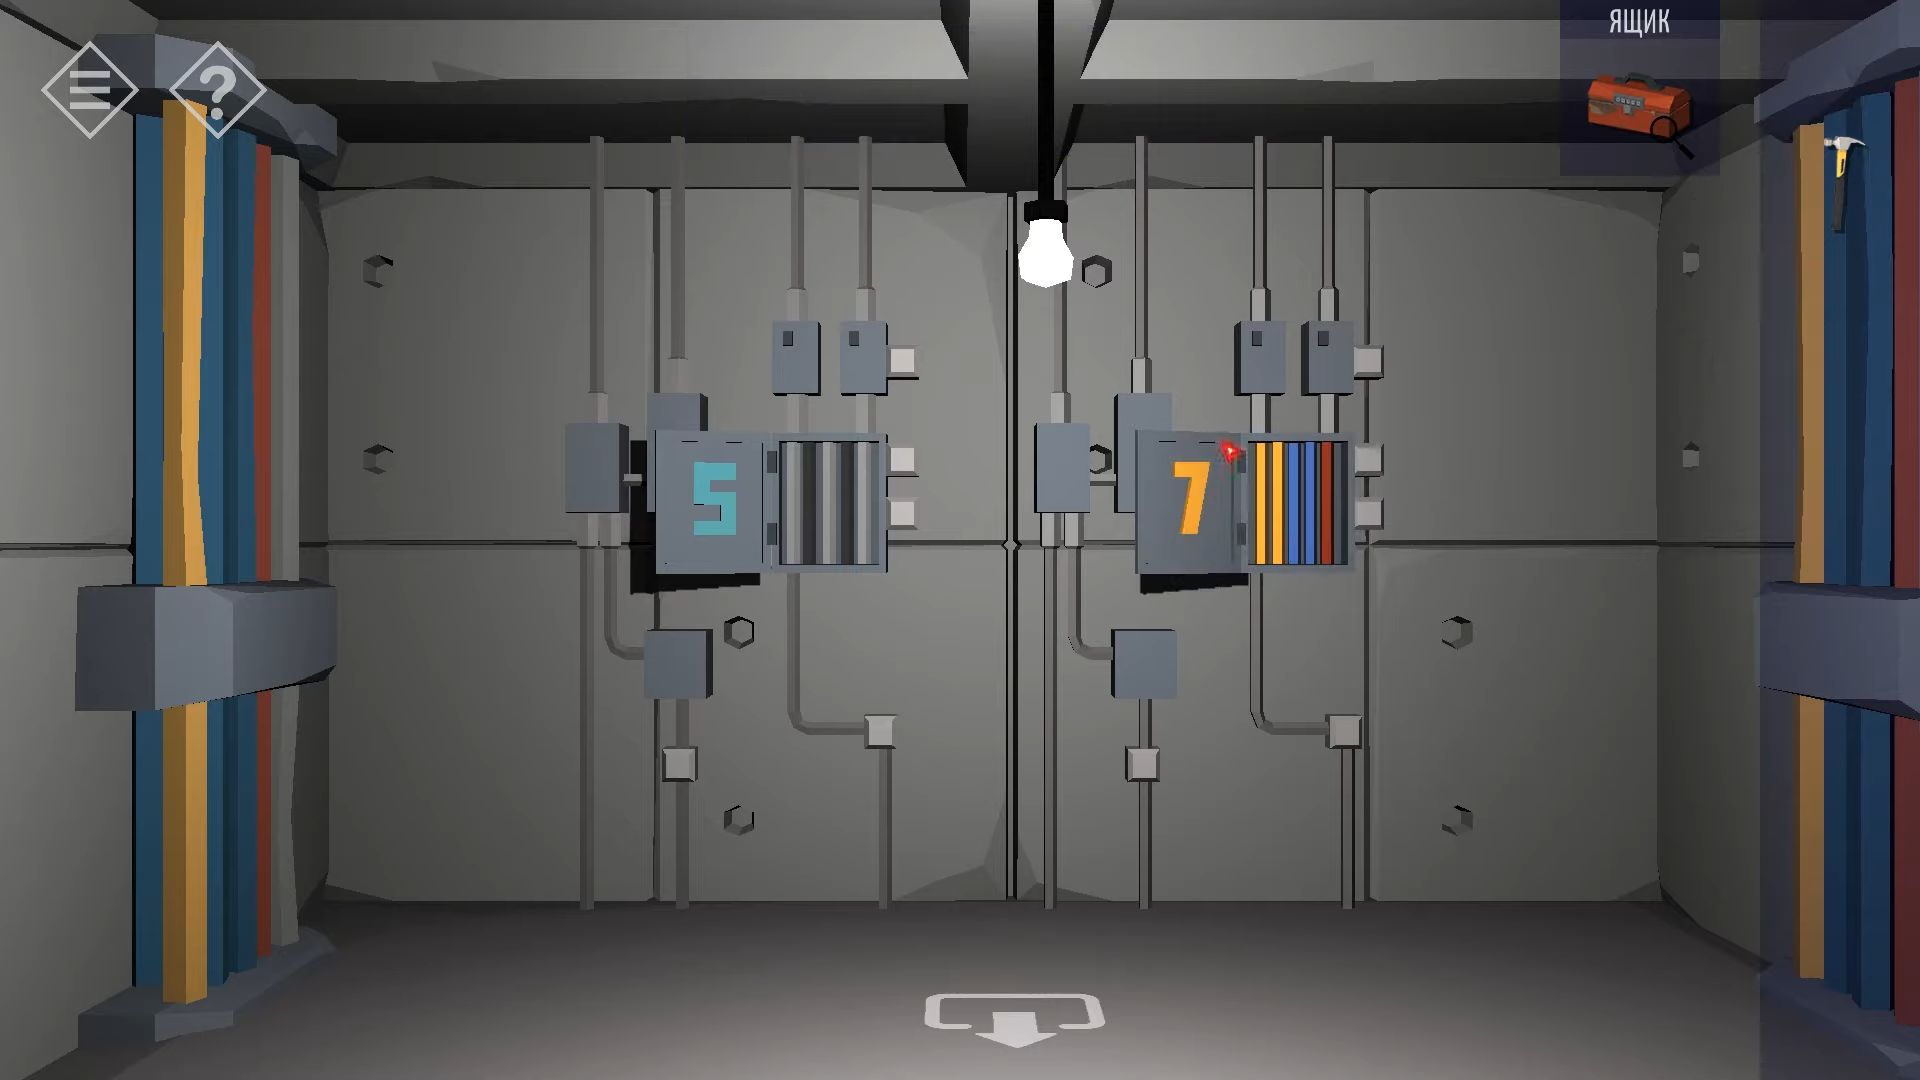
Now, examine the map beneath the red toolbox to observe red lines connecting the 5 electrical boxes (the 2 in the room with the hammer are included in this). This hint will help you unlock the toolbox. Follow the lines carefully from the Electrical symbol on the left around the 5 boxes. This will provide you with a 6-digit code (528742).
Then unlock the box and gather the Bolt Cutter. Return to the storeroom doorway and use the hammer on the EMERGENCY case to enable you to collect a crowbar. Enter the storeroom and go to the right to find a locked door. Use the bolt cutter to break the padlock. Now, move to the right into the new room. Use the crowbar on the 2 boxes and collect a Valve from the left one.
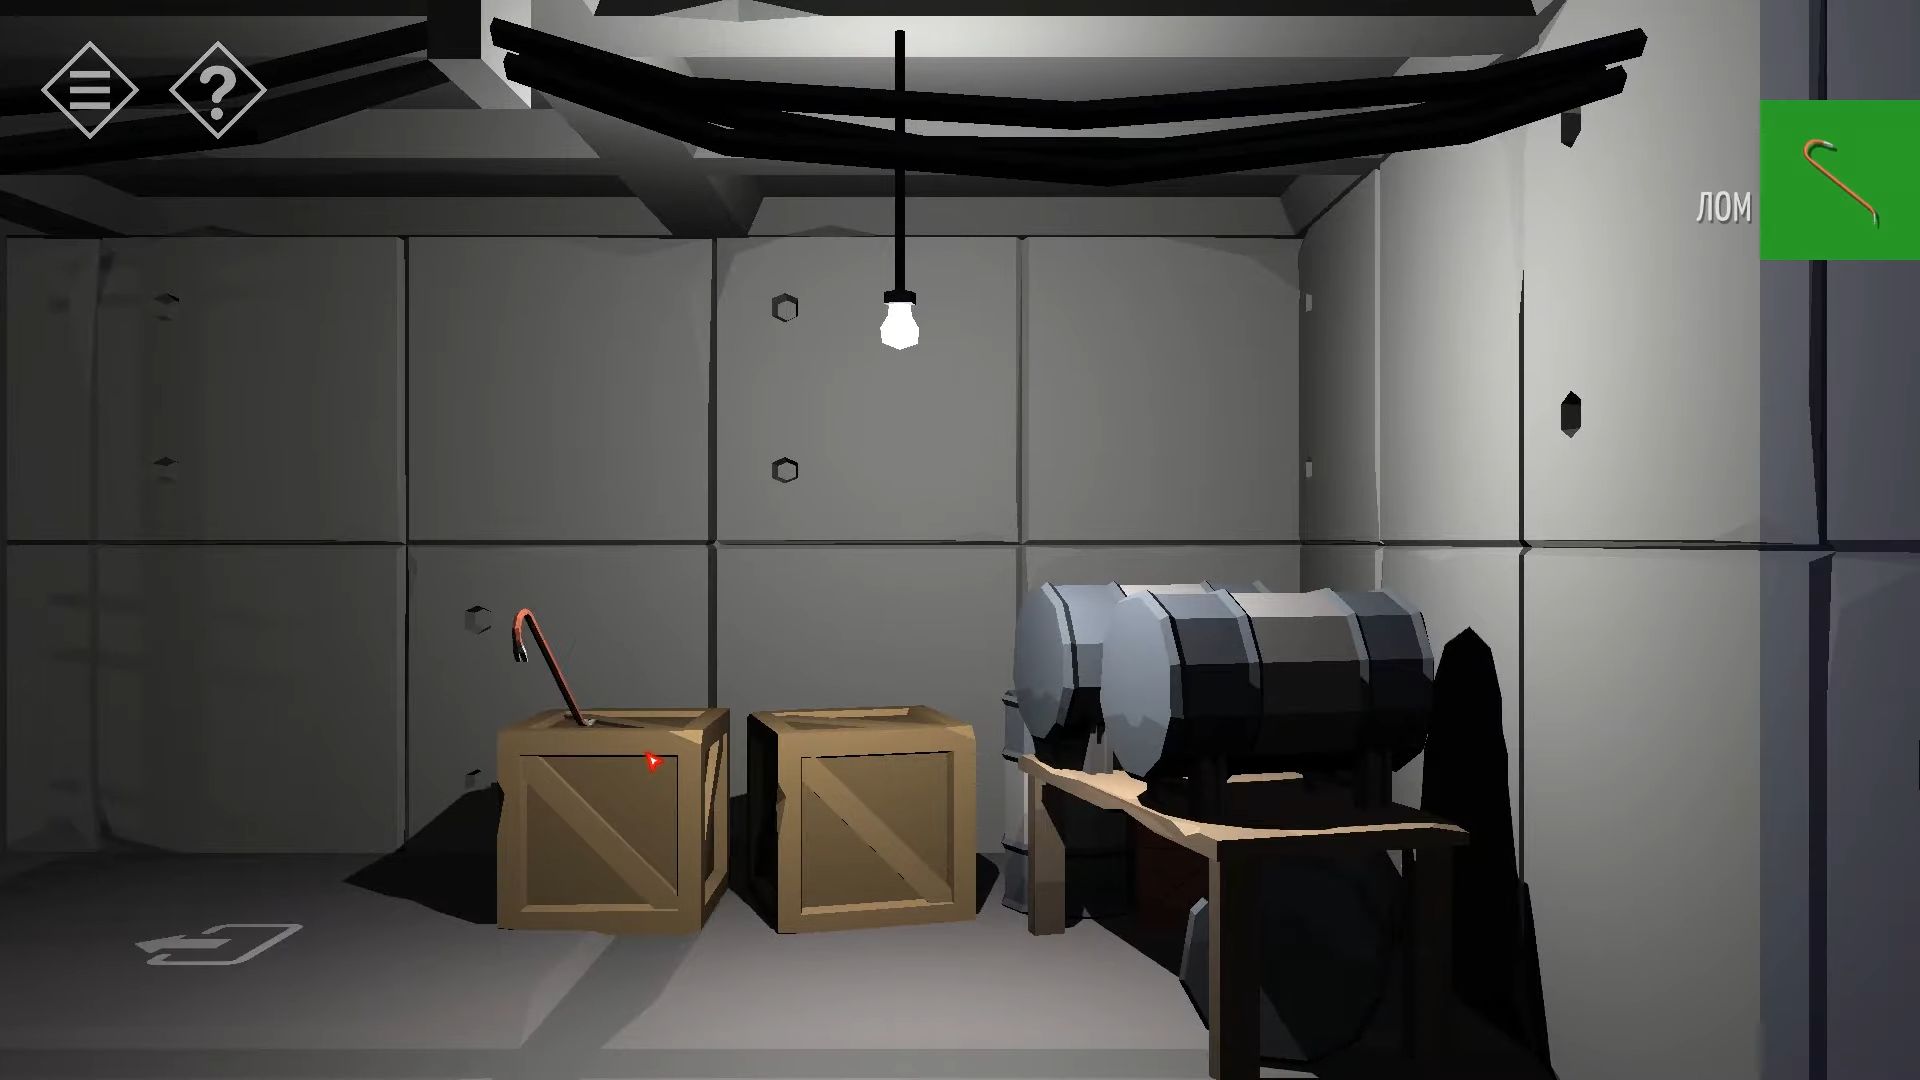
Descend to the lower hallway and go right twice to locate another hatch on the floor. Employ the valve to open it and descend to the bottom corridor. After that, move left to spot a desk, examine it, and tap to gather a folder of papers titled Calculation of pressure for experiments.
Next, above the desk is a green board with some diagrams, with only one not crossed out. Move left once more to find a control desk and a screen. Tap the screen to read the message, and then tap the button to Stop the experiment.
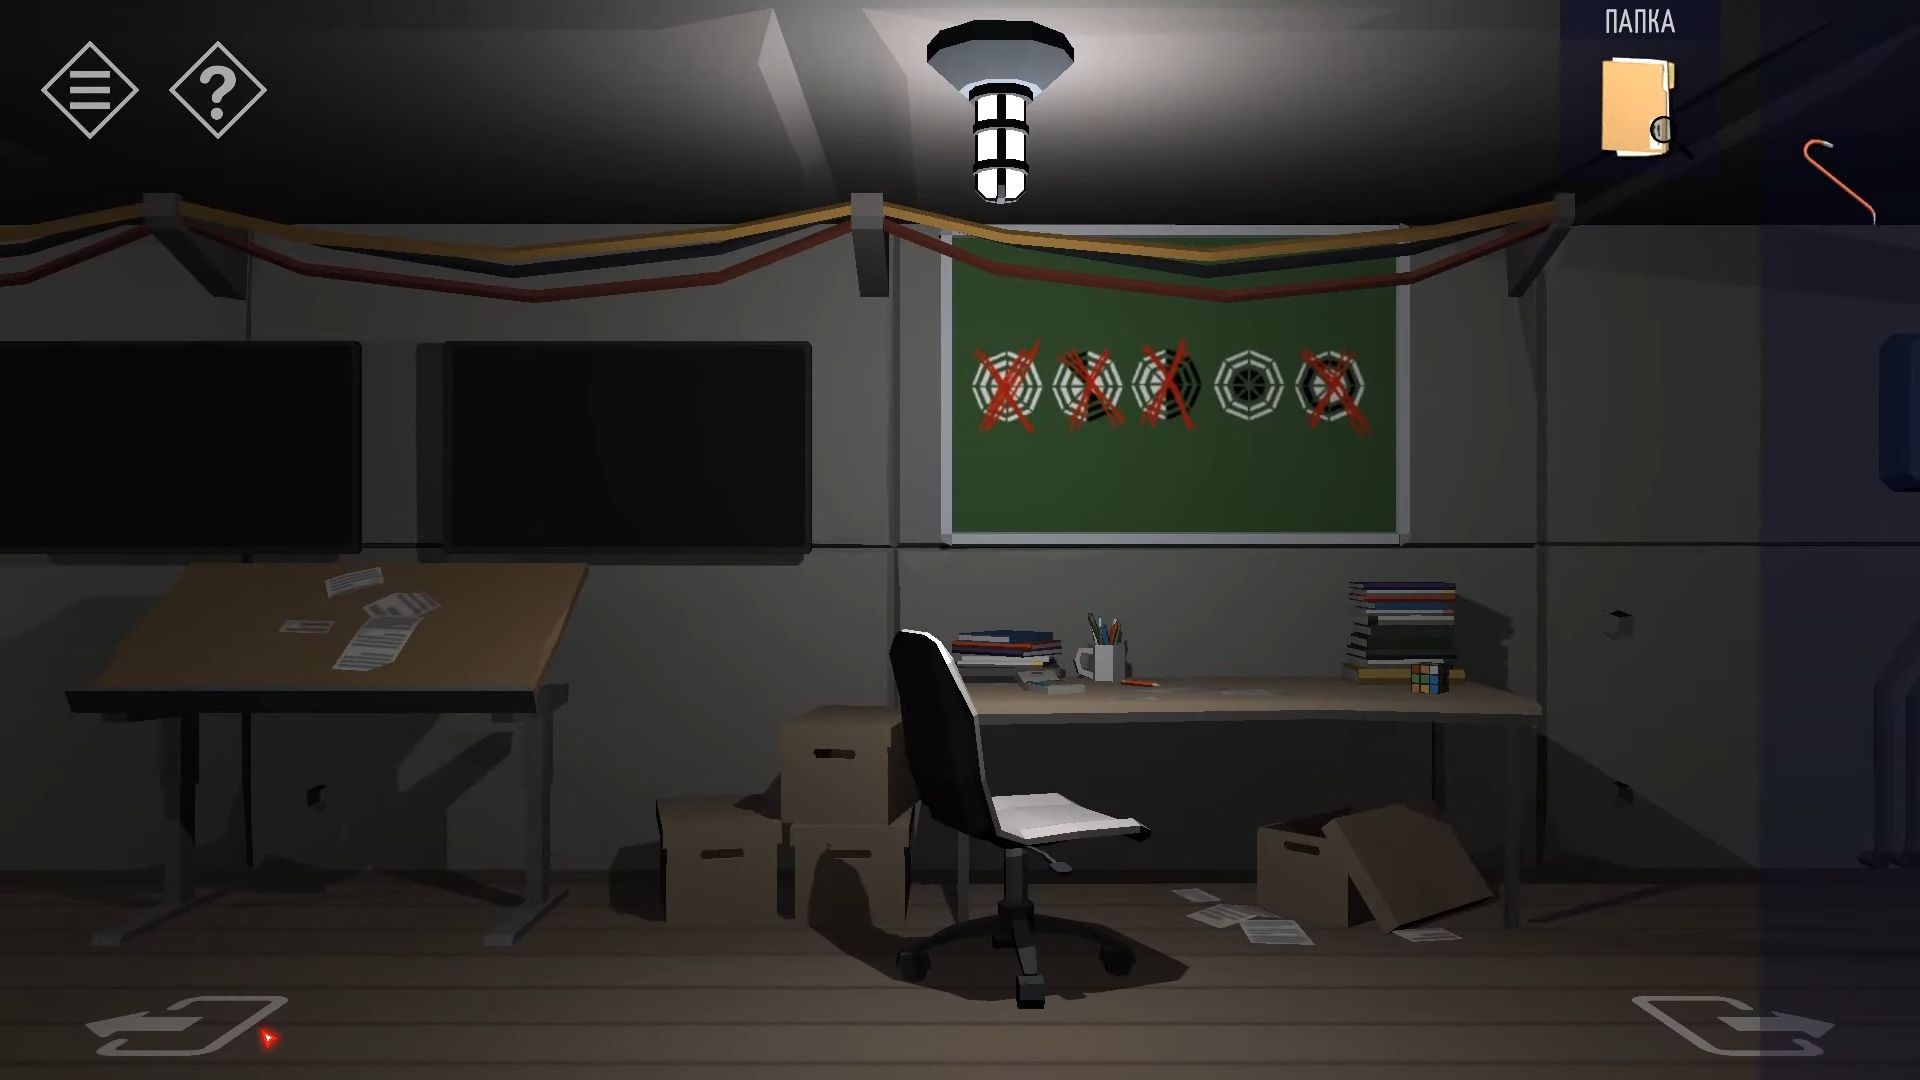
Go left once more to observe the ancient artifact among some equipment and another green board. Spin the board by tapping it to reveal more diagrams. You have to proceed to the far left of the corridor to locate a desk and another board with diagrams. View the desk and collect the orange key card.
Go back right twice to the experiment area and tap the screen beneath it. Then tap the Eject Object button. Now, you need to input a sequence of shapes and use the clues from the boards to figure out the correct sequence. As you tap each shape, they will appear on the left.
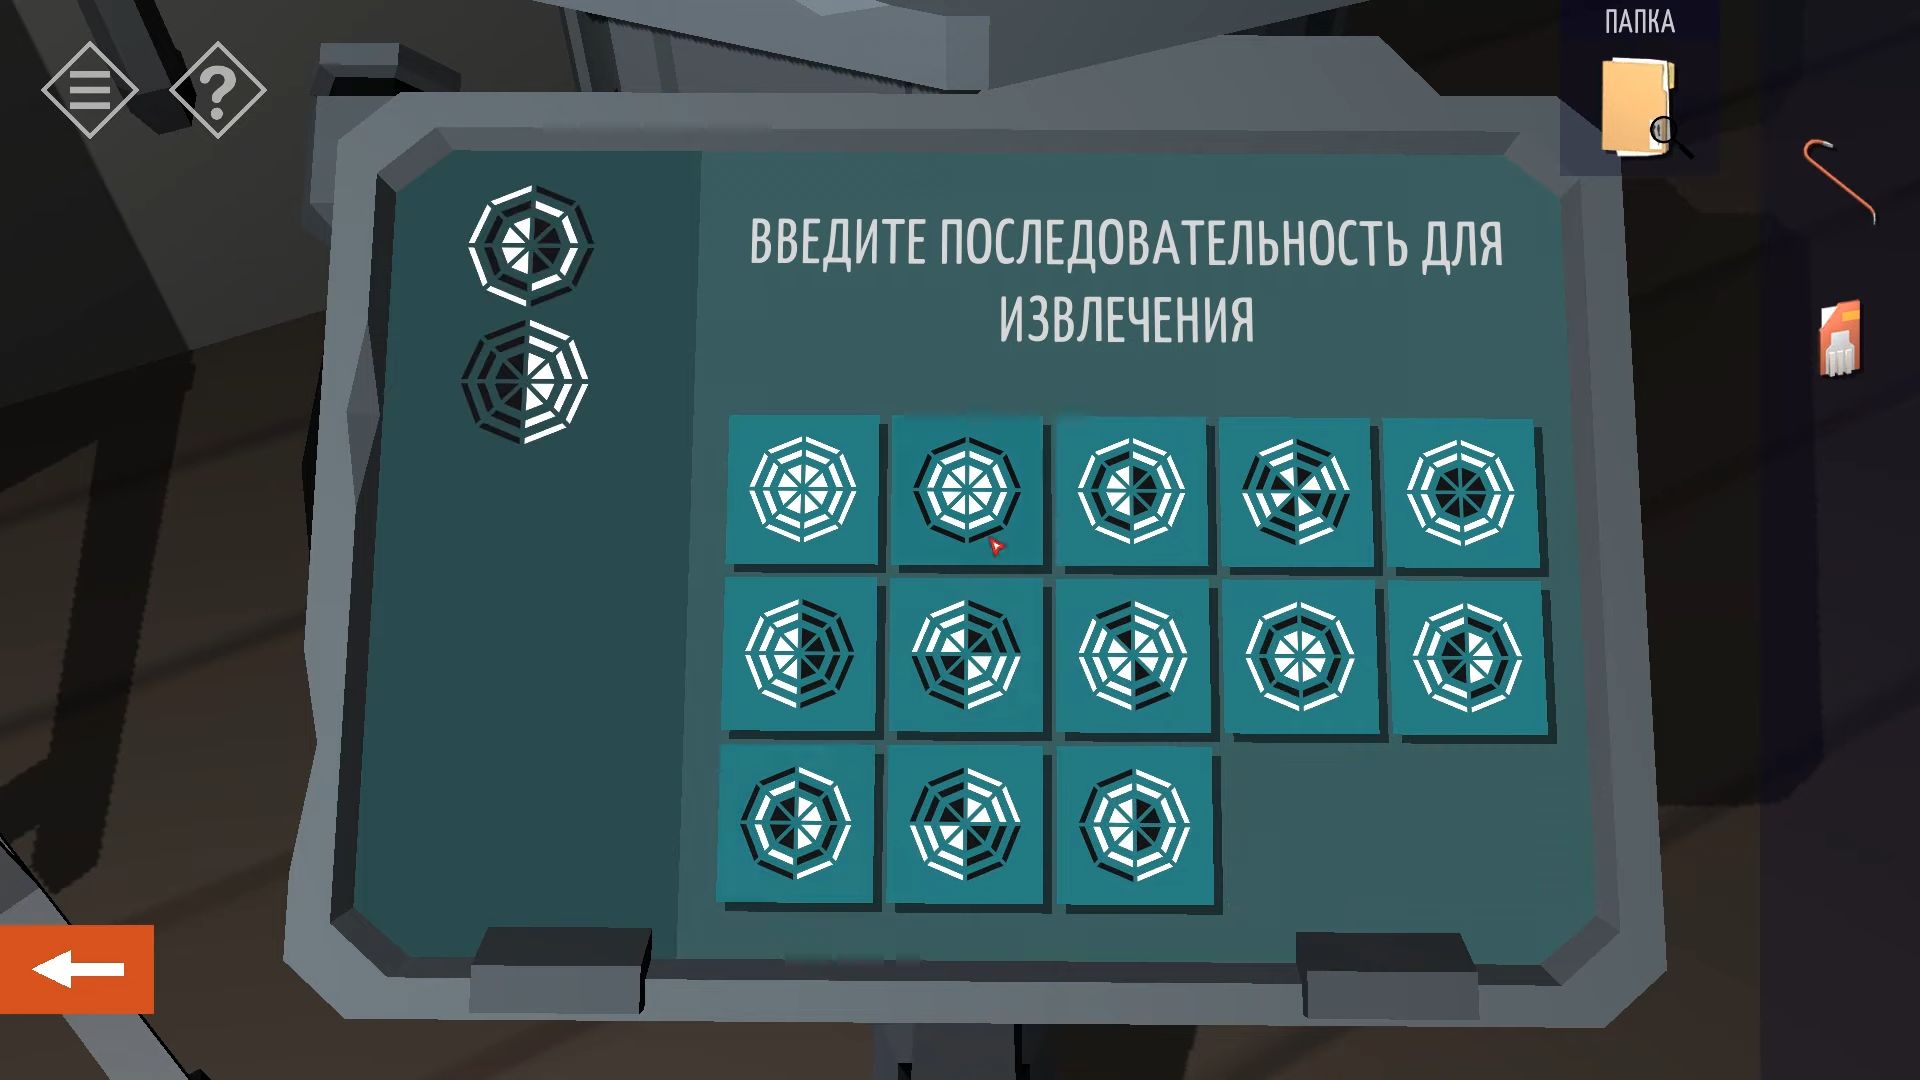
Next, pick up the Ancient Artifact and head to the left to locate the lift doors. Use the key card on them to summon the lift and open the doors. Tap to enter. Initially, you have to use the controls to go to the 1st floor (-1). Exit and move left to gather 3 Lever arms from the shelves. Then, return to the lift and descend to the fourth floor (-4). Go right to find 3 pressure gauges. Inspect these and place the 3 levers, one on each gauge.
Tap each lever to adjust the pressure. Tapping a lever will decrease the pressure in that cylinder by 2 but increase it by 1 in each of the others. You need to set the correct pressures as indicated by the papers found earlier. The correct pressures are (6, 6, 8). Once done, the three lights at the bottom will turn green.
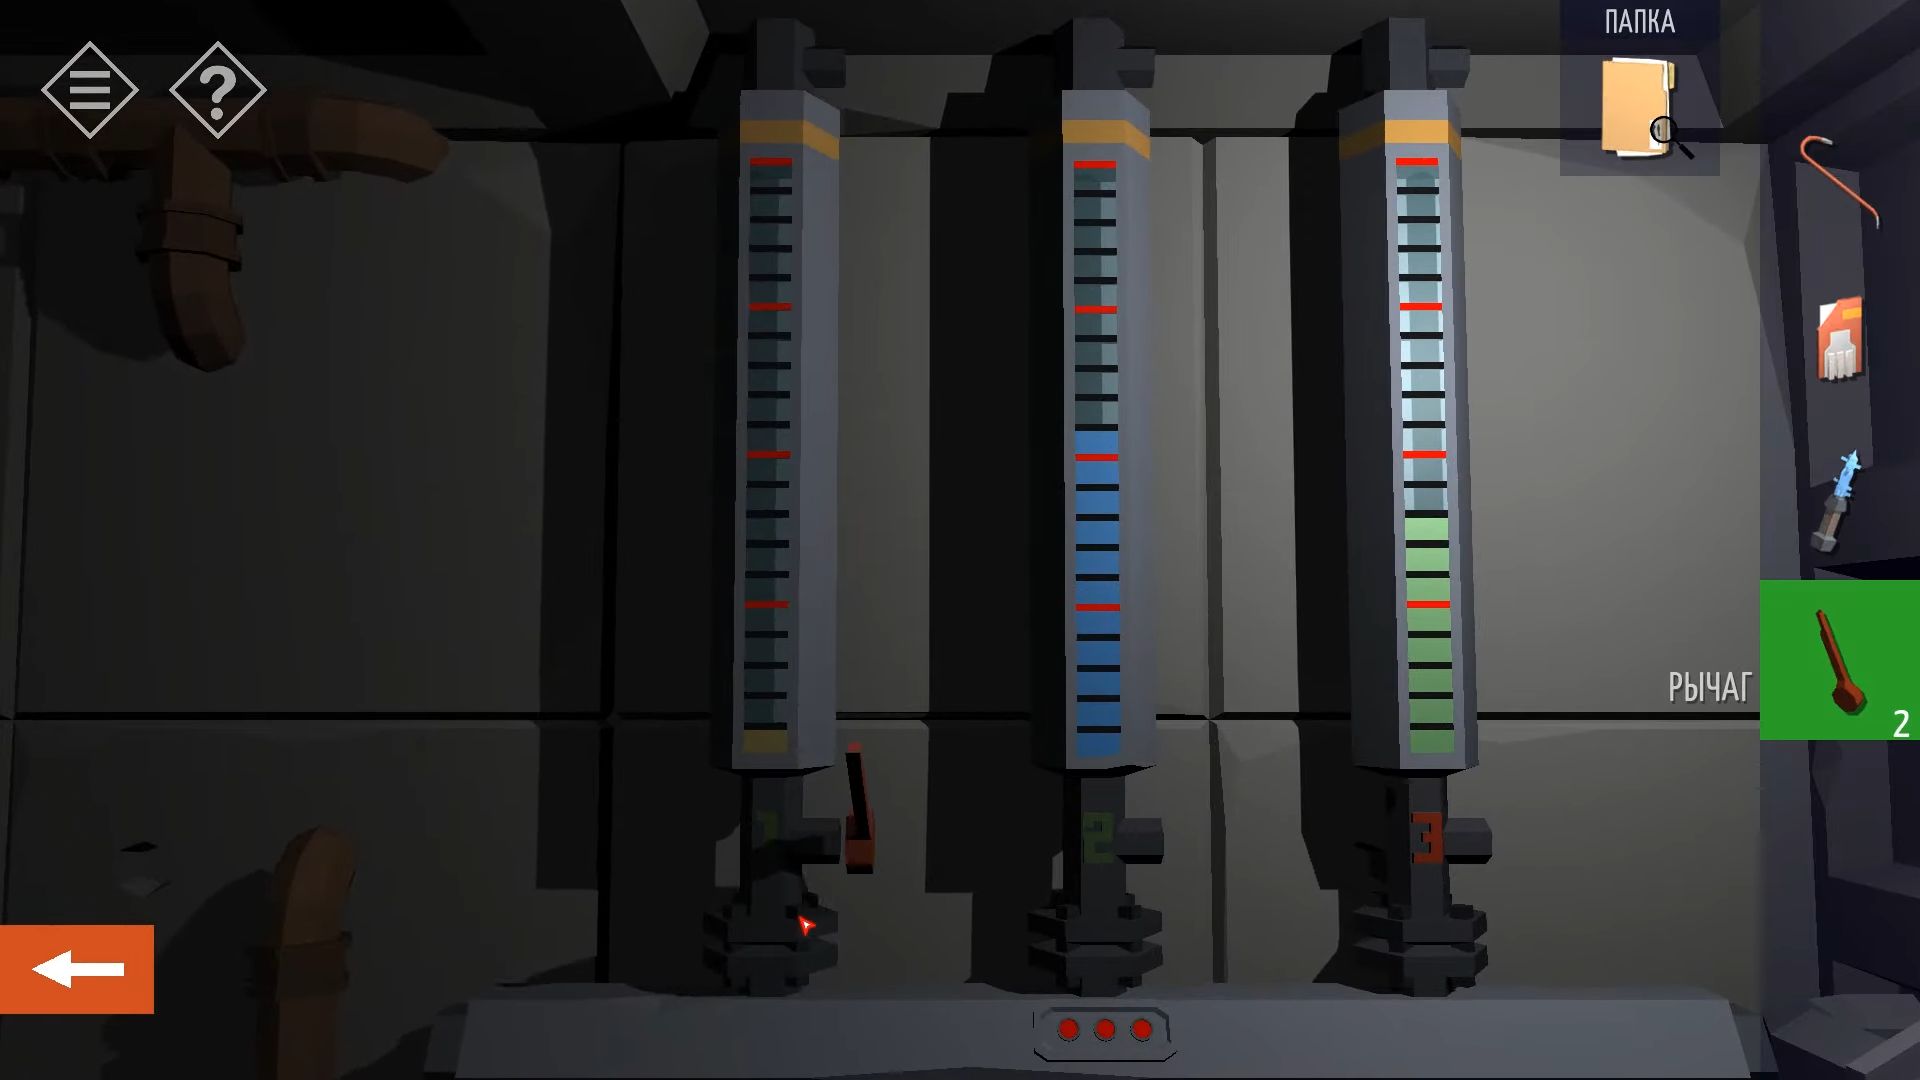
Go back to the third floor (3), go right to the control panel screen, and use the Stop the Experiment button once more. It should now finish successfully. Lastly, use the elevator again to go down to the fifth floor. Exit and move right to locate the experiment chamber with the crystal. Follow the instructions that guide you to self-destruct the object and finish the game.