This guide is all about basic guidelines that you must follow before installing modifications to the Sims 4 game. Installing mods for The Sims 4 can greatly enhance your gameplay experience by adding new features, and custom content, and improving various aspects of the game. Here’s a comprehensive step-by-step guide for beginners.
Step 1: Backup your game
Before you start installing mods, it’s always recommended to create a backup of your game saves and data. This ensures that you can easily revert back to the original state if anything goes wrong during modifications.
Step 2: Understand the basics of Modifications
Mods are user-created modifications that alter or add content to the game. There are two main types of mods: script mods (which add new gameplay features) and custom content (CC) mods (which add new objects, clothing, etc.)
Step 3: Check the Compatibility
Ensure that the mods you’re downloading are compatible with the version of The Sims 4 you’re playing. Mods can become outdated with game updates, leading to crashes or errors. Always download the most recent version of the mod so that it cooperates with the updated Sims 4.
Step 4: Download Mods from Reputable Resources
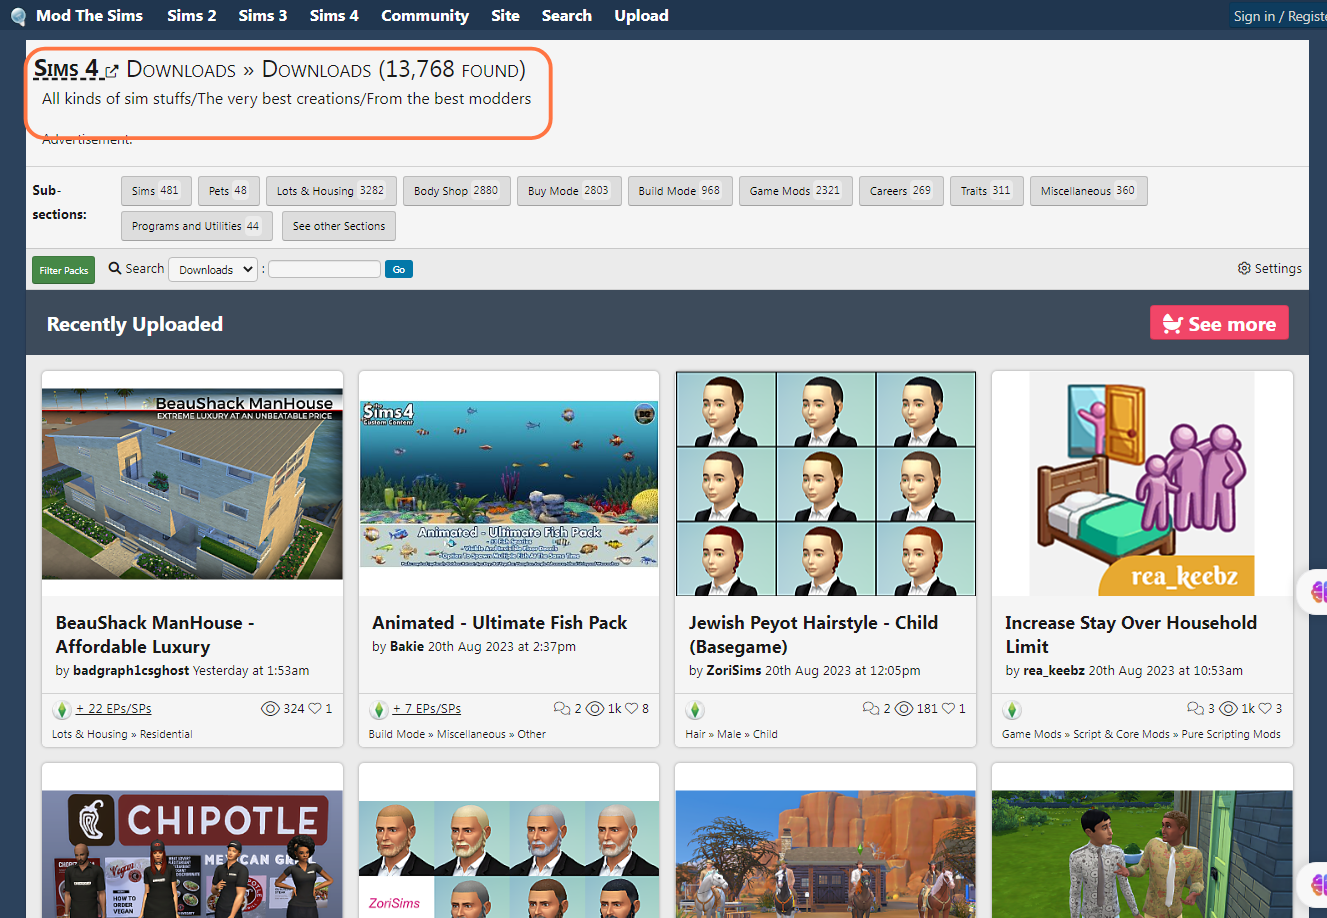
Download mods from reputable sources, such as modding communities like Mod The Sims, The Sims Resource, Nexus Mods and some adult-rated mods and animations from Wicked Whims Website. There are also many popular mod creators available on Patreon as well.
Be cautious of downloading from unknown sites, as they might contain harmful content. Sometimes Mods require some additional mods or scripts to work seamlessly, so you should consider checking the description or requirements section on the relevant mod’s web page.
Step 5: Extract Downloaded Files
If the downloaded mod is in a compressed file format (e.g., .zip or .rar), extract the contents using tools like WinRAR for Windows users. Mac users can unfurl the contents simply by double-clicking the Zip file. Make sure you’re extracting the appropriate files, as mods often contain folders, packages or TS4script files that need to be placed in the Mods folder.
Step 6: Organize your Mods folder
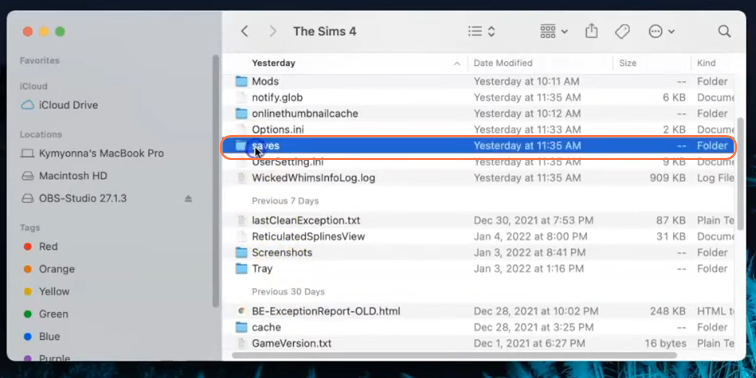
Keep your Mods folder organized by creating subfolders for different types of Mods. This can help you manage and locate mods easily. In case you don’t have a Mods folder or have never installed Mods before, create one inside “The Sims 4” folder. This Mod folder is where you’ll place all your downloaded mods.
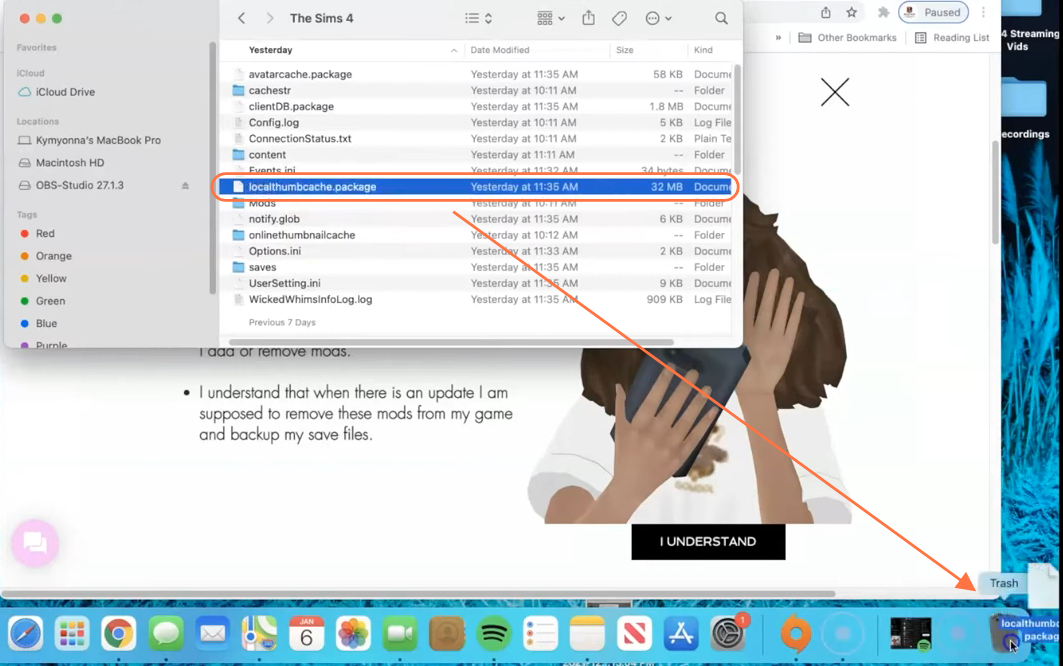
Typically, you can find the game directory at Documents > Electronic Arts > The Sims 4. Alternatively, launching the game at least once and then exiting will generate the necessary folders, including Documents, Electronic Arts, and Mods. As a precautionary measure, ensure the game remains inactive during mod installations, and consider removing the “localthumbcache.package” file from the Sims 4 folder.
Step 7: Installing the Mod
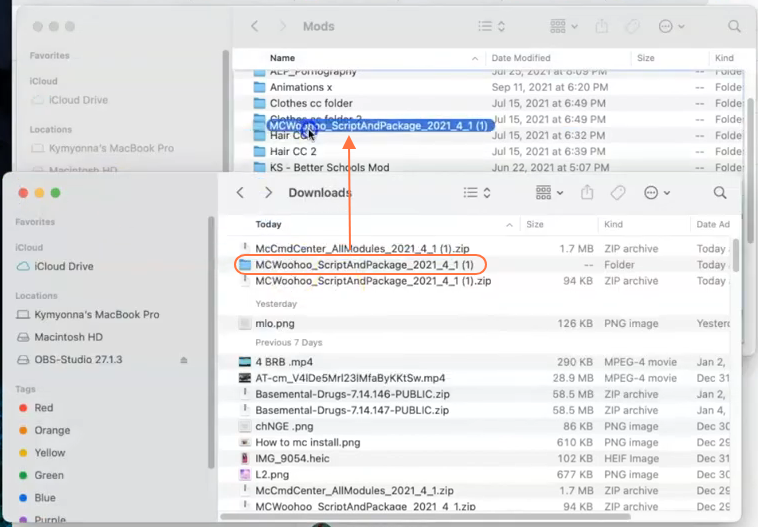
With the Mods folder ready, head to your downloads folder and select the extracted TS4script files, Package files or sometimes extracted folders of the downloaded Mod files. Effortlessly drag and drop these types of items into the Mods folder of the Sims 4 game directory. This action guarantees that the mods are placed accurately for the game to identify and activate them.
Step 8: Enable Mods in the game
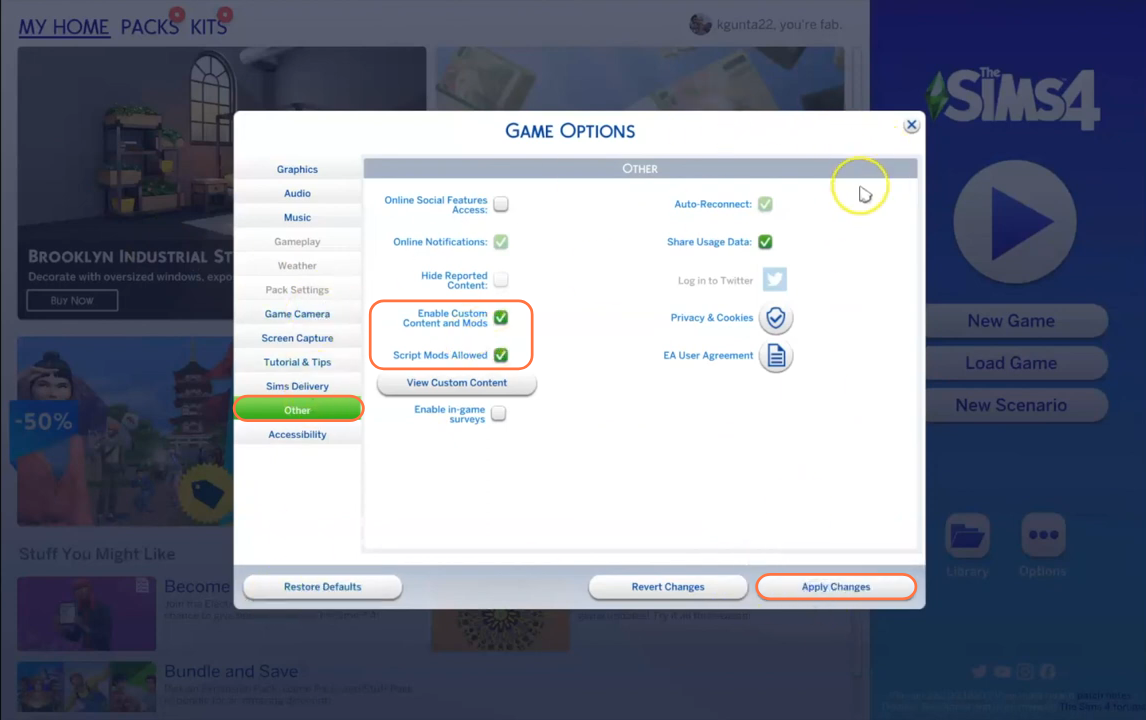
Launch the game and navigate to the main menu. Click on the “Options” tab and then select “Game Options“. Within this window, proceed to the “Other” tab. Here, you’ll find the options labelled “Enable Custom Content and Mods” and “Script Mods Allowed”. Ensure that the checkboxes beside these options are selected.
To implement your changes, click the “Apply Changes” button situated at the bottom right corner of the screen.
Step 9: Disable Auto Updates for Origin or EA App
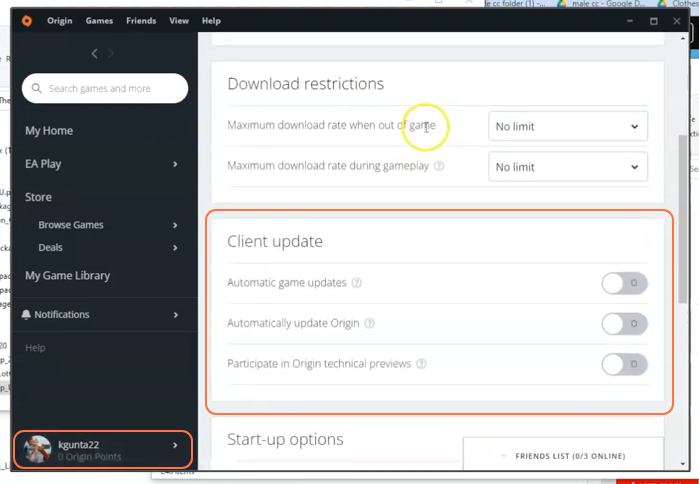
If you are using any of these Apps (Origin or EA), it is recommended to disable auto updates for both the app and the game to prevent potential issues with your mods. Launch the Origin app, hover over your username, and select the “Application Settings” option. Scroll down to the “Client Update” section and disable all the toggle buttons for automatic updates.
Disabling auto updates ensures that your mods folder won’t be affected when an update is available for the app or the Sims 4 game. If an update is released, first take out your mods folder from the Sims 4 directory to a save place, update the app or game, and then reinsert the mod folder to maintain the functionality of your mods.
Step 10: Test Mods Individually & Resolve Conflicts
It’s a good idea to test each new mod individually to make sure it doesn’t cause any conflicts or issues with others. This way, if you encounter problems, you’ll know which mod is causing them. It’s important to read the documentation provided by the mod creators and follow any instructions for resolving conflicts.
Step 11: Update your Mods
As the game receives updates, mods might need updates too otherwise they won’t work at all. So keep checking the mod creators’ pages regularly for updates to ensure compatibility with the latest game version.