ADVANCED XRAY MOD enables X RAY to help players find precious metals and ores easily. It makes mining much faster by highlighting ores and saving in-game time.
Steps to Install ADVANCED XRAY MOD in Minecraft 1.16.4:
-
Go to the Forge website and download Minecraft Forge 1.16.4:
Forge 1.16.4

-
Download the Advanced XRay Java file:

-
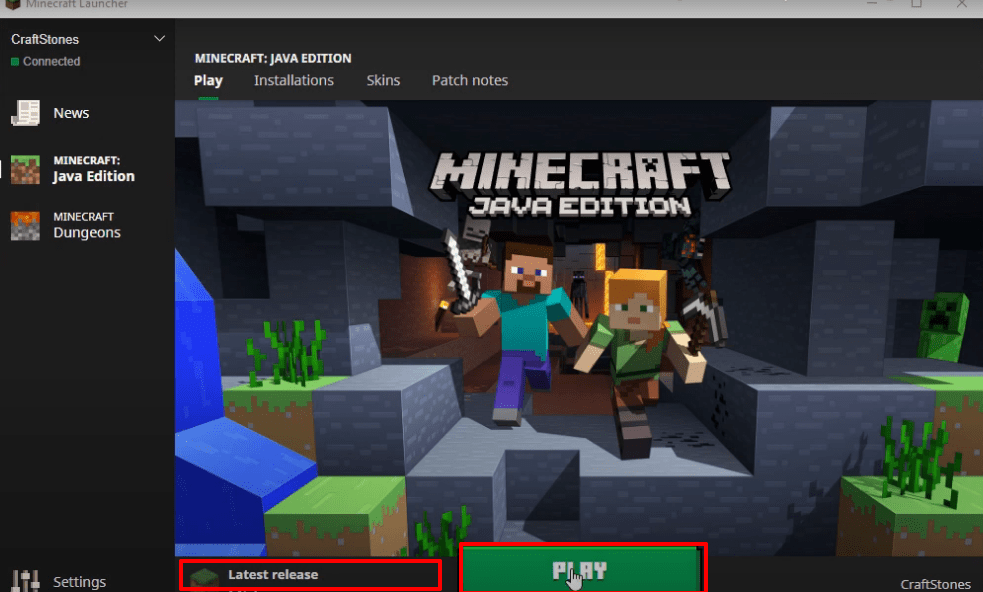
Launch Minecraft, select the latest release, and click Play.
-
Verify Minecraft is installed correctly and click Quit Game.

-
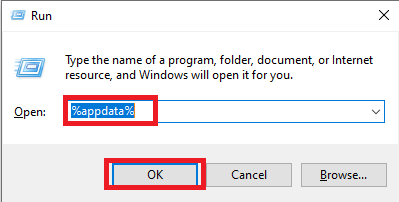
Press Windows+R, type
%appdata%, and press Enter.
-
Navigate to
appdata\roaming\.minecraft\versions.

-
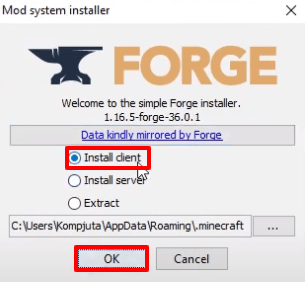
Double-click the Forge installer, select Install, and click OK.
-
Run Minecraft, select Forge, and click Play.

-
Click on Mods and verify the installation.

-
Open the .minecraft\mods folder and paste the Advanced XRay mod file.

-
Launch Minecraft with Forge, click Mods, and verify Advanced XRay appears.

-
Click on Singleplayer, create a new world, and adjust game settings:
- Game Mode: Survival
- Difficulty: Peaceful
- Allow Cheats: On
- Bonus Chest: On

-
Go to Options → Controls, find the XRay feature keys, set them according to your preference, and press Done.

-
Toggle XRay in-game to see ores highlighted.

-
Optionally, switch to Creative mode to explore faster and test the XRay feature.

-
Apply the mod settings and enjoy mining with Advanced XRay.
