This guide will provide you with the best in-game settings for Ghostrunner 2.
DirectX 11 vs 12
In this section, we will take you through the steps to get the best in-game settings for Ghostrunner 2 using DirectX 11 vs 12.
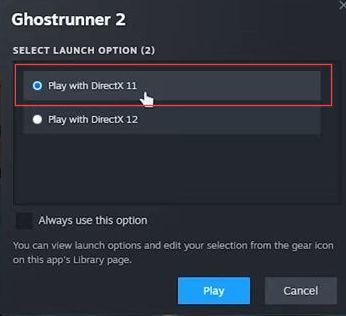
- Start the game, and you’ll be presented with the choice between DirectX 11 and DirectX 12 for gameplay.
- Select DirectX 11, to begin with, and customize your preferred settings and configurations. Once you’re done, switch over to DirectX 12 and compare the performance between the two modes to determine which one provides better performance or visuals for your setup.
It can vary between systems, so trying both modes will help you identify which one suits your preferences and system performance.
Display Optimization
This section describes how to adjust the display optimization.
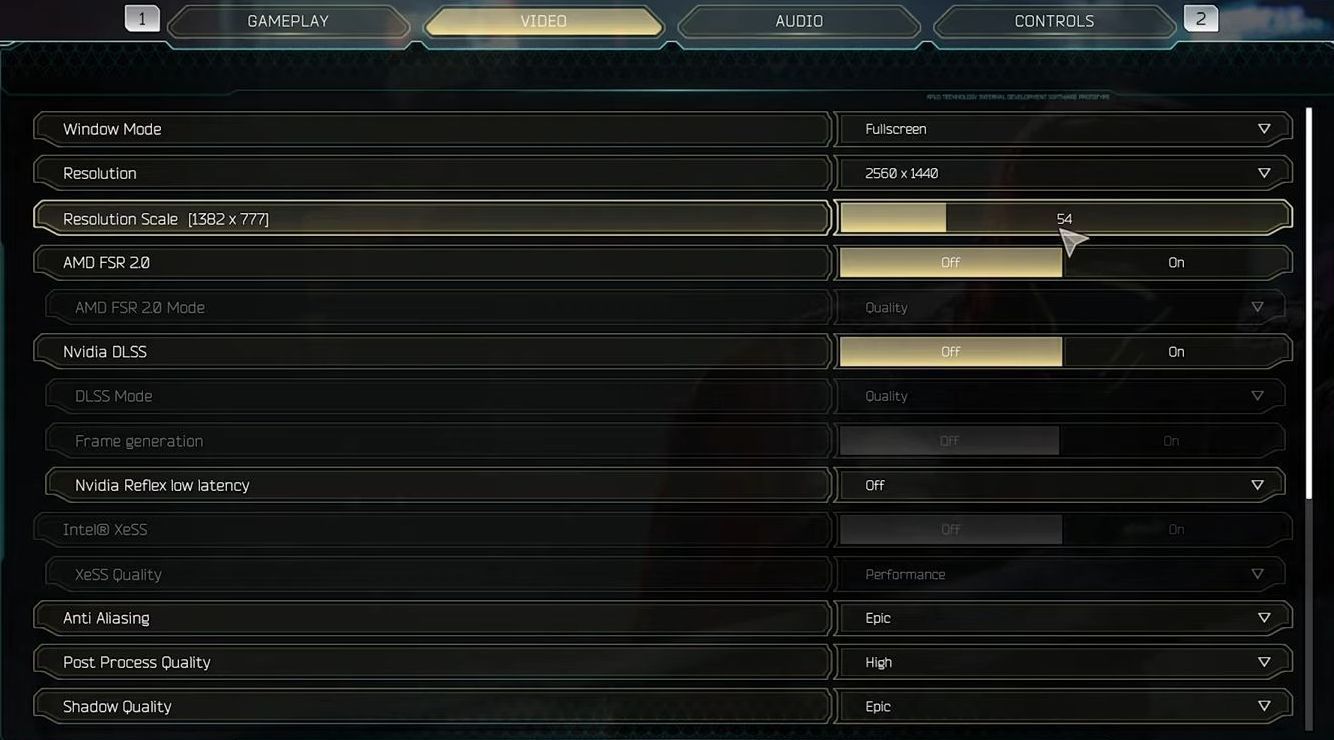
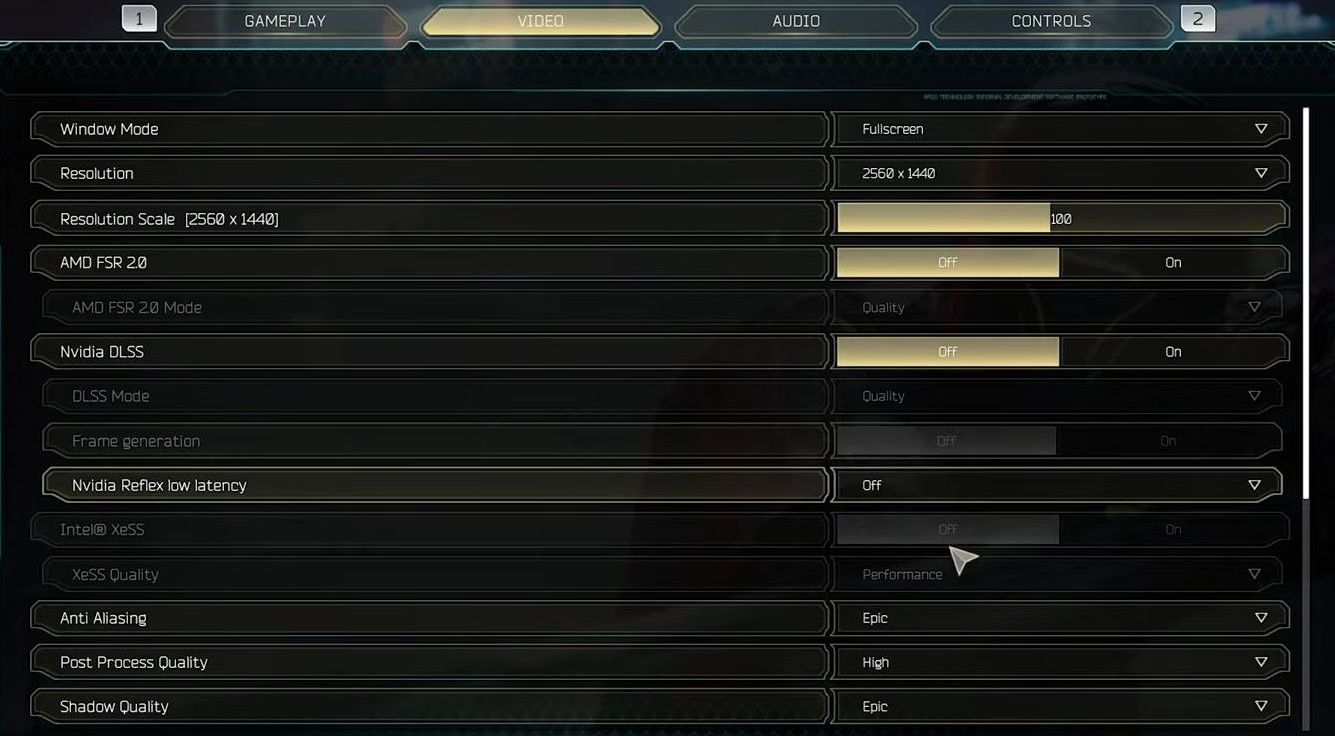
- Start the game in DirectX 11 mode, navigate to the main menu, and access the Settings option. Access the Video tab within the settings menu, and ensure you’ve chosen the Full-Screen mode for the best and most stable performance.
- Set your resolution to match your display. If you have a 2K display, choose 2K resolution or 1080p for Full HD, 4K for Ultra HD, etc.
This ensures that the game is rendered at the correct resolution and prevents unnecessarily blurry or excessively high pixel rendering. - Optionally, adjust the resolution scale to enhance performance. Lowering the resolution scale reduces the rendered resolution while maintaining a decent visual quality, providing a performance boost if needed.
DLSS, FSR, XESS (Upscalers)
This section explains how to get the best in-game performance by adjusting DLSS, FSR, and XESS (Upscalers).
- If available, utilize advanced upscaling technologies like AMD FSR, DLSS, or XSS, which enhance performance by rendering the game at a lower resolution and using AI-based upscaling to maintain visual quality.
- Adjust the upscaling settings to balance performance and visual quality.
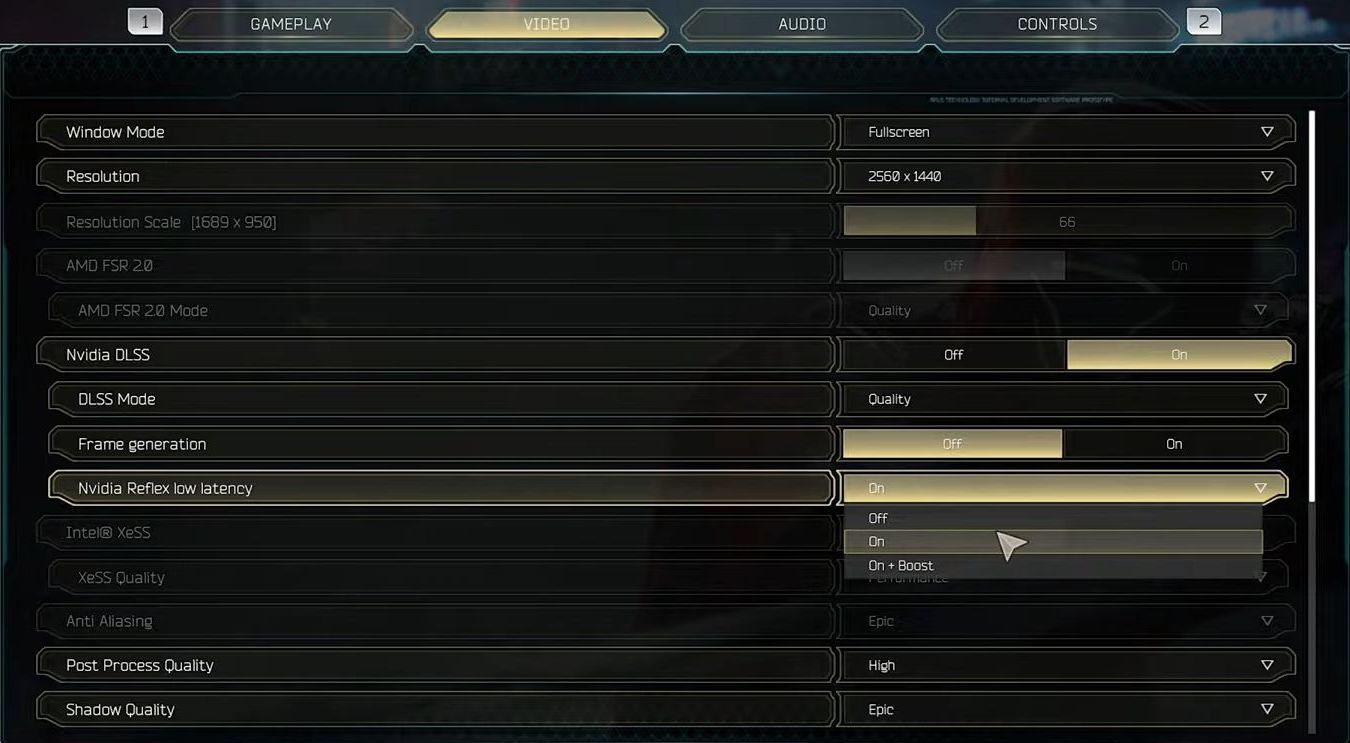
DLSS, settings like Quality, Balanced, and Performance determine the level of rendering and upscaling performed by AI. Quality renders at a lower resolution e.g., 66%, and uses AI to upscale it for better performance with minimal visual compromise. Performance mode further reduces rendering resolution but might introduce noticeable graphic artifacts. - Begin with the Quality option and adjust gradually based on your system’s performance, moving towards Performance only if necessary. For medium-end systems, Balanced might be a reasonable setting.
Frame Generation & Low Latency
This section will take you through the steps to adjust the frame generation and low latency.
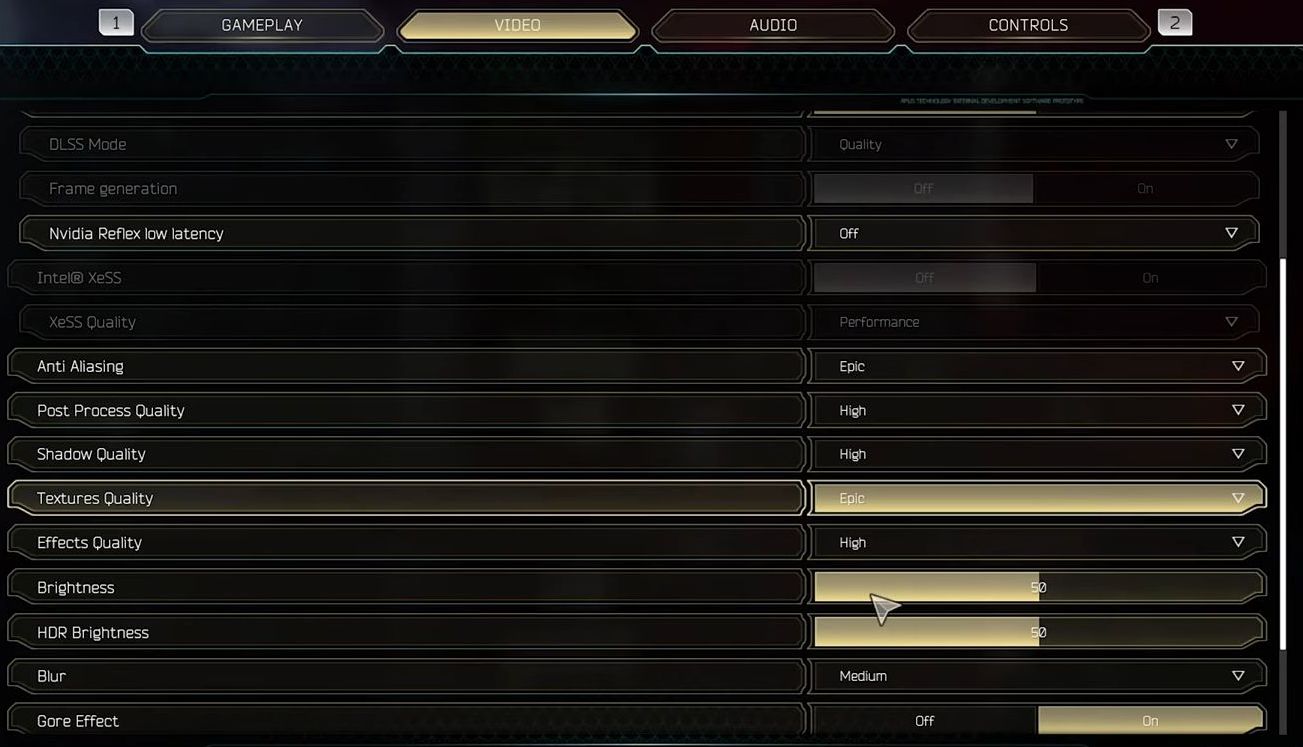
- FSR 2, XSS, and DLSS have quality settings. Adjust these settings according to your system’s capabilities and balance between performance and visual quality.
- For DLSS users with an RTX 40 series GPU, there’s a feature called Frame Generation.
This feature interpolates additional frames between the actual frames, creating a smoother visual transition. It’s especially useful for enhancing visual smoothness. - Nvidia Reflex Low Latency works when Frame Generation is turned off. Enabling this feature should noticeably decrease input delay, particularly for users with CPU-bound systems.
- For additional performance and smoothness, select On Plus Boost, particularly effective if you have a powerful CPU and GPU combination.
Graphics Optimization for Ghostrunner 2
This section describes how to get the best in-game performance by adjusting graphics optimization.
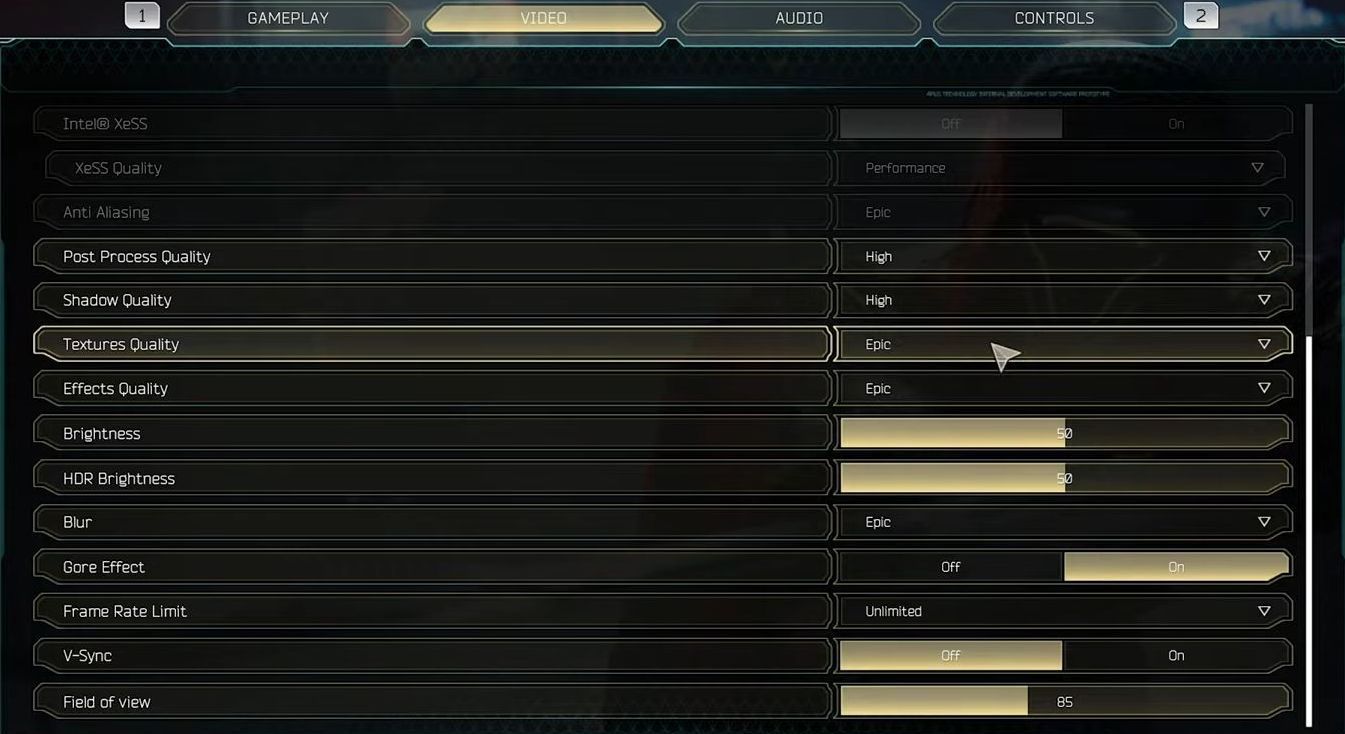
- If you’re using an upscaling feature like FSR, DLSS, or XSS, the anti-aliasing setting will typically be disabled. If you’re playing at Native resolution, you need to keep anti-aliasing at a lower level.
- There is minimal visual and performance difference between Post-processing settings. It’s safe to keep Post-processing too High for smoother visuals.
The higher the Shadow Quality setting, the more FPS will be sacrificed. - Lower settings like Medium and Off can be chosen for greater performance at the expense of shadow quality, with Off resulting in noticeably less realistic shadows.
- The texture quality setting depends on the amount of VRAM your system has. For 4K gaming on a powerful graphics card, choose Epic.
If you select a setting too high or too low for your VRAM, it can impact performance or visual quality adversely.
Fix Missing Reflections (Effects Quality)
This section explains how to fix the missing reflections (effects quality).
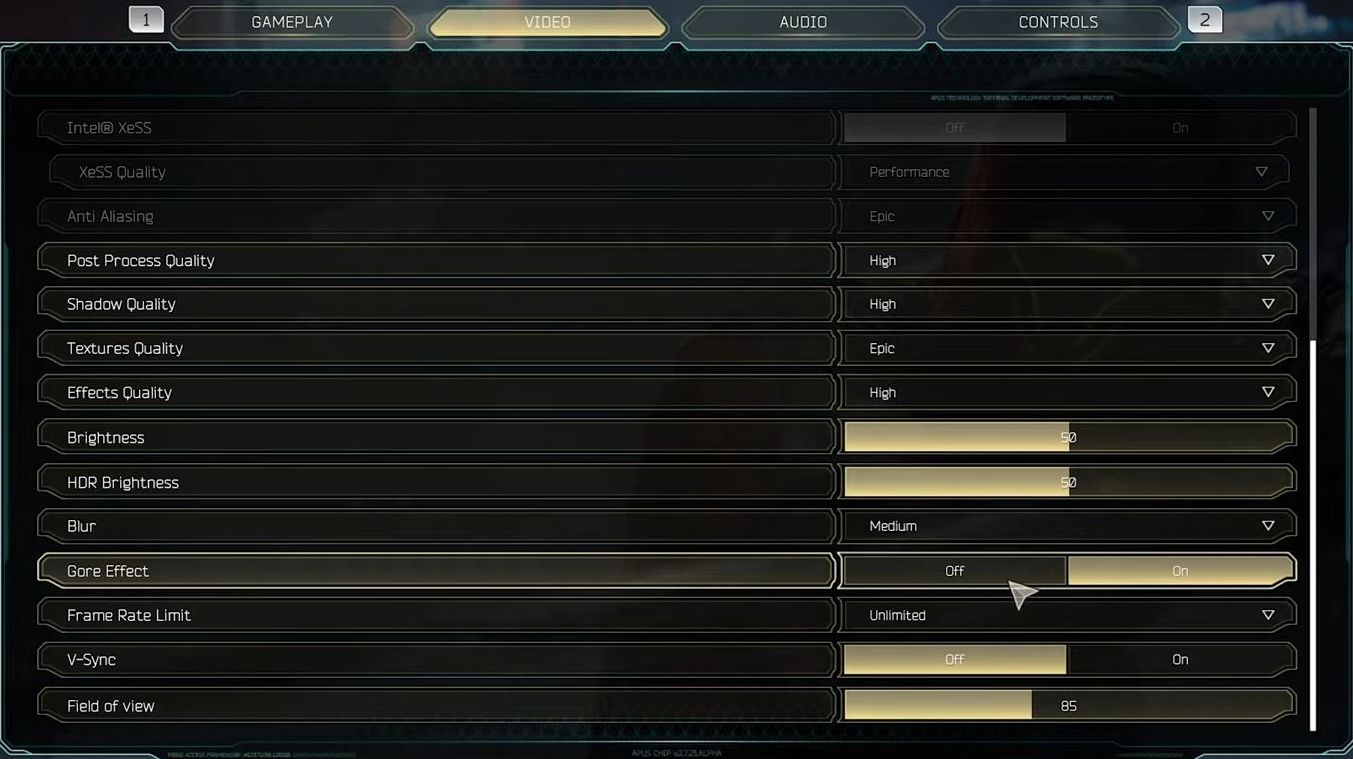
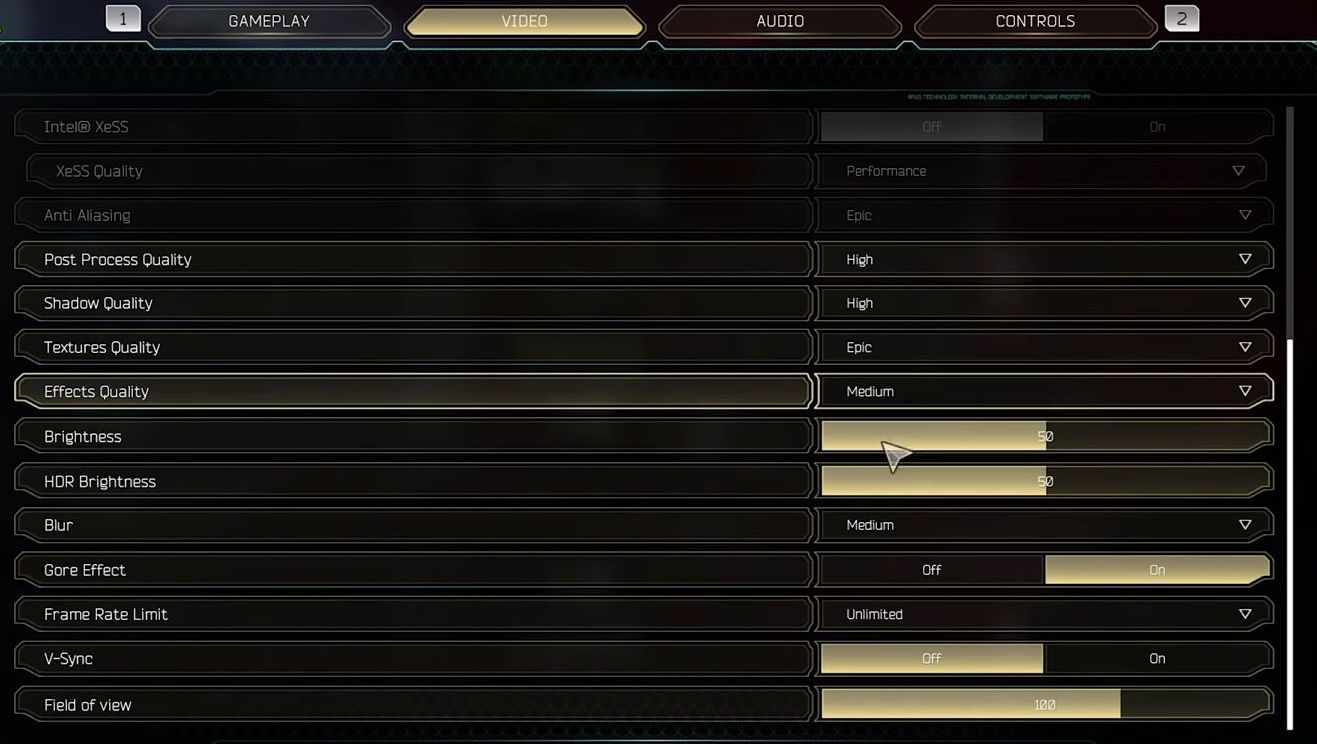
- Lowering Effects Quality setting between Low and Medium leads to around a 5% difference. Screen Space Reflections play a vital role in making objects shine and reflect the environment around them. The optimal setting would be High for the best visual experience.
- However, if you require more performance, lower settings can be chosen, but be aware that it significantly affects the overall look and feel of the game.
- Brightness and HDR Brightness settings are highly subjective and depend on individual preferences. Adjust brightness to your liking based on your monitor’s capabilities and HDR settings if in use. Motion blur can add a sense of speed and fluidity to a fast-paced game. However, if you experience motion sickness or find the visual effects disorienting, it’s advisable to turn it off.
- The choice here significantly impacts your visual experience, and keeping it in a medium setting might offer a good balance between visual quality and clarity. The Gore Effect setting doesn’t usually affect FPS unless there’s visible gore present.
This setting is based on personal preference and can be adjusted to suit individual gaming preferences.
Frame limit
This section describes how to adjust the frame limit to get the best performance.
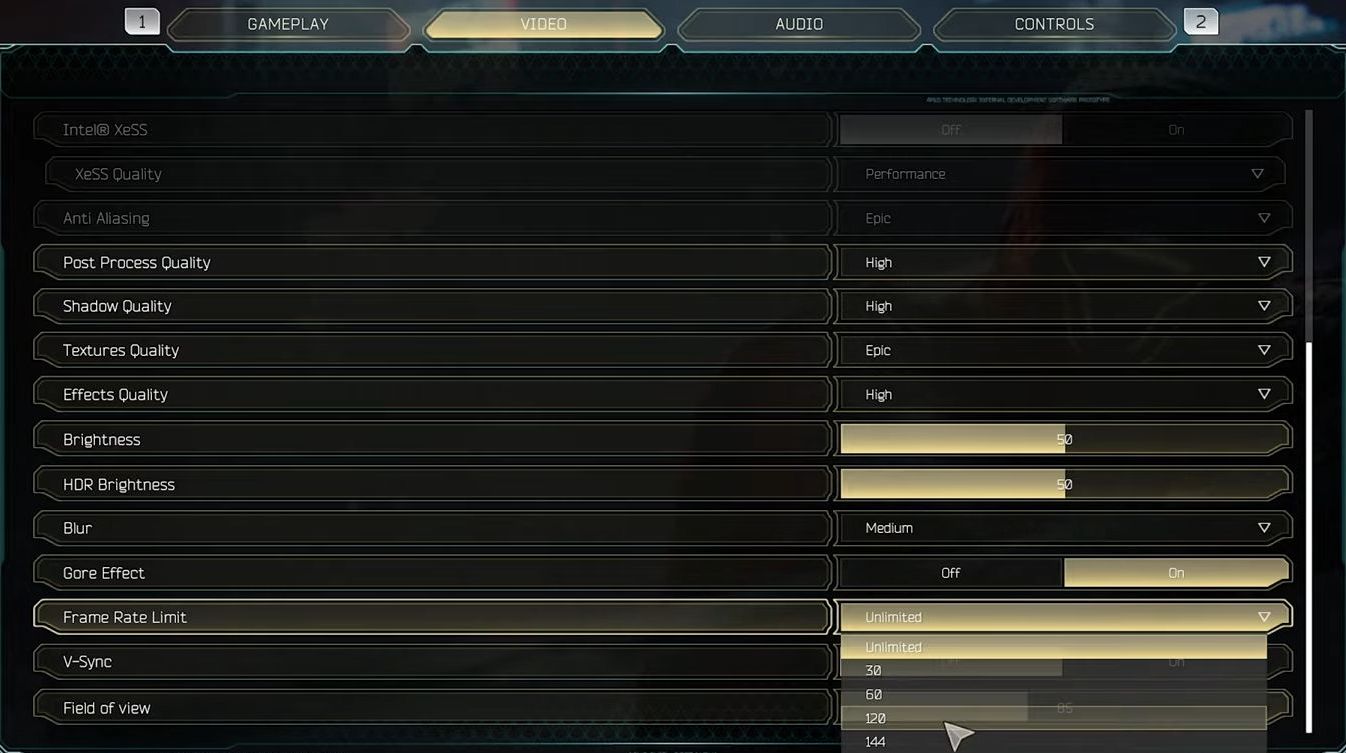
- Set the frame rate limit to Unlimited unless you’re streaming or recording gameplay and your recording software struggles to handle high FPS. Modify the FPS slightly lower than what you’re normally getting.
- Keep V-Sync turned off unless you’re experiencing screen tearing between the top and bottom halves of your monitor.
Turning V-Sync on can eliminate this tearing effect. - Adjust the FOV to your personal preference. While it technically affects FPS, it has a more substantial impact on your overall gaming experience.
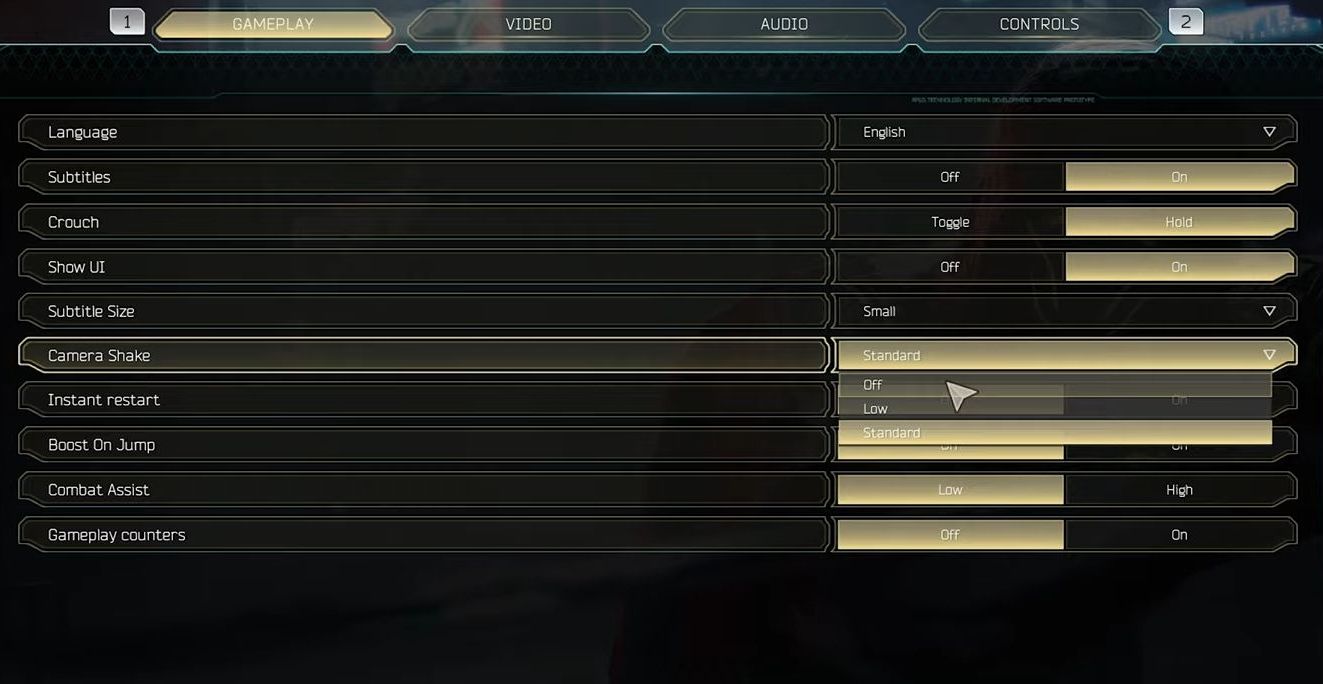
- In the Gameplay settings, locate the Camera Shake option. Turn both options off to enhance your gaming experience.
- If you prefer a slight effect, set it to Low, but leaving these off works fine as well.
Once you’ve made these adjustments, you’re set to enjoy the game according to your preferences.
FPS Overlay
This section explains how to get the best performance by adjusting the FPS Overlay.
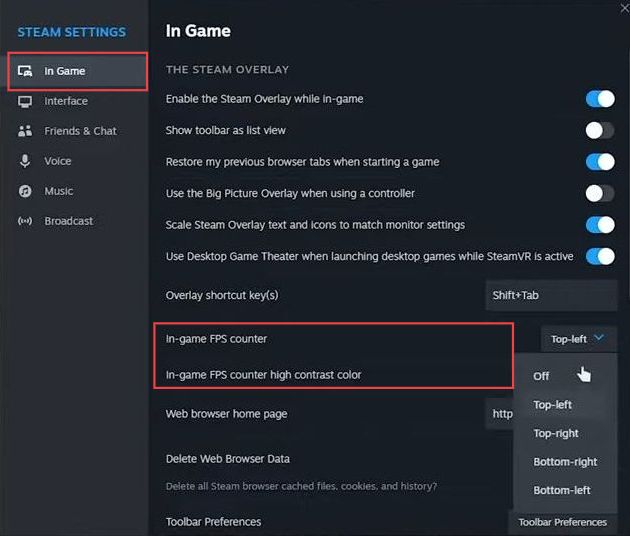
- If you’re using Steam, open the game and press Shift + Tab. Access settings, choose In-Game, and look for the In-Game FPS counter option. Set it to any option other than Off.
- You can also enable High Contrast Color to make the counter easily visible.
This will provide a simple FPS counter in the top left corner of your screen. - Install and run MSI Afterburner and Rivatuner Statistics Server. These tools offer a more detailed overlay that includes additional performance metrics.
They allow you to see more information about your system’s performance while playing the game.
Effects Quality Benchmark/Reflections
This section will take you through the steps to adjust the effects of quality benchmarks/reflections.
- Inside the game, open the settings and navigate to the Video section. Locate the setting labeled Effects Quality and modify it from the current level to a lower setting, such as the Medium option.
- After applying the adjustment, take note of the changes in the in-game environment.
- You’ll notice alterations in visual aspects, especially those related to reflections, lighting effects, or other visual enhancements. While observing the changes in the scene, keep an eye on the FPS counter.
Note how the adjustment impacts the performance. - Even with the visual changes, check if the FPS remains consistent or experiences any notable increase or decrease. Evaluate the trade-off between visual quality and performance.
- Determine whether the decrease in visual effects improves performance significantly or remains unchanged despite the adjustment.
This comparison can help decide the best settings for your gameplay experience based on your hardware capabilities and visual preferences.
Optimized vs Ultra FPS Benchmark
In this section, we will take you through the steps of comparing the optimized and ultra FPS benchmarks.
- Go to the game’s settings, and apply the optimized settings for your system to strike a balance between performance and visual quality. You can adjust a 2K resolution and an Nvidia graphics card.
- While in the game, take note of the FPS counter to monitor the performance.
This counter will show you how well your system is handling the game with the optimized settings. - If your system is still struggling with performance, consider disabling upscaling, which can be applied to render at a lower resolution and upscale using AI magic.
Observe how this impacts FPS and the visual quality. - Experiment with the quality settings, moving them to the highest levels to assess the impact on performance. Note any decrease in FPS as the visual quality increases.
- If you’re still encountering performance issues, consider lowering your display resolution. For instance, reduce the resolution from 2K to 1080p or even lower e.g., 1600×900 to achieve smoother performance.
After making these adjustments, evaluate the game’s performance on your system.
FSR vs DLSS
This section describes how to get the best in-game settings by comparing the FSR and DLSS.
- Access the game settings to enable either FSR or DLSS for enhanced performance. Enabling FSR should visibly boost the FPS in the game, potentially reaching around 160 to 170 FPS.
The visual experience will be slightly altered compared to native rendering or other upscaling options. - Switching to DLSS at the quality setting, you’ll notice a similar performance improvement with a different visual interpretation. Analyze details in the distance, such as fans on the wall, lighting effects, and flashing elements, to assess the changes between FSR and DLSS.
- Lowering the settings to balanced and then performance will offer increased performance and a slight visual quality decrease. The game might render at a lower resolution, maintaining smoother performance.
- When selecting the ultra-performance setting with DLSS, the game renders at a significantly lower resolution, possibly around 720p.
This option provides a substantial performance boost but might affect the visual quality, especially on higher-resolution displays. - Be aware that the impact of these settings might differ based on your monitor’s resolution. Ultra performance may look a bit unusual, especially on higher-resolution displays.