In this guide, you will find the best Season 9 Apex Legends Nintendo Switch Settings Joy Con+PRO settings. Follow the simple steps to make your gameplay faster with these settings.
Step 1
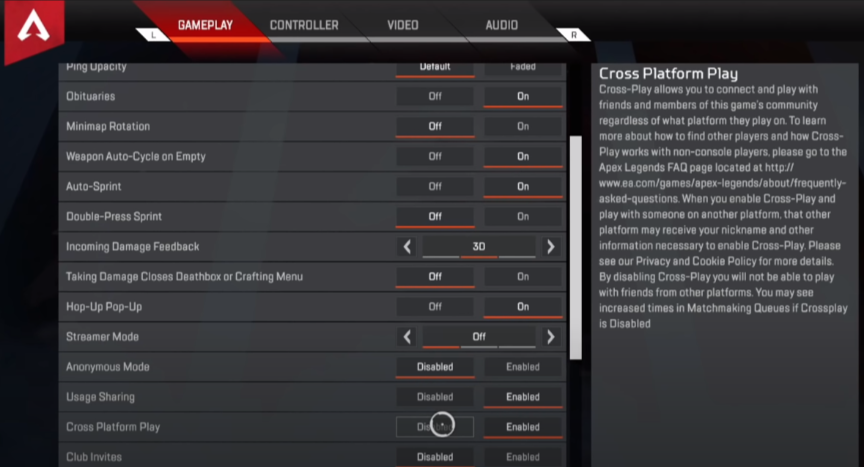
First, you need to open the game settings and tap on the gameplay settings. Scroll down and navigate to Cross-Platform Play; you have to disable this option because it will put you in the player’s lobby, where you will play with Playstation and Xbox players only, as shown in the image below.
Step 2
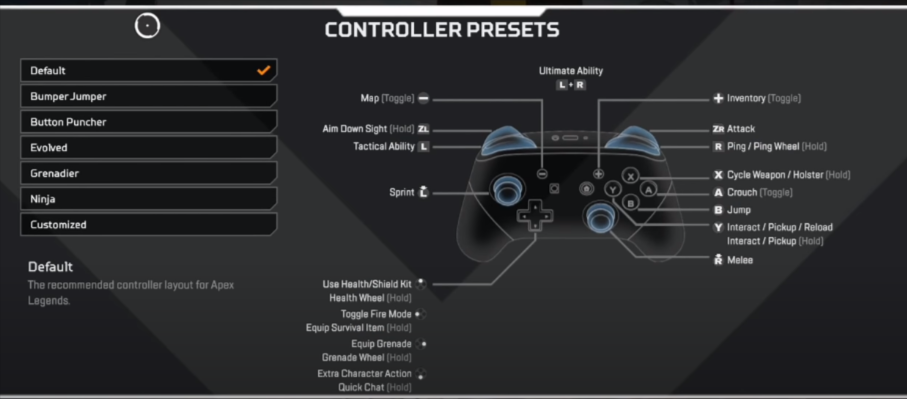
After that, tap on the Controller settings and go to the Button Layout option. There, you can select different formats of controller presets.
Step 3
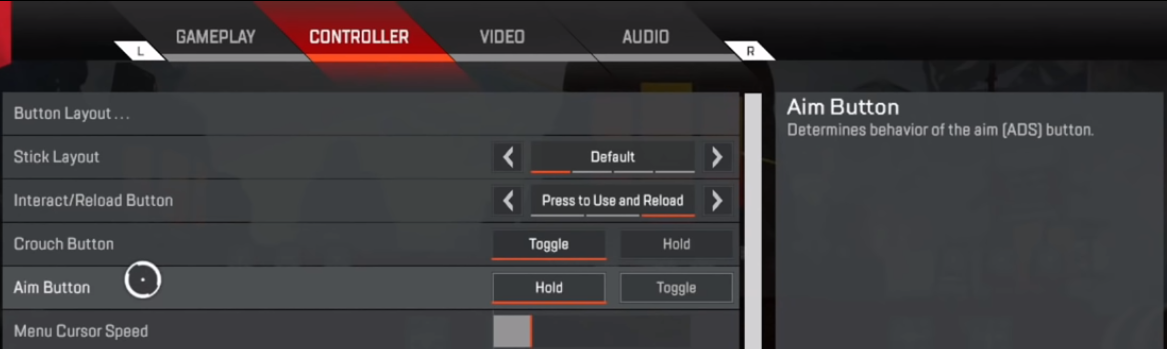
After selecting it, you will need to head back and set the stick layout as default. Then select the “press to use and reload” option for the Interact/Reload button. For the crouch button, you will need to select the Toggle option. For the Aim button, you have to select the Hold option. You have to set the menu cursor speed higher because it will allow you to go through loot boxes quickly after killing the enemy.
Step 4
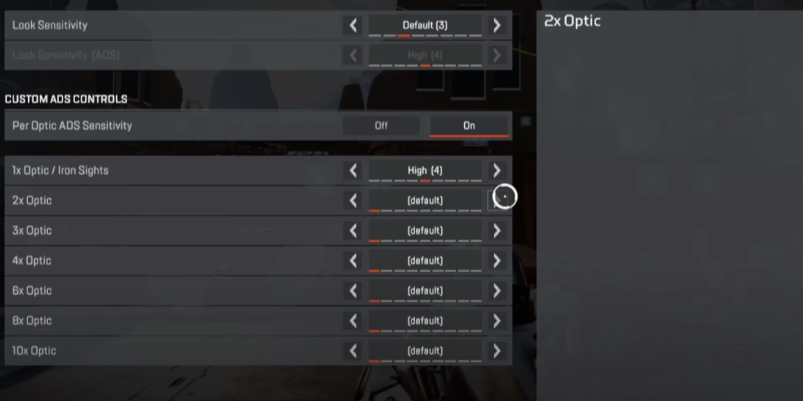
The next thing you will need to do is go to the “Movement and aiming” section and select “look sensitivity” to default 3. When you feel this sensitivity easily, you can change it to the next one. You have to set look sensitivity (ADS) to high four, which will help you in close-up engagements, but if you are using a snipper or are playing from long range, you have to set it lower because it will help you line up your shot.
And if you want to get detailed into it, you can go ahead, go into the “Per Optic” Settings and turn on the “Optic ADS sensitivity,” and for each site, you can change it. If you play aggressively, the one and two times should be very high, and then the 4x optic, 6x optic, 8x optic, and 10x optic should be on a lower sensitivity.
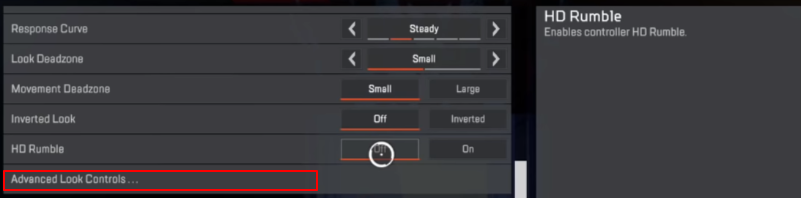
You will need to set the Response Curve to Steady because it will determine your input view in the game. There will be five different views: Classic, Steady, Fine aim, high velocity, and linear. You need to select small for both the look dead zone and movement dead zone.
Step 5
If you are playing on the joy-cons, you have to select large for both the Look Deadzone and Movement Deadzone options, as shown in the image below.

Step 6
After that, you have to turn off the Inverted look and HD rumble options because it is good for story mode games but not for shooting games. Now you need to tap on the Advanced look controls.
Step 7
First, you will need to turn on the custom Look controls and adjust the Deadzone to number 2. After that, go to the Outer Threshold and change it to 3 bar high and Response Cure to fourteen, Select 15 in Yaw Speed which will help you turn the view from left to right quickly. You need to set four less than the Yaw Speed that you set already for the pitch speed, so if you change the Yaw speed, you have to make sure to set the pitch speed four less.
Step 8
After that, set the turning Extra Yaw to 17 ticks to the right, and for the Turning extra pitch, you need to set it to 13. You will need to set the turning ramp-up time to 1, and the turning ramp-up delay will be set to 0, as shown in the image below.
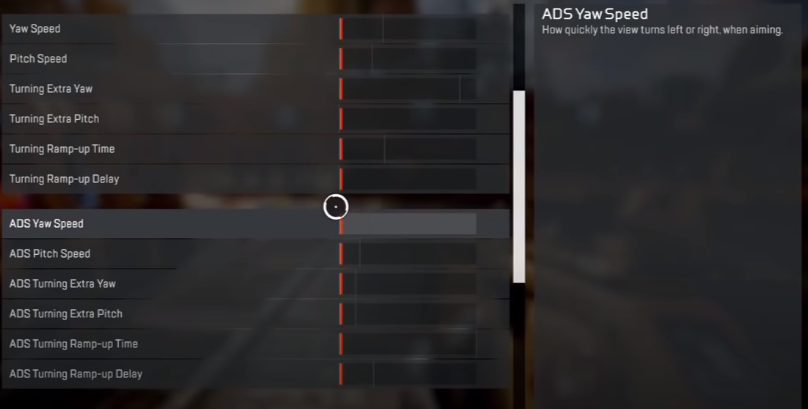
You have to set the ADS Yaw speed to 15 and select four less than ADS taw speed in ADS pitch speed. Set the ADS turning extra yaw to 17, select 13 for the ADS Turning Extra Pitch option, set ADS turning ramp-up time to 1 and ADS turning Ramp-up delay to 0.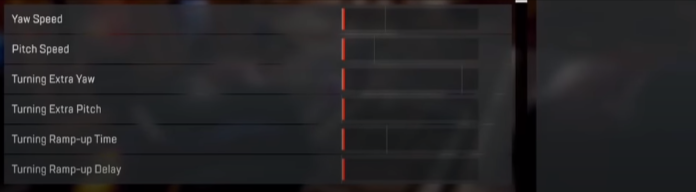
Step 9
Next, you have to tap on the Gameplay settings tab from the top of the menu options, and you will see a lot of gameplay settings options there. You first have to select Compact in Interact prompt style option and turn off the button hints option because it will be very confusing when it tells you to hit the X button from the controller, which is different from its action. You can turn it on if you are a switch player, but you have to turn it off for other consoles.

Set the Crosshair damage Feedback to X w/ Shield icon because it will show you X when you hit them and indicate an icon knowing their shield level. Now you need to set the damage numbers to stacking, showing you all combined numbers of recent damage instead of floating options.
Step 10
And if you select the floating option, it will show you one number for each damage event. Select the Ping opacity to default; if you select the faded option for ping opacity, you cannot see the ping on your game screen.
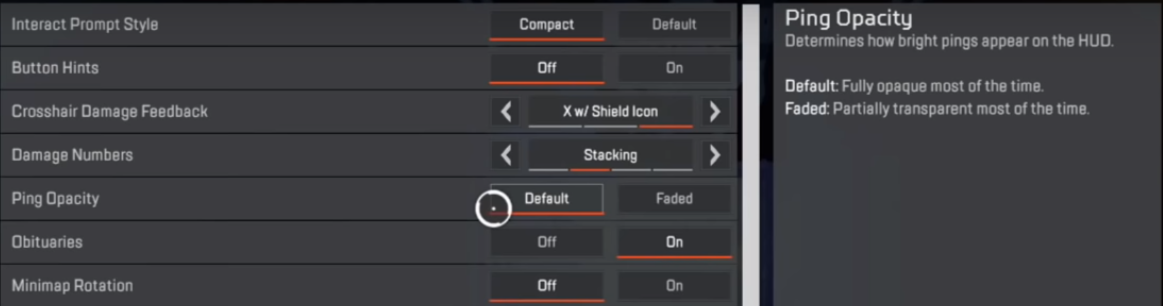
For the Obituaries, you will need to select the On option because when only three teams are left in the game, and you are one of them, and you are not close enough to hear the gunfire, then with this option, you will see when other team players are getting knocked in the top right side of the map. After that, turn off the minimap rotation because it will rotate depending on your direction.
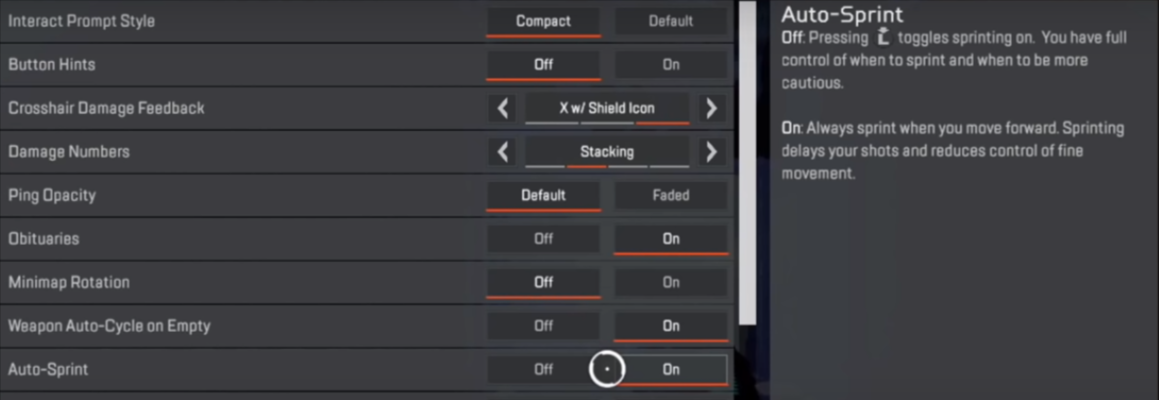
Step 11
In the next option, Weapon, the auto cycle is empty. You will need to turn it on because it will automatically switch the gun to the next one when you run out of ammo on a certain gun. Now turn on the Auto-sprint option which will help you in quicker actions in the game, as shown in the image below.
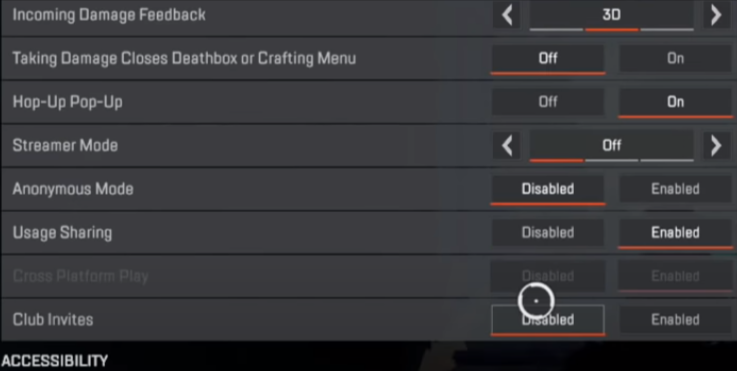
You need to set incoming damage Feedback to 3D because when you get shot, or someone throws a grenade at you, it will show you an arrow to let you know where the grenade or shot is coming from. So for the next option Taking damage closes Deathbox or crafting menu, you need to turn it off because when you get shot in the Apex legend game, your screen will flash, and your health will move on the game screen, as shown in the image below.
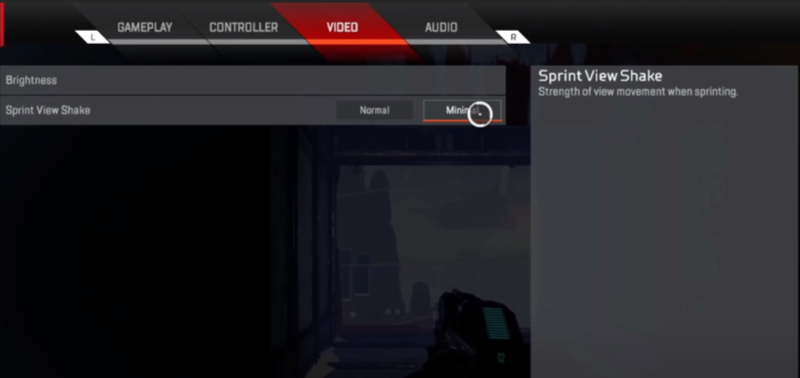
Step 12
Now you need to tap over to the video settings, and there you have to select Minimal in the sprint View Shake option because when you run in the game, your screen will shake, and you will not get the best frames per second as shown in the image below.
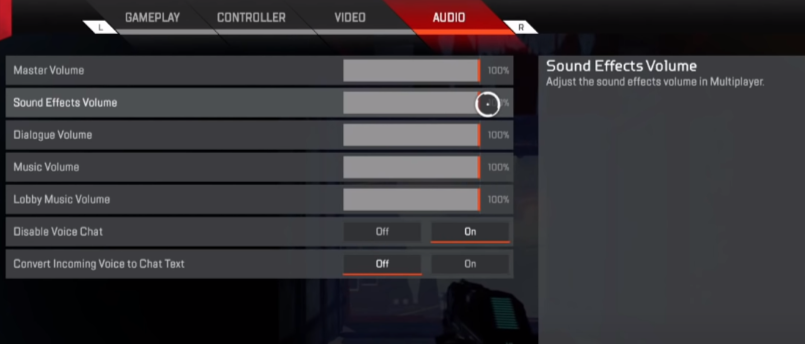
Step 13
Now tap over to the Audio settings, and there you have to adjust the volume settings with your ower personal preferences, as shown in the image below.