The Better Lighting texture pack improves the overall lighting system of the game. It changes the values in the game’s file and brings the best lighting out of the system. The lighting system will look realistic with the Better Lighting texture pack
Follow the following steps to install Better Lighting Texturepack in Minecraft:
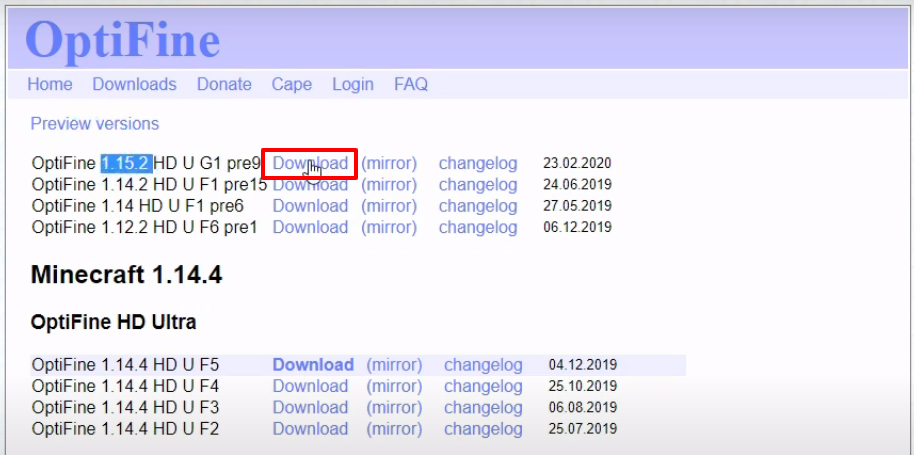
- Open the link below and then download the OptiFine program
https://optifine.net/downloads
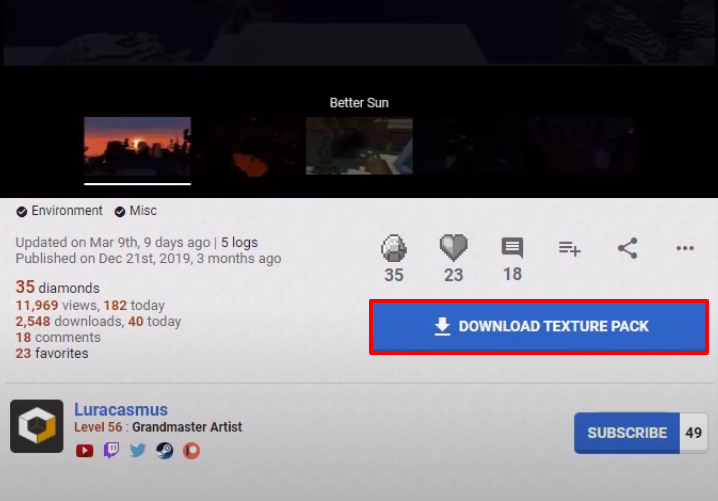
- Open up the following link and download the mod file.
https://www.planetminecraft.com/texture-pack/better-lighting/
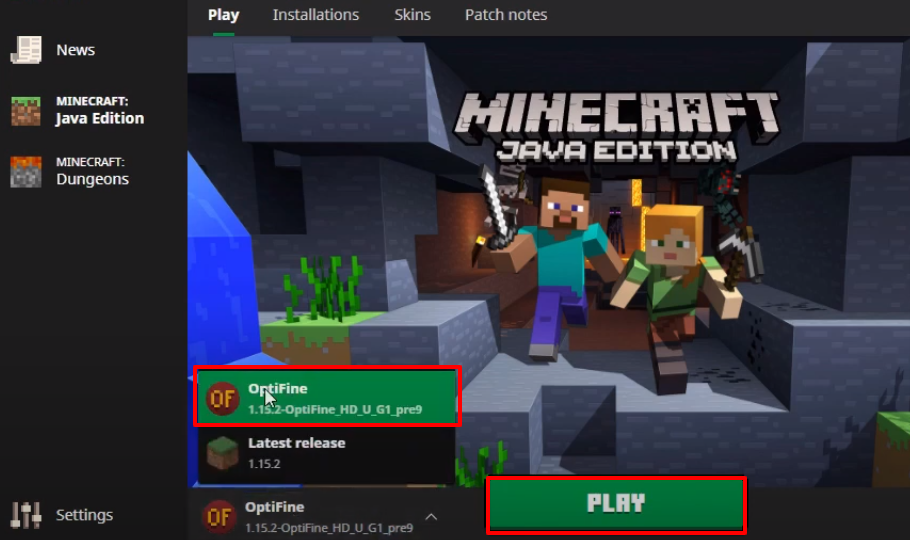
- Launch Minecraft, select the latest release and then click on PLAY.

- Check for the version and then click on Quit Game.
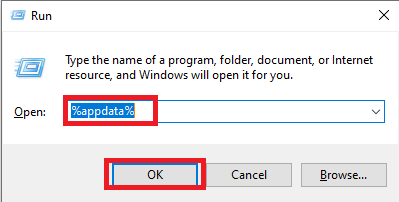
- After that, press windows+R to open the run dialog box, type %appdata% here and hit enter.
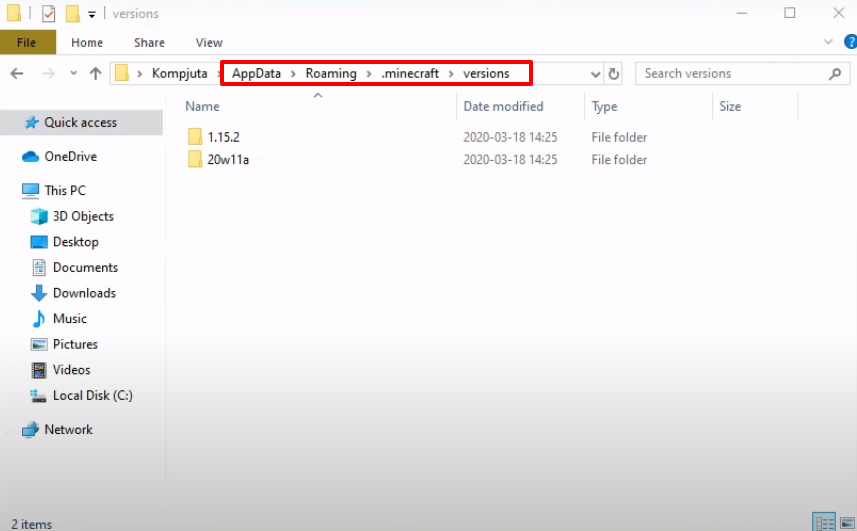
- Follow the path to the versions.
- Click on Install.

- As the installation gets completed, a new folder will be generated in the versions folder.

- Navigate to the resourcepacks and then paste the downloaded mod file in the resourcepacks folder.

- Launch Minecraft, select the OptiFine version and then click on PLAY.
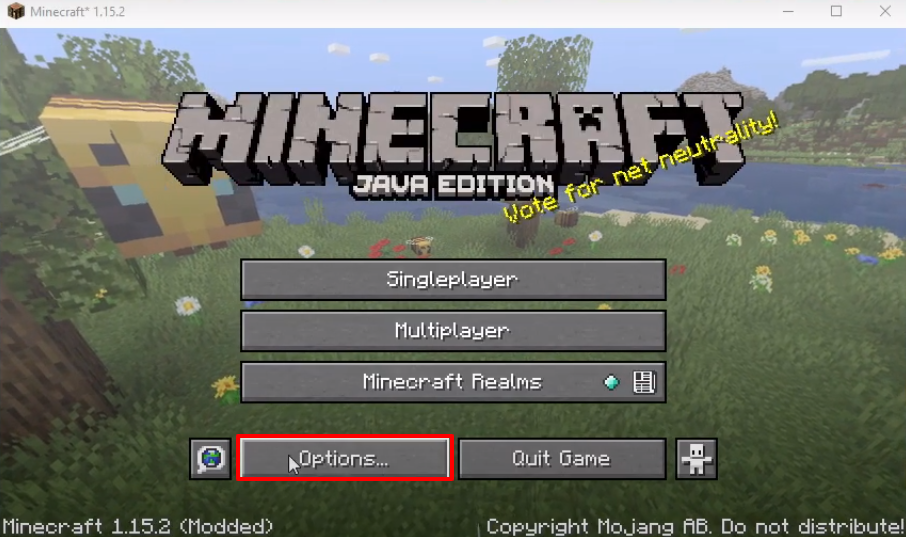
- After that, you will need to click on Options..
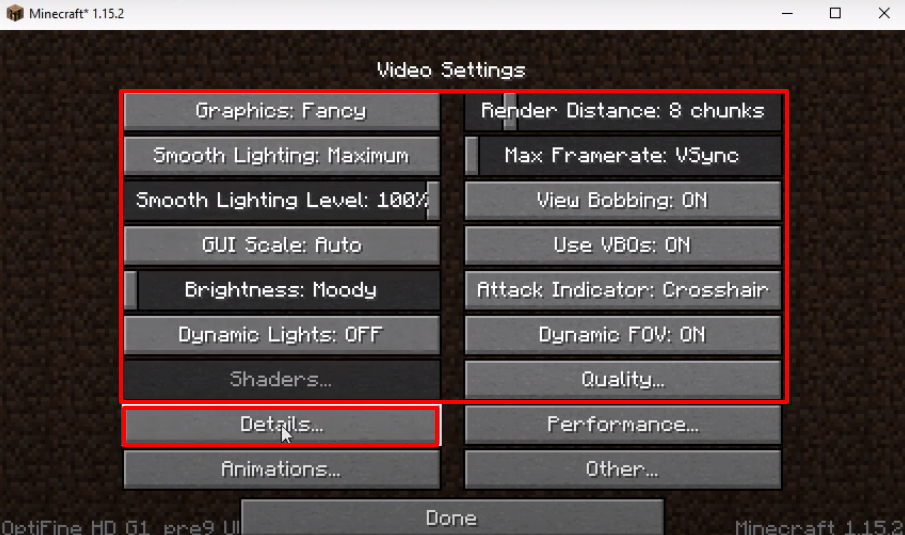
- Click on Video Settings and make some changes as shown in the image below. Then click on Details.
- Make changes as shown in the image below and then click on Done.

- Click on Resource Packs…

- Move the “better-lighting-v6.zip” file under the Selected Resource Packs and then click on Done.

- Explore and enjoy the game now.
