Call of Duty Warzone is still getting errors in its latest update; if you’re getting an error, don’t worry, as there is a way to fix that error. Players have reported different errors like:
There are multiple solutions for the errors mentioned above. Go through the guide and follow step-by-step instructions to counter the errors.
How To FIX DirectX Unrecoverable Error in COD:Warzone?
DirectX Unrecoverable Error mostly occurred due to a problem in your computer.
There are three methods to fix this error; you can go for the next one if one doesn’t work well. Following are the methods to fix the DirectX Unrecoverable Error:
- – D3D11 Command.
- Delete the Players Folder.
- Scan and Repair.
Fix # 01 – D3D11 Command:
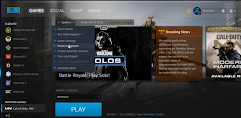
- After launching the Battle.net Launcher, you will need to click on “Options” under the Call of Duty Warzone logo.
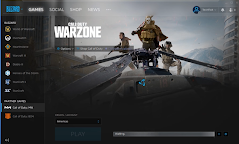
- It will open up a small tab, and you have to find the game settings and click on that.
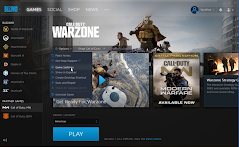
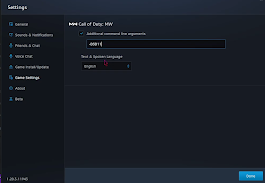
- After that, select the additional command-line arguments in a new popped-up window and type -D3D11. Then press done at the bottom right side.
- Then you have to click on the Play button to launch the game.
- If it didn’t work well, close the launcher and move to the next method.
Fix # 02 – Delete the Players Folder:
There’s one more method to fix the error.
- You will need to open the file explorer, head over to documents, and navigate the Call of Duty Modern Warfare folder.
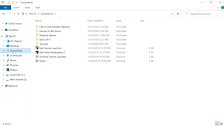
- After that, select the player’s folder, and delete it.
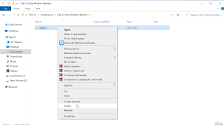
- Now you need to relaunch the game. If this also doesn’t work, you need to try the next method.
Fix # 03 – Scan and Repair:
- You have to lunch the battle.net launcher and click Call of Duty: MW. Then click on the options and navigate to show in explorer.
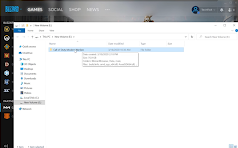
- After that, tap on the Call of Duty Modern Warfare folder and delete all the files except (three) folders.
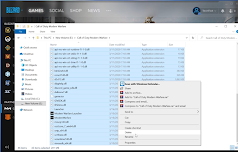
- Now relaunch the battle.net launcher as you close the folder. Click the options and tap on Scan and Repair. You will need to click on Begin scan on the new popped up window.
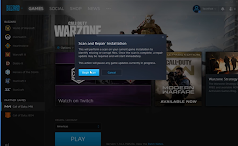
- As you click on the Begin Scan, you have to wait for a while to let it repair. After that, launch the game again and enjoy.
How To FIX Crashes, DEV Errors, Crash on Startup in COD:Warzone?
There are six methods to fix crashes, DEV errors, and crashes on startup. If one doesn’t work well, you can go for the next one.
Following are the methods to overcome the issues at startup.
- Registry Editor.
- -D3D11 Command.
- Delete the Players Folder.
- Driver Installation.
- Run the programs as administrator
- Scan and Repair.
Fix # 01 – Registry Editor:
- At first, you will need to open the Registry Editor by clicking the windows button, then type “reg edit” in the search bar, and click on Yes.
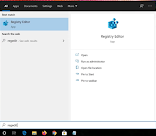
- As the Registry Editor opens up, you have to navigate to the Cryptography by following this directory “HKEY_Local_Machine\Software\Microsoft\Cryptography.”

- After that, right click on machineGUID and tap on Modify. In the newly opened window, you have to type “d1eb246e-6243-4460-a88e-5d4e52b1ef6b” under the value data and click OK. Then you need to restart the computer again in order to run the modified registry key.
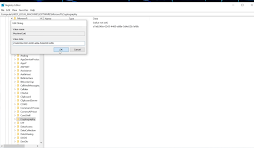
- As it restarts, relaunch the game, and if the incoming issue is not resolved yet, head over to the next method.
Fix # 02 – -D3D11 Command:
This method has been discussed above; click here to look at it.
Fix # 03 – Delete the Players Folder:
We have provided the full details of this method; click here to look at it.
Fix # 04 – Driver Installation:
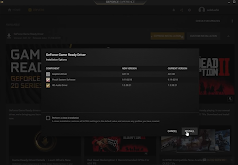
- You have to navigate to the search bar in the taskbar, type GeForce Experience, and hit enter. Then click on Driver.
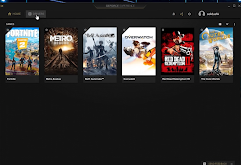
- After that, click on any options you want to install, either Express or Custom installation.
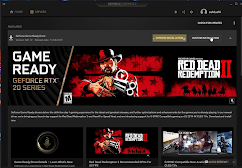
- It will take a while to search for the video card models. Click on install and restart the game; it may fix the error.
Fix # 05 – Run the programs as administrator:
- You have to launch the “Battle.net” and navigate to the “Show in explorer” by clicking on options.
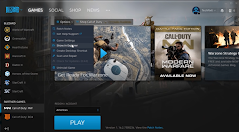
- After that, click on the Call of Duty Modern Warfare folder. Navigate to the Modern Warfare Launcher.exe file, right-click on it and then tap on properties.
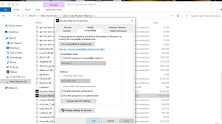
- Next, you will need to navigate to the compatibility tab, check both, i.e., “Run this program as an administrator” and “Disable full screening optimization,” then navigate to the apply button and hit OK.
- Coming to the next step, right-click on the Modern Warfare.exe, navigate to the properties, and head over to the compatibility tab. Check “Run this program as an administrator” and “Disable full screening optimization,” click on Apply, and then OK.
- Close this folder, start the game and go for the next method if it fails again.
Fix # 06 – Scan and Repair:
We have provided the full details of this method; click here to look at it.
How To FIX Error BLZBNTAGT000008A4 in COD:Warzone?
BLZBNTAGT000008A4 error can occur because of overloaded regional servers of the game or ISP’s restrictions. The user configuration of the launcher settings or the network problem can also cause this error.
There are five methods to fix the Warzone Error BLZBNTAGT000008A4. If one method doesn’t work well, you can try the next one.
- Reset Log File.
- Change the Region.
- Change the Internet Properties.
- Network Reset.
- Run the Launcher as Administrator.
Fix # 01 – Reset Log File:
- You have to tap the search bar on the taskbar and type the command prompt. Run it as administrator by clicking the right button of the mouse. As the command prompt opens, you must type “netsh int ip reset C:\resetlog.txt” and hit enter.
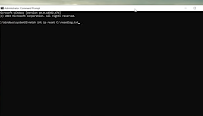
- After that, type “netsh winsock reset” and hit enter. A text line will appear as “successfully reset the winsock catalog.” Now you need to type “ipconfig /flushnds” and hit enter. You have to close the command prompt now, and restart your computer. Play the game, hope, the error will be fixed.
Fix # 02 – Change the Region:
- You will need to open the battle.net launcher, pause the download, and change the game region by clicking the “Region / Account.”
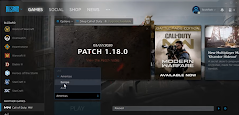
- After changing the region, resume the download, and as it gets completed, you can play the game.
Fix # 03 – Change the Internet Properties:
There’s one more way to fix the error.
- First, you will need to navigate to the Control Panel from the taskbar, and then go to “Network and Internet”.
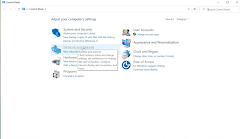
- Then you have to go to the Network and Sharing Center and tap on the Change Adapter Settings.
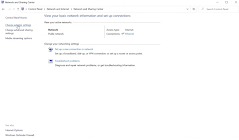
- Right-click on the network adapter and navigate to the properties in the Network Adapter Settings. In Ethernet properties, you have to click on Internet Protocol Version 4 [TVP/IPV4] and navigate to the properties.
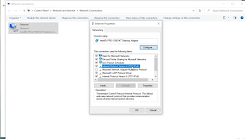
- Now select “Use the following DNS server addresses and type 1.1.1.1 and 1.0.0.1 into “Prefered DNS Server” and “Alternate DNS Server” respectfully, then press OK, and close all tabs.
Fix # 04 – Network Reset:
You can also counter this error by resetting the network.
- Click on the Windows button and navigate to settings, and then tap on “Network and Internet”. Then
- Navigate to the “Network Reset”.
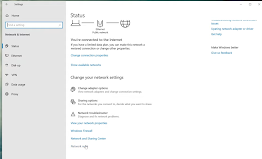
- After that, click on “Reset Now” and press Yes. Now you will need to restart the computer system. As your PC restarts, a window will open on the right side; you must click on Yes and start the game. It will fix the error.
Fix # 05 – Run the Launcher as Administrator:
If the error is not fixed yet, you can use this method.
- You have to right click on the battle.net launcher and navigate to properties. After that, navigate to the Compatibility tab and check “run this program as an administrator”, click on Apply and press OK. Close the tab and play the game again.
How To FIX GPU Not Supported Error In COD:Warzone?
Warzone GPU Not Supported Error can occur because your system’ssystem’s configuration may not be up to the mark or a problem in the GPU settings or GPU driver.
There are two ways to counter the “Warzone GPU Not Supported Error.” If one method doesn’t work well, you can try the next one.
- Alter the graphic settings.
- Driver Installation.
Fix # 01 – Alter the graphic settings:
- You have to click on the windows button and navigate to settings, then tap on systems.
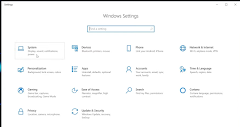
- After that, navigate to Display, scroll down the bar and click on “Graphic Settings”.
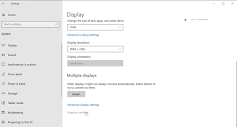
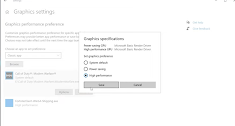
- Select the “Classic app” on Choose an app to set preferences and then browse.
- Locate the folder location, select Call of Duty Modern Warfare.exe and press add.

- Now you will need to click on options.
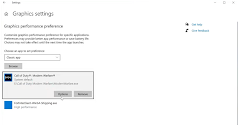
- A new tab with the title “Graphic Specialization” will open; you have to click on High performance, press Save and close the window settings.
- To find the Call of Duty Modern Warfare folder location, launch the battle.net launcher, click on options and navigate to “show in explorer”.
Fix # 02 – Driver Installation:
As this method has been discussed above, click here to jump over the exact location.
How To FIX Dev Error 6328 In COD:Warzone?
Dev Error 6328 is the worst error in Call of Duty: Warzone as it makes the game completely unplayable. There are four methods to fix the “Call of Duty: Warzone Dev Error 6328”. If the first method doesn’t work well, you can try the next one and so on. Following are the fixes to this error:
- Driver Installation.
- D3D11 Command.
- Running programs as an administrator.
- Scan and Repair.
Fix # 01 – Driver Installation:
We have provided the full details of this method, click here to have a look at it.
Fix # 02 – -D3D11 Command:
This method has been discussed above, click here to have a look at it.
Fix # 03 – Running programs as an administrator:
We have provided the full details of this method, click here to have a look at it.
Fix # 04 – Scan and Repair:
This method has been discussed already, click here to have a look at it.
How To FIX Error BLZBNTBGS00000002 In COD:Warzone?
You can fix the Warzone Error BLZBNTBGS00000002 with three methods. If the first method doesn’t work well, you can try the next one. Following are the fixes to Warzone Error BLZBNTBGS00000002:
- Changing Internet Properties.
- Reset Log File.
- Network Reset.
Fix # 01 – Changing Internet Properties:
We have provided the full details of this method, click here to have a look at it.
Fix # 02 – Reset Log File:
This method has been discussed already, click here to have a look at it.
Fix # 03 – Network Reset:
We have provided the full details of this method, click here to have a look at it.
How To FIX Page File Error – Out of memory Error In COD: Warzone?
Page File Error – Out of memory Error mainly occurs because of the problem in the graphics card driver. It is a plain error and easy to fix.
Follow the below step-by-step instructions to fix the “Page File Error – Out of memory Error”.
- You will need to type Control Panel in search bar and hit enter, press F3 to go to the search bar, type system and hit enter. Then you have to navigate to the systems.
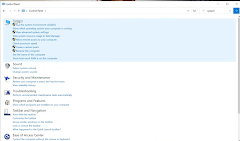
- After that, go to advanced options. Then, click on the advanced tab and press settings under the performance tab.

- In the newly opened tab, you have to navigate to the advanced tab and click on change under the “Virtual Memory”.

- Uncheck “Automatically manage paging file size for all drives”, click on the “No paging file”, and press Set. A small sub-window will pop up; press Yes. After that, you have to press the Apply button and then Ok on all pre-opened tabs.

- After that, close the Control Panel and restart the computer. As it restarts, you have to move on to the game.
How To FIX Dev Error 5573 In COD:Warzone?
Warzone Dev Error 5573 occurs both in PS4 and PC. This error is because you might have selected the wrong weapons or the wrong operator. If you make changes in both, it may fix the error. Following are the two fixes of Warzone Dev Error 5573.
- Modern Warfare weapons.
- Modern Warfare operator.
Fix # 01 – Modern Warfare weapons:
- The first error occurs in your gun loadouts; you may have selected Cold War weapons as your favourite weapon. So, if you change it to modern warfare weapons, it will fix the error.
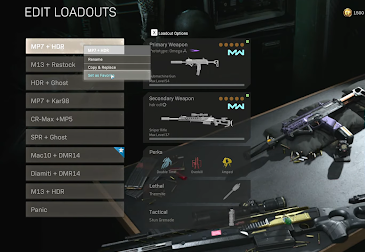
Fix # 02 –
To resolve the second error, you have to select a modern warfare operator instead of a Cold War Operator. Enjoy the game.
How To FIX Warzone Error Code: 4 In COD: Warzone?
Warzone Error Code: 4 is one of the earliest errors in the Call of Duty: Warzone game. The reason behind this error is the previously saved old profile of the player. There are more than one methods to fix the Warzone Error Code: 4; if the first doesn’t work, you can go for the second one. Following are the methods to fix this error.
- Delete the Players Folder.
- Scan and Repair.
- Network Reset.
- Changing Internet Properties.
Fix # 01 – Delete the Players Folder:
We have provided the full details of this method, click here to have a look at it.
Fix # 02 – Scan and Repair:
This method has been discussed already, click here to have a look at it.
Fix # 03 – Network Reset:
We have provided the full details of this method, click here to have a look at it.
Fix # 04 – Changing Internet Properties:
This method has been discussed already, click here to have a look at it.
How To FIX Server Disconnected Error In COD:Warzone?
Warzone Server Disconnected error occurs due to a server or local network problem. Slow internet connection and third-party software interference could also be the reason for this error.
There are two methods to fix this error; if the first one doesn’t work well, go for the second one. Following are the fixes for Warzone Server Disconnected error:
- Reset Log File
- Changing Internet Properties.
Fix # 01 – Reset Log File:
This method has been discussed already, click here to have a look at it.
Fix # 02 – Changing Internet Properties:
We have provided the full details of this method, click here to have a look at it.