In this guide, you will come to know how to fix the Valorant error VAL 51 “There Was An Error Connecting To The Platform”. You have to follow all the steps carefully to eliminate this error.
Riot Games Server Status
The Riot servers usually cause the connecting to the platform error. So you have to make sure that the server is up and running by navigating to status.riotgames.com. Here, select Valorant, as well as your server region. You can then preview current and recently closed messages for server issues, such as planned maintenance and other issues for the Windows platform.

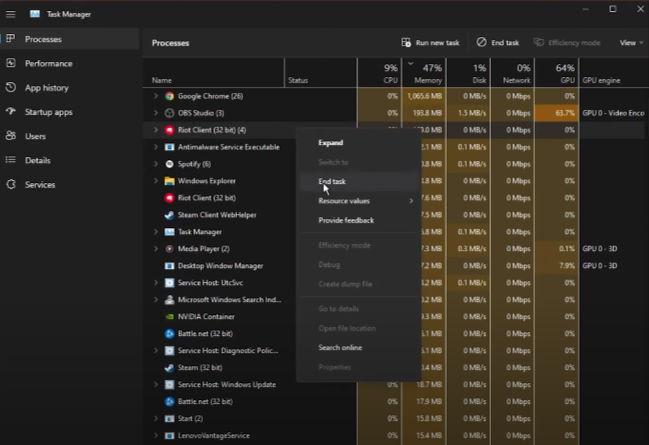
End Riot Processes
If the server seems operational, the issue is linked to your game files, network connection, or Windows version. Next, close all Riot and Valorant processes which might still be running on your system. In your Task Manager, you have to right-click each process in the Processes tab and select the End Task.
Test Network Connection
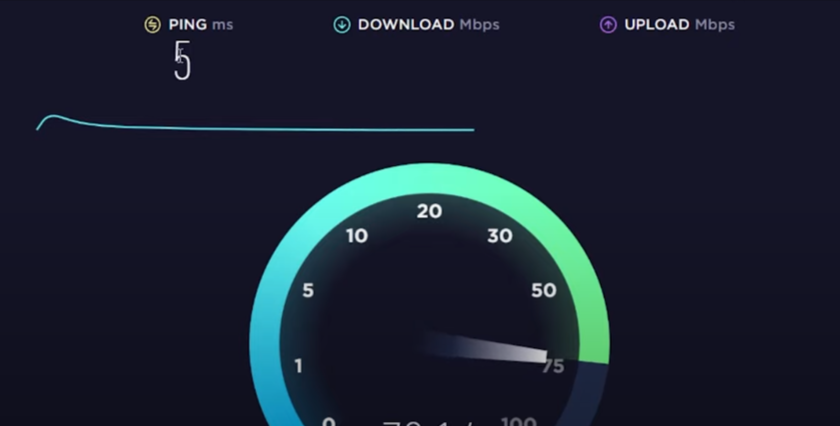
You should then make sure that you are using a reliable network connection. Make use of a speed testing site or application, such as Speedtest.net. You can preview your latency, average upload, and download speed here. Ensure that your ping is below 100ms and that you have a decent download speed. If the connecting to platform error persists, we will have to change your DNS server address as the issue is most likely related to your network connection.
Change DNS Server Address
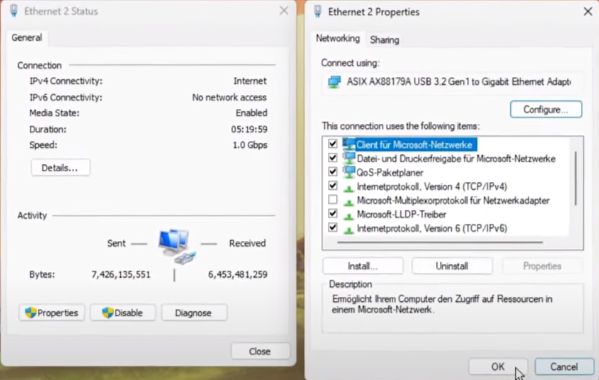
You will need to open up the Control Panel by searching for it in your start menu search. Make sure to View by: Category, and click on Network and Internet. Next, click on Network and Sharing Centre, and here select your connection. It will open up this window, containing some general information about your connection. You have to navigate to Properties and double-click the Internet Protocol Version 4.
Select to Use the following DNS server addresses option, and as your Preferred DNS server, use: 8.8.8.8, and as your Alternate DNS server, use: 8.8.4.4. For a lot of users, it will fix the Valorant error VAL 51, as these are the official public DNS server addresses from Google, which are safe to use.
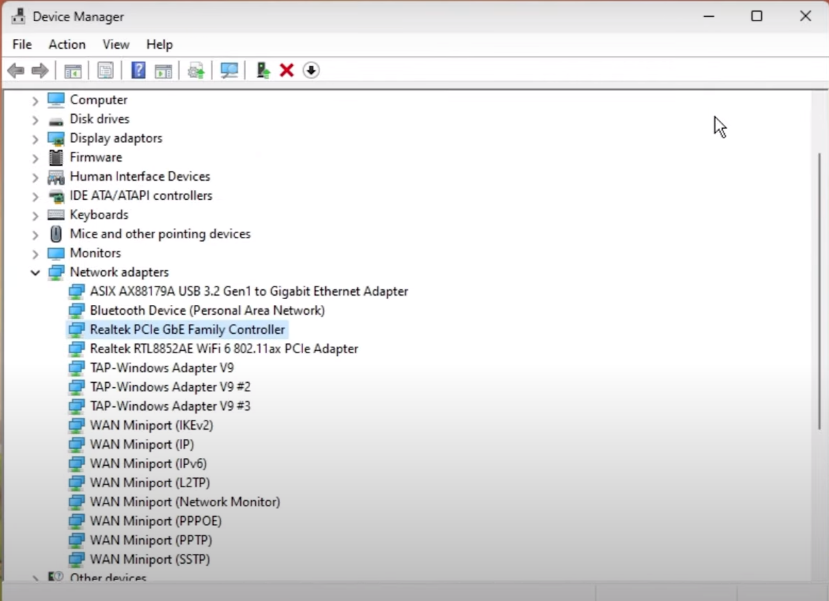
Update Network Adapter Driver
To further troubleshoot network-related problems, you must update your Network Adapter’s driver. To do so, search for Device Manager in your start menu search to open it up. Here, expand your Network Adapters, right-click the one you are using and select Update Driver. Finally, you have to click on Search automatically for drivers. It will take a second to download and install the latest Network Adapter driver.
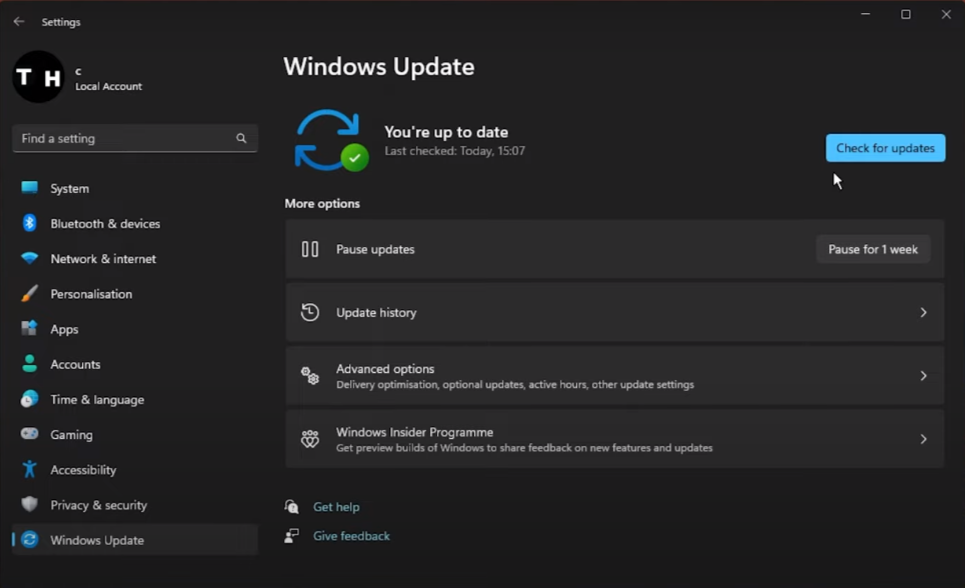
Update Windows
You should also ensure that your Windows 11 version is up to date. Search for Update to open up your Check for Updates system settings window. Your Settings will open up. Click on Check for Updates, Download, or Install Now, and make sure to restart your PC after making the changes.
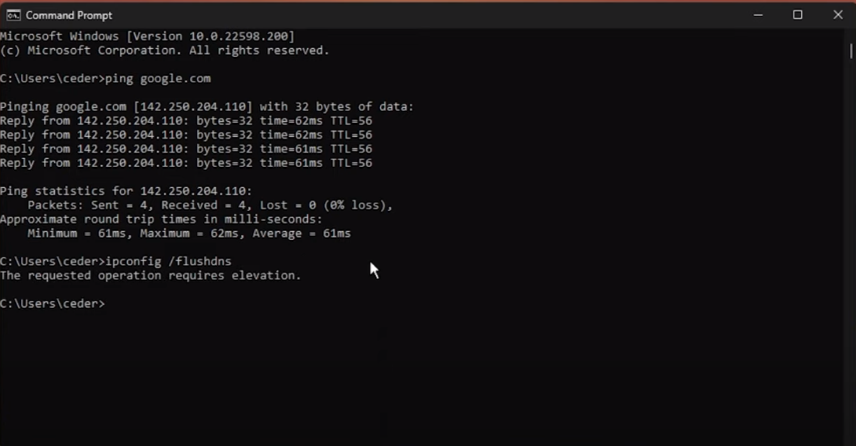
Command Prompt
Next, open up your Command Prompt by searching for cmd and hitting enter. Use the command: ping google.com; this command will check your latency and packet loss to Google’s servers. If your ping is higher than 100ms, or if you encounter any packet loss, you should make a few changes to your connection and follow the next tweaks. ipconfig /flushdns This will flush and reset the content of your DNS resolver cache. Using this command can, in some cases, fix server-related issues for Valorant on your PC.
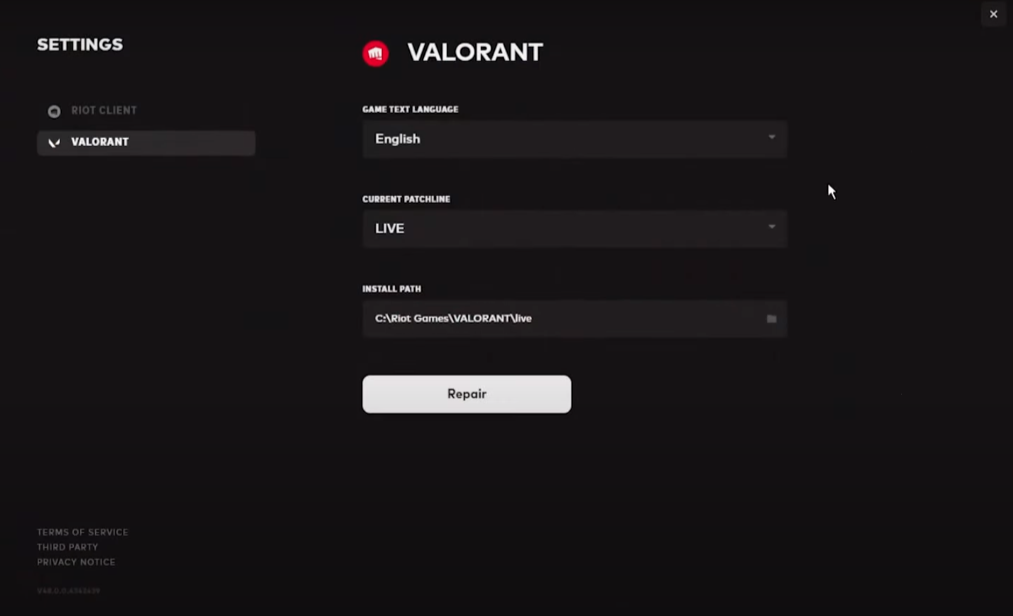
Verify Valorant Files
Lastly, re-open your Riot launcher. Click on the profile icon on the top right and select Settings. In the Valorant section, click on Repair. It will take a minute to verify the integrity of your Valorant game files and will redownload and reinstall any missing or corrupted game files.