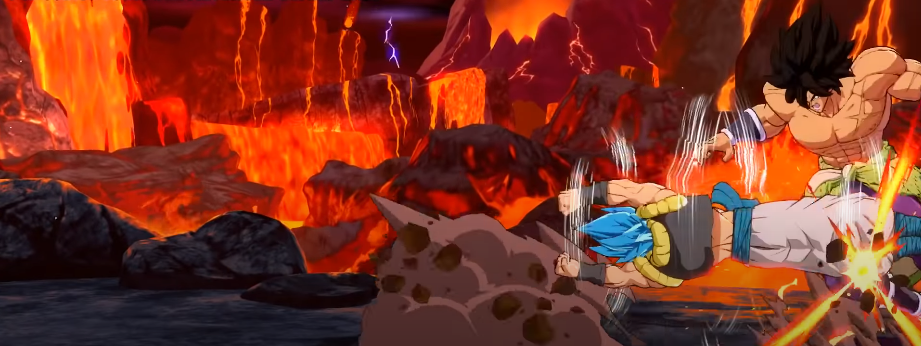
Gogeta Blue BnB Combos & Basics Guide | DRAGON BALL FIGHTERZ
In this guide, you will learn the BnB combos and Gogeta Blue (SSGSS) basics in Dragon Ball Fighter Season 3.5.
5L hits twice and is safe on the block. 5LL is nothing special but allows for stuff like this. 5LLL dubbed the "Vibe check", is an overhead that switches sides.
2L is a pretty slow sliding low, but it's safe on the block since the buffs. 2M was buffed, now it's faster and has absurd range, still not safe on block. 5M is only slightly faster.
The heavies are also huge but unsafe. jM hits three times, with all hits being true overheads. J was made faster and now covers a significant part of the screen.

It is slightly faster since the buffs. 5S and 2S are beam normals usable in the air. Since they're normals, you can vanish out of them on whiff if you change your mind.
Soul Strike (236x, Air OK)
A 3-hit Rekka, with the last hit being an overhead. It's your main knockdown tool in the air. It ending in Medium causes a ground bounce, making assist extensions easy. The heavy version will automatically follow up into a wall bounce. When used after 5S, it will jail and becomes a straightforward way to get in when covered with an assist. You can choose between Light, Medium, and Heavy follow-up at any point. 236L-LL is safe and gapless, while 236M-MM will beat any mashing and 2H attempts.
Rising Vortex (214X, Air OK)

A series of DPS. The Light version is only anti-air, and the Medium version is entirely invincible. In the corner, you can combo off of Medium and Heavy meterless.
Multiplex Afterimage (236S, Air OK)

It shoots a beam with an overhead j2H follow-up on hit and block. You can select a clone by holding BACK (4), UP 8), or no direction. You can hold S to feint out the beam. Clone select is still available.
Punisher Drive (214S)

A full-screen command grab. You have to vanish to combo; however, the enemy can't mash out on hit as it's a plus.
A Assist

Now goes full screen, giving a big wall bounce to use for combos.
B Assist
An anti-air assist, but just too slow and too little blockstun to be used as a combo or super dash assist. Very niche, use A or C.
C Assist
It tracks anywhere on the screen and gives lots of time to side switch, but the tracking is very lackluster. As for supers, God Punisher does the least damage but can go into Level 2.
Stardust Fall pulls the enemies to the floor so you can DHC into other characters. Big Bang Kamehameha does the most damage and has specific Synergies, like with Super Spirit Bomb. Characters with fast supers like Gohan and Vegito can DR afterward for knockdown.
Basic Safe Blockstring

5L(2)L> 2M5M > 5H > 236L-EL
Basic Blockstring with Assist

5L(2)L > 2M5M > 5H > 236L-LL > A1 > 2L5L(2)L>
Rekka Mixups using Assists
Using LM for the Rekka allows you to airdash before landing.
> 66 > jl > 5L(2)L 5L(2)L > 2M5M> 5H > 236L-M > (land) 215L(2)L>...
Left/Right Cross-Up Safe Jump
5L(2)L> 2M5M > 5H > 236L-L > A1 > 96 (delay) ¡M(3) >...
Mixup Options using 236S

From here on, you will have a variety of options. To name a few:
#1 Top clone Overheads
#2 Bottom Clone 2L
#3 Top Clone Crossup iL/M

#4 Feint High into 2L
#5 Feint into Command Grab/DR

In Sparking, cancel 5L (1) into an air dash. No one is going to see this coming.
Mid screen BnB
4111 dmg/3412 scaled | +1.1 Bar
In the corner, you can add a js > j236M-MM before the Rekka.
2M5M - jLL(3)L - SD - jLL(3)jcLL(3)L - j236L~LL
Mid screen BnB Better knockdown
3820 dmg / 3212 scaled | +0.95 Bar
2M5M - jLL(3)L - SD - jLL(3)jcLL(3)2H
2M Sideswitch BnB

4046 dmg | +1.1 Bar
2M5M - jLL(3)L - SD - jL(delay)M(2) (delay) jcLL(3)L - j236L~LL
Mid-Corner BnB

4967 dmg, 3775 scaled | +1.5 Bar
For scaled do ... » SD > İLL(3)jcLL(3)L> j236L-MM
2M5M - jLL(3) - j214M - jH - jS2S - SD - jLL(3)jcLL(3)L - jS - j236M~MM
Corner BnB

4982 dmg, 3810 scaled | +1.3 Bar
2M5M - 214M - jH - jS2S - SD - jLL(3)jcLL(3)L - jS - j236M~MM
For scaled, end in ... > j236L-MM
Advanced Corner BnB
5549 dmg, 3950 scaled | +1.6 Bar
2M(delay)5M - jH - (land) 5L(2)L - 5M - sjLL(3)L - jS2S - SD - jLL(3)jcLL(3)L - j236L~MM
Superjump isn't strictly necessary but it is needed for small bodies.
Optimal Corner BnB
5756 dmg 1 +1.75 Bar
2M(delay)5M - jH - (land, delay) 5L(2)(delay)L - (delay) 5M - sjLL(3)L - jS2S - SD - jLL(3)jcLL(3)L - j236L~MM
Mostly just for flexing as it's tough. For a scaled route, see Advanced Corner BnB.
236H Confirm

4196 dmg
236H - (delay) 5M - sjLL(3)jcLL(3)L - j236L~LL
5M will pierce the sky.
214M Confirm midscreen
2110 dmg 1 +0.45 Bar
214M - 66 j236L~LL
The timing here is tight.
214M Corner Confirm

2990 dmg | +1.2 Bar
214M - jH - jS2S - SD - jLL(3)jcLL(3)L - jS - j236M~MM
214H Confirm
214H - 2M5M - jLL(3)L - jS2S - SD - jLL(3)jcLL(3)L - jS - j236M~MM
Vanish Confirm
2615 dmg
Vanish - micro dash 2L5L(2)L - jLL(3)jcLL(3)L - j236L~LL
Vanish Confirm Side Switch
2800 dmg
Vanish - micro dash 2L5L(2)LL - SD - jLL(3)jcLL(3)L - j236L~LL
Vanish Air Extension
Skip the jcLL(3)L at high Hitstun Decay.
... - Vanish - (whiff j236L) - (delay) jLL(3)jcLL(3)L - j236L~LL
Super dash Confirm
SD - jLL(3)jcLL(3)L - j236S
Super dash Confirm Side Switch

SD - jL(delay)M(2)(delay)jcLL(3)L - j236S
The amount of hits on JM and delay time depends on the SD angle.
2H Punish

3621 dmg | +0.8 Bar
2H - SD - jLL(3)jcLL(3)L - j236L~LL
DR Confirm
3018 dmg 1 +1.5 Bar
DR - jLL(3)jcLL(3)L - j236L~LL
Basic Assist Extension
2M5M - j214M - jH - jS2S - SD - jLL(3)jcLL(3)L - jS - j236M~MM - A1 - DR - 214M
If none of the following examples work with your team, this one works with basically anything.
Tracking Assist Combo

5896 dmg 1 +1.75 Bar
2M5M - 214M - jH - jS2S - SD - jLL(3)jcLL(3)L - jS - j214M - A1 - j214M - A2 - 214S
It is quite specific, but you get the idea. Similar assists include Gotenks, Vegito, and Hit.
2H Assist Combo

-6.5k dmg | +0.2 Bar
It provides a lot of damage for easy extensions.
2H - SD - (delay) jH - j236M~MM - A1 - 5L(2)L - 5M - sjLL(3)L - jS2S - SD - jLL(3)jcLL(3)L - j214H - Vanish - DR
Pop-Up Assist Extension

5527 dmg I +1.55 Bar
2M5M - 214M - jH - jS2S - A1 - j236[S] - jLL(3)L - jS2S - SD - jLL(3)jcLL(3) - j236L~MM
It works with most assists. Instead of 236S, you can whiff a 236L.
4 Bar Sparkless TOD

2M5M - 214M - jH - jS2S - A1 - (whiff 236L) jLL(3)L - jS2S - SD - jLL(3)jcLL(3) - j236L~MM - A2 - DR - 214M - Lvl1 - Lvl2 - Lvl3
2 Bar Limit Break TOD
2M5H - 214S - Sparking - 66 2M5H - 5S - jH - 66 jM(2) - 5H - 5S2S - SD - jLL(3) - j236L~MM - Lvl5
(There's a minimum height on the jH you have to reach to be able to airdash.)
3 Bar Solo TOD

5H - 214S - Sparking - 2M5H - 5S - jH - jS2S - 66 jH - jS2S - SD - jLL(3) - j214M - Vanish - 236S - Lvl5
Yes, solo, not limit break, You can do this with three characters alive.