In this guide, you will come to know how to fix the Voice Chat not Working in Valorant. You have to follow the step-by-step instructions to do so.
Voice Chat settings:
First, you will need to go to Valorant audio settings. In the Voice Chat section, make sure that the Output Device and Input Device are set to the correct device you are using. You also need to check the Incoming Volume and the Mic Volume, which you must select at least 50%. Disable Loopback Test, and reduce the Mic Sensitivity
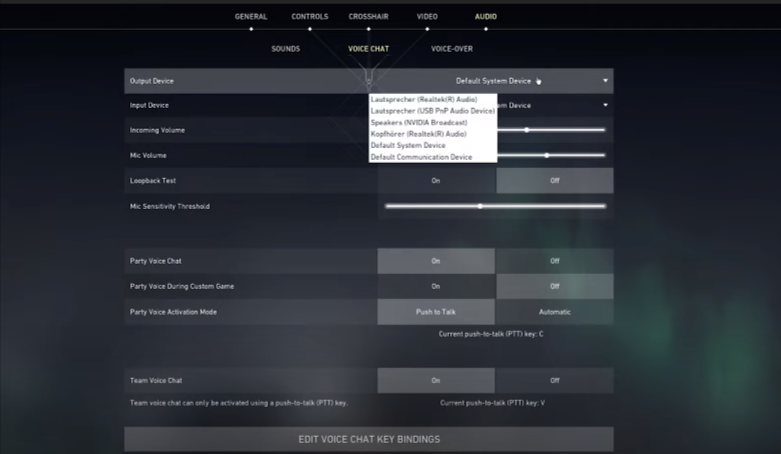
The Threshold can prevent your mic from sending any input if the volume is too low or similar to the importance of the background noise. You have to enable the Party Voice Chat and Party Voice During Custom Game if you wish to enable voice chat for custom games. It would help if you considered using Push to Talk as your Voice Activation Mode. When using Automatic, your voice will be heard when triggering the Sensitivity Threshold. You can always change the push-to-talk key bindings below, set to C by default.

Windows Sound Settings:
After verifying your audio settings, you need to close Valorant and open up your Windows settings. Under System, navigate to Sound and ensure that your Mic Input volume is set to 100%. After that, click on your mic, and select 2 channels, 48’000 or 44’100 Hz, whichever is available. You can also test your microphone to see if your mic works on your Windows PC.

Troubleshoot Common MIC Problems
If you don’t have any audio input, make sure that your device is not faulty and try plugging it in using a different USB slot. You must try to troubleshoot common sound problems for input devices. Back in your Sound settings, click on the Input devices in your advanced sound settings. After a second or two, make sure to select the mic in question, and you can then proceed to let Windows fix the sound input problem.

Sound Control Panel
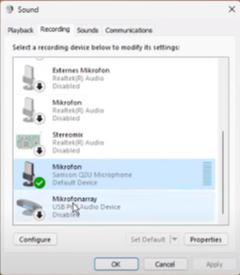
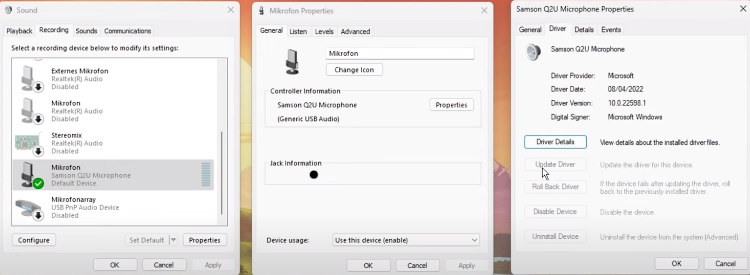
If nothing helps you out, you have to scroll down and select More sound settings to open up your Sound Control Panel. In the Recording section, make sure that your preferred mic is set to the default device and disable all other microphones in this list of devices. Next, right-click the mic you wish to use and navigate to its properties.
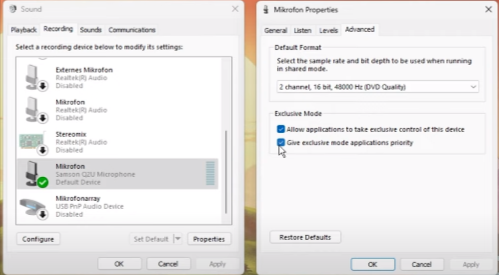
In the Levels tab, make sure that your mic is not muted. In the Advanced section, allow the two exclusive mode options, which will allow Valorant to make changes, such as increasing the mic volume.
Update Sound Driver.
In the General tab, click on Properties, and lastly, in this panel, make sure that the device’s driver is up to date in the Driver section.
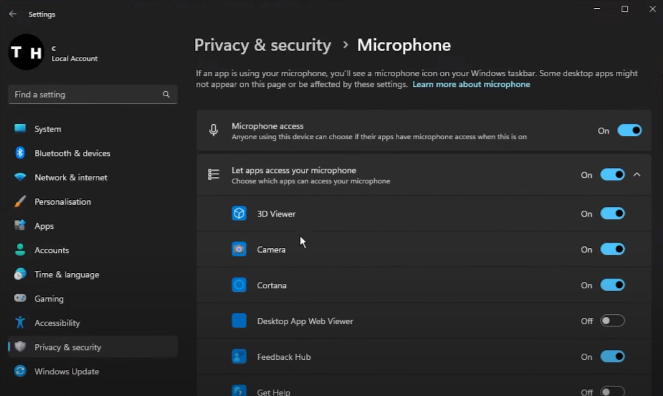
Microphone Privacy Settings
If the problem persists, then navigate back to your Windows settings. Under Privacy & Security, click on Microphone under App Permissions. Here, let desktop apps access your microphone by enabling this option. As a last resort, you will have to reinstall Valorant to your System.