In this guide, you will find out how to Install mods for Dying light. Go through the guide and follow all the steps to install the mods.
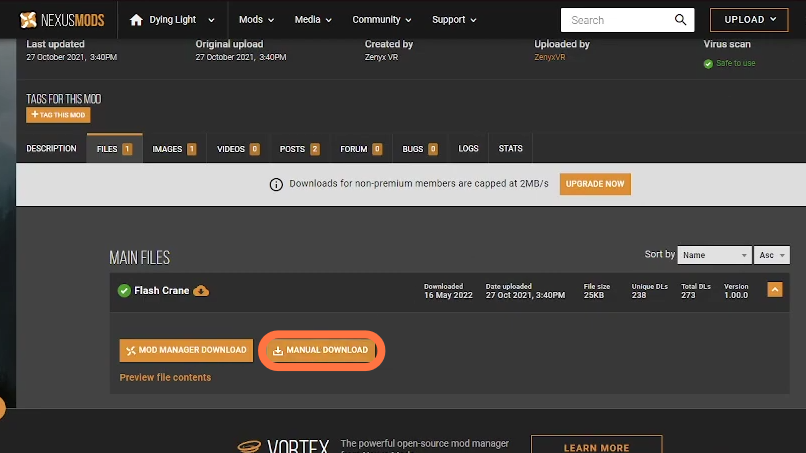
1 You can download mods for the Dying light from “https://www.nexusmods.com/dyinglight“, you need to make an account to download a mod. You can click on the “Most Popular” tab to find the most liked mods. Click on a mod and go to the details page as in this case, it’s Flash Crane. Click on the Manual Download button and then select the Slow Download button on the next page to start your download.
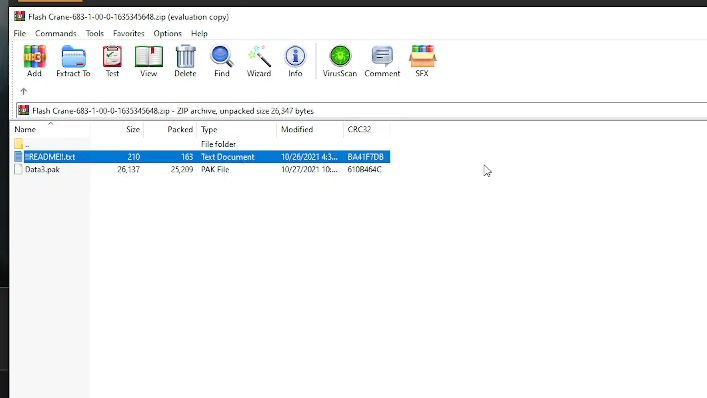
2 Now open the downloaded file using WinRAR or a similar app. You will find a file with ‘pak’ extension and a text file that has instructions on how to install the mod into your game.
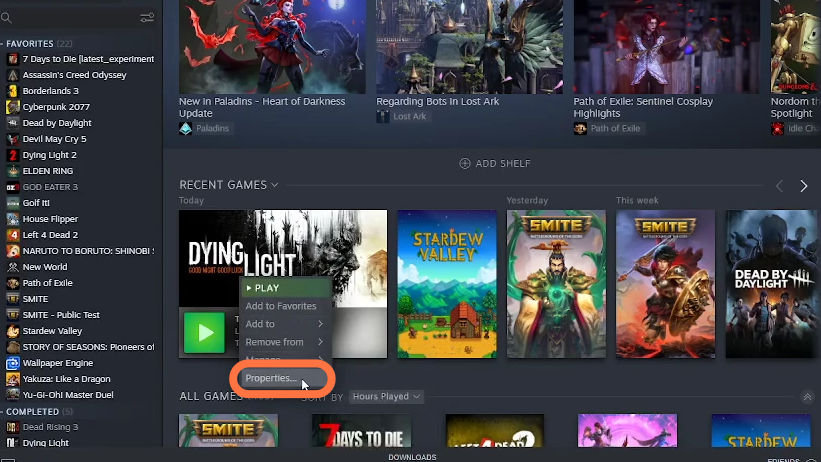
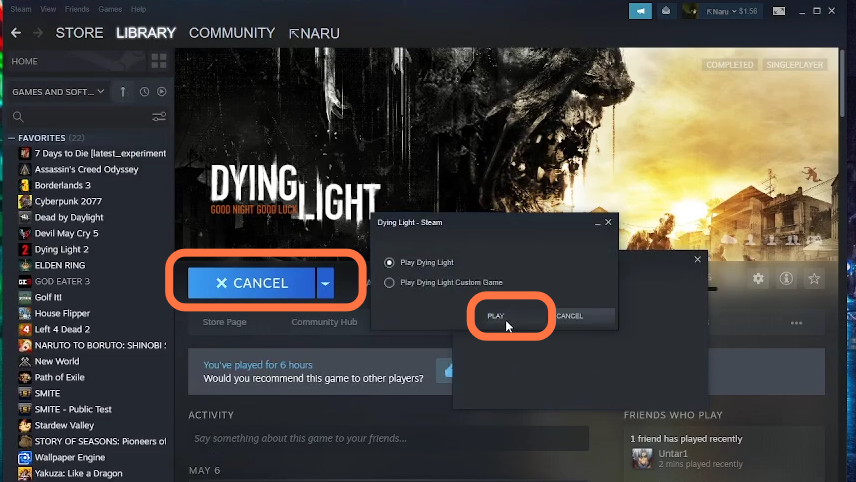
3 After that, open the Steam application and right-click on the Dying Light. Then choose properties > Local Files > Browse and it will take you to the Dying Light directory.
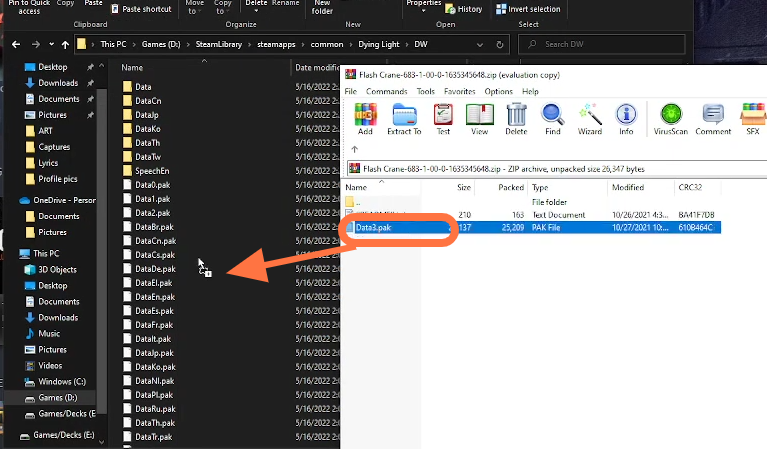
4 Inside this directory, you need to go to DW and delete the data3.pak file from here.

5 Now go to the downloaded mod file and drag the data3.pak file from here into the opened directory of the game.
6 Then you need to open the Game from the Steam application and the mod will be available to use.
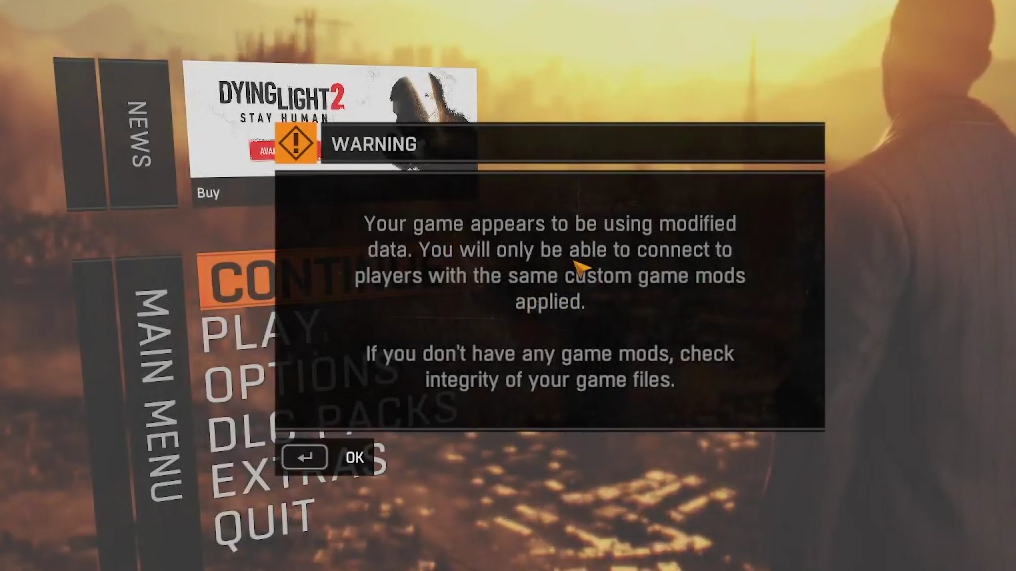
7 At the start of the game, it will show a warning message that some data has been modified. Click on the arrow button at the bottom left corner to connect with people using the same data.
8 After that, click on Play > Play Campaign > choose the save file > Continue. And hopefully, the mod will work.