This guide will let you know how to install mods into Project Zomboid. Go through the guide and follow the simple steps to do so.
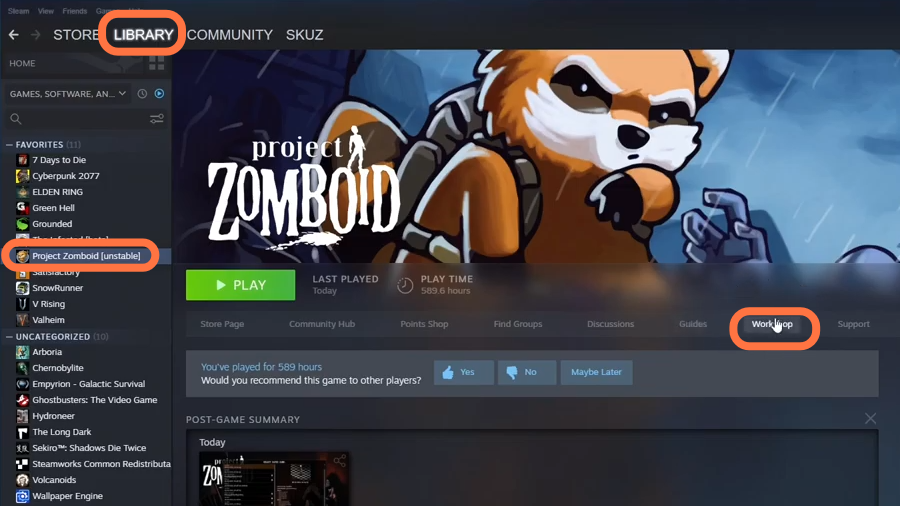
1. You have to open the Steam application, click on Library Tab and find the Project Zomboid game from the list on the left side of the app’s interface. Then go and click on the Workshop Tab.
2. Now pick a mod of your choice from the “Most Popular” Tab. Let’s pick the “Backpack Borders” mod for the moment. After that, click on the mod and go to the details page. Press the Subscribe button on the mod details page and it will start downloading.

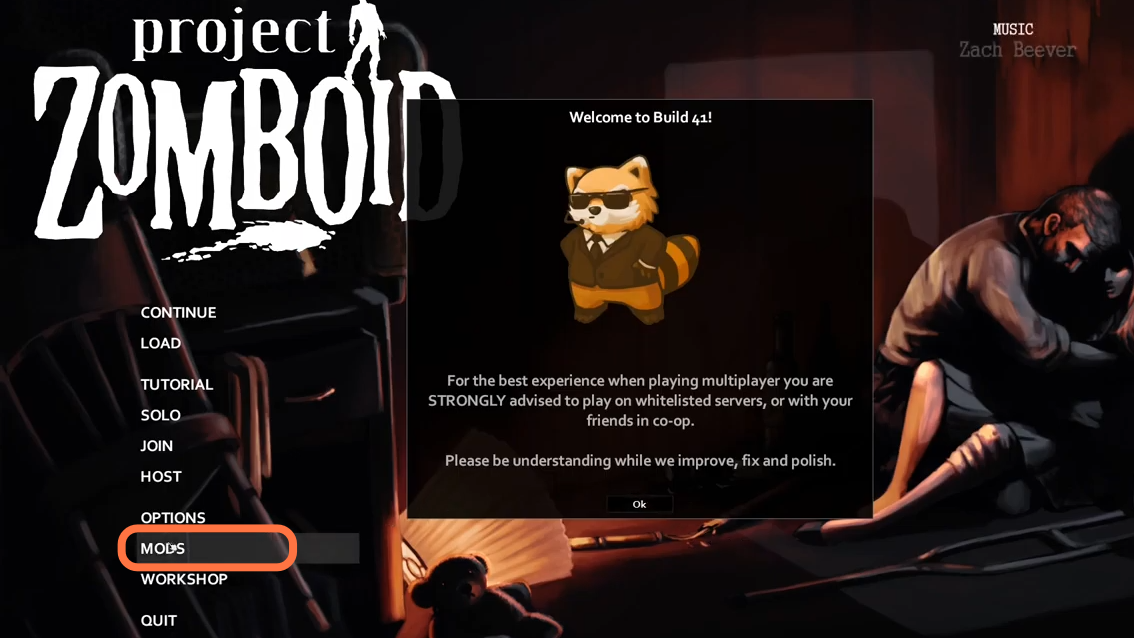
3. One thing to remember is when you play in a multiplayer environment, mods will automatically be downloaded once you join a server. Now go back to your steam library to start the game. Once the game loaded up and the menu shows up, you need to click on the Mods option.
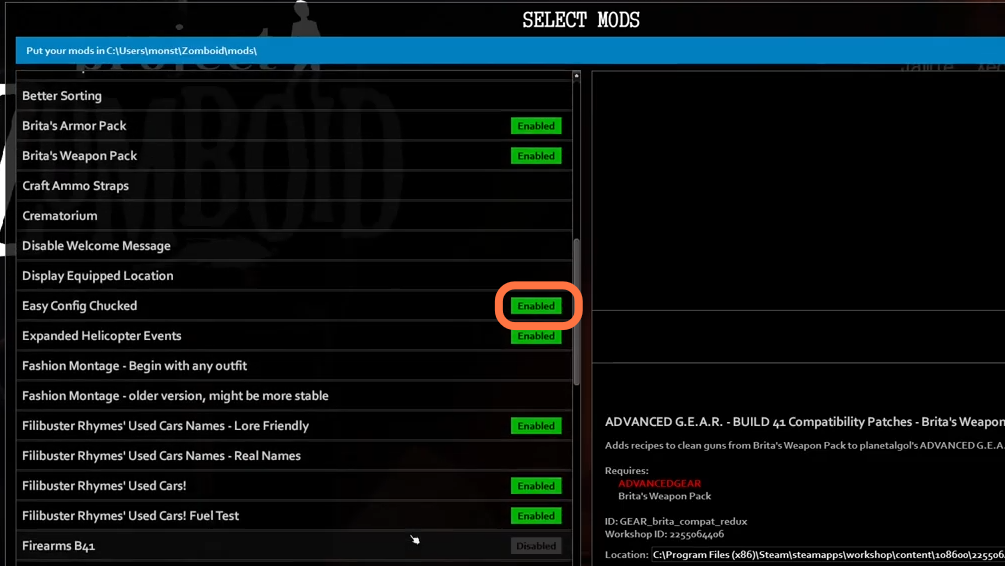
4. Your downloaded mod wouldn’t be enabled automatically or by default. You need to select the mod and enable it by clicking the toggle button in front of the mod.
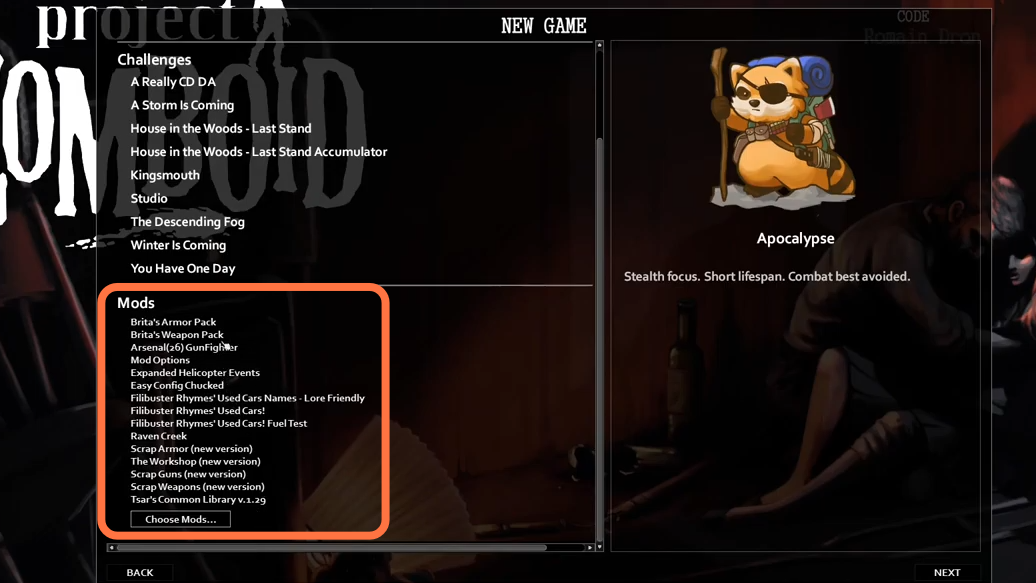
5. Now go back to the main menu and start a new game. Click on SOLO and the next window will show you which mods have been loaded. The mods section also gives you Choose Mods option to add new mods as well. You can add these mods to an existing game but it is better to start a new one as sometimes it could create problems while running.