This guide will let you know how to install Papyrus & Console Utility in Skyrim. Follow the steps below:
1. First, it is recommended to install Visual Enhancement mods. So start with the USSEP (unofficial Skyrim special edition patch), the USSEP is a collection of different bug fixes and tweaks to the original scripting of Skyrim that provides players with a number of different ways to improve their gameplay experience. The USSEP is almost a requirement for many of the mods you might want to download in the game. The problem with USSEP is that it also contains a number of different balancing options. The author decided which ones were best for the game, so when you play the game yourself, you may decide differently. That’s why it can be frustrating because the balancing was decided for you instead of you making that decision. But, USSEP is still recommended to install in order to take advantage of the mods that actually require it. There will be a number of mods that only function with it.

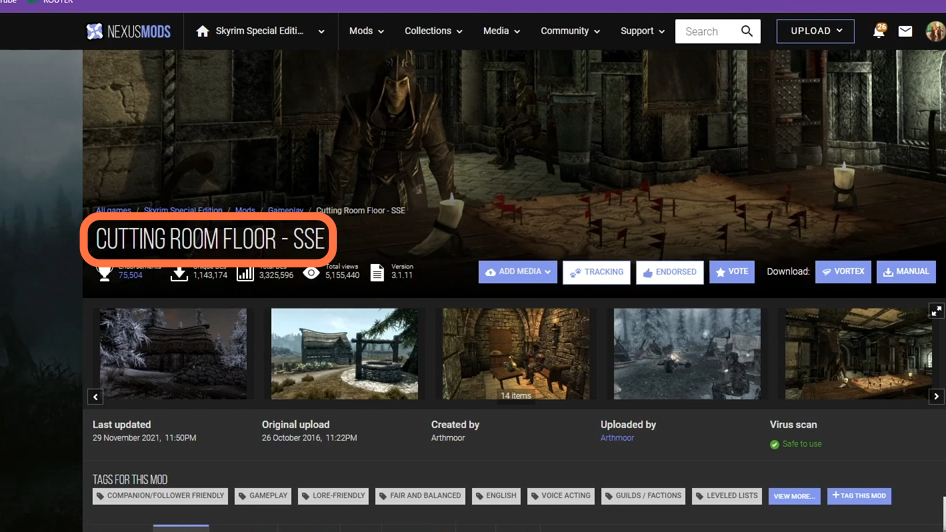
2. The second mod to install is the Cutting Room Floor, it is a well-known add-on for Skyrim that has been around for years. The mod includes different aspects and elements of the game that were intentionally removed from the game by Bethesda & developers of the game. The mod plugin also integrates those removed parts into the game easily, allowing players to get a more in-depth experience.
3. The next one is the Static Mesh Improvement Mod. One of the most popular mods when it comes to making changes to textures and quality aspects in the game including certain items and 3D textures on your game is Static Mesh Improvement Mod. The size of the mod is 1GB and it is one of the must-have mods.

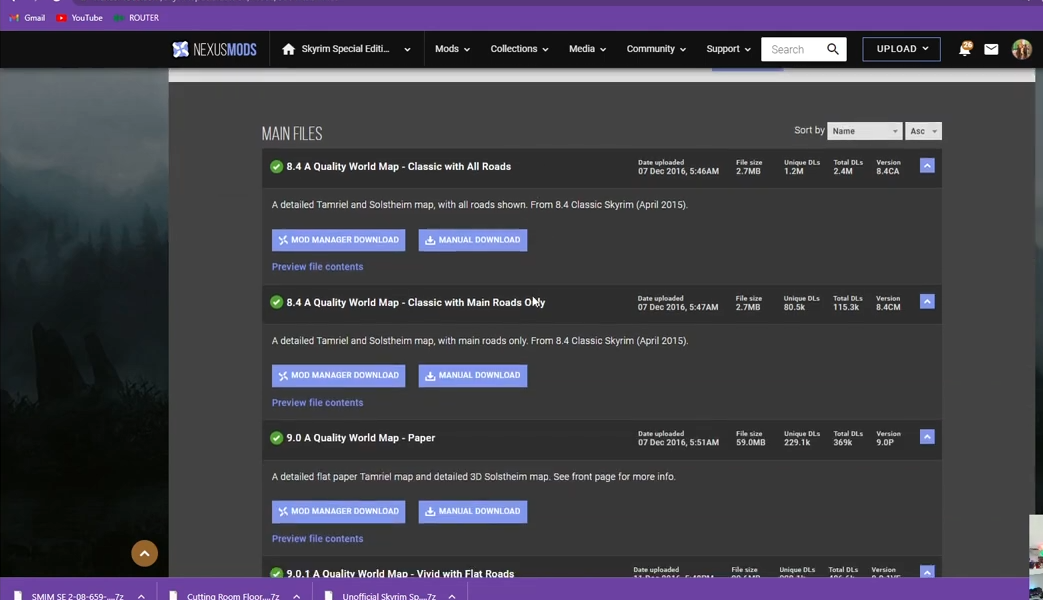
4. A Quality World Map Mod is an overhaul of the game’s map system. It allows you to choose from a couple of different designs for your very own map. The map is something that you’ll use on a regular basis. You’ll find that the map changes look great, so don’t worry about missing out in-game.

5. There are a number of file downloads available for the Quality World Map in the downloads section, you have to select one depending on the type of map you are looking for. Once you’ve selected one, just download it straight into your mod manager or you can download it manually, and then you can drop them straight into our Mod Organizer.
6. Once you have got those downloaded, you need to open up your ‘Downloads’ folder and you will find the folders here in Zip format. Select them and drag & drop them into the ‘downloads’ section of the Skyrim Special Edition.

7. Now you can open and go into your Mod Organizer and double-click on the downloaded files in order to install them. It is recommended to start with the Skyrim Special Edition Patch and just clicking ‘OK’. And then do the same with the other three.

8. Now if you want to get rid of files from the ‘downloads’ section, you can actually right-click in the empty area and choose to hide the installed ones.

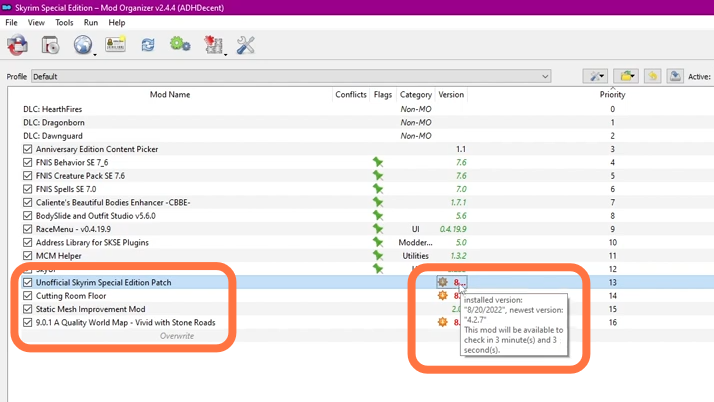
9. At the left side window, you have to tick the four that you have just downloaded and installed. One of the first things you might notice when you open Mod Organizer is that although 4 of your mods have been installed, their installed versions haven’t actually been updated. Sometimes they just display the date or a random number, but it’s always worth checking again to make sure every mod’s installation information is up-to-date.
10. After that, right-click on it and go down to select ‘information’.
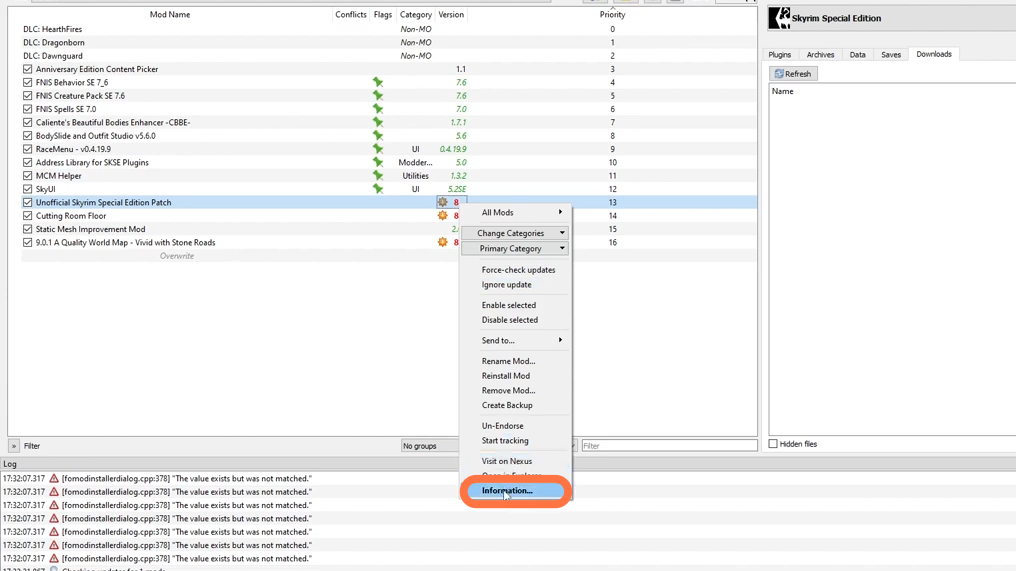
11. It will bring up a pop-up window that says the ‘Mod ID’ and the ‘version number’ Where it will display the current date. So if you go back to where you have downloaded this mod from, and under the ‘files’ section, you will find the version number which you need to copy. Go back into Mod Organizer to put that version number and then close the pop-up. It will update the mod thereafter and it will turn green.

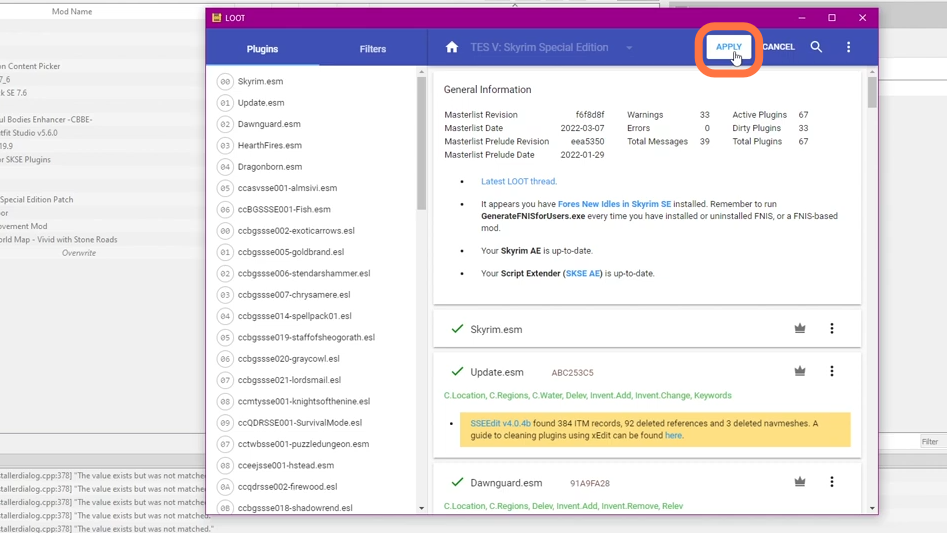
12. Now you need to run ‘LOOT’ by clicking on ‘Run’ to ensure the load order is sufficient.

13. At the top, you will find a button that says ‘Apply’ which needs to be clicked.
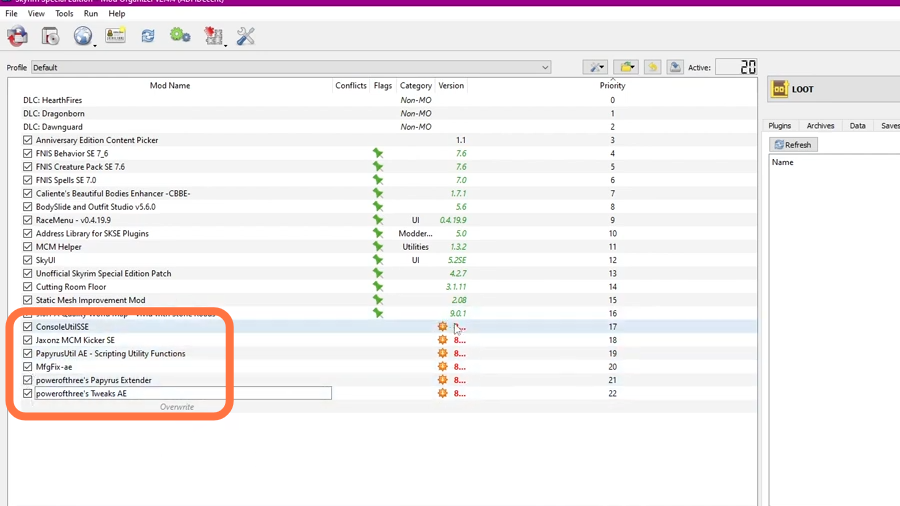
14. Now we’re going to consider a few mods (utility mods) that will do stuff behind the scenes. The first one would be the ‘Console Utility’. This one will be required by a number of different mods that you might download. So you have to go to the ‘files’ section and then to download. This particular mod does actually require ‘Address Library’ which you’ve already downloaded and installed. It also requires SKSE64 which you have actually got as well, so just click on ‘Download’.

15. The next one is the Jaxonz MCM Kicker. The Jaxonz MCM Kicker is the tool you need if you have a lot of mods installed. It speeds up some menus, and it does require SKSE64 and SkyUI to work properly.

16. Another important mod to download is the ‘Papyrus Utility’. It is something that you’ll want to put into your Mod Organizer. It’s more useful for modders because of its ability to support mods while they’re running.

17. The next utility mod to download is the Power of three which is quite useful behind the scenes as well. Click on the Files tab and download the latest version by pressing the Manual Download button.

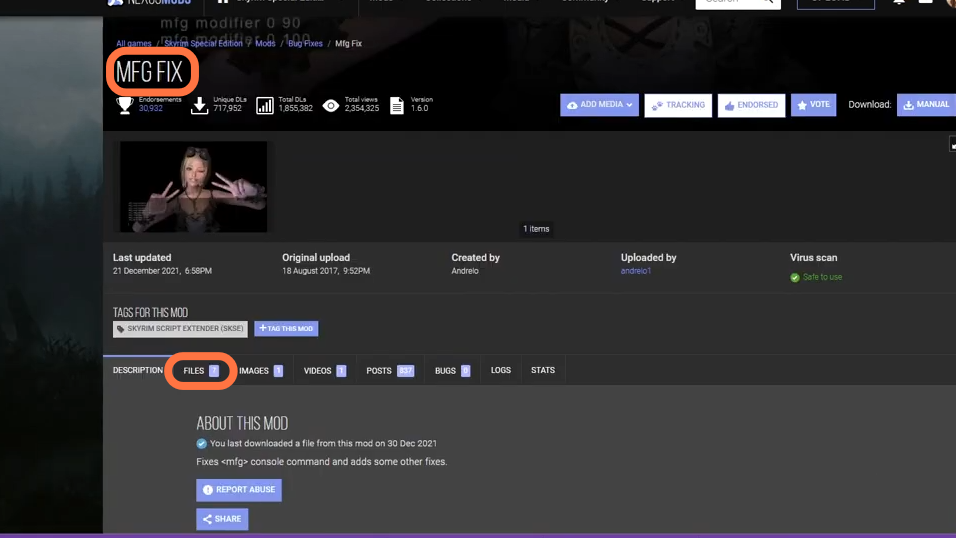
18. The last tool you have to take a look at is MfgFix. This should be particularly helpful for those using the command console. It just fixes a couple of common issues with that.
19. Once you have downloaded all these necessary mods, you need to open up your ‘Downloads’ folder and you will find the folders here in Zip format. Select them and Drag & drop them into the ‘downloads’ section of the Skyrim Special Edition Mod Organizer.
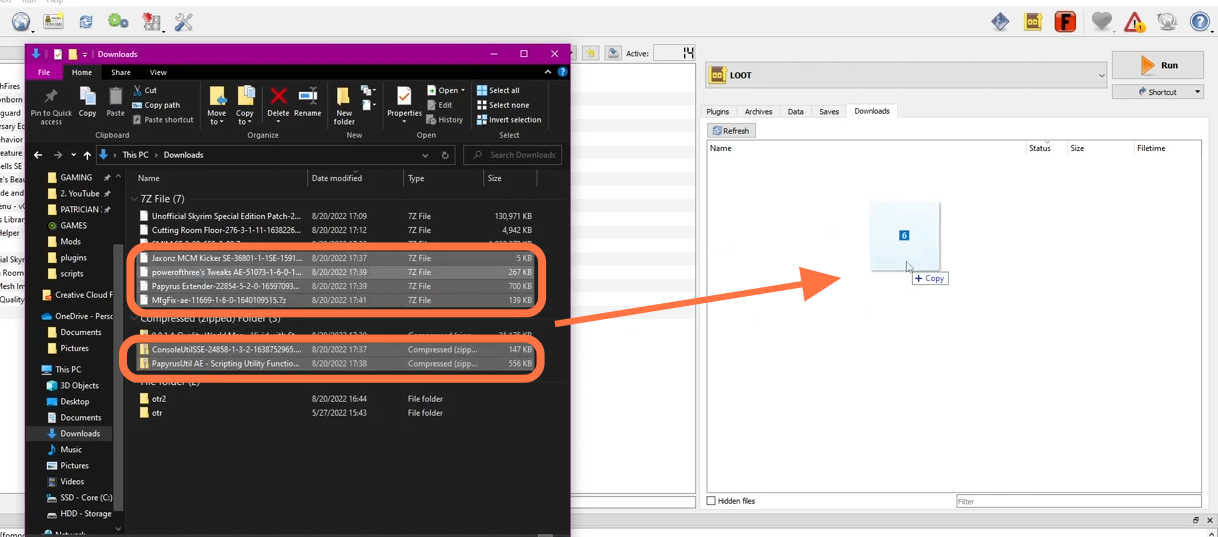
20. Now you can open and go into your Mod Organizer and double-click on the downloaded files in order to install them. Go through them one by one and install them.
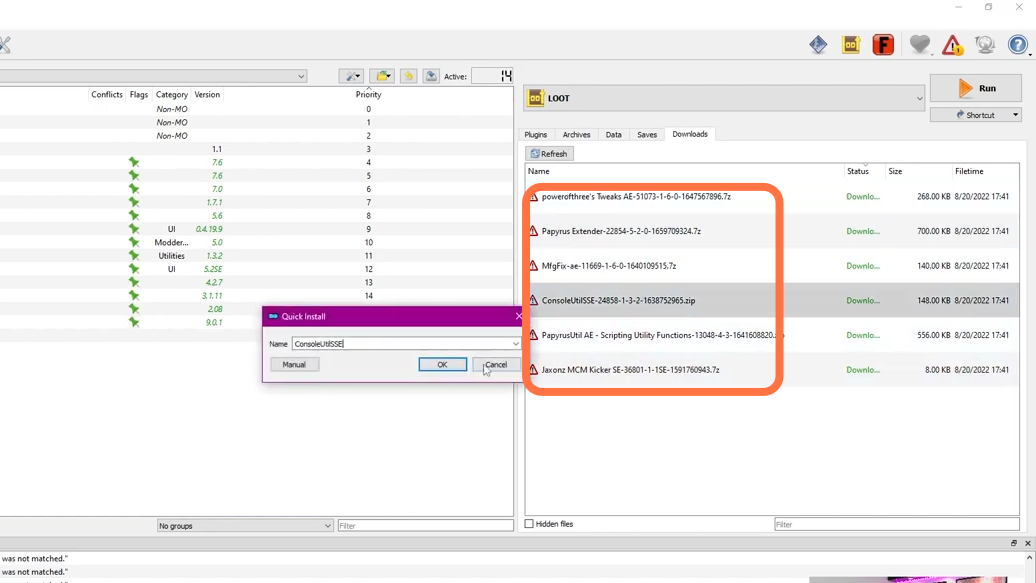
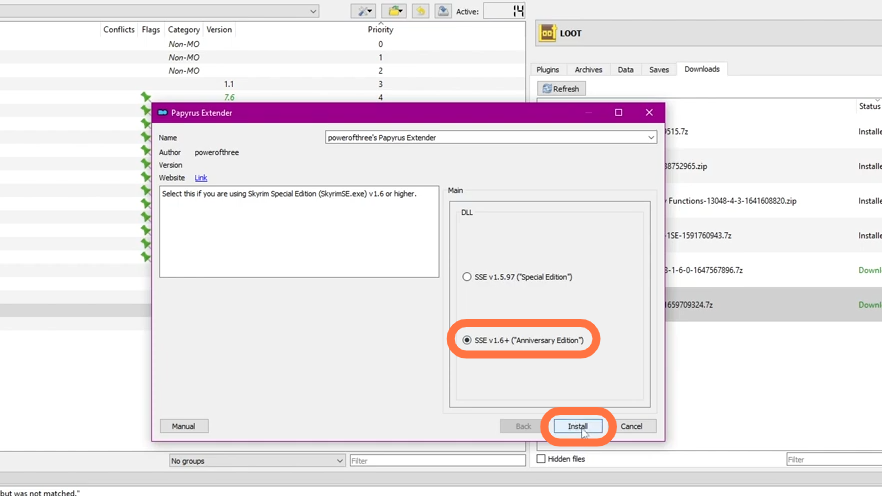
21. When you double-click the ‘Papyrus Extender’, it will appear with a pop-up window that you’ll have to make sure you’ve checked your version number and are using the correct one. If not, that will cause errors.
22. At the left side window, you have to tick the Mods that you have just downloaded and installed. One of the first things you might notice when you open Mod Organizer is that although all of your mods have been installed, their installed versions haven’t actually been updated. Sometimes they just display the date or a random number, but it’s always worth checking again to make sure every mod’s installation information is up-to-date.
23. If you want to update the version numbers, you need to go to ‘information’ by right-clicking on the mods version as you did before with the Enhancement Mods and enter the new version number of the downloaded mod. Now to make sure your mod load order is correct, you have to make sure that LOOT is loaded. Once it gets loaded, you need to tap on Add.

24. When mods are added back into the game, you might see certain errors. If you’re planning on starting off relatively early with your own mod list, things should be fine. However, it is suggested to get your mod list down before continuing to run the game and play it.
