This guide will tell you how to make Crossplay Voice Chat Channel in Call Of Duty Modern Warfare 2. You have to follow the steps given below to make a crossplay voice chat channel.
1- First of all, you have to press the options button and then click on the settings tab. Then go to Account & Network and make sure that the cross-play and the cross-play communication are turned On. By keeping it on, you can easily talk to people on other platforms.

2- After doing this, scroll down until you find Account activation, click on it, and you will find your activation ID now in the center of the screen. You have to give this ID to your friend if you want to cross-chat with him.
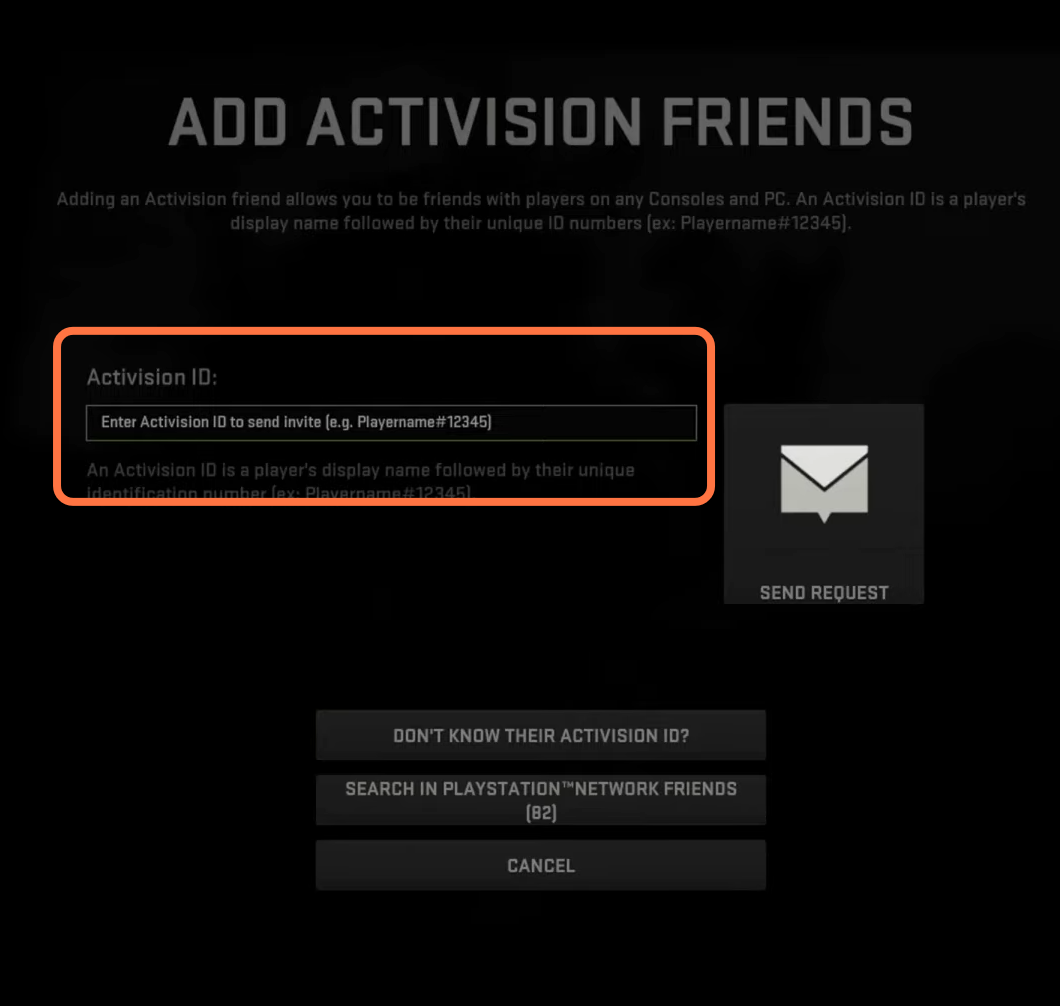
3- Now you need to go back, click on Options again and go to social. After that, go to Friends, click on Add Friend and a new window will open up which will ask you to enter the activation Id of your friend.
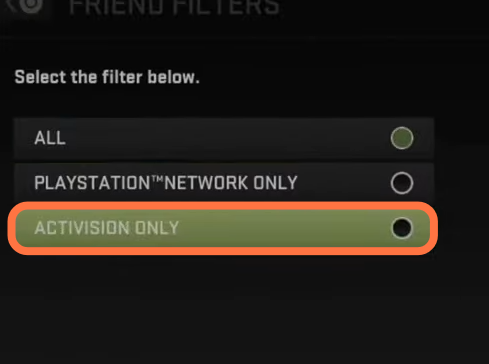
4- After adding the activation ID, that person will be added to your friend list and the creation of voice chat channels becomes very easy. Press r2 which will show you another menu with three options on the left of your screen and you have to select the “activation only” option as it will only show you your cross-play friends.
5- You can find all of your cross-play friends on the top of your friend list and also anyone who is online at that time will also show on the top of the list. After that, go to your friend’s name, press X, and go to channels. Again press x and then you have to create a channel.

6- After clicking on create button, you can invite your friend to this channel. For this, you have to select your friend’s name and then click on the Invite button.
The major benefit of a channel is that it allows you to communicate with each other using a crossplay or you can talk to anyone with whom you are playing the game. It also gives you permission to talk to people even in different games.
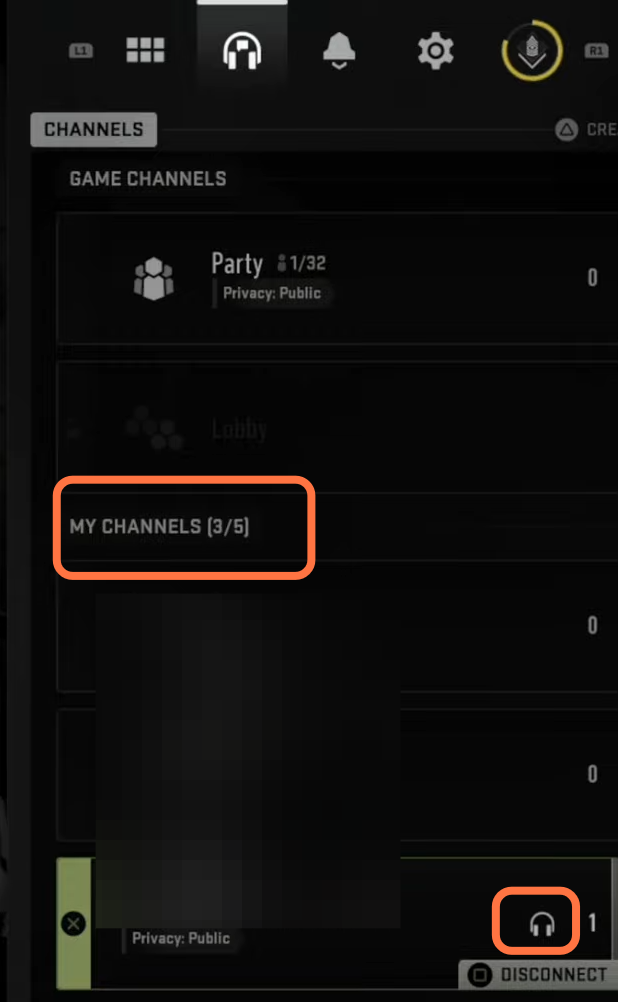
7- To connect to your new channel, you have to press the options again and then press r1 to go to channels and then go to my channels. Under this, you will find the channel that you just created now go to that channel and press Square. Once the headset logo appears in that channel, it means you are now connected to that channel.
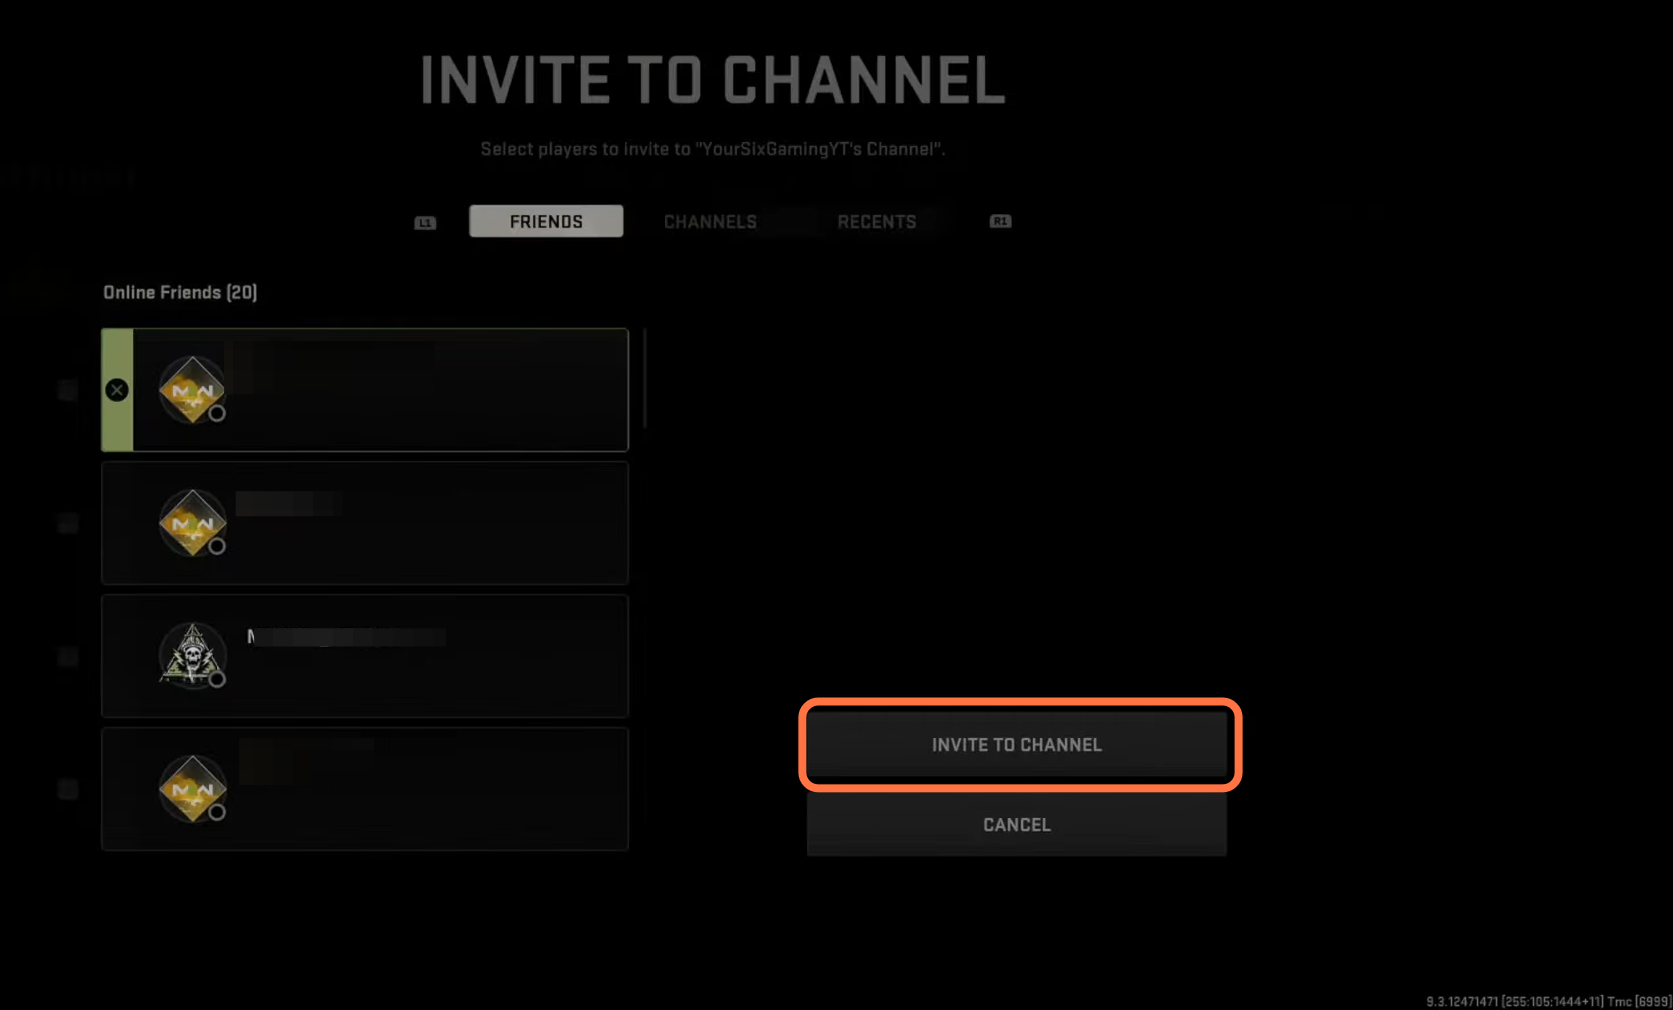
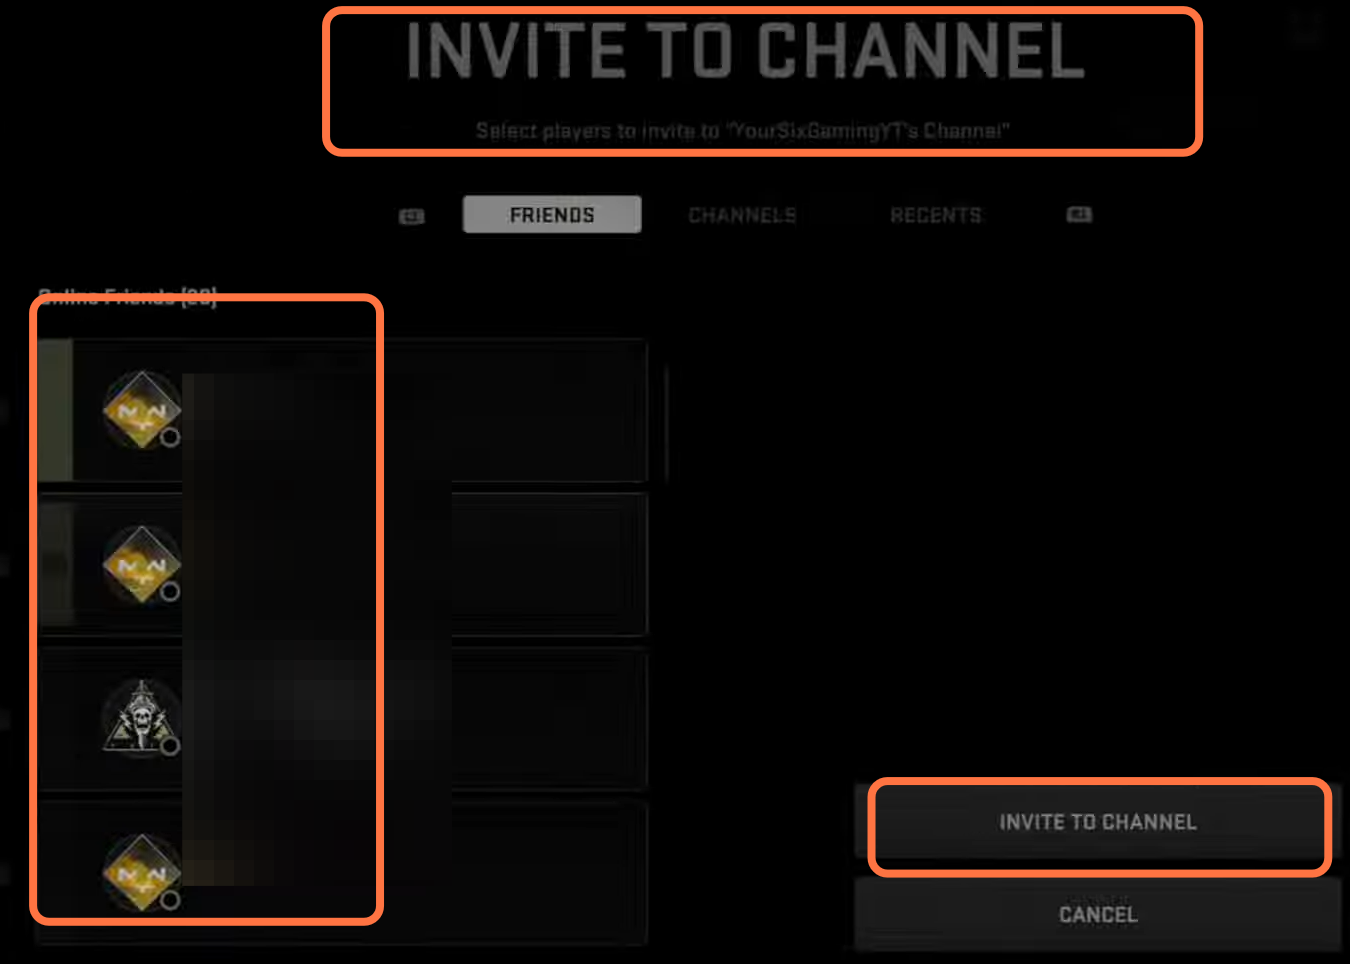
8- After this, you have to press X as it will take you to the channel settings. Then you have to press triangle as it will take you to the invite friends page and there, you can add more friends to this channel. Just select their name and then click on the Invite to Channel button.
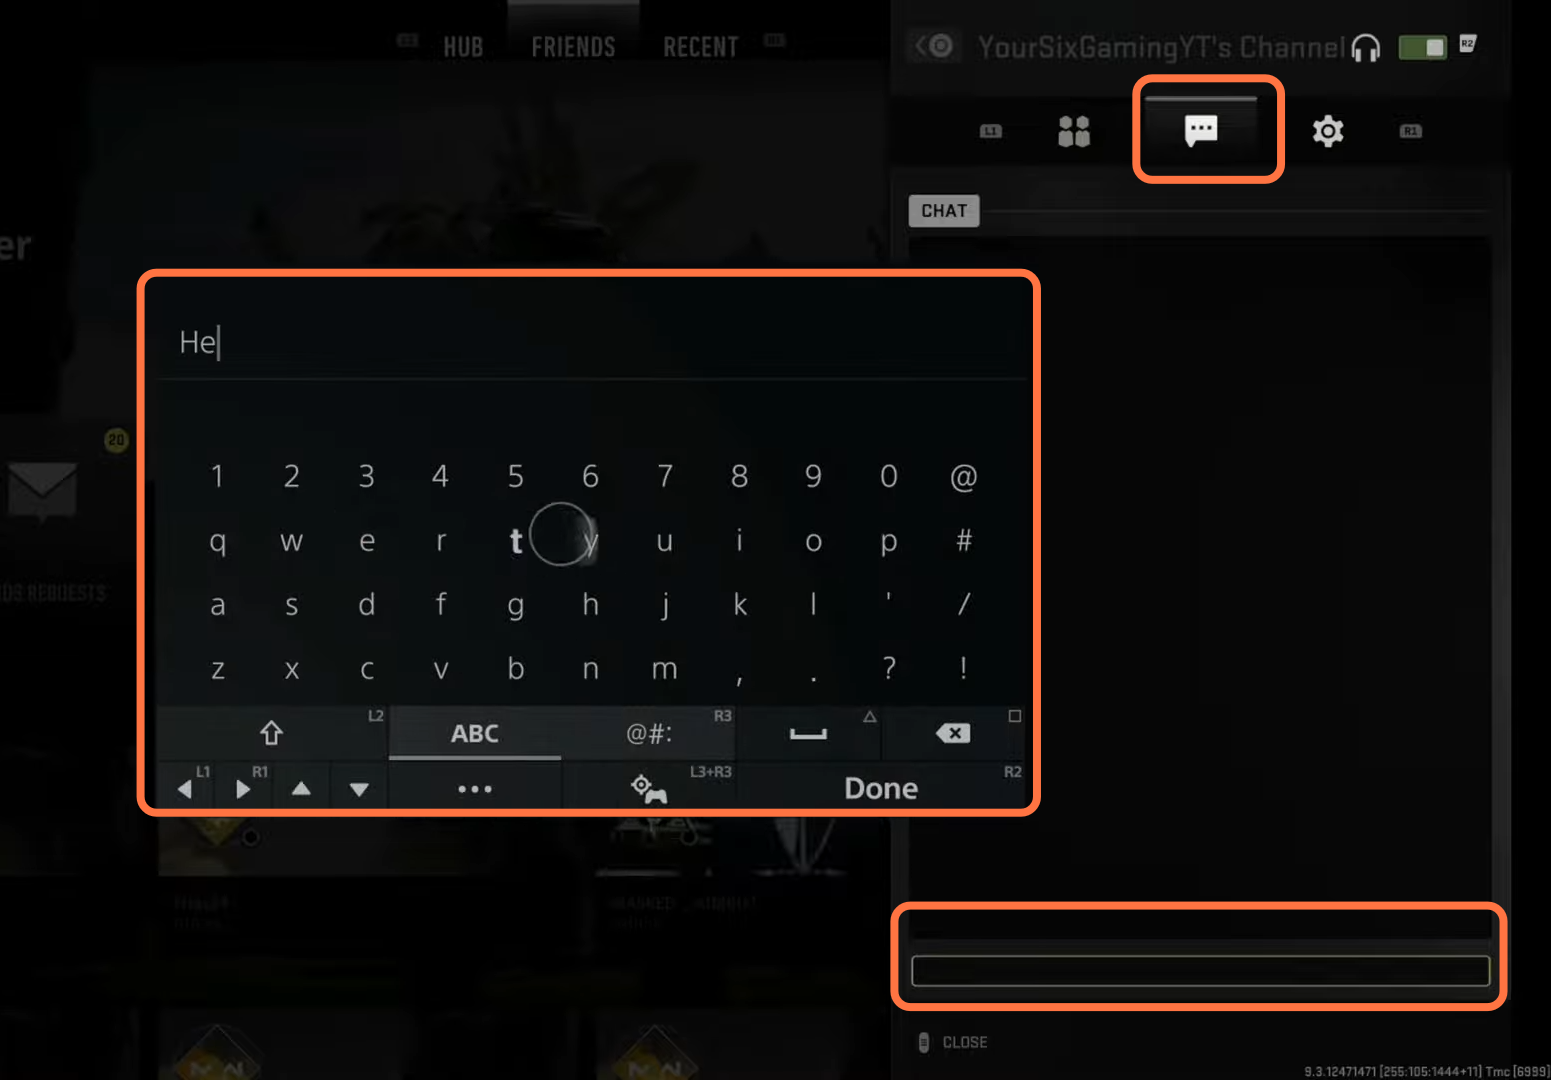
9- To mute yourself, you have to press the Square button, and if you tap on this once, you will be shifted to the text chat box. To send a message you have to press r2 twice. And if you want to leave the voice chat, then you have to press the r2 button one more time. If you want to join the voice chat channel again, then you need to press the r2 button again.
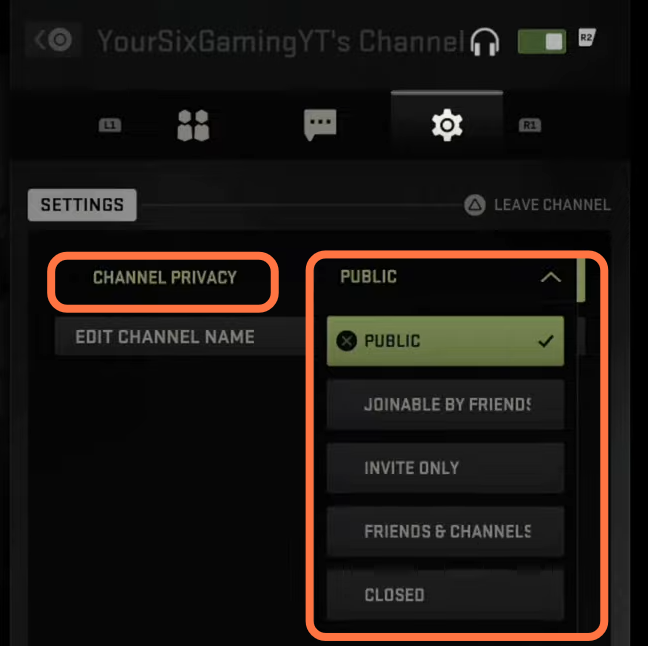
10- To change the privacy of the channel, you have to click on settings and then click on the channel privacy option. You can select the privacy type.