This guide will tell you how to customize your setup for the best performance in Call Of Duty Vanguard. You need to make changes in “battle.net” and “in-game” settings, then optimize each game using windows and the GPU. Next, you need to change the “browser” setting. Following the steps listed here will ensure optimal performance.
Battlenet and Game App Fixes
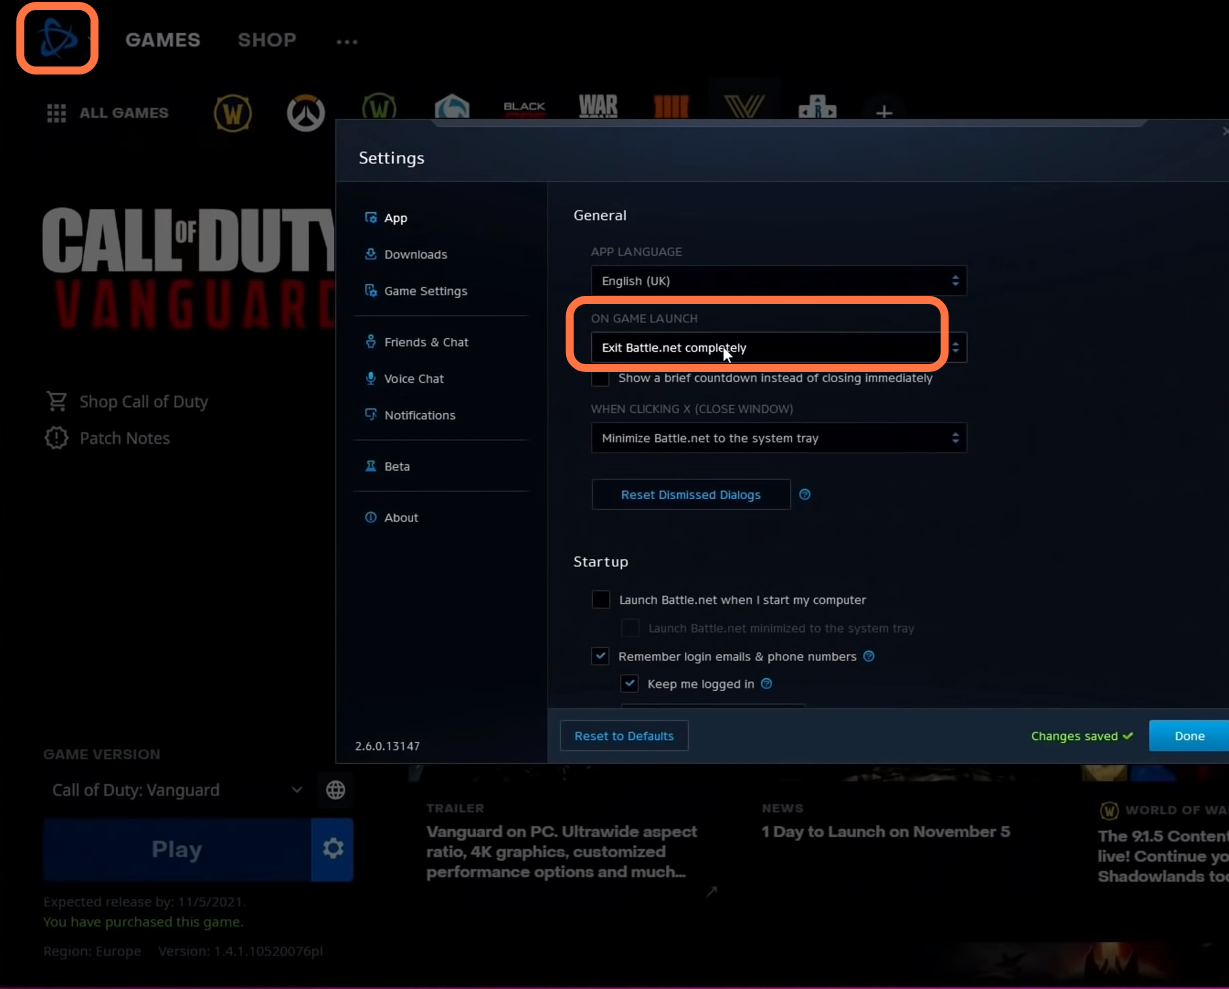
1.1- First, you have to navigate inside the battlenet launcher and click on the battlenet logo on the top left-hand side. Then select Settings, go down to the on-game launch, and set it to exit battle.net completely. After this, scroll down in the advanced setting to make sure that the following two options are unchecked.
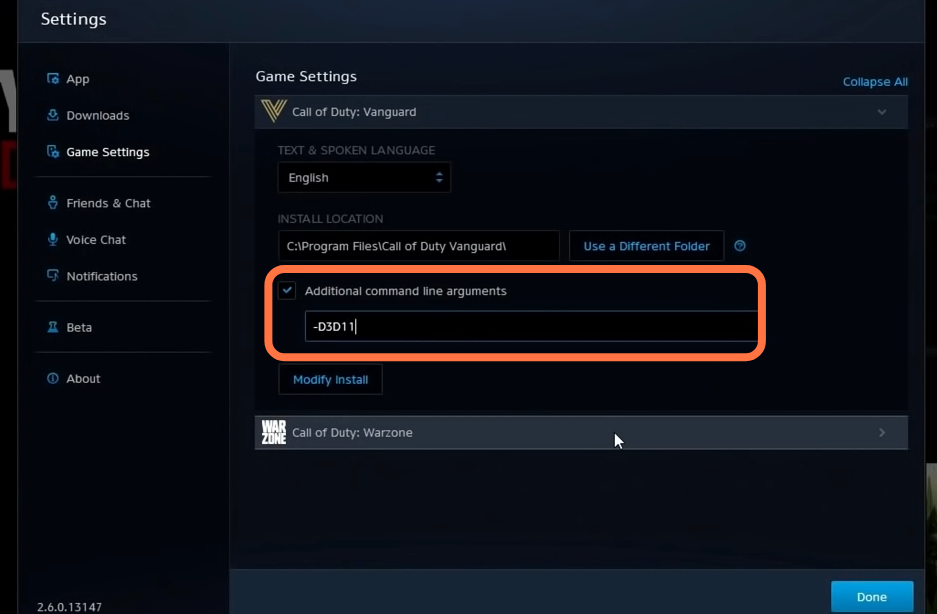
1.2- Now go to game settings and navigate to Call of Duty Vanguard. Go to the drop-down menu next to this, then select additional command line argument and input -D3D11.
1.3- Now you have to apply some optimization fixes to the game exe as it will help to fix crashes and will stabilize the frame rate. After that, click on the Settings button next to the Play button and then click on “show in explorer”. A new folder will pop up and you need to scroll down until you find the vanguard launcher and vanguard.exe. You have to apply optimization changes to both of the files. So first, right-click on the vanguard.exe and then click on properties, go to the compatibility tab and make sure that “run this as an administrator” is selected as this will fix most of the game crashes. After that, go to change dpi settings and there make sure that override the high dpi settings is check marked, then click on OK and Apply.
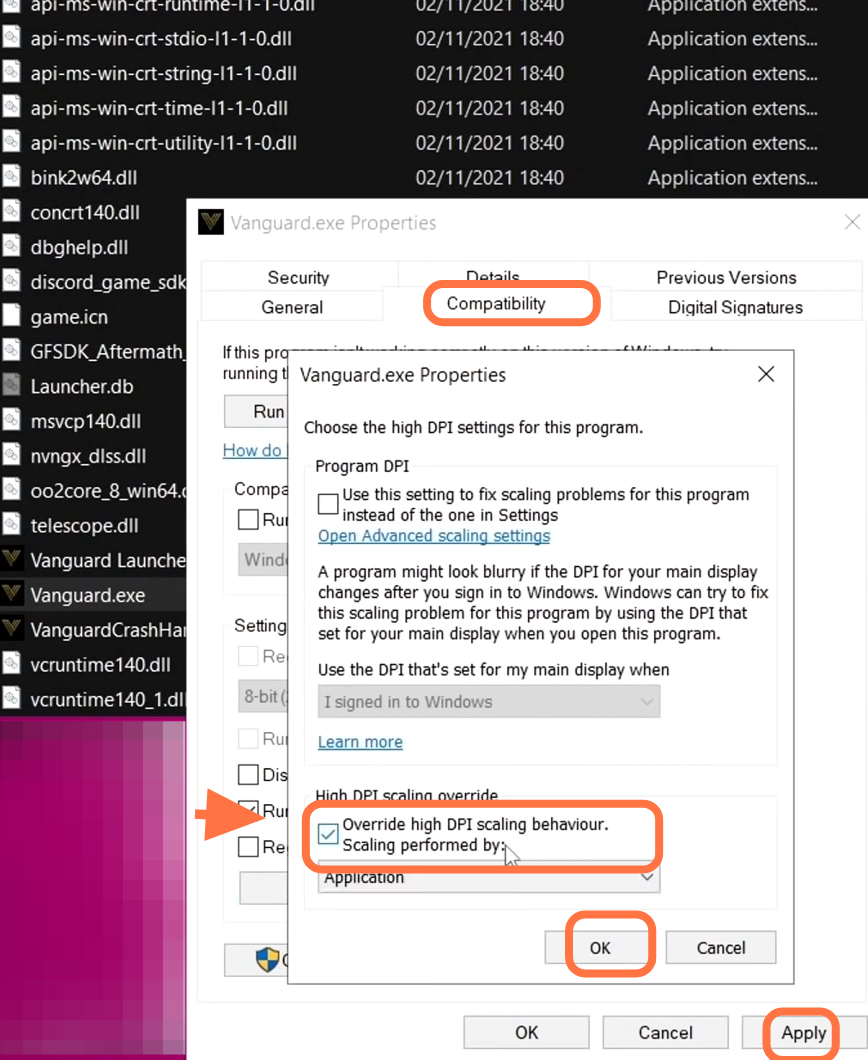
After that, you have to make the same changes in the Vanguard launcher file, right-click on it and then click on properties. Go to the compatibility tab to make sure that “run this as an administrator” is selected as it will fix most of the game crashes. Then go to change dpi settings and there make sure that override the high dpi settings is check marked then click ok and then on apply.
In-Game Settings
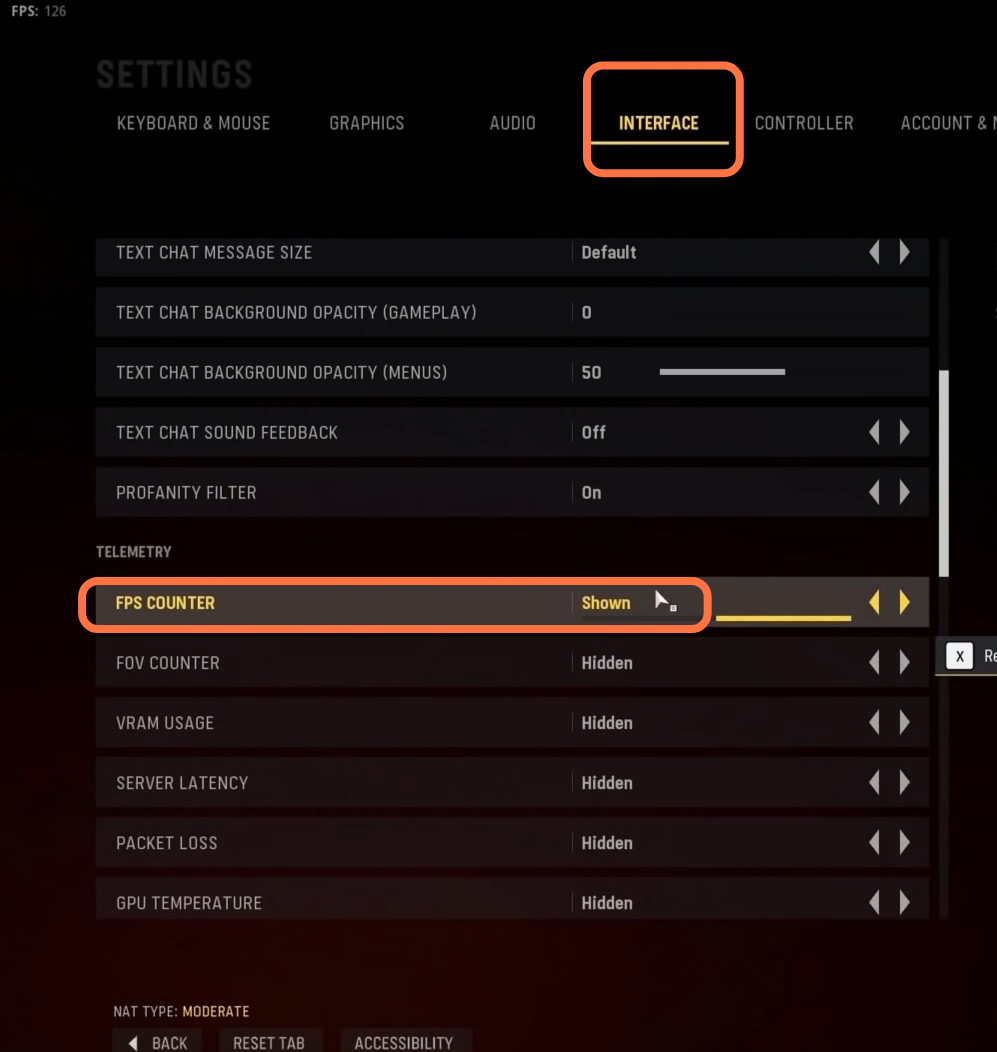
2.1- Now you need to boot up your game, go to the bottom left-hand side of your screen and navigate to settings. Then go to the interface menu, scroll down to the FPS counter option and enable this option. In the same menu, you can enable any option you want. You also need to make sure that the skip intro option is turned on.
2.2- Before you go to graphic settings to go through all of the best settings, you have to do a whilst match instead of a private match. So whenever you change anything in your game settings, you can see how they affect the visuals and performance. In the gameplay, you can decide which is best for your system. You can also choose to add bots for a closer representation of your FPS.
2.3- After booting into your match, you can go to graphics settings. You have to set the Display mode to full-screen as it is the best option and will provide you with the lowest level of latency. Display resolution should be set to auto or to the highest resolution available which will match your monitor’s native resolution. The refresh rate should be set to as high as possible. You have to keep both of the V-syncs OFF. Set the Frame rate limit to unlimited and keep the aspect ratio to automatic position.
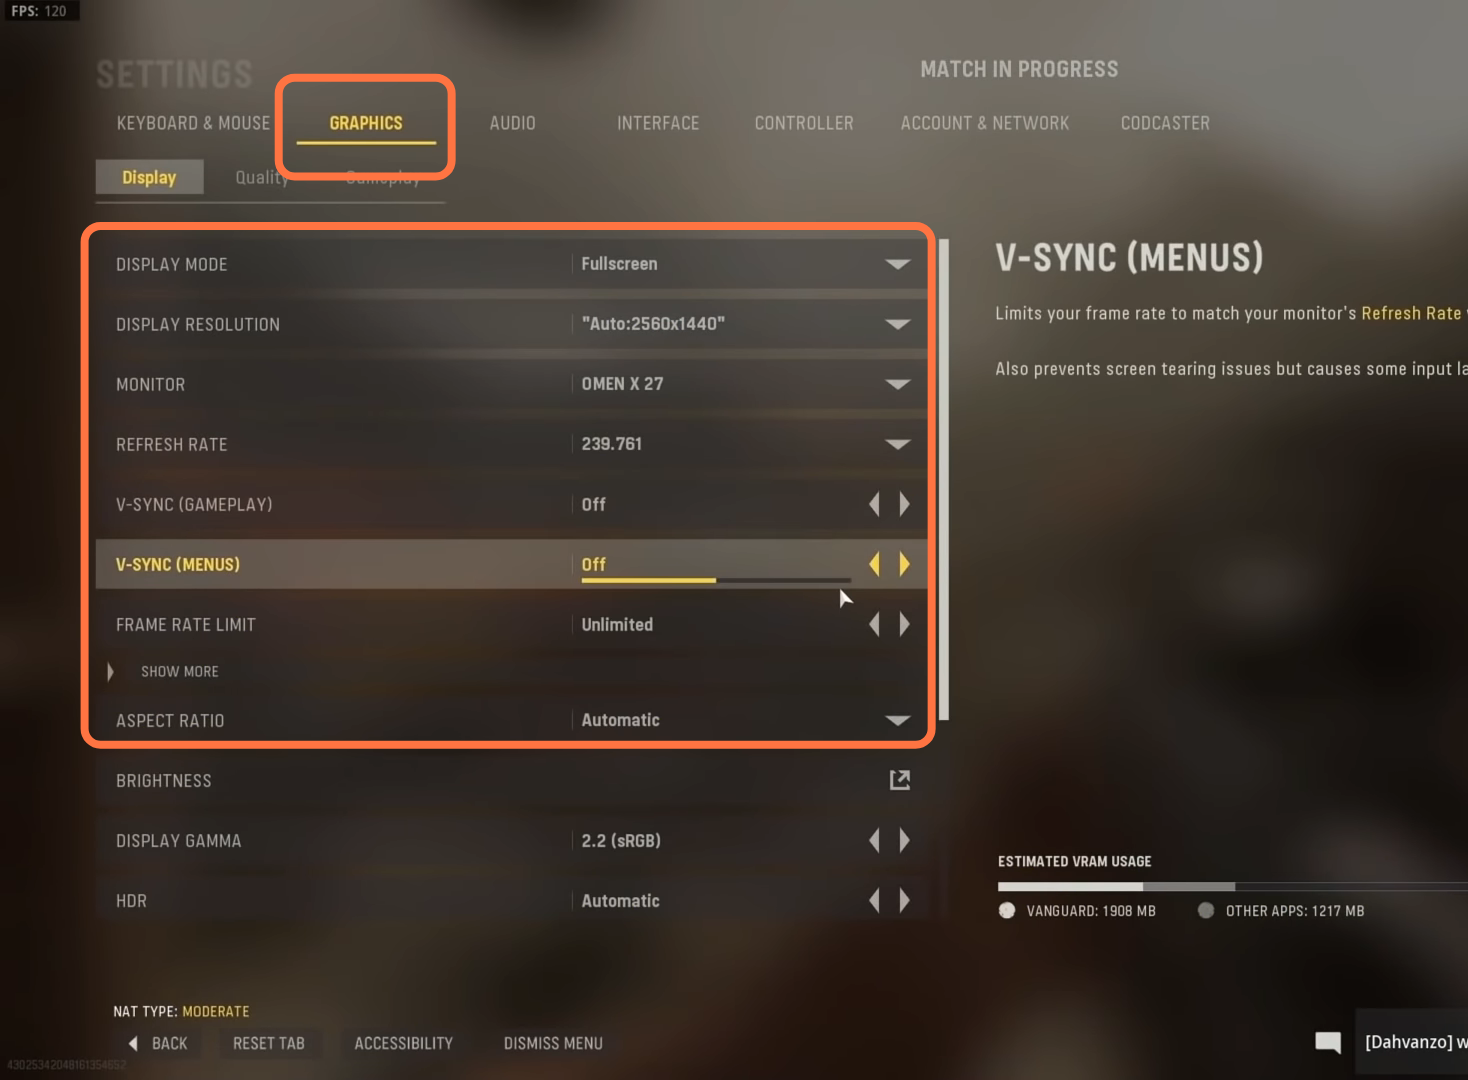
You can set the focus mode according to your personal preference. After that, navigate down to on-demand texture streaming and click on the up arrow to see the pop-up menu. For the best FPS possible, you need to turn on the On-screen texture streaming.

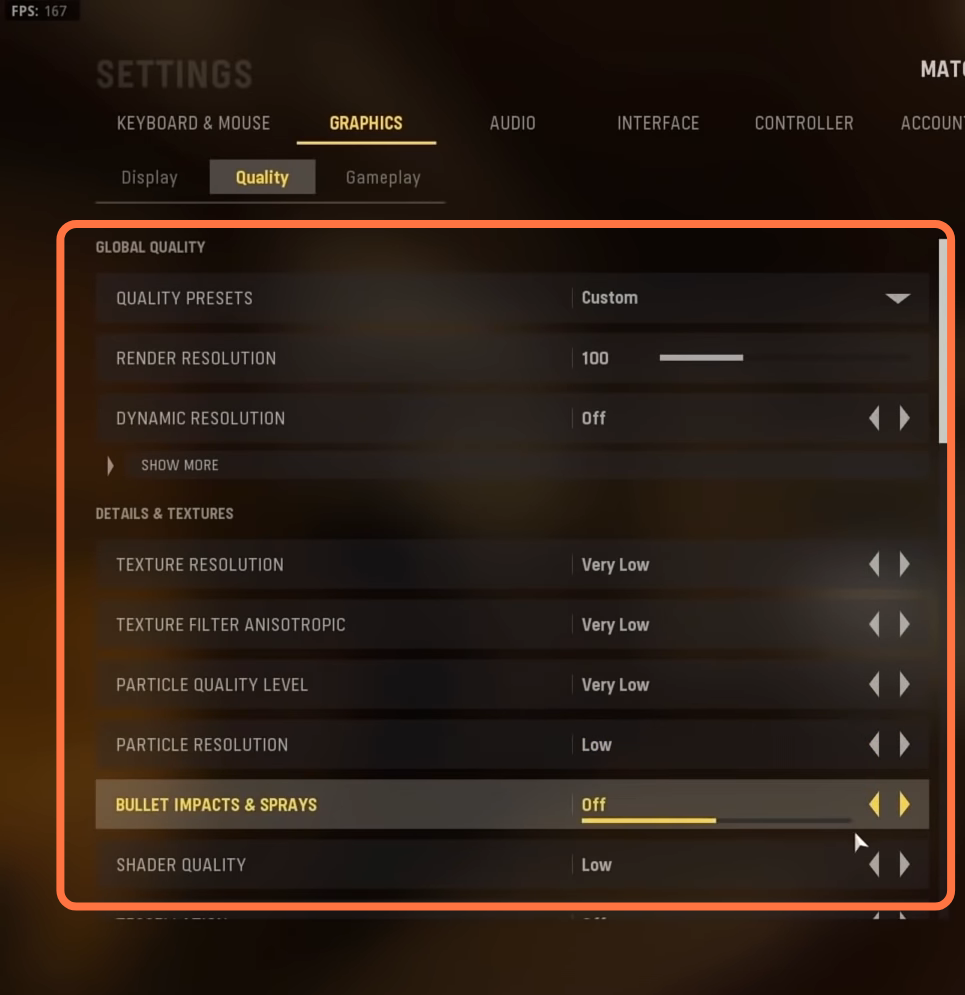
Set the render resolution option to 100 and turn OFF the dynamic resolution. You can keep the texture resolution very low to get the best FPS possible. After that, set the texture filter anisotropy to very low and set the particle quality level and particle resolution to the low position. Bullets impact and sprays will be turned off and you need to set Shader quality to low.
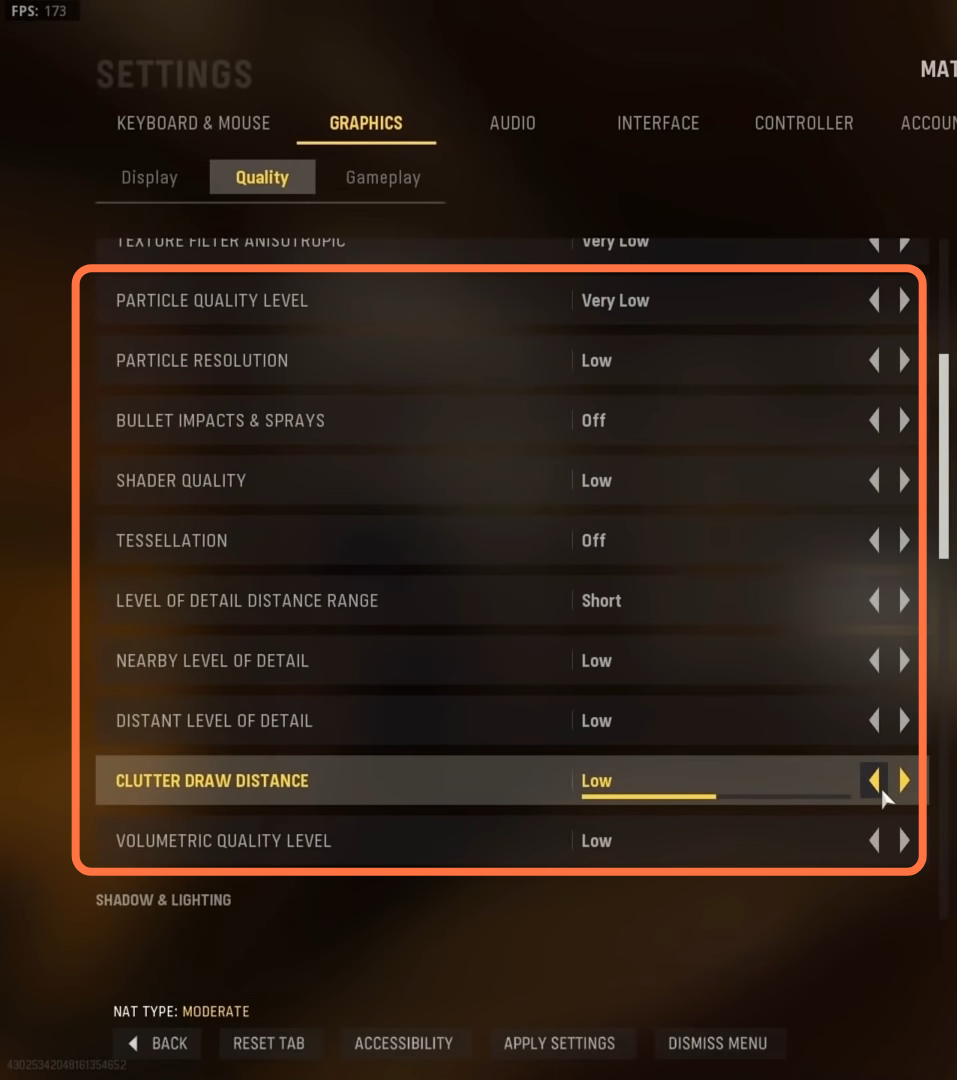
You must turn off Tesselation. and the level of detail distance will depend on your map and mods. The nearby level of detail should be set to low and the distance level of detail has to match with the level of detail distance. You need to set the Clutter draw distance and Volumetric quality level to low.
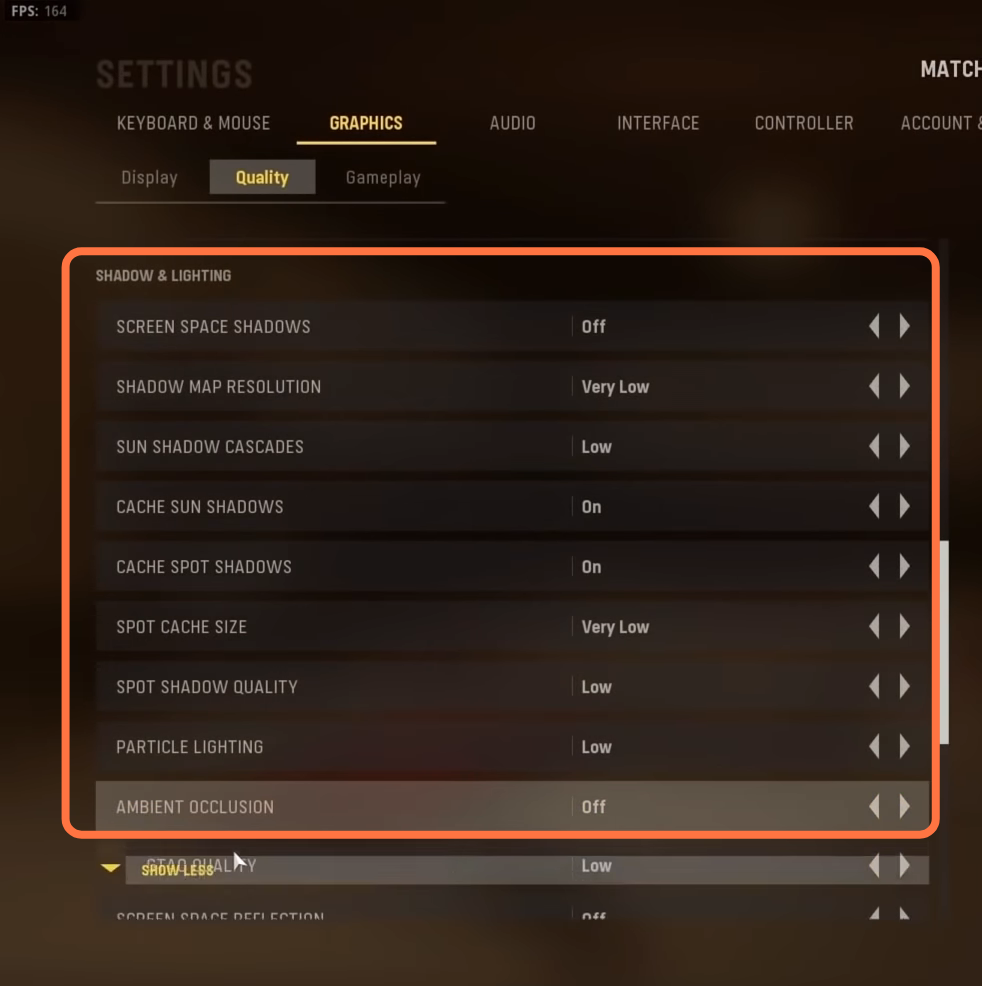
After that, turn off the Screen space shadows and set the Shadow map resolution to very low. Sun shadow cascades should be set to low while cache sun shadow and cache spot should both should be turned on. Spot cache size is going to be set to very low. For the best FPS possible, you need to keep particle lighting very low and turn off the Ambient occlusion.
2.4- If you are using an NVidia card or an AMD card, then you have to set the Fidelity CAS strength to 0.80 as it will give you the best FPS possible.

Game Optimization
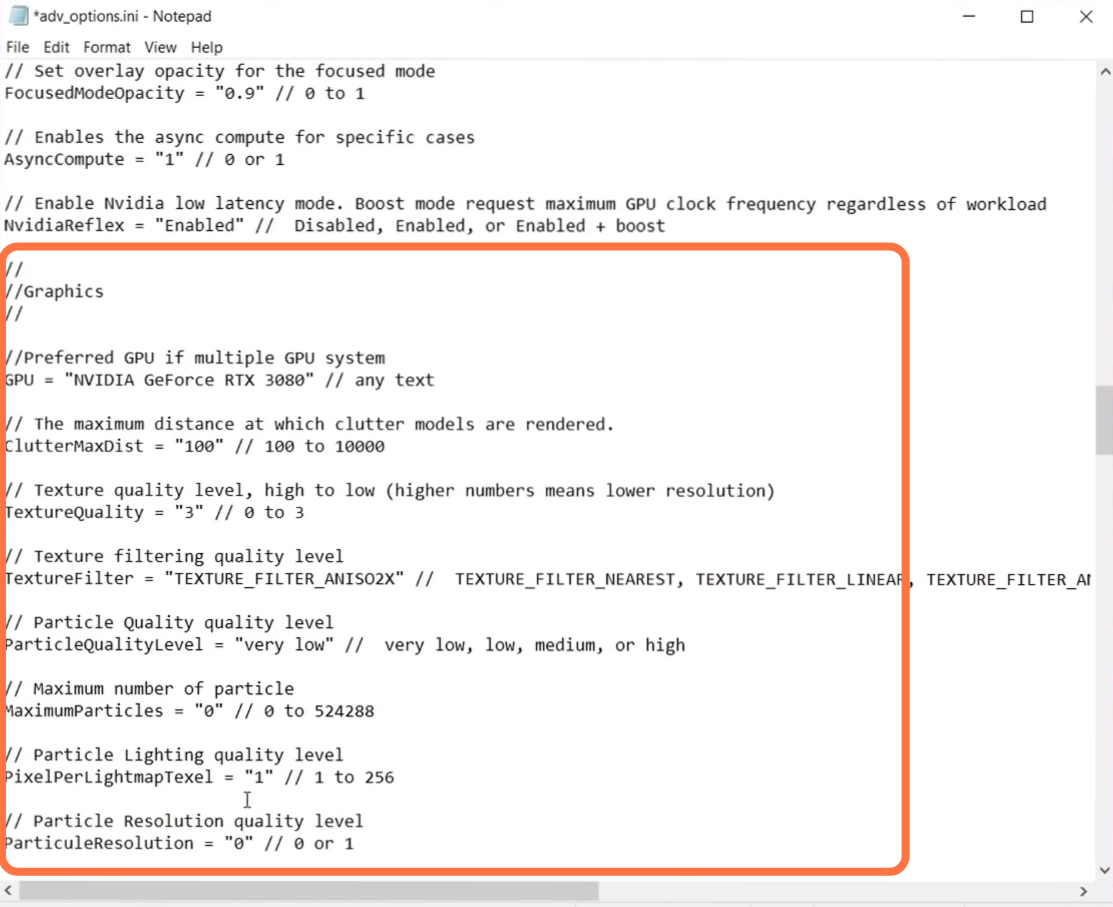
3.1- You will need to go to your file explorer, navigate to documents and then go inside the COD vanguard folder. Go to players and open adv_options_ini. You have to set the Video Memory Scale to 0.9, and the render worker counts to half of your physical count. Clutter Amx distance should be set to 100. The maximum number of particles should be set to 0. Pixel per light map should be set to 1. Set the Particle resolution to 0.
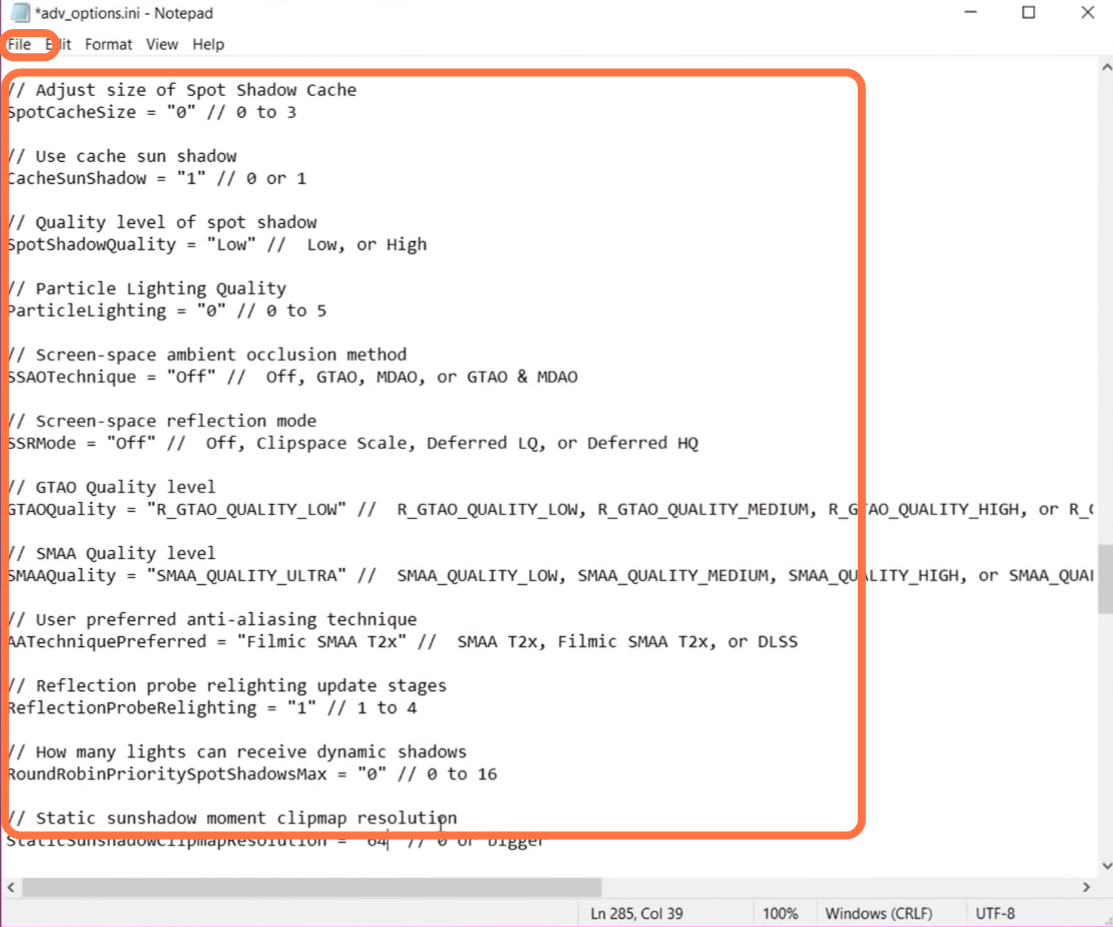
After that, set Corpsescallingthreshold to 1 and Particle lighting quality to 0. Set Reflection probe relighting to 1 and Round robin priority spot shadow max to 0. You have to set the Sun Shadow moment clip map resolution to 64, then go to the top left, select the File button and click on Save.
GPU Optimization
4.1- This is a very important step, you have to make sure that you are running on the latest GPU driver. In case you want to check this, press the control shift and escape buttons on your keyboard to open the task manager, and then head over to the Performance tab. Scroll all the way down to GPU 0 and you will find the name of your GPU on the top right side of this panel.

4.2- After that, right-click on the desktop and open the NVidia control panel. On the top left side, you have to click on the “Adjust image settings with preview”, use the advanced 3D image settings that have been selected and then click on Apply.

4.3- Now head to Manage 3D settings, scroll all the way down to Power management mod, and set it to maximum performance. It will raise your idle clock slightly and also can help to solve the stuttering issues inside of the game. You have to set the Open Render GPU should to your GPU and set the preferred refresh rate to the highest. After that, scroll down to anisotropic optimization and enable this. You need to allow Negative lod Bois and set the texture filtering quality to high performance. Try linear optimization to threaded optimization and then click on Apply.

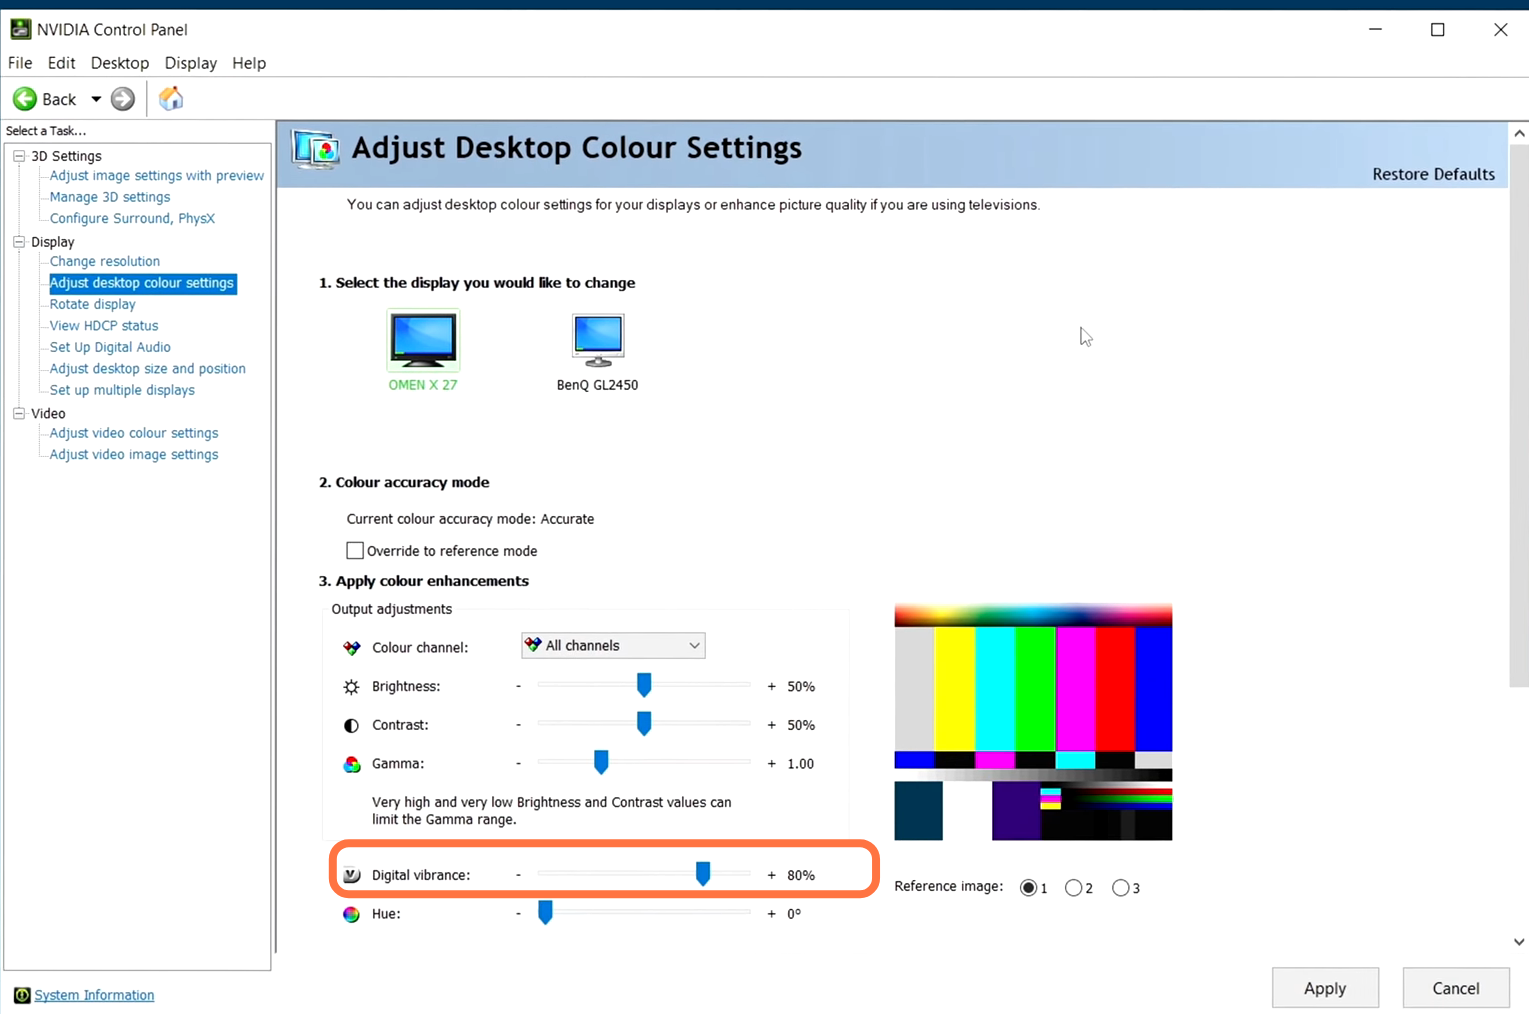
4.4- Now to go to the Adjust Desktop color settings on the right-hand side, you have to adjust your digital vibrance which will increase your saturation and give you a much nicer image result without using any NVidia filter or other techniques.
Windows Optimization
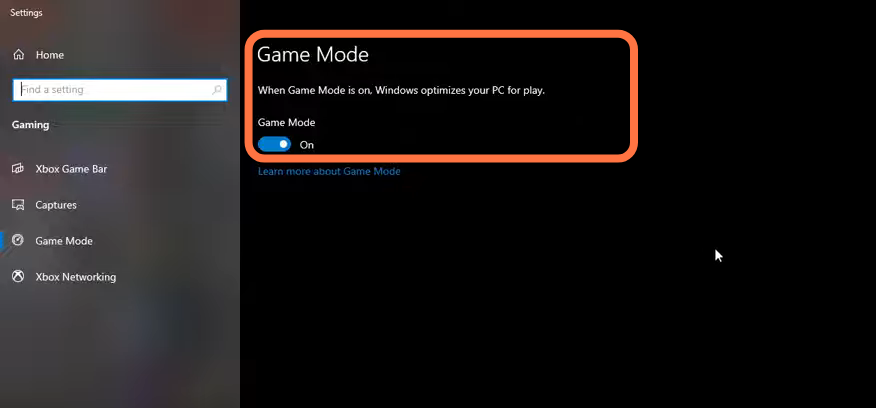
5.1- First, you have to search game mode in the search bar and press enter. Make sure that the game mode is activated so that you will get decent performance. You need to make sure that all your resources are focused on the game that you are playing.
5.2- Make sure that the auto-upgraded GPU setting is turned on. You will need an NVidia card of the 1000 series, it will really help with bottlenecks and you can expect a 2 to 5 percent boost in the FPS.

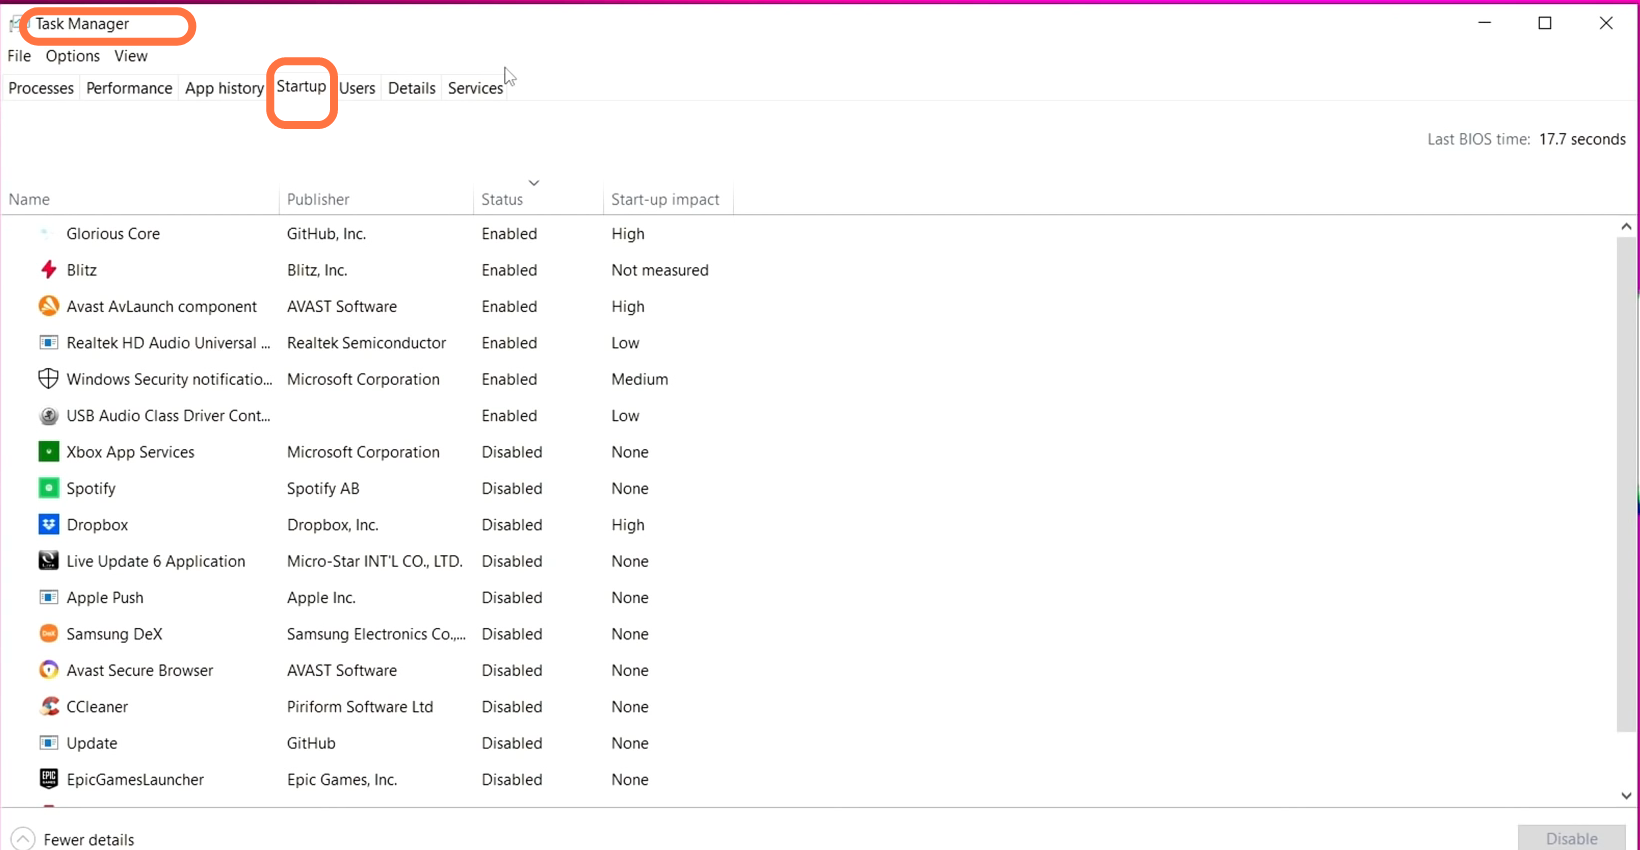
5.3- After that, open your task manager and then go to Startup. Inside of this, you will find all those programs that will boot up automatically when you turn on your PC. You have to turn off as many programs as you can. It does not mean that you are deleting the programs but just it will stop them from booting up automatically. As when they boot up they are taking CPU cycles which will reduce your performance.
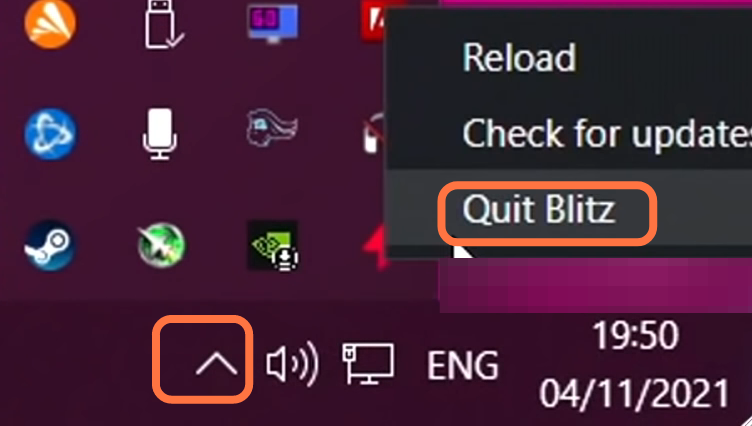
5.4- Once you are done, you need to turn off all the programs running in the background. Go to the taskbar, then click on the small arrow and start right-clicking on the programs that you don’t want to run in the background, and then click on Quit.
5.5- Now you have to go to intelligence list cleaner as it will help you if you don’t have alot of Ram on your PC. It will free memory and will optimize your stand-by list. You need to input half of your total memory in the free memory column and then press start. It will run automatically, so you need to minimize it.

Web Browser Settings
After that, open up your web browser and click on the three dots on the top right-hand side of your screen. Then go to settings, click on the three bars on the left side and scroll down to find Advance. After that, scroll down again to find the System. You have to make sure that the first option is switched off. If this is turned on, then all your plug-ins and extensions will still run in the background even when you close the browser.

Fixes For Crashes
7.1- First of all, you will need to right-click on the Play button, go to settings, and then navigate to game settings. Go to Call of Duty Vanguard and then go to the drop-down menu next to it. Select additional command line argument and input -D3D11.
7.2- Make sure that you have turned OFF on-demand texture. You will find slight low FPS after this but you will see more stability.
7.3- Turn off any GOU overclocks and make sure that you are running the both launcher and the game application as an administrator.
7.4- Implement an FPS cap using the in-game FPS settings set to custom and set this to your monitor refresh rate.
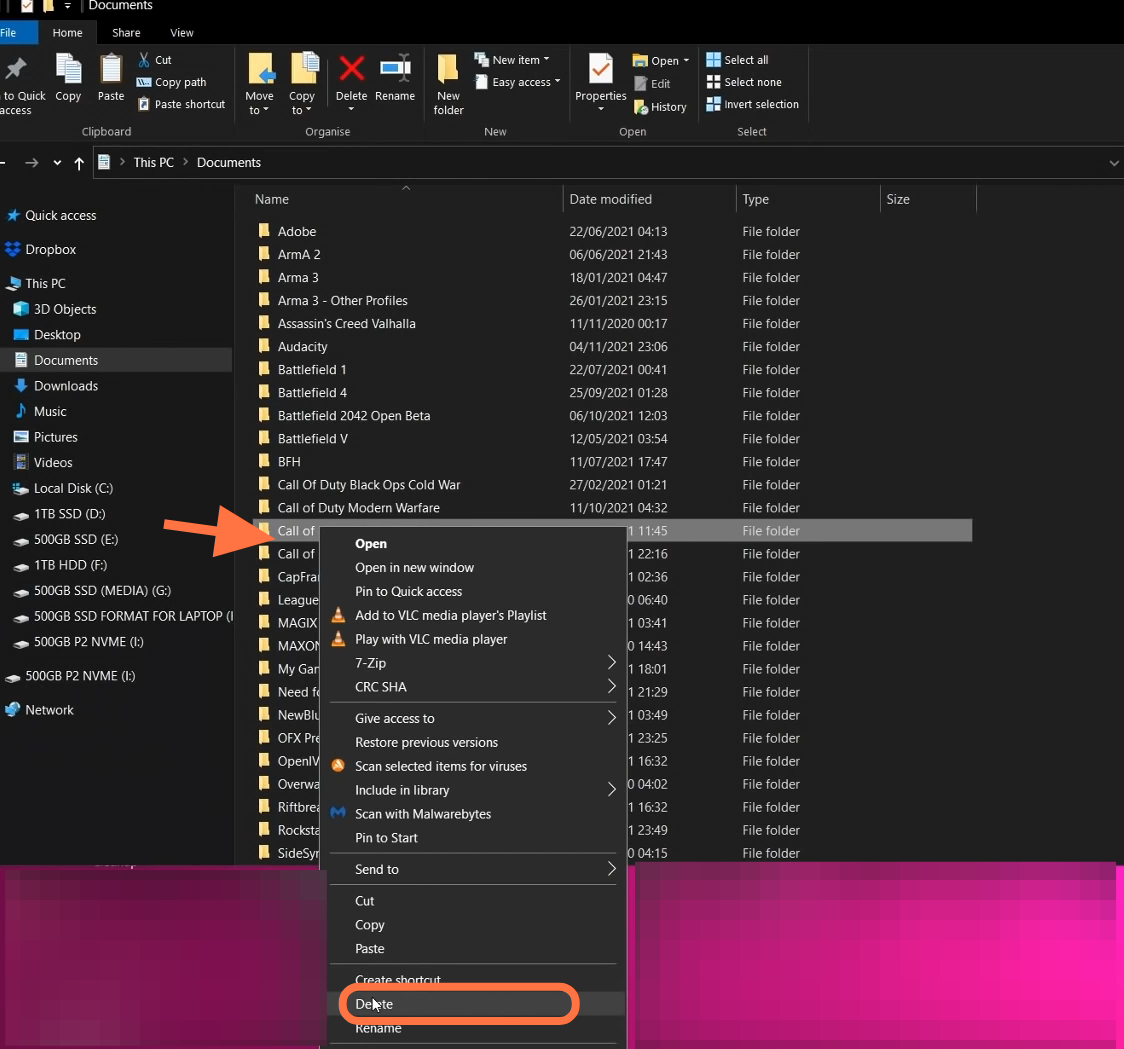
7.5- You can also try to delete your configs folder from the documents folder. After this boot up the game again and generate brand new config files. At last, if you do have msi burner available to you you can also lower the power limit of your graphics card by 10% or 20% as this will cool down your temperature slightly reducing your performance but this will fix your crashing issues.