In this guide, you will find out how to increase performance FPS with any setup in Creative Destruction. First, you have to make games in the game properties, update display drivers, and also enable all the CPU cores. You have to disable all the unnecessary programs as they will affect your performance and also your FPS. At last, you have to set your in-game resolution.
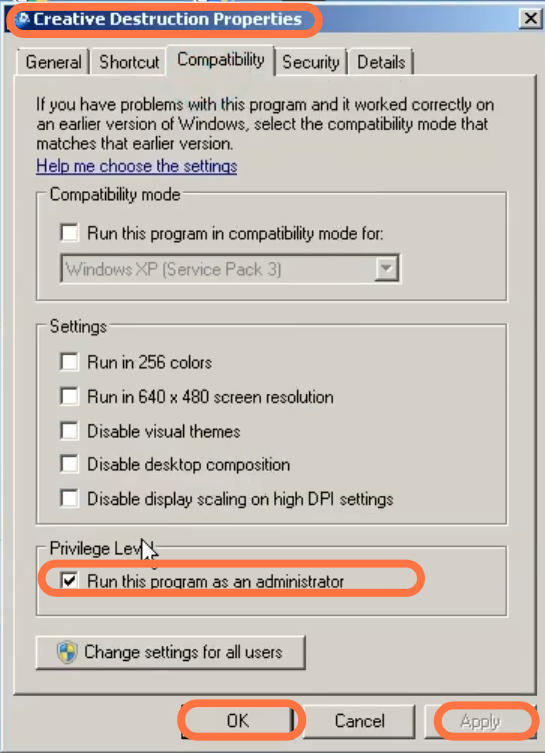
Creative Destruction Properties
You have to right-click on the creative destruction app and then click on properties. After this, go to the Compatibility tab and make sure that “Run this program as an administrator” is enabled and also don’t enable any other option. After this, click on Apply and OK.
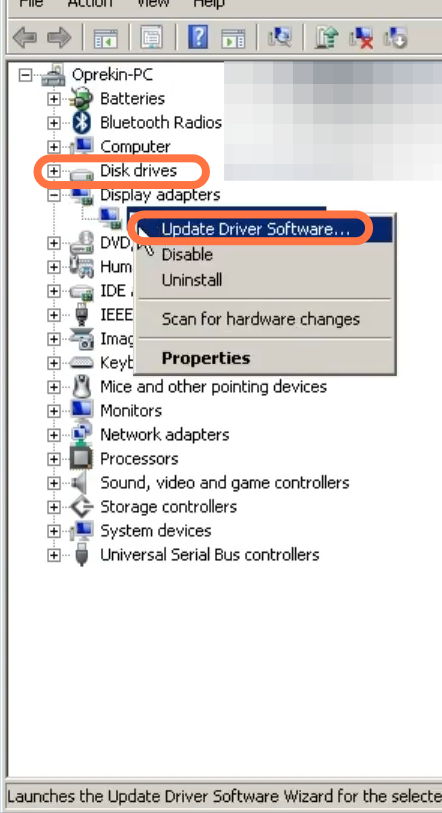
Update Display Drivers
For this, you have to right-click on the Start button, and then click on Device Manager. Expand Display Driver and you will find the name of the graphics card which you are using in your system. You have to right-click on your graphics card and then click on Update Drivers.
Enable CPU Cores
You will need to enable all CPU cores/threads. Input MSConfig in the search and open it, then go to boot and enable all the CPU cores. Also, enable the no GUI boot.
Disabling Unnecessary files
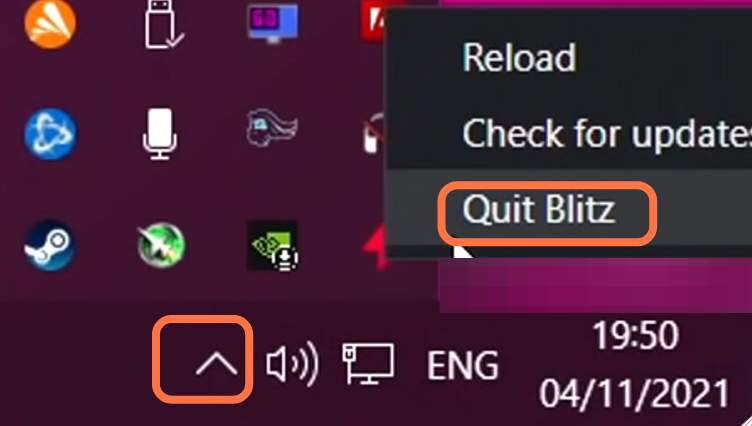
4.1- Turn off all the programs running in the background. You need to go to the taskbar, click on the small arrow, and start right-clicking on the programs that you don’t want to run in the background. After that, click on Quit.
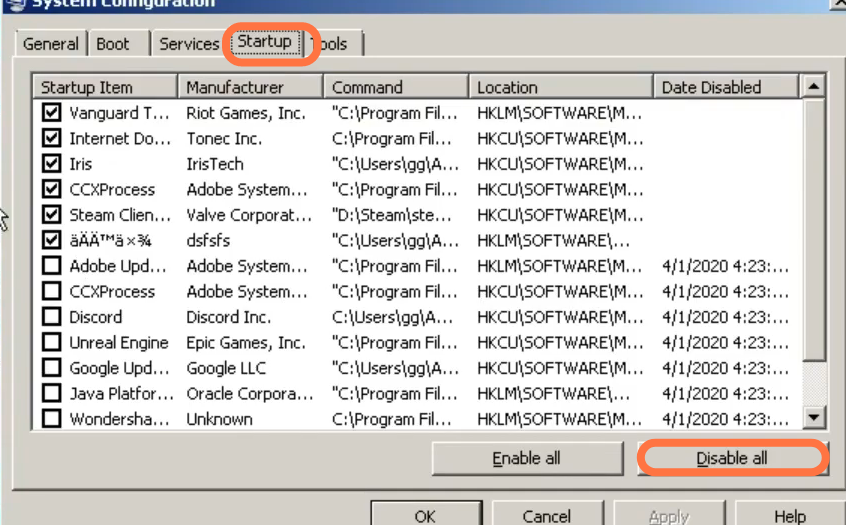
4.2- You also have to disable all the startup programs as these programs are using your cache memory. It results in low performance and also decreases the FPS. For this, go into the system configuration then click on the Startup tab then select the programs you want to disable. After that, click on the Disable button.
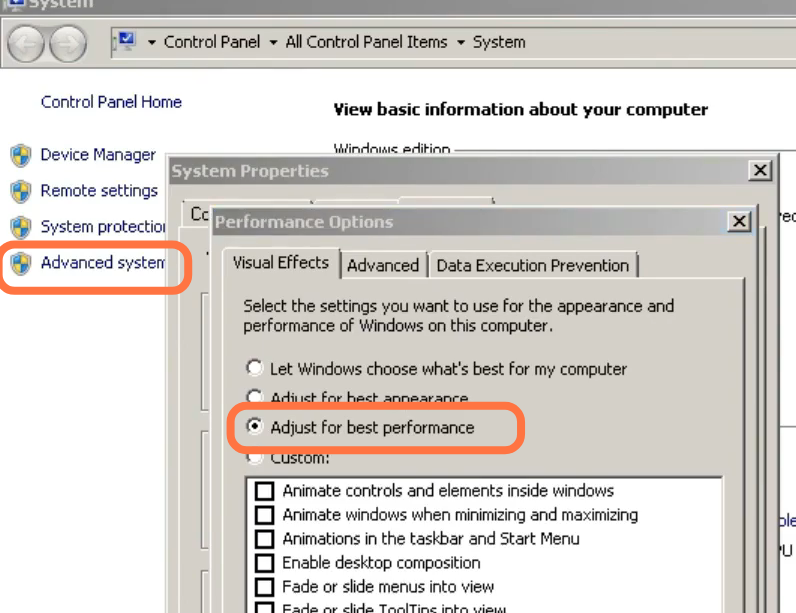
4.3- Now you have to disable the visual effects, go to the Start button, and right-click on This PC. Then go to properties, click on Advance system settings and then again click on settings. After that, select the “Adjust for best performance” option and click on Apply.
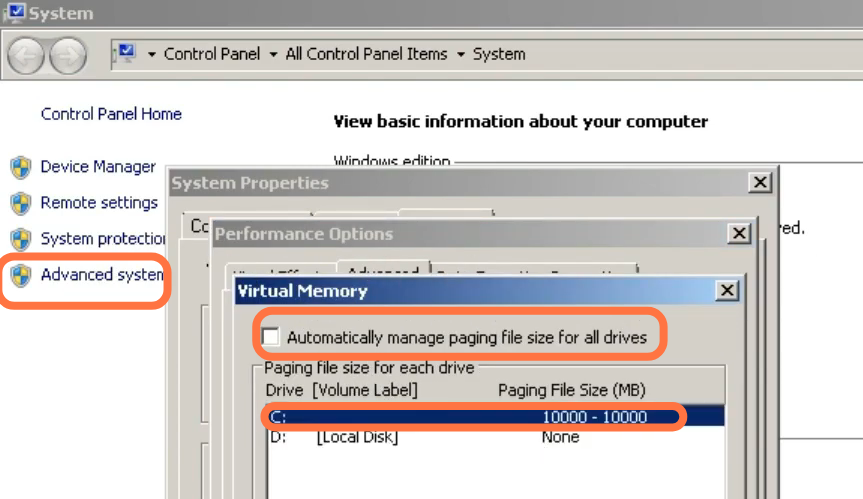
4.4- Now you have to create virtual memory. Go to the Start button, right-click on This PC, go to properties and then click on Advance system settings. After that, again click on settings, go to the Advance tab and then select the program. Then click on Change and disable automatically managing pegging file size. After that, click on custom, select any partition, and set double the amount of your Ram. Then you need to click on Apply.
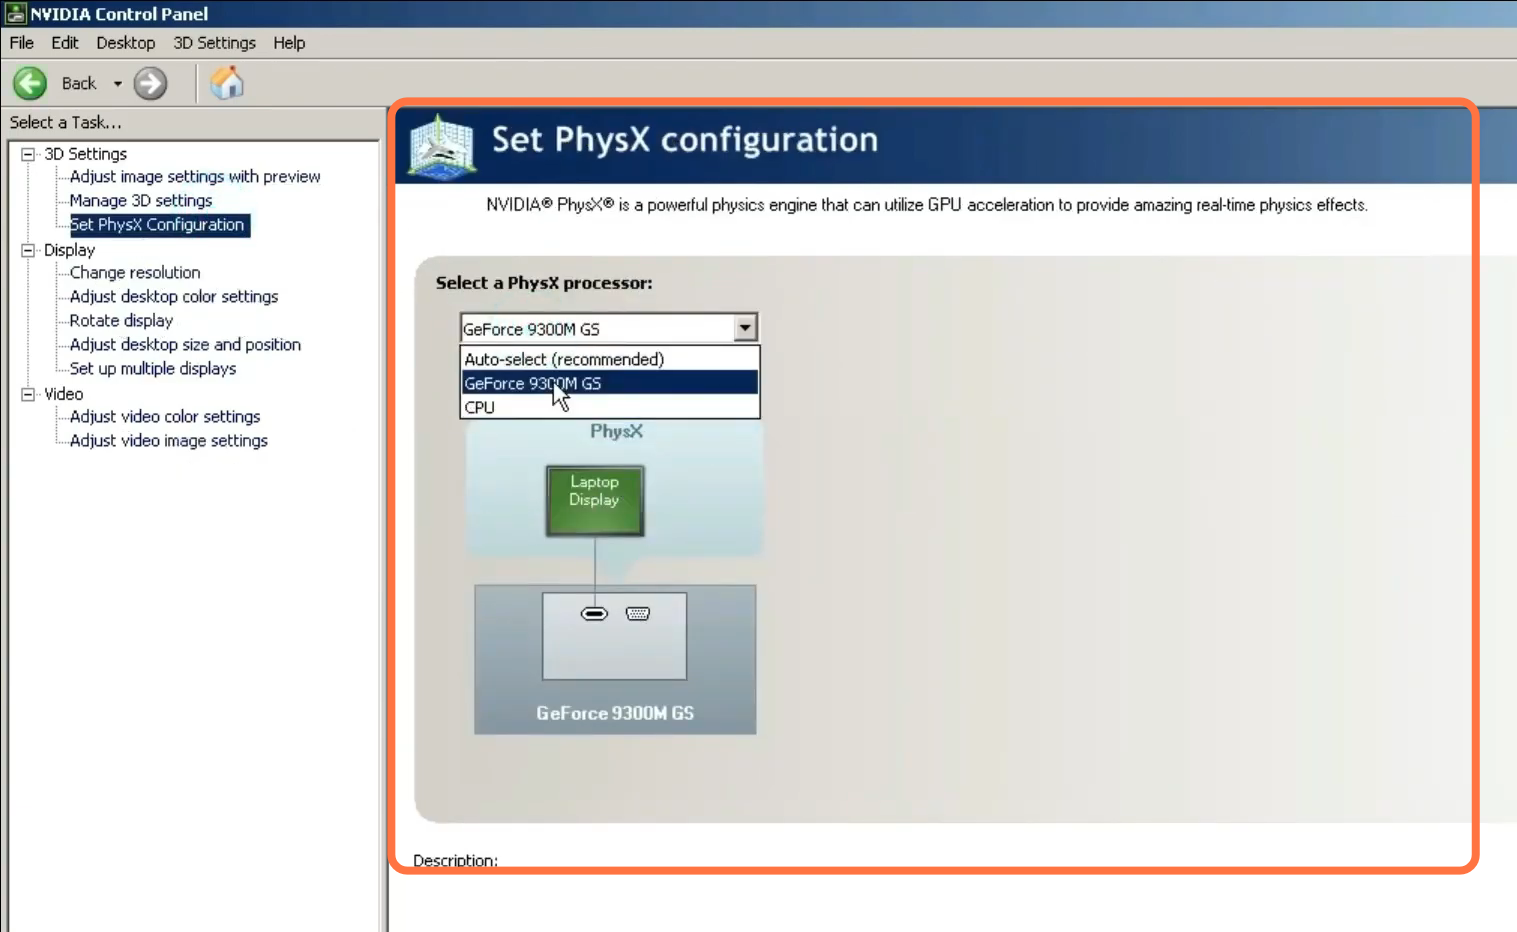
For NVidia Users
It is only if you use NVidia. otherwise, you can skip this step.
AMD User:
5.1- You have to open the NVidia control panel, go to phys x and set it to GPU.
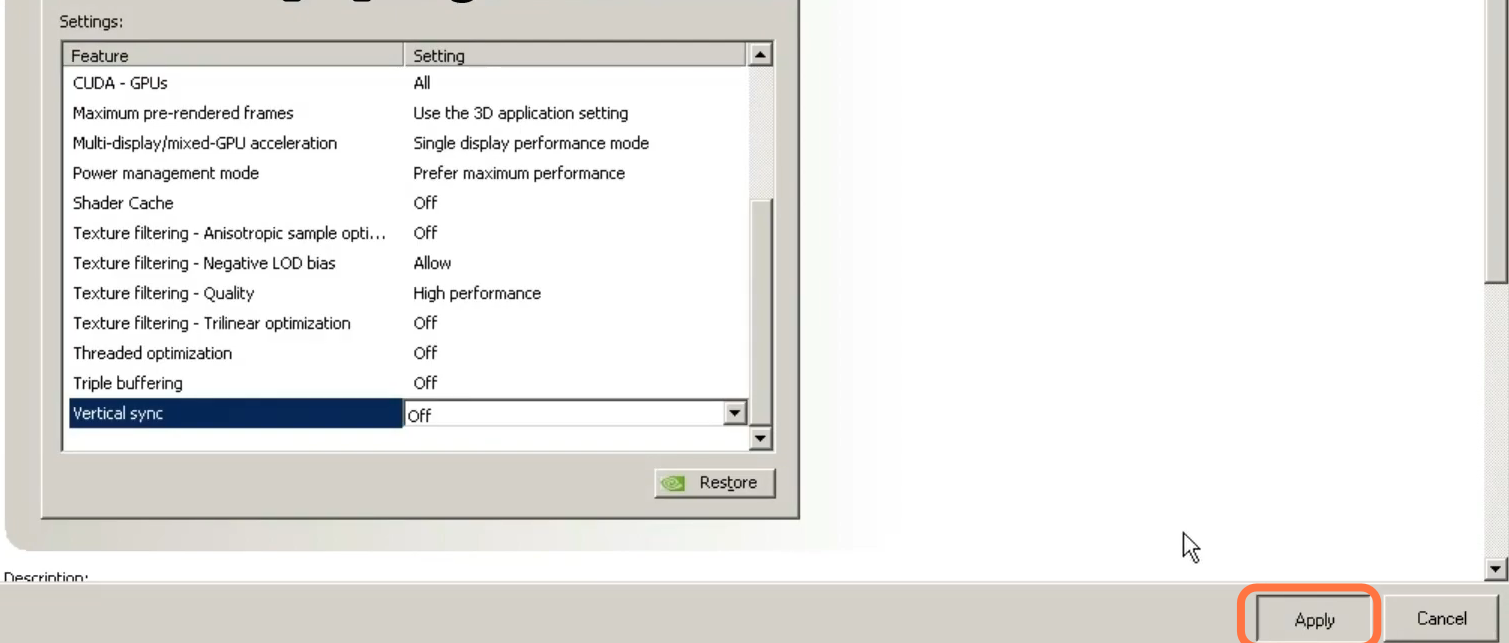
5.2- After that, click on the 3D settings, copy all of these settings, and set the image setting preview to performance. Then you need to click on Apply.
5.3- Now go to adjust desktop size and composition. Select the fill screen, click GPU, and select override scaling.
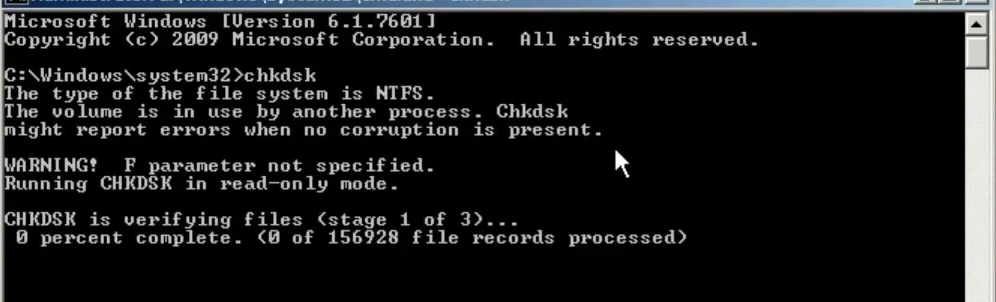
5.4- Run the AMD command to check for any disk error. For this, you need to go to search, type cmd, and run it as administrator. Type “chkdsk” and it will fix all the drive issues if you have any.
In-Game Settings
The only thing that you have to do in in-game settings is to set your resolution. You have to set this first to your default monitor’s resolution which is 1280×800. But in case you feel any lag in your game then you have to set the resolution to lower values that can be 640×480 or 340×280. As it will also boost your FPS. You can set the remaining settings according to your choice.