This guide will let you know how to increase performance FPS with any setup in Knives Out. First, you have to end the explorer.exe, make a few changes in the in-game settings, and then do disk cleanup. Then you have to update GPU drivers and close all the unnecessary programs running in the background. You have to select the best performance power plan and then you need to do disk Fragmentation. After following all the steps, you will definitely achieve the best FPS.
End Task Explorer.exe
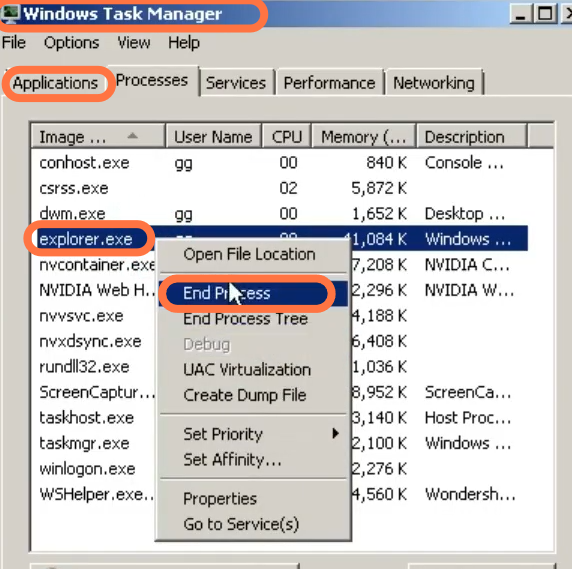
1.1- Now you have to end the task explorer.exe as it will increase your FPS. Right-click on your taskbar, then click on Task Manager and find explorer.exe then in the application tab. Right-click on it and select “End process.”
Disk Cleanup
You will need to go to this PC and then go to the properties of the drive in which you installed your Windows then click on disk cleanup. Select all the files you want to delete and press the disk clean-up button.

Update GPU Drivers
3.1- Now you have to update all the drivers of your hardware on your PC. First, you have to find out what graphics card you have on your computer by right-clicking on the taskbar and then selecting Device Manager. Expand the Display Adapter and you will find the name of your graphics card. Then right-click on your graphics card and click on Update Driver.

Disable unnecessary services
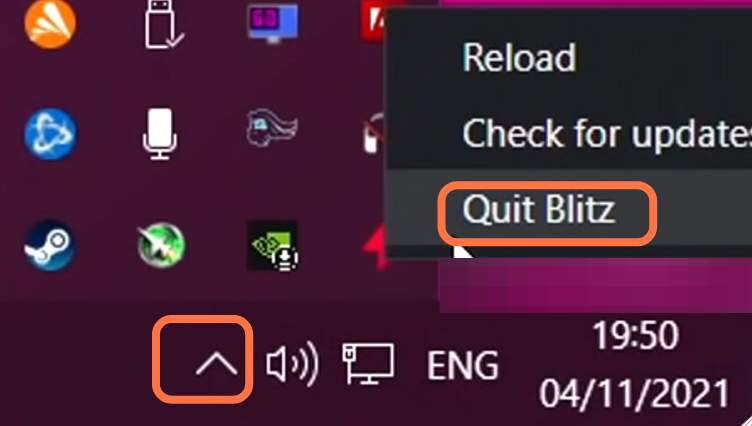
4.1- You have to turn off all the programs running in the background, go to the taskbar and then click on the small arrow. Start right-clicking on the programs that you don’t want to run in the background and click on Quit.
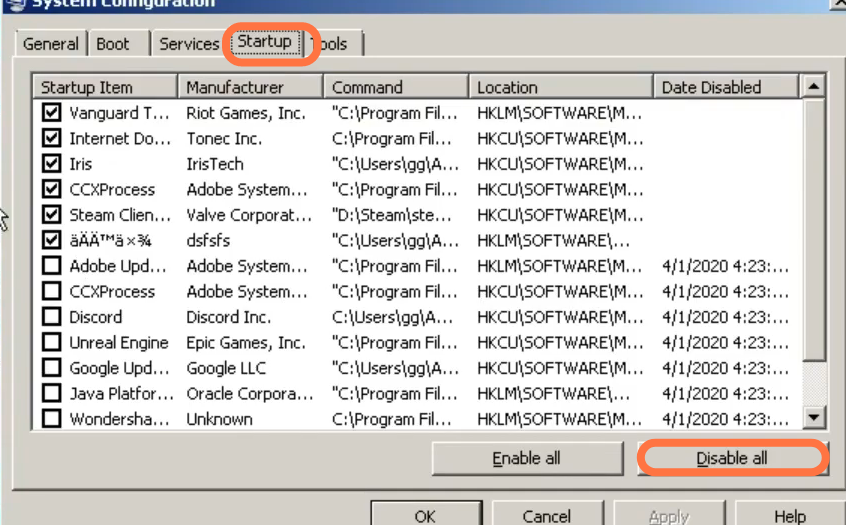
4.2- You also have to disable all the startup programs as these programs are using your cache memory. It results in low performance and also decreases the FPS. For this go into the system configuration then click on the startup tab, and select the programs you want to disable. After this, click on the Disable button.
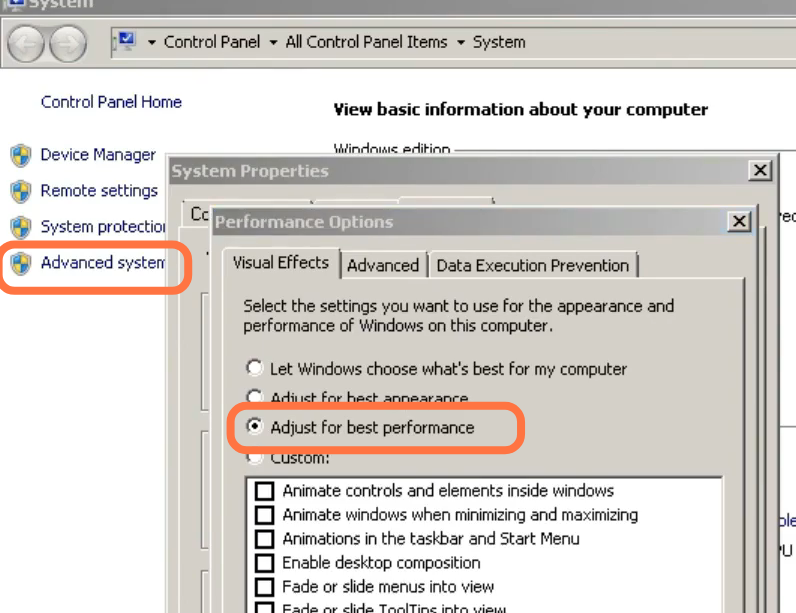
4.3- Now you have to disable the visual effects, go to the Start button, and right-click on This PC. Then go to properties, click on Advance system settings and then again click on settings. After that, select “Adjust for best performance” and then click on apply.
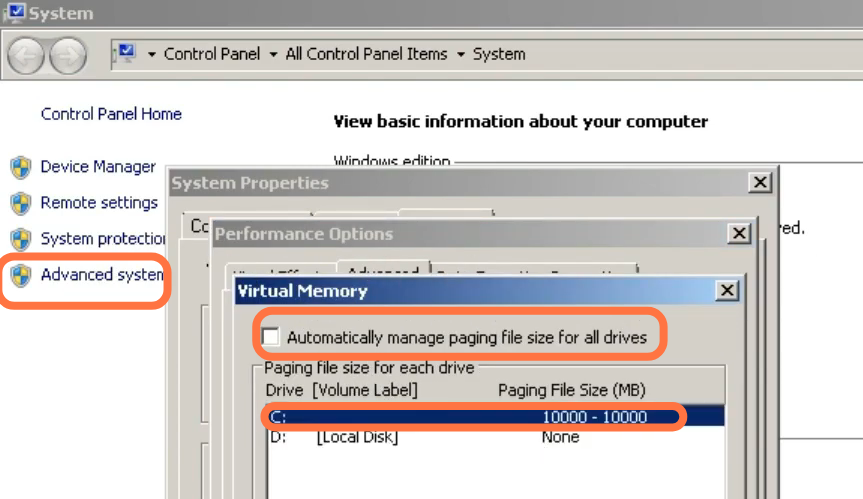
4.4- Now you have to create virtual memory, go to the start button, and right-click on This PC. After that, go to properties, click on advance system settings and then again click on settings. Go to the Advance tab, select the program and click on Change. You have to disable automatically managing pegging file size, click on Custom, and then select any partition. Set double the amount of your Ram and click on Apply.
In-Game Settings
First of all, you will need to boot up your game and then press the Escape button on your keyboard. Go to the graphics tab and set all the settings to the lowest possible value. Then you also have to make sure that the Full screen is selected for Windows.
Power Plan Settings
It is a great and easy way to enhance the performance of your system, as they are highly customizable and effective for disabling some sleep and low-power modes.
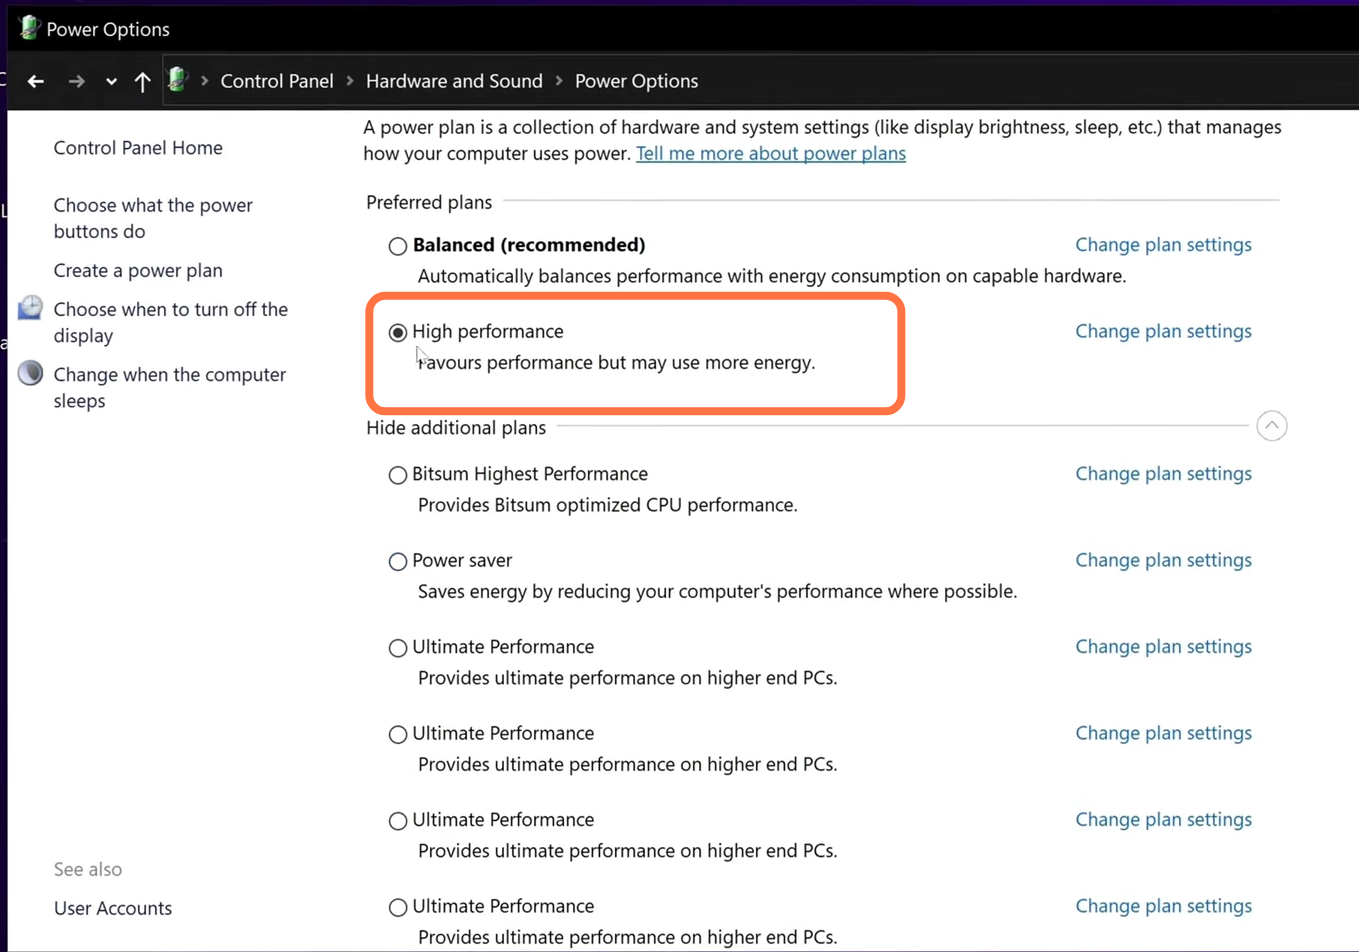
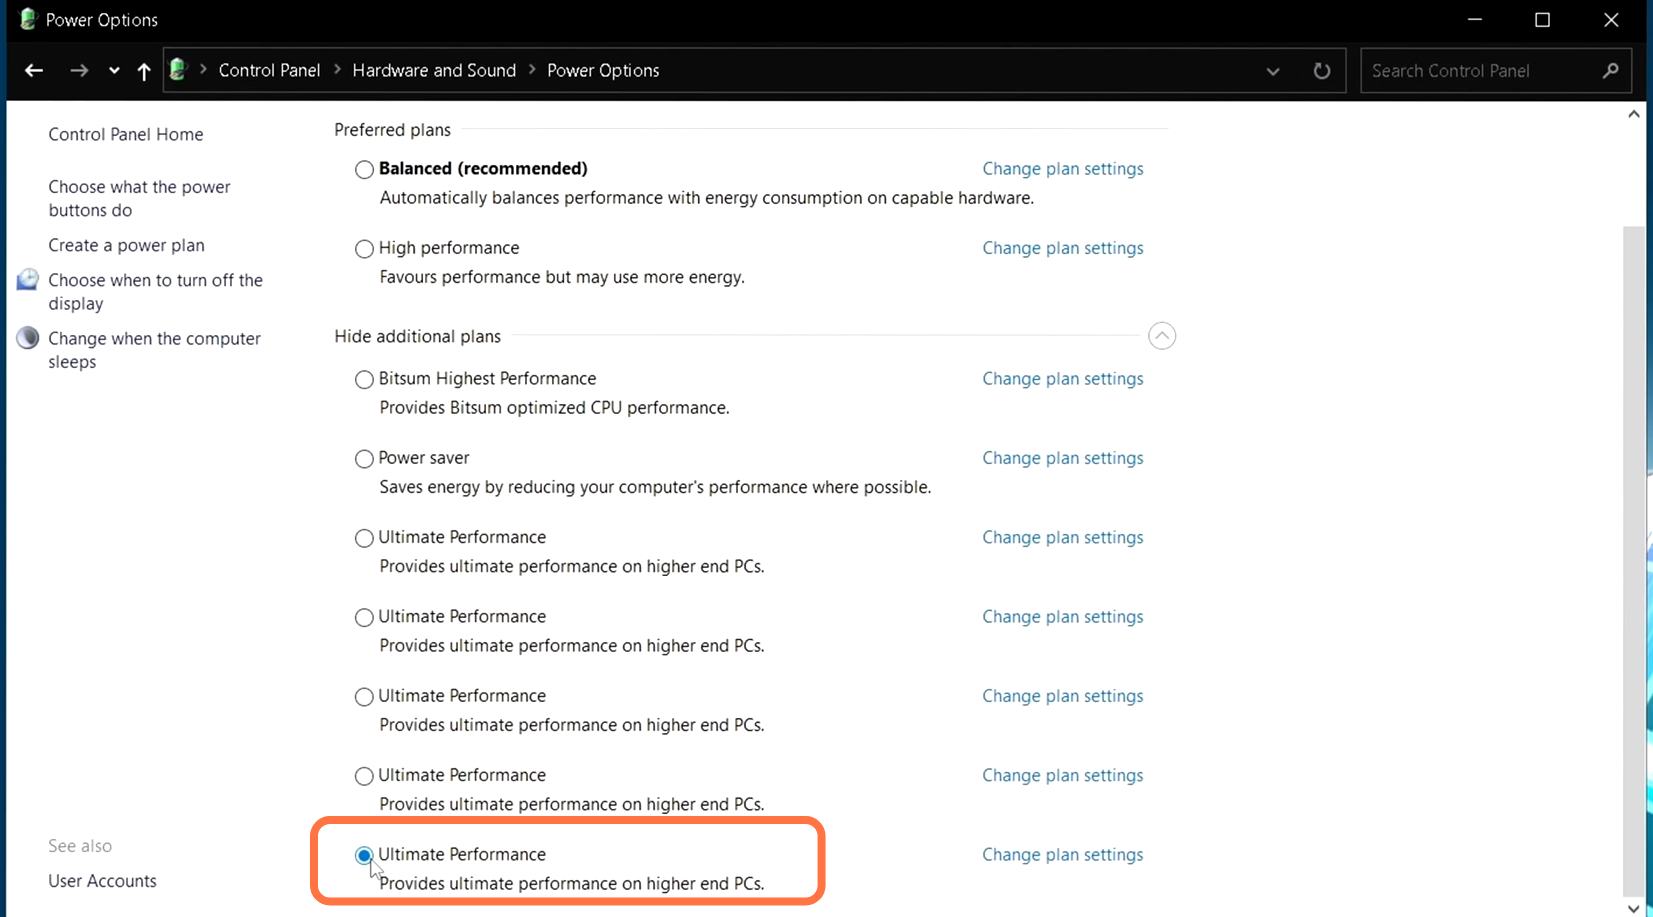
6.1- You have to write “edit power plan” in the search column and press enter. Now inside this menu go to the power option on the top, click on show additional plans and scroll down to select the high-performance power plan.
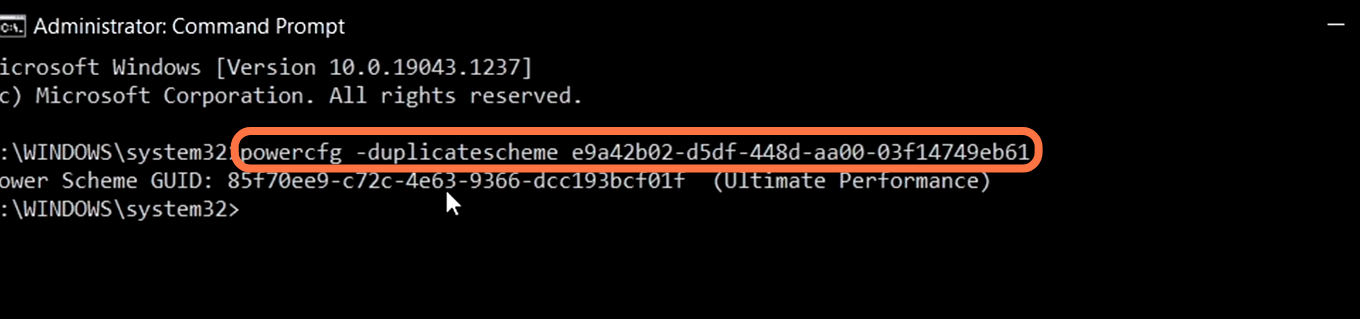
After this, go to the bottom left-handed side of your screen to the search bar and run the Command prompt as an administrator. You have to paste the command “powercfg -duplicatescheme e9a42b02-d5df-448d-aa00-03f14749eb61”, then enter, and now you can exit.
Now again go to the power play menu and press the refresh button on the top right corner. You will find the ultimate performance power plan, you have to select this option.
For NVidia Users
It is only if you use NVidia. otherwise, you can skip this step.
AMD User:
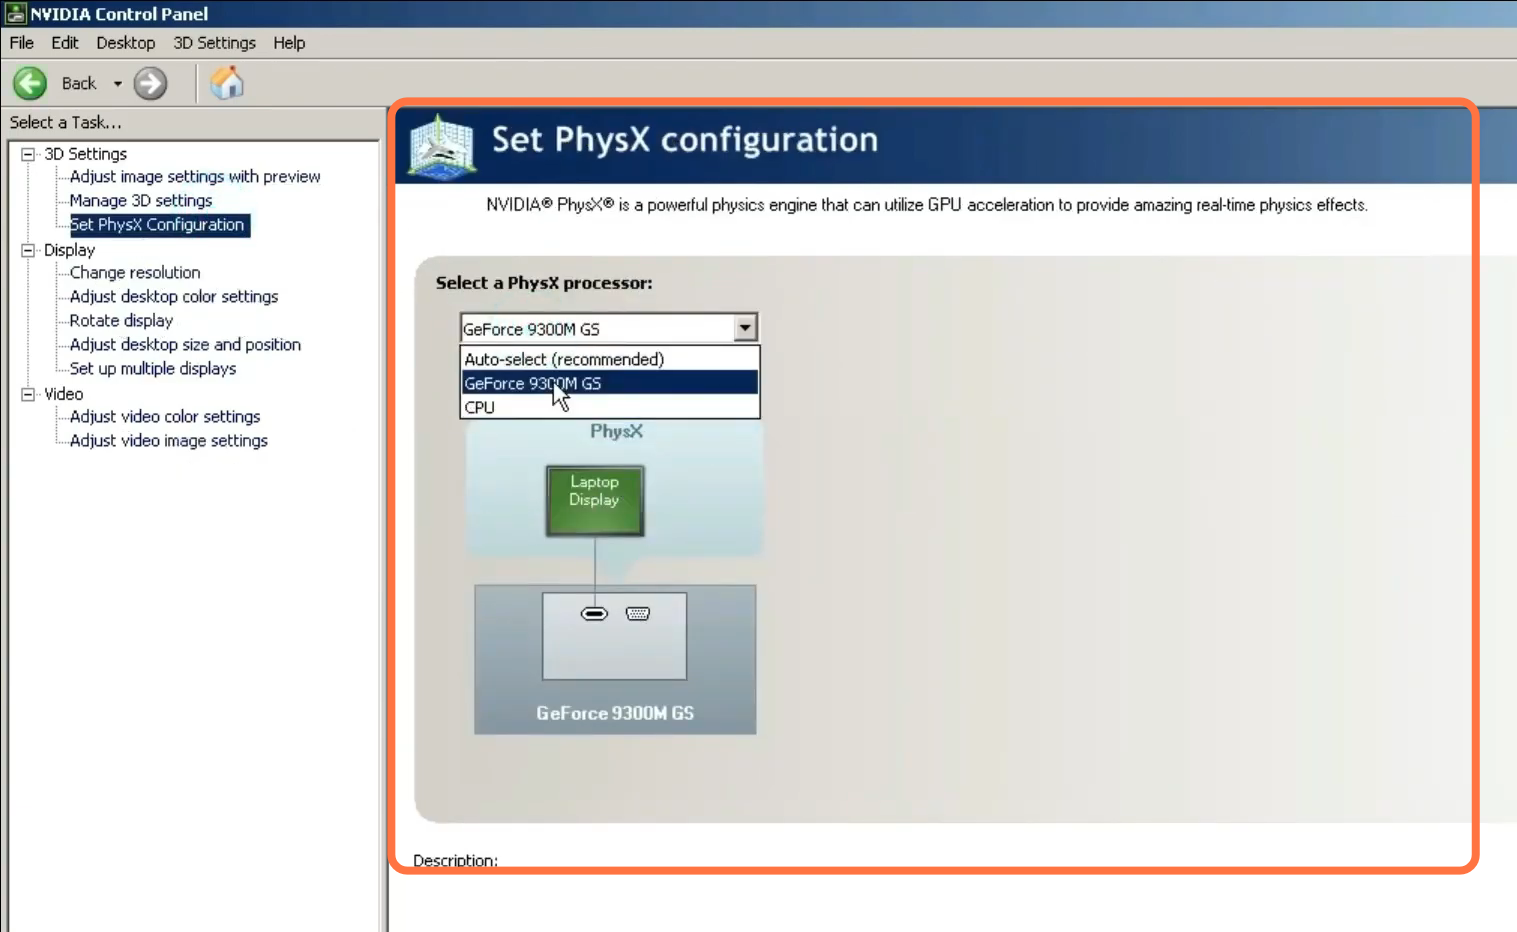
7.1- You have to open the NVidia control panel, go to phys x and set it to GPU.
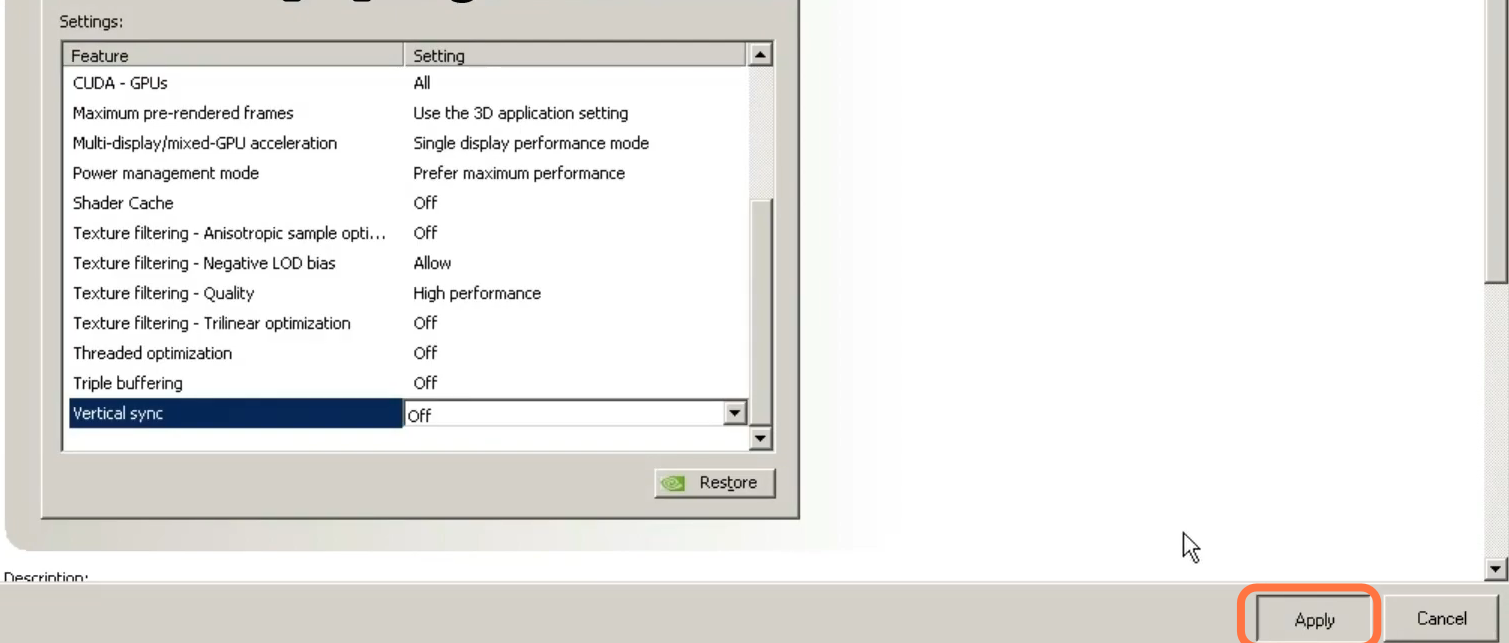
7.2- After that, click on the 3D settings, copy all of these settings, and set the image setting preview to performance. Then you need to click on Apply.
7.3- Now go to adjust desktop size and composition. Select the fill screen, click GPU, and select override scaling.
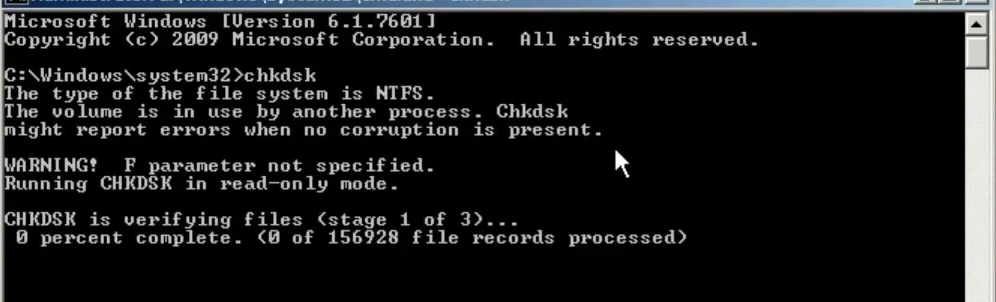
7.4- You need to run the AMD command to check for any disk error. For this, you need to go to search, type cmd, and run it as administrator. Type “chkdsk” and it will fix all the drive issues if you have any.
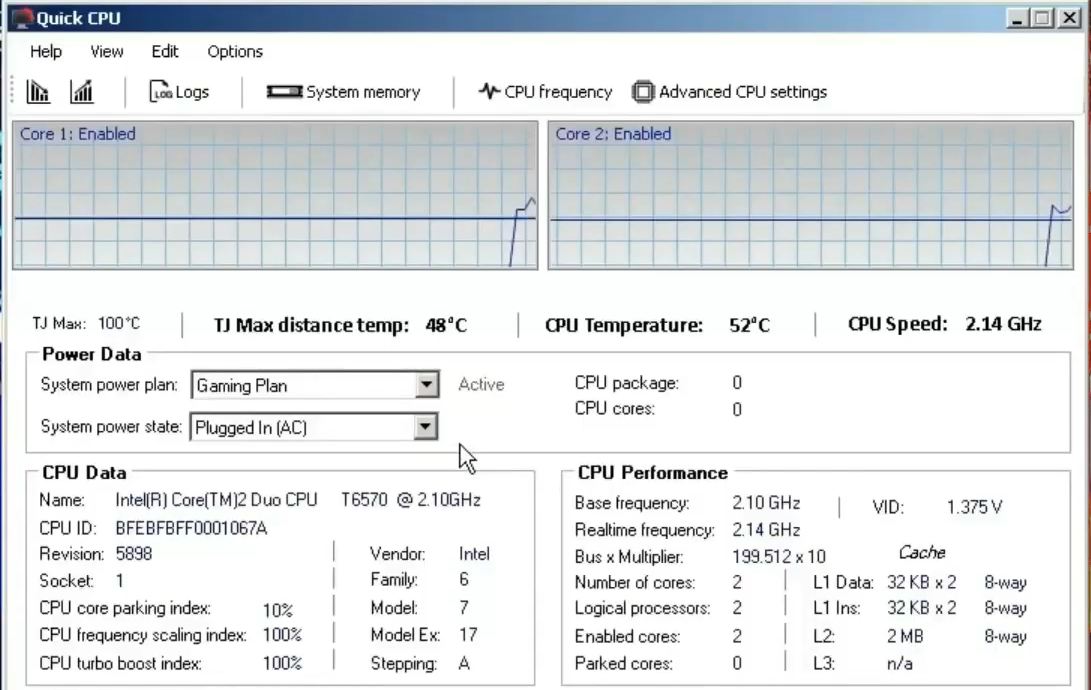
7.5- This step is about unpacking the CPU. You have to select your created gaming plan and then open the quick CPU. Select a gaming plan, make sure it is active and set the value to max.
Disk Defragmentation
8.1- This step is about Disk fragmentation, there are two ways to do disk fragmentation.
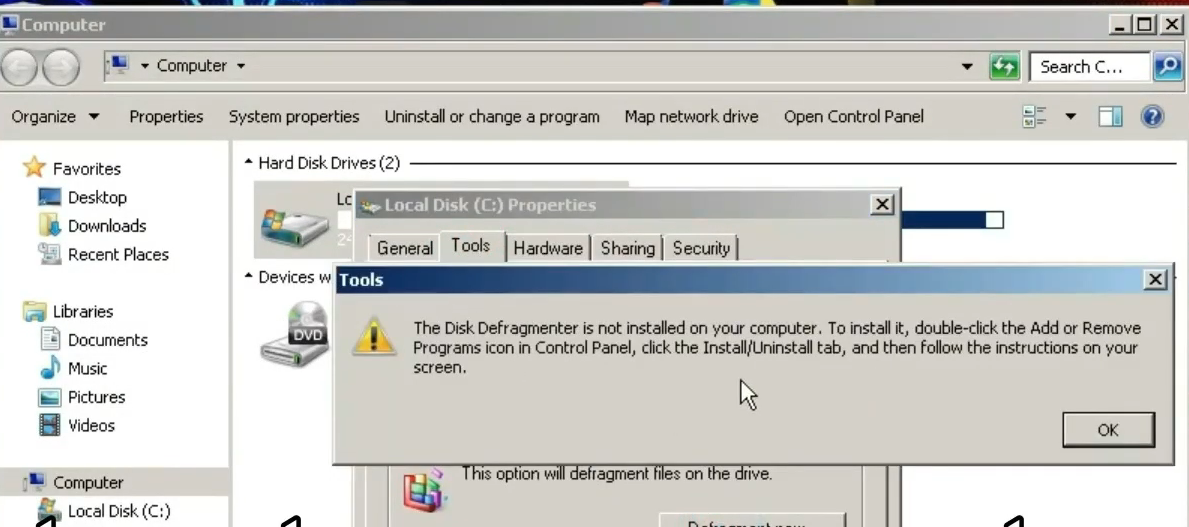
First, you have to go to My Computer and navigate to properties. Click on Tools, and tap on disk fragmentation. If this does not work, then follow the second step. You need to download software into your computer that allows disk fragmentation. You can use “Smart defrag 6” for this purpose.
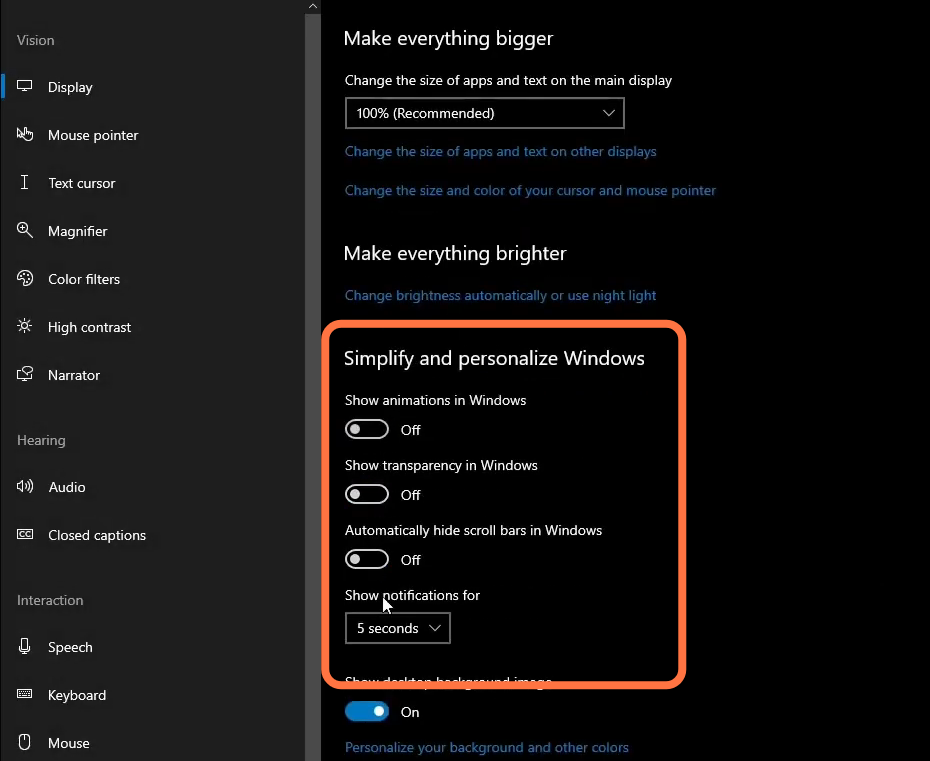
8.2- Set the desktop background to a single color. Right-click on the desktop and click on settings, then go to “ease of access” and disable animation and transparency. You have to hide scroll bars and desktop images.
Delete Junk Files
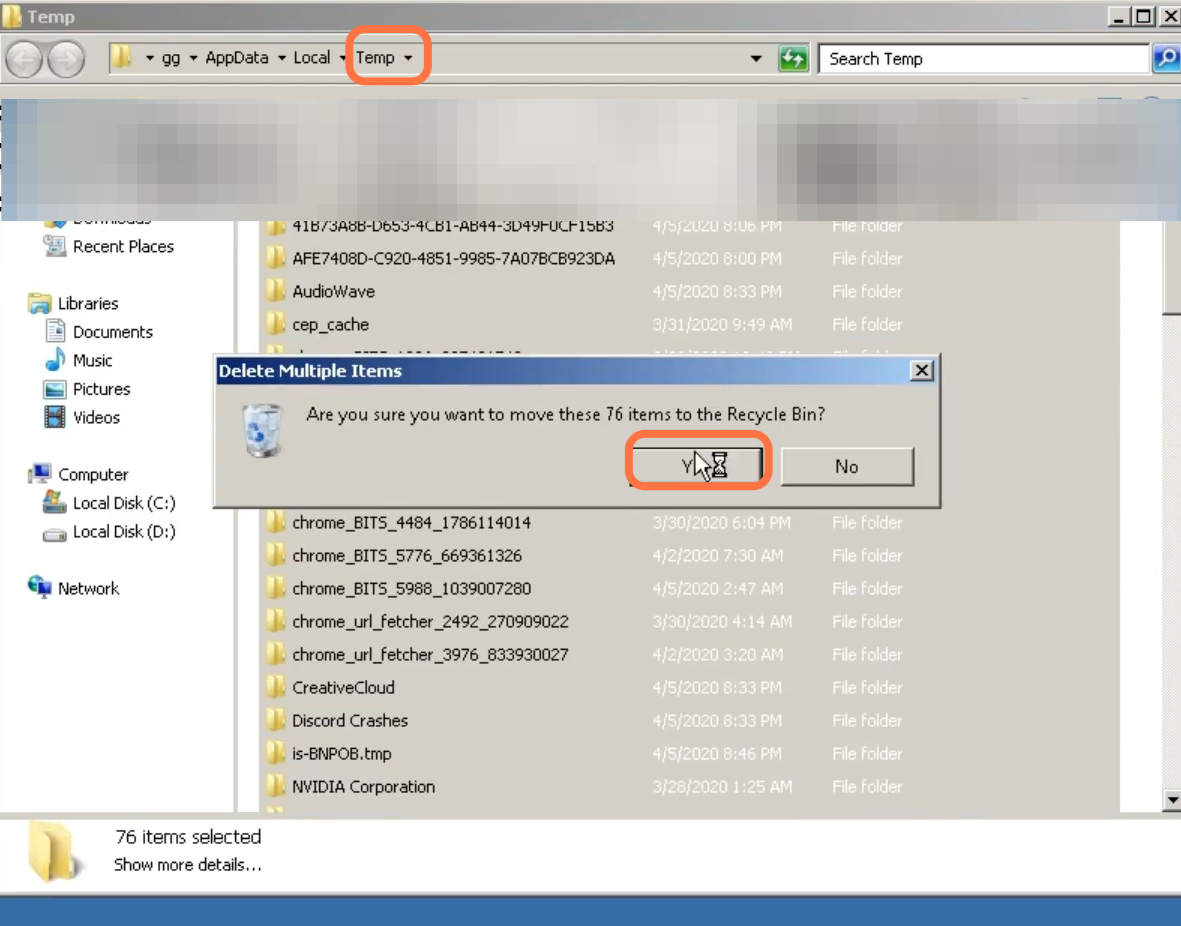
For this, you need to go to the start menu and type run, and then type %temp% in Run. After that, press enter and a folder will pop up, you need to copy all the files in this folder, then right click on it and click on Delete.
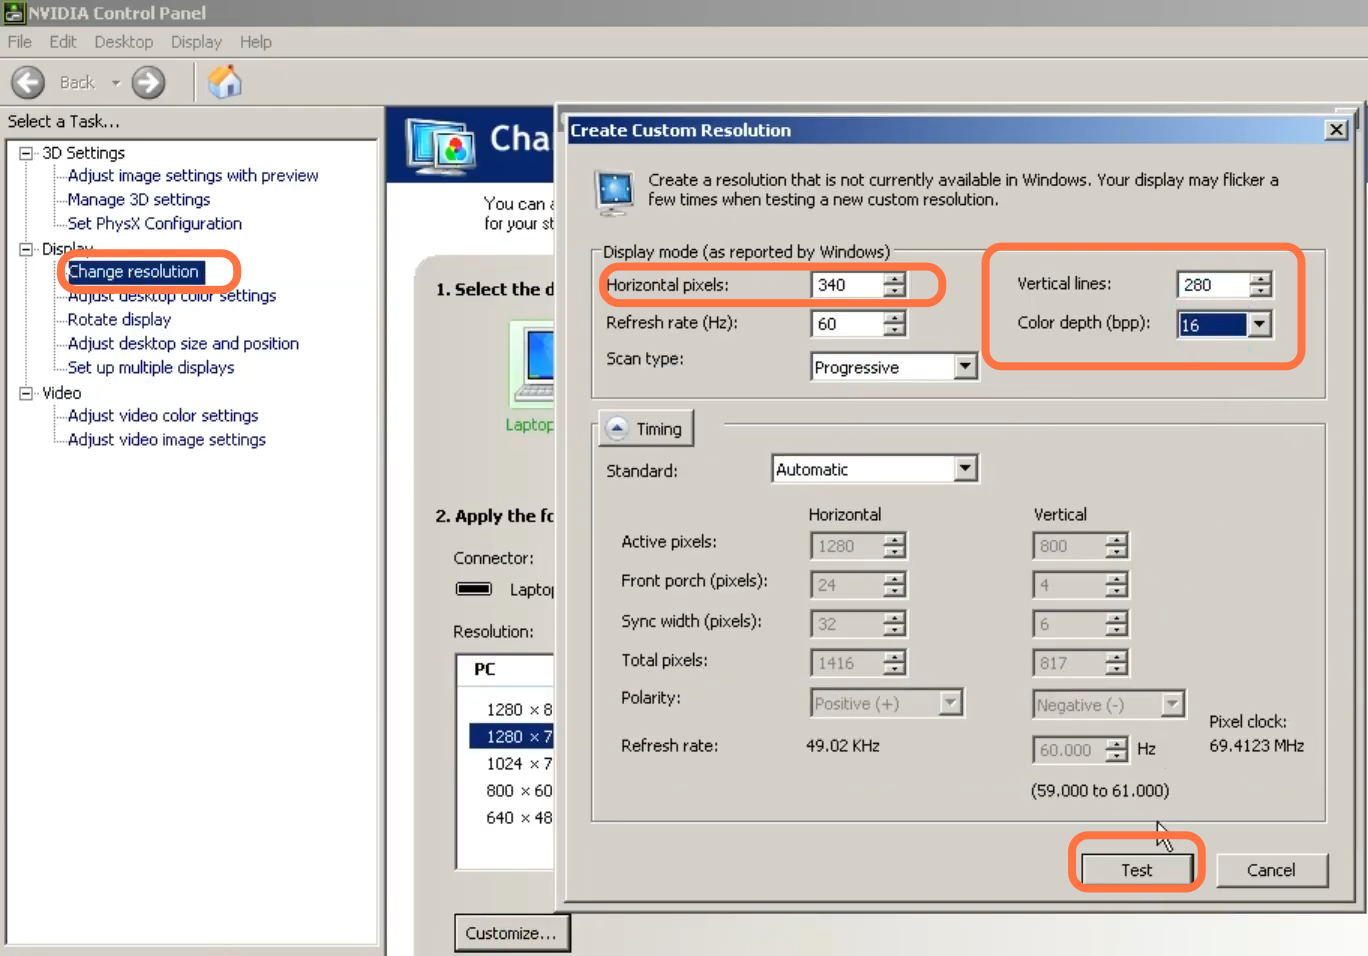
Lower Desktop Resolution
10.1- You will need to right-click on the desktop and then click on NVidia Control Panel. After this, go to the Change resolution tab on the left-hand side of your screen then click on Customize. After that, click on create a custom resolution, set the Horizontal Panel to 340, and set the vertical panel to 280 as it is the lowest resolution set color depth to 16bpp. After this, click on Test. A message will pop up saying that if you want this resolution then click on yes but if you don’t want this then you will have 20secs to convert it back to normal settings.