In this guide, you will find out how to BOOST FPS and increase performance in Ni No Kuni Cross worlds on smartphones. First, you have to make changes to the in-game settings and the bluestack. You have to decide the number of your CPU cores and at last, you have to make a few changes in graphic settings. Following the steps, you will be able to achieve the best FPS and performance.
In-Game Settings
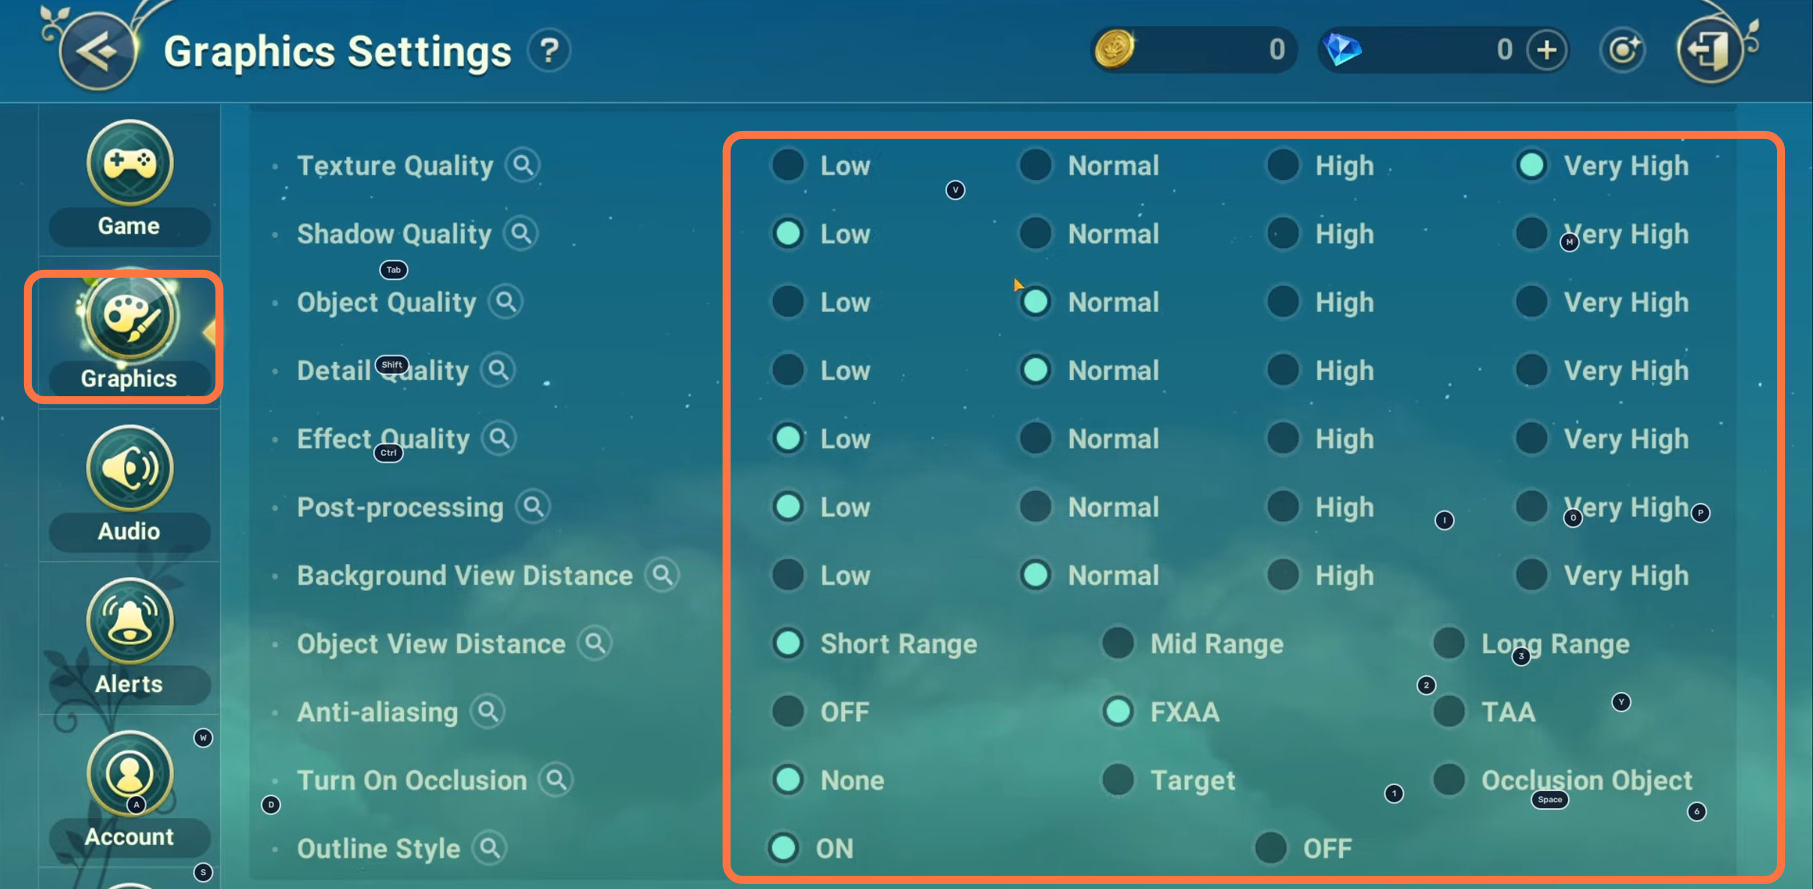
You will need to boot up your game and click on the settings button in the top right corner of your screen. Then click on graphic settings and set the Quick Settings to custom and turn on Advance settings. Set the Texture Quality to very high and set the Shadow quality to Low. Object Quality and Detail quality both should be set to Normal. Effect quality and post-processing make sure that both should be set to Low as this will help you in getting good FPS. Set the background view distance to normal and then set the Object view distance to short range. After that, you need to set Anti-aliasing to FXAA and Occlusion to None as it will prevent the game from lagging. The outline style should be turned On.
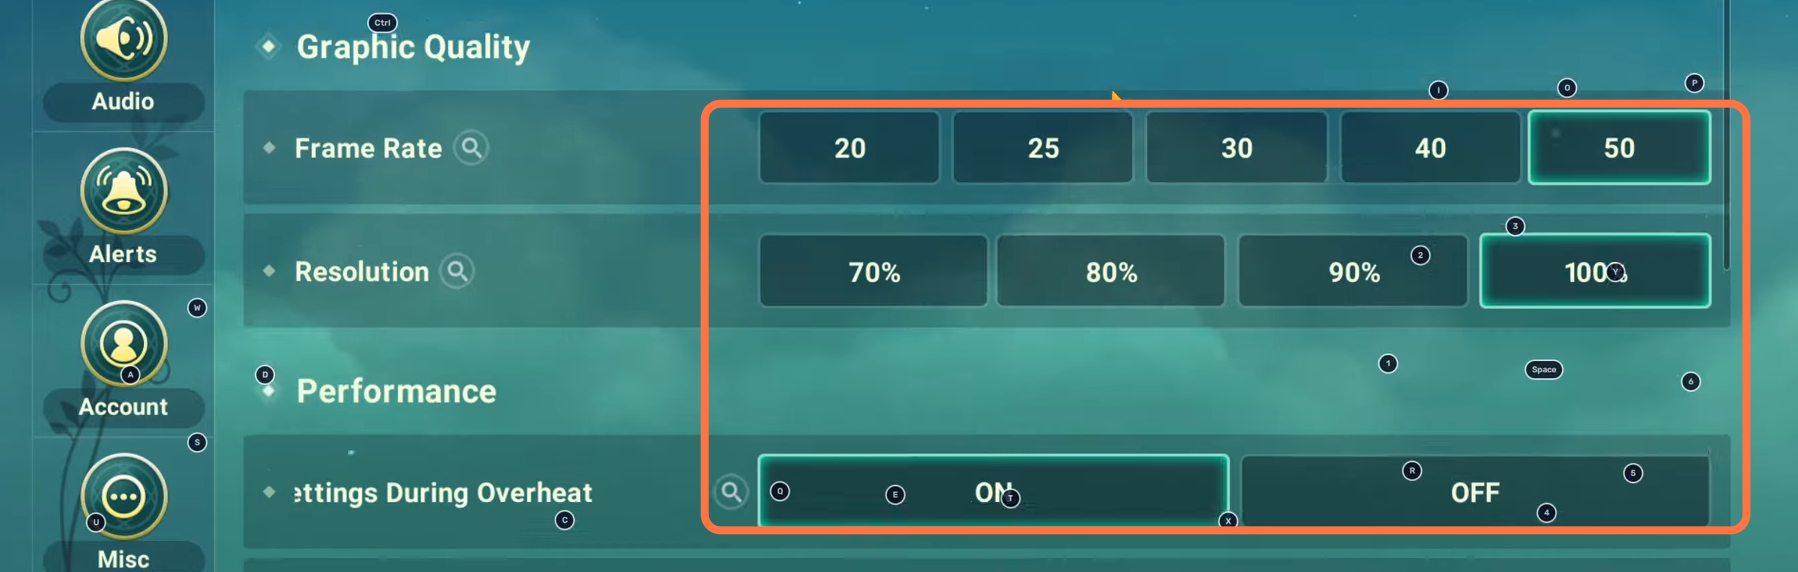
After this scroll down to Graphics quality, Set the frame rate to 50. resolution should be set to 100. After this under the performance tab, turn On the auto graphic settings.
Bluestack Setting
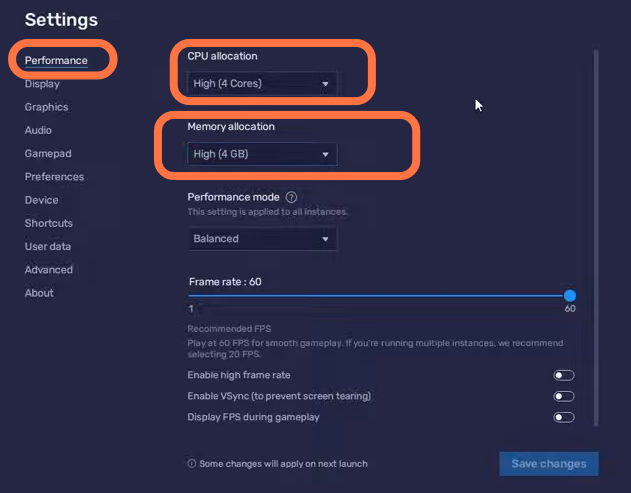
First, you have to enable your virtualization in your bios as it is a very important step. In case you have amd processor or Intel processor, you need to go into your bios and make sure that your virtualization is turned ON. It really depends on your mobile’s motherboard. You have to open your settings and the first step is performance. You will find some CPU allocation memory, you need to make sure that all your CPU cores are working.
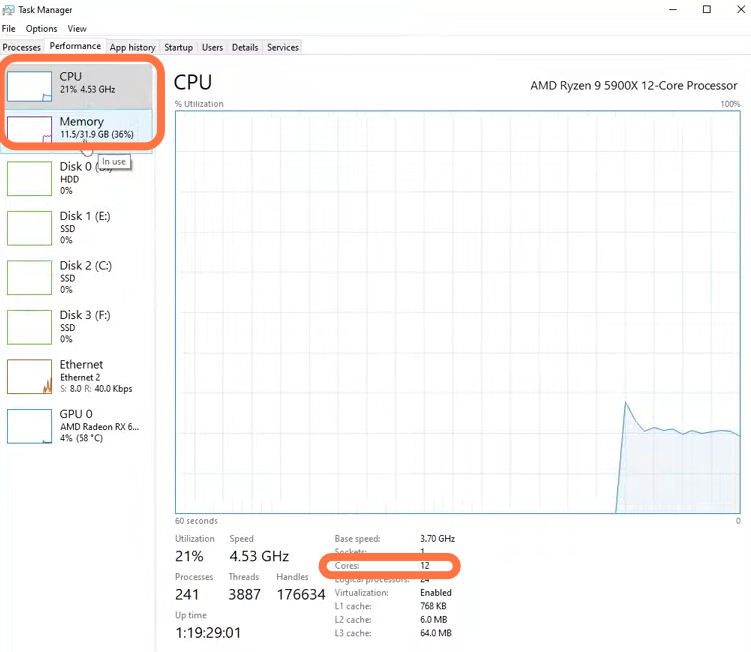
Now you have to open your task manager and go to CPU. You will see the total number of your CPU cores and for the memory, you will see it under the CPU tab on the left side of your screen.
After that, go back to the performance tab in the settings and select Custom then in the CPU allocation drop-down menu. You can decide it’s your choice how many cores you want to use for your game as it will not have a major difference. In the case of memory, you have to set this to half of your actual RAM in your PC. Make sure that the frame rate is set to 60 and the High frame rate, and v-sync is disabled as it will help you in getting better FPS and performance.

Graphics Settings
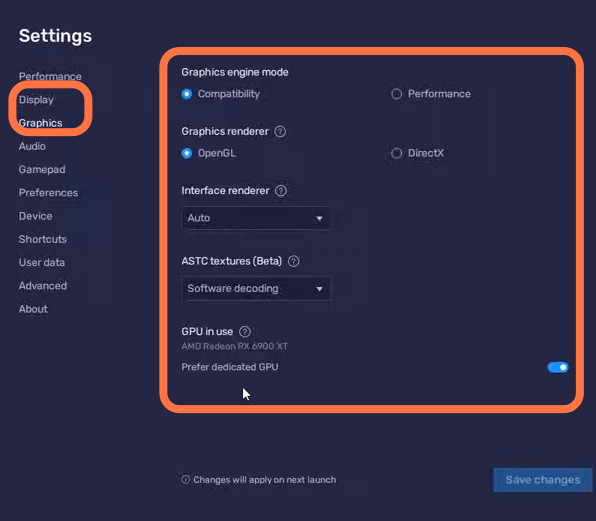
After that, go to display under the performance and set the Display resolution to your monitor’s native resolution. Then go to the Graphics tab and set the Graphic engine mode to Compatibility. The graphics renderer should be set to open GL. The interface renderer should be set to auto. Set ASTC textures to software decoding and make sure that GPU in use should be turned ON.