This guide will tell you how to fix lags, and stutters and how to boost FPS in Paladins. You have to make changes to your graphics settings and make changes in the config files of the game. You also have to update your GPU drivers and make sure that your CPU cores are enabled. You will need to disable unnecessary files and visual effects on your PC.
Changing the Graphic Setting
You will need to lower the game graphics setting to the lowest. Go to the settings and you will find a list of options. You have to move these options to the lowest settings.

Make Changes in Paladins Config file
2.1- Now you have to make a few more changes in the Paladin’s config files. Go to Paladins config file location in the documents, open the default engine and start editing it like the same. After that, start scrolling down and find bstaticdecalsenable, you need to change its value equal to false. You will find bdynamicdecalsenable below that, you have to change its value to false.
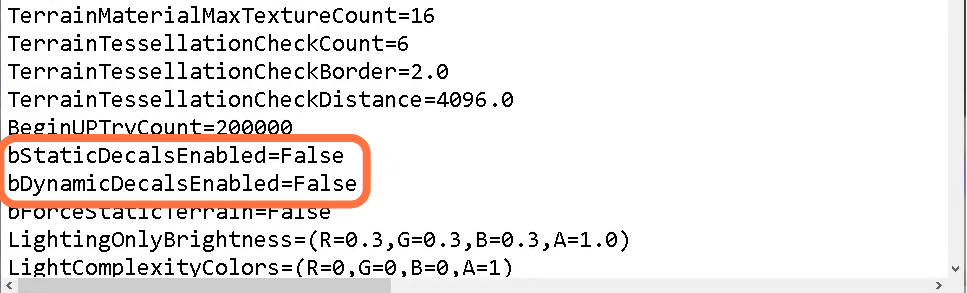
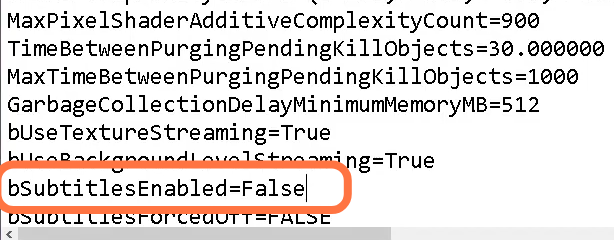
2.2- Now in the same document, scroll down, find bsubtitlesenable and change its value to false.
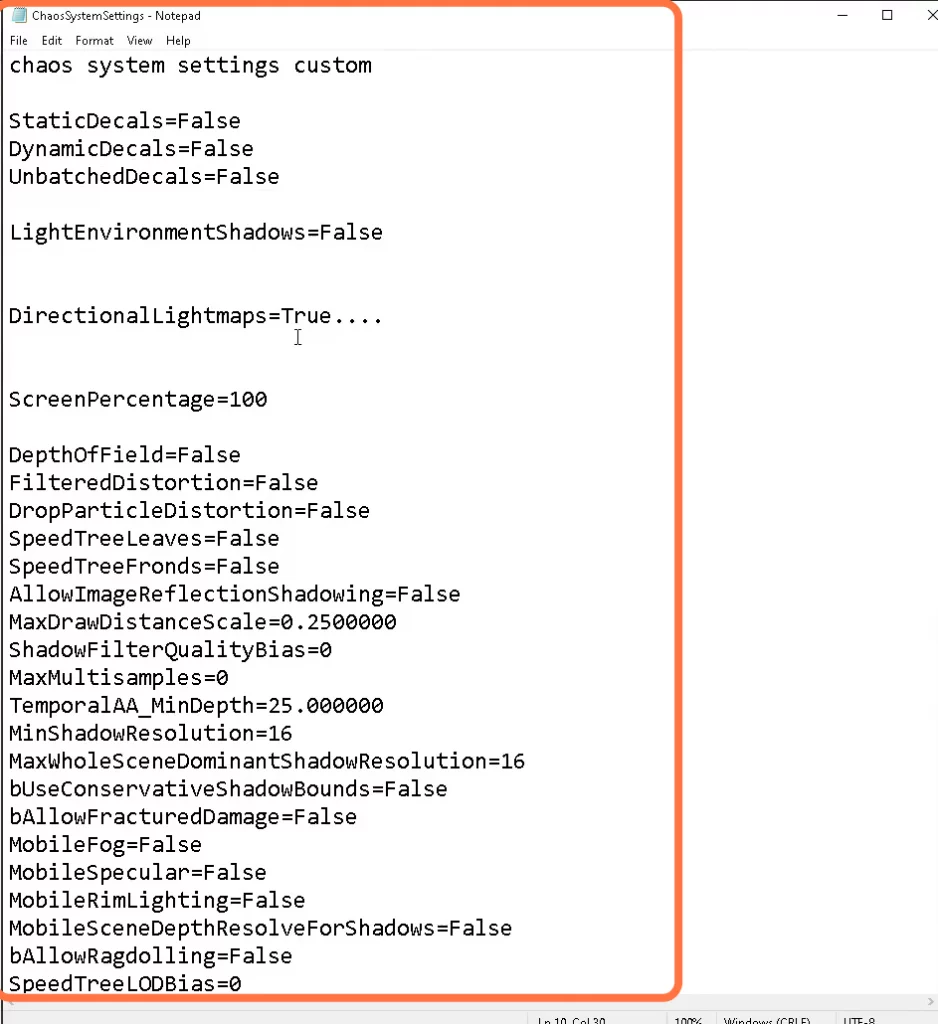
After that, open chaos system settings and change everything there according to the picture given below. In this file, you have to scroll down to find some settings and do make changes according to the picture below.
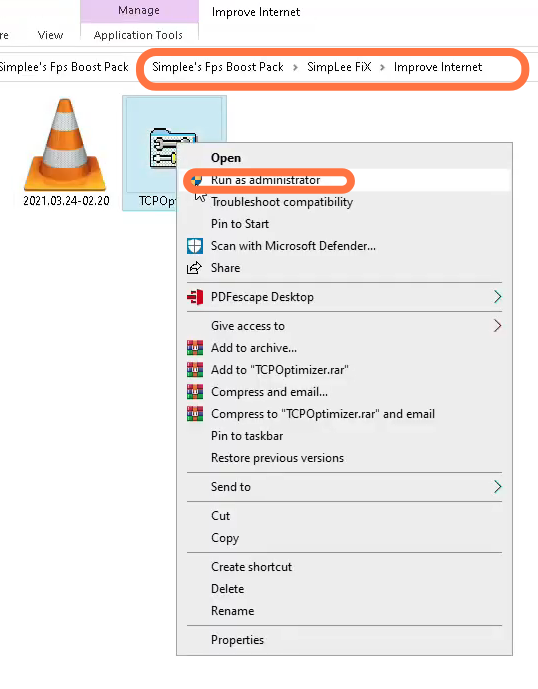
Downloading Simplee’s files and make changes to it
3.1- Now you have to download simplees pack files for the game from the link given below.
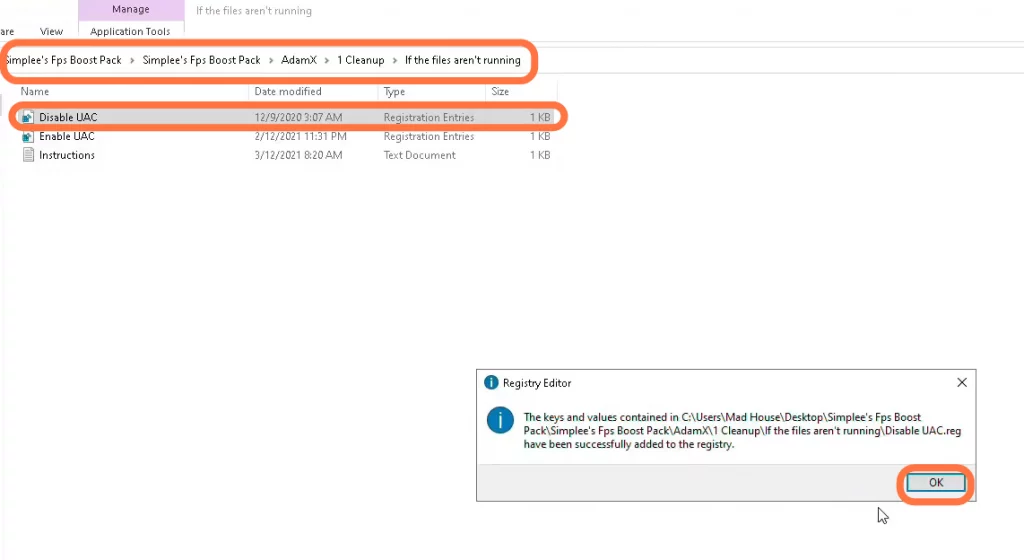
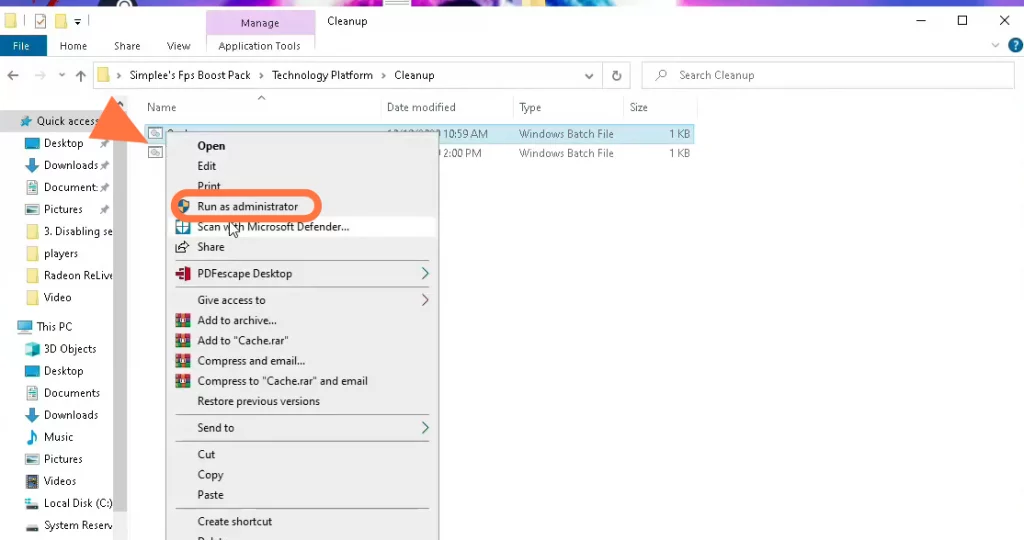
https://www.dropbox.com/s/1n6c9fhdf40… After that, extract the file and open up the folder. You will find three more folders in this folder, you can get a lot of stuff from these folders. Go to the AdamX folder, then to the clean-up folder and navigate to files, you have to disable the UAC by clicking on it and then tapping on OK.
Now you have to go back and run the batch files as an administrator, as it will remove all the junk files.
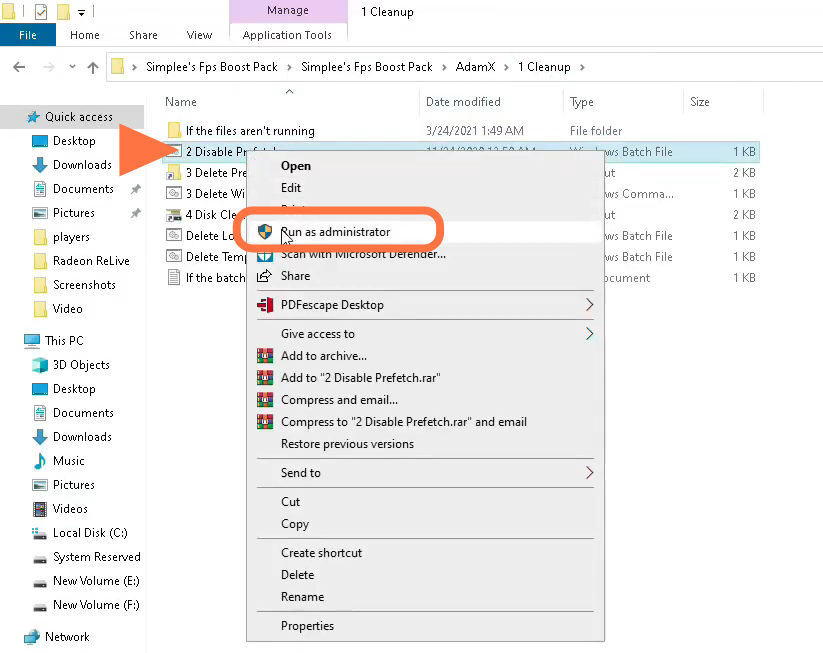
After the first batch file, you need to go to delete the prefetch files and delete all the stuff in it. Then run disk cleanup and select your windows local disk C partition. You have to select all files and then click OK.
Now you have to run the remaining two batch files as an administrator which you will find in the last of this folder.
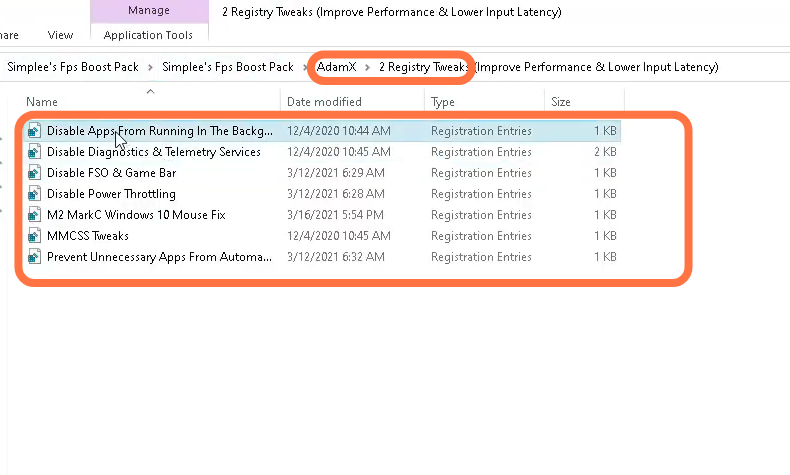
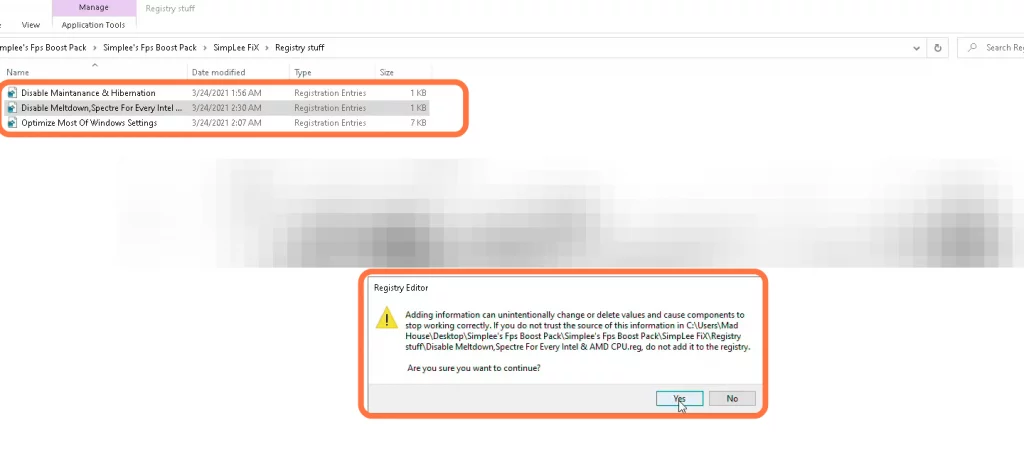
3.2- After that, go back to the registry tweaks folder in the AdamX folder, run all of them and click on Yes.
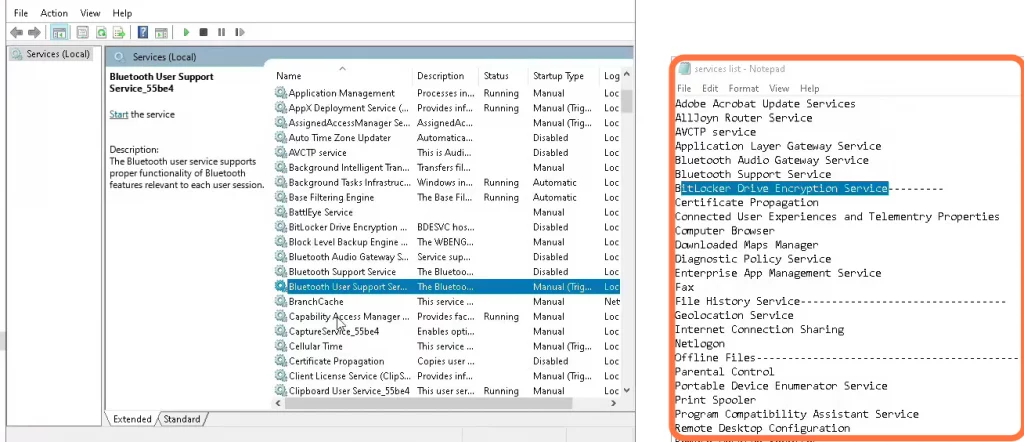
Now go back to adamx folder and navigate to the unwanted services folder. You have to disable some services that are not in use but they are running in the background.

After that, go to BT basic PC tuner folder and disable the services folder. For this, you have to paste the commands in the command prompt one by one from the first file named “commands” in the disable services folder.
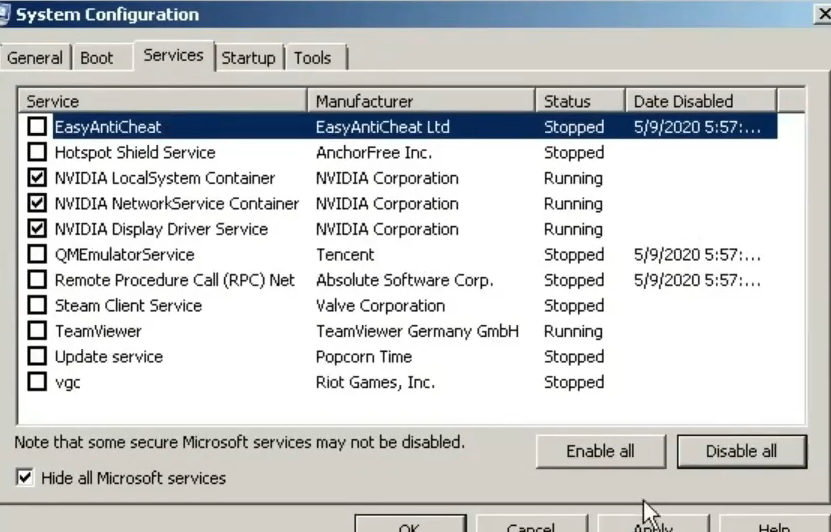
3.3- After that, open the service document and you will find a list of services that you have to disable without causing any problem on your PC. To disable these, you need to go to search and input services or services.msc. You will find the list of all the services running on Windows 10 or there are many services in this folder that are not running. You have to find all the services in the service local folder and disable them.
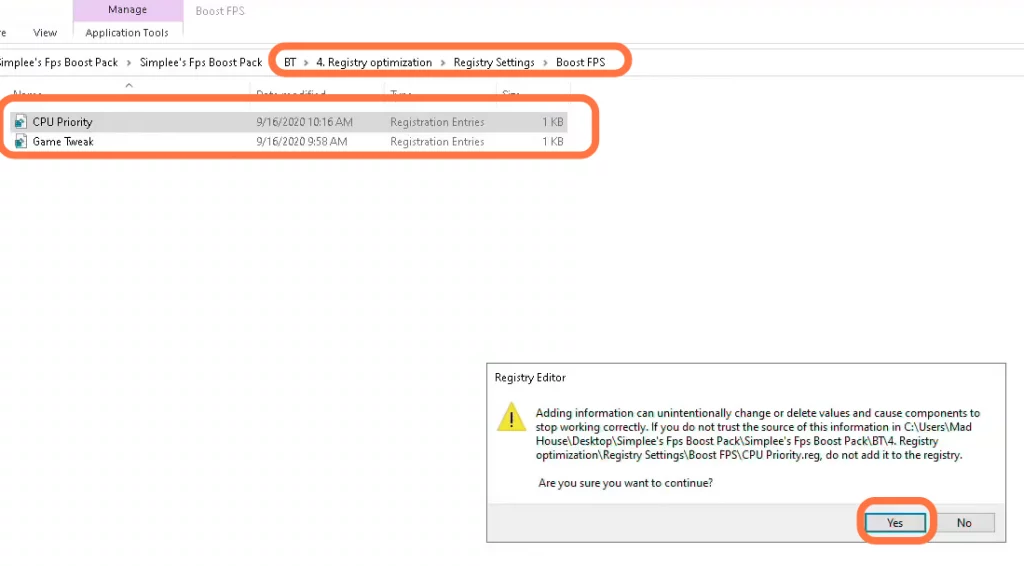
Now go back to the bt folder, go to the registry optimization folder, and navigate to the registry setting folder. Go to the FPS boost folder, run both the registry files and click on Yes.
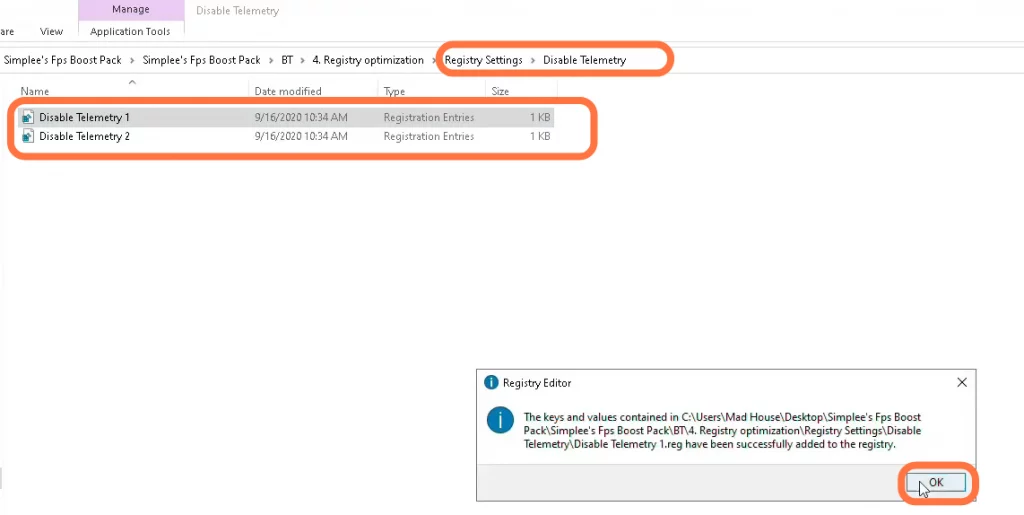
Now go back to the registry settings folder, run both files in it and click on Yes.
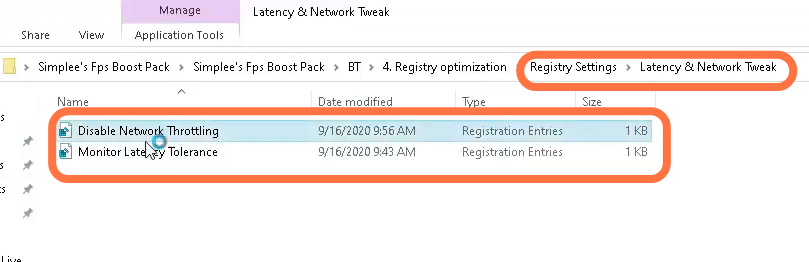
3.4- After that, go back to the registry folder and then go to the latency. Navigate to the network tweak folder and run the following two files.
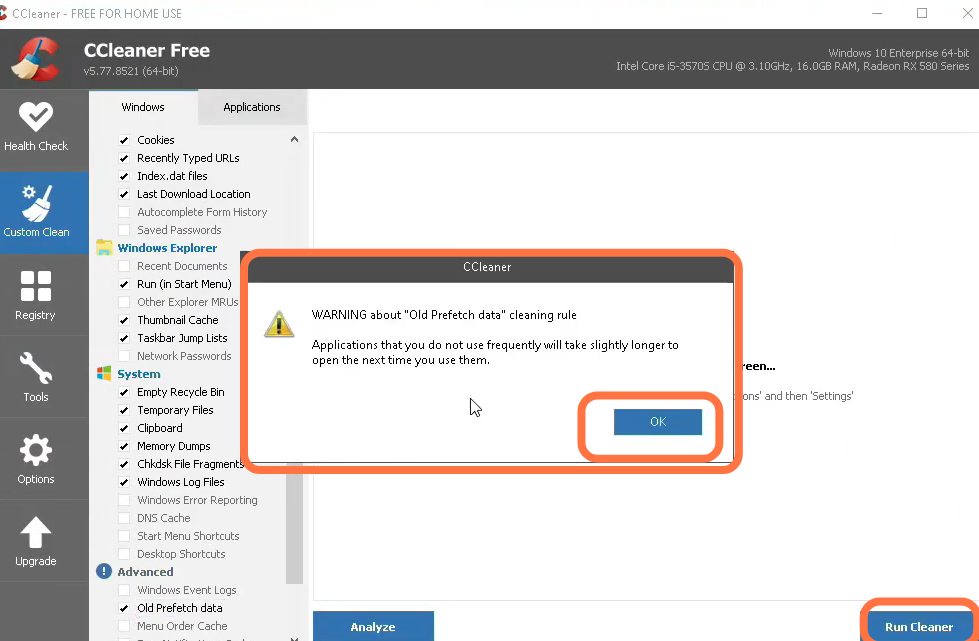
3.5- After that run cc cleaner, enable the old prefetch data option, and click analyze. Then tap on run cc cleaner.
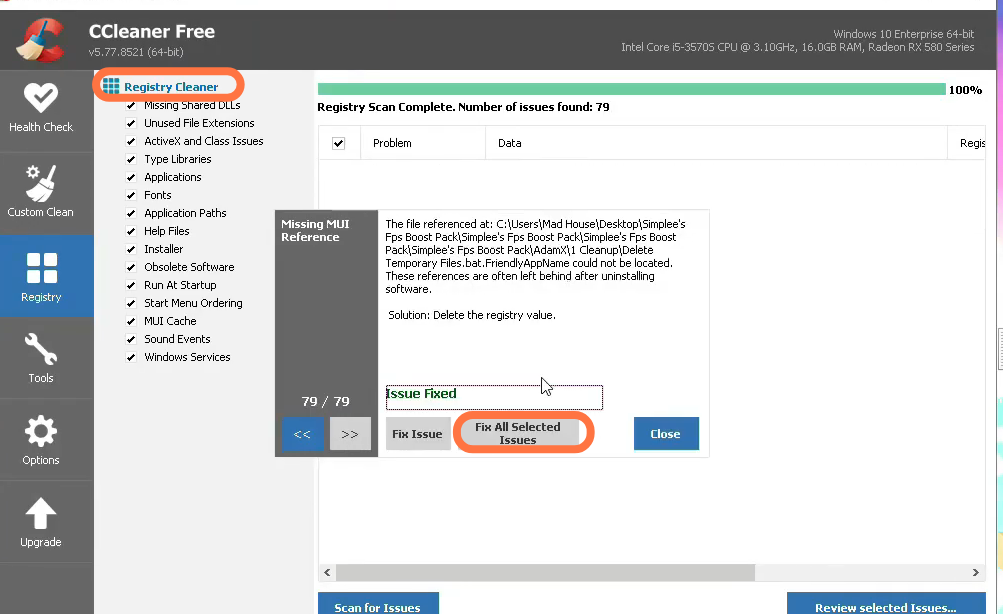
Now you need to go to the registry tab and clean scan for issues. After that, click on Review selected items, make a backup if you want, and then click fix all selected items.
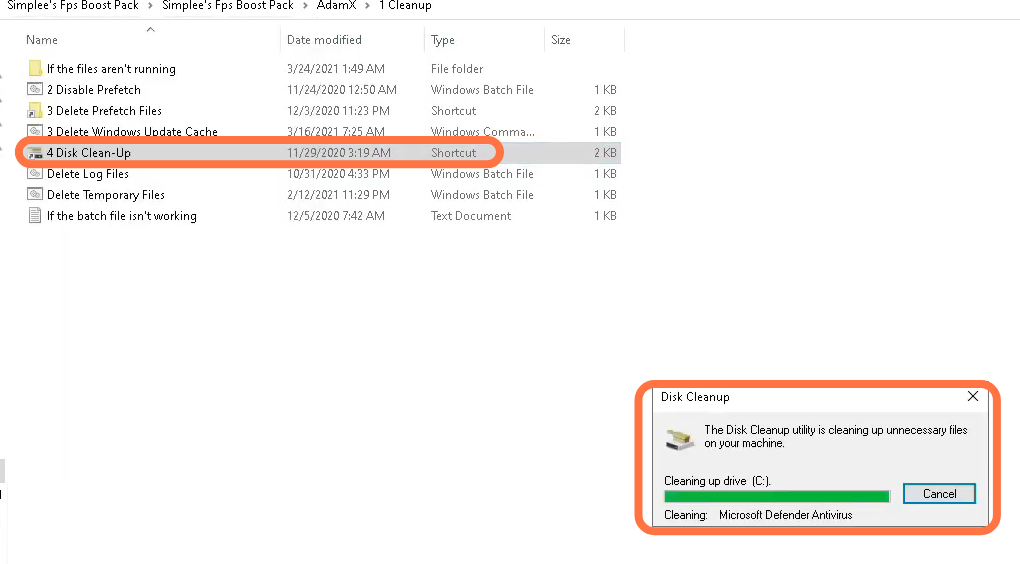
3.6- After that, go to the bt folder and navigate to the cleanup, temp, cache folder. You have to run cleanmgr as an administrator.
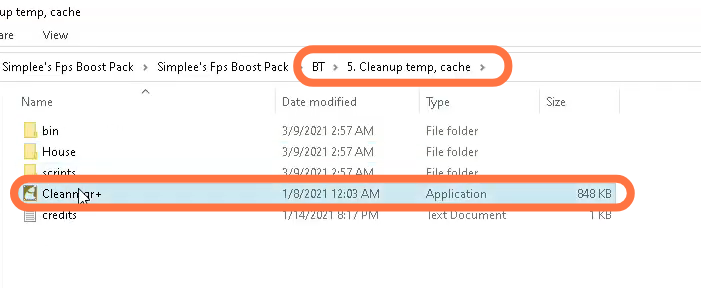
Now select cleanmgr+ and then select all the items as shown in the image below. Then click on clean up and wait till it completes.

After that, go back to the bt folder and navigate to the software update folder. You need to install all the files there.

Then go to the simplees fps pack, navigate to the simplees fix folder and then go to the Change GPU priority folder. Once you reach there, you need to run MSI utility mod v3 as an administrator.
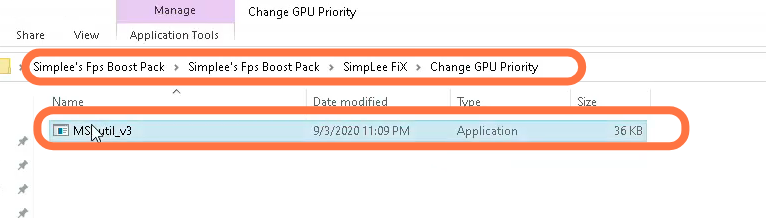
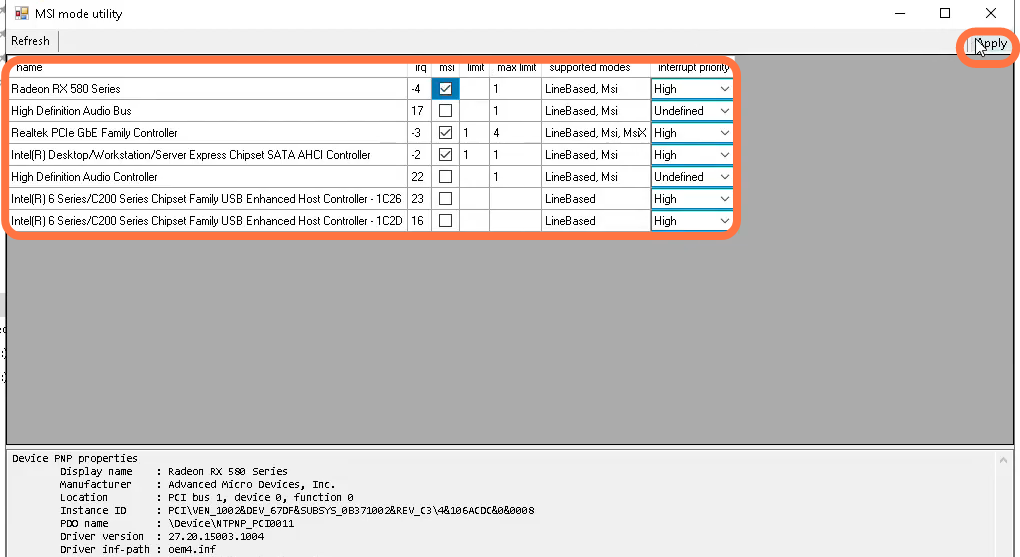
3.7- Enable MSI options for your GPU if it has MSI written on its right side saying supported modes. You need to set interrupt priority to high, then click on Apply and close.
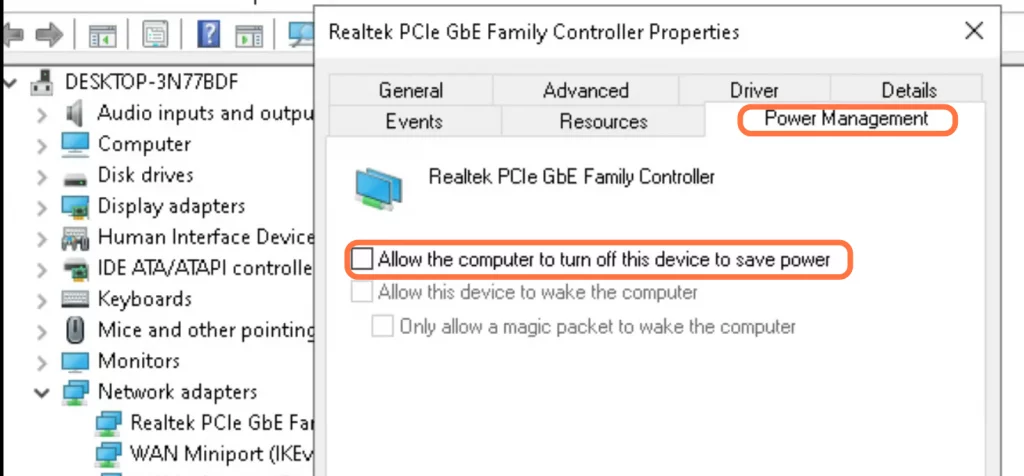
3.8- After that, go to the Device Manager and open your network driver wifi or ethernet, it depends on you whichever you use. After that, goes to power management and disable “allow the computer to turn off this device as this will save power”.
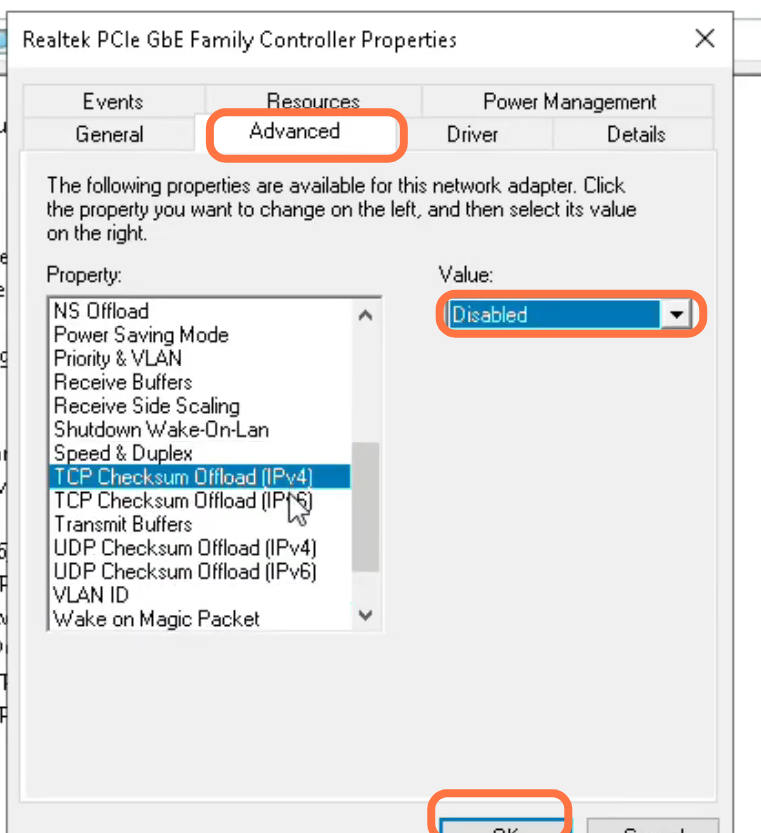
Go to advance and disable all the things which show disable option in the drop-down menu except for network settings.
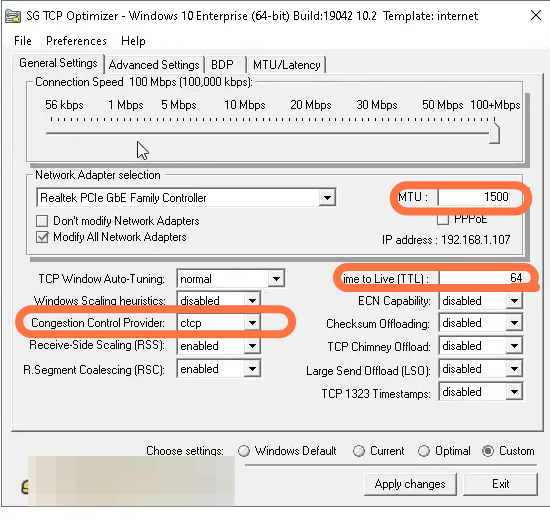
Now go to the improve internet folder and run the top optimizer as an administrator.
Now you can click on the optimal close button and set the congestion provider to ctcp, MTU to 1500, and TTL to 64.
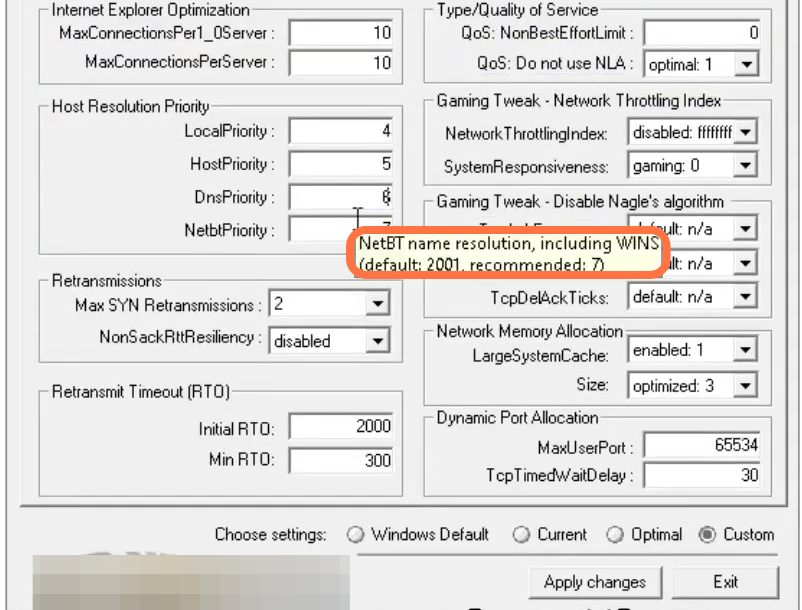
After that, go to advance settings and input all the recommended values as shown in the image below. Then you have to click on Apply changes.
3.9- As you have already downloaded the memory optimizer, you have to run it as an administrator from the desktop. Once it is open, you need to click on the menu beside it and enable all three options.
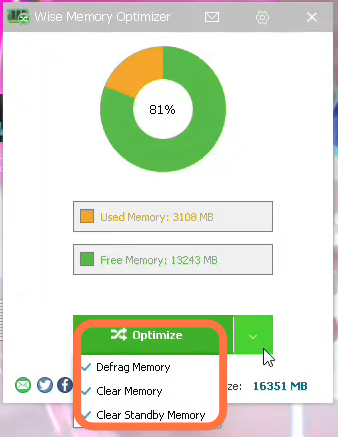
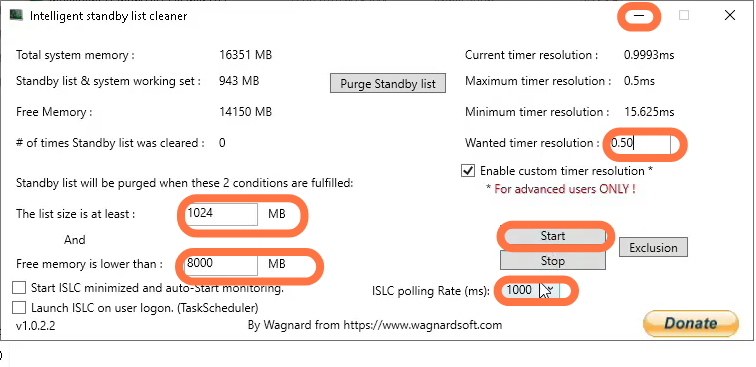
After that, click on the Optimizer button, wait for at least 5 to 10 minutes, and don’t do anything on your PC in the meantime. After that, go to the latency folder and then copy the ISIC intelligence stand-by list cleaner and paste it on your desktop.
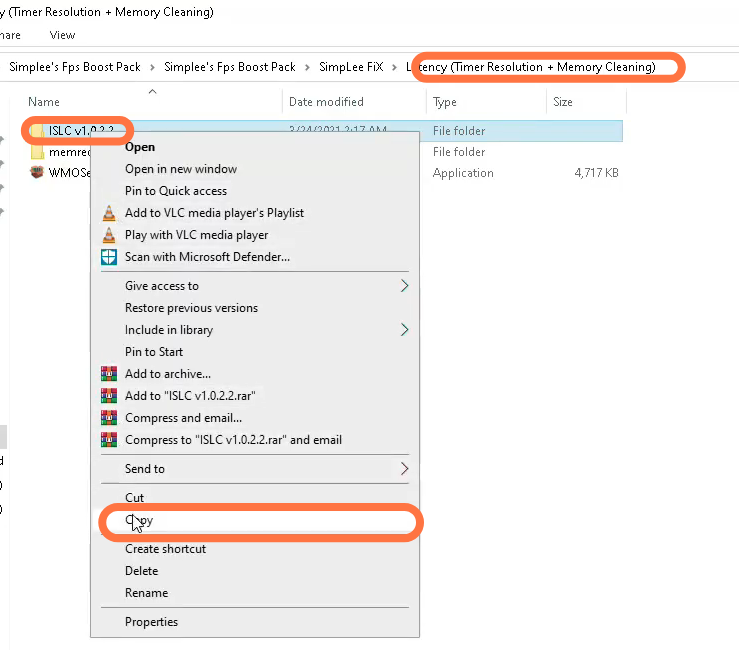
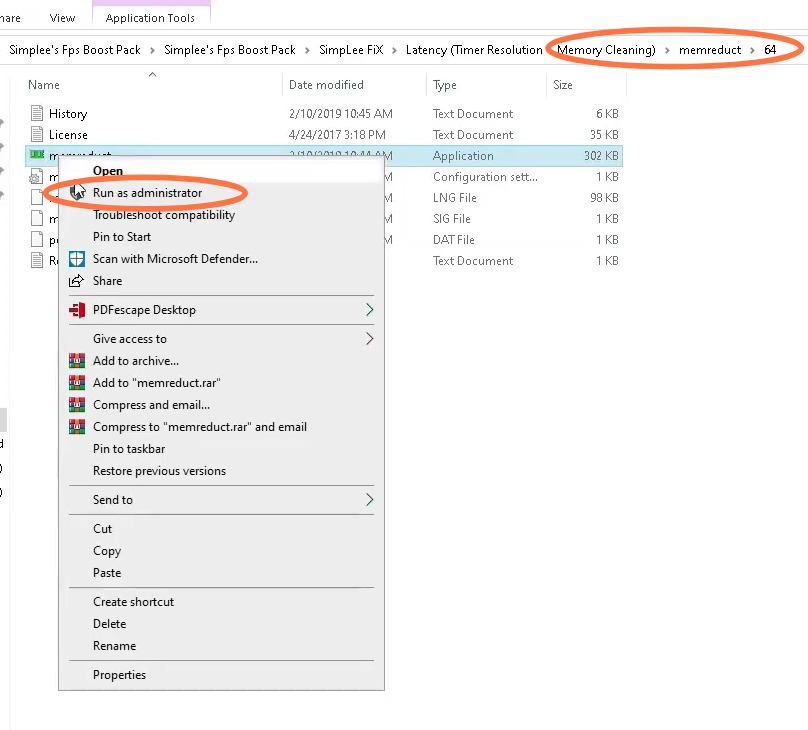
3.10- Go to the latency folder, then to the mem redent folder and you will find different options, 32-bit and 64-bit. It depends on your Windows which option you should choose. Then you have to run mem redent as an administrator.
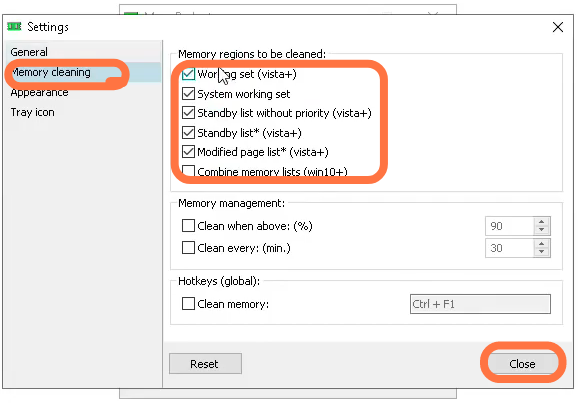
Now go to the file option setting and enable all the options as shown in the image below. Then click on close, tap on clear memory and then click on yes.
After that, you need to go back to simplees fix folder and navigate to the registry settings folder. Run all the files there, and click on yes for all of them.
3.11- After that, go back to the simplees first fps pack and enable UAC. Then go to the desktop and navigate to the ISIC folder that you have saved earlier and run it as an administrator. You need to set the least size to at least 1024 and free memory lower than half of your Ram. Set the custom timer resolution to 0.50 and ISIC polling rate to 1000. Then click on Start and close it once it completes.
Now go back to simplees FPS pack and navigate to platform games folder. You have to run both batch files as an administrator, they will clean up the folder and the junk files.
Updating GPU Drivers
You will need to update your GPU drivers or any other outdated drivers. There are two ways to do this.
4.1- Check for updates in the GPU control panel.
If in case if your GPU is running on an older version, then you will not be able to boost your FPS. So do check for updates,
4.2- Download from the GPU manufactures website.
You can also Download the GPU software to update it from the link below.
https://coderbag.com/product/quickcpu
Enabling CPU Cores
You will need to enable all CPU cores/threads. Input MSConfig in the search and open it, then go to boot and enable all the CPU cores. Also, enable the no GUI boot.
Disabling Unnecessary files.
You have to disable all unnecessary services. Go to the Service tab, click on hide Microsoft services and disable it. And also disable the Nvidia services.
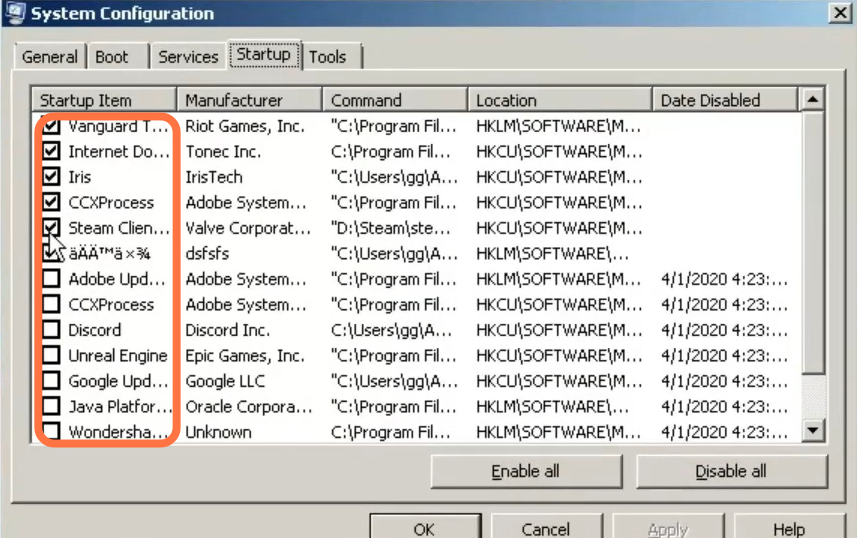
You need to disable unwanted startup programs, go to the startup tab, and disable all the startup applications which you don’t need.
Disabling Visual Effects
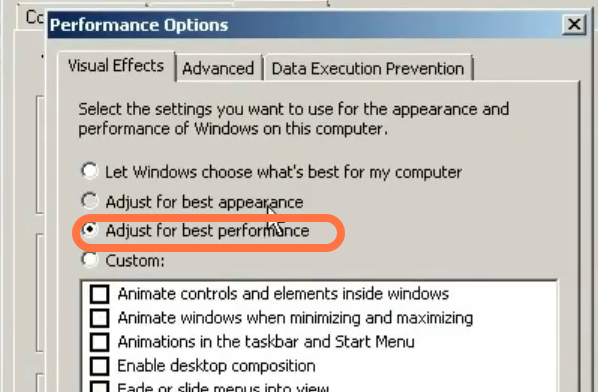
You have to disable all the visual effects. Go to the start menu, right-click on My PC, and then go to properties. Then go to advanced settings, click on best performance, and then tap on Apply.
Create Virtual Memory
Next, you will need to create virtual memory. Go to advance and change “disable automatically manage pegging file” to custom. You can select any partition and set double the amount of your Ram. Click set, tap on OK and then Apply.
Create a High-performance power plan
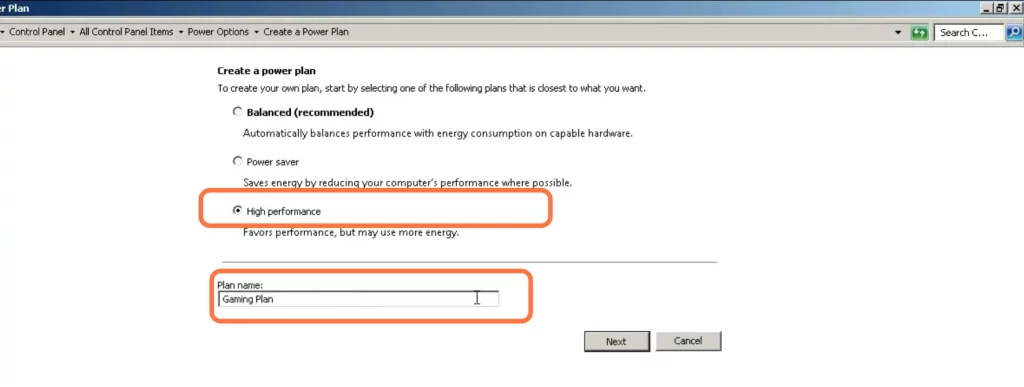
You have to create a high-performance power plan. Go to the power options for desktop users, search it in the search tab and click on “Create a power plan”. Select high performance and name the power plan according to your choice.
For the users of NVidia
It is only if you use NVidia. otherwise, you can skip this step.
10.1- AMD User:
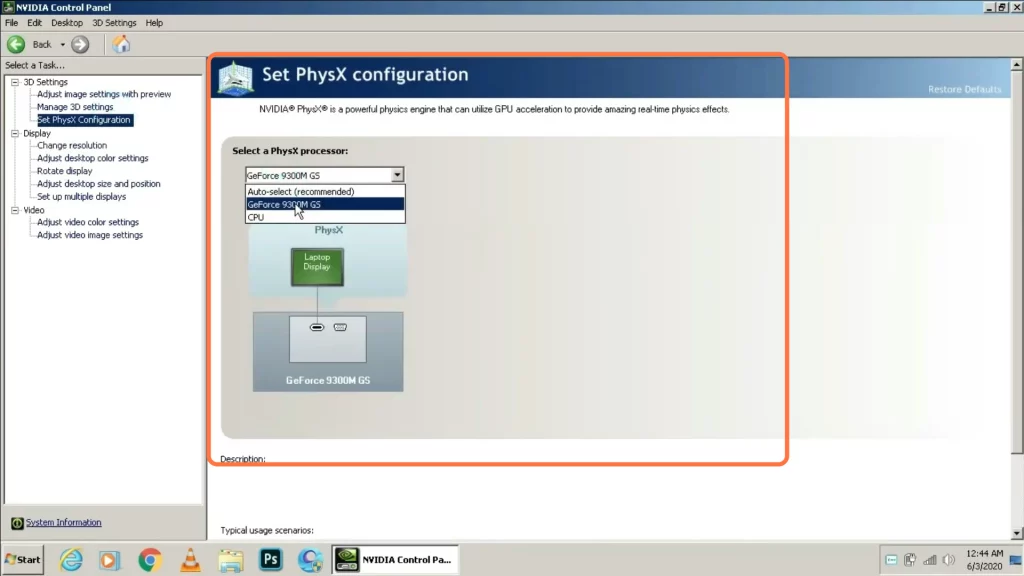
You have to open the NVidia control panel, go to phys x and set it to GPU.
Now click on the 3D settings and copy all of these settings. You have to set the image setting preview to performance and click on Apply.
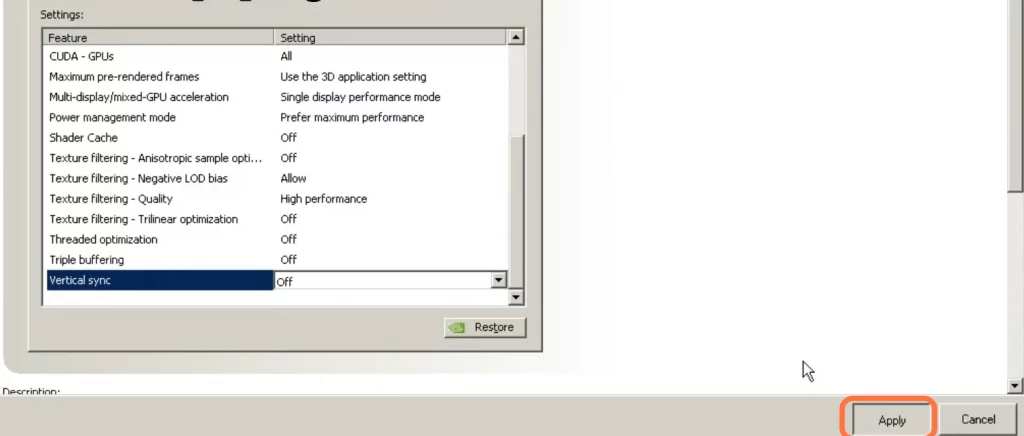
Now go to adjust desktop size and composition. Select full screen, click on GPU, and select override scaling.
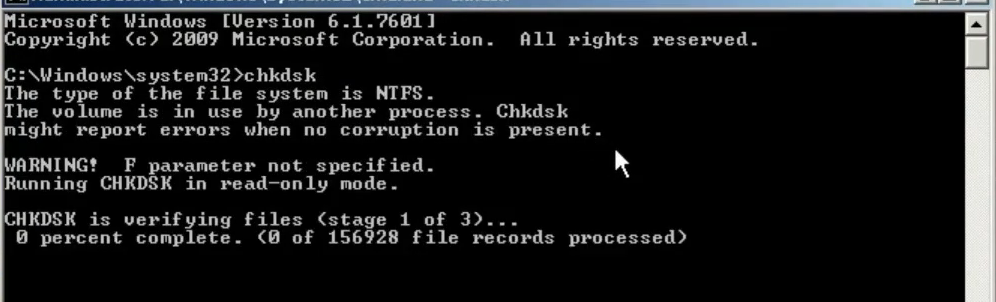
Check for Disk Error
You will need to run the AMD command to check for any disk error. Run cmd as an administrator and input “chkdsk”, it will fix all the drive issues if you have any.
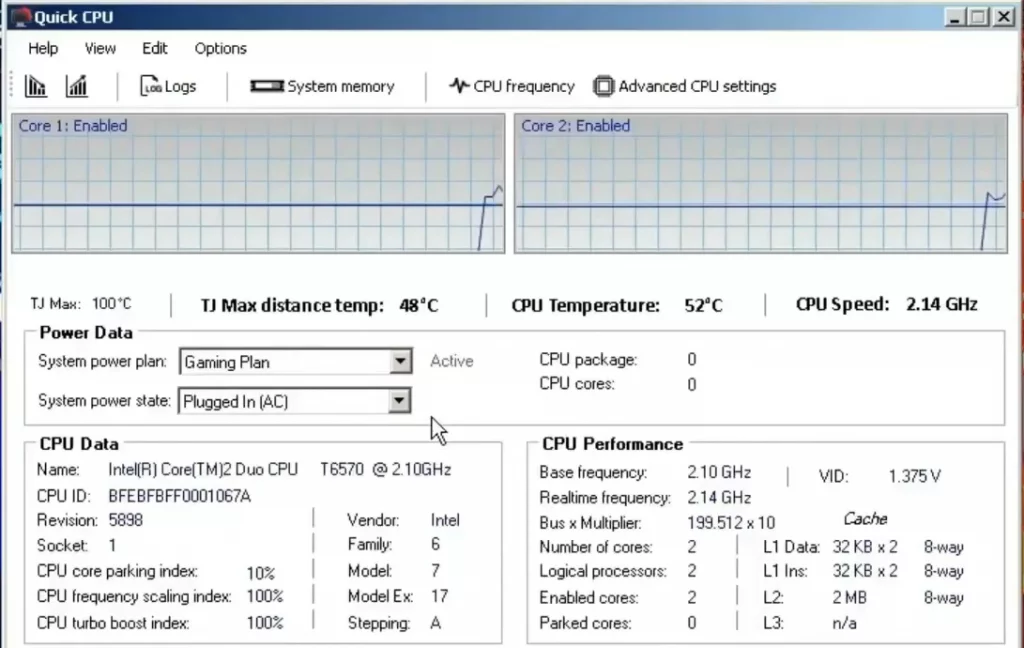
Unparked CPU
This step is about unparking the CPU. You have to select your created gaming plan and then open up the quick CPU. Select a gaming plan, make sure that it is active, and set the value to max.
For Disk Fragmentation
There are two ways to do disk fragmentation.
13.1- First, you have to go to My Computer and navigate to properties. Click on Tools, and then tap on Disk Fragmentation. If it does not work, then go for the second step.
13.2- You need to download software into your computer that allows Disk Fragmentation. You can use smart defrag 6 for this purpose.

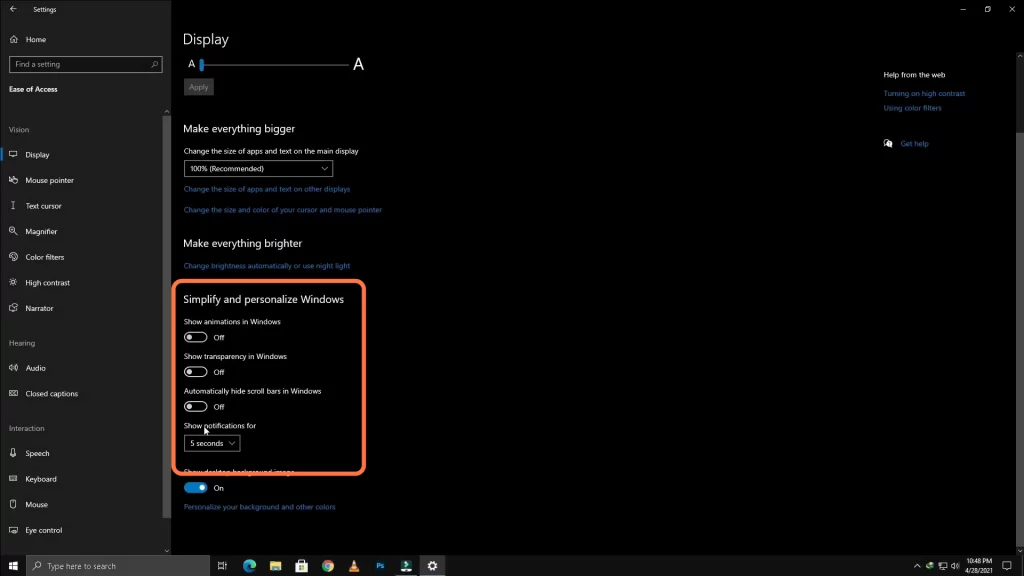
Set Desktop Background
You have to set the desktop background to a single color. Right-click on the desktop and click on settings, then go to “ease of access” and disable animation and transparency, hide scroll bars and desktop images.
End Explore.exe
You have to end explore .exe to get a few more fps. Open task manager and open any folder. Now whenever you start the game, you need to right-click on windows explorer, click end task and then tap on End manager.
Disable Full-Screen Optimization
You need to disable full-screen optimization for iron sight. Go to the iron sight folder, navigate to iron steam, and then open the steam app folder. Navigate to common and then go to full-screen optimization inside this. Right-click on the iron sight folder, then go to compatibility and disable the options.

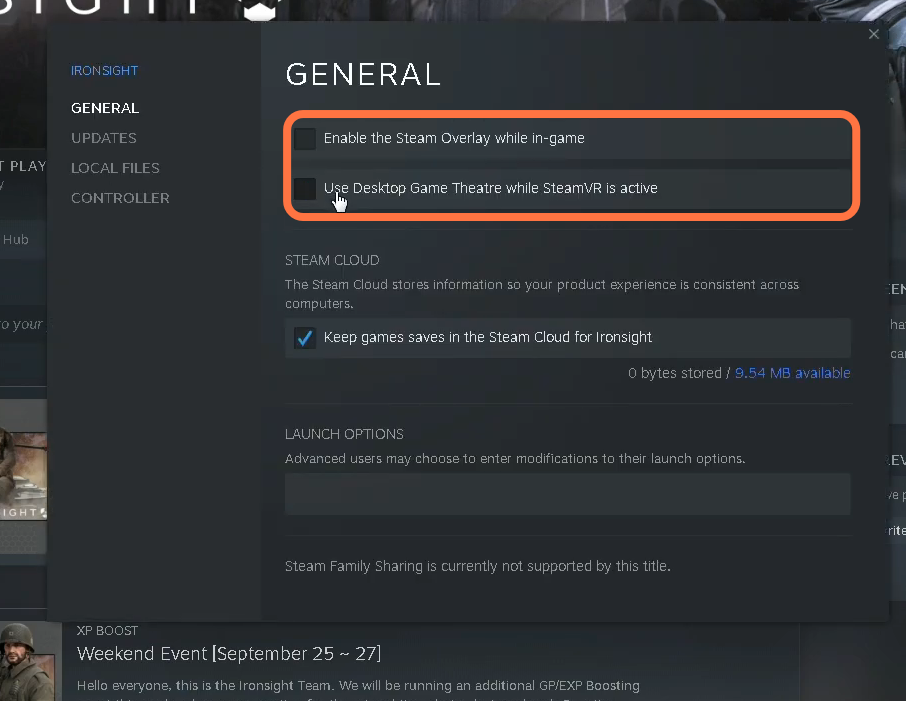
Disable Steam Overlay
Next, you have to disable the Steam Overlay. Go to steam, then go to general settings and uncheck mark the first two options.
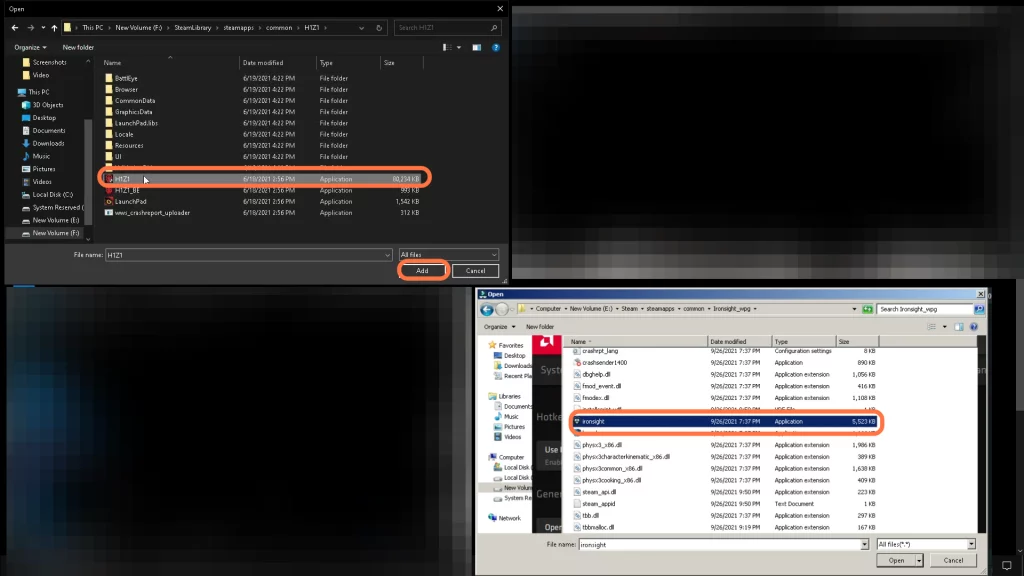
Set Iron sight to High Performance
You also need to set Iron Sight to high performance. Go to settings, then navigate to graphics settings, and click on Browse. Go to the steam library, then navigate to steam apps, and open up the common folder. After that, go to H1Z1. and click on Add.
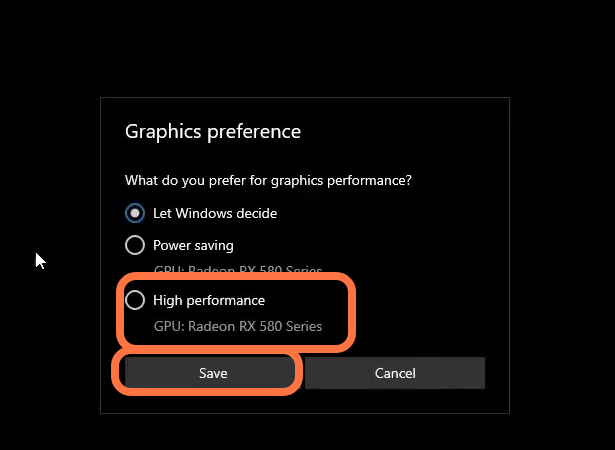
Set Graphics to High Performance
Go to Graphics preference and set H1Z1 to high performance by clicking on the options button.