In this guide, you will find out how to increase performance FPS with any setup in StarCraft 2. First, you have to make changes to the in-game settings and end the explorer.exe. Then you have to update GPU drivers and close all the unnecessary programs running in the background. You have to select the best performance power plan and do disk Fragmentation. After following all the steps, you will definitely achieve the best FPS.
In-Game Settings
You have to boot up your game and once you are in the game, go to the option and click on the Graphics tab. Set the Display mode to full screen, and the resolution should be to the lowest value in the drop-down menu. Set the refresh rate to 75hz and set the graphic quality, shaders, terrain, effect, texture quality, and post-processing to low. Also, turn off physics and set unit portraits to 2D. Movies should be set to low. After doing all these settings, click on Accept.

Disable Full-screen Optimization
For this, you have to go to the starcraft directory and go to the .exe file. Right-click on it then click on properties after this Go to the Compatibility tab and make sure that “disable full-screen optimization” is check marked. After this click on the change dpi settings, now here you have to checkmark the override high dpi settings. After this, click on apply and ok.

Disk Cleanup
Go to this PC and then go to the properties of the drive in which you installed your Windows. Click on Disk cleanup, select all the files you want to delete, and press the disk clean-up button.

Updating GPU Drivers
You will need to update your GPU drivers or any other outdated drivers. There are two ways to do this.
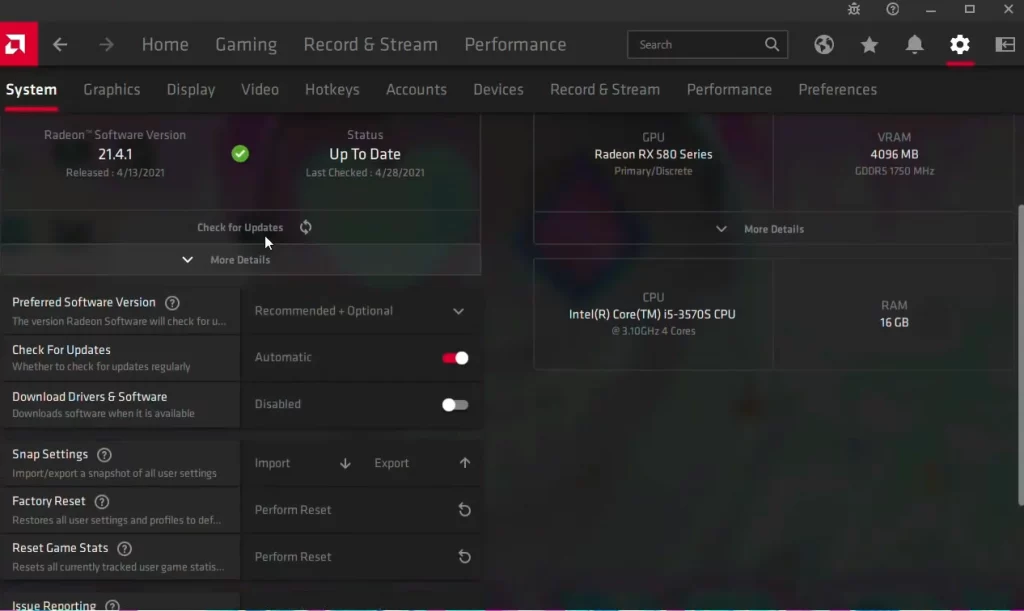
4.1- Check for updates in the GPU control panel.
If your GPU is running on an older version, then you will not be able to boost your FPS. So do check for updates
4.2- Download from the GPU manufactures website.
You can also Download the GPU software to update it from the link below.
https://coderbag.com/product/quickcpu
Enabling CPU Cores
You will need to enable all CPU cores/threads. Input MSConfig in the search and open it, then go to boot and enable all the CPU cores. Also, enable the no GUI boot.
Disabling Unnecessary files
6.1- Turn off all the programs running in the background. For this, you have to go to the taskbar then click on the small arrow and now start right-clicking on the programs that you don’t want to run in the background. After that, click on Quit.

6.2- You also have to disable all the startup programs as these programs are using your cache memory and it results in low performance and also decreases the FPS. Go into the system configuration, then click on the Startup tab and select the programs you want to disable. After this, click on the Disable button.

6.3- Now you have to disable the visual effects, go to the Start button,n then right-click on this PC and go to properties. After that, click on Advance system settings, then again click on settings and select the “Adjust for best performance” option. After that, click on Apply.

6.4- Now you have to create virtual memory, go to the Start button, right-click on This PC and go to properties. Then click on Advance system settings, tap on settings and go to the Advance tab. Select the program, click on change and disable automatically managing pegging file size. After that, click on Custom, then select any partition and set double the amount of your Ram. After this, click on Apply.

Power Plan Settings
It is a great and easy way to enhance the performance of your system, as they are highly customizable and effective for disabling some sleep and low-power modes.
7.1- You must write “edit power plan” in the search column and press enter. Inside this menu, you need to go to the power option on the top, click on “Show additional plans”, and scroll down to select the high-performance power plan.

After this, go to the bottom left-handed side of your screen to the search bar and write Command prompt. Right-click on it and run it as an administrator. Then you have to paste the command “powercfg -duplicatescheme e9a42b02-d5df-448d-aa00-03f14749eb61”, then press the enter button and exit.

Now again go to the power play menu and press the refresh button on the top right corner. You will find the ultimate performance power plan, you have to select this option.

For NVidia Users
It is only if you use NVidia. otherwise, you can skip this step.
AMD User:
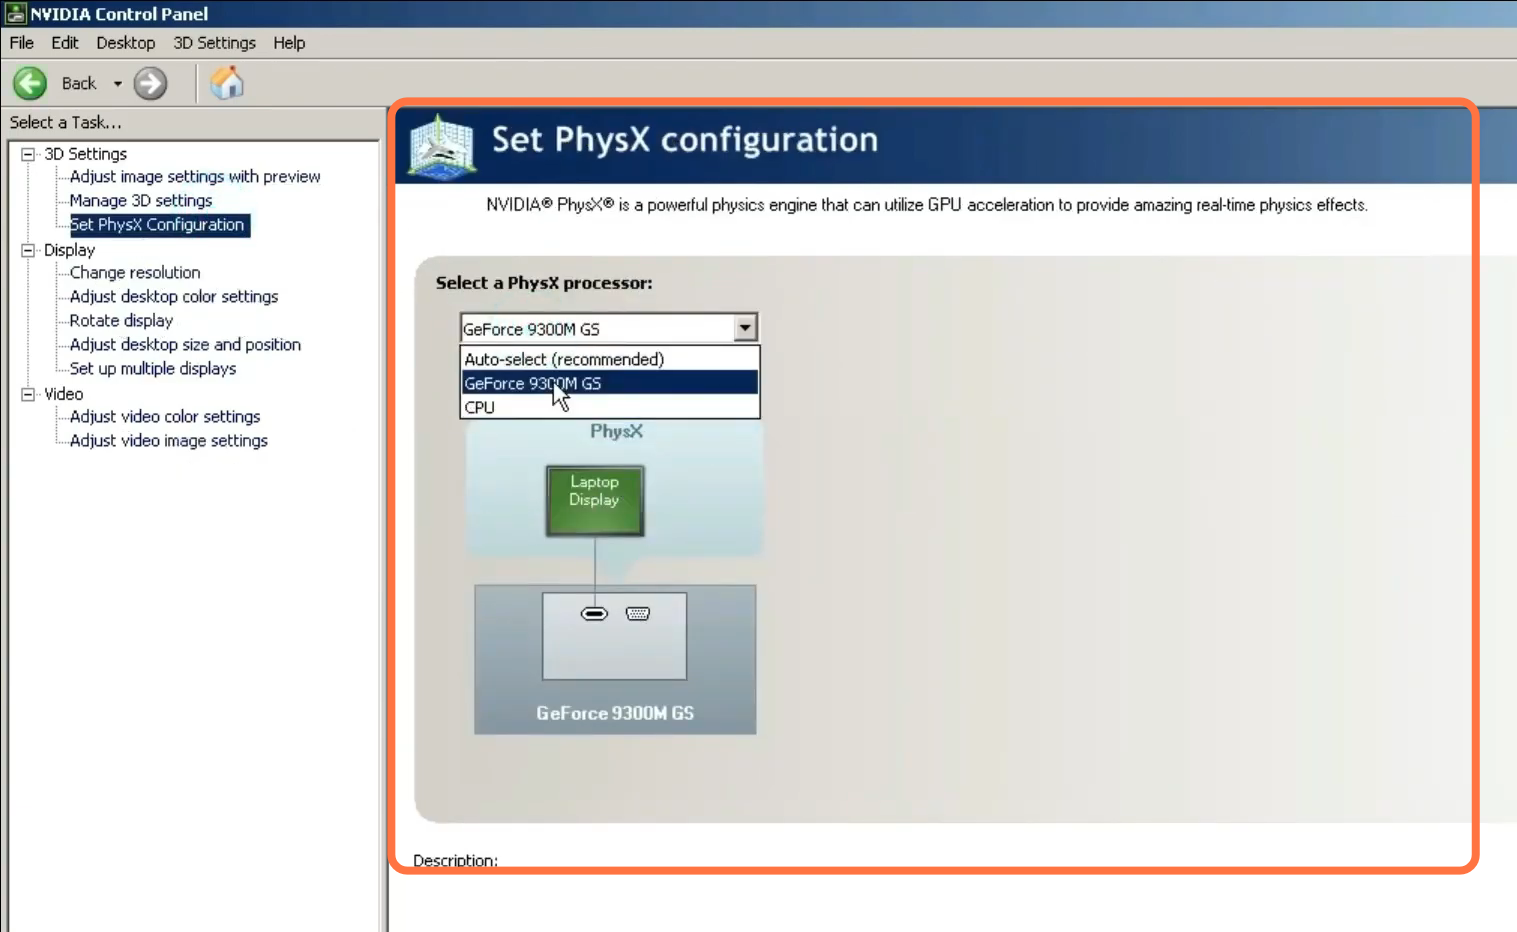
8.1- You have to open the NVidia control panel, go to phys x and set it to GPU.
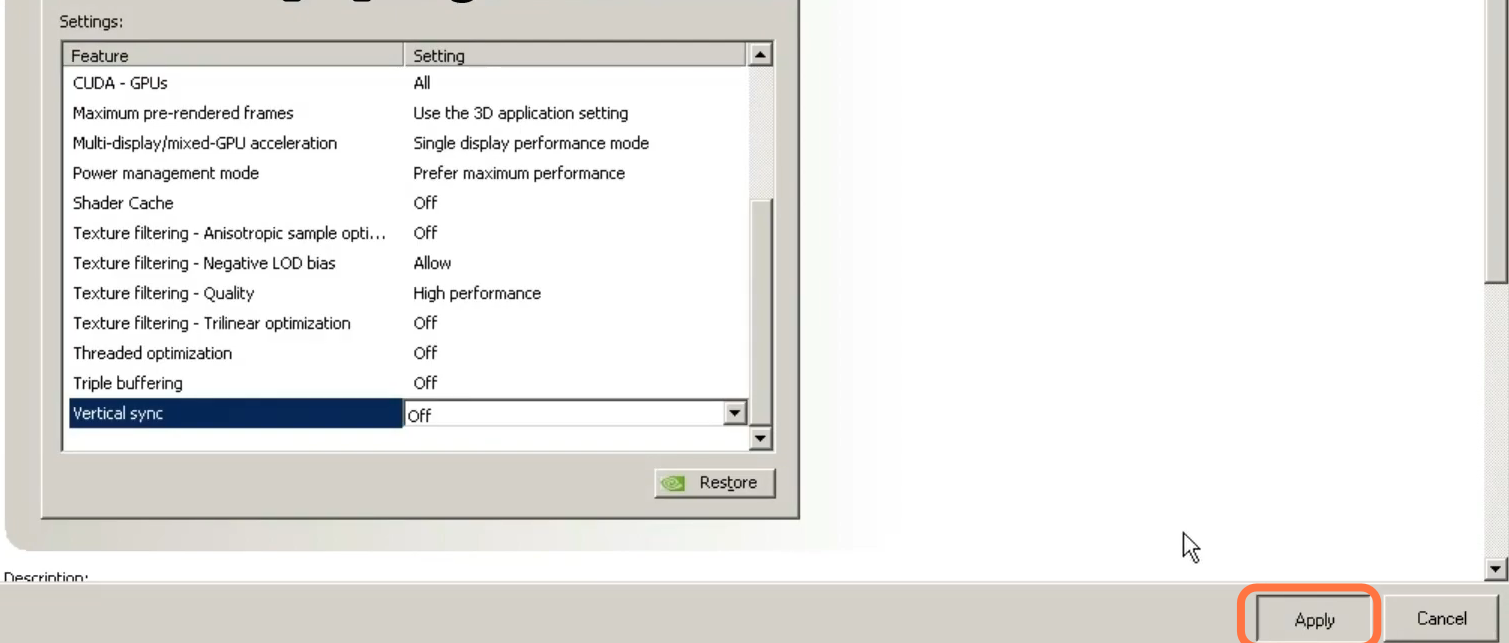
8.2- After that, click on the 3D settings, copy all of these settings, and set the image setting preview to performance. Then you need to click on Apply.
8.3- Now go to adjust desktop size and composition. Select the fill screen, click GPU, and select override scaling.
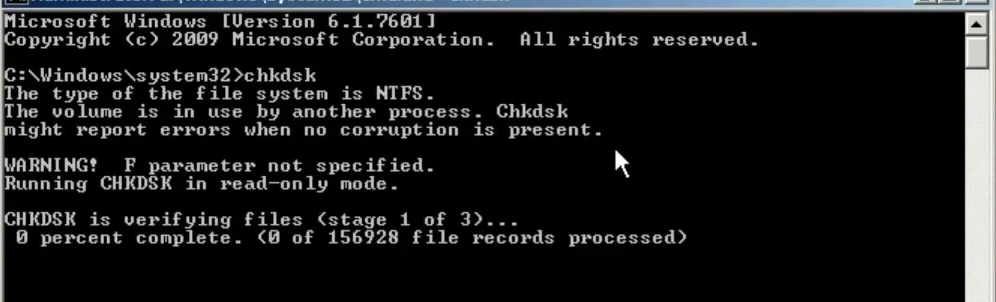
8.4- Run the AMD command to check for any disk error. For this, you need to go to search, type cmd, and run it as administrator. Type “chkdsk” and it will fix all the drive issues if you have any.
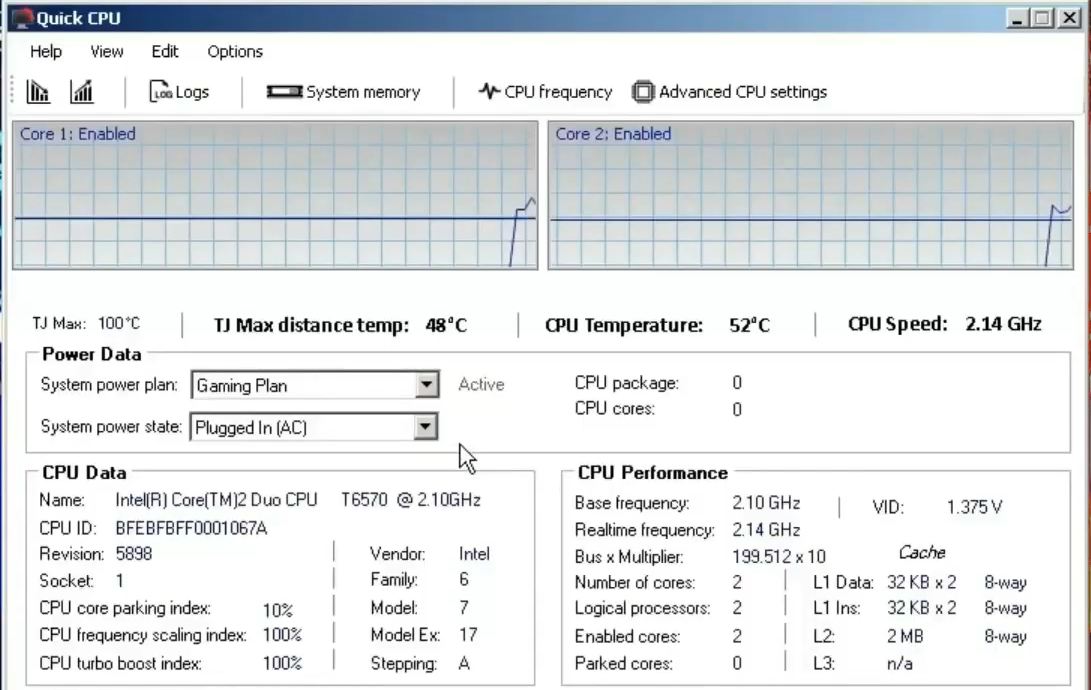
8.5- This step is about unpacking the CPU. You have to select your created gaming plan and then open the quick CPU. Select a gaming plan, make sure it is active, and set the value to max.
Disk Defragmentation
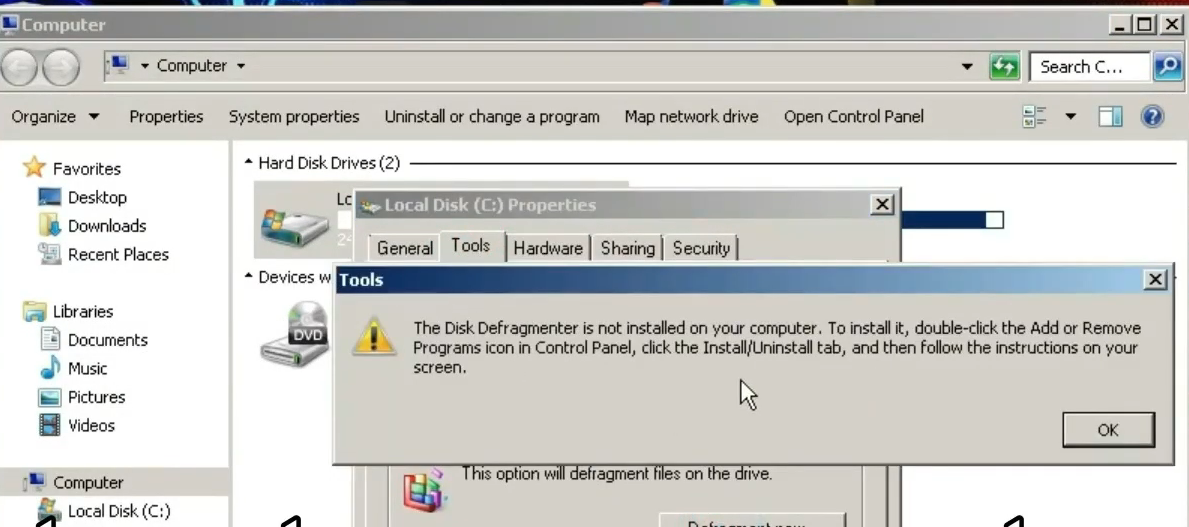
9.1- This step is about Disk fragmentation, there are two ways to do disk fragmentation.
First, you have to go to My Computer and navigate to properties. Click on Tools, and tap on disk fragmentation. If this does not work, then follow the second step.
You need to download software into your computer that allows disk fragmentation. You can use Smart Defrag 6 for this purpose.
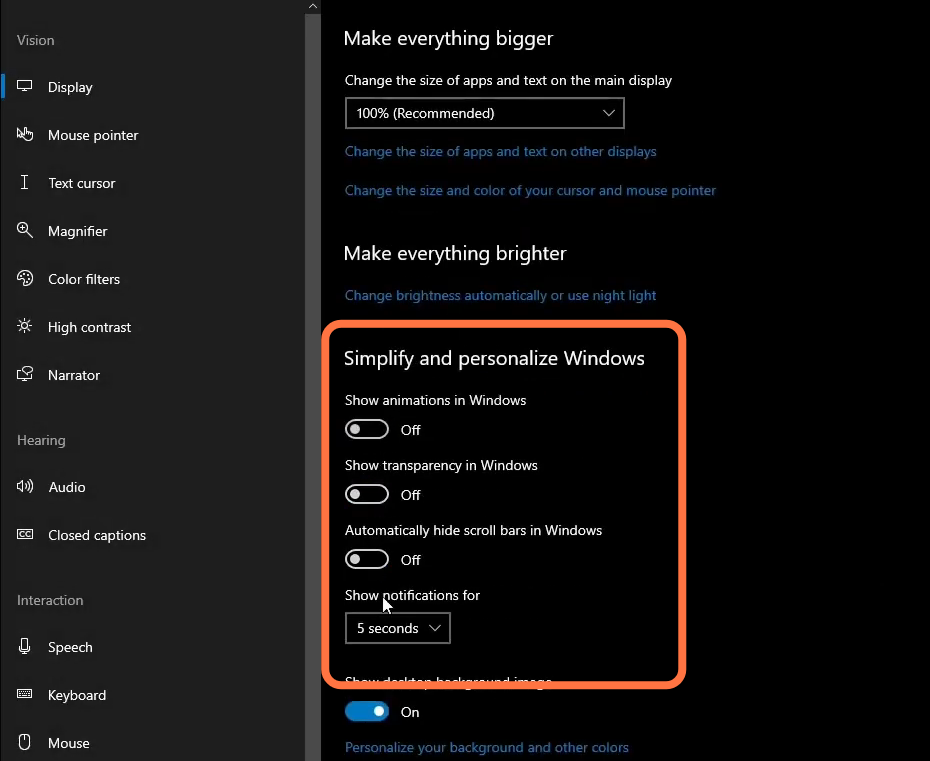
9.2- Set the desktop background to a single color. Right-click on the desktop and click on settings, then go to “ease of access” and disable animation and transparency. You have to hide scroll bars and desktop images.
End Task Explorer.exe
10.1- Now you have to end the task explorer.exe as this will increase your FPS. For this right click on your taskbar then click on task manager then in the application tab you have to find explorer.exe right click on it and select end this process.

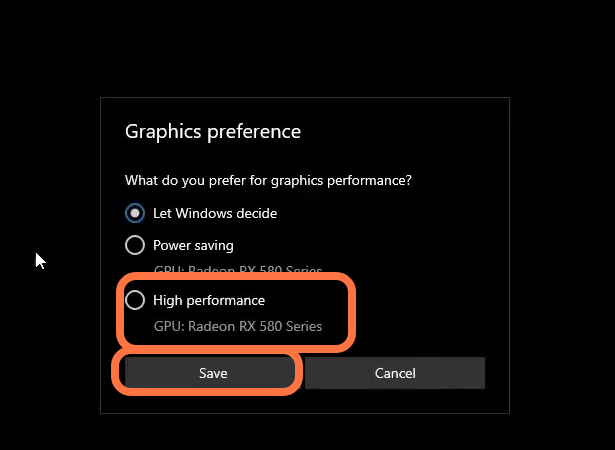
High Performance
You will need to go to Graphics preference and set Valheim to high performance by clicking on the options button.
Tweaks To Lower Latency and Increase FPS
For this, you have to go to the search button in the taskbar and write CMD. Run this as an administrator and then write three commands one by one, as shown in the picture below. It will reduce the input latency and will increase your FPS.

Disable HPET
13.1- You have to open the device manager, expand system devices, and scroll down to the high-precision event timer(HPET). Right-click on it and click on Disable.

After this, you have to command prompt you have to paste this command on it bcdedit /set useplatformclock false and then press enter.

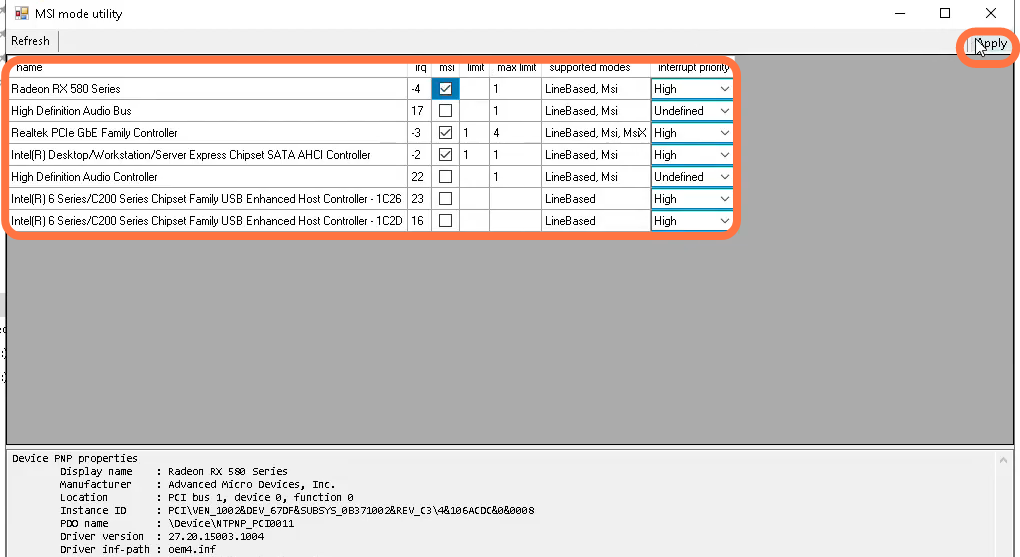
13.2- Enable MSI options for your GPU if it has MSI written on its right side saying supported modes. You need to set interrupt priority to high, then click on Apply and close.
13.3- Now you have to delete the temporary junk file for this open run and write %temp% press enter. Now temp folder will open in front of you have to delete all the files in this folder.

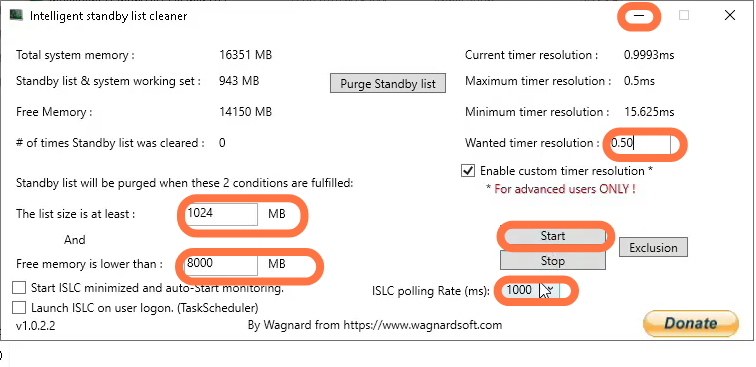
ISLC Set Up
You have to download it from the following link https://www.wagnardsoft.com/forums/vi… Then save it, navigate to the ISIC folder that you saved earlier and run it as an administrator. You need to set the least size to at least 1024 and free memory lower than half of your Ram. Set the custom timer resolution to 0.50 and the ISIC polling rate to 1000. Then click on Start and close it once it completes.