In this guide, you will learn how to get started with your server for playing Subnautica in multiplayer with your friends.
Step 1
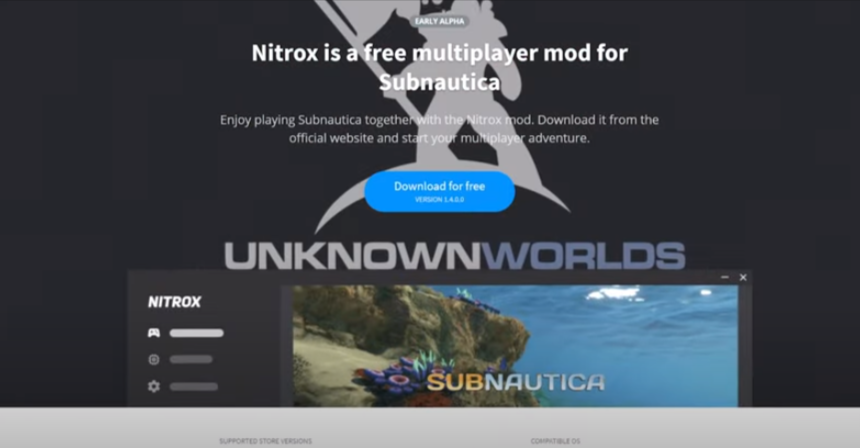
First, you will need to download the mod file from the following link.
https://nitrox.rux.gg/
Step 2
Open the link, click on the download button, and it will start downloading automatically.
Step 3
After downloading the file, you have to open it, copy all the files, and then extract it in any other folder. After that, you have to right-click on the nitrox launcher.exe file and tap on the Run as administrator option.
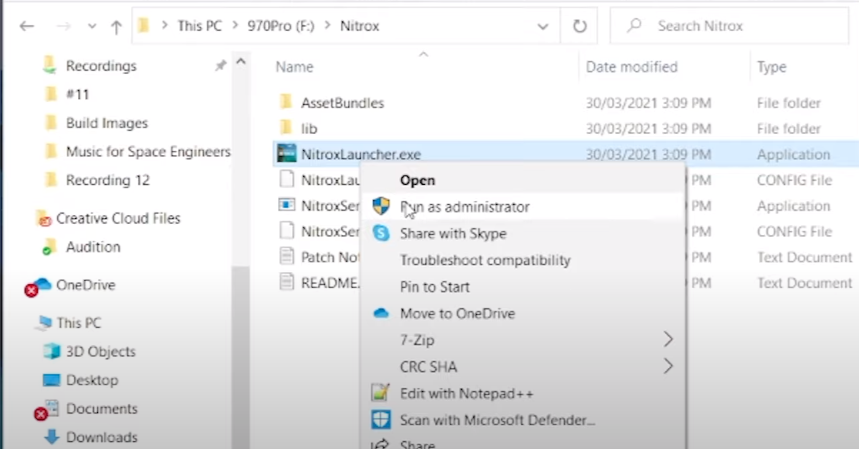
You will receive a warning from your Windows, so you have to click on Run anyway, and it will start installing the nitrox in your system. When it gets installed, it will run automatically, and your launcher will start.
Step 4
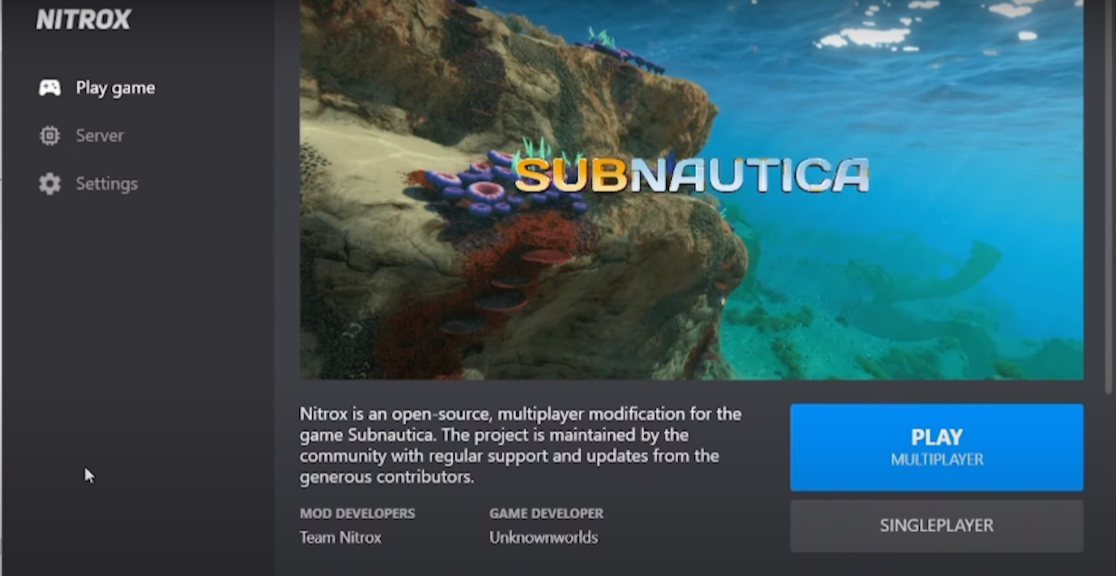
Click on the Play Multiplayer button, and it will open Subnautica with Mod so that you can connect with other people’s servers or start your server. If you select to start your server to host for you and have a friend to play with, you can host it on your playing machine and a separate computer.

Step 5
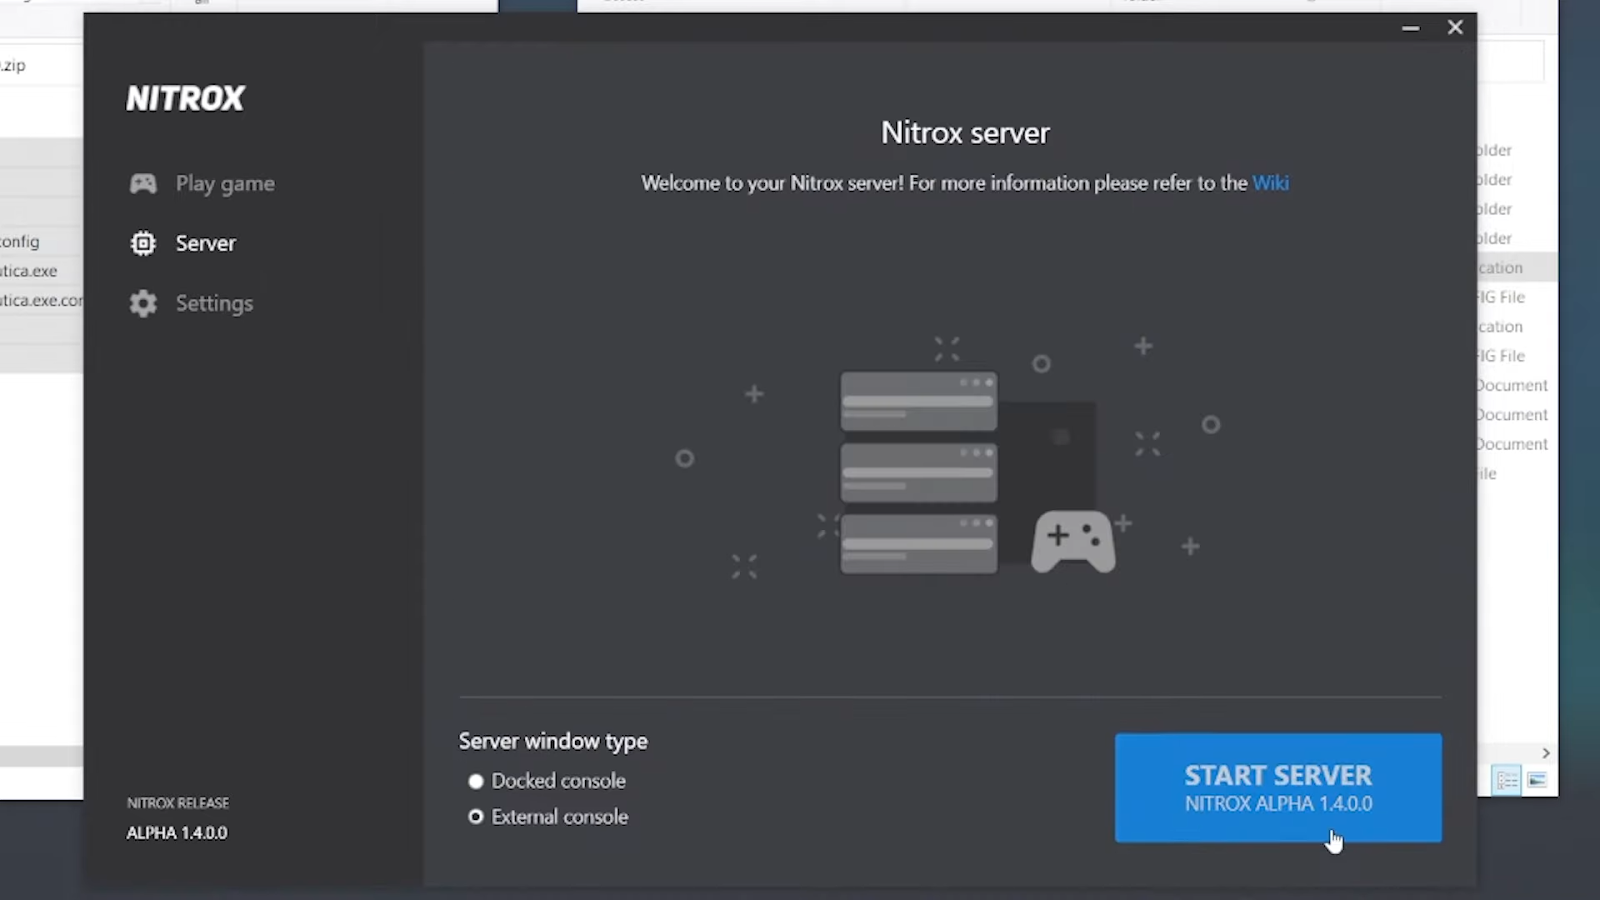
To start the server, you first have to click on the servers tab and then click on the start server button on the right bottom corner of the launcher, as shown in the image below.
Step 6
You will need to open the console window, which will show you if you are playing on a LAN network, you will spot an IP address for your network. You can use it to play with the server, and if you are playing with friends using the same network, you can also use this IP address for the multiplayer.
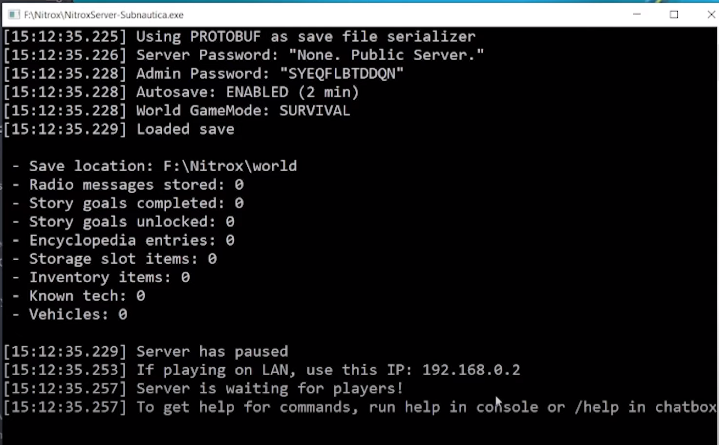
If you are using Port Forwarding, you have to open the port in your router for the people who can connect to your IP address.
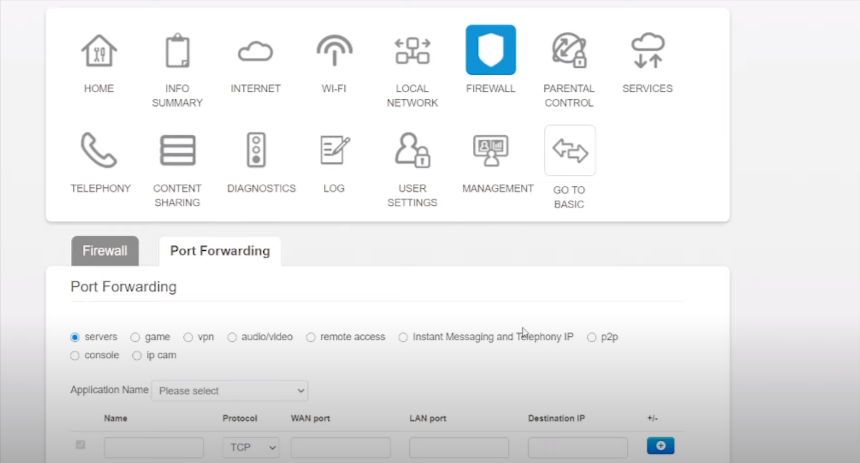
If you don’t know how to set up port forwarding on your router, go to fortforward.com, and search for it, as shown in the image below.
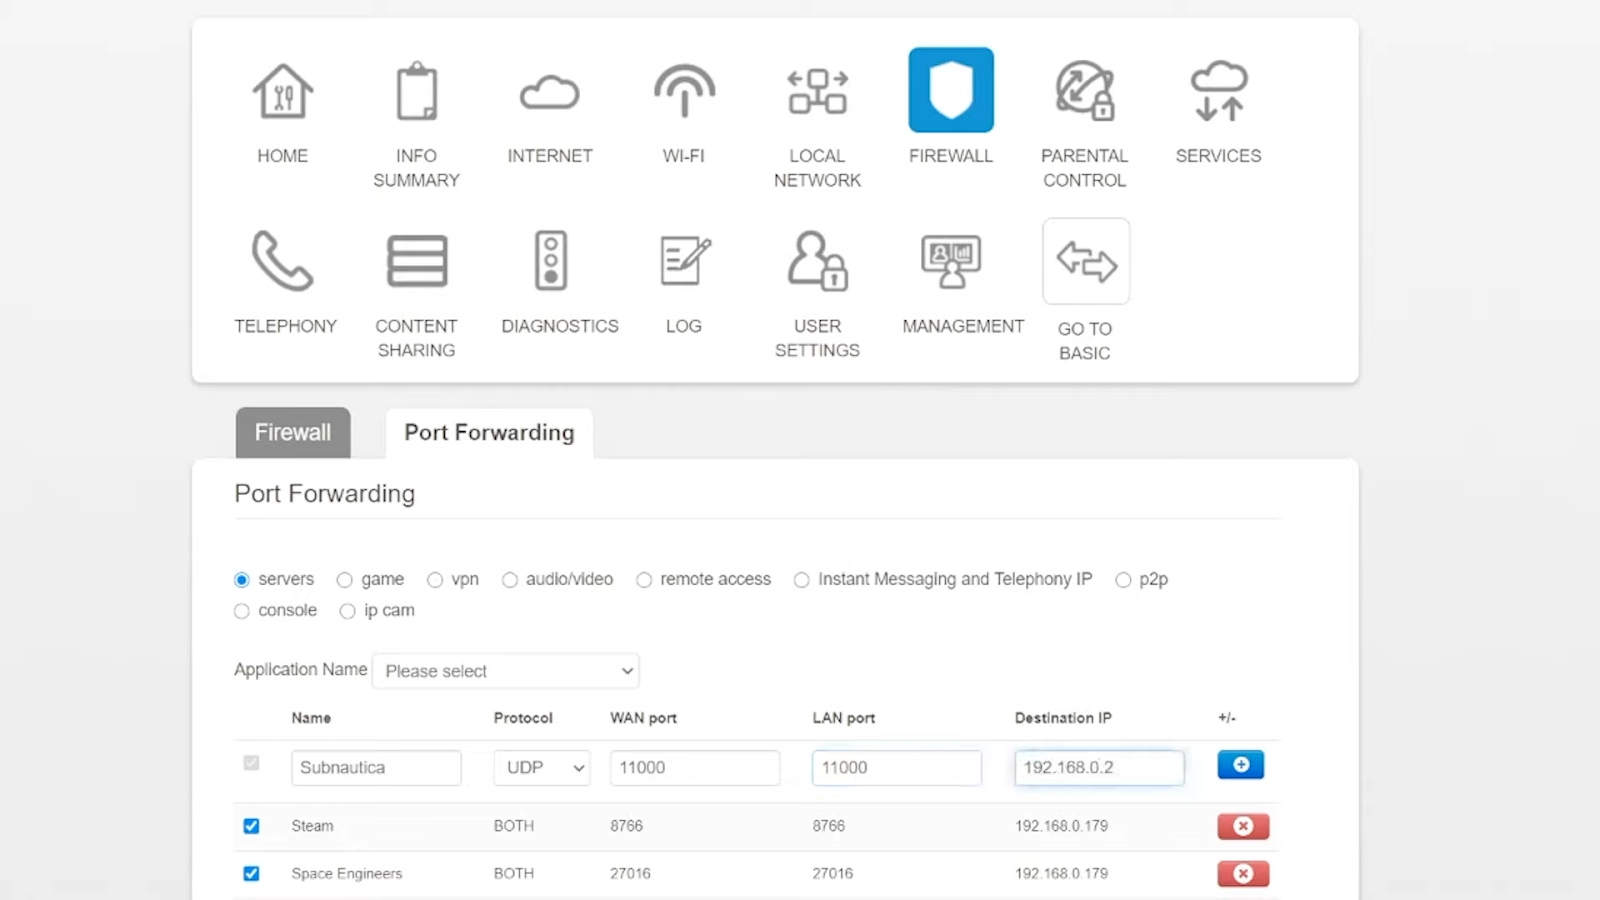
Step 7
After that, set up for Subnautica and then select “udp” next to it. Then set the WLAN port option, set the LAN port, and put the IP address in the destination IP.
Step 8
In the launcher, when the server starts, you have to click on the play game tab. Then click on the Play Multiplayer, your friend will also have to click on that button, and then you will both join the same server.
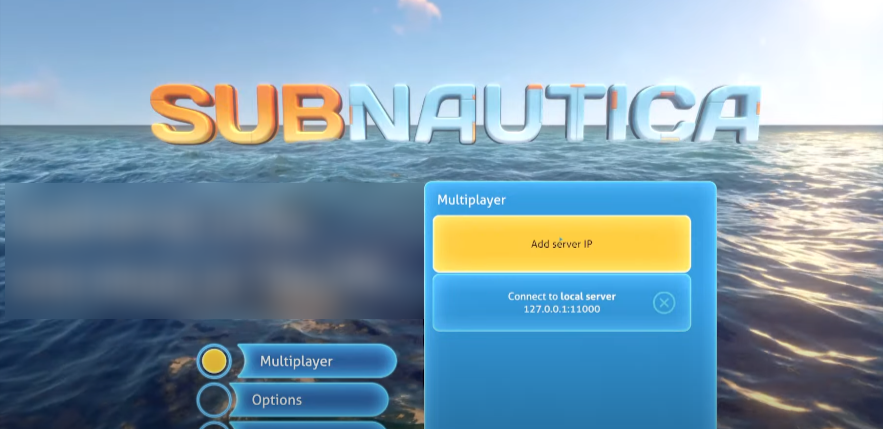
You can connect to your local server, or if you are playing on your friend’s local network, he has to click on the “Add server IP”, as shown in the image below.
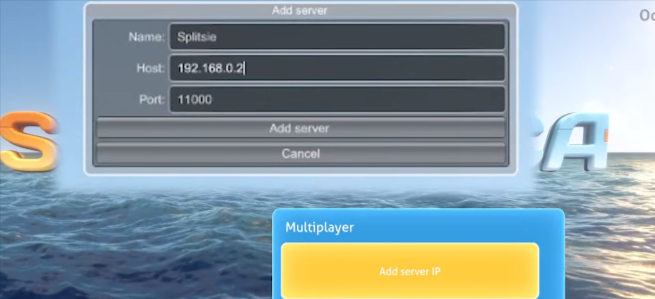
Step 9
After that, you have to add the IP address name and its port, then click on the “Add server” button.
Now, you can connect with the server on your computer; you have to select the name and color you want to appear and click on the Join button. When the game starts, you will spot another player who is connected with your local network.

This mod may have some bugs as it is under development.