This guide will provide you with the basics and BnB combos of Android 21 in Dragon Ball Fighterz 3.5.
21’s 5L, and the auto combo are solid in terms of range and frame data. Her 2L hits low too.

Her Mediums are amazing in both range and speed but are unsafe on block. Combined, they make great long-range pokes, like her 2M, 21’s 3M is also tracking.

2M tracks a short distance in front of her, while 3M will cover anywhere between 2M and almost full screen.
5H is smaller than 5M. You can use it to confirm 2M if you’ve already used 5M. 2H is massive, and you can make it safe using 214L.

Despite appearing as 3, her 5S is just a single Ki Blast. It’s safe and used along 2S in neutral and block strings.
2S shoots 3 Ki blasts covering a large area and moves 21 backward. It recovers fast enough to punish Superdashes at most ranges.

jS is the same, but 21 moves forwards. jL hits high up; it is great for dragging enemies to the floor.
jM is a crazy good cross-up button and air-to-air tool. jH hits on both sides, allowing for some dirty mix-ups after a Level 3.

Hors D’Oeuvre Stab (214X, Air OK)

Series of Divekicks, all safe on block. The Light and Medium are used in both combos and block strings and make assist extensions easy. The Heavy version gives a huge combo cable ground bounce.
Connoisseur Cut (236S or 214S, Air OK)

Command grabs with an absurd range that gives sliding a knockdown. You need to press L, M, or follow up with Hors D’Oeuvre Stab. The Light follow-up will switch sides, but Medium and Heavy won’t. The Heavy version additionally ground bounces. The 236S grabs are grounded/angled down, while the 2145 grabs are angled up. 2145 has explicitly the same anti-air properties as 2H.

Successful grabs will fill one of 21’s “Steals slots. Once filled, using the same input again will use the Steal. The Steal you get will depend on the enemy. Each Slot corresponds to one of the grabs. From left to right, they’re 236S, 12365, 2145, and 1214S. You can chain a Steal into another on the opposite Steal slot, like 236S > 2145 or 12145 > 12365.
However, instead of inputting every Steal manually, you can mash S. You can still end in 214X but won’t pick a side.
Total Detonation Ball (236X)

It shoots a beam property projectile, but it will always leave a gap in the block strings. The Light version is not safe on block, but the pushback makes punishing some characters hard. Instead, the Medium version shoots it upwards, useful against jumpers and Superdash; it is safe on block. The Heavy version becomes stronger and deals more damage the more Steals you have. All held Steals will be removed. Without any Steals, it’s barely positive (+1) on the block, but with each Steal, it gains +5 blockstun up to an obscene +20 total.
Steals

What Steal you get depends on which character you are grabbing and which grab you are using. 2365 Steals are the attacking ones, while 2145 Steals are utility; since they all have different colors, it’s easy to give them names. For example:
Kamehameha can never be in a 214S slot and will always be Blue. Hence, 236B or j236B.
236s +Blue = 236B
j236s+ Yellow = j236Y
J214S+Green = 214G
J214S +Purple = j214p
Kamehameha (236B, Air OK)

Black raspberry-flavoured Kamehameha. Average beam.
Solar Flare (214B, Air OK)

It deals no damage but is a frame four anti-air. You can use it to drag aerial enemies to the ground and mix them up using assists.
Consecutive Energy Blast (236Y, Air OK)
Mainly just for damage in combos since it can be superdashed. If you have resources, you can bait it though, and punish it with a Level 3.
Sticky Energy Blast (214Y. Air OK)

Very fast command grabs but will whiff on crouchers, making the ground version pretty useless. The significant part is that they are frame one air invincible, and their range is a lot bigger in the air. You can only grab once per combo.
Explosive Energy Blast (236G, Air OK)

Teen Gohan-like bombs that are plus on block; mashing here means a free Medium starter. Superdashable, though, so be careful. It deals good damage in combos, but you have to use Light follow-up to the combo.
Barrier Sphere (214G, Air OK)
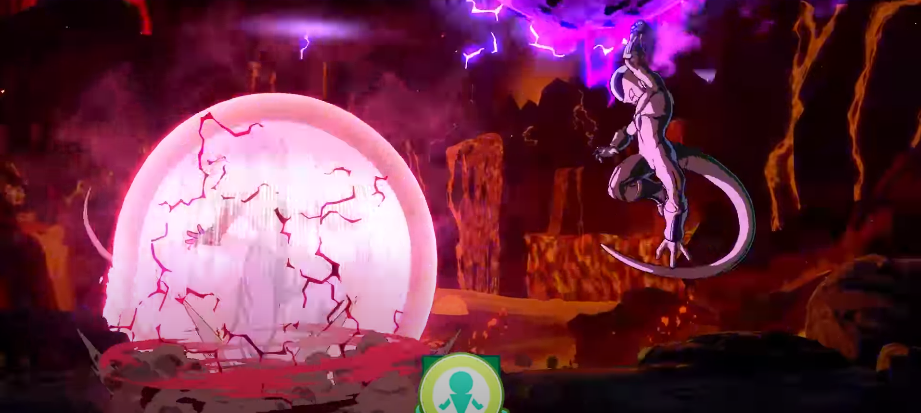
Blocks all non-grab and non-super attacks and builds 0.25 bar for every blocked hit.
Homing Energy Blast (236P, Air OK)

The Versatile homing orb is useful for setups and generally pressuring your enemy.
Sonic Warp (214P, Air OK)

It teleports 21 behind the enemy, and the grounded version leaves her aerial, basically a free empty Vanish. You can get a high/low or cross-up using this, ideally with assists. You can cancel the Divekicks immediately too.
Sweet Tooth (214L+M)

It does less damage than her air level 3 but will restock every Steal slot and heal 300 blue health. It will not replace any Steals you already hold, though.
An Assist

The Explosive fullscreen projectile with decent blockstun, all around a good assist.
B Assist

Tracks to the enemy up to half a screen away and has slightly better blockstun than A assist, but A is usually still the better choice.
C Assist

It tracks to the enemy on the ground, but nothing special apart from long blockstun.
Basic Safe Gapless Blockstring

Your standard blockstring for guaranteed lockdown.
2L5LL’> 2M5M > 5H > 214L 214M
Crossup 214M

214M will go over your enemy if SS hasn’t been used. With assists, this can lead to some neat mixups.
2L5LL > 2M5M > 5H > 214M
5S Options

Your first layer of pressure comes in the form of 5S. Ki Blast properties allow the enemy to guard and cancel the Super dash, but the 5 Stewards will beat Superdash every time.
2L5LL > 2M5M > 555H > 214L
Using 5S AFTER SH instead creates a spacing that will put most jabs out of range while also smoking reflects, letting you 2M or 5M into a Medium Starter.

2L5LL > 2M5M > 5H5S > 5M2M/2M5M >…
214L/M will beat a super dash after 5S, and you can be converted into a full combo with an assist or Vanish.

2L5LL > 2M5M > 5H5S > 214L > A1 > …
If they respect your pressure, you get a tree turn. You can also continue poking them with your gigantic normals to catch them hitting a button.

2L5LL > 2M5M > 5H5S > 2M5M > 5S5H > 214L
236X Usage

All versions of 236X will leave a gap that acts as a frame trap. You can confirm with Vanish or the right assists on a hit and blockijäilinto Vanish for another turn.

2L5LL > 2M5M > 5H5S > 236L 236X
You don’t want to use the 236M midscreen since it has a tendency to shift. In the corner, it is just a direct upgrade from 236L, though.

2L5LL > 2M5M 5H55 > 236M 236X
Usage: If you catch them jumping it, drag them to the ground, and you’ll be plus (+2), but it’s better just to call out a jump with the anti-air grab.

IS2MSM > 55
2L5LL > 2M5M > 5S5H > (dl) 236M > 66 5LL > 236X
Usage 236H can be used to give yourself a “free” turn, as it’s 20 when used with 4 Steals. If it’s blocked, you can truly string into a low or go for a safe jump overhead. Combined with assists, it lets you do basically any mixup you want.

2L5LL > 2M5M > 5H > 236H > 66 2L5LL > …
2L5LL > 2M5M > 555H > 236H > A1 > 3M5S > Vanish …
2S Pressure

2S is also a big part of 2’s pressure. Its fast recovery allows you to reset to neutral or airdash in to steal a turn while risking a 2H
2L5LL > 5M2M > 555H > 25 > 44/66 JM > …
The problem is the big gap it leaves. There aren’t many consistent ways to beat Superdashing here. 214x can beat late SD’s but don’t rely on it.

2L5LL > 2M5M > 5H > 25 >…
If you have 214B, 214G, or especially 214 available, it becomes a guaranteed Superdash punishment, though.

< 2L5LL > 2M5M > 5H > 25 > j214B/Y/G-L/M>…
Command Grabs

What holds your entire pressure together is the constant threat of her decently fast command grabs.
2L5LL> 5M2M > 5H5S > 236S
It is important to keep your grabs unpredictable by mixing them with all the previous options, along with universal mechanics Like DR, GM, and Crossups.

2L5LL > 2M > 236S-M > 66 2L5L > 96 (dl) M > 5M2M > 236G > 236S
If you notice them jumping a lot you can also react with one of the anti-air grabs.

2L5LL > 6M > 66 2145
Level 3 Oki

Anywhere on screen 21 gets an easy left/right 50/50 off any of her Level3s.
… > Lvl 3 > (d) 296 JH>…
Notice how the enemy bounces on the floor twice on the knockdown. The second bounce is your visual cue. Super Jump forward and ardashjHfor the same side option and float up forward to get the cross-up.

… > Lvl 3 > (dl) 296 JH>…
It works the same as her aerial Level 3, but you won’t have the visual cue, so you’ll have to remember the timing.

… > Lvl 3 > (dl) 296 jH > …
Miscellaneous tips
You can get beta two after 25 if you have j2146 available.

2L5LL > 2M5M 555H > 25 > 66 j214G-M > …
Using 2.4P with assist can give you some pretty nasty left/right mixups, depending on when you call your assist.

42L5LL > 2M5M > 5S5H > A1 > 214P > H > …
Make sure you’re not getting predictable, and use your whole arsenal. Here’s an example of an extended block string.
BnB’s
Basic BnB
4370 dmg/3762 scaled I +1.3 Bar
Pick which Steal and side you want by using either grab or follow up. Off as starter do-M2H > SD …for slightly more damage At the max range, the Lights before j2H will whiff so skip them there.
2M5M – jMLL2H – SD – jMLL2HjcLLS – j236/214S~L/M
(Skip the lights before SD if you’re too far. Off 5L starter do jM2H – SD instead for slightly more damage.)
Basic BnB Corner Version

4797 dmg/3947 scaled | +1.5 Bar
2M5M – jMH2H – SD – jMH2HjcLLLS – j236/214S~L/M
5H Route Midscreen

4210 dmg/3675 scaled | +105 Bar
5M2M – 5H – SD – jLL2HjcLLS – j236/214S~L/M
5H Route Near Corner

4952 dmg/4019 scaled I +155 Bar
Damage can vary on most of these combos depending on how many Ki Blasts connect.
5M2M – 5H – (dl) SD – jM(dl)H – (land) jLLL2HjcLLLS – j236/214S~L/M
(Damage can vary slightly depending on how many Ki Blasts hit.)
5H Rejump

4575 dmg/3867 scaled | +1.25 Bar
5M2M – 5H – (dl) SD – 66 jM – (land) 669 jLLL2HjcLLS – j236/214S~L/M
Corner BnB

48B7 dmg/4047 scaled | +1.45 Bar
Off 5M you can add 5S before 214M for extra damage.
2M5M – 214M – 44 5LLL – SD – jLLL2HjcLLLS – j236/214S~L/M
(Off 5M you can do 5M2M – 5S – 214M for more damage)
Advanced Corner BnB
5174 dmg/4084 scaled +1.7 Bar
Proper timing is very tricky; mind the tiny step back before 5S.
5M2M – 5S – 214M – 4 (dl)5S(dl)5H – (dl) SD – jM(dl)H – sjLLL2HjcLLLS – j236/214S~L/M
(For scaled do jH – 5M2M – 214M – … – jcLLS – j236/214S~L/M)
214H Extension

4687 dmg/3962 scaled/+01 Bar
Make sure to dash jump far enough. You have lots of time.
2M5M – jMjcMS – j214H – 669 (dl) jMH2HjcLLS – j236/214S~L/M
236B Combo Example

3908 dmgl-00 Bar Requires all 4 Blue Steals.
236B~SH – 66 (dl) 5M – jML2HjcLLS – j236B~SL
j214Y Combo Example

3798 dmg 1 +1.25 Bar, also required.
j214Y~SM – A1 – 669 jM2HjcLLS – j236/214S~L/M
236G Combo Example

6578 dmg 11 Bar Optional but high damaging 236 after DR.
2M5M – jM2H – SD – jM2HjcLLS – j236G~L – A1 – jLL2HjcLLS – j214L – A2 – DR – 236G – Lvl1
J236P Setup Example
5141 dmg1+045 Bar
Alternatively, you can pressure reset, go low/high or command grab/DR.
2M5M – jMH2H – SD – jMH2HjcLLLS – j214S~L – (dl) Vanish – DR – j236P~L – 2L5LL – 6M – jLL2H – …
(You can also DR or Grab before the orb makes contact, go low, etc.)
Super dash Confirm

2435 dmg1607 Bar
SD – jMLjcLLS – j236/214S~L~M
Super dash Confirm with 214H

37 del 22 arst use 2145 second and vice versa.
SD – jMLjcLLS – j236/214S~H – 669 (dl) jMH2HjcLLS – j236/214S~L/M
(If you use j236S, first use j214S afterwards and vice versa)
2H Punish/DR Route

3780/2017 dmg I+0.95/1.6 Bar
2H/DR – SD – jML2HjcLLS – j236/214S~L/M
Vanish Confirm

2877 dmg
Vanish – 66 5LLL – jML2HjcLLS – j236/214S~L/M
Assist Example 1 (Most Assists)

1982 mg 2 Bayemdə hitsunda.
5M2M – 5H – SD – jLL2HjcLLS – j236S~M – A1 – jML2HjcLL – j214S~M
Assist Example 2 (Teen Gohan A/ UI Goku A)
6118 dmg 1.0.9 Bar Superjump isn’t necessary for most assists. DR at the end can be a problem with low hitstun assists.
2M5M – jM2H – SD – jM2HjcLLS – j214M – A1 – sjM2HjcLLS – j236/214S~M – A2 – sjDR – Lvl1
(The DR at the end can be a problem with certain assist. Super jump isn’t necessary for most assists.)
Assist Example 3 (Base Goku A/ Jiren A)

Yes, she can DHC into Spirit Bomb.
8757 dmg 1-2 Bar
2M5M – jMH2H – SD – jMH2HjcLLLS – j214M – A1 – 5H – SD – jM2HjcLL – j214L – A2 – DR – 214S – Lvl1 – Spirit Bomb
(She can DHC into Spirit Bomb, but she needs to be facing out of the corner.)
2.6 Bar Sparkless Saiyan Steals
(liren A/Any C Assist)

5M2M – 236Y~SSM – A1 – 66 5LLL – SD – jMH2HjcLLS – j236S~M – A2 – 44 DR – 236L – Lvl1 -Lvl1 – Lvl3
(Remember to hold DR for more damage.)
2:25 Bar 5M Midscreen TOD
(Cell A/SSJ Goku A)
5M2M – 214M – Sparking – 2M5M – jMSjcMS – j214M – A1 – jMSjcMS – j214M – A2 – 5LLL – sjLL – j236S~L – Vanish – DR – 214S – Lvl1 – Lvl1 – Lvl3.
2.1 Bar Limit Break Saiyan Steals TOD

2M5M – jMjcMH – j214M – Sparking – (whiff 5L)LL – sjHS – 66 jLLLS – j214M – (dl) [Vanish] – jM (land) 5L – jLL2HjcLL – j236Y~M – Vanish – DR – 236Y~S – Lvl3.