This guide will help you to change Optic Dot Color in Rainbow Six Siege. By following the steps below, you will be able to change it on your PS4, PS5, Xbox, or PC.
- Begin by entering the firing range area in the game where you can practice your shooting and aim.
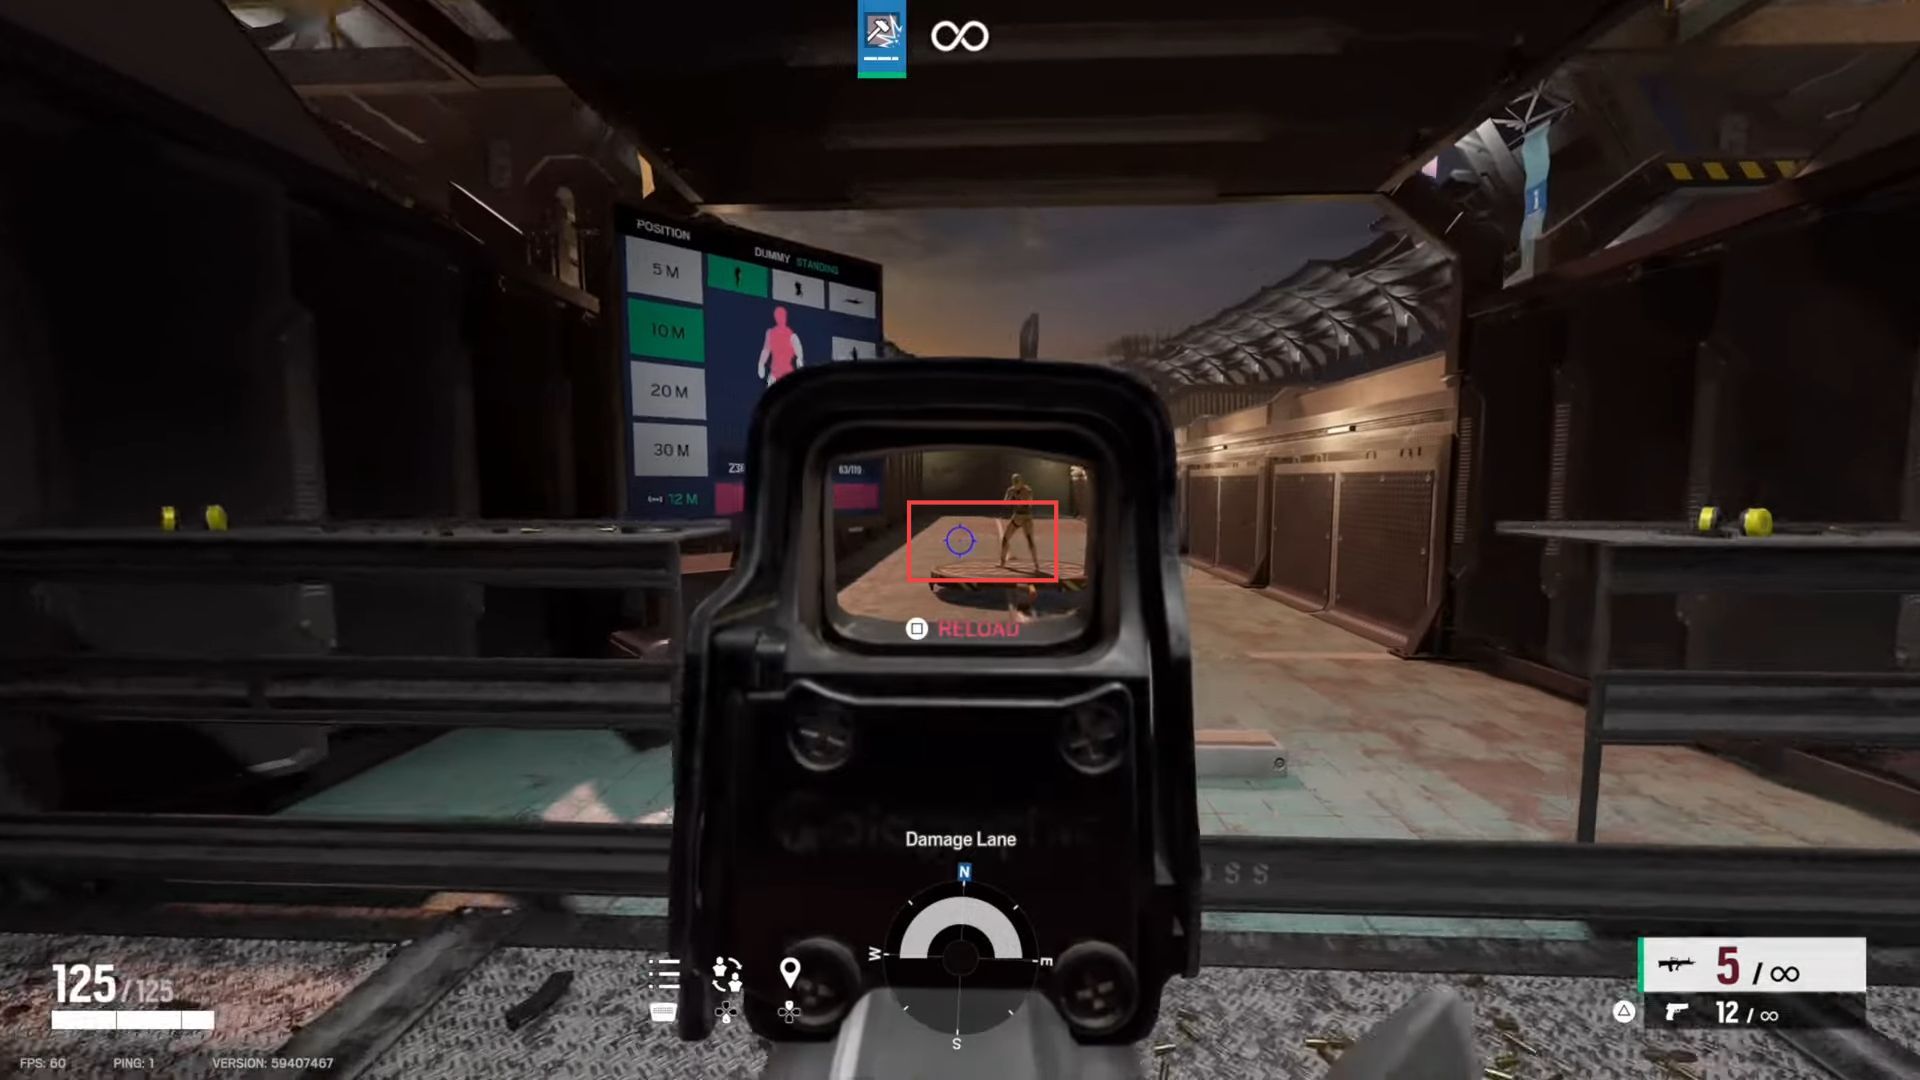
- Take note of the current appearance of your crosshair, which is the visual marker.
It indicates where your shots will land. - You have to look for the option to adjust the OCTA color which is the color of your crosshair.
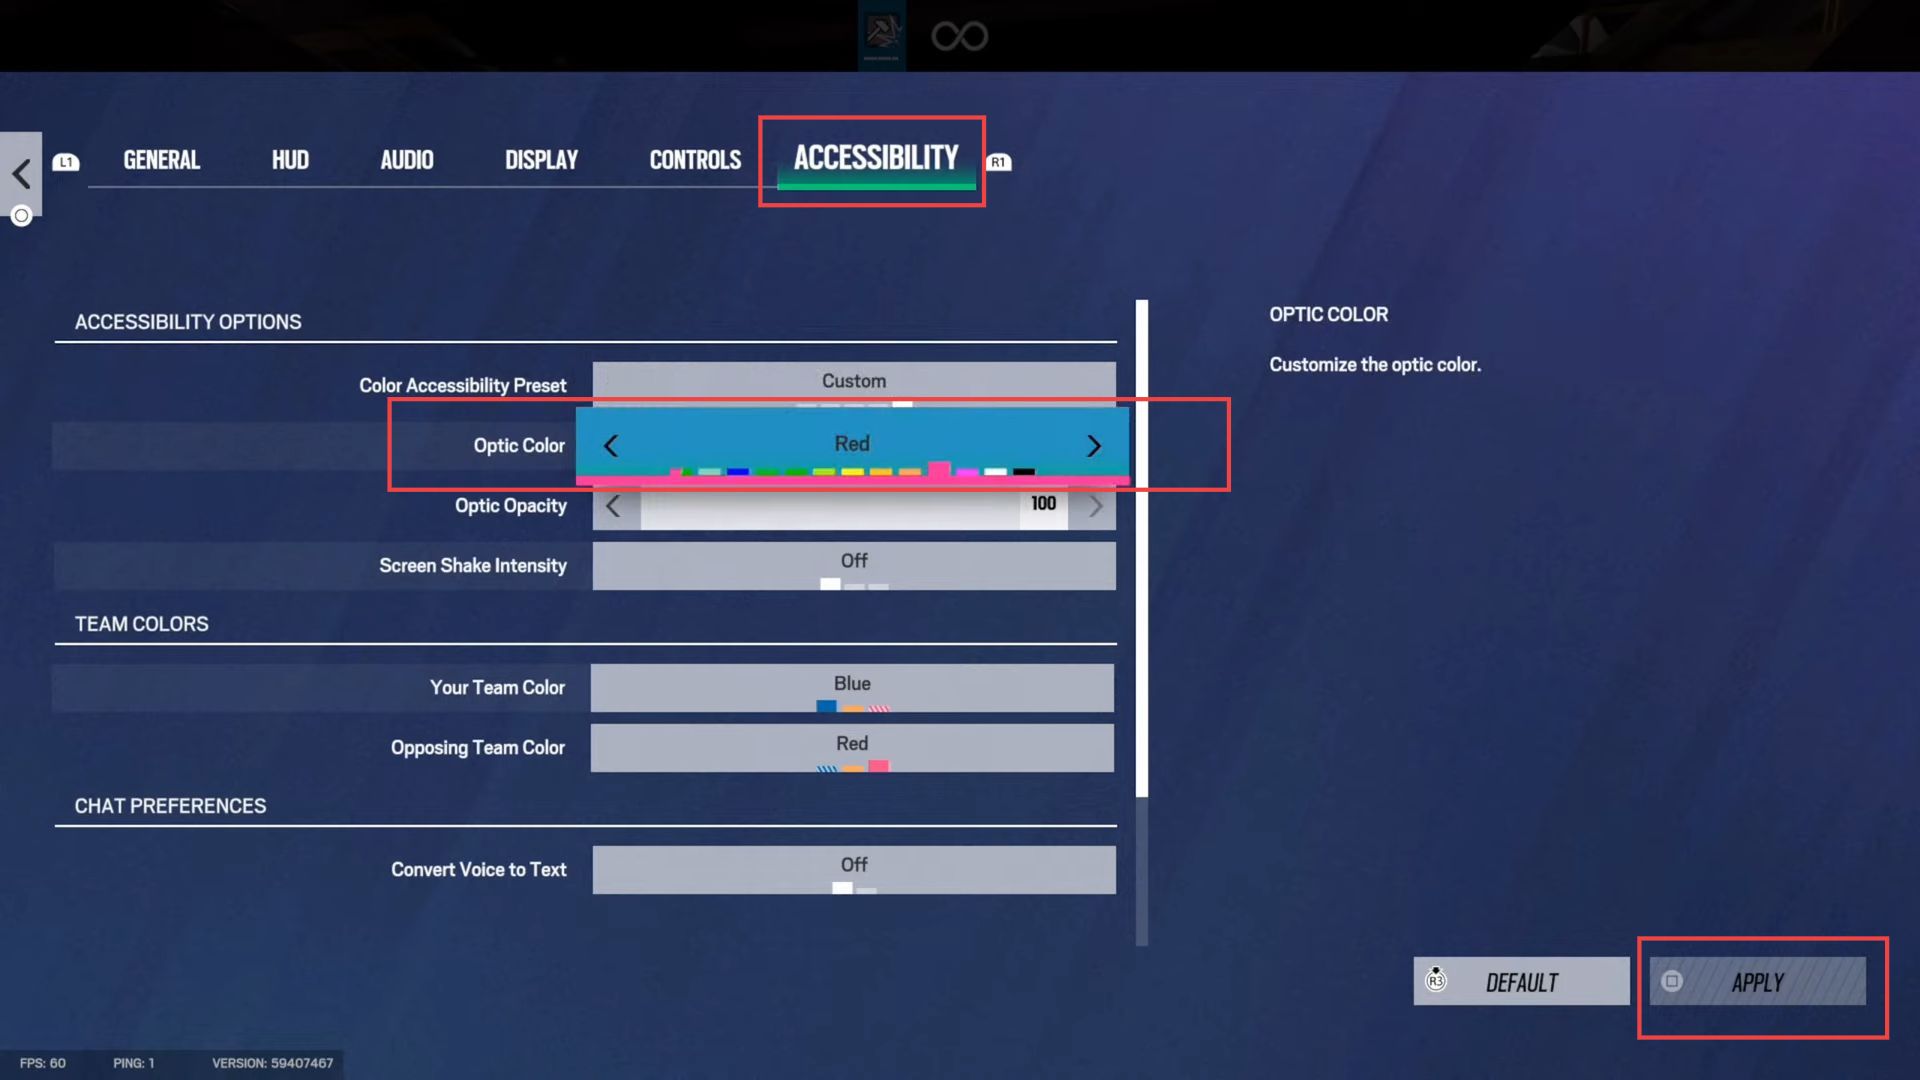
- Now press the Options button on your controller. Within the options menu, use the directional buttons to navigate to the Accessibility section.
Once you’re in the Accessibility section, you’ll find various accessibility settings. - Look for the setting labelled Optic Color.
This setting allows you to change the colour of the crosshair or aiming reticle. - You need to use the R1 button to tap over to the Optic Color option to highlight the colour selection.
- Using the d-pad on your controller, navigate to the colour you want for your crosshair such as choosing the blue colour.
- After selecting the blue colour for your crosshair, press the Square button to apply the colour change.
- After making the changes to your optic colour in the accessibility settings, exit the options menu to return to the main gameplay.
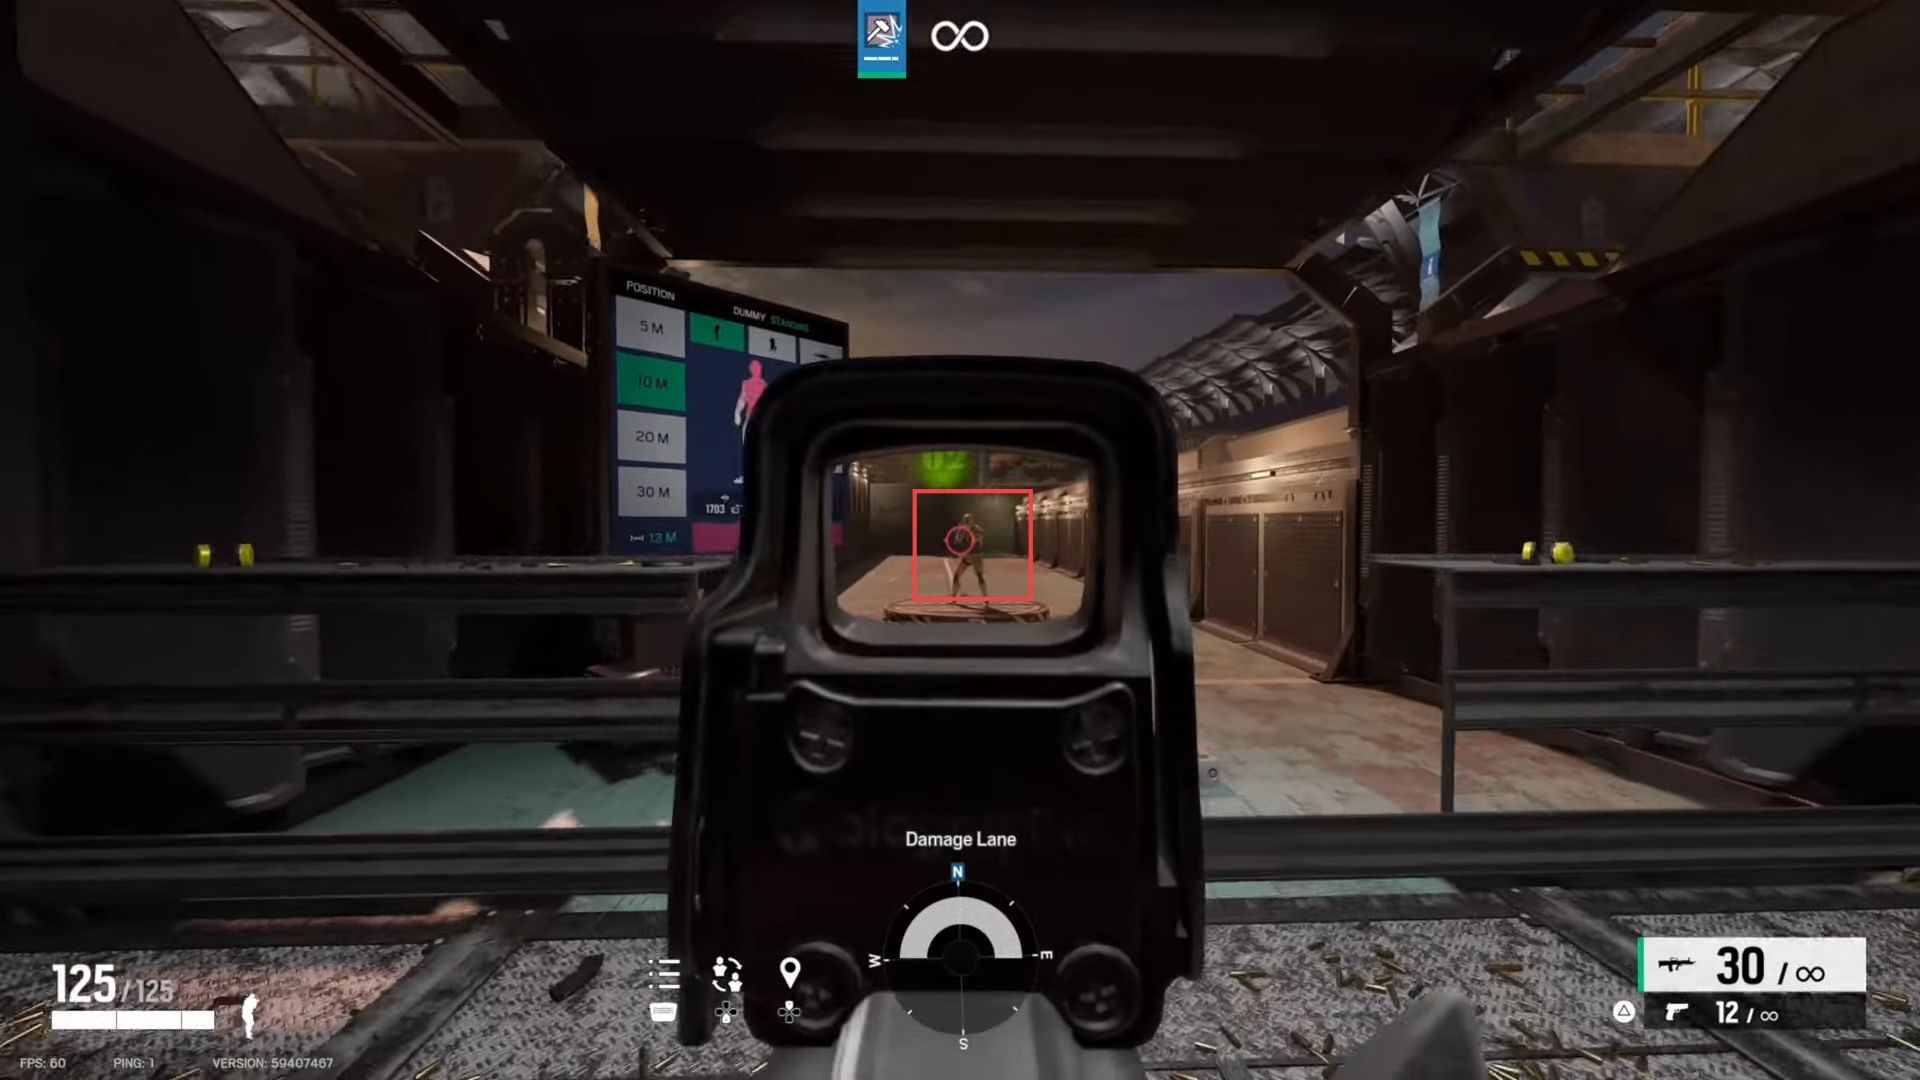
- While playing the game, aim down the sights of your weapon using the appropriate button.
This will activate your aiming reticle or crosshair. - As you aim down sights, take note of the colour of your optic. You’ll see that the colour has changed to the blue colour you selected in the accessibility settings.
- By observing the updated optic colour while aiming, you’ve successfully confirmed that the changes you made in the accessibility settings have been applied to your gameplay.