In this guide, you will learn here how to create a game pass in Roblox Please Donate without any hassle. Since you want to start accepting donations in Please Donate; Here, you will see the menus that they have recently updated over roblox.com.
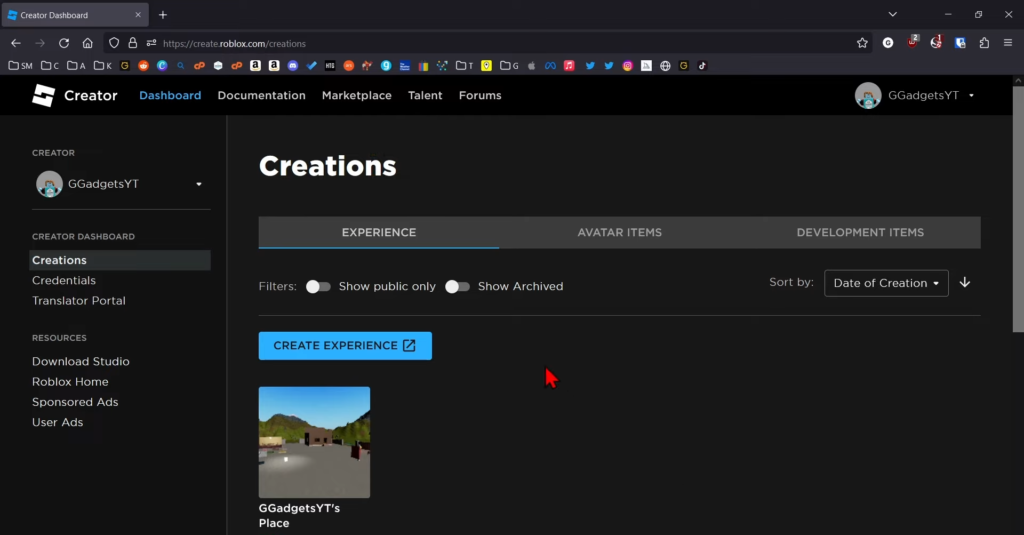
To begin with, open a new browser and go to roblox.com. Sign in to your account and select “Create” in the menu on the top. The next open page will be “Creations” inside the Roblox Creator. Scroll down to “Experience” and select your place; all the users have their place by default. So you don’t need to make a new one for yourself. When your place is open, which reads “Overview,” proceed to the left menu and select “Associated Items.”
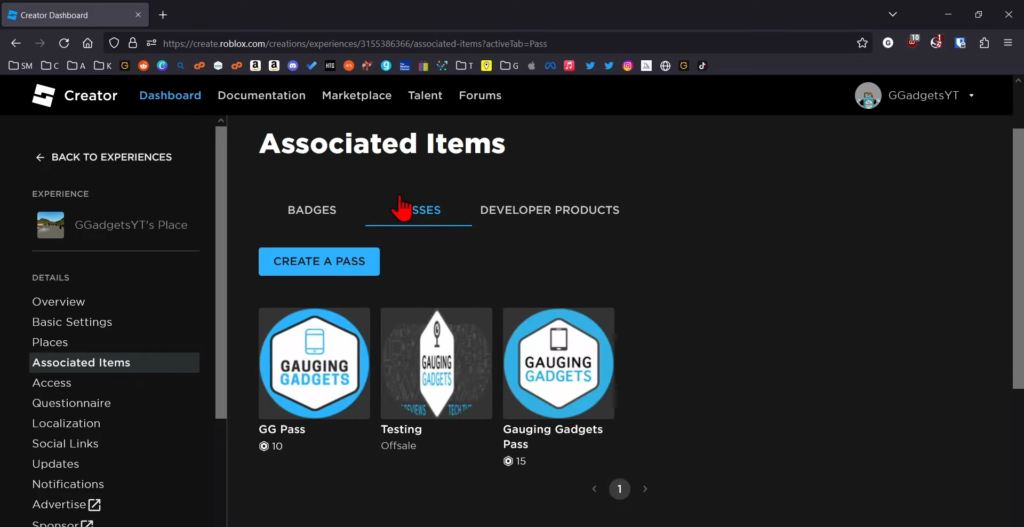
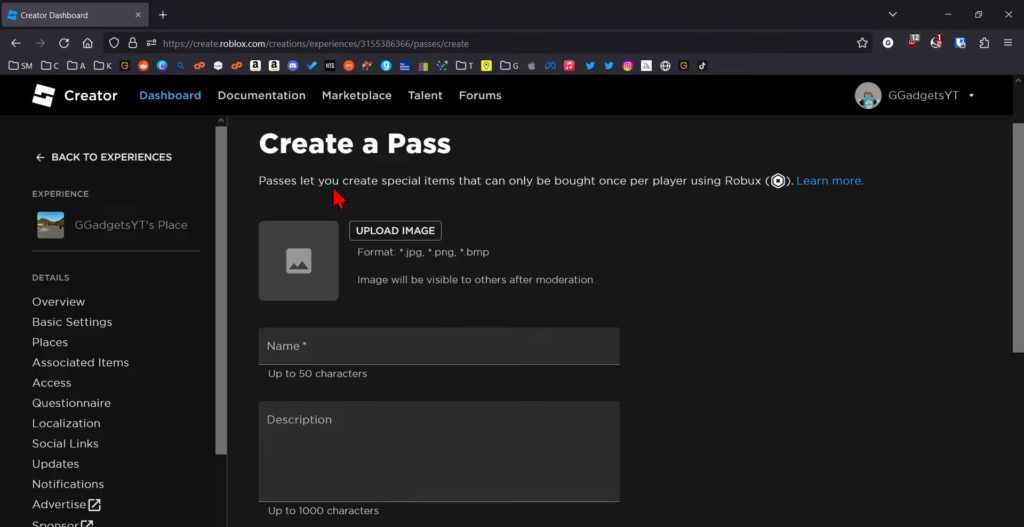
Now select “Passes” and then “Create A Pass.” For this purpose, you must upload any images; these images will be shown on your booth, and Please Donate. Give it a name after uploading the image; it will also be shown on your stand. You can give it a description too, but it is not mandatory. So now, select create a pass, and it has been created.
Finally, Add The Price To The Pass And Claim A Stand
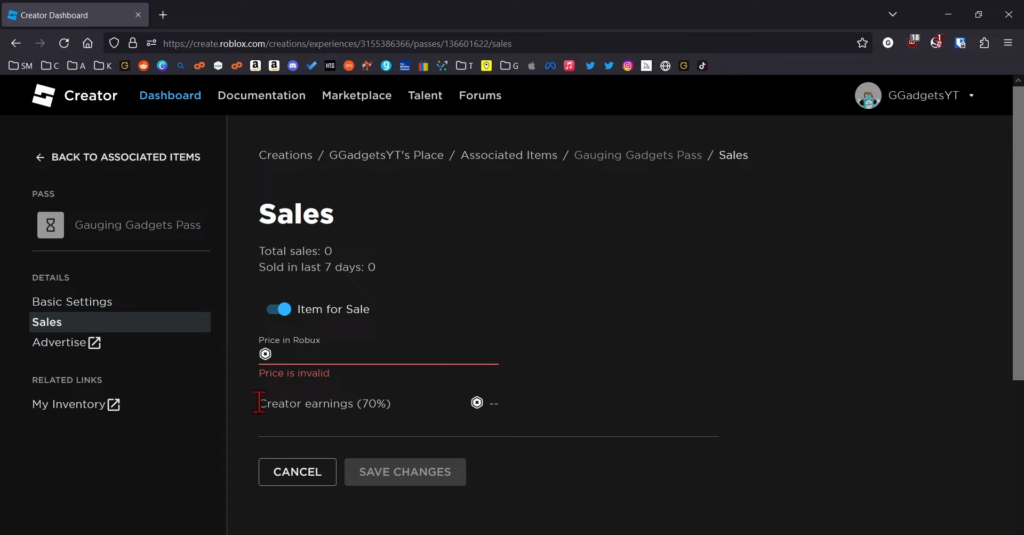
Select it again, move to the menu on the left, and select “Sales.” Here, toggle the item for sale and then put your price. Be informed that the creator always gains 70% of the actual price. For example, if you write 10 Robux, you will get 7 Robux since Roblox takes 30% of it. Now select “Save Changes” and go back to the associated items.
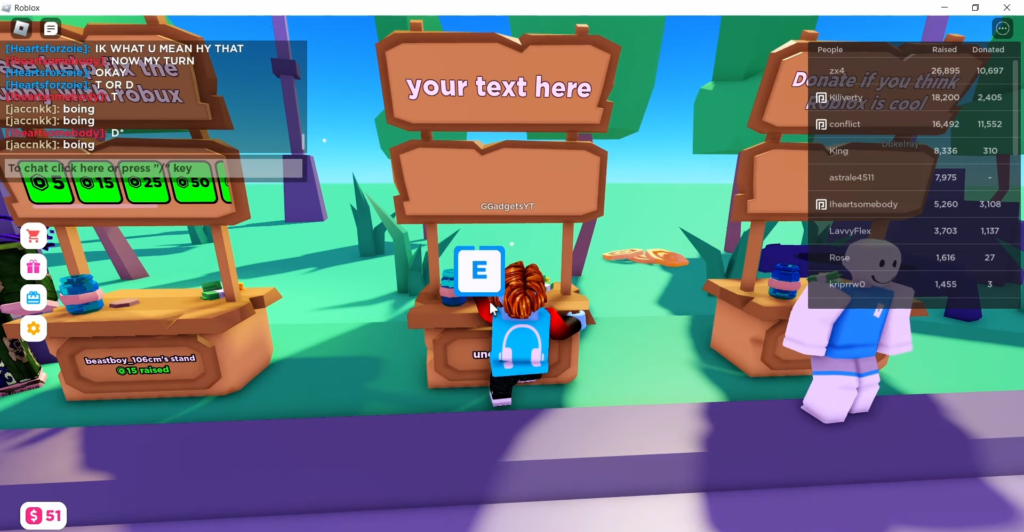
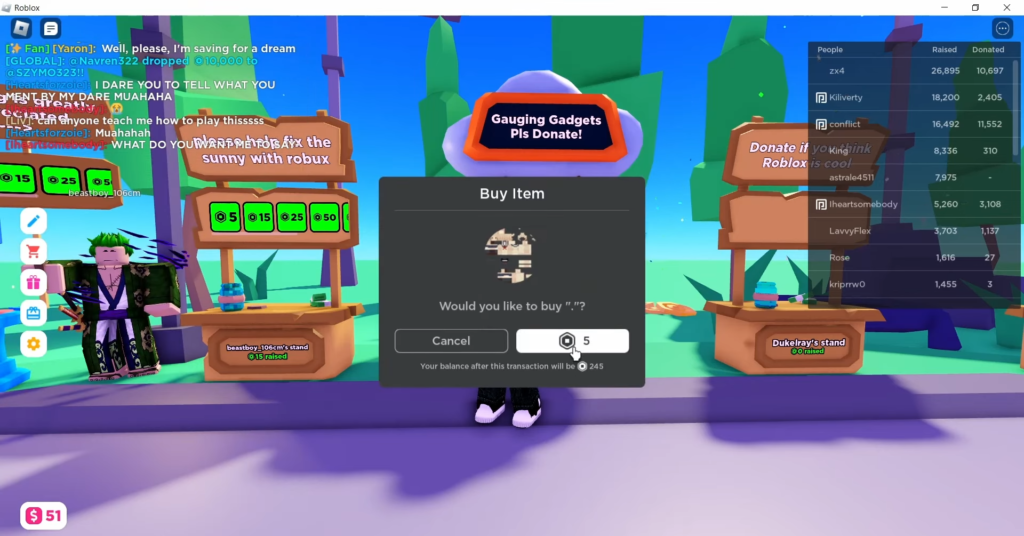
You will see your game pass with 10 Robux written under it. Don’t worry if the image you uploaded is not shown. It takes time because it needs approval from Roblox. Open up Roblox, and then please donate. Go up to a stand and hold the letter E on your keyboard to claim it. You will see your game is added to your stand. So, that is how you make a game pass in Roblox.