RPCS3 has recently come up with a new update that will let you play exclusive games including Metal Gear Solid 4 with much higher frame rates.
This guide will let you know how to emulate Metal Gear Solid 4 on PC via RPCS3 official build. First, you have to download the patch file, then apply game patches and configure the game’s settings to emulate Metal Gear Solid 4.
Download Patch File
In this section, we will take you through the steps to download the Patch File and apply it. The users must check the current version of their game and update it to version 2.0 if necessary and then proceed to download the patch file.
- First, you need to check the current version of your game to ensure it is updated to version 2.0.
If it is not already updated, then you must update your game to version 2.0. - Download the patch file for your game.
This patch file typically comes in the form of a compressed ZIP file. - Copy the file within the zip file and paste it into your patches folder in the RPCS3 directory. Make sure to paste the file next to the patch.yml file.
Make sure RPCS3 is closed while copying this.

Manage Game Patches
The content describes how to manage game patches in the RPCS3 emulator. By following the steps below, you will be able to locate the specific game they want to apply a patch to and then access the “Manage Game Patches” option to apply patches.
- Open the RPCS3 emulator on your computer. In the RPCS3 emulator window, locate the game you want to apply the patch to.
- Right-click on the game and select the Manage Game Patches option.
Now you can turn on the patches. - You have to enable cellSpurs urgent commands hack based on your firmware.
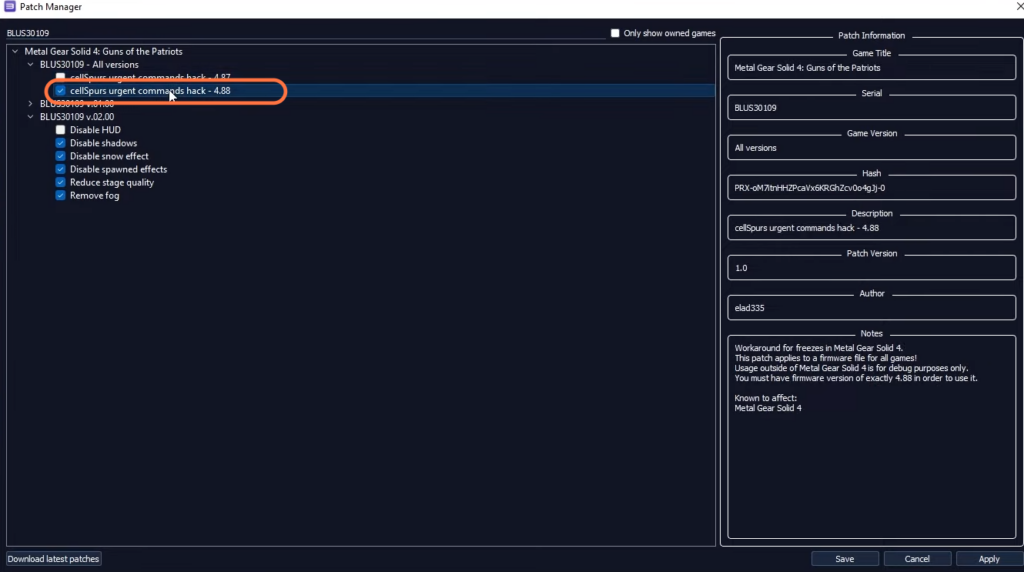
If you have a low-end system, you can turn on all the patches except the ones that “Disable Hud” and “Remove Fog” as they don’t really affect performance.
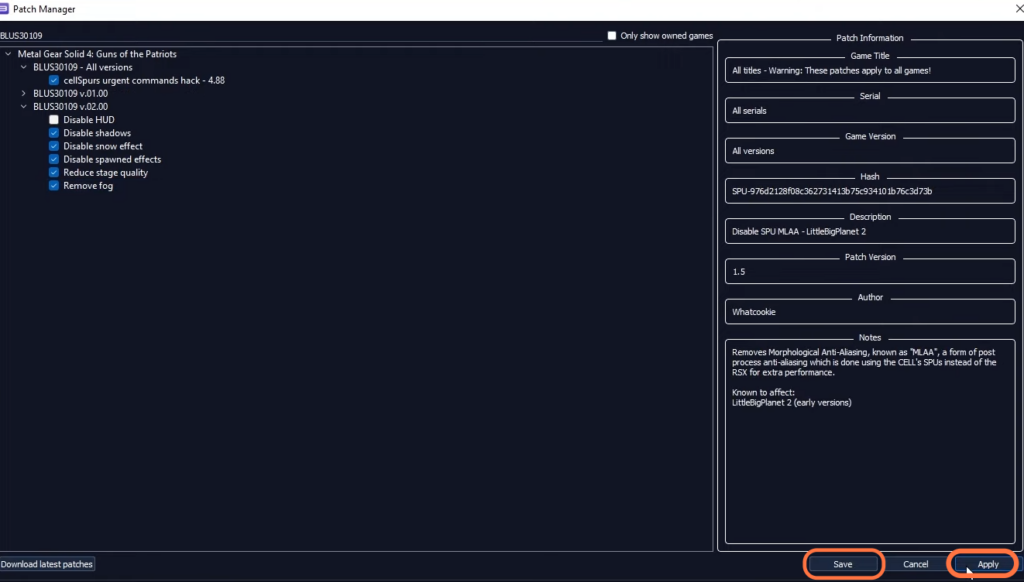
- After enabling or disabling the desired patches, click on the “Save” button in the patch management window.
- Once you have saved the changes, click on the “Apply” button
Configure the Game’s setting
This section will take you through the steps to configure a game’s settings. The user needs to right-click on the game and select the “Create Custom Configuration” option to configure the game settings.
- To configure the game’s settings, you need to right-click on the game within the RPCS3 emulator window.
- This action will bring up a context menu with various options.
- From the context menu, select the “Create Custom Configuration” option.

- Within the custom configuration window, locate and select the “GPU” tab.
- Change the value of the “Frame limit” option to “60“. Next, look for the option labelled “ZCULL Accuracy” and set it to “Relaxed (Fastest).”
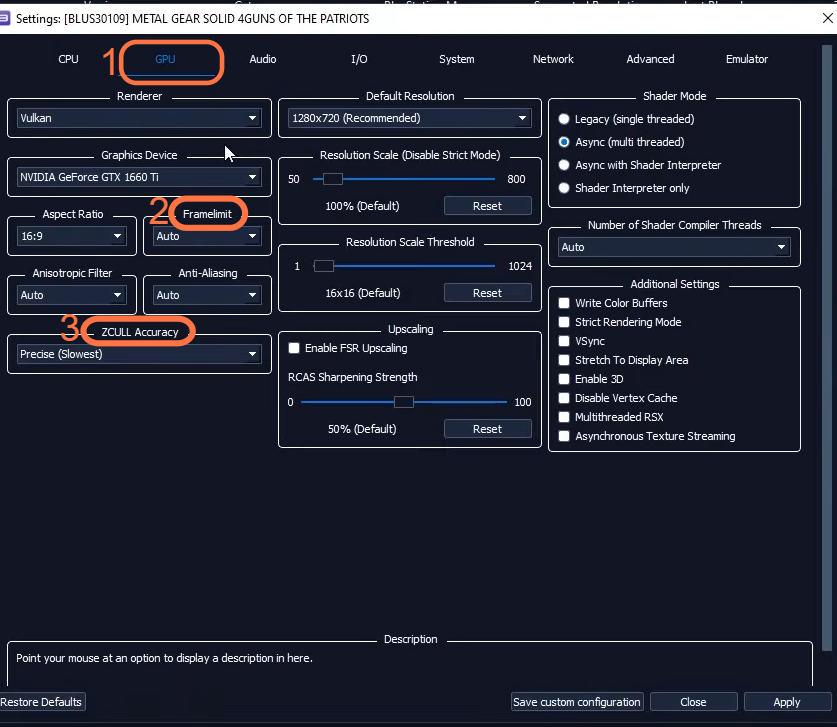
- Select the “Advanced” tab and checkmark Accurate RSX Reservation Access.
- Next, look for the option labelled “Driver Wake-Up Delay” and set its value to either “500” or “200” depending on your experience with crashes.
If you have experienced crashes, set it to “500” to provide a longer delay. Otherwise, set it to “200”. - After that, set the VBlank Frequency to 240, then hit Apply and Save.

Now you are ready to enjoy your game.