This guide will let you know how to fix Starfield’s blurry and pixilated graphics issues on your PC. You can try to adjust the render resolution scale, turn off upscaling, adjust film grain intensity, or disable VRS. You can also disable motion blur and VSync set a higher resolution, download Easy Game Utility and clear graphics cache files. Check graphics card updates, and finally check for Windows updates to resolve the issue.
Adjust Render Resolution Scale
In this section, we will take you through the steps to fix Starfield Blurry and Pixilated Graphics issues by adjusting the Render Resolution Scale.
- You have to start the Starfield game and press the Escape key on your keyboard to access the in-game menu.
- In the menu that appears, locate and select the Settings option.
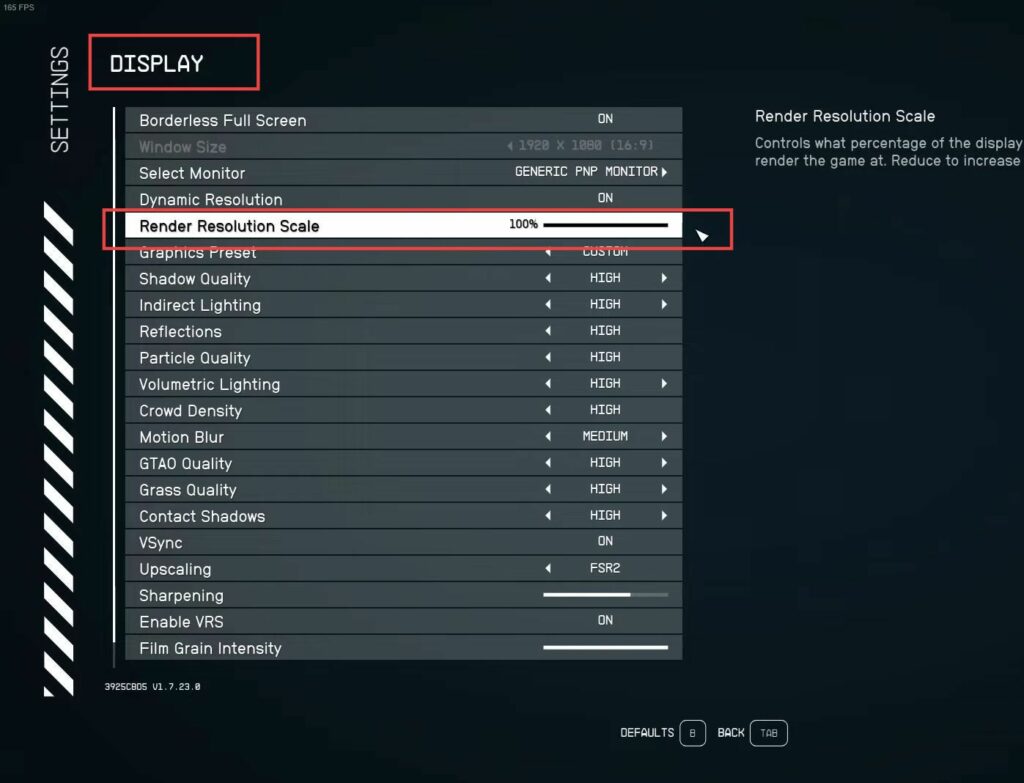
- Inside the settings menu, look for the Display or Graphics category and click on it.
This will open the display settings where you can make changes to graphics-related options. - Find the setting called Render Resolution Scale.
- Increase the render resolution scale by moving the slider to 100. This setting controls the clarity and sharpness of the in-game graphics.
- After setting the render resolution scale to 100, apply the changes.
This will immediately affect the in-game graphics, making them appear clearer and sharper.
Turn Upscaling Off
This section describes how to fix the blurry and pixilated graphics issues by turning upscaling off.
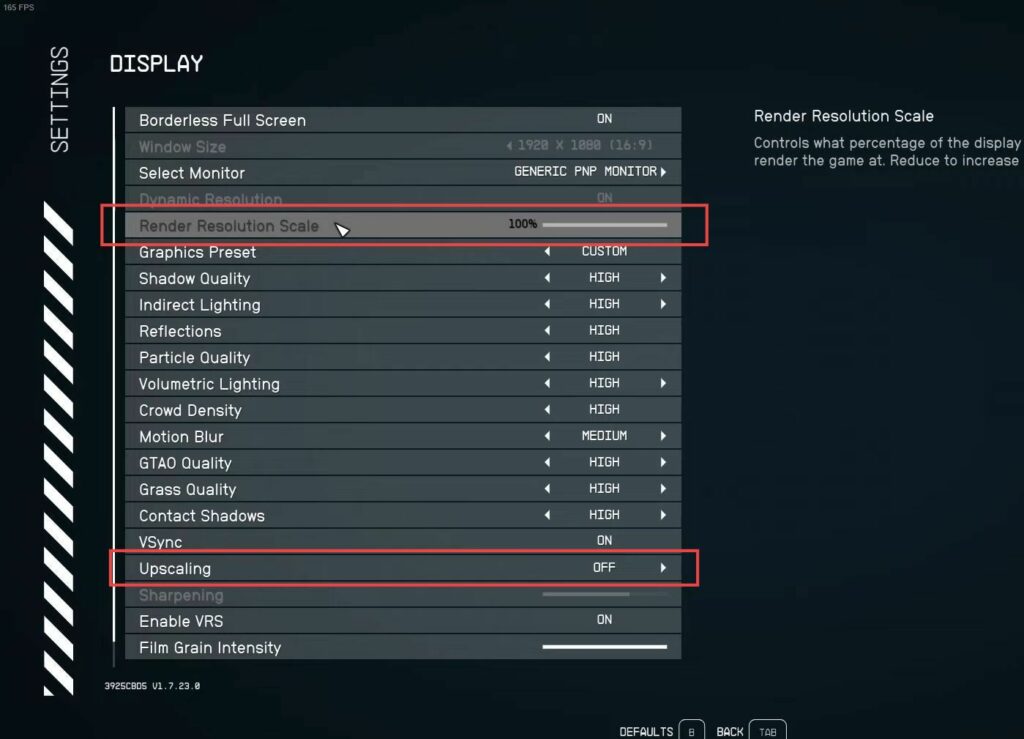
- Go back to the display navigate to upscaling, and set it to FSR2. This feature is typically used to enhance performance at the cost of slightly reducing graphical quality.
- Change the upscaling option from FSR2 or any other setting to Off.
This will disable upscaling, resulting in the native resolution being used. - After turning off upscaling, apply the changes within the settings menu.
This will immediately affect the game’s visuals, making them sharper but potentially impacting performance.
Adjust Film Grain Intensity and Disable VRS
This section explains how to fix the error by adjusting film grain intensity and disabling VRS.
- Now you have to locate the Film Grain Intensity option in the display settings.
This setting is used to control the amount of film grain or noise applied to the graphics for cinematic effect. - Set it to 0 to completely disable film grain.
- Find the Enable VRS option in the display settings and change it to Off to disable VRS.
- After adjusting these settings, apply the changes within the settings menu.
This will immediately affect the game’s visuals based on your preferences. - Play the game for a moment to evaluate the visuals and performance.

Disable Motion Blur and VSync
This section will take you through the steps to disable motion blur and VSync in order to fix the error.
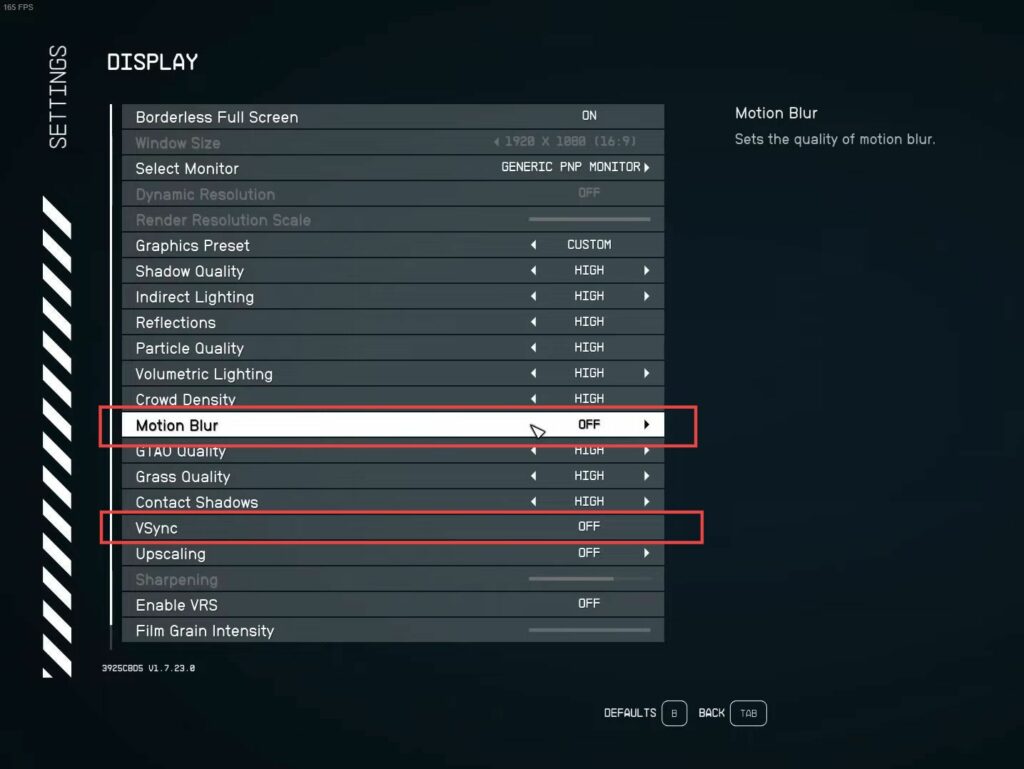
- Now you need to find the Motion Blur option in the display settings. Set it to Off to disable motion blur.
- Look for the VSync or Vertical Sync option in the display settings. VSync is a feature that synchronizes the frame rate of the game with your monitor’s refresh rate to prevent screen tearing.
However, it can sometimes introduce input lag and affect performance. - After that, you have to set VSync to Off to disable it. After adjusting these settings, apply the changes within the settings menu.
This will immediately affect the game’s visuals based on your preferences. - Then play the game for a moment to evaluate the visuals and performance. Now with motion blur and VSync disabled, you should experience sharper visuals and potentially improved responsiveness.
Set a Higher Resolution
In this section, we will take you through the steps to fix resolve the issues by setting a higher resolution.
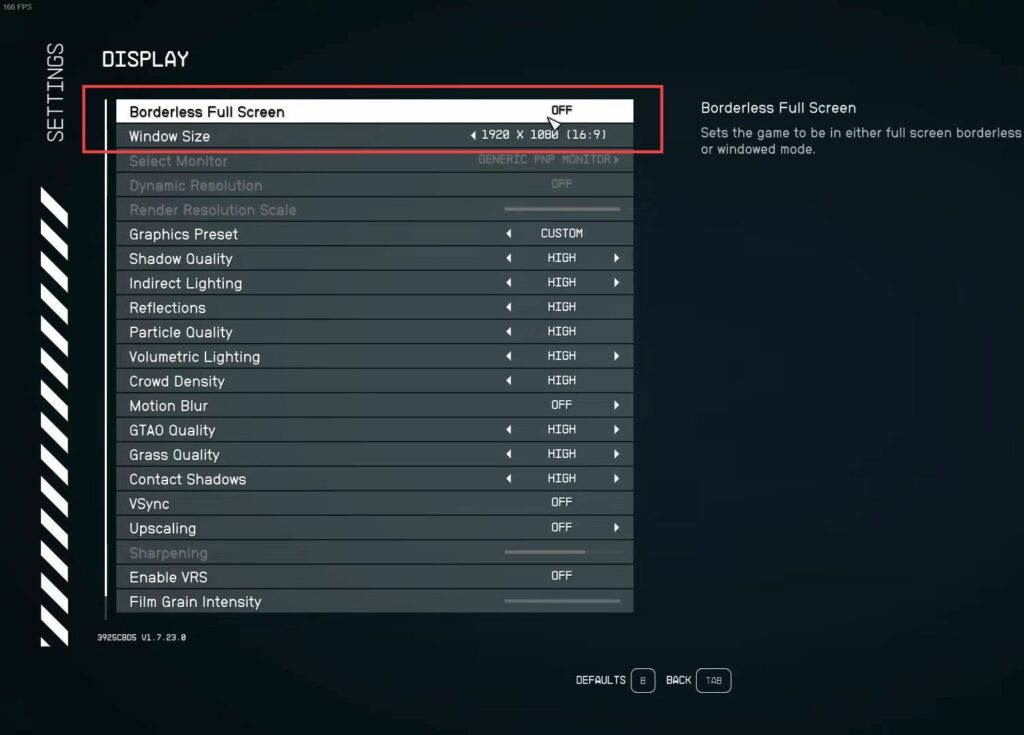
- First, you have to look for the display mode settings. If you are using Borderless Fullscreen mode, consider switching to Fullscreen mode.
This change will allow you to adjust the resolution. - After changing to Fullscreen mode, find the Resolution or Screen Resolution option. Select a higher resolution from the available options. Higher resolutions provide sharper visuals but ensure your monitor can support the chosen resolution.
- Once you’ve selected a higher resolution, apply the changes within the settings menu.
The game’s visuals should now appear sharper and more detailed. - Play the game for a moment to evaluate the improved visual quality. With the higher resolution, the game should look crisper and less pixelated.
- If you are satisfied with the changes, save your settings to make them permanent. Most games have a Save or Apply button within the settings menu.
- To ensure the changes take full effect, you may want to exit the game and relaunch it.
This can help ensure that the higher-resolution settings are properly applied.
Download Easy Gamer Utility and Clear Graphic Cards Cache Files
This section describes how to fix the Starfield blurry and pixilated graphics issues by downloading Easy Gamer Utility and clearing graphic card cache files.
- First, you need to open your browser and download the program called Easy Gamer Utility.
- Install the downloaded program on your computer and open it up.
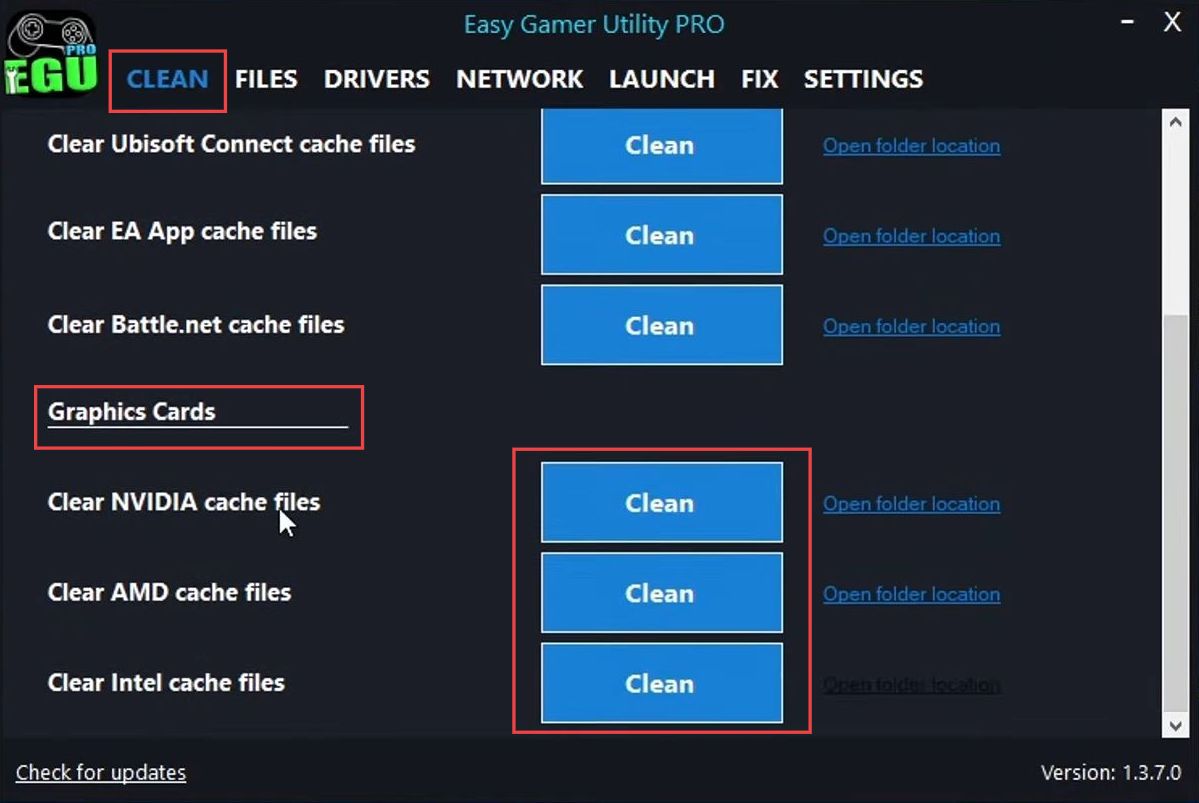
- Look for a tab labelled Clean on the quick access toolbar within the program’s window.
- Within the Clean tab, scroll down until you find a section related to your graphics card.
Once you’ve found the appropriate section for your graphics card, there should be an option to Clear and Video Cache Files. - Click on this option.
After clicking on Clear and Video Cache Files, the utility will begin removing old temporary cache files associated with your graphics card. - Confirm it to proceed with the cache-clearing process.
- Finally, click the OK button to close the cache-cleaning process.
Check Graphics Card Updates
This section explains how to check the graphics card updates.
- Now you have to ensure that you have the latest updates installed for your graphics card driver.
- If you’re unsure about your graphics card, click on the Windows Start menu icon in the taskbar.
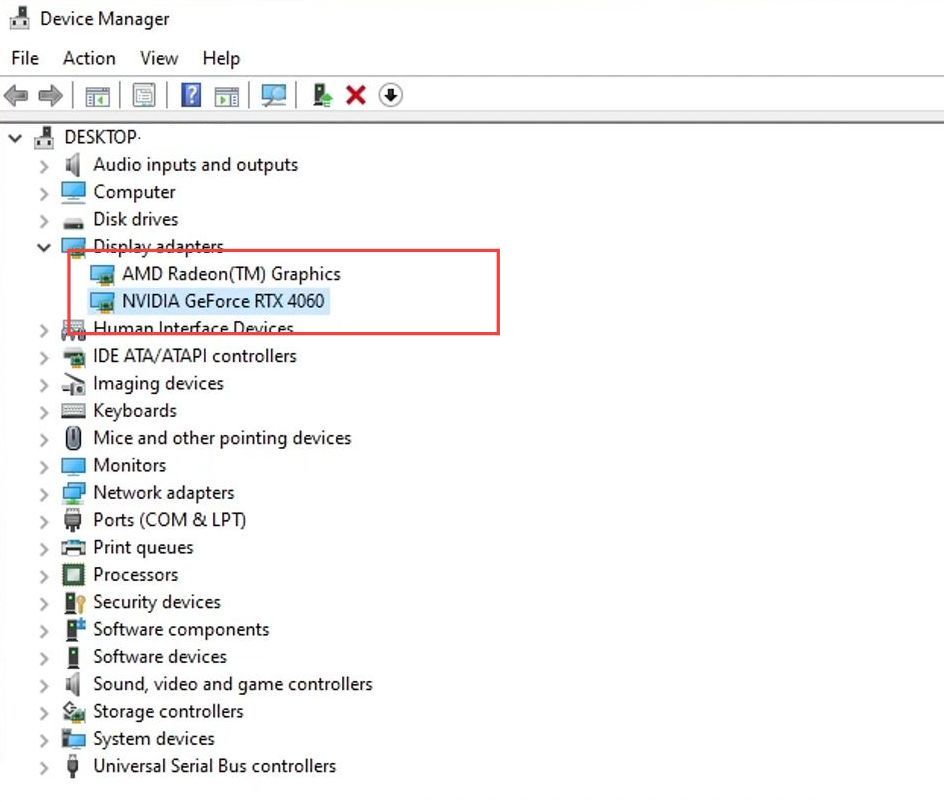
- In the start menu search bar, type Device Manager and select it from the search results.
This will open the Device Manager window. - In Device Manager, locate and expand the section named Display adapters.
This will show you the graphics cards installed on your computer. - After identifying your graphics card like RTX 4060, go to the website of the manufacturer to download the latest driver for your specific graphics card model.
- On the graphics card manufacturer’s website, locate and download the latest driver for your graphics card model.
Follow the instructions provided on the website to install the driver.
Check for Windows Updates
This section will take you through the steps to checking the Windows updates.
- Right-clicking on the Windows Start menu icon located in the taskbar.
- From the context menu that appears, locate and click on the Settings option.
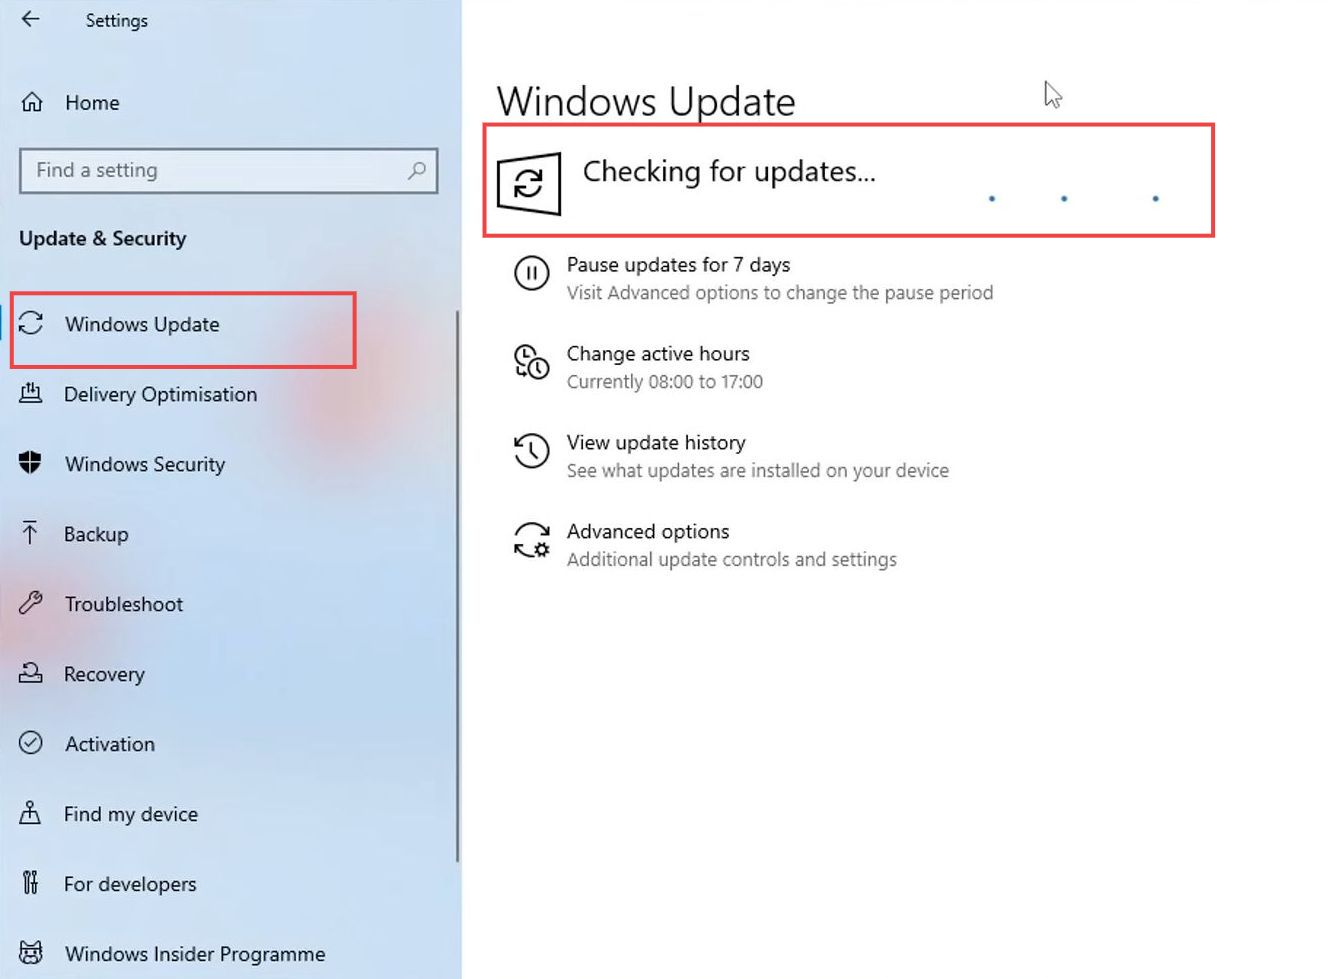
This action opens the Windows Settings menu. - Now within the Windows Settings, you need to locate and click on the Update & Security option.
- In the Update & Security section, look for the Check for Updates button. Click on this button to initiate the process of checking for available updates for your Windows computer.
- Allow the system to check for updates, and if there are any updates available, proceed with installing them.
This ensures your Windows operating system is up to date.
If you have Windows 11 available, you might not want to install it due to reported bugs and issues with the operating system. - Regardless of whether you’re using Windows 10 or Windows 11, update your operating system to the latest version available.
- After installing any available updates, restart your computer to apply the changes.
- Once your computer restarts, launch Starfield and see if the issue has been resolved.