In this guide, you will learn how to fix the Screen Flickering issue with Nancy Drew Games on Windows 11. You can try either of the methods such as adding the game’s executable file, adjusting graphics settings for the game, or managing 3D Settings in the Nvidia Control Panel to resolve the problem.
Fix 1: Add the Game’s Executable File
- First, you have to go to the Graphics settings and then click on Browse within the window.
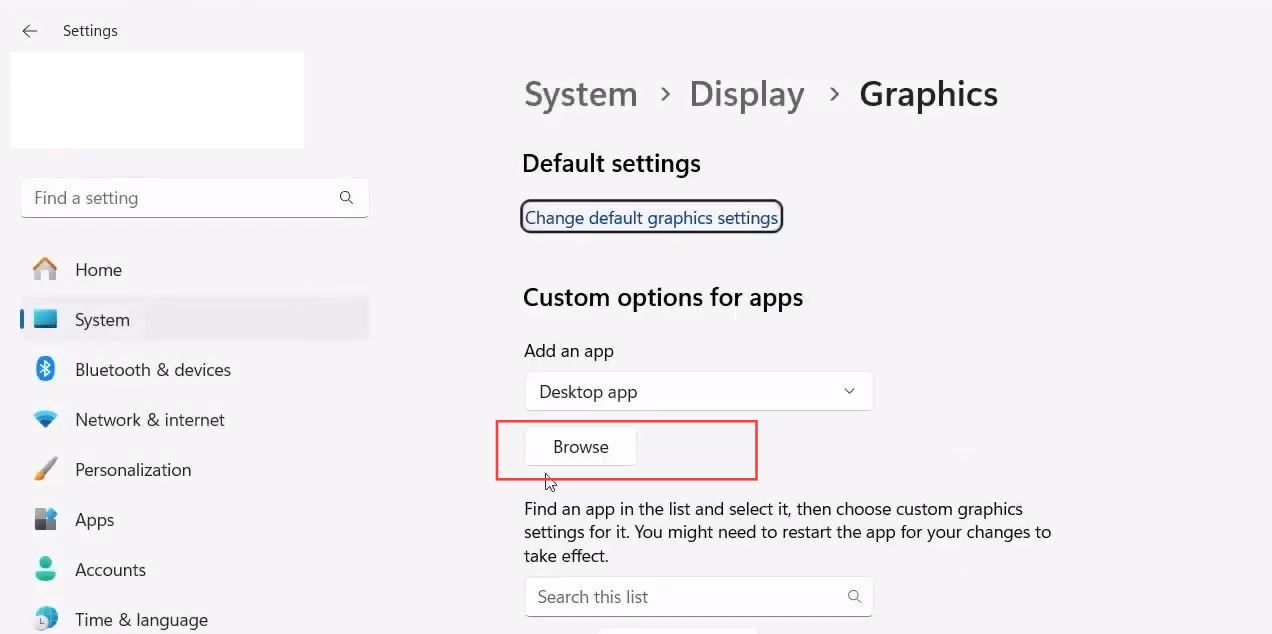
- Navigate to the Nancy Drew: The Phantom of Venice game’s installation folder such as open C drive. Go to Program Files (x86), open the Steam folder, and access the steamapps folder.
- Open the common folder and find the specific Nancy Drew game that’s causing the issue.
- Open the Nancy Drew: The Phantom of Venice game’s folder, then select the game’s .exe file and click on Add.

Fix 2: Adjust Graphics Settings for the Game
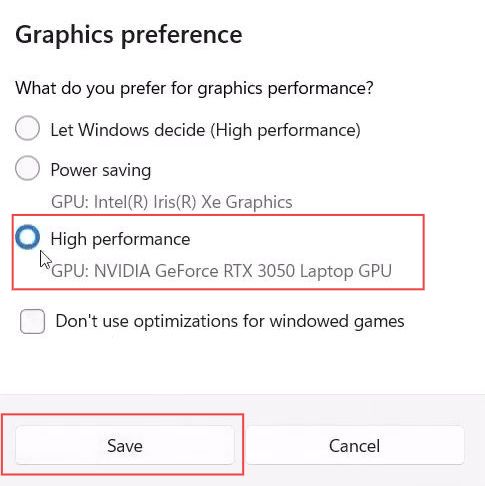
- If the Nancy Drew: The Phantom of Venice game is already added, double-check it to ensure it’s selected correctly.
- After adding the game, click on Options and choose High Performance from the options provided. Click on Save to apply these settings.
Fix 3: Manage 3D Settings in Nvidia Control Panel
- Right-click on the desktop and select Nvidia Control Panel.
- Click on Manage 3D settings, and go to Program Settings. Click on Add to include the game.
If the game is already listed, select it. If not, browse for the game’s installation folder following similar steps mentioned earlier.
- Once the Nancy Drew: The Phantom of Venice game is added, select it, and choose the High-performance Nvidia processor or your discrete graphics card from the options available.
- Click on Apply at the bottom right to save the changes.
- Launch the Nancy Drew: The Phantom of Venice game and check if the screen flickering issue has been resolved.
