This comprehensive guide will walk you through the installation process of LockPickRCM!
Step 1: Download LockPickRCM
- Firstly, download the LockPickRCM file (Lockpick_RCM.bin) from here.
- Locate the downloaded file in your computer’s downloads folder.

Step 2: Transfer to SD Card
- Insert your SD card into your computer and open it.
- Navigate to the ‘bootloader/payloads’ directory on your SD card.
- Copy the downloaded lockpickrcm.bin file into the ‘payloads’ folder.
- Safely eject the SD card from your computer.

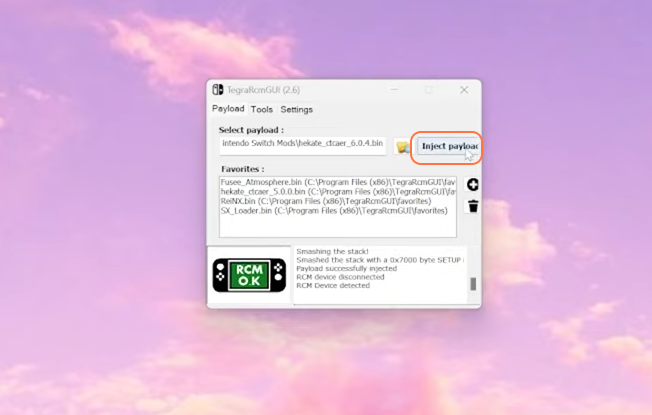
Step 3: Inject into Nintendo Switch
- Insert the SD card into your Nintendo Switch.
- Initiate the injection process on your Nintendo Switch.
Step 4: Access LockPickRCM
- Boot up your Nintendo Switch into the custom firmware of your choice.
- Access the payloads and select LockPick_RCM.bin.

- Once LockPick_RCM is running, proceed to ‘Dump from SysNand’. After completion, it will prompt you to save a screenshot by pressing Volume Plus or another button to return to the menu. Choose to return to the menu.

Step 5: Power Off and Eject the SD Card
- From the menu, select ‘Power Off’.
- Eject the SD card from your Nintendo Switch.
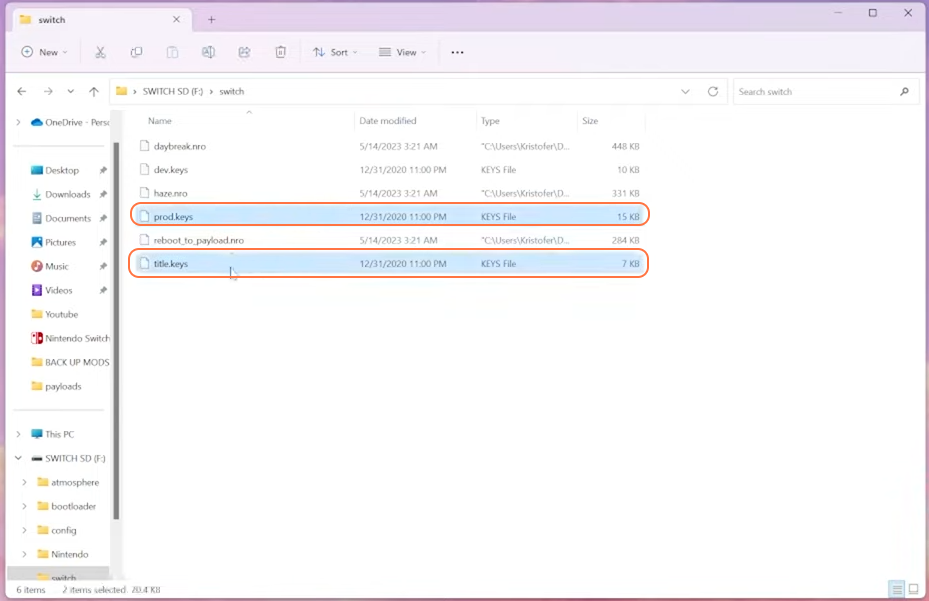
Step 6: Transfer Prod/Title Keys
- Insert the SD card back into your computer.
- Locate and open the SD card contents.
- Look for the newly created files: ‘prod.keys’ and ‘title.keys’.
- Copy and securely store these files on your computer as backups.
By following these steps, one can easily and securely install and utilize LockPickRCM on Nintendo Switch.