Minecraft versions 1.18 and beyond recommend using Java 17 for optimal performance. This guide provides a step-by-step process to install Java 17 on your Windows computer. Though the instructions primarily focus on Windows, they apply to Linux and macOS systems as well.
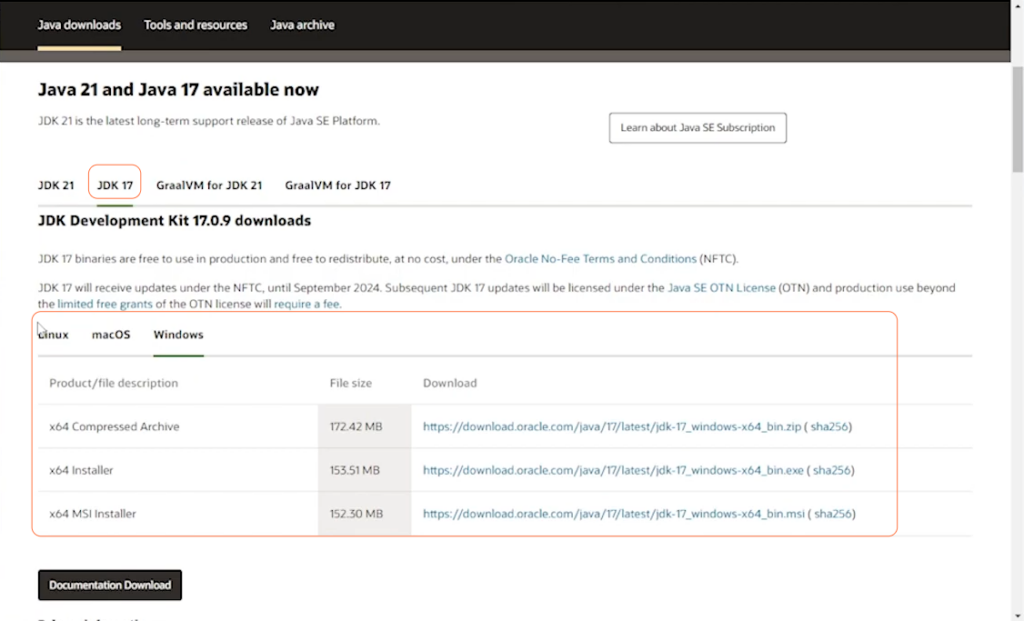
Step 1: Download Oracle’s Java 17
- Visit Oracle’s official website and navigate to the Java 17 download section. You’ll find three tabs for Linux, macOS, and Windows. Click on the Windows tab.
- Locate the “x64 installer” in the middle for the Windows section. Click the download link and save it in a folder/directory of your choice.
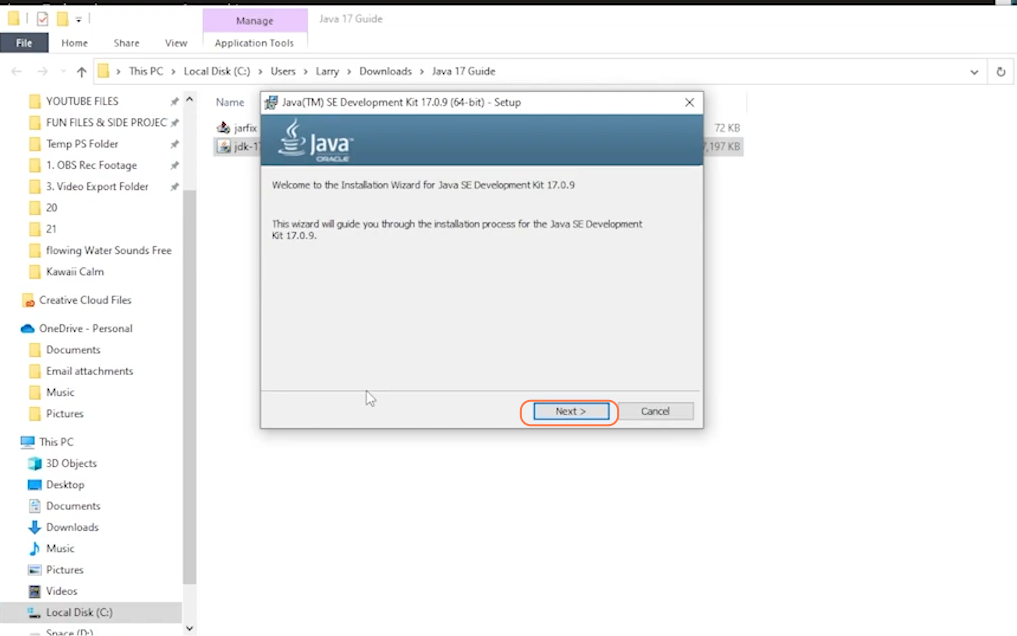
Step 2: Run the Installer
- Navigate to the folder where you saved the downloaded installer. Double-click on the file to run it. If prompted for administrator permission, grant it.
- Follow the installer prompts. Notably, this installer does not attempt to add any unnecessary software or bloatware, ensuring a straightforward installation process.
Step 3: Verification and Association
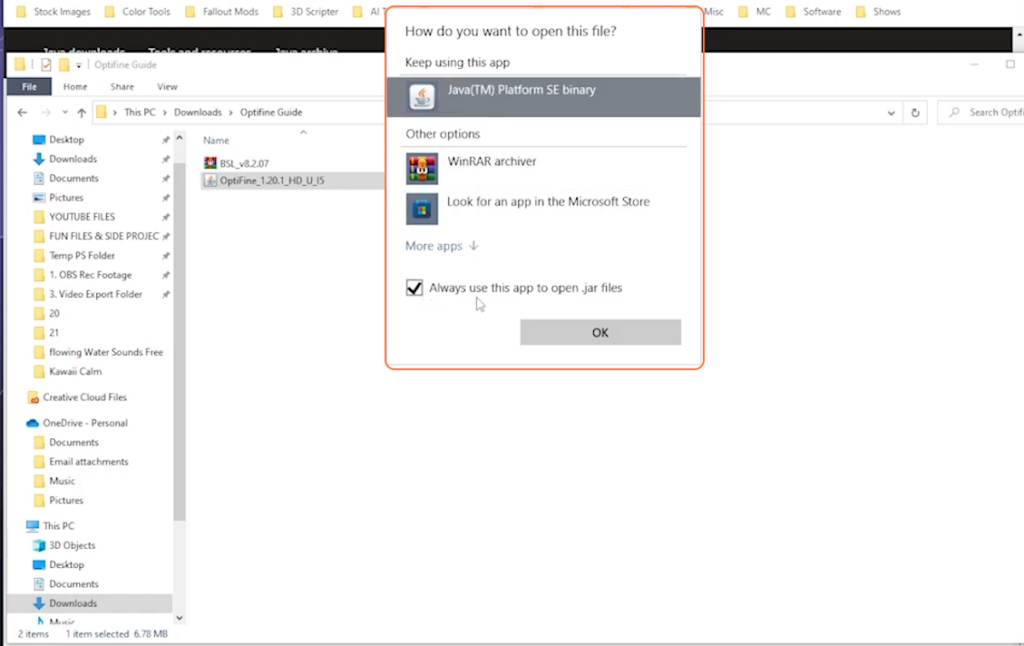
After installation, ensure that Java 17 is correctly associated with “.jar” files. Right-click on a “.jar” file, select “Open with,” choose Java, and tick “Always use this program to open .jar files”. This ensures proper file association.
Step 4: Troubleshooting Associations
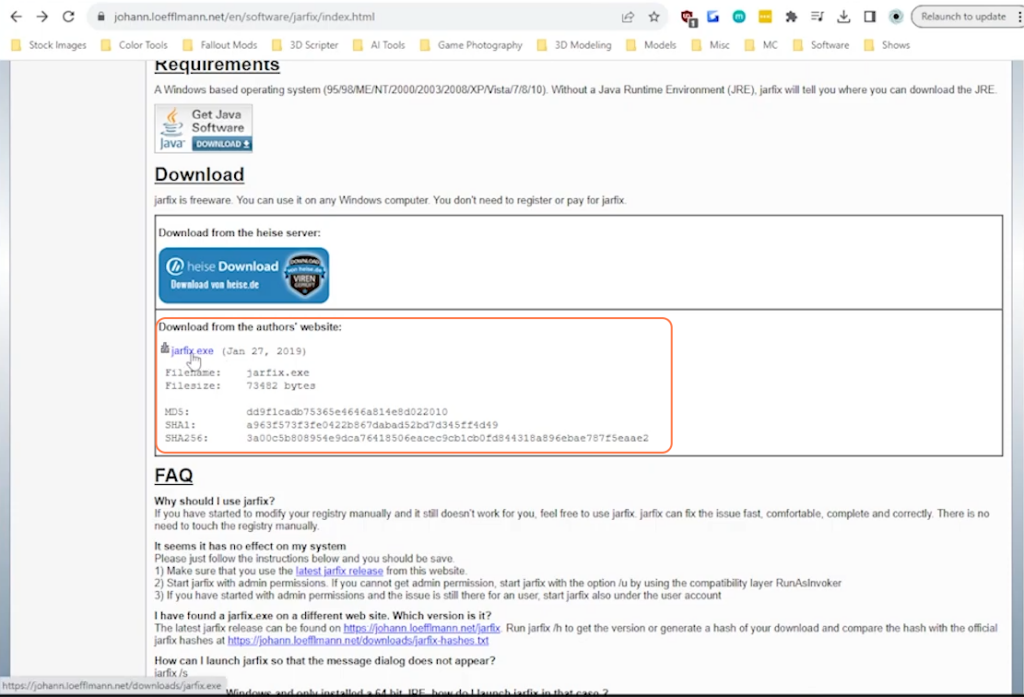
If “.jar” files aren’t associated with Java despite the previous step, utilize the “jarfix” tool. Download the “jarfix.exe“, and run the program. This tool reassociates “.jar” files with the Java program.
By following these steps, you’ll successfully install Java 17, ensuring compatibility with Minecraft 1.18 or higher versions.