This guide will show you how to Install Quacked Spider-Man Remastered/Miles Morales on the Steam Deck using Steam.
For SSD
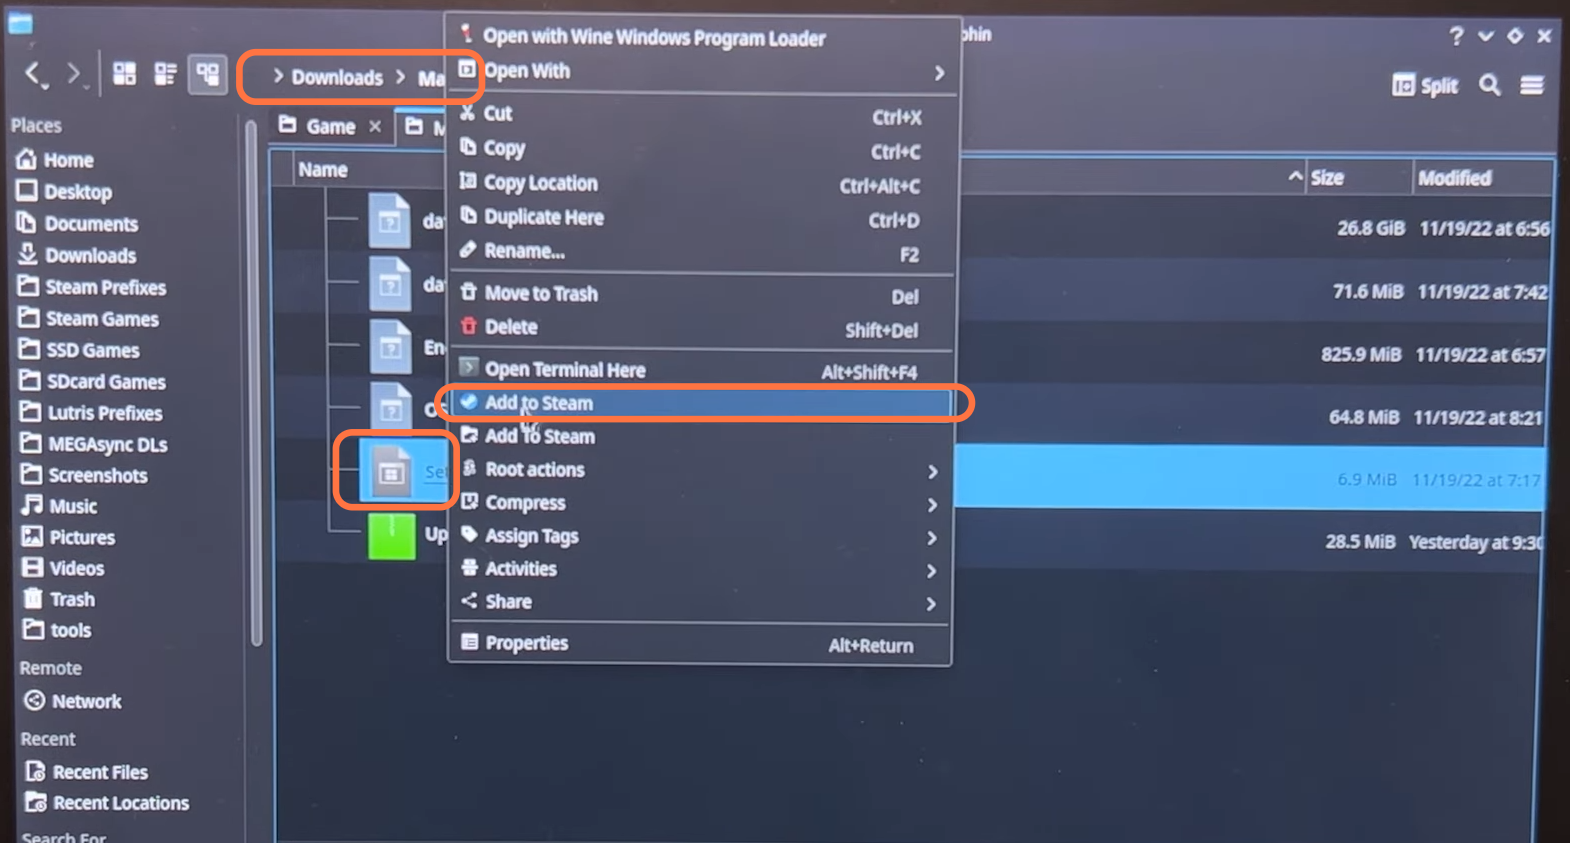
First, you have to boot up your Steam deck and click on files from the bottom of the screen. Then click on Downloads from the left side, open the game folder and right-click on the setup file. Click on the Add to Steam option from the pop-up menu.
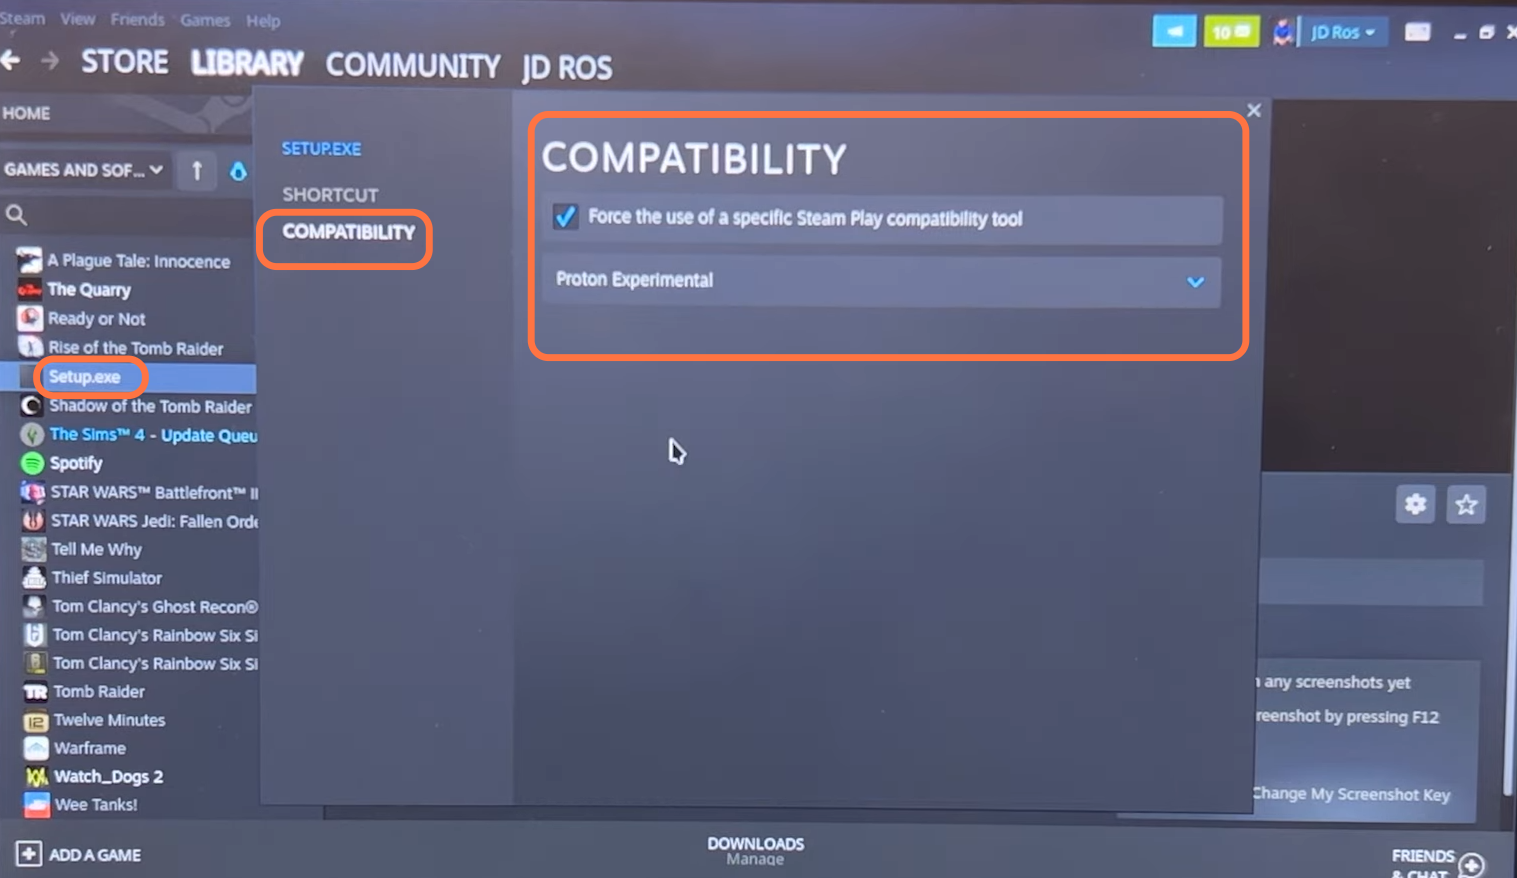
Now you have to open Steam, go to the Library and find the setup file in the game’s list on the left side of the screen. Click on the Settings button, select properties from the drop-down menu, and select Compatibility. Under that, ensure the option is check-marked and then change it to proton experimental.
For SD Card
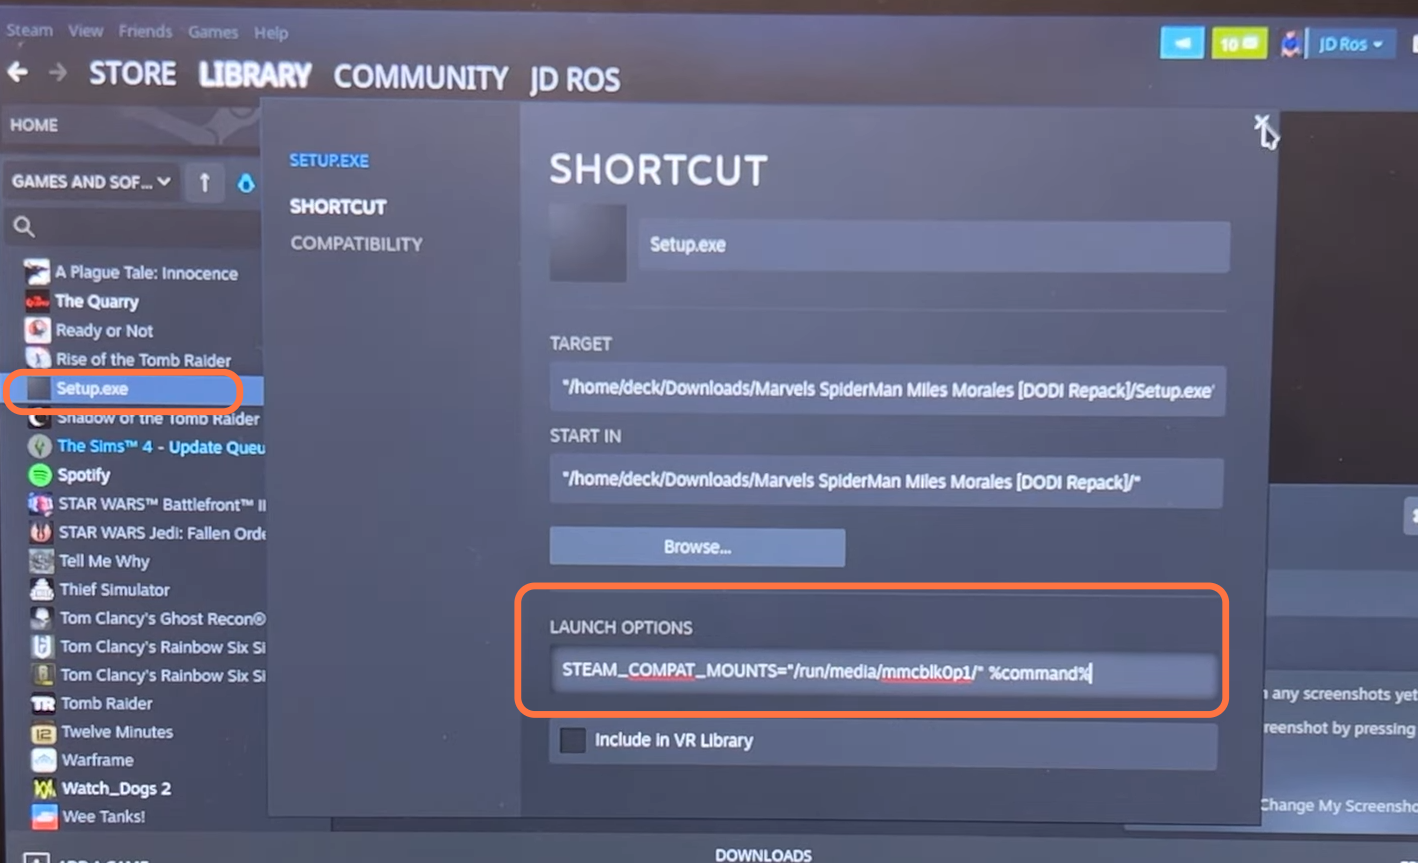
First, boot up your steam deck and click on files from the bottom of the screen. Then click on Primary from the left side, tap on the address bar, and copy the address. Then, open Steam, click on the settings button by opening the setup file, and select properties from the drop-down menu. Under the launch options, write STEAM_COMPAT_MOUNTS= “PASTE THE ADDRESS THAT YOU JUST COPIED” %command%.
Game Installation
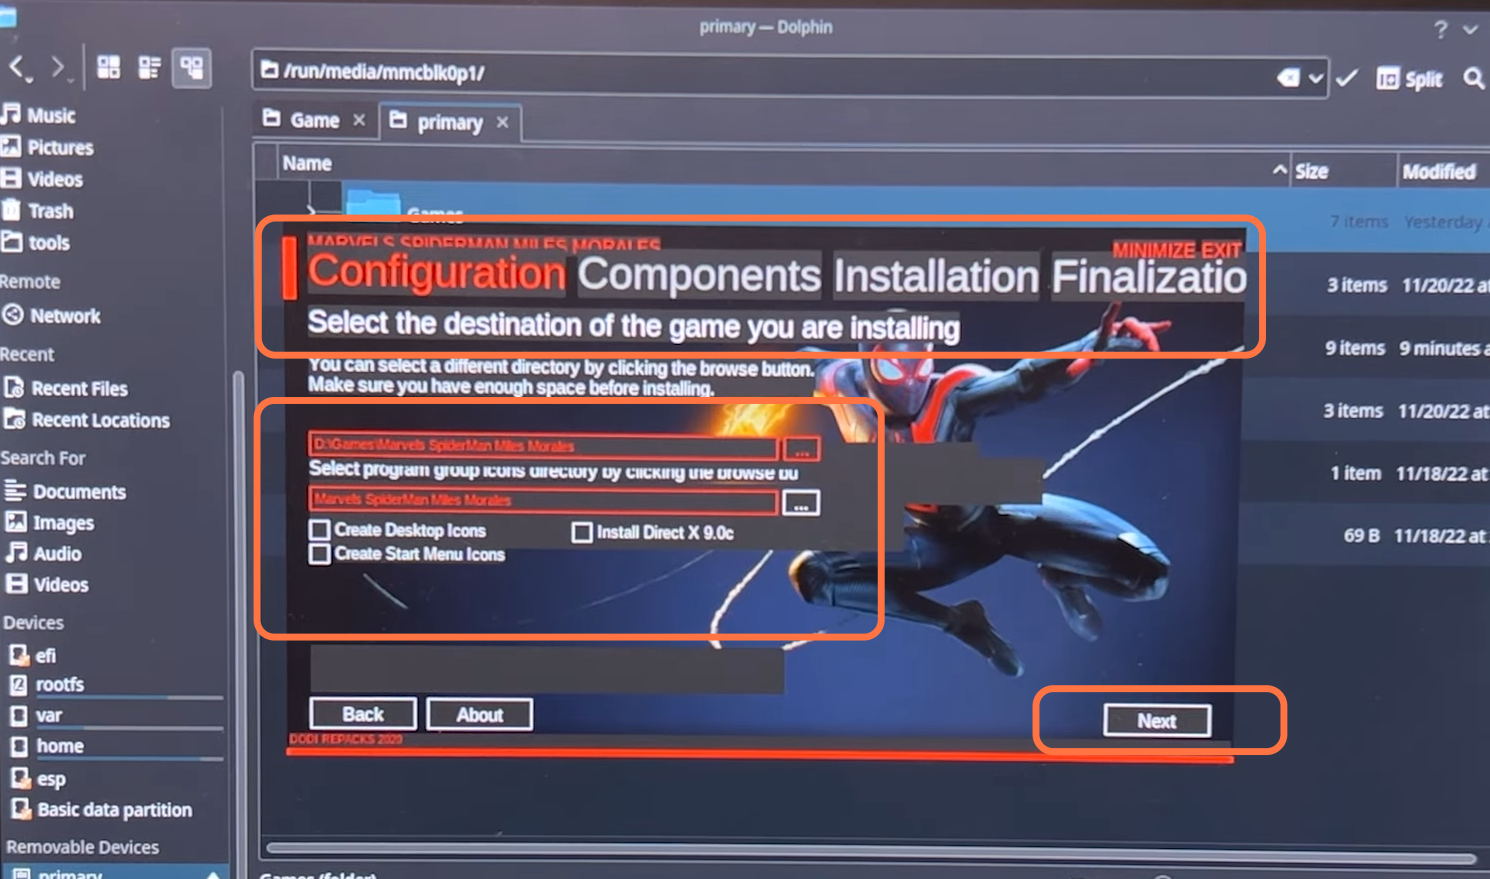
After that, click on the Play button and Install, then click on Proceed and ensure all three options on the configuration page are unchecked. Select the location where you want to install the game. If you want to install this in the SD, click on the three dots and select Sd card. If you want to install this in the SSD, select your SSD drives and click on Next. Select the language version of the game you want to install and click on the Install button.
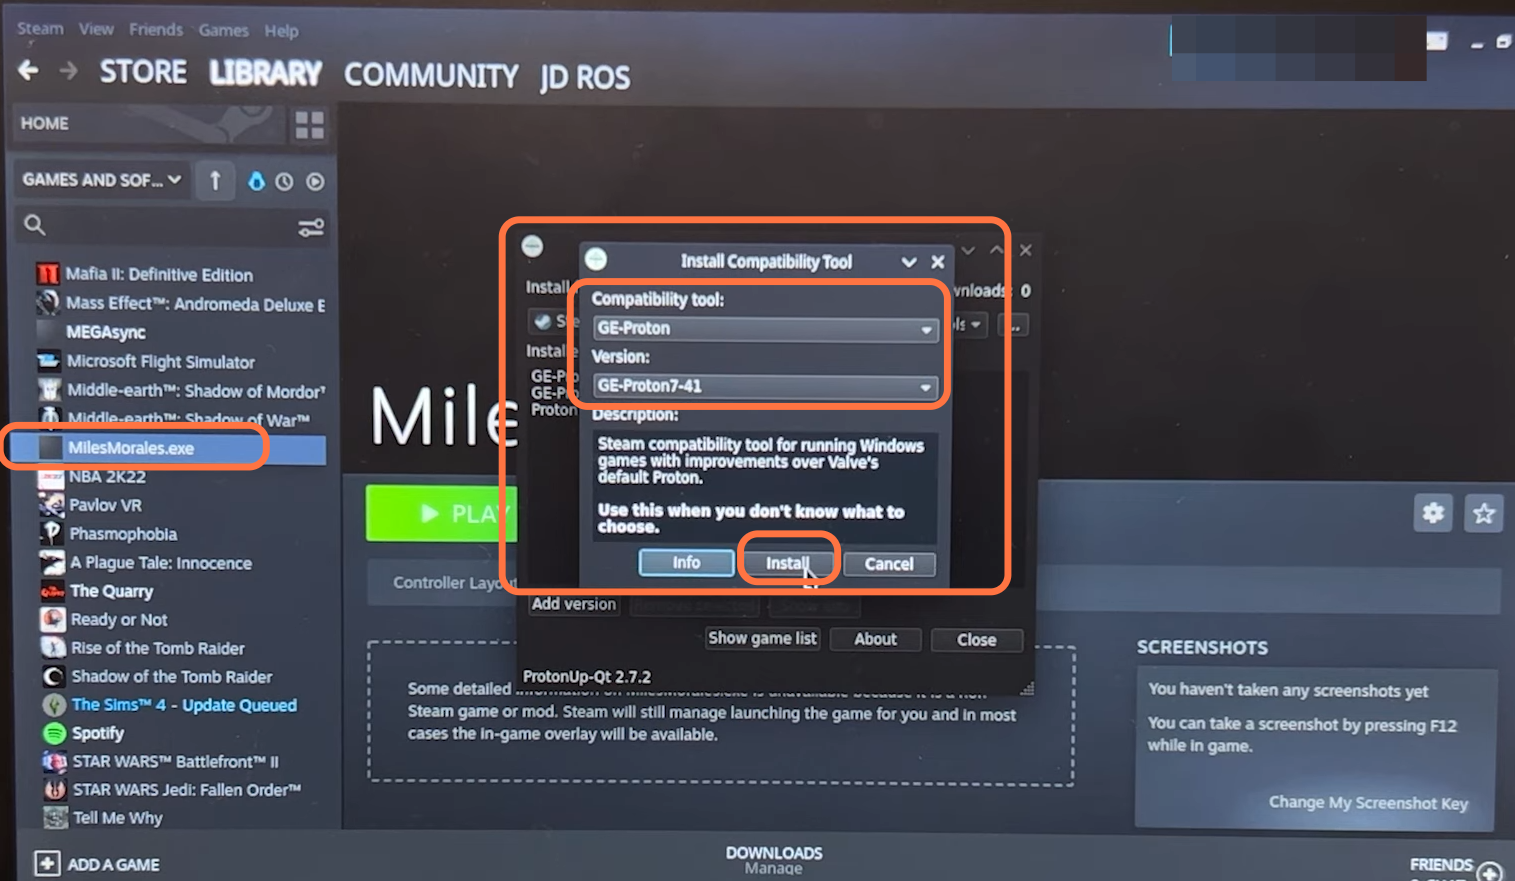
Once the installation completes, you have to add the game to Steam. For this, go to the game location where it is installed, right-click on it and then click on Add to Steam. It will add your game to the Steam library, and you can remove the setup file from the Steam library. Now you have to select the game file and download the proton up-qt software. Open this and make sure that Steam is selected, then click on Add version. Under GE-Proton, you need to select the latest version and click on Install.
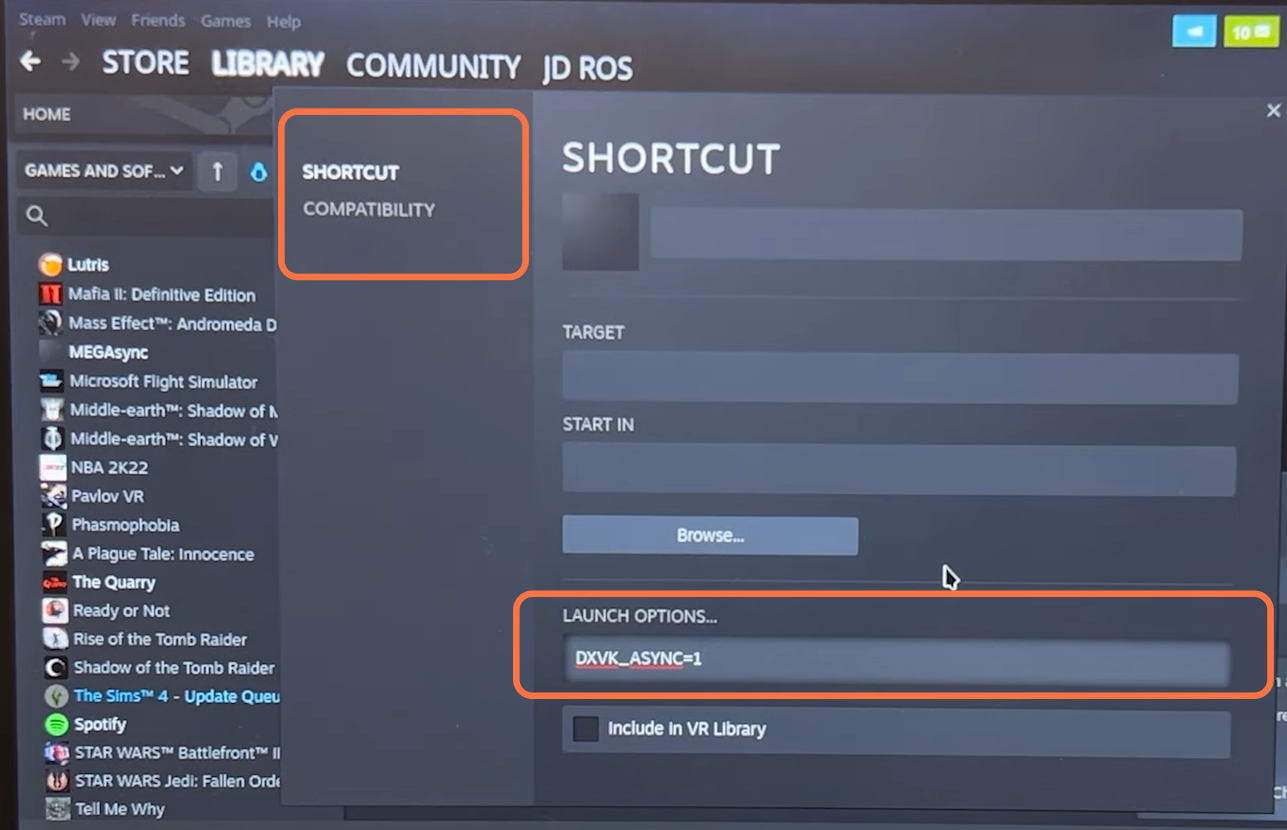
After the installation, close the Steam and then reopen it. Click on the settings button and go to properties from the drop-down menu. Select Compatibility, ensure that the option is check-marked and change it to Proton experimental. After that, select the shortcut tab from the left side and under launch the options, write: “DXVK_ASYNC=1”. If everything disappears on Steam, it is an error; you have to close Steam, relaunch it, and repeat the process.
Controller Settings
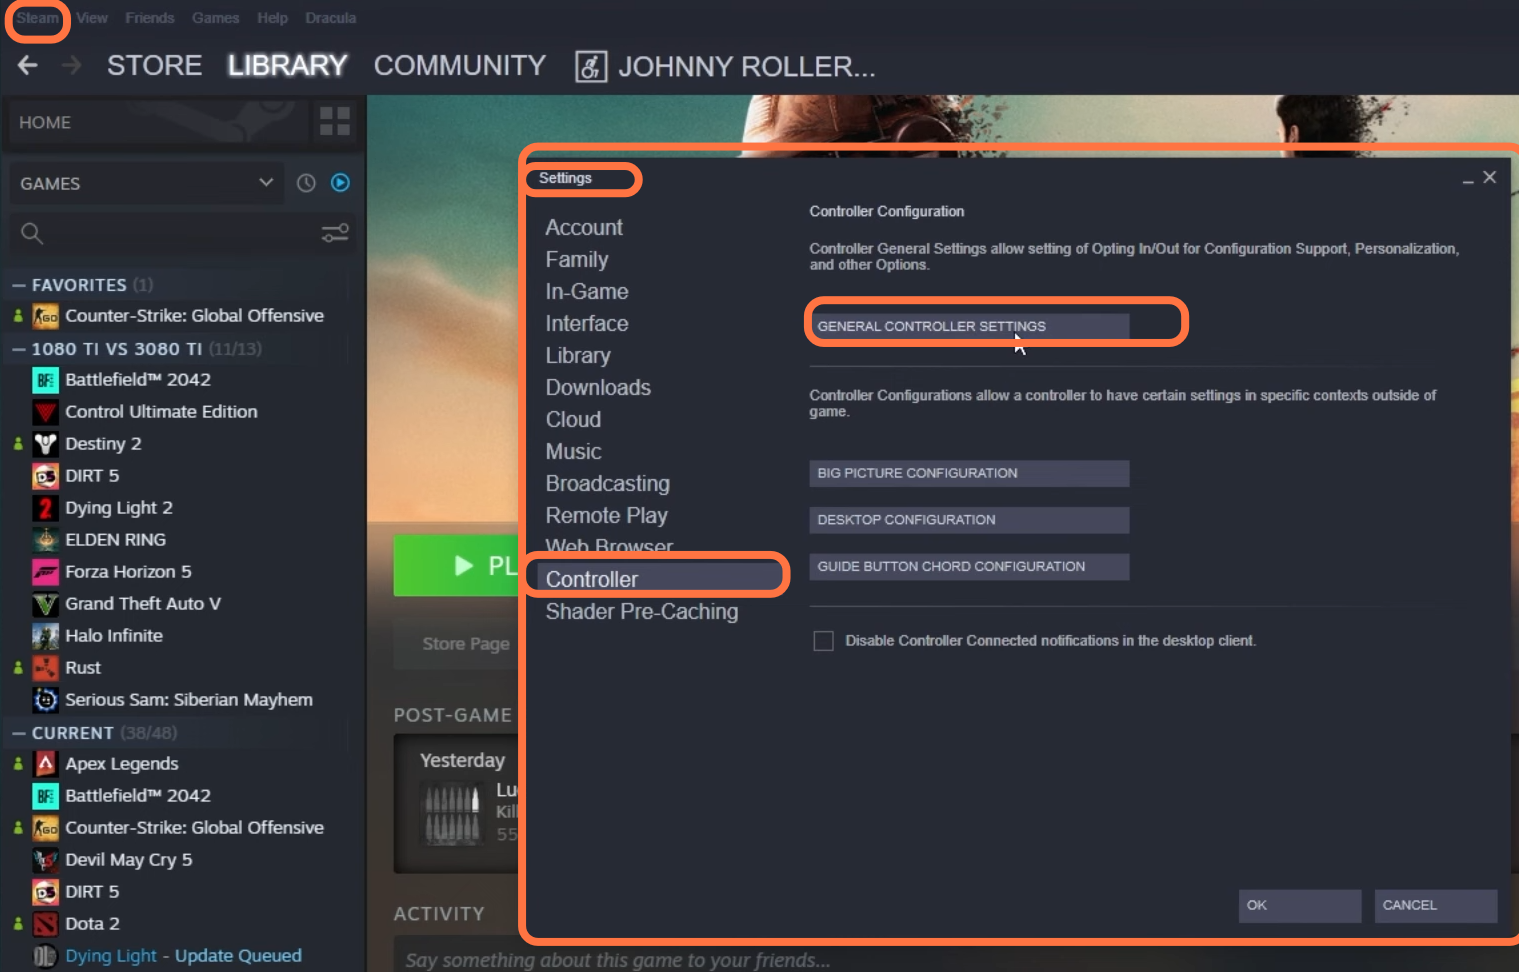
First, you must open Steam and click on the Steam button at the top left of your screen. Right-click on it to go to the properties, and then click on the controller on the left side of your screen. After that, click on the general controller settings.
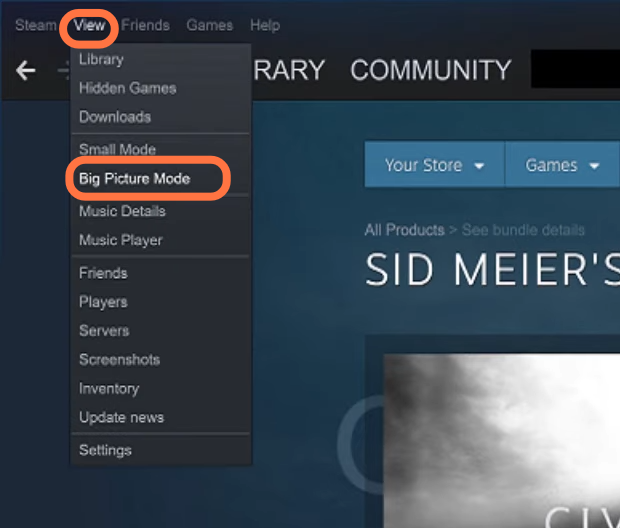
Now you must go to the big picture mod by clicking on View at the top of your screen. Tap on the big picture mod from the drop-down menu.
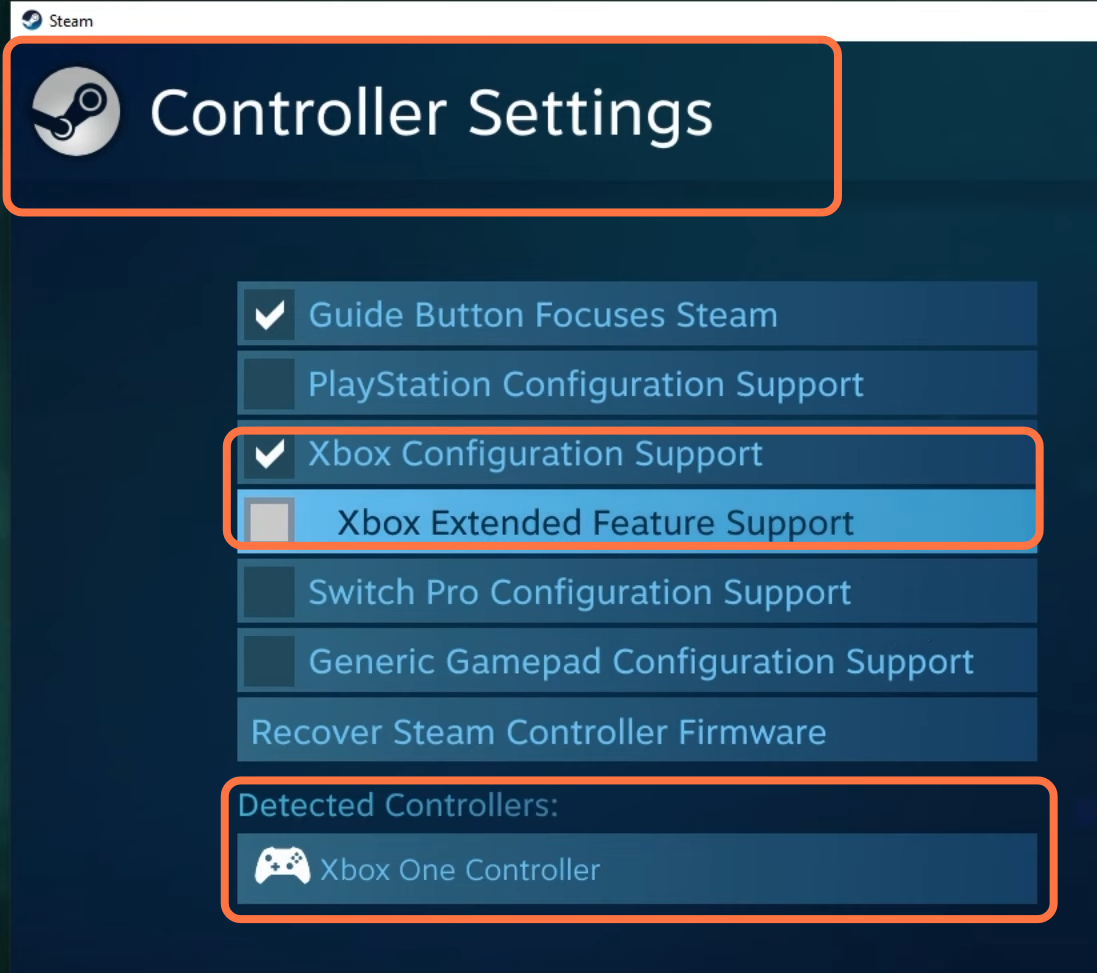
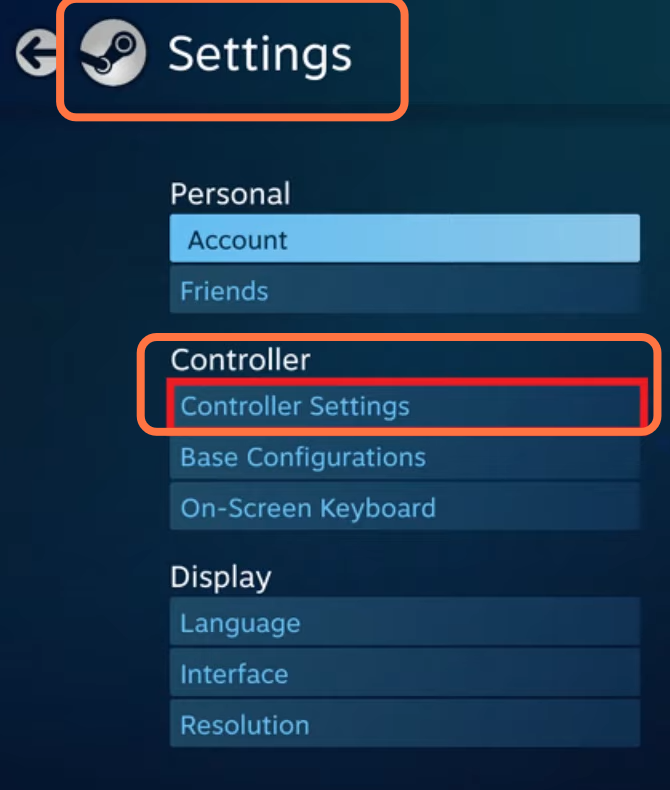
After that, click on the settings button on the top of your screen and then click on the controller settings.
You will find many different options there, you need to connect your controller to your system, and you will find your controller under the detected controller. Checkmark the Xbox configuration support, and you will get options for different controllers in this list. You can select the option according to which controller you are using. You can also checkmark the Xbox extended feature support, which is for the elite controllers.