This guide will let you know how to install the Ridin’ with the Gang mod in GTAV.
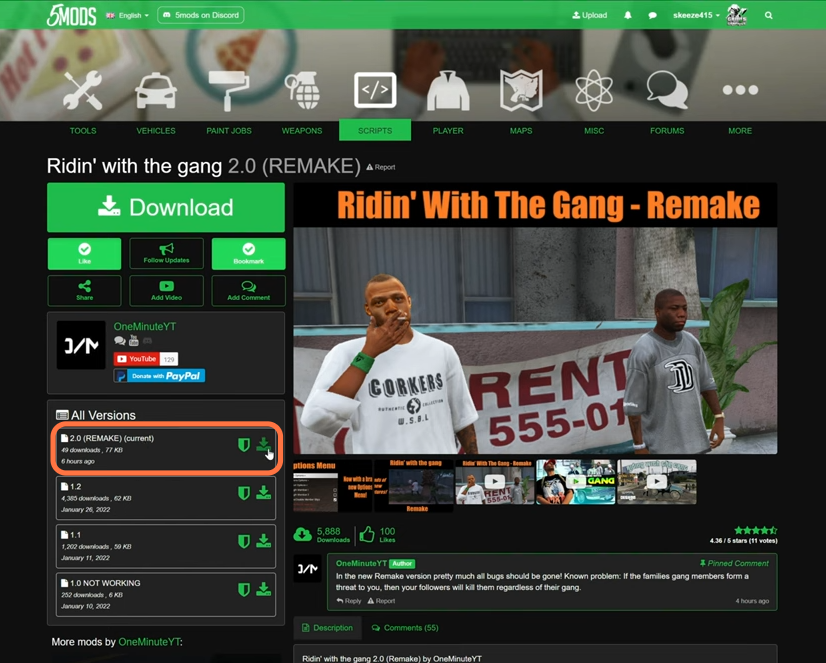
1. The first thing you’ll need to do is download the Ridin’ with the Gang 2.0 (Remake) Mod from “https://www.gta5-mods.com/scripts/ridin-with-the-gang“. Open the link and click on the green arrow icon under the ‘All Versions’ section to download the latest mod file.
2. You will require Scripthookv, ScripthookDotNet & NativeUI for this mod to work accurately.
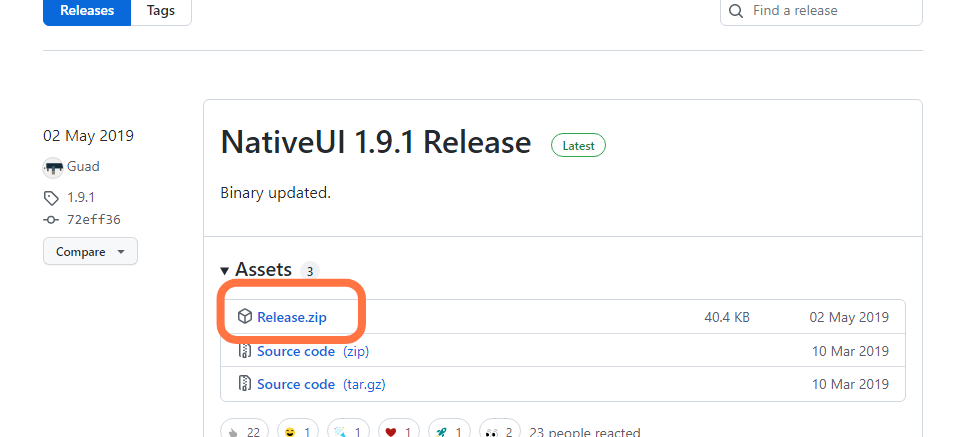
You can download the latest version of the NativeUI library from “https://github.com/Guad/NativeUI/releases“. Open the link and click on the Release.zip file under the Asset section.
3. Now open the “GTAV” main directory side by side with the downloads folder. After that, open the scripts folder of the “GTAV” and if you don’t see this folder here, then you need to create an empty folder and name it scripts.
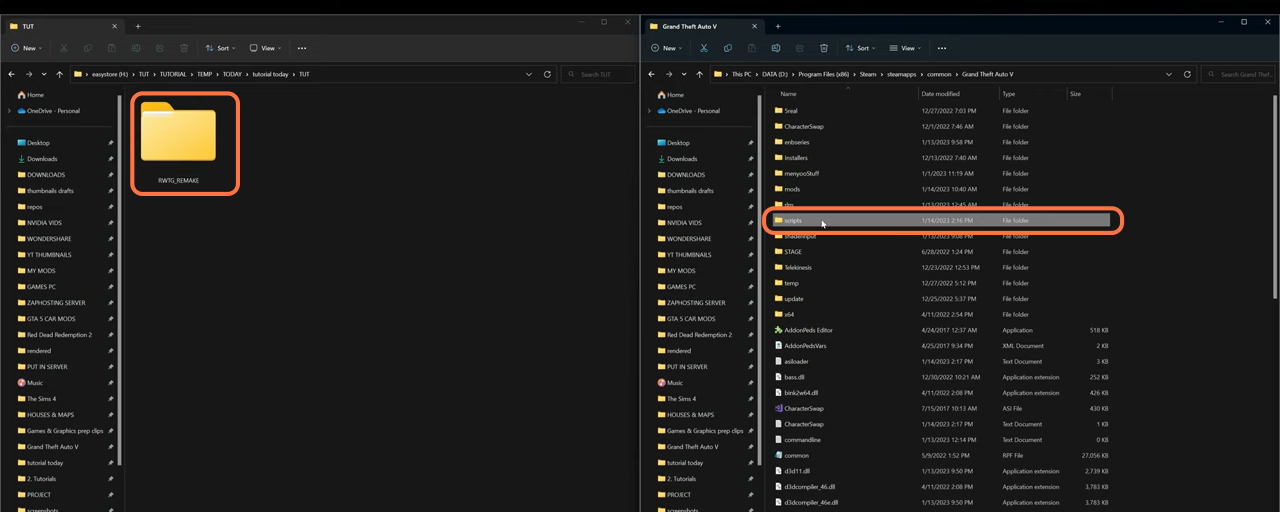
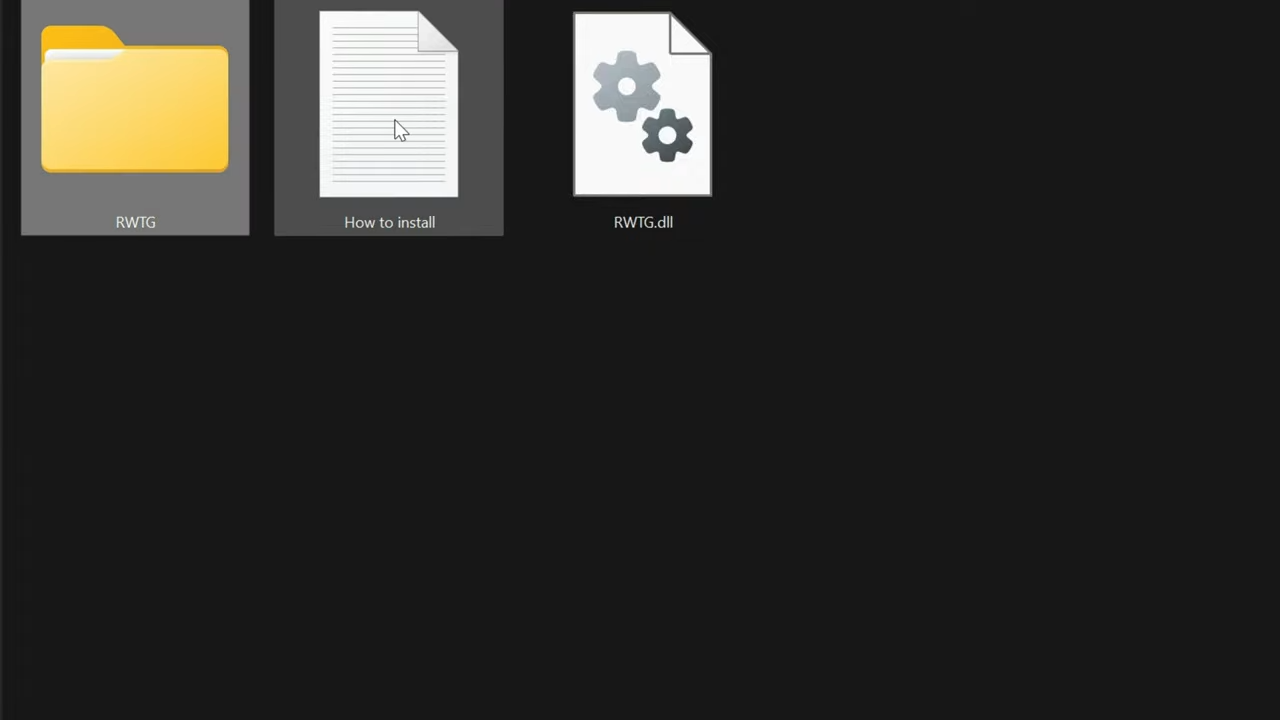
4. Open the downloaded file of the “Ridin’ with the Gang” mod and you’ll find an RWTG folder, RWTG.dll file and a text document. You need to drag the RWTG folder and DLL file into the scripts folder of the GTAV directory.
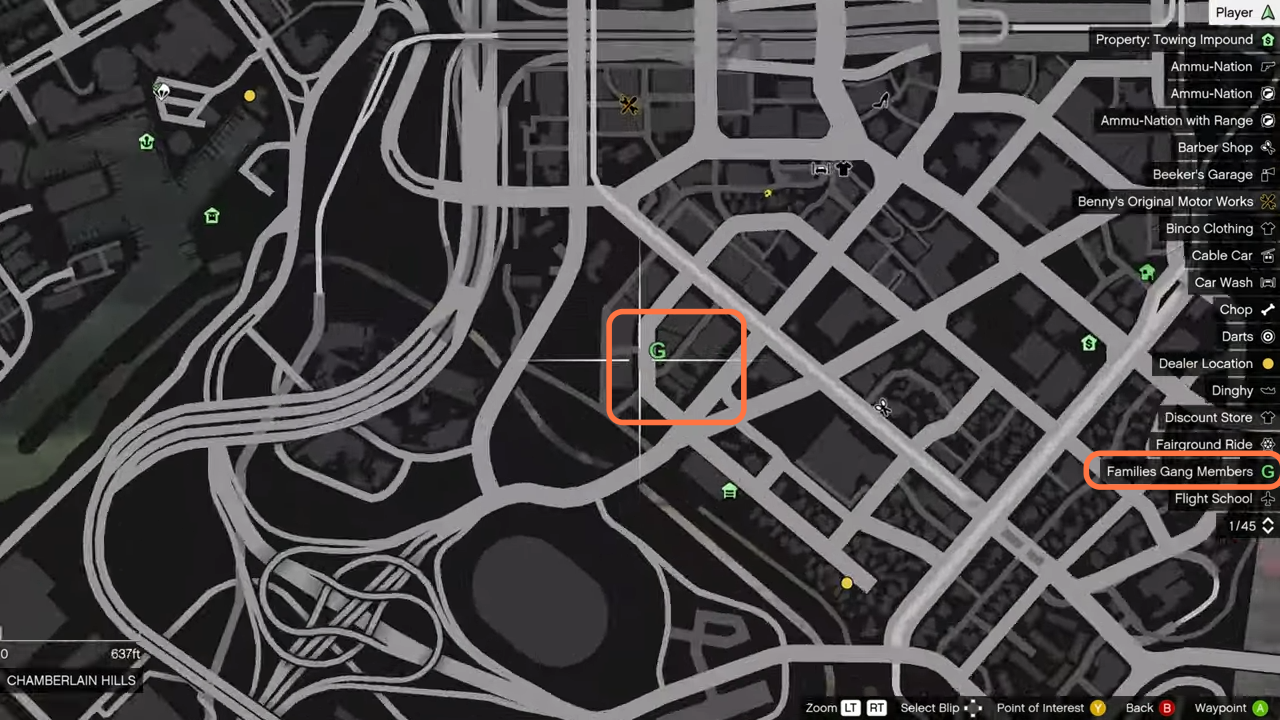
5. Now you can close all the archives and run the game. Once you spawn into the GTAV, open the map and you’ll find a new blip marked ‘G’ which represents families gang members. Teleport yourself to this location and find the marker, then follow the instructions at the upper left corner to recruit members.