In this guide, you will find out how to install Sidio Pocket Flashligh in Grand Theft Auto 5.
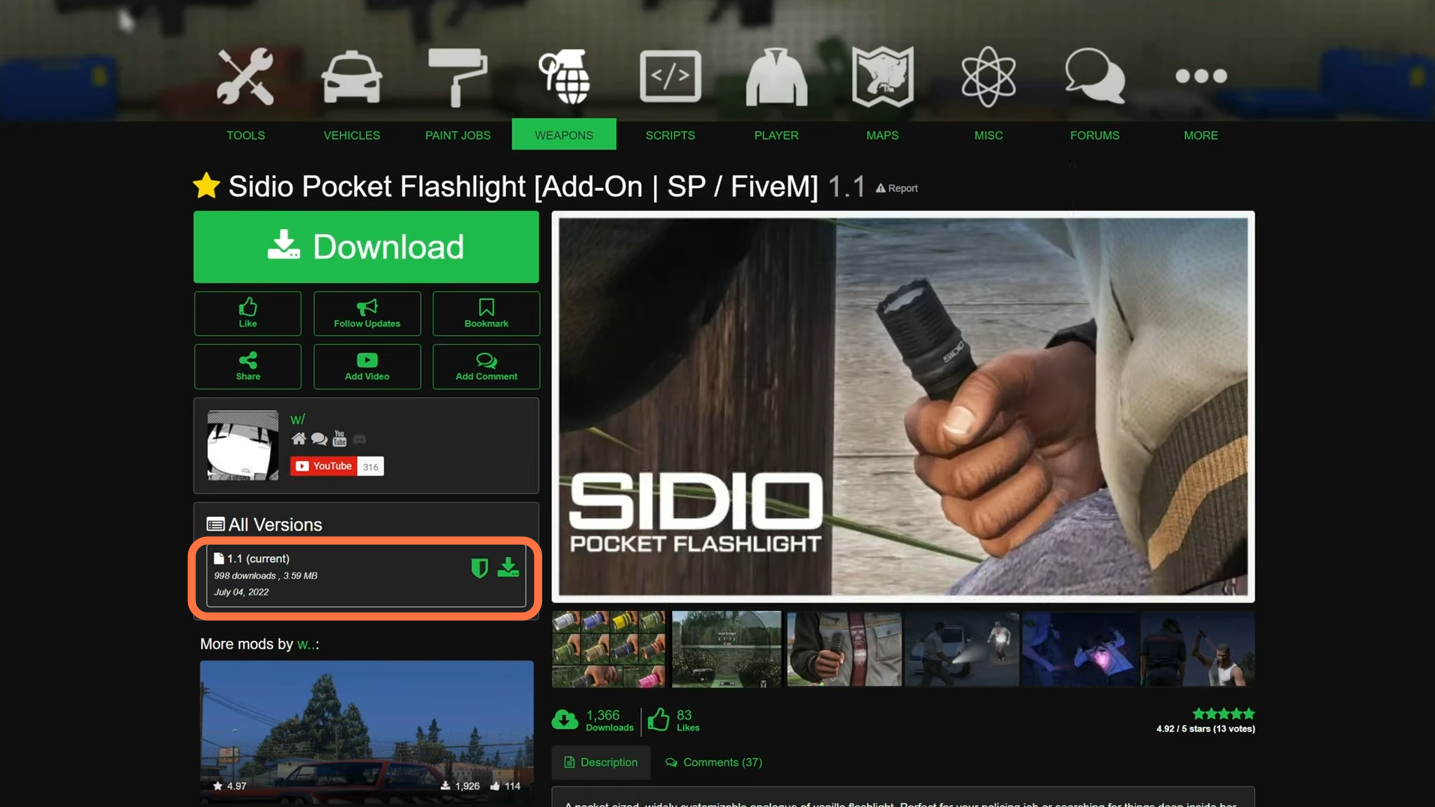
1. First, you will need to download the Sidio Pocket Flashlight from “https://www.gta5-mods.com/weapons/sidio-pocket-flashlight-sp-fivem-add-on-hud-icon-customization-w“. Open the link and click on the green arrow icon under the All Versions section to download the mod.
2. The things you will require for this mod to work are “OPEN IV” and “Zolika1351’s Trainer”. You can download the Open IV from “https://openiv.com/” and “Zolika Trainer” from “https://www.gta5-mods.com/scripts/zolika1351-s-trainer“. Just make sure to install all the requirements into the script folder of the GTA V main directory. Once you have installed all your requirements and downloaded the Sidio Pocket Flashlight mod, you have to go to the downloads folder to open the Pocket Flashlight downloaded file. Inside this file, you will get the ‘Singleplayer’ named folder.

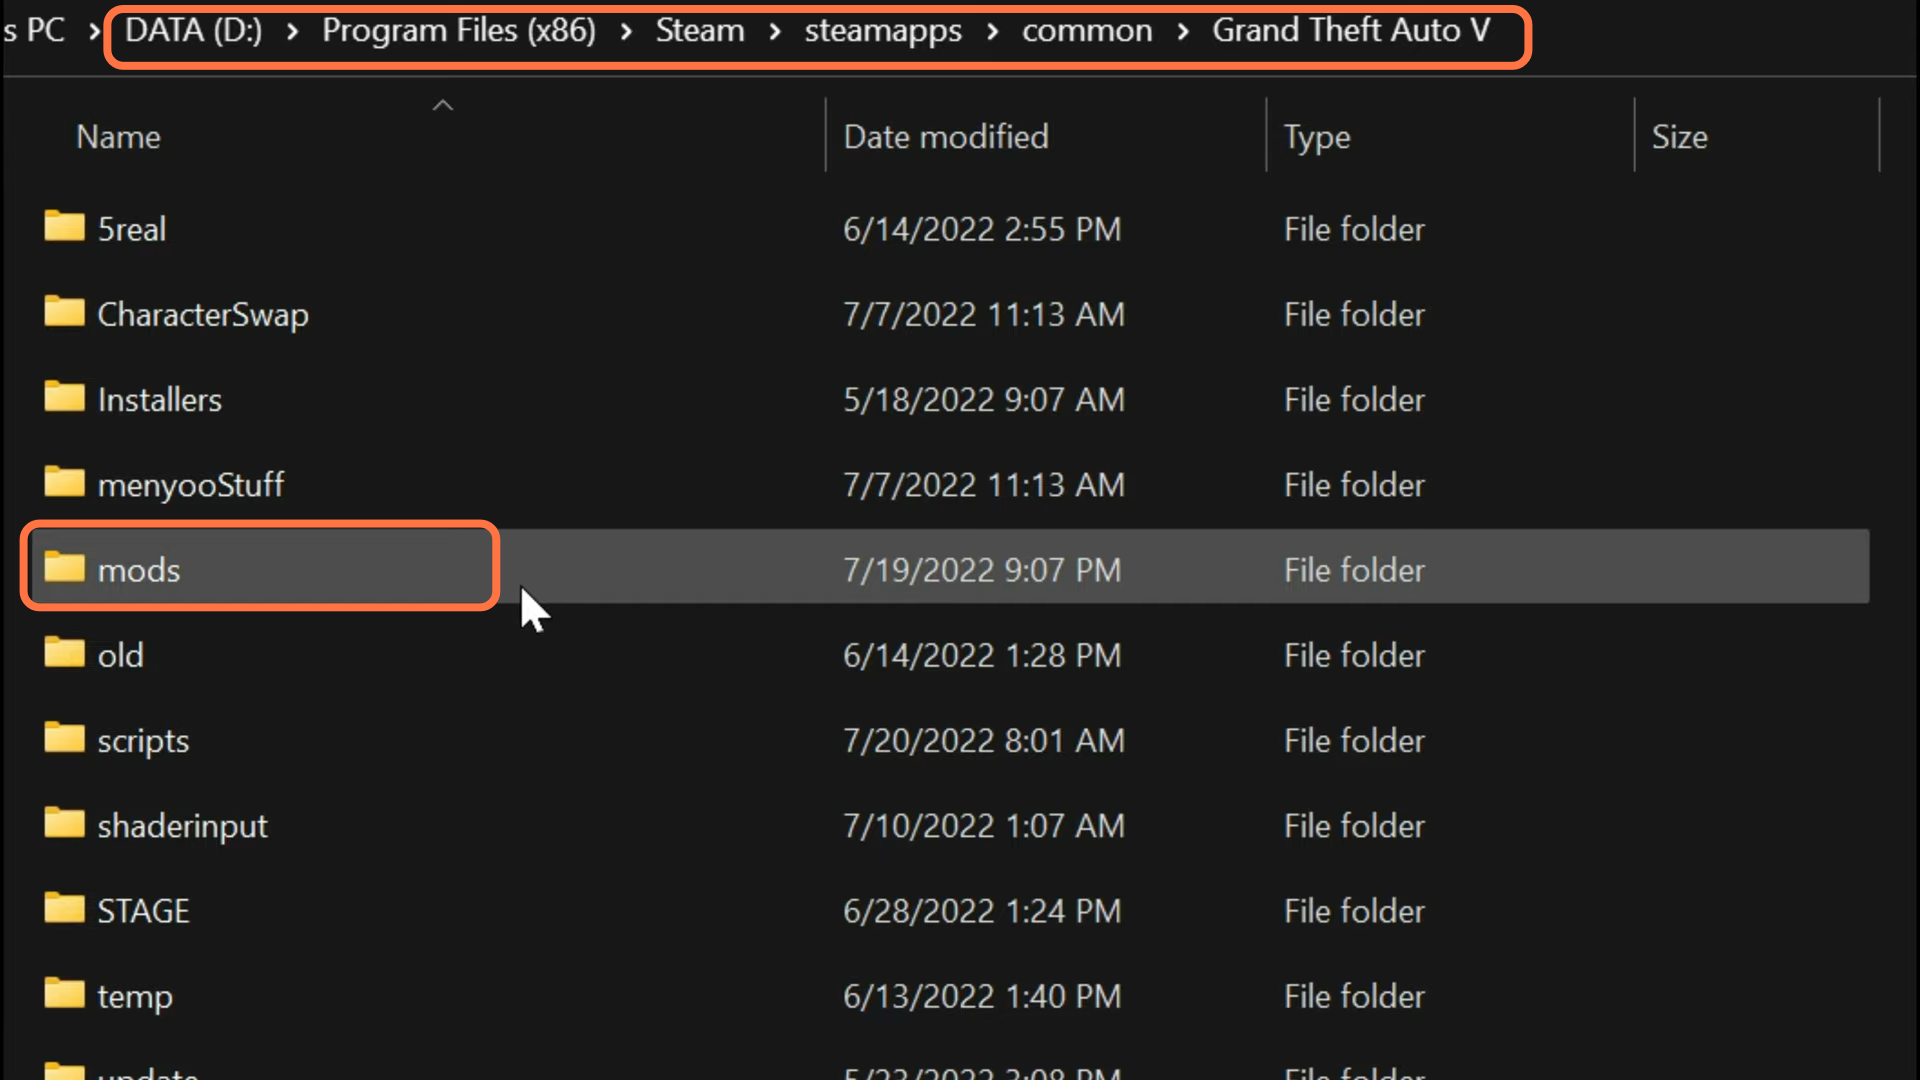
3. On the other hand, open the “GTA V” main directory side by side with the downloads folder and open the mods folder if you don’t see the mods folder, then you need to create an empty folder and name it mods. Now further create some folder inside it like ‘Update’, ‘x64’ and then ‘dlcpacks’.
4. Now open up the Singleplayer folder from the downloaded file & drag the DLC file named ‘w_pocketlight’ into the ‘dlcpacks’ folder you created inside the mods folder of GTA V.

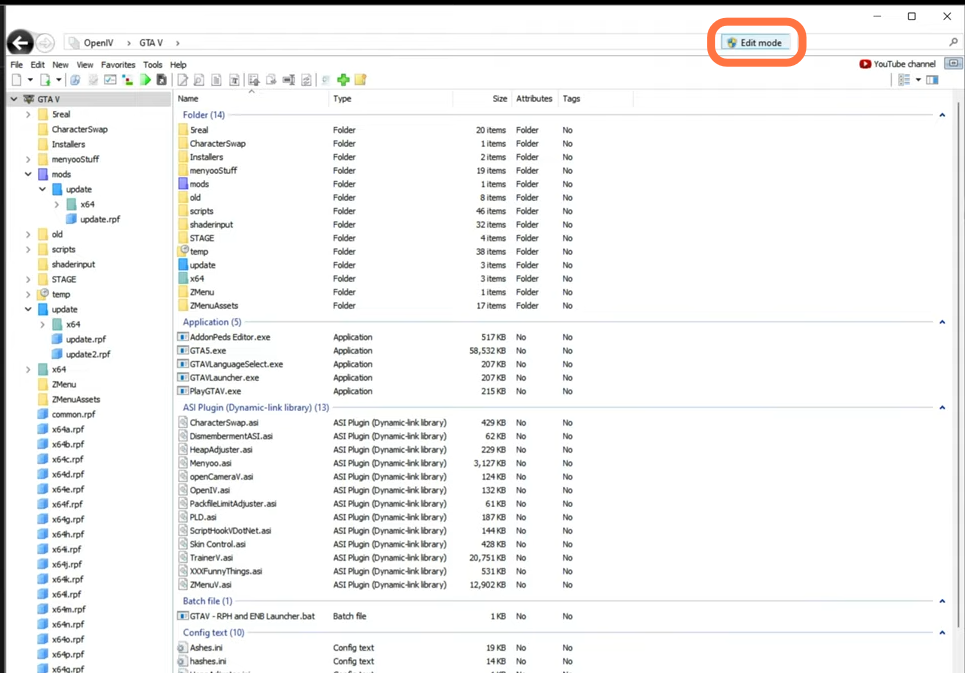
5. Now open the “Open IV” application and press the Edit mode button to enable it.
6. To install the custom HUD file, you need to uncompress the downloaded file into a folder using WinRAR or 7zip.
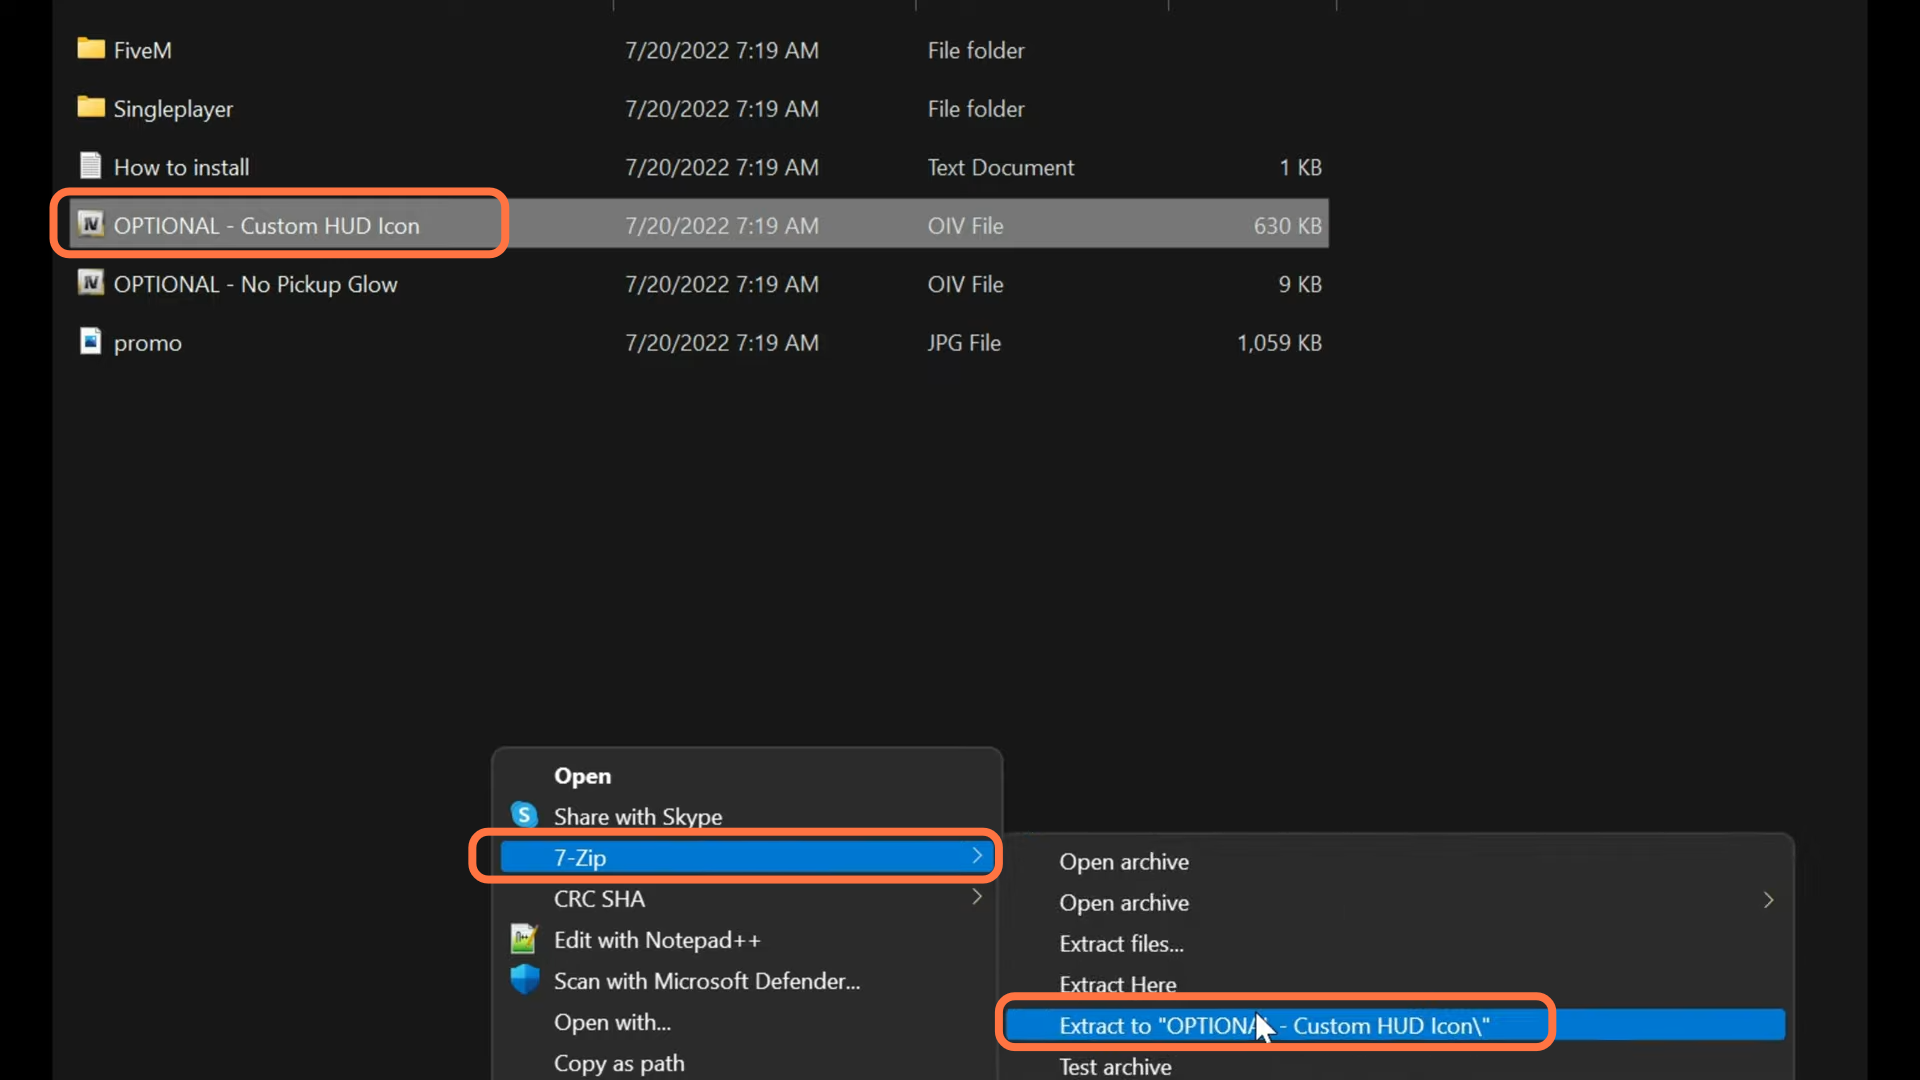
7. After that, open up the extracted folder and you will get a content folder inside it. Open it and you will get the custom HUD files

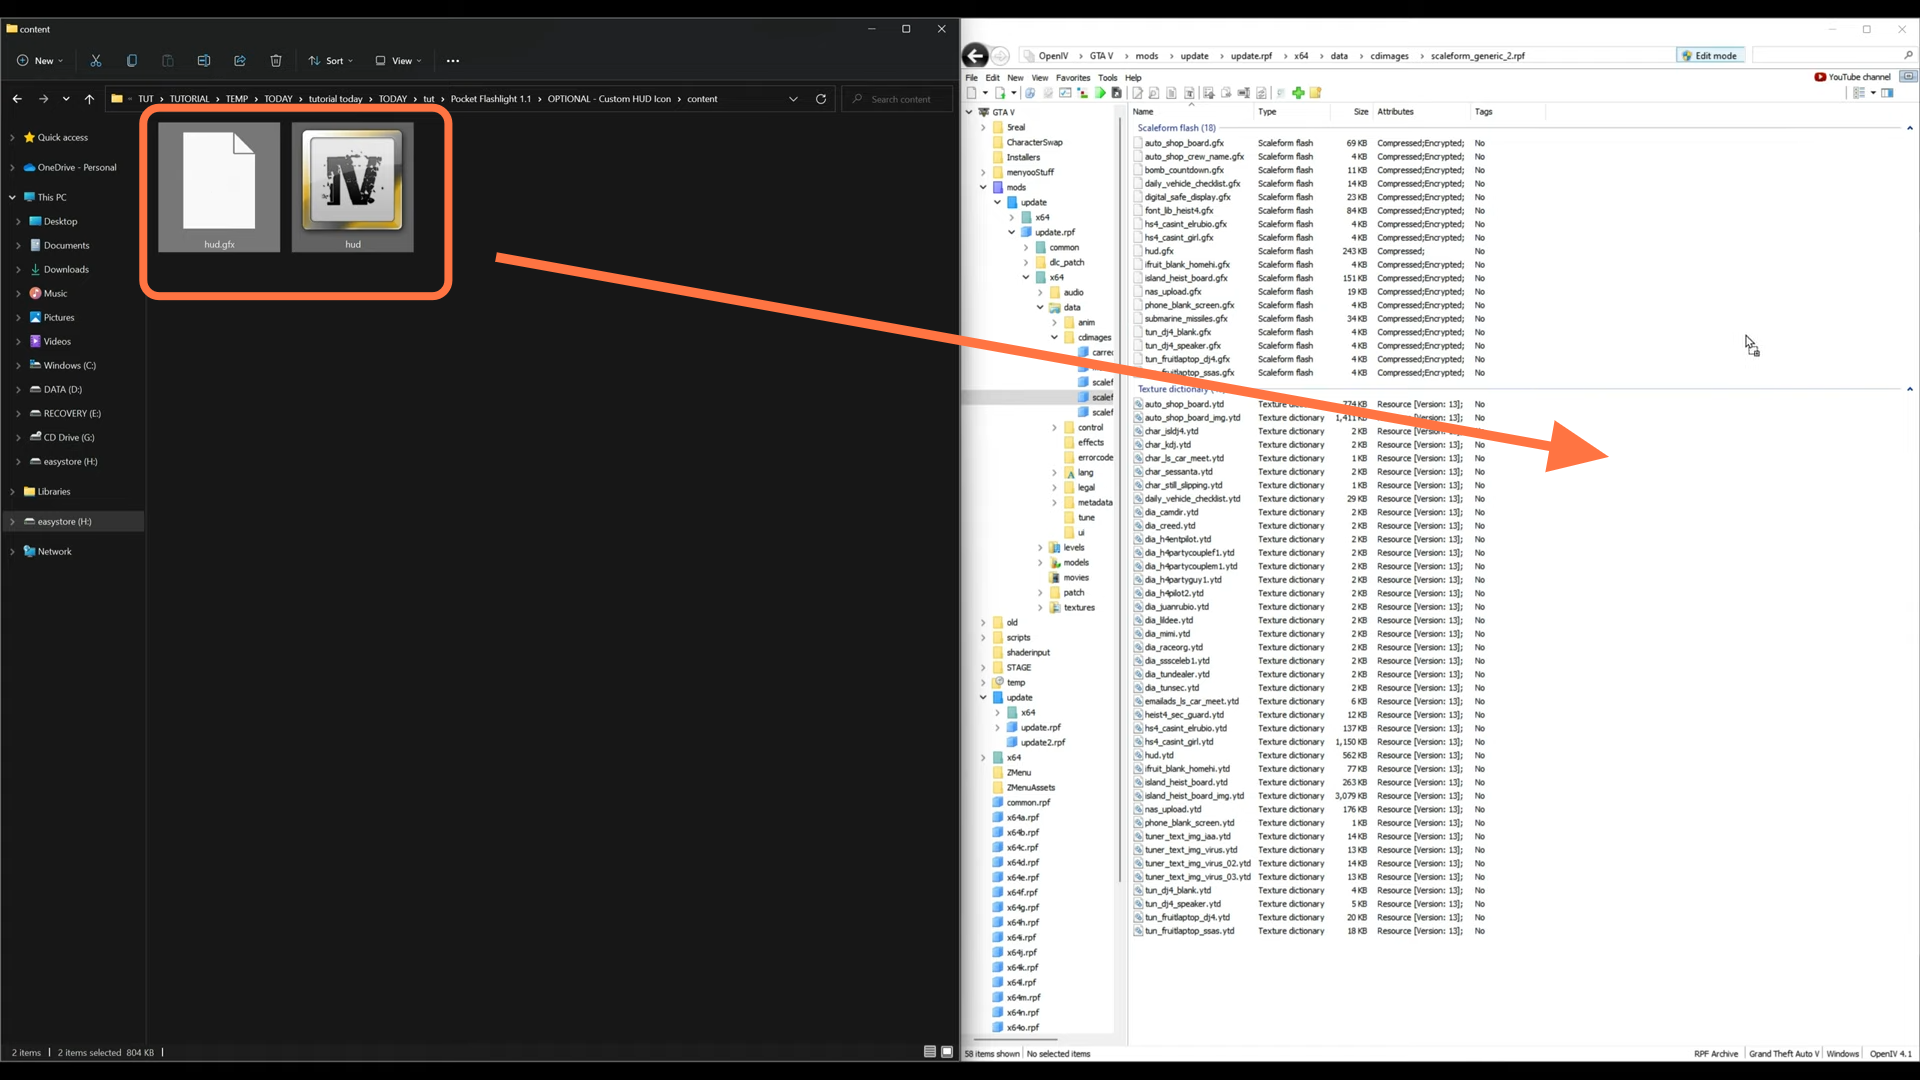
8. Now go back to the Open IV and go to this directory: mods > update > update.rpf > x64 > data > cdimages > scaleform_generic_2.rpf. You need to drag and drop the HUD files of the content folder. After that, click on the files at the top left corner in Open IV and choose close all archives.
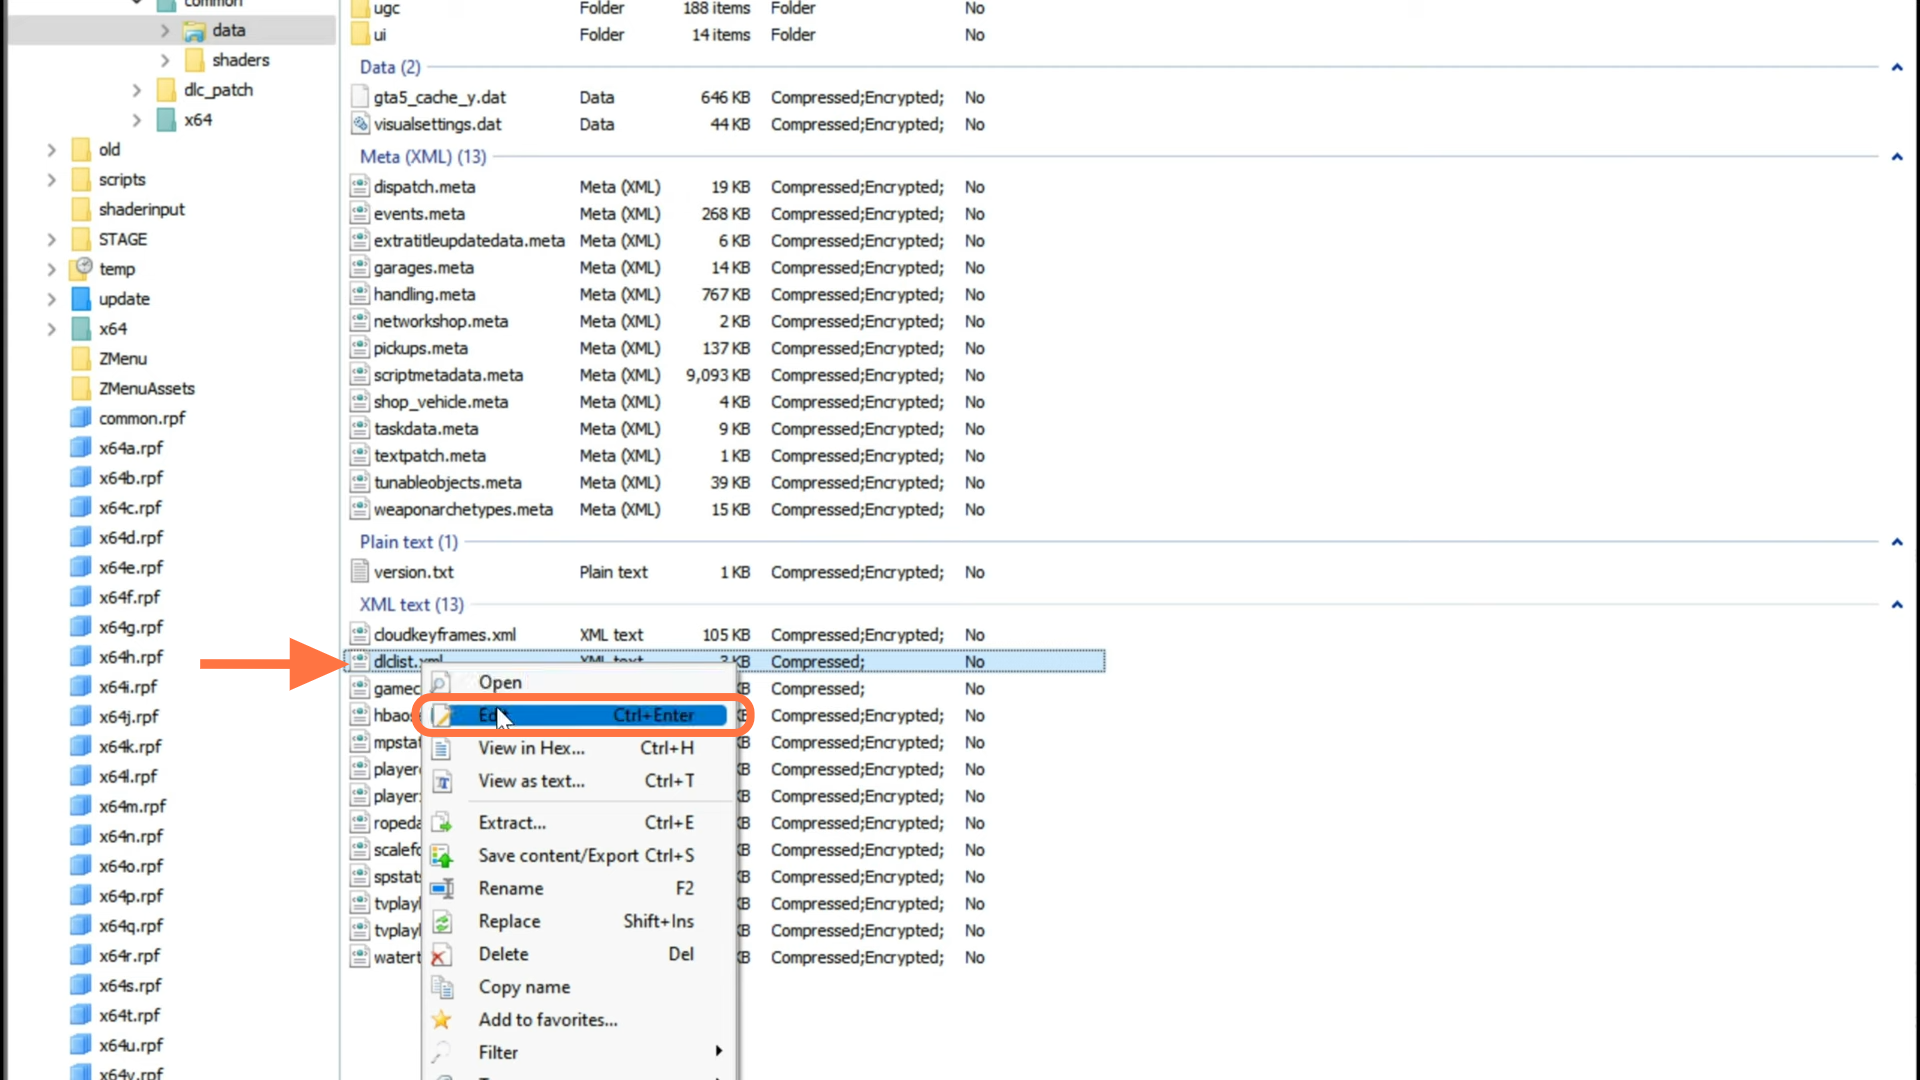
9. Now once again within Open IV, you need to go to mods > update > update.rpf > common> data and scroll down to the XML text section. After that, open the dlclist.xml file, then right-click on this file and select Edit.
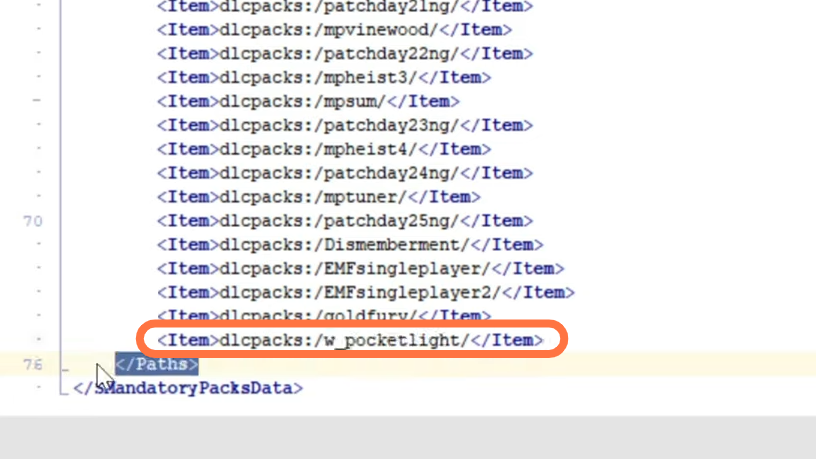
10. Scroll down to the closing of the paths tag and add this code line “<item>dlcpacks:/w_pocketlight/</item>” just before the ending of the paths tag. After that, save the file and close all the windows.
11. To bind the keys for Zolika, you first need to spawn into the game. Once you spawn in, open up the trainer by pressing F7, navigate to Zolika’s Menu and select weapons.

12. Then go into the Weapon list > Weapons and scroll all the way down to find the Weapon_pocketlight.

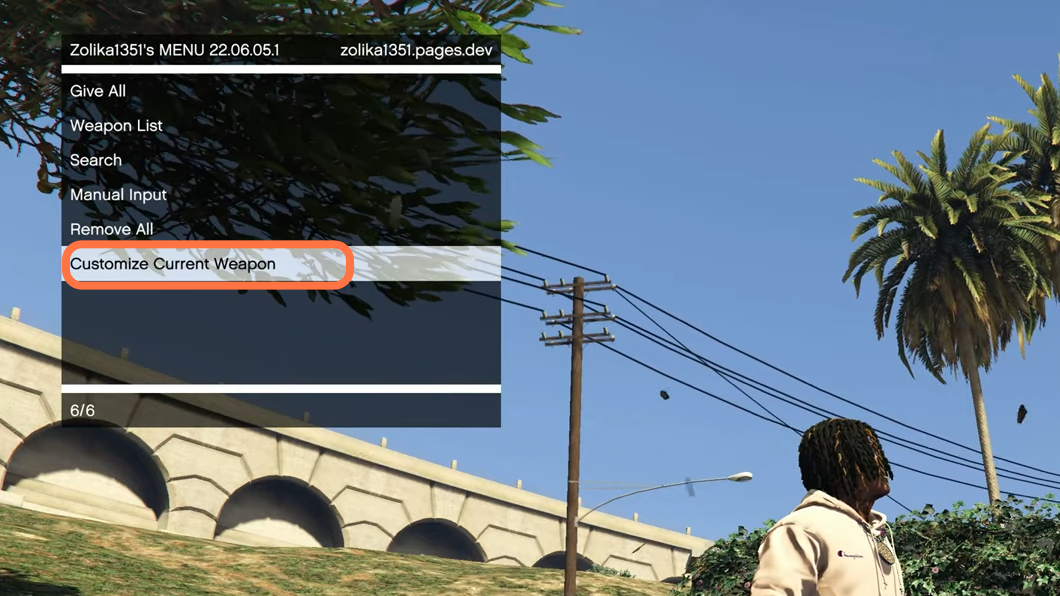
13. Once you selected the pocket light, you can choose to customise it by going back to the weapons main menu and selecting the Customise Current Weapon > Tints > Gun Tints. There, you can choose a tint for your flashlight.
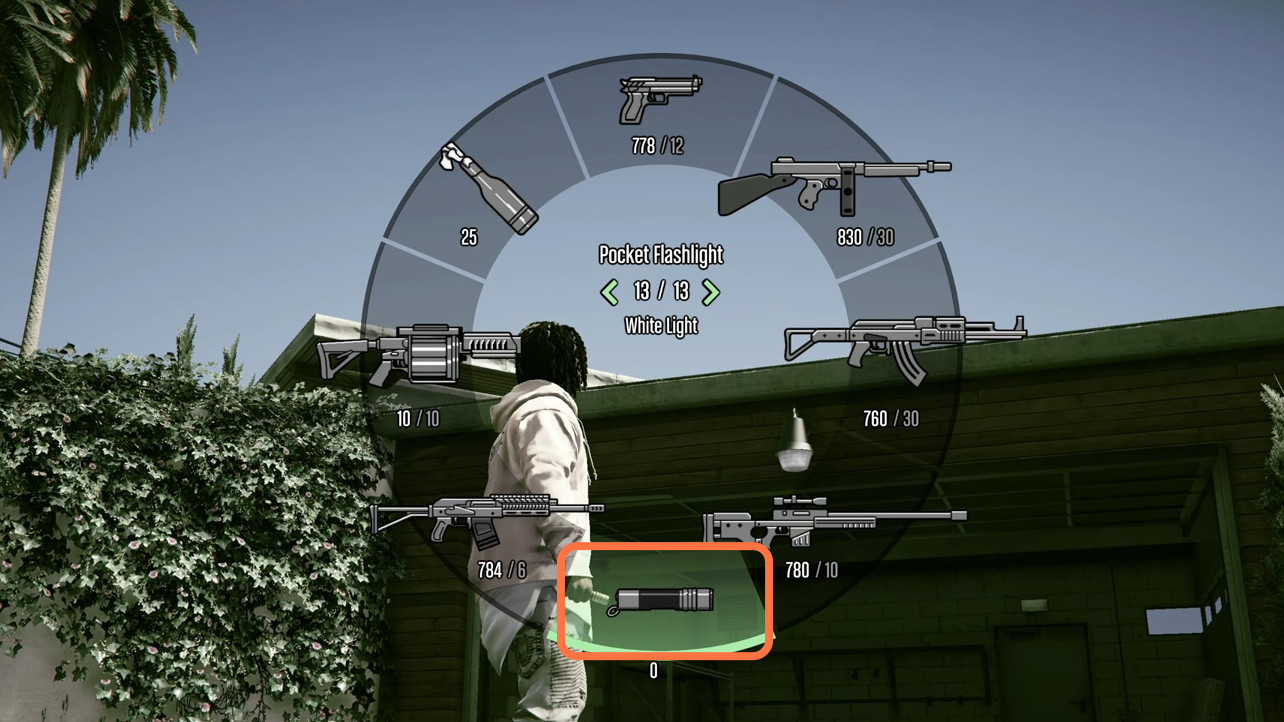
14. Now If you open up the weapon wheel, you’ll notice the pocket flashlight has been added there as well.