This guide will let you know how to set up an unturned dedicated server. First, you have to download and install SteamCMD, set up the steamCMD application, and generate config files. After that, setting up the Windows Defender Firewall with advanced security
Download and install SteamCMD
In this section, we will take you through the steps to download and install SteamCMD to set up an unturned dedicated server. After downloading, you have to extract the downloaded files on your computer.
- First, you have to open the browser from your computer and download the SteamCMD application.
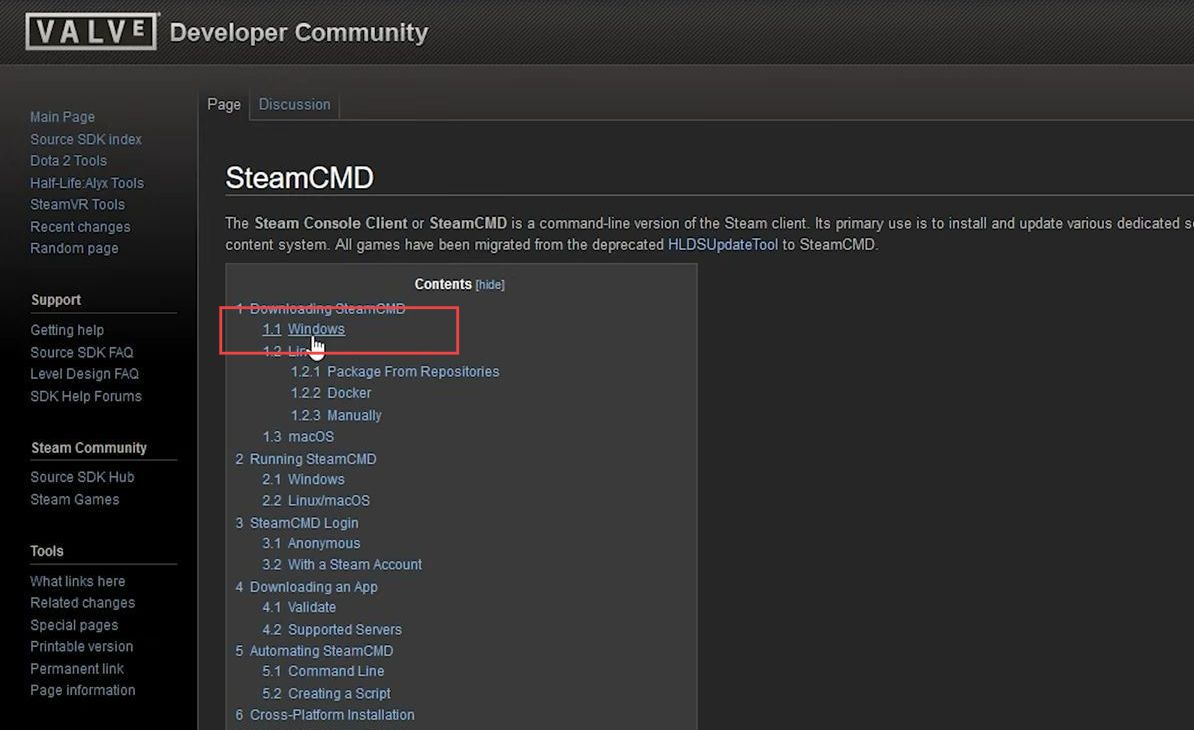
- Upon reaching the window, click the Windows tab from the listings of content.
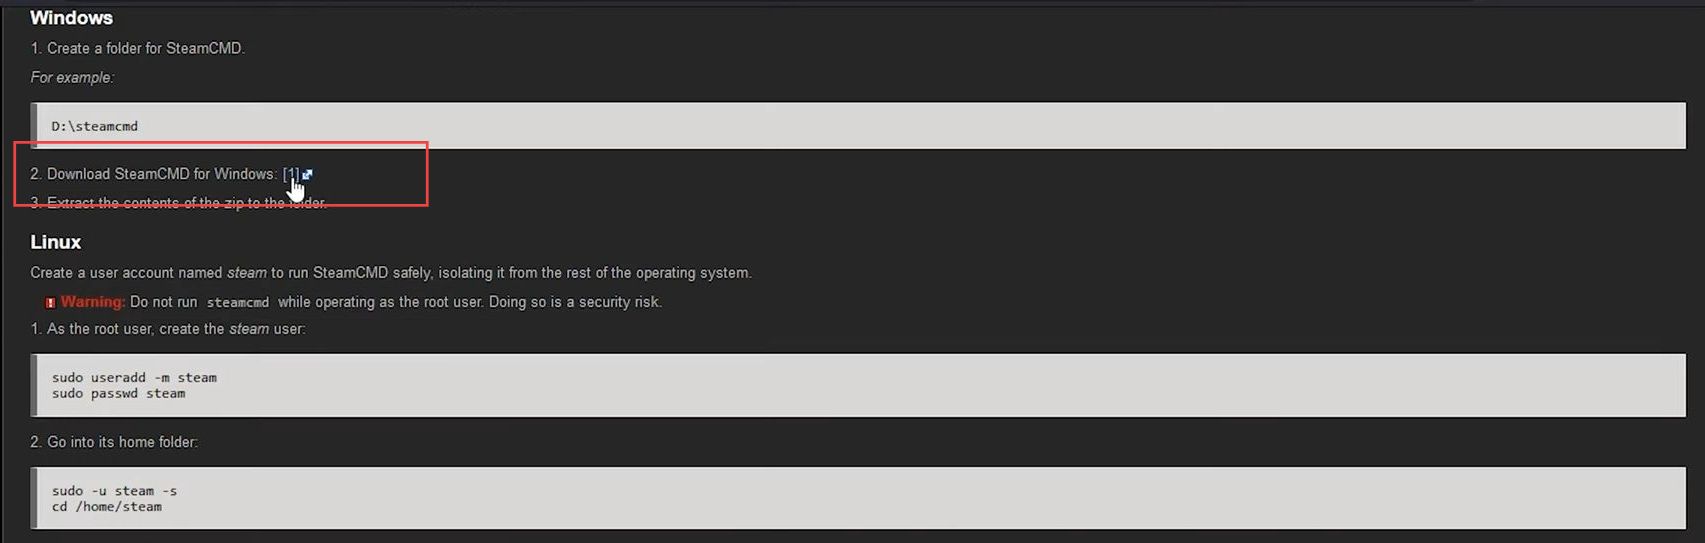
- Once the next window is opened, click the Download SteamCMD for Windows option from the menu.
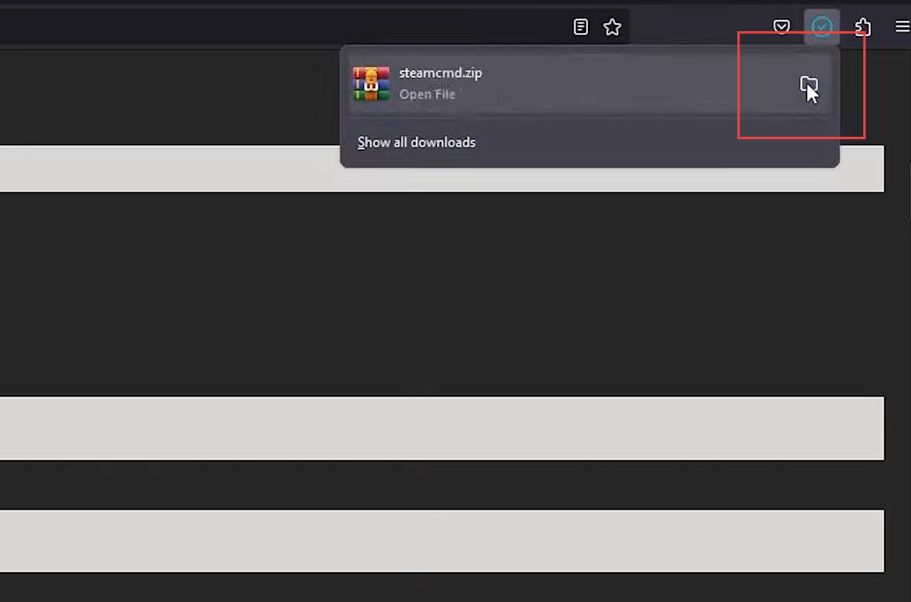
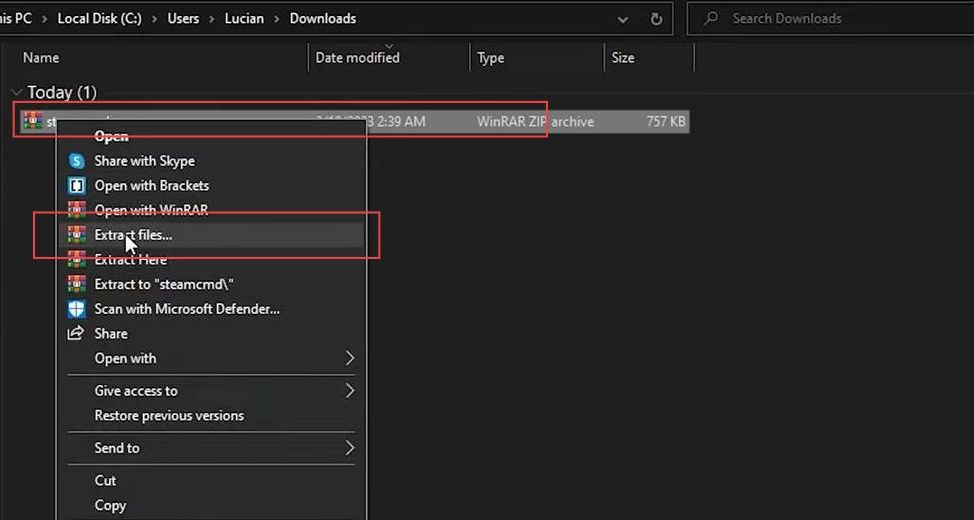
- After downloading, click the folder icon from the right side of the window to reach the recently downloaded file’s location.
- Upon reaching the recently downloaded file’s location, right-click the zip file and select the Extract files option from the drop-down menu.
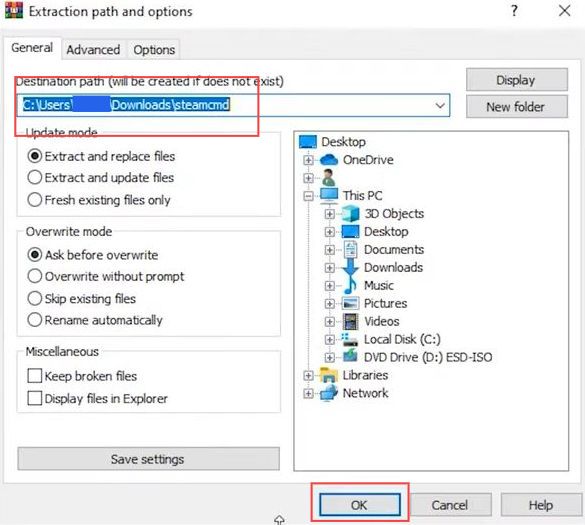
- Select the destination path from the general tab and click the OK button from the bottom of the window.
Setting up the steamCMD application
This section describes how to setting up the steamCMD application to set up an unturned dedicated server. You have to write specific commands to generate the config files.
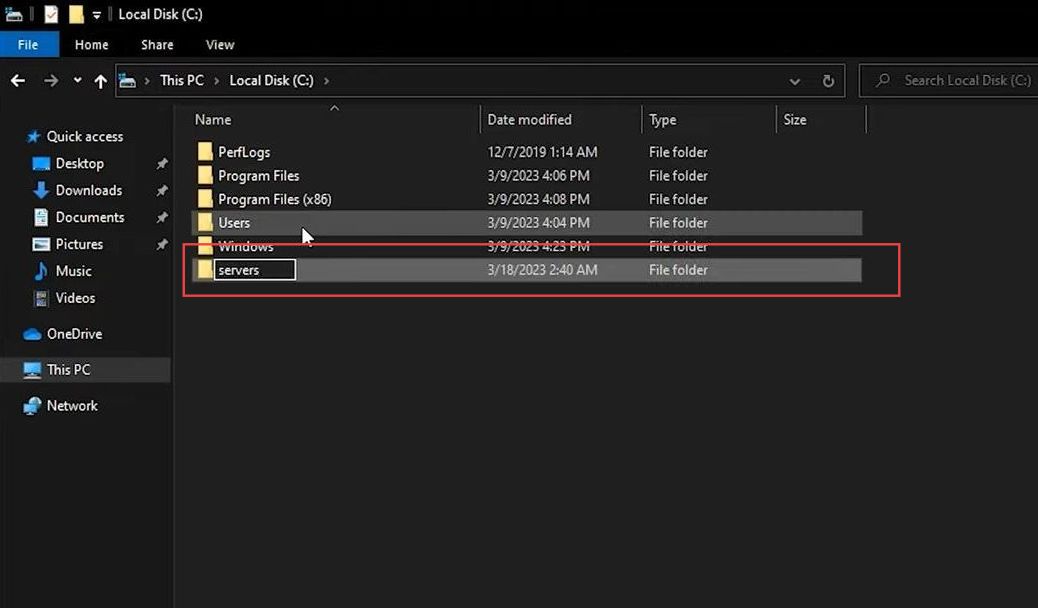
- Once the file has been extracted, click This PC from the left side panel of the file explorer.
- After that, go to Local Disk C and make a new folder in the menu.
- Now rename this newly created folder as Server and double-click it to open it.
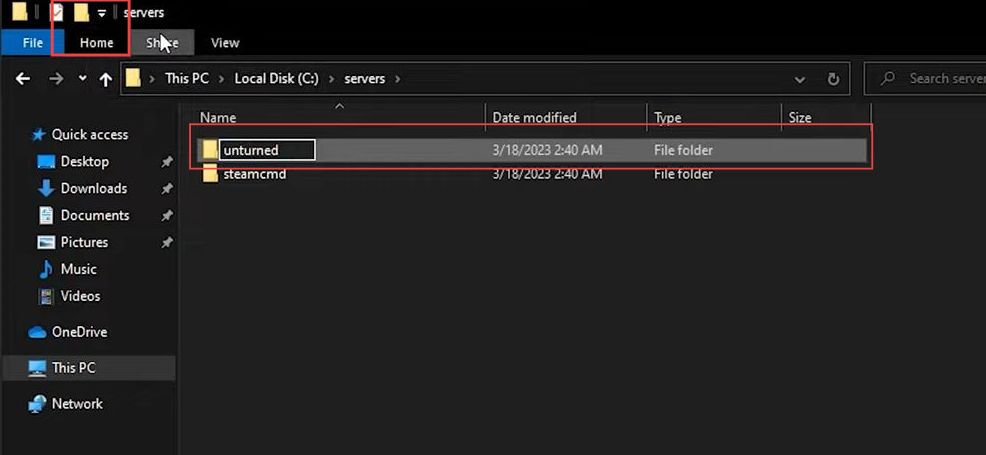
- Drag the recently downloaded SteamCMD folder and drop it into the newly created Server folder.
- Now make a new folder in the recently opened server folder by clicking the folder icon from the quick access toolbar.
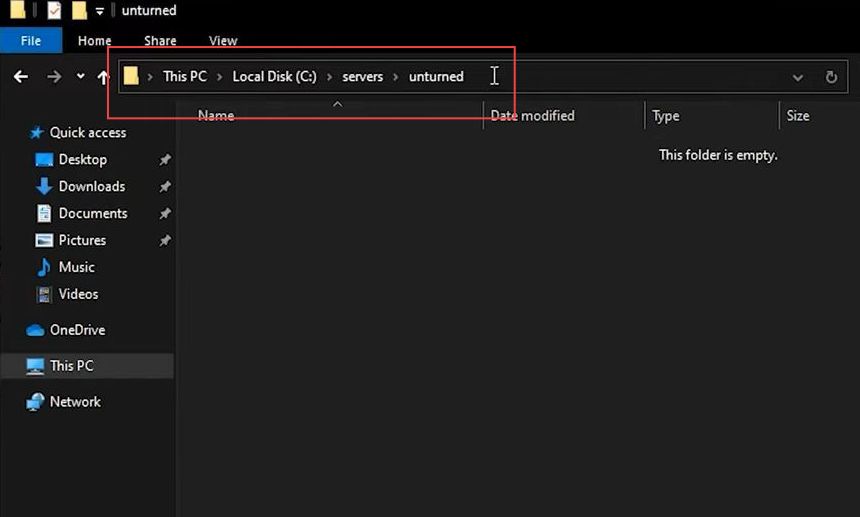
- After that, rename this newly created folder as unturned or whatever you desire and double-click the steamCMD folder to open it.
- Once the folder s opened, double-click the steamCMD application to open it.
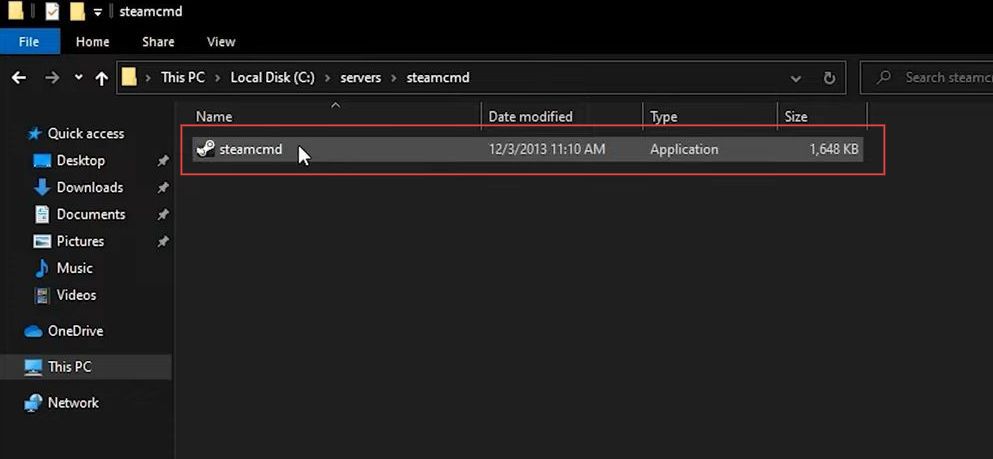
- When the steamCMD application is opened, double-click the recently created unturned folder to open it.
- Once the folder is opened, copy the address shown on the location bar from the menu.
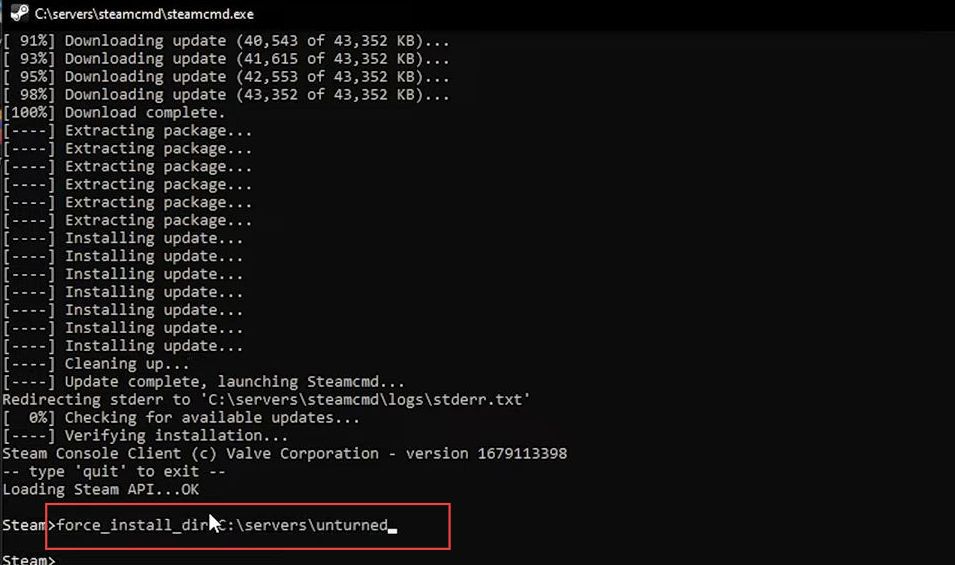
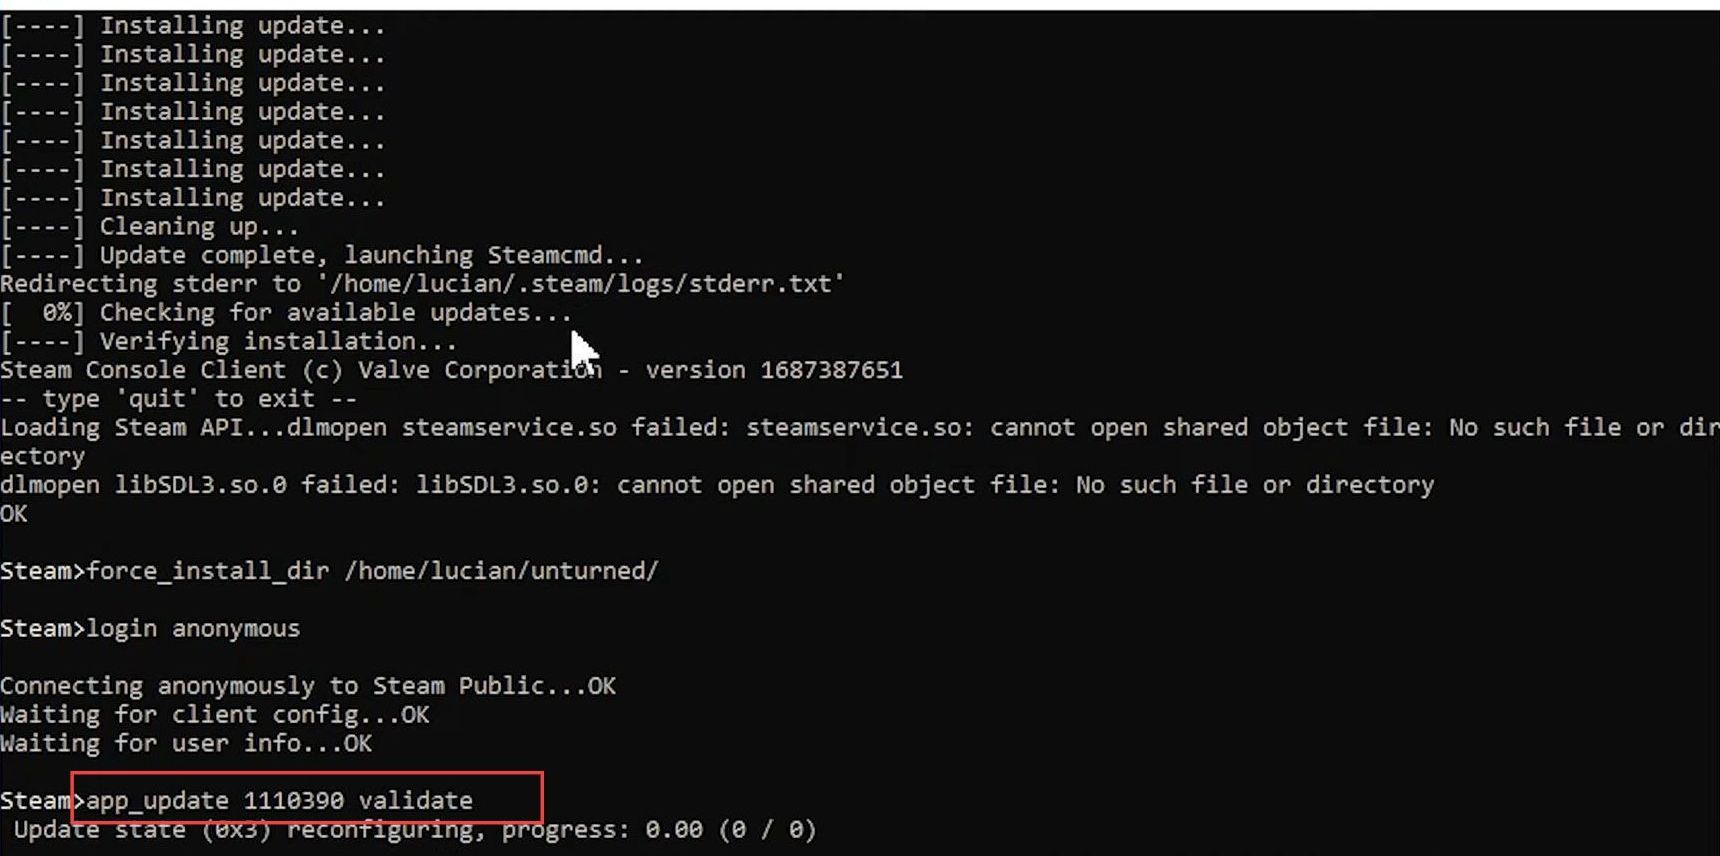
- Once the steam CMD application is opened, then input the following command to install the server forcefully.
'force_install_dir (your home path)This command is used to specify a custom installation directory (your home path) when installing software or games, forcefully directing the installation to that location.
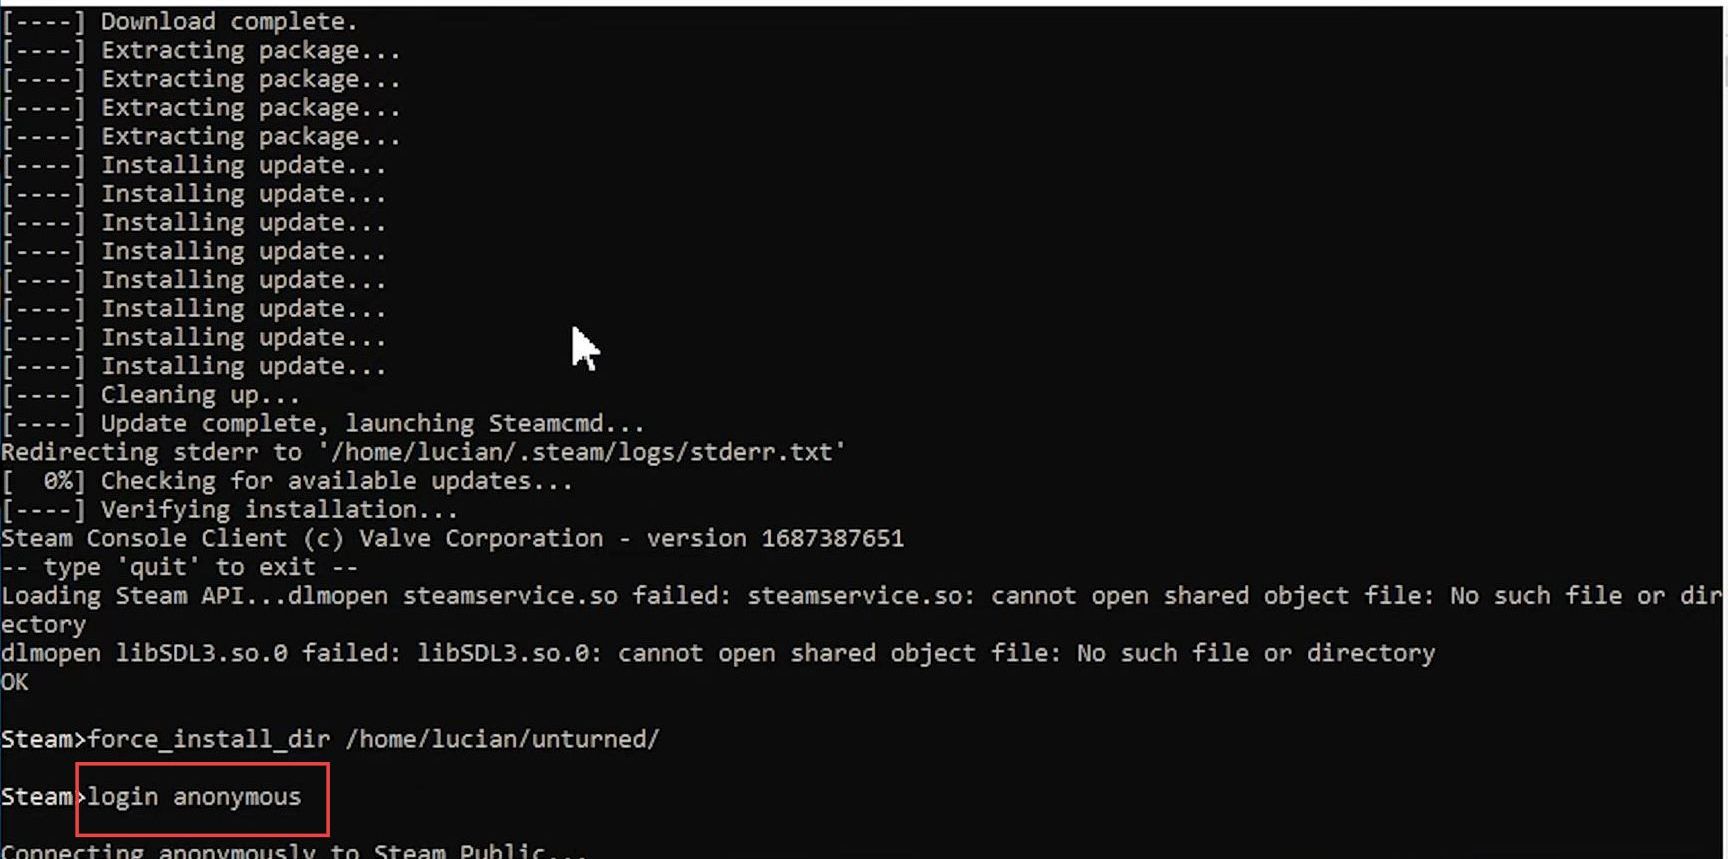
- Input the following command to log into your server anonymously.
login anonymousIt will log you into a system or server anonymously, without requiring a username or password.
- After that, write this command in the command prompt box.
- Now you have to wait for the files to process as it depends on the speed of your internet connection.
app_update 1110390 validate“app_update 1110390 validate” is a command used to update and validate the game or application with the ID number 1110390.
- Once the game is downloaded, you have to write this command to close the command prompt and quit the server.
exitIt will close the command prompt and quit the server.
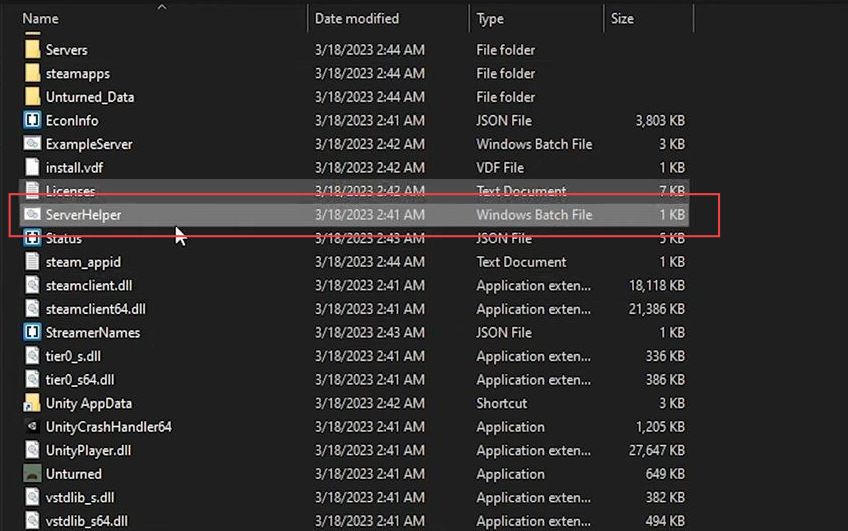
- Now go back to the unturned folder from the Local disk C and double-click the ServerHelper batch file to open it.
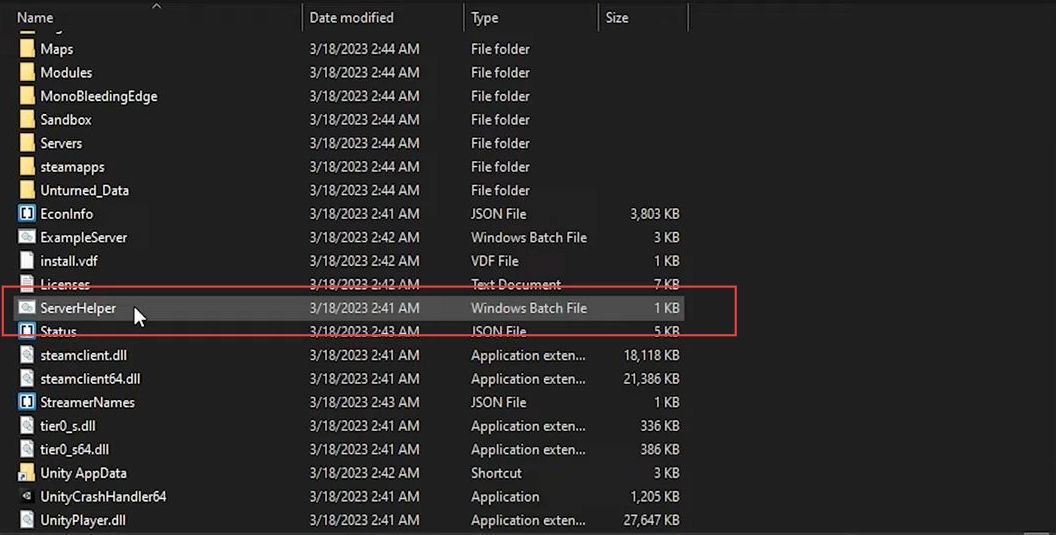
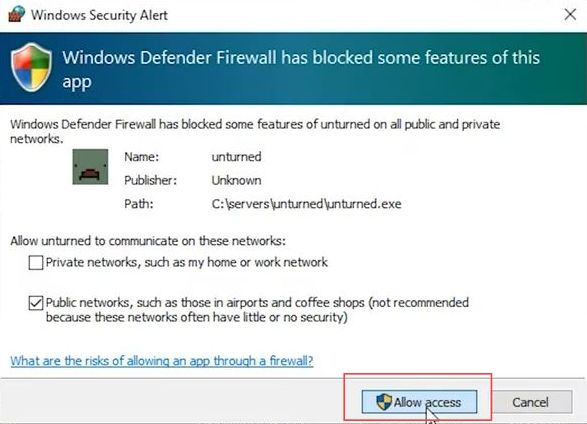
- You have to click the Allow access button from the Windows security alert window to give it access permission.
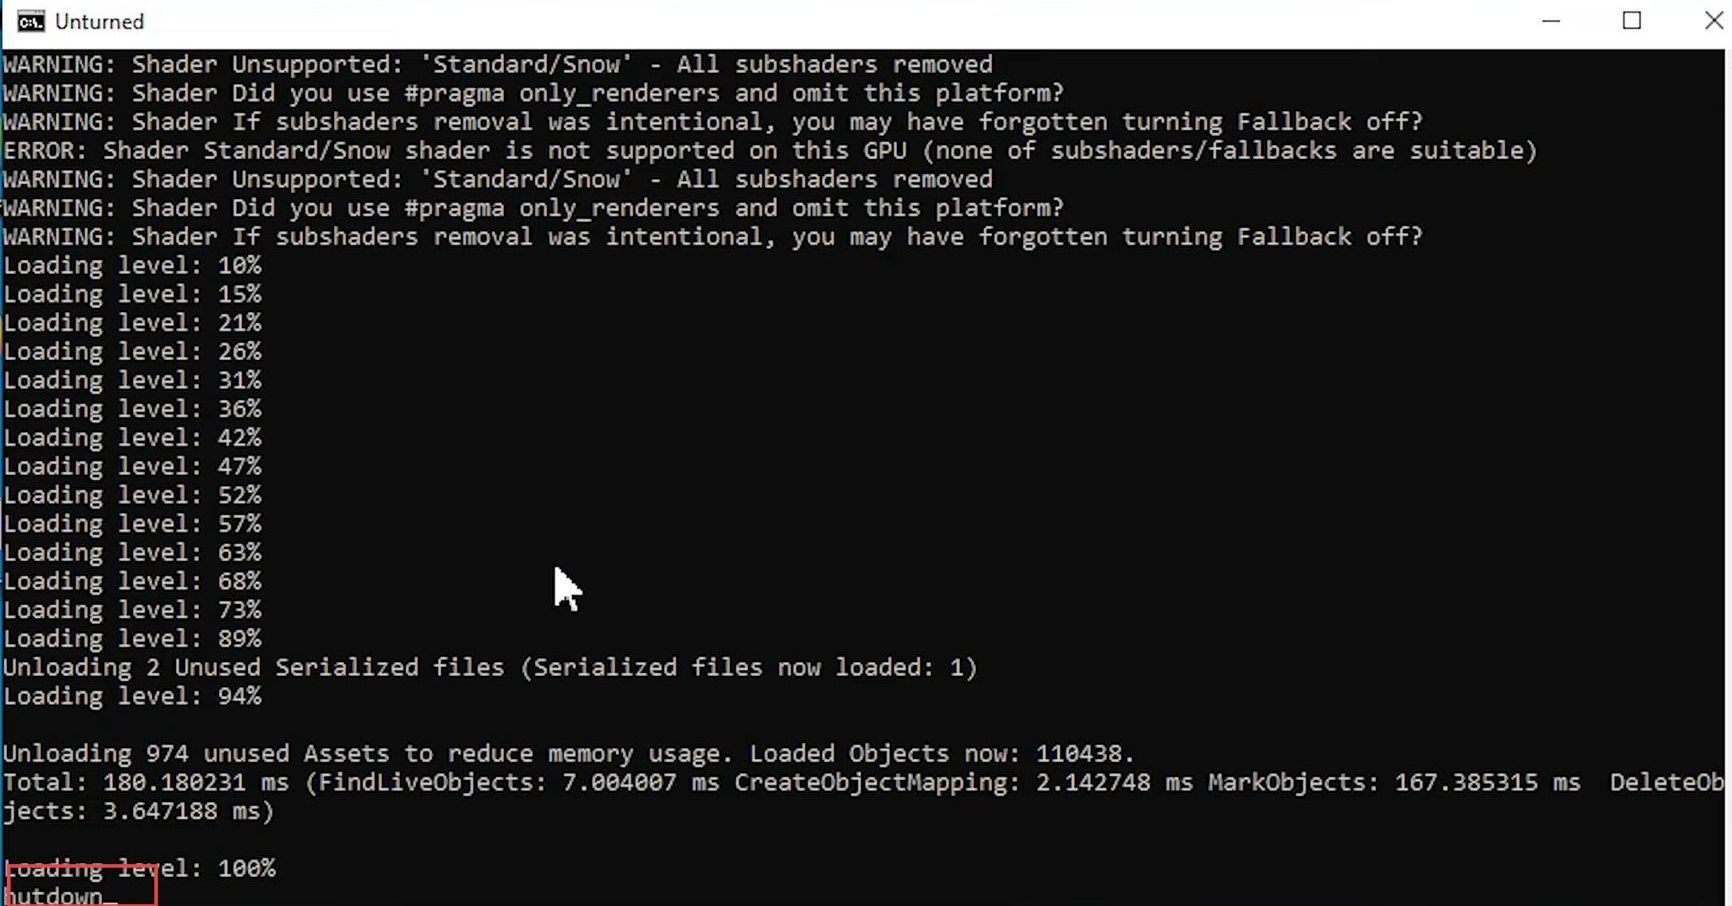
- After that, input the following command, once the server has generated all the config files.
shutdownIt will close the command prompt and quit the server.
Generate config files
This section explains how to generate the config files to set up an unturned dedicated server. You can also set your server name, perspective, and port number in the configuration files.
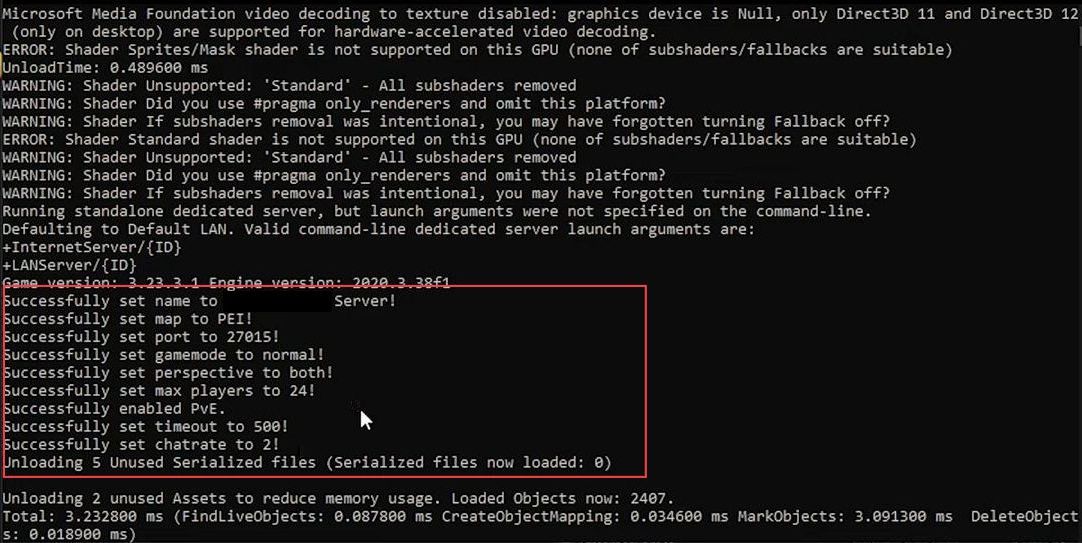
Now you can set up a server config like an owner. You can write the server name as ”your name Server” or whatever you desired.
- Write both in the perspective, you can set it to one, third, or fourth. After that, write map PEI which is the default PVP.
You can also change the game port number otherwise use the default port which is 27015. You may also set the game mode to easy, hard, normal, or gold.
You can also set the maximum player in the game to 24 or as per your desire and the timeout which sets the ping to 500.
The chat rate which defined the amount of time to chat in the game can be set to 2 seconds or more based on your desire.
- Once you have set all the desired settings based on your choice, press Ctrl + S from your keyboard to save all the config files.

Setting up the Windows Defender Firewall with advanced security
This section describes how to set up the Windows Defender Firewall with advanced security to set up an unturned dedicated server.
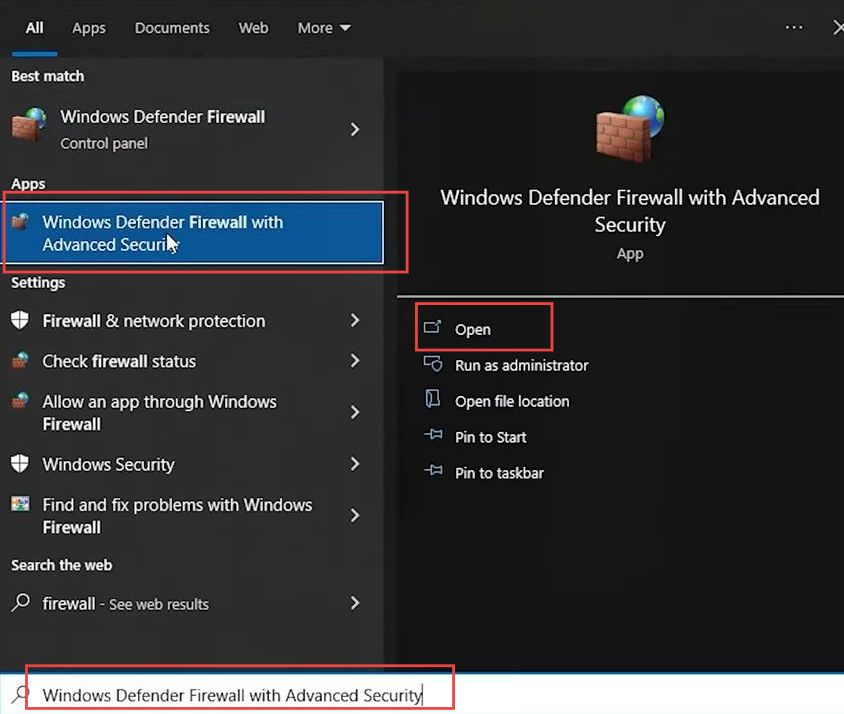
- Now you need to click the Windows button from the taskbar.
- Write firewall in the search box and after that select the Windows Defender Firewall with advanced security option from the start menu.
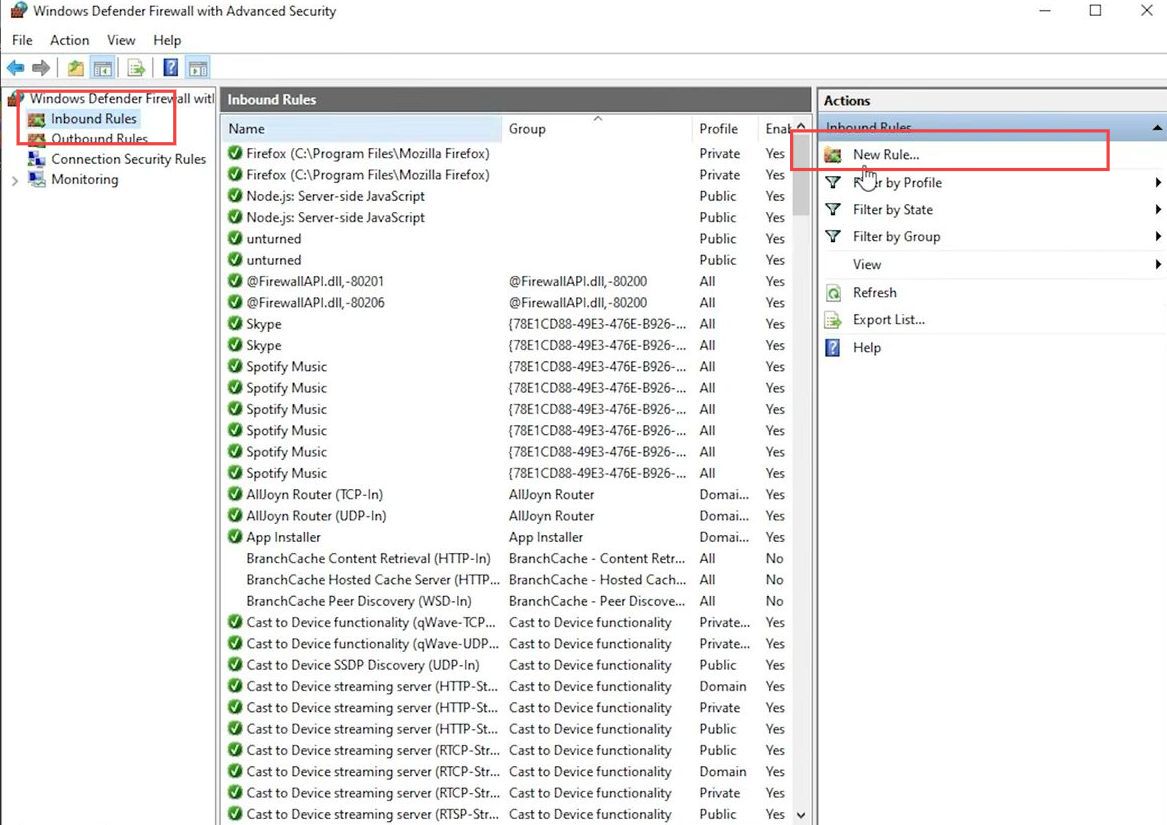
- Upon reaching the window, click the inbound rules tab from the left side panel.
- Select the New rule option from the Action section.
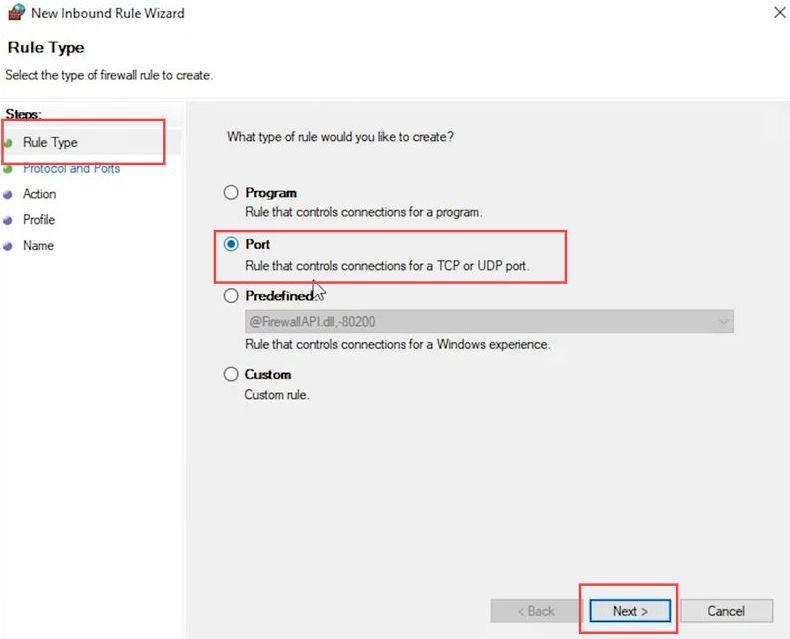
- Once the window is opened, click the port option from the menu of the rule type.
- After that, select the Next button from the bottom of the menu.
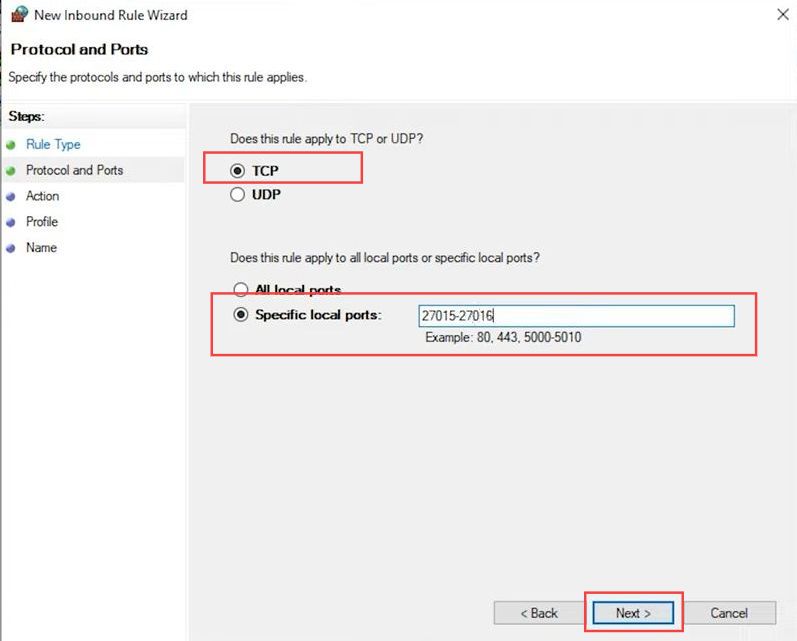
- When the next window popup, click the Protocol and Ports tab from the left side panel.
- Now select the TCP from the menu and write 27015-27016 as the ports.
- After that, tap on the Next button a couple of times from the bottom of the menu.
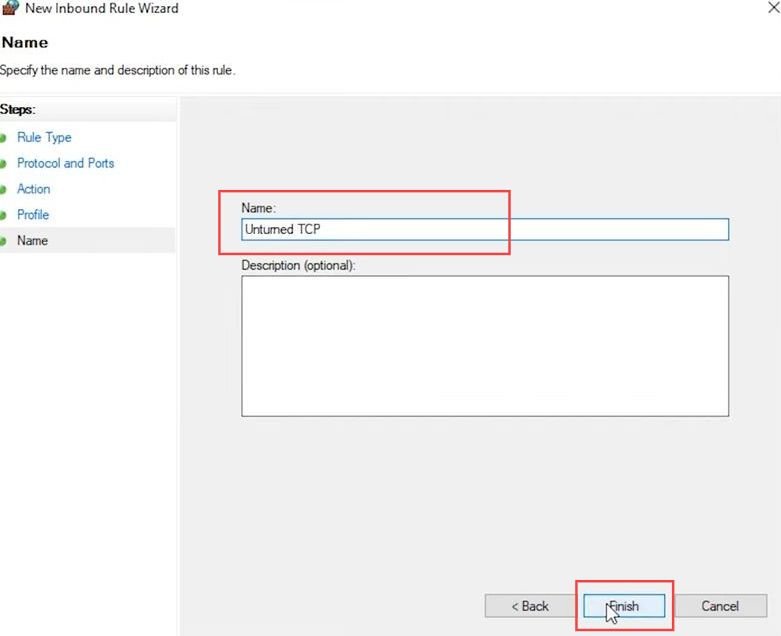
- Upon reaching the Name window, write Unturned TCP in the name box and hit the Finish button from the menu.
- Go back to the Unturned folder and double-click the ServerHelper batch file to open it.
Once the server window is opened, you can see that name, map, port, and other related settings are successfully set.