This guide will show you how to set up a Satisfactory Server on Linux. You first have to log into sudo still, then allow your ports, and install Steam CMD. After that, check the status of the firewall, activate your ports then run the script and add a public server address to the game.
Logging into sudo still
In this section, we will take you through the steps to log into sudo still to set up Satisfactory Server on Linux. You must write specific commands in the command prompt to do so.
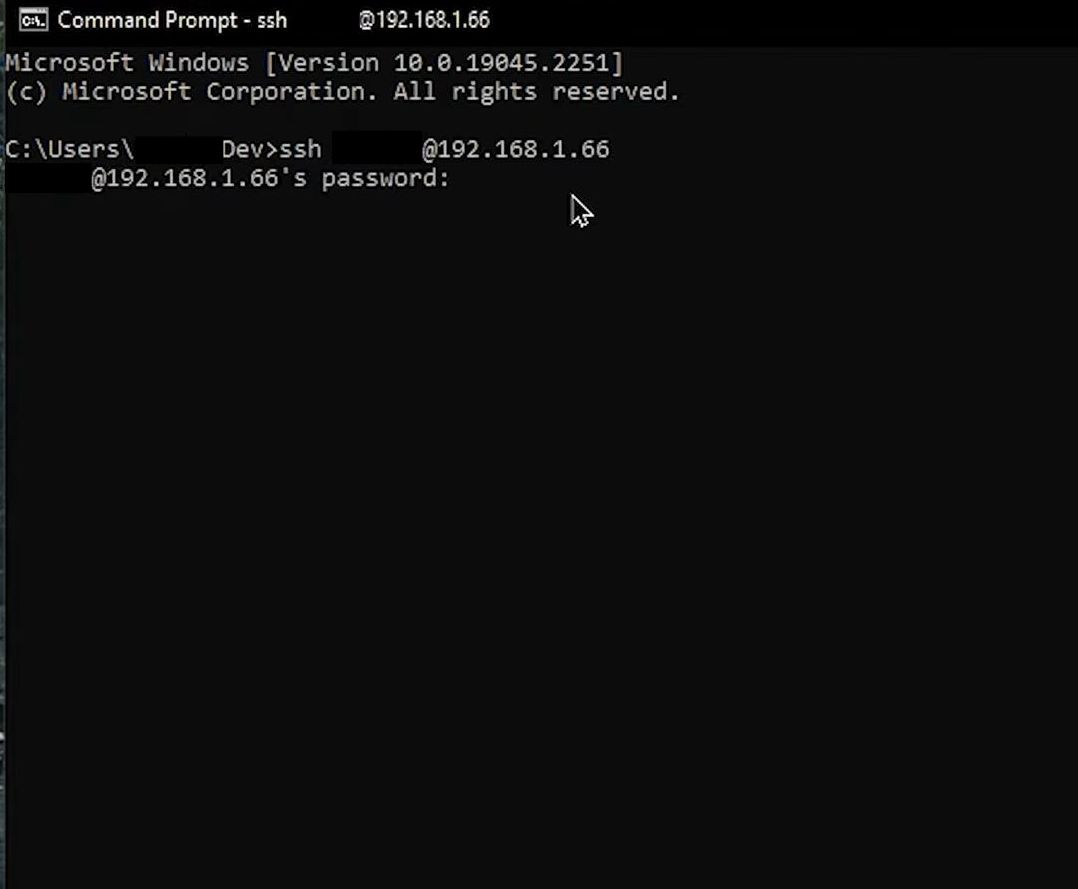
- First, open the terminal and log in to your server by using the following command replace your IP address with your IP.
ssh your server name@your IP address
This command will initiate an SSH (Secure Shell) connection to a remote server specified by its name and IP address, enabling secure remote access and management.
Allowing your Ports
This section describes how to allow your ports to set up Satisfactory Server on Linux.
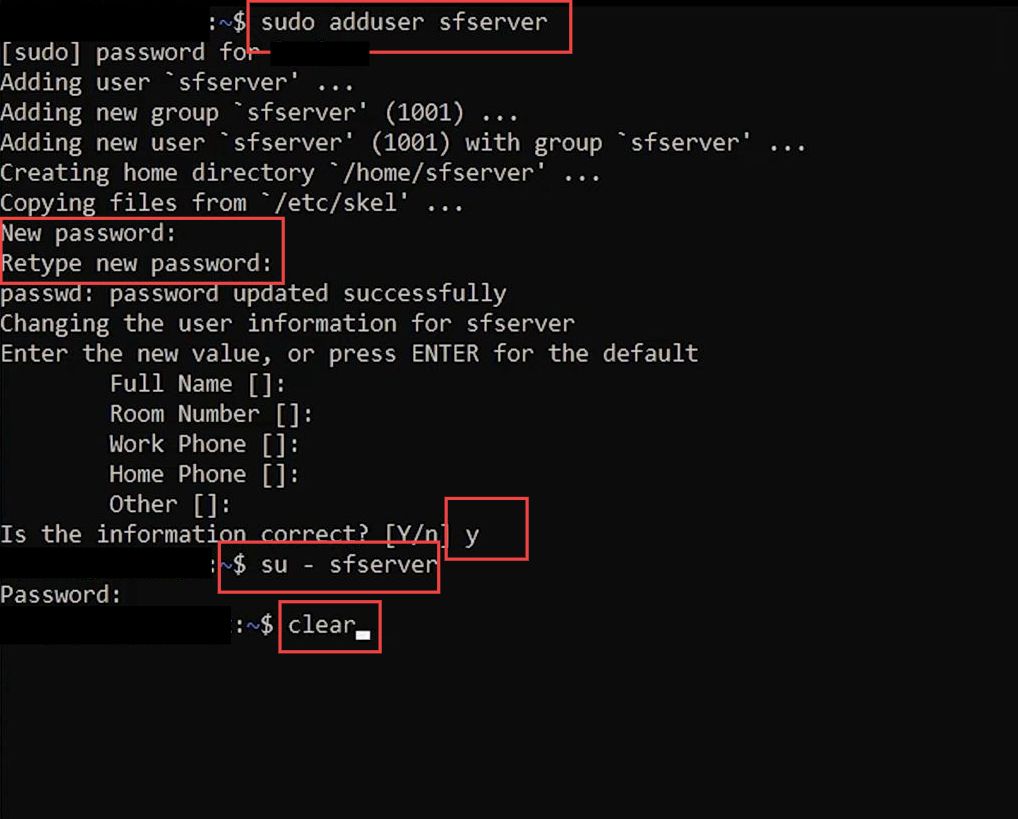
- You will need to install Steam CMD along with all the required Steam CMD dependencies by using the following code.
sudo adduser sfserver
This command is used with administrative privileges to create a new user account named “sfserver” on the system.
- Again retype your password and this code to go to the satisfactory user server.
su - sfserver
This command is used to switch the current user to the user account “sfserver” and open a new shell session with that user’s environment.
- After that, input the following command to clear your screen.
clearIt allows you to clear all the content from the screen with administrative privileges.
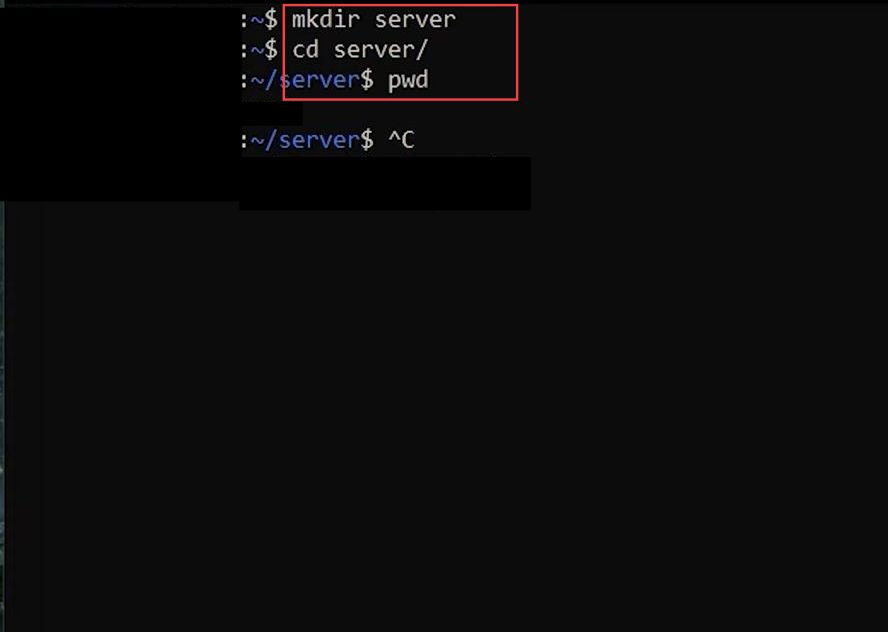
- You have to input the following command to make a new directory.
mkdir server
You can change the current working directory to a directory named “server” within the current location or path.
- After that, use this command to change the directory.
cd server/
It is used to change the current working directory to a directory named “server” within the current location or path.
- Input the following command to put your password in the directory.
pwd
It will put your password into the current working directory, and display the path of the directory you are currently in.
Install Steam CMD
This section will take you through the steps to install Steam CMD to set up Satisfactory Server on Linux.
- You have to remember your home path where you have saved your Linux file.
- Input the following command in the command prompt box to start the steam CMD process.
steamcmd
This command-line tool is used to install, update, and manage games and dedicated servers on the Steam platform.
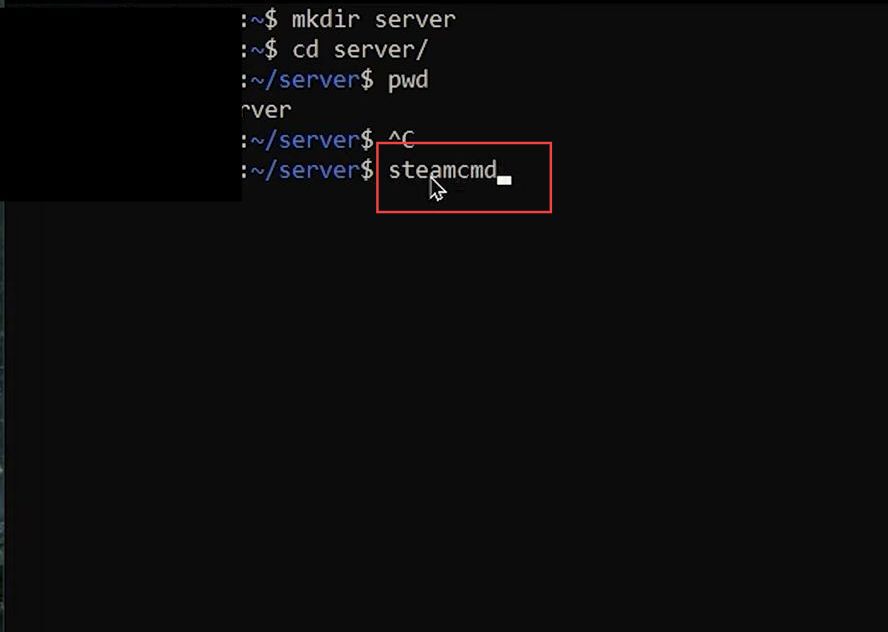
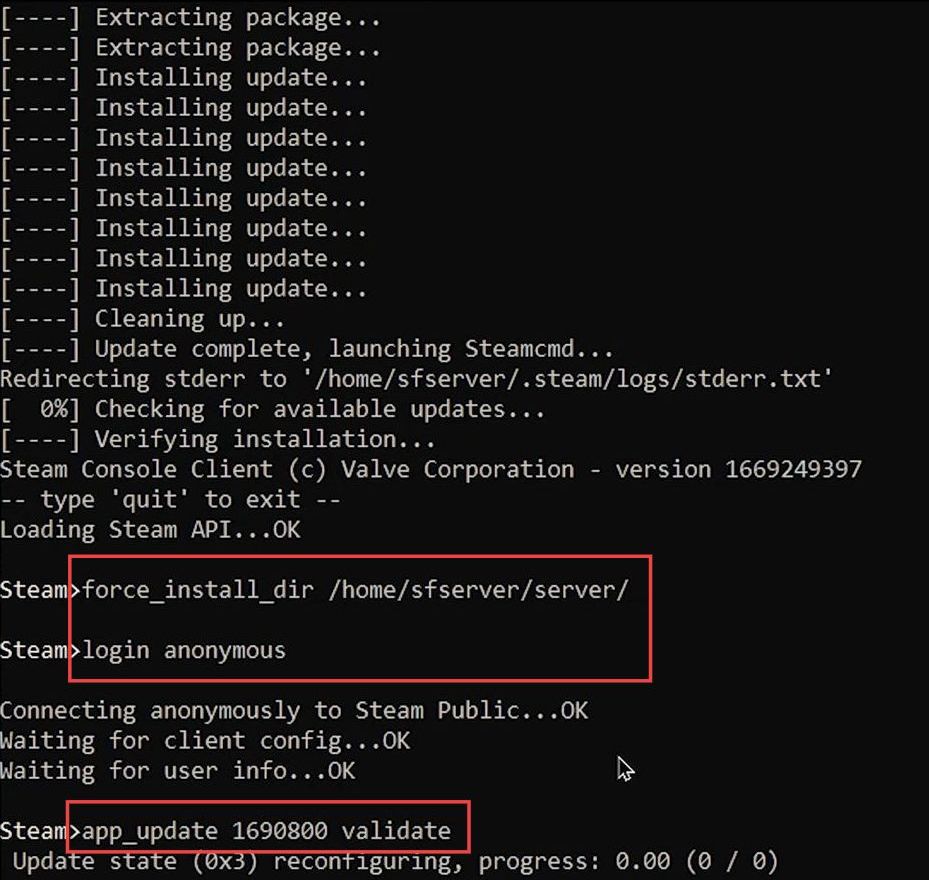
- Once the steam CMD process is done, then input the following command to install the server forcefully.
force_install_dir (your home path)
It will start your server’s directory forcefully.
- You need to write the following command to log into your server anonymously.
login anonymous
It will log you into the server anonymously, without requiring a username or password.
- After that, write this command in the command prompt box.
- You have to wait for the files to process as it depends on the speed of your internet connection.
app_update 169800 validate
In Linux, “app_update 169800 validate” is a command used to update and validate the game or application with the ID number 169800.
- Once the game is downloaded, input the following command to close the command prompt and quit the server.
exit
Checking the status of the firewall
This section describes how to check the status of your firewall to set up Valheim Server on Linux. By following the steps below, you will be able to write specific commands in the command prompt to set up your firewall.
- You will need to input the following command.
ls
It is used to list the files and directories in the current working directory.
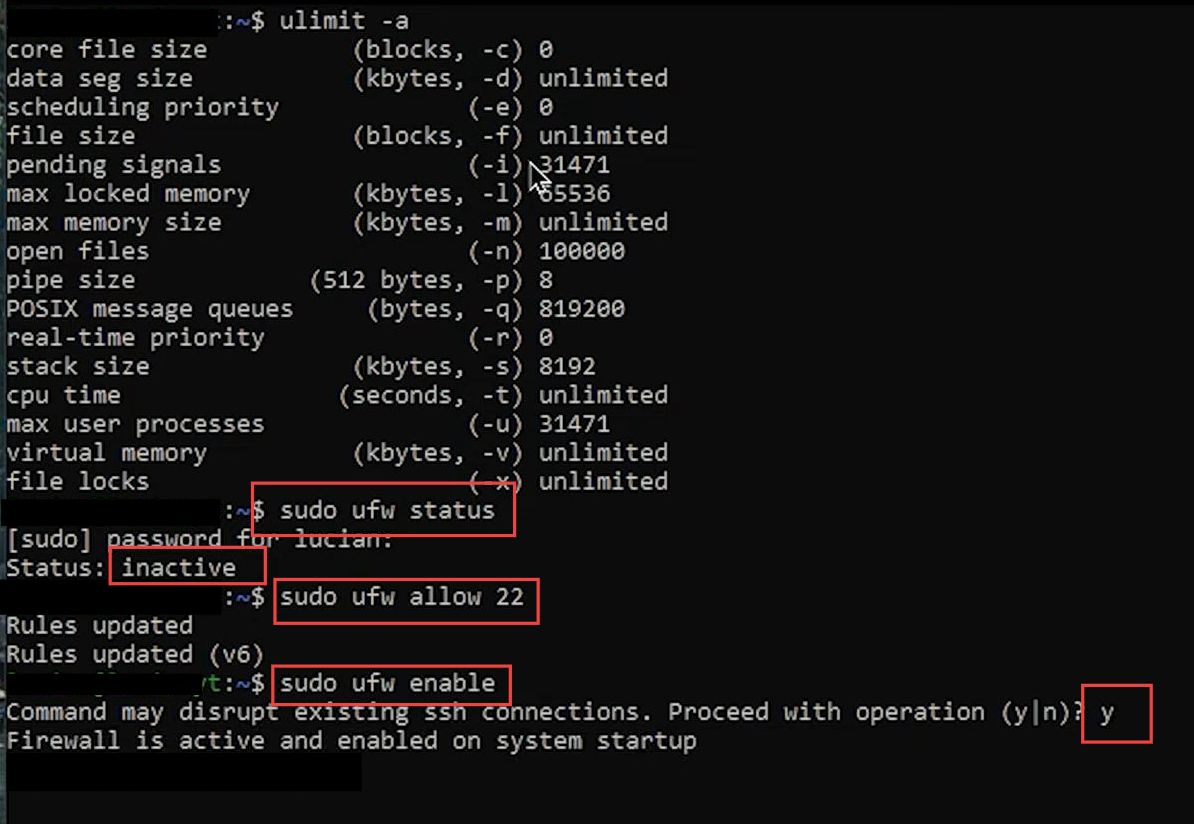
- To make your server more protected and secure, you need to check your firewall in Linux.
- Input the following command to do so and then write your sudo password.
- If your firewall is inactive, activate it by using the following code.
sudo ufw status
This command is used with administrative privileges to check the status of the Uncomplicated Firewall (UFW) and display the current firewall rules and settings.
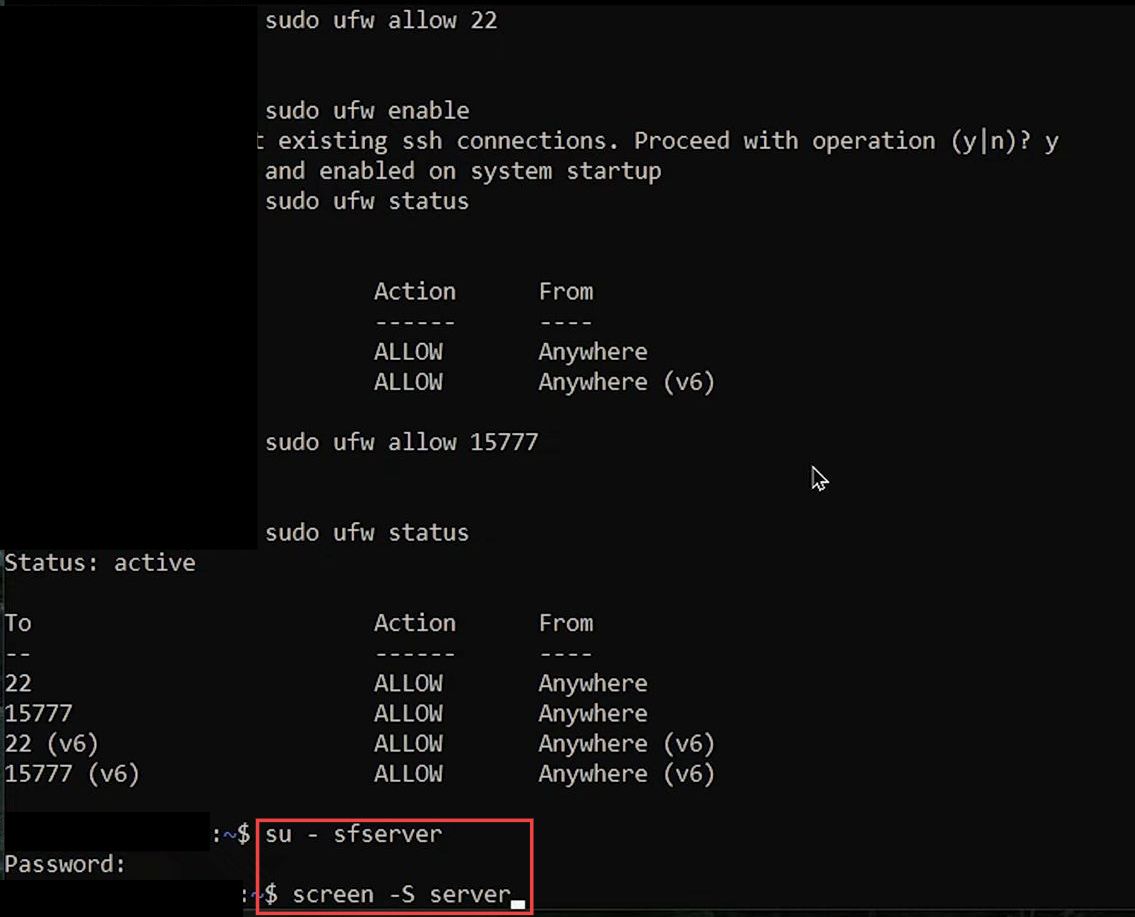
sudo ufw allow 22
It gives you administrative privileges to allow incoming network traffic on port 22, which is the default port for SSH (Secure Shell) connections.
- After that, input your sudo password and this command.
sudo ufw enable
It will allow you to secure the socket shell into the server.
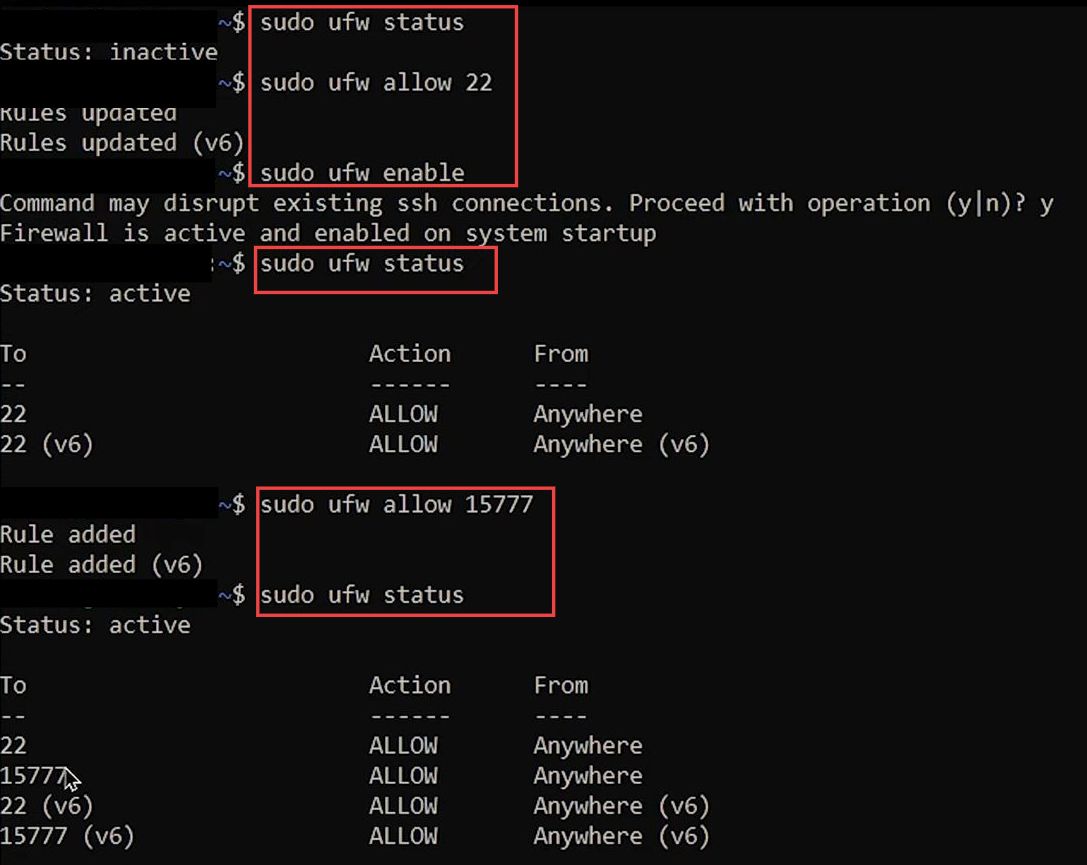
- You need to check your firewall again by writing this code.
sudo ufw status
This command is used with administrative privileges to check the status of the Uncomplicated Firewall (UFW) and display the current firewall rules and settings.
Activating your ports
This section explains how to activate your ports to set up Satisfactory Server on Linux.
- You will need to write the following codes in the recently opened window.
sudo ufw allow 15777
It is used with administrative privileges to allow incoming network traffic on port 15777.
- Now check your firewall again by using this code.
sudo ufw status
This command is used with administrative privileges to check the status of the Uncomplicated Firewall (UFW) and display the current firewall rules and settings.
- Now input the following command inside it to get back to the Valheim user and then input your sudo password.
su - sfserver
It will switch the current user to another user account and open a new shell session within sfserver ‘s environment.
- After that, write this command in the command prompt box to create a new session on the screen with the specified name.
screen -S (You server name)
It allows you to identify and reconnect to the session later.
Running your script files
This section describes how to run the script to set up your Satisfactory Server on Linux.
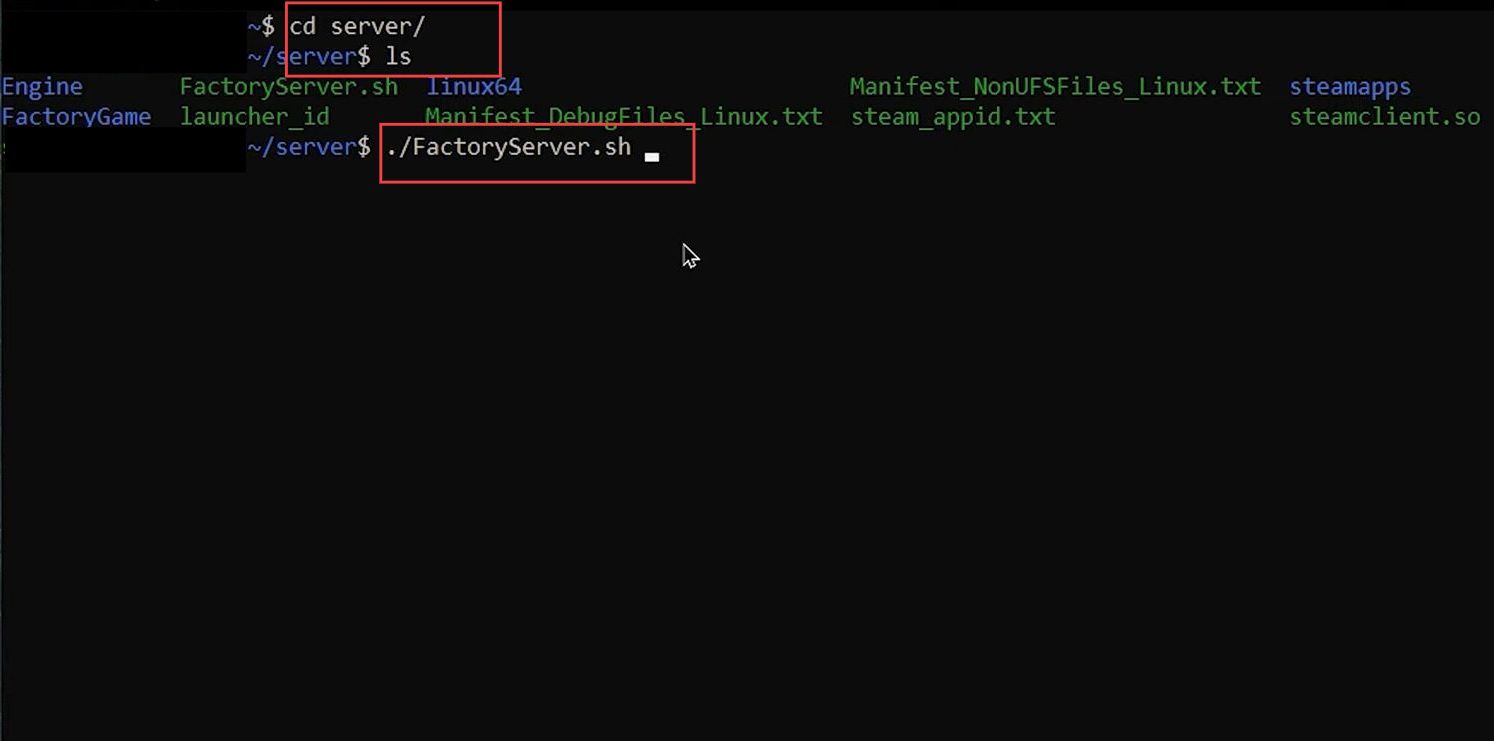
- If you want to see all your server files in the command prompt, then input the following command.
It will open all the server files on the command prompt box. It is used to list the files and directories in the current working directory.
ls
- Now to open up the server, input the following code.
./FactoryServer.sh
This command is used to open the file named “./FactoryServer.sh” in the Nano text editor, allowing for editing or viewing its content.
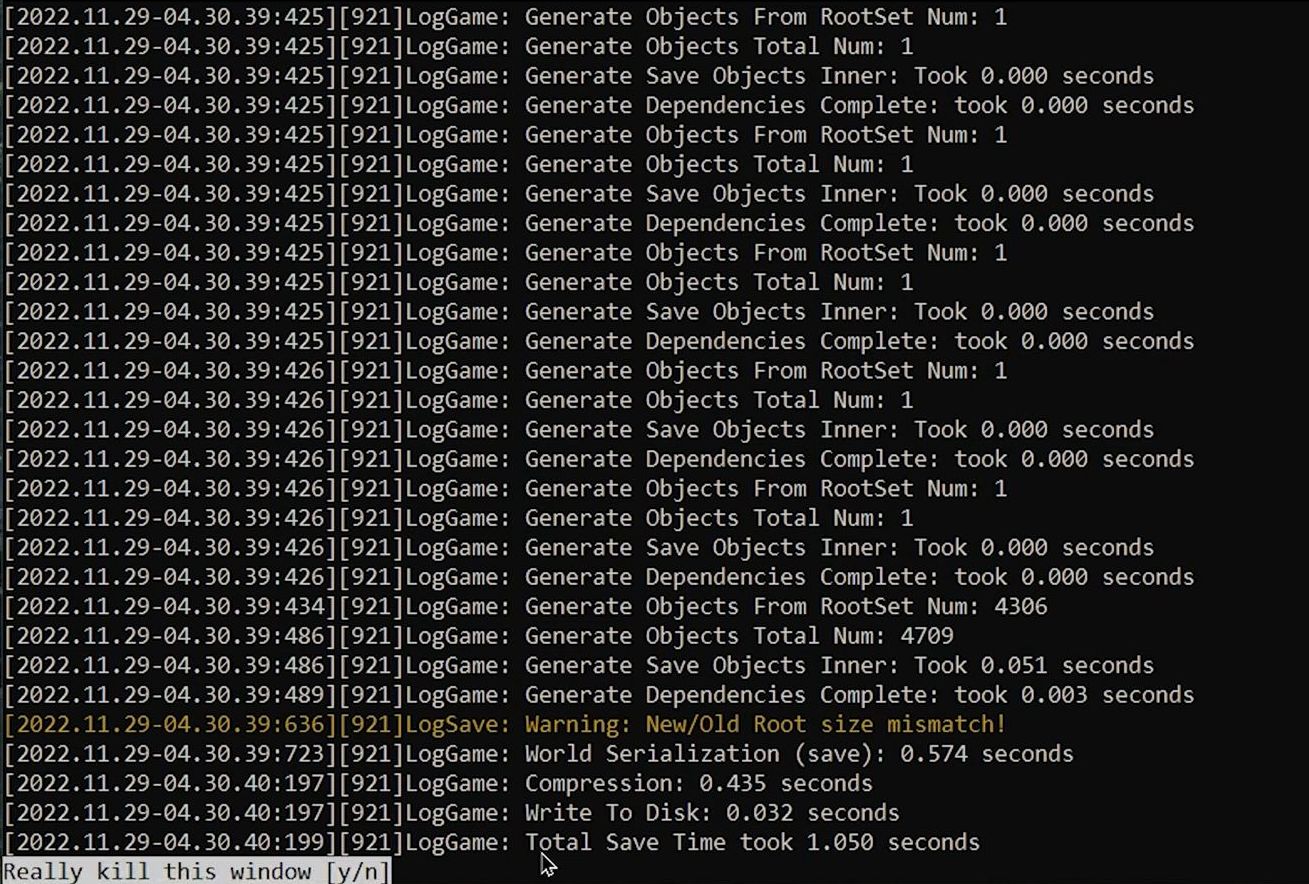
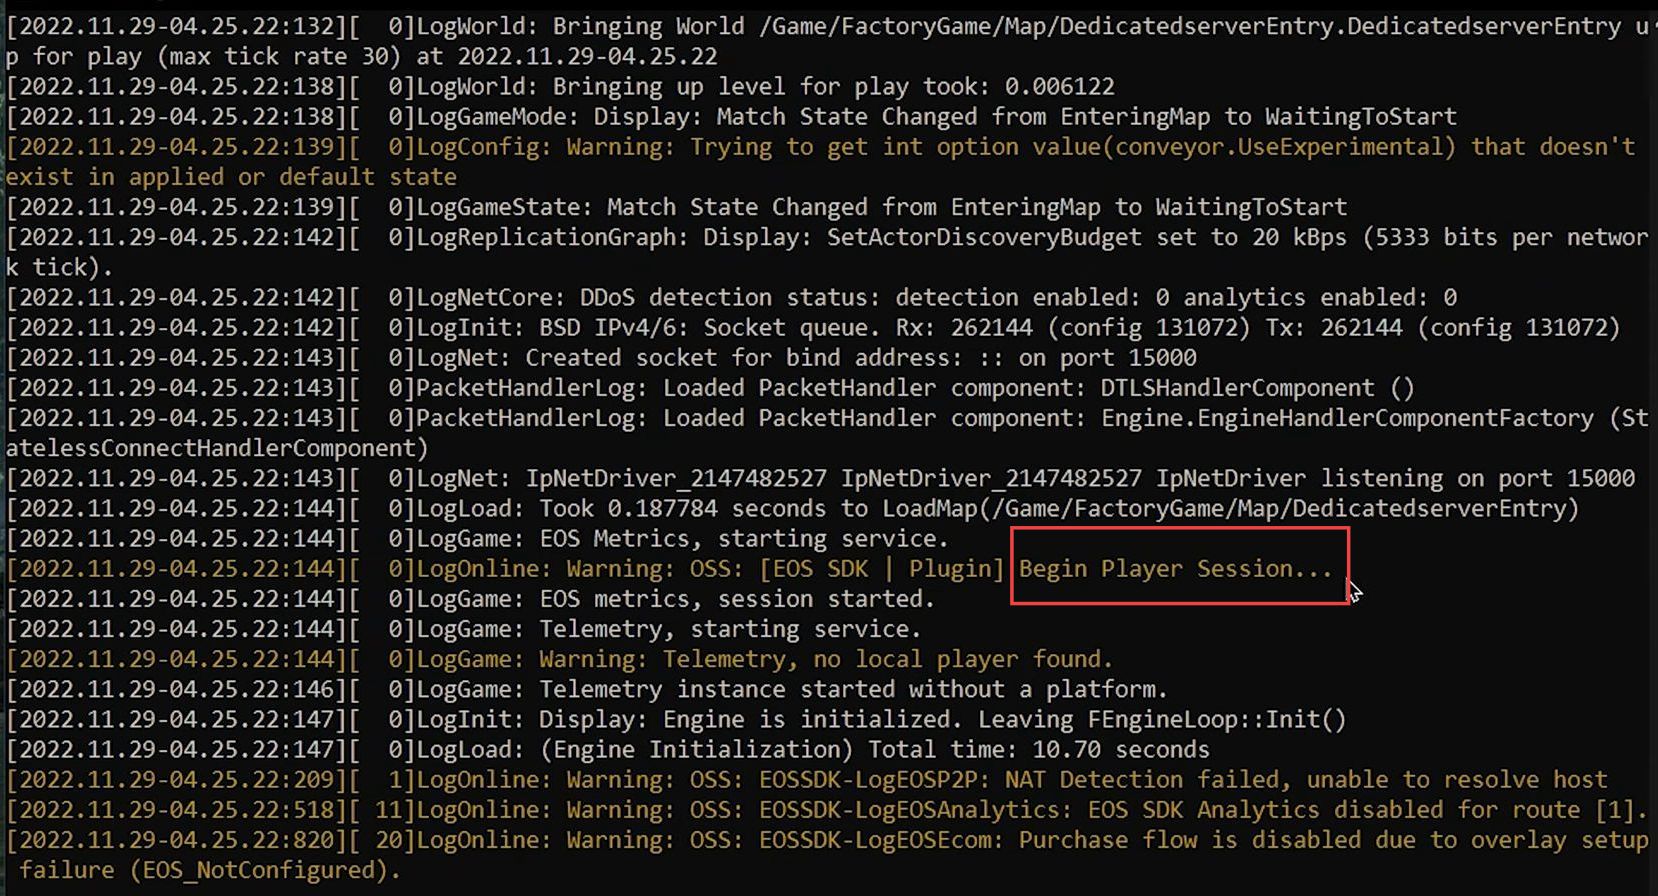
Now you can see the beginning player session has been highlighted in yellow colour once the script is booted.
Adding a public server address to the game
This section explains how to add a public server address to the game to set up Satisfactory Server on Linux. You must set your IP address and admin password in the games server manager tab.
- You will need to launch the Satisfactory Early Access game on your computer.
- Once the game is opened, click the server manager tab from the left side panel and input the IP address of your internet connection in the address box.
- Hit the confirm button from the popup screen if you want to let other people connect to the server who are outside of your network besides the local people
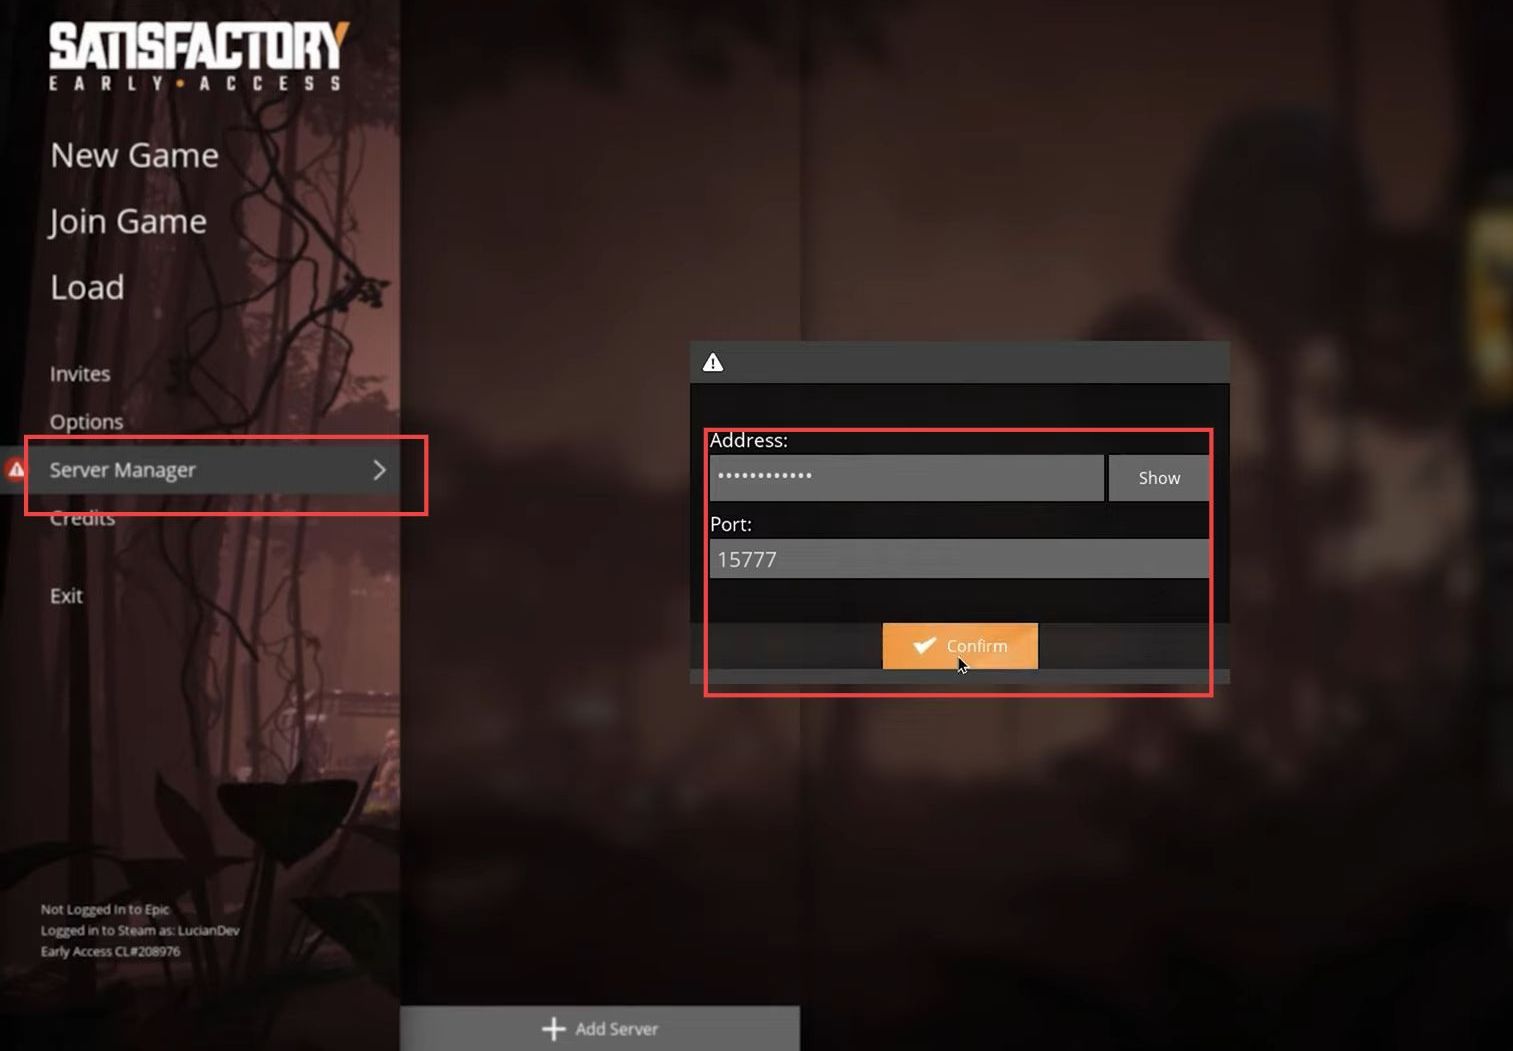
- Set a specific name to your server and click the confirm button from the menu.
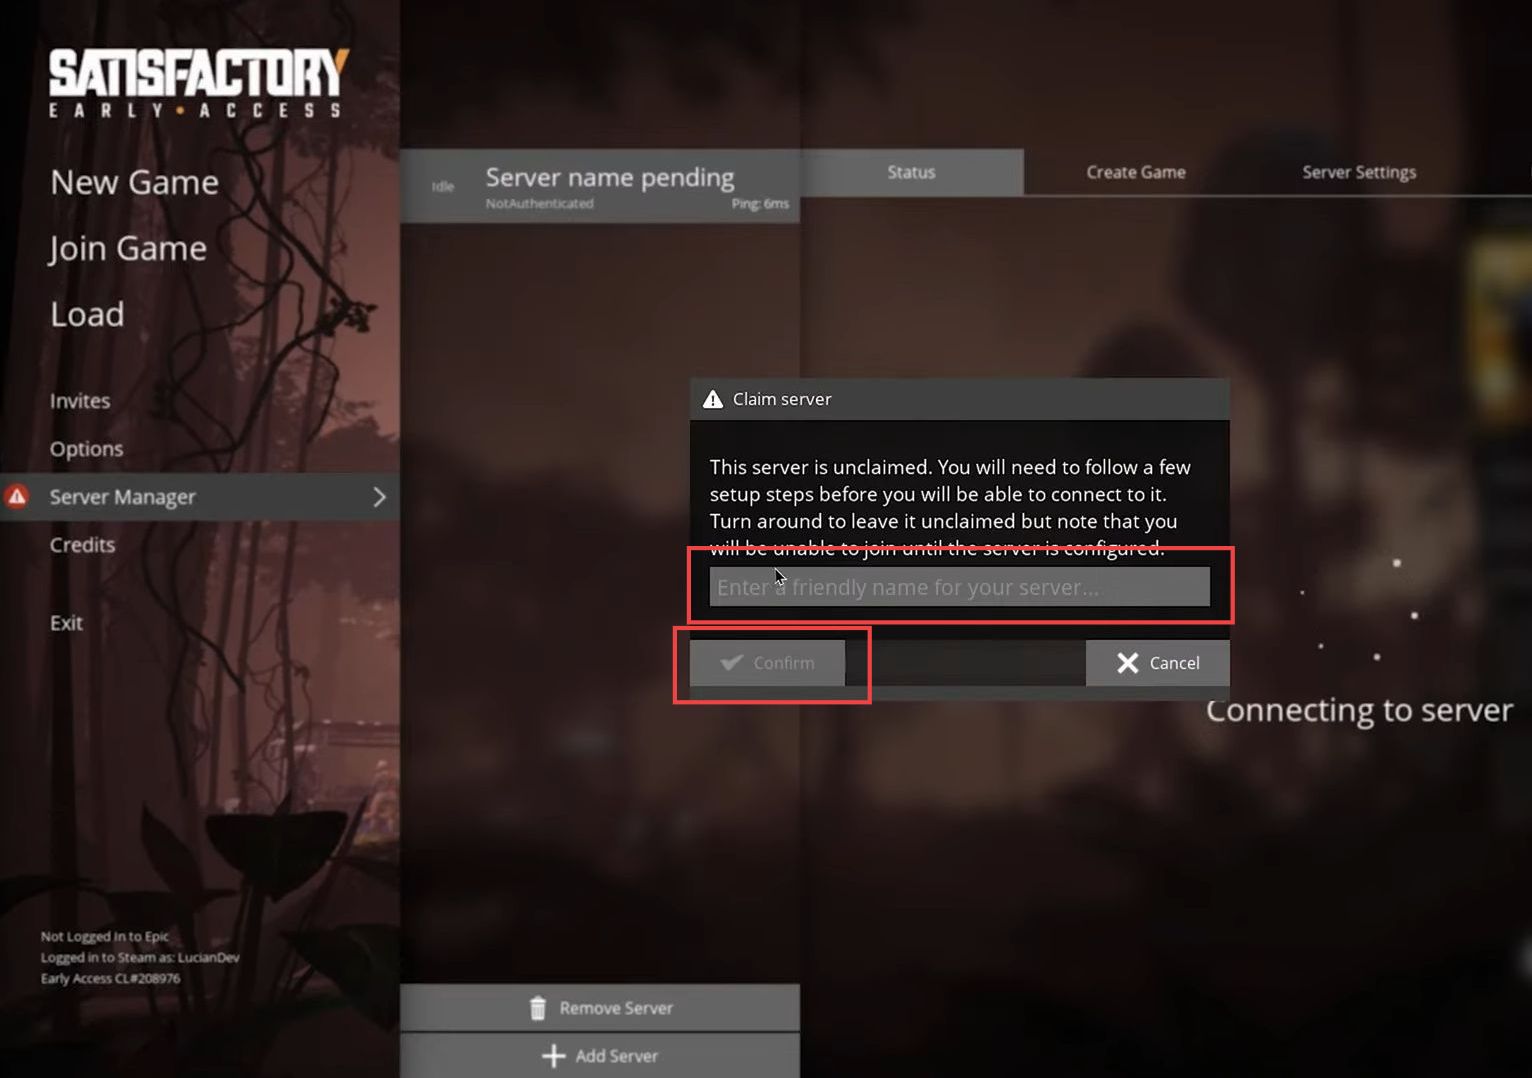
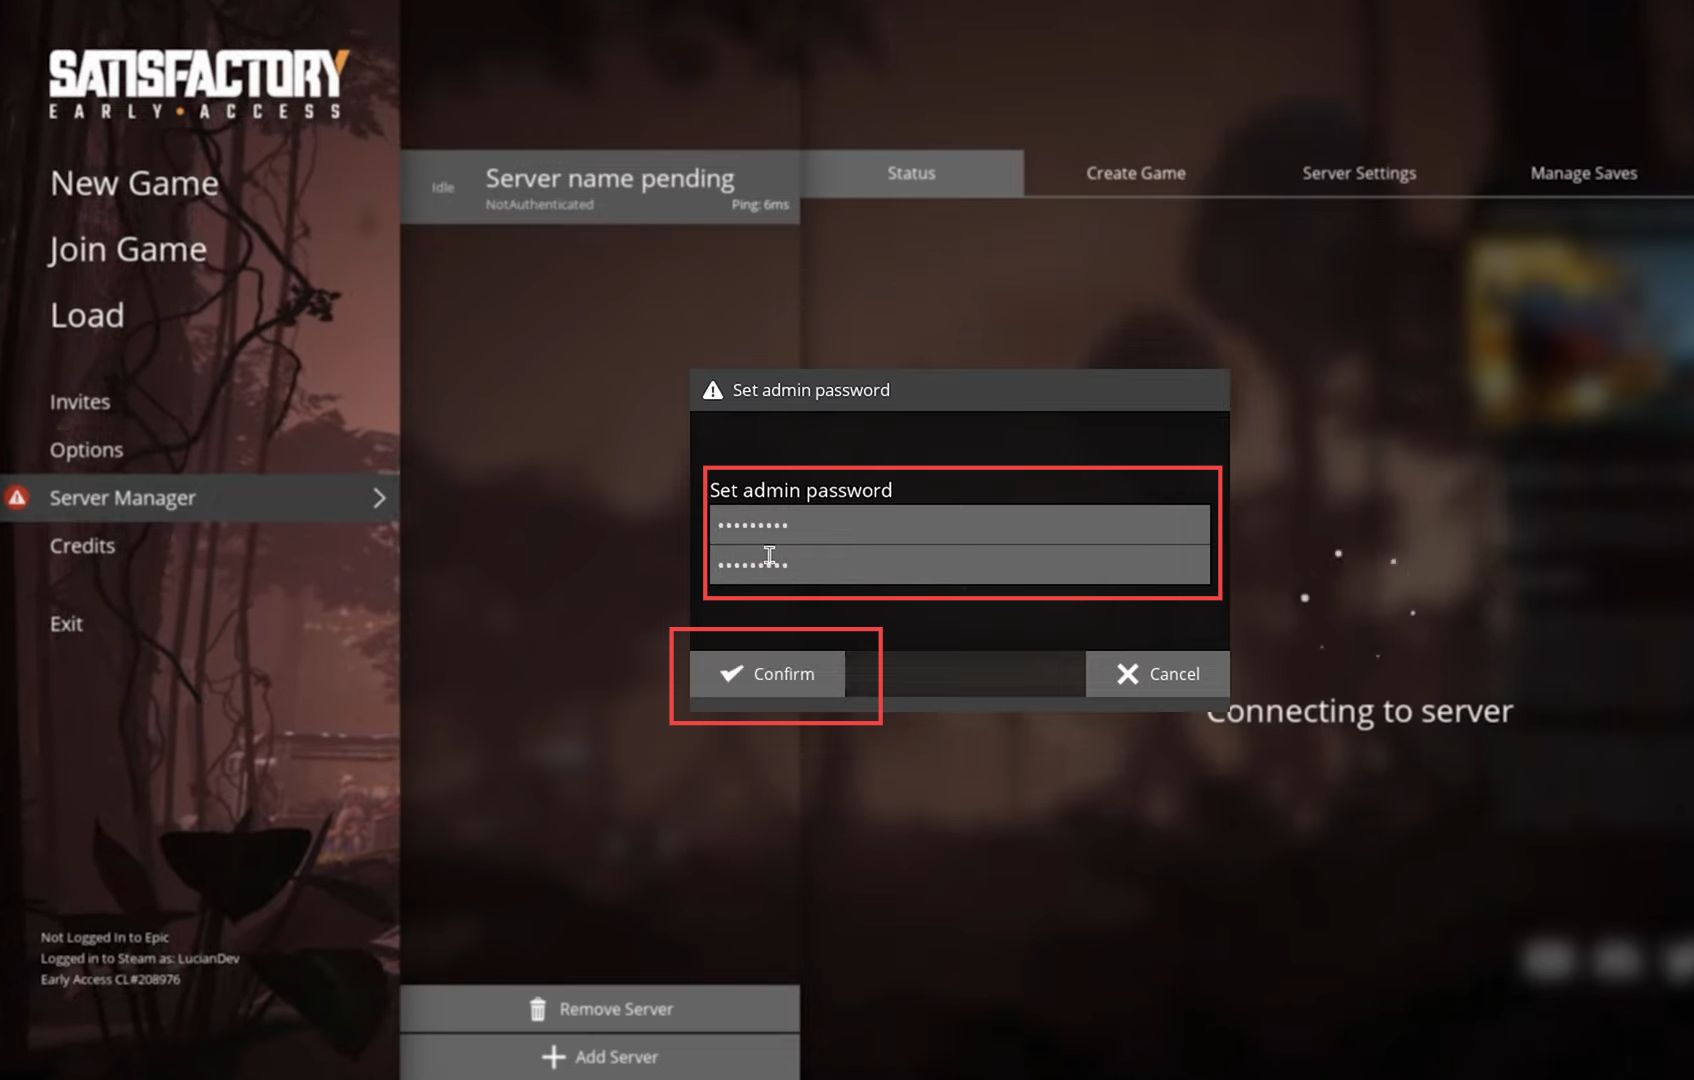
- After that, set a suitable admin password, repeat the password again, and press the confirm button.
This is not a network server password, it is just for the administration privileges.
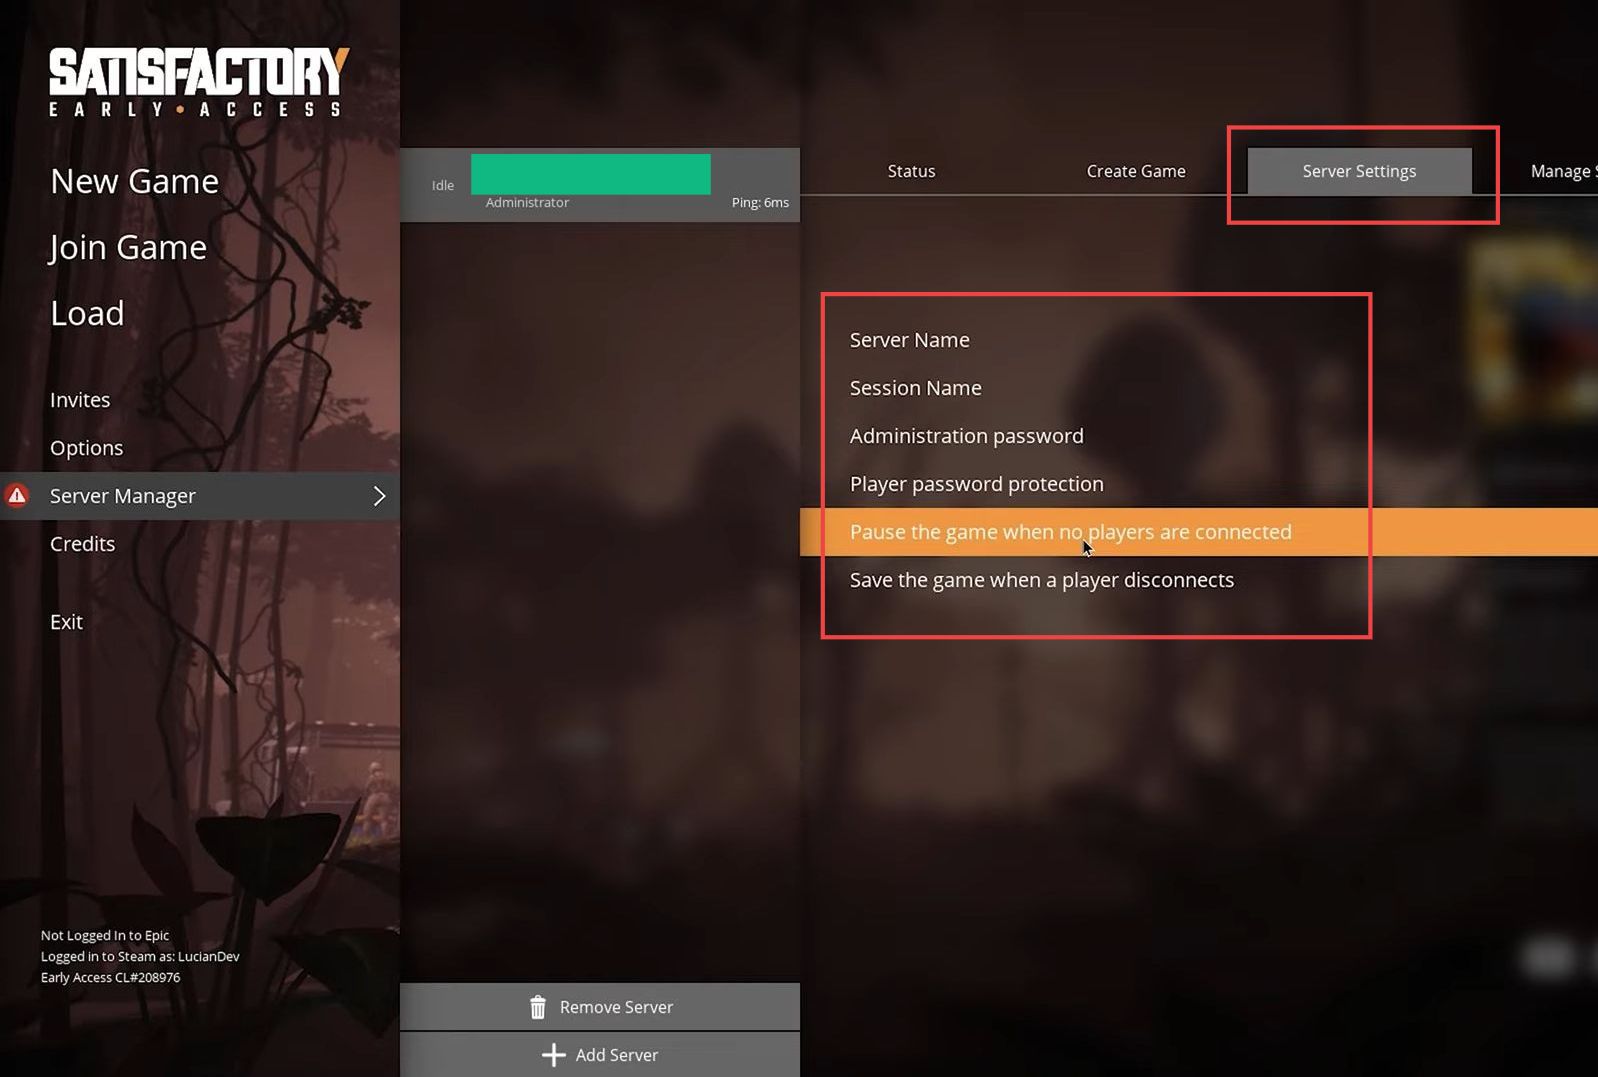
- Now click the server settings tab from the quick access toolbar and you can see that you can change the server name and session name.
- Moreover, you can also change the admin password, player password protection, pause the game when no players are connected and save the game when a player disconnects.
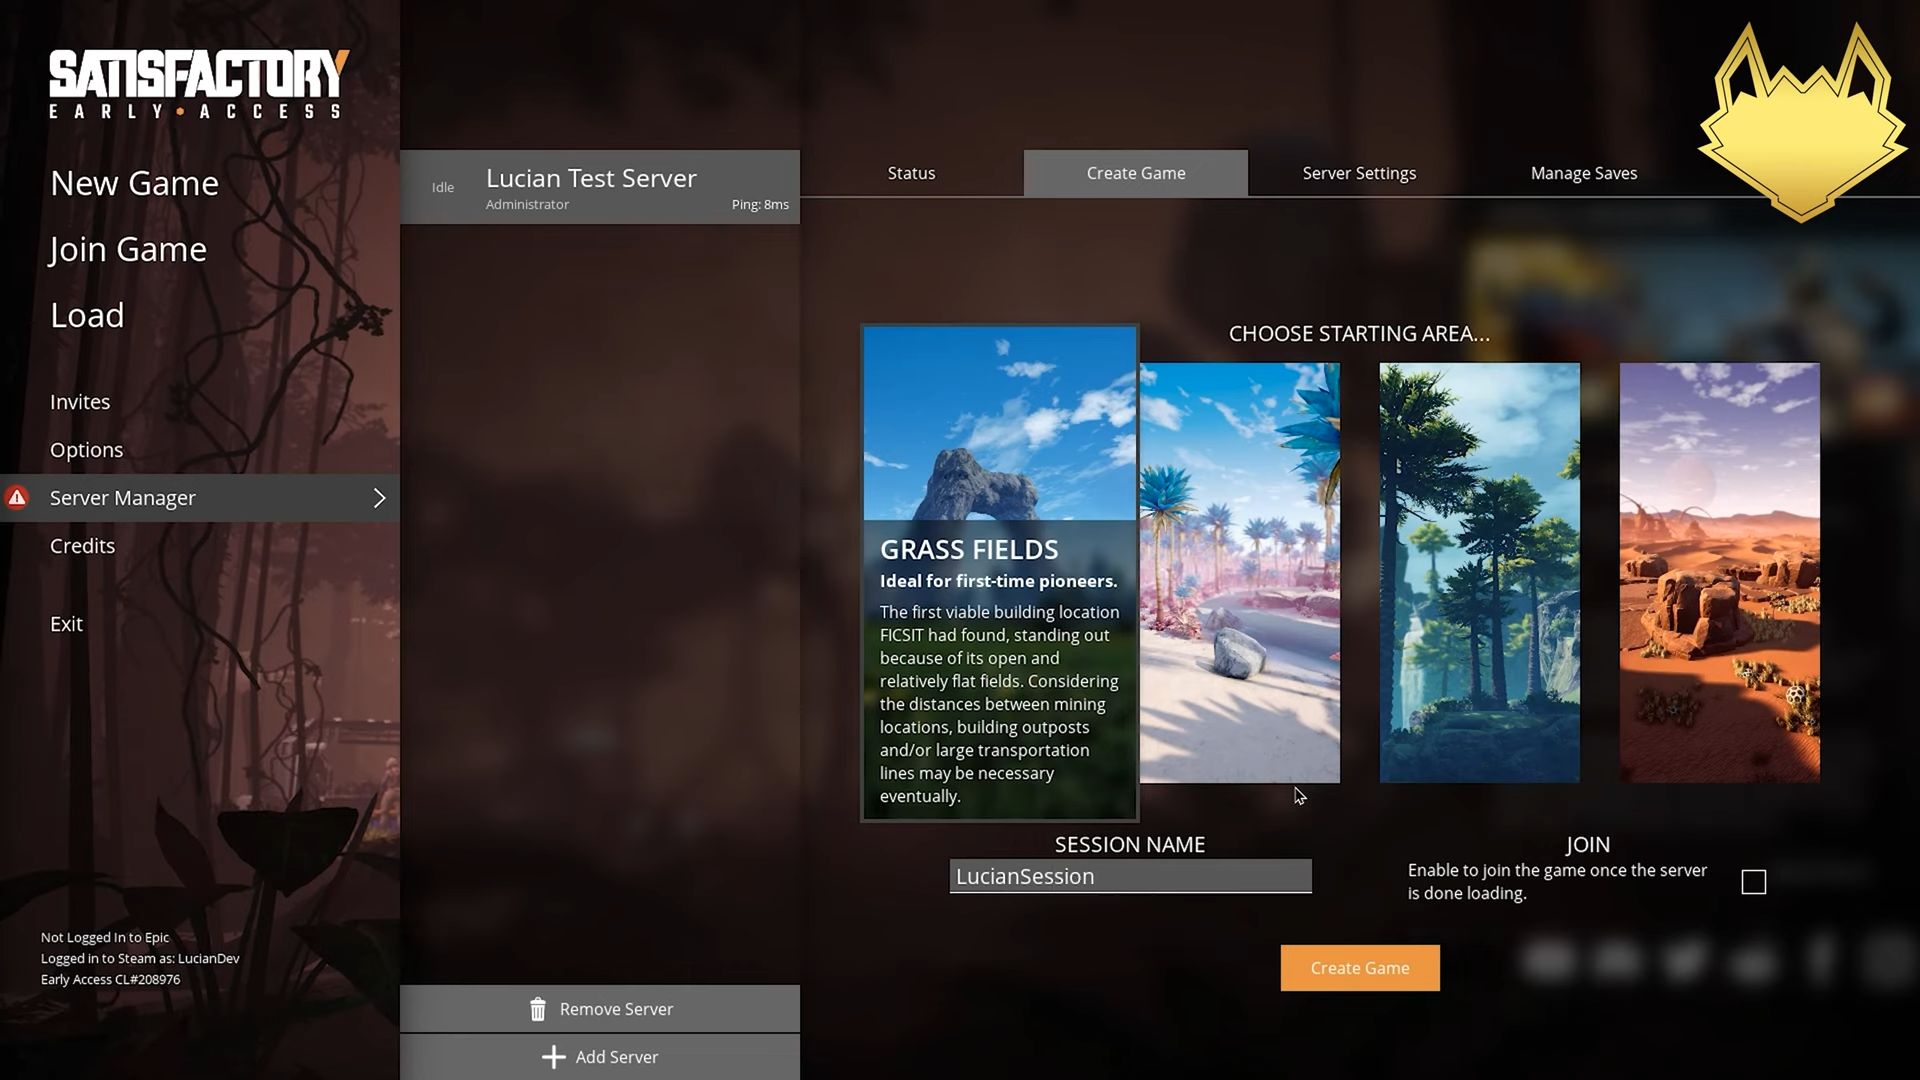
- Click the Create Game tab from the quick access toolbar and write a specific session name.
- After that, click the create game button from the menu.
Upon reaching the window, you can get a network error popup, but it mostly happened when you connect to a server for the first time.
- Click the confirm button from the popup window.
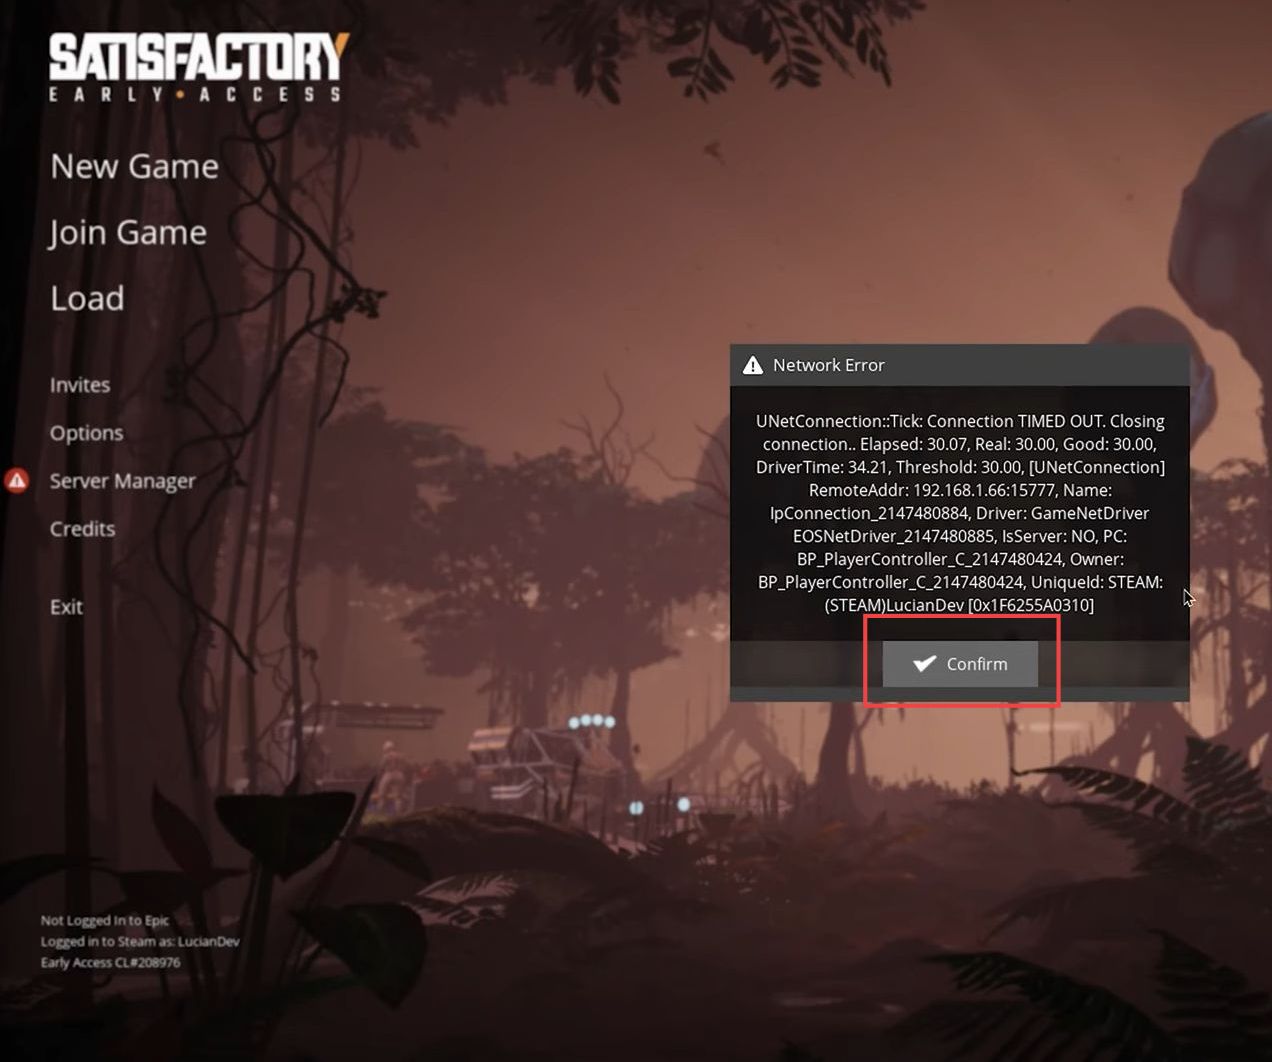
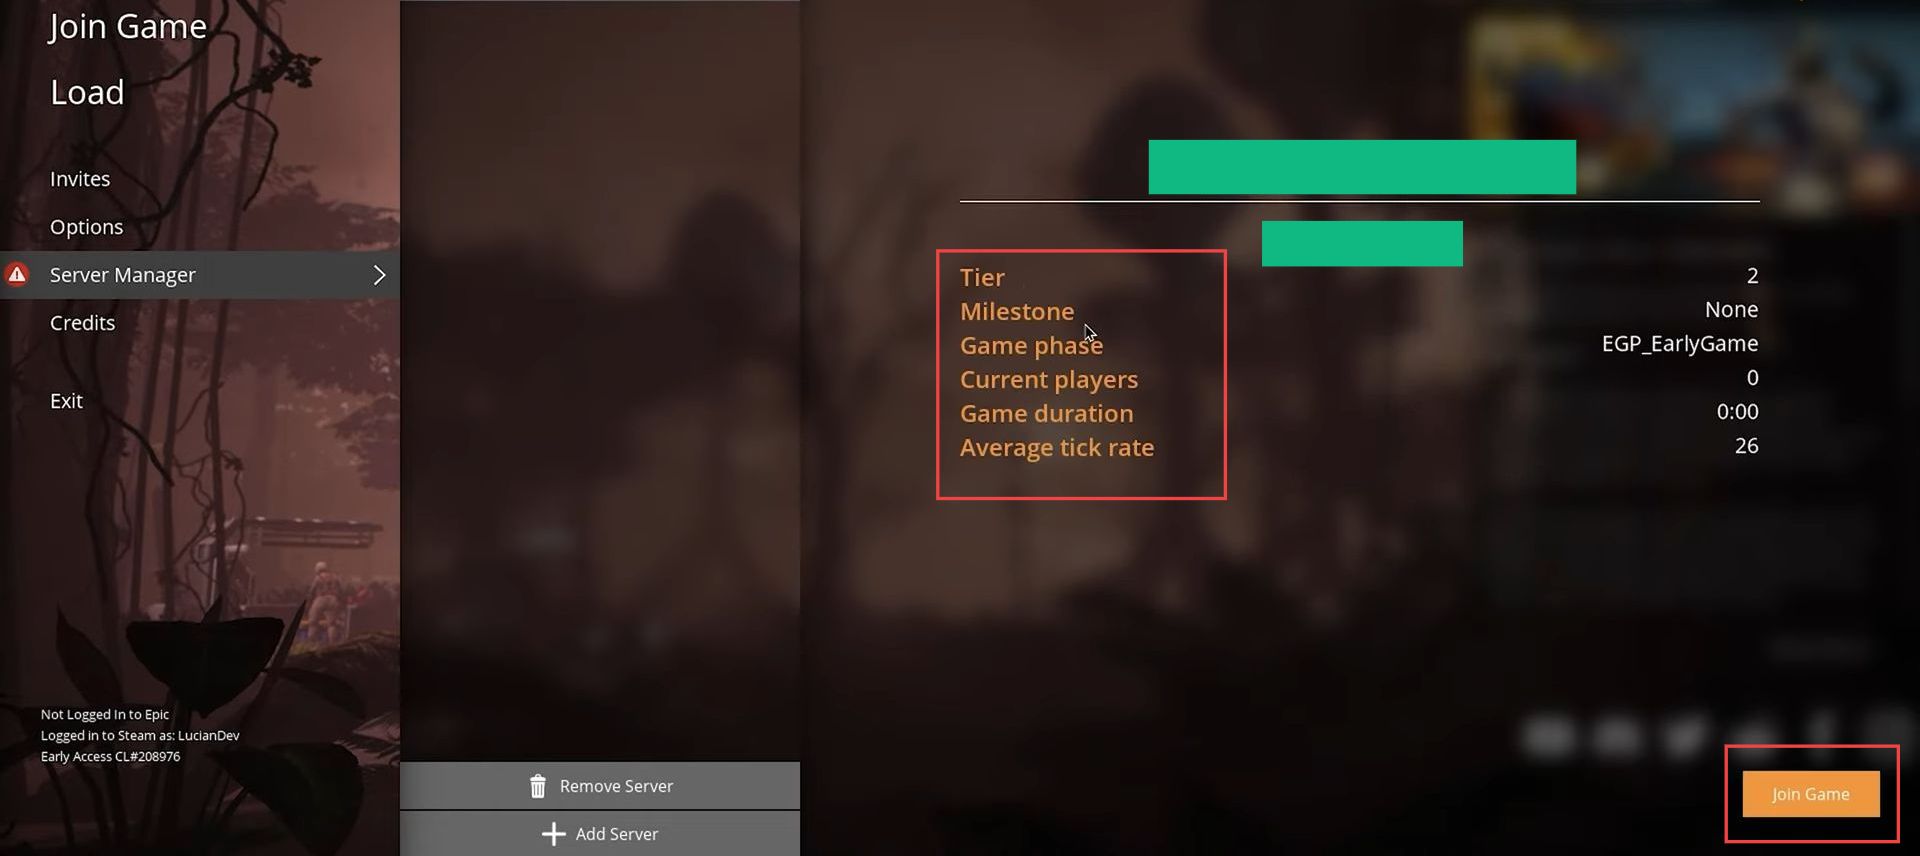
- Once the server window is opened, click the join game button from the menu.
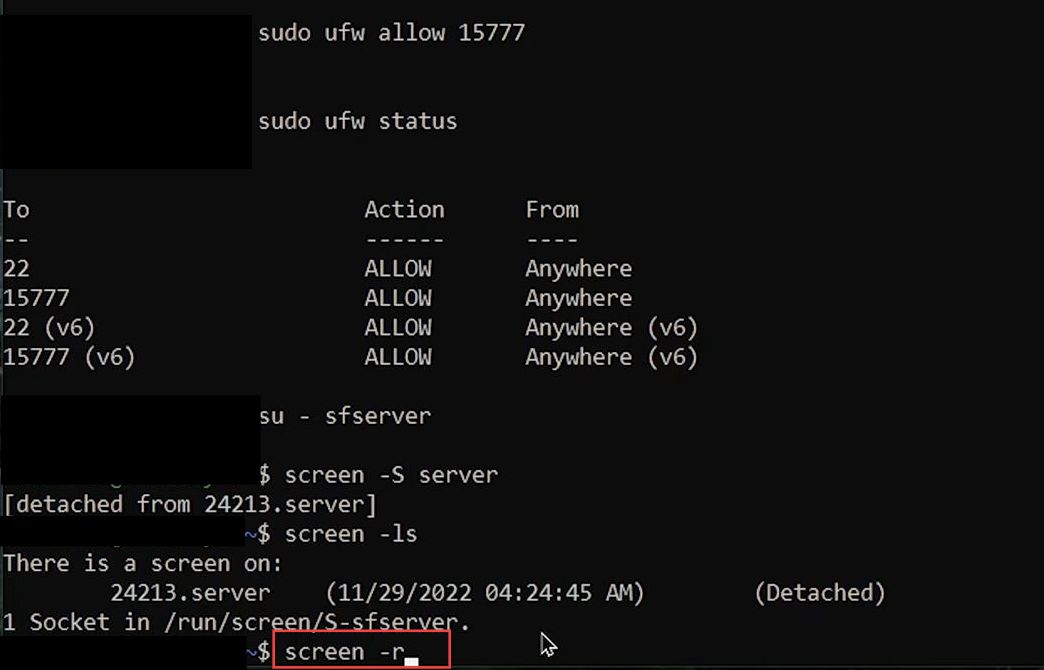
- Now you have to write this code to see all the running screens.
screen -r
It will allow you to kill or completely quit the screen.
- Once you are on the next window, press the Ctrl+ A buttons from your keyboard then hit the K button to kill the screen.
- Input the following code for confirmation.
Y
This command represents yes to allow the confirmation to run the script.
