Adventure Escape Hidden Ruins is a challenging game where you must explore the secrets of a lost civilization and solve different puzzles. The game’s primary objective is to search for clues to find the ancient treasure. Escape the dangerous trap and unravel the story behind this mysterious place.
Adventure Escape Hidden Ruins has eight chapters, this guide will walk you through all these chapters while providing you with solutions to all the challenging puzzles. You will find all the useful hints you need to solve the mystery.
Chapter 1 – Entering the Ruins
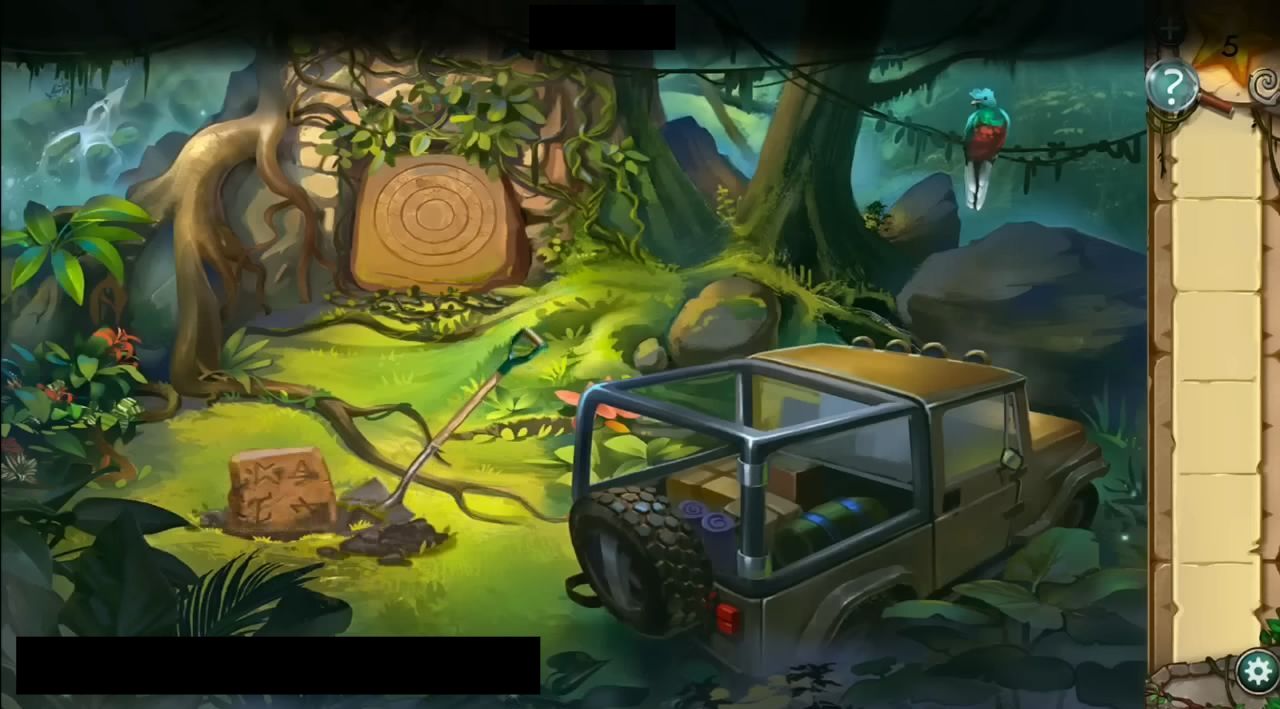
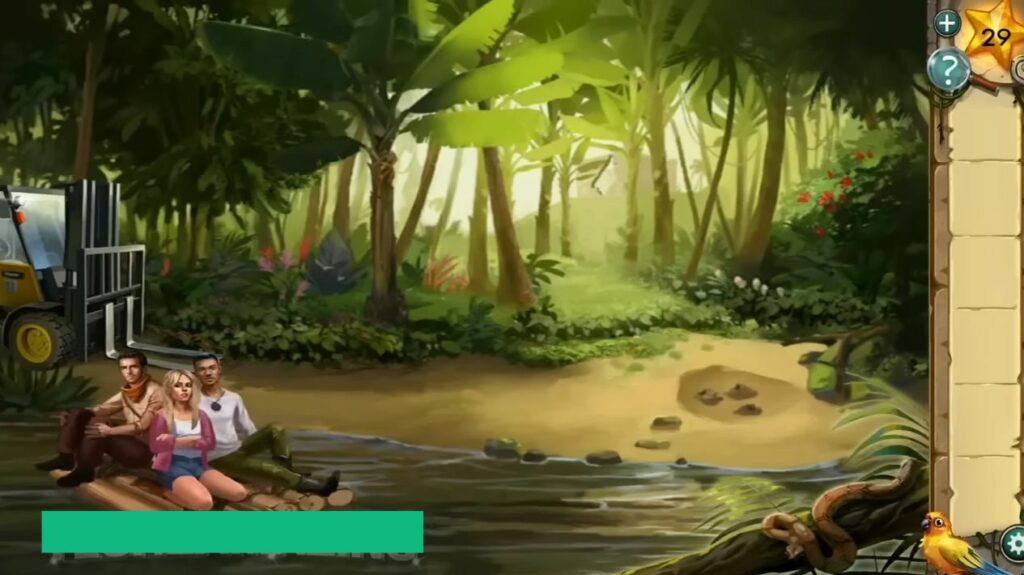
In the first chapter, you and your team will be located in a jungle. You must go through the tutorial, collect the machete from the jeep, and cut the vines using it. Grab the star that can be used as a hint.
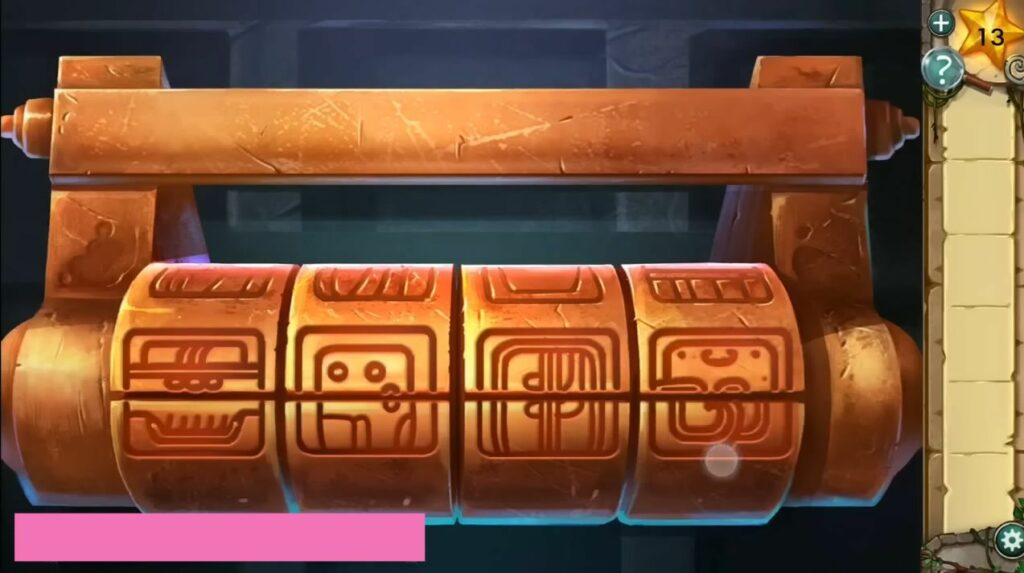
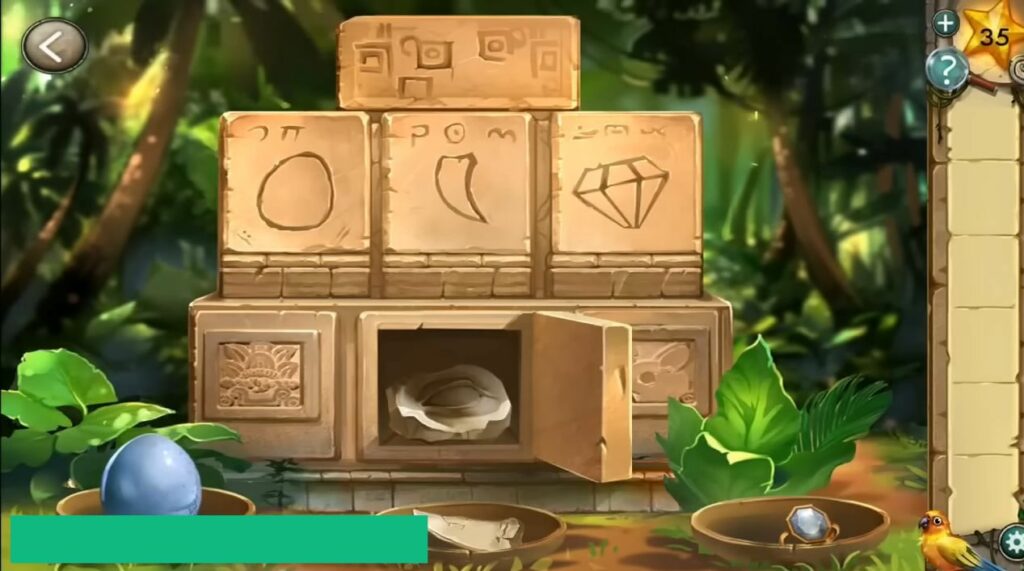
You will also find a shovel next to the jeep, pick it up, and use it on the tablet on the ground. The tablet will showcase four different symbols. Take a brief look at the entrance door and the wheel puzzle to solve it.
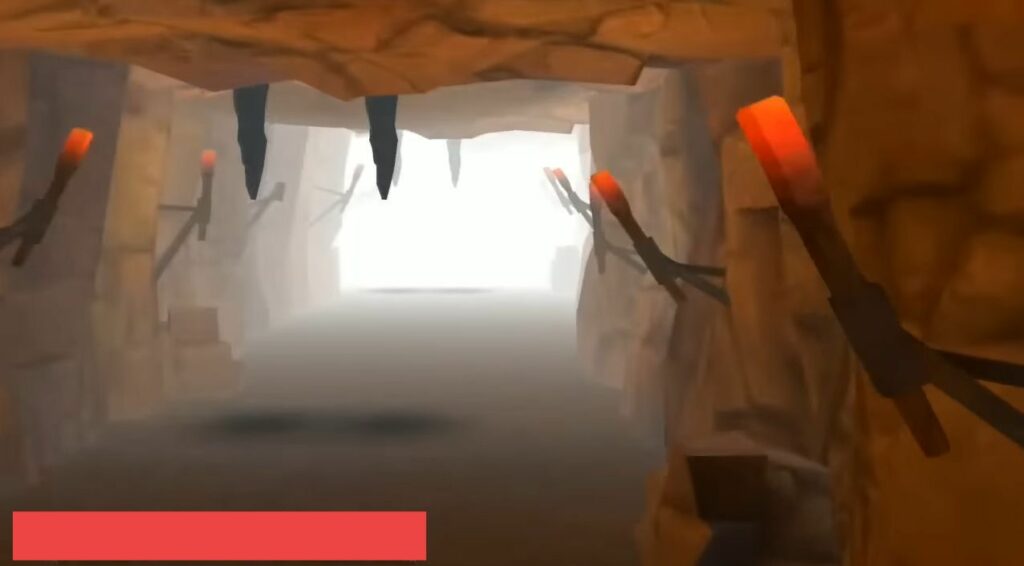
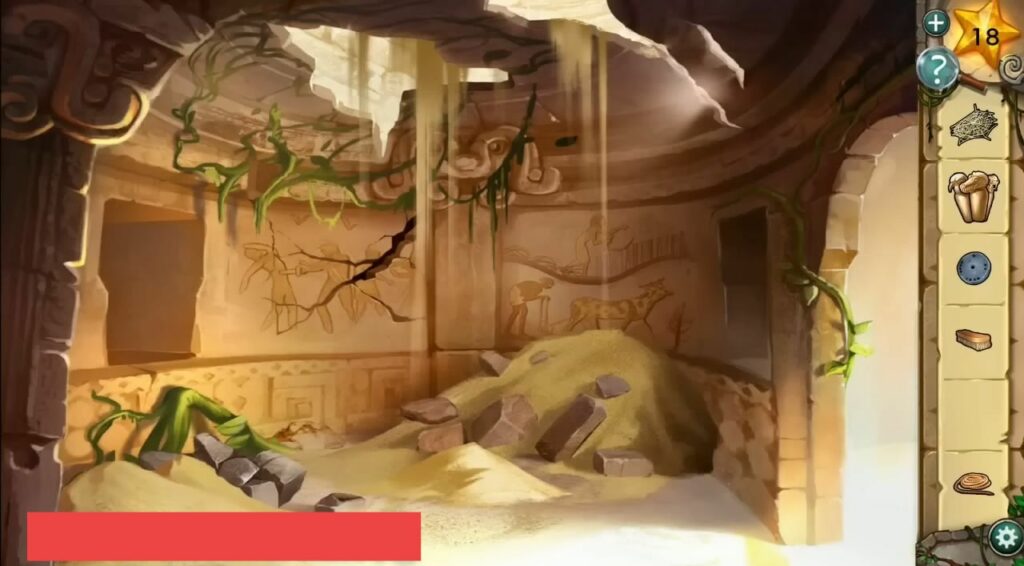
Enter the cave, grab the torch from the right side, and light it up using the fire on the left. After that, use this lit torch to light the oil lamps.
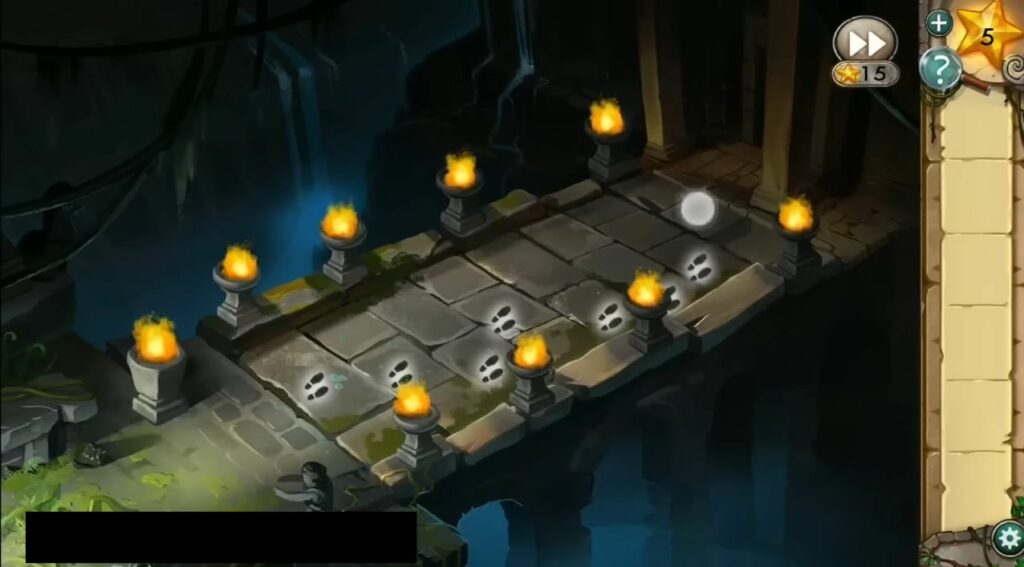
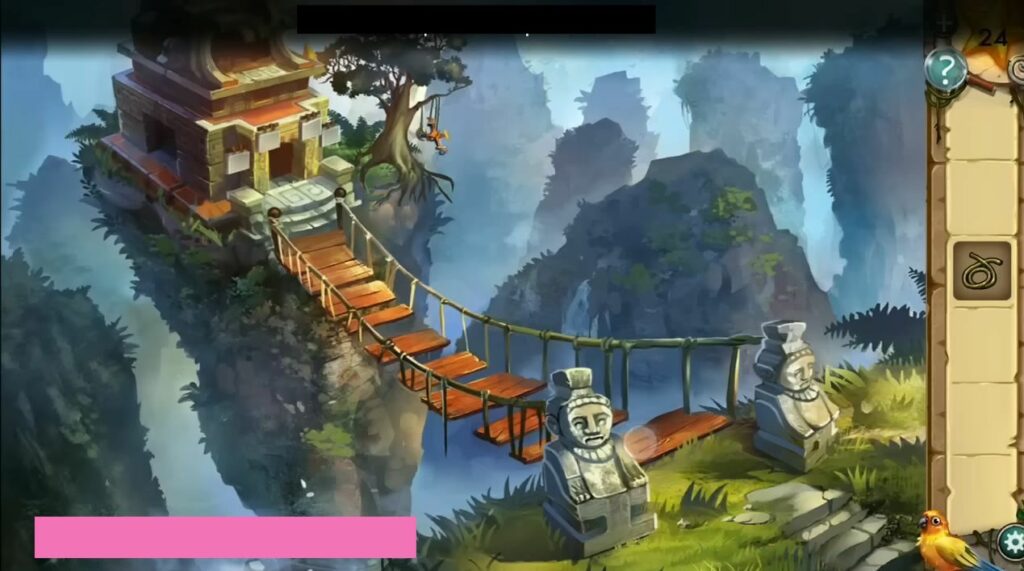
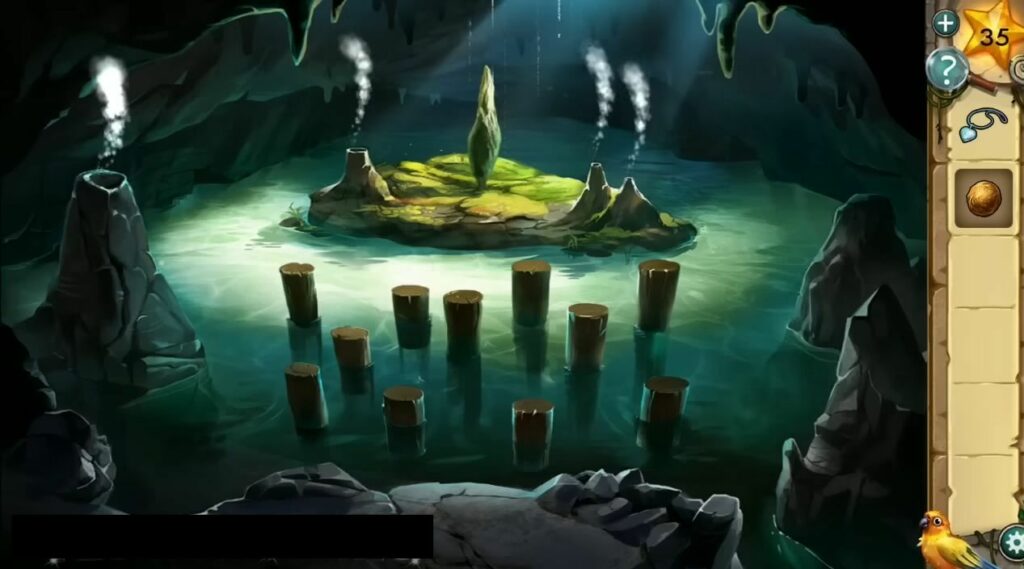
Now the bridge you are standing on is a puzzle. You must step on each stone in the right order from the left to the right-hand side to cross the bridge.
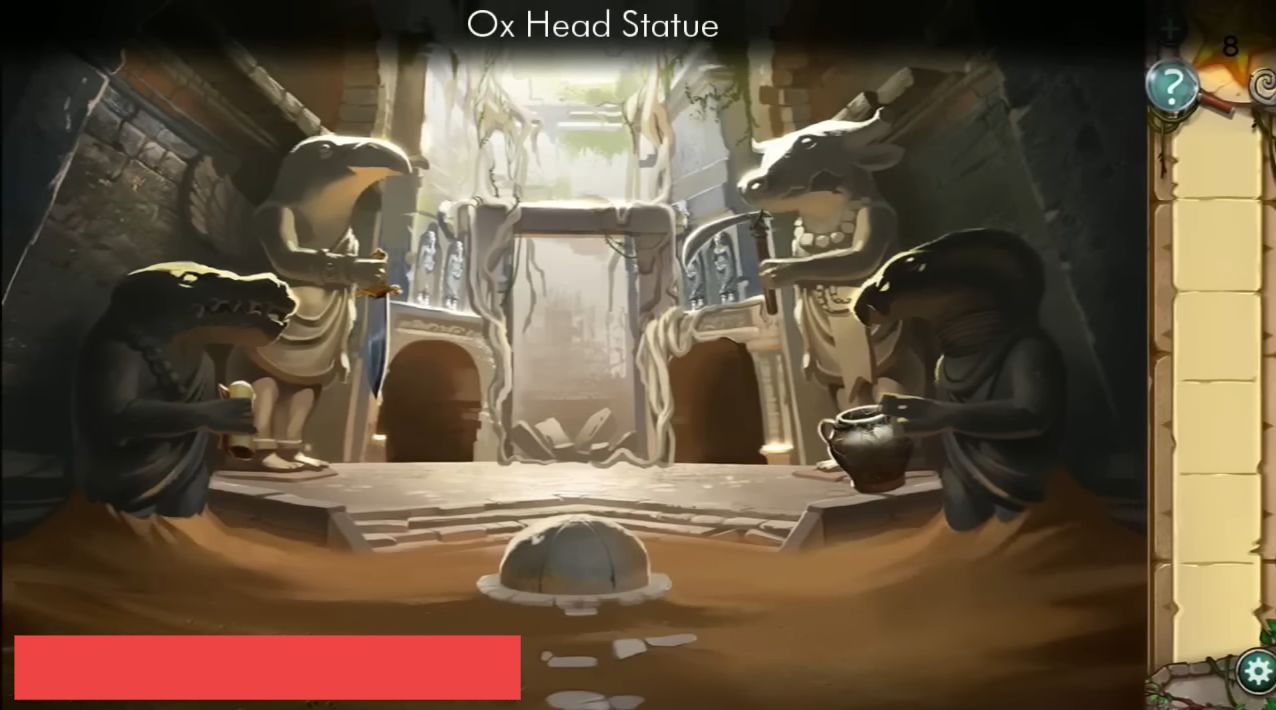
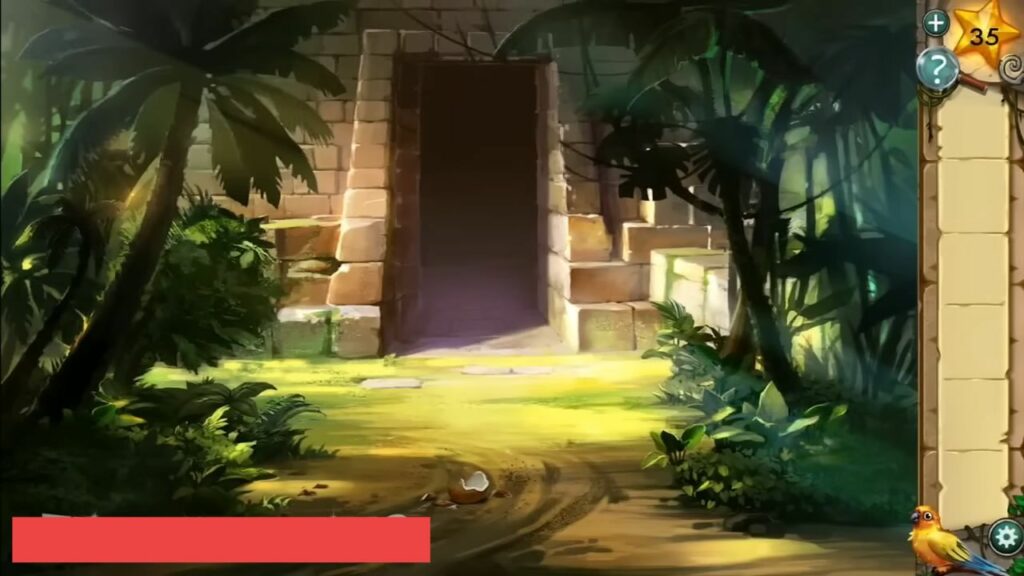
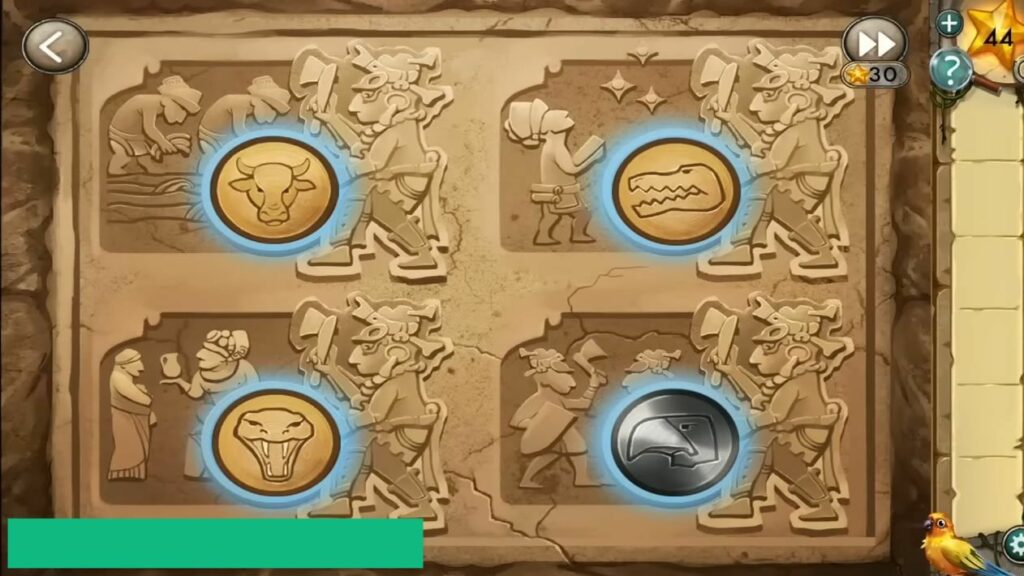
After crossing the bridge, you will get to the temple entrance with animal-headed statues and two doorways. Enter the left doorway, pick the ceremonial dagger from the wall, and then cut the vines using it.
Move two sections of the rocks from the ground to collect two parts of a scythe. Combine them using the vines to get a full scythe.
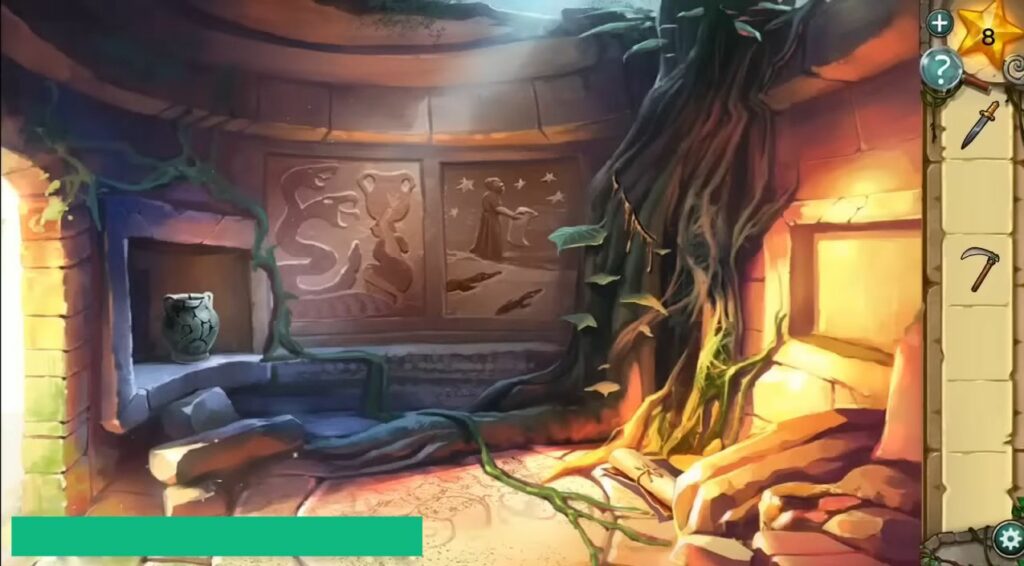
Notice the images on the wall, as they can be used as a clue. Now go back, enter the door on the right, and then grab the star from the ground.
Collect one pottery shard below the rocks on the right, and one from the shelf on the right. Also, collect one from the stones on the left side, and a large leaf from the tree roots. You need to cut the roots using the dagger to obtain a sticky sap and then pick a scroll from the ground below the tree roots.
Add three shards to the broken ancient pot on the left shelf and then move the pieces to reassemble the pot. You can use the sap to glue it and then pick it up from the shelf.

Take note of the drawings on the wall and head back to the entrance area. You have to give an item to each of the statues to progress further. The central small dome will open up and you can collect the Key of Ages to complete this chapter.
Chapter 2 – The Lower Temple
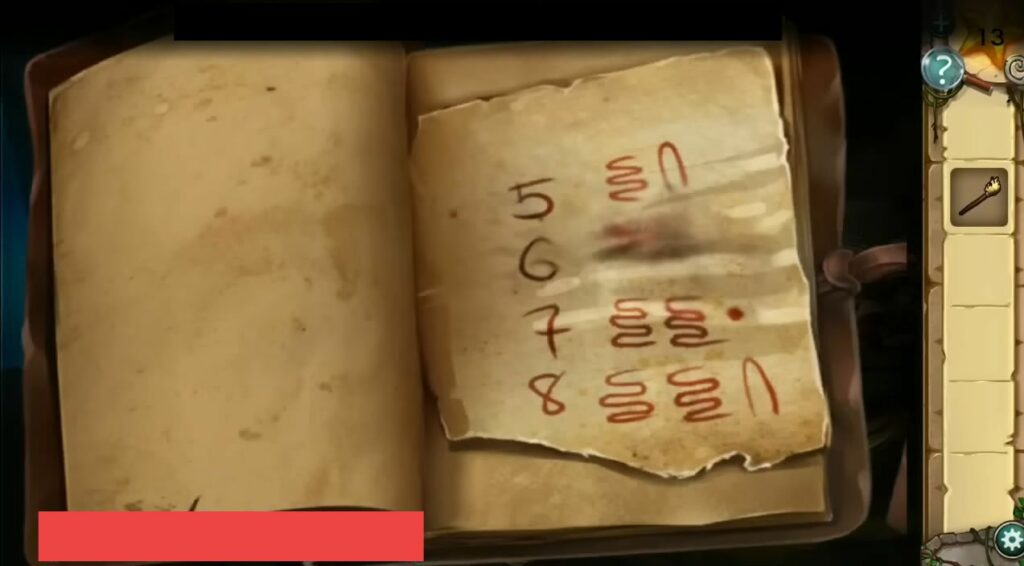
You will play as Tawa in the second chapter. Make your way to the back of the cave area and collect an unlit torch, a pile of driftwood from the ground, and some mushrooms from the rocks. Open the satchel held by the corpse and collect the flint rocks. Open up the book, then note the numbers and symbols in the book.
Grab the star from the satchel that can be used as a hint. View the symbols by clicking on six pillars in the water and then feed the mouse sleeping with mushrooms to make him leave. Use the flint rocks on the dry moss to light it, then make a fire to light the torch.
Now there will be three different paths to exit the cave, you have to figure out the correct path to exit it.
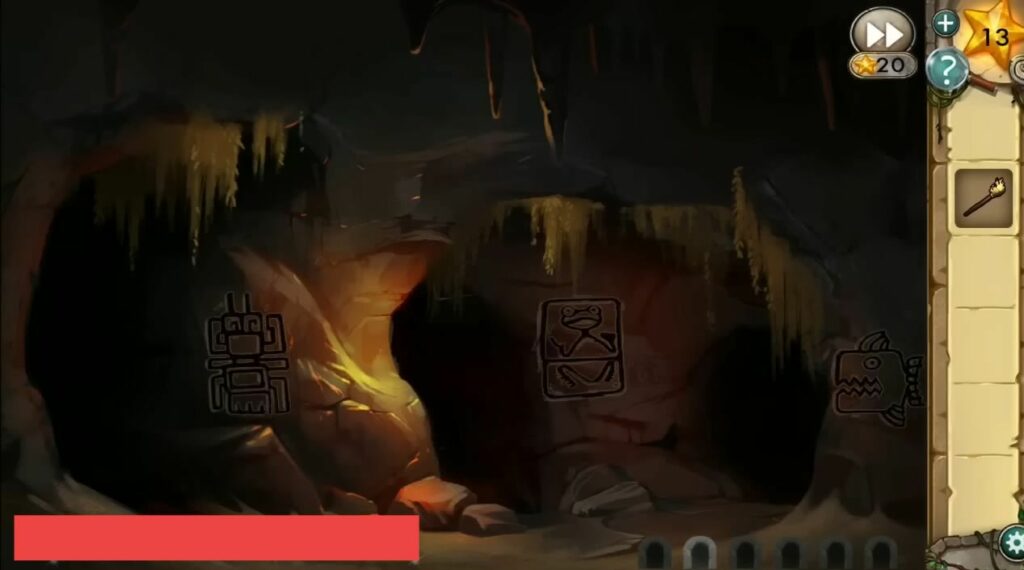
Follow the correct tunnel path and it will lead you to a darkened room. Look for the two torches on the wall and light them. After that, break down the pile of skulls on the ground to collect the bone, then grab the animal skin from the wall.
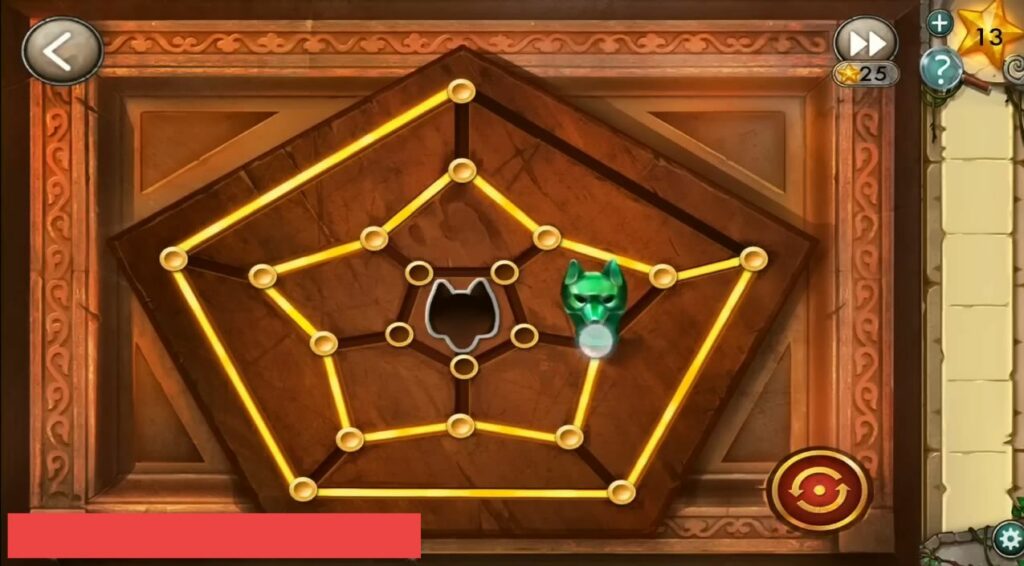
Use the animal skin on the pot to cover it in the fish oil, and then use it on the green item in the skull. You will be able to collect the Jade Fox head. Pull a box from the left shelf using the bone and open it to find a puzzle. Place the fox head on the board and move every point of the board without it crossing its path to solve the puzzle.
You will find a scroll in the box, it’s a clue for the combination lock puzzle. Click on the gate on the right to view the puzzle, and change the picture to match the scroll by tapping the top and bottom half of each dial. It will open up the gate to a vertical shaft.
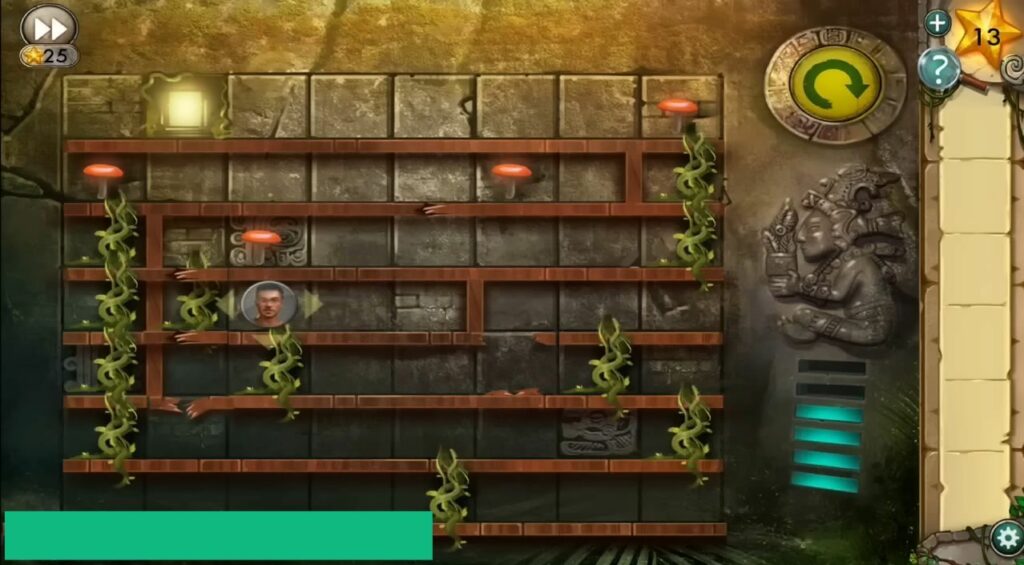
Now you have to solve another puzzle to climb Tawa to the top of the shaft. There are two stages of this puzzle, just move forward one step to take energy from the meter. The passing mushrooms will restore your energy, and you can climb up the vines to move to the next level. Complete this puzzle to proceed to the next chapter.
Chapter 3 – Secret Rooms
In chapter 3, you will be trapped in the temple. Collect four fragments from the ruins of the statues and pass through the left-hand doorway to enter the room. Grab four fragments, and then go to the room on the right side.
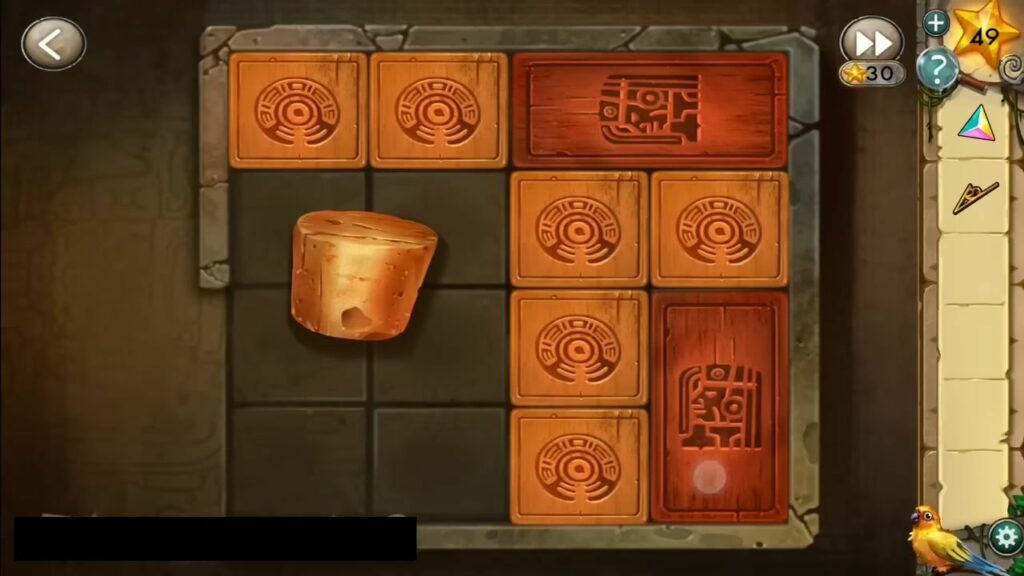
Collect four more fragments and the hawk jar from the rubble on the right. Head to the entrance area and find and tap on a stone plaque lying on the ground, it is another puzzle. You have to place all the fragments on the puzzle board and complete the picture to solve this jigsaw puzzle.
It will open up a secret passage in the floor, you have to head down using the stairs.
Grab the gear from the corner and go through the right doorway on the right side. Pick the snake jar from the floor, sieve from the left of the cage, and leave the room.
Use this sieve on the pool to collect a key and go through the doorway to the left of the water. A cut scene will start there.
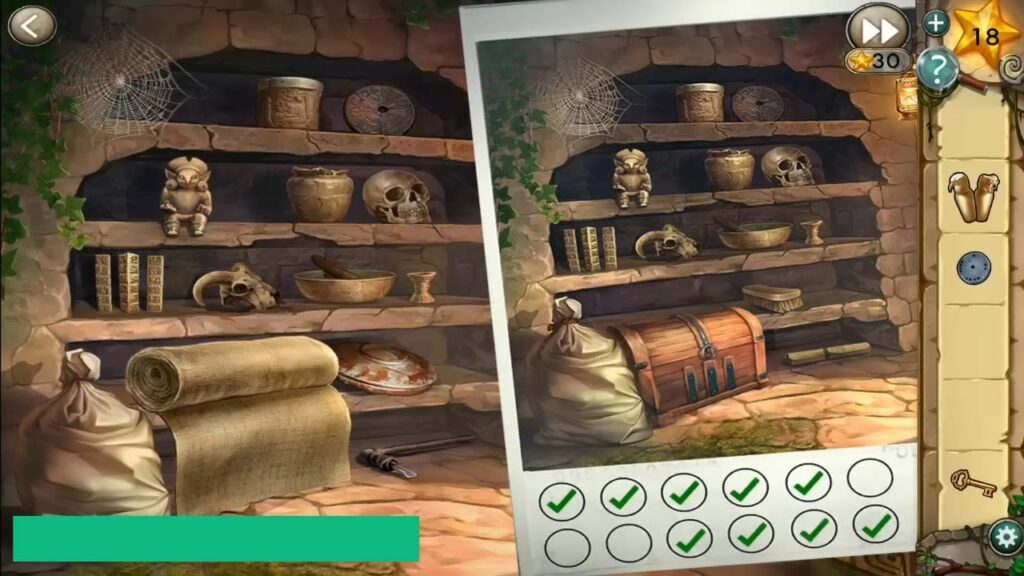
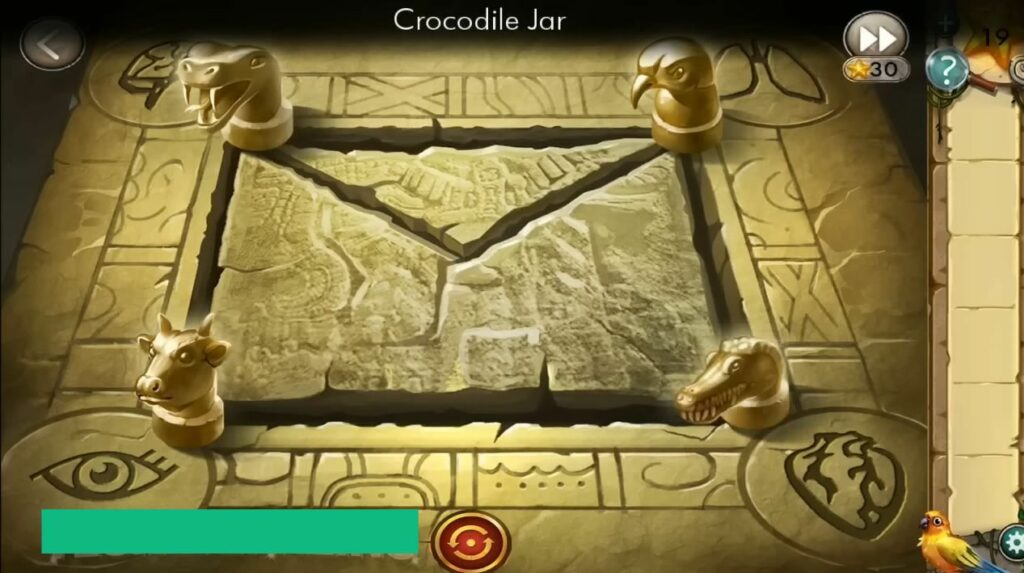
Use the photo of the room to find all of the things that have been moved, and restore the room to its previous settings. You can tap on each difference to find the changes. After restoring it, collect the cobweb from the top left, the brush, and the crocodile jar. Open up the chest using the keys and grab the rope.
Head back to the main area, enter the room on the left side, and use the brush on the floor to find a gear. Head to the right side room to find a third gear using the same method.
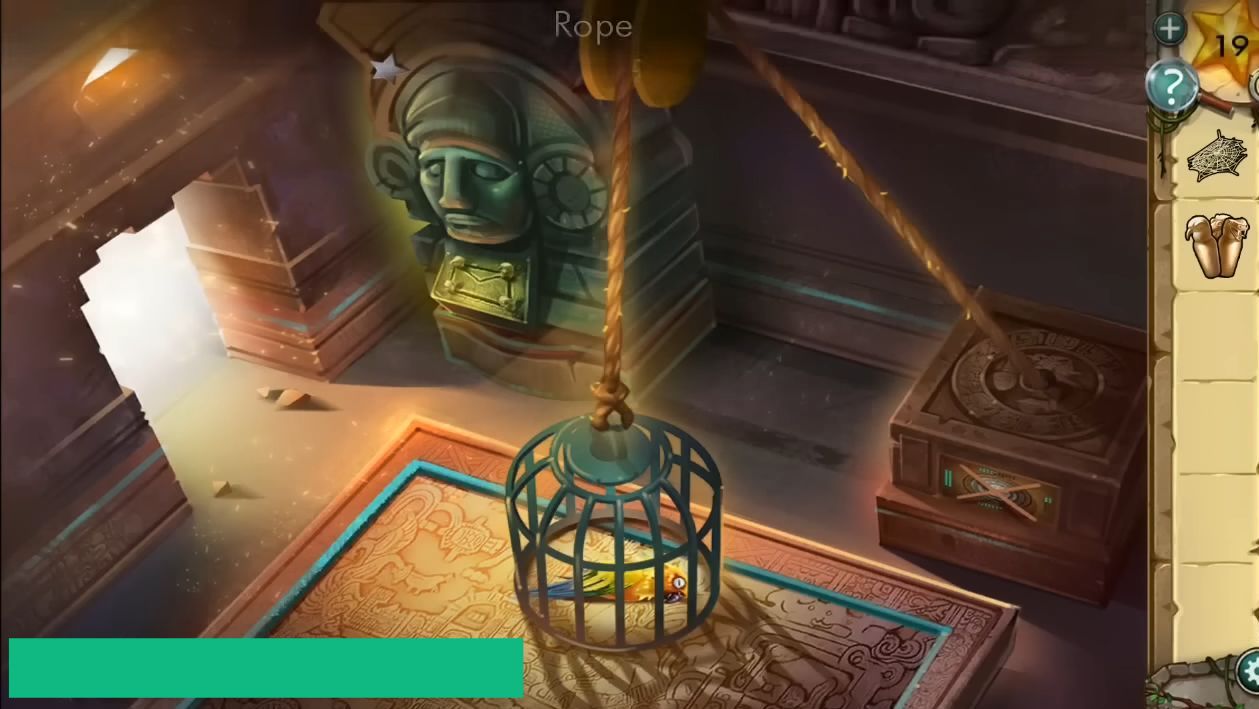
Make your way back to the main area and remove the pile of dust to collect a star. Move downstairs and enter the room with a bird in the cage, then connect the cage to the box using the rope on the pulley. Place three gears on top of the box to set up a puzzle.
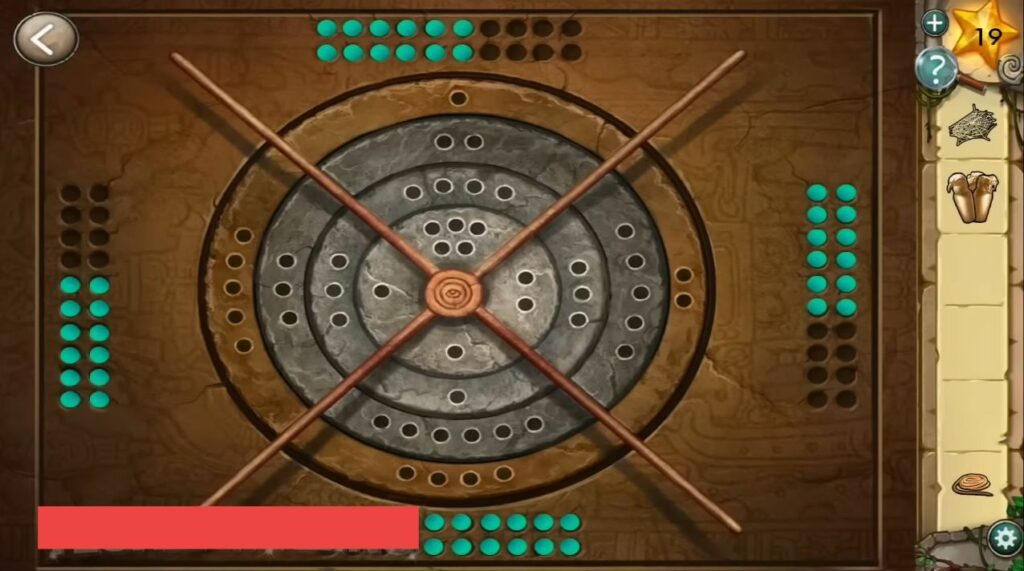
You need to move each gear to ensure that the number of dots in each section adds up to the same number to solve the puzzle. It will lift the cage to free the bird and you will get a stone star.
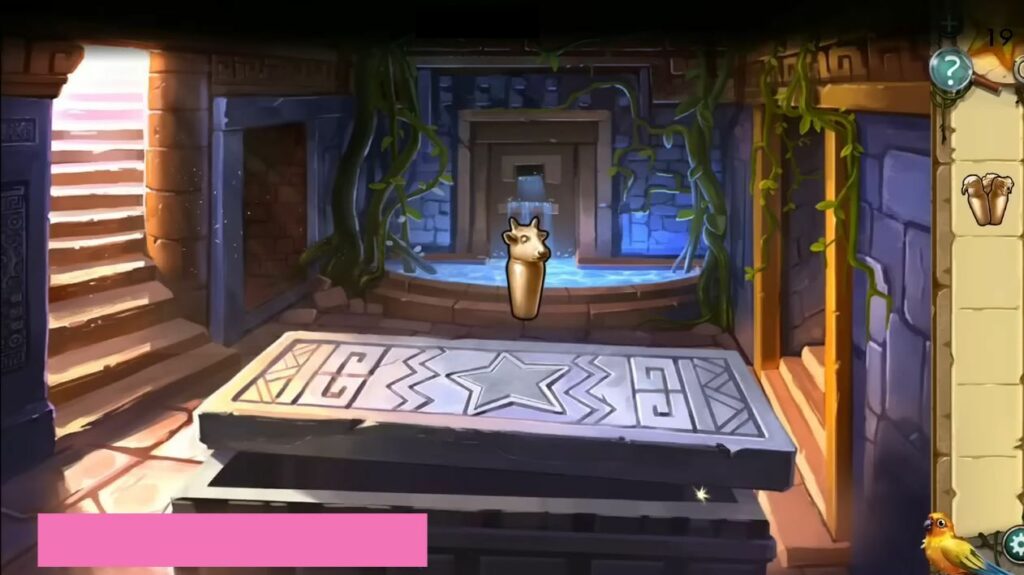
If the bird is injured, you can stop the bleeding and pick him up. You can set a name for the bird, select him, and then collect the stone star from the statue. Exit the room, place the star on the large stone sarcophagus to open the lid and then you can grab the ox jar.
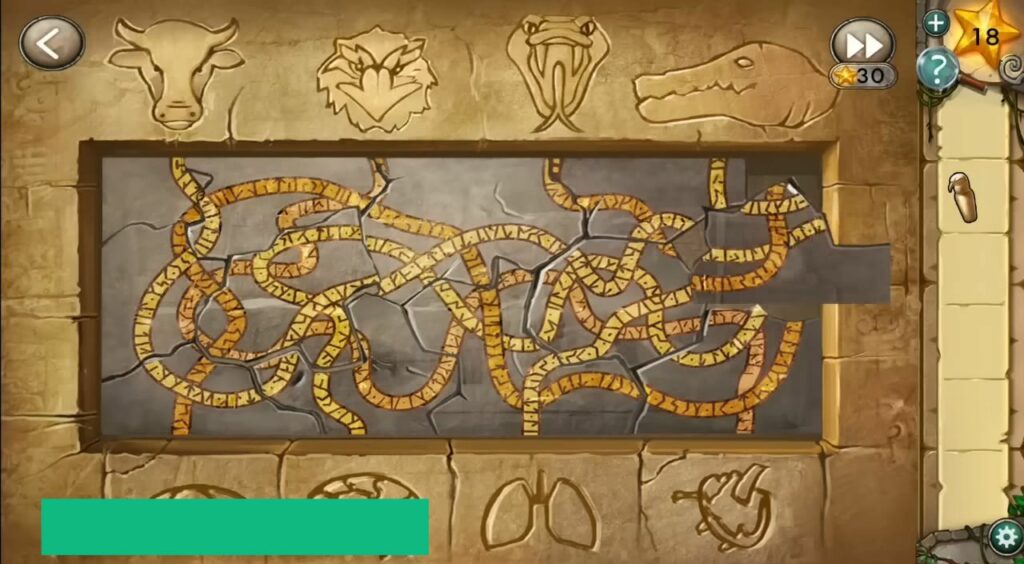
Grab the star inside the stone sarcophagus, then go to the room on the right side and click on the center of the statue to find a new puzzle. Place the correct jars in the correct body part locations to open up a secret door and exit to complete the third chapter.
Chapter 4 – The Drone
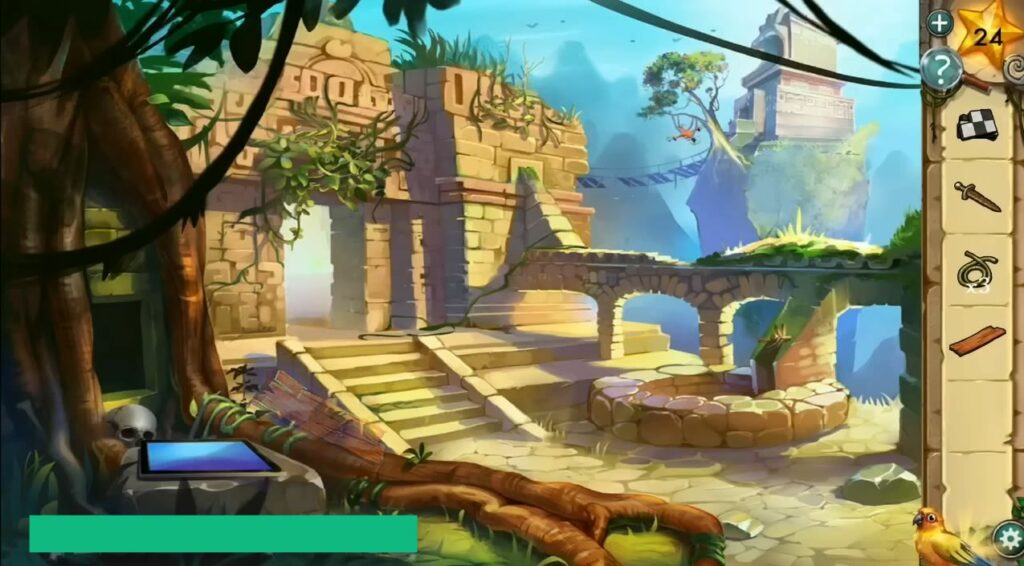
In this chapter, you have to retrieve the drone. Go to the open area and collect a checkered piece from the ground and a sword from the far left corner. Ask your bird to collect a vine for you and a checkered piece on top of the stone building in the center.
Grab two planks near the steps, and move a small rock on the lower right to get another checkered piece. After that, cut the vines on the ground and the doorway to get two more checkered pieces, then go through the arched doorway.
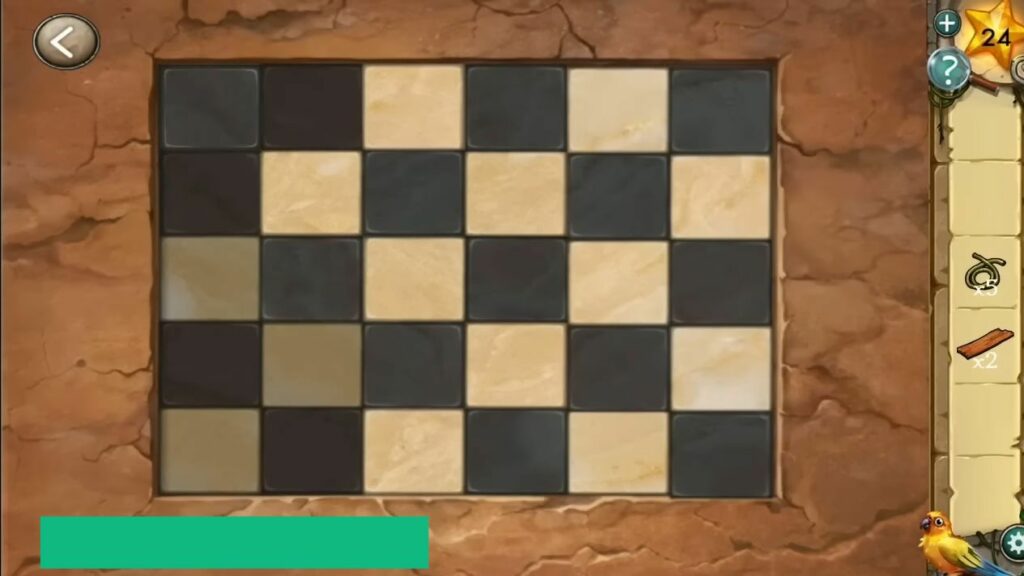
Cut the vines to get two more pieces and then collect a wooden plank. Click on the alcove with a partial checkered board pattern in the center to view the puzzle.
Place the alternating black and white checkered pieces on the board to complete the puzzle. You can tap on the pieces to place them accordingly.
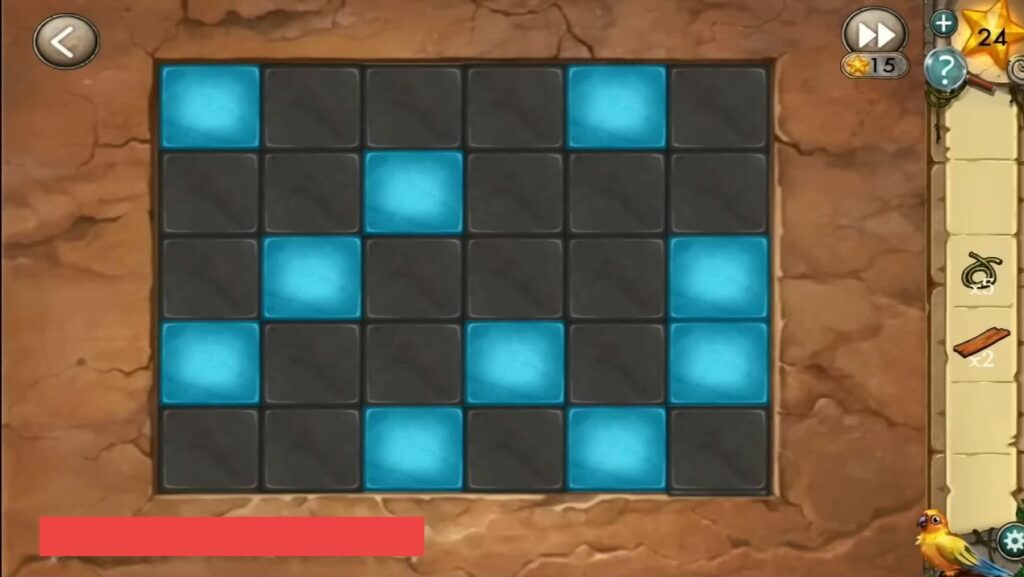
The board will turn all squares black, you can toggle them to blue by clicking on them and then figure out the pattern to complete the puzzle. It will open up the doorway for you.
Grab another plank and a bird talon behind two statues. Use the bird talon on the object blocking the water chute over the well to release the water and grab the last plank. Now go to the bridge place a plank and use a vine on it to fix it.
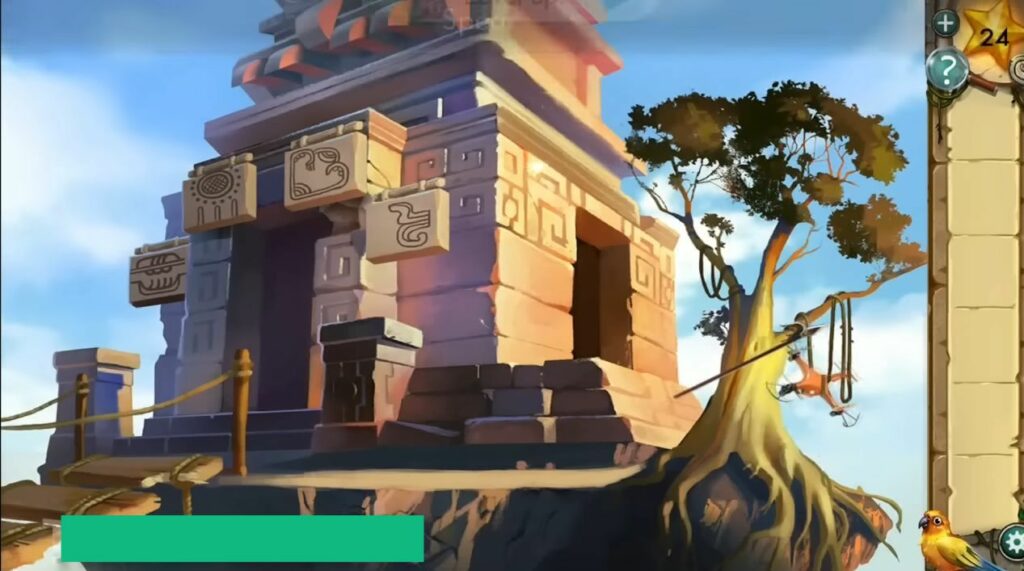
Fix the whole bridge to cross it to get to the building with four symbols on the tablets hanging from it. Note these symbols, head up to the statues with the pool, and you will find that the plinths have symbols on them.
Change the plinths, copy the tablet symbols, and collect the spear. Head to the bridge, navigate to the drone using the spear, and grab the computer chips.
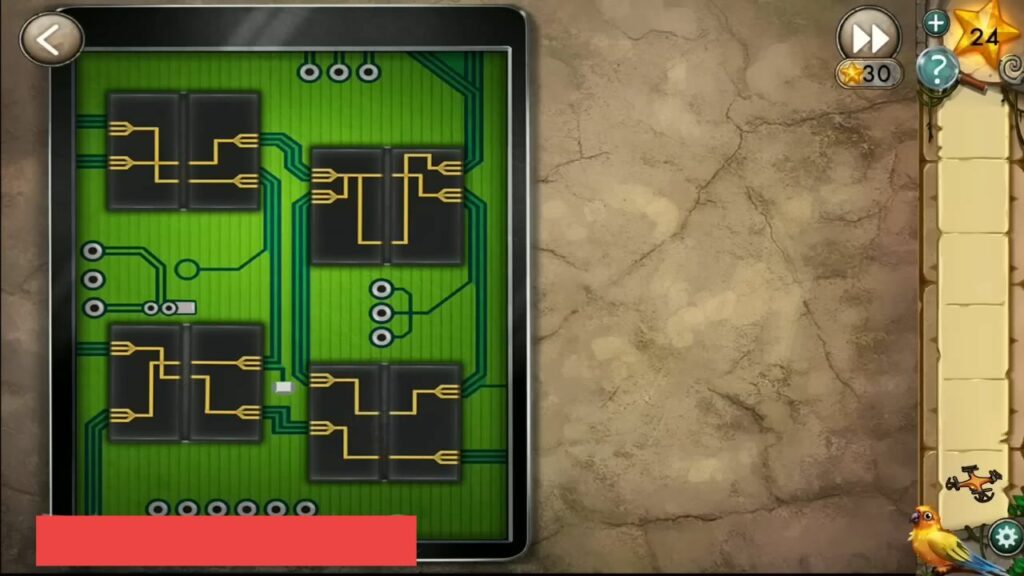
Go to the starting area, tap on the tablet computer, and place eight chips in the correct slots to fix it. You must match three entry lines to the circuits on the board.
After that, escape this area using the drone. It will complete this chapter.
Chapter 5 – The Plane
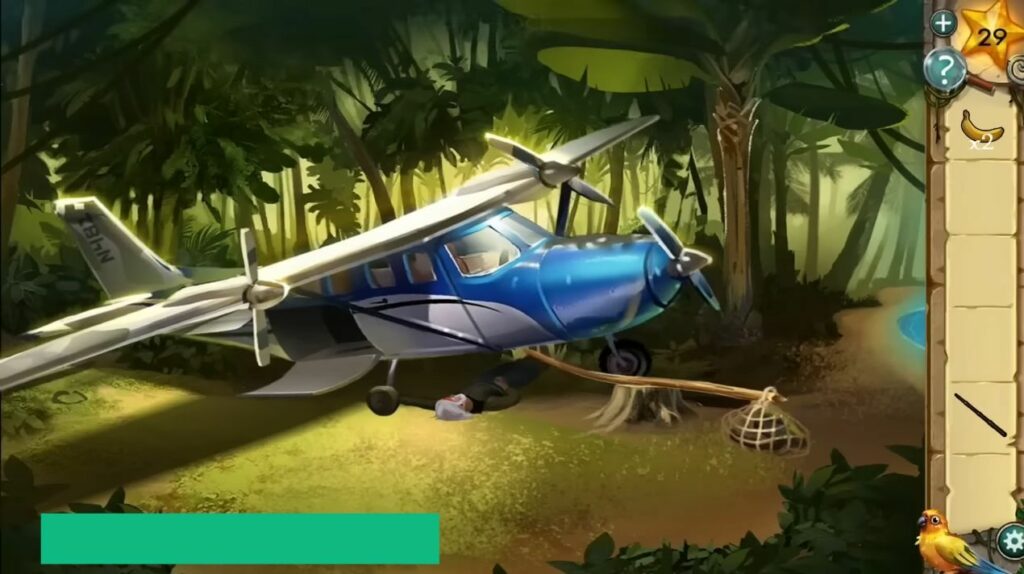
In Chapter 5, you will find a crashed plane with a survivor trapped underneath. You have to collect a fallen tree branch and a heavy rock from the ground, then ask your bird to take the banana from the tree.
You need a 3-digit number to open the cargo door, then collect the fishing pole and cargo net from the cargo bay. After that, collect another large rock and a banana from the ground.

Use the fishing rod on the water and look for a sport with a bubble rising to find the tasty fish. Go back to the plane, place the fallen tree branch on the tree stump next to it, and add the cargo net to the right end. Add the two rocks to the net to lift the plane and free the trapped guy.
Open up the lunch box of the survivor and take a banana in exchange for fish. He will give you some information on where to go next, then head through the trees to the old logging camp.
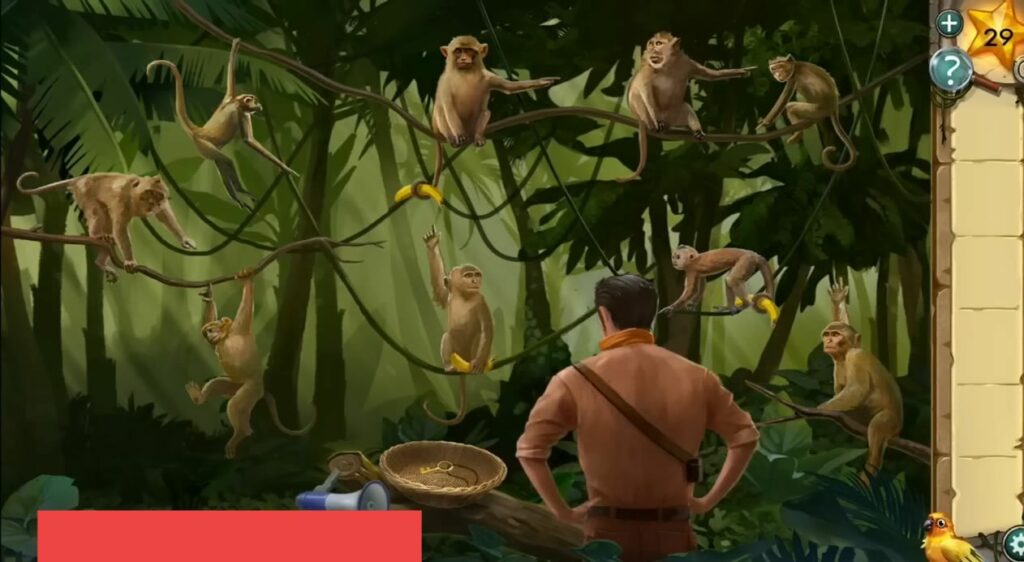
Collect the bullhorn and then open a puzzle by tapping on the monkeys in the trees. After that, place the bullhorn next to the basket and three bananas in the basket.
When you blow the bullhorn, the monkey will pass the key to the one it is pointing at and if you give a banana to a monkey, it will change the way it is pointing. Place three bananas on the right monkey to make him point to the basket. In this way, the key will travel around and eventually end up in the basket.
Collect the rusty key, use it to unlock the shed on the left side, and move inside. Collect one fuse from the window sill and one under the air compressor. Also, collect an oil spray from the desk.
View the papers on the floor to the left with diagrams and then click the cabinet at the back with a 3-digit lock. This paper is a clue to the code, you can use the code to unlock the cabinet.
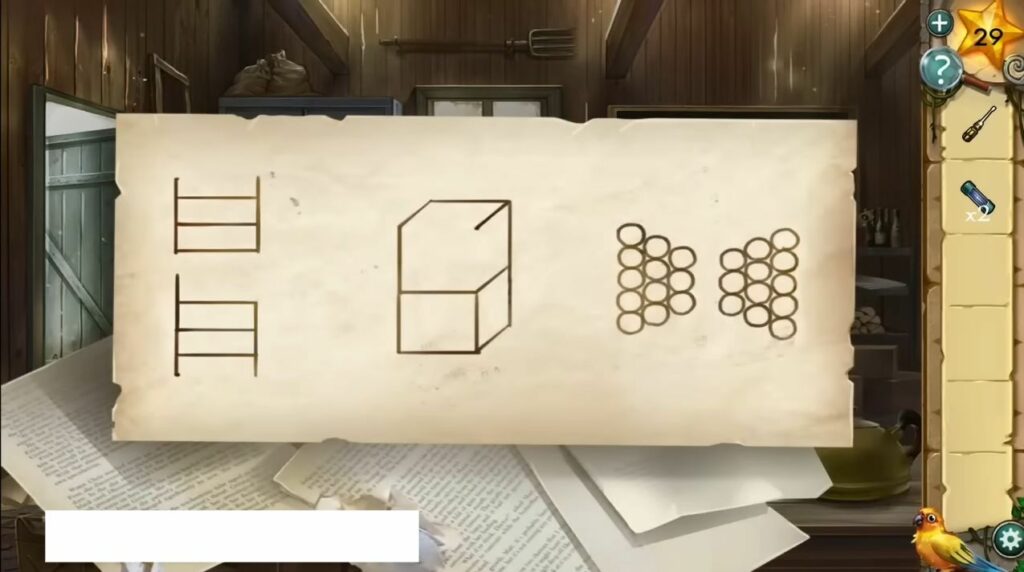
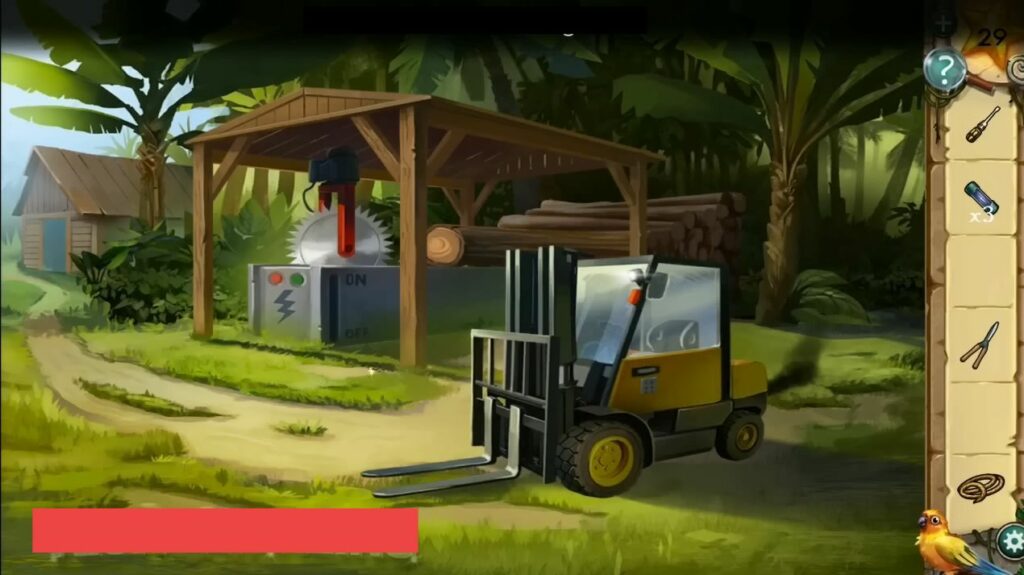
Collect the shears, saw blade, and a third fuse, then take a look at the blackboard with the “Work Shifts” details. Now you have to figure out the pattern to find four missing numbers. Tap the small building in the back of the shed, place the saw blade on the machine, and click on the forklift.
Open the door using the blackboard code, use the oil spray on the rusted toolbox to open it, and grab the screwdriver inside it. Cut the rope holding the tire swing using the shears, then collect the rope and the flat tire.
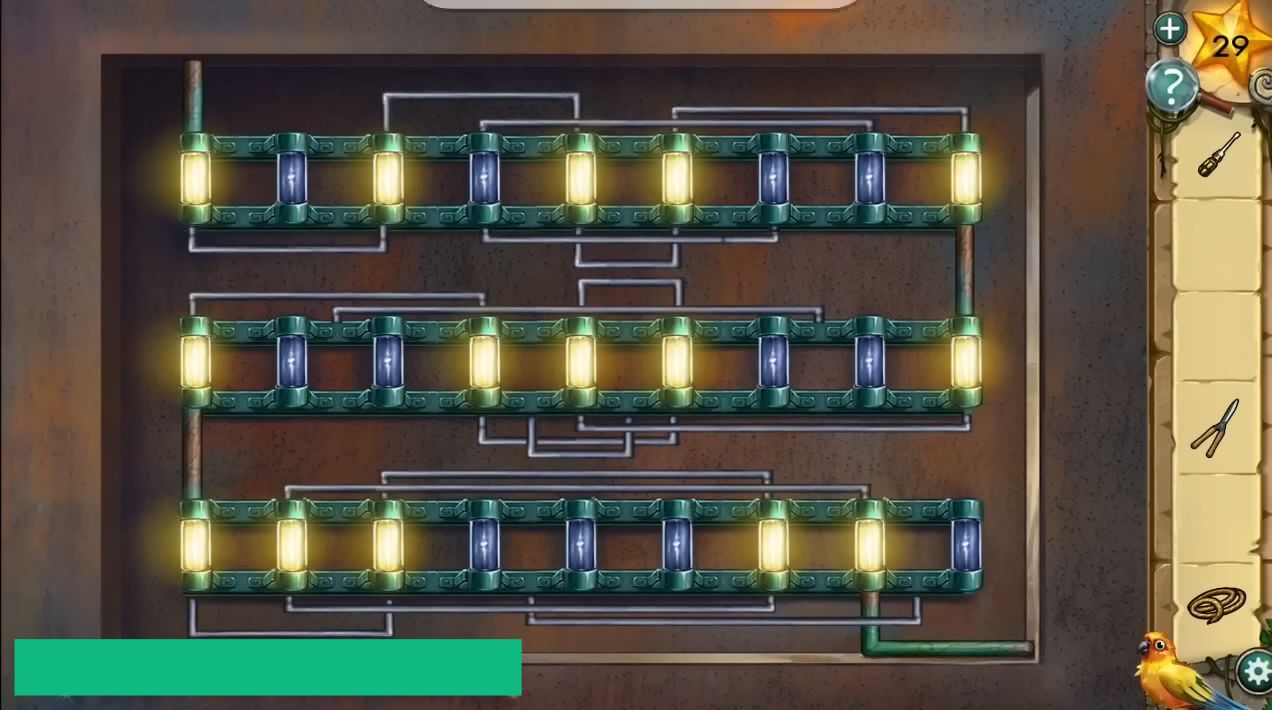
Head to the camp view and use the screwdriver on the red electrical box to open it and view the connections. Place three fuses in the missing gaps, then slide the metal brackets to get the power to flow through each row to the bottom. Now you will have power in the camp, now you can go back into the shed.
Use the flat tire on the air tank to inflate and collect the tire. Go to the plane area and cut the net free from the tree branch using the shears to collect the net, then head back to the logging area.
Turn on the cutting machine using the screwdriver to get six cut logs and use two ropes to tie them together into a raft. Place the inflated tire on the forklift, then take the raft to the river and float away to end this chapter.
Chapter 6 – Waterfall
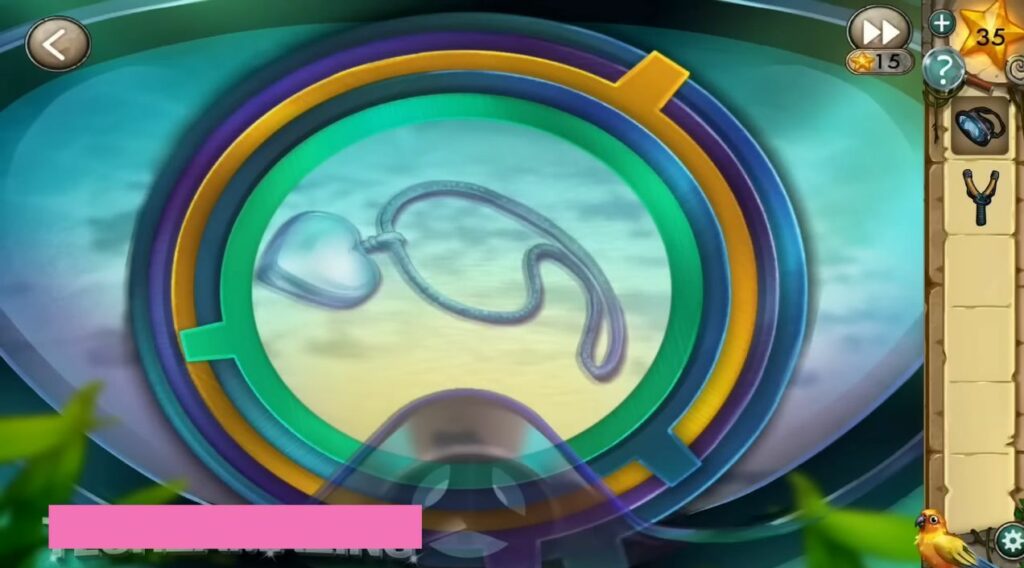
Open the backpack on the ground and collect from it a diving mask and a slingshot. Use the diving mask, and click on the water to peer into it to open different puzzles.
Now you have to align some rings to bring an object into focus and rotate five colored dials until the image on each overlaps correctly. You will receive Rachel’s necklace as a reward.
Enter a cave behind the waterfall and tap on the pile of pebbles at the bottom to collect them. Tap at the bottom to leave and follow the path on the far right to reach a building with a crocodile blocking your way.
View the trees and a coconut puzzle by tapping on the coconut tree on the left side.
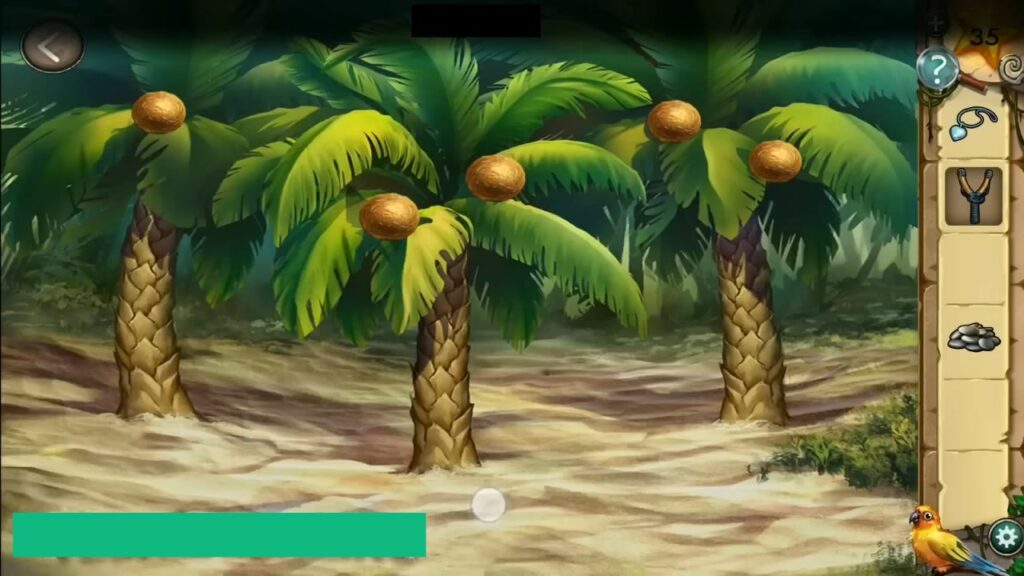
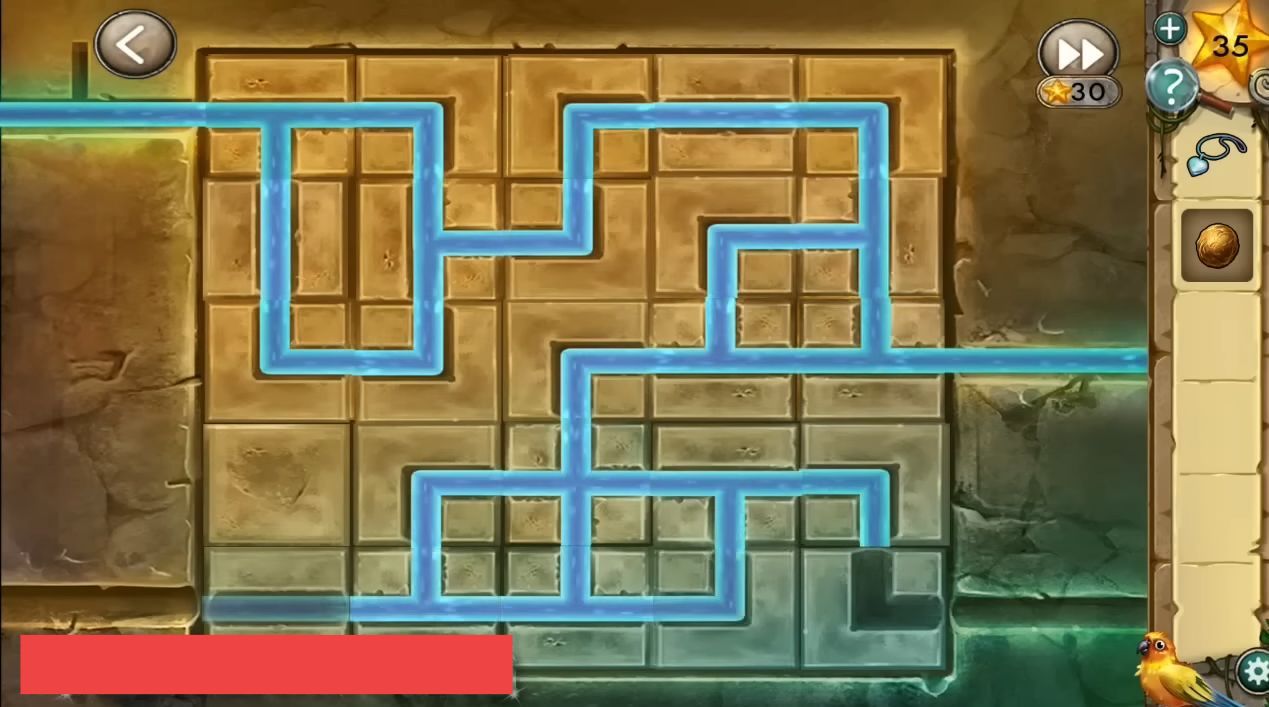
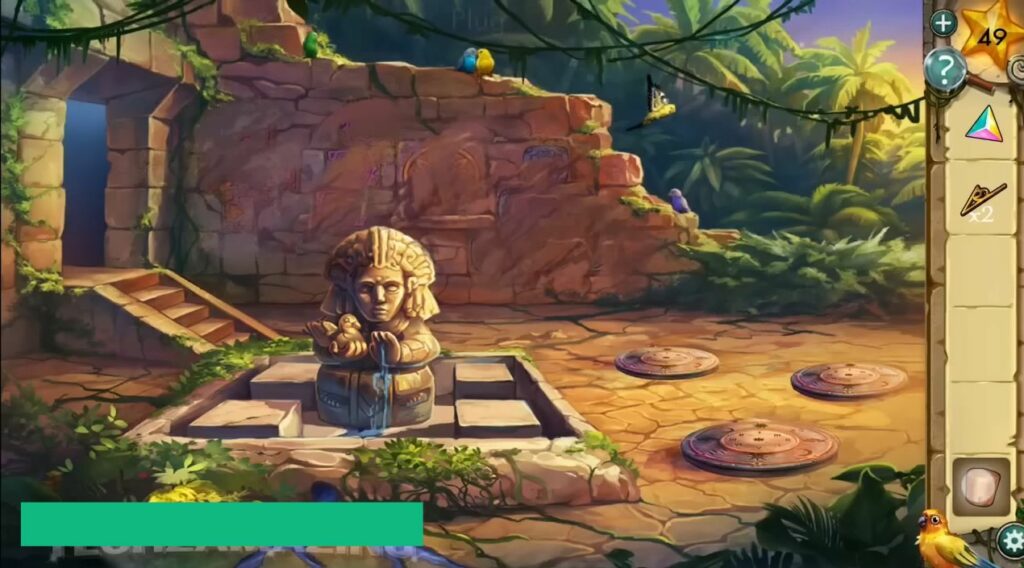
Use the slingshot, and place the pebbles on it to knock down the coconuts. Pick up the coconuts from the ground, go back to the river bank, and ask your bird to sing and distract the crane. Collect the egg, and click on a puzzle stone above the empty water fountain to find the puzzle.
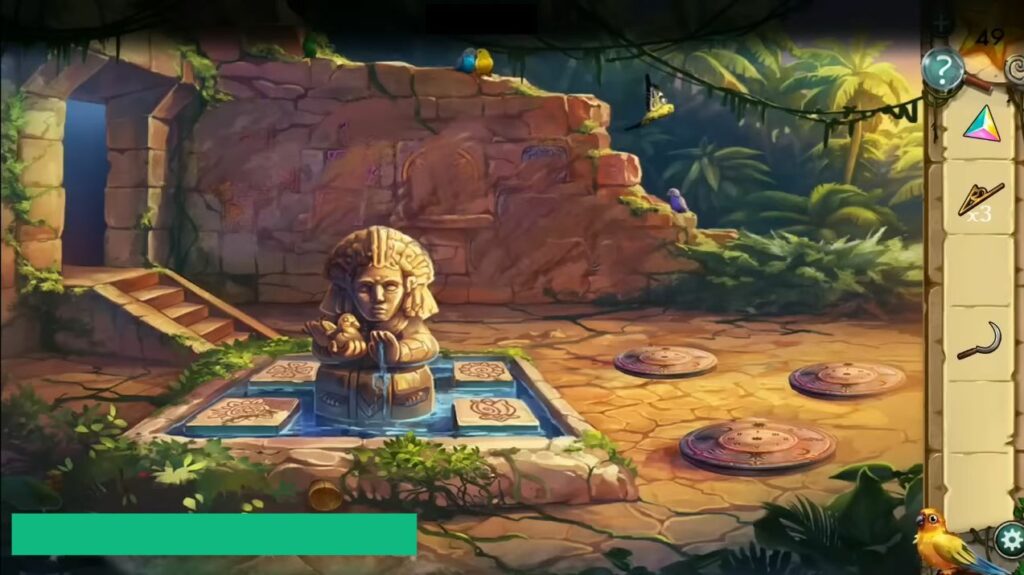
Rotate each block and complete the pipes to let the water flow. Have a brief look at the columns in the water and remember the order of height of the ones that have risen above the water starting from the lowest on the near right.
Tap on the puddle below the crane to get a puddle of mud. Go back to the cave behind the waterfall and then click on the pegs in the same order as the fountain.
Go from the lowest to the tallest and block the steam vents, use the mud you have collected, and tap on every vent. A flower will bloom as a result and then you can use the coconut on the flower to make it smell and then collect it again.
Return to the path where you find the crocodile and feed the crocodile with a coconut. After that, you can collect the teeth of a crocodile, then go back to the river and tap on the small stone plinth in the center. Make three offerings based on the diagrams on the stone; a diamond, an egg, and a tooth.
But first, go to the river and give the necklace to Rachel there. Talk to Rachel, she will give you a diamond in exchange for her necklace. Now place all three items in the bowls in front of the stone and collect the Stone eye.
Go back to the path with the crocodile and place the stone eye in the door.. After that, go through the door to complete the sixth chapter 6.
Chapter 7 – The Inner Sanctum
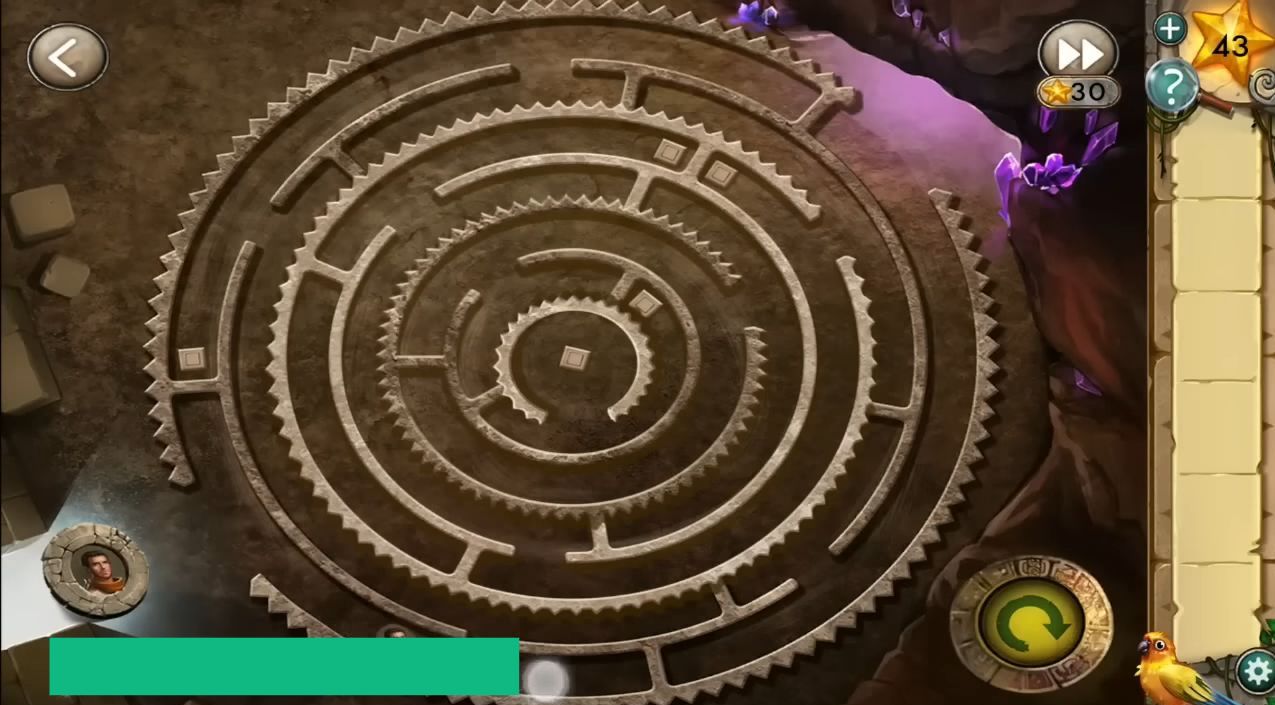
Inside the inner sanctum, you have to break three stone pots on the ground to collect three stars. Tap the blue doorway to the left to find a circular maze puzzle.
Slide the small icon of yourself around the maze and it will cause some rings of the maze to realign when you reach one of the small squares. Realign the circles in the center until you can exit back out to the right.
Collect obsidians on the right side. Click on the stone plinth with the mortar and pestle on it to dislodge and collect some ore, then head back to the main room. Go through the right doorway and you will find a puzzle on the right side wall.
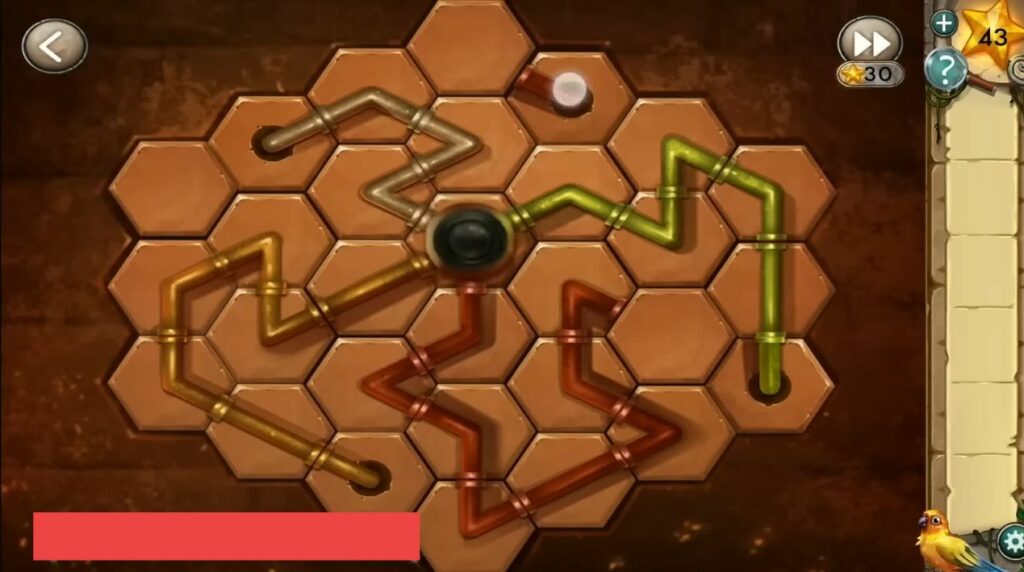
Swap the pair of blocks on the board until the pipes of each color connect and form 4 continuous pipes from the center to an end piece that drops into the board. This will solve the puzzle.
Now you can access the room and use the obsidian on the grinding stone to sharpen it. Take a look at the picture of a fish on the left wall, then return to the main room and use the sharpened obsidian to cut the flower.
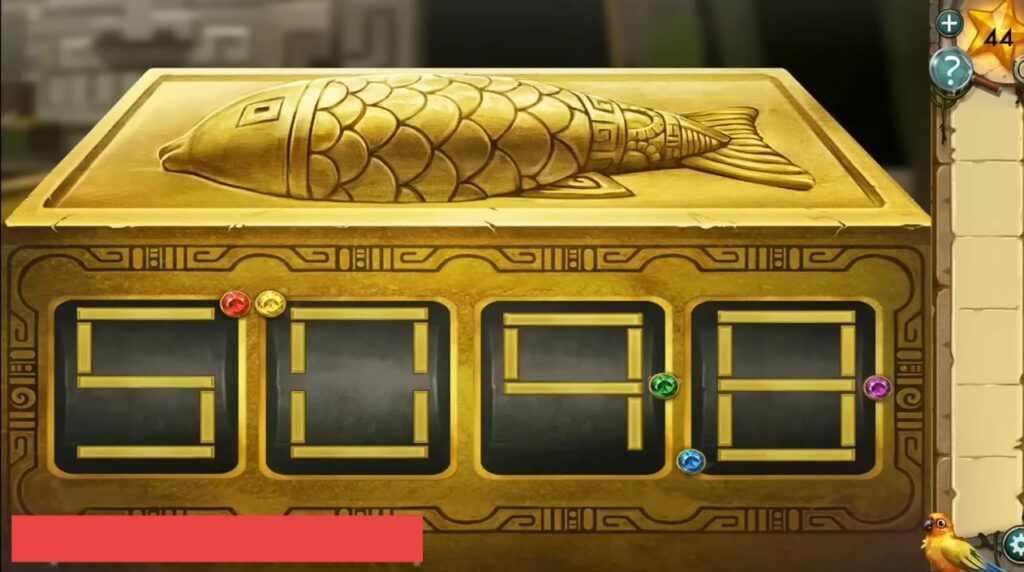
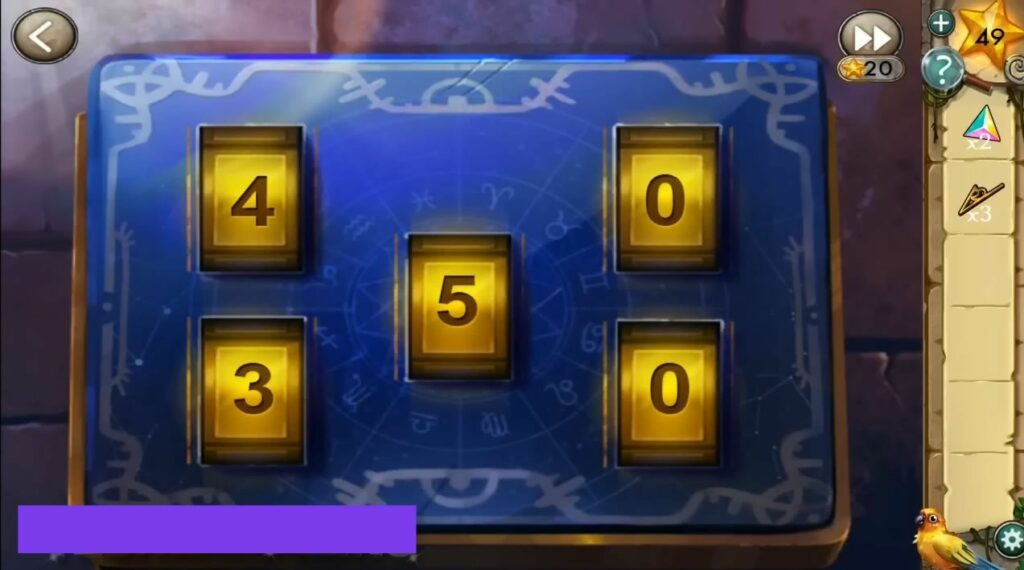
Click on the gold box on the lower right, and notice the colored gems and the fish on it.
The first number has a red gem, so look at the redfish on the wall picture and draw a line based on the directions they’re facing. So with red, you get left, down, right, down, left, and draw a 5 using these lines. After that, do the same with Green to get a 9 while yellow gives you 0. Purple and Blue together will give you 8.
Open the box to collect some stone quills, then go through the blue door to the crystal cave and use the sharpened obsidian on the glowing crystal to obtain a crystal. Get a liquid vial by using the cut flower on the mortar and pestle. View a parchment above the mortal and pestle on the wall and then add the liquid to the parchment to get a clue for the stone quill puzzle.
You need to get a clue for the puzzle by placing the crystal on the pedestal at the top of the steps. Enter the smelting room and add the ore in the hanging crucible pot, then view the puzzle at the bottom of the fire pit. Select the correct symbol on each of the 4 blocks using the clue.
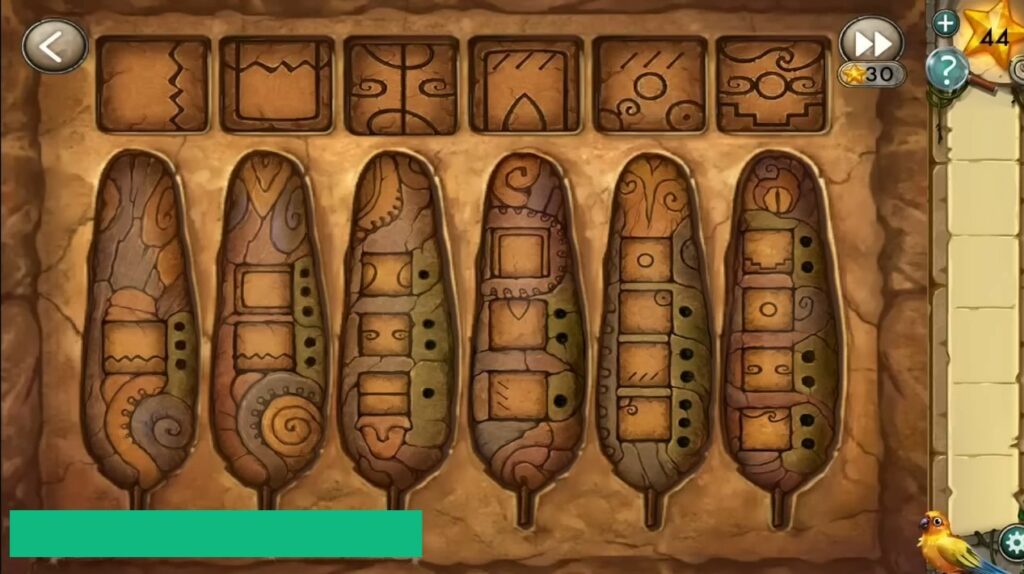
Once the ore is melted, collect it and use it on the mold on the floor to craft the shield. After that, head to the main room and open the puzzle where you have to place six stone quills.
Rotate the images by tapping the top squares. You can follow the code of dots using the clue found on the parchment to know how many times to rotate them.
Head to the puzzle on the right side and place the forged shield with the other shields. Tap all four images to read a text and figure out which animal shield fits best, then swap the position of shields accordingly to solve the puzzle.
It will open up the main door, you need to go through the door to complete this chapter.
Chapter 8 – The Elixir of Life
In Chapter 8, you first need to collect a dial piece from the center of the floor and a prism from the statue on the right side. Click on the wall on the right side of the status to find a sliding block puzzle, move the blocks around, and then move the ‘Plug’ to the lower left opening to solve the puzzle. After that, you can collect that plug.
Enter the room with stars on the right side and fetch a second dial piece from the left shelf using your bird. Grab the gauntlets and the sickle from a lower shelf, and tap on the right side of the room to see a hanging parchment. It is a very useful clue.
Go to the hallway entrance and cut down the long banner hanging on the left banner using the sickle. Grab the dry banner piece and go through the left doorway to an outer courtyard.
Pick another dial piece, then use the gloves to search the brambles on the lower left and collect a prism. Go to the sundial circles on the right and place the three dials on it to view the puzzle.
Make sure that the sundials match the clue from the parchment above and then you will get a note with the positions and the shadow positions. Use the Plug on the hole to stop the water from escaping into the water fountain and let the pool fill up. As a result, four drawings will appear on the stones.
Dip the banner piece in the water, then clean the back wall using it to reveal some symbols. These symbols are the same as the ones in the fountain. After that, have a look at the statue in the center. Head to the hallway and enter the room on the right side, then find the purple chest on the left side.
You will need five numbers to unlock this puzzle, you can use the clues above to find the numbers.
Enter these numbers in the correct positions to unlock the chest and get the third prism, click on the floor to view a puzzle with light. Now you have to activate all the prisms by placing them in the empty spaces.
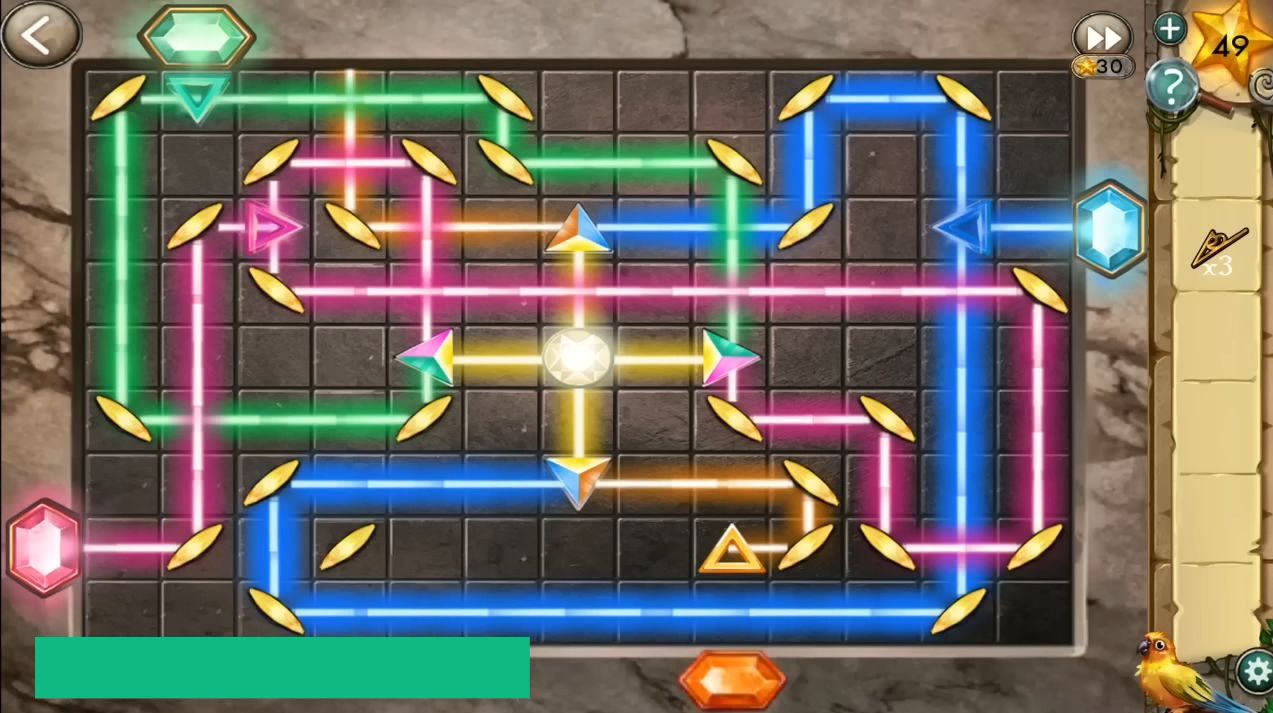
Rotate the mirrors to direct the colored beams and make sure that two beams of the same color hit every colored triangle and then activate the gems. It will raise a telescope from the ground, click on it, and add the Sundial Note to it.
The dials in the puzzle have numbers on the inner ring and symbols on the outer ring, you need to match a symbol to a number using the note and hit the Turquoise button to make a constellation light up. Enter the papers in the order of the dials with the top center one first, then the left pair, and finally the right pair.
Grab the Dog tile from the base of the telescope, then go back to the main hall and click on the doorway in the center. After that, place the dog tile in the empty slot.
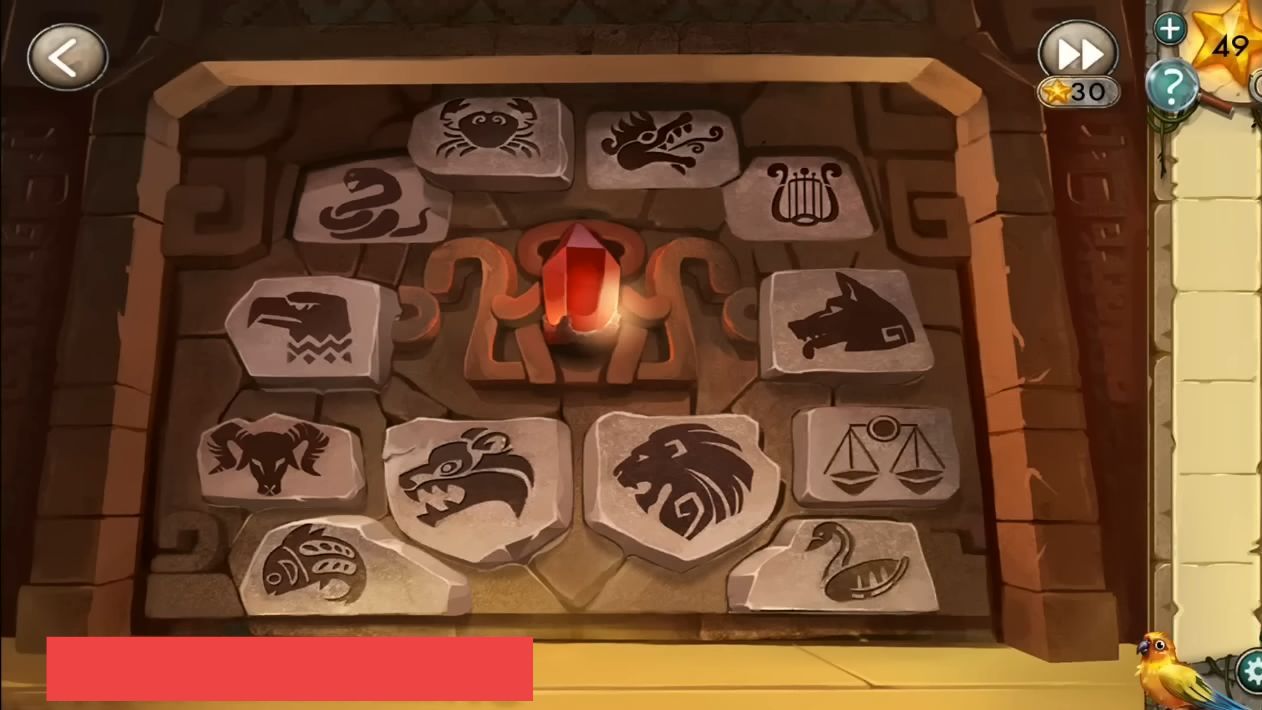
Press the tiles in the right order, you can find the order in the previous puzzle. Enter the opened door to find the Elixir and collect the star on a lily from the water. Pick up a large leaf, a mallet, 6 bowls, and a twig from the ground. After that, fix the broken bowl.
Use the bowl to collect some water from the pool and then pour it on the dry dirt below the pool. Mix it using the twig and make a messy pile of clay, use the leaf to collect it, and then fix the broken bowl with clay. Fill all the bowls with water. Fill up all the bowls with water and then click on the statue.
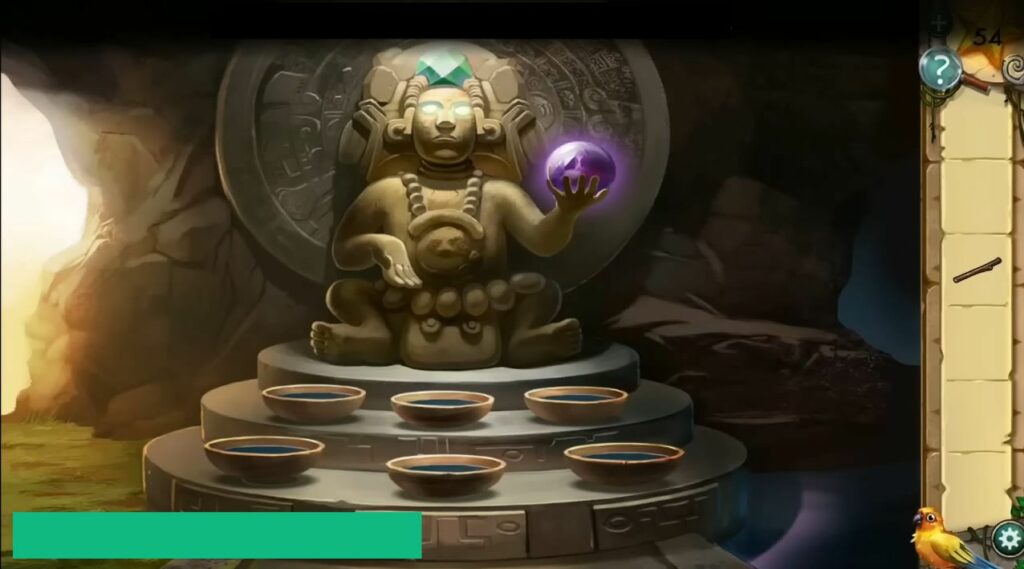
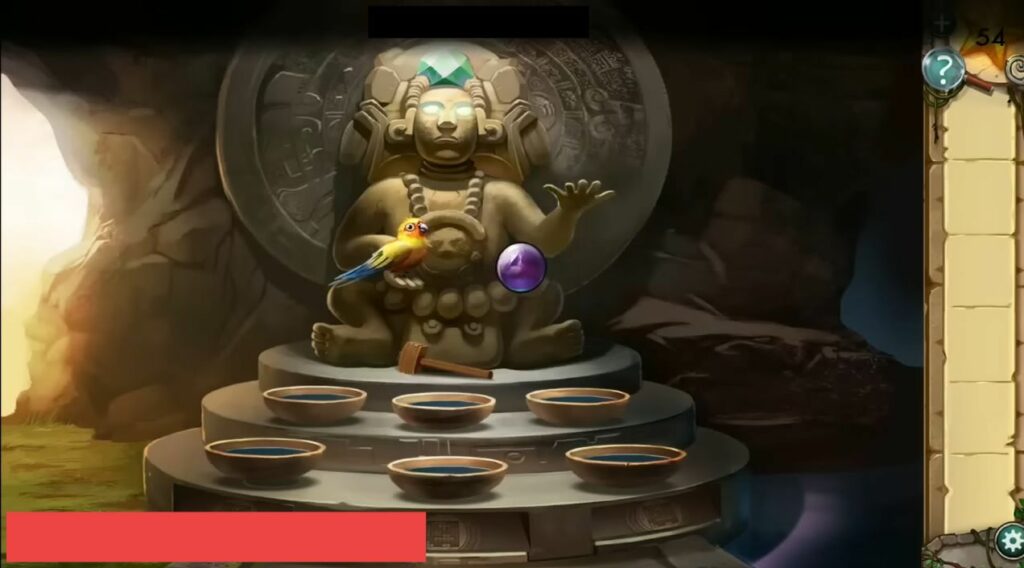
Place the bowls on the base of the statue, and place your bird in the statue’s open hand. Hear your bird singing a rising 6-note tune, take a closer at the bowls, and then add the mallet.
After that, play that tune and tap on each bowl to play a note. play in the order from lowest to highest note. Use the twig to open up a panel on the base of the statue and it will reveal another challenging puzzle.
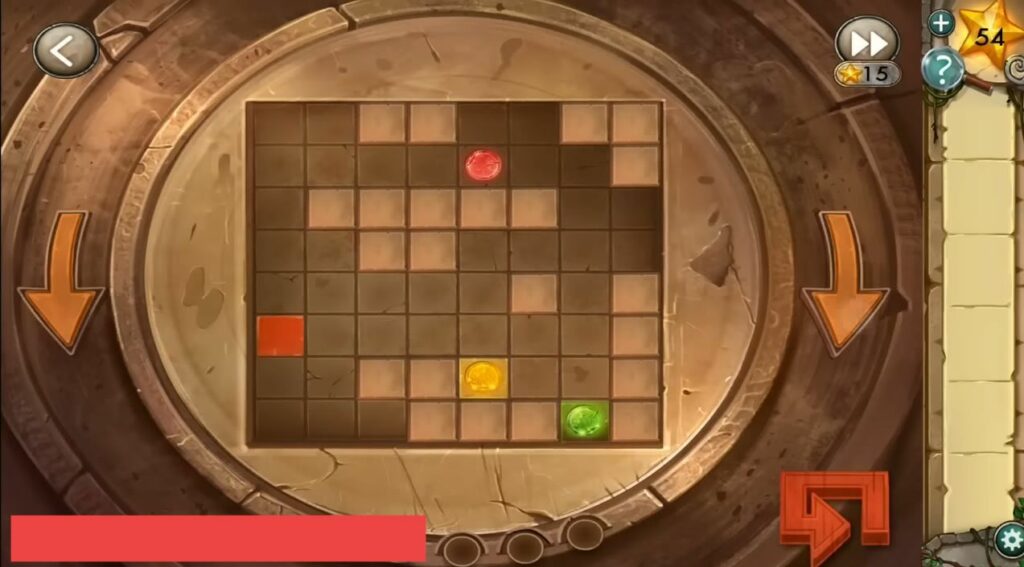
Turn the board using the arrow until the balls end up in their matching squares, there is a limit of 5 moves before the board resets. Click on your bird to sing again and follow the tune on the bowls, it will open the center panel and give you another ball puzzle. Tap on your bird to get the notes to open the final panel opens and collect the Elixir of Life.
Now Larissa will appear to take the Elixir. After that, you will enter into an escape puzzle where you have to swipe to move left and right to move and avoid the stalactites. Simply escape the cave to complete the game.