Adventure Escape Murder Manor is a free-to-play detective story game. The primary objective of the game is to explore the manor and solve different puzzles to escape. You can gather different items and tools to help you survive longer. Adventure Escape Murder Manor is available for free on the Apple App Store and Google Play Store.
This game has nine chapters, this guide will walk you through all these chapters while providing you with solutions to all the challenging puzzles. You will find all the useful hints you need to solve the murder mystery.
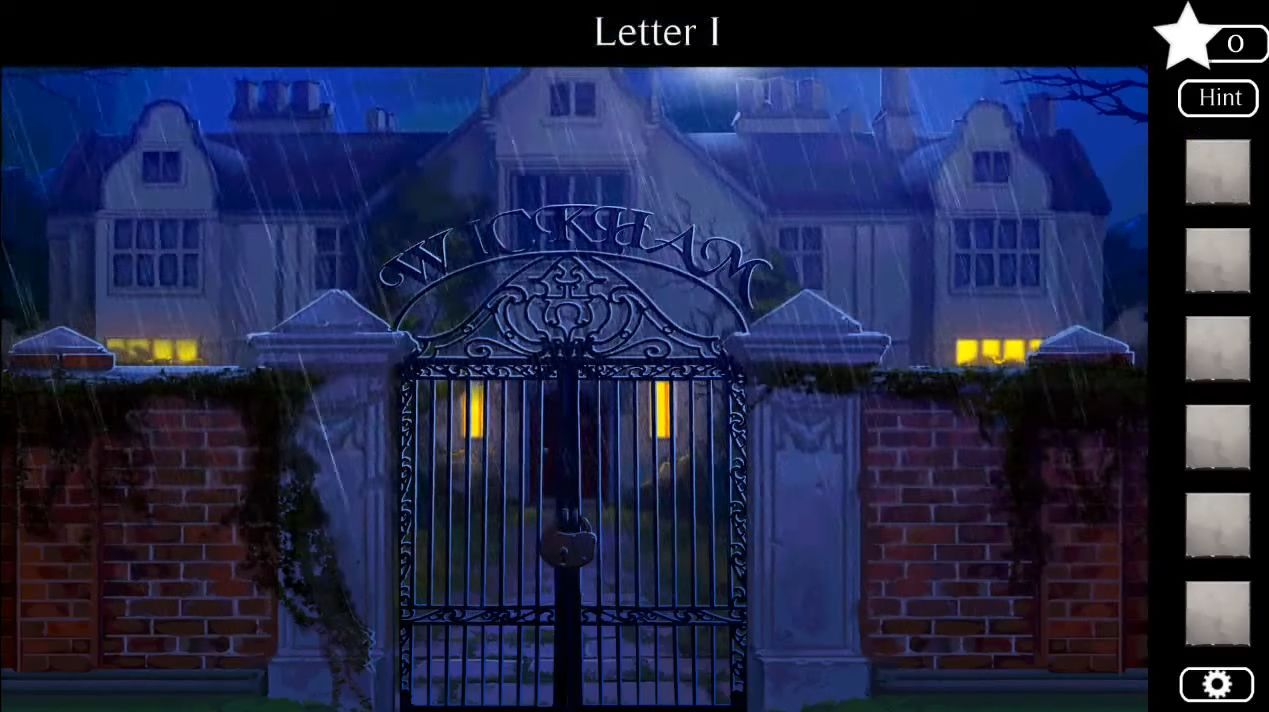
Chapter 1 – Invitation to Dine
In the first chapter, you will be located outside a large manor house. You must pick the highlighted letter ‘I’ from the ground and place it on the gate to complete the “WICKHAM” word. It will give you a key.
Use this key to open the gate, head inside, and collect three stars from the ground. Grab one star from the left window and then enter the building.
Solve a puzzle by finding the best places for each name card. The power will turn off and you will find that Mike is dead. Also, you will be located in the hall after that.

Grab the star from the stairs and a key from the drawer on the left of the stairs. Open the white doors to the left with the help of that key and head to the basement.
Collect the star from the top right window and the red wire and hammer from the ground. Open two drawers below the furnace to pick a screwdriver and the blue wire. Collect a star from the right drawer, then smash three boxes on the left using the hammer.
Grab two stars and two and then pick up a paper from the top of the unit. This paper is a clue.

Open the fuse box on the wall using the screwdriver and it will show you a new puzzle. To solve it, you have to add four wires with the help of the clue on the paper.
Tap the stairs to go back up and enter the dining room on the right side to complete the first chapter.

Chapter 2 – Serving of Murder
In Chapter 2, you will be located in the kitchen. Look for the clues, grab a star from the back candle on the chandelier, one from the counter on the right side, and another one on the floor near the fridge. View a recipe sheet on the wall to the left of the fridge.
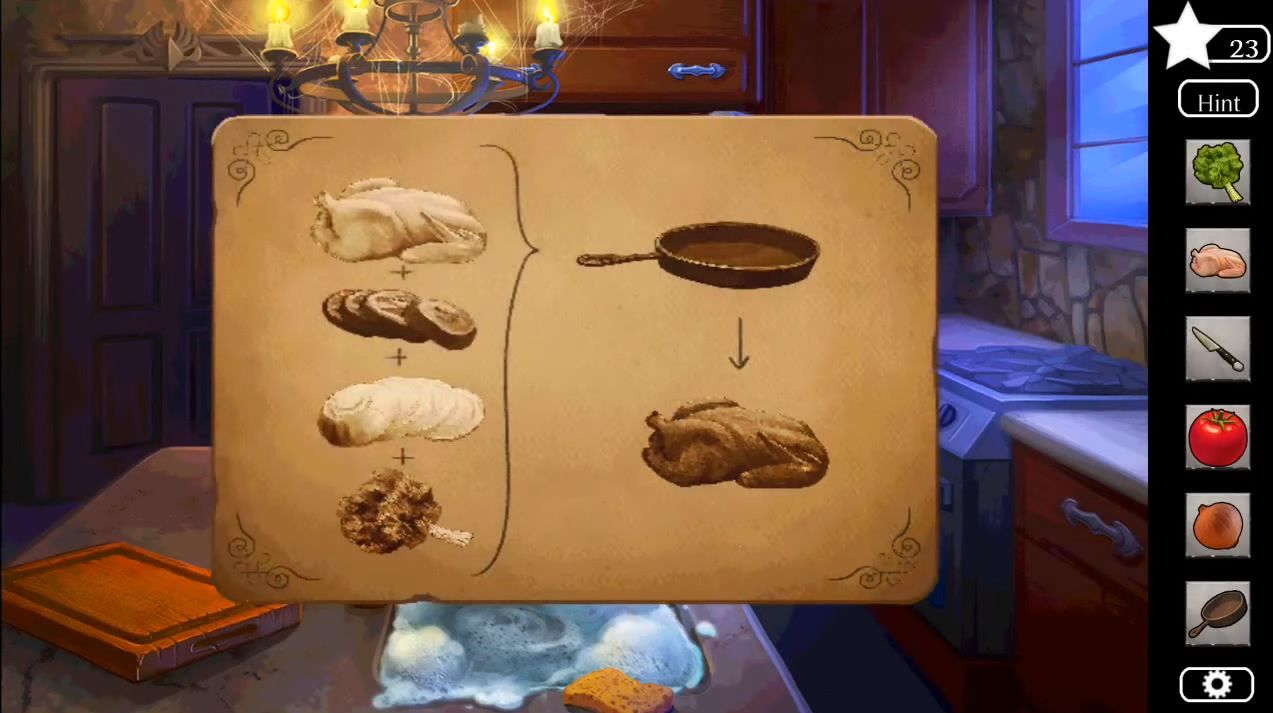
Head to the counter on the left side to collect the dirty pan and place it in the sink to get a clean pan. Grab a raw chicken from the fridge door and a star from the top shelf. After that, pick up an onion from the basket on the right and then tap on the left door to go outside.
Pick up a star from the box bottom left and one from the bin. Grab the parsley and tomato and notice a clue on the back wall. Head back to the kitchen, and view a drawer on the left of the fridge, it has a 3-digit lock.

Grab the knife, and place the tomato and the onion on the chopping board, then use the knife to slice them. Place the pan on the stove, then add the sliced onions, sliced tomato, chicken, and parsley to cook it.
Pick up the cooked chicken, then exit the kitchen and give it to the raccoon. It will leave and then you can look inside the dumpster. You will find that Mike was poisoned and it ends the second chapter.

Chapter 3 – A Host of Trouble
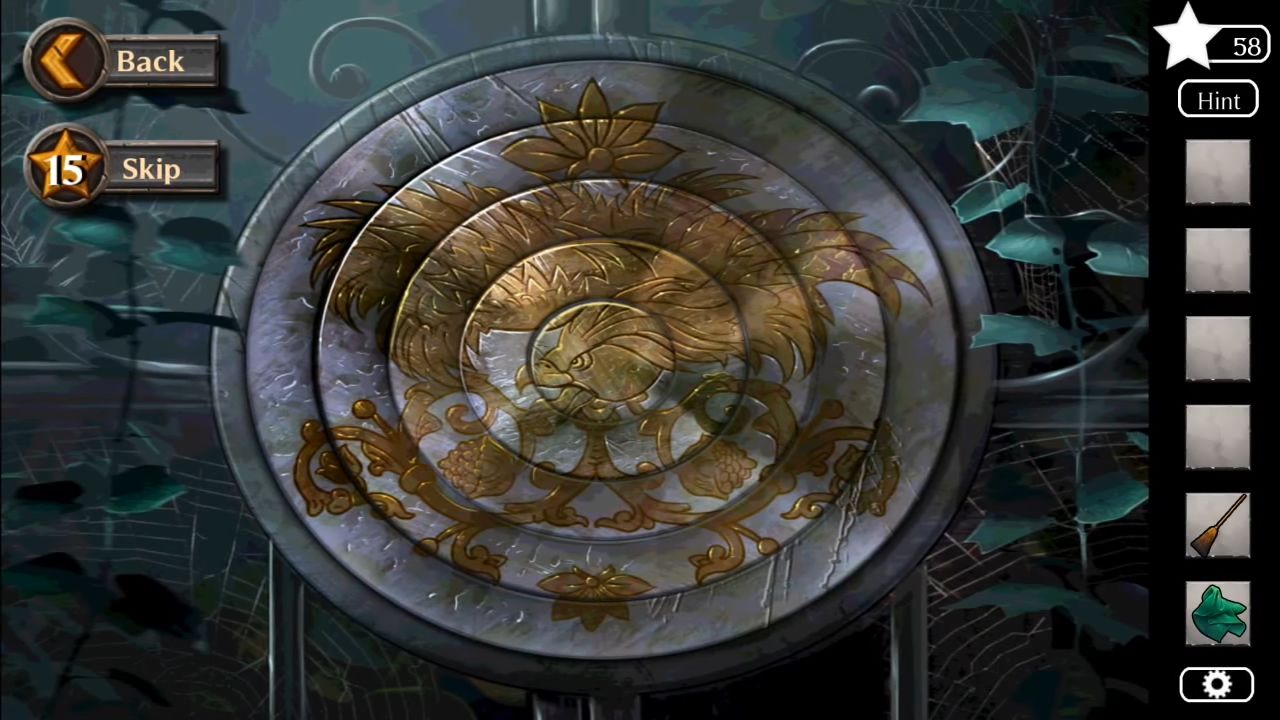
Navigate through the house to investigate other guests and collect the star from the cobweb. Solve the puzzle on the wall ahead, select pairs of tiles, and swap their positions to complete the picture. It will reveal new doors for you.
Enter the secret room, grab the stars from the floor under the bed and one from the top shelf.
Pick up the battery from the floor, the ladder, and the yellow flask from the shelves. Next, you have to view the diagram with details for Rubbing Alcohol on the left.
Open the top drawer in the chest to get an orange flask and then have a look at the photo on the right side wall. Go to the hallway, use the ladder on the left wall, and grab the green flask from the top shelf.
Go to the secret room and add all the liquids in the empty bottle to craft rubbing alcohol. Now head to the hallway to use the rubbing alcohol on the small unit, it will open up the drawer.
Collect a flashlight and add the battery to it. After that, lift the carpet and find a puzzle under it.

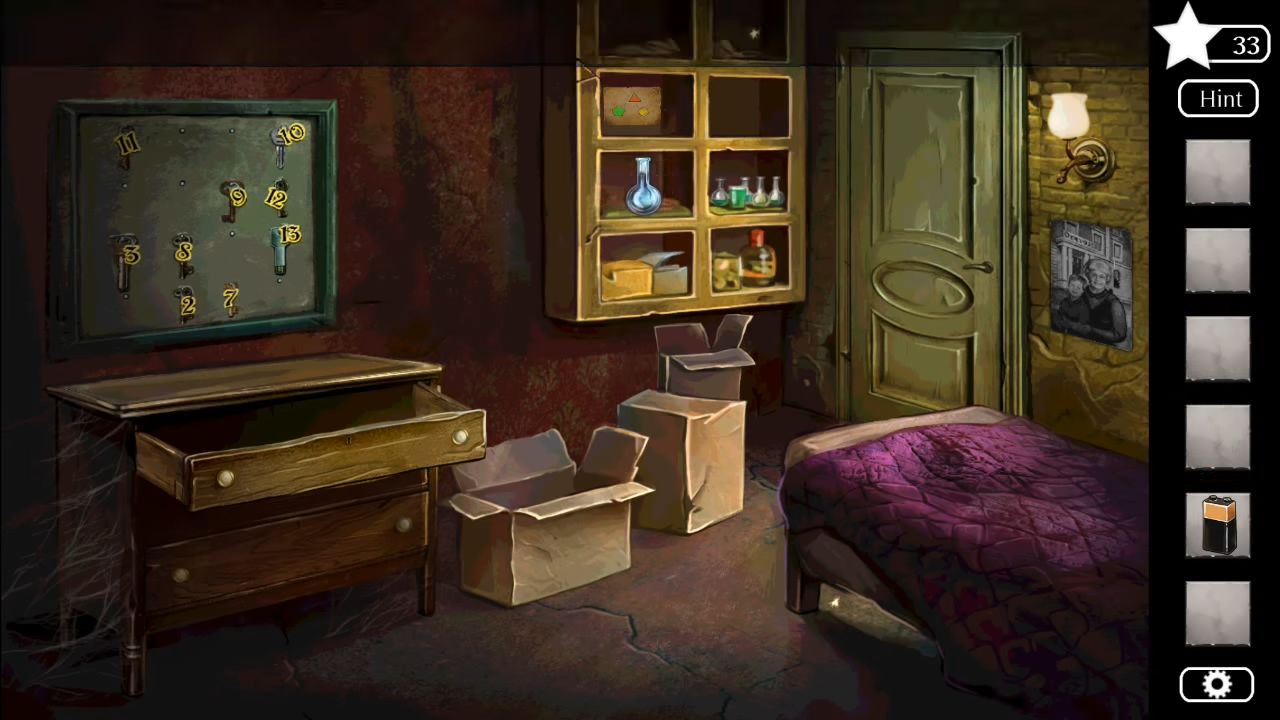
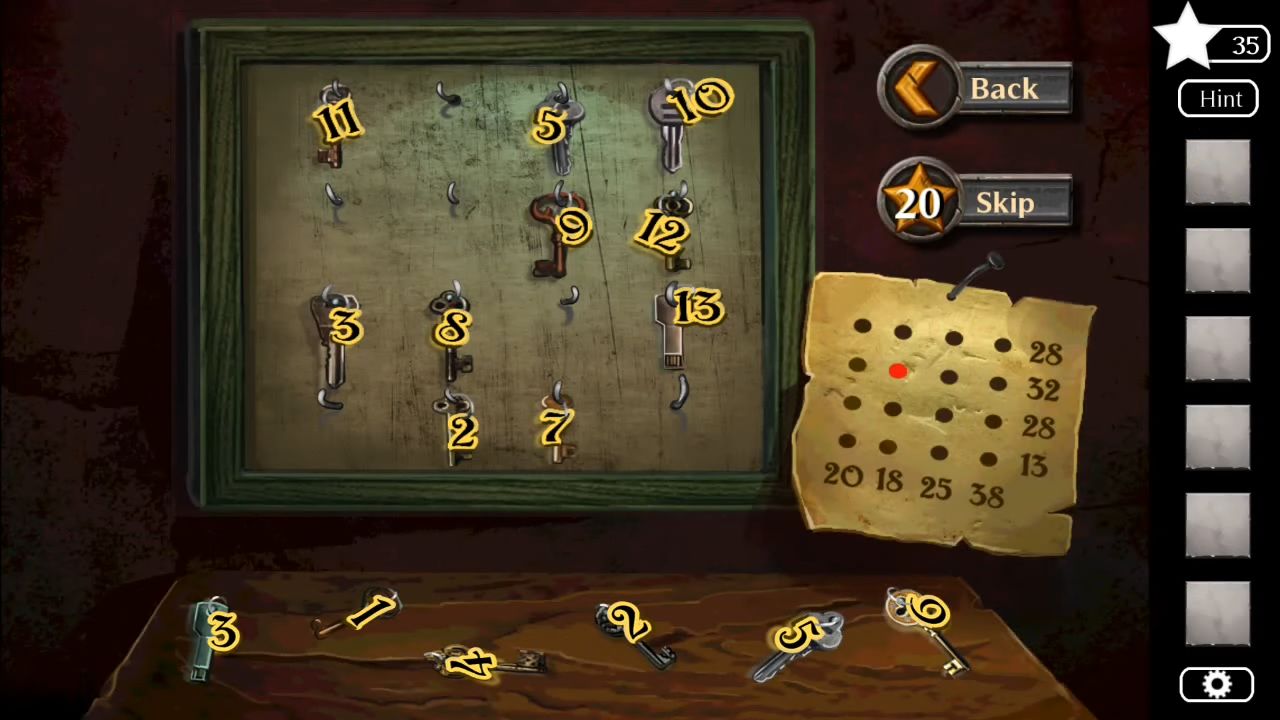
To solve the puzzle, you have to move the pieces to the edges to access the box in the center, and then use the flashlight to find the clue in the hole. Pick the key puzzle paper, then go to the secret room and look at the board of keys on the left.
Use the puzzle paper to solve the puzzle and you will get the guest room key. Simply match the clue paper by placing these keys accordingly and collect the pone marked in red.
Use the key to exit the room and then enter the guest room to complete the third chapter.
Chapter 4 – The Guests
You have to look for clues inside the guest room and collect a star from the lower floor. Collect the two statues from the right and left side, then enter the first room on the left.
Grab a star on the floor on the bottom left and one from the right side window. Find a clue from the tiles on the wall, and then open up the cabinet on the right to collect the bottle of Lubricant. Head to the second room, collect the star on the far left, and also a statue from the floor.
Move to the third room, open the window by using the lubricant, and collect a stick from the tree outside. There are two sets of tiles above the fireplace, now you need to follow the clue from the first room to solve this puzzle. It will light up the fire and then you can collect the statue from the lower left. After that, exit this room.

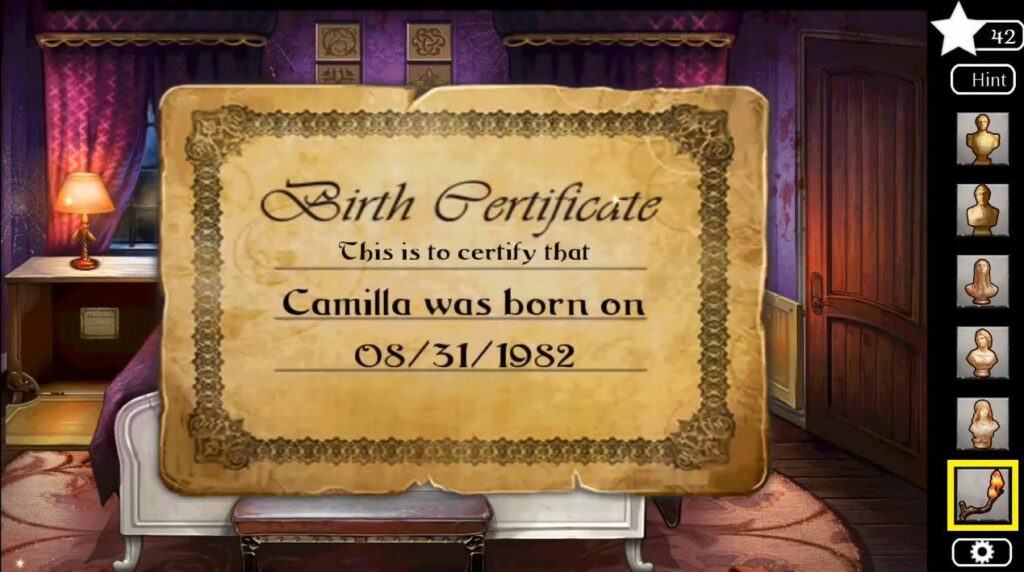
Head inside the fourth room, and light the candles using the lit stick. Take note of the numbers on the mirror, then head back to the first room and view the locked cabinet on the left. Use the code from the previous room to unlock it, and grab a birth certificate – Camilla and a statue from it.
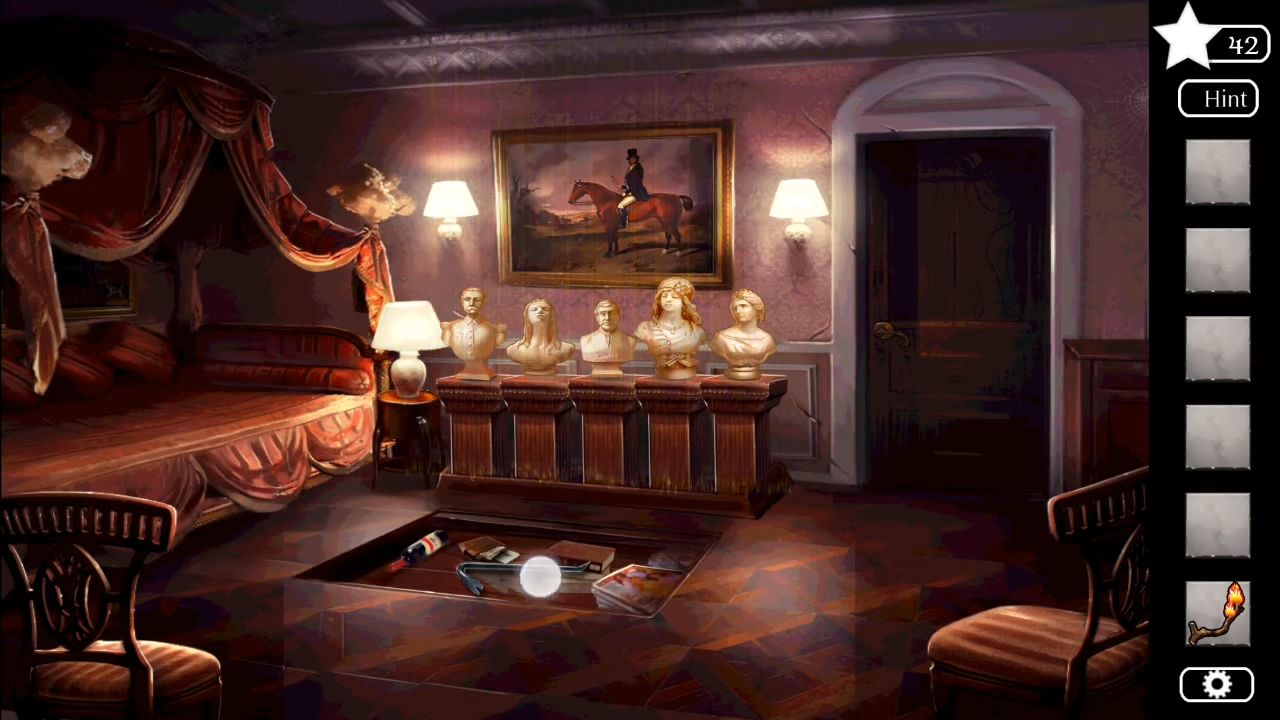
Head back to the second room and you will find a puzzle where you have to place five statues and five pedestals. Place them in the correct positions to lower the pedestals and make sure all the pedestals get to the same height.
After that, you will be able to view an ID card and grab a crowbar.

Enter the third room and use the crowbar on the drawers on the left side to find another birth certificate – Brady.
Go back to the fourth room, open the puzzle box on the left using the crowbar, and view a Horoscope puzzle.
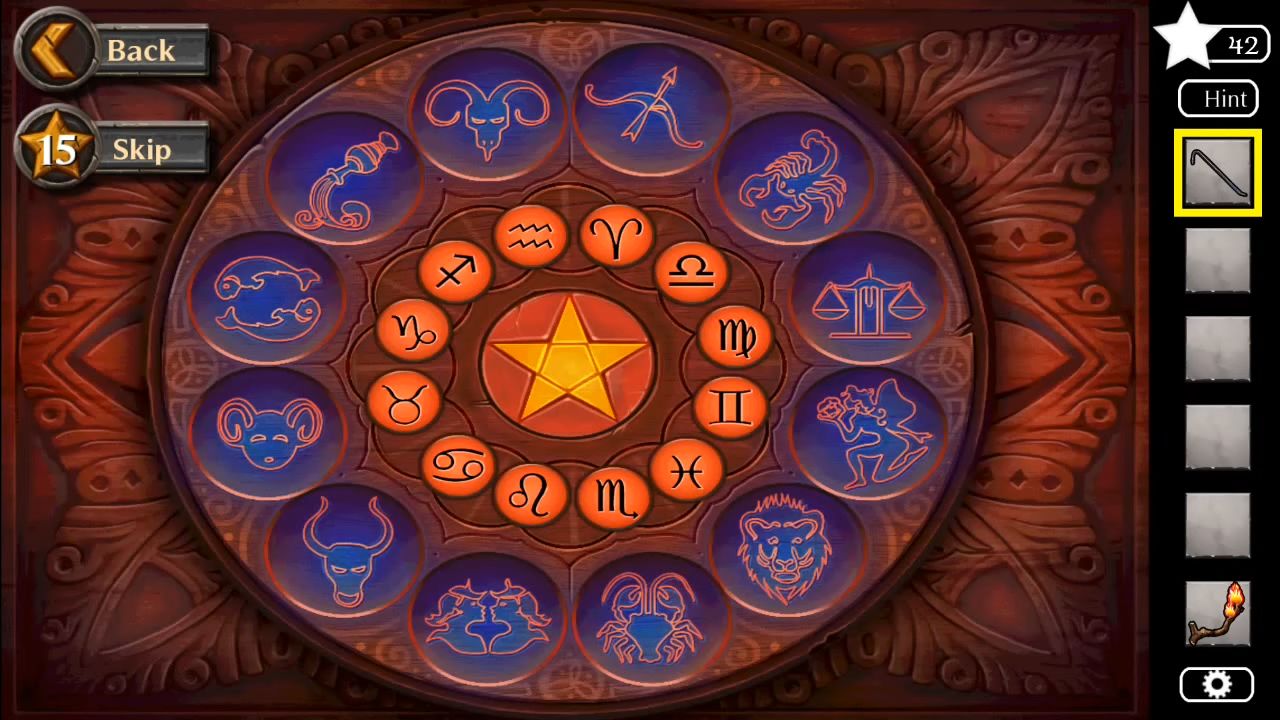
Two rings of symbols refer to astrological signs, you have to swap the adjacent pairs of the red symbols to view the final birth certificate – Fontana.

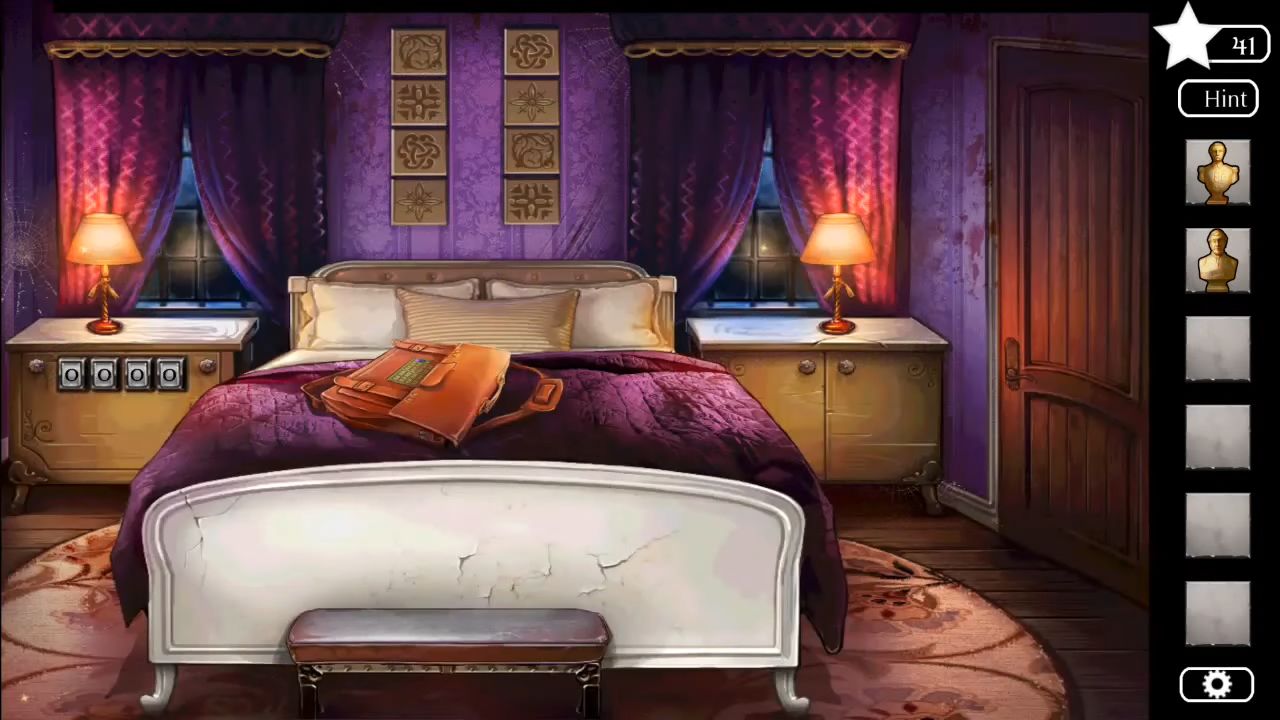
Go to the first room and you will find a briefcase on the bed. Crack the four-digit code and view the family tree document to find a code. It is a Caesar cipher that decodes the family tree and you will learn that the guests are all related. It will complete this chapter.

Chapter 5 – The Night Garden
Go to the garden and look for more clues. Grab a star by the tree, one from the ground to the right of the wheelbarrow, and one from the shed roof. After that, pick up a metal disc from the wheelbarrow and then enter the shed.

Grab a metal disc from the bench, a green rag on the left, and a broom from the right. There is a music box/piano keyboard under the rag, you need to play the piece of music on the keys.
The music box will open up when you hit the correct notes. Collect another metal disc and then clear the mirror using the rag to get a clue.

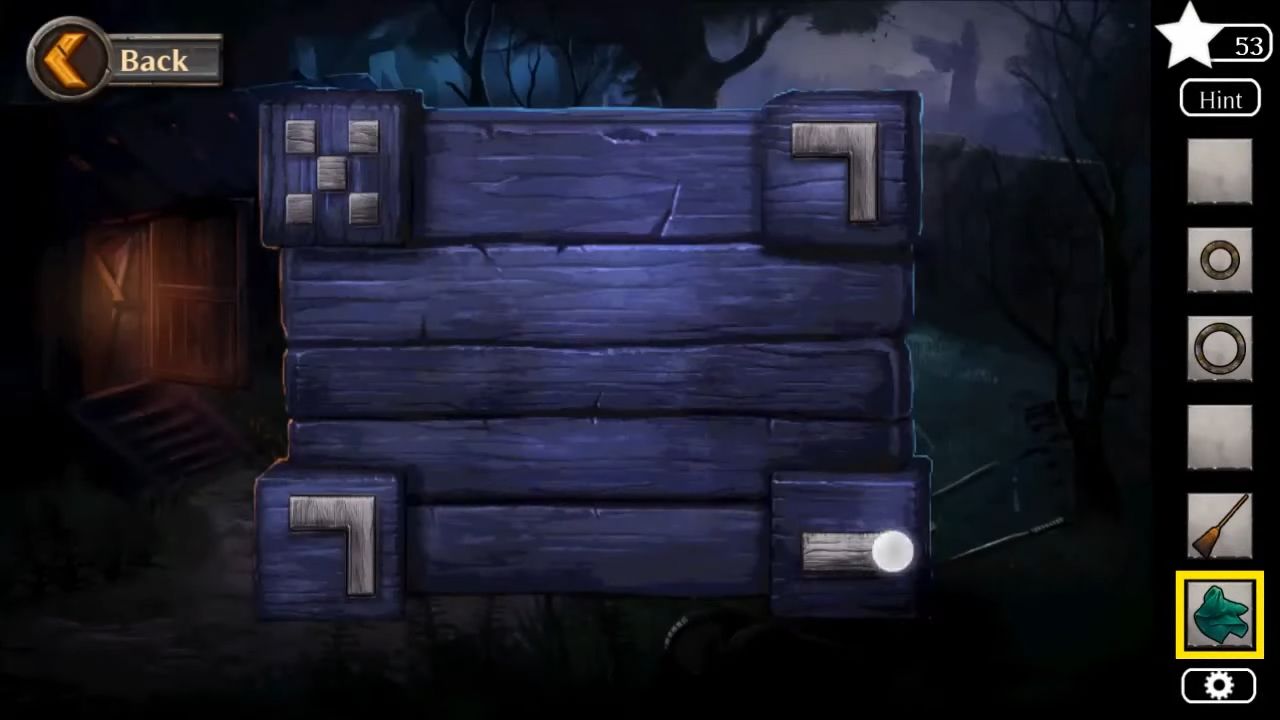
Exit the shed and tap on a box on the side to view a puzzle. To solve this puzzle, you need to change the symbols by tapping on every corner. It will open the box and you can grab a fourth metal disc.
Use the broom on the cobwebs to clear them and then click on the gate to find a lock puzzle. Add the 4 discs to it and then complete the picture by rotating four rings. After that, go through to complete the fifth chapter.
Chapter 6 – Memories of Remorse
In chapter 5 we moved through the garden to unlock the gate, we have now reached the family graveyard. let’s look for more clues. Collect the shears (scissors) next to the tree. Tap to the left of the scene to move to a new area with a fountain.
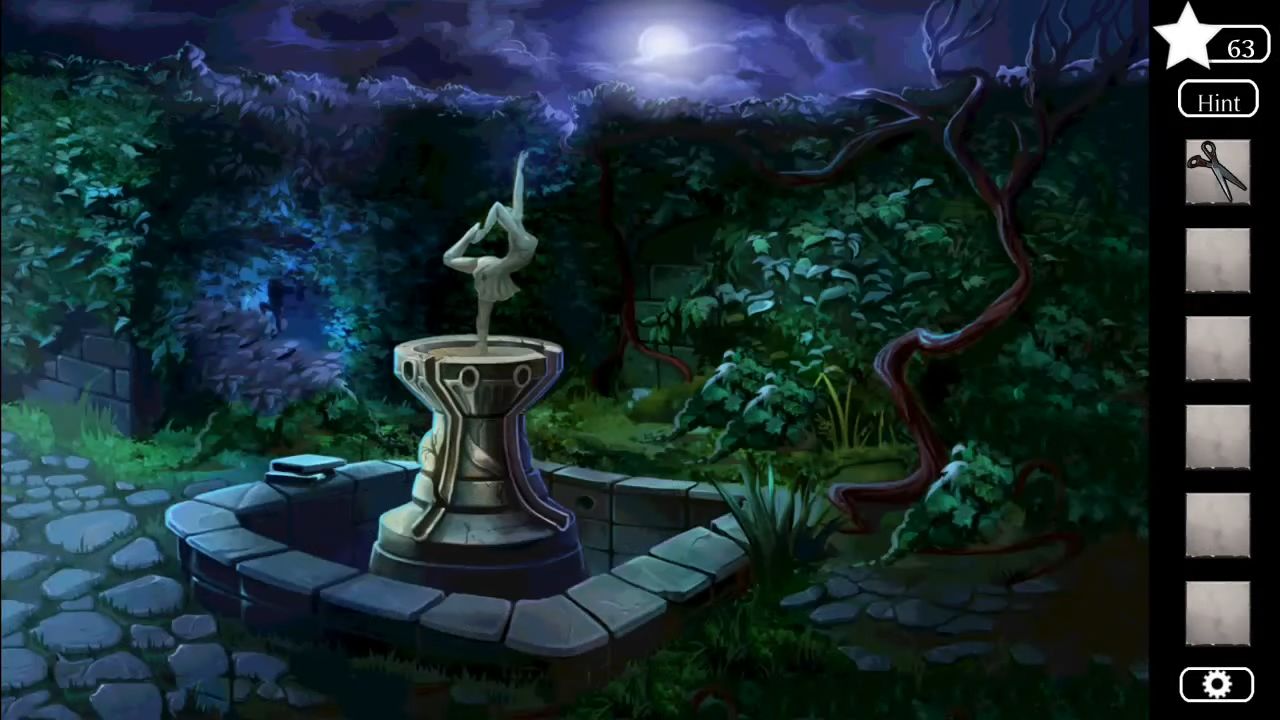
Cut the vines on the right side of the fountain and the back wall using the shears. Also, cut the vines at the bottom of the tree, and collect stars under the vines.
After that, pick an egg and two pieces of headstone, then return to the graveyard and add the egg to the nest on the tree to make the bird move. Collect a spigot, go to the fountain, and place the spigot on the top of a pipe to turn on the fountain.

Pick up the wrench, then head to the graves and go back to the shed area from Chapter 5 by tapping on the bottom right side. Open the locked cabinet in the shed using the wrench and grab the third tombstone piece.
Go to the cemetery and add three tombstone pieces to the graves. Tap the mausoleum to view the doors, you need numbers to unlock it, look at the dates on each gravestone, and use them to unlock it.
Enter the mausoleum, and you will find that Lloyd is dead now. It will also complete this chapter.

Chapter 7 – The Wickham Legacy
Head to the house to meet Mr Wickham, collect a star on the the left of the stairs and one on the wall above the doors. Go through the door upstairs and open the red curtain to collect an axe behind it.
After that, enter the next room and collect a star from the pocket of the pool table. Place the axe on the other hand of the Suit of armor, collect a star, and then open three doors on the cabinet. Grab a key from the right side and a star from the left door.

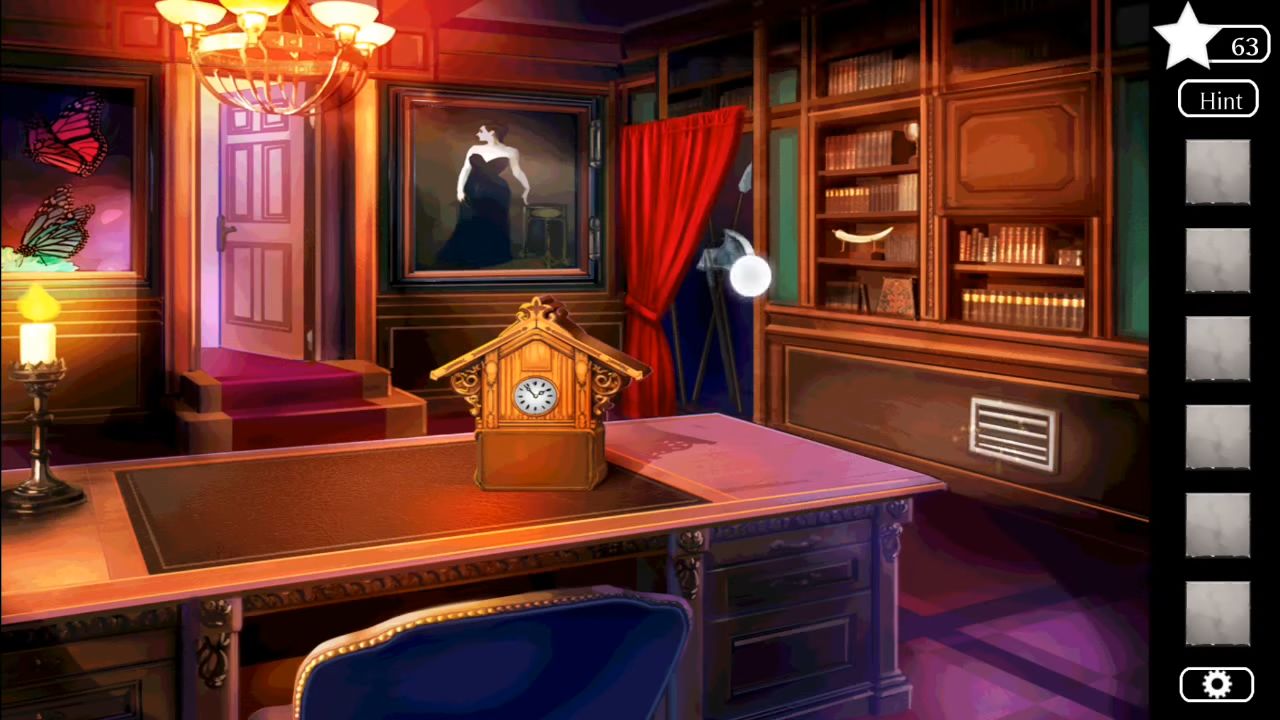
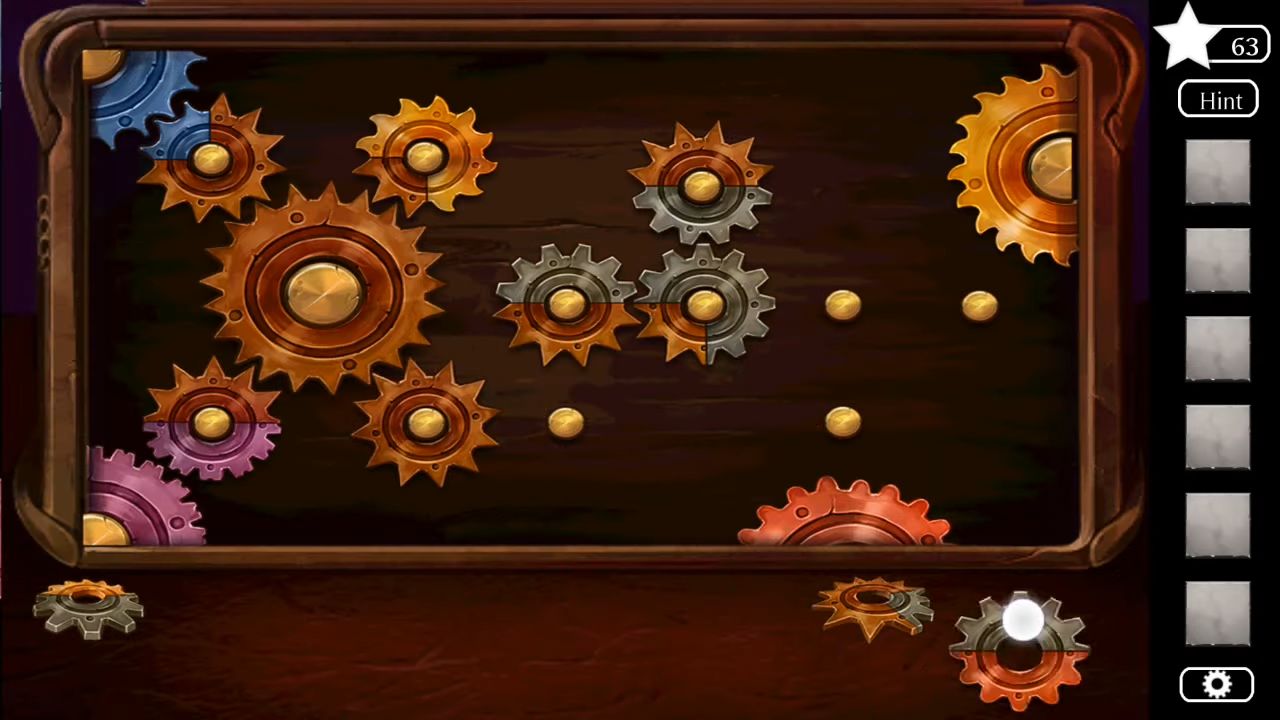
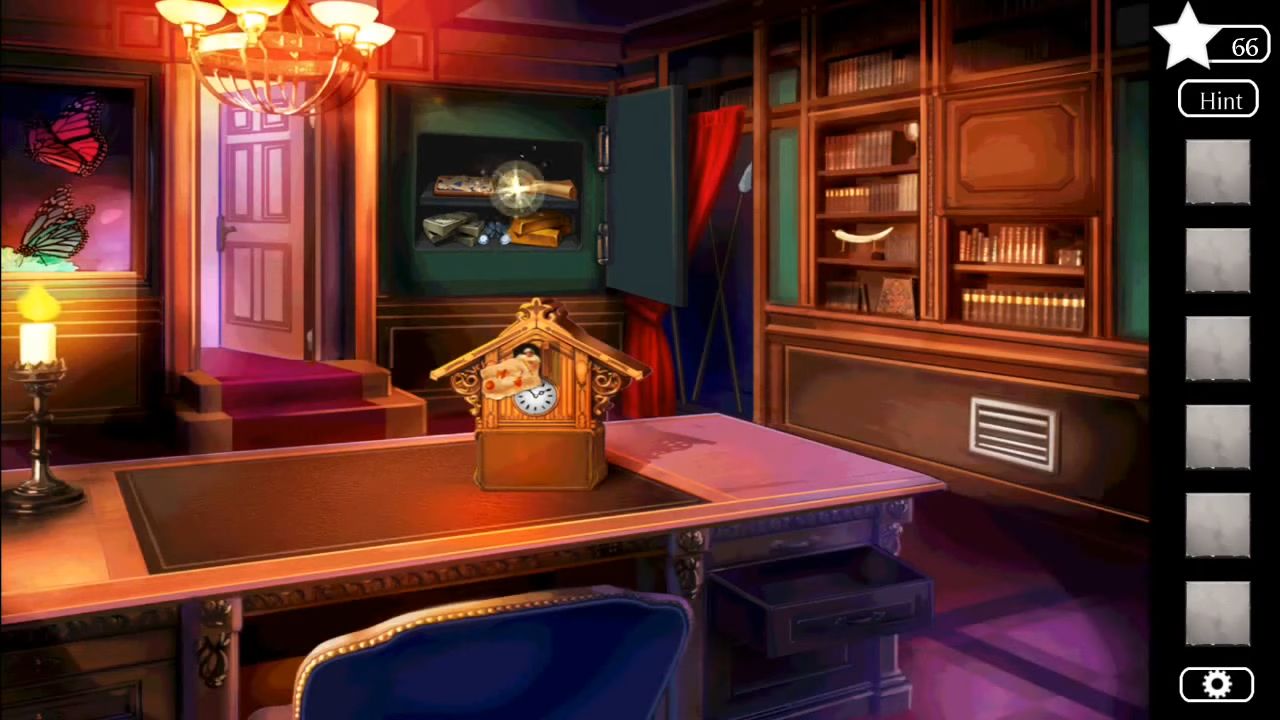
Collect a piece of the antler from the middle deer, then enter the first room and open the drawer of the desk using the key. Pick a star from the drawer and a bottle of vinegar. Use the antler on the vent on the right (sparkling) to collect gear and then click on the clock on the desk to reveal another puzzle.
Place the gear with the others and match up the colors to solve the puzzle and view a clue.
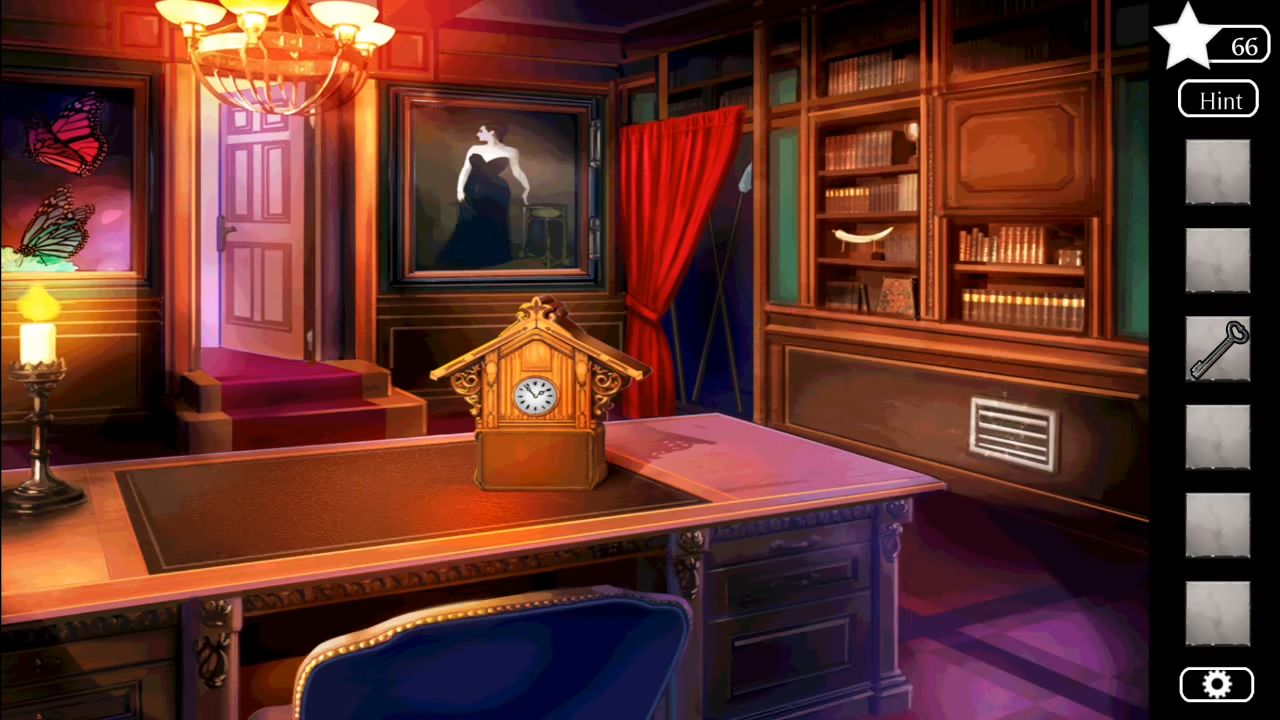
Head to the painting of the woman and use the vinegar on it to loosen the hinges. It will reveal a locked safe. A clue shows four items, and you can find these items in the two rooms. Open the safe and collect the stars inside it.
After that, grab a star from the top shelf and tap on the torn-up paper to reveal another puzzle. To complete this puzzle, you just need to rearrange the pieces.

Click on the bookshelf on the right side to find another puzzle, and then place these books in the correct place to solve this puzzle. It will open up a secret door to the bedroom with Will and his father.
Now you will find that Will is the killer and then he will set the room on fire to kill you and his father. It will complete this chapter.
Chapter 8 – A House Divided
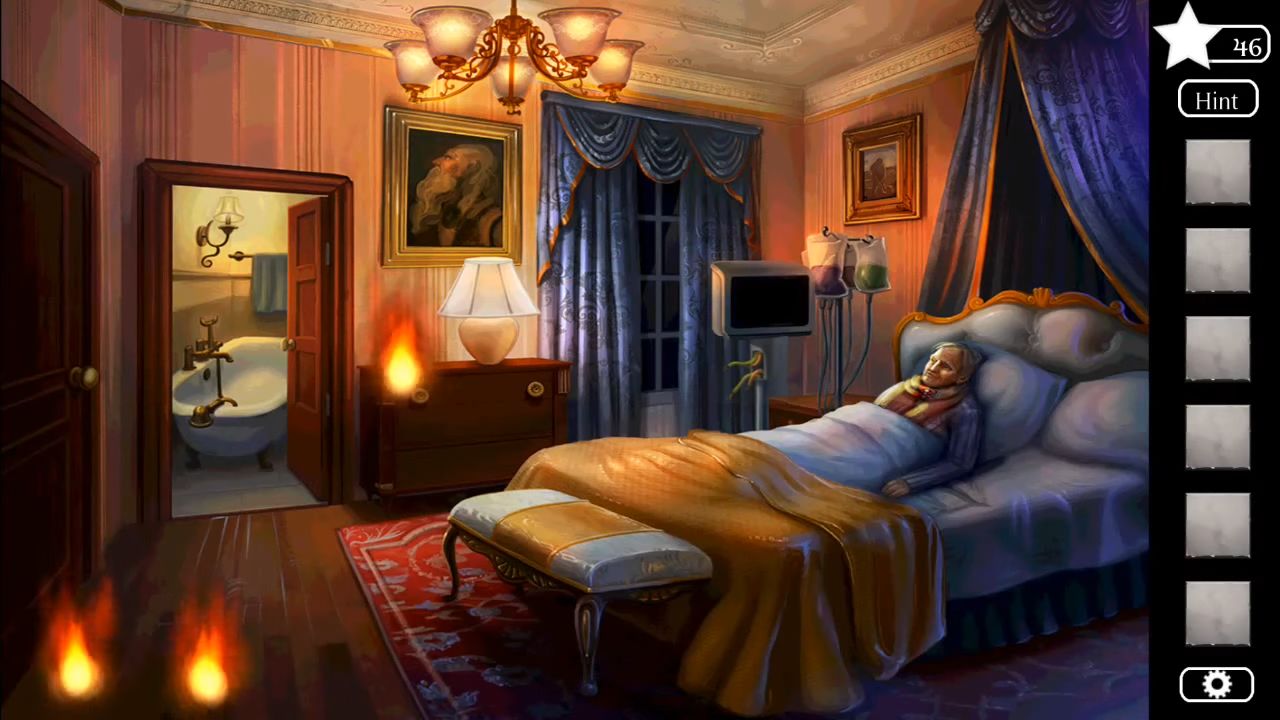
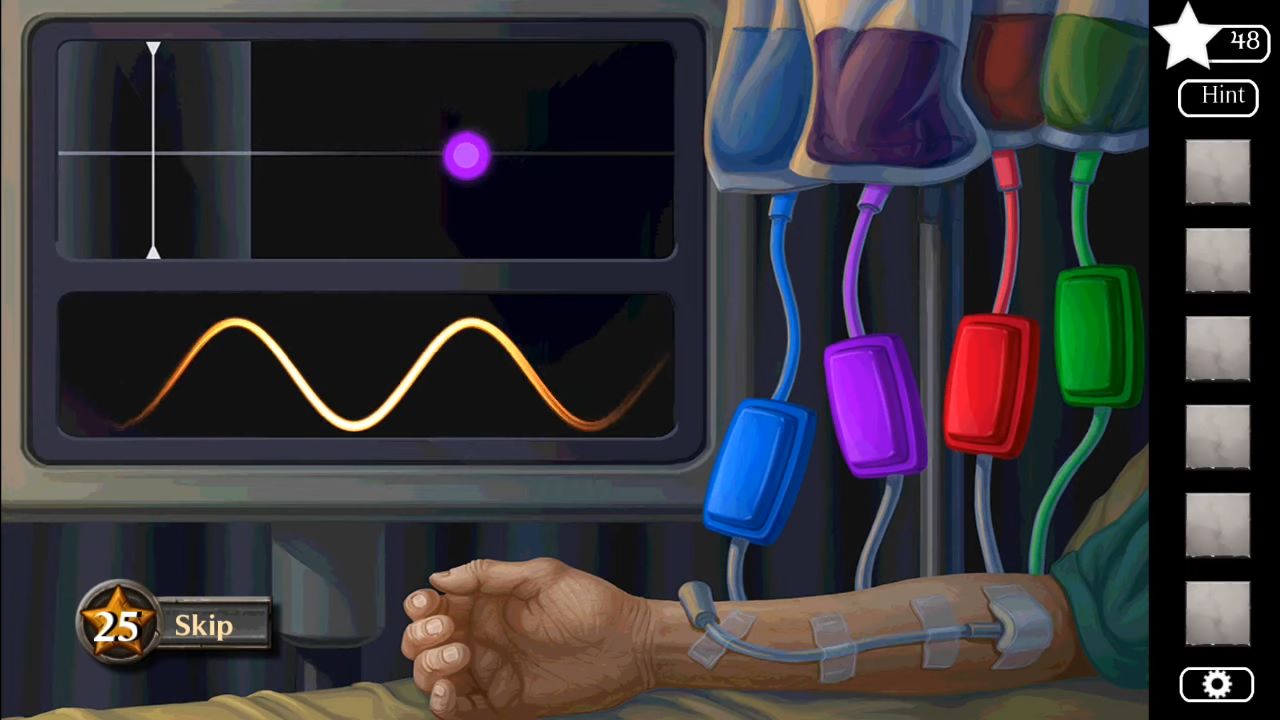
First, you have to pick up a star from the floor and then open the drawer to get the duct tape. Use this tape to fix the sparking machine and then click on the machine to view a puzzle.
Start tapping the buttons on the colored liquids to make sure that the colored orbs enter the grey area on the left side to revive Lord Wickham.
Move the yellow bed cover and collect a bucket, then place this in the bathroom and fill it with water. After that, pour the water on all of the flames and then leave the room. Head to the garage and collect a star from the ceiling above the green car and one above the yellow car on the right.
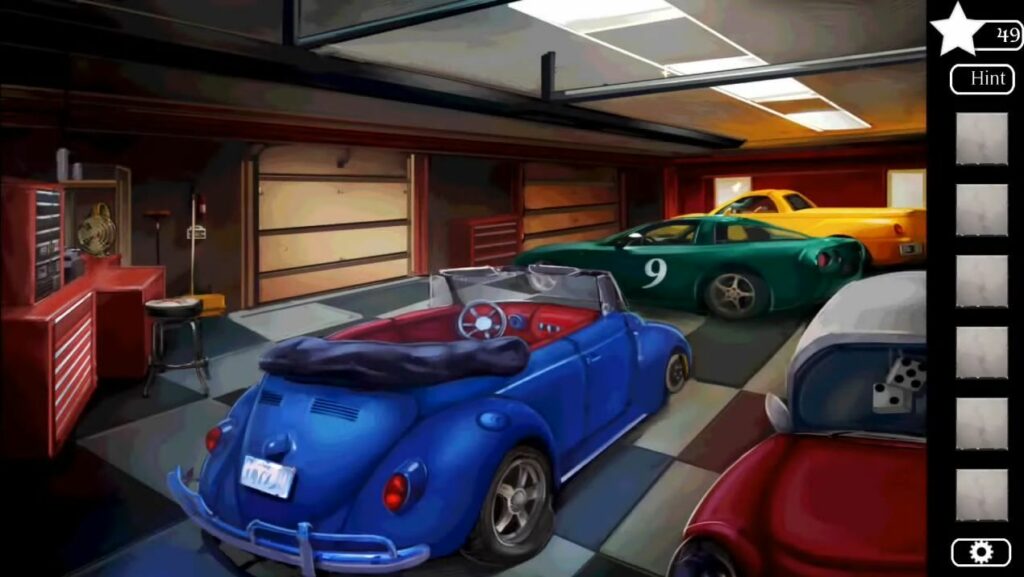
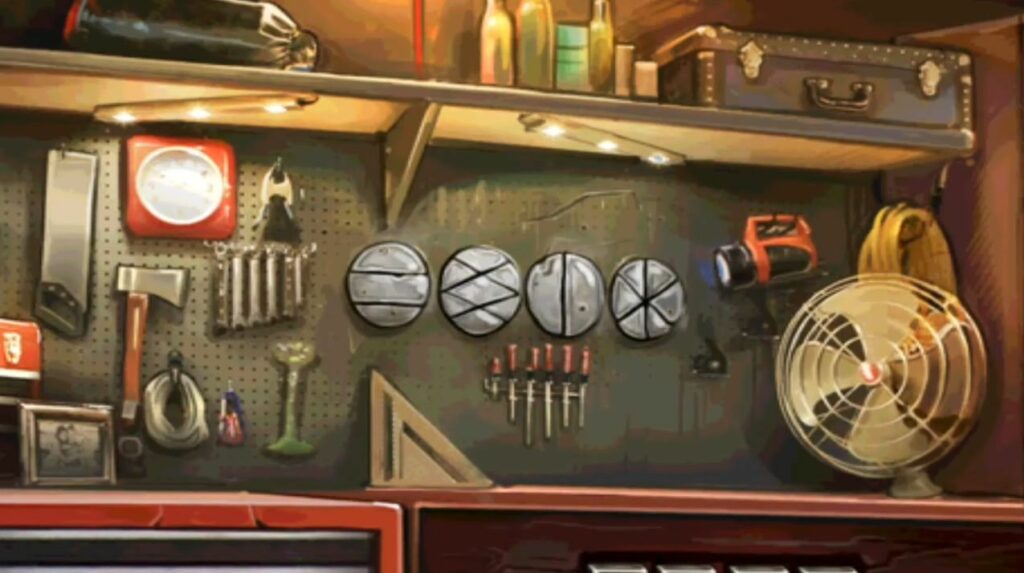
Go to the tool cabinets to grab a spare wheel, then open up the drawer to collect a pump and a crowbar. Pick the red Gasoline canister from the top, and notice of the designs on the wall.
Unlock the locked drawer on the right and collect the engine part. Pick up a star and open up the trunk of the blue car using the crowbar.
Put in the engine part, close the trunk, and then pour the gas in. Next, you need to place the spare wheel at the front and use the tire pump on the back right tire.

View the locked glove compartment inside the car and solve another puzzle to obtain the car key. Now you can use this key to ignite the car. It will also complete the eighth chapter.
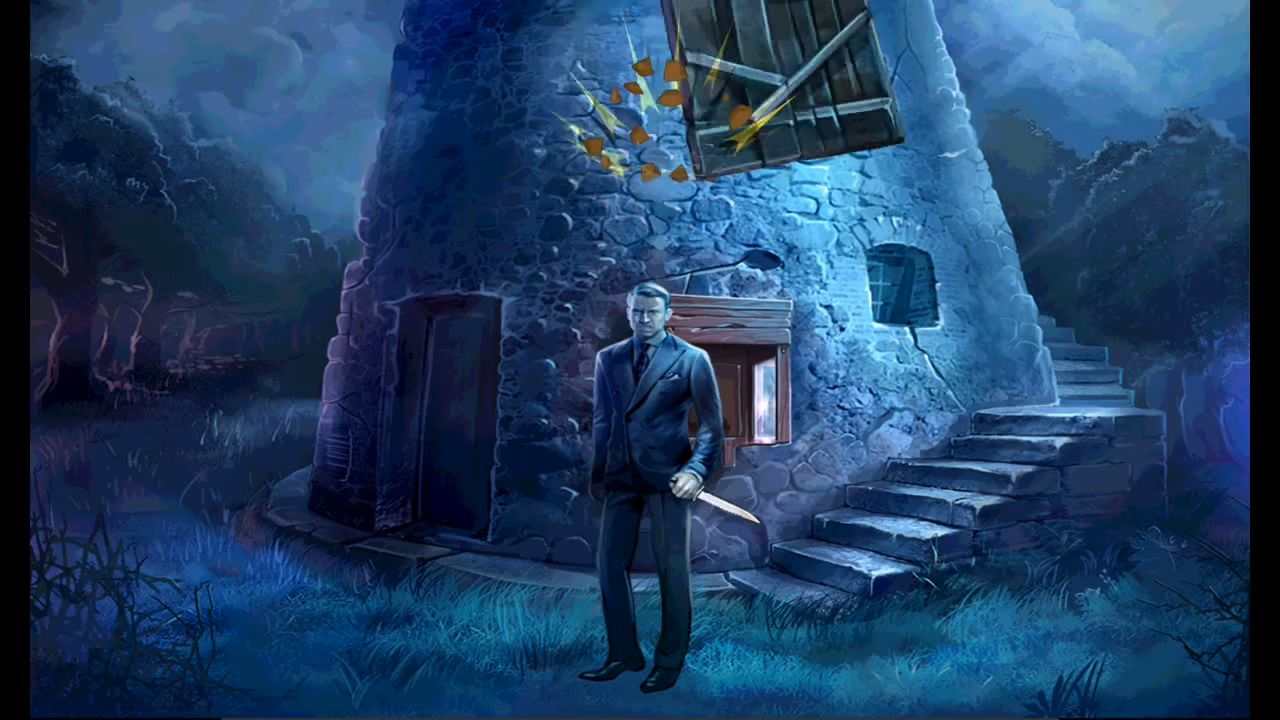
Chapter 9 – Fallen
In chapter 9, you will need to go to the old windmill to stop the killer from escaping.
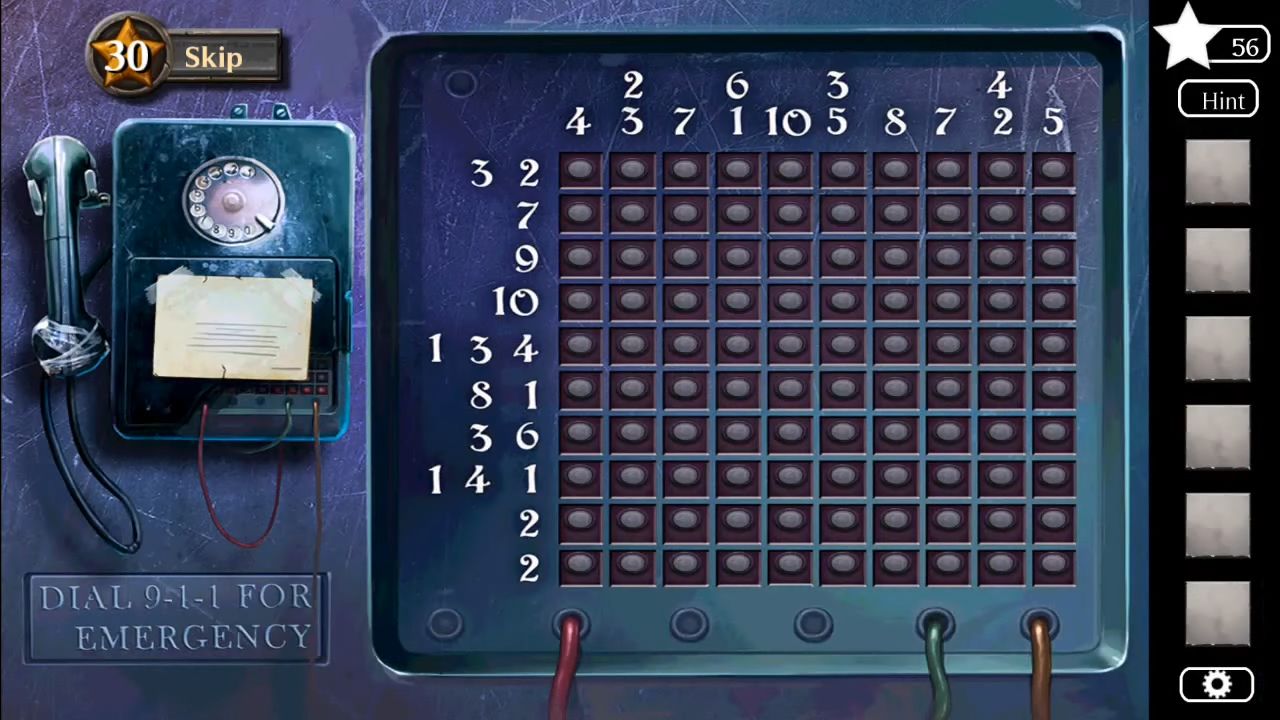
Once you get there, pick up a star from the lower window on the right and one from the ground. Click on the telephone to find a puzzle, and then fix the switchboard. You can use the hints on the paper on the left to solve this puzzle.
You cannot hit Will with the rock. So collect the rock from the floor and aim for the windmill’s sail as he passes.
Once you hit it correctly, it will knock Will out and will also solve the case. It ends the game.