Adventure Escape: Cult Mystery is an escape room puzzle game where you will need to solve challenging puzzles to rescue a missing friend and escape. The primary objective of the game is to go undercover and take the cult down to rescue your friend.
Adventure Escape: Cult Mystery has 9 chapters, this guide will walk you through all these chapters while providing you with solutions to all the challenging puzzles. You will find all the useful hints you need to solve the mystery.
Chapter 1 – Melissa’s Home
In the first chapter, you will find yourself at the home of your friend Melissa and the tutorial will ask you to find some objects.
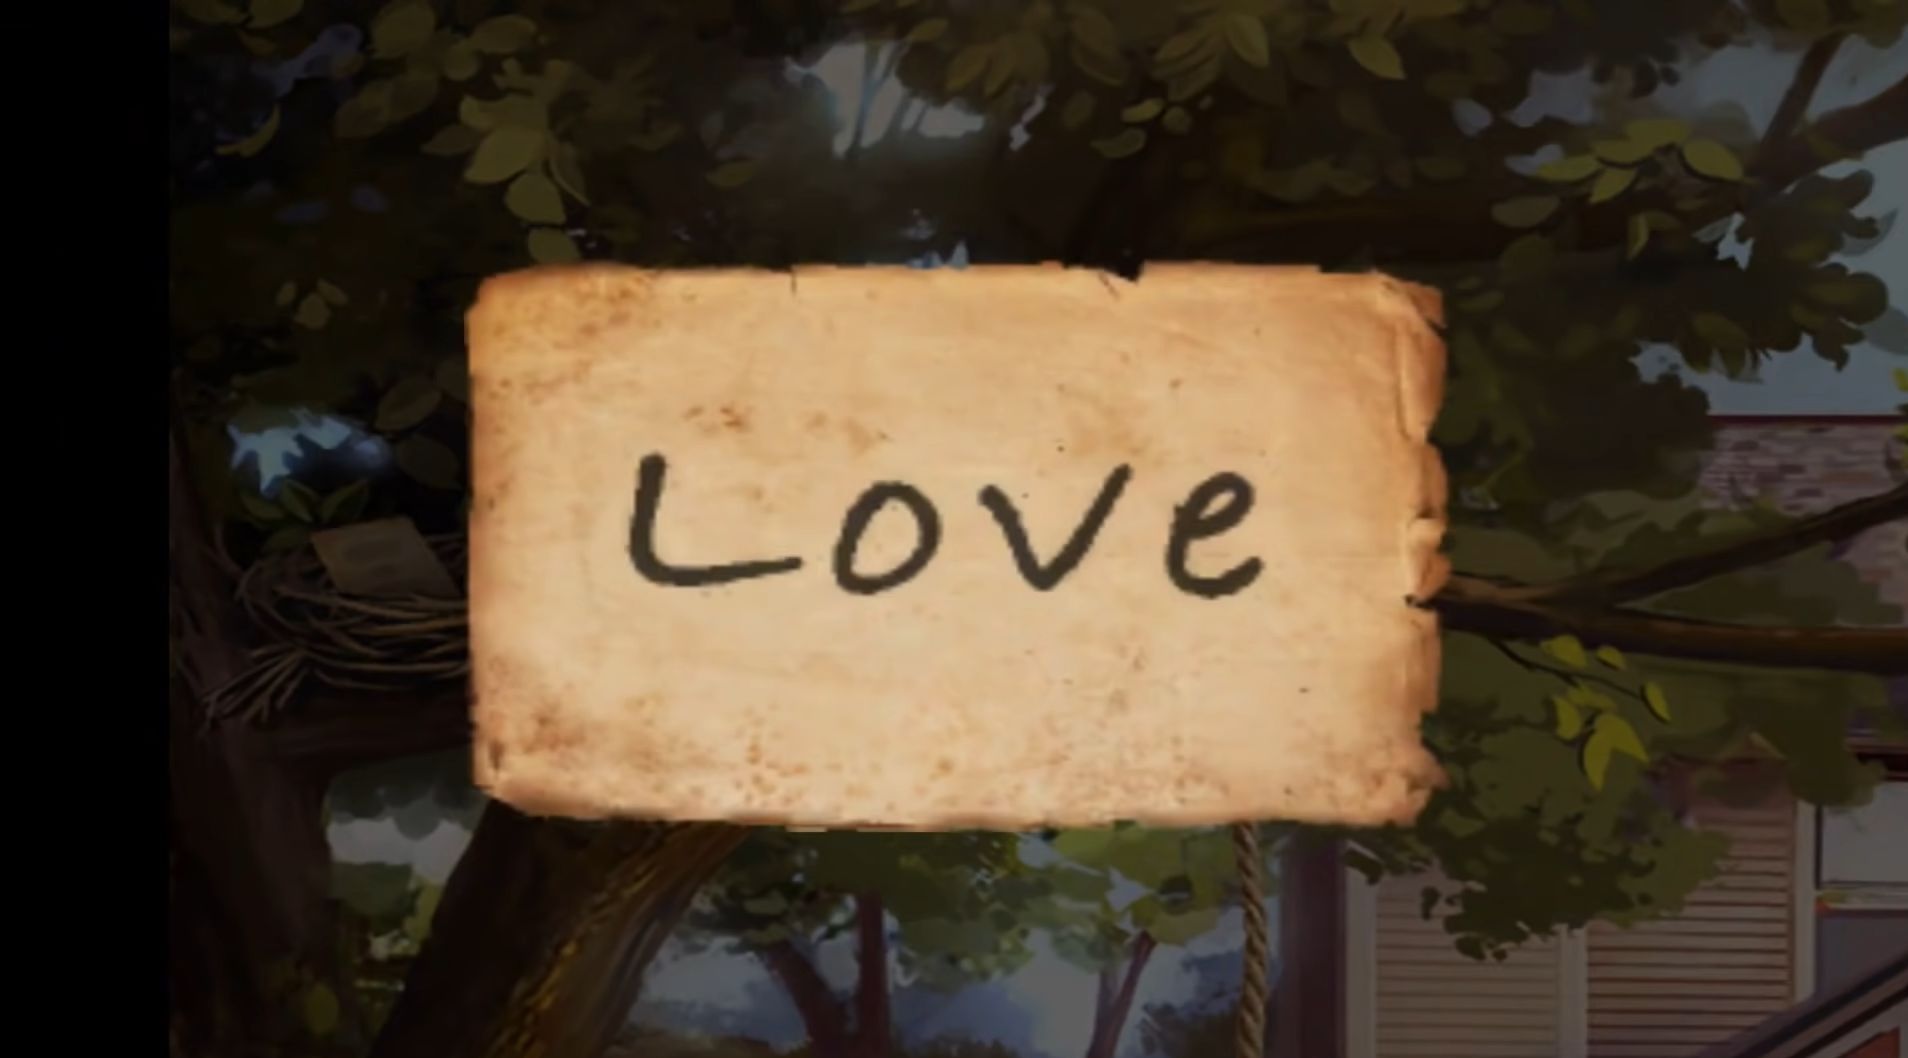
First, pick up the rope from the pot and use it to climb up the tree. You will find a note in the chest. Take a closer look at it and you will find “LOVE” written on it.
You can collect Star from the bush that will aid you in your adventure.
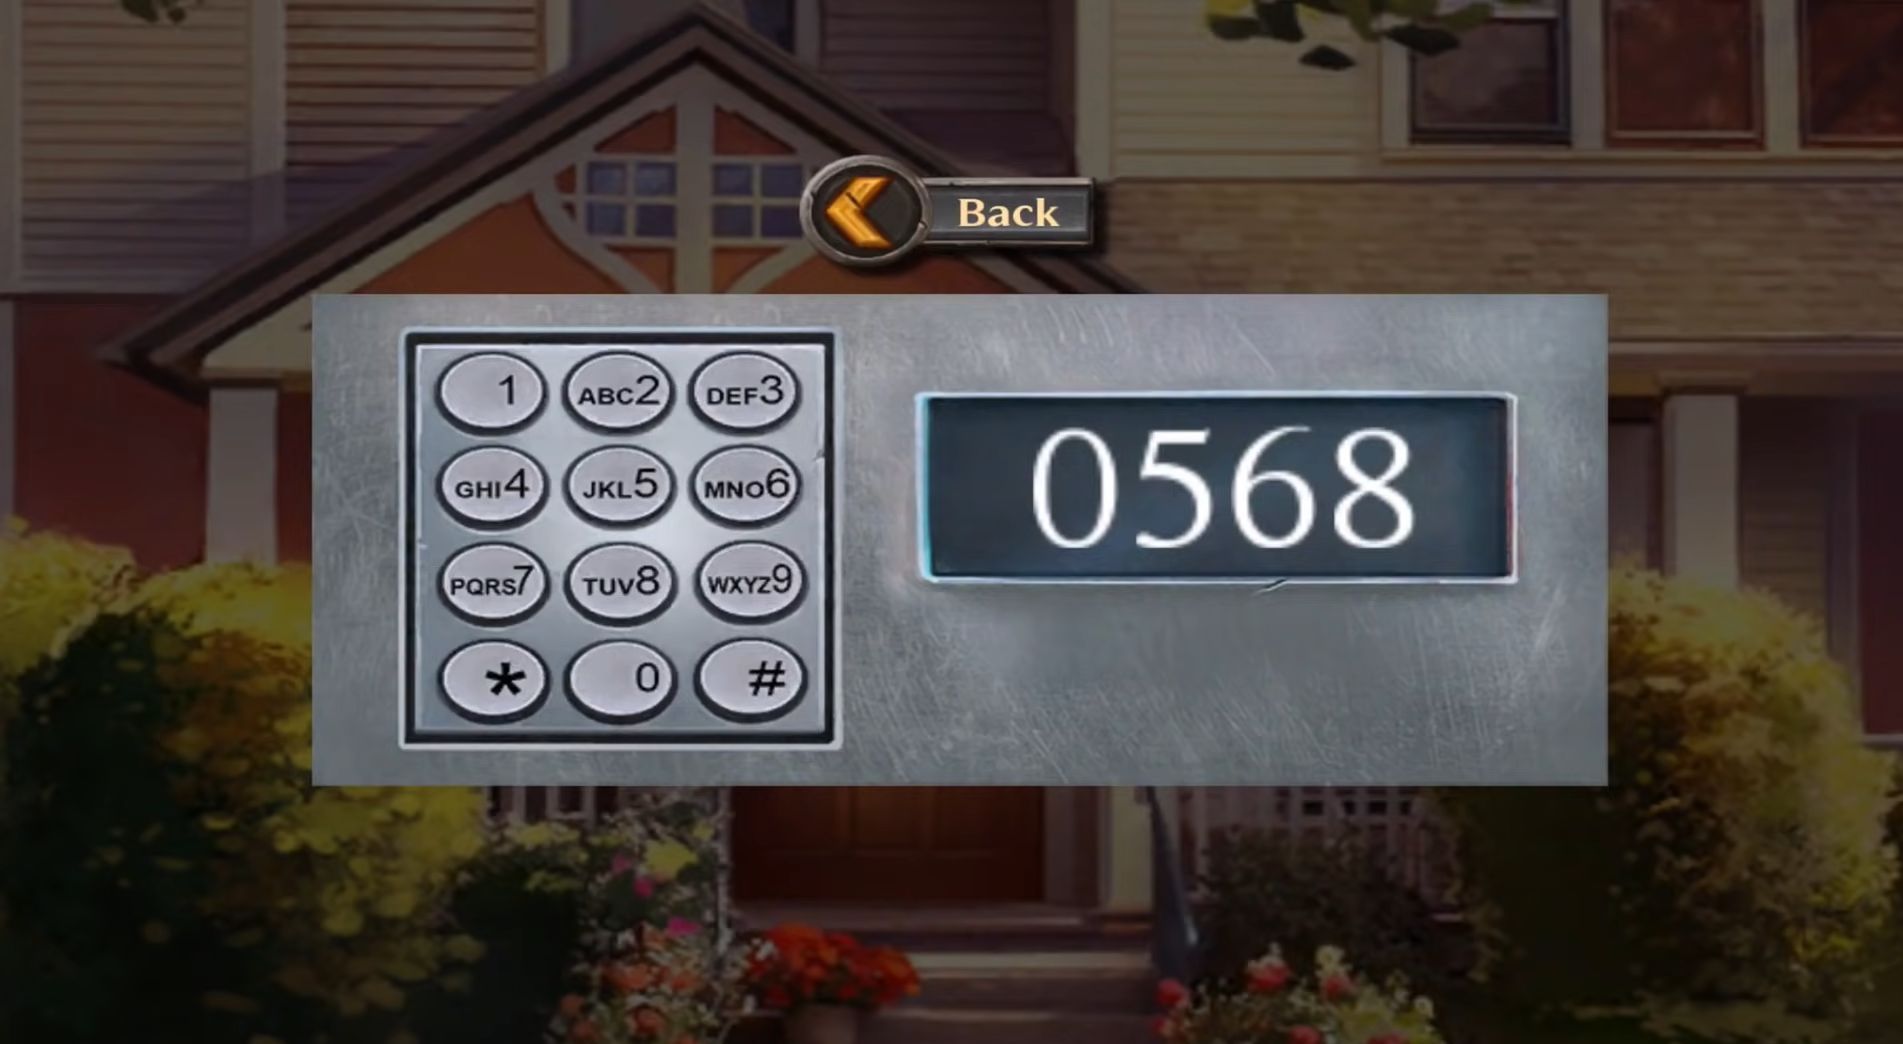
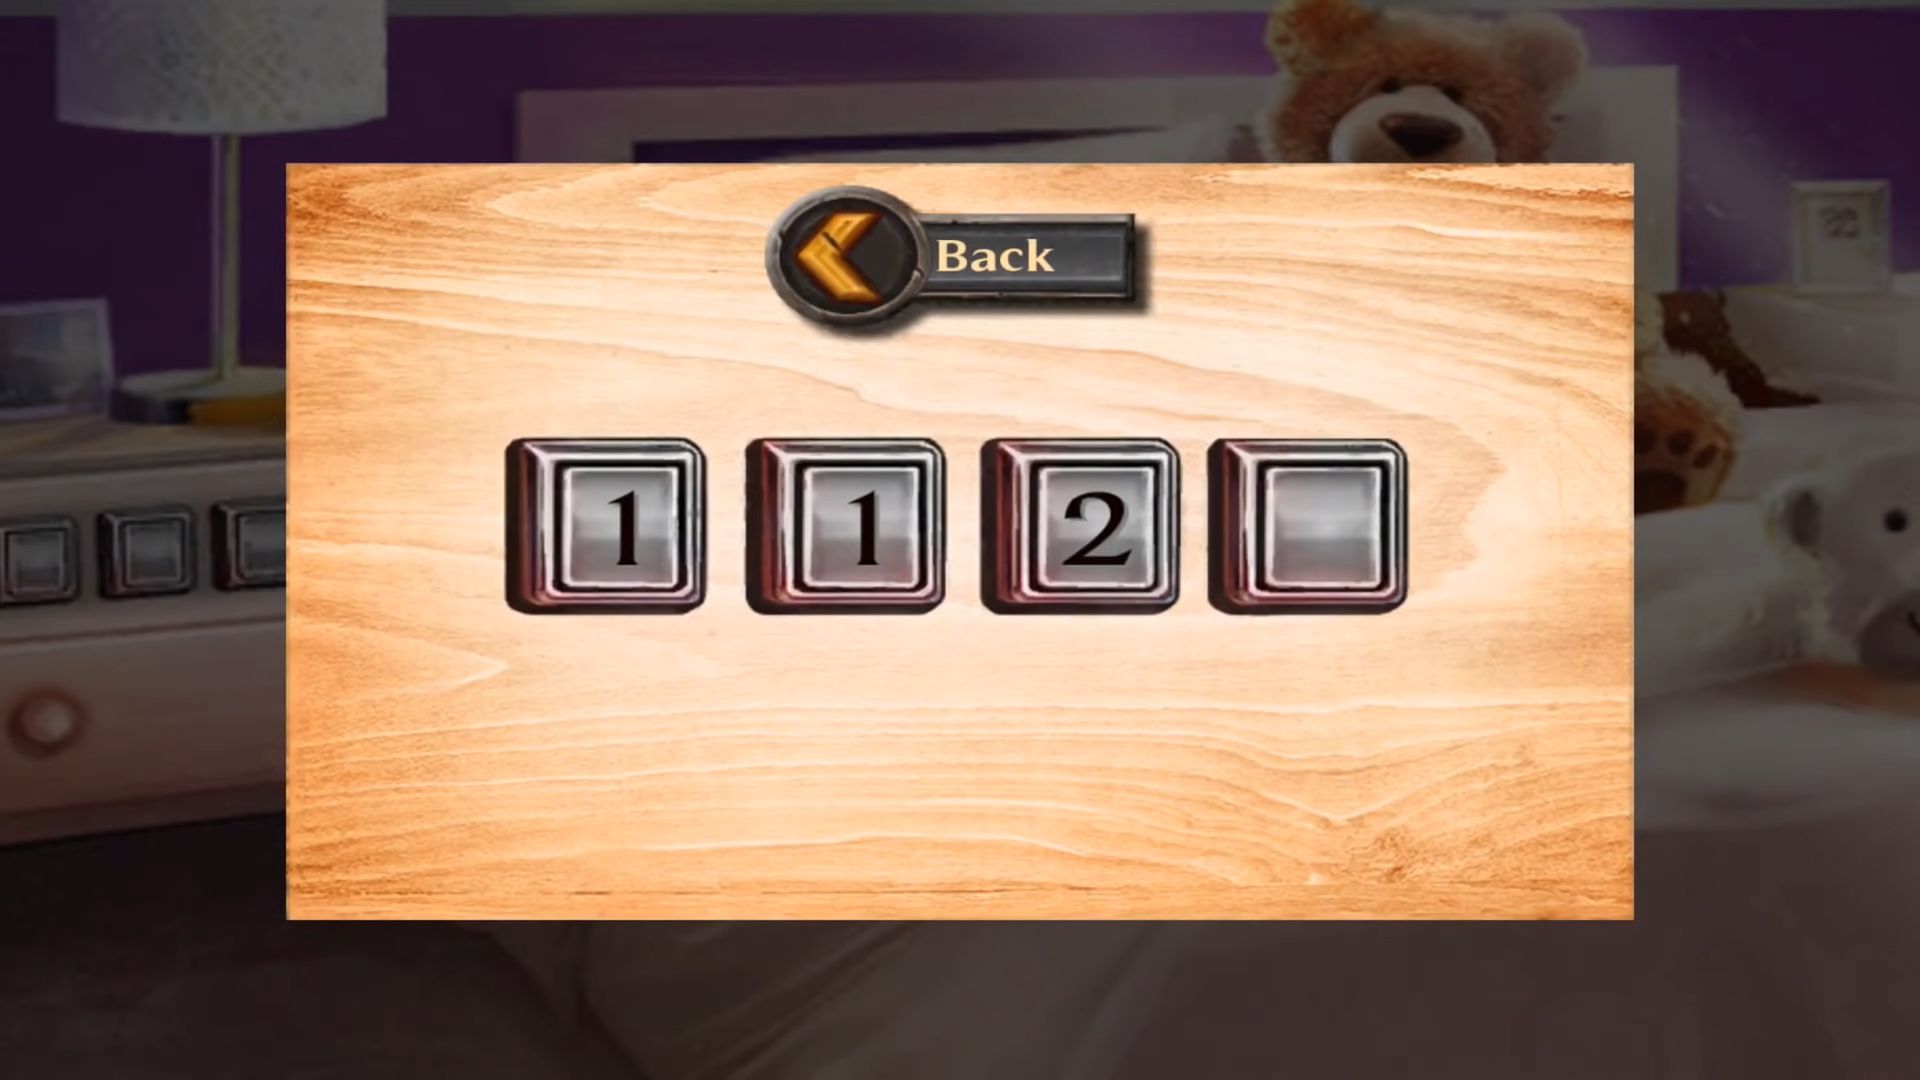
Now go to the house’s gate and a lock keypad will open up. Use the word “LOVE” to crack the correct password. Input the code in the keypad and then move inside the house.
Pick fish food from the rack on the wall and use it to feed fish in the aquarium. Pick up Melissa’s phone and check if it’s on or off.
Pick up the red piece from the center table and a blue piece from inside the sofa.
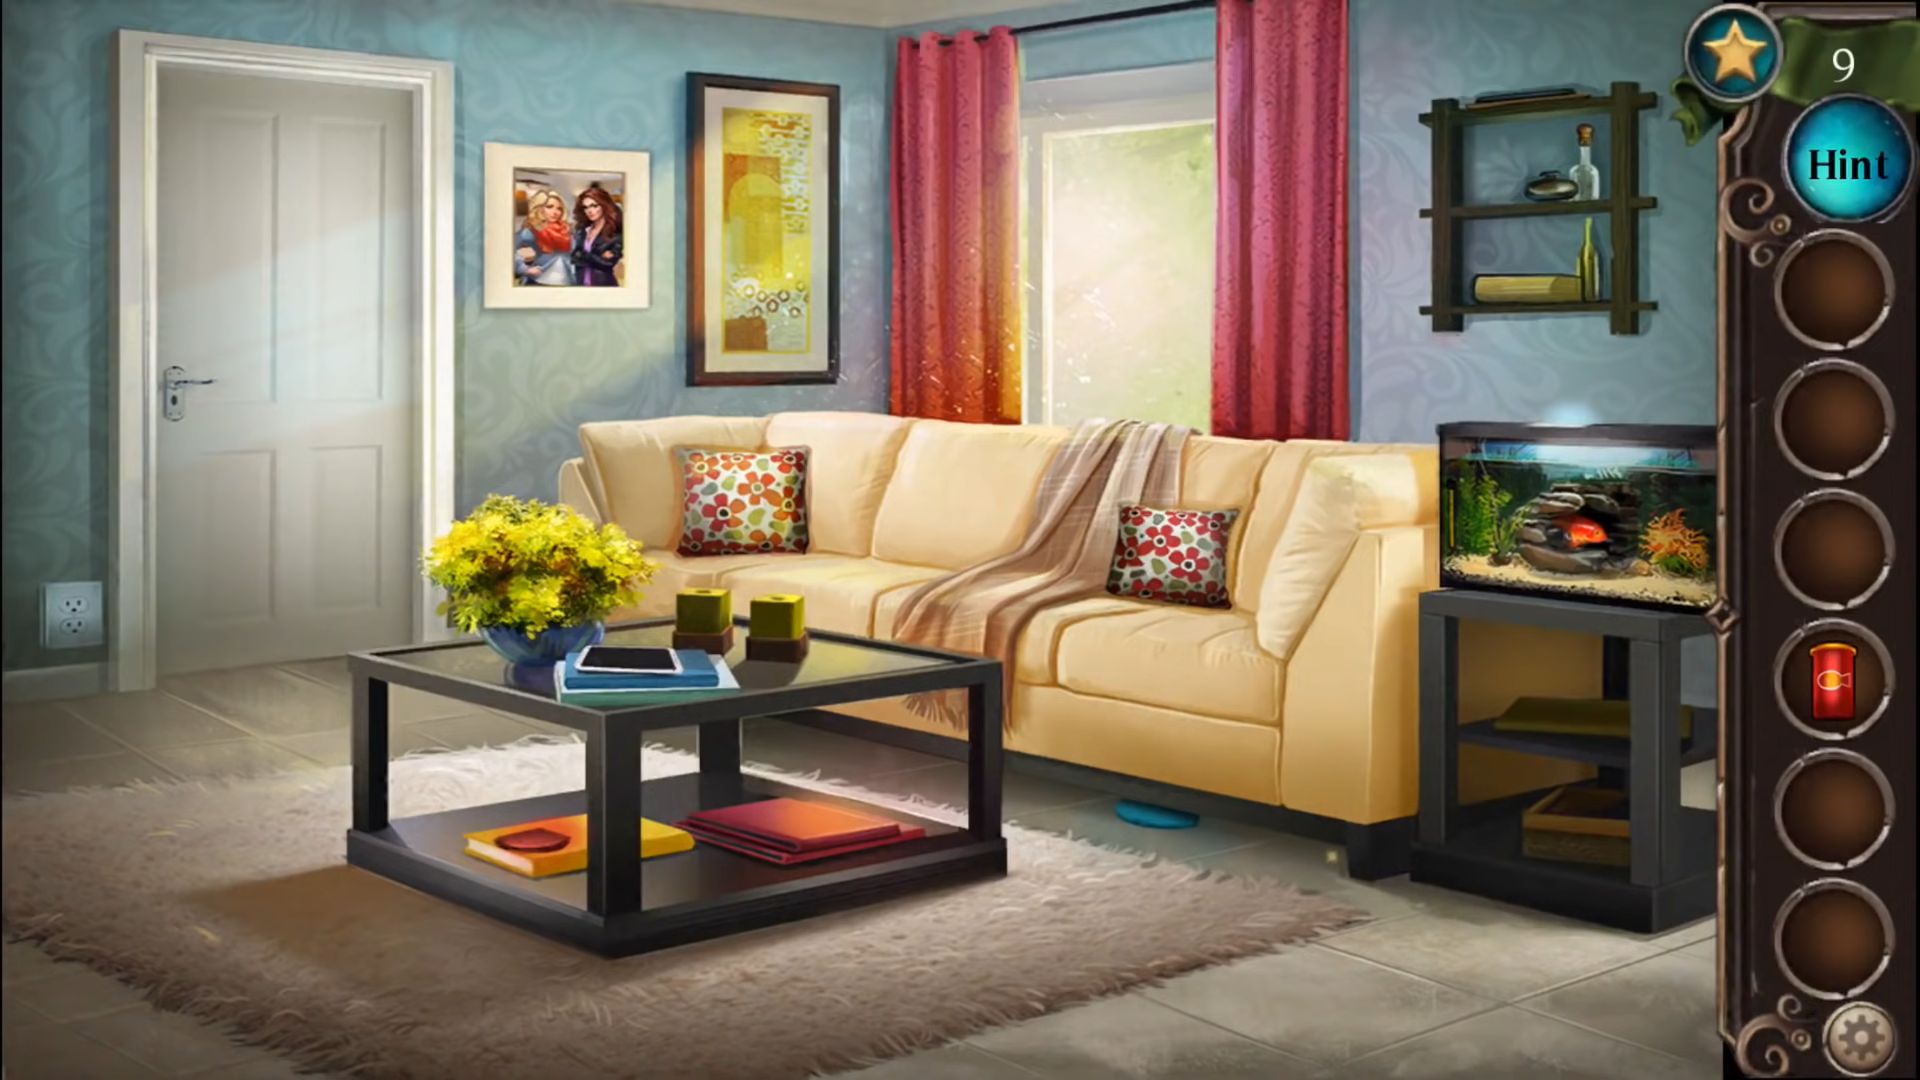
You will get a key. Use this key to open up the bedroom door.
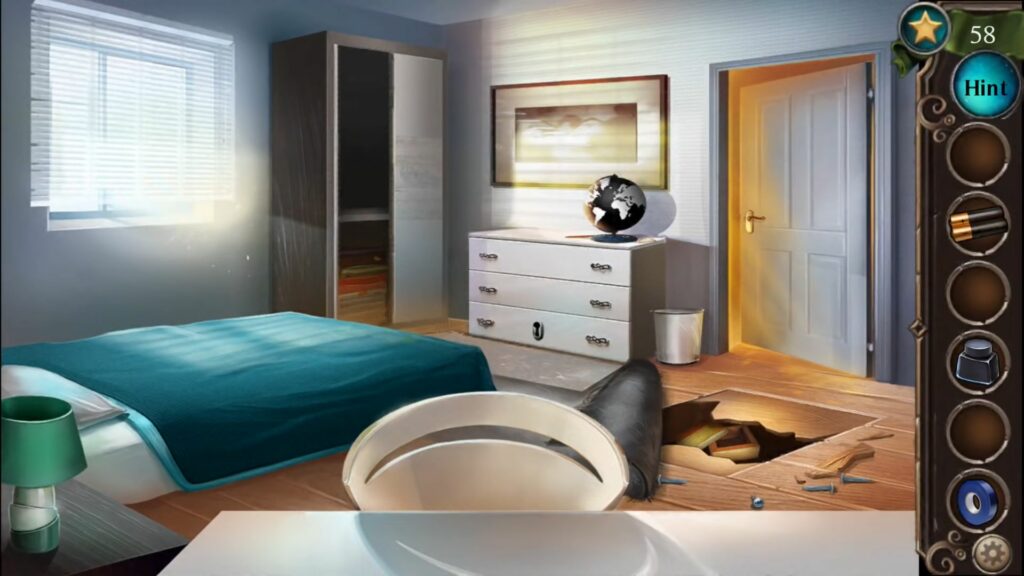
Note down that date from the calendar on the wall. Pick up the red piece near the bear and a charger from the study table.
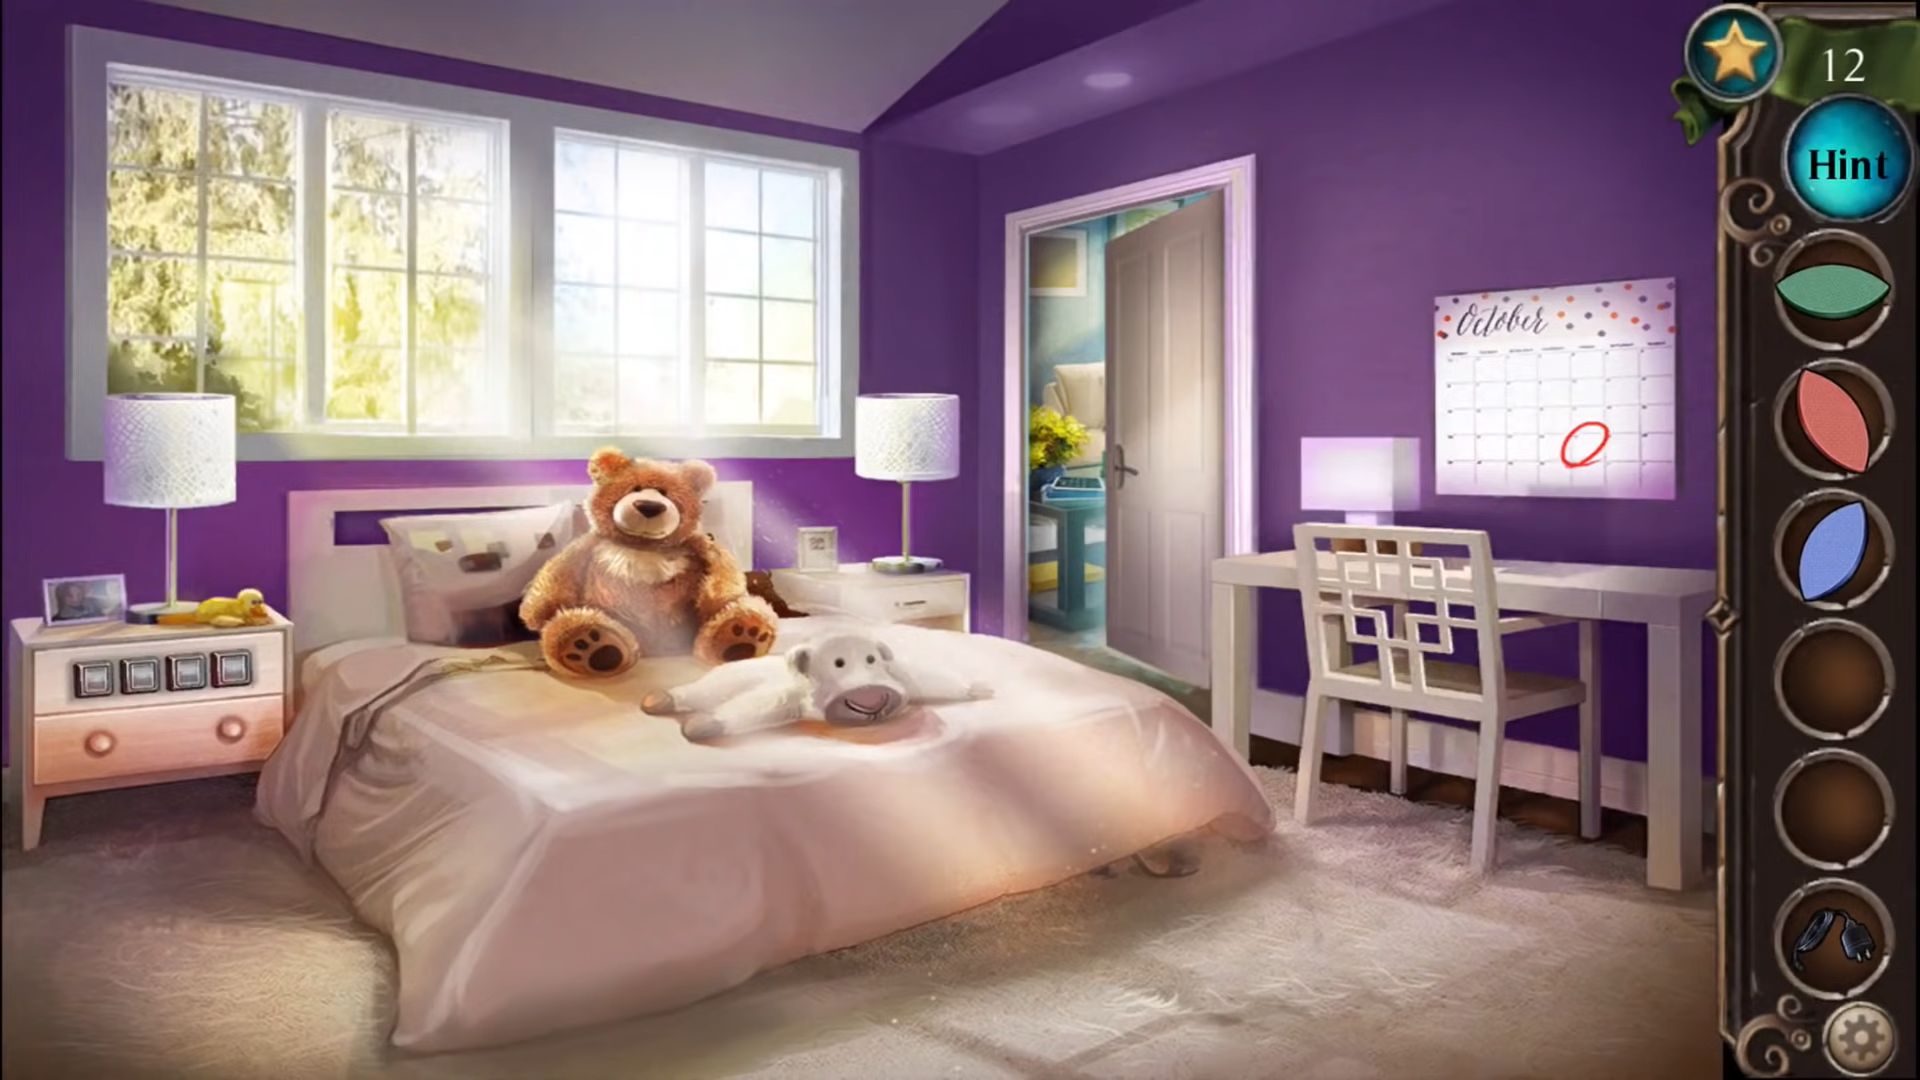
Go to the side table on the left side and use the calendar date to crack the password.
Input the password in the lock keypad to open the drawer.
There will be a puzzle inside that drawer and you will find some puzzle pieces are missing. Place your collected pieces on the puzzle and rotate the circles to get the same background.
It will complete the puzzle. Now you will be able to view Melissa’s journal for the next location clue and there will be a diagram on the page. Take a note of the diagram. The clue says Seth took her to the Compound.

Go back to the living room and plug in the phone charger to charge the phone. Use the diagram in the Journal to unlock the phone. It will complete the first chapter.

Chapter 2 – The Security Gate
Get into your car and head across the mountains. You will find a security gate to the compound. You have to find a way to get inside.
Enter the security office to the right and collect the ladder near the window. Pick up the stethoscope from the wall and a key from the boxes on the floor. You need to open the cabinet on the left using this to key and grab the wire strippers inside the box.
Collect the start from the cabinet that can be used as a hint.

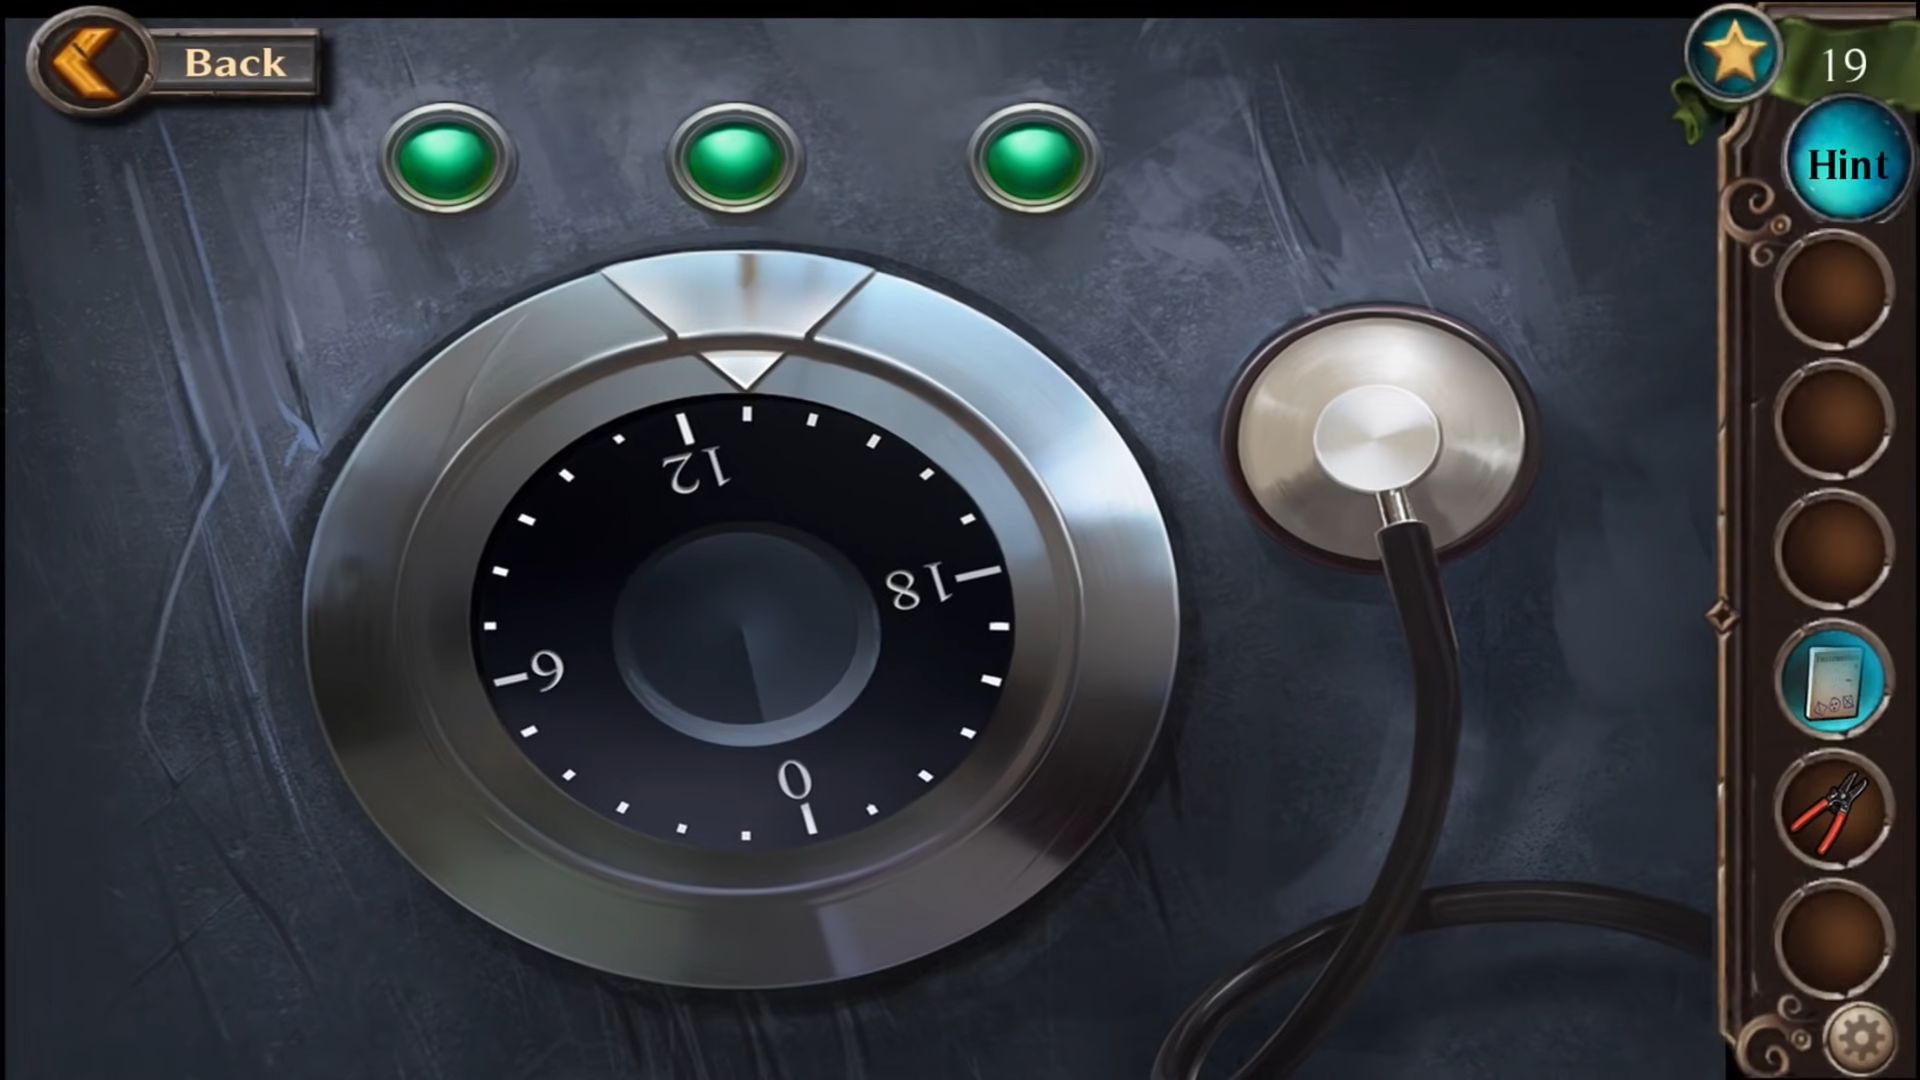
Place the ladder on the right-hand wall next to the high shelf to collect an Electrical manual. Now go back to the security gate and click on the lock keypad.
Use the stethoscope on the lock and you will hear the tumblers moving. Keep rotating the dial until a green light appears and your device vibrates. It means you have reached the right number.
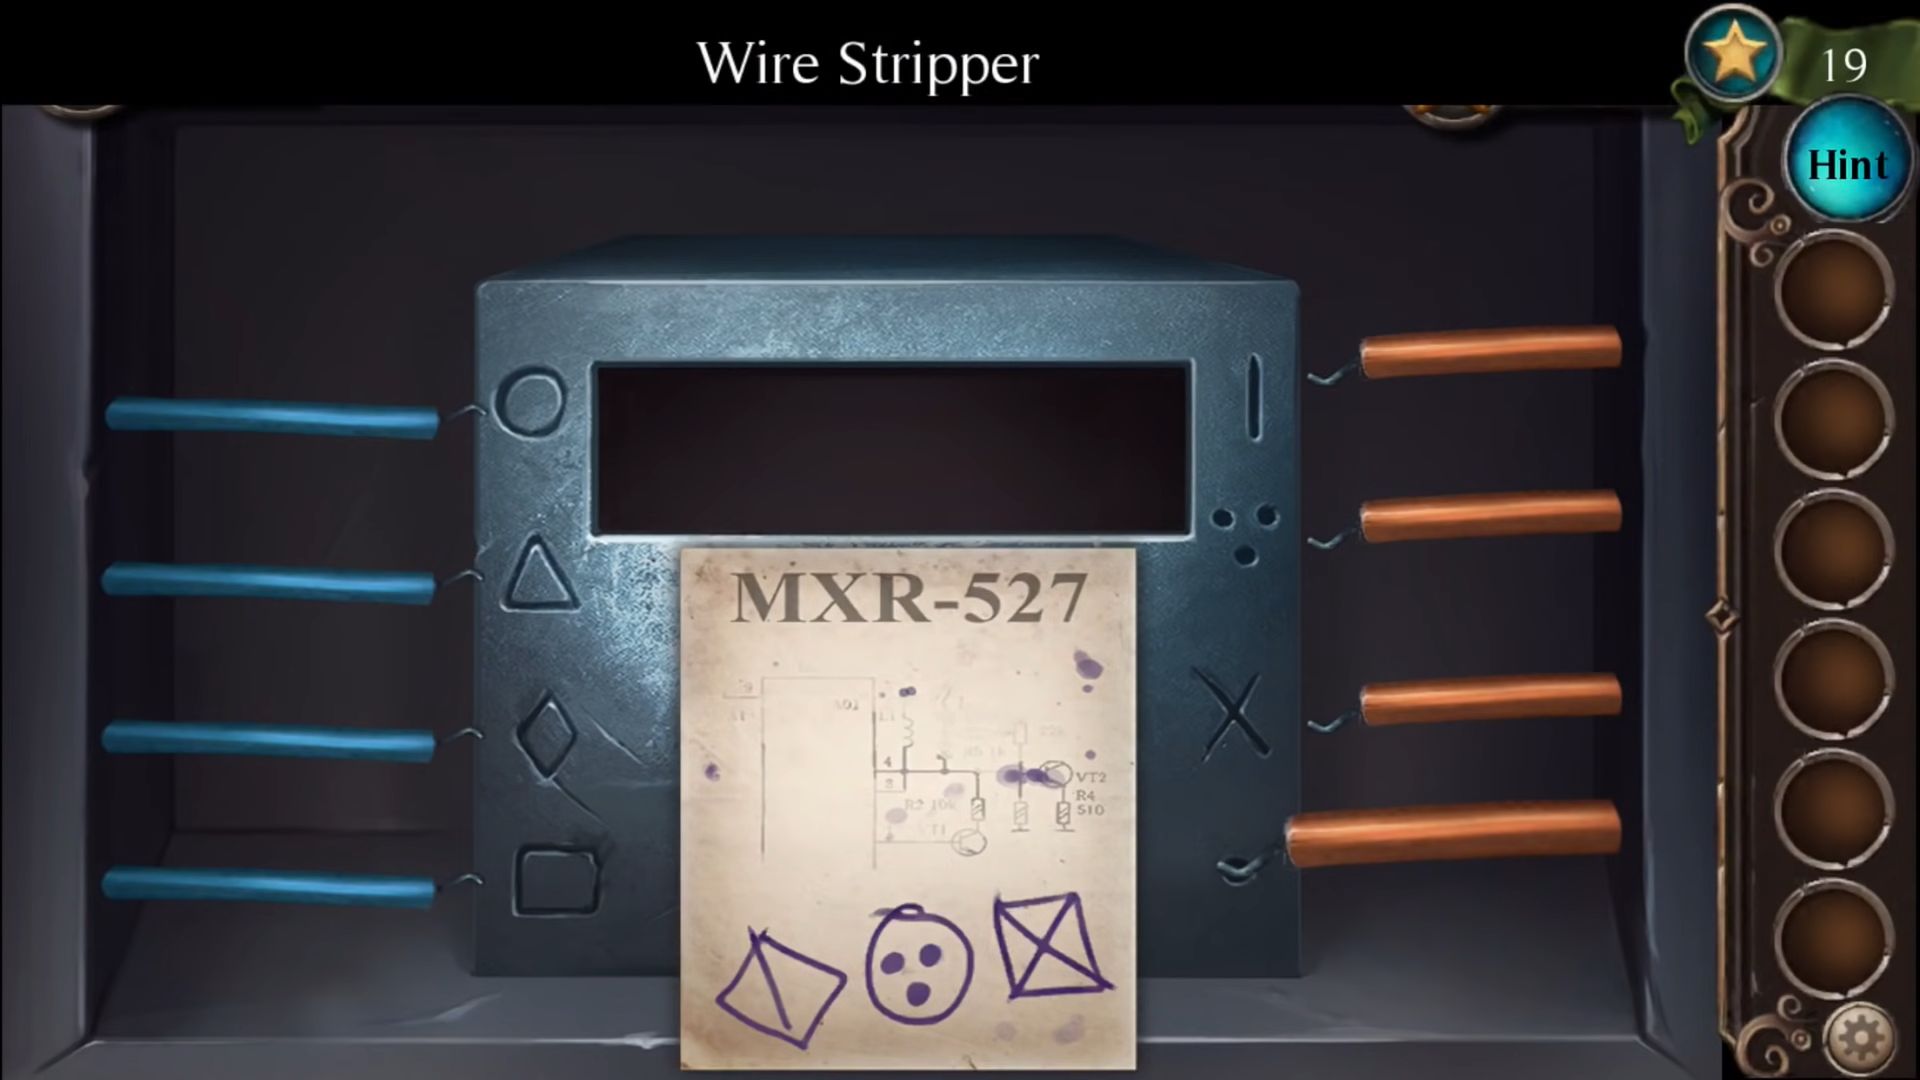
After that, you will find a panel with wires, it is another puzzle. Tap on the electrical manual and place it on the panel to view it. Select the wires to use the wire strippers and then connect them, following the drawing on the paper.
The gate will open up and it will complete the second chapter.
Chapter 3 – A Flat Tire
There is still a drive to make it to the compound and now you have a flat tire. You need to find the items that can rescue you from this situation.
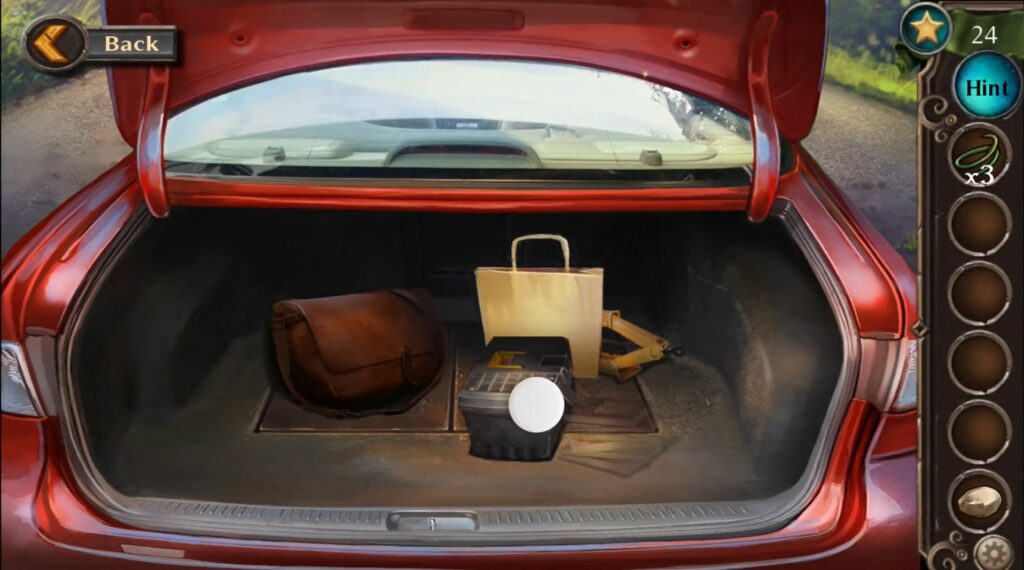
Open up the car trunk and remove the items by tapping on the items. Collect gloves and the jack from the trunk, then collect the spare wheel by opening up the compartment doors on the floor of the trunk.
Next, pick up the large rock from the road and look for the hanging vines in the trees. Click on the tree stump on the right of the road to attach the vines as a rope. Use this rope to climb down to a crashed car.
Pick up the star on the far right near the bushes that can be used as a hint.
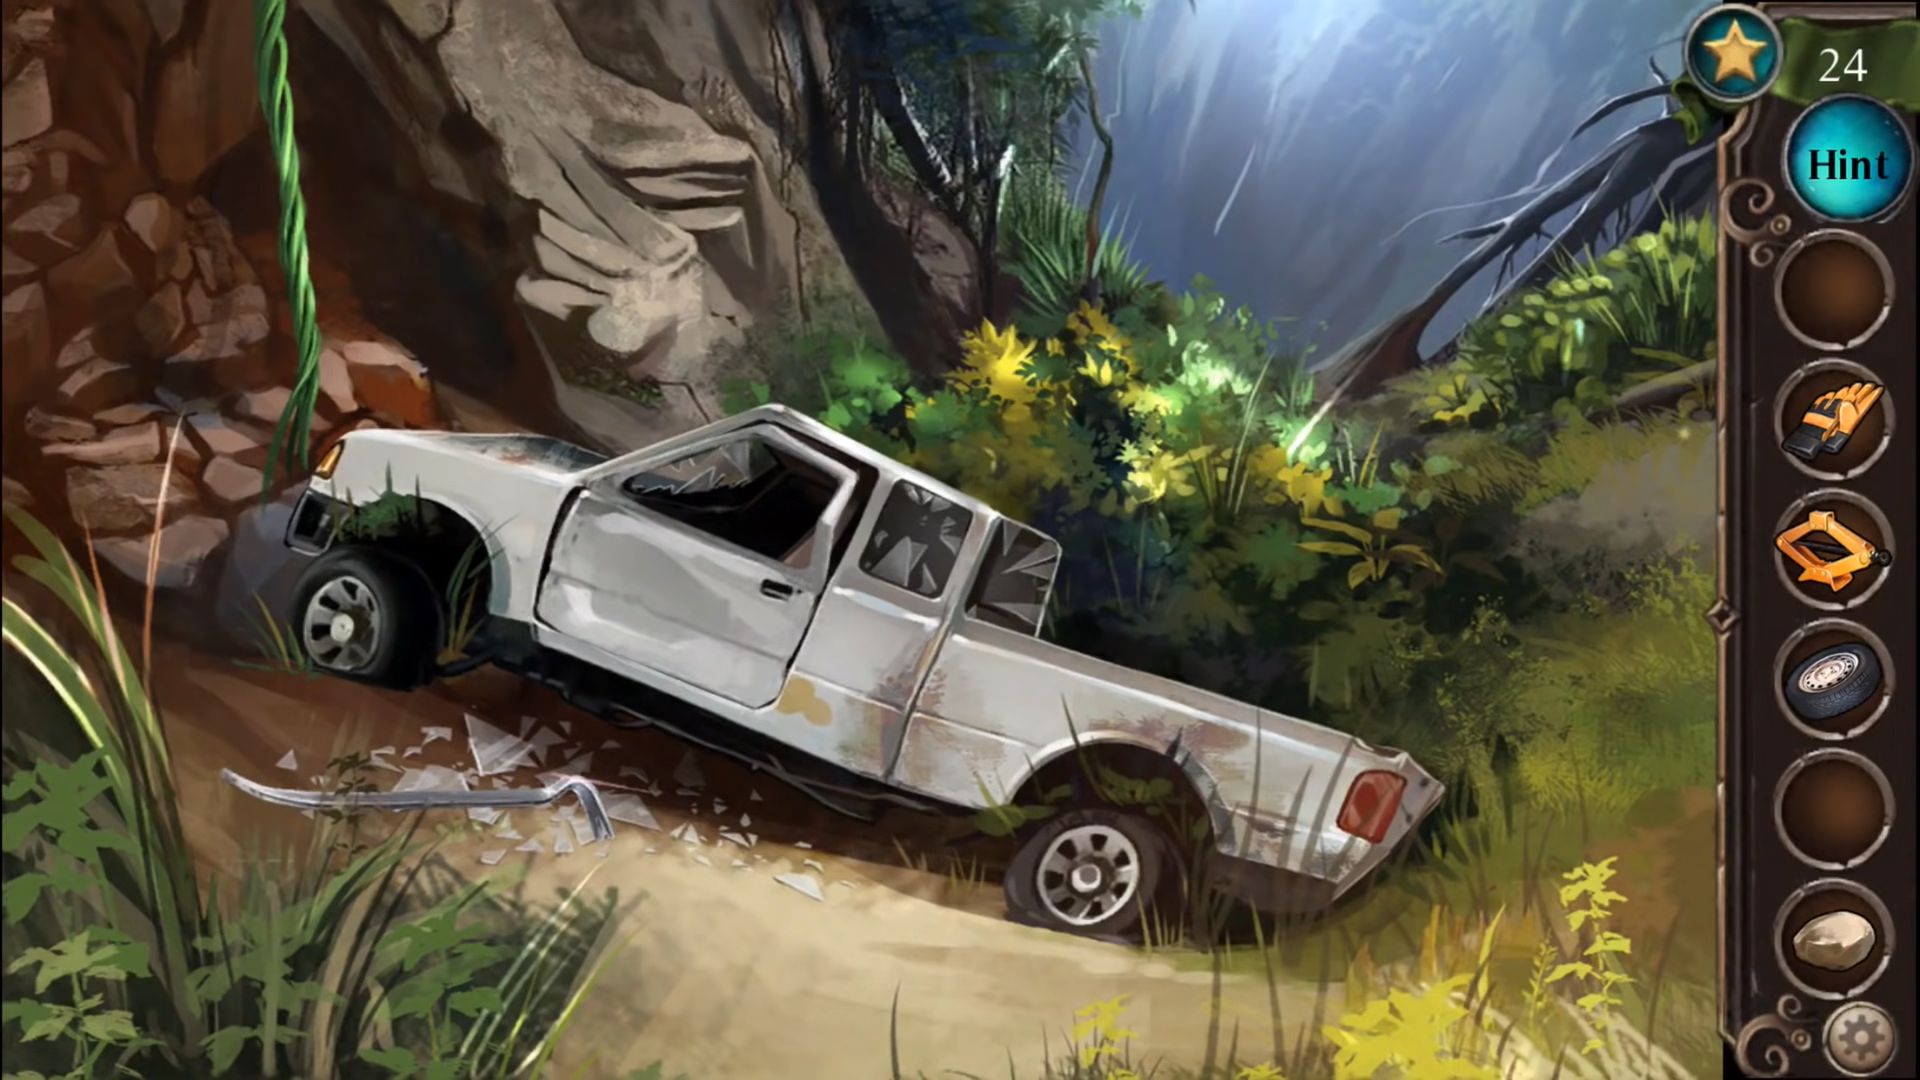
Wear your gloves and then pick up the crowbar from the ground. Open up the car door using this crowbar and pick the wrench from the car. Collect the star from the seat of the car.
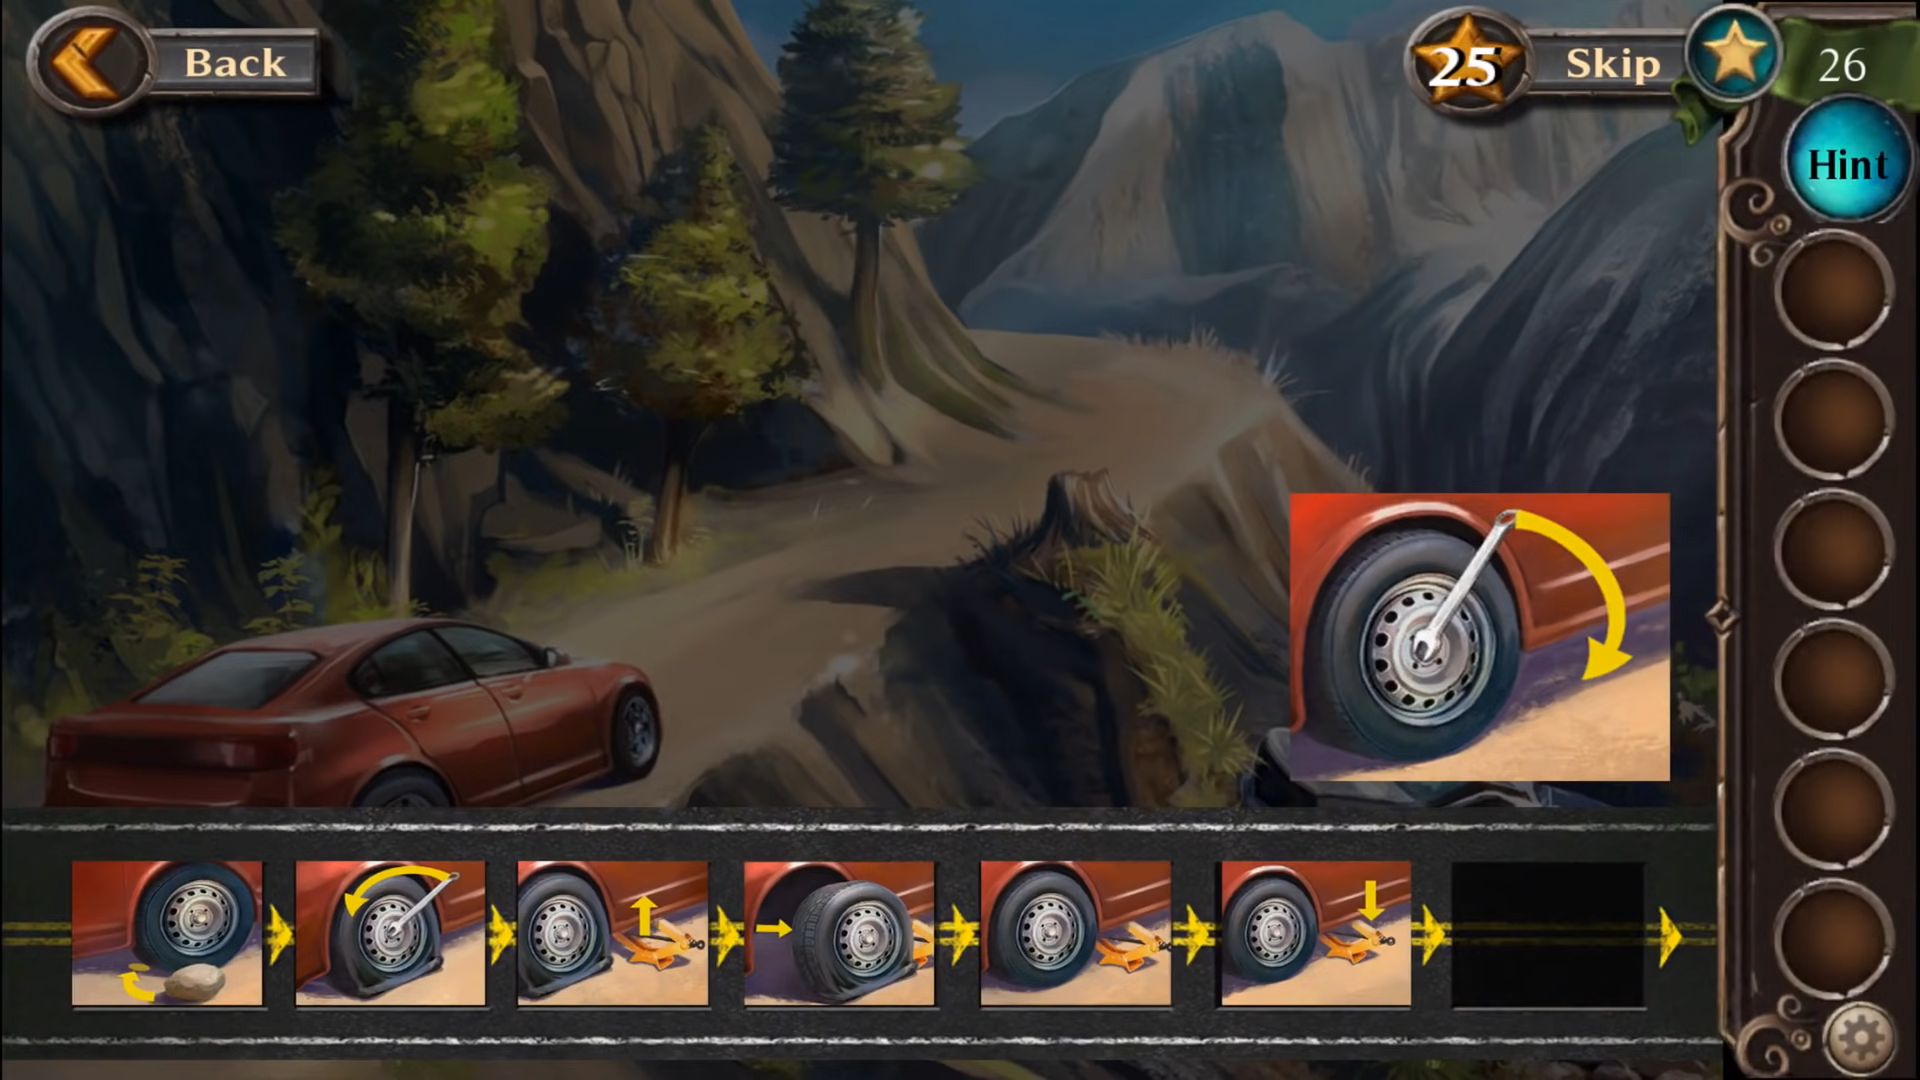
Go back up on the road using the rope and you will find Darius, a passing driver. He will warn you about the compound. Now to change the tire, click on the flat tire to open a puzzle screen with a sequence list at the bottom.
Add the car jack, rock, and spare tire to the screen and then drag them into the sequence bar at the bottom to complete it. It will fix the flat tire and also complete Chapter 3.
Chapter 4 – Even More Security
Make your way back to a large building with more security to get past. Collect the star from the roof line of the small building just above the door.
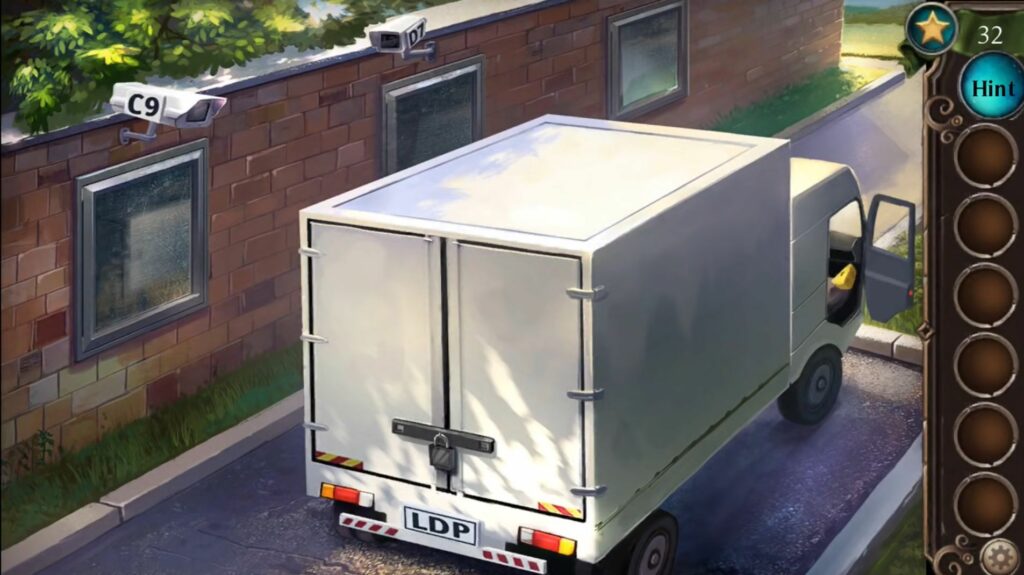
Take a look at the security cameras and their respective IDs. After that, switch to a view of a truck by tapping to the right-hand side, open the side door of the truck, and grab the cheese inside it.
Give this cheese to the mouse sitting near the wall. The mouse will give you a ring of keys.
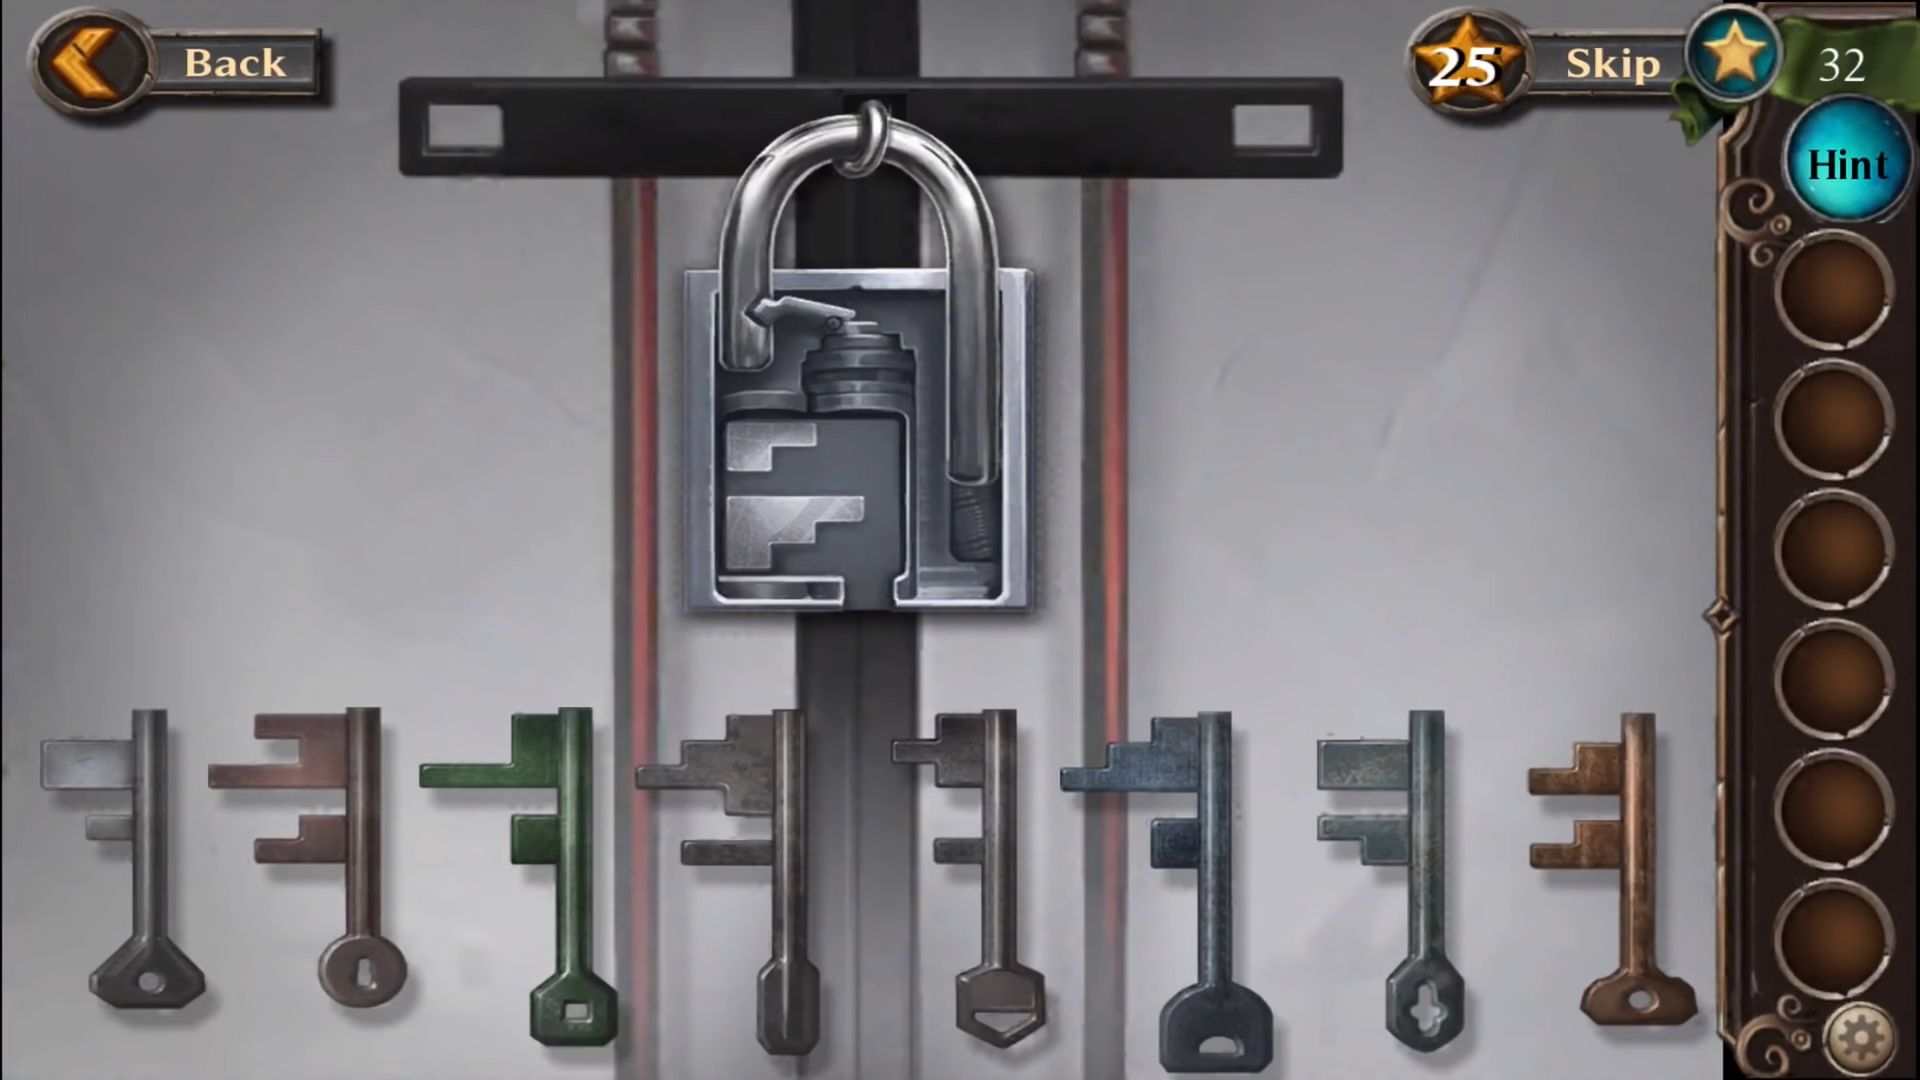
Return to the truck and select two keys from the set of 8 to fit the shape shown on the padlock. It will open up the back doors.
Pick up the green cleaning rag and a star on a shelf inside the truck. Click on the cabinet on the left to view a 4-digit entry. You have to figure out the numbers to unlock this.
Open up the cabinet and grab the hood and cleaning spray inside it. Now you have to clean each of the windows of the building using the cleaning spray, and then wipe them with the rag. You will see dogs through the windows, having a word on their collar.

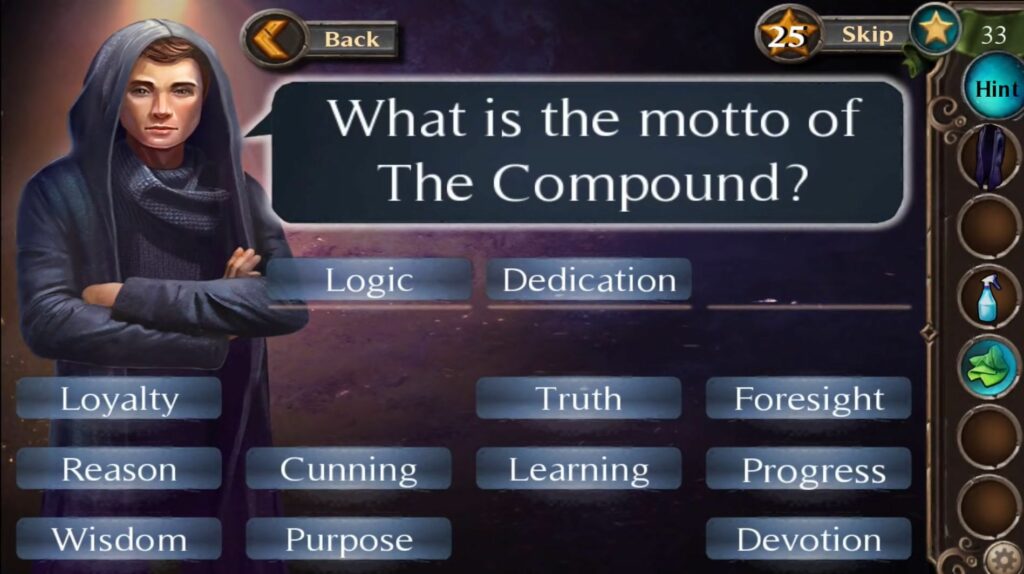
Note down the license plate of the truck: LDP. Click on the small building and a guard will ask you if you are here to join and what the compound motto is to allow you to enter.
After that, you will be able to enter the compound and it will complete this chapter.
Chapter 5 – Three Tests
After entering the compound, you have to pass the tests to be allowed to pass. There are three tests based on dedication, logic, and progress.
Enter this room on the right to find the logic test. Collect the star under the sofa on the left side.
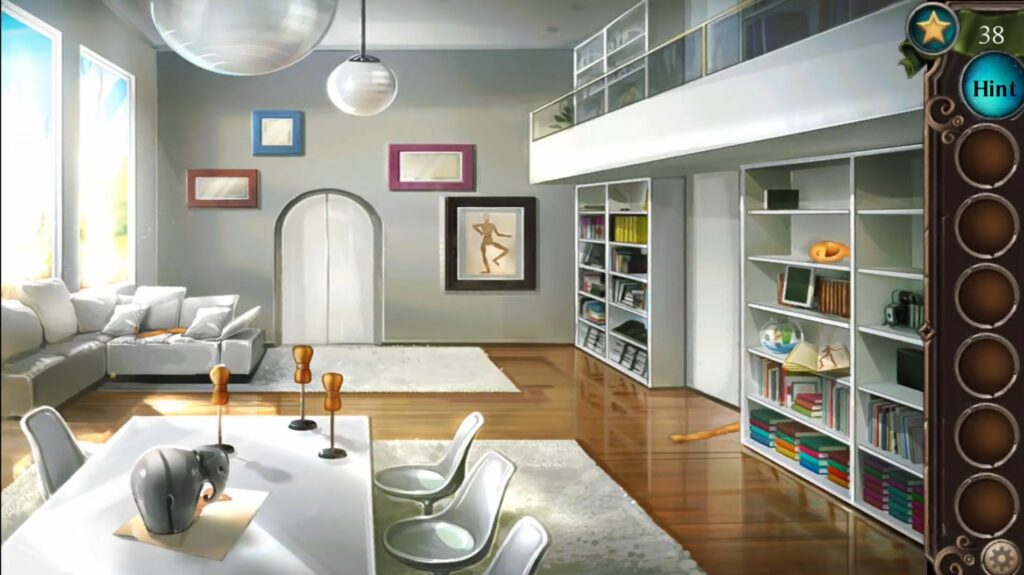
Pick three wooden model torso on the table, an arm on the floor, a leg on the sofa, and a head from the shelves. Grab the three sketches from the picture frame on the wall, under the ornament on the table, and from a book on the bookshelf.
Click on the three torsos, then place the parts and sketches into the spaces and on the table to build the models.
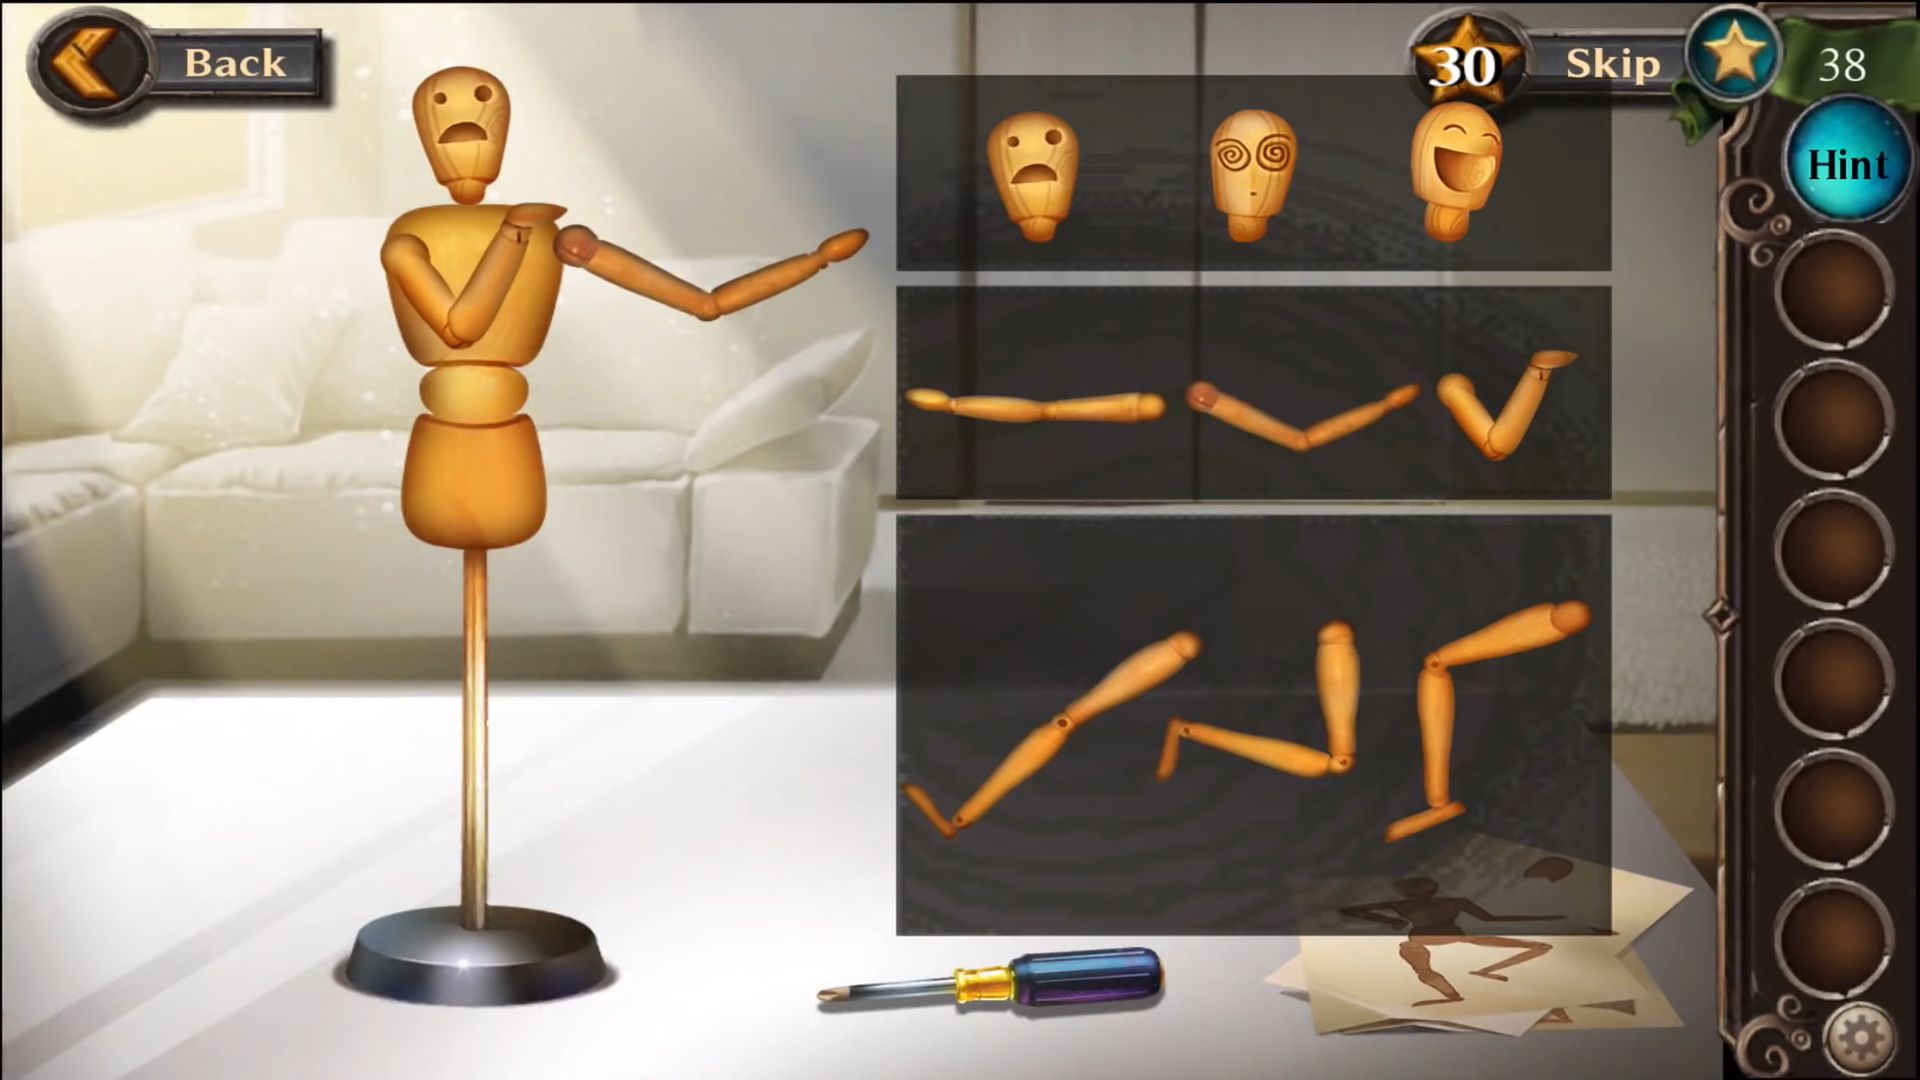
View the first sketch, then place the required limbs and move them around to match the sketch. Complete the model and it will be saved automatically.
After creating all three models, grab the Logic Crystal and move out of the room. Place the crystal on the pedestal and then enter the room on the left to complete the dedication puzzle. Grab the star behind the sofa cushion that can be used as a hint.
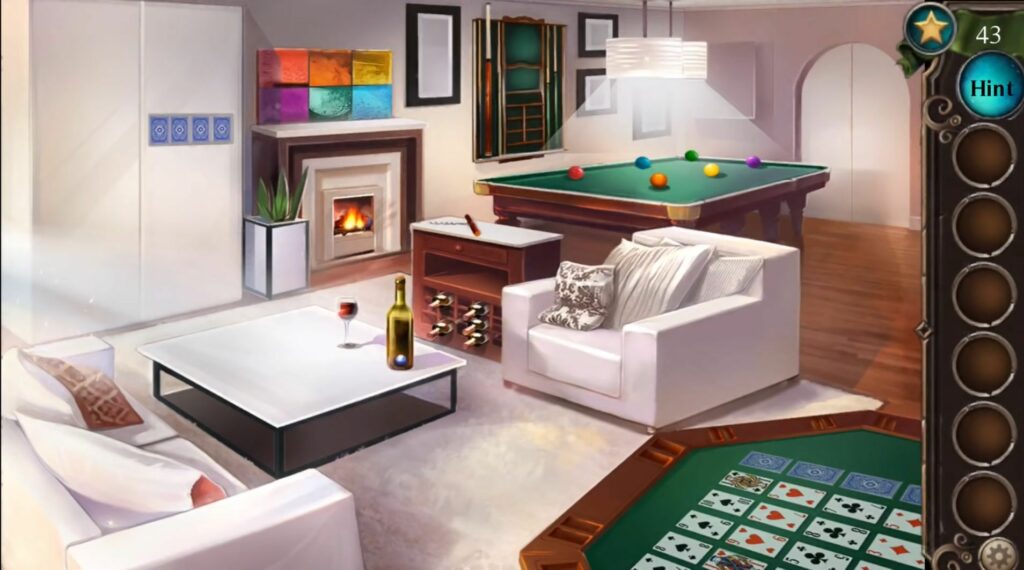
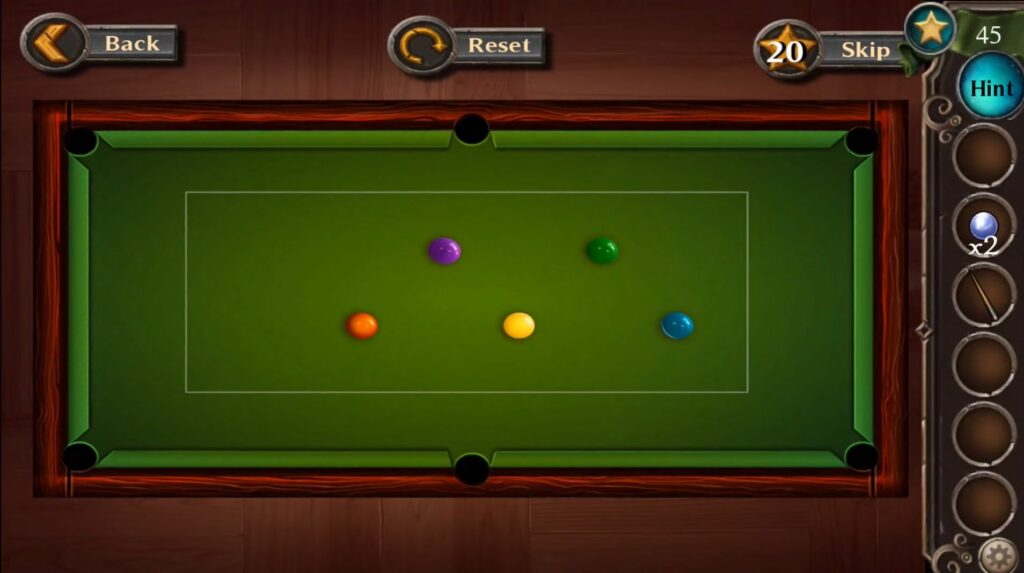
Grab the corkscrew from the table and use it on the bottle of wine to obtain a marble. Collect the pool cue hanging on the wall and take note of the decoration in the room.
Tap on the pool table to view it and then arrange the 6 colored balls in the correct color pattern to solve a puzzle. Move all the balls into the respective holes and a marble will appear in the fireplace. You can use the pool cue to get it.
Click on the locked closet on the left side and you will find a code entry lock with 4 playing cards.
Head up to the card table in the room and have a look at the 4 sequences of cards. You need to figure out which card you come next in each row.
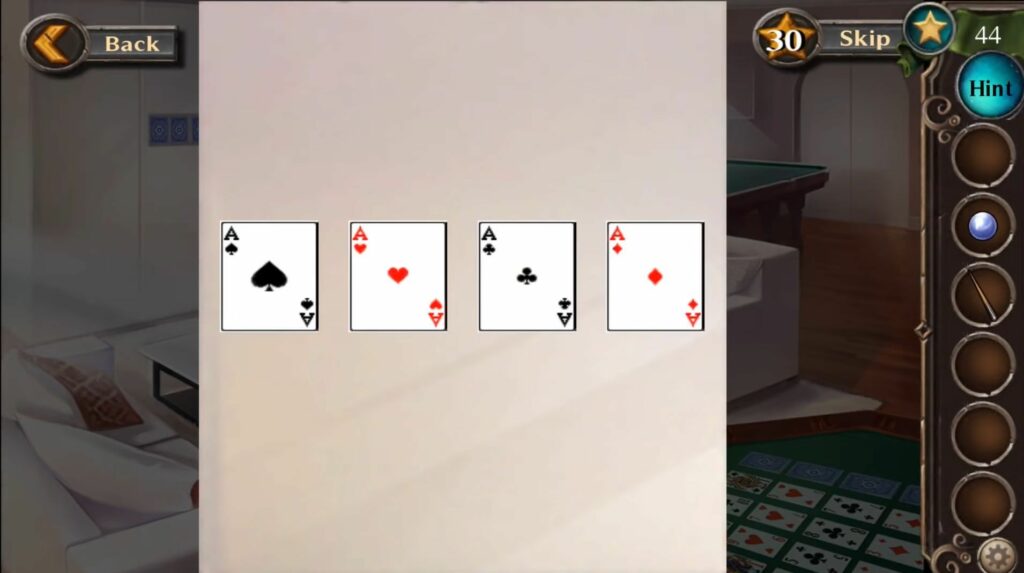
Now input the code to open up the closet and grab the third marble inside it. Also, pick the star from the top shelf in the closet.
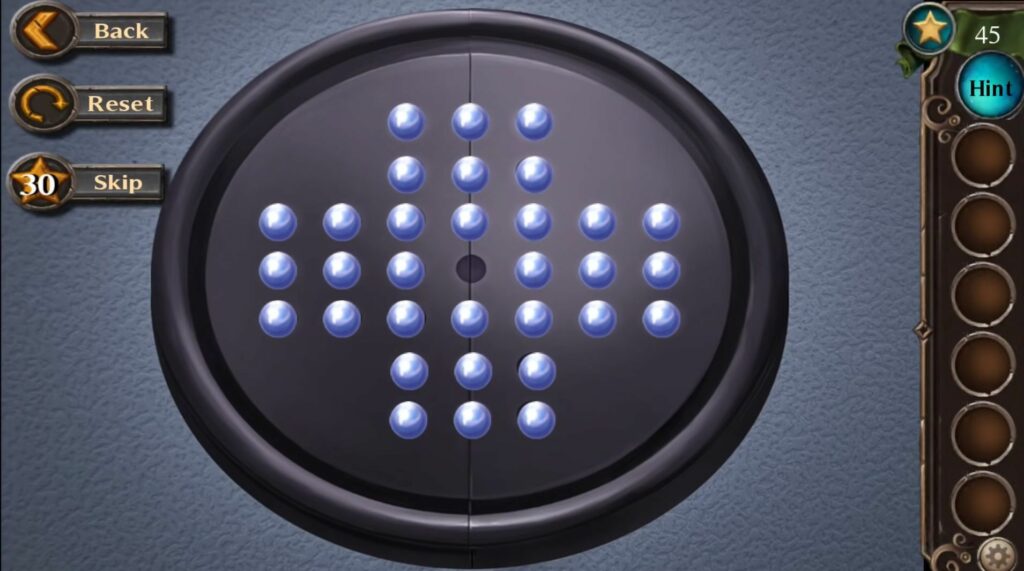
Tap the game of solitaire inside the closet and add all three marbles to the board. The goal is to clear the marble board. You now need to solve this puzzle until you cannot make any more moves. The test will be completed even if you have enough marbles left. You will receive the Dedication Crystal as a reward.
Exit the room and place the crystal on the pedestal to open the laboratory door. Enter this door for the Progress test and grab the star just behind the cabinet on the left wall.
Collect the lab equipment item from the shelf and a key from the left wall, a Bunsen burner from the far cabinet top, and also a stack of paper from the top shelf.
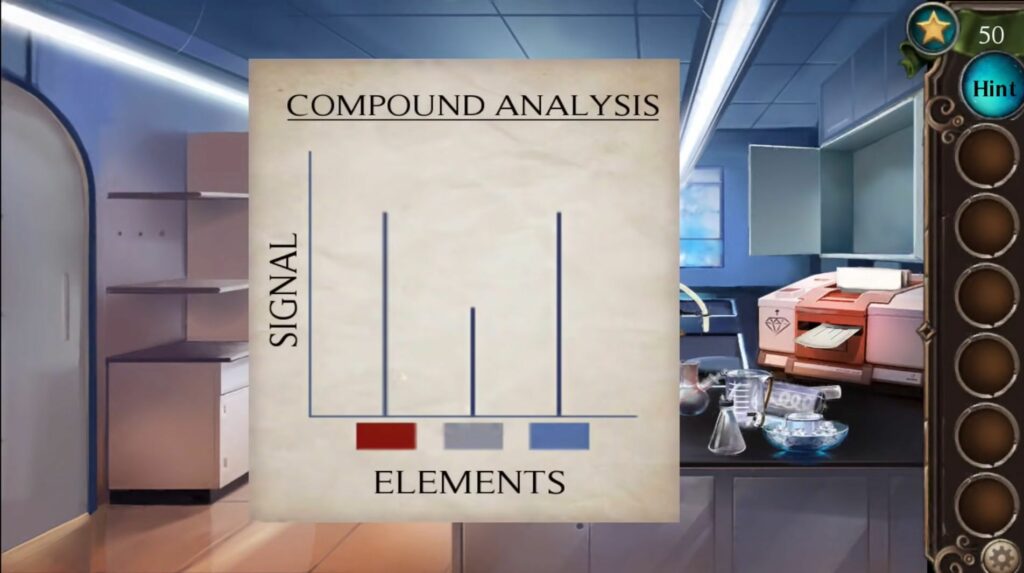
Unlock the top right cabinet using the key and grab the crystal powder. Place the stack of paper and the crystal powder into the machine on the far right to get a compound analysis report for it.
Open the tall closet on the left and select the correct three bottles. Head up to the lab bench and tap on the chemistry equipment. Place the Bunsen burner and other items on the right with all the pieces, then place the equipment in the correct places.
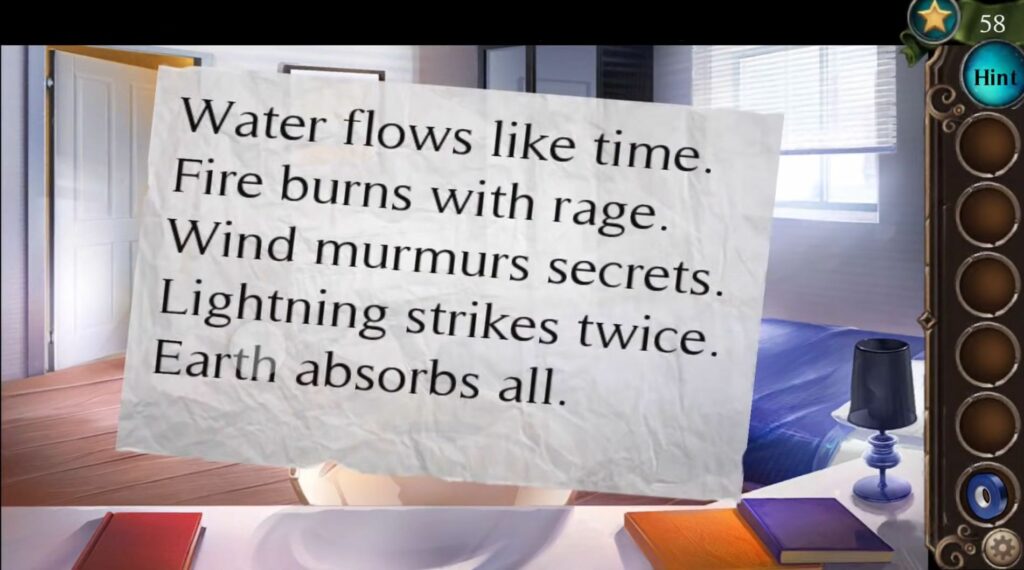
Place the three colored elements on the table and check the paper with the compound analysis results. The lines for red and blue are twice as high as the line for white. Drag three elements to the beaker on the left and then place them in the correct order.
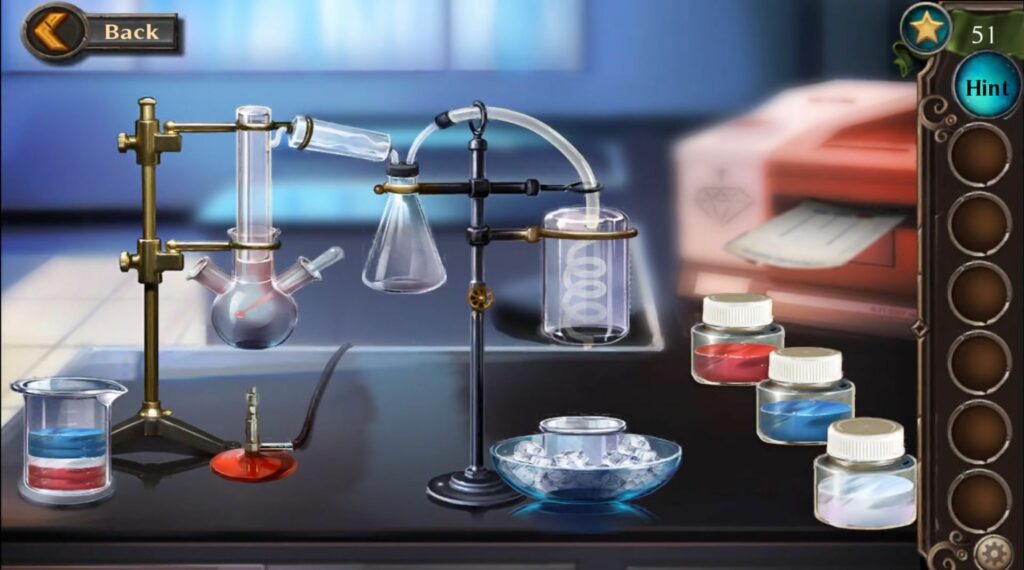
Add the elements of the beaker to the left of the apparatus and then take the Progress crystal. After that, leave the room and place the crystal on the pedestal to complete the fifth chapter.
Chapter 6 – The Dorms
Now you can pass into the dorms to rest and continue our investigation.
Tap on the building on the left to enter it and collect the start from the back right corner.
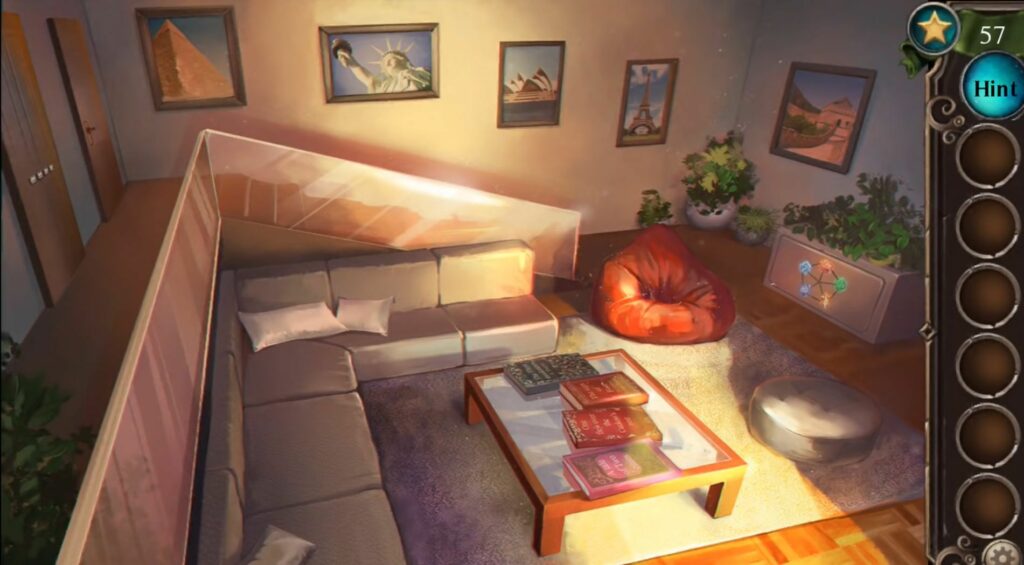
Investigate the room by taking note of the pictures on the wall. and view the books on the coffee table by tapping on them. Open the door at the top of the stairs and enter the bedroom.
Open the window shades and grab the screwdriver. Click on the drawers to get a broken blow dryer and then click on the rubbish bin to find a clue.
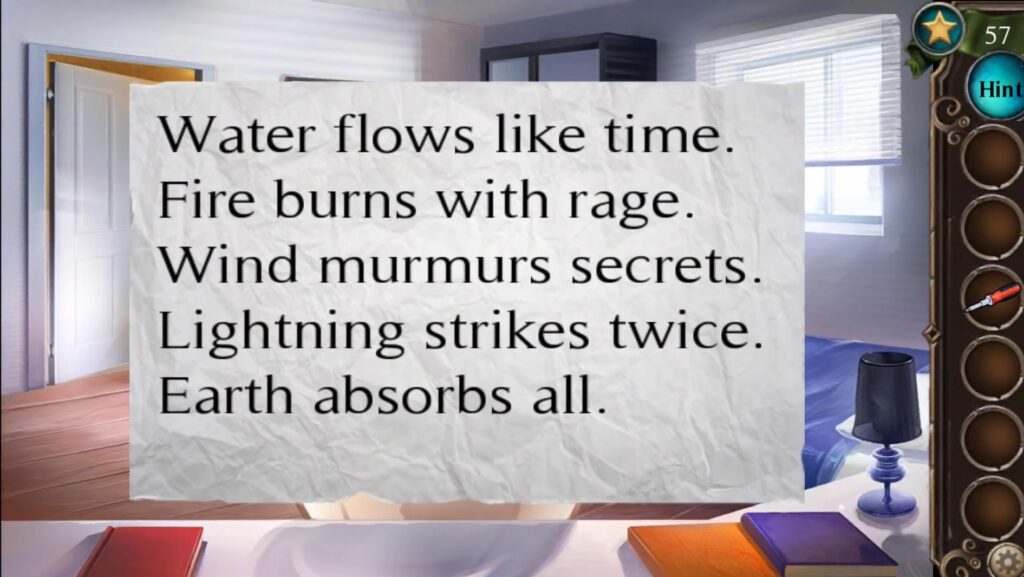
Now head back to the first room and click on the unit with the five colored shapes. You need to tap the shapes in the correct order. These shapes represent elements as found in the clue.
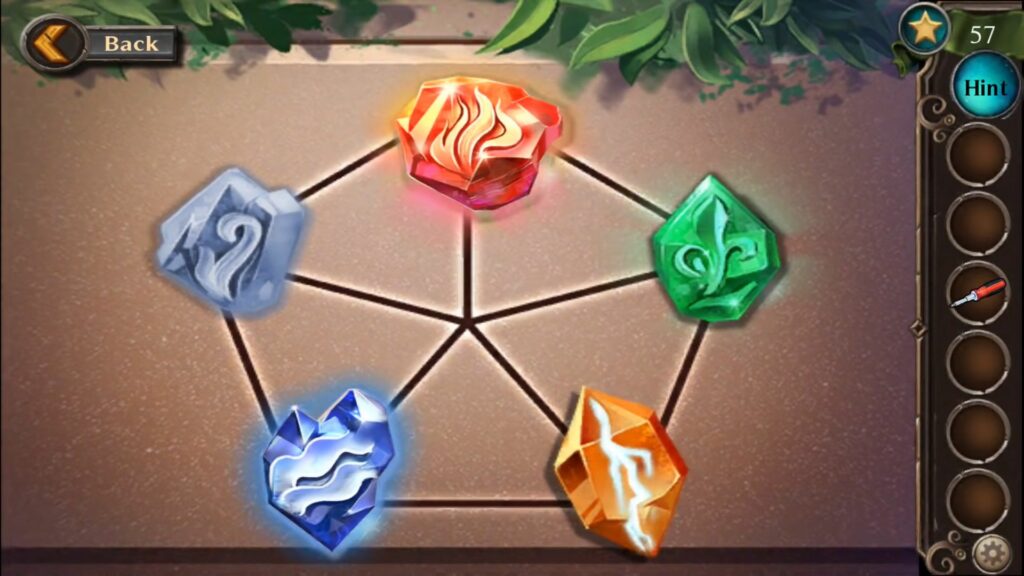
A drawer will open up, pick the batteries inside it, and then click on the other door to enter inside it. Once you get inside, open the closet and pick a crowbar. After that, navigate to the side table and pick up an electrical tape.
Lift the rug from the floor and use the crowbar to open up the floor. Grab the star from the hole next to a box, you can use it as a hint whenever needed.
Use the screwdriver to open up the box and pick up a bottle of special ink. Use the batteries on the globe on the chest of drawers. You have to tap on the globe in the right order, as it is a geographical puzzle.

The globe will open up and then you can grab the globe key. Unlock the bottom drawer by using the globe key and use the ink on a book with blank pages.
Head back to the first bedroom and fix the blow dryer using the electrical tape. Collect it and navigate to the book in the second bedroom. Use the blow dryer on the book to make some works appear. It will give you a clue to the next place and complete this chapter.
Chapter 7- The Kitchen
You got some clues to a hidden wine cellar under the kitchen in chapter 5. So head to the kitchen to find the cellar.
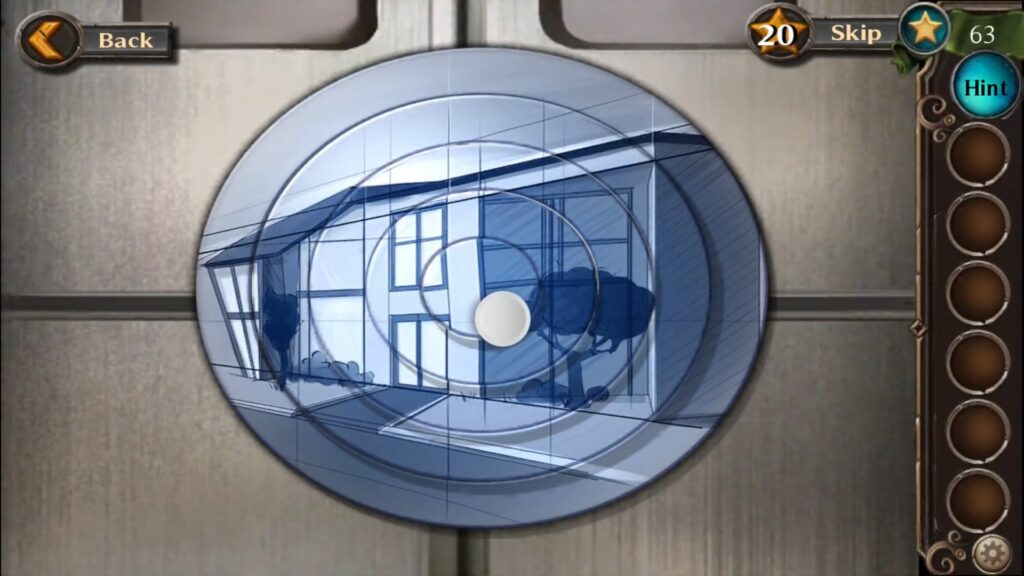
First, go to the tree on the left side and collect the ring piece. Click on the kitchen building to view the door puzzle, use the ring piece, and then rotate each ring to complete the picture. It will unlock the kitchen door.
Upon entering, collect the star above the oven on a panel. Collect a chain hanging on the bar and an unlit torch on the right.
You will also find Darius inside the kitchen. Grab the baking sheet from the oven and the wine glass from the counter. Attach the chain to the cellar door and then use the baking sheet at the other end of the chain.
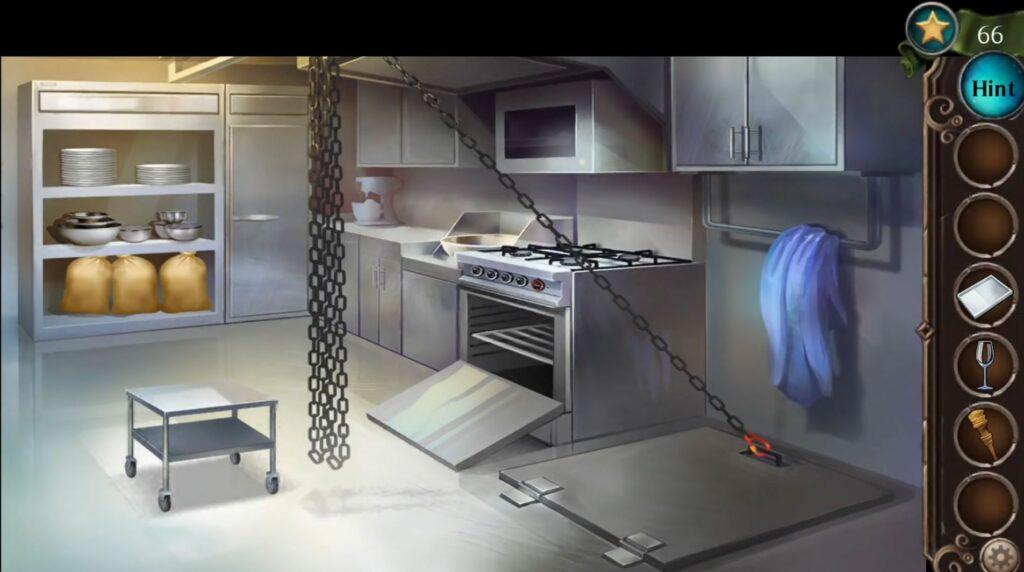
Roll the small trolley backward to the shelves with the sacks. Place a sack on the trolley, roll it to the backing sheet, and then move it onto the sheet. You need to do this with three sacks to open the cellar door.
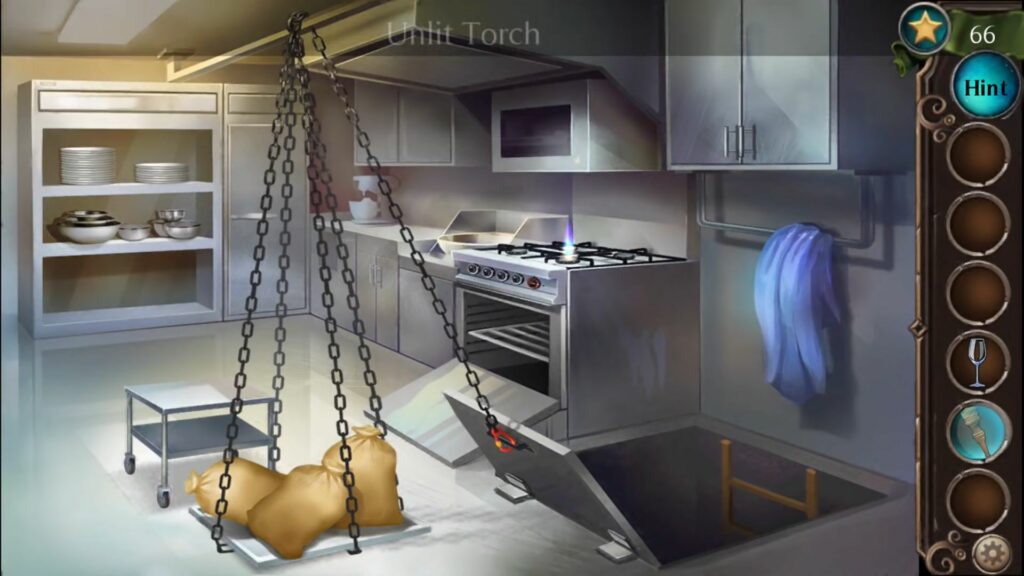
Use the torch to light up the burner of the oven. You can now go down into the cellar. Select the lit torch to lighten up your surroundings.
Grab a star from the top of the barrels in the top center, and one under the barrels on the floor. There is one more star just above some barrels in the center of the room.
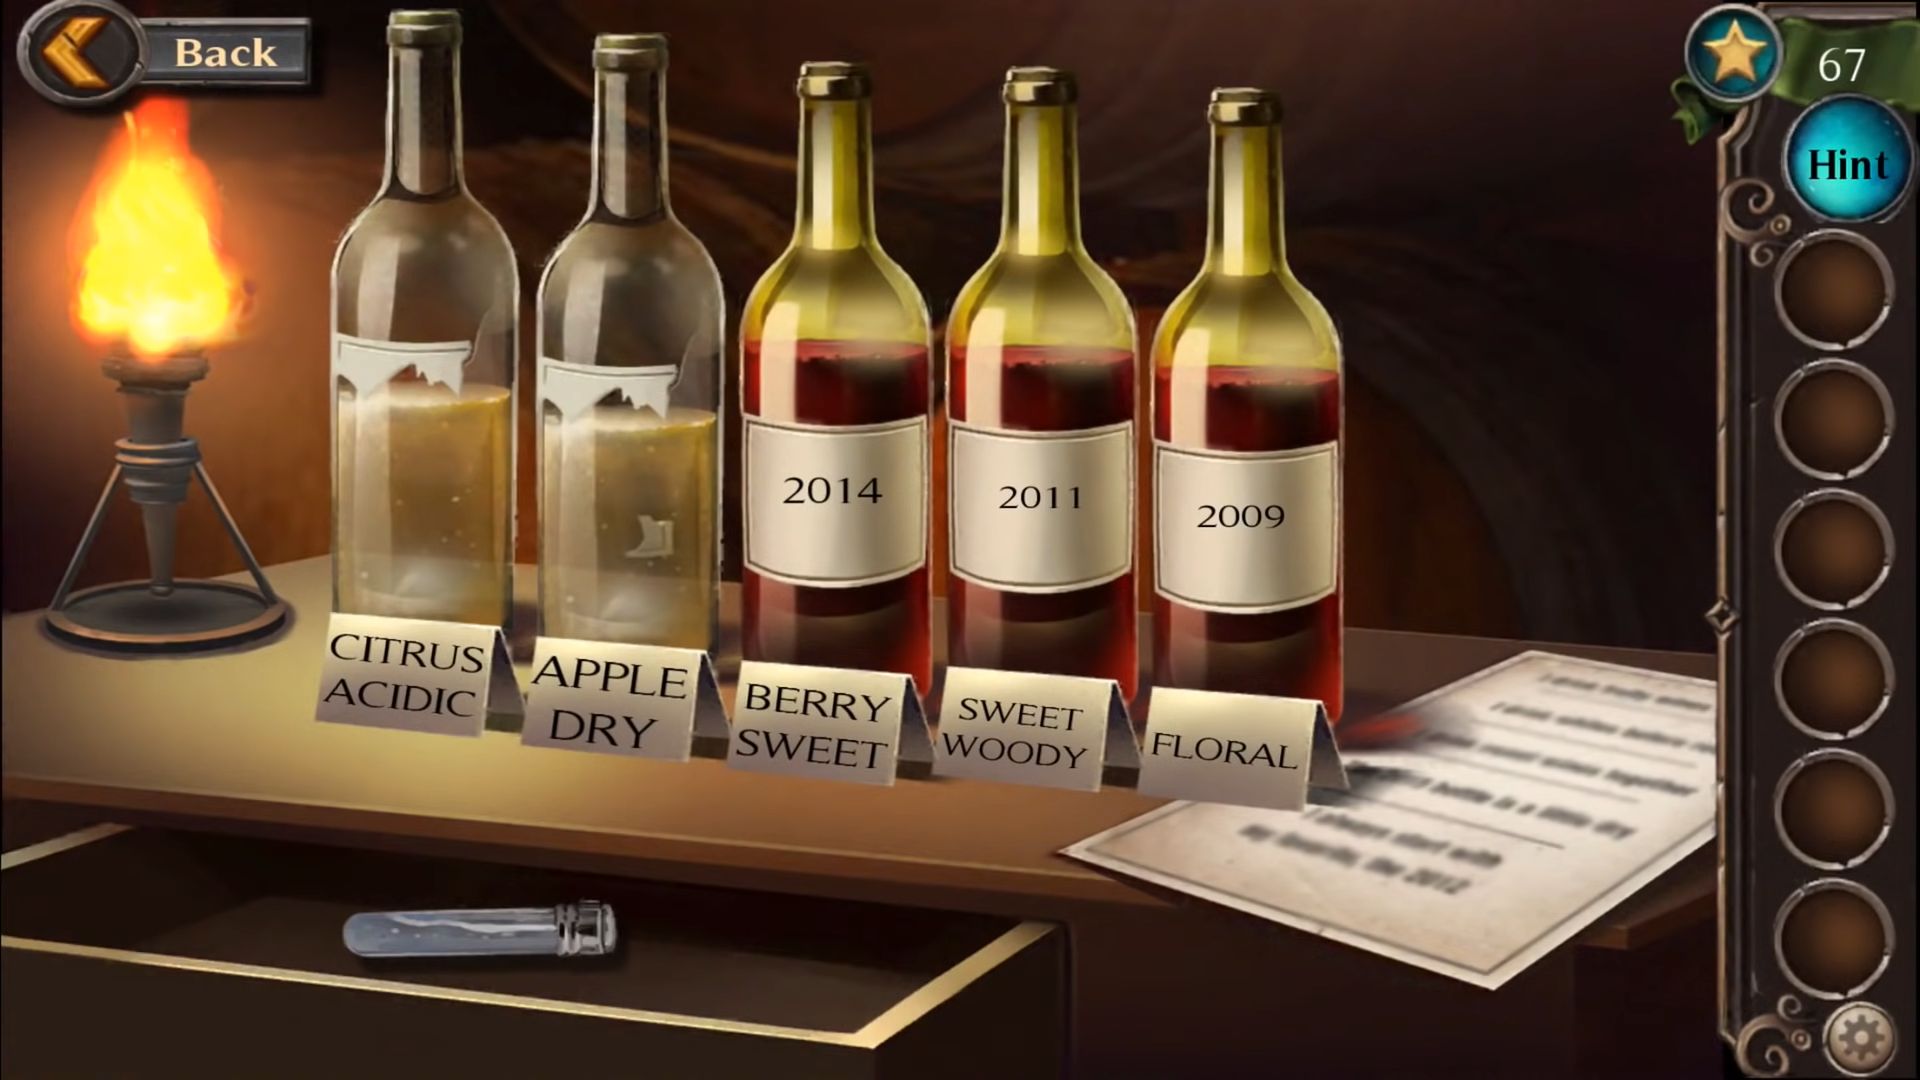
Grab a small glass pipe from the lower left corner, and pick up some notes from the top of a barrel. View the wine bottles and then place the notes and wine glasses with the bottles. Darius will give them descriptions by tasting them all. You need to look at the notes for a clue.
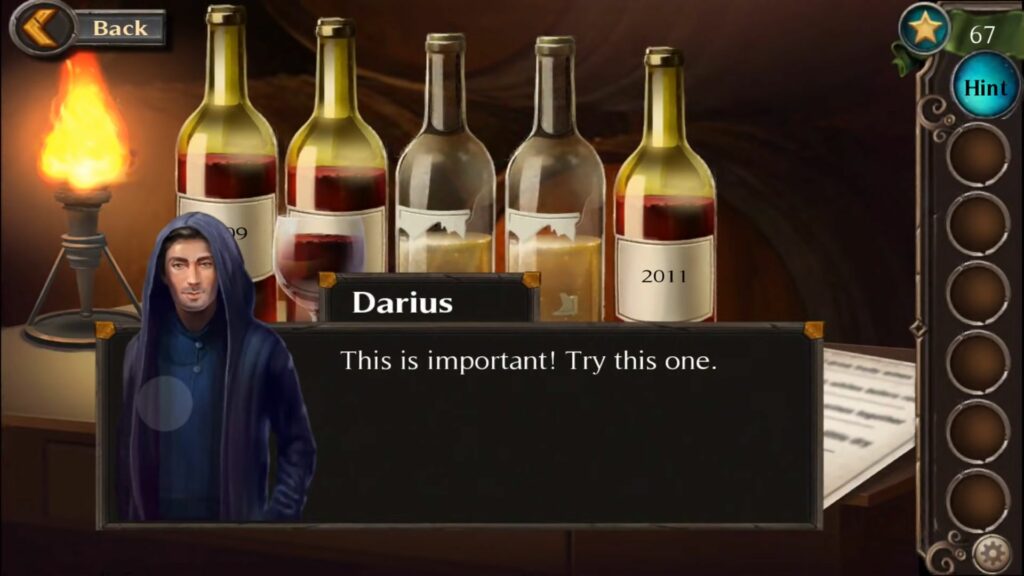
“Fruity wines go together
Whites before reds
Sweet wines all together
The 2015 is a little dry
Start with my favorite, the 2012”
Place the bottles using this order, you can also swap the positions to place them correctly. After that, collect the vial of silver liquid.
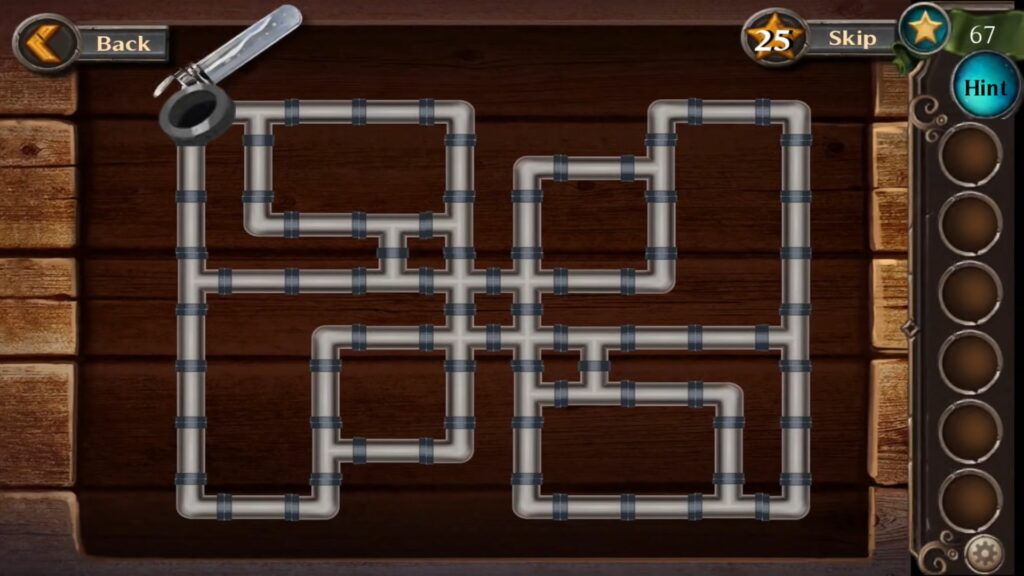
Open up the top center barrel and look for a small glass pipe. View the puzzle in the top left of the room, then place the vial of silver liquid and two glass pipes onto it.
Rotate the pieces until they all connect then pour the silver liquid down them to solve the puzzle.
Open the top left barrel to find a corpse and complete this chapter. Now you need to rescue Melissa.
Chapter 8 – The AGI
Click on the middle building and enter the AGI room that you heard about from Darius. Once you get inside, collect the star from the sofa on the right side.
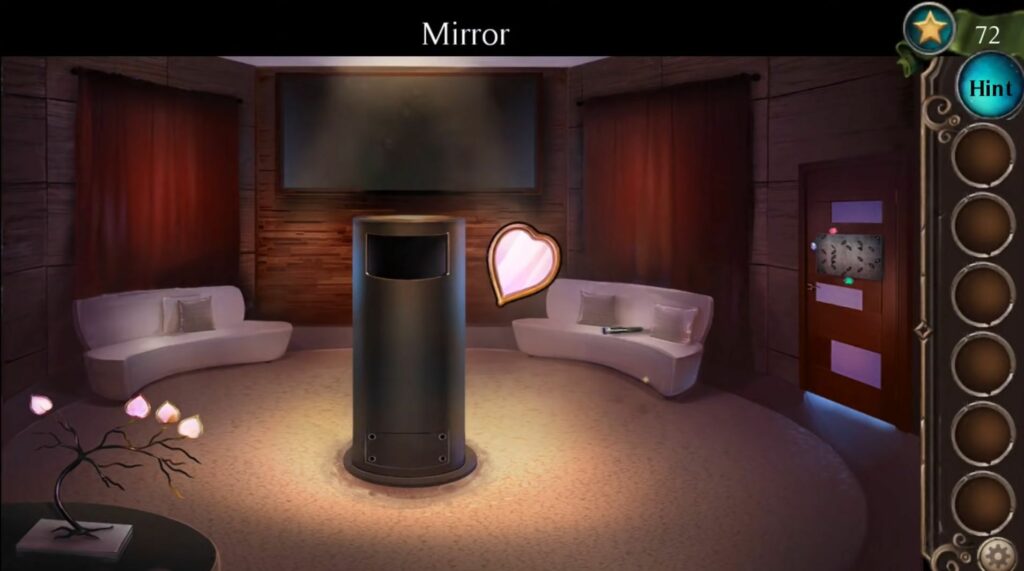
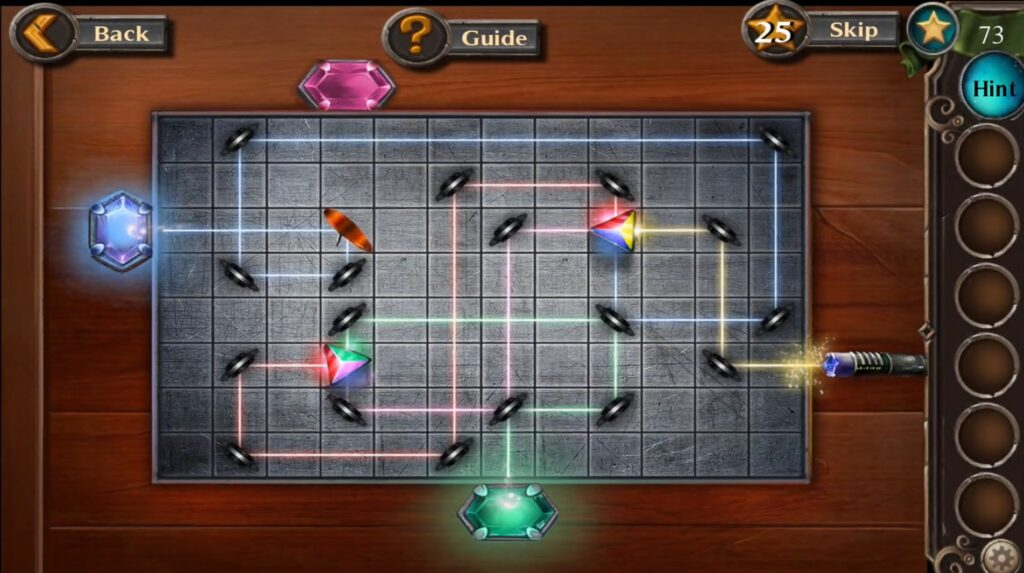
Click on the plant sculpture to pick a mirror and then open up the sets of curtains at the back. Collect a prism from each set and then grab the laser pointer from the sofa. Go to the far right door to find a puzzle. The puzzle consists of mirrors that reflect the light beam and the prisms that split it.
You have to add all the collected items to the puzzle, then arrange each mirror element to direct the light around the board and end up hitting every gem placed around the edge. It will solve the puzzle.
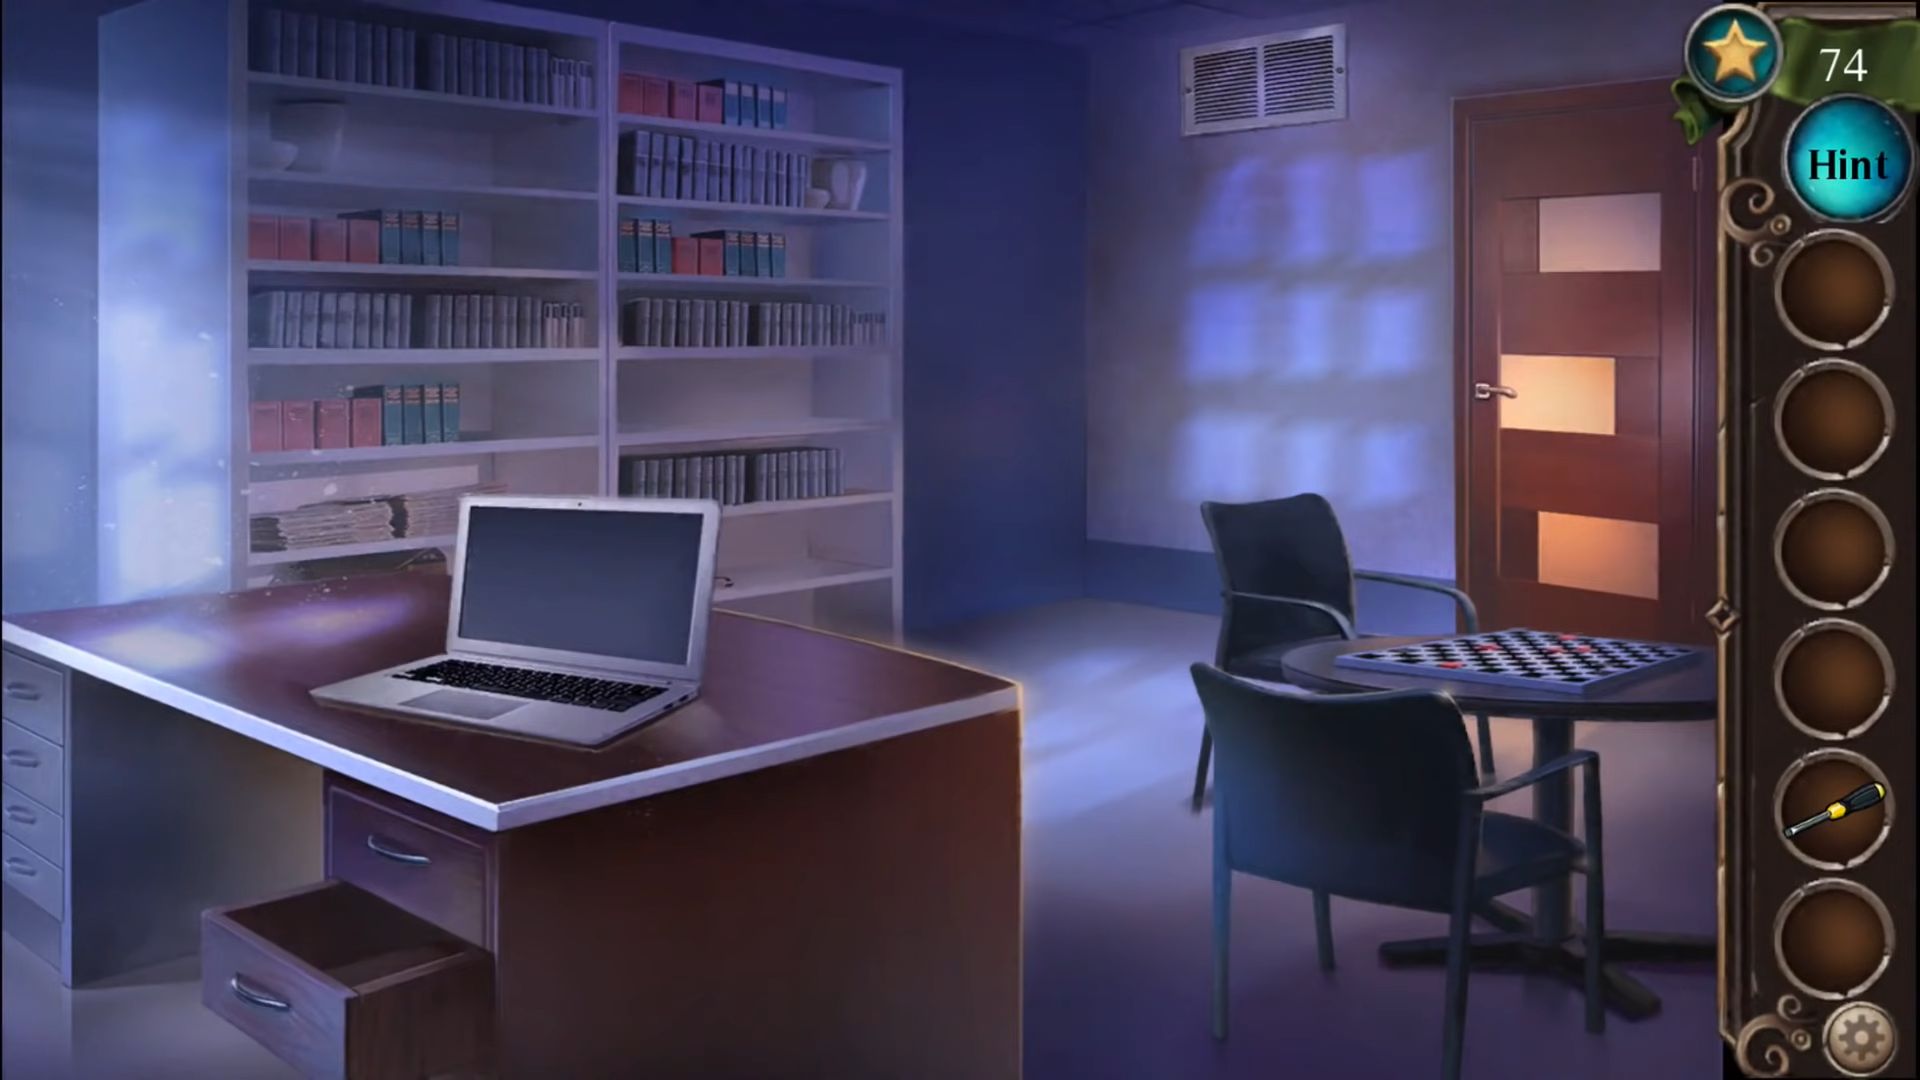
After that, head to the office room and collect the star from the floor. Open the nearest desk drawer and pick up a screwdriver. Collect the farthest chair, place the chair on the high wall vent, and use the screwdriver to open it.
Take a look at the game of checkers on the table as you can reveal a message if you read the letters marked out by the pieces across the board.
The vent will take you into a surveillance room. Grab the star near the ceiling and collect the two USB sticks from the desk shelves. Also, collect a note above the desk.
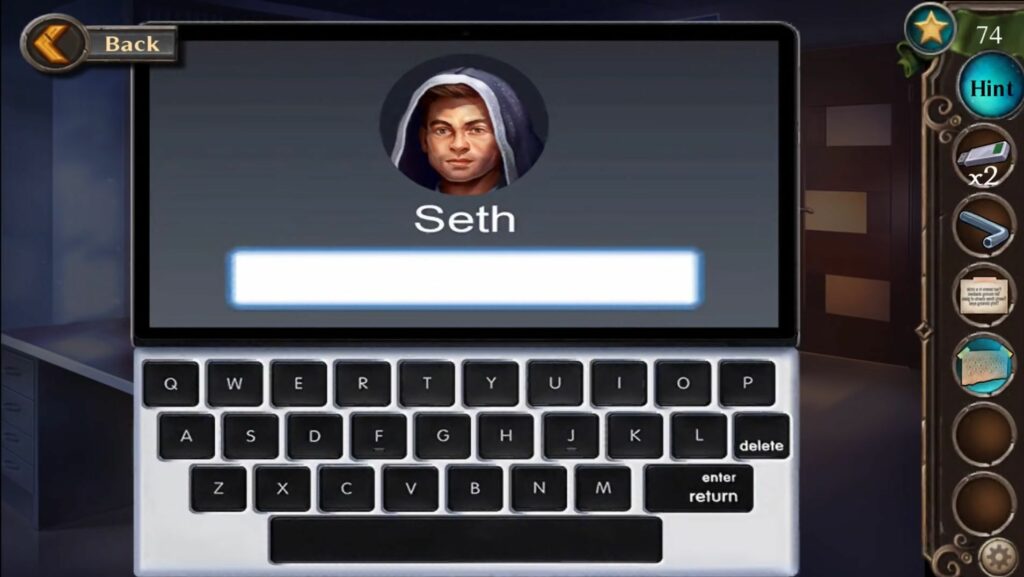
Open the right cabinet and pick a hex key and a strange note with numbers. Go back to the office room and click on the laptop on the desk to find a password input. You will find the password just above on the checkerboard. You have to enter it into the computer and press enter to see Seth’s confession.
Take a copy of the confession by using a USB stick on the laptop. Head to the first room and try to view words reflected by using the backward note found above on the mirror plant.
Go to the surveillance room, click on the computer screen and you will find a code entry at the bottom. Input the code and then press the Play button. Use the second USB stick on the small port, and then remove it to take a copy of this video.

Now head back to the AGI broadcast room and open up a plate at the foot of the AGI unit using the hex wrench. View the puzzle and then use the note found with numbers to see the numbers on each of the chips.

Connect the pairs of chips to solve the puzzle. Every chip must have the same number of connections to other chips.
After that, you can use the AGI to broadcast messages and reveal the evidence to everyone. It will complete this chapter.
Chapter 9 – The Mountain Lodge
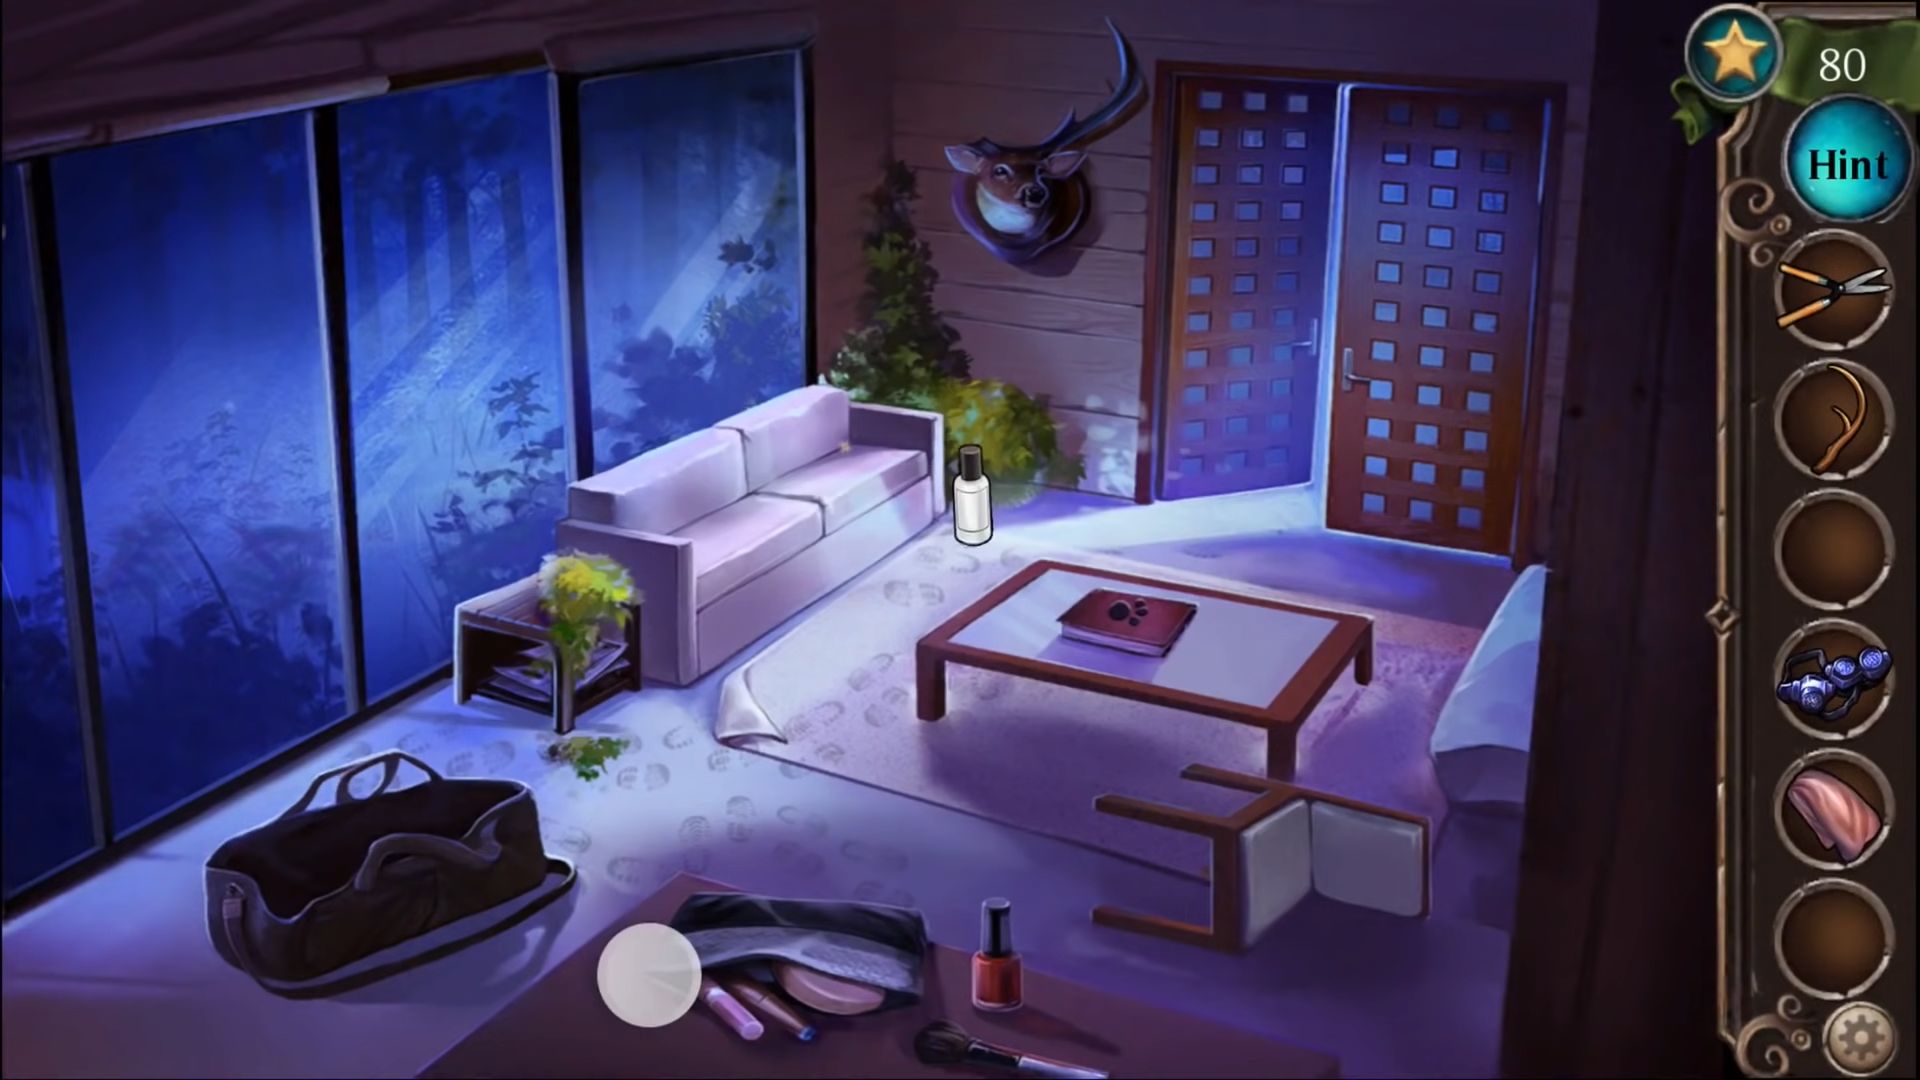
In this chapter, you will need to find your friend and stop the leader Seth. Collect the star from the road that can be used as a hint and then pick gardening shears from the road on the lower right. Enter the glass house to the left and grab the star on the sofa.
Grab the bag on the left and collect some headlamps from it. Collect a towel from the small table, an antler from the wall, and a nail polish remover from the tablet.
Click on the book on the table and go through the pages to get some details about various dogs.
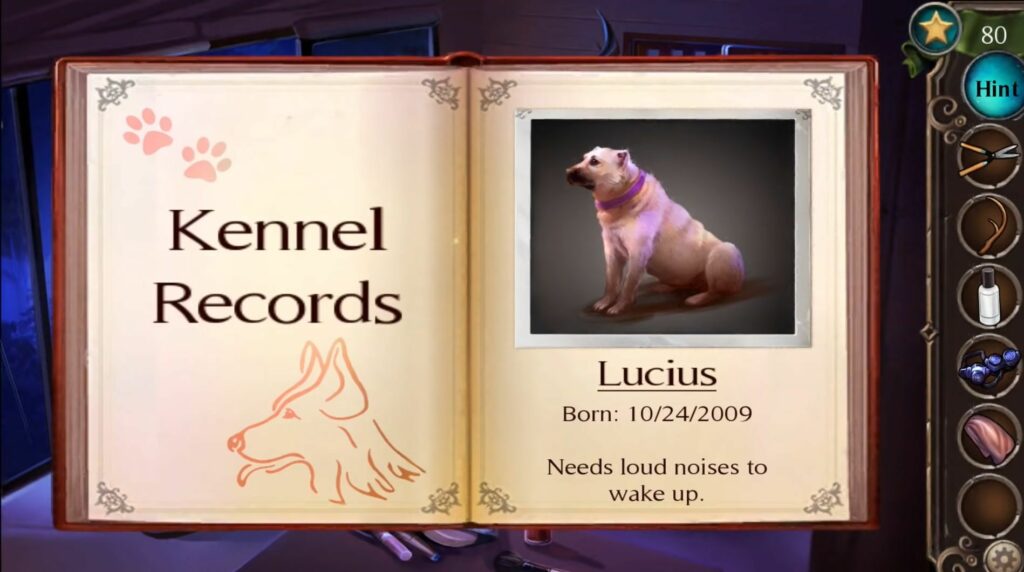
Exit the building and go to the other building across the road, it is a dog house. Once inside, you will find different items that can be placed in the bowls in front of each dog. You have to use the descriptions of each dog from the book to find out what to give each of them.
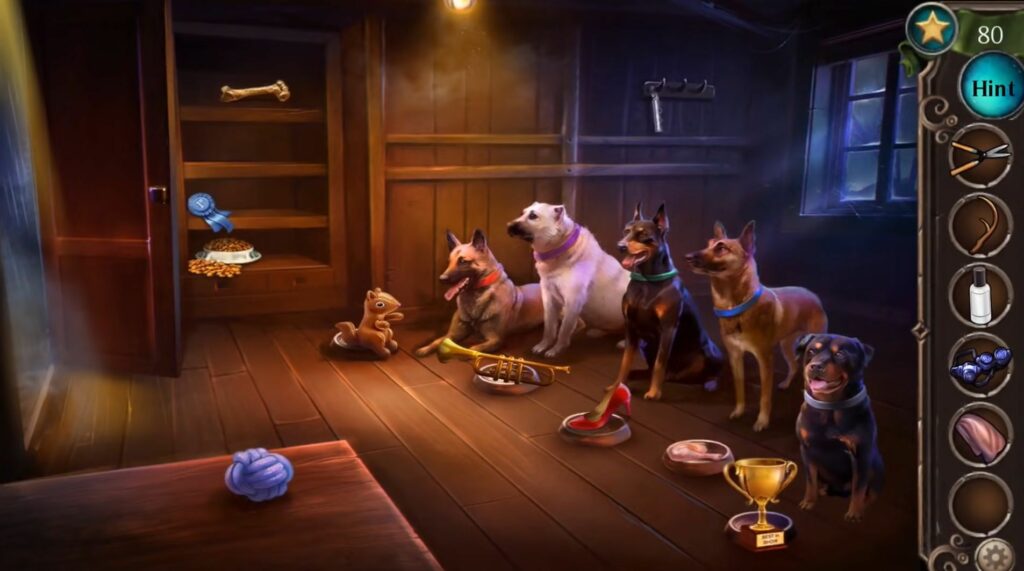
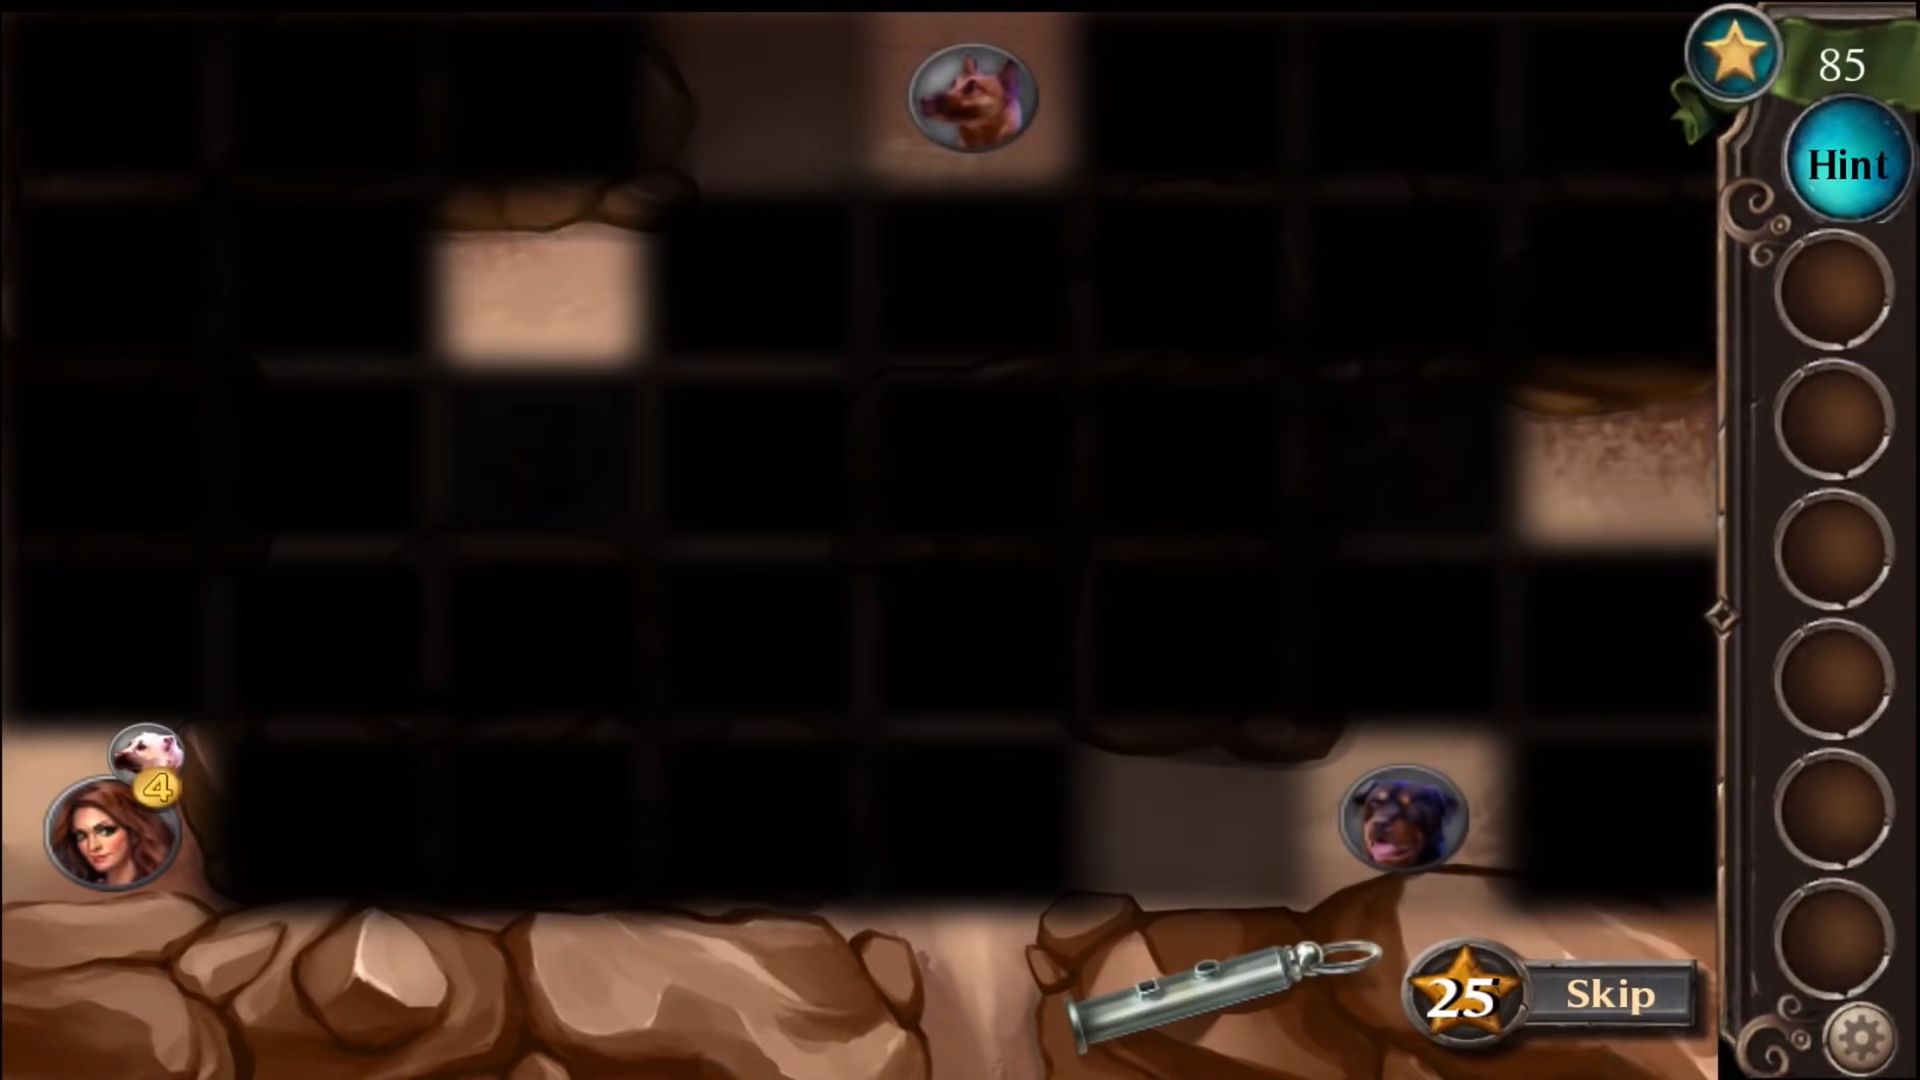
Grab the dog whistle from the wall and then use it to get the dogs to follow you. After that, move out of the building and click on the cave entrance in the distance.
You need to reveal weak points by using the nail polish remover on the fence and then removing it with the towel. Use the garden shears to cut a hole in it and allow the dogs to see by using the headlamps on their collars. After that, enter the cave to solve the puzzle.
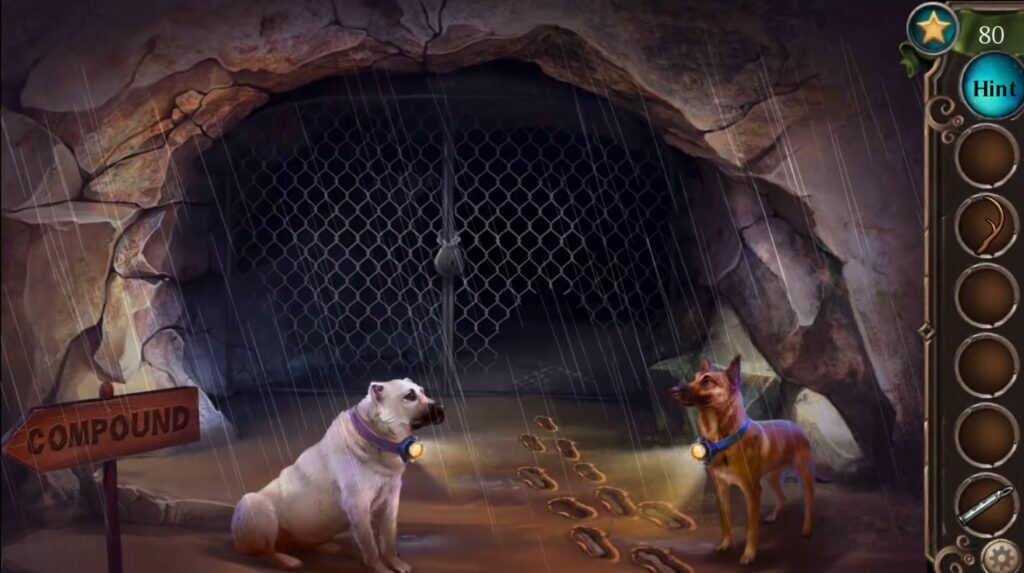
Once inside, you need to find areas of the cave by moving your marker around the dark map. Call a dog and assign a route to patrol by moving in a pattern of 5 squares. You will need to do this with all 5 dogs to cover all of the paths. If you need to move a dog, then place your marker and tap the whistle item to recall it.
After that, you will be able to pass on to the next area of the cave. You will find Melissa confronted by Seth. You have to defeat him and then arrest him to complete the last chapter.
