In this guide, you will find how to fix Armored Core 6 Fires of Rubicon graphics issues or black screen issues on your PC.
Download Easy Game Utility and Clear Graphic Cards Cache Files
In this section, we will take you through the steps to fix the graphics issues or black screen issues by downloading Easy Gamer Utility and clearing graphic cards cache files.
- First, you need to open your browser and download the program called Easy Game Utility.
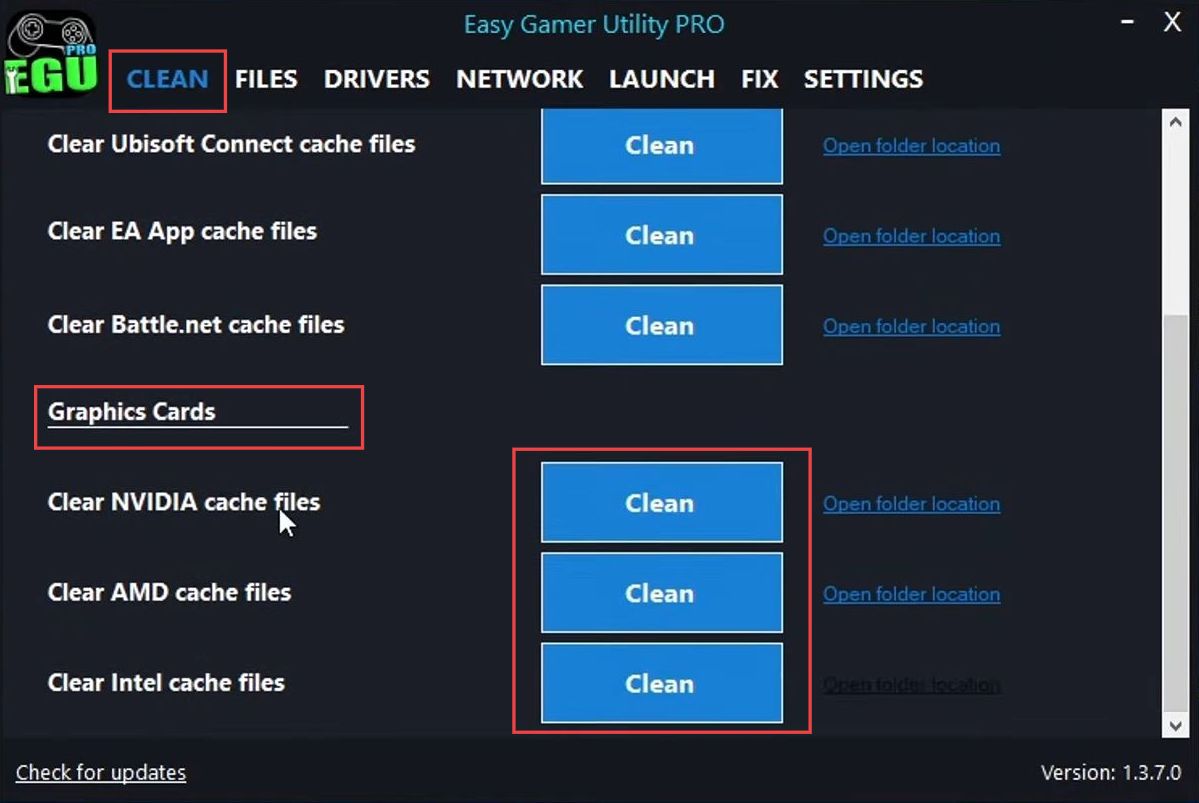
- Install the downloaded program on your computer and open it up. Navigate to the Clean tab and scroll down until you find a section related to your graphics card.
- Once you’ve found the appropriate section for your graphics card, click on the option to clear graphic cards cache files.
The utility will begin removing old temporary cache files associated with your graphics card. You might be prompted to confirm the action. - Confirm it to proceed with the cache-clearing process.
Once the cache-clearing process is finished, you’ll receive a notification indicating it’s complete. - After receiving the notification, click the OK button to close the cache cleaning process.
Clean Up DirectX Shader Cache
This section describes how to clean up the DirectX Shader cache in order to fix the error.
- Open the Start menu and type disk cleanup in the search bar.
- From the search results, choose the Disk Cleanup utility.
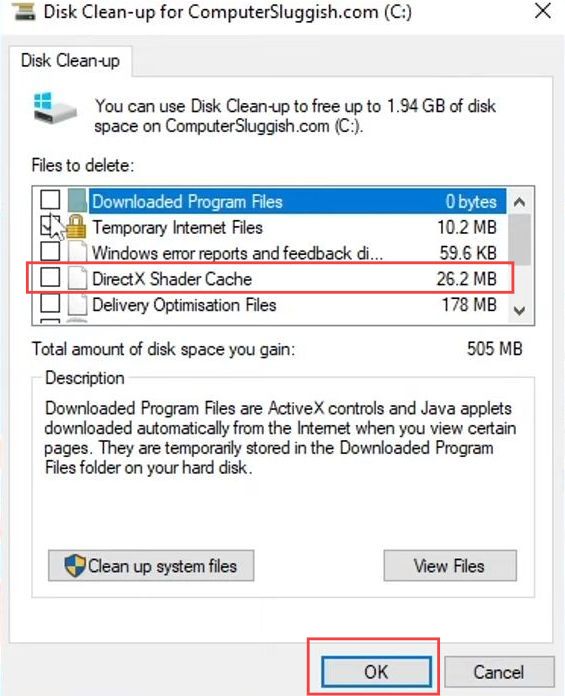
This tool helps you free up space on your computer’s hard drive. - In the Disk Cleanup window, select the drive you want to clean. In this case, choose your C drive.
After selecting the drive, a list of files and categories that can be cleaned up will be displayed. - Uncheck all options except for DirectX and click the OK button to confirm your selections for cleanup.
You’ll be asked to confirm the deletion of the selected files. - Click the Delete Files button to proceed.
Allow the cleanup process to complete. This might take a few moments depending on the amount of data being removed. - After the cleanup is finished, proceed to launch the game once more. Test whether the changes made by the cleanup process have helped to resolve the issue with the game.
Check Graphics Card Updates
This section will take you through the steps to check the graphics card updates in order to resolve the issues.
- You need to ensure that you have the latest updates installed for your graphics card driver.
- To begin, identify your graphics card. If you’re unsure about your graphics card, click on the Windows Start menu icon located in the taskbar.
- In the start menu search bar, type Device Manager and select it from the search results.
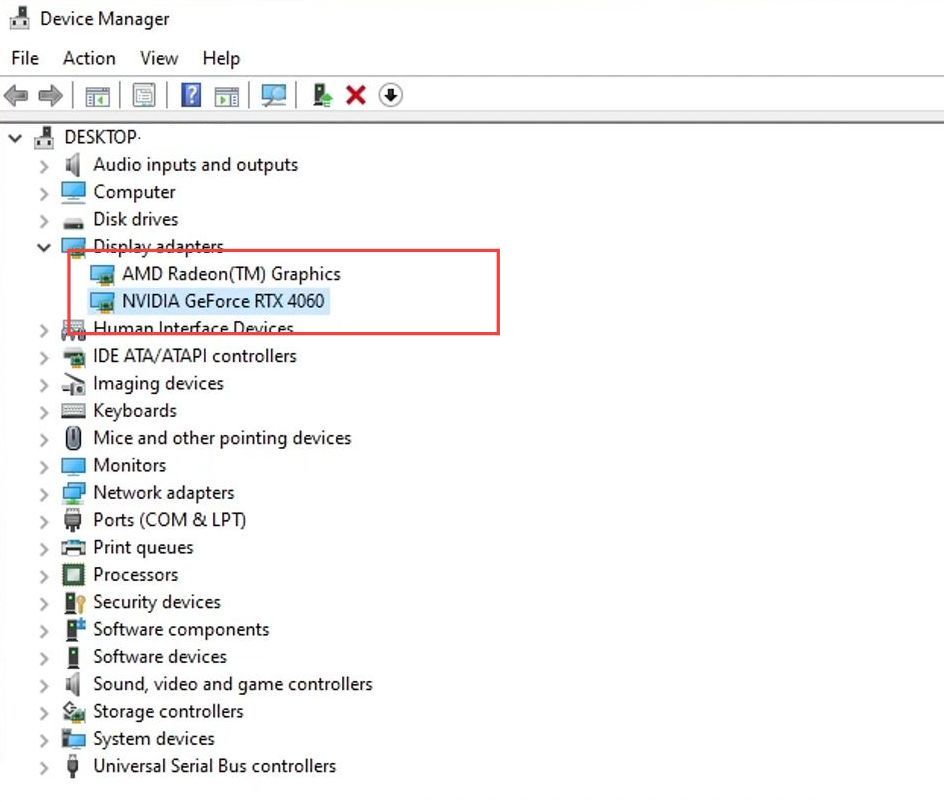
This opens the Device Manager window. - In Device Manager, expand the section named Display adapters.
This will show you the graphics cards installed on your computer. - Your graphics card’s name will be listed under the Display adapters section. In the example, an RTX 4060 is mentioned.
- After identifying your graphics card like RTX 4060, go to the website of the manufacturer in this case, NVIDIA to download the latest driver for your specific graphics card model.
- On the graphics card manufacturer’s website, locate and download the latest driver for your graphics card model. Follow the instructions provided on the website to install the driver.
Download Microsoft DirectX
This section describes how to fix the error by downloading Microsoft DirectX.
- Open your browser to download DirectX End-User Runtime.
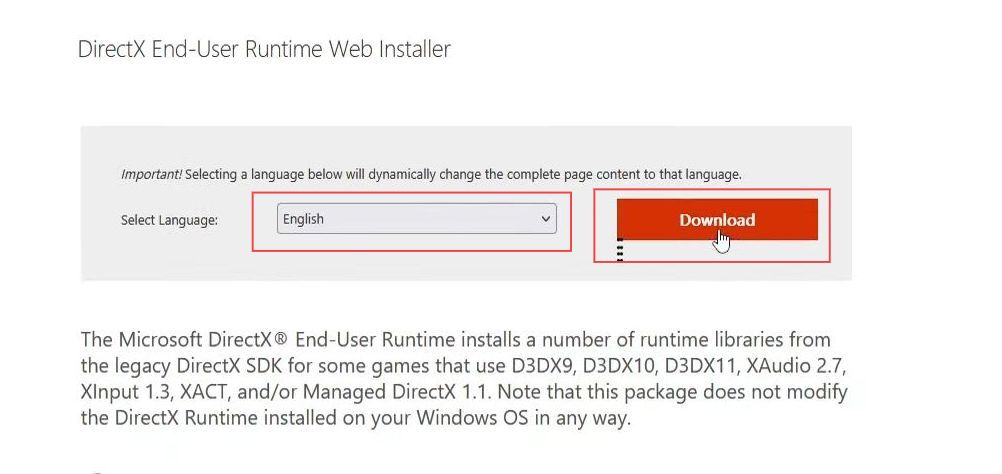
- On the Microsoft Download Center page, scroll down and locate the section where you can select your preferred language for downloading DirectX. Click on the dropdown menu and choose your language.
- After selecting your language, click on the Download button.
This will start the download process for the DirectX installer. - Once the download is complete, navigate to the location where the installer file has been saved. Double-click on the setup file to run it.
- During the installation process, you will likely encounter a term-of-use agreement. If you agree with the terms, click on the I accept or similar button to proceed.
- After accepting the terms, click on the Next button to continue with the installation.
- You might be presented with optional components to install, such as the Bing Bar. If you do not want to install these optional components, uncheck the respective boxes.
- After deselecting any optional components, click on the Next button to continue the installation.
If the installer detects that you do not have the latest DirectX files, it will install the necessary files. If you already have the latest version, it will simply verify this. - After the check is complete, the installer will show the DirectX version you currently have. Make sure it’s the latest version (e.g., DirectX 12).
- It’s also advised to ensure you have the latest Windows updates installed, as Windows updates can also update DirectX.
- Once you’ve verified the DirectX version and completed any necessary updates, click on the Finish button to complete the installation process. Launch the game and check if the error is resolved.
Rename Config Armored Core 6 Files
In this section, we will take you through the steps fix the error by renaming Config Armored Core 6 files.
- You need to access the location where the configuration file for the game Armored Core 6 is located.
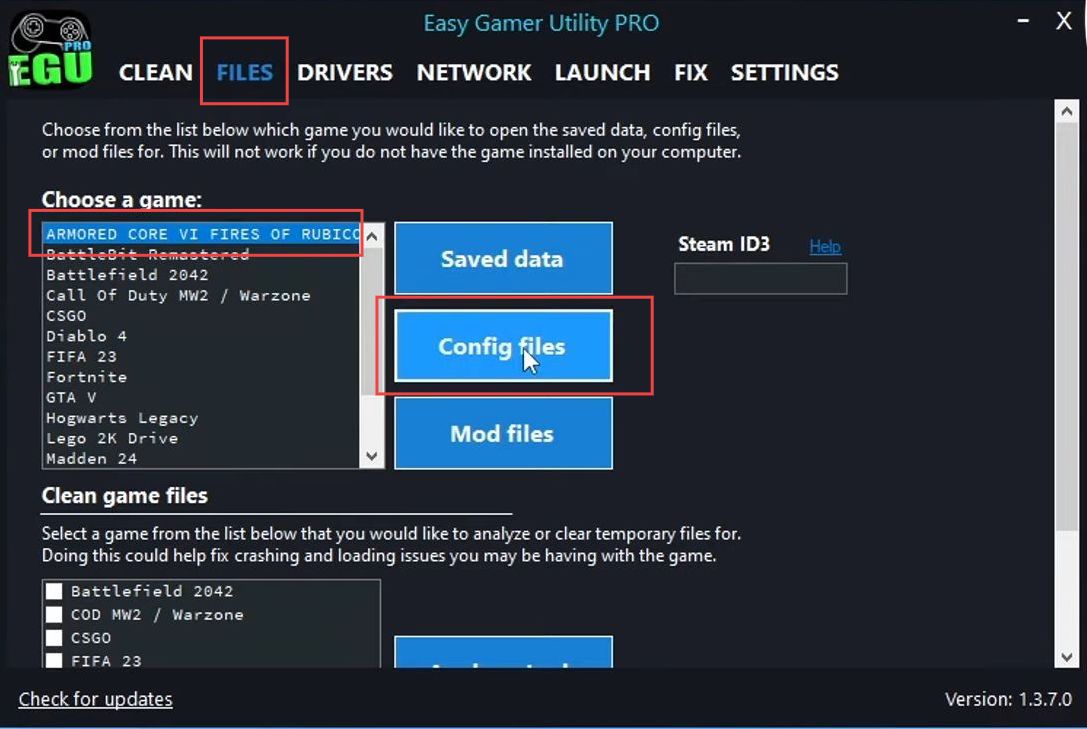
This configuration file might hold settings that could be contributing to the issues you’re facing. - If you have the Easy Gamer Utility, it can simplify the process. Open the Easy Gamer utility and select the Armored Core 6 game from the utility’s interface.
- Click on the Config Files option which will take you directly to the location of the game’s configuration files.
- If you prefer to do it manually, you can open File Explorer on your computer and navigate to the location where the configuration files for Armored Core 6 are stored.
- Once you’ve reached the location of the configuration files, access the specific file associated with Armored Core 6.
- Now you need to rename the game file by adding CS or BK at the end of its name.
- After making any changes, save the configuration file and try launching Armored Core 6 again.
Disable the Overclock Settings
This section describes how to disabling the overclock settings in order to fix the issues.
- If you’re still experiencing issues with the game, consider the possibility that overclocking your hardware might be causing these problems.
- To address this, you need to access your computer’s BIOS such as Basic Input/Output System settings.
- Restart your computer and during the boot-up process, typically press a specific key like Delete, F2, F12, or another key depending on your motherboard to access the BIOS.
- Within the BIOS settings, identify any overclocking settings you’ve enabled.
These could include settings like XMP (eXtreme Memory Profile) for RAM or overclocking settings for your graphics card or CPU. - If you’re familiar with the process of disabling overclock settings and have experience with it, turn off these settings.
Be cautious as incorrect changes in BIOS settings can affect your computer’s stability. - If you’re not confident about adjusting these settings, it’s best not to make changes as incorrect settings could potentially lead to system instability.
- If you made changes, ensure you save the changes and exit the BIOS settings.
- After making changes so that no overclocking settings are active, launch the game again.
- Test whether the issues with the game have been resolved.
Disabling overclock settings could potentially lead to a more stable environment for the game.