In this guide, you will find how to change the DNS server on Xbox Series X. Go through the guide and follow the simple steps to change it.
- Start from the home screen, navigate to Settings, and select the General tab.
- Now you have to choose Network Settings and go to Advanced Settings.
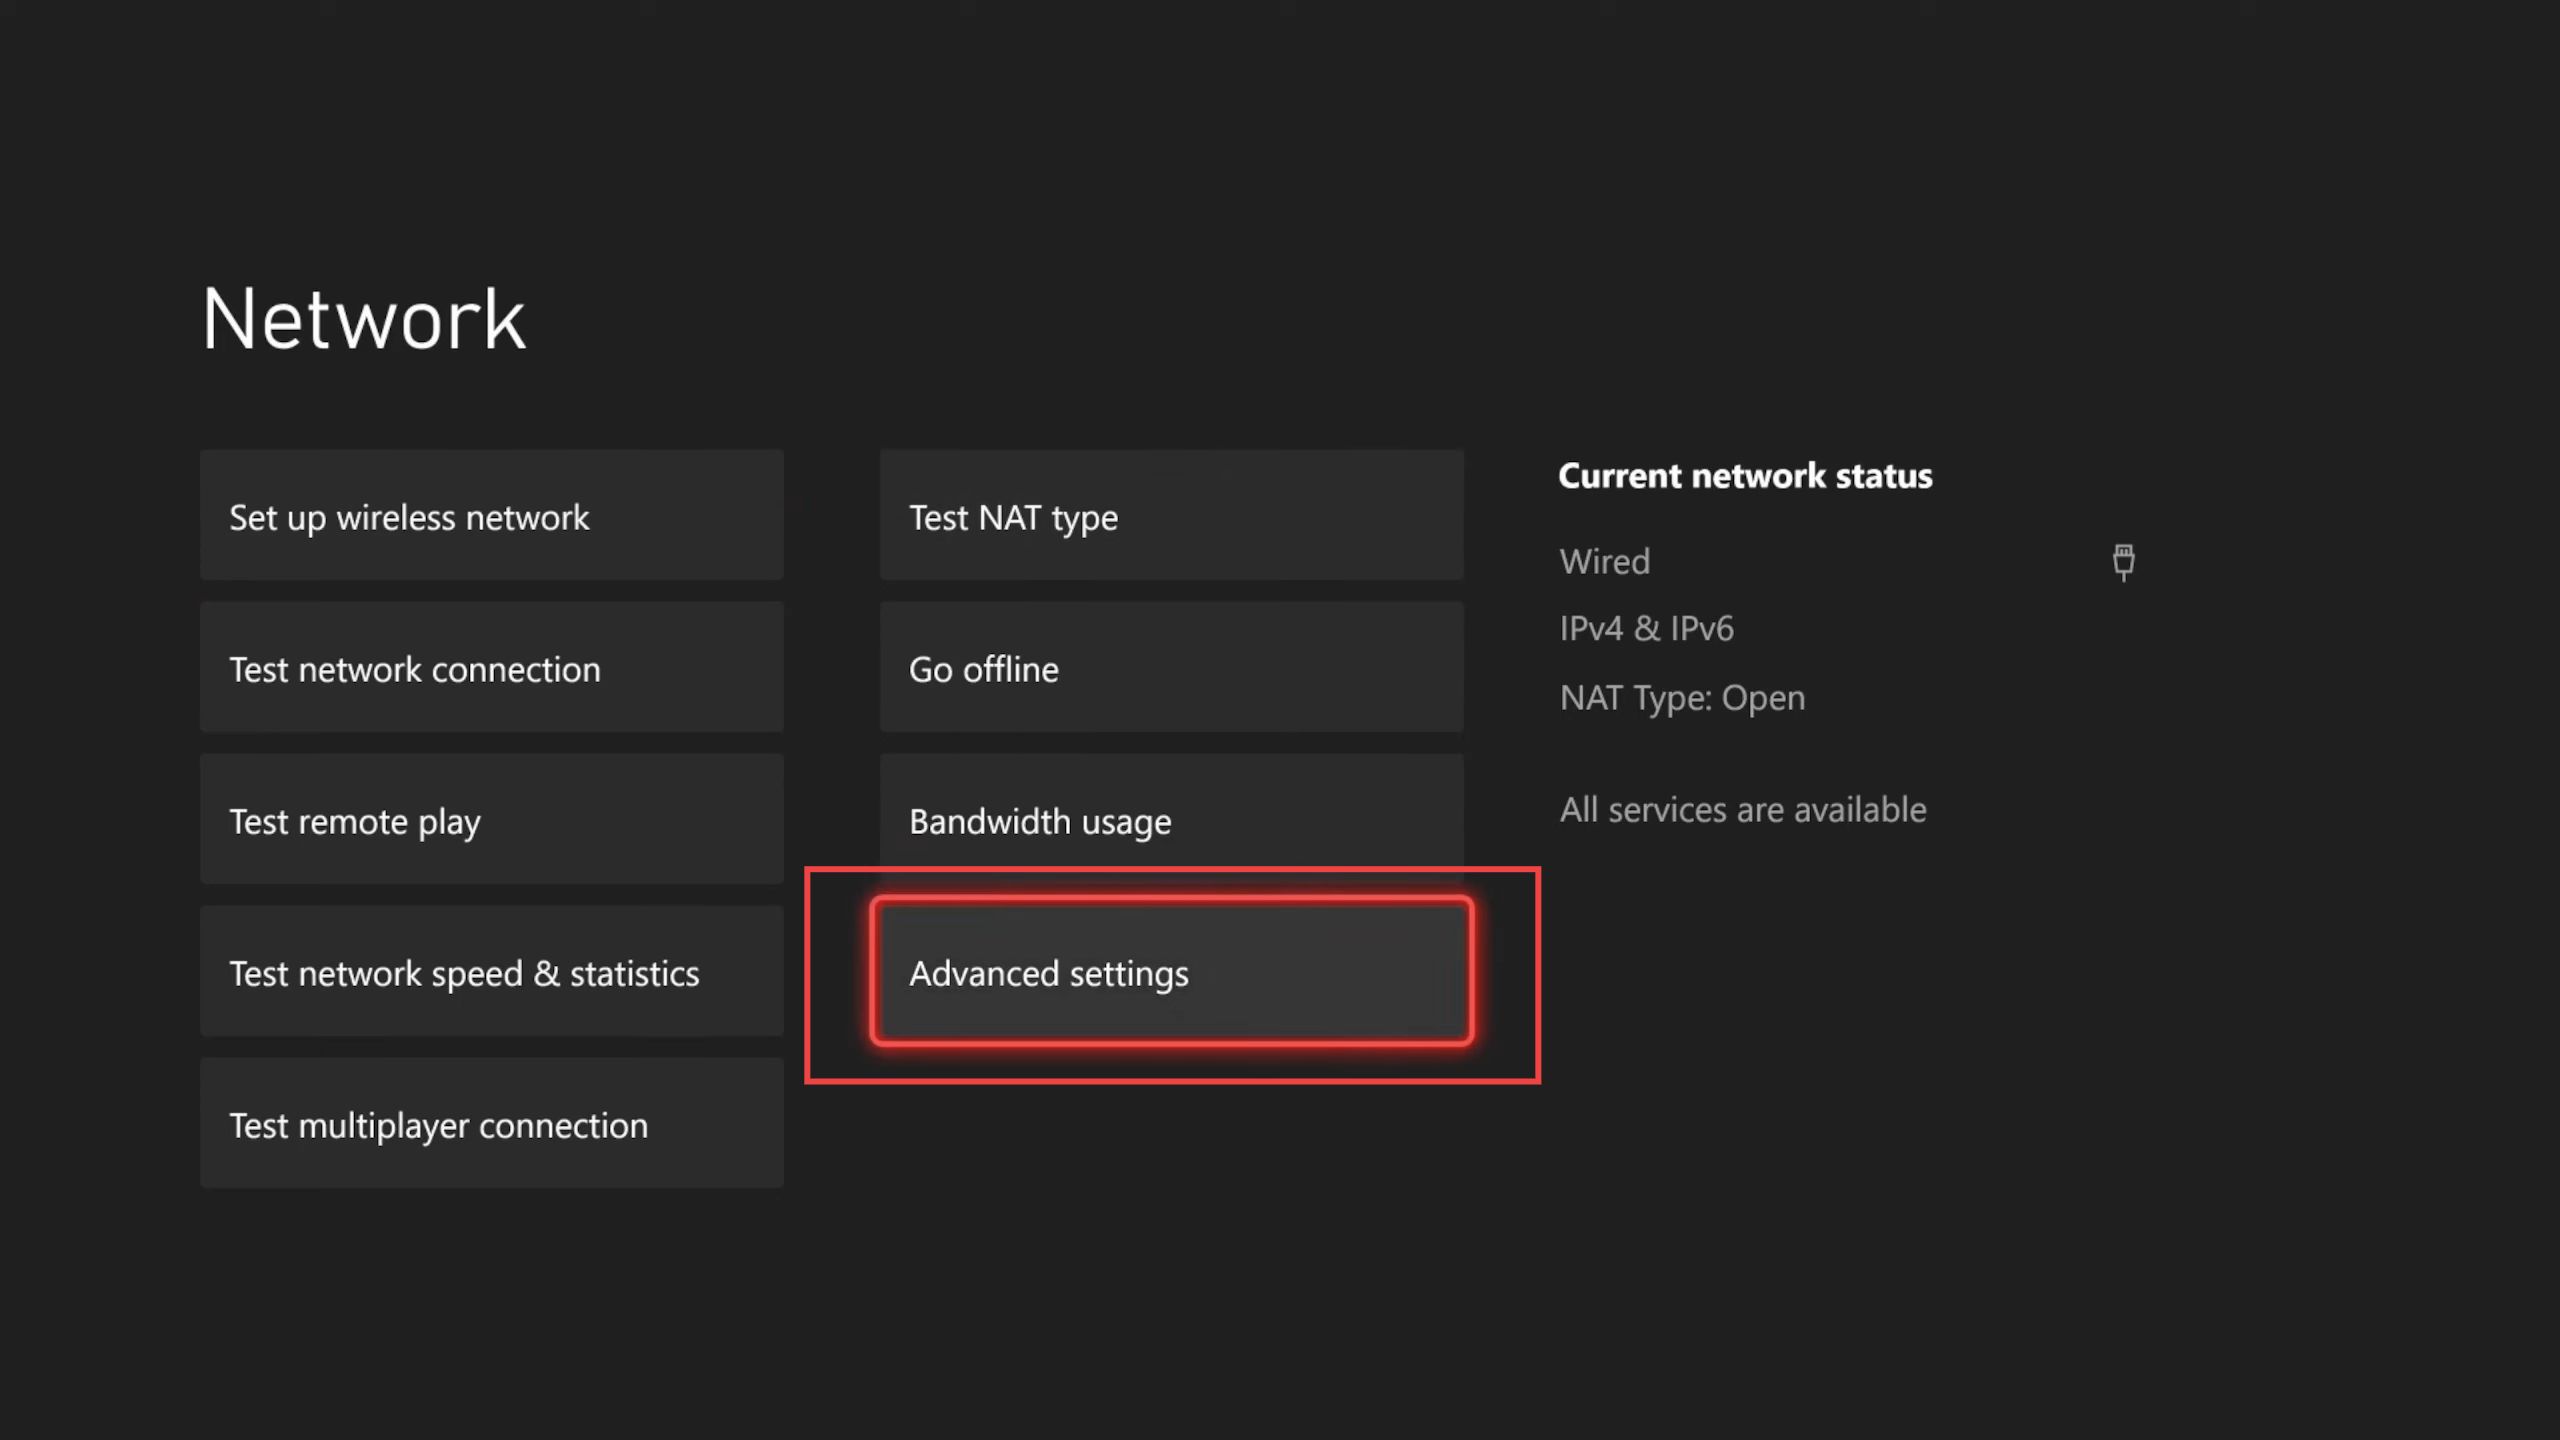
- Look for DNS Settings on the left side of the screen and choose Manual in the DNS settings.
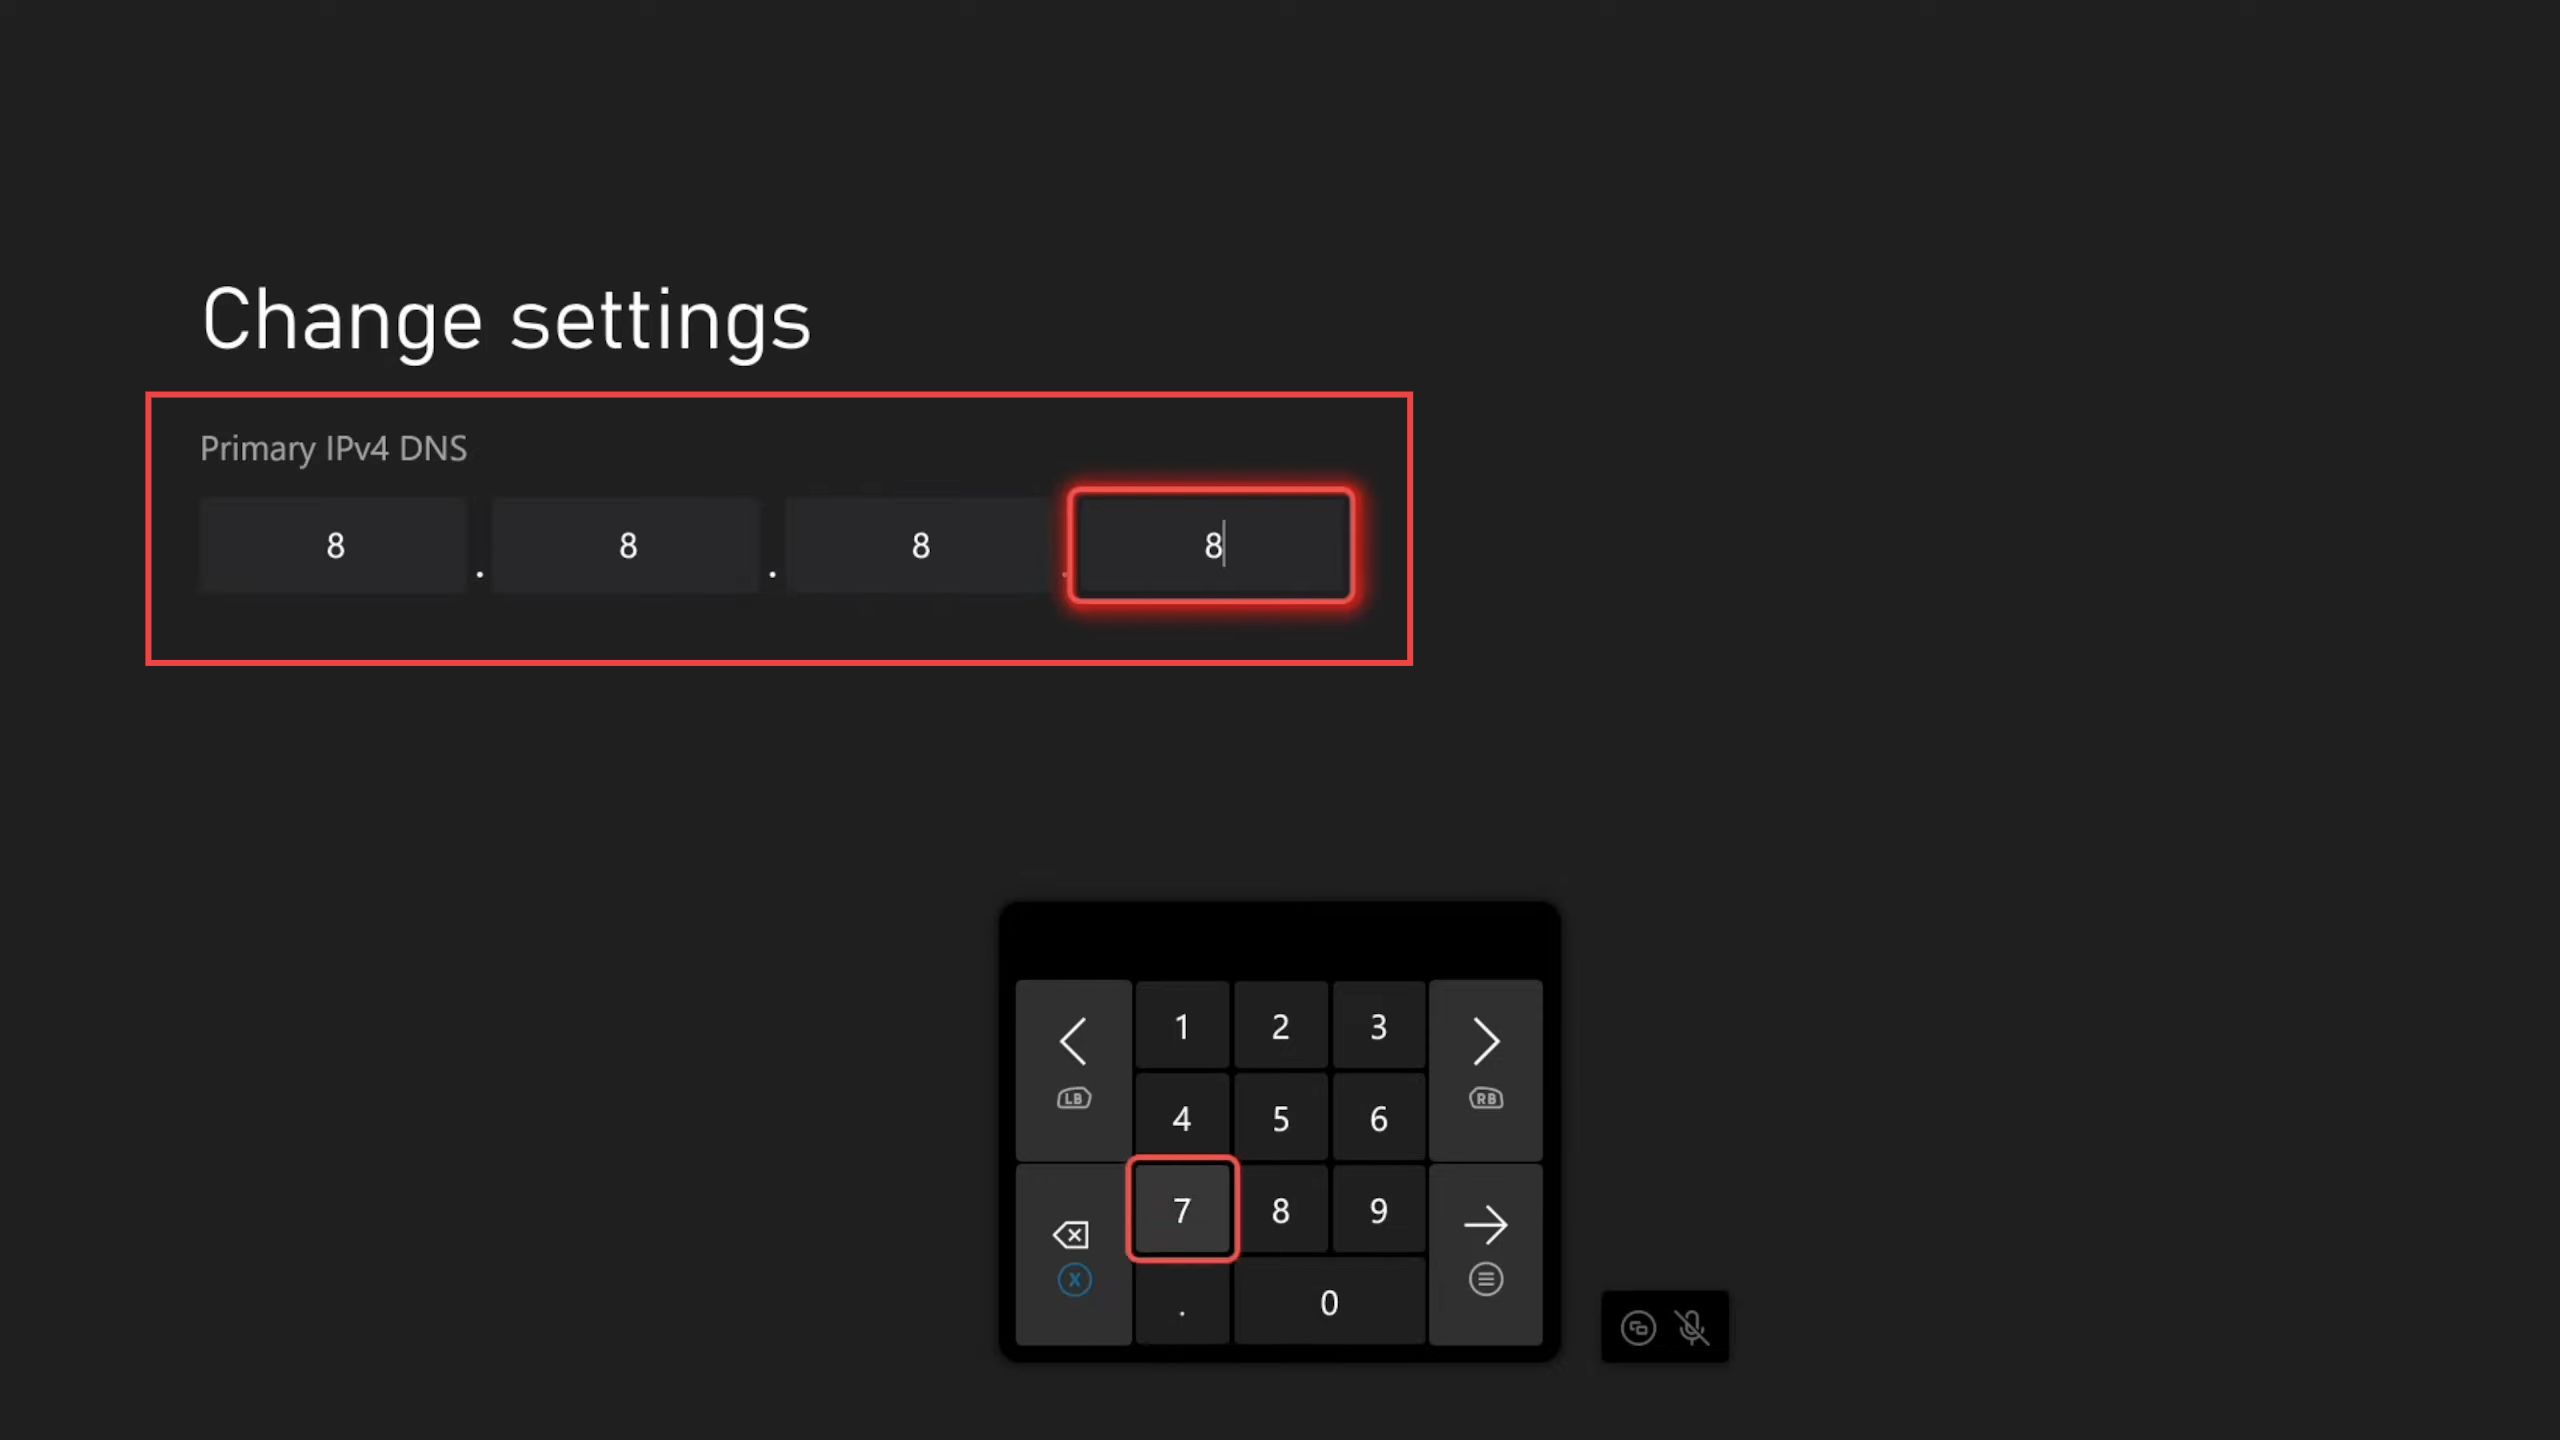
- Enter the primary IPv4 DNS by inputting 8.8.8.8 and delete any zeros.
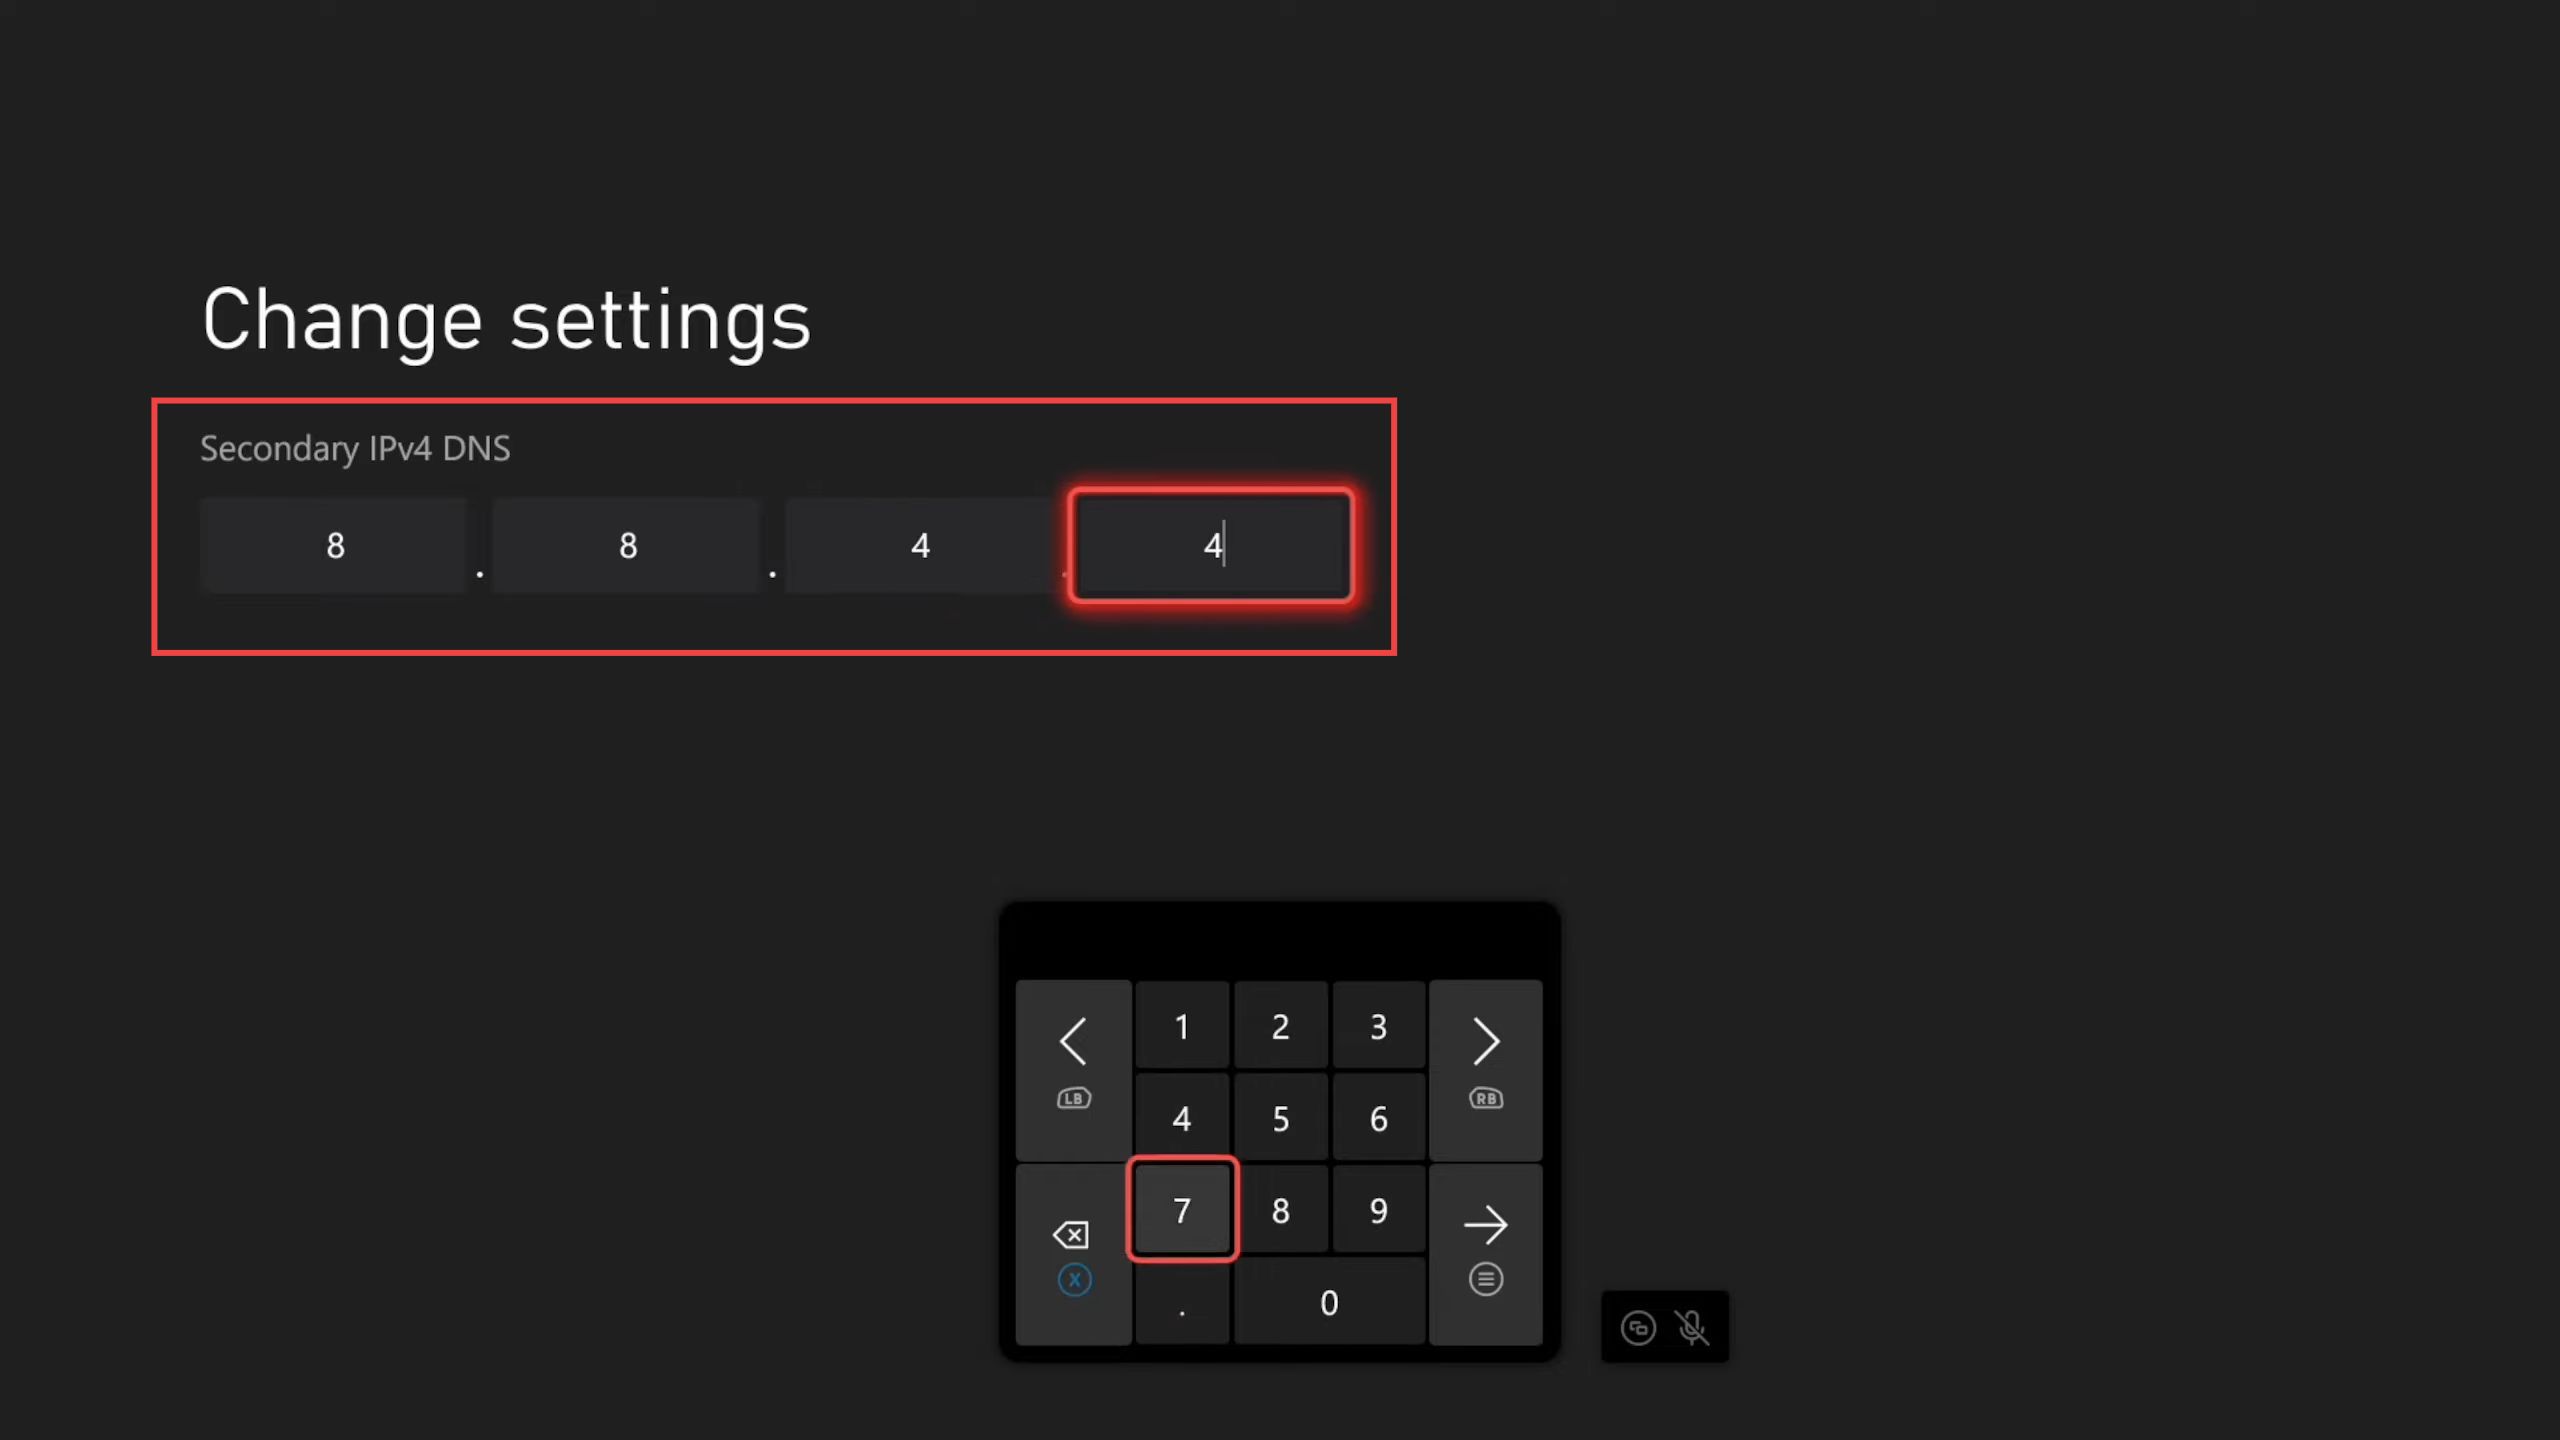
- Move to the secondary DNS, delete zeros, and input 8.8.4.4.
These are Google’s OpenDNS servers, possibly the fastest in your area. - Confirm by pressing the button with three lines and check that the DNS server has changed to 8.8.8.8.
It will be visible on the main screen under DNS.