This guide will show you how to change the language of Xenia Canary on Xbox Series X using the most convenient method.
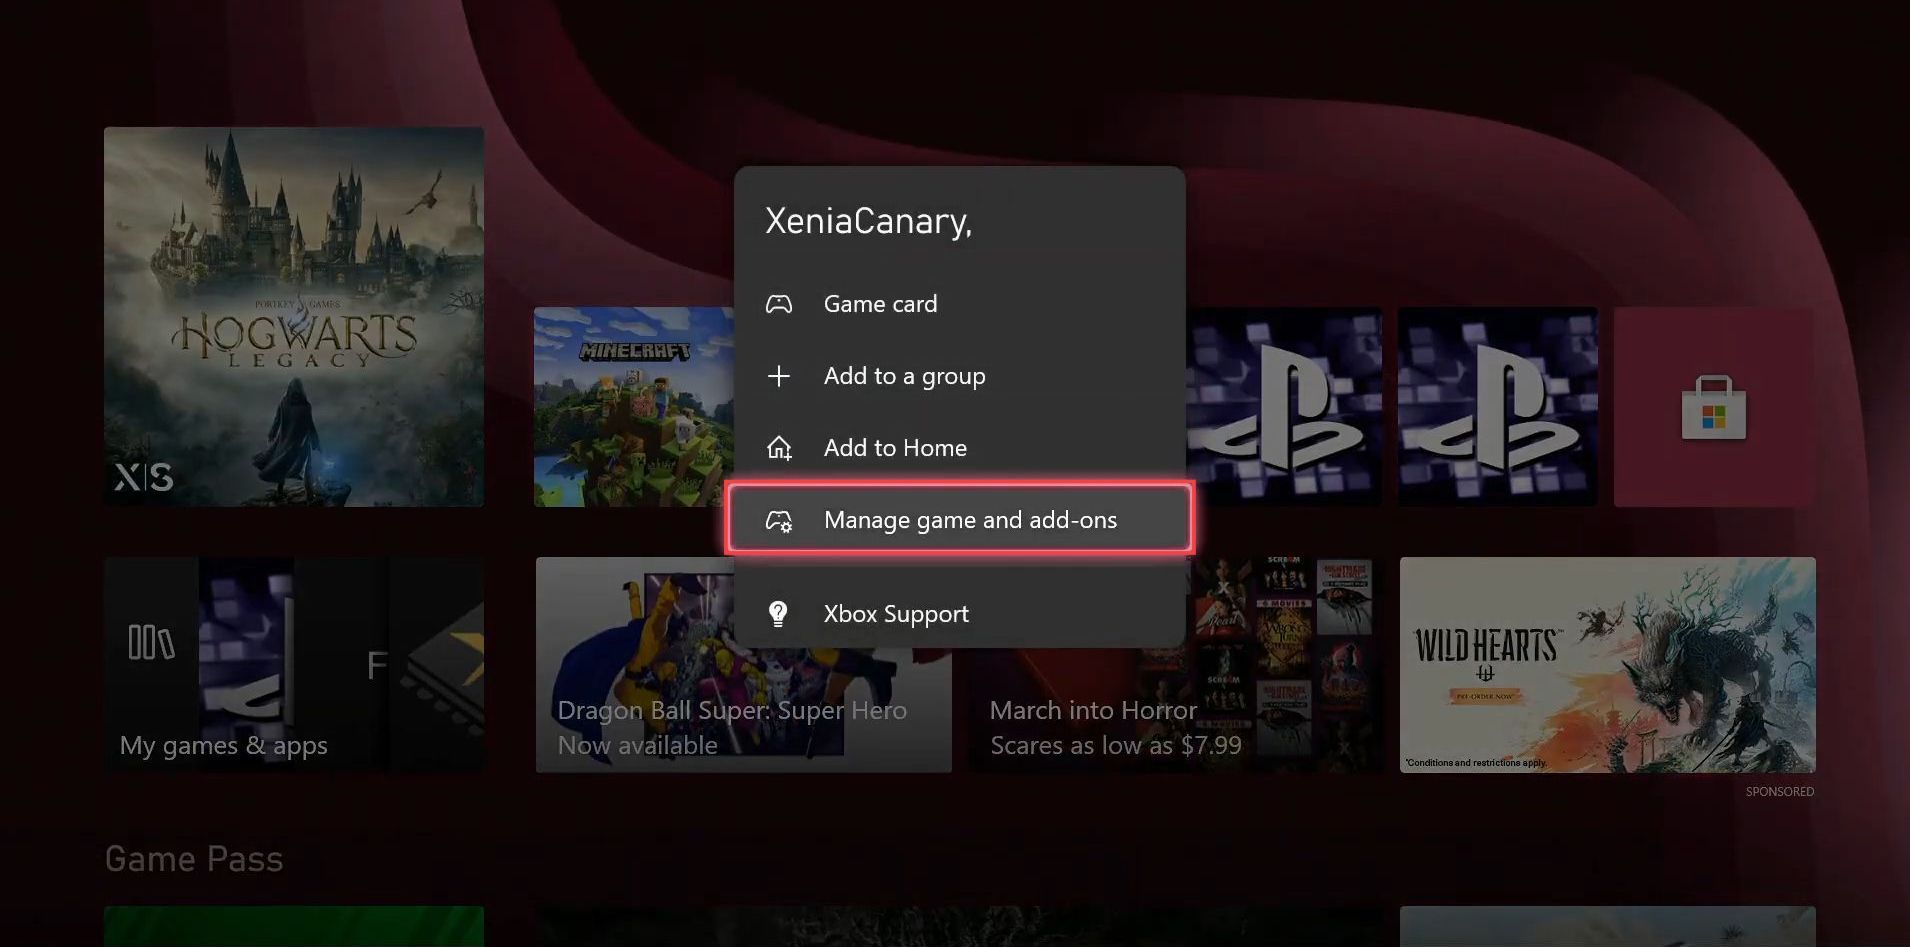
- First, you need to launch the Xbox application on your computer and click the Xenia Canary app from the left side panel to open it.
It will open up a drop-down menu. - Now select the Manage game and add-ons option from the menu.
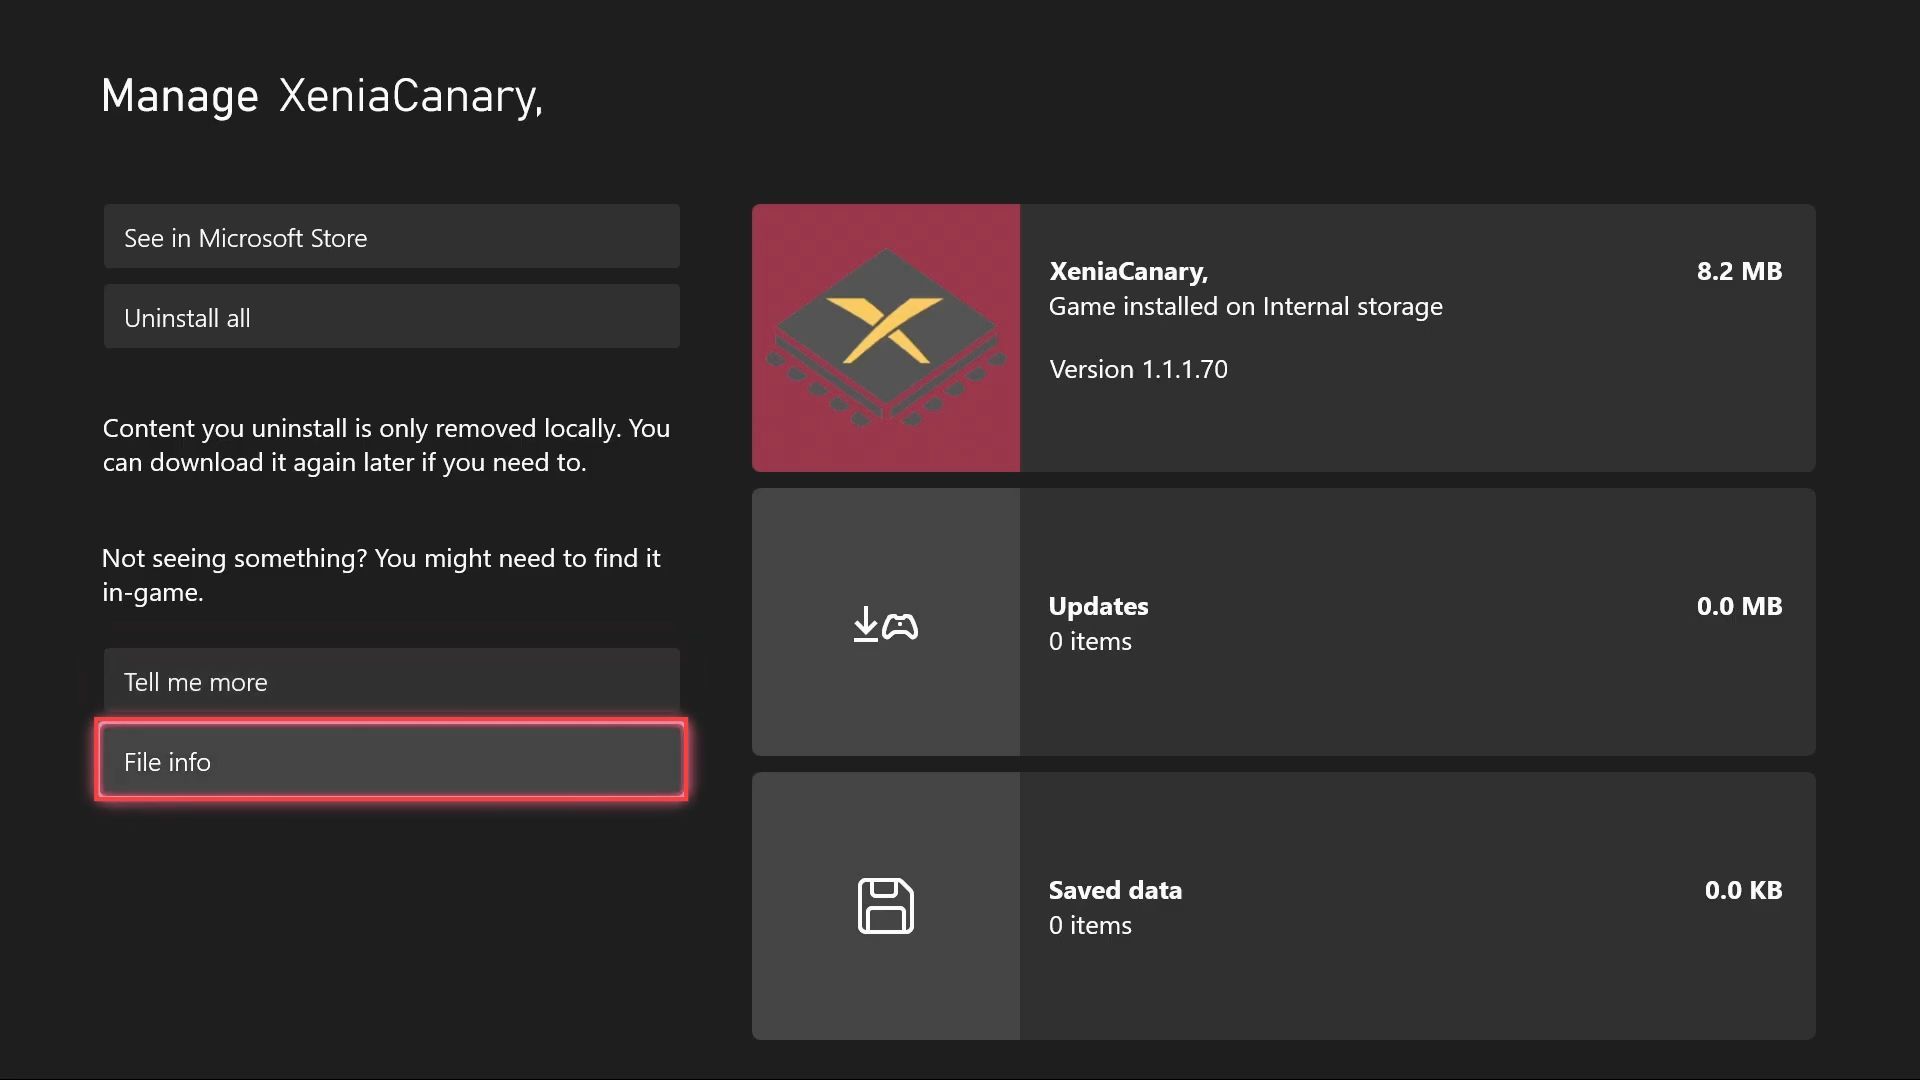
- Upon reaching this window, click the file info tab from the left side panel.
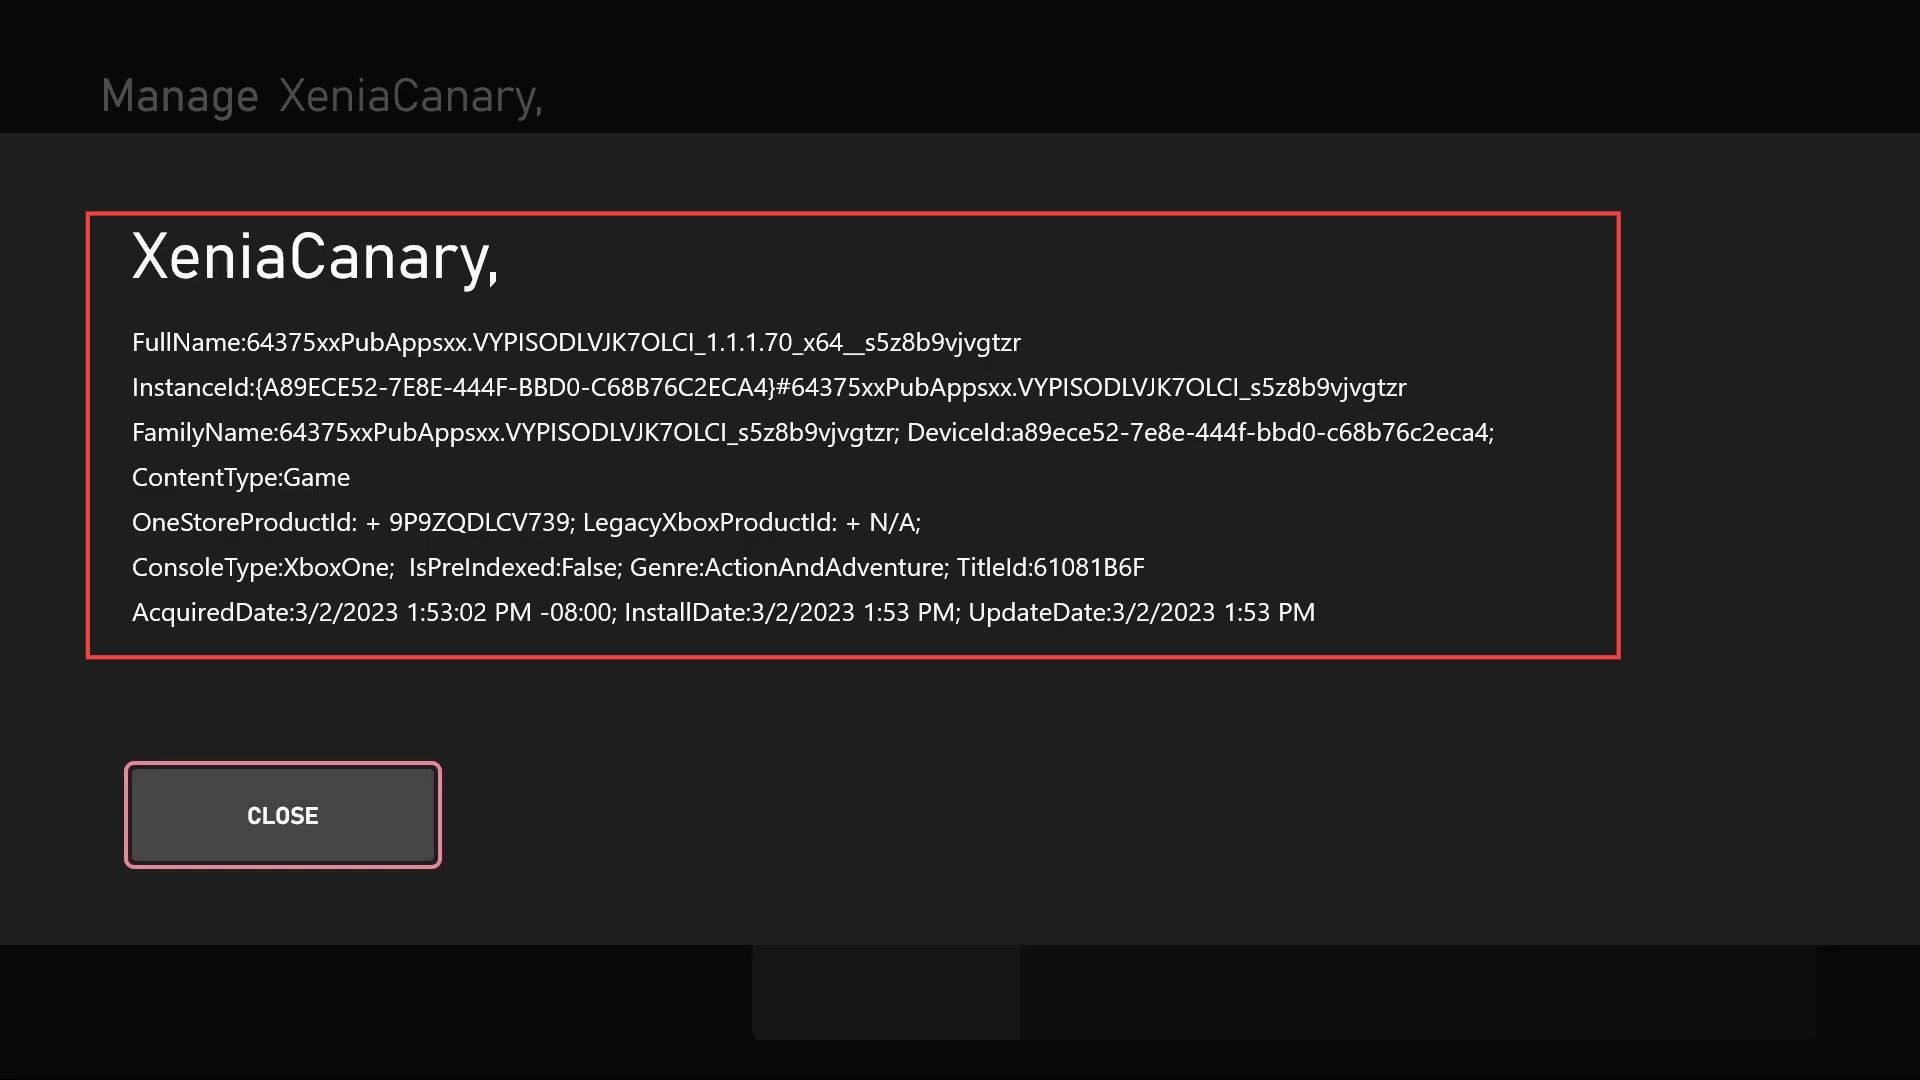
- Now you have to take a snap of this information to get the correct Xenia Canary.
- After that, click the Xbox icon and select my games & apps tab from the left side panel.
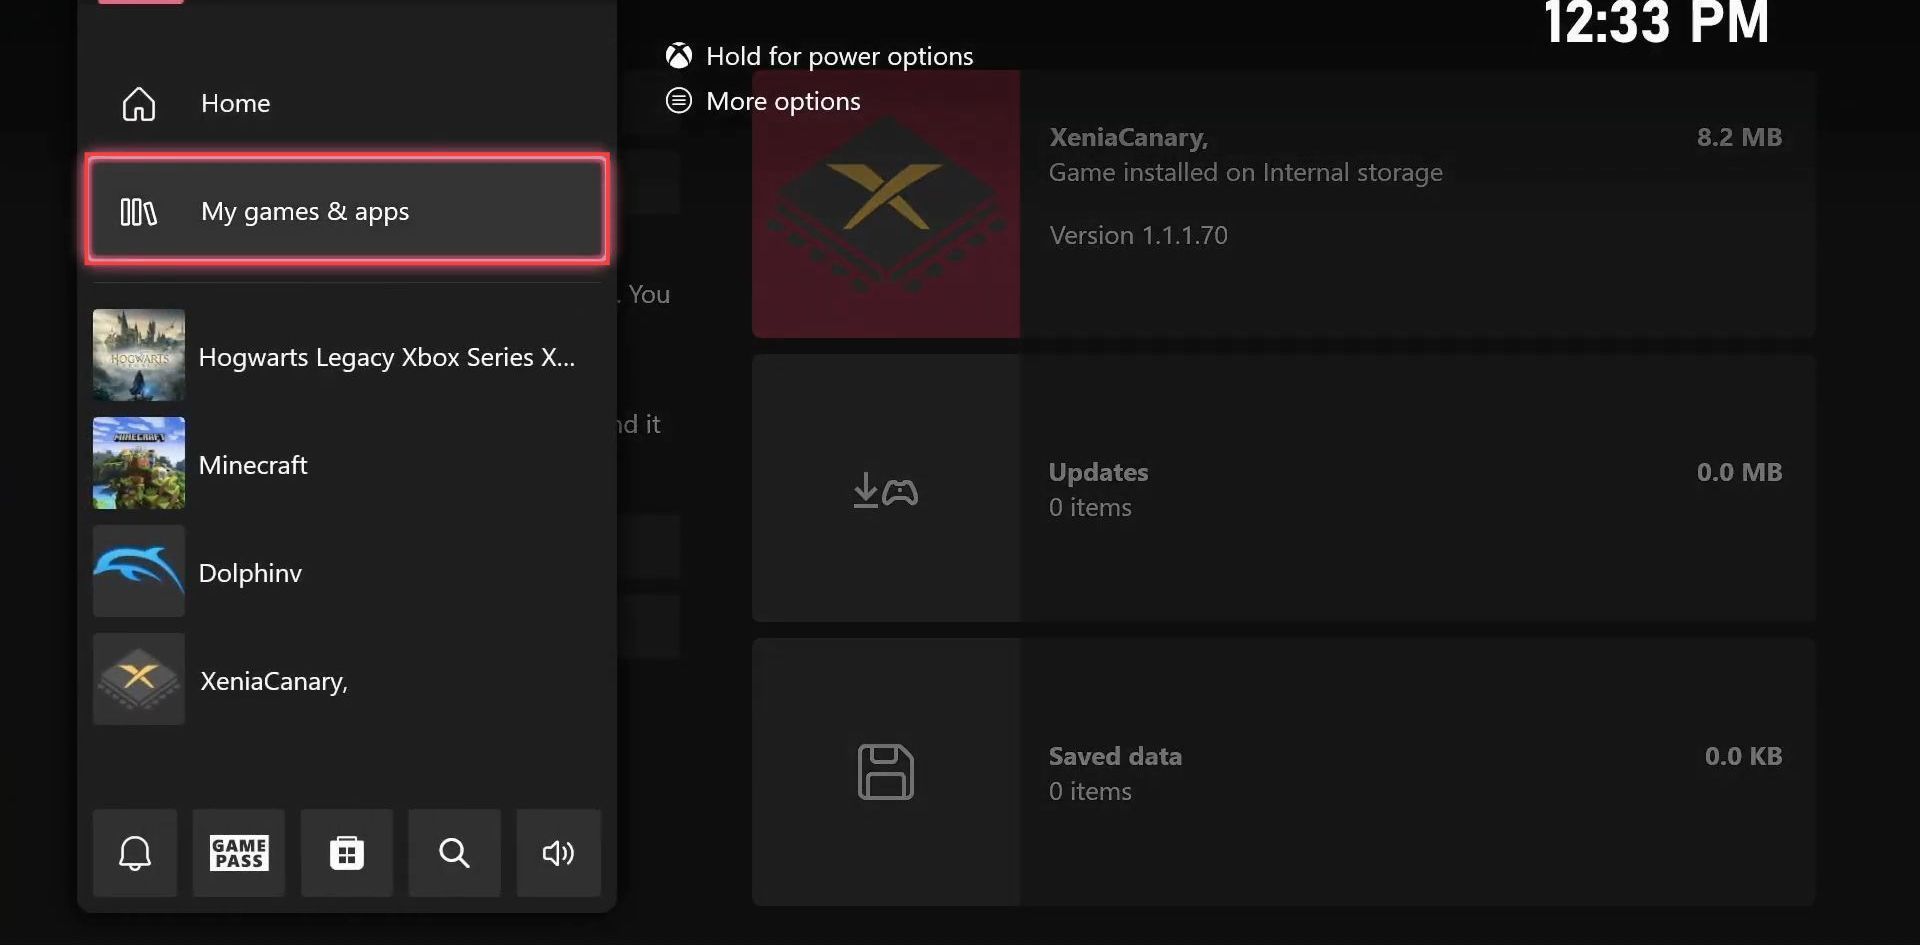
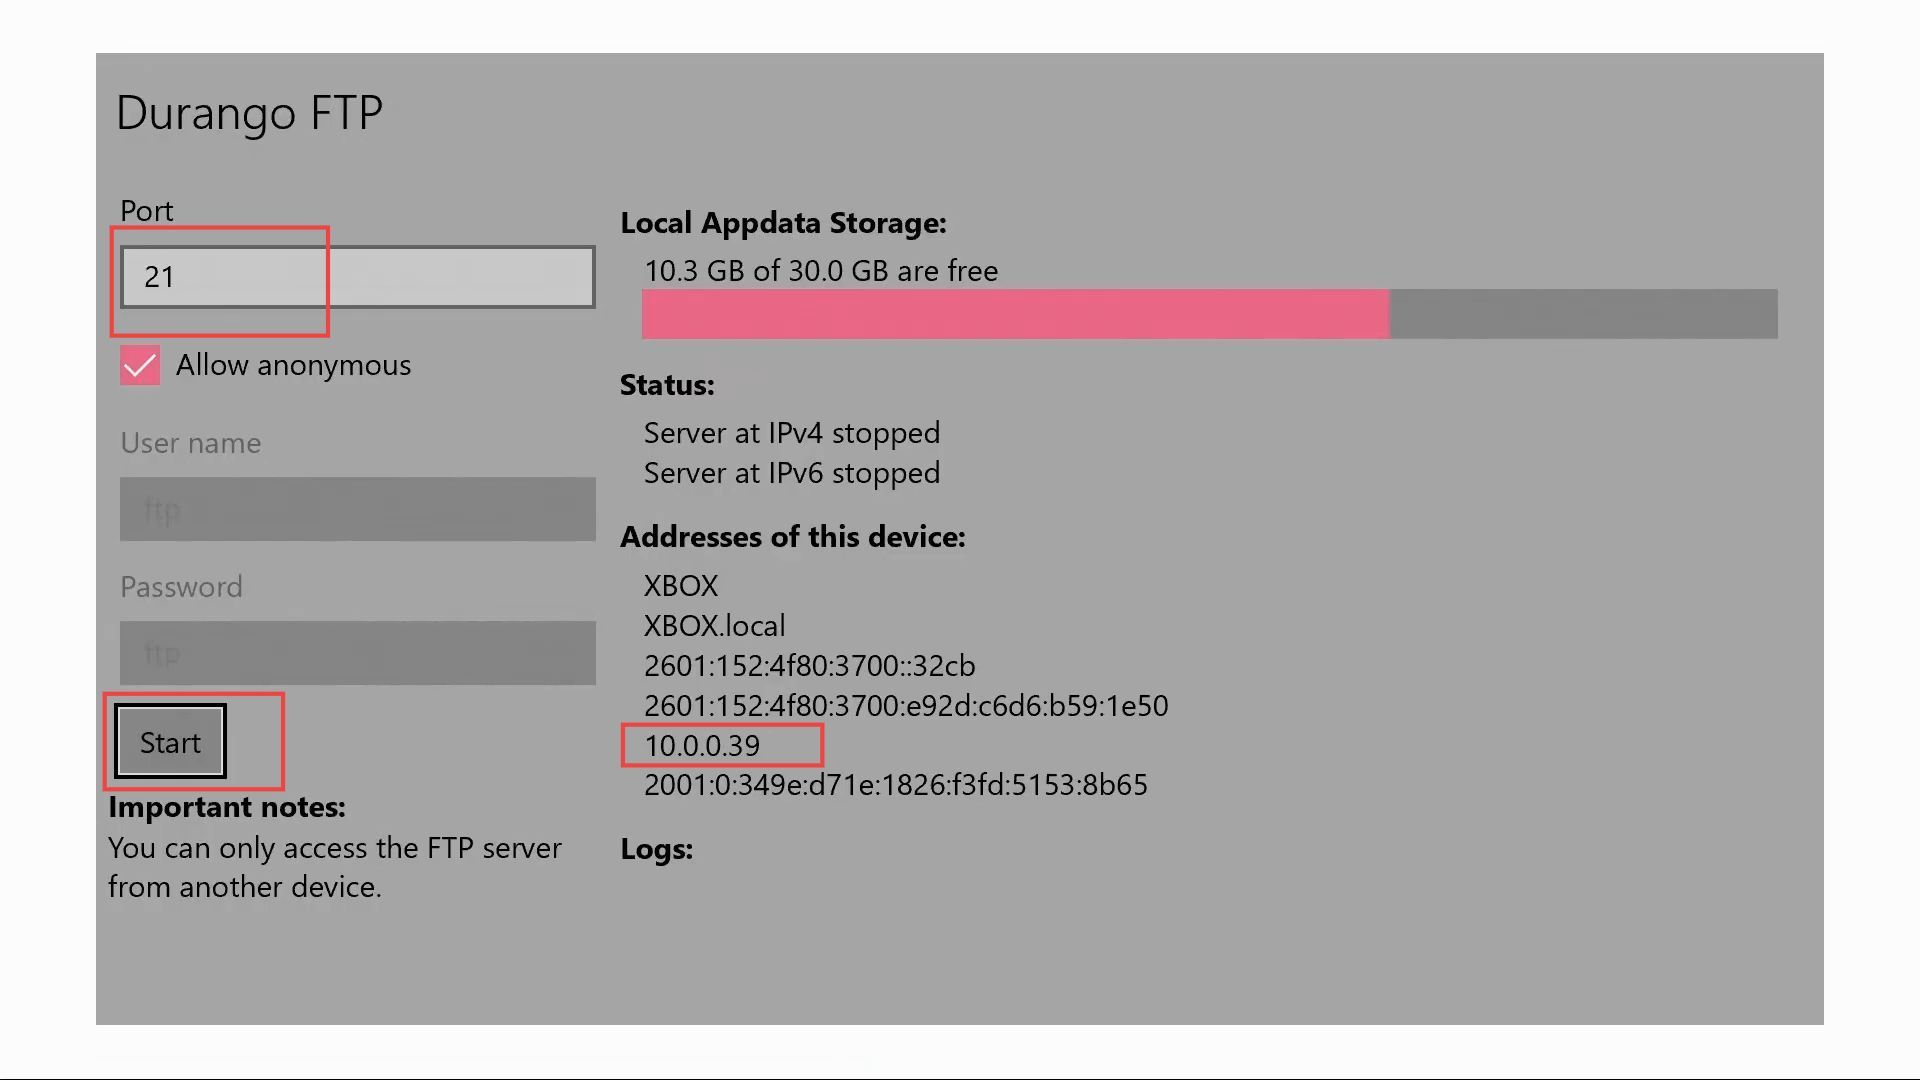
- Locate the Durango FTP application on your computer and click the start button from the left side.
- Upon reaching this window, look for the Addresses section and find the number displayed under the Addresses of this device.
- You have to copy this number.
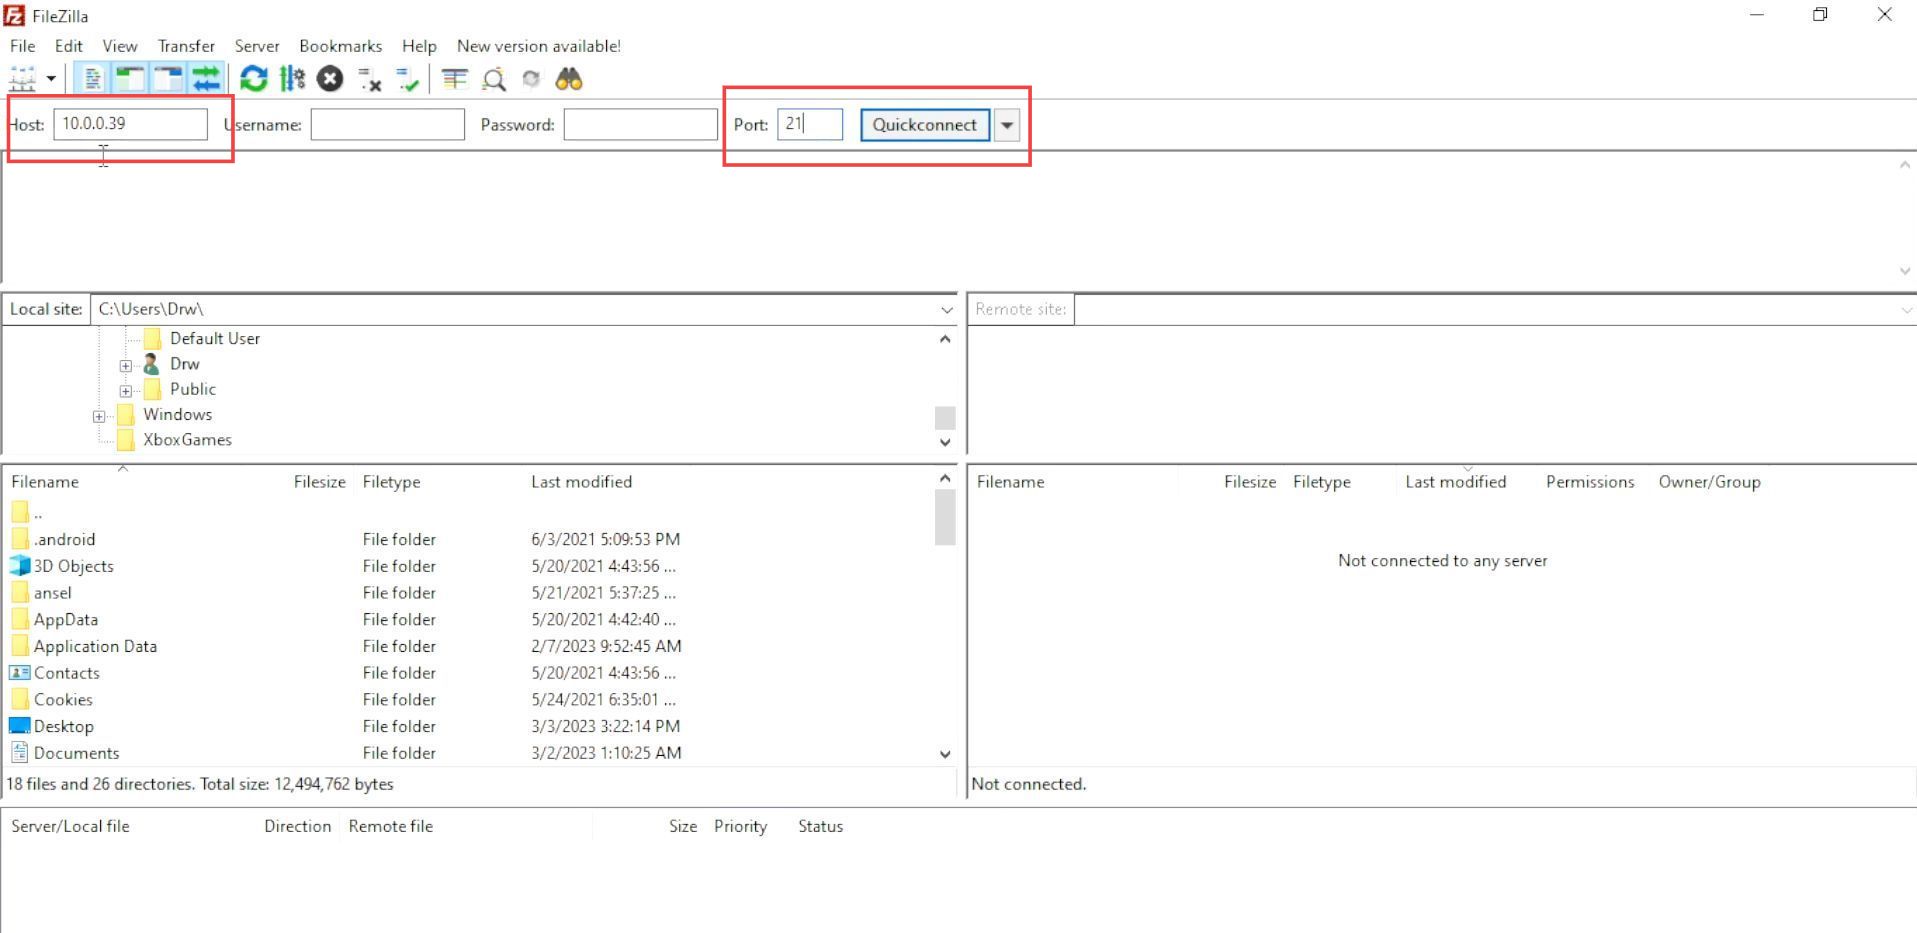
- Locate the FileZilla application on your computer and launch it.
- Once FileZilla is opened, input the address that you previously copied from the Xbox console into the Host text box and enter the port number associated with your Durango FTP.
- After entering the address and port, hit the Quick Connect button within the FileZilla interface.
- If a window prompt appears asking for confirmation, click the OK button.
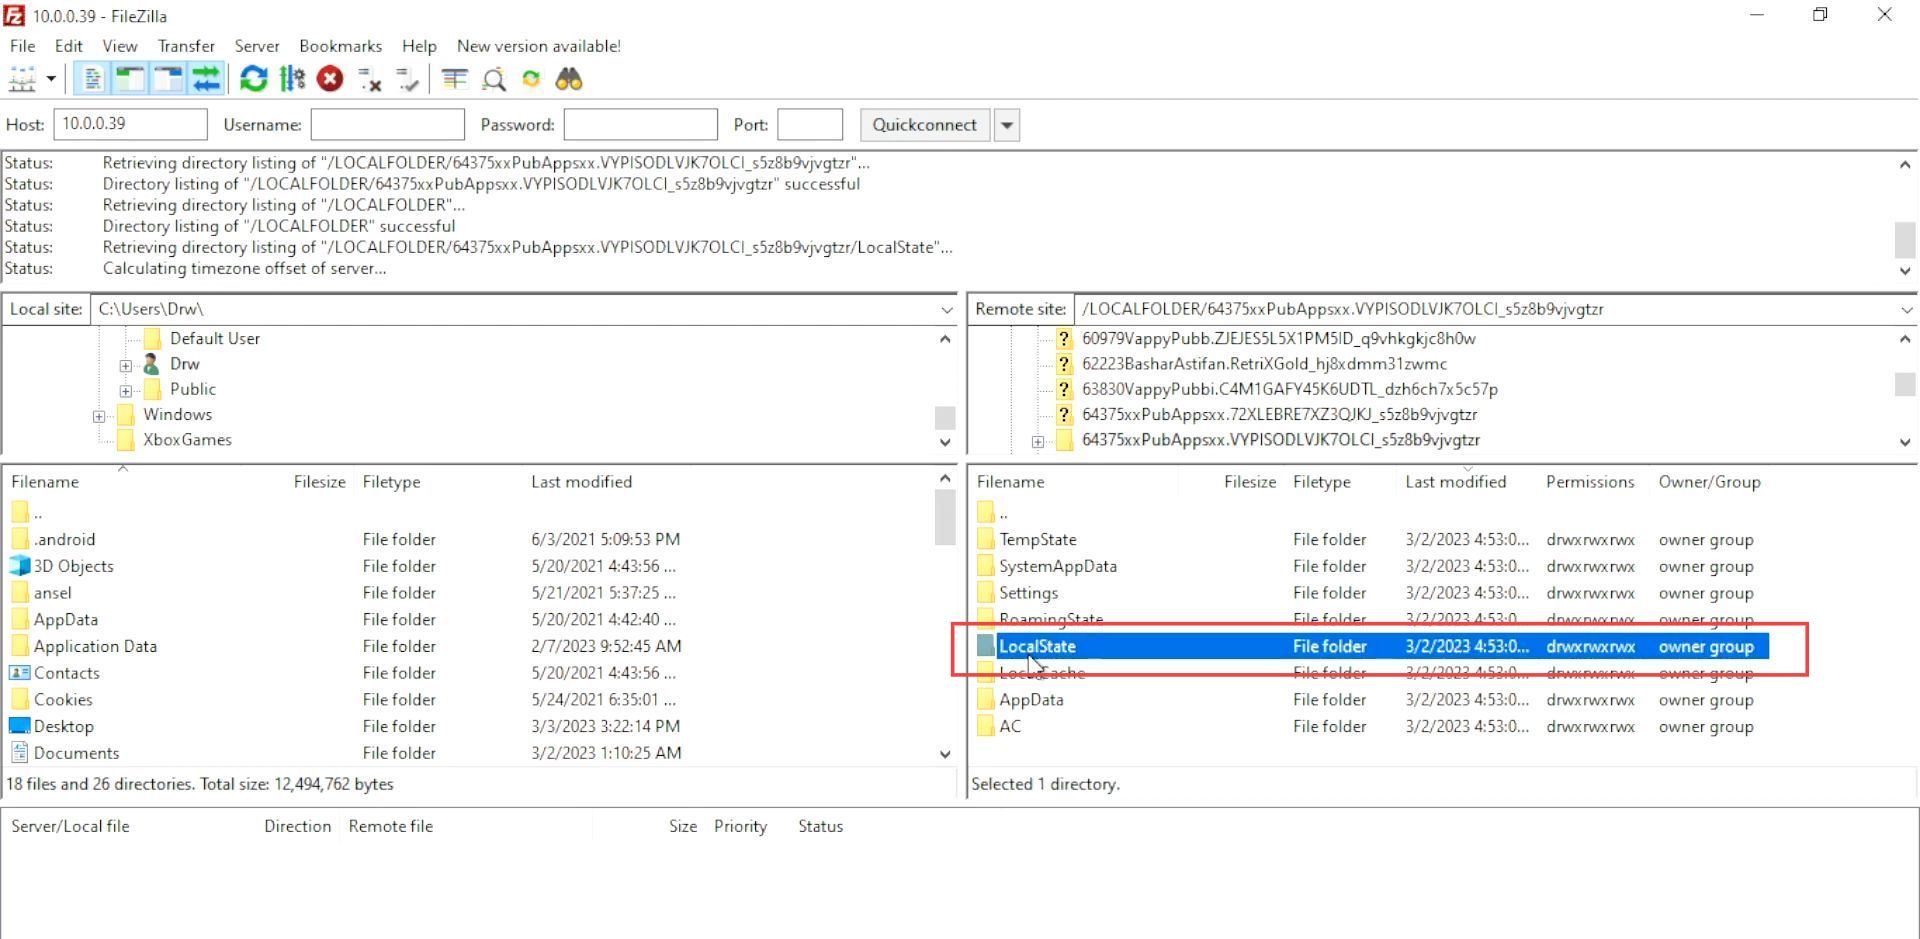
- Navigate to the local folder and look for the Xenia Canary folder within the local folder.
You can find it conveniently using the last modified tab which shows the recently downloaded content.
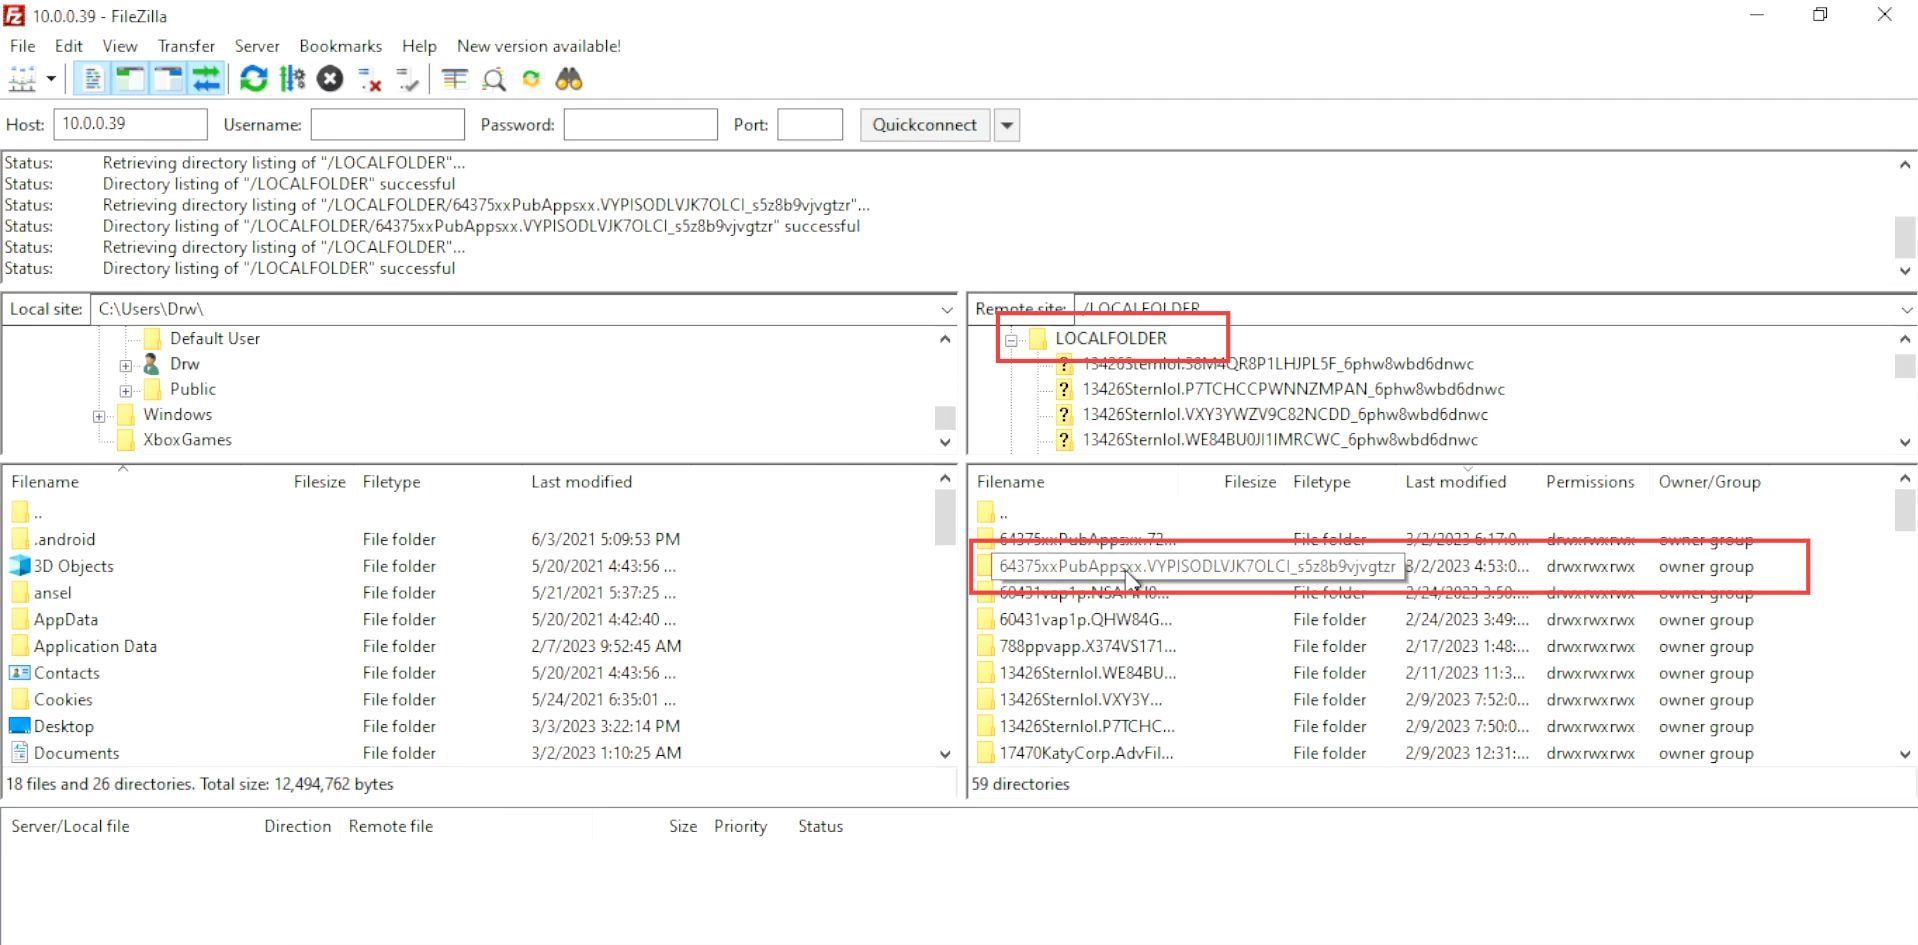
- Open the Xenia folder to view its contents. Inside the Xenia folder, and then go to the Local State folder.
- Now you have to copy this Xenia Canary folder and paste it into the desktop.
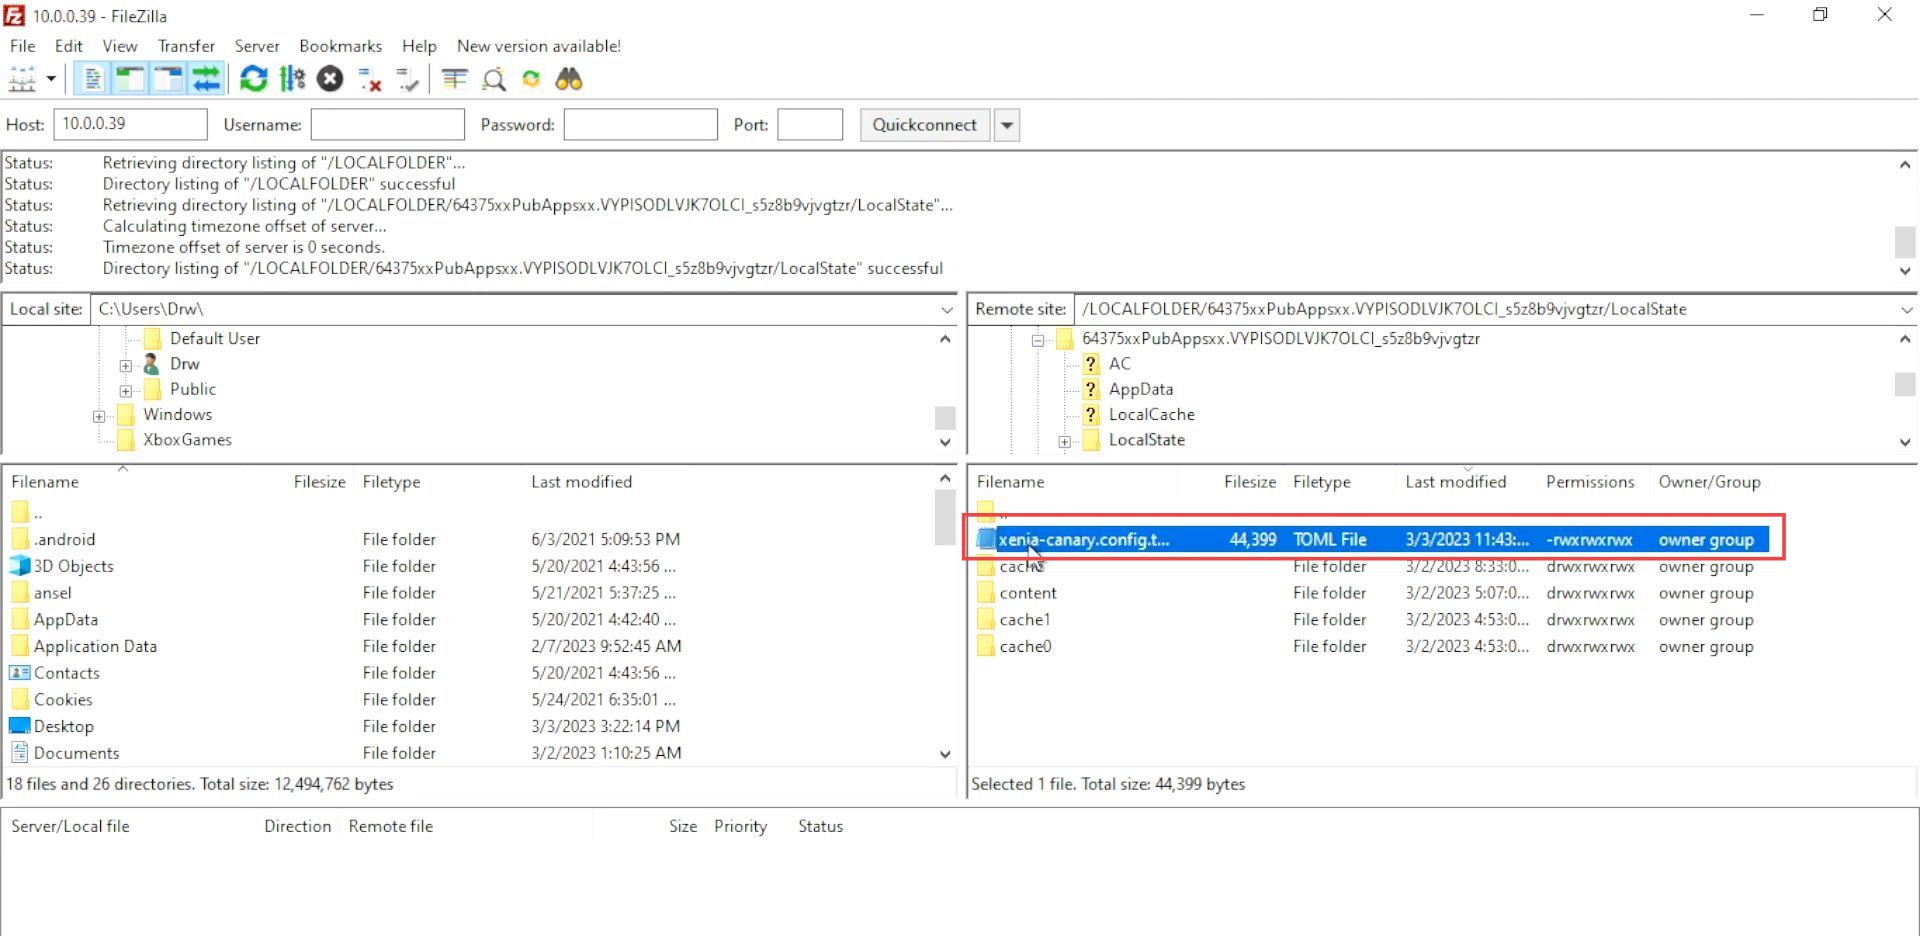
- You have to right-click the recently copied file and select the open with option from the drop-down menu.
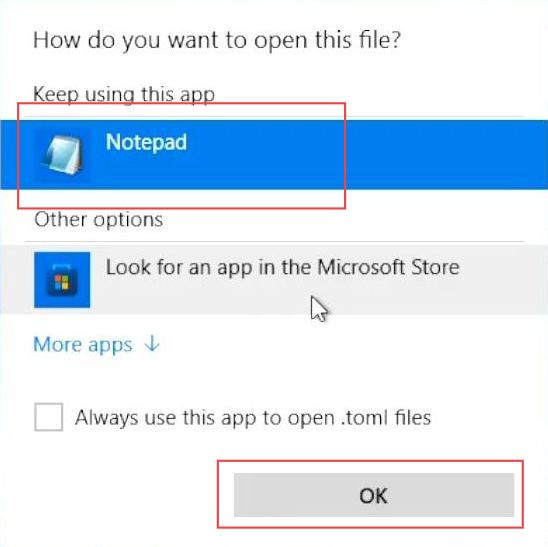
- After that, ensure that you have opened the file using Notepad and click the OK button.
- Upon reaching this window, you need to press the Ctrl + F keys from your keyboard.
It will open the find window. - Input language in the search box and click the Find Next button.
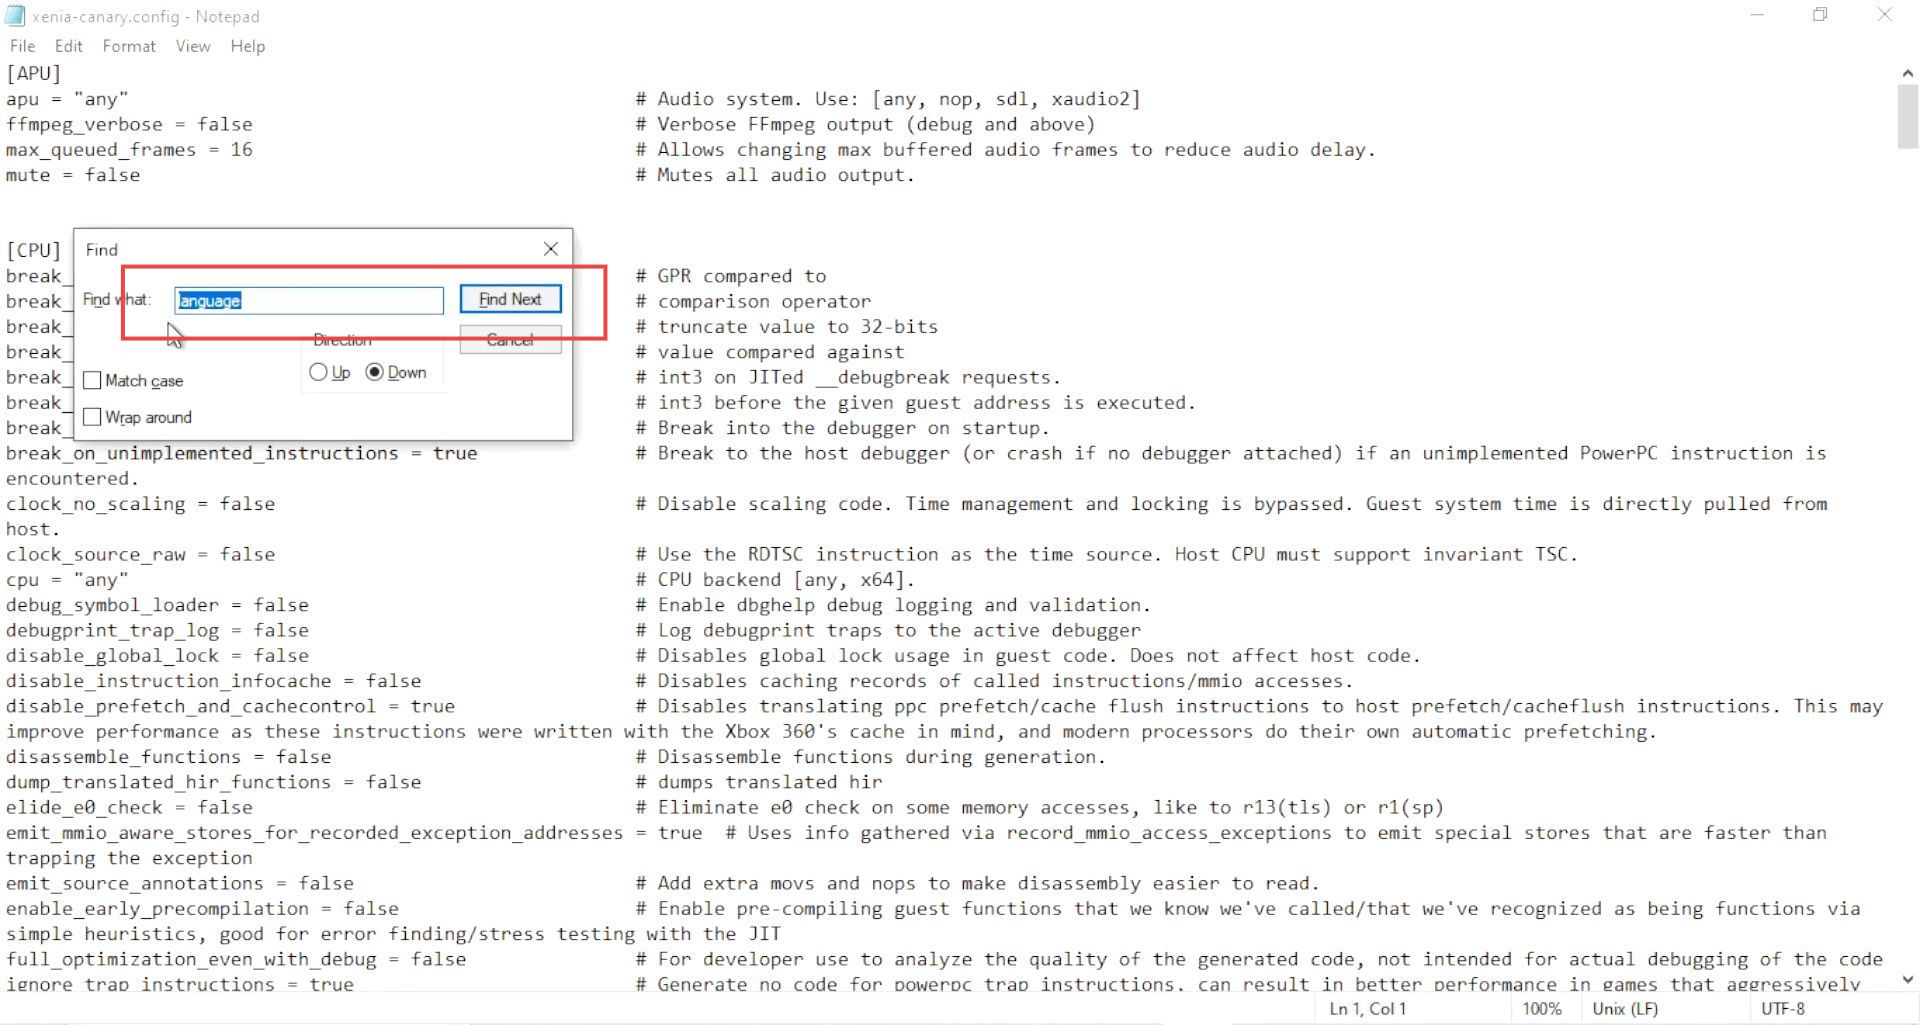
- Once you have found the user language, you can see seventeen different languages that can be set as per your choice.
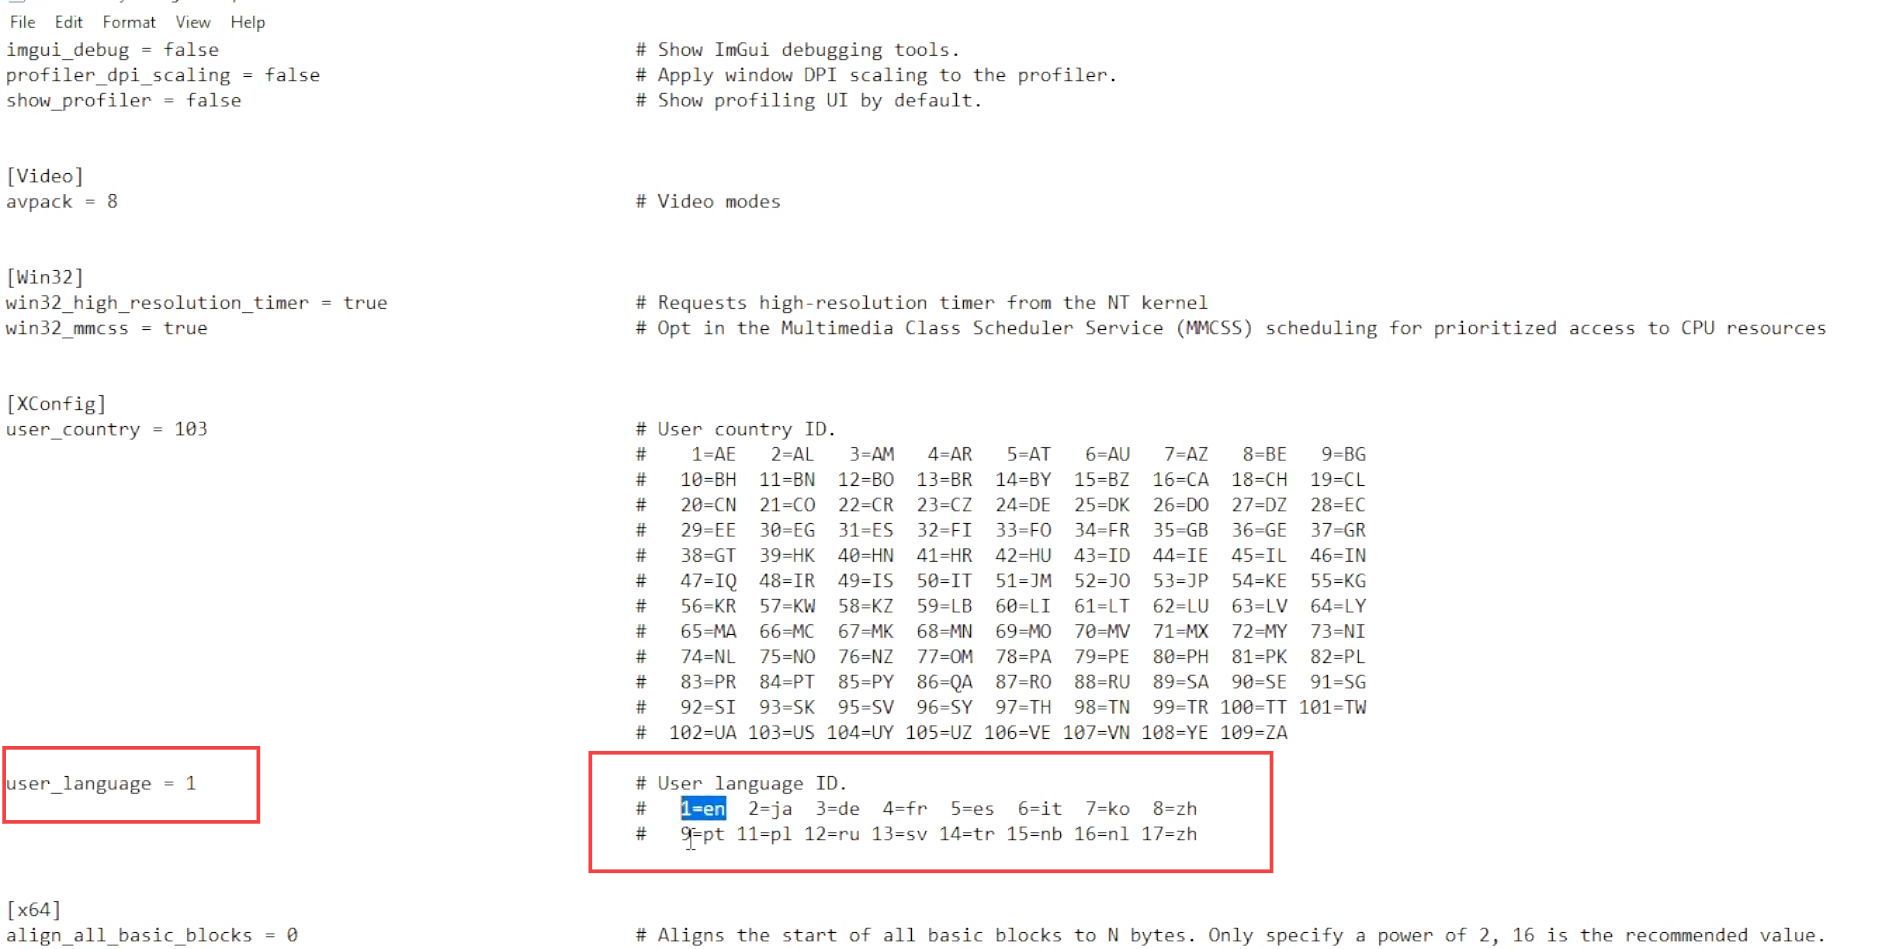
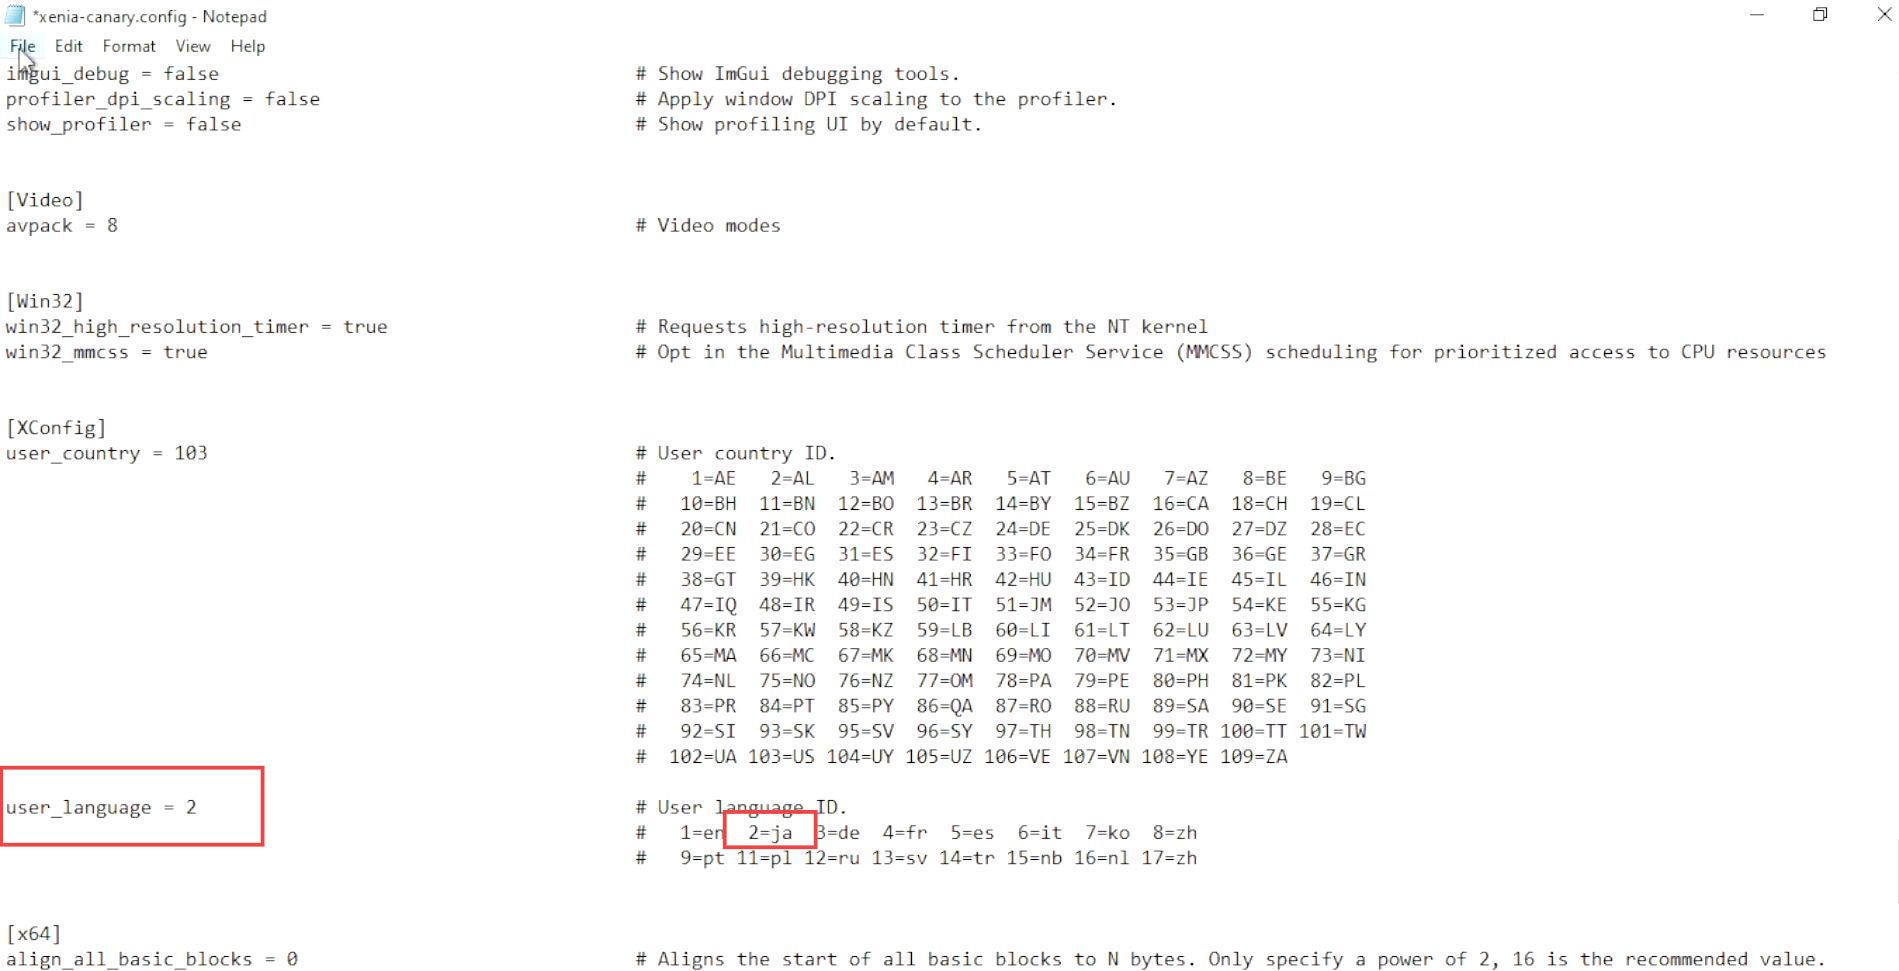
- Remove ”1” from the user language section and put the ID of the language you want to set.
Such as if you want to set the Japanese language then write 2 in the user language section.
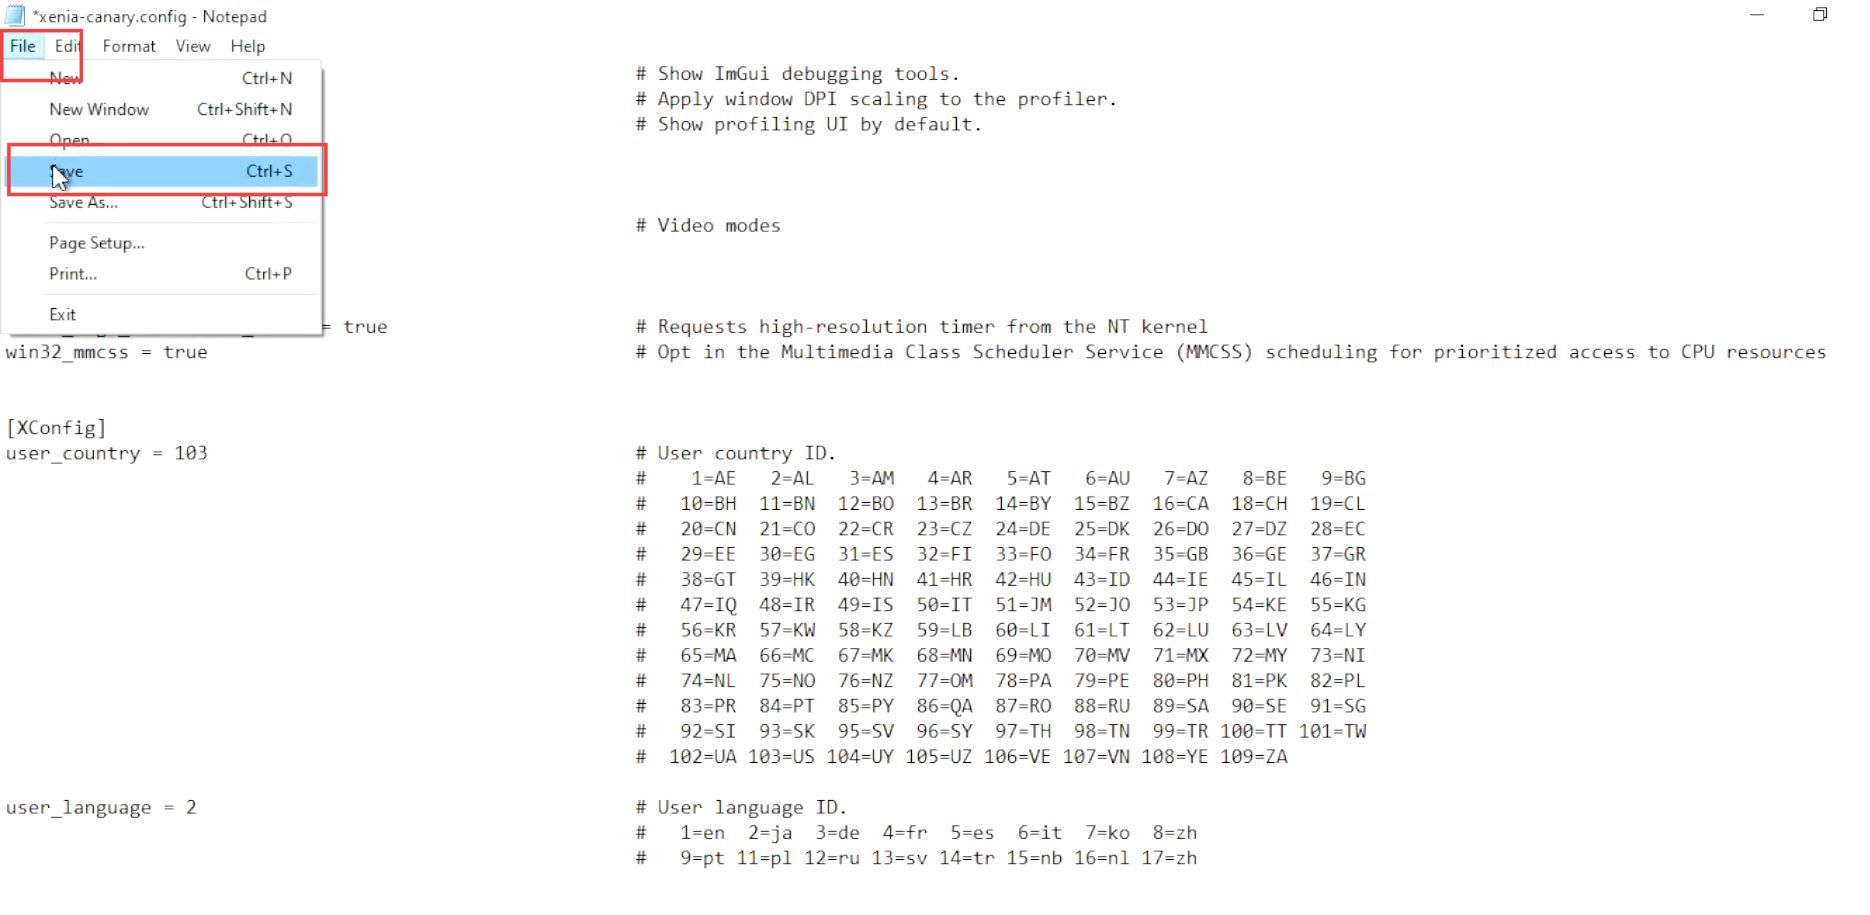
- Once you have written the ID of your desired language, click the file tab from the quick access toolbar.
- After that, select the Save option from the listings.
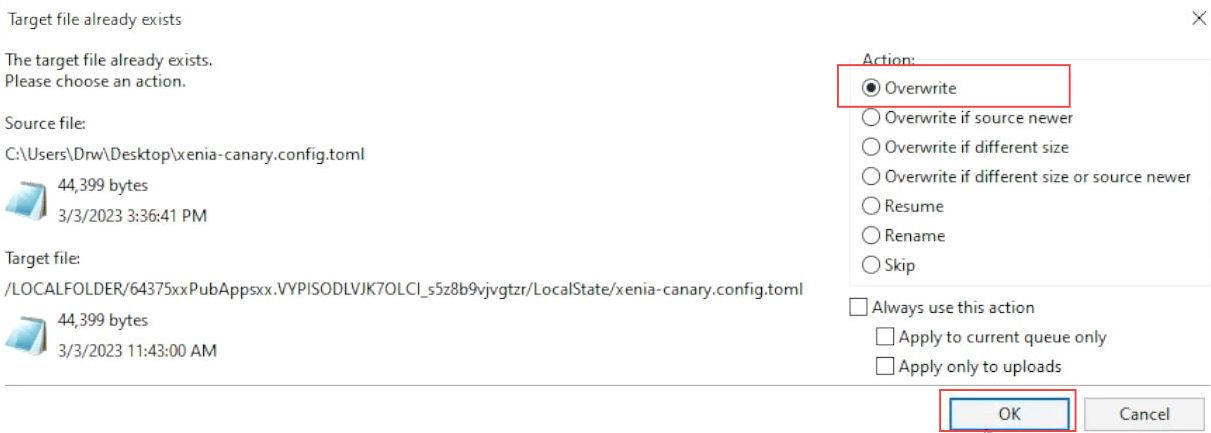
- After saving the file, drag and drop it back to the FileZilla menu.
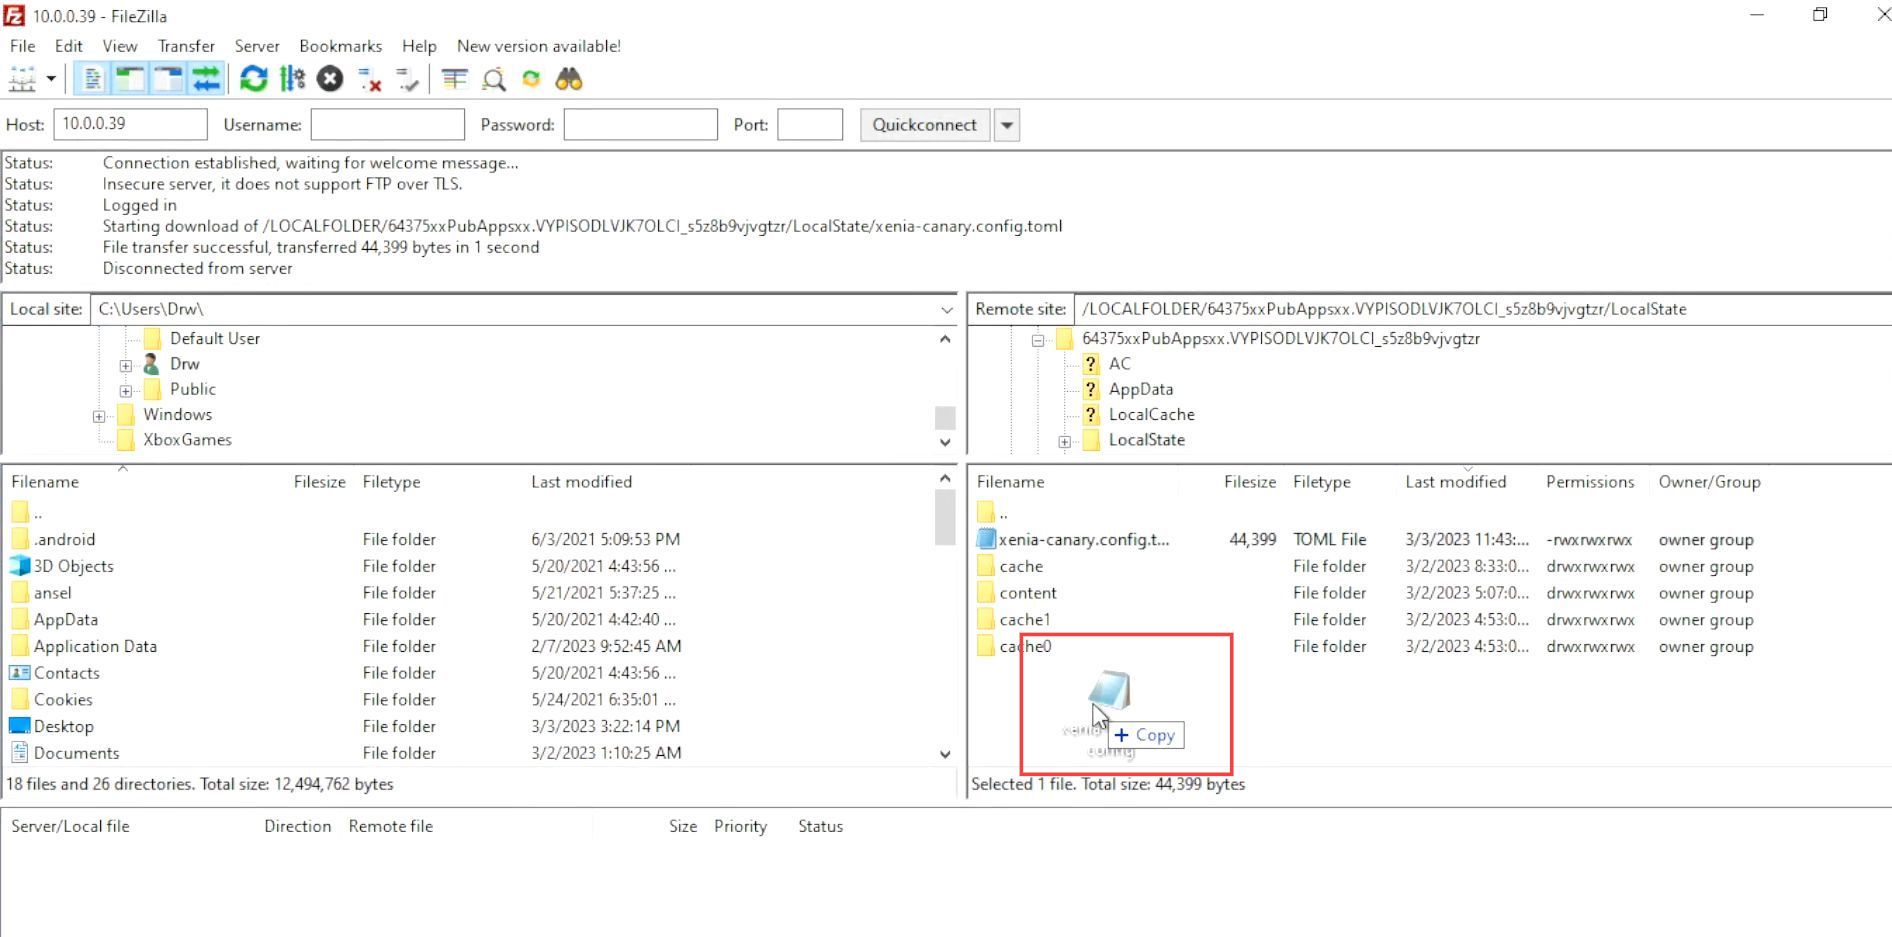
- Ensure that you have checkmarked the option named Overwrite from the listings and clicked the OK button.